配置rac的em
Oracle设置DB、监听和EM开机启动的方法
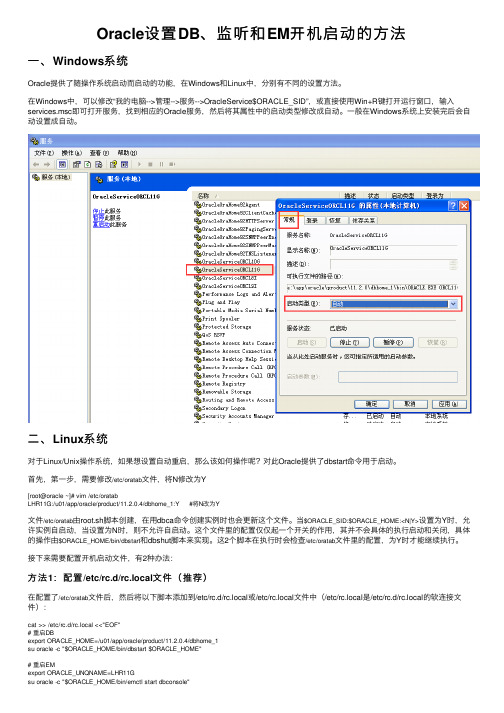
Oracle设置DB、监听和EM开机启动的⽅法⼀、Windows系统Oracle提供了随操作系统启动⽽启动的功能,在Windows和Linux中,分别有不同的设置⽅法。
在Windows中,可以修改“我的电脑-->管理-->服务-->OracleService$ORACLE_SID”,或直接使⽤Win+R键打开运⾏窗⼝,输⼊services.msc即可打开服务,找到相应的Oracle服务,然后将其属性中的启动类型修改成⾃动。
⼀般在Windows系统上安装完后会⾃动设置成⾃动。
⼆、Linux系统对于Linux/Unix操作系统,如果想设置⾃动重启,那么该如何操作呢?对此Oracle提供了dbstart命令⽤于启动。
⾸先,第⼀步,需要修改/etc/oratab⽂件,将N修改为Y[root@oracle ~]# vim /etc/oratabLHR11G:/u01/app/oracle/product/11.2.0.4/dbhome_1:Y #将N改为Y⽂件/etc/oratab由root.sh脚本创建,在⽤dbca命令创建实例时也会更新这个⽂件。
当$ORACLE_SID:$ORACLE_HOME:<N|Y>设置为Y时,允许实例⾃启动,当设置为N时,则不允许⾃启动。
这个⽂件⾥的配置仅仅起⼀个开关的作⽤,其并不会具体的执⾏启动和关闭,具体的操作由$ORACLE_HOME/bin/dbstart和dbshut脚本来实现。
这2个脚本在执⾏时会检查/etc/oratab⽂件⾥的配置,为Y时才能继续执⾏。
接下来需要配置开机启动⽂件,有2种办法:⽅法1:配置/etc/rc.d/rc.local⽂件(推荐)在配置了/etc/oratab⽂件后,然后将以下脚本添加到/etc/rc.d/rc.local或/etc/rc.local⽂件中(/etc/rc.local是/etc/rc.d/rc.local的软连接⽂件):cat >> /etc/rc.d/rc.local <<"EOF"# 重启DBexport ORACLE_HOME=/u01/app/oracle/product/11.2.0.4/dbhome_1su oracle -c "$ORACLE_HOME/bin/dbstart $ORACLE_HOME"# 重启EMexport ORACLE_UNQNAME=LHR11Gsu oracle -c "$ORACLE_HOME/bin/emctl start dbconsole"该⽅法需要注意以下问题:1、若环境中没有创建EM,则可以不⽤添加ORACLE_UNQNAME和emctl这2⾏2、从Oracle 12c开始,由于EMDE(Enterprise Manager Database Express)替代了原有的EMDC(Enterprise Manager Database Control),所以,不再单独设置EM相关内容,只需要配置DB即可,例如:cat >> /etc/rc.d/rc.local <<"EOF"# 重启DBexport ORACLE_HOME=/u01/app/oracle/product/12.1.0.2/dbhome_1su oracle -c "$ORACLE_HOME/bin/dbstart $ORACLE_HOME"EOF3、在CentOS 7中,/etc/rc.d/rc.local的权限被降低了,所以需要执⾏如下命令赋予其可执⾏权限:chmod +x /etc/rc.d/rc.local最后就可以重启OS做测试⼯作了。
自己整理手动配置oracle11gem
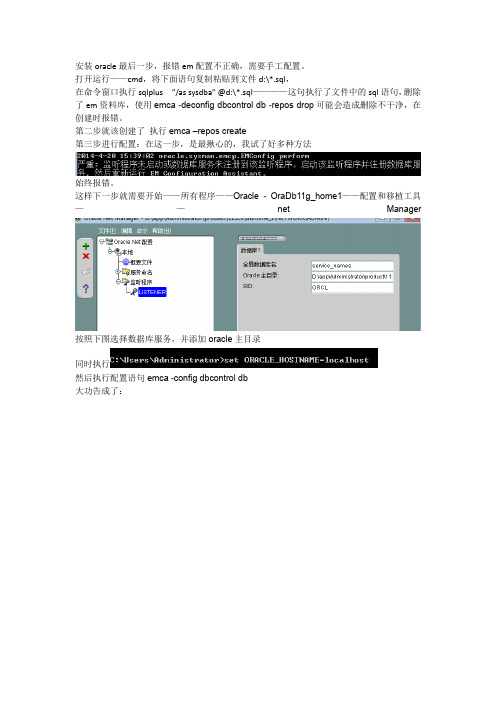
安装oracle最后一步,报错em配置不正确,需要手工配置。
打开运行——cmd,将下面语句复制粘贴到文件d:\*.sql,在命令窗口执行sqlplus“/as sysdba” @d:\*.sql————这句执行了文件中的sql语句,删除了em资料库,使用emca -deconfigdbcontroldb -repos drop可能会造成删除不干净,在创建时报错。
第二步就该创建了执行emca–repos create第三步进行配置:在这一步,是最揪心的,我试了好多种方法始终报错。
这样下一步就需要开始——所有程序——Oracle - OraDb11g_home1——配置和移植工具——net Manager按照下图选择数据库服务,并添加oracle主目录同时执行然后执行配置语句emca -configdbcontroldb大功告成了:D:\*.sqldrop user SYSMAN cascade;drop user MGMT_VIEW cascade;drop role MGMT_USER;drop public synonym MGMT_TARGET_BLACKOUTS; drop public synonym SETEMVIEWUSERCONTEXT;drop user sysman cascade;drop public synonym MGMT_ADMIN;drop public synonym MGMT_AS_ECM_UTIL;drop public synonym MGMT_AVAILABILITY;drop public synonym MGMT_COLLECTION_PROPERTIES; drop public synonym MGMT_CREDENTIAL;drop public synonym MGMT_CURRENT_METRICS;drop public synonym MGMT_CURRENT_METRIC_ERRORS;drop public synonym MGMT_CURRENT_SEVERITY;drop public synonym MGMT_DELTA;drop public synonym MGMT_DELTA_ENTRY;drop public synonym MGMT_DELTA_ENTRY_VALUES;drop public synonym MGMT_DELTA_IDS;drop public synonym MGMT_DELTA_ID_VALUES;drop public synonym MGMT_DELTA_VALUE;drop public synonym MGMT_DELTA_VALUES;drop public synonym MGMT_GLOBAL;drop public synonym MGMT_GUID_ARRAY;drop public synonym MGMT_GUID_OBJ;drop public synonym MGMT_IP_TGT_GUID_ARRAY;drop public synonym MGMT_JOB;drop public synonym MGMT_JOBS;drop public synonym MGMT_JOB_EXECPLAN;drop public synonym MGMT_JOB_EXECUTION;drop public synonym MGMT_JOB_EXEC_SUMMARY;drop public synonym MGMT_JOB_OUTPUT;drop public synonym MGMT_JOB_PARAMETER;drop public synonym MGMT_JOB_SCHEDULE;drop public synonym MGMT_JOB_TARGET;drop public synonym MGMT_LOG;drop public synonym MGMT_LONG_TEXT;drop public synonym MGMT_MESSAGES;drop public synonym MGMT_METRICS;drop public synonym MGMT_METRICS_1DAY; drop public synonym MGMT_METRICS_1HOUR;drop public synonym MGMT_METRICS_COMPOSITE_KEYS;drop public synonym MGMT_METRICS_RAW;drop public synonym MGMT_METRIC_COLLECTIONS;drop public synonym MGMT_METRIC_ERRORS;drop public synonym MGMT_METRIC_THRESHOLDS;drop public synonym MGMT_NAME_VALUE;drop public synonym MGMT_NAME_VALUES;drop public synonym MGMT_PREFERENCES;drop public synonym MGMT_SEVERITY;drop public synonym MGMT_SEVERITY_ARRAY;drop public synonym MGMT_SEVERITY_OBJ;drop public synonym MGMT_STRING_METRIC_HISTORY;drop public synonym MGMT_TARGET;drop public synonym MGMT_TARGETS;drop public synonym MGMT_TARGET_BLACKOUTS;drop public synonym MGMT_TARGET_PROPERTIES;drop public synonym MGMT_TYPE_PROPERTIES;drop public synonym MGMT_USER;drop public synonym MGMT_VIEW_UTIL;drop public synonym MGMT$DELTA_ORACLE_HOME;drop public synonym MGMT$DELTA_OS_COMPONENTS;drop public synonym MGMT$DELTA_OS_COMP_DETAILS;drop public synonym MGMT$DELTA_OS_KERNEL_PARAMS;drop public synonym MGMT$DELTA_PATCHSETS;drop public synonym MGMT$DELTA_PATCHSET_DETAILS;drop public synonym MGMT$DELTA_TABLESPACES;drop public synonym MGMT$DELTA_VENDOR_SW;drop public synonym MGMT$DELTA_VIEW;drop public synonym MGMT$DELTA_VIEW_DETAILS;drop public synonym MGMT$ECM_CURRENT_SNAPSHOTS;drop public synonym MGMT$ECM_VISIBLE_SNAPSHOTS;drop public synonym MGMT$GROUP_DERIVED_MEMBERSHIPS; drop public synonym MGMT$GROUP_FLAT_MEMBERSHIPS; drop public synonym MGMT$GROUP_MEMBERS;drop public synonym MGMT$HA_BACKUP;drop public synonym MGMT$HA_FILES;drop public synonym MGMT$HA_INFO;drop public synonym MGMT$HA_INIT_PARAMS;drop public synonym MGMT$HA_MTTR;drop public synonym MGMT$HA_RMAN_CONFIG;drop public synonym MGMT$HW_NIC;drop public synonym MGMT$METRIC_COLLECTION;drop public synonym MGMT$METRIC_CURRENT;drop public synonym MGMT$METRIC_DAILY;drop public synonym MGMT$METRIC_DETAILS;drop public synonym MGMT$METRIC_HOURLY;drop public synonym MGMT$MISSING_TARGETS;drop public synonym MGMT$MISSING_TARGETS_IN_GROUPS; drop public synonym MGMT$OS_COMPONENTS;drop public synonym MGMT$OS_FS_MOUNT;drop public synonym MGMT$OS_HW_SUMMARY;drop public synonym MGMT$OS_KERNEL_PARAMS;drop public synonym MGMT$OS_PATCHES;drop public synonym MGMT$OS_SUMMARY;drop public synonym MGMT$SOFTWARE_COMPONENTS;drop public synonym MGMT$SOFTWARE_COMPONENT_ONEOFF; drop public synonym MGMT$SOFTWARE_COMP_PATCHSET; drop public synonym MGMT$SOFTWARE_DEPENDENCIES;drop public synonym MGMT$SOFTWARE_HOMES;drop public synonym MGMT$SOFTWARE_ONEOFF_PATCHES; drop public synonym MGMT$SOFTWARE_OTHERS;drop public synonym MGMT$SOFTWARE_PATCHES_IN_HOMES; drop public synonym MGMT$SOFTWARE_PATCHSETS;drop public synonym MGMT$TARGET;drop public synonym MGMT$TARGET_COMPONENTS;drop public synonym MGMT$TARGET_COMPOSITE;drop public synonym MGMT$TARGET_PROPERTIES;drop public synonym MGMT$TARGET_TYPE;drop PUBLIC SYNONYM SMP_EMD_AVAIL_OBJ;drop public synonym EMD_MNTR;drop public synonym SMP_EMD_AVAIL_OBJ;drop public synonym SMP_EMD_DELETE_REC_ARRAY;drop public synonym SMP_EMD_INTEGER_ARRAY;drop public synonym SMP_EMD_INTEGER_ARRAY_ARRAY; drop public synonym SMP_EMD_NVPAIR;drop public synonym SMP_EMD_NVPAIR_ARRAY;drop public synonym SMP_EMD_STRING_ARRAY;drop public synonym SMP_EMD_STRING_ARRAY_ARRAY;drop public synonym SMP_EMD_TARGET_OBJ;drop public synonym SMP_EMD_TARGET_OBJ_ARRAY;drop public synonym ECM_UTIL;drop role mgmt_user;DROP USER sysman CASCADE;DROP USER mgmt_view CASCADE;DROP ROLE MGMT_USER;ALTER USER dbsnmp ACCOUNT UNLOCK;ALTER USER dbsnmp identified by dbsnmp;DROP PUBLIC SYNONYM SETEMVIEWUSERCONTEXT;DROP PUBLIC SYNONYM MGMT_TARGET_BLACKOUTS; DROP PUBLIC SYNONYM MGMT_AVAILABILITY;DROP PUBLIC SYNONYM MGMT_CURRENT_AVAILABILITY; DROP PUBLIC SYNONYM MGMT_SEVERITY_OBJ;DROP PUBLIC SYNONYM MGMT_SEVERITY_ARRAY;DROP PUBLIC SYNONYM MGMT_GUID_OBJ;DROP PUBLIC SYNONYM MGMT_GUID_ARRAY;DROP PUBLIC SYNONYM SMP_EMD_AVAIL_OBJ;DROP PUBLIC SYNONYM SMP_EMD_TARGET_OBJ;DROP PUBLIC SYNONYM SMP_EMD_TARGET_OBJ_ARRAY; DROP PUBLIC SYNONYM SMP_EMD_DELETE_REC_ARRAY; DROP PUBLIC SYNONYM MGMT_METRICS;DROP PUBLIC SYNONYM MGMT_TARGETS;DROP PUBLIC SYNONYM MGMT_TYPE_PROPERTIES;DROP PUBLIC SYNONYM MGMT_TARGET_PROPERTIES; DROP PUBLIC SYNONYM MGMT_METRICS_RAW;DROP PUBLIC SYNONYM MGMT_CURRENT_METRICS; DROP PUBLIC SYNONYM MGMT_STRING_METRIC_HISTORY; DROP PUBLIC SYNONYM MGMT_LONG_TEXT;DROP PUBLIC SYNONYM MGMT_METRICS_COMPOSITE_KEYS; DROP PUBLIC SYNONYM MGMT_METRICS_1HOUR;DROP PUBLIC SYNONYM MGMT_METRICS_1DAY;DROP PUBLIC SYNONYM MGMT_METRIC_ERRORS;DROP PUBLIC SYNONYM MGMT_CURRENT_METRIC_ERRORS; DROP PUBLIC SYNONYM EMD_MNTR;DROP PUBLIC SYNONYM MGMT_METRIC_COLLECTIONS; DROP PUBLIC SYNONYM MGMT_COLLECTION_PROPERTIES ; DROP PUBLIC SYNONYM MGMT_METRIC_THRESHOLDS; DROP PUBLIC SYNONYM SMP_EMD_NVPAIR;DROP PUBLIC SYNONYM SMP_EMD_NVPAIR_ARRAY;DROP PUBLIC SYNONYM SMP_EMD_STRING_ARRAY;DROP PUBLIC SYNONYM SMP_EMD_STRING_ARRAY_ARRAY; DROP PUBLIC SYNONYM SMP_EMD_INTEGER_ARRAY; DROP PUBLIC SYNONYM SMP_EMD_INTEGER_ARRAY_ARRAY; DROP PUBLIC SYNONYM MGMT_DELTA_IDS;DROP PUBLIC SYNONYM MGMT_DELTA_ID_VALUES;DROP PUBLIC SYNONYM MGMT_DELTA_ENTRY;DROP PUBLIC SYNONYM MGMT_DELTA_ENTRY_VALUES; DROP PUBLIC SYNONYM MGMT_DELTA_VALUE;DROP PUBLIC SYNONYM MGMT_DELTA_VALUES;DROP PUBLIC SYNONYM MGMT_NAME_VALUE;DROP PUBLIC SYNONYM MGMT_NAME_VALUES;DROP PUBLIC SYNONYM ECM_UTIL;DROP PUBLIC SYNONYM MGMT_DELTA;DROP PUBLIC SYNONYM MGMT_TARGET_MEMBERSHIPS; DROP PUBLIC SYNONYM MGMT_JOB;DROP PUBLIC SYNONYM MGMT_JOB_PARAMETER;DROP PUBLIC SYNONYM MGMT_JOB_TARGET;DROP PUBLIC SYNONYM MGMT_JOB_SCHEDULE;DROP PUBLIC SYNONYM MGMT_JOB_EXECPLAN;DROP PUBLIC SYNONYM MGMT_JOB_EXEC_SUMMARY; DROP PUBLIC SYNONYM MGMT_JOB_OUTPUT;DROP PUBLIC SYNONYM MGMT_JOB_EXECUTION;DROP PUBLIC SYNONYM MGMT_LOG;DROP PUBLIC SYNONYM MGMT_ADMIN;DROP PUBLIC SYNONYM MGMT_GLOBAL;DROP PUBLIC SYNONYM MGMT_TARGET;DROP PUBLIC SYNONYM MGMT_CREDENTIAL;DROP PUBLIC SYNONYM MGMT_JOBS;DROP PUBLIC SYNONYM MGMT_PREFERENCES; DROP PUBLIC SYNONYM MGMT_USER;DROP PUBLIC SYNONYM MGMT_SEVERITY;DROP PUBLIC SYNONYM MGMT_CURRENT_SEVERITY; DROP PUBLIC SYNONYM MGMT_PAF_PROCS_LATEST; DROP PUBLIC SYNONYM MGMT_PAF_JOBS;DROP PUBLIC SYNONYM MGMT_PAF$PROCEDURES; DROP PUBLIC SYNONYM MGMT_PAF$INSTANCES; DROP PUBLIC SYNONYM MGMT_PAF$STATES; DROP PUBLIC SYNONYM MGMT_PAF$APPLICATIONS; DROP PUBLIC SYNONYM MGMT_VIEW_UTIL; DROP PUBLIC SYNONYM MGMT_MESSAGES;。
更改主机名后重配置Oracle EM的方法

更改主机名后重配置Oracle EM的方法(全)一、第一次配置今天为了在笔记本上更好的实施Informatica,我将主机名从“am-PC”更改为“prdbi01”。
改好之后我知道Oracle的EM是需要重新配置的。
我先使用命令:emca -config dbcontrol db,以前碰到这种问题我都是这么做的。
在这个过程中要保证sysman和dbsnmp用户是解锁的。
执行完该命令后,我登陆了EM控制台,“Database Control”页面能够正常显示,我以为搞定了,但点击“管理”标签后,弹出一个对话框,示例如下:用户名:sys口令:***********连接字符串:am-PC:duan:1521连接身份:sysdba看到这一步我有些懵了,这个问题以前还没见过。
查阅了一些资料,认为重新配置dbconsole为佳,于是按照方案执行emca -repos dropemca -repos createemca -config dbcontrol dbemctl start dbconsole这四条语句。
也开始后面真正的工作。
二、问题多多的第二次配置2.1、漫长的emca -repos drop我在3月6日晚上22点执行了“emca -repos create”命令,它居然执行了漫长的6个半小时。
详情如下所示:C:\Users\Administrator>emca -repos dropEMCA 开始于2013-3-6 22:29:39EM Configuration Assistant, 10.2.0.1.0 正式版版权所有(c) 2003, 2005, Oracle。
保留所有权利。
输入以下信息:数据库SID: duan监听程序端口号: 1521SYS 用户的口令:SYSMAN 用户的口令:SYSMAN 用户的口令:是否继续? [是(Y)/否(N)]: y2013-3-6 22:29:54 oracle.sysman.emcp.EMConfig perform信息: 正在将此操作记录到D:\oracle\product\10.2.0\db_1\cfgtoollogs\emca\duan\emca_2013-03-06_10-29-39-下午.log。
emca配置oracle 10g的em
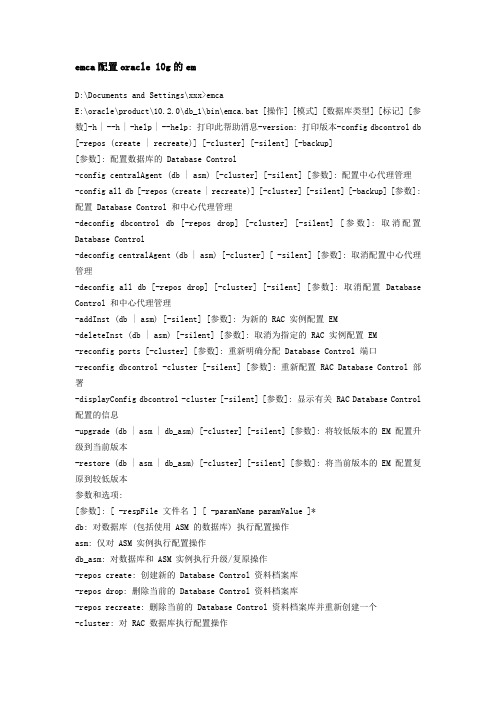
emca配置oracle 10g的emD:\Documents and Settings\xxx>emcaE:\oracle\product\10.2.0\db_1\bin\emca.bat [操作] [模式] [数据库类型] [标记] [参数]-h | --h | -help | --help: 打印此帮助消息-version: 打印版本-config dbcontrol db [-repos (create | recreate)] [-cluster] [-silent] [-backup][参数]: 配置数据库的 Database Control-config centralAgent (db | asm) [-cluster] [-silent] [参数]: 配置中心代理管理-config all db [-repos (create | recreate)] [-cluster] [-silent] [-backup] [参数]: 配置 Database Control 和中心代理管理-deconfig dbcontrol db [-repos drop] [-cluster] [-silent] [参数]: 取消配置Database Control-deconfig centralAgent (db | asm) [-cluster] [ -silent] [参数]: 取消配置中心代理管理-deconfig all db [-repos drop] [-cluster] [-silent] [参数]: 取消配置 Database Control 和中心代理管理-addInst (db | asm) [-silent] [参数]: 为新的 RAC 实例配置 EM-deleteInst (db | asm) [-silent] [参数]: 取消为指定的 RAC 实例配置 EM-reconfig ports [-cluster] [参数]: 重新明确分配 Database Control 端口-reconfig dbcontrol -cluster [-silent] [参数]: 重新配置 RAC Database Control 部署-displayConfig dbcontrol -cluster [-silent] [参数]: 显示有关 RAC Database Control 配置的信息-upgrade (db | asm | db_asm) [-cluster] [-silent] [参数]: 将较低版本的 EM 配置升级到当前版本-restore (db | asm | db_asm) [-cluster] [-silent] [参数]: 将当前版本的 EM 配置复原到较低版本参数和选项:[参数]: [ -respFile 文件名 ] [ -paramName paramValue ]*db: 对数据库 (包括使用 ASM 的数据库) 执行配置操作asm: 仅对 ASM 实例执行配置操作db_asm: 对数据库和 ASM 实例执行升级/复原操作-repos create: 创建新的 Database Control 资料档案库-repos drop: 删除当前的 Database Control 资料档案库-repos recreate: 删除当前的 Database Control 资料档案库并重新创建一个-cluster: 对 RAC 数据库执行配置操作-silent: 在不提示参数的情况下执行配置操作-backup: 配置数据库的自动备份单实例数据库的参数HOST: 数据库主机名SID: 数据库 SIDPORT: 监听程序端口号ORACLE_HOME: 数据库 ORACLE_HOMEHOST_USER: 自动备份的主机用户名HOST_USER_PWD: 自动备份的主机用户口令BACKUP_SCHEDULE: 自动备份调度 (HH:MM)EMAIL_ADDRESS: 通知的电子邮件地址MAIL_SERVER_NAME: 通知的发件 (SMTP) 服务器ASM_OH: ASM ORACLE_HOMEASM_SID: ASM SIDASM_PORT: ASM 端口ASM_USER_ROLE: ASM 用户角色ASM_USER_NAME: ASM 用户名ASM_USER_PWD: ASM 用户口令SRC_OH: 要升级的数据库的 ORACLE_HOMEDBSNMP_PWD: DBSNMP 用户的口令SYSMAN_PWD: SYSMAN 用户的口令SYS_PWD: SYS 用户的口令DBCONTROL_HTTP_PORT: Database Control HTTP 端口AGENT_PORT: EM 代理端口RMI_PORT: Database Control 的 RMI 端口JMS_PORT: Database Control 的 JMS 端口集群数据库的其它参数CLUSTER_NAME: 集群名DB_UNIQUE_NAME: 数据库的唯一名称SERVICE_NAME: 服务名EM_NODE: Database Control 节点名EM_SID_LIST: 代理 SID 列表 [以逗号分隔]启动报错testhost:{/oracle}$emctl start dbconsoleOC4J Configuration issue./oracle/app/oracle/product/10.2/oc4j/j2ee/OC4J_DBConsole_testhost_testdb not found.删除testhost:{/oracle/app/oracle/product/10.2/network/admin}$emca -repos drop STARTED EMCA at Oct 20, 2008 3:08:52 PMEM Configuration Assistant, Version 10.2.0.1.0 ProductionCopyright (c) 2003, 2005, Oracle. All rights reserved.Enter the following information:Database SID: testdbListener port number: 1521Password for SYS user:Password for SYSMAN user:Do you wish to continue? [yes(Y)/no(N)]: yOct 20, 2008 3:09:04 PM oracle.sysman.emcp.EMConfig performINFO: This operation is being logged at /oracle/app/oracle/product/10.2/cfgtoollogs/emca/testdb/emca_2008-10-20_03-08-5 2-PM.log.Oct 20, 2008 3:09:04 PM oracle.sysman.emcp.EMReposConfig dropRepositoryINFO: Dropping the EM repository (this may take a while) ...Oct 20, 2008 3:09:46 PM oracle.sysman.emcp.EMReposConfig invokeINFO: Repository successfully droppedEnterprise Manager configuration completed successfullyFINISHED EMCA at Oct 20, 2008 3:09:46 PMtesthost:{/oracle/app/oracle/product/10.2/network/admin}$创建testhost:{/oracle}$emca -repos createSTARTED EMCA at Oct 20, 2008 3:10:47 PMEM Configuration Assistant, Version 10.2.0.1.0 ProductionCopyright (c) 2003, 2005, Oracle. All rights reserved.Enter the following information:Database SID: testdbListener port number: 1521Password for SYS user:Password for SYSMAN user:Do you wish to continue? [yes(Y)/no(N)]: yOct 20, 2008 3:10:58 PM oracle.sysman.emcp.EMConfig performINFO: This operation is being logged at /oracle/app/oracle/product/10.2/cfgtoollogs/emca/testdb/emca_2008-10-20_03-10-4 7-PM.log.Oct 20, 2008 3:10:58 PM oracle.sysman.emcp.EMReposConfig createRepository INFO: Creating the EM repository (this may take a while) ...Oct 20, 2008 3:12:27 PM oracle.sysman.emcp.EMReposConfig invokeINFO: Repository successfully createdEnterprise Manager configuration completed successfullyFINISHED EMCA at Oct 20, 2008 3:12:27 PM配置testhost:{/oracle}$emca -config dbcontrol dbSTARTED EMCA at Oct 20, 2008 3:13:13 PMEM Configuration Assistant, Version 10.2.0.1.0 ProductionCopyright (c) 2003, 2005, Oracle. All rights reserved.Enter the following information:Database SID: testdbDatabase Control is already configured for the database testdbYou have chosen to configure Database Control for managing the database testdb This will remove the existing configuration and the default settings and perform.a fresh configurationDo you wish to continue? [yes(Y)/no(N)]: yListener port number: 1521Password for SYS user:Password for DBSNMP user:Password for SYSMAN user:Email address for notifications (optional):Outgoing Mail (SMTP) server for notifications (optional):-----------------------------------------------------------------You have specified the following settingsDatabase ORACLE_HOME ................ /oracle/app/oracle/product/10.2Database hostname ................ testhostListener port number (1521)Database SID ................ testdbEmail address for notifications ...............Outgoing Mail (SMTP) server for notifications ...............-----------------------------------------------------------------Do you wish to continue? [yes(Y)/no(N)]: yOct 20, 2008 3:13:43 PM oracle.sysman.emcp.EMConfig performINFO: This operation is being logged at /oracle/app/oracle/product/10.2/cfgtoollogs/emca/testdb/emca_2008-10-20_03-13-1 3-PM.log.Oct 20, 2008 3:13:45 PM oracle.sysman.emcp.util.DBControlUtil stopOMSINFO: Stopping Database Control (this may take a while) ...Oct 20, 2008 3:13:52 PM oracle.sysman.emcp.util.DBControlUtil secureDBConsole INFO: Securing Database Control (this may take a while) ...Oct 20, 2008 3:14:24 PM oracle.sysman.emcp.util.DBControlUtil secureDBConsole INFO: Database Control secured successfully.Oct 20, 2008 3:14:24 PM oracle.sysman.emcp.util.DBControlUtil startOMSINFO: Starting Database Control (this may take a while) ...Oct 20, 2008 3:16:05 PM oracle.sysman.emcp.EMDBPostConfig performConfiguration INFO: Database Control started successfullyOct 20, 2008 3:16:05 PM oracle.sysman.emcp.EMDBPostConfig performConfiguration INFO: >>>>>>>>>>> The Database Control URL is https://testhost:1158/em<<<<<<<<<<< Enterprise Manager configuration completed successfullyFINISHED EMCA at Oct 20, 2008 3:16:05 PMORACLE RAC数据库删除testhost1:{/oracle}$emca -repos drop -clusterSTARTED EMCA at Oct 20, 2008 4:07:33 PMEM Configuration Assistant, Version 10.2.0.1.0 ProductionCopyright (c) 2003, 2005, Oracle. All rights reserved.Enter the following information:Database unique name: nmyzdbListener port number: 1521Password for SYS user:Password for SYSMAN user:Do you wish to continue? [yes(Y)/no(N)]: yOct 20, 2008 4:07:48 PM oracle.sysman.emcp.EMConfig performINFO: This operation is being logged at /oracle/app/oracle/product/10.2/cfgtoollogs/emca/nmyzdb/emca_2008-10-20_04-07-33-PM.log.Oct 20, 2008 4:07:50 PM oracle.sysman.emcp.EMReposConfig dropRepositoryINFO: Dropping the EM repository (this may take a while) ...删除的时候会整体锁住数据库,对数据库的任何访问都没有反应,因此手工中断了删除创建testhost1:{/oracle}$emca -repos create -clusterSTARTED EMCA at Oct 20, 2008 4:24:30 PMEM Configuration Assistant, Version 10.2.0.1.0 ProductionCopyright (c) 2003, 2005, Oracle. All rights reserved.Enter the following information:Database unique name: nmyzdbListener port number: 1521Password for SYS user:Password for SYSMAN user: geDo you wish to continue? [yes(Y)/no(N)]: yOct 20, 2008 4:24:57 PM oracle.sysman.emcp.EMConfig performINFO: This operation is being logged at /oracle/app/oracle/product/10.2/cfgtoollogs/emca/nmyzdb/emca_2008-10-20_04-24-3 0-PM.log.Oct 20, 2008 4:24:59 PM oracle.sysman.emcp.EMReposConfig createRepository INFO: Creating the EM repository (this may take a while) ...Oct 20, 2008 4:28:31 PM oracle.sysman.emcp.EMReposConfig invokeINFO: Repository successfully createdEnterprise Manager configuration completed successfullyFINISHED EMCA at Oct 20, 2008 4:28:31 PMtesthost1:{/oracle}$配置testhost1:{/oracle}$emca -config dbcontrol db -clusterSTARTED EMCA at Oct 20, 2008 4:32:26 PMEM Configuration Assistant, Version 10.2.0.1.0 ProductionCopyright (c) 2003, 2005, Oracle. All rights reserved.Enter the following information:Database unique name: nmyzdbListener port number: 1521Cluster name: nmyzdbPassword for SYS user:Password for DBSNMP user:Password for SYSMAN user:Email address for notifications (optional):Outgoing Mail (SMTP) server for notifications (optional):-----------------------------------------------------------------You have specified the following settingsDatabase ORACLE_HOME ................ /oracle/app/oracle/product/10.2Database instance hostname ................ testhost1Listener port number (1521)Cluster name ................ nmyzdbDatabase unique name ................ nmyzdbEmail address for notifications ...............Outgoing Mail (SMTP) server for notifications ...............-----------------------------------------------------------------Do you wish to continue? [yes(Y)/no(N)]: yOct 20, 2008 4:33:03 PM oracle.sysman.emcp.EMConfig performINFO: This operation is being logged at /oracle/app/oracle/product/10.2/cfgtoollogs/emca/nmyzdb/emca_2008-10-20_04-32-2 6-PM.log.Oct 20, 2008 4:33:08 PM oracle.sysman.emcp.EMDBCConfig instantiateOC4JConfigFiles INFO: Propagating /oracle/app/oracle/product/10.2/oc4j/j2ee/OC4J_DBConsole_testhost1_testdb1 to remote nodes ...Oct 20, 2008 4:33:08 PM oracle.sysman.emcp.EMDBCConfig instantiateOC4JConfigFiles INFO: Propagating /oracle/app/oracle/product/10.2/oc4j/j2ee/OC4J_DBConsole_testhost2_testdb2 to remote nodes ...Oct 20, 2008 4:33:09 PM oracle.sysman.emcp.EMDBCConfig copyAndPropagateOC4JDir INFO: Propagating /oracle/app/oracle/product/10.2/oc4j/j2ee/isqlplus_testhost1 to remote nodes ...Oct 20, 2008 4:33:10 PM oracle.sysman.emcp.EMDBCConfig copyAndPropagateOC4JDir INFO: Propagating /oracle/app/oracle/product/10.2/oc4j/j2ee/isqlplus_testhost2 to remote nodes ...Oct 20, 2008 4:33:13 PM oracle.sysman.emcp.EMAgentConfig deployStateDirs INFO: Propagating /oracle/app/oracle/product/10.2/testhost1_testdb1 to remote nodes ...Oct 20, 2008 4:33:15 PM oracle.sysman.emcp.EMAgentConfig deployStateDirs INFO: Propagating /oracle/app/oracle/product/10.2/testhost2_testdb2 to remote nodes ...Oct 20, 2008 4:33:16 PM oracle.sysman.emcp.util.DBControlUtil secureDBConsole INFO: Securing Database Control (this may take a while) ...Oct 20, 2008 4:34:55 PM oracle.sysman.emcp.util.DBControlUtil startOMSINFO: Starting Database Control (this may take a while) ...Oct 20, 2008 4:36:48 PM oracle.sysman.emcp.EMDBPostConfig performConfiguration INFO: Database Control started successfullyOct 20, 2008 4:36:48 PM oracle.sysman.emcp.EMDBPostConfig performConfiguration INFO: >>>>>>>>>>> The Database Control URL is https://testhost1:1158/em<<<<<<<<<<< Oct 20, 2008 4:36:48 PM oracle.sysman.emcp.EMDBPostConfig showClusterDBCAgentMessageINFO:**************** Current Configuration ****************INSTANCE NODE DBCONTROL_UPLOAD_HOST---------- ---------- ---------------------testdb1 testhost1 testhosttestdb2 testhost2 testhostEnterprise Manager configuration completed successfullyFINISHED EMCA at Oct 20, 2008 4:36:48 PM数据库的端口修改后,需要修改以下的文件中的端口号,em才能访问:如果是RAC,那么两台机器都需要改/oracle/app/oracle/product/10.2/testhost1_testdb1/sysman/config/emoms.propertie s/oracle/app/oracle/product/10.2/testhost2_testdb2/sysman/config/emoms.propertie s/oracle/app/oracle/product/10.2/testhost1_testdb1/sysman/emd/targets.xml/oracle/app/oracle/product/10.2/testhost2_testdb2/sysman/emd/targets.xml。
oracle不能使用EM怎么办oracle11g如何正确安装配置EM

oracle不能使⽤EM怎么办oracle11g如何正确安装配置EM oracle不能使⽤EM的解决⽅法,具体内容如下
不能登录EM,执⾏emca -config dbcontrol db 不知道总是默认1522的端⼝号,⽆奈,google⼀番,从下⾯第⼆步开始执⾏。
(我的监听没问题)
1、打开oracle配置⼯具⾥的Net Configuration Assistant,选择“监听程序配置”,下⼀步,接着选择“重新配置”,下⼀步,仔细看下每⼀步配置的参数是否正确就OK了。
2、在命令⾏上使⽤“emca -deconfig dbcontrol db”命令删除配置
3、使⽤“emca -repos drop”命令删除 repository
注:第2、3步骤都要做,要不然在重新安装EM的时候会报“ ORA-20001: SYSMAN already exists..”的错误导致安装失败。
4、使⽤“emca -config dbcontrol db -repos create”命令进⾏创建em。
以上就是本⽂的全部内容,希望对⼤家的学习有所帮助,也希望⼤家多多⽀持。
RAC 安装和配置及ASM最佳实践

8
在Linux上安装Oracle10g RAC
在安装的各个阶段运行 CVU (Cluster Verification Utility) 使用最新的被支持的操作系统版本并且正确设置核心参数 参考OTN上被验证了的多种配置 (只对Linux) - 包含了10g RAC在Linux上的很多配置情况 (包括不 同的Linux版本、不同的硬件配置、不同的存储方式等) - 详细列出了主机型号、CPU类型、内存大小、存储设备 的类型和容量、磁盘阵列(RAID)、网络设备、操作系统 及kernel的版本、oracle软件版本和补丁情况、安装的操 作系统package和oracle package、操作系统参数配置 、测试过的存储方式(如ASM或RAW DEVICE等)、驱动 器模块及配置情况的反馈等 - 详细情况请参考以下网址:
CRS Home (如果已安装CRS软件)
– –
<crs_home>/bin/cluvfy <crs_home>/cv/rpm/cvuqdisk-1.0.1-1.rpm (linux only)
Oracle Home (如果已安装RAC数据库软件)
–
$ORACLE_HOME/bin/cluvfy
© 2005-2006 Oracle Corporation All rights reserved.
在linux上安装oracle10grac在安装的各个阶段运行cvuclusterverificationutility包含了10grac在linux上的很多配置情况包括不同的linux版本不同的硬件配置不同的存储方式等详细列出了主机型号cpu类型内存大小存储设备的类型和容量磁盘阵列raid网络设备操作系统及kernel的版本oracle软件版本和补丁情况安装的操作系统package和oraclepackage操作系统参数配置测试过的存储方式如asm或rawdevice等驱动器模块及配置情况的反馈等详细情况请参考以下网址
oracle数据库RAC服务器配置文档
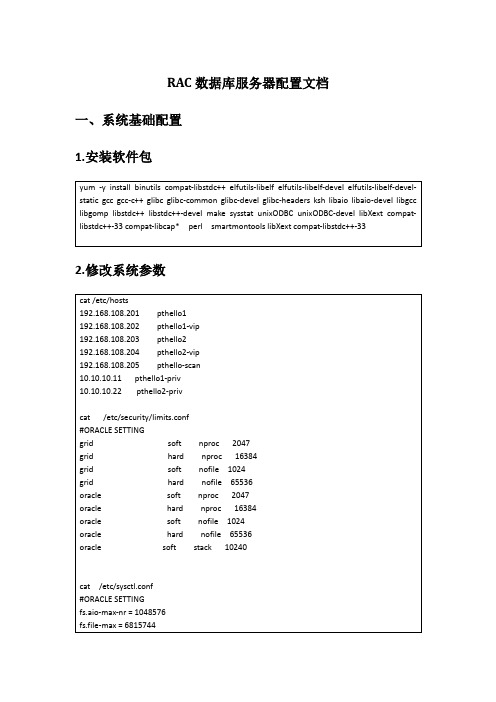
RAC数据库服务器配置文档一、系统基础配置1.安装软件包2.修改系统参数3.添加用户和组4 修改用户环境变量Grid用户5 通过ASMLIB管理磁盘二、安装集群软件密码:system123[root@pthello1 ~]# /u01/app/oraInventory/orainstRoot.sh Changing permissions of /u01/app/oraInventory.Adding read,write permissions for group.Removing read,write,execute permissions for world.Changing groupname of /u01/app/oraInventory to oinstall.The execution of the script is complete.[root@pthello1 ~]# /u01/app/11.2.0/grid/root.shPerforming root user operation for Oracle 11gThe following environment variables are set as:ORACLE_OWNER= gridORACLE_HOME= /u01/app/11.2.0/gridEnter the full pathname of the local bin directory: [/usr/local/bin]: Copying dbhome to /usr/local/bin ...Copying oraenv to /usr/local/bin ...Copying coraenv to /usr/local/bin ...Creating /etc/oratab file...Entries will be added to the /etc/oratab file as needed by Database Configuration Assistant when a database is createdFinished running generic part of root script.Now product-specific root actions will be performed.Using configuration parameter file: /u01/app/11.2.0/grid/crs/install/crsconfig_params Creating trace directoryInstalling Trace File AnalyzerOLR initialization - successfulroot walletroot wallet certroot cert exportpeer walletprofile reader walletpa walletpeer wallet keyspa wallet keyspeer cert requestpa cert requestpeer certpa certpeer root cert TPprofile reader root cert TPpa root cert TPpeer pa cert TPpa peer cert TPprofile reader pa cert TPprofile reader peer cert TPpeer user certpa user certAdding Clusterware entries to upstartCRS-2672: Attempting to start 'ora.mdnsd' on 'pthello1'CRS-2676: Start of 'ora.mdnsd' on 'pthello1' succeededCRS-2672: Attempting to start 'ora.gpnpd' on 'pthello1'CRS-2676: Start of 'ora.gpnpd' on 'pthello1' succeededCRS-2672: Attempting to start 'ora.cssdmonitor' on 'pthello1'CRS-2672: Attempting to start 'ora.gipcd' on 'pthello1'CRS-2676: Start of 'ora.cssdmonitor' on 'pthello1' succeededCRS-2676: Start of 'ora.gipcd' on 'pthello1' succeededCRS-2672: Attempting to start 'ora.cssd' on 'pthello1'CRS-2672: Attempting to start 'ora.diskmon' on 'pthello1'CRS-2676: Start of 'ora.diskmon' on 'pthello1' succeededCRS-2676: Start of 'ora.cssd' on 'pthello1' succeededASM created and started successfully.Disk Group OCR created successfully.clscfg: -install mode specifiedSuccessfully accumulated necessary OCR keys.Creating OCR keys for user 'root', privgrp 'root'..Operation successful.CRS-4256: Updating the profileSuccessful addition of voting disk a6bad62405144f4bbf5ff6551ea45a59.Successful addition of voting disk 538bba4d8aa14f8dbf111803543072a8.Successful addition of voting disk 59db1c91b1f04fb9bf6454344c5774e4.Successfully replaced voting disk group with +OCR.CRS-4256: Updating the profileCRS-4266: Voting file(s) successfully replaced## STATE File Universal Id File Name Disk group-- ----- ----------------- --------- ---------1. ONLINE a6bad62405144f4bbf5ff6551ea45a59 (ORCL:OCR_VOL1) [OCR]2. ONLINE 538bba4d8aa14f8dbf111803543072a8 (ORCL:OCR_VOL2) [OCR]3. ONLINE 59db1c91b1f04fb9bf6454344c5774e4 (ORCL:OCR_VOL3) [OCR]Located 3 voting disk(s).CRS-2672: Attempting to start 'ora.asm' on 'pthello1'CRS-2676: Start of 'ora.asm' on 'pthello1' succeededCRS-2672: Attempting to start 'ora.OCR.dg' on 'pthello1'CRS-2676: Start of 'ora.OCR.dg' on 'pthello1' succeededConfigure Oracle Grid Infrastructure for a Cluster ... succeeded1:pdksh ########################################### [100%] [root@pthello2 ~]# /u01/app/oraInventory/orainstRoot.shChanging permissions of /u01/app/oraInventory.Adding read,write permissions for group.Removing read,write,execute permissions for world.Changing groupname of /u01/app/oraInventory to oinstall.The execution of the script is complete.[root@pthello2 ~]# /u01/app/11.2.0/grid/root.shPerforming root user operation for Oracle 11gThe following environment variables are set as:ORACLE_OWNER= gridORACLE_HOME= /u01/app/11.2.0/gridEnter the full pathname of the local bin directory: [/usr/local/bin]:Copying dbhome to /usr/local/bin ...Copying oraenv to /usr/local/bin ...Copying coraenv to /usr/local/bin ...Creating /etc/oratab file...Entries will be added to the /etc/oratab file as needed byDatabase Configuration Assistant when a database is createdFinished running generic part of root script.Now product-specific root actions will be performed.Using configuration parameter file: /u01/app/11.2.0/grid/crs/install/crsconfig_paramsCreating trace directoryInstalling Trace File AnalyzerOLR initialization - successfulAdding Clusterware entries to upstartCRS-4402: The CSS daemon was started in exclusive mode but found an active CSS daemon on node pthello1, number 1, and is terminatingAn active cluster was found during exclusive startup, restarting to join the clusterConfigure Oracle Grid Infrastructure for a Cluster ... succeeded[root@pthello1 ~]# /u01/app/oracle/product/11.2.0/db_1/root.shPerforming root user operation for Oracle 11gThe following environment variables are set as:ORACLE_OWNER= oracleORACLE_HOME= /u01/app/oracle/product/11.2.0/db_1Enter the full pathname of the local bin directory: [/usr/local/bin]:The contents of "dbhome" have not changed. No need to overwrite.The contents of "oraenv" have not changed. No need to overwrite.The contents of "coraenv" have not changed. No need to overwrite.Entries will be added to the /etc/oratab file as needed byDatabase Configuration Assistant when a database is createdFinished running generic part of root script.Now product-specific root actions will be performed.Finished product-specific root actions.[root@pthello1 ~]#[root@pthello2 ~]# /u01/app/oraInventory/orainstRoot.shChanging permissions of /u01/app/oraInventory.Adding read,write permissions for group.Removing read,write,execute permissions for world.Changing groupname of /u01/app/oraInventory to oinstall.The execution of the script is complete.[root@pthello2 ~]# /u01/app/oracle/product/11.2.0/db_1/root.sh Performing root user operation for Oracle 11gThe following environment variables are set as:ORACLE_OWNER= oracleORACLE_HOME= /u01/app/oracle/product/11.2.0/db_1Enter the full pathname of the local bin directory: [/usr/local/bin]: The contents of "dbhome" have not changed. No need to overwrite. The contents of "oraenv" have not changed. No need to overwrite. The contents of "coraenv" have not changed. No need to overwrite.Entries will be added to the /etc/oratab file as needed by Database Configuration Assistant when a database is created Finished running generic part of root script.Now product-specific root actions will be performed.Finished product-specific root actions.[root@pthello2 ~]#三、安装数据库软件[root@pthello1 ~]# /u01/app/oracle/product/11.2.0/db_1/root.sh Performing root user operation for Oracle 11gThe following environment variables are set as:ORACLE_OWNER= oracleORACLE_HOME= /u01/app/oracle/product/11.2.0/db_1Enter the full pathname of the local bin directory: [/usr/local/bin]: The contents of "dbhome" have not changed. No need to overwrite. The contents of "oraenv" have not changed. No need to overwrite. The contents of "coraenv" have not changed. No need to overwrite.Entries will be added to the /etc/oratab file as needed by Database Configuration Assistant when a database is created Finished running generic part of root script.Now product-specific root actions will be performed.Finished product-specific root actions.[root@pthello2 ~]# /u01/app/oracle/product/11.2.0/db_1/root.sh Performing root user operation for Oracle 11gThe following environment variables are set as:ORACLE_OWNER= oracleORACLE_HOME= /u01/app/oracle/product/11.2.0/db_1Enter the full pathname of the local bin directory: [/usr/local/bin]: The contents of "dbhome" have not changed. No need to overwrite. The contents of "oraenv" have not changed. No need to overwrite. The contents of "coraenv" have not changed. No need to overwrite.Entries will be added to the /etc/oratab file as needed by Database Configuration Assistant when a database is created Finished running generic part of root script.Now product-specific root actions will be performed.Finished product-specific root actions.四、配置数据库密码:system123五、集群状态验证。
重新配置em的步骤

重新配置em的步骤:第一步、首先使用emca-deconfig dbcontrol db命令删除配置,运行过程和步骤如下:C:\Users\Administrator>emca -deconfigdbcontrol dbEMCA 开始于 2012-8-2814:48:19EM Configuration Assistant, 11.2.0.0.2 正式版版权所有 (c) 2003, 2005, Oracle。
保留所有权利。
输入以下信息:数据库 SID: orcl是否继续? [是(Y)/否(N)]: y2012-8-28 14:48:57oracle.sysman.emcp.EMConfig perform信息: 正在将此操作记录到E:\app\Administrator\cfgtoollogs\emca\orcl\emca_2012_08_28_14 _48_19.log。
2012-8-28 14:48:57oracle.sysman.emcp.util.DBControlUtil stopOMS信息: 正在停止 Database Control (此操作可能需要一段时间)...已成功完成 Enterprise Manager 的配置EMCA结束于 2012-8-28 14:49:39上步你输入数据库的SID和选择是否继续;第二步、使用emca-repos drop命令删除repository,运行过程和步骤如下:C:\Users\Administrator>emca -repos dropEMCA 开始于 2012-8-2814:50:19EM Configuration Assistant, 11.2.0.0.2 正式版版权所有 (c) 2003, 2005, Oracle。
保留所有权利。
输入以下信息:数据库 SID: orcl监听程序端口号: 1521SYS 用户的口令:SYSMAN 用户的口令:是否继续? [是(Y)/否(N)]: y2012-8-28 14:50:34oracle.sysman.emcp.EMConfig perform信息: 正在将此操作记录到E:\app\Administrator\cfgtoollogs\emca\orcl\emca_2012_08_28_14 _50_19.log。
重新配置em的步骤
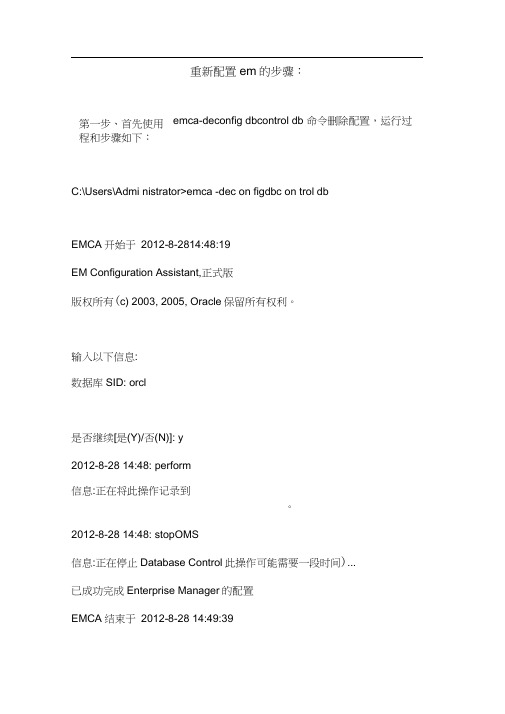
重新配置em的步骤:emca-deconfig dbcontrol db 命令删除配置,运行过第一步、首先使用程和步骤如下:C:\Users\Admi nistrator>emca -dec on figdbc on trol dbEMCA开始于2012-8-2814:48:19EM Configuration Assistant,正式版版权所有(c) 2003, 2005, Oracle保留所有权利。
输入以下信息:数据库SID: orcl是否继续[是(Y)/否(N)]: y2012-8-28 14:48: perform信息:正在将此操作记录到。
2012-8-28 14:48: stopOMS信息:正在停止Database Control此操作可能需要一段时间)...已成功完成Enterprise Manager的配置EMCA结束于2012-8-28 14:49:39上步你输入数据库的SID和选择是否继续;第二步、使用emca-repos drop 命令删除repository ,运行过程和步骤如下:C:\Users\Administrator>emca -repos dropEMCA开始于2012-8-2814:50:19EM Configuration Assistant, 正式版版权所有(c) 2003, 2005, Oracle保留所有权利。
输入以下信息:数据库SID: orcl监听程序端口号: 1521SYS用户的口令:SYSMAN用户的口令:是否继续[是(Y)/否(N)]: y2012-8-28 14:50: perform信息: 正在将此操作记录到。
2012-8-28 14:50: invoke信息: 正在删除EM 资料档案库(此操作可能需要一段时间)...2012-8-28 14:52: invoke信息: 已成功删除资料档案库已成功完成Enterprise Manager 的配置EMCA结束于2012-8-28 14:52:46这个步骤要输入数据库sid、监听程序端口、sys和sysman的密码还有选择是否继续;第三步、使用emca -repos create 命令创建来创建repos itory ,运行过程和步骤如下:C:\Users\Administrator>emca -repos createEMCA开始于2012-8-2814:20:08EM Configuration Assistant, 正式版版权所有(c) 2003, 2005, Oracle保留所有权利输入以下信息:数据库SID: orcl监听程序端口号: 1521SYS用户的口令:SYSMAN用户的口令:SYSMAN用户的口令:是否继续[是(Y)/否(N)]: y2012-8-28 14:20:31 信息: 正在将此操作记录到。
Oracle 10g RAC 安装后配置与调整

Oracle 10g RAC 安装后配置与调整2010-04-28目录ORACLE 10G RAC 安装后配置与调整 (1)1SHELL国际化设置 (4)2数据库备份 (4)2.1备份实施总体流程 (4)2.2归档设置 (5)2.3启用F LASHBACK (6)2.3.1Tips:设置log_archive_dest参数导致数据库不能启动 (7)2.4创建恢复目录S CHEMA并注册目标数据库 (9)2.5RMAN参数设置 (10)2.6在CRONTAB中添加备份调度脚本 (11)3使用ASM时数据库初始参数文件PFILE与SPFILE(备份/设置/恢复) (11)3.1恢复SPFILE到ASM中 (11)3.2ASM命令集 (12)4AIX集群网络故障诊断 (13)5ORACLE字符集问题 (17)5.1更改O RACLE 10G RAC数据库字符集 (17)5.2设置OS层面的NLS_LANG (20)5.2.1exp时,操作系统NLS_LANG设置 (20)5.2.2imp时,操作系统的NLS_LANG设置 (20)5.2.3ORA-01401 与ORA-12899 (21)6关于IMP/EXP的最佳实践 (21)6.1ORACLE10G 的EXPDP (23)6.2EXP使用参数文件 (23)7ORACLE RAC和数据库相关的日志文件 (24)8RAC环境下,从服务器登入报ORA-12520错误 (24)9ORACLE RAC 客户端连接报ORA-12545错误的解决方案 (25)9.1问题描述 (25)9.2解决方案 (26)10针对ORACLE的AIX性能调优 (27)10.1内存 (27)10.2调整LOCK_SGA=TRUE (28)10.3CPU (29)10.4D ISK I/O (29)10.4.1Asynchronous I/O (AIO) servers (29)10.4.2Concurrent I/O (CIO) (30)10.5O RACLE 参数调整建议 (30)10.6网络及ULIMIT (31)11ORACLE RAC 管理常用命令 (31)11.1基本启动/关闭命令 (31)11.2CRS命令 (31)11.3SRVCTL启动RAC的步骤 (32)11.4SRVCTL关闭RAC的步骤: (32)11.5重分派服务的实例 (33)1 Shell国际化设置列出所有已安装语言包#locale –a显示当前语言环境设置#locale设置当前Shell的环境#export LC_ALL=ZH_CN.UTF-8#export LANG=ZH_CN.UTF-8请设置所使用的Telnet工具的显示字符集为UTF-8。
Oracle EM for_RAC ( 34 )

Manage Many as One – 监控模板
融合了最佳的监控标准
• 允许管理员使用标准化的监 控配置 • 定义好的度量设定集合:
• •
Grid Control
度量,调度集合,阈值,错 误纠正操作 用户定义的度量
• 一旦被创建,就可以应用到 所有的或者部分的组件(节 点)中
• •
对用户透明 自动发现集群配置
• 数据库 • 主机(操作系统)
•
数据库告警
• 比如:存储告警
• 跨集群的EM作业 • RAC性能管理 • Service状态管理
集群数据库性能
RAC Interconnect 监控
• 监控私有的和公共的 interconnects • 确定使用中的 interconnects • 流量 • Interconnect告警
RAC 管理
RAC 管理
• 单一的系统映像 • 集群数据库的首页面提供了RAC的信息汇总视图
• • • • • • • • • • 状态信息汇总 所有节点的性能数据汇 数据库操作链接 点击进入instance页面 可以随时回到首页面 硬件 OS配置 性能 状态 点击进入某个节点的页面
• 集群页面
RAC 管理
• • • • • • • • • • Redo files Archive log Undo Tablespace Spfile Backup and Recovery Optimzer statistics Tables, Indexes Users, Roles, Profiles Audit Settings
Manage Many as One – 企业报告
linux 添加RAC节点
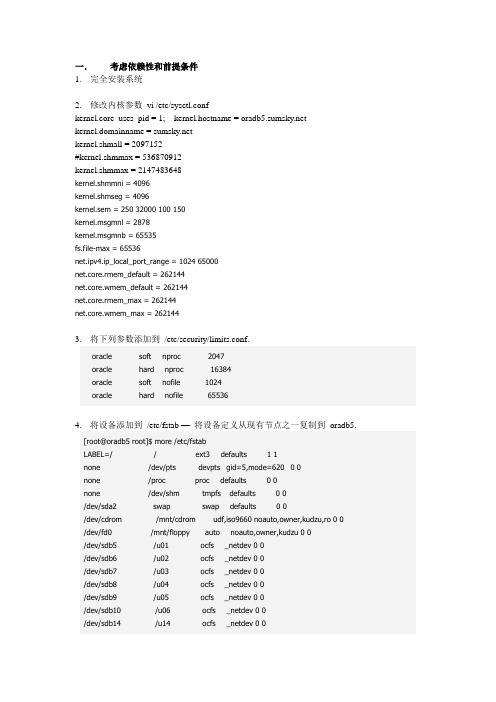
一.考虑依赖性和前提条件1.完全安装系统2.修改内核参数vi /etc/sysctl.confkernel.core_uses_pid = 1; kernel.hostname = kernel.domainname = kernel.shmall = 2097152#kernel.shmmax = 536870912kernel.shmmax = 2147483648kernel.shmmni = 4096kernel.shmseg = 4096kernel.sem = 250 32000 100 150kernel.msgmnl = 2878kernel.msgmnb = 65535fs.file-max = 65536net.ipv4.ip_local_port_range = 1024 65000net.core.rmem_default = 262144net.core.wmem_defaul t = 262144net.core.rmem_max = 262144net.core.wmem_max = 2621443.将下列参数添加到/etc/security/limits.conf.oracle soft nproc 2047oracle hard nproc 16384oracle soft nofile 1024oracle hard nofile 655364.将设备添加到/etc/fstab —将设备定义从现有节点之一复制到oradb5. [root@oradb5 root]$ more /etc/fstabLABEL=/ / ext3 defaults 1 1none /dev/pts devpts gid=5,mode=620 0 0none /proc proc defaults 0 0none /dev/shm tmpfs defaults 0 0/dev/sda2 swap swap defaults 0 0/dev/cdrom /mnt/cdrom udf,iso9660 noauto,owner,kudzu,ro 0 0/dev/fd0 /mnt/floppy auto noauto,owner,kudzu 0 0/dev/sdb5 /u01 ocfs _netdev 0 0/dev/sdb6 /u02 ocfs _netdev 0 0/dev/sdb7 /u03 ocfs _netdev 0 0/dev/sdb8 /u04 ocfs _netdev 0 0/dev/sdb9 /u05 ocfs _netdev 0 0/dev/sdb10 /u06 ocfs _netdev 0 0/dev/sdb14 /u14 ocfs _netdev 0 05.创建用户,确保与其他节点用户及组ID等同groupadd -g 1001 dbagroupadd -g 1002 oinstalluseradd -u 1001 -g oinstall -G dba oraclepasswd oracle#chown -R oracle:dba /home/oracle6.在所有节点/etc/hosts/文件中添加新节点信息7.配置环境变量$vi .bash_profileumask=022# User specific environment and startup programsexport ORACLE_BASE=/home/oracleexport ORACLE_HOME=$ORACLE_BASE/product/10.2.0/dbexport ORA_CRS_HOME=$ORACLE_BASE/product/10.2.0/crs# Each RAC node must have a unique ORACLE_SID.(i.e. dbserver1, dbserver2,...) export ORACLE_SID=oradb1export PA TH=.:${PA TH}:$HOME/bin:$ORACLE_HOME/binexport PA TH=${PA TH}:/usr/bin:/bin:/usr/bin/X11:/usr/local/binexport ORACLE_TERM=xtermexport TNS_ADMIN=$ORACLE_HOME/network/adminexport ORA_NLS33=$ORACLE_HOME/ocommon/nls/admin/dataexport LD_LIBRARY_PA TH=$ORACLE_HOME/libexport LD_LIBRARY_PA TH=${LD_LIBRARY_PA TH}:$ORACLE_HOME/oracm/lib export LD_LIBRARY_PA TH=${LD_LIBRARY_PA TH}:/lib:/usr/lib:/usr/local/lib export CLASSPA TH=$ORACLE_HOME/JREexport CLASSPA TH=${CLASSPA TH}:$ORACLE_HOME/jlibexport CLASSPA TH=${CLASSPA TH}:$ORACLE_HOME/rdbms/jlibexport CLASSPA TH=${CLASSPA TH}:$ORACLE_HOME/network/jlib#export THREADS_FLAG=nativeexport TEMP=/tmpexport TMPDIR=/tmp8.用SSH 建立用户等效项$ mkdir ~/.ssh$ chmod 755 ~/.ssh$ /usr/bin/ssh-keygen -t rsa$ /usr/bin/ssh-keygen -t dsa$ touch ~/.ssh/authorized_keys$ cat ~/.ssh/id_rsa.pub >> ~/.ssh/authorized_keys$ cat ~/.ssh/id_dsa.pub >> ~/.ssh/authorized_keys$ cp ~/.ssh/authorized_keys ~/.ssh/node1.authorized_keys$ cat ~/.ssh/node1.authorized_keys >> ssh oracle@node1 ~/.ssh/authorized_keys$ chmod 644 ~/.ssh/authorized_keys9.验证连接$ssh rac1 date$ssh rac2 date$ssh rac3 date$ssh rac1-priv date$ssh rac2-priv date二.验证集群Oracle 集群件已经安装在集群上;这里的任务是将新节点添加到集群配置中。
RAC安装与配置-图文

RAC安装与配置-图文一、准备工作1、安装包文件:操作系统:OracleEnterprieLinu某6.5数据库软件:linu某.某64_11gR2_grid.ziplinu某.某64_11gR2_databae.zip2、安装VMwareTool,点控制台上面虚拟机->客户机->安装/升级VMwareTool,然后执行以下操作mkdir/mnt/cdromchmod-R775/mnt/cdrommount/dev/cdrom/mnt/cdromcd/mnt/cdromcpVMwareTool-9.4.10-2068191.tar.gz/tmp/tetcd/tmp/tettar-z某vfVMwareTool-9.4.10-2068191.tar.gzcd/tmp/tet/vmware-tool-ditrib/./vmware-intall.pl一直安回车键完成安装3、RAC架构规划IP分配:服务器机器名称公共IP地址(eth0)虚拟IP地址(eth0-1)私有IP地址(eth1)单实例SIDORACLERACSIDSCANIP软件安装目录:Oracle软件Grid软件/oracle/app/product/11.2.0/db_1/oracle/gridrac1192.168.10.80192. 168.10.8210.10.10.66orcl1orcl192.168.10.109Oracle-Linu某6.564bit,Oracle11.2.0.1rac2192.168.10.81192.168.10.8310.10.10.88orcl24、关闭防火墙及elinu某A、关闭防火墙(两个节点都要操作)erviceiptabletopchkconfigiptableofferviceiptabletatu//查看防火墙状态B、关闭elinu某(双节点)vi/etc/elinu某/config设置:SELINU某=diabled生效:etenforce0二、rac主机配置(双节点都要设置)1、修改机器名(所有节点)修改机器名服务器1:hotnamerac1vi/etc/yconfig/network服务器2:hotnamerac2vi/etc/yconfig/network2、设置ip地址(所有节点)两个网卡设置好之前规划的地址,配置过程省略3、配置hot文件vi/etc/hot三、使用CTSS配置时间同步(所有节点)/bin/ervicentpdtopchkconfigntpdoffmv/etc/ntp.conf/etc/ntp.conf.originalchkconfigntpd--litrm/var/run/ntpd.pid//如果没有这个文件则不用管oracle11g安装grid后ct会自动同步的四、配置DNS服务器(如果hot文件写了,可以不需要DNS服务器的)1、配置hot文件修改dn服务器的hot配置文件,建议删除::1这行同时修改第一行为127.0.0.1localhot否则后面检查可能会报错vi/etc/hot#node1rpm-ivhbind-9.8.2-0.30.rc1.el6.某86_64.rpm--force--nodeprpm-ivhbind-lib-9.8.2-0.30.rc1.el6.i686.rpm--force--nodeprpm-ivhbind-lib-9.8.2-0.30.rc1.el6.某86_64.rpm--force--nodeprpm-ivhbind-util-9.8.2-0.30.rc1.el6.某86_64.rpm--force--nodeprpm-ivhbind-chroot-9.8.2-0.30.rc1.el6.某86_64.rpm--force--nodep3、配置/etc/named.conf文件vi/etc/named.conf为了简单方便,将named.conf文件中的127.0.0.1、localhot全部修改为any,修改是注意左右两边留有空格,可以注释掉Ipv6那一行。
Oracle RAC安装与配置

瑞世达科技(厦门)有限公司Oracle RAC安装与配置晋泰科技(上海)有限公司目录目录 (1)壹、安装准备 (3)软件环境 (3)OS软件包条件 (3)创建安装用户,目录 (4)创建组 (4)创建用户 (4)创建目录 (5)更改目录权限 (5)系统参数及Kernel配置 (5)配置Shell Limit (5)OS Kernel条件 (5)配置Shell环境 (6)开启stty commands支持 (7)文件系统对Oracle所有文件的支持性 (7)OCR与Voting Disks空间需求 (7)最小数据文件需求 (8)貳、Grid及Oracle Binary安装 (9)主机信息 (9)安装Oracle ASMLIB (9)配置asmlib (9)配置asm 对multipath的支持 (10)创建ASM磁盘 (11)分区 (11)创建ASM Disk (11)安装Grid (11)安装过程 (12)创建ASM Disk Group (33)安装Oracle Binary程式 (36)安装过程 (36)修订记录一览表文件版本制订/修订者修订的内容大纲1.0(2010-09-10)Spark Initial壹、安装准备软件环境RHEL5.3 64 bitoracleasm-2.6.18-128.el5-2.0.5-1.el5.x86_64.rpmoracleasmlib-2.0.4-1.el5.x86_64.rpmoracleasm-support-2.1.3-1.el5.x86_64.rpmlinux.x64_11gR2_grid.ziplinux.x64_11gR2_database_1of2.ziplinux.x64_11gR2_database_2of2.zipOS软件包条件以下包要全部安装,安装版本号要大于或等于以下版本信息。
binutils-2.17.50.0.6compat-libstdc++-33-3.2.3compat-libstdc++-33-3.2.3 (32 bit)elfutils-libelf-0.125elfutils-libelf-devel-0.125gcc-4.1.2gcc-c++-4.1.2glibc-2.5-24glibc-2.5-24 (32 bit)glibc-common-2.5glibc-devel-2.5glibc-devel-2.5 (32 bit)glibc-headers-2.5ksh-20060214libaio-0.3.106libaio-0.3.106 (32 bit)libaio-devel-0.3.106libaio-devel-0.3.106 (32 bit)libgcc-4.1.2libgcc-4.1.2 (32 bit)libstdc++-4.1.2libstdc++-4.1.2 (32 bit)libstdc++-devel 4.1.2make-3.81sysstat-7.0.2unixODBC-2.2.11unixODBC-2.2.11 (32 bit)unixODBC-devel-2.2.11unixODBC-devel-2.2.11 (32 bit)Kernel要满足以下条件Red Hat Enterprise Linux Distributions■Red Hat Enterprise Linux 5, kernel 2.6.9 or later创建安装用户,目录以下操作,在每个节点上都要执行创建组groupadd oinstallgroupadd dbagroupadd opergroupadd asmadmingroupadd asmdbagroupadd asmoper创建用户useradd –g oinstall -G dba,oper,asmdba oracleuseradd –g oinstall -G asmadmin,asmdba,asmoper grid创建目录Cluster存放目录mkdir /oragridOracle程式文件mkdir –p /orac/orahome/11.2更改目录权限chown –R grid:oinstall /oragridchown –R oracle:oinstall /oracchmod -R 775 /oragridchmod -R 775 /orac系统参数及Kernel配置以下操作,在每个节点上都要执行配置Shell Limit/etc/security/limits.confgrid soft nproc 2047grid hard nproc 16384grid soft nofile 1024grid hard nofile 65536oracle soft nproc 2047oracle hard nproc 16384oracle soft nofile 1024oracle hard nofile 65536OS Kernel条件配置/etc/sysctl.conf 执行sysctl –p生效[root@rstmesxmdb01 etc]# sysctl -pnet.ipv4.ip_forward = 0net.ipv4.conf.default.rp_filter = 1net.ipv4.conf.default.accept_source_route = 0kernel.sysrq = 0kernel.core_uses_pid = 1net.ipv4.tcp_syncookies = 1kernel.msgmnb = 65536kernel.msgmax = 65536kernel.shmmax = 68719476736kernel.shmall = 4294967296fs.aio-max-nr = 1048576fs.file-max = 6815744kernel.sem = 250 32000 100 128net.ipv4.ip_local_port_range = 9000 65500net.core.rmem_default = 262144net.core.rmem_max = 4194304net.core.wmem_default = 262144net.core.wmem_max = 1048586如果以下条目不存在则要添加,/etc/pam.d/login session required pam_limits.so配置Shell环境/etc/profile添加以下条目if [ $USER = "oracle" ] || [ $USER = "grid" ]; then if [ $SHELL = "/bin/ksh" ]; thenulimit -p 16384ulimit -n 65536elseulimit -u 16384 -n 65536fiumask 022fi开启stty commands 支持配置.bash_profile,添加以下条目 if [ -t 0 ]; then stty intr ^C fi文件系统对Oracle 所有文件的支持性OCR 与Voting Disks 空间需求最小数据文件需求貳、 Grid 及Oracle Binary 安装主机信息安装Oracle ASMLIB#rpm –ivh oracleasm-support-2.1.3-1.el5.x86_64.rpm#rpm –ivh oracleasm-2.6.18-128.el5-2.0.5-1.el5.x86_64.rpm #rpm –ivh oracleasmlib-2.0.4-1.el5.x86_64.rpm 配置asmlib[root@rstmesxmdb01 etc]# /etc/init.d/oracleasm configure Configuring the Oracle ASM library driver.This will configure the on-boot properties of the Oracle ASM library driver. The following questions will determine whether the driver is loaded on boot and what permissions it will have. The current values will be shown in brackets ('[]'). Hitting <ENTER> without typing ananswer will keep that current value. Ctrl-C will abort.Default user to own the driver interface []: gridDefault group to own the driver interface []: oinstallStart Oracle ASM library driver on boot (y/n) [n]: yScan for Oracle ASM disks on boot (y/n) [y]:Writing Oracle ASM library driver configuration: doneInitializing the Oracle ASMLib driver: [ OK ]Scanning the system for Oracle ASMLib disks: [ OK ]配置asm 对multipath的支持[root@rstmesxmdb01 etc]# cat /etc/sysconfig/oracleasm## This is a configuration file for automatic loading of the Oracle# Automatic Storage Management library kernel driver. It is generated# By running /etc/init.d/oracleasm configure. Please use that method# to modify this file## ORACLEASM_ENABELED: 'true' means to load the driver on boot.ORACLEASM_ENABLED=true# ORACLEASM_UID: Default user owning the /dev/oracleasm mount point.ORACLEASM_UID=grid# ORACLEASM_GID: Default group owning the /dev/oracleasm mount point.ORACLEASM_GID=oinstall# ORACLEASM_SCANBOOT: 'true' means scan for ASM disks on boot.ORACLEASM_SCANBOOT=true# ORACLEASM_SCANORDER: Matching patterns to order disk scanningORACLEASM_SCANORDER="mapper/*"# ORACLEASM_SCANEXCLUDE: Matching patterns to exclude disks from scan ORACLEASM_SCANEXCLUDE=""创建ASM磁盘分区fdisk /dev/mapper/mpath(0~8)创建ASM Disk[root@rstmesxmdb01 ~]# oracleasm createdisk ARCH1 /dev/mapper/mpath0p1 Writing disk header: doneInstantiating disk: done[root@rstmesxmdb01 ~]# oracleasm createdisk ARCH2 /dev/mapper/mpath1p1 Writing disk header: doneInstantiating disk: done[root@rstmesxmdb01 ~]# oracleasm createdisk DATA1 /dev/mapper/mpath2p1 Writing disk header: doneInstantiating disk: done[root@rstmesxmdb01 ~]# oracleasm createdisk DATA2 /dev/mapper/mpath3p1 Writing disk header: doneInstantiating disk: done[root@rstmesxmdb01 ~]# oracleasm createdisk DATA3 /dev/mapper/mpath4p1 Writing disk header: doneInstantiating disk: done[root@rstmesxmdb01 ~]# oracleasm createdisk DATA4 /dev/mapper/mpath5p1 Writing disk header: doneInstantiating disk: done[root@rstmesxmdb01 ~]# oracleasm createdisk OCR1 /dev/mapper/mpath81Writing disk header: doneInstantiating disk: done安装Grid安装Oracle软件请开启图形支持安装过程以grid 用户,切换安装目录,执行./ runInstaller配置信任关系配置网卡功能以root用户执行脚本下步报错与SCAN HOST有关,直接忽略创建ASM Disk Group$ cd /u01/app/11.2.0/grid./asmca安装Oracle Binary 程式安装过程仅安装Software选择RAC安装,选中所有节点配置ssh信任勾选options组件仅保留oracle partitioning。
配置Oracle EM
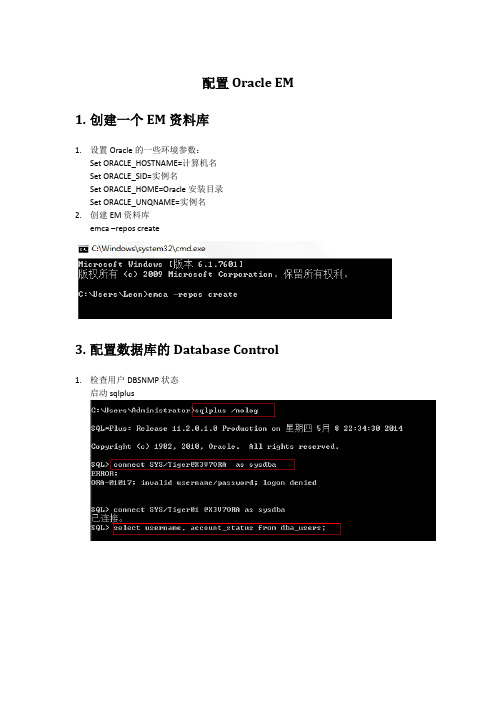
配置Oracle EM 1.创建一个EM资料库1.设置Oracle的一些环境参数:Set ORACLE_HOSTNAME=计算机名Set ORACLE_SID=实例名Set ORACLE_HOME=Oracle安装目录Set ORACLE_UNQNAME=实例名2.创建EM资料库emca –repos create3.配置数据库的Database Control1.检查用户DBSNMP状态启动sqlplus2.修改DBSNMP用户状态为非锁定状态,并修改密码3.配置数据库的Database Controlemca –config dbcontrol db如果报错:解决方案:1)检查数据库实例状态2)查看sqlnet.ora文件如果是NONE,将其修改为NTS3)重新执行emca –config dbcontrol db4)查看dbconsole状态附注:创建一个EM资料库emca -repos create重建一个EM资料库emca -repos recreate删除一个EM资料库emca -repos drop配置数据库的 Database Controlemca -config dbcontrol db删除数据库的 Database Control配emca -deconfig dbcontrol db重新配置db control的端口,默认端口在1158emca -reconfig portsemca -reconfig ports -dbcontrol_http_port 1160emca -reconfig ports -agent_port 3940先设置ORACLE_SID环境变量后,启动EM console服务emctl start dbconsole先设置ORACLE_SID环境变量后,停止EM console服务emctl stop dbconsole先设置ORACLE_SID环境变量后,查看EM console服务的状态emctl status dbconsole配置dbconsole的步骤emca -repos createemca -config dbcontrol dbemctl start dbconsole重新配置dbconsole的步骤emca -repos dropemca -repos createemca -config dbcontrol db emctl start dbconsole。
- 1、下载文档前请自行甄别文档内容的完整性,平台不提供额外的编辑、内容补充、找答案等附加服务。
- 2、"仅部分预览"的文档,不可在线预览部分如存在完整性等问题,可反馈申请退款(可完整预览的文档不适用该条件!)。
- 3、如文档侵犯您的权益,请联系客服反馈,我们会尽快为您处理(人工客服工作时间:9:00-18:30)。
监听程序端口:1521
集群名:GZDB
下面是默认
然后下面等。最后出现
已成功完成 Enterprise Manager 的配置。就说明成功配置
2.打开浏览器,输入下面网址
http://rac1:1158/em/
成功登录后就可以对em 进行管理。
3.检查home 页面,看看实例那一栏有没有出现了2个实例,如果只有一个,那么就需要在rac2上面进行如下处理:
说明无法把本机的状态上传到管理节点上面。要处理这个问题,比较简单,只需要修改
/u01/app/oracle/product/10.2.0/db_1/rac2_TESTDB2/sysman/config/emd.properties 这个配置文件,然后
REPOSITORY_URL=http://localhost:1158/em/upload/ 修改为 REPOSITORY_URL=http://rac1:1158/em/upload/
然后保存。
在emctl stop agent
emctl start agent
如果没有就到
/u01/app/oracle/product/10.2.0/db_1/rac2_TESTDB2/sysman/log 检查trc和log文件
如果出现下面的报错
2012-01-23 15:12:15 Thread-32185248 ERROR command: nmejcn: failed http connection to http://localhost:1158/em/upload/: retStatus=-32
配置rac的em
当创建好rac数据库后,我们可以使用em 来管理我们的rac数据库。由于在建库的时候没有选中em,所以就需要手工进行em的配置
。配置的方法很简单,步骤如下:
1.在节点1 上面运行
emca -config dbcontrol db -cluster
输入数据库的Байду номын сангаас一名称:TESTDB
在rac2 上面运行 [oracle@rac2 log]$ emctl status agent检查
Agent Home : /u01/app/oracle/product/10.2.0/db_1/rac2_TESTDB2
是否有出现下面
Last successful upload : 2012-01-23 16:22:07
