EM12C添加Exadata指南
Oracle Exadata特性简介及应用指南

2012年 8月一Exadata 概述 (4)1Exadata简介 (4)2Exadata的配置及性能参数 (4)二Exadata特性 (5)1Smart Scan(智能扫描) (5)2Storage Index(存储索引) (14)3Flash Cache(智能闪存) (24)4Compression(压缩) & EHCC(Exadata Hybrid Columnar Compression)28 5IORM(IO资源管理) (34)三Exadata监控 (37)1Exadata特性监控常用指标 (37)2如何查看指标 (38)四如何应用Exadata (38)1Exadata参数调整 (38)2在Exadata上开发注意事项 (38)4Exadata总体总结 (42)1前言1.1本文背景前期东软-甲骨文公司组织了一次针对社保系统的Exadata联合应用测试,本文内容是本次Exadata测试的经验总结,其中包含了与Oracle技术人员交流经验应用、Oracle相关技术文档应用及个人测试经验总结。
1.2本文简介本文是关于ORACLE Exadata的一些特性介绍和应用Exadata的一些指南;本文不会涉及太多传统ORACLE DataBase已经具有的而非Exadata专有的一些特性介绍。
通过本文,读者可以了解ORACLE推出 Exadata的目的和初衷,简单了解Exadata 架构体系,了解Exdata的一些设计思路,了解其特性及其原理;了解Exadata的适合应用场景,不适合应用场景,以及在Exadata下开发的一些注意事项(尤其是做Exadata项目主要设计、开发人员一定要了解Exadata,不要把它完全当作传统ORACLE 数据库)。
1.3读者范围已经熟悉ORACLE数据库有Exadata相关项目想了解一些Exadata 的特性原理和其实现细节一Exadata 概述1Exadata简介1.1ORACLE Exadata Database Machine1.ORACLE Exadata数据库云服务器,把服务器、存储、数据库合理的整合在一起。
OEM12c安装
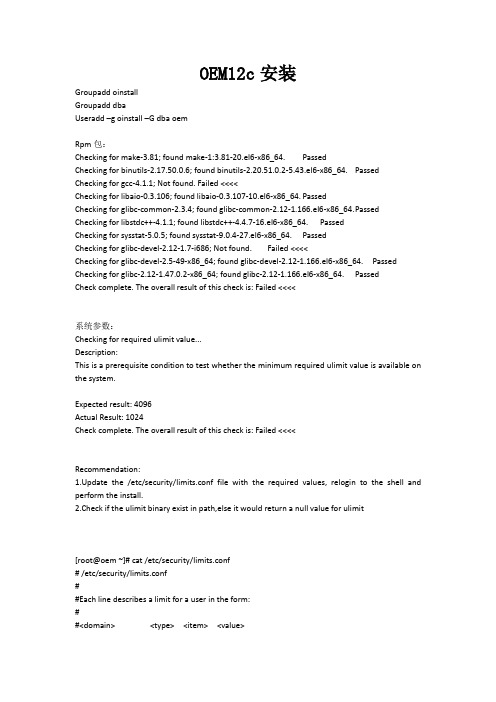
OEM12c安装GroupaddoinstallGroupadddbaUseradd–g oinstall–G dbaoemRpm包:Checking for make-3.81; found make-1:3.81-20.el6-x86_64. PassedChecking for binutils-2.17.50.0.6; found binutils-2.20.51.0.2-5.43.el6-x86_64. Passed Checking for gcc-4.1.1; Not found. Failed <<<<Checking for libaio-0.3.106; found libaio-0.3.107-10.el6-x86_64. PassedChecking for glibc-common-2.3.4; found glibc-common-2.12-1.166.el6-x86_64. P assed Checking for libstdc++-4.1.1; found libstdc++-4.4.7-16.el6-x86_64. PassedChecking for sysstat-5.0.5; found sysstat-9.0.4-27.el6-x86_64. PassedChecking for glibc-devel-2.12-1.7-i686; Not found. Failed <<<<Checking for glibc-devel-2.5-49-x86_64; found glibc-devel-2.12-1.166.el6-x86_64. Passed Checking for glibc-2.12-1.47.0.2-x86_64; found glibc-2.12-1.166.el6-x86_64. PassedCheck complete. The overall result of this check is: Failed <<<<系统参数:Checking for required ulimit value...Description:This is a prerequisite condition to test whether the minimum required ulimit value is available on the system.Expected result: 4096Actual Result: 1024Check complete. The overall result of this check is: Failed <<<<Recommendation:1.Update the /etc/security/limits.conf file with the required values, relogin to the shell and perform the install.2.Check if the ulimit binary exist in path,else it would return a null value for ulimit[root@oem ~]# cat /etc/security/limits.conf# /etc/security/limits.conf##Each line describes a limit for a user in the form:##<domain><type><item><value>##Where:#<domain> can be:# - a user name# - a group name, with @group syntax# - the wildcard *, for default entry# - the wildcard %, can be also used with %group syntax,# formaxlogin limit##<type> can have the two values:# - "soft" for enforcing the soft limits# - "hard" for enforcing hard limits##<item> can be one of the following:# - core - limits the core file size (KB)# - data - max data size (KB)# - fsize - maximum filesize (KB)# - memlock - max locked-in-memory address space (KB)# - nofile - max number of open file descriptors# - rss - max resident set size (KB)# - stack - max stack size (KB)# - cpu - max CPU time (MIN)# - nproc - max number of processes# - as - address space limit (KB)# - maxlogins - max number of logins for this user# - maxsyslogins - max number of logins on the system# - priority - the priority to run user process with# - locks - max number of file locks the user can hold# - sigpending - max number of pending signals# - msgqueue - max memory used by POSIX message queues (bytes) # - nice - max nice priority allowed to raise to values: [-20, 19]# - rtprio - max realtime priority##<domain><type><item><value>##* soft core 0#* hard rss 10000#@student hard nproc 20#@faculty soft nproc 20#@faculty hard nproc 50#ftp hard nproc 0#@student - maxlogins 4# End of fileoem soft core -1 oem soft rss -1 oem hard rss -1 oem soft nproc -1 oem hard nproc -1 oem soft nofile -1运行./runInstaller[root@oem ~]# cat /etc/hosts127.0.0.1 localhostlocalhost.localdomain localhost4 localhost4.localdomain4 ::1localhostlocalhost.localdomain localhost6 localhost6.localdomain6192.168.86.70 oemWeblogic: weblogic1 ; Node Manager Password: wangle123SYS Password: ora123若数据库主机上已安装了em,则需删除。
Oracle 一体机管理手册(Exadata_admin)
•
• • •
dcli
In parallel executes OS commands or scripts on multiple nodes Requires SSH -k option automates distribution of SSH private keys into authorized_keys file
17
© 2011 Oracle Corporation – Proprietary and Confidential
DCLI Usage Examples
$ dcli -g mycells stsd2s1: GridDisk stsd2s1: GridDisk stsd2s1: GridDisk stsd2s1: GridDisk stsd2s1: GridDisk ... $ dcli -g mycells stsd2s1: GridDisk stsd2s1: GridDisk stsd2s1: GridDisk stsd2s1: GridDisk ... $ dcli -g mycells stsd2s1: IORMPLAN stsd2s2: IORMPLAN stsd2s3: IORMPLAN cellcli -e create data_CD_2_stsd2s1 data_CD_3_stsd2s1 data_CD_4_stsd2s1 data_CD_5_stsd2s1 data_CD_6_stsd2s1 griddisk all successfully successfully successfully successfully successfully prefix="data", size=120G created created created created created
Oracle GoldenGate 12c 用户指南.pdf_1701870649.8259318说

Oracle GoldenGate 12c for Oracle Database 12cJagdev DhillonVice PresidentNick WagnerProduct ManagerSafe Harbor StatementThe following is intended to outline our general product direction. It is intended for information purposes only, and may not be incorporated into any contract. It is not a commitment to deliver any material, code, or functionality, and should not be relied upon in making purchasing decisions. The development, release, and timing of any features or functionality described for Oracle’s products remains at the sole discretion of Oracle.Program Agenda1 2 3 4 Oracle GoldenGate 12.1.2 Review Oracle GoldenGate 12.1.2.1 New Features Streams to GoldenGate ConversionsQ&AOracle GoldenGate 12c Generic Enhancements•DDL Trigger is no longer needed–Works with Oracle 11.2.0.4 and up and requires Integrated Extract–Works with Oracle Standard Edition as well as Enterprise Edition•DISCARDFILE now has defaults, and no longer needs to be specified for each Replicat •Improved Schema Wildcard resolution within the parameter files–Only captures first TABLE parameter for SCOTT.EMP DMLTABLE SCOTT.EMP, COLMAP(…);TABLE *.EMP;•Oracle 12c Expanded Data Type Support–Support for VARCHAR2 / NVARCHAR2 / RAW MAX options (32k length)Integrated Replicat•Integrated Replicat for Oracle target databases only–11.2.0.4 and 12c (12.1.+)•Leverages database parallel apply servers for automatic dependency aware parallel apply•Minimal changes to replicat configuration–Single replicat parameter file for all tables–No split transaction semanticsIntegrated ReplicatInbound Server (Database Apply Process) Delivery Lightweight Streaming API Receiver Preparer Coordinator Inbound Server Applier NApplier 2 Applier 1 Oracle DatabaseDelivery Delivery Delivery Delivery Customer defined splitSQL SQLSQL SQLTargetOracle and Non-Oracle DatabasesMAP sales.acct1, TARGET sales.acct1; MAP sales.acct2, TARGET sales.acct2; MAP sales.acct3, TARGET sales.acct3;Trail Files Thread Customer defined split SQL SQLSQLSQL Single replicationprocess forcustomerGoldenGatecoordinatesthread for barrieroperations TargetOracle and Non-Oracle DatabasesMAP sales.acct1, TARGET sales.acct1, THREAD (2); MAP sales.acct2, TARGET sales.acct2, THREAD (3); MAP sales.acct,3 TARGET sales.acct3, THREADANGE (4-9);Credential Store/Oracle Wallet•Oracle Wallet and Credential Store functionality now built into the Oracle GoldenGate Installation•Credential Store for storing usernames and passwords•Once a credential has been added to the wallet–Remove USERID, MININGDBUSERID, etc–Replace with USERIDALIAS, MININGDBUSERIDALIAS, etcHA Features for GoldenGate in 12.1.2•Oracle Active Data Guard and Oracle GoldenGate High-Availability Best Practices [CON7715]–Tuesday, Sep 30, 10:45 AM - 11:30 AM- Moscone South – 308•Full Integration with ASYNC FSFO–GoldenGate can now safely follow bounded data-loss failovers–Support enabled in Integrated Extract with the addition of the following parameter:TRANLOGOPTIONS HANDLEDLFAILOVER•Works for Oracle DB 11g and 12c•Full integration with Oracle’s XAG–XAG allows you to register a GoldenGate instance to improve HA–XAG provides increased availability in the face a loss of an instance or Primary databaseProgram Agenda1 2 3 4 Oracle GoldenGate 12.1.2 Review Oracle GoldenGate 12.1.2.1 New Features Streams to GoldenGate ConversionsQ&A12.1.2.1 Major Enhancements•Capture Enhancements–Integrated Extract Enhancements–Certification for Oracle 12.1.0.2 and In-Memory Database (IMDB) –Support for Capturing from ADG Standby database •Integrated Delivery Enhancements–Dependency Aware Batching–DDL and DML Handlers–Error Queue Support•Support for multiple Editions (Edition Based Redefinition) •Column Level Character Set Support•SOCKS 5 SupportIntegrated Extract Specific Enhancements•Continues to support Oracle SE and EE databases•Improved Startup Performance and Scalability (shared mining dictionary) •Tagged transaction can be excluded for Active-Active replication–EXCLUDETAG•Create Table As Select… can be applied as DDL + DML rather than DDL –TRANLOGOPTIONS GETCTASDML•Added redo log capture for ANYDATA and UDTs–TRANLOGOPTIONS USENATIVEOBJSUPPORT•Support for Edition Based Redefinition and multiple editionsClassic Extract can now capture from an ADG Standby database •Extract can be configured to run on the Standby Database•Configuration on the Primary database–Setup DDL capture (optional)–Configure Supplemental log data•Configuration on the Standby database–USERID Parameter points to the Primary database (USERID username@primary ) –Set TRANLOGOPTIONS MINEFROMACTIVEDGShared Logminer Dictionary•REGISTER EXTRACT ecap DATABASE•REGISTER EXTRACT ename DATABASE SHARE ecap–Ename is created as a “clone” of ecap–2nd extract (ename) uses same internal dictionary as ecap•Fast start of 2nd extract (no dictionary processing required)•Single extract does dictionary maintenance•REGISTER EXTRACT eother DATABASE SCN startatscn SHARE ecap –SCN parameter meaning is different when combined with SHAREEXCLUDETAG Functionality•TRANLOGOPTIONS EXCLUDETAG takes a single string value, but allows multiple lines to specify multiple tags•Extend EXCLUDETAG to exclude any tagged operation–EXCLUDETAG +–Similar to Streams is_null_tag setting.•Filtering of tagged transactions can be done in the Extract pump and REPLICAT12.1.2.1 Integrated Delivery Enhancements Dependency-Aware Batching for Integrated Replicat•Through the use of INTEGRATEDPARAMS BATCHSQL_MODE–Controls the ordering of transactions in BATCHSQL mode–Options:•SEQUENTIAL – transaction batched in sequential order•DEPENDENT – Dependency grouping, schedule when no active dependencies•DEPENDENT_EAGER – dependency grouping but allow scheduling when there are active dependencies–Default is DEPENDENT for Oracle 12.1.0.2–Requires new OGG/RDBMS bundled patch (bp2) but not available for 11.2.0.4.•Without patch, default is SEQUENTIAL•COMMIT_SERIALIZATION=FULL sets BATCHSQL_MODE=SEQUENTIALIntegrated Replicat Apply Handler Configuration•Uses the same package calls to set up as Streams does–DBMS_APPLY_ADM package•DML: Set_dml_handler or Add_stmt_handler•DDL: Alter_apply–The scope of handler is dependent on the configuration•Per Table , Per Operation (Ins/Upd/Del)•It is associated with the Inbound Server (Integrated Replicat process inside thedatabase)•Operations processed by the DML/DDL handler will not be applied by the Replicat •Integrated Replicat needs to be stopped and restarted when adding or removing handlers.PL/SQL Update Handler on DEMO.ORDERS table BEGINDBMS_APPLY_ADM.SET_DML_HANDLER(object_name => '"DEMO"."ORDERS"',object_type => 'TABLE',operation_name => 'UPDATE',error_handler => FALSE, ## if FALSE, then the handler replaces normal apply processing, ## if TRUE, then the handler is only executed on error.user_procedure => 'DEMO.ORDERS_DML_HANDLER',apply_database_link => NULL,apply_name => NULL); ## If NULL, then handler is used for ALL apply & inbound servers END;/12.1.2.1 Integrated Delivery Enhancements Statement DML Handlers•Statement DML handlers are up to 4x faster than procedural DML handlers –Statement DML handlers should be used to replace SQLEXEC in the Replicat when possible •Easy to Use–SQL statements, rather than PL/SQL procedures–DBMS_APPLY_ADM.ADD_STMT_HANDLER•Creates handler with SQL statement AND•Registers to Apply process–DBMS_STREAMS_HANDLER_ADM package procedures•Create or Drop handler•Add or Remove statements to/from handler•Register with apply12.1.2.1 Integrated Delivery EnhancementsEnable Error Queue Handling•In older versions of OGG, if an error occurs it falls back and lets the Replicat retry the operation. If the OGG retry fails it abends•Allow DBMS_Apply_Adm.Execute_Error capability for Integrated Replicat to retry operations in the error queue. Handles whether is message is added to the error queue.–DBOPTIONS _NO_DISABLE_ON_RETRY_ERROR•Allow OGG to retry, but if OGG fails, continue processing. If OGG successfully applies transaction, OGG deletes error from queue. Default behavior.–DBOPTIONS _NO_DISABLE_OR_RETRY_ERROR•Disable OGG retry and continue processing, recommended with COMMIT_SERIALIZATION=FULLManaging Apply Errors12.1.2.1 Integrated Delivery EnhancementsEdition Based Redefinition•DDL Replication now supports CREATE/DROP EDITION–Replicat will grant the user permission to use if it exists on target•Extract will capture the EDITION NAME owner•Replicat will switch session to the EDITION owner before applying DDL •DDL operations on editions can be filtered as well–DDL INCLUDE ALL, EXCLUDE OBJTYPE EDITION•Support for Column Level Character Sets–For cases where a table has column(s) with a character set that is different from the database character set.–Use SOURCECHARSET to enable this functionality•In MAP / TABLE statements use CHARSET to use your own settings•In DEFGEN use COLCHARSET to use your own settings•Enhanced Cloud support–SOCKS v5 Support•SOCKet Secure is a protocol that supports routing between client and server •Allows authentication•SOCKS can encrypt all traffic between client and server•Alternative to VPN for cloud to on-premise or vice-versa–New parameter SOCKSPROXY•SOCKSPROXY host:port, [PROXYCSALIAS <alias> [, PROXYCSDOMAIN domain]]•Enhanced Cloud support–Example for sending trail data from on-premise to cloud.•GoldenGate installed on with manager port 9000•Firewall only allows incoming connections on SSH port.–Use SSH as SOCKS proxy server on-premise•ssh –i ssh-key –N –f –D 1080 ******************************.com•Port 1080 is the client port that will route to an OGG installation on –Extract Parameter file:•RMTHOST , MGRPORT 9000, SOCKSPROXY localhost:1080Program Agenda1 2 3 4 Oracle GoldenGate 12.1.2 Review Oracle GoldenGate 12.1.2.1 New Features Streams to GoldenGate ConversionsQ&AMOS 1912338.1 Oracle Streams to Oracle GoldenGate Conversion •Streams is now deprecated (as of Oracle 12c)•Designed to help existing Streams users convert their replication into Oracle GoldenGate replication.–The streams2ogg tool will generate the appropriate GoldenGate 12c configuration files allowing for an easier way to migrate the Streams implementation into a GoldenGate implementation.•This tool will help–Eliminate manual conversion errors–Minimize the GoldenGate learning curve for Streams customers–Implement GoldenGate best practicesMOS 1912338.1 Oracle Streams to Oracle GoldenGate Conversion•The streams2ogg migration tool is run at the database level–connecting to the Streams Administrator schema–Load and execute the streams2ogg package–Oracle GoldenGate Parameter files are produced•OGG configuration files can be generated to run on a different database or machine to allowing for testing and platform migrations.NOTE:This tool does not provide the environment or process for switching from Streams over to your GoldenGate implementation. And does not support complete conversion of the CDC (Change Data Capture) feature of Oracle DB. Ideally suited for environments where the source and target object structure is the same.Streams2oggMOS 1912338.1 Oracle Streams to Oracle GoldenGate Conversion •Database package streams2ogg–Download from MOS Doc ID 1912338.1•Load package as Streams Administrator and answer 2 questions –@streams2ogg–Name of Oracle GoldenGate administrator schema–Name of staging directory for storing the generated files•Run procedure from Streams Administrator schema using either: –exec streams2ogg.main–exec streams2ogg.customize (if performing customizations)•All generated files will be in the staging directory.Streams2ogg Files GeneratedFile Name Descriptione capname.prm Extract file name based on capture namep capname.prm Pump file name based on capture name/propagation namer appname.prm Replicat file name based on apply namemgr.prm Manager file name - contains PORT number,other OGG mgr Best Practiceparameters (These are not based on Streams configuration) handlers.sql Sql script to configure Streams handlers after replicat process isregistered (does not include handler code)streams2ogg.trc Debug/Trace file – always generatedstreams2ogg.rpt Report file – always generatedFile Name Descriptionggconfig.oby GGSCI obey file to create extract, pump, replicat processes ggconfig2.oby GGSCI obey file to create additional extract processes based on firstextract SCNggconfig_trandata.oby GGSCI obey file to configure database supplemental logging create_subdirectories.sh Shell script to generate directory structure under the trail file storagedirectoryreg_extract.sh Helper shell script for ggconfig2.oby OGG 12.1.2.0 Register extract….SCN optionwatch.sh, watch.sql watch_status.sql Helper shell and sql script for ggconfig2.oby for OGG 12.1.2.1 Register extract….SHARE optionwatch_status.sql can be used to get status of capture initializationogg_name_map.csv Comma-separated name/value pairs for customizing streams2ogg filegenerationStreams2ogg Files Generated (continued)Streams2ogg Post Execution StepsMOS 1912338.1 Oracle Streams to Oracle GoldenGate Conversion •Parameter files and obey files need to be edited–Choose method to login: dblogin or dbloginalias–For dblogin, set password•Pump parameter file also needs to identify the host name for the RMTHOST command–If PORT number is changed in mgr.port, modify port number in pump file, too. •wait.sh script needs sqlplus login passwordProgram Agenda1 2 3 4 Oracle GoldenGate 12.1.2 Review Oracle GoldenGate 12.1.2.1 New Features Streams to GoldenGate ConversionsQ&A。
Oracle Enterprise Manager Cloud Control 12c 产品说明书

Copyright © 2014 Oracle and/or its affiliates. All rights reserved. | Oracle Confidential – Restricted
2
Evolution of Datacenter
Changing Dynamics of Database Maintenance
Ever growing database population
Multiple versions and patch levels Compliance challenges Poor resource utilization High cost of deployment and operation
3. Self Service users or Admin can choose to migrate DBs over to the new home
Benefits:
– Scale: Subscription based, automated deployment and at mass scale
Distinct configs.
OHs are Different !!!
X with version and platform 9 Versions, 3 Platforms avg.
Copyright © 2014 Oracle and/or its affiliates. All rights reserved. | Oracle Confidential – Restricted
downtime and rollback/switch back Mass automation - multiple targets with multiple patches
用于 Oracle Enterprise Manager 12c 的 Dell OpenManage
用于 Oracle Enterprise Manager 12c 的 Dell OpenManage Plug-in 版本 1.0用户指南2014 年 3 月日期说明2014 年 3 月初版© 2014 Dell Inc. 保留所有权利。
未经 Dell Inc. 书面许可,严禁以任何方式复印这些材料。
本文中使用的商标:Dell™、Dell 徽标、Dell Boomi™、Dell Precision™、OptiPlex™、Latitude™、PowerEdge™、PowerVault™、PowerConnect™、OpenManage™、EqualLogic™、Compellent™、KACE™、FlexAddress™、Force10™ 和 Vostro™ 是 Dell Inc. 的商标。
本说明文件可能使用了其他 Dell 商标。
Cisco Nexus®、Cisco MDS®、Cisco NX-0S®和其他 Cisco Catalyst®是 Cisco System Inc. 的注册商标。
EMC VNX®和 EMC Unisphere®是 EMC Corporation 的注册商标。
Intel®、Pentium®、Xeon®、Core®和 Celeron®是 Intel Corporation 在美国和其他国家或地区的注册商标。
AMD®是 Advanced Micro Devices, Inc. 的注册商标,AMD Opteron™、AMD Phenom™ 和 AMD Sempron™ 是 Advanced Micro Devices, Inc. 的商标。
Microsoft®、Windows®、Windows Server®、Internet Explorer®、MS-DOS®、Windows Vista®和 Active Directory®是 Microsoft Corporation 在美国和/或其他国家/地区的商标或注册商标。
Oracle EM12c 简介

• 主动式支持
– “Phone home” – 健康检查 – 补丁与最佳实践建议
主动式支持
集成My Oracle Support • 主动式补丁建议 • 认证检查
– End-of-life建议
My Oracle Support
Knowledge Management Problem/SR Management Configuration Management
Database-as-a-Service (DBaaS)
提升企业价值
Platform-as-a-Service (PaaS)
云资源模型
资源类型分类
• 云
– 顶层实体,不同zone的集合, OVM, DB, …
OVM Pool 1 RAC 11.2.0.2 RAC 11.2.0.2
OVM Pool 2
Oracle Enterprise Manager 12c 帮助企业实现私有云管理
Jeffrey Huang 大中华区EM 业务拓展总监
议题
• • • • • • 企业业务管理挑战分析 EM 云管理策略 EM 技术架构 EM 部署成效案例 EM 价值定位 问答
<在此处插入图片>
企业管理挑战分析
• 众多数据库节点和不同版本同时运行 <在此处插入图片> • ERP 系统访问压力很大, 如何提高访问性能 • IT应用系统种类繁多,如何对应用系统进行 集中式管理 • 如何实现企业云管理战略的价值提升 • 如何实现数据库,中间件,网络和客户前端应用的端到端 的全向业务监控,提高投资回报率, 例如RUEI监控与数据 库性能分析的集成等
Host 1
Plug-Ins (Database, FMW, Fusion Apps, . .) Agent
Exadata一体机使用的50个小技巧

Exadata管理 (3)Exadata性能优化 (3)让表使用flash cache (3)可以使用如下公式计算Exadata特性对IO的优化 (3)可以使用如下公式计算Exadata Storage Index对Disk IO减少的共享 (3)可以使用如下计算Flash Cache的使用率 (3)收集cell级别的表缓存统计信息的方法 (3)确认在使用write back flash cache (4)确认所有的griddisk均为正常online状态 (4)确认所有的flashdisk均为正常online状态 (4)启用write back flash cache的方法 (4)确认Exadata 计算节点间的网络带宽 (6)检测多个ORACLE_HOME是否RDS可用? (6)relink ORACLE_HOME的RDS (6)不同配置Exadata的推荐最大并行度 (6)Exadata EHCC支持 (6)Exadata 压缩信息 (6)针对写日志redo特别多的应用建议启用Smart Flash logging特性 (6)Exadata DB管理 (7)Exadata存储空间计算 (7)查看cell软件版本 (7)了解cell的温度 (7)cell存储节点的日志存放位置 (7)列出cell中的alert history (7)为cell创建一个告警阈值 (8)cell可用性监控 (8)如何禁用Smart Scan? (8)如何禁用storage index? (8)如何禁用flash cache? (8)cell相关的数据库视图有以下这些视图 (8)配置Inter-Database IORM (8)如何禁用布隆过滤Bloom Fliter (9)Exadata数据备份 (9)backup备份速率 (9)recovery应用日志恢复速率 (9)standby database搭建 (9)Exadata恢复 (9)cell 救护 (9)Exadata部署 (10)onecommand下载 (10)Exadata安装前准备工作 (10)环境检查 (10)验证网络连通性 (10)Exadata监控 (11)exachk健康检查脚本 (12)Exadata文档信息 (12)Exadata硬件篇 (12)常规 (12)默认密码,以下是Exadata中cell/db node IB等的默认密码: (12)硬件常规巡检: (12)检测Exadata数据库机器上的硬件和固件版本是否匹配? (13)检测软件版本与平台是否匹配? (13)为cell启用告警 (13)监控磁盘故障 (13)更换Storage Cell硬盘 (13)观察Database Server 磁盘状态 (14)观察Database Server RAID状态 (14)Storage Cell加电启动 (14)检测memory ECC错误 (14)若发现Exadata上存在磁盘损毁则: (14)检测 cell server Cache Policy (14)Exadata 停机: (16)Exadata 启动 (16)Infiniband篇 (16)启停IBSwitch (17)检查IB链路状态 (17)查看IB网络拓扑状态 (17)诊断IB链路没有错误 (17)查看IB网络连线 (17)查看IB健康状态 (18)IB健康检查 (18)IB故障处理 (18)IB硬件监控 (18)Switch端口错误 (18)Link状态 (18)Subnet manager (19)CISCO交换机 (19)例行维护操作 (19)KVM (19)PDU (19)故障处理 (19)Exadata管理Exadata性能优化让表使用flash cacheALTER TABLE <object name> storage (CELL_FLASH_CACHE KEEP);可以使用如下公式计算Exadata特性对IO的优化[ 1 – {(cell physical IO interconnect bytes returned by smart scan)/ (cell IO uncompressed bytes + cell physical IO bytes saved by storage index)} ] * 100可以使用如下公式计算Exadata Storage Index对Disk IO减少的共享(cell physical IO bytes saved by storage index / physical read total bytes) * 100可以使用如下计算Flash Cache的使用率(cell flash cache read hit / physical read total IO requests) * 100 收集cell级别的表缓存统计信息的方法SQL> SELECT data_object_id FROM DBA_OBJECTS WHERE object_name=’EMP'; OBJECT_ID———57435CellCLI> LIST FLASHCACHECONTENT –WHERE objectNumber=57435 DETAIL cachedSize: 495438874dbID: 70052hitCount: 415483missCount: 2059objectNumber: 57435tableSpaceNumber: 1确认在使用write back flash cache#dcli -g ~/cell_group -l root cellcli -e “list cell attributes flashcachemode”Results:flashCacheMode: WriteBack -> write back flash cache is enabled flashCacheMode: WriteThrough -> write back flash cache is not enabled确认所有的griddisk均为正常online状态# dcli -g cell_group -l root cellcli -e list griddisk attributes asmdeactivationoutcome, asmmodestatus确认所有的flashdisk均为正常online状态# dcli -g cell_group -l root cellcli -e list flashcache detail启用write back flash cache的方法A. Enable Write Back Flash Cache using a ROLLING method(RDBMS & ASM instance is up – enabling write-back flashcache one cell at a time)Log onto the first cell that you wish to enable write-back FlashCache1. Drop the flash cache on that cell# cellcli -e drop flashcache2. Check if ASM will be OK if the grid disks go OFFLINE. The following command should return ‘Yes’ for the grid disks being listed:# cellcli -e list griddisk attributesname,asmmodestatus,asmdeactivationoutcome3. Inactivate the griddisk on the cell# cellcli –e alter griddisk all inactive4. Shut down cellsrv service# cellcli -e alter cell shutdown services cellsrv5. Set the cell flashcache mode to writeback# cellcli -e “alter cell flashCacheMode=writeback”6. Restart the cellsrv service# cellcli -e alter cell startup services cellsrv7. Reactivate the griddisks on the cell# cellcli –e alter griddisk all active8. Verify all grid disks have been successfully put online using the following command:# cellcli -e list griddisk attributes name, asmmodestatus9. Recreate the flash cache# cellcli -e create flashcache all10. Check the status of the cell to confirm that it’s now in WriteBack mode:# cellcli -e list cell detail | grep flashCacheMode11. Repeat these same steps again on the next cell. However, before taking another storage server offline, execute the following making sure‘asmdeactivationoutcome’ displays YES:# cellcli -e list griddisk attributesname,asmmodestatus,asmdeactivationoutcomeB . Enable Write Back Flash Cache using a NON-ROLLING method (RDBMS & ASM instances are down while enabling write-back flashcache)1. Drop the flash cache on that cell# cellcli -e drop flashcache2. Shut down cellsrv service# cellcli -e alter cell shutdown services cellsrv3. Set the cell flashcache mode to writeback# cellcli -e “alter cell flashCacheMode=writeback”4. Restart the cellsrv service# cellcli -e alter cell startup services cellsrv5. Recreate the flash cache# cellcli -e create flashcache all确认Exadata 计算节点间的网络带宽可以采用nc nc-1.84-10.fc6.x86_64.rpm获得检测多个ORACLE_HOME是否RDS可用?dcli -g /opt/oracle.SupportTools/onecommand/dbs_group -l oracle md5sum ${ORACLE_HOME}/lib/libskgxp11.sorelink ORACLE_HOME的RDSdcli -g /opt/oracle.SupportTools/onecommand/dbs_group -l oracle “export ORACLE_HOME=$ORACLE_HOME;;cd `pwd`;;make – f i*mk ipc_rds”dcli -g /opt/oracle.SupportTools/onecommand/dbs_group -l oracle “export ORACLE_HOME=$ORACLE_HOME;;cd `pwd`;;make – f i*mk ioracle” | egrep‘rm|mv.*oracle’不同配置Exadata的推荐最大并行度配置CPU个数推荐最大Parallelism Full Rack64 core DOP=256Half Rack32 core DOP=128Quarter Rack16 core DOP=64Exadata EHCC支持Exadata的EHCC支持宽表最大支持1000个字段的表,而不像11.1中的压缩仅支持最多255列的表Exadata 压缩信息通过dbms_compression.get_compression_ratio 可以获得表的压缩信息针对写日志redo特别多的应用建议启用Smart Flash logging特性CREATE FLASHLOG ALLCREATE FLASHLOG ALL SIZE=1GCREATE FLASHLOG CELLDISK=’fd1,fd2′CREATE FLASHLOG CELLDISK=’fd1,fd2′ SIZE=1GExadata DB管理Exadata存储空间计算FreeMB(最大可用空间) =GridDisk*12*Num of Cells/RedundancyUsableMB (支持1个CELL故障的最大可用空间) =GridDisk*12*(Num of Cells – 1) /Redundancy查看cell软件版本imagehistoryimageinfo了解cell的温度dcli -g cell_group -l root “ipmitool sensor | grep ‘Inlet Amb Temp'”cell存储节点的日志存放位置$ADR_BASE/diag/asm/cell/`hostname`/trace/alert.log$ADR_BASE/diag/asm/cell/`hostname`/trace/ms-odl.*$ADR_BASE/diag/asm/cell/`hostname`/trace/svtrc__0.trc — ps -ef | grep “cellsrv 100″ $ADR_BASE/diag/asm/cell/`hostname`/incident/*/var/log/messages*, dmesg /var/log/sa/*/var/log/cellos/*列出cell中的alert historylist alerthistory where notificationState like ‘[023]’ and severity like ‘[warning|critical]’ and examinedBy = NULL;为cell创建一个告警阈值cellclicreate threshold CD_IO_ERRS_MIN warning=1, comparison=’>=’, occurrences=1, observation=1;cell可用性监控一般建议使用 EMGC Oracle Exadata Storage Server Management Plug-In 监控如何禁用Smart Scan?设置 Cell_offload_processing=false如何禁用storage index?设置 _kcfis_storageidx_disabled=true如何禁用flash cache?11.2.0.2 以后设置_kcfis_keep_in_cellfc_enabled=false11.2.0.1中设置_kcfis_control1=1cell相关的数据库视图有以下这些视图select * from sys.GV_$CELL_STATE;select * from sys.GV_$CELL;select * from sys.GV_$CELL_THREAD_HISTORY;select * from sys.GV_$CELL_REQUEST_TOTALS;select * from sys.GV_$CELL_CONFIG;配置Inter-Database IORMCellCLI> alter iormplan –dbplan = ((name = production, level = 1, allocation = 100), –(name = test, level = 2, allocation = 80), –(name = other, level = 2, allocation = 20))IORMPLAN successfully alteredCellCLI> alter iormplan activeIORMPLAN successfully alteredCellCLI> list iormplan detailname: cell4_IORMPLANcatPlan:dbPlan: name=production,level=1,allocation=100name=test,level=2,allocation=80name=other,level=2,allocation=20status: active如何禁用布隆过滤Bloom Fliter设置_bloom_pruning_enabled=falseExadata数据备份backup备份速率Exadata下rman备份的速率从1通道到8通道大约为1003MB/s 到 2081MB/s,视乎配置不同也略微有区别recovery应用日志恢复速率exadata recovery的速率大约为每秒600~1000MB/s的归档日志standby database搭建对于50TB的standby database搭建,若使用infiniband + 4rman通道大约耗费5.5小时,若使用GigE则在18个小时左右Exadata恢复cell 救护可以通过 /opt/oracle.SupportTools/make_cellboot_usb脚本创建部USB cellboot_usb_in_rescure_modeExadata部署onecommand下载可以下载patch (9935478) ONECOMMAND FOR Exadata 11gR2Exadata安装前准备工作1. 下载安装介质包括Grid, Database,Patches等2. 硬件设备到货验收并安装就绪3. 规划DBM用的管理网,生产网,ILOM等用的网段和IP地址4. 配置DNS服务器5. 将IP地址和域名注册到DNS服务器6. 配置NTP服务器7. 网络连线环境检查1. 检查DBM主机的eth0网卡是否可以通过cisco交换机被访问2. 检查hardware and firmware profile是否正确3. 验证InfiniBand Network验证网络连通性1.登陆第一台数据库服务器使用sh脚本验证网络连通性2.验证DNS是否正常3.验证NTP 服务器是否正常安装Exadata Storage Server Image Patch (root user)1. 在db server和cell server上为root用户配置SSH# /opt/oracle.SupportTools/onecommand/setssh.sh -s -u root -p password -n N -h dbs_group2. 检查当前Cell storage server的Exadata Image 版本3. 安装最新的Patch具体步骤详见Readme4. 验证当前Exadata Image version#cd /opt/oracle.SupportTools/firstconf#dcli -l root -g quarter ‘imagehistory | grep –i Version使用OneCommand工具完成DBM的配置安装1. #cd /opt/oracle.SupportTools/onecommand2. Display the onecommand steps# ./deploy112.sh -i –l3. The steps in order are…Step 0 = ValidateThisNodeSetupStep 1 = SetupSSHForRootStep 2 = ValidateAllNodesStep 3 = UnzipFilesStep 4 = UpdateEtcHostsStep 5 = CreateCellipnitoraStep 6 = ValidateHWStep 7 = ValidateIBStep 8 = ValidateCellStep 9 = PingRdsCheckStep 10 = RunCalibrateStep 11 = ValidateTimeDateStep 12 = UpdateConfigStep 13 = CreateUserAccountsStep 14 = SetupSSHForUsersStep 15 = CreateOraHomesStep 16 = CreateGridDisksStep 17 = InstallGridSoftwareStep 18 = RunGridRootScriptsStep 19 = Install112DBSoftwareStep 20 = Create112ListenerStep 21 = RunAsmCaStep 22 = UnlockGIHomeStep 23 = UpdateOPatchStep 24 = ApplyBPStep 25 = RelinkRDSStep 26 = LockUpGIStep 27 = SetupCellEmailAlertsStep 28 = RunDbcaStep 29 = SetupEMDbControlStep 30 = ApplySecurityFixesStep 31 = ResecureMachineTo run a command#./deploy112.sh –i –s NWhere N corresponds to a step number Example to run step 0Exadata监控exachk健康检查脚本exachk脚本可以以daemon形式后台运行./exachk –d start以daemon形式cluster support运行./exachk –clusternodes [node1,[node N]] –d start! Exadata文档信息Exadata的官方文档 docs.oracle./cd/E50790_01/welcome.html另外文档还保存在您cell 的 /opt/oracle/cell/doc/ 目录下。
Oracle BIEE 12c SampleApp v511 快速部署指南说明书
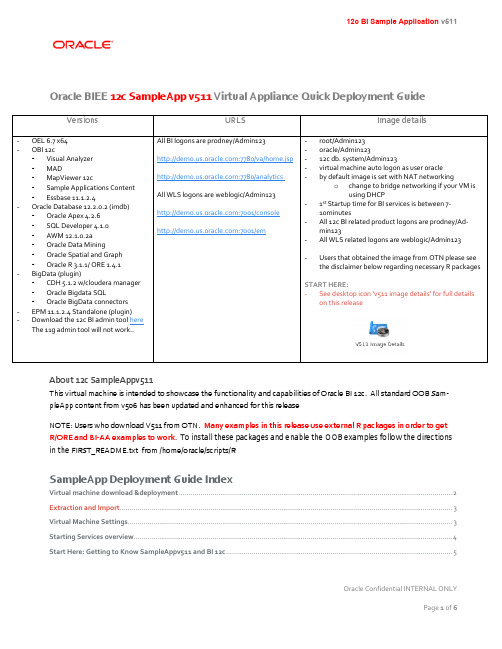
Oracle BIEE 12c SampleApp v511 Virtual Appliance Quick Deployment Guide-root/Admin123-oracle/Admin123-12c db. system/Admin123-virtual machine auto logon as user oracle-by default image is set with NAT networkingo change to bridge networking if your VM isusing DHCP-1st Startup time for BI services is between 7-10minutes-All 12c BI related product logons are prodney/Ad-min123-All WLS related logons are weblogic/Admin123-Users that obtained the image from OTN please seethe disclaimer below regarding necessary R packagesSTART HERE:-See desktop icon ‘v511 image details’ for full detailson this releaseAbout 12c SampleAppv511This virtual machine is intended to showcase the functionality and capabilities of Oracle BI 12c. All standard OOB Sam-pleApp content from v506 has been updated and enhanced for this releaseNOTE: Users who download V511 from OTN. Many examples in this release use external R packages in order to getR/ORE and BI-AA examples to work. To install these packages and enable the OOB examples follow the directionsin the FIRST_README.txt from /home/oracle/scripts/RSampleApp Deployment Guide IndexVirtual machine download &deployment (2)Extraction and Import (3)Virtual Machine Settings (3)Starting Services overview (4)Start Here: Getting to Know SampleAppv511 and BI 12c (5)Virtual machine download &deployment1.Prepare your host system.Minimum 8GB, 16 GB ram and SSD are recommended.Turn on Virtual Assist features in the BIOS (usually done by default). Refer to Troubleshooting tips in Step 12 for more details.~ 100 GB of temp disk space needed to download and install. (Includes zips files that total 18 GB, and an 18 GB .ova, 55 GB deployed image) note: ova and zip files can be deleted once the import is completed-Download and install Free Download Manager or an ftp client of your choice.-Download and install md5sum (optional)2.Download and install Oracle Virtual Box (4.3.x and above is supported, 5.10 is the current version)3.Click Here to open the SampleApp OTN Pagea.Sign into OTN prior to starting your download4.Navigate to the SampleAppv511 Sectiona.You must accept the licensing terms prior to proceedingDownload files SampleAppv511p-appliance.zip .001 through .004Extraction and Import4a. When all zip files are downloaded into a single directory, unpack them with 7zip or zip utility of your choice.Extract your zip files (note: you only need to select zip file .001 when extracting, the rest will automatically unpack)Linux users can run the following command as shown below. Users with a graphical zip utility can right click on .zip.001 and choose extract-7za x SampleAppv511p-appliance.zip.001-(Typical extraction time will take between 5 and 10 minutes depending on your host machine) when completed a folder called SampleAppv511p-appliance will be created containing a SampleAppv511p-appliance.ova file5. Start Oracle Virtual Box Manager Click File / Import Appliance /Open appliance (you can also double click your.ova file to open virtual box manager-Navigate to the location you downloaded the SampleAppv511rc3-10-15.ova file-Click import (typical import time is between 10 to 20 minutes)Check [x] Reinitialize the MACaddress of all network cardsO NCE YOUR VM IMPORT IS COMPLETED PROCEED TO STEP 6Virtual Machine Settings6. Virtual Machine Settings(Review this section fully before powering on)By default your vm is configured with the following parameters which is ideal for an 8GB host system - 6.2 GB ram- 2 processors-NAT Network adaptero By default your VM once powered on will have a IP address 10.0.2.15o See how to setup port forwarding on YouTube. Port forwarding allows you to access your VM from a local web browser directly on your host machine-Users with more physical host memory can allocate more memory to the virtual machineo You can edit any of the VM configurations by clicking on edit/settings-If your VM can obtain a DHCP address change your networking to bridged7.Start your VM Your VM will auto logon as oracle/Admin123. Upon logon your IP address will be displayed with further instructions on configuring your vm. Note: If your VM does not have an active network connection no IPaddress will be displayed.NOTE: if your VM is having issues obtaining a IP address power down the VM and refresh the MAC addressif you are using bridge networking and your VM does not have a IP address at boot up you must either assign it one manually or power off and switch to NAT networking in order for services to start properly8.Adjust your screen resolution to fit your host machine-From your toolbar menu click on system/preferences/display and select a screen resolution as needed-Your screen should auto adjust automaticallyVBox Tools /shared folders/guest extensions: ensure your virtual box tools are up to date and your Vbox guest exten-sion pack is installed to ensure maximum performance and stability. For recordings on these topics as well as creating shared folders click hereP ROCEED TO STEP 9 TO REVIEW THE SERVICE STARTUP PROCESSStarting Services overview9. Starting ServicesClick on the desktop icon “v511 image details”> starting services tab for instructions on starting services -Typical 1st start time is between 7 to 10 minutes (subsequent service starts are substantially faster)-Follow the ‘recommended startup’ processo Note: start/stop all scripts are available-Subsequent services startup will be faster-Download the bi thin client here click hereSampleApp v511 DesktopStart Here: Getting to Know SampleAppv511 and BI 12cAll Users should start with the v511 image details launch Pad for details, tips and deployment options, service control and users and URLs for this release.NOTE: service control tab contains all port numbers used in 12c。
Oracle Exadata特性简介及应用指南
月 8年2012.1 前言 (3)一Exadata 概述 (4)1Exadata简介 (4)2Exadata的配置及性能参数 (4)二Exadata特性 (5)1Smart Scan(智能扫描) (5)2Storage Index(存储索引) (14)3Flash Cache(智能闪存) (24)4Compression(压缩) & EHCC(Exadata Hybrid Columnar Compression) 285IORM(IO资源管理) (34)三Exadata监控 (37)1Exadata特性监控常用指标 (37)2如何查看指标 (38)四如何应用Exadata (38)1Exadata参数调整 (38)2在Exadata上开发注意事项 (38)413 ................................................... 应用总结42........................................... 总体总结4. Exadata前言1本文背景1.1前期东软-甲骨文公司组织了一次针对社保系统的Exadata联合应用测试,本文内容是本次Exadata测试的经验总结,其中包含了与Oracle技术人员交流经验应用、Oracle相关技术文档应用及个人测试经验总结。
本文简介1.2本文是关于ORACLE Exadata的一些特性介绍和应用Exadata的一些指南;本文不会涉及太多传统ORACLE DataBase已经具有的而非Exadata专有的一些特性介绍。
通过本文,读者可以了解ORACLE推出 Exadata的目的和初衷,简单了解Exadata 架构体系,了解Exdata的一些设计思路,了解其特性及其原理;了解Exadata 的适合应用场景,不适合应用场景,以及在Exadata下开发的一些注意事项(尤其是做Exadata项目主要设计、开发人员一定要了解Exadata,不要把它完全当作传统ORACLE数据库)。
Oracle数据库一体机Exadata的IO资源管理

类别计划
(CellCLI)
INTERACTIVE:60% BATCH:40%
I/O 资源管理计划:示例
IORM 分配
数据库内
数据库 A
数据库 B
数据库 A
数据库 B
45%
30%
15%
40%
70%
35%
18%
30%
22% 10%
70%
15%
数据库间
类别
40%
60%
BATCH
所有 用户 I/O (100%)
级别 1
80% 20%
级别 2
100%
级别 3
50% 50%
设置数据库 I/O 利用率限制
CellCLI> alter iormplan
-
>
dbplan=((name=db1, level=1, allocatபைடு நூலகம்on=50, limit=75), -
>
(name=db2, level=1, allocation=30, limit=75), -
当设置或修改了某个数据库内资源计划时,会通知 Exadata Storage Server:
启用或修改的计划将使用 iDB 发送到每个单元
您必须在所有 Exadata 单元上激活 IORMPLAN。 以下是常用的数据库内计划:
mixed_workload_plan
dss_plan
default_maintenance_plan
数据库 A
BEGIN DBMS_RESOURCE_MANAGER.CREATE_SIMPLE_PLAN(SIMPLE_PLAN => ‘DB_A_Plan', CONSUMER_GROUP1 => ‘CG1', GROUP1_PERCENT => 15, CONSUMER_GROUP2 => ‘CG2', GROUP1_PERCENT => 10, CONSUMER_GROUP3 => ‘CG3', GROUP1_PERCENT => 35, CONSUMER_GROUP4 => ‘CG4’, GROUP2_PERCENT => 40); DBMS_RESOURCE_MANAGER.CREATE_PENDING_AREA(); DBMS_RESOURCE_MANAGER.UPDATE_CONSUMER_GROUP(CONSUMER_GROUP => ‘CG1’, NEW_CATEGORY => ‘BATCH’); DBMS_RESOURCE_MANAGER.UPDATE_CONSUMER_GROUP(CONSUMER_GROUP => ‘CG2’, NEW_CATEGORY => ‘BATCH’); DBMS_RESOURCE_MANAGER.UPDATE_CONSUMER_GROUP(CONSUMER_GROUP => ‘CG3’, NEW_CATEGORY => ‘INTERACTIVE’); DBMS_RESOURCE_MANAGER.UPDATE_CONSUMER_GROUP(CONSUMER_GROUP => ‘CG4’, NEW_CATEGORY => ‘INTERACTIVE’); DBMS_RESOURCE_MANAGER.SUBMIT_PENDING_AREA();
Eaton ELC-PC12NNAR与ELC-EX08NNAN产品替代方案应用说明说明书

Applica Solut ELC Ations fo Applica or Repla ations R ENacing t Requiri the ELC ing ACEffective Ma C-PC12 Voltag arch 2014NNAR ge Inpuor for tsApplication SummaryThis application note will cover the replacement solutions for the ELC-PC12NNAR which is no longer available. The mapping of digital inputs and outputs will be covered, as well as some practical examples for using the ELC-EX08NNAN to accommodate the lost AC inputs.Products and RevisionsVendor Product Applicable Revision Tested RevisionAll All Eaton ELC-PC12NNAREaton ELC-PC12NNDR All All Eaton ELC-EX08NNAN All All Supporting DocumentationManual Name Reference NumberEaton Logic Controller Programming Manual MN05003003EEaton Logic Controller Operation Manual MN05003006EApplication DetailsThe ELC-PC12NNAR has become obsolete and there is no direct replacement for this component. Applications requiring the use of 110 Vac inputs will have to use the extension module ELC-EX08NNAN. The primary purpose of this application note is to illustrate the differences in wiring the units and addressing the inputs.ELC Migration to the ELC2All ELC controllers are replaced by the ELC2 series controller. This means that as of the writing of this application note, when the ELC-PC12NNDR stock is depleted, it will be replaced by the ELC2-PC12NNDR. The ELC2-PC12NNDR’s output terminals and wiring are different from the ELC-PC12NNAR. See chart below.All extension modules will continue to use the ELC prefix and their catalog numbers will not change. Any projects that have been developed for the ELC series can be used in the ELC2 series; you will simply have to change the ELC type in the development software to reflect the new controller. For the remainder of this document, when I refer to the ELC series this covers both the ELC and ELC2 catalog prefixes.ELC Series Input and Output Extension Unit AddressingThe ELC controller automatically addresses discrete I/O based on the position of each I/O module with respect to the controller. Independent of the number of discrete I/O points on the controller, the first Input on the first input module to the right of the controller will be X20. The first output on the first output module to the right of the controller will be Y20. Keep in mind that the I/O addressing uses an octal numbering system. The controller always reserves input addresses X0 through X7 and X10 through X17. That is why the inputs for the first input module start at X20. Addresses will never end in 8 or 9 because they do not exist in an octal numbering system.Extension position ELC Catalog No. Numberof inputpointsNumberofoutputpointsInputaddressesOutputaddresses1st extension ELC-EX08NNDN 8 - X20~X27 -2nd extension ELC-EX06NNNI - 6 - Y20~Y25 3rd extension ELC-EX16NNDR 8 8 X30~X37 Y30~Y37 4th extension ELC-EX08NNNR - 8 - Y40~Y47 5th extension ELC-EX08NNDR 4 4 X40~X43 Y50~Y53 6th extension ELC-EX08NNAN 8 - X50~X57 -Even though the second extension unit ELC-EX06NNNI only has 6 outputs, the other two output addresses associated with it, Y26 and Y27 are invalid and should not be used.It is important to note that any analog I/O modules are not included in the addressing associated with the discrete I/O modules. The data sent to and read from analog modules by the controller is accomplished via TO and FROM instructions used in the controller program.Example:Extension position ELC Catalog No. Numberof inputpointsNumberof outputpointsInputaddressesOutputaddresses1st extension ELC-EX08NNDN 8 - X20~X272nd extension ELC-AN06AANN - - - -3rd extension ELC-EX16NNDR 8 8 X30~X37 Y20~Y27 4th extension ELC-AN04ANNN - - - -5th extension ELC-EX08NNDR 4 4 X40~X43 Y30~Y33 6th extension ELC-EX08NNAN 8 - X50~X57 -In regards to the replacement of the ELC-PC12NNAR, below is the recommendation using an ELC-PC12NNDR with an ELC-EX08NNAN extension module.=>Illustration 1The physical wiring of the AC inputs will be the same, except that they will now go into the ELC-EX08NNAN module instead. In the simplest of cases just move the terminal block from the ELC-PC12NNAR to the ELC-EX08NNAN. Please refer to the tables be-low for more details on wiring the AC inputs.As we have described before, now that we are using an extension module, the mapping of the AC input will now be different in your ladder logic. Inputs X0~X7 will now have the address X20~X27 and any contacts or coils using X0~X7 will have to be replaced in your ladder logic with the corresponding X20~X27 input addresses. Please refer to the table below.X0 X20X1 X21X2 X22X3 X23X4 X24X5 X25X6 X26X7 X27Let’s consider an application in which the controller is already utilizing an extension module. In this case the ELC-EX16NNDR has 8 digital inputs and 8 digital outputs. Be-cause the ELC-PC12NNAR is no longer available, we have to replace it with an ELC-PC12NNDR and add an ELC-EX08NNAN extension module as depicted in illustration 2. Because the new extension module is in the 2nd position, its inputs are mapped to theX30 block. Change any inputs in your ladder logic from X0~X7 to X30~X37.X0 X30X1 X31X2 X32X3 X33X4 X34X5 X35X6 X36X7 X37Illustration 2As a final example, we will look at an application in which an ELC-PC12NNAR had an analog extension module and a digital extension module. As described before, analog extension modules do not count toward the mapping of digital inputs or outputs. When we replace the ELC-PC12NNAR with an ELC-PC12NNDR and add an ELC-EX08NNAN module to the right end (as shown in illustration 3), the ELC-EX08NNAN is actually the 2nd digital input module. Its inputs would be mapped to the X30 block as in the previous example.X0 X30X1 X31X2 X32X3 X33X4 X34X5 X35X6 X36X7 X37Illustration 3In the original ladder logic, X0, X1, and X2 are used as shown in illustration 4. Therefore they need to be replaced with X30, X31, and X32 respectively. Please refer to illustra-tion 5.Illustration 4Illustration 5Additio In the US or 1-877-3Location United St Canada EuropeAll other sonal Help or Canada: p 326-2273.n Ctates Tsupporting do pplease contac Contact Technical Reso ocumentation ct the Technic ource Center at is located on Eaton1000 Eaton Boule Cleveland, OH © 2014 Eaton All Rights Reserve Printed in USA Publication No. AP March 2014cal Resource t 1-877-ETN-CA the Eaton we vard 122 USA ed P070001EN Center at 1-8ARE or 1-877-eb site at www 877-ETN-CAR 326-2273. /Eaton is a registe of Eaton CorporaAll other trademaof their respective RE/plcered trademark ation. arks are property e owners。
玩转Oracle EM12c-数据库管理优化篇

实时ADDM—架构
EM Agent
诊断连接
JDBC连接
数据库
ADDM 分析
通过实时ADDM市别 Top事件
资源约束 挂起
内存问题 到达资源限制
死锁
• 发起一个轻量级的连接,不占用额外的锁和资源, 不通过SQL*Plus的连接 协议而是通过Agent端的连接
• 同时也会尝试启动一个JDBC连接
• 这两种连接的返回数据都会被ADDM分析
– AWR (Automatic Workload Repository) 自动负载资料库 – ADDM (Automatic Database Diagnostic Monitor)自动数据库诊断 – ASH (Automated Session History)自动会话历史
Oracle 9i、10g、11g自我管理的数据库自动监控、自动警报
Oracle数据库管理
120% 100%
80% 60% 40% 20%
0%
诊断、性能
变更管理
一体机管理
高服务,高质量,低风险
数据库云服务
EM12c数据库管理概要
• 日常管理:备份管理、安全管理、对象管理、空间管理、灾难备 份
• 日常监控:数据库全面监控,快速发现问题 • 数据库性能优化:捕获需要优化的SQL语句,快速解决问题 • 软件分发:包括克隆软件、安装补丁等 • 报表:对系统的运行状况提供自定义报表
集成
ASH可以分析哪方面的性能问题
SQL
会话属性
ASH
PL/SQL
会话标识
资源消耗
SQL PL/SQL
SQL ID Plan Hash Operation
PL/SQL
Top Level PL/SQL
深入了解OracleEnterpriseManager12c中的OracleExadata.

14 版权所有 © 2013,Oracle 和/或其分支机构。保留所有权利。
何时执行 exachk?
• Oracle 数据库机首次部署之后 • 计划的维护活动之前
量度 计算节点级
X2-2 94
V2
X2-8
118
56
• 计划的维护活动之后
• 作为常规运营过程的一部分, 至少每三个月进行一次,选在 负载最低的时间
3 版权所有 © 2013,Oracle 和/或其分支机构。保留所有权利。
发现架构
1. 计算节点上部署的 OEM 代理 2. 与代理一起部署的 Exadata
插件 3. 代理通过 ssh 与存储服务器
和 Infiniband 交换机目标通信 4. Exadata 插件监视其他 DBM
组件 5. OEM 代理收集数据并将其上
5 版权所有 © 2013,Oracle 和/或其分支机构。保留所有权利。
Exadata 监视
6 版权所有 © 2013,Oracle 和/或其分支机构。保留所有权利。
数据库
存储服务器
Infiniband 网络 KVM、PDU、ILOM、CISCO 交换 机
Exadata 管理
硬件和软件的集成视图
监视特定量度 • Cisco 交换机 - 配置变更跟踪和报告 - 未授权的 SNMP 访问 • 键盘、视频、鼠标 (KVM) - 连接到添加/删除、加电/断电的 KVM 的服务器
Exadata 信息板
▪ 提供用于创建信息板的脚本,以监视性 能和使用量度
– 数据库机系统 – 数据库机组件
▪ 举例
如何创建信息板? 1. 在 Enterprise Manager 12c PS1 中执行“信息板
数据库一体机(Exadata)日常运维手册

Exadata日常运维目录一、日常操作 (4)配置查看 (4)详细查看硬件配置和状态 (5)检查当前电源功耗 (6)检查功耗的历史记录 (7)告警设置 (9)二、健康检查 (11)系统状态查看 (11)各传感器工作状态 (11)设置组件的指示灯亮和快闪 (13)检查系统硬件日志 (14)三、Infiniband交换机 (16)查看IB硬件信息 (16)查看IB硬件配置和状态 (18)查看ILOM的网络会话超时的设置 (19)查看ILOM的网络设置 (20)查看系统SNMP管理的设置 (21)检查IB链路状态 (22)查看IB网络拓扑状态 (23)诊断IB链路没有错误 (26)查看IB网络连线 (34)查看IB健康状态 (35)四、PDU (35)监控PDU状态 (35)使用Metering Unit’s LCD Screen监控PDU (35)使用Web界面监控PDU (36)PDU故障处理 (38)五、Cisco交换机 (38)监控Cisco交换机状态 (38)Cisco故障处理 (38)六、日常运维及故障处理 (39)Powering Off Oracle Exadata Rack (39)启停Exadata Database Server (39)启停Exadata Storage Server (40)监控服务器周边温度 (41)DB节点磁盘状态检查 (42)CELL节点磁盘故障 (43)CELL节点Flash卡故障 (55)七、常用诊断工具 (58)Exachk or HealthCheck (58)Diagnostics Collection Tool: sundiag.sh (59)RDA(Remote Diagnostic Agent) (60)ADRCI (61)八、Exadata最佳实践 (61)Optimize ASM Diskgroup Balance (61)Optimize Scan Rates (62)Ensure auto extend size will allocate space on all disks in the diskgroup63备份 (Tape-Based) (63)备份 (Disk-Based) (66)恢复 (68)Verify DW/BI Instance Database Initialization Parameters (69)Check for ASM notification of corruption (70)Choose the ASM redundancy type based on your desired protection level and capacity demands (71)一、日常操作由于Database Server 与Storage Cell 为同平台产品,ILOM 版本相同,所以ILOM 管理操作基本相同,下述内容及图例将以Storage Cell 为例。
HOL_Oracle_EM12c_Installation_cn-v1.0
HOL_Oracle_EM12c_Installation_cn-v1.0 Oracle EM12c Installation Hands On Lab(HOL)提交人: Lichao Li、Frank Hu提交日期: Mar 19, 2013版本号: v1.0第 1 页文档控制变更记录审阅目录1概述 (4)2环境说明 (5)2.1硬件说明 (5)2.2VM WARE IMAGE环境说明 (5)2.2.1VMware环境及网络说明 (5)2.2.2账号说明 (5)2.2.3目录结构说明 (6)3加载VMWARE IMAGE (7)4配置VNC VIEWER (9)5ORACLE EM12C安装 (11)5.1解压O RACLE EM12C S OFT (11)5.2启动EM12C REPOSITORY D ATABASE L ISTENER (11) 5.3启动EM12C REPOSITORY D ATABASE (12)5.4安装O RACLE EM12C (13)5.4.1运行runInstaller (13)5.4.2【My Oracle Support Details】页面 (13)5.4.3【Software Updates】页面 (14)5.4.4【Prerequisite Checks】页面 (15)5.4.5【Installation Types】页面 (16)5.4.6【Installation Details】页面 (17)5.4.7【Plug-in Deployment】页面 (18)5.4.8【WebLogic Server Configuration Details】页面 (19) 5.4.9【Database Connection Detail】页面 (20)5.4.10【Database Connect Details】页面 (21)5.4.11【Database Connect Details】页面 (24)5.4.12【Port Configuration Details】页面 (25)5.4.13【Review】页面 (25)5.4.14【Install Process】页面 (26)5.4.15【Finish】页面 (29)6登陆EM12C CLOUD CONTROL (31)7ORACLE EM12C管理 (33)7.1准备工作 (33)7.2手工关闭EM12C (33)7.2.1关闭EM12c Agent (33)7.2.2关闭EM12c Server (33)第 2 页7.2.3关闭Oracle Listener (34)7.2.4关闭Repository Database (34)7.3手工启动EM12C (34)7.3.1启动Oracle Listener (34)7.3.2启动Repository Database (35)7.3.3启动EM12c Server (35)7.3.4启动EM12c Agent (36)第 3 页1 概述欢迎来到Oracle EM12c Installation Hands On Lab(HOL),本次实验将指导大家完成一次完整的OEM12c For Linux的安装工作。
适用于 Oracle Enterprise Manager 12c 的 Dell OpenManag
适用于的版本用户指南年月年月年月版本更新了对版的支持并对版本进行了一些修复保留所有权利。
未经书面许可,严禁以任何方式复印这些材料。
本文中使用的商标:、徽标、、、、、、、、、、、、、和是的商标。
本说明文件中还可能使用了其他商标。
、、和其他是的注册商标。
和是的注册商标。
、、、和是在美国和其他国家或地区的注册商标。
是注册商标,、和是的商标。
、、、、、和是在美国和或其他国家地区的商标或注册商标。
和是在美国和或其他国家地区的注册商标。
和是在美国和其他国家地区的注册商标。
是和或其子公司的注册商标。
、、和是在美国和或其他国家或地区的注册商标或商标。
、、、和是在美国或其他国家或地区的商标或注册商标。
是的注册商标。
和是的注册商标。
是的注册商标。
本说明文件中可能使用的其他商标和商品名称是指拥有该商标和或名称的实体或者其产品,并且是其各自所有者的财产。
对任何其他公司的商标和名称不拥有所有权益。
修订 (2)1关于适用于 Oracle Enterprise Manager 的 Dell OpenManage Plug-in (5)1.1关键功能 (5)1.2支持值表 (6)1.3您可能需要的其他信息 (6)2适用于 Oracle Enterprise Manager 的 Dell OpenManage Plug-in 版本 2.0 中的新增功能 (7)3适用于 Oracle Enterprise Manager 的 Dell OpenManage Plug-in 入门指南 (8)3.1配置适用于 Oracle Enterprise Manager 的 Dell OpenManage Plug-in (8)3.1.1启用过滤已确认的警报 (8)3.1.2配置插件的收集时间间隔 (9)3.1.3创建目标之间的手动关联 (10)3.1.4查看目标之间的关联 (11)4使用适用于 Oracle Enterprise Manager 的 OpenManage Plug-in (12)4.1查找和升级设备 (12)4.2管理设备 (13)4.2.1启动控制台 (14)4.2.2数据源 (14)4.2.4在 OpenManage Essentials 中查看 (15)4.2.5插件度量收集时间间隔 (15)5最佳做法 (18)5.1Dell PowerEdge 服务器 (18)5.2Dell OpenManage Essentials (18)5.4插件部署 OMA 注意事项 (19)5.5Plug-in 维护 (19)5.5.1配置自动发现 (19)5.5.2定期升级设备目标 (19)5.5.3定期删除设备目标 (20)5.5.4命名目标实例 (20)6使用案例 (21)7故障排除 (23)7.1插件日志位置和说明 (23)7.2缺失的设备数据 (24)7.3目标不可用 (25)7.4自动关联数据库和服务器不起作用 (25)7.5无法找到与另一个设备同名的设备 (25)8常见问题 (26)1关于适用于 Oracle Enterprise Manager 的 DellOpenManage Plug-in1.1关键功能适用于 Oracle Enterprise Manager 的 Dell OpenManage Plug-in 提供了一种主动方法来管理数据中心,所提供的功能用于在 Oracle Enterprise Manager (OEM) 管理的环境中监测 Dell 服务器、存储和网络基础架构。
Oracle FLEXCUBE 全球银行系统发布12.0(May 2012)安装和设置指南说明书
Installation and Setup Guide Oracle FLEXCUBE Universal BankingRelease 12.0[May] [2012] Oracle Part Number E51527-01Installation and Setup GuideTable of Contents1.PREFACE ........................................................................................................................................................ 1-11.1A UDIENCE .................................................................................................................................................. 1-1 1.2R ELATED DOCUMENTS................................................................................................................................ 1-1 1.3C ONVENTIONS............................................................................................................................................ 1-12.INTRODUCTION ........................................................................................................................................... 2-12.1H OW TO U SE T HIS G UIDE........................................................................................................................... 2-13.PRE-REQUISITES ......................................................................................................................................... 3-13.1JDK ............................................................................................................................................................ 3-13.1.1License Information ........................................................................................................................... 3-13.1.2Instructions ........................................................................................................................................ 3-1 3.2A PACHE A NT 1.7.1 ..................................................................................................................................... 3-13.2.1License Information ........................................................................................................................... 3-13.2.2Download Instructions ....................................................................................................................... 3-13.2.3Post Download Instructions ............................................................................................................... 3-1 3.3A CTIVE X SETTINGS: ................................................................................................................................... 3-1 3.4M SXML: ...................................................................................................................................................... 3-1 3.5O RACLE C LIENT (D ATABASE I NSTALLATION) ............................................................................................ 3-1 3.6S WING L AYOUT.......................................................................................................................................... 3-23.6.1License Information ........................................................................................................................... 3-23.6.2Download Instructions ....................................................................................................................... 3-23.6.3Post Download Instructions ............................................................................................................... 3-2 3.7L OG4J1.2.15 .............................................................................................................................................. 3-23.7.1License Information ........................................................................................................................... 3-23.7.2Download Instructions ....................................................................................................................... 3-23.7.3Post Download Instructions ............................................................................................................... 3-2 3.8O RACLE 11G D ATABASE D RIVER (11.1.0.7)(D ATABASE I NSTALLATION) .................................................. 3-23.8.1License Information ........................................................................................................................... 3-23.8.2Download Instructions: ..................................................................................................................... 3-3 3.9S ETUP FOR INSTALLER O PEN D EVELOPMENT A PPLICATIONS ..................................................................... 3-33.9.1Step1 .................................................................................................................................................. 3-33.9.2Step2 .................................................................................................................................................. 3-33.9.3Step 3 ................................................................................................................................................. 3-43.9.4Step 4 ................................................................................................................................................. 3-53.9.5Step 5 ................................................................................................................................................. 3-64.OPEN DEVELOPMENT TOOL 11.1 INSTALLATION ............................................................................ 4-14.1WAR F ILE GENERATION............................................................................................................................. 4-14.1.1Step 1 ................................................................................................................................................. 4-14.1.2Step 2 ................................................................................................................................................. 4-14.1.3Step 3 ................................................................................................................................................. 4-14.1.4Step 4 ................................................................................................................................................. 4-25.HOW TO RUN INSTALLER ......................................................................................................................... 5-16.TROUBLESHOOTING .................................................................................................................................. 6-16.1C HECKING L OGS......................................................................................................................................... 6-17.DEPLOYMENT OF WAR FILE TO APPLICATION SERVER............................................................... 7-17.1A PACHE T OMCAT 5.5S ERVER.................................................................................................................... 7-17.1.1Step 1 ................................................................................................................................................. 7-17.1.2Step 2 ................................................................................................................................................. 7-17.1.3Step 3 ................................................................................................................................................. 7-27.1.4Step 4 ................................................................................................................................................. 7-37.1.5Step 5 ................................................................................................................................................. 7-47.1.6Step 6 ................................................................................................................................................. 7-5 7.2OC4J A PPLICATION SERVER....................................................................................................................... 7-57.2.1Step 1 ................................................................................................................................................. 7-67.2.2Step 2 ................................................................................................................................................. 7-77.2.3Step 3 ................................................................................................................................................. 7-87.2.4Step 4 ................................................................................................................................................. 7-97.2.5Step 5 ............................................................................................................................................... 7-107.2.6Step 6 ............................................................................................................................................... 7-117.2.7Step 7 ............................................................................................................................................... 7-127.2.8Step 8 ............................................................................................................................................... 7-137.2.9Step 9 ............................................................................................................................................... 7-147.2.10Step 10 ............................................................................................................................................. 7-147.2.11Step 11 ............................................................................................................................................. 7-157.2.12Step 12 ............................................................................................................................................. 7-157.2.13Step 13 ............................................................................................................................................. 7-187.2.14Step 14 ............................................................................................................................................. 7-187.2.15Step 15 ............................................................................................................................................. 7-197.2.16Step 16 ............................................................................................................................................. 7-207.2.17Step 17 ............................................................................................................................................. 7-217.2.18Step 18 ............................................................................................................................................. 7-227.2.19Step 19 ............................................................................................................................................. 7-237.2.20Step 20 ............................................................................................................................................. 7-24 7.3W EB L OGIC A PPLICATION SERVER............................................................................................................ 7-247.3.1Step 1 ............................................................................................................................................... 7-267.3.2Step 2 ............................................................................................................................................... 7-277.3.3Step 3 ............................................................................................................................................... 7-287.3.4Step 4 ............................................................................................................................................... 7-297.3.5Step 5 ............................................................................................................................................... 7-297.3.6Step 6 ............................................................................................................................................... 7-307.3.7Step 7 ............................................................................................................................................... 7-317.3.8Step 8 ............................................................................................................................................... 7-327.3.9Step 9 ............................................................................................................................................... 7-337.3.10Step 10 ............................................................................................................................................. 7-347.3.11Step 11 ............................................................................................................................................. 7-357.3.12Step 12 ............................................................................................................................................. 7-367.3.13Step 13 ............................................................................................................................................. 7-377.3.14Step 14 ............................................................................................................................................. 7-387.3.15Step 15 ............................................................................................................................................. 7-397.3.16Step 16 ............................................................................................................................................. 7-407.3.17Step 17 ............................................................................................................................................. 7-417.3.18Step 18 ............................................................................................................................................. 7-428.IE SETTINGS .................................................................................................................................................. 8-19.ADMINISTRATION ....................................................................................................................................... 9-1 9.1U SER R OLES ............................................................................................................................................... 9-19.1.1System Administrator ......................................................................................................................... 9-19.1.2Release Administrator........................................................................................................................ 9-19.1.3Developer ........................................................................................................................................... 9-1 9.2R ELEASE D EFINITION ................................................................................................................................. 9-2 9.3E NVIRONMENT C REATION.......................................................................................................................... 9-49.3.1User Definition .................................................................................................................................. 9-510.DEVELOPER CHECK LIST ................................................................................................................... 10-11. PrefaceThis document provides the steps to install extensible Open Development tool and initialadministration activities.1.1 AudienceThis document is intended for FLEXCUBE UBS Application developers who are required to thefollowing:∙Install and setup Open Development Tool development environment1.2 Related documentsFor more information, see following documents.∙Development Overview Guide.docx∙Getting Started.docx∙Reference.docx1.3 ConventionsThe following text conventions are used in this document:Convention Meaning2. IntroductionThis document is a guide for installation of Open Development Tool Version 11.1. Detailed steps have been mentioned for generation of WAR file from the Open Development Tool Source anddeployment of Open Development Tool application to Apache Tomcat and OC4J server.2.1 How to Use This GuideThe information in this guide includes:∙Chapter 2, “Introduction”∙Chapter 3, “Pre-requisites”∙Chapter 4, “Open Development Tool 11.1 installation”∙Chapter 5, “How to run Installer”∙Chapter 6, “Troubleshooting”∙Chapter 7, “How to deploy WAR file”∙Chapter 8, “IE settings”∙Chapter 9, “Administration”∙Chapter 10, “Developer check list”3. Pre-requisites 3.1 JDK3.1.1 License InformationJDK is distributed by Sun Microsystems, Inc under Java Development Kit Binary Code LicenseAgreement.3.1.2 InstructionsInstaller requires JDK 1.6 update 16 version to be downloaded in the system and the sameshould be set as environmental variable (explained later in this document).3.2 Apache Ant 1.7.13.2.1 License InformationApache License version 2.0. This is available for reference at/licenses/LICENSE-2.03.2.2 Download InstructionsApache Ant 1.7.1 is available in the archives at /dist/ant/binaries/ The file to be downloaded is apache-ant-1.7.1-bin.zip.3.2.3 Post Download InstructionsExtract the apache-ant-1.7.1-bin.zip distribution to a directory. And provide this path for setting the environmental variable which is explained later in this document.3.3 ActiveX settings:Tools -> Internet Options -> Security -> Local intranet -> Custom Level -> ActiveX controls andPlug-ins -> Initialize and script ActiveX controls not marked as safe -> Select Enable.3.4 Msxml:Msxml 4.0 to be available on client machine.3.5 Oracle Client (Database Installation)In order to carry out Database Installation, Installer requires Oracle 11g Client or later versionto be installed in the system.3.6 Swing Layout3.6.1 License InformationLesser General Public License (LGPL 2.1)3.6.2 Download InstructionsSwing Layout is available in the archives at https:/// . In the website under ‘project tools’ section, select ‘Documents and files’ section. The file to be downloaded is swing-layout-1.0.jar.3.6.3 Post Download InstructionsExtract the Swing-layout-1.0 distribution to a directory. Copy the following fileswing-layout-1.0.jarInto the directory {INSTALLER_DIR}\lib3.7 Log4J 1.2.153.7.1 License InformationApache License 2.0. This is available for reference at/licenses/LICENSE-2.03.7.2 Download InstructionsLog4j 1.2.15 is available in the archives at/dist/logging/log4j/1.2.15/ .The file to be downloaded isapache-log4j-1.2.15.zip.3.7.3 Post Download InstructionsExtract the Log4j 1.2.15 distribution to a directory. Copy the following filelog4j-1.2.15.jarInto the directory {INSTALLER_DIR}\lib3.8 Oracle 11g Database Driver (11.1.0.7) (Database Installation)3.8.1 License InformationOracle Corporation3.8.2 Download Instructions:ojdbc6.jar is available in the archives at/technology/software/tech/java/sqlj_jdbc/htdocs/jdbc_111060.htmlThe file to be downloaded is ojdbc6.jar.Post Download Instructions:Extract the ojdbc6.jar distribution to a directory. Copy the following fileojdbc6.jarInto the directory {INSTALLER_DIR}\lib3.9 Setup for installer Open Development Applications3.9.1 Step1Navigate to Control Panel3.9.2 Step2Double Click System icon to launch System Properties screen as shown below.3.9.3 Step 3Click Advanced Tab button and then click Environment Variables as shown below.3.9.4 Step 4In User variables click New and in Variable name type RAD_ANT_HOME. In the value field give the path of Apache Ant root directory as shown below.The Ant provider supported by Installer is Apache and the version should be 1.7.1.3.9.5 Step 5Repeat Step 4 and Step 5 to set RAD_JAVA_HOME environment variable to jdk directory as shown below.Ensure that the Variable value for Variable name RAD_JAVA_HOME eliminates space4. Open Development Tool 11.1 InstallationOpen Development Tool 11.1 installation includes below mentioned activities∙Deployment of Front-end Units or WAR File to Apache Tomcat or OC4J Server∙Loading of Back-end units(PLSQL Packages) to an existing FCUBS schema in Oracle Database∙RADTool.properties file configurationThe next section explains these two activities in detail4.1 WAR File generationTo generate WAR file follow the below mentioned steps4.1.1 Step 1Copy all the contents from \\IFLBLW-BPD-12\Vercon_IP-BPD-01\SOFT\FLEXCUBE_Kernel\FC_UBS_V.UM_11.1.0.0.0.0.0\TOOLS\RAD\SOURCE\ To RADTool_11.14.1.2 Step 2RADTool. Properties file configurationOpen RADTool.properties file from RADTool_11.1 folder. Refer the screen shot shown belowand enter appropriate values4.1.3 Step 3Open Web.xml add the JNDI reference for backend Database.Ex: <resource-ref><res-auth>Container</res-auth><res-ref-name>jdbc/RADTOOL</res-ref-name><res-type>javax.sql.DataSource</res-type></resource-ref>4.1.4 Step 4Please Use the Installer To Prepare Warfile.Installer sources will be available in the following location.\\IFLBLW-BPD-12\Vercon_IP-BPD-01\SOFT\FLEXCUBE_Kernel\FC_UBS_V.UM_11.1.0.0.0.0.0\TOOLS\RAD\INSTALLE R\SOURCE5. How to Run Installer After copying the installer sources and library folder to your local system, make sure you uncheck the read only check box in source properties and apply the same to all the sub folders.The screen shot below shows how the source folder in your local system should look like.To run the installer, double click the batch file (RADInstaller11.1.bat) present in the installer source.This displays the screen as follows.If you want create the war component, please enter the Destination path and War file Name otherwise it will compile only db object display the screen as followsAfter generation of war file you can deploy war file in Application Server /Web server from destination path.6. Troubleshooting 6.1 Checking LogsIn case an error occurs while doing a particular Open Development activity and the user wants to know the exception, he can look at the log file which contains detailed information about executed and the type of error thrown if any.To check the log file open the logs folder in the installer source of your local system.Please Enter the Open Development Schem detail where you are going to connect the Open Development schema and select the Open Development source which you are copied from vercon area and press next button .display the screen as followsFCJRADTool.war file is generated at specified “destPath” i.e. in this case at RADTool_11.1 This completes WAR file generation and Database installation .7. Deployment of WAR file to Application Server 7.1 Apache Tomcat 5.5 ServerTo deploy FCJRADTool.war to Apache Tomcat 5.5 Server follow the below mentioned steps7.1.1 Step 1Open tomcat-users.xml from <apache-tomcat-5.5.20_home>\conf folder.Add <user username="admin" password="admin" roles="manager,admin"/>As shown in highlighted section of the below screenshot.7.1.2 Step 2Open Server.xml from <apache-tomcat-5.5.20_home>\conf folder.Refer the highlighted section of screenshot below and add corresponding Datasource between <GlobalNamingResources></GlobalNamingResources> tags.7.1.3 Step 3Open context.xml from <apache-tomcat-5.5.20_home>\conf folder.Refer the highlighted section of screenshot below and add corresponding Resource Link7.1.4 Step 4Start Apache Tomcat 5.5 Server by double-clicking startup.bat from <apache-tomcat-5.5.20_home>\bin folderLaunch Internet Explorer with URL Error! Hyperlink reference not valid. Refer the screenshot below and enter User Id as admin and password as adminUpload the generated FCJRADTool.war file from RADTool_11.1 folder as shown Below in the screen shot and then click Deploy.This completes Deployment of FCJRADTool.war file to Apache Tomcat 5.5 Server.RADTool 11.1 Application can be launched with the URL.7.2 OC4J Application serverTo deploy FCJRADTool.war to OC4J 10.1.3.X Application Server follow the below mentionedstepsSteps 1-15 explain creation of Connection Pool and Data Source. Skip these steps if Connection pool and data source already exists in the OC4J Application server.Login to Oracle 10g Application server’s Administration console as shown belowClick Home as shown belowClick Administration tab as shown belowClick JDBC Resources as shown belowClick Create Connection Pool as shown below7.2.6 Step 6Click Continue as shown below7.2.7 Step 7Refer the screen shots shown below. Provide equivalent information and click FinishThis creates the connection pool as shown below7.2.8 Step 8Click Test Connection as shown below7.2.9 Step 9Click Test as shown below7.2.10 Step 10Click Create Data Sources as shown below7.2.11 Step 11Click Continue as shown below7.2.12 Step 12Refer the screen shot below. Provide equivalent information as shown below and click Finish.Select the Connection Pool that was created from the combo boxThis creates Data Source as shown below.7.2.13 Step 13Click Test Connection as shown below7.2.14 Step 14Click Test as shown belowThis completes Data source creation7.2.15 Step 15Click Applications Tab to navigate to the screen shown and then click DeployUpload FCJRADTool.war file as shown below and click NextRefer the screen shot below and click Next7.2.18 Step 18Click Go To Task for Map Environment Reference as shown belowRefer the screen shot below and enter corresponding details and then click OK.Click DeployThis completes Deployment of FCJRADTool.war file to OC4J 10.1.3.x Application server.7.3 WebLogic Application serverTo deploy FCJRADTool.war to WebLogic Application Server follow the below mentioned steps Steps 1-18 explain creation of Connection Pool and Data source. Skip these steps if Connection pool and data source already exists in the WebLogic Application server.Login to the Weblogic Server with <USername> and <Password>7.3.1 Step 1Under Domain Configurations→Services→JDBC, Click on Data SourcesJDBC Data Sources shows a list of available Data Sources. To create a new DS, Click on New∙Give a suitable name for the Data Source. The JNDI Name(Case Sensitive) should match the name as given in Open Development web.xml. Click Next.∙JNDI Name Should be like jdbc/<Schema-Name>Schema Name is same added while adding environment details.。
- 1、下载文档前请自行甄别文档内容的完整性,平台不提供额外的编辑、内容补充、找答案等附加服务。
- 2、"仅部分预览"的文档,不可在线预览部分如存在完整性等问题,可反馈申请退款(可完整预览的文档不适用该条件!)。
- 3、如文档侵犯您的权益,请联系客服反馈,我们会尽快为您处理(人工客服工作时间:9:00-18:30)。
– 7–
手动添加数据库节点
• 输入主机名并选择操作系统平台(注意要输入管理IP对应的域名)
Copyright © 2010 Oracle Corporation and/or i 输入部署agent的目录,选择一个身份证明(若已建立)
Copyright © 2010 Oracle Corporation and/or its affiliates
Copyright © 2010 Oracle Corporation and/or its affiliates
– 26 –
添加Exadata监控
• 复查无误
Copyright © 2010 Oracle Corporation and/or its affiliates
– 27 –
添加Exadata监控
– 24 –
添加Exadata监控
• 配置所有目标的监控密码——ILOM
Copyright © 2010 Oracle Corporation and/or its affiliates
– 25 –
添加Exadata监控
• 自动配置SNMP,注意此处infiniband交换机需要使用root用户
– 12 –
手动添加数据库节点
• 部署完成 • 依次添加所有DB node
Copyright © 2010 Oracle Corporation and/or its affiliates
– 13 –
步骤
1 2 3 4
配置确认
添加数据库节点
添加Exadata
查看监控状态
Copyright © 2010 Oracle Corporation and/or its affiliates
(4)检查确认监控 状态。
(3)添加 Exadata监控。
Copyright © 2010 Oracle Corporation and/or its affiliates
– 2–
步骤
1 2 3 4
配置确认
添加数据库节点
添加Exadata
查看监控状态
Copyright © 2010 Oracle Corporation and/or its affiliates
Copyright © 2010 Oracle Corporation and/or its affiliates
– 18 –
添加Exadata监控
• 列出Exadata中的所有组件,默认全部选中,可以选择要将哪些组件加 入监视
Copyright © 2010 Oracle Corporation and/or its affiliates
– 31 –
查看监控状态
• 点击exadata名,可以看到状态面板
Copyright © 2010 Oracle Corporation and/or its affiliates
– 32 –
查看监控状态
• 部分节点的状态为down,常见的有以下原因
• 目标未与OMS Server连通,如PDU • SNMP配置错误,参考 Enterprise Manager Exadata Management Getting Started Guide第3节 3 Post-Discovery Configuration and Verification • SSH等效性建立失败(可能性最高) • 验证Agent节点与被监控的cell目标之间是否能以ssh root@cellname登录 • 验证Agent节点与被监控的infiniband目标之间是否能以ssh nm2user@ibname登 录
– 3–
配置检查和确认
• Exadata • 确认Exadata的所有管理IP与EM服务器的连通性 • 所有Db node与cell node,ibswitch之间的ssh正常 (root@cellnode,nm2user@ibswitch) • Db node 1 的 /opt/oracle.SupportTools/onecommand/databasema chine.xml文件存在 • 确认Exadata各个组件的用户名与密码 • db node oracle密码 • cell node root密码 • Infiniband交换机nm2user与root密码 • ILOM root密码 • EM12C • 部署教新BP的EM版本 • 确认对应Exadata OS(linux或solaris)的Agent已准备
Copyright © 2010 Oracle Corporation and/or its affiliates
– 21 –
添加Exadata监控
• 选择代理身份证明,即部署了Agent的db node的用户名与密码
Copyright © 2010 Oracle Corporation and/or its affiliates
• 也可以不配置SUDO,在之后的部署中手动跑一些需要root权限的脚本
Copyright © 2010 Oracle Corporation and/or its affiliates
– 11 –
手动添加数据库节点
• 点击Deploy Agent开始部署
Copyright © 2010 Oracle Corporation and/or its affiliates
<Insert Picture Here>
EM12C添加监控Exadata步骤
Aug,2012
Copyright © 2010 Oracle Corporation and/or its affiliates
EM12C添加监控Exadata过程
(1)检查Exadata 配置正常。 (2)在DB server上部署 agent。
• 如果是第一次配置监控,选择将新的exadata组件作为目标进行搜索 • 如果是向已经被监控的exadata中添加新的目标,选择第二个选项
Copyright © 2010 Oracle Corporation and/or its affiliates
– 16 –
添加Exadata监控
• 搜索db node目标,填入所需信息,Agent URL可以从列表中选择
– 14 –
添加Exadata监控
• 从Setup→Add Targets Manually进入添加目标界面 • 选择用向导方式添加非主机目标,目标类型选择Exadata
Copyright © 2010 Oracle Corporation and/or its affiliates
– 15 –
添加Exadata监控
– 29 –
添加Exadata监控
• 在目标中可以看到出现了Exadata
Copyright © 2010 Oracle Corporation and/or its affiliates
– 30 –
步骤
1 2 3 4
配置确认
添加数据库节点
添加Exadata
查看监控状态
Copyright © 2010 Oracle Corporation and/or its affiliates
Copyright © 2010 Oracle Corporation and/or its affiliates
– 33 –
Q&A
Copyright © 2010 Oracle Corporation and/or its affiliates
– 4–
步骤
1 2 3 4
配置确认
添加数据库节点
添加Exadata
查看监控状态
Copyright © 2010 Oracle Corporation and/or its affiliates
– 22 –
添加Exadata监控
• 配置所有目标的监控密码——cell node
Copyright © 2010 Oracle Corporation and/or its affiliates
– 23 –
添加Exadata监控
• 配置所有目标的监控密码——Infiniband交换机
Copyright © 2010 Oracle Corporation and/or its affiliates
– 9–
手动添加数据库节点
• 若未预先建立身份证明,可以添加一个。 • 不能为root用户,可以选择sudo as root
Copyright © 2010 Oracle Corporation and/or its affiliates
– 10 –
手动添加数据库节点
配置SUDO
• 提示找不到/usr/local/bin/sudo,可以将/usr/bin/sudo拷贝过来
– 19 –
添加Exadata监控
• 列出Exadata中的所有组件,默认全部选中,可以选择要将哪些组件加 入监视
Copyright © 2010 Oracle Corporation and/or its affiliates
– 20 –
添加Exadata监控
• EM会自动分配各个目标的监视Agent,也可以手动更改
• 提示oracle无法以sudo方式执行脚本,根据提示做相应的sudo配置修改: vi /etc/sudoers 找到Defaults requiretty 注释掉 找到Defaults !visiblepw 修改为Defaults visiblepw 找到root ALL=(ALL) ALL在下面添加一行oracle ALL=(ALL) ALL
• 选择DB node1即可
Copyright © 2010 Oracle Corporation and/or its affiliates