MTTY刷机指令命令
DDRWT_TT刷机教程

想具备强悍的功能动手升级无线路由!可能没有玩过DD-WRT的玩家不知道DD-WRT是什么,我们打个比方:路由器的硬件就如同我们计算机的主板、内存、硬盘等,而实际上每台无线路由都有一个操作系统OS,每个厂家的无线路由器操作系统都不相同,而且也没有对外公布代码,这就类似于windows操作系统,虽然我们可以正常使用这些无线设备,但是由于自带的OS不能够随便修改,所以难免在实际使用上存在这样或那样的不足,可能不适合自己使用。
在这种环境下DD-WRT驱动应运而生,准确的说就是有了DD-WRT之后,每台路由的功能可以由我们自己安装、配置,挺有意思的吧。
如何刷DD-WRT和流程DD-WRT(简称DD)是一个Linux开源操作系统,实质它是第三方的路由器固件。
路由和网管功能非常强大,通常我们使用的路由器设备,都具有一个独立的操作系统(英文简称OS),用于对路由器设备进行各种功能设置和管理。
其实我们通常所说的升级路由器固件,也就是指升级刷新路由设备里面的操作系统,以使得路由器设备的功能更加强大。
常见的第三方路由器固件还有番茄(Tomato)等。
DD-WRT固件刷机流程如下。
一、为什么要刷DD-WRT?DD-WRT固件可以实现中继、AP、VPN、VOIP、UPNP、DHCP、端口映射、DDNS、IPv6、SNMP、SSH、计费功能、封杀BT、VLAN划分、调整无线信号发射功率等扩展功能。
二、DD-WRT收费吗?常规版本都不用收费,但也是特别版需要付费。
付费版功能更加强大。
如:PPPoE验证、ARP欺骗等。
三、哪些路由器可以刷DD-WRT固件1、支持刷DD-WRT的路由器种类很多,可以参考官方的硬件支持列表。
主要是Broadcom芯片方案的路由器,其他的的也有支持,但是并不是很多。
2、首先要了解自己的路由器是否支持DD-WRT、支持那种版本的DD-WRT。
其次刷固件方式,如有特殊说明,一般都会有提示。
如有一些路由器就提到只能使用TFTP方法刷,否则有可能不成功!3、DD-WRT的MINI(迷你版)和STD(标准版)固件大小差不多,Flash(闪存)通常在4M或8M就可以刷标准版或增强版的固件。
miui刷机教程
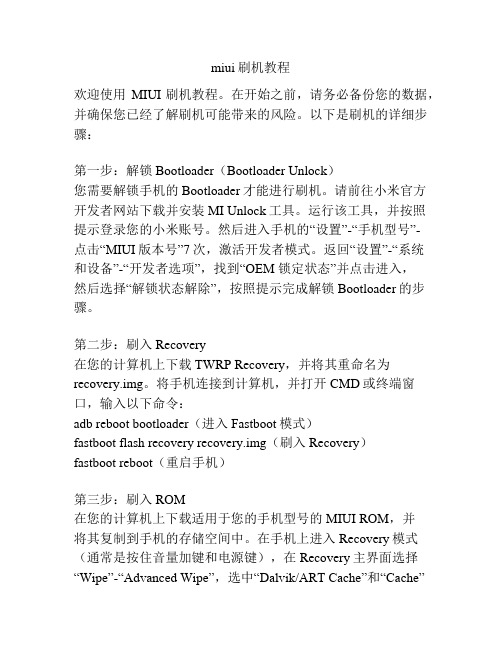
miui刷机教程欢迎使用MIUI刷机教程。
在开始之前,请务必备份您的数据,并确保您已经了解刷机可能带来的风险。
以下是刷机的详细步骤:第一步:解锁Bootloader(Bootloader Unlock)您需要解锁手机的Bootloader才能进行刷机。
请前往小米官方开发者网站下载并安装MI Unlock工具。
运行该工具,并按照提示登录您的小米账号。
然后进入手机的“设置”-“手机型号”-点击“MIUI版本号”7次,激活开发者模式。
返回“设置”-“系统和设备”-“开发者选项”,找到“OEM 锁定状态”并点击进入,然后选择“解锁状态解除”,按照提示完成解锁Bootloader的步骤。
第二步:刷入Recovery在您的计算机上下载TWRP Recovery,并将其重命名为recovery.img。
将手机连接到计算机,并打开CMD或终端窗口,输入以下命令:adb reboot bootloader(进入Fastboot模式)fastboot flash recovery recovery.img(刷入Recovery)fastboot reboot(重启手机)第三步:刷入ROM在您的计算机上下载适用于您的手机型号的MIUI ROM,并将其复制到手机的存储空间中。
在手机上进入Recovery模式(通常是按住音量加键和电源键),在Recovery主界面选择“Wipe”-“Advanced Wipe”,选中“Dalvik/ART Cache”和“Cache”并进行清除。
然后返回主界面,选择“Install”,找到并选择您复制到手机中的ROM文件,然后滑动确认进行刷入。
第四步:清除数据(可选)如果您希望刷机后手机恢复到出厂设置,可以选择在Recovery主界面选择“Wipe”-“Factory Reset”进行数据清除。
第五步:重启手机刷入完成后,在Recovery主界面选择“Reboot”-“System”。
刷机过程可能需要一些时间,请耐心等待。
MTK指令

博世(BOSCH)909S回中文:*#0852#
博世(BOSCH)909s回英文:*#0851#
NEC显软件版本:*#2820#
NEC恢复原厂设置:*#73738#
波导s1000隐藏功能:*#*#1705#
查看版本:*#8375#' B3 V* q, {% d) P
使用 [数字键]→[发射键]即可。
西门子手机锁机解锁方法
请需要解锁的网友,将解锁码在开机状态下直接输入手机,然后等候自动解锁,时间约1秒至60分钟不等
诺基亚显出厂日期:*#0000#(插卡)
诺基亚省30%电:*#746025625#
爱立信显可用否自己测试,不同芯片平台不同……
三星SGH-N288手机测试指令
*#0001# 显示RS232串行通信参数
*#0228# 显示电池容量、电压和温度
*#0246# 程序参数显示
*#0324# 网络检测(工程模式)
*#0364# 显示Watchdog状态,可以修改
*#0377# EEPROM错误显示
输入[*#0001#]+[发射键],改成英文显示。
输入[*#0086#]+[发射键],改成简体中文显示。
输入[*#0886#]+[发射键],改成繁体中文显示。
快速键
长按[*],开启或关闭铃声。
长按[#],开启或关闭键盘锁。
长按[左侧上键],开启情景模式设置。
MTK手机指令大全2009年09月04日 10:50解话机锁:*2767*2878#/*2767*7377#
三星码片复位:*2767*3855# 也可用*#0228#
fastboot刷机命令齐全
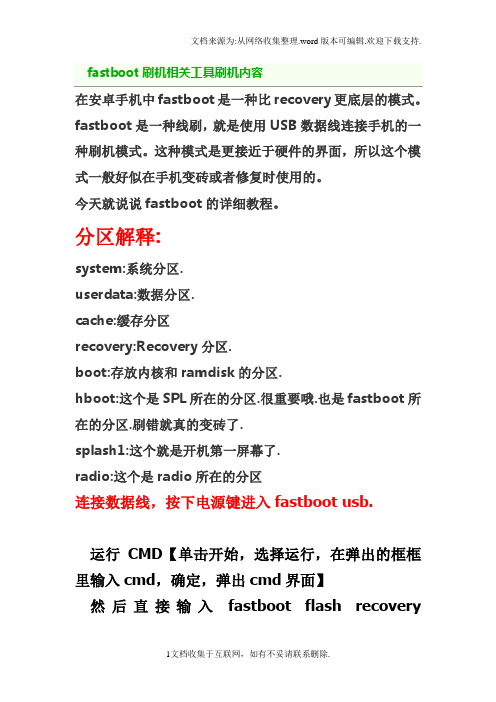
在安卓手机中fastboot是一种比recovery更底层的模式。
fastboot是一种线刷,就是使用USB数据线连接手机的一种刷机模式。
这种模式是更接近于硬件的界面,所以这个模式一般好似在手机变砖或者修复时使用的。
今天就说说fastboot的详细教程。
分区解释:system:系统分区.userdata:数据分区.cache:缓存分区recovery:Recovery分区.boot:存放内核和ramdisk的分区.hboot:这个是SPL所在的分区.很重要哦.也是fastboot所在的分区.刷错就真的变砖了.splash1:这个就是开机第一屏幕了.radio:这个是radio所在的分区连接数据线,按下电源键进入fastboot usb.运行CMD【单击开始,选择运行,在弹出的框框里输入cmd,确定,弹出cmd界面】然后直接输入 fastboot flash recoveryXXXX\recovery.img 【XXXX是recovery.img 的位置】,我的位置是D盘,那自然就是fastboot flash recovery D:\recovery.img具体大家放哪里就请自行修改了。
然后按回车,OK ,已经刷入recovery了。
重启手机即可。
reboot重启相关fastboot reboot #重启手机(退出)fastboot reboot-bootloader#重启到bootloader模式fastboot oem rebootRUU #重启到HTC RUU刷机模式擦除相关(erase)fastboot erase system #擦除system分区fastboot erase boot #擦除boot分区fastboot erase cache #擦除cache分区依次类推,需要擦除哪个分区就填写哪个分区的名字。
写入分区(flash)依次类推,需要擦除哪个分区就填写哪个分区的名字。
flashreboot重启相关解锁相关华为解锁命令:fastboot oem unlock ***************(***代表imei);HTC解锁命令:fastboot flash unlocktoken unlock_code.bin(需事先申请解锁文件);以上介绍的fastboot命令几乎涵盖了你能用到的所有命令,当然也可能有不全的命令,大家可以留言,小编会不断完善;了解更多关于Android系统基础知识请关注木子基础课堂。
▲▲MTTY刷机指令命令(修复砖头用)大全-最详细的指令介绍
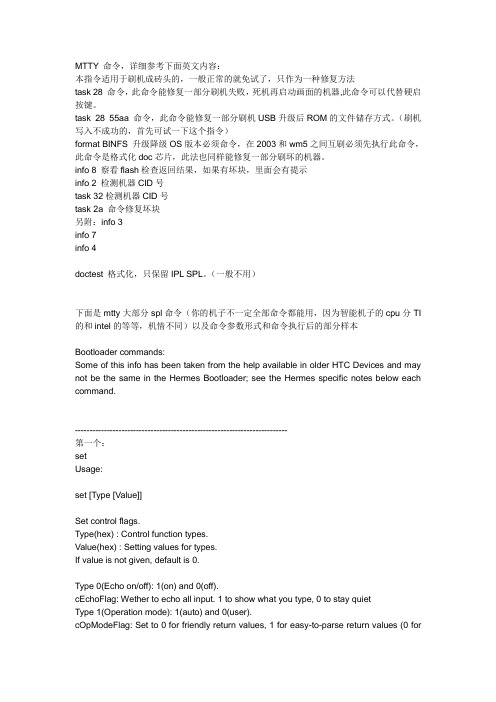
MTTY 命令,详细参考下面英文内容:本指令适用于刷机成砖头的,一般正常的就免试了,只作为一种修复方法task 28 命令,此命令能修复一部分刷机失败,死机再启动画面的机器,此命令可以代替硬启按键。
task 28 55aa 命令,此命令能修复一部分刷机USB升级后ROM的文件储存方式。
(刷机写入不成功的,首先可试一下这个指令)format BINFS 升级降级OS版本必须命令,在2003和wm5之间互刷必须先执行此命令,此命令是格式化doc芯片,此法也同样能修复一部分刷坏的机器。
info 8 察看flash检查返回结果,如果有坏块,里面会有提示info 2 检测机器CID号task 32检测机器CID号task 2a 命令修复坏块另附:info 3info 7info 4doctest 格式化,只保留IPL SPL。
(一般不用)下面是mtty大部分spl命令(你的机子不一定全部命令都能用,因为智能机子的cpu分TI 的和intel的等等,机情不同)以及命令参数形式和命令执行后的部分样本Bootloader commands:Some of this info has been taken from the help available in older HTC Devices and may not be the same in the Hermes Bootloader; see the Hermes specific notes below each command.-------------------------------------------------------------------------第一个:setUsage:set [Type [Value]]Set control flags.Type(hex) : Control function types.Value(hex) : Setting values for types.If value is not given, default is 0.Type 0(Echo on/off): 1(on) and 0(off).cEchoFlag: Wether to echo all input. 1 to show what you type, 0 to stay quietType 1(Operation mode): 1(auto) and 0(user).cOpModeFlag: Set to 0 for friendly return values, 1 for easy-to-parse return values (0 forusers, 1 for programs)Type 2(Back color on/off): 1(on) and 0(off).cBackColorShowFlag: Wether to draw a background with text.Type 3(Inverse on/off): 1(on) and 0(off).cShowInverseFlag: Wether to inverse fore and background colors (1 = yes, 0 = no)Type 4(Front color value): 16 bits datag_wFColor: Foreground color, 16-bit number, 5-6-5 bit compressionType 5(Background color value): 16 bits datag_wBColor: Background color, 16-bit number, 5-6-5 bit compressionType 6(Set color of screen): Fill color to whole screen one time.Type 8(COMM queue flag): 0(TX_RX disable),1(RX enable),2(TX enable) and 3(TX_RX enable).g_cCommQueueFlag: UnknownType 14(action after reset): What to do after a reset. Set to 1 to go to bootloader after reset, set to 0 to start OS.Type 16(RUU Flag): setting it to 0 if your machine starts in bootloader mode may help to solve this problem.Type 1E(RUU command read/write flag): 1(unlock) and 0(lock).Current flag settings:Type 0(Echo flag): cEchoFlag=(0x1).Type 1(Operation mode flag): cOpModeFlag=(0x0).Type 2(Back color flag): cBackColorShowFlag=(0x1).Type 3(Inverse flag): cShowInverseFlag=(0x0).Type 4(Front color): g_wFColor=(0x0).Type 5(Background color): g_wBColor=(0xFFFF).Type 6(Set color of screen): None.Type 8(COMM queue flag): g_cCommQueueFlag=(0x0).Type 1E(RUU command read/write flag): g_cRUUCommandRWFlag=(0x0).Example commands issued by ROMUpgradeUt:set 14 0 - start OS after a resetset 5 7777 - change bg colorset 2 1 - change back color onset 6 FFFF - screen color FFFFset 1 0 - operation mode user--------------------------------------------------------------------------------第二个:rbmcUsage:rbmc [FileName [StartAddr [Len]]]Read back the memory content from the specified address to the hostand save the data to specified file name.FileName : Full file path for save data of memory(default=c:\temp\Mem.nb).StartAddr : Start address of memory(default(hex)=A0000000).Len : How many bytes will be read. And if not given value, it will beTotal ROM size on board - ((StartAddress & 0x0FFFFFFF) - (ROM base address(0) & 0x0FFFFFFF)).NOTE: To use rbmc you need toauthenticate with proper passwordtype the command 'set 1e 1' before every rbmc commanduse the right syntax for rbmc commandbe seclevel=0 (not sure, if you know please edit)otherwise bootloader returns "Command error !!!" or "Command is Locked!". (if you're using Hard-SPL, this is unlocked, and any address can be read with 2.30.Olipro)--------------------------------------------------------------------------------第三个:passwordUsage:password [string]Enter the password string to enable wdata, erase and rbmc functionsSee more info on the bootloader password here.Newer SPL takes a static password of BsaD5SeoA (or ignored on Hard-SPL)--------------------------------------------------------------------------------第四个:shmsgUsage:shmsg [Row [Col ["String"]]]Show texts on display.Row(hex) : 0 - 17(11).Col(hex) : 0 - 12(C).Text String : The string which will be show on display.Example commands issued by ROMUpgradeUt:shmsg 3 d "50%"shmsg 9 8 " Completed "(this is used on older SPL)--------------------------------------------------------------------------------第五个:prouterUsage:prouter [PortID1[Baud1[PortID2[Baud2]]]]Port Router: Construct data path between two ports.PortID1: PortID1 number(default=6).Baud1: Baud rate1 select(default=5).PortID2: PortID2 number(default=0).Baud2: Baud rate2 select(default=5).Port ID: 0(ACTIVE_PORT),1(PPSH_CABLE),2(PPSH_SERIAL2),3(PPSH_PAR1),4(USB_CABLE ),5(ON_BOARD_FFUART),6(ON_BOARD_BTUART),7(ON_BOARD_STUART) and 9(DPRAM_MEMORY).Baud Rate: 1(9600),2(19200),3(38400),4(57600),5(115200),6(230400),7(460800) and 8(921600).--------------------------------------------------------------------------------第六个:taskUsage:task [Type [Value [Value1]]]Type,Value and Value1 are both DWORD(hex).Value and Value1 are ignore in some case.Type(hex) 0: Do hardware clear boot.Type(hex) 8: Resets the deviceType(hex) 7: Do flash ROM lock/unlock and [value]: 1(lock) and 0(unlock).Type(hex) 1e: switches to eMapiMain+++ modeType(hex) 28: Format NAND. (28 55aa will also reformat the "partition" )Type(hex) 2a: fix bad blocks on MFG bootloader or Hard-SPL 1.30 (or after Task 32) Type(hex) 32: Checks your security level. Unpriviledged: "Level=0xFF", SuperCID: "Level=0"Type(hex) 37: Sends KITL info (requires you to do Task 32 first unless on Hard-SPL) Type(hex) 3c: Sends "+SA_USB_Init" - Used for eMapi, removed in newer SPLs.This is incomplete, if you know please edit!Example commands issued by ROMUpgradeUt:task 32 - Returns "Level = FF" if your device is CID locked, or "Level = 0" if your device is SuperCIDtask 8 - Reboots the device after ~ROMUpgradeUt finishes ROM upgrade.Output of task 28, formats NAND (Storage):Storage format startWrite Nand SuccessdwBlockT oWrite = 13Storage start block: 462Storage Total block: 474Total Bad Block in CE: 0NeedToEraseBlockStart: 475Storage format success--------------------------------------------------------------------------------第七个:eraseUsage:erase [StartAddr [Len]]Erase the content of flash ROM.StartAddr : Start address of ROM(default(hex)=a0040000).Len : How many bytes will be erased(default(hex)=40000).It should either return "T " for succes, or "F " for failure (encapsulated in the HTCS-HTCE block).--------------------------------------------------------------------------------第八个:checksumUsage:checksum [StartAddr [Len]]Return CRC checksum of memory.StartAddr : Start address of ROM(default(hex)=A0000000).Len : How many bytes will be calculated.default(hex) = ROM total size - ((dwStartAddress & 0x0FFFFFFF) - (ROM_BASE & 0x0FFFFFFF))In user mode: Show 4 bytes of CRC checksum value on display of terminal.In auto mode: Send 4 bytes of CRC checksum value to terminal with data format.--------------------------------------------------------------------------------第九个:checkimageReturns CRC checksums from IPL, SPL, CE, Extrom and Radio Image.Example:USB>checkimageIPL CRC checksum = 0x19A4A13FSPL CRC checksum = 0x3BF03635CE CRC checksum = 0xC0E1751AExtROM CRC checksum = 0x4F9844B0Radio Image CRC checksum = 0x724875C8--------------------------------------------------------------------------------第十个:infoUsage:info [Type [Value]]Type(hex) 2: Get info for RUU software autentify for the PPC(16 bytes) and [value] (hex) is ignore.Returns "HTCS" + CID + (4-byte checksum) + "HTCE"Type(hex) 3: Get binary information for RUU sofware (2,10Kbytes)and [value](hex) is ignore.Returns "HTCS" + binary data used by RUU to calculate password + (4-byte checksum) + "HTCE"Type(hex) 4: Returns "HTCS" + CID + (4-byte checksum) + "HTCE"Type(hex) 5: Returns "IsAllBytesTheSame-: dwLength=8, bResult=0"Type(hex) 6: Get the information, for password crypt. (16 bytes) and [value] (hex) is ignore. Returns "HTCS" + binary data (password crypt) + (4-byte checksum) + "HTCE" (redundant in newer SPLs)Type(hex) 7: Returns information about the bootloaderType(hex) 8: Returns information on blocks and partitionsExamples:USB>info 7HTC Integrated Re-Flash Utility, Common Base Version : 1.50aDevice Name: H, Bootloader Version : 1.04Built at: May 26 2006 20:17:35Copyright (c) 1998-2006 High Tech Computer CorporationCPU ID=0x41129200Main CPLD version=0x5Upper CPLD version=0x4Main Board version=0x5USB>info 8Block 0x0(0) is Reversed blockBlock 0x1(1) is Reversed blockBlock 0x2(2) is Reversed blockBlock 0x3(3) is Reversed blockBlock 0x4(4) is Reversed blockBlock 0x5(5) is Reversed blockBlock 0x6(6) is Reversed blockBlock 0x7(7) is Reversed blockBlock 0x8(8) is Reversed blockBlock 0x9(9) is Reversed blockBlock 0xA(10) is Reversed blockBlock 0xB(11) is Reversed blockBlock 0xC(12) is Reversed blockPartition[0], type=0x20, start=0x2, total=0x18FEPartition[1], type=0x23, start=0x1900, total=0x1700Partition[2], type=0x25, start=0x3000, total=0x19800Partition[3], type=0x4, start=0x1C800, total=0x1E000CE Total Length(with sector info) = 0x39E4000CE CheckSum Length(without sector info) = 0x3900000--------------------------------------------------------------------------------第十一个:rtaskUsage:rtask [Type [Value]]Type(hex) 0: Reset radio and [value](hex) is ignore.Type(hex) 1: Turn on radio, lease use type 3 and 4 instead.Type(hex) 2: Turn off radio and [value](hex) is ignore.Type(hex) 3: Run radio image and [value](hex) is ignore.Type(hex) 4: Run radio bootloader and [value](hex) is ignore.Type(hex) 5: GSM code Burn In (19200).Type(hex) 6: GSM code Burn In (115200).Type(hex) 7: Radio AT Command Debug Without SD security Key Check (only for newer MFG BL)Type(hex) 8: GSM trace route.Type(hex) A: Talk to GSM bootloader.Type(hex) B: Radio AT Command Debug. With SD security Key Check (for newer BL, use this for Older)This command is only available in bootloader versions <= 1.04, it has been removed in bootloader 1.06 so you cannot enter the radio bootloader or the GSM AT cmd interface unless you happen to have an MFG version.To learn more about the radio bootloader and AT command interpreter read the Hermesradio bootloader wiki page.--------------------------------------------------------------------------------第十二个:wdatahSeems to replace / extend the old wdata command which writes data to memory (in newer SPLs, this is wdata again)Usage: wdata [Len [StartAddr]]Write data to memory(if write to ROM, need erase first).StartAddr : Start address of memory.Len : How many bytes will be written.Length must not more than 0x80000 bytes(buffer limitation).Write to RAM: 4 bytes(CRC checksum limitation).1 byte(in user mode).Write to ROM: 4 bytes(CRC checksum limitation).2(16-bit)/4(32-bit) bytes(in user mode).Write to ROM(16-bit data bus): 32 bytes(writebuffer mode).Write to ROM(32-bit data bus): 64 bytes(writebuffer mode).Length must be 4 bytes boundary(CRC checksum) if not in user mode.After command execute, then send out the data to terminal. Data format: HTCS(4 bytes)+DATA+checksum(4 bytes, if not in user mode)+HTCE(4 bytes).Password is needed to use this command (unless Hard-SPL):USB>wdatahCommand is Locked!Example commands issued by ROMUpgradeUt:wdatah 80000 33d5115ewdatah 80000 723a520b--------------------------------------------------------------------------------第十三个:waddrDeprecated commmand, for older devices should write a specified address--------------------------------------------------------------------------------第十四个:lnbsUsage:lnbs [pathname [StartAddr [Length [SkipOffset ["cp"]]]]]Download NBS file (signed NB) via MTTY.pathname : path to file to downloadStartAddr : Start address for downloading(default=80000000).Length : Length for downloading(default=FFFFFFFF).SkipOffset : SkipOffset for downloading(default=00040000).cp : Compare image with file data only.Seems to replace the old lnb, l and ls commands which download NB0 (raw) or BIN file to ROM, but now the file must be signed. Prior to running lnbs you need to run 'task 32' and it must return SecLevel=0 to use this command.#Basically the signed version of LNB.--------------------------------------------------------------------------------第十五个:LRSlrs ?StartAddr [pathname]?LoadCertToRamAndGoThis will load a signed (NBS) (usually diag) image to Ram and jump to it.non-signed version is LR - only exists for MFG compiled SPL though.--------------------------------------------------------------------------------第十六个:progressUsed to show a progress bar for percentage of rom update.Seems to do nothing on the Hermes (except on new SPL)--------------------------------------------------------------------------------第十七个:ruustartSeems to start a special RUU mode, but does nothing on the Hermes. (except on new SPL)--------------------------------------------------------------------------------第十八个:wdatasDeprecated test command, intended for old NBFs, doesn't exist in newer SPL.--------------------------------------------------------------------------------第十九个:btrouterused for programming bluetooth, although no idea how.--------------------------------------------------------------------------------第二十个:emapiemapi ds is a secondary mode; both of these are intended for programming of the WLAN using the TI tool "?RadioScope"--------------------------------------------------------------------------------超级CID查看方法:Preproduction BootLoader outputHTC Hermes preproduction devices have security level=0 (SuperCID).This is the output from some bootloader commands (IPL=0.16 , SPL=0.94)USB>task 32Level = 0USB>info 2HTCSSuperCID....HTCEUSB>USB>info 3HTCSHERM100SuperCID ..a....Em5..."/K.c...$.........PPH0.94.m..HTCEUSB>USB>info 4HTCSSuperCID....HTCEUSB>USB>info 6HTCST ....HTCEUSB>USB>info 7HTC Integrated Re-Flash Utility, Common Base Version : 0.05Device Name: H, Bootloader Version : 0.94Built at: Feb 21 2006 14:11:43Copyright (c) 1998-2005 High Tech Computer CorporationCPU ID = 0x41129200USB>info 8Block 0x0(0) is Reversed blockBlock 0x1(1) is Reversed blockBlock 0x2(2) is Reversed blockBlock 0x3(3) is Reversed blockBlock 0x4(4) is Reversed blockBlock 0x5(5) is Reversed blockBlock 0x6(6) is Reversed blockBlock 0x7(7) is Reversed blockBlock 0x8(8) is Reversed blockBlock 0x9(9) is Reversed blockBlock 0xA(10) is Reversed blockBlock 0xB(11) is Reversed blockBlock 0xC(12) is Reversed blockPartition[0], type=0x20, start=0x2, total=0x18FEPartition[1], type=0x23, start=0x1900, total=0x1700Partition[2], type=0x25, start=0x3000, total=0x1B300CE Total Length(with sector info) = 0x3D51800CE CheckSum Length(without sector info) = 0x3C60000USB>rbmcRBMCCommand+(): *pArgs=.[..[..[..[..[..[.
刷手机失败的解决办法Android手机刷机失败的解决办法有句古话叫常在河边走,难免会翻船。
对于经常刷机的Android刷友来说,难免会碰到刷机失败损坏recovery程序乃至手机无法启动的情况,也就是传说中的手机变砖块。
不过刷机失败手机变砖并不是世界末日,略施小计就可以让你的Android手机重新复活,方法如下:1. 在PC 上安装配置Android SDK刷机失败后手机变砖无法在手机上完成操作,智能借助Android SDK工具,所以你必须在操作的PC上下载并安装Android SDK程序,程序下载地址和安装配置方法见Android SDK官网/sdk/2. 安装Android 手机USB 驱动程序安装完Android SDK后就可以把手机通过USB线缆连接至PC,开启手机电源后PC会提示安装设备驱动程序,不要让系统自动查找驱动程序安装,选择自定义驱动程序位置,因为已经安装了Android SDK,驱动程序的位置默认为Android SDK的安装目录下的usb_driver子目录,选择从这个目录安装驱动程序。
3. 下载一个可用Recovery 程序变砖的Android手机能否复活的关键就是Recovery程序,因为recovery程序意味着你可以再次刷新的ROM,相当于给PC重新安装操作系统。
Android平台有很多可用的recovery程序,推荐使用最常见的Clock Recovery程序,注意recovery程序针对不同手机型号有不同版本的程序,下载时注意和手机型号匹配。
把下载的recovery程序放在某一目录备用,比如c:\\recovery-RA-Magic-v2.3.1.img4. 关键步骤:重新给变砖的手机安装recovery 程序在PC上打开命令提示符(Windows 系统,开始,运行,输入cmd回车),输入#adb devices 回车,如果返回一串序列号说明手机已经正常连接。
moto 刷机进入工程模式方法

A1200 按住语音键+导航键+开机键9 R6 V: @0 v6 V& TE680 左下角侧键和右上角的侧键+开机键* w$ t; r# p, _4 `- q2 s' i) D" W摩托罗拉E680/E680I硬启动用于主清除关机后同时按下音量键+相机快捷键+开/关机键& S" a* j4 D4 C. b" aA920 按A B键+开机键! i$ }2 L4 S% E9 Z9 hA780滚轮键+照相键+开机键6 V9 P$ o9 c) S6 X* a# U2 X" v其他机型一般就是*键+ #键+开机键8 d8 u, X5 O3 m/ S: q+ m' U/ @另外无法进入刷机模式的可以使用短接法" X( ?# e- q: g: @% \6 w3 OA1200 按住语音键+导航键+开机键$ u* G$ y& @. HE680 左下角侧键和右上角的侧键+开机键(F键,L键和开机键) % F9 Y5 Y3 N+ k1 CA920 按A B键+开机键(*********:W-]3gA780滚轮键+照相键+开机键/ ]( T K2 f) P% V7 rE6按右侧照相键加开机键进入刷机模式' W: f6 Z4 z' ?" }5 jE2按"语音键"和"开机键".进入手机的AP模式少待几秒钟.再次按手机的"语音键".进入的就是手机的BP模式. / E%E \( F8 Y. K4 m2 e+ |A760 伟插4 5加开机4#5#用镊子加上然后开机势下: J4 Z1 E9 p5 r7 U摩托罗拉E680/E680I硬启动用于主清除4 B7 t% x! V% w- @* N关机后同时按下音量键+相机快捷键+开/关机键8 [* t5 n, s2 ^: ^; t) b摩托指令不插卡**0107#复位( a2 y" g1 O+ J& o+ F8 VE6刷机教程, O; |! o3 G7 q7 J2 A/ A,关机状态下,按右侧照相键加开机键进入刷机模式& b- x& t8 w6 F, F如何输入WWW008W, b2 `5 x5 O* b7 x8 H7 ]9 L打开拨号盘,点一下在“呼叫”左边的倒“三”——插入——可插入+ p w,$ N% V+ j6 ^) x4 D% G5 M+ wW是最后一个“插入等待”。
山寨机 MTK平台手机进入工程测试模式指令大全
串号查询:*#06#
原厂设置:*#66*#
查看版本:*#8375#
工厂指令:*#3646633#
自动测试:*#87#
软件版本:*#8882#
*#035670766*001#
*#035670766*002#
有一些机器开机输入*#66*#不进测试的。
联想I909(MT6228)
####72728439# 进入工程模式。
MTK最新维修指令密码全集
不同的字库密码地址段不同,在没有资料的情况下,试试这些指令也许能帮助你
原始密码;1122
35E8D2H------数据 #3646633#工程模式
35E8E4H------数据 #87#AUTOTEST
大C工程码是*#83646633#*
狼牙工程码是*#53646633#
F350工程码是*#6668*#
下面几个是国产机常用的工程模式指令,大家可以参考一下!注意有的是无卡状态输入的.
特别提示:对于一些指令可能会使手机进入一些未知的状态,在这种情况下,心中无底的话,最好不要冒险继续操作.
*#301
2945#*#
*#*#1705#
MT6225齐乐D600手机可用*#4853*#
天基168.芯片是MTK6225 #6803#.
仿苹果ciphone工程模式*#83646633#;*#83656565#
埃利特仿苹果机*#83646633# *#23642*#
联想288/300输入2945#*进入测试模式
MTK 最新指令全集
设置指令:*#66*#
中文语言:*#0086# + send
刷机及测试常用adb命令
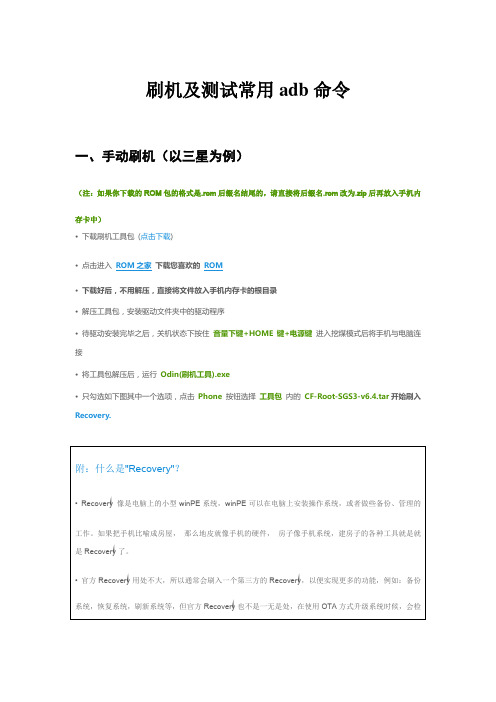
刷机及测试常用adb命令一、手动刷机(以三星为例)(注:如果你下载的ROM包的格式是.rom后缀名结尾的,请直接将后缀名.rom改为.zip后再放入手机内存卡中)• 下载刷机工具包(点击下载)• 点击进入ROM之家下载您喜欢的ROM• 下载好后,不用解压,直接将文件放入手机内存卡的根目录• 解压工具包,安装驱动文件夹中的驱动程序• 待驱动安装完毕之后,关机状态下按住音量下键+HOME键+电源键进入挖煤模式后将手机与电脑连接• 将工具包解压后,运行Odin(刷机工具).exe• 只勾选如下图其中一个选项,点击Phone按钮选择工具包内的CF-Root-SGS3-v6.4.tar开始刷入Recovery.附:什么是"Recovery"?•Recovery 像是电脑上的小型winPE系统,winPE可以在电脑上安装操作系统,或者做些备份、管理的工作。
如果把手机比喻成房屋,那么地皮就像手机的硬件,房子像手机系统,建房子的各种工具就是就是Recovery了。
•官方Recovery用处不大,所以通常会刷入一个第三方的Recovery,以便实现更多的功能,例如:备份系统,恢复系统,刷新系统等,但官方Recovery也不是一无是处,在使用OTA方式升级系统时候,会检查此分区内容,如果不是原厂自带的,OTA升级就会失败。
• 成功刷入Recovery后,关机状态下按住音量上键+HOME键+电源键进入Recovery模式,• 根据下图所选择项目进行操作!- wipe data/factory reset 清除数据- yes -- delete all user data 确定清除- wipe cache partition 清除缓存- Yes - Wipe Cache 确定清除缓存• Recovery模式下继续进行以下操作,- install zip from sdcard 从存储卡安装刷机包- choose zip from sdcard 从存储卡选择刷机包- 选择您所放入内存卡的ROM文件- Yes - Install 确定刷入• 完成后会返回至Recovery初始界面,选择第一项reboot system now重启进入新系统二、使用刷机工具自动刷机1、将手机连接电脑,打开刷机精灵(或刷机大师、甜椒刷机、完美刷机等),待刷机工具显示手机识别成功后,选择所需rom,点击一键刷机,将会自动完成整个刷机过程。
米德手控器刷机教程(一)
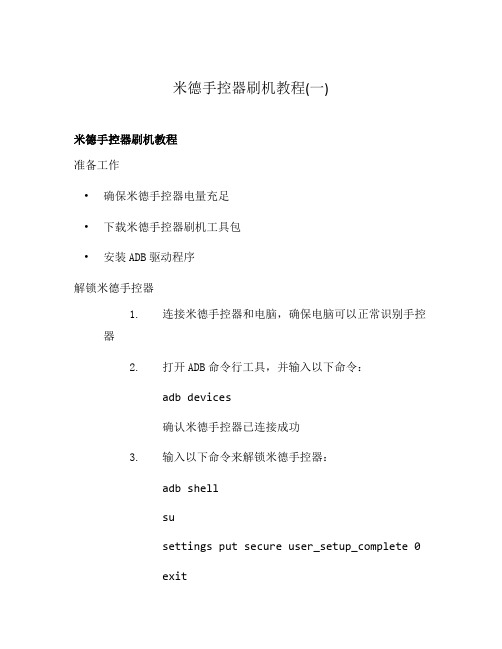
米德手控器刷机教程(一)米德手控器刷机教程准备工作•确保米德手控器电量充足•下载米德手控器刷机工具包•安装ADB驱动程序解锁米德手控器1.连接米德手控器和电脑,确保电脑可以正常识别手控器2.打开ADB命令行工具,并输入以下命令:adb devices确认米德手控器已连接成功3.输入以下命令来解锁米德手控器:adb shellsusettings put secure user_setup_complete 0exitadb reboot手控器将会重启并进入刷机模式刷机操作1.连接米德手控器和电脑,确保电脑可以正常识别手控器2.打开刷机工具包,并按照工具包中的说明进行安装和配置3.在刷机工具包中选择适合米德手控器的ROM版本,并开始刷机4.等待刷机过程完成,手控器将会自动重启完成刷机1.刷机完成后,米德手控器将进入新的系统界面2.进行系统设置和个人账户登录3.安装所需的应用程序和游戏注意事项•刷机有一定风险,请谨慎操作,切勿随意中断刷机过程•与刷机相关的软件和工具仅供技术交流和研究使用,请勿用于非法用途•刷机后可能会导致手控器的保修失效,请谨慎考虑•在刷机过程中,遵循工具包和刷机教程的指示,不要进行错误的操作以上是关于米德手控器刷机的详细教程,希望能对你有所帮助。
再次提醒,请谨慎操作,刷机有风险。
备份数据在刷机之前,我们建议你先备份米德手控器中的重要数据,以免数据丢失。
以下是备份数据的步骤:1.连接米德手控器和电脑,确保电脑可以正常识别手控器。
2.打开ADB命令行工具,并输入以下命令来查看设备是否连接成功:adb devices如果设备列表中显示了米德手控器的设备号,表示连接成功。
3.输入以下命令来备份数据:adb backup -all -f backup.ab这将会备份所有应用及其数据,备份文件将保存在电脑上。
4.根据提示在米德手控器确认备份请求。
备份过程可能会持续一段时间,请耐心等待。
5.备份完成后,在电脑上找到备份文件(backup.ab),将其复制到安全的位置,以防止意外丢失。
terminalfaker命令刷机教程
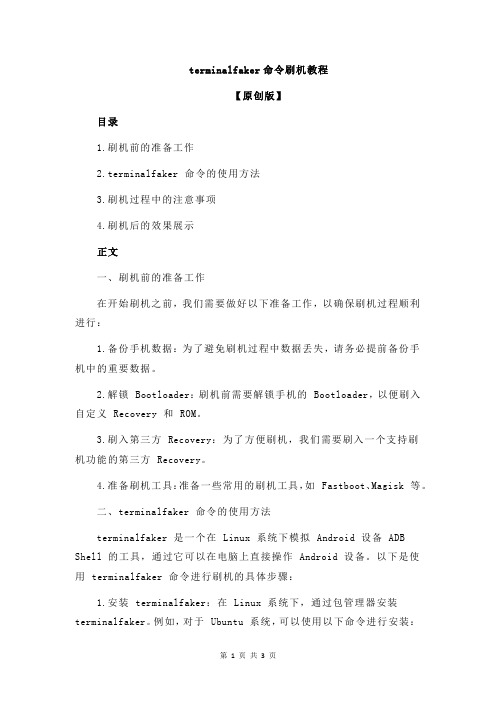
terminalfaker命令刷机教程【原创版】目录1.刷机前的准备工作2.terminalfaker 命令的使用方法3.刷机过程中的注意事项4.刷机后的效果展示正文一、刷机前的准备工作在开始刷机之前,我们需要做好以下准备工作,以确保刷机过程顺利进行:1.备份手机数据:为了避免刷机过程中数据丢失,请务必提前备份手机中的重要数据。
2.解锁 Bootloader:刷机前需要解锁手机的 Bootloader,以便刷入自定义 Recovery 和 ROM。
3.刷入第三方 Recovery:为了方便刷机,我们需要刷入一个支持刷机功能的第三方 Recovery。
4.准备刷机工具:准备一些常用的刷机工具,如 Fastboot、Magisk 等。
二、terminalfaker 命令的使用方法terminalfaker 是一个在 Linux 系统下模拟 Android 设备 ADB Shell 的工具,通过它可以在电脑上直接操作 Android 设备。
以下是使用 terminalfaker 命令进行刷机的具体步骤:1.安装 terminalfaker:在 Linux 系统下,通过包管理器安装terminalfaker。
例如,对于 Ubuntu 系统,可以使用以下命令进行安装:```sudo apt-get install terminalfaker```2.连接 Android 设备:确保 Android 设备已连接到电脑,并开启USB 调试功能。
在 terminalfaker 中输入“adb devices”以查看已连接的设备列表。
3.刷入自定义 Recovery:将刷机工具(如 Magisk)和自定义Recovery 镜像文件放入 Android 设备的/data/local/tmp 目录下,然后在 terminalfaker 中执行以下命令:```adb shell chmod 755 /data/local/tmp/magisk.imgadb shell chmod 755 /data/local/tmp/recovery.imgadb shell cat /data/local/tmp/magisk.img > /dev/kmemadb shell cat /data/local/tmp/recovery.img > /dev/kmemadb shell reboot -f```4.刷入 ROM:将刷机工具和 ROM 镜像文件放入 Android 设备的/data/local/tmp 目录下,然后在 terminalfaker 中执行以下命令:```adb shell chmod 755 /data/local/tmp/rom.zipadb shell cat /data/local/tmp/rom.zip > /dev/kmemadb shell reboot -f```三、刷机过程中的注意事项1.在刷机过程中,请勿断开设备与电脑的连接,以免导致刷机失败。
如何使用命令刷机ADB与FASTBOOT工具使用教程
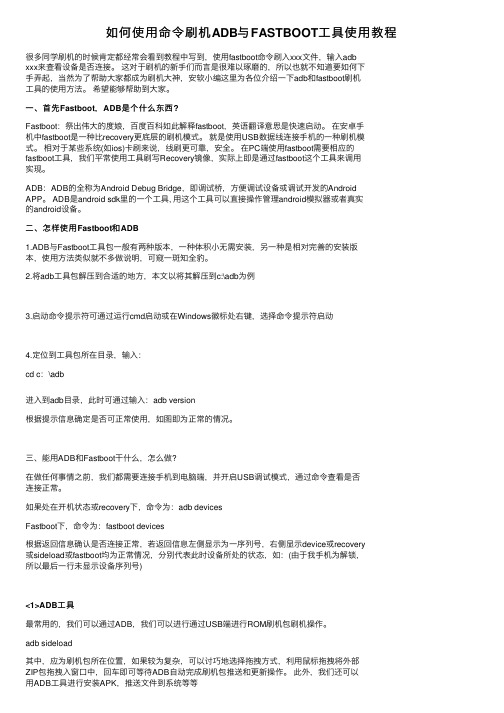
如何使⽤命令刷机ADB与FASTBOOT⼯具使⽤教程很多同学刷机的时候肯定都经常会看到教程中写到,使⽤fastboot命令刷⼊xxx⽂件,输⼊adbxxx来查看设备是否连接。
这对于刷机的新⼿们⽽⾔是很难以琢磨的,所以也就不知道要如何下⼿弄起,当然为了帮助⼤家都成为刷机⼤神,安软⼩编这⾥为各位介绍⼀下adb和fastboot刷机⼯具的使⽤⽅法。
希望能够帮助到⼤家。
⼀、⾸先Fastboot,ADB是个什么东西?Fastboot:祭出伟⼤的度娘,百度百科如此解释fastboot,英语翻译意思是快速启动。
在安卓⼿机中fastboot是⼀种⽐recovery更底层的刷机模式。
就是使⽤USB数据线连接⼿机的⼀种刷机模式。
相对于某些系统(如ios)卡刷来说,线刷更可靠,安全。
在PC端使⽤fastboot需要相应的fastboot⼯具,我们平常使⽤⼯具刷写Recovery镜像,实际上即是通过fastboot这个⼯具来调⽤实现。
ADB:ADB的全称为Android Debug Bridge,即调试桥,⽅便调试设备或调试开发的AndroidAPP。
ADB是android sdk⾥的⼀个⼯具, ⽤这个⼯具可以直接操作管理android模拟器或者真实的android设备。
⼆、怎样使⽤Fastboot和ADB1.ADB与Fastboot⼯具包⼀般有两种版本,⼀种体积⼩⽆需安装,另⼀种是相对完善的安装版本,使⽤⽅法类似就不多做说明,可窥⼀斑知全豹。
2.将adb⼯具包解压到合适的地⽅,本⽂以将其解压到c:\adb为例3.启动命令提⽰符可通过运⾏cmd启动或在Windows徽标处右键,选择命令提⽰符启动4.定位到⼯具包所在⽬录,输⼊:cd c:\adb进⼊到adb⽬录,此时可通过输⼊:adb version根据提⽰信息确定是否可正常使⽤,如图即为正常的情况。
三、能⽤ADB和Fastboot⼲什么,怎么做?在做任何事情之前,我们都需要连接⼿机到电脑端,并开启USB调试模式,通过命令查看是否连接正常。
刷机步骤
HD2用了段时间感觉系统不爽,本想去购机的地方免费刷的,实在是白天太忙没时间去,于是想自己动手解决。
在各大论坛逛了一圏后,却发现各类教程对刷机新手来说还是不完整的。
既然是新手,最好就是能从第一步开始,到最后一步都有教授才行,免得新手刷机觉得步步危机。
很久没有这种写大篇东西的心情了,这里不谈原理,只讲操作步骤。
做为刷机新手,只要细心就可以了,当然前提还是要会一点电脑的基本操作。
以下刷机步骤是参考了各大论坛中刷机注意事项后总结而来,每一步骤必须严格检查执行,这样才能保证刷机成功。
一、刷ROM。
1、刷机前要确认HSPL解锁如何察看已经解锁:进入三色屏。
进入三色屏方法:开机状态下重启手机或关机状态下开机,并马上按住“音量下”键,直到出现三色屏再松开音量键。
如果后缀不是HSPL(而是0001之类的)那就是未刷HSPL(未解锁),千万不要开始刷机,否则会变砖头。
示例:未解锁已经解锁SPL 1.42.0000---1.42 HSPLSPL 1.62.0000---1.62 HSPLSPL 1.66.0000---1.66 HSPLSPL 2.07.0000---2.07 HSPLSPL 2.08.0000---2.08 HSPLSPL 2.10.0000---2.10 HSPL解除三色屏:卸掉电池或用尖锐物捅一下电池仓旁边的红色小按钮。
2、HSPL解锁方法(已解锁的跳过,从下一步开始)HD2 LEO解锁程序目前最新的是HSPL3_PKG,安装此HSPL要事先确认你机器的SPL为1.42.0000,否则安装将失败(若不是1.42,可先安装HSPL2.EXE升级或降级到1.42)。
安装HSPL3_PKG时确保电脑上已经安装了ActiveSync(如不清楚去下载91手机助手,会根据你的电脑系统版本自动下载安装),并且能够正常连接手机进行同步操作。
USB线连接手机后运行HSPL3_PKG,一路next下去,其中有一个选择的下拉框中选择2.08HSPL,再继续next到底。
多普达U1000解锁刷机方法

按住音量下调键然后用手写笔捅reset孔这个孔在手机尾端或看电池附近后可以找到屏幕出现英文按导航键确认然后屏幕会出现要求你按通讯管理员键按过后出现提示要你按电源键重启设备这样就完成了u1000三
多普达U1000解锁刷机方法
U1000解锁、刷机要求:
一:首先你的电脑要装Microsoft .NE刷机包会出现打不开。另装activeSync4.5 .
二:刷机要先格机。也就是恢复出厂设置,如果你可以使用数据线和电脑连接的话不用格机。保险起见最好格机。方法:按住音量下调键,然后用手写笔捅RESET孔,(这个孔在手机尾端或看电池附近后可以找到)屏幕出现英文按导航键确认,然后屏幕会出现要求你按通讯管理员键,按过后出现提示要你按电源键重启设备,这样就完成了U1000的格机。
三:下载athenaUnlocker.exe到你电脑C盘。解锁你的手机拥有SUPERCID,方法:
1.软起你的是手机然后同步联机执行athenaUnlocker.exe的文件。会出来个对话框"I nor XDa-Developers.......Do you accept?"就是让你自己承担风险,点“是(Y)”。
安卓系统手机刷机方法

首先我们来解释一下安卓系统里面刷机需要用到的几个名词,以及他们所起到的作用,当然也是刷机的关键步骤和要点所在,下边我给大家一一解释。
步骤/方法1. 固件、刷固件固件是指固化的软件,中文为固件,它是把某个系统程序写入到特定的硬件系统中的flashROM。
手机固件相当于手机的系统,刷新固件就相当于刷系统。
不同的手机对应不同的固件,在刷固件前应该充2. ROM(包)智能手机配置中的ROM指的是擦除(电擦除可写只读存储器)类似于计算机的硬盘,手机里能存多少东西3. 固件版本固件版本是指官方发布的固件的版本号!里面包含了应用部分的更新和基带部分的更新,官方新固件的推4. Recovery(恢复模式)笼统的说,就是一个刷机的工程界面。
如果你装过系统,你可能知道dos界面或者winPE,安装了Recovery相当于给系统安了一个dos界面。
在recovery界面可以选择安装系统,清空数据,ghost备份系统,恢复系统等等。
刷recovery与刷rom不冲突5. RootRoot权限跟我们在Windows系统下的Administrator权限可以理解成一个概念。
Root是Android系统中的超级管理员用户帐户,该帐户拥有整个系统至高无上的权利,所有对象他都可以操作。
只有拥有了这个权限我们才可以将原版系统刷新为改版的各种系统,比如简体中文系统。
6. RADIORadio简单的说是无线通信模块的驱动程序。
ROM是系统程序,Radio负责网络通信,ROM和Radio可以分开刷,互不影响。
如果你的手机刷新了ROM后有通讯方面的问题可以刷新RADIO试一试。
7. SPL(这个是关键)SPL,“第二次装系统”,就是负责装载OS操作系统到RAM中。
另外SPL还包括许多系统命令,如mtty中使用的命令等。
SPL损坏了还可以用烧录器重写。
最后说说金卡(这个有很大作用的)很多朋友第一时间下载了官方的系统,然后就开始升级,不是台版的机器都会提示客户ID错误,这是因为更新程序会检测你机器的出货地,也就是销售地区,如果和升级程序不一致,就会中断升级,造成升级失败。
三种刷机方法
关于此文,首先说明两点:1、为什么说是简述。
因为刷机涉及的内容比较多,需要了解比较全面的有关知识,这里只是对刷机方法的介绍,有关名词术语需要查阅有关材料。
2、此文中的部分内容源自不同网友的刷机经验,下面介绍的三种方法我都测试过,所以在这里结合自己的经验,归纳总结一下。
一、第一种刷机方法1、概述该方法是最初的刷机方法,官方公布的ROM更新刷机基本都是这个方法。
2、前提机器拥有supercid,SPL版本为104,如果想刷RADIO,HTC_BOOT的版本必须为107,如HTC_BOOT的版本为108,则需要在SPL版本为109下刷NBH格式的RADIO,或者在SPL版本为104下,使用SSPL方法(后面有介绍)单刷RADIO。
3、步骤(1)进入bootloader模式,又称三色屏(同时按住ok和power键,然后用笔撮一下PP)(2)取消电脑同步软件ACTIVSYNC的usb连接选项(3)用USB连接电脑和手机(4)运行下载后的ROM升级执行文件,以1.35南非版为例,升级文件为RUU_HERMES_HTC_WWE_1_1_.35.255.2_1.35.255.102_1.08.00.10_SHIP.EXE (5)按照提示,选择有关选项,NEXT下去,直到刷机完成,约30分钟左右。
(6)刷机完成后重启,按照提示,在手机上设置有关选项,自动安装Extended ROM中的内置软件(7)OK,检查手机系统版本信息。
二、第二种刷机方法1、概述该方法又称为准安全刷机法,主要是通过MTTY.EXE软件,通过类似DOS命令来完成刷机优点:单独刷ROM中任意一部分nbh的内容,如os,radio,开机画面,spl 等,而且速度快(单刷OS约5分钟),只要不刷bootloader(包括ipl和spl),就不会对机器造成损伤,风险比较低。
缺点:在MTTY界面下输入命令,一定不能出错,否则后果很严重。
2、前提机器拥有supercid,SPL版本为101(需要通过软件把spl降级为101)下面简述如何确认机器是否拥有SUPERCID和SPL降级为101的方法,具体软件这里不公布,可自行查找。
MTTY
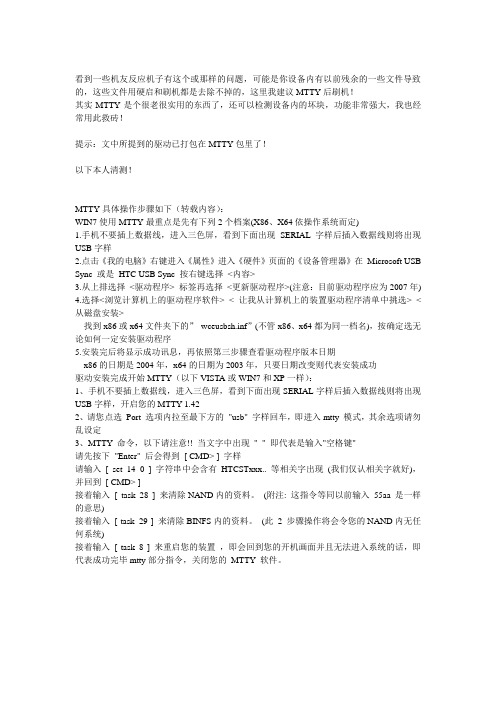
看到一些机友反应机子有这个或那样的问题,可能是你设备内有以前残余的一些文件导致的,这些文件用硬启和刷机都是去除不掉的,这里我建议MTTY后刷机!其实MTTY是个很老很实用的东西了,还可以检测设备内的坏块,功能非常强大,我也经常用此救砖!提示:文中所提到的驱动已打包在MTTY包里了!以下本人清测!MTTY具体操作步骤如下(转载内容):WIN7使用MTTY最重点是先有下列2个档案(X86、X64依操作系统而定)1.手机不要插上数据线,进入三色屏,看到下面出现SERIAL字样后插入数据线则将出现USB字样2.点击《我的电脑》右键进入《属性》进入《硬件》页面的《设备管理器》在Microsoft USB Sync 或是HTC USB Sync 按右键选择<内容>3.从上排选择<驱动程序> 标签再选择<更新驱动程序>(注意:目前驱动程序应为2007年)4.选择<浏览计算机上的驱动程序软件> < 让我从计算机上的装置驱动程序清单中挑选> < 从磁盘安装>找到x86或x64文件夹下的”wceusbsh.inf”(不管x86、x64都为同一档名),按确定选无论如何一定安装驱动程序5.安装完后将显示成功讯息,再依照第三步骤查看驱动程序版本日期x86的日期是2004年,x64的日期为2003年,只要日期改变则代表安装成功驱动安装完成开始MTTY(以下VISTA或WIN7和XP一样):1、手机不要插上数据线,进入三色屏,看到下面出现SERIAL字样后插入数据线则将出现USB字样,开启您的MTTY 1.422、请您点选Port 选项内拉至最下方的"usb" 字样回车,即进入mtty 模式,其余选项请勿乱设定3、MTTY 命令,以下请注意!! 当文字中出现"_" 即代表是输入"空格键"请先按下"Enter" 后会得到[ CMD> ] 字样请输入[ set_14_0 ] 字符串中会含有HTCSTxxx.. 等相关字出现(我们仅认相关字就好),并回到[ CMD> ]接着输入[ task_28 ] 来清除NAND内的资料。
智能手机刷机详解
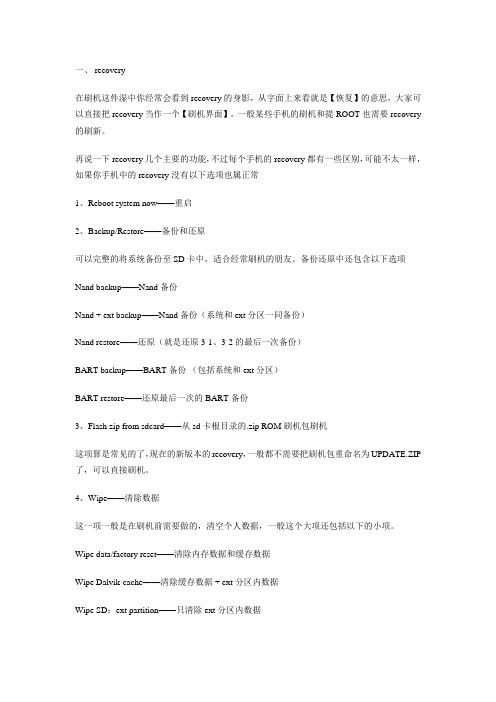
一、 recovery在刷机这件湿中你经常会看到recovery的身影,从字面上来看就是【恢复】的意思,大家可以直接把recovery当作一个【刷机界面】。
一般某些手机的刷机和提ROOT也需要recovery 的刷新。
再说一下recovery 几个主要的功能,不过每个手机的recovery 都有一些区别,可能不太一样,如果你手机中的recovery没有以下选项也属正常1、Reboot system now——重启2、Backup/Restore——备份和还原可以完整的将系统备份至SD卡中,适合经常刷机的朋友。
备份还原中还包含以下选项Nand backup——Nand 备份Nand + ext backup——Nand 备份(系统和ext 分区一同备份)Nand restore——还原(就是还原3-1、3-2 的最后一次备份)BART backup——BART 备份(包括系统和ext 分区)BART restore——还原最后一次的BART备份3、Flash zip from sdcard——从sd卡根目录的.zip ROM 刷机包刷机这项算是常见的了,现在的新版本的recovery,一般都不需要把刷机包重命名为UPDATE.ZIP 了,可以直接刷机。
4、Wipe——清除数据这一项一般是在刷机前需要做的,清空个人数据,一般这个大项还包括以下的小项。
Wipe data/factory reset——清除内存数据和缓存数据Wipe Dalvik-cache——清除缓存数据 + ext 分区内数据Wipe SD:ext partition——只清除ext 分区内数据Wipe battery stats——清除电池数据Wipe rotate settings——清除传感器内设置的数据5、Partition sdcard——分区sd 卡这个选项主要是用来做APP2 SD的,需要将卡分为LINUX下的格式ext,一般有以下选项。
- 1、下载文档前请自行甄别文档内容的完整性,平台不提供额外的编辑、内容补充、找答案等附加服务。
- 2、"仅部分预览"的文档,不可在线预览部分如存在完整性等问题,可反馈申请退款(可完整预览的文档不适用该条件!)。
- 3、如文档侵犯您的权益,请联系客服反馈,我们会尽快为您处理(人工客服工作时间:9:00-18:30)。
MTTY刷机指令命令(修复砖头用)大全-最详细的指令介绍2009-11-08 20:41MTTY 命令,详细参考下面英文内容:本指令适用于刷机成砖头的,一般正常的就免试了,只作为一种修复方法task 28 命令,此命令能修复一部分刷机失败,死机再启动画面的机器,此命令可以代替硬启按键。
task 28 55aa 命令,此命令能修复一部分刷机USB升级后ROM的文件储存方式。
(刷机写入不成功的,首先可试一下这个指令)format BINFS 升级降级OS版本必须命令,在2003和wm5之间互刷必须先执行此命令,此命令是格式化doc芯片,此法也同样能修复一部分刷坏的机器。
info 8 察看flash检查返回结果,如果有坏块,里面会有提示info 2 检测机器CID号task 32检测机器CID号task 2a 命令修复坏块另附:info 3info 7info 4doctest 格式化,只保留IPL SPL。
(一般不用)下面是mtty大部分spl命令(你的机子不一定全部命令都能用,因为智能机子的cpu分TI的和intel的等等,机情不同)以及命令参数形式和命令执行后的部分样本Bootloader commands:Some of this info has been taken from the help available in older HTC Devices and may not be the same in the Hermes Bootloader; see the Hermes specific notes below each command.-------------------------------------------------------------------------第一个:setUsage:set [Type [Value]]Set control flags.Type(hex) : Control function types.Value(hex) : Setting values for types.If value is not given, default is 0.Type 0(Echo on/off): 1(on) and 0(off).cEchoFlag: Wether to echo all input. 1 to show what you type, 0 to stay quietType 1(Operation mode): 1(auto) and 0(user).cOpModeFlag: Set to 0 for friendly return values, 1 for easy-to-parse return values (0 for users, 1 for programs)Type 2(Back color on/off): 1(on) and 0(off).cBackColorShowFlag: Wether to draw a background with text.Type 3(Inverse on/off): 1(on) and 0(off).cShowInverseFlag: Wether to inverse fore and background colors (1 = yes, 0 = no)Type 4(Front color value): 16 bits datag_wFColor: Foreground color, 16-bit number, 5-6-5 bit compression Type 5(Background color value): 16 bits datag_wBColor: Background color, 16-bit number, 5-6-5 bit compression Type 6(Set color of screen): Fill color to whole screen one time. Type 8(COMM queue flag): 0(TX_RX disable),1(RX enable),2(TX enable) and 3(TX_RX enable).g_cCommQueueFlag: UnknownType 14(action after reset): What to do after a reset. Set to 1 to go to bootloader after reset, set to 0 to start OS.Type 16(RUU Flag): setting it to 0 if your machine starts in bootloader mode may help to solve this problem.Type 1E(RUU command read/write flag): 1(unlock) and 0(lock).Current flag settings:Type 0(Echo flag): cEchoFlag=(0x1).Type 1(Operation mode flag): cOpModeFlag=(0x0).Type 2(Back color flag): cBackColorShowFlag=(0x1).Type 3(Inverse flag): cShowInverseFlag=(0x0).Type 4(Front color): g_wFColor=(0x0).Type 5(Background color): g_wBColor=(0xFFFF).Type 6(Set color of screen): None.Type 8(COMM queue flag): g_cCommQueueFlag=(0x0).Type 1E(RUU command read/write flag): g_cRUUCommandRWFlag=(0x0).Example commands issued by ROMUpgradeUt:set 14 0 - start OS after a resetset 5 7777 - change bg colorset 2 1 - change back color onset 6 FFFF - screen color FFFFset 1 0 - operation mode user--------------------------------------------------------------------------------第二个:rbmcUsage:rbmc [FileName [StartAddr [Len]]]Read back the memory content from the specified address to the host and save the data to specified file name.FileName : Full file path for save data ofmemory(default=c:\temp\Mem.nb).StartAddr : Start address of memory(default(hex)=A0000000).Len : How many bytes will be read. And if not given value, it will be Total ROM size on board - ((StartAddress & 0x0FFFFFFF) - (ROM base address(0) & 0x0FFFFFFF)).NOTE: To use rbmc you need to authenticate with proper passwordtype the command 'set 1e 1' before every rbmc commanduse the right syntax for rbmc commandbe seclevel=0 (not sure, if you know please edit)otherwise bootloader returns "Command error !!!" or "Command is Locked!". (if you're using Hard-SPL, this is unlocked, and any address can be read with 2.30.Olipro)--------------------------------------------------------------------------------第三个:passwordUsage:password [string]Enter the password string to enable wdata, erase and rbmc functionsSee more info on the bootloader password here.Newer SPL takes a static password of BsaD5SeoA (or ignored on Hard-SPL)--------------------------------------------------------------------------------第四个:shmsgUsage:shmsg [Row [Col ["String"]]]Show texts on display.Row(hex) : 0 - 17(11).Col(hex) : 0 - 12(C).Text String : The string which will be show on display.Example commands issued by ROMUpgradeUt:shmsg 3 d "50%"shmsg 9 8 " Completed "(this is used on older SPL)--------------------------------------------------------------------------------第五个:prouterUsage:prouter [PortID1[Baud1[PortID2[Baud2]]]]Port Router: Construct data path between two ports.PortID1: PortID1 number(default=6).Baud1: Baud rate1 select(default=5).PortID2: PortID2 number(default=0).Baud2: Baud rate2 select(default=5).Port ID:0(ACTIVE_PORT),1(PPSH_CABLE),2(PPSH_SERIAL2),3(PPSH_PAR1),4(USB_CABLE ),5(ON_BOARD_FFUART),6(ON_BOARD_BTUART),7(ON_BOARD_STUART) and9(DPRAM_MEMORY).Baud Rate:1(9600),2(19200),3(38400),4(57600),5(115200),6(230400),7(460800) and 8(921600).--------------------------------------------------------------------------------第六个:taskUsage:task [Type [Value [Value1]]]Type,Value and Value1 are both DWORD(hex).Value and Value1 are ignore in some case.Type(hex) 0: Do hardware clear boot.Type(hex) 8: Resets the deviceType(hex) 7: Do flash ROM lock/unlock and [value]: 1(lock) and 0(unlock). Type(hex) 1e: switches to eMapiMain+++ modeType(hex) 28: Format NAND. (28 55aa will also reformat the "partition" ) Type(hex) 2a: fix bad blocks on MFG bootloader or Hard-SPL 1.30 (or after Task 32)Type(hex) 32: Checks your security level. Unpriviledged: "Level=0xFF", SuperCID: "Level=0"Type(hex) 37: Sends KITL info (requires you to do Task 32 first unless on Hard-SPL)Type(hex) 3c: Sends "+SA_USB_Init" - Used for eMapi, removed in newer SPLs.This is incomplete, if you know please edit!Example commands issued by ROMUpgradeUt:task 32 - Returns "Level = FF" if your device is CID locked, or "Level = 0" if your device is SuperCIDtask 8 - Reboots the device after ~ROMUpgradeUt finishes ROM upgrade.Output of task 28, formats NAND (Storage):Storage format startWrite Nand SuccessdwBlockToWrite = 13Storage start block: 462Storage Total block: 474Total Bad Block in CE: 0NeedToEraseBlockStart: 475Storage format success--------------------------------------------------------------------------------第七个:eraseUsage:erase [StartAddr [Len]]Erase the content of flash ROM.StartAddr : Start address of ROM(default(hex)=a0040000).Len : How many bytes will be erased(default(hex)=40000).It should either return "T " for succes, or "F " for failure (encapsulated in the HTCS-HTCE block).--------------------------------------------------------------------------------第八个:checksumUsage:checksum [StartAddr [Len]]Return CRC checksum of memory.StartAddr : Start address of ROM(default(hex)=A0000000).Len : How many bytes will be calculated.default(hex) = ROM total size - ((dwStartAddress & 0x0FFFFFFF) - (ROM_BASE & 0x0FFFFFFF))In user mode: Show 4 bytes of CRC checksum value on display of terminal. In auto mode: Send 4 bytes of CRC checksum value to terminal with data format.--------------------------------------------------------------------------------第九个:checkimageReturns CRC checksums from IPL, SPL, CE, Extrom and Radio Image. Example:USB>checkimageIPL CRC checksum = 0x19A4A13FSPL CRC checksum = 0x3BF03635CE CRC checksum = 0xC0E1751AExtROM CRC checksum = 0x4F9844B0Radio Image CRC checksum = 0x724875C8--------------------------------------------------------------------------------第十个:infoUsage:info [Type [Value]]Type(hex) 2: Get info for RUU software autentify for the PPC(16 bytes) and [value] (hex) is ignore.Returns "HTCS" + CID + (4-byte checksum) + "HTCE"Type(hex) 3: Get binary information for RUU sofware (2,10Kbytes)and [value](hex) is ignore.Returns "HTCS" + binary data used by RUU to calculate password + (4-byte checksum) + "HTCE"Type(hex) 4: Returns "HTCS" + CID + (4-byte checksum) + "HTCE"Type(hex) 5: Returns "IsAllBytesTheSame-: dwLength=8, bResult=0"Type(hex) 6: Get the information, for password crypt. (16 bytes) and [value] (hex) is ignore.Returns "HTCS" + binary data (password crypt) + (4-byte checksum) + "HTCE" (redundant in newer SPLs)Type(hex) 7: Returns information about the bootloaderType(hex) 8: Returns information on blocks and partitionsExamples:USB>info 7HTC Integrated Re-Flash Utility, Common Base Version : 1.50aDevice Name: H, Bootloader Version : 1.04Built at: May 26 2006 20:17:35Copyright (c) 1998-2006 High Tech Computer CorporationCPU ID=0x41129200Main CPLD version=0x5Upper CPLD version=0x4Main Board version=0x5USB>info 8Block 0x0(0) is Reversed blockBlock 0x1(1) is Reversed blockBlock 0x2(2) is Reversed blockBlock 0x3(3) is Reversed blockBlock 0x4(4) is Reversed blockBlock 0x5(5) is Reversed blockBlock 0x6(6) is Reversed blockBlock 0x7(7) is Reversed blockBlock 0x8(8) is Reversed blockBlock 0x9(9) is Reversed blockBlock 0xA(10) is Reversed blockBlock 0xB(11) is Reversed blockBlock 0xC(12) is Reversed blockPartition[0], type=0x20, start=0x2, total=0x18FEPartition[1], type=0x23, start=0x1900, total=0x1700Partition[2], type=0x25, start=0x3000, total=0x19800Partition[3], type=0x4, start=0x1C800, total=0x1E000CE Total Length(with sector info) = 0x39E4000CE CheckSum Length(without sector info) = 0x3900000--------------------------------------------------------------------------------第十一个:rtaskUsage:rtask [Type [Value]]Type(hex) 0: Reset radio and [value](hex) is ignore.Type(hex) 1: Turn on radio, lease use type 3 and 4 instead.Type(hex) 2: Turn off radio and [value](hex) is ignore.Type(hex) 3: Run radio image and [value](hex) is ignore.Type(hex) 4: Run radio bootloader and [value](hex) is ignore.Type(hex) 5: GSM code Burn In (19200).Type(hex) 6: GSM code Burn In (115200).Type(hex) 7: Radio AT Command Debug Without SD security Key Check (only for newer MFG BL)Type(hex) 8: GSM trace route.Type(hex) A: Talk to GSM bootloader.Type(hex) B: Radio AT Command Debug. With SD security Key Check (for newer BL, use this for Older)This command is only available in bootloader versions <= 1.04, it has been removed in bootloader 1.06 so you cannot enter the radio bootloader or the GSM AT cmd interface unless you happen to have an MFG version.To learn more about the radio bootloader and AT command interpreter read the Hermes radio bootloader wiki page.--------------------------------------------------------------------------------第十二个:wdatahSeems to replace / extend the old wdata command which writes data to memory (in newer SPLs, this is wdata again)Usage: wdata [Len [StartAddr]]Write data to memory(if write to ROM, need erase first).StartAddr : Start address of memory.Len : How many bytes will be written.Length must not more than 0x80000 bytes(buffer limitation).Write to RAM: 4 bytes(CRC checksum limitation).1 byte(in user mode).Write to ROM: 4 bytes(CRC checksum limitation).2(16-bit)/4(32-bit) bytes(in user mode).Write to ROM(16-bit data bus): 32 bytes(writebuffer mode).Write to ROM(32-bit data bus): 64 bytes(writebuffer mode).Length must be 4 bytes boundary(CRC checksum) if not in user mode.After command execute, then send out the data to terminal. Data format: HTCS(4 bytes)+DATA+checksum(4 bytes, if not in user mode)+HTCE(4 bytes).Password is needed to use this command (unless Hard-SPL):USB>wdatahCommand is Locked!Example commands issued by ROMUpgradeUt:wdatah 80000 33d5115ewdatah 80000 723a520b--------------------------------------------------------------------------------第十三个:waddrDeprecated commmand, for older devices should write a specified address--------------------------------------------------------------------------------第十四个:lnbsUsage:lnbs [pathname [StartAddr [Length [SkipOffset ["cp"]]]]]Download NBS file (signed NB) via MTTY.pathname : path to file to downloadStartAddr : Start address for downloading(default=80000000).Length : Length for downloading(default=FFFFFFFF).SkipOffset : SkipOffset for downloading(default=00040000).cp : Compare image with file data only.Seems to replace the old lnb, l and ls commands which download NB0 (raw) or BIN file to ROM, but now the file must be signed. Prior to running lnbs you need to run 'task 32' and it must return SecLevel=0 to use this command.#Basically the signed version of LNB.--------------------------------------------------------------------------------第十五个:LRSlrs ?StartAddr [pathname]?LoadCertToRamAndGoThis will load a signed (NBS) (usually diag) image to Ram and jump to it. non-signed version is LR - only exists for MFG compiled SPL though.--------------------------------------------------------------------------------第十六个:progressUsed to show a progress bar for percentage of rom update.Seems to do nothing on the Hermes (except on new SPL)--------------------------------------------------------------------------------第十七个:ruustartSeems to start a special RUU mode, but does nothing on the Hermes. (except on new SPL)--------------------------------------------------------------------------------第十八个:wdatasDeprecated test command, intended for old NBFs, doesn't exist in newer SPL.--------------------------------------------------------------------------------第十九个:btrouterused for programming bluetooth, although no idea how.--------------------------------------------------------------------------------第二十个:emapiemapi ds is a secondary mode; both of these are intended for programming of the WLAN using the TI tool "?RadioScope"--------------------------------------------------------------------------------超级CID查看方法:Preproduction BootLoader outputHTC Hermes preproduction devices have security level=0 (SuperCID). This is the output from some bootloader commands (IPL=0.16 , SPL=0.94)USB>task 32Level = 0USB>info 2HTCSSuperCID....HTCEUSB>USB>info 3HTCSHERM100SuperCID ..a....Em5..."/K.c...$.........PPH0.94.m..HTCEUSB >USB>info 4HTCSSuperCID....HTCEUSB>USB>info 6HTCST ....HTCEUSB>USB>info 7HTC Integrated Re-Flash Utility, Common Base Version : 0.05Device Name: H, Bootloader Version : 0.94Built at: Feb 21 2006 14:11:43Copyright (c) 1998-2005 High Tech Computer CorporationCPU ID = 0x41129200USB>info 8Block 0x0(0) is Reversed blockBlock 0x1(1) is Reversed blockBlock 0x2(2) is Reversed blockBlock 0x3(3) is Reversed blockBlock 0x4(4) is Reversed blockBlock 0x5(5) is Reversed blockBlock 0x6(6) is Reversed blockBlock 0x7(7) is Reversed blockBlock 0x8(8) is Reversed blockBlock 0x9(9) is Reversed blockBlock 0xA(10) is Reversed blockBlock 0xB(11) is Reversed blockBlock 0xC(12) is Reversed blockPartition[0], type=0x20, start=0x2, total=0x18FEPartition[1], type=0x23, start=0x1900, total=0x1700Partition[2], type=0x25, start=0x3000, total=0x1B300CE Total Length(with sector info) = 0x3D51800CE CheckSum Length(without sector info) = 0x3C60000USB>rbmcRBMCCommand+(): *pArgs=.[..[..[..[..[..[.![.$[.'[.+[.rbmc, cArgs=1 GetExtRomData+(): *pszPathName=c:\temp\Mem.nb,dwStartAddress=57600000, dwLengt8 rbmc=55AB8Mem.nb。