Labview2013安装教程
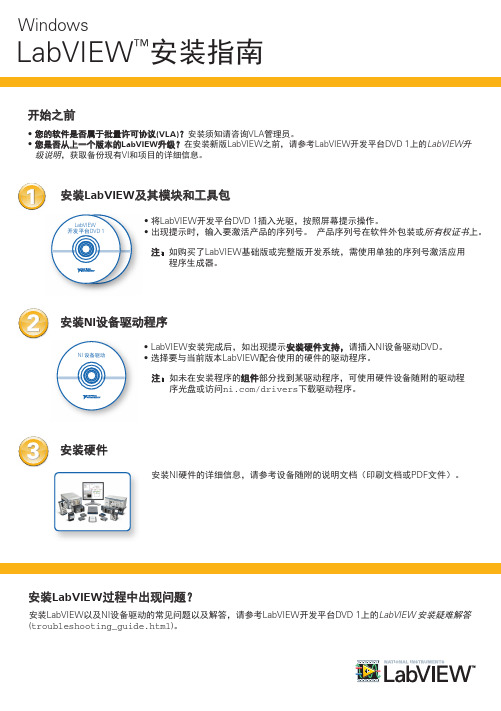
LabVIEW安装指南
Windows 处理器 RAM
运行引擎
开发环境
Pentium III/Celeron 866 MHz或等 效处理器
Pentium 4/M或等效处理器
256 MB
1 GB
屏幕分辨率
1024 x 768像素
1024 x 768像素
操作系统
Windows 8(32位、64位) Windows 7/Vista(32位、64位) Windows XP SP3(32位) Windows Server 2003 R2(32位) Windows Server 2008 R2(64位)
注:LabVIEW在Windows操作系统上的使用有下列限制。
• LabVIEW不支持Windows 2000/NT/Me/98/95以及Windows XP x64。 • 以访客账户登录Windows操作系统,不能访问操作系统上安装的LabVIEW。
安装LabVIEW模块和工具包的附加系统要求
LabVIEW模块和工具包可能有额外的系统要求。 找到LabVIEW开发平台DVD 1上的LabVIEW 开发平台自述文件 (readme_platform.html),找到相应的模块或工具包的部分,可查看特定模块或工具包时文件目录 N/A
LabVIEW和LabVIEW 帮助包含16位彩色图形。 LabVIEW至少需要16位彩色配置。
LabVIEW使用专用目录存放临时文件。 NI建议预 留磁盘空间存放临时文件。
Adobe Reader N/A
如需查看PDF格式的LabVIEW用户手册,必须安装 Adobe Reader。
Windows
LabVIEW™安装指南
开始之前
• 您的软件是否属于批量许可协议(VLA)?安装须知请咨询VLA管理员。 • 您是否从上一个版本的LabVIEW升级?在安装新版LabVIEW之前,请参考LabVIEW开发平台DVD 1上的LabVIEW升
【VIP专享】labview安装教程
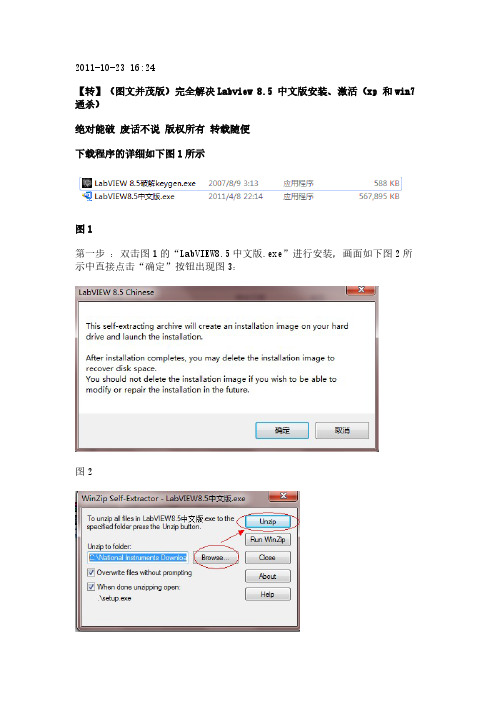
2011-10-23 16:24【转】(图文并茂版)完全解决Labview 8.5 中文版安装、激活(xp 和win7通杀)绝对能破废话不说版权所有转载随便下载程序的详细如下图1所示图1第一步:双击图1的“LabVIEW8.5中文版.exe”进行安装,画面如下图2所示中直接点击“确定”按钮出现图3:图2图3第二步:在上面图3中点击Browse浏览到一个文件夹(说明:这个文件夹是作为临时解压出安装的文件用的,装完这个程序之后要手动删除这个文件夹得内容),接着点击图3中的Unzip按钮,出现下面图4的解压进度画面;图4第三步:等待图4的进度条到达最后就说明解压完成,解压完成后会提示“448 。
successful"的对话框,直接点击提示框中的”确定“按钮进入图5的安装初始化状态。
(说明如果在等待图4中的进度条中途提示有带”Abort“按钮的提示框弹出的话,直接按Abort按钮就是啦。
)图5第四步:等待图5中的初始化状态完成后进入图6所示的对话框,直接点击下一步进入图7,此时先别点击下一步按钮,先看第五步,图6图7第五步:打开图1所示的那个”LabVIEW 8.5破解keygen.exe“文件,如图8所示,在图8中,分别单击图中1、2和3的位置,接着回到上面的图7中序列号位置粘贴出序列号,在单位那里随便填接着点击图7中的下一步,进入图9所示,图8图9第六步:在图9的中点击两个浏览选择安装的目录,或者保持默认也行。
接着点击下一步,进入图10所示;图10第七步:在图10直接点击下一步,进入图11所示,直接点击下一步进入图12;图11图12第八步:在图12中选中“我接受”点击下一步进入图13所示,在图13中直接点下一步进入图14所示;图13图14第九步:等待图14的进度条结束,会提示图15所示的对话框提示“安装NI设备驱动程序?”,点击“以后”按钮进入图16所示,图15图16第十步:在图16直接点击下一步进入图17所示;图17第十一步:按照上面图17中设置直接点击取消,进入图18所示;图18第十二步:安装到此结束,点击“重新启动”按钮,等待电脑重新启动后接着下面的破解操作;图19第十三步:电脑重新启动后,没破解之前你启动了软件的话,请先将它关闭,接着点击“开始”-》“所有程序”-》找到如上面图19所示的那个National Instruments的文件夹,点击它后会看到图19所示的“NI许可证管理器”,接着点击“NI许可证管理器”,接着如图20所示;图20第十四步:再次双击运行图1中所示的那个”LabVIEW 8.5破解keygen.exe“文件,如图21所示,此时点击“Create license file”,弹出图22所示对话框,按照图22上面的标注设定保存生成的破解文件后弹出如图23所示,点击确定。
LabVIEW 2013 Setup指导
LabVIEW 2013已经发布有一定时间了,与原来的LabVIEW相比,推出了模板和项目范例的新功能,其中推荐了项目起始点,可确保系统的质量和可扩展性。
所有的模板和示例项目都是开源的,且包括丰富的文档,清楚地表明了代码的工作方式以及添加/修改功能的最佳做法。
除了展示推荐的架构,这些项目也介绍了记录和组织代码的最佳做法。
对于labview2013,目前,一般拿到手中的是简体中文评估版DVD,这个是个试用版本,评估期只有短短7天,如果想继续使用,要么从官网购买正版,要么破解,对于个人而言,破解是最好的方法。
LabVIEW软件可以通过官网下载或者从百度云盘里搜索下载。
第一步,安装Labview2013所需硬件环境:Windows xp sp3/windows7 平台,注意:不支持windows xp sp2版本!在安装的过程中,如果你的计算机没有安装Microsoft Corporation 公司的WIC (Windows Imaging Component )组件,安装程序会提示错误,无法进行安装。
所以要安装WIC 这个程序。
附件名称:wic_x86_chs.exe.第二步,安装软件:先发个光盘截图:可以看到光盘容量非常大,有5.61G,让光盘自动运行后,开始安装labview2013.点击最上面的一个内容开始安装:在出现的界面中,选择试用产品点击下一步后,继续:这个过程可能要持续一段时间,选择安装目录,我选择了安装在D盘,默认是C盘,空间有限,D盘容量大,当然也可以是E和F盘。
最后,接收许可协议,点下一步,等待安装完成!第三步,破解Labview2013软件安装完DVD中的简体中文评估版后,打开软件时有提示:试用版的话,用起来就不爽了,只能去破解了。
打开破解机:找到labview2013的【licenses】文件所在,然后,鼠标点右键激活。
labview入门教程
手把手教你学labview编程项目一 labview正版软件安装一、下载软件。
可以在官网下载,也可以购买正版的U盘和光盘。
二、安装软件。
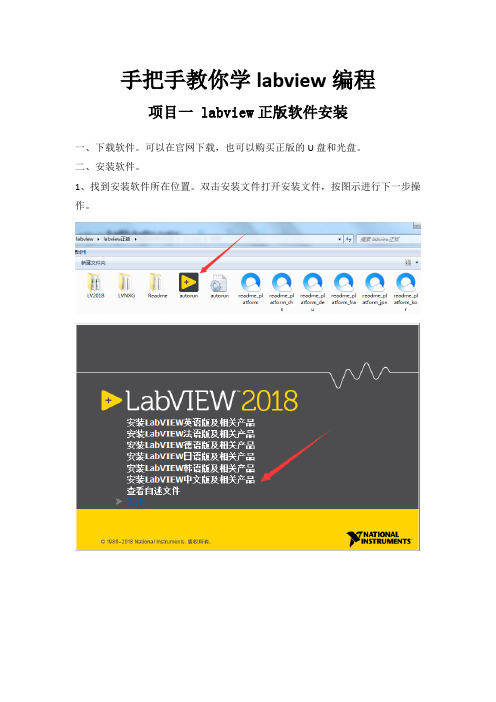
1、找到安装软件所在位置。
双击安装文件打开安装文件,按图示进行下一步操作。
查看自己电脑的版本:鼠标选中桌面上的计算机图标,右键点击属性。
查看自己的电脑是32位系统还是64位系统。
我的电脑是32位操作系统所以选择的是labview中文版,32位。
点击下一步进行下一步操作。
等待安装完成,安装文件较多,可能要等待的时间较久。
点击下一步重启电脑完成安装。
三、labview软件注册1、点击电脑开始菜单,再点击所有程序,找到NI许可证管理器。
2、单击打开许可证管理器,点击激活软件3、在弹出的窗口输入账号密码登录,没有账号点击创建账号注册NI用户账号。
4、登录后在相应的地方输入产品的序列号进行激活。
软件激活后便可以正常使用。
项目二 labview破解版软件安装一、下载数据包。
在网上搜索labview 2018破解版,下载相应的安装数据包,下载后进行解压。
二、软件安装。
1、双击运行2018LV-WinChn进行安装。
2、选择数据保存位置,建议选择默认,点击Unzip。
3、进入安装向导,点击“下一步”。
安装过程弹出安装Labview硬件支持,点击不需要支持,破解版暂时没办法解决硬件支持问题。
如果需要使用硬件请下载正版激活。
这里可以重启,也可以稍后重启,安装完后先不要打开软件。
三、软件破解。
1、回到刚才下载的数据包中,运行破解程序“NI License Activator 1.2”右键选择所有需要激活的地方,点activate进行激活。
2、当全部变为绿色表示破解成功。
3、运行软件即可正常使用。
项目三两个数值相加一、新建VI。
双击打开Labview软件。
在弹出的窗口点击创建项目,按以下图示进行下一步操作完成VI创建。
创建完成后会有前面板和程序框图两个窗口。
前面板主要用来放置控件,程序框图用来编写程序。
LabVIEW 2013实时模块版本使用说明说明书
RELEASE AND UPGRADE NOTESLabVIEW Real-Time Module Version 2013This document provides system requirements, installation instructions, descriptions of new features, and information about upgrade and compatibility issues for the LabVIEW 2013 Real-Time Module.Refer to the Getting Started with the LabVIEW Real-Time Module manual for exercises you can complete to familiarize yourself with the Real-Time Module.TipRefer to the Real-Time Module Best Practices book in the LabVIEW Help for programming recommendations on designing, developing, and deploying applications with the LabVIEW Real-Time Module. Select Real-Time Module»Real-Time Module Best Practices on the Contents tab of the LabVIEW Help to display this book.ContentsSystem Requirements (2)Installing the LabVIEW 2013 Real-Time Module (2)Activating the Real-Time Module (3)Configuring Real-Time Targets (3)New Features (3)Support for NI Linux Real-Time Targets (3)Enhanced Example VIs (4)Performance Improvements for Advanced Format HDDs on ETS Targets (4)Ethernet Driver MSI Support (4)Networking Improvements on ETS Targets with Multiple Network Cards (4)NI Real-Time Execution Trace Toolkit (4)Activating the NI Real-Time Execution Trace Toolkit (5)Upgrade and Compatibility Issues (5)Known Issues with the Real-Time Module (5)Where to Go from Here (5)Related Documentation and Examples (5)NI Web Site (6)Support (6)™2| |LabVIEW Real-Time Module Release and Upgrade NotesSystem RequirementsThe following section describes the system requirements to run the LabVIEW 2013 Real-Time Module. In addition to the LabVIEW system requirements listed in the LabVIEW Readme , the Real-Time Module has the following requirements:•LabVIEW 2013 Full or Professional Development System (32-bit)•At least 200 MB of disk space in addition to the LabVIEW-recommended minimum.•RT target hardware and driver software.•One of the following operating systems for application development:–Windows 8 (32-bit)–Windows 8 (64-bit with 32-bit LabVIEW installed)–Windows 7 (32-bit)–Windows 7 (64-bit with 32-bit LabVIEW installed)–Windows Server 2003 R2 (32-bit)–Windows Server 2008 R2 (64-bit with 32-bit LabVIEW installed)–Windows Vista (32-bit)–Windows Vista (64-bit with 32-bit LabVIEW installed)–Windows XP Pro (Service Pack 3)NoteYou might need more memory than the LabVIEW-recommended minimum depending on the size of the application you design in LabVIEW on the host computer.Installing the LabVIEW 2013 Real-Time Module Complete the following steps to install LabVIEW and the Real-Time Module on a development computer:1.Log in to the development computer as an administrator or as a user with administrative privileges.2.Insert the LabVIEW 2013 Platform DVD 1.NoteTo request additional LabVIEW 2013 Platform DVDs, refer to the National Instruments website. If you purchased this product with an NI Software Suite or NI Product Bundle, use the installation media that shipped with your purchase to install this product.3.Follow the instructions on the screen to install and activate the following software:•LabVIEW•Real-Time Module•(Optional) PID and Fuzzy Logic Toolkit—Use the Real-Time Module serial number to activate this toolkit.•Device DriversLabVIEW Real-Time Module Release and Upgrade Notes |© National Instruments |3NoteRefer to your hardware-specific documentation for information about installing the appropriate device drivers.Activating the Real-Time ModuleThe Real-Time Module relies on licensing activation. When the evaluation period expires, you must activate a valid Real-Time Module license to continue using the Real-Time Module. You must create an User Profile to activate your software.You can use the NI License Manager, available by selecting Start»All Programs»National Instruments»NI License Manager , to activate National Instruments products. (Windows 8)Click NI Launcher and select NI License Manager in the window that appears. Refer to the National Instruments License Manager Help , available by selecting Help»Contents in the NI License Manager, for information about activating NI products.Configuring Real-Time TargetsUse Measurement & Automation Explorer (MAX) to configure RT targets and to install software and drivers on targets. You can install MAX from the LabVIEW Platform DVD.•Networked RT Targets —Refer to the MAX Remote Systems Help book in theMeasurement & Automation Explorer Help , available by selecting Help»MAX Help from MAX, for information about configuring networked RT targets.•Desktop PC Targets —Refer to the Using Desktop PCs as RT Targets with theLabVIEW Real-Time Module document for information about configuring a desktop PC as a networked RT target. Open the labview\manuals directory and double-click RT_Using_PC_as_RT_Target.pdf to open the document.Note When NI Web-based Configuration & Monitoring is installed on an RTtarget, you can use a web browser to perform common monitoring and configuration tasks on the target. Refer to the Fundamentals»Working with Projects andTargets»How-To»Monitoring and Configuring a Remote Device from a WebBrowser topic on the Contents tab in the LabVIEW Help for information aboutNI Web-based Configuration & Monitoring.New FeaturesThe LabVIEW 2013 Real-Time Module includes the following new features. Refer to the LabVIEW Help, available by selecting Help»LabVIEW Help , for more information about these features.Support for NI Linux Real-Time T argetsThe LabVIEW 2013 Real-Time Module adds support for targets running the NI Linux Real-Time operating system. Refer to the Real-Time Module»Real-Time OperatingSystems»Real-Time Module on NI Linux Real-Time Targets topic on the Contents tab in the LabVIEW Helpfor information about NI Linux Real-Time targets.Enhanced Example VIsUse the NI Example Finder, available by selecting Help»Find Examples from LabVIEW, to find new or enhanced RT examples in the Toolkits and Modules»Real-Time directory. Performance Improvements for Advanced Format HDDs on ETS TargetsThe LabVIEW 2013 Real-Time Module includes performance improvements for Advanced Format HDDs on ETS targets. To take advantage of these improvements, such as increased write speed, you must reformat your hard drive partition.Ethernet Driver MSI SupportThe LabVIEW 2013 Real-Time Module includes support for message signaled interrupt (MSI) on Intel 1000e Ethernet drivers and on Intel 8254 Ethernet drivers for Intel 8257 devices. Networking Improvements on ETS Targets with Multiple Network CardsThe LabVIEW 2013 Real-Time Module adds the following features to ETS targets:•DHCP/AutoIP on secondary network cards•Support for multiple network cards on the same network subnet•Dynamic network reconfiguration based on network card link state•Extended feedback of network device status on target screens and consolesNI Real-Time Execution Trace T oolkitThe LabVIEW Real-Time Module includes a 30-day evaluation of the Real-Time Execution Trace Toolkit. The Real-Time Execution Trace Toolkit includes the Real-Time Execution Trace Tool and the Execution Trace Tool VIs. You can use the Execution Trace Tool VIs to capture the timing and execution data of VI and thread events for applications running on an RT target. The Real-Time Execution Trace Tool displays the timing and event data, or trace session, on the host computer. In LabVIEW, select Tools»Real-Time Module»Execution Trace Toolkit to display the Real-Time Execution Trace Tool.Refer to the Real-Time Execution Trace Toolkit book in the LabVIEW Help for information about using the Real-Time Execution Trace Toolkit to debug real-time applications. Select Help»LabVIEW Help to display the LabVIEW Help. In the LabVIEW Help, browse to Toolkits»Real-Time Execution Trace Toolkit to view the Real-Time Execution Trace Toolkit book.4||LabVIEW Real-Time Module Release and Upgrade NotesActivating the NI Real-Time Execution T race ToolkitThe Real-Time Execution Trace Toolkit relies on licensing activation. You have a temporary license for a 30-day evaluation period. When the evaluation period expires, you must activate a valid Real-Time Execution Trace Toolkit license to continue using the Real-Time Execution Trace Toolkit. You can use the NI License Manager to activate the Real-Time Execution Trace Toolkit.Upgrade and Compatibility IssuesYou might encounter compatibility issues when upgrading to the Labview 2013 Real-Time Module from the LabVIEW 2012 Real-Time Module. Refer to previous versions of the LabVIEW Real-Time Module Release and Upgrade Notes, available on /manuals, for changes in previous versions of the Real-Time Module.NI Linux Real-Time T argetsCertain conventions on ETS and VxWorks targets, such as the file transfer mechanism and directory structure, do not apply on NI Linux Real-Time targets.Refer to the Real-Time Module»Real-Time Operating Systems»Real-Time Module onNI Linux Real-Time Targets topic on the Contents tab in the LabVIEW Help for information about NI Linux Real-Time targets.Known Issues with the Real-Time ModuleRefer to the National Instruments website at /info and enter the Info CodeLVRT2013KIL to access the known issues for the LabVIEW 2013 Real-Time Module. Where to Go from HereNational Instruments provides many resources to help you succeed with your NI products. Use the following resources as you start exploring LabVIEW and the Real-Time Module. Related Documentation and ExamplesUse the following resources to learn more about using LabVIEW and the Real-Time Module:•LabVIEW Help—Available by selecting Help»LabVIEW Help in LabVIEW. Browse the Real-Time Module book in the Contents tab for an overview of the Real-Time Module.•Context Help Window—Available by selecting Help»Show Context Help. Context help provides brief descriptions of VIs, functions, and dialog boxes. Context help for most VIs and functions include a link to the complete reference for a VI or function.LabVIEW Real-Time Module Release and Upgrade Notes|© National Instruments|5•Hardware-Specific Documentation—Some RT targets provide printed documentation as well as content in the LabVIEW Help. Use the hardware documentation for information about using the RT target with LabVIEW and for information about hardwarespecifications.•Examples—Use the NI Example Finder, available by selecting Help»Find Examples from LabVIEW, to browse or search for RT example VIs. You also can access example VIs from the labview\examples\Real-Time Module directory.NI Web SiteRefer to /info and enter the Info Code rtinfo for the latest NI Developer Zone articles, examples, and support information for the Real-Time Module.Refer to /info and enter the Info Code rttrn to access online training for the Real-Time Module.SupportThe National Instruments website is your complete resource for technical support. At/support you have access to everything from troubleshooting and application development self-help resources to email and phone assistance from NI Application Engineers. National Instruments corporate headquarters is located at 11500North Mopac Expressway, Austin, Texas, 78759-3504. National Instruments also has offices located around the world to help address your support needs. For telephone support in the United States, create your service request at /support and follow the calling instructions or dial 5127958248. For telephone support outside the United States, visit the Worldwide Offices section of / niglobal to access the branch office websites, which provide up-to-date contact information, support phone numbers, email addresses, and current events.6||LabVIEW Real-Time Module Release and Upgrade NotesRefer to the NI Trademarks and Logo Guidelines at /trademarks for more information on National Instruments trademarks. Other product and company names mentioned herein are trademarks or trade names of their respective companies. For patents covering National Instruments products/technology, refer to the appropriate location: Help»Patents in your software, the patents.txt file on your media, or the National Instruments Patents Notice at /patents. You can find information about end-user license agreements (EULAs) and third-party legal notices in the readme file for your NI product. Refer to the Export Compliance Information at /legal/export-compliance for the National Instruments global trade compliance policy and how to obtain relevant HTS codes, ECCNs, and other import/export data.© 2000–2013 National Instruments. All rights reserved.371374K-01Jun13。
国家工程实验室LabVIEW 2013软件校准管理工具包 Getting Started指南说明书
NI Software Calibration Management Toolkit for LabVIEW™ 2013Getting Started GuideWeb : /powertrain-controls/,E-mail :2. Installing NI SCMFor more information on the NI Software Calibration Management Toolkit for LabVIEW, please visit /powertrain-controls/.To download the NI Software Calibration Management Toolkit for LabVIEW, visit /info and enter the Info Code "SCMToolkit".There are two use cases for NI SCM. First, NI SCM may be activatedto allow CalPoints to be added or modified within LabVIEW Real-Time applications. NI LabVIEW Real-Time Module is required for this. Second, the NI SCM console can be used on any system running Microsoft Windows OS to connect to a LabVIEW Real-Time application using the NI SCM. This allows users to monitor and calibrate pre-existing real-time applications with embedded CalPoints, and only requires the free LabVIEW Run-Time Engine. The user interface VI on the host may be modified if NI LabVIEW Base Development System (or higher) is installed.NI SCM consists of three components; a LabVIEW Real-Time functions palette (block diagram), NI LabVIEW controls palette (front panel) and a NI SCM console. The LabVIEW Real-Time palette is used to instrument the LabVIEW Real-Time application with CalPoints. The control palette provides specialty controls for interfacing with unique CalPoints on the target suchas 1D and 2D lookup tables. The NI SCM console is used to pair target CalPoints with NI LabVIEW host VI controls/indicators and transfer the data to and from the host VI front panel.NI SCM uses several different network ports to communicate with the target. The table below describes the network connections used by NI SCM. These ports should be unblocked by firewall software on the host computer.What is the NI Activation Wizard?The NI Activation Wizard is a part of NI License Manager that steps you through the process of enabling software to run on your machine.What Information Do I Need to Activate?You need your product serial number, user name, and organization. The NI Activation Wizard determines the rest of the information. Certain activation methods may require additional information for delivery. This informationis used only to activate your product. Complete disclosure of the National Instruments software licensing information privacy policy is available at /activate/privacy. If you optionally choose to register your software, your information is protected under the National Instruments privacy policy, available at /privacy.How Do I Find My Product Serial Number?Your serial number uniquely identifies your purchase of NI software. You can find your serial number on the Certificate of Ownership included in your software kit. If your software kit does not include a Certificate of Ownership, you can find your serial number on the product packing slip or on the shipping label.If you have installed a previous version using your serial number, youcan find the serial number by selecting the Help»About menu item within the application or by selecting your product within NI License Manager (Start»All Programs»National Instruments»NI License Manager). You can also contact your local National Instruments branch.What is a Computer ID?The computer ID contains unique information about your computer. National Instruments requires this information to enable your software. You can find your computer ID through the NI Activation Wizard or by using NI License Manager, as follows:1. Launch NI License Manager by selecting Start»AllPrograms»National Instruments»NI License Manager.2. Click the Display Computer Information button in the toolbar.For more information about product activation and licensing, refer to / activate.How Can I Evaluate NI Software?You can install and run most NI application software in evaluation mode. This mode lets you use a product with certain limitations, such as reduced functionality or limited execution time. Refer to your product documentation for specific information on the product’s evaluation mode.Moving Software After ActivationTo transfer your software to another computer, install and activate it on the second computer. You are not prohibited from transferring your software from one computer to another and you do not need to contact or inform NIof the transfer. Because activation codes are unique to each computer, you will need a new activation code. Refer to How Do I Activate My Software? to acquire a new activation code and reactivate your software.Deactivating a ProductTo deactivate a product and return the product to the state it was in before you activated it, right- click the product in the NI License Manager tree and select Deactivate. If the product was in evaluation mode before youactivated it, the properties of the evaluation mode may not be restored.Using Windows Guest AccountsNI License Manager does not support Microsoft Windows Guest accounts. You must log in to a non-Guest account to run licensed NI application software.4. Additional Support/Feedback Please contact NI Systems Support at 210-248-9308 or*****************************.For additional help with getting your NI hardware and software installed and configured, visit: /gettingstarted/。
labview安装步骤
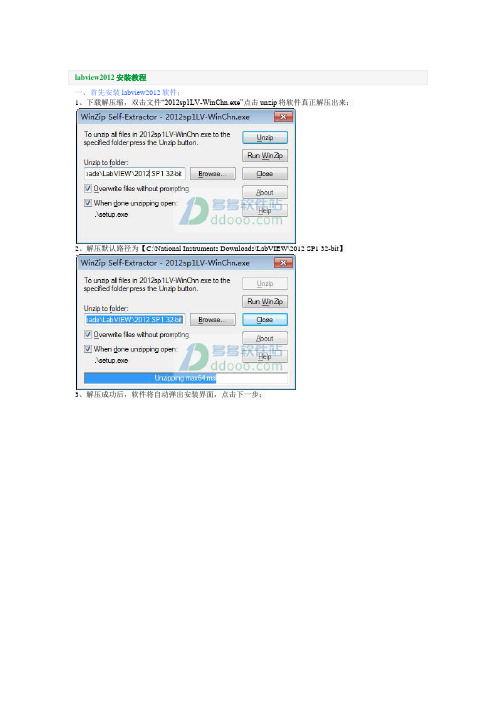
一、首先安装labview2012软件;
1、下载解压缩,双击文件“2012sp1LV-WinChn.exe”点击unzip将软件真正解压出来;
2、解压默认路径为【C:\National Instruments Downloads\LabVIEW\2012 SP1 32-bit】
3、解压成功后,软件将自动弹出安装界面,点击下一步;
4、输入用户信息;
5、不输入产品序列号,直接点击下一步;
6、安装路径设置为D盘;
7、组件安装按默认即可;
8、去除左下角的勾,点击下一步;
9、我接受上述2条许可协议;
10、继续接受;
11、下一步,继续安装;
12、安装正在进行中,大概10分钟左右,请等待;
13、接近完成时,弹出此界面,选择不需要支持;
14、看到以下信息时,表明labview2012安装完成;
15、弹出ni客户体验改善计划设置,选择否;
16、重新启动;
17、重启电脑后,打开360,把有关NI的东西都禁止掉,否则NI会经常弹出乱七八糟的窗口。
二、现在开始激活labview软件
1、双击生成的软件图标;
2、打开软件,显示试用版,剩余7天,先不要运行,点击退出labview;
3、双击软件包中文件“NI License Activator.exe”,弹出界面;
4、每一个选项都右击,选择“Activate...”即可;
5、全部激活后,如下图;
6、这时打开软件,你已经拥有一个无限制免费使用的labview2012。
Labwindows CVI2013安装教程
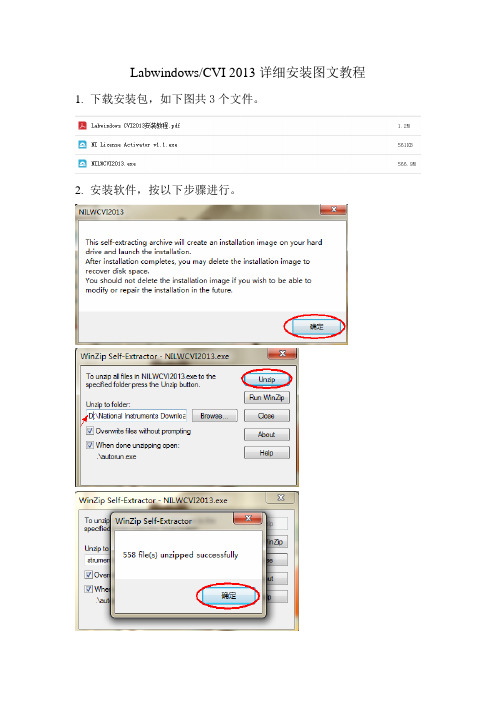
Labwindows/CVI 2013详细安装图文教程1.下载安装包,如下图共3个文件。
2.安装软件,按以下步骤进行。
注:如果提示需要.net framework 4.0按提示下载安装即可,如果你的电脑有安装有就不会出现这个提示。
大部分软件的安装路径都不支持中文路径,请尽量避免软件安装在中文路径下。
耐心等待,根据个人电脑配置不同需要的时间也不同,我的要半小时。
3.下面进入最重要的一步,就是软件激活了!
找到NI License Activator v1.1.exe激活工具打开并按下面的步骤进行激活。
在需要激活的版本和模块上依次点鼠标右键,出现Activate再点鼠标左键确认,直到出现绿色图标,表示已经激活。
请选择自已需要的版本进行激活,我只是举例说明激活步骤一般Base Package和Full Development System(Debug only)版本不需要激活,
这两个版本功能要弱一些,Full Development Systems要激活。
在开始---程序处点击NI License Manager,确认激活情况
到此激活完成,慢慢享用吧!
注:模块的安装激活在此不再讲述,因为模块很多,每个人需求的也不同。
安装激活方法同上(先安装后用激活工具激活)。
LabVIEW安装指南说明书
LabVIEW Platform Media
• Insert the LabVIEW Platform media and follow the onscreen instructions. • When prompted, enter the serial number for each product you want to activate.
© 2012–2014 National Instruments All rights reserved.
375842C-01
Jun14
2 Install NI Device Nhomakorabearivers
NI Device Drivers
• Insert the NI Device Drivers media when the installer prompts you to Install Hardware Support or after LabVIEW finishes installing.
Platform media for information about protecting existing VIs and projects before installing a new version of LabVIEW.
1 Install LabVIEW, Modules, and Toolkits
For answers to common questions about installing LabVIEW and NI device drivers, refer to / gettingstarted or the LabVIEW Installation Troubleshooting Guide (troubleshooting_guide.html) on the LabVIEW Platform media.
LabVIEW2013安装教程
安装步骤:
1、右击软件压缩包选择解压到LabVIEW2013。
2、右击选择打开labvIEW2013.exe文件。
3、点击确定。
4、点击Unzip解压文件。
5、点击确定。
6、点击下一步。
7、任意填写信息后,点击下一步。
8、点击下一步。
9、点击浏览更改安装路径,建议安装到除C盘以外的磁盘,可在D盘或者其他盘创建一个LabVIEW2013文件夹。
然后点击下一步。
11、点击下一步。
13、选择我接受上述2条许可协议,点击下一步。
15、软件安装中(大约需要10分钟)。
16、点击下一步。
19、在安装包中找到NI LIcense Activator,鼠标右击选择以管理员身份运行。
20、找到Base Development System右击找到Activate点击。
21、找到Debug Development System右击找到Activate点击。
22、找到Full Development System右击找到Activate点击。
23、找到Professional Development System右击找到Activate点击。
24、找到Student Edution右击找到Activate点击。
25、找到Application Builder右击找到Activate点击。
26、在开始菜单找到软件打开,取消勾选启动时显示,使其处于未选中状态,点击关闭。
27、安装完成。
Arduino 的LabVIEW接口工具包安装指南
Arduino的LabVIEW接口工具包安装指南1、安装LabVIEW 2012(LabVIEW 2012评估版下载地址:点此下载)图1(如图1所示,LabVIEW 2012中文版安装过程省略。
)2、安装NI-VISA 软件包(NI-VISA软件包下载地址:点此下载)图2(如图2所示,NI-VISA安装过程省略。
)3、安装JKI VI Package Manager(VIPM)工具包(1)在浏览器中输入地址/vipm,点击【Download Now】图标,进入Download VI Package Manager页面。
如图3所示。
图3(2)在Download VI Package Manger页面的Step1选项中,选择VIPM 2013 for Windows 8/7/vista or XP选项,如图4所示。
(3)在Setp2选项中,输入自己的Email地址,如图4所示。
(4)单击Setp3选项中,单击Download Now图标,如图4所示。
(5)保存下载的VI Package Manager到本地硬盘。
如图4所示4、安装VI Package Manager(1)找到下载的vipm-13.1.1905-windows-setup.exe安装文件,运行VI Package Manager 2013安装程序,如图5所示。
图5(2)VI Package Manager 2013安装过程省略。
5、运行VI Package Manager(1)在桌面找到VI Package Manger,双击VI Package Manger图标,启动VI Package Manger,如图6所示。
图66、在VI Package Manager环境中,安装LabVIEW Interface for Arduino工具包(1)在VIPM中,搜索LabVIEW interface for Arduino,单击Install按钮,如图7所示。
labview 教程
labview 教程LabVIEW教程:LabVIEW概述:LabVIEW是一种图形化编程语言和集成开发环境,一般用于数据采集、仪器控制、实时控制和模拟等工程应用。
它采用了数据流编程的方式,使用图形化的块状图形表示程序的结构,使得用户可以通过拖拽和连接各个图形块来实现程序的编写。
LabVIEW还提供了丰富的工具箱和函数库,可以轻松地进行信号处理、图像处理、控制算法实现等操作。
入门:1. 下载和安装LabVIEW软件2. 打开LabVIEW,并了解主界面的各个部分3. 创建一个新的LabVIEW项目LabVIEW界面与工具栏:1. 界面的各个部分介绍:前面板、块图、工具栏等2. 前面板的控件和指示器:按钮、开关、滑动条、数字显示等3. 块图的基本元素:数据线、函数、结构等4. 工具栏的常用功能介绍:保存、运行、调试等数据流编程:1. 数据流的概念和基本原理2. 如何在LabVIEW中实现数据流编程3. 数据流编程的优点和应用场景信号处理与数据分析:1. 在LabVIEW中进行数字信号处理的基本方法和工具2. 如何进行滤波、谱分析等常见信号处理操作3. 数据分析的方法和工具:统计分析、曲线拟合等仪器控制与数据采集:1. 如何使用LabVIEW控制外部仪器和设备2. 仪器通信的基本原理和常用接口:Serial、GPIB等3. 数据采集的方法和工具:传感器连接、数据存储等LabVIEW的高级功能:1. LabVIEW中的事件驱动编程方法和应用2. 多线程编程和并行计算的方法和工具3. LabVIEW中的高级图形显示和用户界面设计方法总结:LabVIEW是一个功能强大且易于学习和使用的图形化编程工具,适用于各种工程应用。
通过本教程的学习,你将能够掌握LabVIEW的基本操作和常用功能,为实际工程项目的开发和应用奠定基础。
祝你在LabVIEW的学习和实践中取得成功!。
Labview 安装

本PPT旨在介绍如何在笔记本上安装labview与其驱动等运行测试程序。
1.我们需要哪些软件?
①2013sp1LV-WinChn.exe labview 2013 中文版安装程序 这是运行**.vi的基础软件,测试程序是基于这个软件编写的。 ② visa540_full.exe Visa程序是连接labview和gpib串口的驱动程序,有了它,我们就能控 制gpib端口了。 ③ni488_312.exe Visa是基于这个软件运行的。 ④ NI License Activator.exe 破解程序。 ⑤ keithley_24xx-2012.zip Labview中 keithley2400的驱动。
2.我们怎么安装他们?
(1)下载①、②、③三个软件,按顺 序安装,全部按照它默认的安装,不建 议换安装软件的位置,就算换了位置, 还是会在它默认位置生成一个文件夹。 (2)打开④软件,在每一个白色□ 内 右击,点击activite, □ 会变成绿色 即激活成功,最后如右图就好了。 (3)把⑤软件解压到b文件夹 中。
本图为未连接GPIB 设备情况下的窗口, 其中没有GPIB选项。
4.我们可以从哪里下载这些软件?
官方下载渠道: /support/softlib/ 可以下载除了激活程序以外的所有程序的历史版本和最新版
打开labview任意程序工具窗口measurementautomationexplorer选项右边栏设备和接口下拉菜单有一个gpib设备选项点击后按中间栏提示完成即配置成功本步骤需要与gpib设备连接即插上usb连接线
如何在你的电脑上做keithley2400的测试
我们的样品测试很多都是利用keithley 2400进行测试。 但是如果哪天,测试的电脑又坏了,我们会想,如果我的笔记本上 也能连接测试软件多好啊。
Labview安装教程
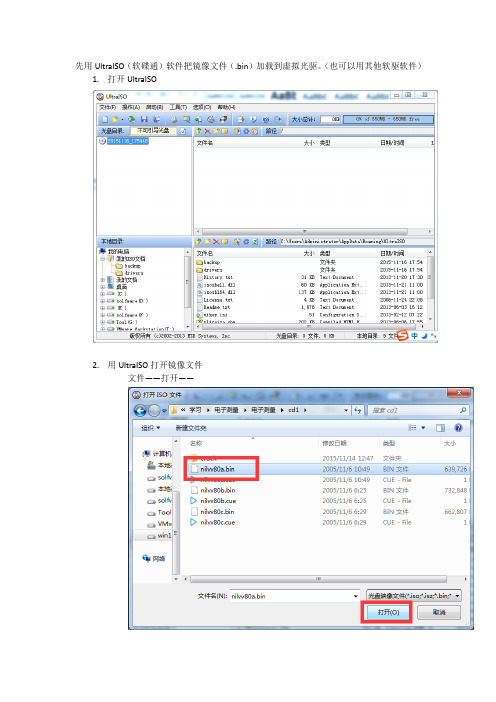
先用UltraISO(软碟通)软件把镜像文件(.bin)加载到虚拟光驱。
(也可以用其他软驱软件)1.打开UltraISO2.用UltraISO打开镜像文件文件——打开——3.打开之后4.加载到虚拟光驱a)点击工具——加载到虚拟光驱——加载b)加载好之后,打开我的电脑,就会看到我们刚刚加载的镜像文件了打开加载的镜像文件(打开上图的CD 驱动器),找到autorun 打开。
点击第一个,开始安装之旅。
点击第二个选项选择安装盘(最好不要安装在C盘)(名字最好改成wssb)接下来我们需要做的就是等待它安装好就ok了。
最重要的环节破解!!打开文件电子测量——crack——Keygen.exe点击generate 获取CID然后点击create license file 生成证书文件保存到你的安装目录下(是一个.lic文件)终于到了最后一步了,安装证书文件。
(win7和win8有一点区别,win10 同win8)Win7:点击开始——所有程序——National Instruments ——NI License ManagerWin8:点击Windows键在方格界面里找到NI License Manager 点击打开就好了如果没找到有,也没关系,随便找到一个图标右键——打开文件位置这时候路径选择到start menu ——程序——National Instruments——NI License Manager (所以说win8 真的是很坑很坑,还是win7用起来方便很多很多)打开好了的界面点击选项——安装许可证文件找到刚才生成的.lic 文件安装,就完成了破解工作。
到此所有的安装完毕,尽情享受吧!!。
NI LabVIEW安装说明
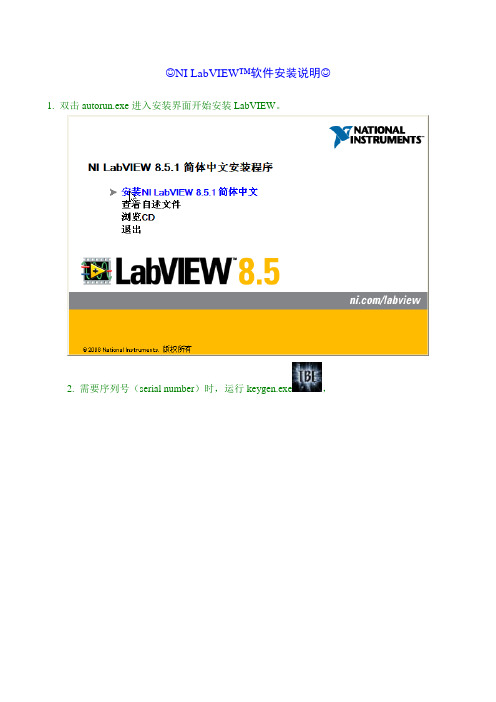
☺NI LabVIEW™软件安装说明☺1. 双击autorun.exe进入安装界面开始安装LabVIEW。
2. 需要序列号(serial number)时,运行keygen.exe,
点击Generate生成序列号,点击Copy复制序列号,粘贴到安装过程的输入框,再点击Create license file...产生一个.lic许可证文件并保存到临时目录(如C:\pro.lic,注意:该临时路径不可含中文,否则提示错误)。
以LabVIEW专业版为例,如要使用其全部功能,需分别选中以下3个选项并各自生成一个许可证文件。
3. NI设备驱动可选择安装(会在LabVIEW安装完成后提示插入设备驱动光盘,若为ISO镜像,可直接载入虚拟光驱使用)或在LabVIEW安装完毕后单独进行。
4. 安装即将完毕时,取消选中安装界面中的“启动激活向导…”复选框
打开NI License manager许可证管理器(位于开始菜单→National Instruments中),选择选项→安装许可证文件,按提示导入第2步的.lic文件。
(或者直接将.lic文件复制到安装目录的National Instruments\Shared\License Manager\Licenses文件夹)
5. 刷新(F5)许可证管理器,确认相应组件前边的方框被绿色充满,表示激活,搞定!重启计算机即可使用。
6. NI其他模块、工具包的安装方法类同!
7. NI软件的许可证管理与本地网络连接有关,如果正常激活过的软件提示许可证过期,请确认本地连接已启用。
******注意:支持正版! keygen仅供个人学习和交流,请于使用后24小时内删除******。
Abaqus6.14 IVF2013 VS2013安装设置指南
Abaqus6.14+VS2013+IVF2013安装设置指南ByPh.D Kong XianghongNUAA2014.09.26目录前言 (1)1安装并激活VS2013 (2)1.1安装VS2013 (2)1.2激活VS2013 (3)2安装IVF XE2013 (4)3安装Python (6)3.1安装IronPython和ActivePython (6)3.2安装Python Tool for VS2013 (7)4安装Abaqus (8)4.1设置环境变量 (8)4.2安装Documentation (9)4.3安装License (10)4.4安装Product (12)5关联Abaqus和VC、IVF (13)前言本文详细介绍Abaqus6.14、VS2013及IVF2013等软件的安装过程及相关设置。
以期达到使Abaqus运行Fortran子程序(Subroutine),在VS2013中集成IVF2013等目的。
本文内容安排:1安装并激活VS2013;2安装IVF XE2013;3安装IronPython、ActivePython、Python Tool for VS2013;4安装Abaqus;5关联Abaqus和VC、IVF。
本文所述操作可以有选择地进行,读者可以根据需要,选择安装所需的软件,进行必要的设置。
如果仅使用Abaqus进行简单有限元分析,则可以只进行第4章的操作;如果使用子程序,则必须要执行第1、2、4、5章的操作;使用Python做Abaqus前后处理及二次开发的用户,可以参考第3章的操作;如果所需软件都安装好,关于Abaqus与VC和IVF的关联,可以参考第5章。
1安装并激活VS20131.1安装VS2013(1)忽略警告,点继续(2)勾选同意,设置安装路径,点下一步(3)选择安装的功能,点安装(4)安装完成,点启动1.2激活VS2013VS2013启动后,单击菜单栏的“帮助”菜单,在下拉子菜单中单击“注册产品”,弹出如下图所示的窗口,单击“更改我的产品许可证”,在弹出的对话框中输入破解Key即可。
实验 LabVIIEW安装与操作
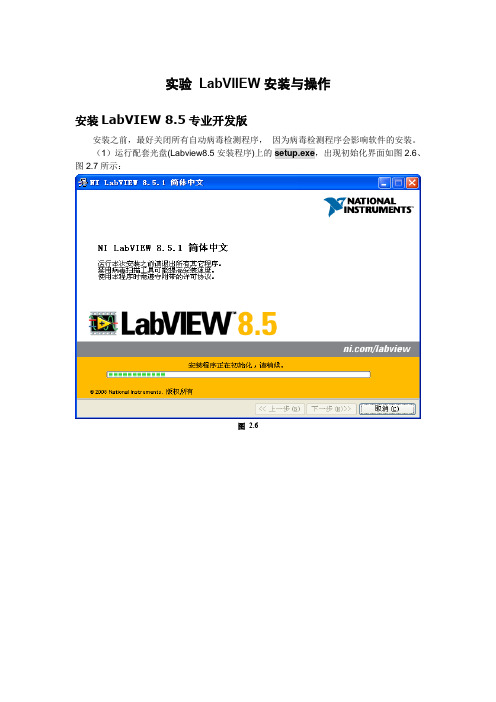
实验LabVIIEW安装与操作安装LabVIEW 8.5专业开发版安装之前,最好关闭所有自动病毒检测程序,因为病毒检测程序会影响软件的安装。
(1)运行配套光盘(Labview8.5安装程序)上的setup.exe,出现初始化界面如图2.6、图2.7所示:图2.6图2.7(2)点击下一步,弹出如图2.8所示的用户信息输入对话框界面:选择通过序列号安装NI LabVIEW 8.5.1,其中序列号是购买软件时NI公司授予合法用户的标识(光盘附带)。
图2.8(3)点击下一步按钮进入安装目录对话框。
图2.9中默认的安装路径为C盘,可以单击浏览按钮选择其他安装路径。
图2.9(4)点击下一步按钮进入安装组件选择对话框,如下图2.10所示,左击“NI设备驱动”选择不安装设备驱动CD。
图2.10图2.11(5)点击下一步按钮进入许可协议对话框,如下图2.12所示。
选择我接受该许可协议后出现如图2.14所示的安装进度对话框。
图2.12图2.13图2.14(6)安装完成后弹出如下图2.15所示界面,点击下一步按钮,需要重新启动计算机,如图2.16所示。
图2.15图2.162.3.5 LabVIEW编程环境用LabVIEW编写程序与其他Windows环境下的可视化开发环境一样,程序的界面和代码是分离的。
在LabVIEW中,通过使用系统提供的工具选板、工具条和菜单来创建程序的前面板和程序框图。
LabVIEW包括3个工具选板:控件(Controls)选板、函数(Functions)选板、工具(Tools)选板,还包括启动窗口、上下文帮助窗口、工程管理窗口和导航窗口。
(1)启动界面选择开始—>所有程序—> National Instruments LabVIEW 8.5.1选项启动LabVIEW。
启动完成后进入如图2.17所示的启动窗口。
图2.17图中左边新建栏中的VI选项用于创建一个新的空白VI程序;项目选项可以创建一个新的工程项目;基于模板的VI按类型列出LabVIEW自身提供的VI模板,用户可以以这些模板为基础,建立自己的程序;更多选项和基于模板的VI选项的功能类似。
labview教程
labview教程LabVIEW是一款强大的图形化编程软件,用于实时数据采集、仪器控制、测量设备、数据处理和分析等应用。
本教程将带你快速入门LabVIEW,介绍一些基本操作和常用功能。
1. 下载和安装LabVIEW软件- 前往官方网站下载最新版本的LabVIEW软件,并按照提示进行安装。
2. 打开LabVIEW并创建一个新的VI(Virtual Instrument)- 打开LabVIEW软件后,点击菜单栏上的"File",选择"New VI"。
- 这将在编辑器中创建一个新的虚拟仪器。
3. LabVIEW界面介绍- LabVIEW的界面主要由菜单栏、工具栏、面板和编辑区组成。
- 菜单栏提供各种功能和选项,例如文件操作、编辑、调试和运行。
- 工具栏包含了常用的操作工具,例如选择、连线和调节大小等。
- 面板是VI的前端界面,用于显示和操作数据。
- 编辑区是VI的主要工作区域,用于构建程序逻辑和连接各种功能模块。
4. 基本操作和函数- 拖拽控件和函数:在工具栏中选择需要的控件或函数,拖拽到面板或编辑区中。
- 连线功能模块:使用鼠标从一个输出端口拖拽线条到另一个输入端口,将功能模块串联起来。
- 配置控件和函数:右键点击控件或函数,选择"Properties"或"Configure"进行参数设置。
- 调试和运行程序:点击编辑器中的运行按钮,或按下快捷键Ctrl+R,运行程序并查看结果。
5. 数据采集和显示- 使用数据采集模块:LabVIEW提供了丰富的数据采集函数和工具,用于连接和读取各种传感器、仪器和设备。
- 配置数据显示:选择适当的图表或指示器,配置其参数和样式,将采集的数据显示在界面上。
6. 仪器控制和操作- 使用仪器控制模块:LabVIEW支持与各种仪器进行通信和控制,例如示波器、多用途数据采集卡等。
- 配置仪器控制:选择合适的仪器控制函数,配置通信接口和命令参数,实现对仪器的操作和控制。
- 1、下载文档前请自行甄别文档内容的完整性,平台不提供额外的编辑、内容补充、找答案等附加服务。
- 2、"仅部分预览"的文档,不可在线预览部分如存在完整性等问题,可反馈申请退款(可完整预览的文档不适用该条件!)。
- 3、如文档侵犯您的权益,请联系客服反馈,我们会尽快为您处理(人工客服工作时间:9:00-18:30)。
一、首先安装labview2013软件,详细步骤如下1、下载解压缩,双击“labvIEW 2013 中文(32和64都能用).exe”将软件解压出来;2、点击unzip解压,解压默认路径为【C:\National Instruments Downloads\LabVIEW Chines】3、成功解压后,弹出安装界面,点击下一步;4、用户信息,用户可能随意输入;5、这一步我们先不要输入labview2013序列号;6、安装目录设置为D盘;7、安装组件一般按默认安装即可;8、去除左下角的勾不进行产品更新,点击下一步;9、我接受上述2条许可协议;10、继续接受;11、核对安装信息后,点击下一步;12、软件正在安装中,请稍等一会儿,大概10分钟左右;13、接近完成时,弹出此界面,选择不需要支持;14、安装完成;15、重新启动;二、接下来激活labview2013软件,操作如下1、开始菜单--找到软件打开;2、软件显示试用版,剩余7天,先不要运行,点击退出labview;3、双击软件包中文件“NI License Activator.exe”,弹出界面;4、因为小编已经安装过labview2012,所以这里显示了两个版本;选择2013版后,每一个选项都右击,选择“Activate...”即可;5、全部激活后,如下图;6、这时打开软件,你已经拥有一个无限制免费使用的labview2013。
1、处理器:Pentium 4M或同等处理器2、内存:1Gb3、屏幕分辨率:1024 x 768像素4、操作系统Windows 8/7/Vista (32位和64位)Windows XP SP3(32位)Windows Server 2012 R2(64位)Windows Server 2008 R2(64位)Windows Server 2003 R2(32位)5、磁盘空间:5.0GB一、新增Web服务器选项1、Web服务本地调试:用来配置调试阶段对Web服务的访问。
注:开始调试会话后,如在Windows计算机上发布Web服务,重启LabVIEW后对这些设置的修改才会生效;如在RT终端上发布Web服务,重启终端后修改才会生效。
2、调试HTTP端口:指定调试时LabVIEW用来与Web服务通信的端口。
默认值为8001。
3、(Windows) 调试时允许远程连接:如选择该项,允许远程连接的客户端在调试中访问Web服务。
否则,必须通过localhost或127.0.0.1连接Web服务。
该复选框默认为选中。
二、新增和改动的类、属性、方法和事件labview2013新增了一些VI服务器类、属性、方法和事件。
labview2013包含获取VI依赖关系(名称和路径)方法的改动。
通过包括备选调用设置VI参数可返回使用VI调用配置对话框中每次调用时重新加载或首次调用时加载并保留选项的子VI。
通过加载程序框图?参数可在LabVIEW评估应用程序依赖关系之前,加载VI的程序框图。
三、LabVIEW范例的更新labview2013对范例进行了重新设计和组织,更好地演示了LabVIEW编程方法。
参考labview目录中的examples文件夹,可查看范例的新位置和更新。
四、新增和改动的VI、函数和节点labview2013中新增和改进了下列VI、函数和节点。
1、应用程序控制VI和函数应用程序控制选板新增了下列函数:按索引获取控件值按索引设置控件值与其他VI服务器对象相比,使用上述函数可更快获取或设置控件值,例如,控件类的值属性。
使用上述函数获取或设置控件值与直接和控件接线端连线速度几乎相同。
但与其他获取和设置控件值的方法相比,上述函数要求更为高级的应用程序设计。
2、簇、类、变体VI和函数簇、类和变体选板新增了下列VI:获取LV类名称获取LV类默认值(按名称)2、平化/还原字符串函数新增的平化/还原字符串选板包含下列新增函数:平化至JSON从JSON还原平化/还原字符串选板还包含下列新增函数:平化至字符串平化至XML平化字符串至变体转换从字符串还原从XML还原变体至平化字符串转换3、内存管理器函数labview2013新增了下列内存管理器函数:DSNewAlignedHandle—为指定大小、对齐和对齐偏移的可重定位内存块创建新句柄。
DSNewAlignedHClr—为指定大小、对齐和对齐偏移的可重定位内存块创建新句柄,并将内存初始化为0。
DSSetAlignedHandleSize—修改指定句柄引用的内存块的大小、对齐和对齐偏移。
DSSetAlignedHSzClr—修改指定句柄引用的内存块的大小、对齐和对齐偏移,并将新内存设为0。
可通过外部C/C++代码调用上述内存管理器函数,分配和调整特定对齐特性的内存块。
上述函数适用于计划通过特定操作访问的LabVIEW数据数组,将数据与特定地址范围对齐时该操作性能更佳。
例如,可通过上述函数分配计划通过SSE/AVX向量指令或LabVIEW分配的内存和硬件间DMA数据传输访问的LabVIEW数据数组。
4、改进的VI和函数labview2013中对以下VI和函数进行了更改。
1)TDMS VI和函数在LabVIEW 2013中,TDMS VI和函数支持更多的数据类型。
例如,单精度和双精度复杂浮点数。
该选板还包括以下改动:TDMS生成随机数据—该VI包含新增的CSG和CDB实例。
可使用上述实例生成相应的单精度或双精度随机复杂浮点数。
TDMS打开—该函数包含新增的创建索引文件?(T)输入端,指定LabVIEW是否生成对应.tdms文件的.tdms_index文件。
索引文件使LabVIEW对.tdms文件的随机访问速度加快。
如磁盘空间有限,请连接FALSE至该输入端,避免LabVIEW生成.tdms_index文件。
默认值为TRUE。
TDMS文件查看器—该VI包含TDMS文件查看器对话框值(表格)页中新增的转到按钮。
使用该按钮可指定要查看数据值的索引编号。
TDMS刷新—该函数包含内部改进,比之前LabVIEW版本中的同名函数更可靠。
通过该函数可强制操作系统写入缓冲数据至.tdms文件。
但使用该函数可能会影响TDMS应用程序性能。
2)波形文件I/O VI导出波形至电子表格文件—该VI包含新增的“导出波形至电子表格文件(数字)”实例。
从文件读取波形—该VI包含新增的“从文件读取波形(数字)”实例。
写入波形至文件—该VI包含新增的“写入波形至文件(数字)”实例。
3)其他VI和函数的改动幅值和电平测量—该Express VI配置幅值和电平测量对话框的幅值测量参数包含下列重命名选项:直流重命名为均值(直流)。
最大峰重命名为正峰。
最小峰重命名为反峰。
写入测量文件—该Express VI在配置对话框中新增了Microsoft Excel (.xlsx)选项。
选择该选项可将数据写入Microsoft Excel文件。
该Express VI先将数据存储在临时文件中,然后刷新数据,保存至Excel文件。
通过新增的刷新?程序框图输入端可指定刷新数据的频率。
(OS X, Linux)LabVIEW 2012及更早版本中,该Express VI只能创建和保存.lvm文件。
在LabVIEW 2013中,该Express VI可创建和保存其他文件类型。
例如,.tdms和.xlsx文件。
五、LabVIEW事件驱动编程的性能改进labview2013对事件驱动编程和相关功能进行了以下改进。
1、运行时查看已入队事件在labview2013中,可查看和事件结构相关的在事件队列中等待的事件。
还可通过VI列表查看带注册事件的事件结构和事件结构处理的事件记录。
右键单击事件结构并选择事件检查器窗口可查看事件信息。
2、自定义控件响应鼠标滑轮动作的时间可在LabVIEW 2013中指定控件响应鼠标滑轮动作的时间。
浏览控件属性对话框的快捷键页。
然后选择内置鼠标滑轮支持组件的可用选项。
例如,可选择控件是否在悬浮时或键选中时响应鼠标滑轮动作。
六、Web服务相关VI的新增选项和改动labview2013包含下列新增和改动的VI:1、Web服务VIWeb服务选板包含新增的服务子选板。
与其他Web服务VI不同,可从启动VI和HTTP方法VI调用服务VI。
该选板包含下列VI:获取Web服务状态-返回Web服务是否正在停止。
读取服务属性-返回Web服务的相关信息,包括发布的私有和公共内容文件夹路径。
2、SMTP Email VISMTP Email选板中包括了LabVIEW 2013所有新增的SMTP Email VI。
通过SMTP Email VI可发送电子邮件,包括附加数据和文件。
LabVIEW通过简单邮件传输协议(SMTP)发送邮件。
可将TLS(传输层安全协议)与SMTP服务器配合使用,实现更高的邮件安全性。
也可为SMTP客户端指定身份验证。
SMTP Email选板包含“发送Email”Express VI。
通过“发送Email”Express VI可快速将电子邮件发送至指定的收件人。
如要配置邮件头、TLS设置、附件等高级设置,必需使用SMTP Email VI。
3、WebDAV VIlabview2013包含新增的WebDAV选板和VI,可用于和终端安全地传输文件。
WebDAV选板还包括高级WebDAV同步和WebDAV异步子选板。
WebDAV同步VI用于使用同步界面在WebDAV终端安全地管理和传输文件。
使用WebDAV同步VI每次只能向WebDAV服务器发送一个请求。
WebDAV异步VI用于使用异步界面在WebDAV终端安全地管理和传输文件。
使用WebDAV异步VI可向WebDAV服务器同时发送多个请求。
