升级AIX系统微码
IBM小型机微码升级详细的升级过程
微码升级详细的升级过程如下:Special Instructions for Models 9117-570, 9116-561 and 9406-570下面三个菜单是让你确认设备配置是否给Deconfigured 。
是做升级微码前的准备确认工作。
Model 9117-570, 9116-561 and 9406-570 systems with any level of SF240 installed must be checked for GARDed out nodes, processors and memory before applying a new level of SF240 firmware. Following are instructions to determine if any nodes, processors or memory is GARDed out. If any hardware resource are found to be GARDed, contact your next level of support and have the situation corrected before applying this service pack.1. Log on to ASM as "admin".2. Click on the "Expand all menus" link to make all options visible.3. Navigate down to the options under "System Configuration" followed by "Hardware Deconfiguration".4. Click on the link "Processor Deconfiguration" to bring up the page that shows the number of processors present and whether or not they areconfigured.5. Click on the link "Memory Deconfiguration" to bring up the page thatshows the total amount of memory present and if any is presentlydeconfigured.6. Click on the link "Processing unit Deconfiguration" to bring up thepage that shows the processing units in the system and if any ispresently deconfigured.7. Log off.从IBM官网下载最新的01SF240_338_201版本的微码,文件下载下来是一个rpm包,01SF240_338_201.rpm,FTP 到AIX系统上找到AIX下微码的目录,进入,在命令行下运行命令:rpm -Uvh --ignoreos 01SF240_338_201.rpm微码文件会被解压到/tmp/fwupdate目录下,文件名是01SF240_338_201到/tmp/fwupdate目录下,运行命令:/usr/lpp/diagnostics/bin/update_flash -f 01SF240_338_201系统提示如果要继续更新微码需要重新启动,按下1并回车,机器重新启动并自动进入微码更新进程在更新过程中液晶面板会有CA2799FD 和CA2799FF 交替显示,更新完毕后系统自动关机,然后启动。
AIX6.1操作系统及HACMP版本和补丁升级实施工艺

AIX操作系统及HACMP软件升级实施工艺(V1.1)2010-031说明 (4)2AIX补丁升级实施工艺 (5)2.1下载补丁 (5)2.2C OMMIT系统中APPLIED状态的软件包 (7)2.2.1查看当前系统中软件包状态 (7)2.2.2Commit Applied Software Updates (Remove Saved Files) (8)2.3上传文件并进行升级 (10)2.3.1上传文件 (10)2.3.2操作系统升级 (11)2.3.3重新引导操作系统 (15)3HACMP升级实施工艺 (16)3.1HACMP大版本升级 (16)3.1.1版本获取 (16)3.1.2查看原来HACMP版本 (16)3.1.3对当前HACMP做快照 (16)3.1.4卸载原来的HACMP (17)3.1.5安装新版本的HACMP软件 (18)3.1.6迁移HACMP库文件 (18)3.2HACMP补丁升级 (20)3.2.1下载补丁文件 (20)3.2.2Commit系统中为APPLIED状态cluster软件包 (21)3.2.3上传文件并升级(提前做好系统备份和HACMP快照) (21)3.2.4重新引导操作系统 (22)3.2.5升级后进行HACMP的切换测试 (22)4应急回退 (23)4.1REJECT软件更新 (23)4.2恢复安装MKSYSB备份带 (24)1说明版本或补丁升级需要提前做好升级计划及回退方案,并注意以下事项:1、任何软件升级前一定都先要做好操作系统的Mksysb备份工作,且要制作两份备份带;如果rootvg中有用户数据,或者数据库的裸设备等,还要对数据进行单独备份2、升级HACMP软件前,要做Hacmp的配置备份Snapshot3、补丁升级前要先把系统内状态为APPLIED的软件包COMMIT后,再进行升级4、升级操作系统时要停止所有应用及HACMP软件进程5、注意升级操作系统TL版本后,是不能回退到升级前的TL版本,只能使用操作系统Mksysb备份带进行恢复安装6、升级补丁包时,使用APPLY方式进行安装,以便出现问题时可以卸载7、对于HA环境的服务器,升级操作系统补丁、Hacmp补丁、RSCT补丁时,集群中的每个节点都要将软件升级到相同版本8、补丁升级后要reboot重新启动操作系统,以使升级生效9、操作系统大版本的变化不要通过升级的方式实现,需要重新安装,如AIX5.3升级到AIX6.1(因为通过迁移升级方式,过程非常繁琐,风险很大,所以我们不建议这样做);Hacmp软件大版本变化只能先卸载原HA 软件,再重新安装新版本的Hacmp软件,如Hacmp5.3不能直接升级到Hacmp5.4。
AIX常用命令大全

df -g 查看文件使用率
一、检查AIX系统状态
1、文件系统:df -k
2、设备:lsdev -C
3、磁盘(物理卷):lspv
4、paging space:lsps -a
5、配置:lscfg -vp
6、软件:lslpp -l
7、用户:who
8、处理器个数:lsdev -C|grep proc
mem0 Available 00-00 Memory
L2cache0 Available 00-00 L2 Cache
再使用命令# lsattr -El mem0
输出如下
size 512 Total amount of physical memory in Mbytes False
更改用户组属性:smitty chgroup
3、删除用户:smitty rmuser
删除用户组:smitty rmgroup
十、常用用户监视命令
who
last - 登录事件和关机信息
last root console
last | grep shutdown
十一、系统记录文件
5、解除卷组:varyoffvg vg_name
6、向卷组中增加一个物理卷:extendvg vg_name hdiskn
注:extendvg命令用于向已存在的卷组增加新的物理卷,这个物理卷设备的状态必须是可用的(Available)。
7、从卷组中删除一个物理卷:reducevg [-d] vg_name hdiskn
列出物理卷中物理分区的分配:lslv -p <pvname>
显示逻辑卷中LP(逻辑分区)与PP(物理分区)的对应:lslv -m <lvname>
AIX系统中如何查看HBA卡的WWPN和微码版本
1得到HBA卡的安装信息root@bj3ychdb01:/home/hjl>lsdev -Cc adapterent0 Available 00-08 2-Port 10/100/1000 Base-TX PCI-X Adapter (14108902)ent1 Available 00-09 2-Port 10/100/1000 Base-TX PCI-X Adapter (14108902)ent2 Defined 09-08 2-Port 10/100/1000 Base-TX PCI-X Adapter (14108902)ent3 Defined 09-09 2-Port 10/100/1000 Base-TX PCI-X Adapter (14108902)ent4 Available 0B-08 2-Port 10/100/1000 Base-TX PCI-X Adapter (14108902)ent5 Available 0B-09 2-Port 10/100/1000 Base-TX PCI-X Adapter (14108902)fcs0 Available 07-08 FC Adapterfcs1 Available 0A-08 FC Adapteride0 Defined 03-08 ATA/IDE Controller Devicepkcs11 Available PKCS#11 Devicesisscsia0 Available 04-08 PCI-X Dual Channel Ultra320 SCSI Adaptersisscsia1 Available 06-08 PCI-XDDR Dual Channel Ultra320 SCSI Adapterusbhc0 Defined 08-08 USB Host Controller (33103500)usbhc1 Defined 08-09 USB Host Controller (33103500)usbhc2 Defined 08-0a USB Enhanced Host Controller (3310e000)vsa0 Available LPAR Virtual Serial Adaptervsa1 Defined LPAR Virtual Serial Adaptervsa2 Defined LPAR Virtual Serial Adapter或者root@bj3ychdb01:/home/hjl>lsdev -C |grep fcsfcs0 Available 07-08 FC Adapterfcs1 Available 0A-08 FC Adapter结果中红色部分是HBA卡信息,蓝色部分是网卡信息(注意网卡信息中的红色字,下面查询网卡驱动会用到)。
AIX系统维护命令大全

IBM小型机系统维护命令使用总结uname -a //操作系统版本instfix -i|grep ML //操作系统补丁prtconf //获取硬件信息mklv -y lvinformix -c 2 rootvg 64 //创建逻辑卷lvinformix,大小为64(LP)×16M=1G,磁盘镜像后需用-c参数crfs -v jfs -d lvinformix -m /opt/informix //在lvinformix上创建文件系统/opt/informixmount /dev/lvinformix /opt/informix //将设备mount到文件系统上chfs -A yes /dev/lvinformix //修改所建文件系统的自动安装属性(Auto-Mount)//以上四步为创建文件系统四步曲mkvg -t 16 -s 4 -y vgdata hdisk2 //在hdisk2上创建卷组vgdata,-t 16指定系数factor=16,-s 4指定物理分区大小PP SIZE=4MB//factor×PP SIZE×1016≥hdisk2的大小。
如果factor×PP SIZE×1016的值< hdisk2的大小,//请适当调整factor和PP SIZE的值varyonvg vgdata //激活卷组vgdatavaryoffvg vgdata //去激活卷组vgdataexportvg testvg //如果在smcp2上已经有testvg的信息,则先删除原有信息(exportvg),再引入新信息(importvg)importvg -y vgsmp hdisk2 //将vgsmp信息引入hdisk2lspv //查看hdisk和vg的对应关系lsdev -Cc disk //查看磁盘名和磁盘类型(内置盘还是SSA外置盘)lsdev -Cc processor //查询cpu的个数lscfg -v -l ent0 //查看网卡ent0的MAC地址lsvg -o //查询所有激活的卷组chfs -a options=rw,mind /tellinshare/sms //设置文件系统/tellinshare/sms的mind属性//否则当文件系统中有足够多的大文件(指32K以上的文件)时会出问题mkgroup id=101 informix //创建组informix,组编号101mkuser id=101 pgrp=informix home=/opt/informix shell=/usr/bin/csh informix//创建用户informix,命令参数说明://id:指定用户的id号,请根据规划设置;//pgrp:指定该用户的归属组,请根据规划设置;//home:指定该用户的home目录,请根据规划设置;//shell:指定该用户的登录shell,请根据规划设置;//informix:指定用户名称,请根据规划设置。
P610AIX系统升级操作手册
历史版本记录★文档属性★文档变更过程目录1 编写目的 (3)2 实施方案 (3)关于迁移安装(M IGRATION INSTALLATION) (3)3 操作步骤 (4)3.1 准备工作 (4)3.2 系统安装 (4)4 系统回退方法 (6)附:AIX5.2不支持的硬件和软件列表 (6)1 编写目的在保留P610原有系统中的文件系统和应用的前提下,将操作系统AIX4.3升级为AIX5.2,应用软件正常运行在升级后系统,并可以通过备份恢复到升级前状态。
此文档做为实际操作中的参考指导文档。
2 实施方案首先对原系统的rootvg进行备份到磁带中,做好相关信息记录,通过AIX5.2cd启动系统,进行迁移安装(Migration installation)。
关于迁移安装(Migration installation)根据IBM对迁移安装(Migration installation)的解释,迁移安装(Migration installation)是一种用于将AIX4.2、AIX4.3升级到AIX5.1、AIX5.2的安装方法,这种安装方法将保留原系统的rootvg、文件系统,用户在前一个操作系统中对应用软件的配置也将被保留这是三种安装方式的对比:3 操作步骤3.1 准备工作1、准备好磁带机,并确保与主机链接正常、可用。
2、检查磁盘空间是否大于2.2G(lsattr –El hdisk0);系统paging space 是否大于512MB(lsps –a);检查系统微码,并做记录(lsmcode –a)。
3、备份rootvg,命令:# mksysb –e /dev/rmt04、备份完成后,将启动顺序改成光盘引导。
命令:bootlist –m normal cd0 将AIX5.2系统光盘放入光驱中,执行shutdown –Fr 重启系统。
3.2 系统安装1、系统安装流程:将安装模式改为Migration Installation2、启动画面到这里时选择23、系统会自动检测到安装AIX4.3的磁盘,并把安装模式改为migration,如图:4、按照需求将选项配置好后,即可选择0,继续安装。
使用SUMA 更新AIX系统
使用SUMA 更新AIX系统了解AIX 5L™ Version 5.3 中首次引入的特性,服务更新管理助理(SUMA),如何实现AIX®系统的自动化更新过程。
我们还将研究与AIX 更新相关的一些问题,以及如何实施特定的步骤以解决这些问题。
引言在“AIX updates Version 3: How to work the puzzle” 一文中,您已经了解了如何解决与AIX®更新过程相关的不确定问题。
大多数的更新任务需要手动地从IBM®支持Web 站点查找维护更新,因为直到最近,这仍是保持系统更新的唯一途径。
随着AIX 5L™ Version 5.3 的发行,一种新的特性,服务更新管理助理(SUMA),允许您实现更新过程的自动化。
在本文中,我们将研究“AIX updates Version 3: How to work the puzzle”一文中提出的一些问题,并讨论如何从SUMA 中获益。
我们还将展示一些新的情况,并说明如何使用SUMA 来处理它们。
从2006 年起,作为IBM 新的AIX 5L 服务策略中的一部分,维护级别(ML) 被称为技术级别(TL)。
在2006 年8 月发布5300-05 技术级别之前,SUMA 使用了以前的术语ML,而不是TL。
然而,随着在5300-05 技术级别中引入了SUMA 增强功能(在此更新稍后的部分中进行了描述),现在同时支持这两个术语。
这个服务策略还引入了Service Pack (SP) 和Concluding Service Pack (CSP) 的概念。
有关这些术语的详细描述,请参阅AIX 5L Service Strategy and Best Practices 文档。
在哪里可以找到最新的AIX 修复程序?您可以通过SUMA 获得最新的AIX 修复程序。
然而,我们并不推荐您安装最新的修复程序。
相反,我们建议您安装最新的TL 或SP,因为将它们作为一个单元进行了测试,并且经历了较长的测试周期。
aix系统补丁升级

RS6000升级PTF完全步骤1、升级操作系统的补丁之前建议先备份操作(rootvg),以免造成升级补丁失败或者是由于补丁本身的缺陷造成操作系统(rootvg)的文件损坏,从而导致操作系统不能正常启动。
命令:#smit mksysbBack Up the SystemType or select values in entry fields.Press Enter AFTER making all desired changes.[TOP] [Entry Fields] W ARNING: Execution of the mksysb command willresult in the loss of all materialpreviously stored on the selectedoutput medium. This command backsup only rootvg volume group.* Backup DEVICE or FILE [/dev/rmt0] +/ Create MAP files? no + EXCLUDE files? no + List files as they are backed up? no + Generate new /image.data file? yes + EXPAND /tmp if needed? no + Disable software packing of backup? no + Number of BLOCKS to write in a single output [ ] # (Leave blank to use a system default)2、将本机操作系统现在使用中的所有fileset设置为commit状态。
经过这个设置后,可以在升级补丁失败后(或升级后的补丁对应用程序不兼容)可以用#smit reject命令将操作系统的fileset包退回到升级之前(即退回到commit状态)命令:#smit commitCommit Applied Software Updates (Remove Saved Files)Type or select values in entry fields.Press Enter AFTER making all desired changes.[Entry Fields]* SOFTWARE name [all] + PREVIEW only? (commit operation will NOT occur) no + COMMIT requisites? yes + EXTEND file systems if space needed? yes + DETAILED output? no +3、升级补丁命令:#smit update_allUpdate Installed Software to Latest Level (Update All)Type or select values in entry fields.Press Enter AFTER making all desired changes.[Entry Fields]* INPUT device / directory for software [/dev/cd0]* SOFTWARE to update _update_allPREVIEW only? (update operation will NOT occur) noCOMMIT software updates? noSA VE replaced files? yesAUTOMATICALL Y install requisite software? yesEXTEND file systems if space needed? yesVERIFY install and check file sizes? noDETAILED output? noProcess multiple volumes? Yes如果系统补丁光盘包含多张光盘,系统会自动提示换盘的盘符。
微码update
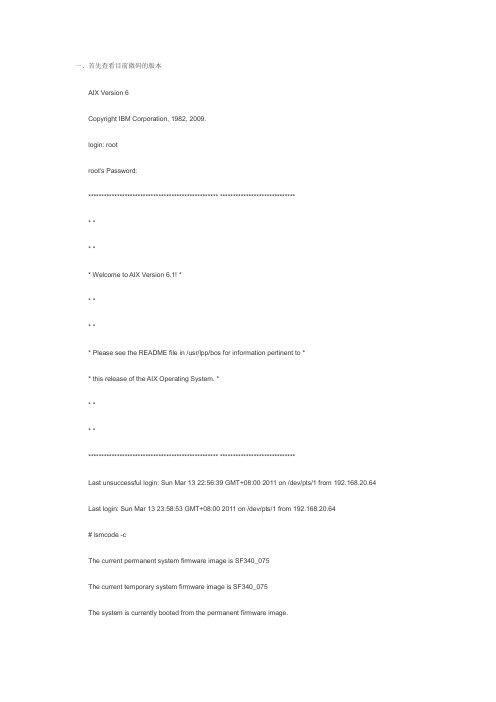
一、首先查看目前微码的版本AIX Version 6Copyright IBM Corporation, 1982, 2009.login: rootroot's Password:************************************************** ****************************** ** ** Welcome to AIX Version 6.1! ** ** ** Please see the README file in /usr/lpp/bos for information pertinent to ** this release of the AIX Operating System. ** ** *************************************************** *****************************Last unsuccessful login: Sun Mar 13 22:56:39 GMT+08:00 2011 on /dev/pts/1 from 192.168.20.64 Last login: Sun Mar 13 23:58:53 GMT+08:00 2011 on /dev/pts/1 from 192.168.20.64# lsmcode -cThe current permanent system firmware image is SF340_075The current temporary system firmware image is SF340_075The system is currently booted from the permanent firmware image.二、将微码的RPM文件上传到/tmp/fwupdate目录中,用FTP工具的BIN模式。
AIX微码升级全过程

AIX微码升级全过程首先是把微码补丁从IBM网站下到个人电脑里(微码下载地址:/webapp/set2/firmware/gjsn),假设该文件为123.bin并储存在C盘根目录下,然后进入小机的cd /tmp目录,在用LS命令查看该目录下的所有文件:# cd /tmp# ls.X11-unix aaa.jlfEa baaNDlfMb dpi_socket reconfig1.ctinst.log aaaM9lfMa baaajlfEb lost+found reconfig2.sr_migrate.log aaat2jwaa baau1jwab .out reconfig3.strload.mutex auiml.tmp bos .serial.out xlogfile再在该目录下创建firmware文件夹,在用ls命令查看是否创建成功。
# mkdir firmware# ls.X11-unix aaa.jlfEa baaNDlfMb dpi_socket .serial.out xlogfile.ctinst.log aaaM9lfMa baaajlfEb firmware reconfig1.sr_migrate.log aaat2jwaa baau1jwab lost+found reconfig2.strload.mutex auiml.tmp bos .out reconfig3文件创建成功。
然后在个人电脑的运行中进“ftp”,进入到cd /tmp/firmware目录下,ftp> cd /tmp/firmware再用lcd命令进入补丁存放的当前目录(我们前面说过补丁存在C盘根目录下)。
ftp> lcd C:\二进制传输模式执行传输ftp> bin200 Type set to I.然后使用PUT命令把补丁从C盘中复制到小机的cd /tmp/firmware文件夹中ftp> put 123.bin然后进入小机的cd /tmp/firmware目录,再LS查看是否复制成功。
AIX上从MQ 9.0.0.1升级到MQ 9.1.0.0 LTS说明书

Upgrading in AIX from MQ 9.0.0.1 to MQ 9.1.0.0 LTShttps:///support/pages/node/6415777Date last updated: 16-Feb-2021Angel Rivera –r i v e r a@u s.i b m.c o mIBM MQ Support+++ ObjectiveThis tutorial shows all the steps to upgrade in AIX, from MQ 9.0.0.1 Long Term Support (LTS) to MQ 9.1.0.0 LTS.This is a straight upgrade and does not exploit the 'multi-version' feature in which several versions of MQ can co-exist ("side-by-side").The upgrade instructions apply also for MQ 9.2.Notes about older releases:- You can upgrade from MQ 8.0 to MQ 9.1 without first going through MQ 9.0.- You can upgrade from MQ 8.0 to MQ 9.2 without first going through MQ 9.0 orMQ 9.1.- You cannot migrate directly from MQ 7.x to MQ 9.1 or MQ 9.2:- If you are using MQ 7.0, then you will need to upgrade to MQ 8.0, then to MQ 9.1 or MQ 9.2- If you are using MQ 7.1 or MQ 7.5, then you will need to upgrade to MQ 8.0 orMQ 9.0, then to MQ 9.1 or MQ 9.2.Prior to the upgrade, you need to take a full backup of your MQ 9.0 queue managers. Why? Because the upgrade of MQ, such as from MQ 9.0 to MQ 9.1 is NOT reversible.If you need to back out and revert back to MQ 9.0, you will need to delete the upgraded MQ 9.1 queue managers and restore the MQ 9.0 queue managers from backup.The chapters are:Chapter 1: How to get the installation imagesChapter 2: Take a backup of the queue manager data and recovery logsChapter 3: Uninstalling MQ 9.0Chapter 4: Installing MQ 9.1.0.0 LTSChapter 5: Running setmqenv to use MQ 9.1 commandsChapter 6: Creating a queue manager under 9.1Chapter 7: Upgrading an existing queue manager to MQ 9.1++ Overall tasksThe straight upgrade from MQ 9.0 to MQ 9.1 means that only one version of MQ will be available under /usr/mqm.It is necessary to:- uninstall MQ 9.0- and then install MQ 9.1These tasks do NOT alter the contents of /var/mqm (which contains the data for the queue managers). That is, when you uninstall the product from /usr/mqm, the queue managers are NOT deleted.++ Related tutorialshttps:///support/pages/node/6407842Summary of AIX commands to administrate MQhttps:///support/pages/node/6407850Installing in AIX - MQ 9.0.0.1 LTS, applying Fix Pack 9.0.0.11, Uninstalling MQ++ For more information on what new attributes, queues and system objects were introduced in MQ 9.1 and MQ 9.2, see the following technotes:https:///support/pages/node/213019New SYSTEM queues added in MQ 7.1, 7.5, 8.0, 9.0, 9.0.1, 9.1 and 9.2https:///support/pages/node/198031New MQ 7.1, 7.5, 8.0, 9.0, 9.1 and 9.2 attributes in DISPLAY QMGR for new or migrated queue managershttps:///support/pages/node/487355New objects and new attributes for objects in MQ 7.1, 7.5, 8.0, 9.0, 9.0.1, 9.1 and 9.2++ For more information on what is new and what has changed after MQ 8.0, see: https:///support/knowledgecenter/SSFKSJ_9.2.0/com.ibm.mq.sec.doc /q014265_.htmlIBM MQ 9.2.x / IBM MQ / Securing / Confidentiality of messages /Enabling CipherSpecs /Deprecated CipherSpecshttps:///support/knowledgecenter/SSFKSJ_9.2.0/com.ibm.mq.pro.doc /q113110_.htmlIBM MQ 9.2.x / IBM MQ / About IBM MQ /What's new and changed in IBM MQ 9.2.0https:///support/knowledgecenter/SSFKSJ_9.1.0/com.ibm.mq.pro.doc /q113110_.htm#q113110_IBM MQ 9.1.x / IBM MQ / About IBM MQ /What's new and changed in IBM MQ Version 9.1.0++ Note about the licensing1) The following web page from the online manual for MQ has some information on MQ Licenses:https:///support/knowledgecenter/SSFKSJ_9.1.0/com.ibm.mq.pro.doc /q126140_.htmIBM MQ 9.1.x / IBM MQ / About IBM MQ /IBM MQ license information2) You need to have an active subscription to upgrade to newer versions of MQ.If you have questions about licenses and entitlement please consult with your IBM Sales representative.++ Information about the version of AIX used for this tutorial+ROOT+ aglet: /downloads/mq9001# uname -aAIX aglet 2 7 00F944604C00+ROOT+ aglet: /downloads/mq9001# oslevel7.2.0.0+ROOT+ aglet: /downloads/mq9001# oslevel -s7200-05-01-2038++ Current setup of MQ 9.0MQ 9.0 already installed in the default location:/usr/mqmThe data for the queue managers is stored in:/var/mqmThe Queue Managers are:QM90 => Already created with MQ 9.0. To be migrated to MQ 9.1.QM91 => To be created with MQ 9.1.+++ Chapter 1: How to get the installation images++++++++++++++++++++++++++++++++++++++++++++++++++++++++++++++++++ Summary of Part Numbers for MQ on AIX 9.x from IBM Passport Advantage https:///software/passportadvantage/pao_customer.htmlIBM Passport Advantage for the MQ server images:Part Number: CNRD6MLDescription: IBM MQ V9.1.0.0 for AIX eImagePart Number: CC5TPMLDescription: IBM MQ V9.2.0.0 Long Term Support Release for AIX eImage++ MQ 9.1.0.0 (full install) - from IBM Passport Advantagehttps:///support/pages/downloading-ibm-mq-910-older-fix-packs Downloading IBM MQ 9.1.0: Older Fix PacksScroll down to the link:Downloading IBM MQ 9.1.0It is recommended that you search for Part Number, which will provide a more focused list.Part Number: CNRD6MLDescription: IBM MQ 9.1 for AIX eImageDownloaded image name MQ 9.1.0.0:IBM_MQ_9.1_AIX.tar.gzLocal Directory:/downloads/mq9100+++ Chapter 2: Take a backup of the queue manager data and recovery logs++++++++++++++++++++++++++++++++++++++++++++++++++++++++++++++++Take a backup of /var/mqm and any other file system that is used (such as mounted, or via symbolic links) for the storage of the MQ recovery logs and the MQ data for the queue managers.If the queue manager is created in a non-default directory (such as Multi-Instance), ensure that all queue manager data and logs are included in the backup based on the configuration in mqs.ini and qm.ini files.When an MQ 9.0 queue manager is upgraded to MQ 9.1, it goes through some migration steps that are NOT reversible.If for some reason you want to back out later on your upgrade MQ queue manager (at 9.1) back to 9.0, you will NOT be able to use the current data in /var/mqm and you will need to restore from the backup taken when the MQ queue manager was at 9.0. Disclaimer:The MQ Support teams do not recommend or support the action to revert to an earlier version of the product.If any problem were to occur after upgrading to MQ 9.1, the best way to address the situation is to contact MQ Support and get that fixed, rather than by reverting to version MQ 9.0.Given the above disclaimer, please review the following technotes which explain more details on the topic.https:///support/pages/node/88035After upgrading from MQ 5.3 to V6/V7, or from MQ V6 to V7, you want to revert back to previous level++ Reference tutorial for backup in Linux (applicable to AIX)https:///support/pages/node/6114082Backup of an MQ queue manager to move files from one Linux host to another Linux hostThe quick description of the procedure is to take a backup of the files from host-1 and restore them in host-2.+++ Chapter 3: Uninstalling MQ 9.0++++++++++++++++++++++++++++++++++++++++++++++++++++++++++++++++++ Stop all MQ activityAs an MQ Administrator stop the queue managers and clients.For details see the Steps 1 and 2:https:///support/knowledgecenter/SSFKSJ_9.0.0/com.ibm.mq.ins.doc/ q009420_.htmIBM MQ 9.0.x / IBM MQ / Installing and uninstalling / Installing and uninstalling IBM MQ on AIX /Uninstalling or modifying IBM MQ on AIX++ Uninstall the filesetsAs user root proceed with the rest of the steps from the web page mentioned above. Step 3: Log in as root.Step 4: Uninstall or modify IBM MQ using either installp or smit. If IBM MQ was installed in a non-default location, you must use installp.To uninstall or modify IBM MQ by using installp, enter one of the following commands: - To uninstall an installation in the default location /usr/mqm:installp -u mqm- To uninstall an installation in a non-default location:installp -R usil -u mqmwhere usil is the path of the User Specified Installation Location (USIL) specified when the product was installed.The full listing of the uninstall is not included in this current tutorial.But if you want to see the equivalent full listing for the uninstallation of MQ 9.0.0.1 see the companion tutorial:https:///support/pages/node/6407850Installing in AIX - MQ 9.0.0.1 LTS, applying Fix Pack 9.0.0.11, Uninstalling MQ Chapter 9: Appendices showing full output from installp for the scenariosSection 4: Uninstallation of base 9.0.0.1 (Chapter 8)Next step:Ensure that there are no more MQ filesets shown as installed:# lslpp -la "mqm*"lslpp: 0504-132 Fileset mqm* not installed.# ls /usr/mqmls: 0653-341 The file /usr/mqm does not exist.Notice that the mqinst.ini file was updated (the 2 lines about being Primary installation were removed).# cat /etc/opt/mqm/mqinst.iniInstallation:Name=Installation1Description=Identifier=1FilePath=/usr/mqmNow that there are no MQ installations, it is recommended to delete the mqinst.ini file.It will be recreated when MQ 9.1 is installed.# rm /etc/opt/mqm/mqinst.ini# ls /etc/opt/mqm/mqinst.inils: 0653-341 The file /etc/opt/mqm/mqinst.ini does not exist.+++++++++++++++++++++++++++++++++++++++++++++++++++++++++++++++++++ Chapter 4: Installing MQ 9.1.0.0 LTS++++++++++++++++++++++++++++++++++++++++++++++++++++++++++++++++++ Downloading the MQ 9.1.0.0 LTS codeSee Chapter 1: How to get the installation imagesPart Number: CNRD6MLDescription: IBM MQ 9.1 for AIX eImageDownloaded image name MQ 9.1.0.0:IBM_MQ_9.1_AIX.tar.gzLocal Directory:/downloads/mq9100++ Installing MQ 9.1 into /usr/mqmYou need to login as root.Go to the local directory where the file with the MQ 9.0.0.1 code is located (see Chapter 1)# cd /downloads/mq9100Unpack the file:# gunzip IBM_MQ_9.1_AIX.tar.gz# tar -xvf IBM_MQ_9.1_AIX.tarNotice that the extracted files are located into a new directory: MQServer# ls -1FIBM_MQ_9.1_AIX.tarMQServer/Change to the MQServer directory:# cd MQServerInstall the code:# installp -acgXYd . all+-----------------------------------------------------------------------------+ Pre-installation Verification...+-----------------------------------------------------------------------------+ Verifying selections...doneVerifying requisites...doneResults...…+-----------------------------------------------------------------------------+Summaries:+-----------------------------------------------------------------------------+ Installation Summary--------------------Name Level Part Event Result------------------------------------------------------------------------------- mqm.base.runtime 9.1.0.0 USR APPLY SUCCESSmqm.base.runtime 9.1.0.0 ROOT APPLY SUCCESSmqm.server.rte 9.1.0.0 USR APPLY SUCCESS…The full listing of the uninstall is not included in this current tutorial.But if you want to see the equivalent full listing for the uninstallation of MQ 9.0.0.1 see the companion tutorial:https:///support/pages/node/6407850Installing in AIX - MQ 9.0.0.1 LTS, applying Fix Pack 9.0.0.11, Uninstalling MQ Chapter 9: Appendices showing full output from installp for the scenariosSection 1: Installation of base 9.0.0.1 (See Chapter 3)The AIX installation database will indicate that MQ is installed:# lslpp -la "mqm*"Fileset Level State Description---------------------------------------------------------------------------- Path: /usr/lib/objreposmqm.amqp.rte 9.1.0.0 COMMITTED IBM MQ AMQP Servicemqm.ams.rte 9.1.0.0 COMMITTED IBM MQ Advanced - AdvancedMessage Securitymqm.base.runtime 9.1.0.0 COMMITTED IBM MQ Runtime for Client andServermqm.base.samples 9.1.0.0 COMMITTED IBM MQ Samplesmqm.base.sdk 9.1.0.0 COMMITTED IBM MQ Base Kit for Client and…mqm.server.rte 9.1.0.0 COMMITTED IBM MQ Servermqm.web.rte 9.1.0.0 COMMITTED IBM MQ REST API and Consolemqm.xr.service 9.1.0.0 COMMITTED IBM MQ Advanced - TelemetryServicePath: /etc/objreposmqm.base.runtime 9.1.0.0 COMMITTED IBM MQ Runtime for Client andServerPath: /usr/share/lib/objreposmqm.man.en_US.data 9.1.0.0 COMMITTED IBM MQ Man Pages - U.S.EnglishNotice that the mqinst.ini is recreated: # cat /etc/opt/mqm/mqinst.ini Installation:Name=Installation1Description=Identifier=1FilePath=/usr/mqm# /usr/mqm/bin/dspmqinst InstName: Installation1 InstDesc:Identifier: 1InstPath: /opt/mqmVersion: 9.1.0.0Primary: NoState: Available+++++++++++++++++++++++++++++++++++++++++++++++++++++++++++ Chapter 5: Running setmqenv to use MQ 9.1 commands++++++++++++++++++++++++++++++++++++++++++++++++++++++++Now that we finished with the root activities, we can login as an MQ administrator. You can use the following new MQ command to display the information on the installation.mqm@aglet: /home/mqm$ dspmqinstInstName: Installation1InstDesc:Identifier: 1InstPath: /usr/mqmVersion: 9.1.0.0Primary: NoState: Availablemqm@aglet: /home/mqm$ dspmqverName: IBM MQVersion: 9.1.0.0Level: p910-L180705BuildType: IKAP - (Production)Platform: IBM MQ for AIXMode: 64-bitO/S: AIX 7.2InstName: Installation1InstDesc:Primary: NoInstPath: /usr/mqmDataPath: /var/mqmMaxCmdLevel: 910LicenseType: ProductionYou need to run the following MQ command to setup the MQ environment variables: setmqenvBefore running "setmqenv", the following command did not return any entries for environment variables that have "MQ" or "mq" in the names:$ set | grep -i mq(no items returned)It is a bit tricky to invoke the setmqenv command.You need to "source" (run "inline") the utility setmqenv by specifying a leading . (dot) and a blank:$ . /usr/mqm/bin/setmqenv -n Installation1| || +--- blank+--- dotThese are the changes made in the environment by this utility:+ Hint:You can create a script that will run the setmqenv command with the specified syntax.Its usage is an overkill when having only 1 installation in the system, but it becomes very useful if you decide to exploit the multi-version features later on.For example, the script $HOME/bin/set-mq-91 can be created with the contents: $ mkdir $HOME/bin$ cd $HOME/bin$ vi set-mq-91============= begin script# Name: set-mq-91# Purpose: to setup the environment to run MQ 9.1. /usr/mqm/bin/setmqenv -n Installation1# Additional MQ directories for the PATHexportPATH=$PATH:$MQ_INSTALLATION_PATH/java/bin:$MQ_INSTALLATION_PATH/ samp/bin:$MQ_INSTALLATION_PATH/samp/jms/samples:# Add local directory for running Java/JMS programsexport CLASSPATH=$CLASSPATH:.# Display the full fix pack leveldspmqver -f 2# end============= end of scriptNotice that additional directories are included in the PATH. This is going to be explained later. The setmqenv will setup the proper directory forMQ_INSTALLATION_PATH.You will need to specify the script as executable:$ chmod 755 $HOME/bin/set-mq-91You will need to add $HOME/bin in the PATH in your .bashrc or .profile: export PATH=$PATH:$HOME/bin:.You will need to invoke the script with the leading dot!$ . set-mq-91| || +--- blank+--- dot+++ Hint for your bashrc or profileYou can add into your bashrc or profile file the following:. set-mq-91+++++++++++++++++++++++++++++++++++++++++++++++++++++++++++ Chapter 6: Creating a queue manager under 9.1++++++++++++++++++++++++++++++++++++++++++++++++++++++++Let's create a new queue manager. Notice the new line shown in bold font that indicates that Installation1 is used:$ crtmqm -u SYSTEM.DEAD.LETTER.QUEUE QM91IBM MQ queue manager created.Directory '/var/mqm/qmgrs/QM91' created.The queue manager is associated with installation 'Installation1'.Creating or replacing default objects for queue manager 'QM91'.Default objects statistics : 84 created. 0 replaced. 0 failed.Completing setup.Setup completed.Start the queue manager. Notice the lines that indicate the installation and the version under which the queue manager is running:$ strmqm QM91IBM MQ queue manager 'QM91' starting.The queue manager is associated with installation 'Installation1'.5 log records accessed on queue manager 'QM91' during the log replay phase. Log replay for queue manager 'QM91' complete.Transaction manager state recovered for queue manager 'QM91'.IBM MQ queue manager 'QM91' started using V9.1.0.0.Let's display the status$ dspmq -m QM91QMNAME(QM91) STATUS(Running)Let's do a more advanced display of status.$ dspmq -o installation -s -m QM91QMNAME(QM91) STATUS(Running)INSTNAME(Installation1) INSTPATH(/usr/mqm) INSTVER(9.1.0.0)++++++++++++++++++++++++++++++++++++++++++++++++++++++++++++++++++++++++ +++ Chapter 7: Upgrading an existing queue manager from MQ 9.0 to MQ 9.1++++++++++++++++++++++++++++++++++++++++++++++++++++++++++++++++++++++++ Let's display the status of the queue managers.$ dspmqQMNAME(QM90) STATUS(Ended immediately) QMNAME(QM91) STATUS(Running)Notice that the QM90 queue manager was created with MQ 9.0 and its data is still for MQ 9.0.To migrate QM90 from MQ 9.0 to MQ 9.1, you need to start the queue manager with the MQ 9.1 code.The strmqm command will detect that the data needs to be upgraded and it will proceed to upgrade the data.NOTE: The upgrade of the data is NOT reversible!$ strmqm QM90IBM MQ queue manager 'QM90' starting.The queue manager is associated with installation 'Installation1'.5 log records accessed on queue manager 'QM90' during the log replay phase.Log replay for queue manager 'QM90' complete.Transaction manager state recovered for queue manager 'QM90'.Migrating objects for queue manager 'QM90'.Default objects statistics : 1 created. 0 replaced. 0 failed.IBM MQ queue manager 'QM90' started using V9.1.0.0.Let's display the status:$ dspmqQMNAME(QM90) STATUS(Running)QMNAME(QM91) STATUS(Running)- Now display some relevant attributes for the queue manager using runmqsc. Notice the CMDLEVEL and the new VERSION fields:$ runmqsc QM901 : DISPLAY QMGR CMDLEVEL VERSIONAMQ8408I: Display Queue Manager details.QMNAME(QM90) CMDLEVEL(910)VERSION(09010007)+++ end +++。
AIX微码升级全过程

AIX微码升级全过程首先是把微码补丁从IBM网站下到个人电脑里(微码下载地址:/webapp/set2/firmware/gjsn),假设该文件为123.bin并储存在C盘根目录下,然后进入小机的cd /tmp目录,在用LS命令查看该目录下的所有文件:# cd /tmp# ls.X11-unix aaa.jlfEa baaNDlfMb dpi_socket reconfig1.ctinst.log aaaM9lfMa baaajlfEb lost+found reconfig2.sr_migrate.log aaat2jwaa baau1jwab .out reconfig3.strload.mutex auiml.tmp bos .serial.out xlogfile再在该目录下创建firmware文件夹,在用ls命令查看是否创建成功。
# mkdir firmware# ls.X11-unix aaa.jlfEa baaNDlfMb dpi_socket .serial.out xlogfile.ctinst.log aaaM9lfMa baaajlfEb firmware reconfig1.sr_migrate.log aaat2jwaa baau1jwab lost+found reconfig2.strload.mutex auiml.tmp bos .out reconfig3文件创建成功。
然后在个人电脑的运行中进“ftp”,进入到cd /tmp/firmware目录下,ftp> cd /tmp/firmware再用lcd命令进入补丁存放的当前目录(我们前面说过补丁存在C盘根目录下)。
ftp> lcd C:\二进制传输模式执行传输ftp> bin200 Type set to I.然后使用PUT命令把补丁从C盘中复制到小机的cd /tmp/firmware文件夹中ftp> put 123.bin然后进入小机的cd /tmp/firmware目录,再LS查看是否复制成功。
9133-55A微码升级技术方案
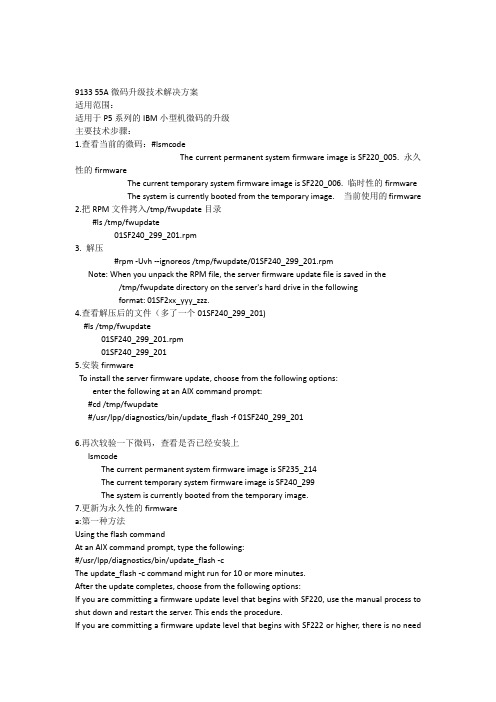
9133 55A微码升级技术解决方案适用范围:适用于P5系列的IBM小型机微码的升级主要技术步骤:1.查看当前的微码:#lsmcodeThe current permanent system firmware image is SF220_005. 永久性的firmwareThe current temporary system firmware image is SF220_006. 临时性的firmwareThe system is currently booted from the temporary image. 当前使用的firmware 2.把RPM文件拷入/tmp/fwupdate目录#ls /tmp/fwupdate01SF240_299_201.rpm3. 解压#rpm -Uvh --ignoreos /tmp/fwupdate/01SF240_299_201.rpmNote: When you unpack the RPM file, the server firmware update file is saved in the /tmp/fwupdate directory on the server's hard drive in the followingformat: 01SF2xx_yyy_zzz.4.查看解压后的文件(多了一个01SF240_299_201)#ls /tmp/fwupdate01SF240_299_201.rpm01SF240_299_2015.安装firmwareTo install the server firmware update, choose from the following options:enter the following at an AIX command prompt:#cd /tmp/fwupdate#/usr/lpp/diagnostics/bin/update_flash -f 01SF240_299_2016.再次较验一下微码,查看是否已经安装上lsmcodeThe current permanent system firmware image is SF235_214The current temporary system firmware image is SF240_299The system is currently booted from the temporary image.7.更新为永久性的firmwarea:第一种方法Using the flash commandAt an AIX command prompt, type the following:#/usr/lpp/diagnostics/bin/update_flash -cThe update_flash -c command might run for 10 or more minutes.After the update completes, choose from the following options:If you are committing a firmware update level that begins with SF220, use the manual process to shut down and restart the server. This ends the procedure.If you are committing a firmware update level that begins with SF222 or higher, there is no need to shut down and restart the server. This ends the procedure.Using the AIX diagnostic service aidsb:第二种方法At the AIX command prompt, type diag.Initialize the terminal type, if requested.On the function selection screen, select Tasks and Service Aids.On the task selection screen, scroll to the bottom of the list of options, and select Update and Manage Flash. A screen similar to the following is displayed:UPDATE AND MANAGE SYSTEM FLASHThe current permanent system firmware image is SF235_214The current temporary system firmware image is SF240_299The system is currently booted from the temporary image.Validate and Update System FirmwareUpdate System FirmwareCommit the Temporary ImageSelect Commit the Temporary Image, and press Enter. The process might run for 10 or more minutes.After the update is complete, choose from the following options:If you are committing a firmware update level that begins with SF220, use the manual process to shut down and restart the server. This ends the procedure.If you are committing a firmware update level that begins with SF222 or higher, there is no need to shut down and restart the server. This ends the procedure.注意问题整个微码升级的过程中严禁断电,掉电。
升级AIX系统微码
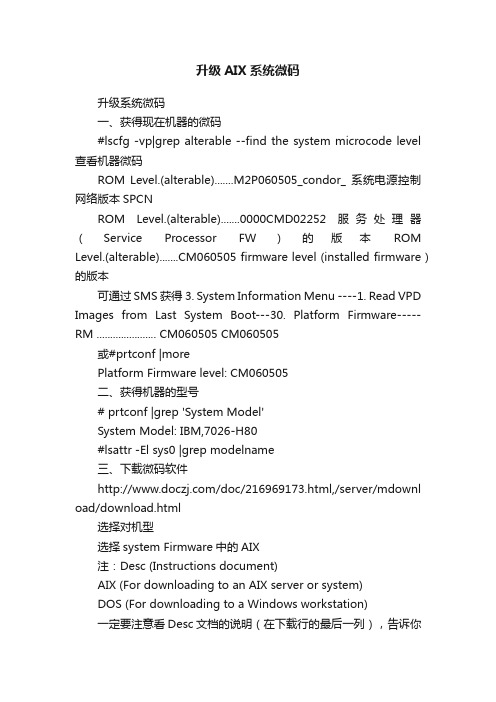
升级AIX系统微码升级系统微码一、获得现在机器的微码#lscfg -vp|grep alterable --find the system microcode level 查看机器微码ROM Level.(alterable).......M2P060505_condor_ 系统电源控制网络版本SPCNROM Level.(alterable).......0000CMD02252 服务处理器(Service Processor FW)的版本ROM Level.(alterable).......CM060505 firmware level (installed firmware)的版本可通过SMS获得 3. System Information Menu ----1. Read VPD Images from Last System Boot---30. Platform Firmware-----RM ...................... CM060505 CM060505或#prtconf |morePlatform Firmware level: CM060505二、获得机器的型号# prtconf |grep 'System Model'System Model: IBM,7026-H80#lsattr -El sys0 |grep modelname三、下载微码软件/doc/216969173.html,/server/mdownl oad/download.html选择对机型选择system Firmware中的AIX注:Desc (Instructions document)AIX (For downloading to an AIX server or system)DOS (For downloading to a Windows workstation)一定要注意看Desc文档的说明(在下载行的最后一列),告诉你操作步骤及注意事项、命令、firmware文件大小等重要信息。
AIX系统安装以及升级
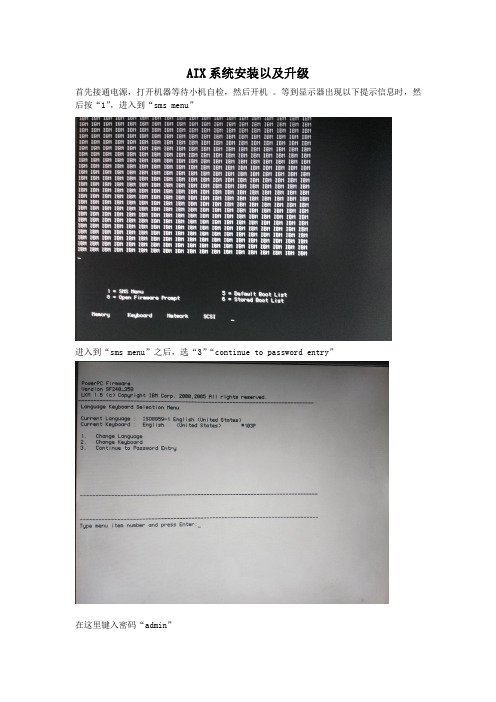
AIX系统安装以及升级首先接通电源,打开机器等待小机自检,然后开机。
等到显示器出现以下提示信息时,然后按“1”,进入到“sms menu”进入到“sms menu”之后,选“3”“continue to password entry”在这里键入密码“admin”在进入到“main menu ”是选择“5”——“select boot options”在进入到“multiboot ”选择“1”——“select install/boot device”在“select device type”上选择“3”——“CD/DVD”选择“4”-“IDE”然后选择“1” ,选择CD-ROM选择“2 ”,进行引导。
“1 ”,“yes”开始安装,按F1 ,然后按回车键进入安装页面。
选择一,用英语安装。
选择一,默认设置安装。
然后,就直接看到了安装默认的信息。
然后为了看到配置信息,按99,回到上层。
这里选择二,配置安装,至于“3”则是进维护模式。
这里会提示有三种安装方式。
第一种是完全覆盖安装,第二种是主要环境安装,第三种是保护安装。
这里选1,覆盖安装。
选择1 ,完全覆盖安装。
2是保存安装。
选择安装的磁盘,hdisk0,选择0,继续。
在前面配置完成之后会再次回到这个界面,什么都不选,默认回车,查看一下安装信息有无错误,然后回车。
等待安装,光盘读写。
换光盘。
再次将光盘换回。
系统已经安装到p55A的机器中。
然后,在键盘上按tab+空格键使用键盘,进行配置信息,也可以不配置直接进入系统,进行配置。
#oslevel –s (查看系统版本信息)5300-04-00下面进行AIX的系统升级。
用#ls sj (查看到在sj目录下升级安装包已经上传到系统之中)#smit update_all(使用smit工具进行升级安装)然后进入升级配置界面,这里选择升级路径“/zsh/sj”在“accept new license agreements?”选择“yes”,回车两次。
升级微码总结

The current temporary system firmware image is 0000
The system is currently booted from the permanent firmware image.
ftp> cd /tmp/fwupdate
250 CWD command successful.
ftp> pwd
257 "/tmp/fwupdate" is current directory.
ftp> bin
200 Type set to I.
ftp> bin
200 Type set to I.
注意:此选项不会要求确认,除非你确定要这样做,否则不要选择此项
这个过程将会运行10分钟左右,成功完成之后,如果提交的微码版本是SF220,那么需要手动关机,并重新启动机器,如果提交的微码版本是SF222或更高,就不需要关机和重启了。使用命令#lsmcode查看当前的微码
The current permanent system firmware image is 01SF240_338
ftp> put 70286C4F.BIN
200 PORT command successful.
150 Opening data connection for 70286C4F.BIN.
226 Transfer complete.
ftp: 发送 4430377 字节,用时 0.97Seconds 4572.11Kbytes/sec.
IBM_P570 AIX5.3升级到AIX6.1方法

IBM P570操作系统AIX5.3至AIX6.1升级应用总结目录前言 (1)第一章升级准备阶段 (2)一、环境检查(30MIN) (3)(一)应用环境(5MIN) (3)(二)用户信息(1MIN) (3)(三)设备信息(1MIN) (3)(四)软件版本(1MIN) (3)1、确认在用AIX操作系统补丁版本。
(3)(五)文件系统(1MIN) (3)(六)检查HACMP当前状态(10MIN) (4)1、A、B机停止HACMP (4)(七)生成预迁移信息(5MIN) (4)(八)确认引导分区(1MIN) (4)(九)确认镜像是否规范(1MIN) (4)二、系统备份( 60MIN ) (5)(一)创建备份用文件系统及备份数据。
(15MIN) (5)(二)备份HACMP配置(5MIN) (5)(三)备份ROOTVG(40MIN) (5)第二章系统升级阶段 (6)一、操作系统升级(120MIN) (7)(一)拆除镜像(10MIN) (7)1、拆除镜像 (7)2、确认拆除镜像后rootvg满足升级要求 (7)3、移除镜像盘 (8)(二)卸载HACMP(10MIN) (8)1、停止cluster服务。
(8)2、卸载HACMP 4.4.0软件包 (8)(三)安装操作系统AIX5.1(110MIN) (9)1、修改bootlist从光盘启动。
(9)2、设定升级参数 (9)3、安装AIX5.1操作系统BOS (10)4、检查安装HA所需扩展包 (11)(四)安装操作系统补丁ML09(30MIN) (11)(五)验证 (12)二、HACMP升级(40MIN) (13)(一)安装软件包(10MIN) (13)(二)配置迁移(20MIN) (14)1、建立HACMP的内部通讯机制: (14)2、转换备份的snapshot文件。
(14)3、导入转换后的snapshot文件。
(14)4、同步HACMP配置。
(14)(三)HA空切验证(10MIN) (15)(五)升级后系统整理(30MIN) (15)恢复ROOTVG 镜像 (15)第三章系统验证阶段 (17)系统检查(30MIN) (18)第四章系统回退 (19)前言为保证升级成功,确保系统数据安全和系统可用性,在升级过程中应严格按照本方案进行操作。
- 1、下载文档前请自行甄别文档内容的完整性,平台不提供额外的编辑、内容补充、找答案等附加服务。
- 2、"仅部分预览"的文档,不可在线预览部分如存在完整性等问题,可反馈申请退款(可完整预览的文档不适用该条件!)。
- 3、如文档侵犯您的权益,请联系客服反馈,我们会尽快为您处理(人工客服工作时间:9:00-18:30)。
升级系统微码
一、获得现在机器的微码
#lscfg -vp|grep alterable --find the system microcode level 查看机器微码
ROM Level.(alterable).......M2P060505_condor_ 系统电源控制网络版本SPCN
ROM Level.(alterable).......0000CMD02252 服务处理器(Service Processor FW)的版本ROM Level.(alterable).......CM060505 firmware level (installed firmware)的版本
可通过SMS获得 3. System Information Menu ----1. Read VPD Images from Last System Boot---30. Platform Firmware-----RM ...................... CM060505 CM060505
或#prtconf |more
Platform Firmware level: CM060505
二、获得机器的型号
# prtconf |grep 'System Model'
System Model: IBM,7026-H80
#lsattr -El sys0 |grep modelname
三、下载微码软件
/server/mdownload/download.html
选择对机型
选择system Firmware中的AIX
注:Desc (Instructions document)
AIX (For downloading to an AIX server or system)
DOS (For downloading to a Windows workstation)
一定要注意看Desc文档的说明(在下载行的最后一列),告诉你操作步骤及注意事项、命令、firmware文件大小等重要信息。
如/ibmdl/pub/software/server/firmware/7026H80F.html
四、ftp及解压、校验下载的升级文件
ftp>bin -----一定要加此命令,否则解压时会有错误。
ftp>put 7026HM80.BIN
解压升级文件
#cd /tmp/fwupdate
# chmod +x 7026HM80.BIN
# ./7026HM80.BIN
CM_MM_060505.img
校验升级文件
#sum CM_MM_060505.img
28838 4985 CM_MM_060505.img --28838就是校验码,
校验码要跟Desc (Instructions document) 文档中提示的表Firmware Levels, File Sizes and Checksums要一致,否则不要更新。
五、升级
当校验没有问题后,就可以升级了。
不过要确保在升级过程中不能掉电。
#cd /usr/lpp/diagnostics/bin
#./update_flash -f /tmp/fwupdate/CM_MM_060505.img
***** WARNING: Continuing will reboot the system! *****
Do you wish to continue?
Enter 1=Yes or 2=No
选1 此时会关机的,呆会显示屏显示99FF和99FD,表示正在升级。
需要等待15分钟。
切记不能关机,断电。
SHUTDOWN PROGRAM
Mon Dec 22 05:40:38 CST 2008
Wait for 'Rebooting...' before stopping.
六、校验升级结果
#lscfg -vp|grep alterable --find the system microcode level 查看机器微码
ROM Level.(alterable).......M2P060505_condor_ 系统电源控制网络版本
ROM Level.(alterable).......0000CMD02252 服务处理器(Service Processor FW)的版本ROM Level.(alterable).......CM060505 firmware level (installed firmware)的版本或#lscfg -vp|grep -F .CM 得到的是firmware level (installed firmware)的版本。
