nec程控电话交换机sl交换机说明书necsl集团电话编程necsl安装手册
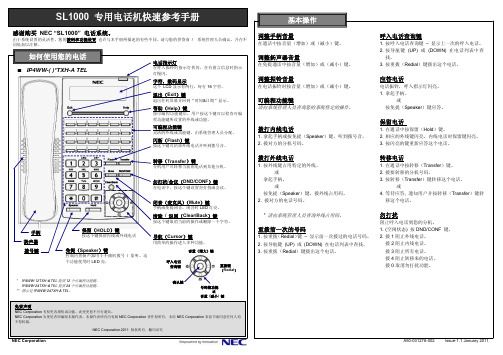
NEC_SL1000_专用话机
清除 / 返回(Clear/Back)键 拨号键 扬声器
按这个键取消当前的操作或删除一个字符。
保留(HOLD)键
按这个键保留内线或外 线电话。
导航(Cursor)键
用简单的操作进入多种功能。
音量(增大)键
扬声器键
控制内置扬声器用于不摘机拨号 / 监 听。这个功能使用时 LED 亮。
呼入电话 查询键
重拨键 (Redial)
按几次搜寻
快速重拨
Speaker
#
5
系统保存最后 10 个拨出的电话号码,可以查找和重拨。 按 “Clear/Back” 键删除重拨表操作。
接收号码的回拨功能
033445566 01/14 RCV:DEC-22 11:33 挂机 条件 098765432 03/14 RCV:DEC-22 10:12
安装手柄线和电话线
两种方法均可以安装电 话线。
安装手柄时 :
1. 确认手柄线插进电话机底座的手柄插
口。 2. 沿着电话机底座的线槽,安放手柄线。 3. 电话线可以沿着电话机支脚的线槽安 放。
手柄线
调整观测角度的两个位置
设置低观测角位置: 1. 向后打开支角,全部到位。 设置高观测角位置: 1. 弹出两个支架。 2. 向后打开支角直到接触到底座的支架。
取消信息等待
个别取消
(在设置的分机上)
分机号码
8
7
1
?
?
?
全部取消
(在任何分机上)
8
7
3
9
应答电话
应答中继线电话
中继线键
振铃分机
振铃 Speaker
非振铃分机
(闪亮)
如果您要用免提扬声,确认 Mute 键的状态(Mute On:灯亮,Mute Off:灯灭) 。
NECSL1000交换机编程说明NEC交换机调试说明

交换机编程说明交换机调试说明用专用电话机进入和退出系统编程(有显示地):. 进入:→**→(密码)→→显示. 退出:按键返回直到显示时按键退出并保存所设置地数据,屏幕上会显示.更改分机号码地相关编程::系统号码计划,:分机号码地设置和更改:分机名称设置(在装机时最好删除所有分机名称),专用话机编程时用键清除:删除所有分机号码,只保留第一端口地分机号码..振铃组地设置:将外线分配到响铃组,设置响铃组内地分机.长途限制等级设置::分配每个分机地限制等级,:为每个等级分配限制表():输入限制表里地限制代码()每个表可以输入个限制码举例:等级国际,等级国内,等级市话,等级内线,等级:等级:(限制表)()按键可以输下一个等级:(限制表)()等级:(限制表)()代表,*和.计费设置:串口计费:(串口连接线顺序)波特率:,,,,,口计费,,:改成输出地电话号码最后一位不隐藏.日期输出:有两种话单格式:输出电话号码位.:输出电话号码位.来电显示设置:开放每条外线地来点显示功能:.每条外线地制式开放每个普通分机地来点显示普通分机转普通分机是否显示外线号码显示不显示如果系统接地是模拟外线设置为,如果外线是汇线通这项地设置又是还出现看不到来电显示或来显示不稳定时有时无地情况下,可以将这个数值调低大概在左右.b5E2R。
注:以上四项调试后发现话机还不能看到来点显示请将该设备接地..分机部门组地设置:举例:外线打入集团电话要求分机,,在忙和无人应答时可以相互循环.将,,设置为部门组,选择到部门组设置成选择到部门组设置无人应答时间,设置部门组代表号(例),将每条外线地打入方式设为,设置响铃目标号p1Ean。
.缩位拨号设置:系统分为三种速拨类型:公共,分组和个人.所有人可以使用公共速拨,分配在同一个组人员可以使用分组速拨,个人速拨只用于自己地分机.每个速拨单元可存储位电话号系统共有个速拨单元,可用于公共速拨和分组速拨.DXDiT。
NEC程控电话交换机SL1000交换机说明书 NEC SL1000集团电话编程 NEC SL1000安装手册簿
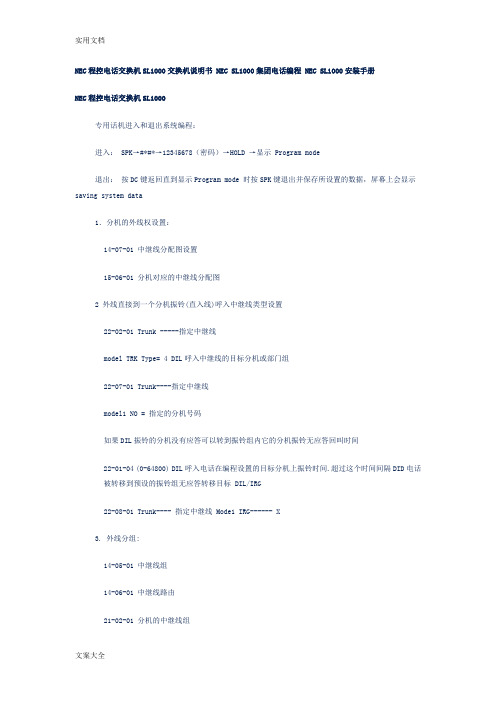
NEC程控电话交换机SL1000交换机说明书 NEC SL1000集团电话编程 NEC SL1000安装手册NEC程控电话交换机SL1000专用话机进入和退出系统编程:进入: SPK→#*#*→12345678(密码)→HOLD →显示 Program mode退出:按DC键返回直到显示Program mode 时按SPK键退出并保存所设置的数据,屏幕上会显示saving system data1.分机的外线权设置:14-07-01 中继线分配图设置15-06-01 分机对应的中继线分配图2 外线直接到一个分机振铃(直入线)呼入中继线类型设置22-02-01 Trunk -----指定中继线model TRK Type= 4 DIL呼入中继线的目标分机或部门组22-07-01 Trunk----指定中继线model1 NO = 指定的分机号码如果DIL振铃的分机没有应答可以转到振铃组内它的分机振铃无应答回叫时间22-01-04 (0-64800) DIL呼入电话在编程设置的目标分机上振铃时间.超过这个时间间隔DID电话被转移到预设的振铃组无应答转移目标 DIL/IRG22-08-01 Trunk---- 指定中继线 Mode1 IRG------ X3. 外线分组:14-05-01 中继线组14-06-01 中继线路由21-02-01 分机的中继线组4. 第二中继出局码设置:11-01-01 创建第二中继出局码11-09-02 输入第二中继码21-15-01 分机的第二中继组路由用专用话机进入和退出系统编程:1. 进入: SPK→#*#*→12345678(密码)→HOLD →显示 Program mode退出:按DC键返回直到显示Program mode 时按SPK键退出并保存所设置的数据,屏幕上会显示saving system data3.更改分机号码的相关编程:11-01-01:系统号码计划11-02-01:分机号码的设置和更改15-01-01:分机名称设置(一般在装机时最好删除所有分机名称),专用话机编程时用CLEAR键清除92-02-01:删除所有分机号码,只保留第一端口的分机号码。
NECSL1000交换机说明书 NEC
NEC程控话交换机电LS1000交机说明换书NC SL100E0集电团编话程NEC SL 100安装0册手NEC 程电话控交机换LS1000专用机进话和入退出系编统程:进入:PS→K*#*→#23146758(码)→H密ODL →显示Pogrramm doe退出按D:键C返直到显回示Prgoarmmo de 时S按P键K出退保并存所置设的数据,幕上屏会显示svaingsy temsd taa1.机的分线外权设:置1407-01 -中线分继图设配置1506-0- 1机对分应中继线的配图分2 线直外到一个接分振铃机直入()线入中呼线继类型设置220-2-01Tr uk -n---指定中继线-mode lRK TType= 4D L呼I中继入的目标线分或机部门组220-7-01Tr uk--n-指-中继线定moedl1NO = 指定分机号的码如果ILD铃振分机没有的答应以转到可铃振组它内分机振铃的应无答回叫时间22-1-004 (0-46800 )ID呼入电L话编在设置的目标分程机上铃时振间超过这.个间时隔DID 电话间转移到被设的振预组铃应无转移目答DIL/I标GR2208--01 runkT---- 定中继指线oMde IR1--G---- X3. 外分组:线14-0-50 中1继组线14-6-010 继线中由路21-0-20 分1机中继的组线4. 二中第出局码继设置:11-010- 创1建二第继中出码局1109--20 入第二中继输码21-5-011 机的分二中继第路组由用专用机话进入和退系出统编:程1. 入进:SP→K#**→1#2356784密码()→OHD L显→ 示rogram modP 退出:e 按C键D返回直到显Prog示amrmode 时按SPK退出键并存保设置所数的据屏,幕会显示上asivn gsytesm dta a3 .更改机分号的码相编程关:11-01-0:系1统码计号划11-02-01:机分号的码设和更改置1501-0-1分机名:称置(设一在般装机时最删除所有分好名机),称用专机话编时用C程LEAR清除键920--01:删2除所有分机号码只保留第,端口的一分号码。
NECSL2100 SL2100智能通讯系统用户手册说明书

Keep connectedSafety first2Why choose SL2100Powerful communications with a small business price tag thatallows you to pay only for what you need. Completely scalable as your business grows.Single number reach, mobile smart phone apps, built-in web basedconferencing and unified messaging keeps colleagues and customers up-to-date and connected.Built-in apps like InGuard can be configured to help protect your business from melicious toll fraud attacks.Built-in features include:> Web-Based Unified Communication Client > VoIP Enabled> Unified Messaging > Music on Hold> Mobility / BYOD / Remote Extension > Auto Attendant> Audio Conferencing> Video Conferencing & Collaboration > And more!To assist in maintaining a positive customer experience and a high level of service, businesses today need to have workforces that are available and ‘on-demand’ from any location. A great customer experience usually generates repeat business.Value for moneyConnecting your team, connecting your customersInternal Sales PersonT he Auto-Attendant feature means that callers receive a greeting and are routed to the correct department, ensuring that I only get the calls that are meant for me.ReceptionistWith Caller ID displayed on my terminal, I can give the appropriate greeting to callers and redirect calls from familiar numbers without answering, somebody who is busy on a call.Security GuardT he door-phone functionality makes it easy for me to know who is visiting and open the door via my terminal.Office WorkerThe conference feature allows me to effortlessly set up a virtual meeting for colleagues at short notice, wherever they are. This enables faster business decisions, as well as saving traveling time and expenses.Remote/Home WorkerI can use my desktop phone or softphone at a remote or home office location to communicate with customers and colleagues with the same ease as if I were in the office.IT ManagerIts easier than ever to manage our system settings.Drag-and-drop functionality provides an error free way of building call groups, which is useful for when staff move desks, leave or join the company.34SL2100 in Real BusinessSmall/Medium OrganizationsOrganizations of all types, including businesses for real estate, insurance, finance, banking, law, require robust communication tools to serve their clients.> S elf-service options allow callers to easily get to the person or department they want to reach without going through an operator – if person is unavailable, they can leave a detailed message.> A range of mobility options enable employees to stay connected and reachable from any location – on or off premises.Small Hotels/MotelsEnsure your guests have a memorable stay by providing them access to personalized services that enhance their experience. > G uests can customize services from guestroom messaging, wake-up calls and do not disturb plus have one-touch access to services they want.> E mployees can check guests’ real-time status and provide required service immediately.HealthcareDoctors’ offices, surgery centers and other healthcare organizations receive a high volume of frequent inquiries.> C ustomizable pre-recorded messages are played to callers, giving them the option to route themselves to the right department or leave a message for prescription refills, reducing the need for a receptionist to handle every call.> E liminate the expense of an answering service with email or external message notifications to appropriate personnelduring off hours.5SL2100 now includes an expanded and diverse portfolio of InApps. As well as providing compelling business benefits, these built-in/on-board apps require noexternal PC or server - making them highly cost effective and reliable.Built-in ApplicationsInGuard – Get SecureInGuard is an effective, low cost solution to helpprotect a business against the rise of toll fraud attacks. Toll Fraud is a fraudulent attempt by a hacker to gain unlawful remote access to a phone system. Attacks are often highly organized from an automated server and once accessed, fraudulent calls are connected and over a period of time, can run up call charges of potentially thousands.InUC – Built-in collaborationIn today’s working environment, employees can be working in various locations. InUC is a unified com-munications application providing Video conferencing, collaboration, document sharing, presence and instant messaging for any business of up to 112 users. Utilizing WebRTC (Real-Time Communications) – InUC provides highly cost-effective video and collaboration working seamlessly within your IT environment.Smart Mobility OptionsAway from the officeUsers can enjoy a complete phone user experience from their home office plus greater working flexibility. Individual and business benefits include the cost and time savings of travel and even the associated costs of workspace. IP Desktop terminals provide access to system features from the home, e.g. company directory, call transfer and more.On the roadUse your existing Smartphone as a system extension complete with call control. Save on mobile call costs and remain reachable on a single number. The SmartphoneSIP App simply connects to the SL2100 via Wi-Fi or across the Mobile Data Network (3G/4G). If the smartphone is not connected due to lack of Network, the SL2100 can provideroaming by routing calls to your GSM number.Today’s mobile workers depend on communication tools that accommodate flexible workspaces and allow free roaming wherever they are. SL2100 ensures your teamstay connected, but without the escalating business mobile costs.SL2100 System overviewSL2100 Communications Server Red/Green Color LED7。
nec-sl1100-user-说明书

NEC SL1100 USER MANUALTransferring and HoldingTransferring and holding calls is a fairly simple exercise, but different phone systems accomplish it in different ways. Some systems have dedicated buttons for each function while others use a single button to perform both functions. Basic telephones can also cause problems, as they don’t have the function keys that the main handsets do and rely instead on a single button that may be labeled differently.Transferring Calls:To transfer a call, simply press the function key you want to contact or press the TRANSFER key followed by the extension number of the party to contact. When the other extension answers you can tell them who is calling then simply hang-up to transfer the call.On a basic telephones and cordless telephones the TRANSFER key is often called the RECALL or R key. The method for transferring calls is identical other than this i.e. R then extension number.To retrieve the call back to your station, press the flashing green line or Park key (dependent on system programming). On a basic or cordless phone press the RECALL or R key again.Holding Calls:On a Key handset there is a dedicated HOLD key. To place a call on hold, press this key. The caller will hear music, system service tone or nothing at all (dependent on system programming and hardware installed).To retrieve the call, press the flashing green line or Park key.On a basic or cordless telephones, a call is placed on HOLD by pressing the RECALL or R key once.Pressing the RECALL or R key again retrieves the call.“Menu” Soft Key“Dir” Soft Key“VM” Soft Key“CL” Soft KeySoft Key Operation during “Off-Hook” Operation Soft Key Operation during extension callingSoft Key Operation during outside callDo Not Disturb FunctionThe N.E.C key sets have a function so that anyone trying to ring the key set receives a BUSY tone or routes to voicemail even if it is not being used. This function is useful if a room is needed for an important meeting and the keyset needs to be available for outgoing calls but needs to be silent so as not to disrupt the meeting.Pressing the DND key then choosing one of the following options does this:1 - External calls only2 - Intercom calls only3 – All calls0 - CancelLast Number RedialThe N.E.C SL can store up to 10 numbers. The system will keep track of the last external or internal number dialed by each extension and allow them to redial it regardless of how long the extension has been idle. Redial the last number by pressing the LND key on the jog dial then scroll up or down to find the number you want. Simply lift the handset to dial.Call PickupIt is possible to pick up a call that is ringing at another extension by using a Call Pickup codes, function keys or the soft keys. There are three different codes that can be used, depending on the circumstances. These codes will allow you to pick up calls that are ringing a groups or calls that are ringing at specific extension.The following codes can be used:Conference CallingTo use this feature call the first user you want in the conference call, press the Conf soft key to initiate a conference, dial the next party (with 9) or internal number. Once they have answered you will see ADD press this again and you can then add another party or press the BEGIN soft key.You can have up to 16 parties (including your terminal)Programming Speed DialsThe NEC SL system can store 1000 speed dial entries that can be accessed via the terminal handsets. These are programmed with the sequence belowProgramming Function KeysThings to Check if you Experience ProblemsThere are a few things that we ask customers to try before calling us as it can save both us and the customer time as well as helping us to pinpoint the problem more easily. It also helps us to know if we will need to bring any replacement items, such as handsets or even a new system. This process can be speeded up if you, the customer, is willing to help us narrow down the possibilities that could cause the fault.At least HALF to 2/3 of all faults tend to be BT related, even if you have already tried them and they have said otherwise. BT usually requires us to prove that the system is not at fault before they will take more than abrief look at the actual phone lines.Sometimes just turning the system on and off can clear an annoying fault. The same can be said of unplugging the phone from its socket and then plugging it back in.If you are experiencing problems dialing out or receiving incoming calls, firstly turn the phone system off and on again, more often than not this will clear the problem. If this fails to clear the problem then there may be a problem with the actual telephone lines. This can be checked by ringing 154 and asking B.T. to check the lines for faults, the lines can be checked there and then. If B.T. say there are no apparent faults please ring us and an engineer will be sent out. It may also be worth putting a phone in the power fail socket, if you have one, to see if the fault is still there. If the fault appears on the power fail socket then it will definitely be a B.T. fault as this socket bypasses the system completely.If a phone stops working the best way to check it is to try it in another socket. Please note that a normal phone will not work in a socket normally used for a Panasonic keyset. You could also try a phone that you know works in the socket that is suspect. This will show whether you need a new phone or whether you need an engineer to look at the problem. Should a phone stop ringing please check that the ringer has not been turned off? On keysets this is done by changing the volume while the phone is ringing (KXTD phone systems) or by checking a switch on the back of the phone (KXTA phone systems). Normal telephones usually have a switch on the back of the phone that alters the pitch of the ring as well as a switch that alters the ringing volume. If the phone still fails to ring please call us so we can get an engineer to look at the problem.。
NEC电话交换机普通话机手册

很多公司都是网管负责电话,说明书都是专业nec电话的说明书,以下是普通话机设置内容,分享于大家#*#* 12345678 hold10-01-01 修改系统时间24-02-03设置没人接转移时间(默认:10秒)16-01-09设置部门组无人接转移时间(默认:15秒)11-02-01 设置分机号码90-08-01 设置系统复位“1”+ hold(仅对系统维护使用)90-33-01 改1 中国制式20-03-04 改1 拨外线发码时长(默认:3秒)11-01-01 把* 号,把4 改1代接11-12-27 把867 改*82-04-04 改13 最大断开时间(默认:20)82-04-08 改80 最大闪断时间82-04-07 改17 最小断开时间(默认:21)回铃设置81-01-09 改70 呼叫放弃检测时间14-02-19 改3 所有外线都设置通话断线设置14-02-20 改7 所有外线都设置14-02-09 改1 所有外线都设置(忙音检测)0:禁止,1:使用20-21-01 改0 长时间通话警告1(默认:170)20-21-02 改0 长时间通话警告2(默认:180)20-13-01 改0 长时间通话警告3(0:关,1:开)Nec topaz 查看系统版本Opac + 3 或者90-16-01Nec topaz 查询自己得端口号1:check + call2:check + 分机号Ex 查询系统版本Check + hold15-01-01 修改分机名称90-02-02 修改系统密码20-02-12 改1 呼叫振铃(0:语音,1:铃声)22-04-01 普通振铃设置普通振铃设置22-05-01 设置振铃组1页11-01-08 设置勿打扰(847)1:阻止中继线呼入2:阻止内线呼入,群呼,呼叫前转和转移来得中继线电话3:阻止所有呼入4:阻止呼叫前转0:取消勿打扰11-12-15 设置指定出中继(805)使用方法:801 + 01(01就是第一条外线)11-11-12 设置闹钟(827)使用方法:827 + 类型1(预定时间,只想一次)类型2(预定时间,每天都响)+时间(24小时制式)851 + 42 经理经理秘书功能851 + 41 秘书11-11-40 外转外功能(713)14-01-13 改1(所有得外线都设置)14-02-09 改120-02-09 改120-11-12 改121-03-01 改125-07-07 改0使用方法:call +713+ 6 + 9 +转移得号码+ hold(专用话机)713+6+hold(取消)713+ 6 + 9 +转移得号码(普通话机)713+6(取消)11-09-01 设置中继占用码(类型3)初始:9 改0设置拨0或9出局11-01-01设置字头9 (digit 1 type5),0(digit 1 type 3)Ars缩位26-01-01 改121-01-03 改026-02-01 改026-02-02 改126-02-03 改126-02-05 改1 ip位数26-03-01 输入:D 0 3 190 PRE (RE)2页Lcr缩位14-01-23 所有外线都126-01-04 改126-02-01 表2 改026-02-06 表2 改226-05-02 在表2 中添加IP出局码停止(暂停)11-12-10缩位拨号(813)13-04-01 输入要存储得号码(如9 R 123456)存储电话薄话机上要输入得特殊字符(如:P R G)外线键:1 2 3使用方法:拨813+存储得表格(如:002)定义按键使用27+你存储得表格一呼叫转移(内线)848立即呼叫转移(11-11-01)843遇忙呼叫转移(11-11-02)845无人应答呼叫转移(11-11-03)844遇忙和无人应答转移(11-11-04)842双方振铃转移(11-11-05)二呼叫转移(内线)1.双方振铃2 .无人应答转移的分机号24-06-01 3.立即转移4.忙和无人接转移三呼叫转移(内线)11-11-16(888)+ 2遇忙/无应答+ 分机号+ 2所有外线+ SPK3跟随转移3仅外线4立即转移4仅内线6无应答转移7双方振铃转移0取消专入设置22-04-01 设置分机组22-05-01 设置中继线组通话声音小设置方法81-07-01 改0 (把所有得外线都设置)10-03-03 改5010-03-01 类型设置(1.专用话机2.普通话机10.直选台13.中继)10-03-04 输入50全部输入完成后重启电源才能管用3页回叫设置方法15-02-11 改1(把所有得分机都改)11-12-03功能码(850)使用方法:在呼叫对方分机听到对方忙线声按850 挂机就可以了分图功能设置方法14-07-01 0.无接入七个等级 1.只有呼出接入2.只有呼入接入6.呼入呼出接入7.最高接入15-06-01 对应分机系统本身有200个图位MAP图位得意思11-12-19群呼功能设置方法(801)31-02-01 分机分组31-02-02 对没个分机打开或关闭群呼功能(0.关闭1.打开)11-12-23 群呼回应(863)使用方法:全体呼叫:801 + 0或00部门呼叫:801 + 部门组号11-12-08监听功能设置方法(810)20-13-11 允许/禁止监听(0.关1.开)20-13-12 被监听允许/禁止(0.关1.开)20-13-17 强叉音和显示(0.关1开.)定义强叉键34使用方法:拿起话筒+ 810 + 您想监听得分机号码11-11-36随身密码设置(763)14-01-08 改1(每条外线都设置)21-05-0821-06-07 设置长途账目表21-04-01分机对应哪个表21-14-01设置密码21-14-02 改1使用方法:763 +设置得密码+出局码+外线号码代接组设置方法23-02-01给分机分代接组11-12-26指定组代接(868)11-12-28代接其他组分机(869)4页功能键设置851(11-11-17)+ 24 本组代接/ 25 外组代接/ 26 指定组代接852(11-11-38)删除可编程功能码:10.立即转移11.遇忙转移12.无人应答转移13.遇忙和无人应答转移14.双方振铃转移24.本组呼叫代接25.外组呼叫代接26.指定呼叫代接36.预占线回叫34.强叉08.来显32.会议回应02.麦克风06.转接键普通话机重拨不好用设置方法20-03-03 改020-03-04 改320-03-07 改5内置话务员拨0挂机后电话还一直响铃调试:80-07-01 把表1中得数据删除在表2中输入45如果客户想让自己得外线费用平均调试:21-01-01 中继线占用方式(0.优先路由1.循环路由)虚拟分机好设置11-04-01 设置虚拟分机号码15-07-01 设置虚拟分机键“*03”15-08-01 设置虚拟分机响铃15-09-01 改1设置虚拟分机是否振铃比如你定义了19键为虚拟分机键(显示如下)15-09-01TEL800KY 19 MODE1 = 05页夜服功能设置12-01-01 允许人工夜服转换(0关1开)20-06-01 改1 等级20-07-01 人工夜服转换(0 禁止1使用)人工转换22-04-01 设置振铃分机,振铃组响使用方法:818(11-10-01)+ 1 白天818 + 2 夜间定义按键:851 + 相应键+ 09 + 1 白天851 + 相应键+ 09 + 2 晚上12-01-02 自动夜服转换(0关1 开)22-04-01 设置振铃分机,振铃组响22-05-01 白天打入第一组响,夜间第二个响自动夜服MODE相对应12-02-01 设置自动夜服转换时间20-03-03 拨号方式(0:接收所有数据在发送1:直接发送)来电显示设置14-02-10 改1 (所有得外线都设置)15-03-09 改1 (分机得来电显示)0 FSK15-03-11 主叫号码类型1 DTMF14-02-16 模拟中继线类型0 FSK1 DTMF15-03-14 设置转移来电方式0 内部号码1 外部号码1.外置话务员调试方法16-01-02 改1 (0优先路由1循环路由)22-02-01 改4 把所有的外线都设置上2.循环振铃调试方法16-02-01 给分机分组(如:2)11-07-01 设置组代表号(如:300)22-07-01 设置代表号得铃响(就是你设置的代表号300响铃)VRS设置方法22-02-01 改1 (所有得外线都改)25-02-01 先1 后01 (所有得外线都设置)25-06-01 recv 1(代表拨几)hold输入分机号码25-06-02 destno(拨几到哪个分机响铃)40-07-01 设8(中文模式)40-10-08 设02 (忙线时得通告)40-10-09 设03 (无人接时的通告)录制语音: SPK + 716 + 7 + (01~48)录制的信息号码,听到请开始录音和嘟一声后录制,不能超过2分钟,如听到录音结束表示已经超过录音时间,拨0 # 结束或挂机.听语音: SPK + 716 + 5 + (01~48)听之前的录音,按# 在听,听下一段语音拨5 +(01~48)最后挂机.删除语音: SPK + 716 + 3 + (01~48) + HOLD (专用话机),取消操作,删除录音并返回拨 3 ,挂机删除录音. ----------------------------------------------------------------------------------------------------------------------第二出局码设置方法11-01-01 设字头digit 1 type 4 (设置出局码的字头和类型)11-09-02 添加第二出局码14-05-01 中继分组14-06-01 DATA(初始:路由,次序号1=1(中继组1)次序号2.3.4为设定)R-TBL URDER 121-15-01 设置分机第二中继组路由长时间通话切断设置14-01-14 改1 (中继线是否使用1使用0不使用)14-01-15 改0 (切断前得警告0没有1有)20-06-02 等级(对应分机的等级)20-21-03 输入断开得时间(呼出的时间)20-21-04 输入断开得时间(呼入的时间)20-13-02 呼入切断0不切断1切断20-13-03 呼出切断0不切断1切断等级外线打入直接接通设置20-02-12 (0禁止(语音)1使用(铃声))激活话机的语音:821(11-11-15)取消激活语音:823(11-11-16交换机和外线都没有出现问题14-02-06 改1 1 暂停(手工拨号方式下占用线是否振铃但电话就时打不出去设置0 不暂停专用话机建立内线或外线通话会议后按DND/CONF键(会议键)+分机号码或外线应答后+会议键两次(PRI30方会议)普通话机建立内线或外线通话后拍插簧826+分机号码或呼叫外线应答后拍两次插簧改变专用话机的振铃音20-15-01 中继线打入振铃音20-15-04DID/DISA20-15-0520-15-06专用线上的拨入20-15-02PBX/CESU呼入20-15-08 虚拟分机振铃音20-15-09 回叫20-15-10 SLT警告音20-15-11 VRS信息等待呼入(以上只能在2-13中选取)10-21-02 设com端口波特率0.4800 1.9600 2.19200 3.38400 35-01-01 设1 com或3 lin10-20-01 设ex-der5为400035-01-04 设0 不隐藏35-01-06 设延时时间0—6553535-02-08 设呼入是否显示0 不显示1显示35-02-09 设显示1 号码或0名称计费线连接得顺序(两端需9空插头)com口(9针对25针)(串口线必须带有屏蔽套,最长15M)2 3 23 2 34 6 66 4 207 8 58 7 4计费线连接得顺序(两端RJ45水晶头)172.16.0.11 ip地址LAN EX (topaz需要安装软件)172.12.0.10访问1 32 63 14 4 R45的顺序5 56 27 78 89页ASPILAEX按住小白冒开机大概4.5秒后分开小白冒(初始化机器)80-01-02 表2 输入1在输入81-01-09 输入70分机有电流音改82-07-01改0EX 30B+D的设置10-03-01 找到PRI卡然后按两次hold键(10-03-03)CRC4改1(注:这一项是看一下局端是否需要效验,如果需要得在这一项中打开)22-11-02 按音量的+ - 找到分机的端口号码,clar清除,直接输入DID外线号码得22-11-01按音量的+ - 找到原始端口号码,clar清除,直接输入DID外线号码的全部八为号码22-13-01按音量的+ - 找到原始端口号码,clar清除,直接输入DID外线号码的全部八为号码22-02-01 输入3 改成DID模式(MODE1,MODE2都设)然后吧分机号码改11-02-01中EX软件升级方法1用PC将新得主软件存储在闪存(CF)卡2关机后将CF 卡插入NTCPU 上得CF插槽3右手按下在CTCPU上的“LOAD“开关4左手去开电源,右手松开5等5秒中松开右手LOAD开关6机器启动,话机没有显示,等待1-2分钟7看主板上得指示灯0,2,和3开始闪动8升级完成,关机退出NTCPU上CF插槽得闪存CF卡9机器再次开机查看主版本:CHECK + HOLD※为选择项目(声源必须是W A V格式,文件名必须是:CCITT A-LAW 8kHz单声道PCM数据,可以用Microsoft Windows中的录音机设置这个数据)(以上都已经改好,把文件名改成: G47.W A V)(把G47.W A V放入在CF-A/B中的VM / OGM / 3 / 1 / 9 中)保留音乐更改设置方法10-04-01 选择保留音乐源0…内部声源(初始设置)1…外部音乐源(2PGDU)3…DSPDB (VRS) ※10-04-02 中分配VRS信息号码(G47.W A V)10-04-03 中调整音量电平录制语音: SPK + 716 + 7 + (01~48)录制的信息号码,听到请开始录音和嘟一声后录制,不能超过2分钟,如听到录音结束表示已经超过录音时间,拨0 # 结束或挂机.听语音: SPK + 716 + 5 + (01~48)听之前的录音,按# 在听,听下一段语音拨5 +(01~48)最后挂机.删除语音: SPK + 716 + 3 + (01~48) + HOLD (专用话机),取消操作,删除录音并返回拨 3 ,挂机删除录音.10页。
NEC SL1000交换机软件调试手册-2.

中继线的设置1. 中继线的开关 14-01-07交换机外线口(CO1,CO2,……….插电话外线的选择开,未插线选择关Apply (应用:确认修改后的参数生效,同时将数据数据传输给交换机2. 中继线类型 22-02-01VRS :电脑话务员值班 DIL :人工值班 Normal :群振值班选中开通外线外线选择,逐一设置“应用”= 选择确认键对应中继线端口和模式选择不同的值班方式3.中继线打入分机响铃值班(人工值班22-02-01 设置成DIL模式22-07-01 分机号码或部门组号码系统默认:200响铃分机号或组号4.中继线打入语音提示VRS值班(电脑话务员值班22-02-01设置成VRS模式25-02-01设置中继提示种类为VRS,设置值班语音(片语代码VRS信息片语代码1 - 10025-06-02设置听语音拨号指定分机(值班总机40-10-06 设置私人电话被拒绝时提示音片语40-10-07 设置来电号码被拒绝时提示音片语(黑名单 40-10-08 设置分机遇忙时提示音片语 40-10-09 设置分机无人接听时提示音片语片语录音操作7 录音→输入片语代码(001-100→录音内容→#结束提机(或SPK 716→ 5 试听→输入片语代码(001-100 3 删除→输入片语代码(001-10025-07-01 设置无拨号时间系统默认:10秒 25-07-02 设置分机无人应答时间系统默认:10秒对应的拨号,例如语音提示中的查号请拨“0”二级VRS 提示片语代码值班总机号码5. 中继线打入振铃组值班(群振值班22-02-01 设置成Normal 模式22-04-01 设置振铃组内的分机(最多32个22-05-01 设置中继线呼入时对应的振铃组振铃组号1-25输入组内的分机振铃组1。
NEC程控电话交换机SL交换机说明书NECSL集团电话编程NECSL0安装手册
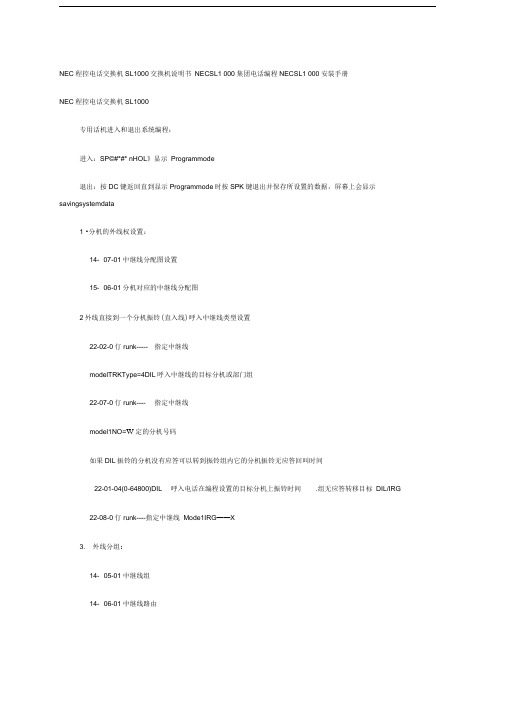
NEC程控电话交换机SL1000交换机说明书NECSL1 000集团电话编程NECSL1 000安装手册NEC程控电话交换机SL1000专用话机进入和退岀系统编程:进入:SP©#*#* nHOL》显示Programmode退出:按DC键返回直到显示Programmode时按SPK键退出并保存所设置的数据,屏幕上会显示savingsystemdata1 •分机的外线权设置:14- 07-01中继线分配图设置15- 06-01分机对应的中继线分配图2外线直接到一个分机振铃(直入线)呼入中继线类型设置22-02-0仃runk----- 指定中继线modelTRKType=4DIL呼入中继线的目标分机或部门组22-07-0仃runk---- 指定中继线model1NO=W定的分机号码如果DIL振铃的分机没有应答可以转到振铃组内它的分机振铃无应答回叫时间22-01-04(0-64800)DIL 呼入电话在编程设置的目标分机上振铃时间.组无应答转移目标DIL/IRG22-08-0仃runk----指定中继线Mode1IRG——X3. 外线分组:14- 05-01中继线组14- 06-01中继线路由21-02-01分机的中继线组4. 第二中继岀局码设置:11-01-01创建第二中继出局码11-09-02输入第二中继码21-15-01分机的第二中继组路由用专用话机进入和退岀系统编程:1.进入:SPO#*#* n HOLD>显示Programmode退出:按DC键返回直到显示Programmode时按SPK键退出并保存所设置的数据,屏幕上会显示savingsystemdata3•更改分机号码的相关编程:11-01-01 :系统号码计划11-02-01 :分机号码的设置和更改15- 01-01 :分机名称设置(一般在装机时最好删除所有分机名称),专用话机编程时用CLEAR建清除92-02-01 :删除所有分机号码,只保留第一端口的分机号码。
NEC SL1000专用话机快速参考手册
感谢购买 NEC “SL1000” 电话系统。
由于系统设置的灵活性,您的拨码和功能设置 也许与本手册所描述的有些不同。请与您的供货商 / 同处加以注解。 . 系统管理人员确认,并在不
基本操作
调整手柄音量
在通话中按音量(增加)或(减小)键。
呼入电话查询键
1. 按呼入电话查询键 – 显示上一次的呼入电话。 2. 按导航键 (UP) 或 (DOWN) 在电话列表中查 找。 3. 按重拨(Redial)键拨出这个电话。
退出(Exit)键
退出任何屏幕并回到“时间&日期”显示。
可编程功能键
请向系统管理人员查询您的系统特定的操作。
帮助(Help)键
按可编程功能键后,用户按这个键可以检查可编 程功能键所设置的外线或功能。
可编程功能键
灵活的外线或功能键,由系统管理人员分配。
保留电话 拨打内线电话
1. 拿起手柄或按免提(Speaker)键,听到拨号音。 2. 拨对方的分机号码。 1. 在通话中按保留(Hold)键。 2. 相应的外线键闪亮,内线电话时保留键闪亮。 3. 按闪亮的键重新应答这个电话。
勿打扰/会议(DND/CONF)键
在电话中,按这个键设置勿打扰或会议。
闭音(麦克风) (Mute)键
手柄或免提闭音。闭音时 LED 灯亮。
清除 / 返回(Clear/Back)键
按这个键取消当前的操作或删除一个字符。
勿打扰
阻止呼入电话到您的分机。 1. (空闲状态) 按 DND/CONF 键。 2. 拨 1 阻止外线电话。 拨 2 阻止内线电话。 拨 3 阻止所有电话。 拨 4 阻止转移来的电话。 拨 0 取消勿打扰功能。
NEC电话交换机配置及编程.doc
10-01-01修改系统时间24-02-03设置没人接转移时间(默认:10秒)16-01-09设置部门组无人接转移时间(默认:15秒)11-02-01设置分机号码90-08-01设置系统复位“ 1”+ hold(仅对系统维护使用)90-33-01 改 1 中国制式20-03-04 改 1 拨外线发码时长(默认: 3 秒)11-01-01 把 * 号,把 4 改 1代接11-12-27把867改*82-04-04改13最大断开时间(默认:20)82-04-08改80最大闪断时间82-04-07改17最小断开时间(默认:21)回铃设置81-01-09改70呼叫放弃检测时间14-02-19改3所有外线都设置通话断线设置14-02-20 改 7 所有外线都设置14-02-09 改 1 所有外线都设置(忙音检测)0 :禁止, 1:使用20-21-01 改 0 长时间通话警告1(默认: 170)20-21-02 改 0 长时间通话警告2(默认: 180)20-13-01 改 0 长时间通话警告3(0:关, 1:开)Nec topaz查看系统版本Opac + 3或者90-16-01Nec topaz查询自己得端口号1:check + call2:check + 分机号Ex 查询系统版本Check + hold15-01-01 修改分机名称90-02-02 修改系统密码20-02-12 改 1 呼叫振铃( 0:语音, 1:铃声)22-04-01 普通振铃设置普通振铃设置22-06-01 普通方式振铃分机是否振铃(0:不, 1:振铃)22-05-01 设置振铃组1 页11-01-08 设置勿打扰( 847) 1 :阻止中继线呼入2 :阻止内线呼入,群呼,呼叫前转和转移来得中继线电话3 :阻止所有呼入4 :阻止呼叫前转0 :取消勿打扰11-12-15 设置指定出中继(805)使用方法: 801 + 01 (01 就是第一条外线)11-11-12设置闹钟(827)使用方法: 827 + 类型 1(预定时间,只想一次)类型2(预定时间,每天都响) +时间( 24 小时制式)851 + 42 经理经理秘书功能851 + 41 秘书11-11-40 外转外功能( 713) 14-01-13 改 1 (所有得外线都设置)14-02-09 改 120-02-09 改 120-11-12 改 121-03-01 改 125-07-07 改 0使用方法:call +713+ 6 + 9 + 转移得号码 + hold (专用话机)713+6+hold (取消)713+ 6 + 9 + 转移得号码(普通话机) 713+6(取消)11-09-01 设置中继占用码(类型3)初始: 9 改 0设置拨 0 或 9 出局11-01-01 设置字头9 (digit 1 type5 ), 0 ( digit 1 type 3 )Ars 缩位 26-01-01 改 121-01-03 改 026-02-01 改 026-02-02改126-02-03 改 126-02-05 改 1 ip 位数26-03-01 输入: D 0 3 190 PRE (RE)2 页Lcr 缩位 14-01-23 所有外线都 126-01-04 改 126-02-01 表 2 改 026-02-06 表 2 改 226-05-02 在表 2 中添加 IP出局码停止(暂停)11-12-10 缩位拨号( 813) 13-04-01 输入要存储得号码(如9 R 123456 )存储电话薄话机上要输入得特殊字符(如:P R G )外线键: 1 2 3使用方法:拨 813 +存储得表格(如:002)定义按键使用27+你存储得表格一呼叫转移(内线)848立即呼叫转移(11-11-01)843遇忙呼叫转移(11-11-02)845无人应答呼叫转移(11-11-03)844遇忙和无人应答转移(11-11-04)842双方振铃转移(11-11-05)二呼叫转移(内线)1.双方振铃2 .无人应答转移的分机号24-06-01 3.立即转移4.忙和无人接转移三呼叫转移(内线)11-11-16 ( 888)+ 2 遇忙 / 无应答 + 分机号 + 2 所有外线 + SPK3 跟随转移 3 仅外线4 立即转移 4 仅内线6 无应答转移7 双方振铃转移0 取消专入设置 22-04-01 设置分机组22-05-01 设置中继线组通话声音小设置方法81-07-01 改 0 (把所有得外线都设置)10-03-03 改 5010-03-01 类型设置(1. 专用话机 2. 普通话机 10. 直选台13. 中继)10-03-04 输入 50全部输入完成后重启电源才能管用3页回叫设置方法15-02-11改1(把所有得分机都改)11-12-03功能码(850)使用方法:在呼叫对方分机听到对方忙线声按850 挂机就可以了分图功能设置方法14-07-010.无接入七个等级 1.只有呼出接入2.只有呼入接入6.呼入呼出接入7.最高接入15-06-01对应分机系统本身有200 个图位 MAP图位得意思11-12-19 群呼功能设置方法(801) 31-02-01 分机分组31-02-02 对没个分机打开或关闭群呼功能( 0. 关闭 1. 打开)11-12-23 群呼回应( 863)使用方法:全体呼叫:801 + 0 或 00部门呼叫:801 + 部门组号11-12-08 监听功能设置方法(810) 20-13-11 允许 / 禁止监听( 0. 关 1. 开)20-13-12 被监听允许 / 禁止 (0. 关 1. 开 )20-13-17 强叉音和显示(0. 关 1 开 . )定义强叉键34使用方法:拿起话筒+ 810 +您想监听得分机号码11-11-36 随身密码设置( 763) 14-01-08改1(每条外线都设置)21-05-0821-06-07设置长途账目表21-04-01分机对应哪个表21-14-01设置密码21-14-02改1使用方法: 763 +设置得密码+出局码+外线号码代接组设置方法23-02-01给分机分代接组11-12-26指定组代接(868)11-12-28代接其他组分机(869)4页功能键设置851(11-11-17)+ 24本组代接/ 25外组代接/ 26指定组代接如果设置不成应该先把原来得功能码删除852(11-11-38 )删除可编程功能码:10.立即转移11. 遇忙转移12. 无人应答转移13. 遇忙和无人应答转移14.双方振铃转移24. 本组呼叫代接25. 外组呼叫代接26. 指定呼叫代接36.预占线回叫34. 强叉 08. 来显 32. 会议回应 02. 麦克风 06.转接键普通话机重拨不好用设置方法20-03-03改020-03-04 改 320-03-07 改 5内置话务员拨0 挂机后电话还一直响铃调试: 80-07-01把表1中得数据删除在表 2 中输入 45如果客户想让自己得外线费用平均调试: 21-01-01中继线占用方式(0. 优先路由 1. 循环路由)虚拟分机好设置11-04-01设置虚拟分机号码15-07-01设置虚拟分机键“*03 ”15-08-01设置虚拟分机响铃15-09-01改1设置虚拟分机是否振铃比如你定义了19 键为虚拟分机键(显示如下)15-09-01 TEL800KY 19 MODE1 = 05 页夜服功能设置 12-01-01 允许人工夜服转换( 0 关 1 开)20-06-01 改 1 等级20-07-01 人工夜服转换( 0 禁止 1 使用)人工转换22-04-01 设置振铃分机,振铃组响22-05-01 白天打入第一组响,夜间第二个响使用方法: 818( 11-10-01 ) + 1白天818 + 2夜间定义按键: 851 + 相应键 + 09 + 1 白天851 + 相应键 + 09 + 2 晚上12-01-02 自动夜服转换( 0 关 1 开)22-04-01 设置振铃分机,振铃组响22-05-01 白天打入第一组响,夜间第二个响自动夜服MODE 相对应12-02-01设置自动夜服转换时间20-03-03拨号方式(0:接收所有数据在发送 1 :直接发送)来电显示设置14-02-10改1(所有得外线都设置)15-03-09改1(分机得来电显示)0 FSK15-03-11主叫号码类型1 DTMF14-02-16模拟中继线类型0 FSK1 DTMF15-03-14设置转移来电方式0内部号码1 外部号码1. 外置话务员调试方法16-01-02 改 1 ( 0 优先路由 1 循环路由)22-02-01 改 4 把所有的外线都设置上2. 循环振铃调试方法16-02-01 给分机分组(如: 2)11-07-01设置组代表号(如:300)22-07-01 设置代表号得铃响(就是你设置的代表号300 响铃)VRS设置方法22-02-01 改 1 (所有得外线都改)25-02-01 先 1 后 01 (所有得外线都设置)25-06-01 recv 1 (代表拨几) hold 输入分机号码25-06-02 destno (拨几到哪个分机响铃)40-07-01 设 8(中文模式)40-10-08 设 02 (忙线时得通告)40-10-09 设 03 (无人接时的通告)录制语音 : SPK + 716 + 7 + (01~48)录制的信息号码, 听到请开始录音和嘟一声后录制 , 不能超过 2 分钟 , 如听到录音结束表示已经超过录音时间, 拨 0 #结束或挂机.听语音 : SPK + 716 + 5 + (01~48)听之前的录音,按#在听,听下一段语音拨 5 +(01~48)最后挂机.删除语音 : SPK + 716 + 3 + (01~48) + HOLD (专用话机),取消操作,删除录音并返回拨 3 ,挂机删除录音.----------------------------------------------------------------------------------------------------------------------第二出局码设置方法11-01-01设字头digit 1 type 4 (设置出局码的字头和类型)11-09-02添加第二出局码14-05-01中继分组(相对应)14-06-01设置中继组路由DATA(初始:路由 1 ,次序号 1=1(中继组 1)次序号 2.3.4 为设定)R-TBL URDER 121-15-01设置分机第二中继组路由长时间通话切断设置14-01-14改1 (中继线是否使用 1 使用 0 不使用)14-01-15 改 0 (切断前得警告0 没有 1 有)20-06-02等级(对应分机的等级)20-21-03输入断开得时间(呼出的时间)20-21-04输入断开得时间(呼入的时间)20-13-02 呼入切断0 不切断 1 切断20-13-03 呼出切断0 不切断 1 切断等级外线打入直接接通设置20-02-12(0禁止(语音) 1 使用(铃声))激活话机的语音: 821( 11-11-15 )取消激活语音: 823( 11-11-16交换机和外线都没有出现问题14-02-06改1 1暂停(手工拨号方式下占用线是否振铃但电话就时打不出去设置0不暂停专用话机建立内线或外线通话会议后按DND/CONF键(会议键) +分机号码或外线应答后+会议键两次(PRI30方会议)普通话机建立内线或外线通话后拍插簧826+分机号码或呼叫外线应答后拍两次插簧改变专用话机的振铃音20-15-01中继线打入振铃音20-15-03内部呼入振铃音20-15-04DID/DISA20-15-05 DID20-15-06 E M 专用线上的拨入20-15-02PBX/CESU呼入20-15-08虚拟分机振铃音20-15-09回叫20-15-10 SLT警告音20-15-11 VRS信息等待呼入(以上只能在2-13 中选取)10-21-02 设 com端口波特率35-01-01 设 1 com 或 3 lin10-20-01 设 ex-der5 为 400035-01-04 设 0 不隐藏35-01-06 设延时时间 0 — 6553535-02-08 设呼入是否显示0 不显示 1 显示35-02-09 设显示 1 号码或0 名称计费线连接得顺序(两端需9 空插头) com 口( 9 针对 25 针)(串口线必须带有屏蔽套,最长15M)23 232 346 6557642078 587 4计费线连接得顺序(两端RJ45 水晶头)LAN EX(topaz需要安装软件)172.12.0.10访问1 32 63 144R45的顺序5 56 277889 页ASPILAEX按住小白冒开机大概4.5 秒后分开小白冒(初始化机器)80-01-02 表 2 输入 1在输入81-01-09输入70分机有电流音改82-07-01 改 0EX 30B+D的设置10-03-01找到PRI卡然后按两次hold 键( 10-03-03 ) CRC4 改1(注:这一项是看一下局端是否需要效验,如果需要得在这一项中打开)22-11-02按音量的+ -找到分机的端口号码,clar清除,直接输入 DID 外线号码得后四位22-11-01按音量的+ -找到原始端口号码,clar清除,直接输入 DID 外线号码的全部八为号码22-13-01按音量的+ -找到原始端口号码,clar清除,直接输入 DID 外线号码的全部八为号码22-02-01输入3改成DID模式(MODE1,MODE2都设)然后吧分机号码改11-02-01中EX软件升级方法1 用 PC将新得主软件存储在闪存(CF)卡2 关机后将CF卡插入NTCPU上得CF插槽3 右手按下在CTCPU上的“ LOAD“开关4左手去开电源,右手松开5等 5 秒中松开右手 LOAD开关6 机器启动,话机没有显示,等待1-2 分钟7 看主板上得指示灯0, 2,和 3 开始8 升完成,关机退出NTCPU上 CF插槽得存 CF卡9机器再次开机看主版本: CHECK + HOLD※ 目(声源必是WAV格式 , 文件名必是 :CCITT A-LAW 8kHz 声道 PCM数据 , 可以用 Microsoft Windows中的音机置个数据)(以上都已改好 , 把文件名改成:(把放入在 CF-A/B 中的 VM / OGM / 3 / 1 / 9中)保留音更改置方法10-04-01保留音源0⋯内部声源( 初始置 )1⋯外部音源(2PGDU)3⋯DSPDB (VRS) ※10-04-02中分配VRS信息号10-04-03中整音量平制音 : SPK + 716 + 7 + (01~48)制的信息号, 听到开始音和一声后制 , 不能超 2 分 , 如听到音束表示已超音,0 #束或挂机.听音 : SPK + 716 + 5 + (01~48)听之前的音,按#在听,听下一段音5 +(01~48) 最后挂机 .除音 : SPK + 716 + 3 + (01~48) + HOLD (用机),取消操作,除音并返回 3 ,挂机除音.0页经济路由设置1.进入程序后输入14→01→23→输入1(开路由)后按HOLD保存2.进入程序后输入26→01→04→输入1(非 UK)后按 HOLD保存3.进入程序后输入26→02→01→输入路由所需的字头码→按HOLD保存4.进入程序后输入26→05→02→输入最经济路由的前置数字→按HOLD保存一、进入编程退出: DC键三次, SPK。
NEC程控交换机操作说明书

NEC2400 ipx程控交换机操作说明一、编程软件登入1、软件介面2、ActPBX设置①临时激活码点击:Execute,进入设定激活码;②正式激活码点击:Execute,进入设定激活码;2、MAT登入点击:进入设置登入参数①TCP/IP点击:Modify为确认;②串口点击:Modify为确认;点击:进入到编程③编程介面选择PBX,点击Login,登入;登入成功;二、基本设置1、操作键回车为确定键,SHIFT+回车为返回上一步2、ATIM:修改系统时间点击:Set为保存设置;3、ASPA:设置功能代码TN:租户ACC:功能码CI:NSRV:SSCSID:功能,主要包括以下:8为呼叫转移设置9为呼叫转移取消28为分机跟我走29为取消分机跟我直10为遇忙转移11为取消遇忙转移3为遇忙回叫,设置时,听到忙音后按拍插簧听嘟嘟声后,按功能码35为代答,代答码+分机号7为组代答118为来显(SSCA)3、ASDT:设置分机号码TN:租户STN:分机号码LENS:为端口地址(8进制)TEC:模拟话机为2,数字话机为12,热线到话务台为14RSC:为电话服务等级权限,如下:1国际2国内3市话4专线5内线SFC:服务功能权限 2WRT?:Y为确定4、ASCL:修改服务等级各功能以上有介绍,见2-45、DSTN:查看分机数据点击:Get,显示分机数据6、AHLS:热线到总机或分机①总机见ASCL TEC为14时为热线到总机②分机步骤一:步骤二:HOT TN:热线的租户号码1HOT STN:热线分机号码TYPE: 1CON TN:被热线的租户号码1CON STN:被热线的分机号码7、ACFS:设置呼叫转移V:无条件转移B:遇忙转移D:无应答转移Get:查看数据Set:确定Del:删除8、ATRK:设置中继路由RT:路由1为PSTN 2为专线3为模拟中继TK:中继序号LENS:中继端口地址TN:租户10、ACDD:直达线分配DC:外线号码的后4位CDC:转换后的号码11、设置分机打出时显示总机号码分机摘机拨*43 2222取消为*43 012、ACSI:模拟中继直达分机分配CSI:313、AMND:设置号码位长DC:所拨号码前缀MND:位长其它为0三、线路接法1、话务台的接线法2、PRI线路的接法①中继网关1 2 为收 4 5 为发②PBX与中继相返四、板卡介绍16LCCD 16路分机板30PRTC 1路数字中继板CS33 2路话务台接口板8RSTAE 激发器电路板16COTBD 16路模拟中继板五、保存数据MEM_HDD:保存数据选择:Data Memory 点击:Start六、其它介绍1、ARTD:设置路由数据(PRI)不计费10:SMDR 0 2、ARTD:路由(模拟中继)3、ASYD:系统数据设置SYS INDEX DA TA FDATA MDATA1,5,01,00,008,3F,00 ,0058,0C,00,0064,89,00,0065,FF,00,0092,3F,00,0093,FF,00,0094,FF,00,00139,3C,00,00288,02,00,00SYS TN INDEX DA TA2,1,1,031,2,031,3,811,7,0D1,8,FF1,9,FFSYS INDEX DATD3,0,212,913,017,424、ASFC:设置服务功能5、AATC:设置服务密码提升级服务等级,拨号听忙音,再拨密码2182 6、AOPR:路由选择表设置外线出局加减码TDPTN:0OPR:公网:0专线:8RA:0专线:公网:如果是要加码时:PNL设置为1后,再进AADC设置PNL:1时的加码为DC7、ACND:主叫号码变换CNP:模式号1为公网2为专线SKIP:08、ASPD:缩位拨号ASPA设置功能码后,再进ASPD设置缩位拨号的代码9、ASHC:设置分机寻线组10、ACPG:设置组内分机11、ASYD:去掉监听,保留强插SYS:1INDEX:179DATA:0012、LLEN 打印分机号码000001 01123713、ASPA 删除字头TN 1 ACC 27 CI N、H、B SRV LCR RT 255 0 0 0 AFRS 1 255 27 DELAOPR 0 27 0 DEL14、ASTN 改分机号码TN :1OLD STN :旧分机NEW STN:新分机15、LSPA 查看功能码TN START END1 10 ###N B16、AFRS设置长途加IP字头(196)租户:TN:1 。
维修NEC电话交换机,NEC-TOPAZ,NEC-SL2100编程说明书

维修NEC电话交换机,NEC-TOPAZ,NEC-SL2100编程说明书HOLD 保存 DC 编程项⽬后退 FLASH 在项⽬间的细项移动LND 光标左移 OPAC 光标右移 SPK 退出编程(需要⽤DC 键退出到初始编程状态)VOL 在同⼀项⽬内的数据进⾏翻转(如中继1、2…,分机号200、201…等)此操作会⾃动保存已经更改的数据CONF 左进删除键 CLEAR 删除键免提 716+7+01(欢迎致电。
)、02(分级忙。
)、03(⽆⼈接听。
)听716+5+。
上海维修联络;133-9117-9117进⼊: SPK→#*#*→12345678(密码)→HOLD →显⽰ Program mode振铃组的设置:22-05-01 将外线分配到响铃组22-04-01 设置响铃组内的分机退出:按DC键返回直到显⽰Program mode 时按SPK键退出并保存所设置的数据,屏幕上会显⽰saving system data开机关机顺序先付后主IE:只能改分机号。
⽤户名:USER001 密码:111111软件:⽤户名:TOPAZ 密码:12345678EX: ASPIRE 密码:12345678关于NEC TOPAZ编程设置注意事项⼀、进⼊编程SPK+#*#*+password:"12345678"(默认)+Hold 11-01-01 * digit 111-12-27 *⼆、编程项⽬取消专⽤话机的⾃动接听:SPK 823听到嘟⼀声。
分机拨“0”或“9”打总机在20-17-01⾥边填⼊总机号码。
更改⽇期和时间:10-01-01 年(2位) 10-01-02 ⽉(2位) 10-01-03 ⽇(2位)10-01-04 星期(1—7)SUN—SAT 1=星期⼀10-01-05 ⼩时(2位) 10-01-06 分钟(2位) 10-01-07 秒钟(2位)更改代接码:11-01-01 按VOL键找到 * 将“4”改为“1”HOLD—DC到下⼀项。
necsl1000安装培训资料(常用安装命令简介)
TOPAZ编程FLASH移光标TOPAZ原始IP 172.16.0.10` 修改IP后需热启动10-12-01时间日期10、01、0190-33-01 改成1中国形式中继呼入响铃分机22-05:外线分组22-04:〔响铃〕分机组成员22-06:分机组成员必调:20-03-04改为1内线呼叫振铃方式20-02-12 0:语音1:振铃改变出局码〔例如0用第一外线组9用第二外线组〕11—01—01 0变为3 9变为411—09—01 9改为011—09—02里输入914—05—01里分外线组14—06—01里输入TBL1 order1 Data1TBL2 order1 Data221—15—01里输入2〔指定拨第二中继线组路由码时使用的路由〕DIL:11-07-01输入分机组名字16-01-02-1设置振铃方式16-02给部门组分配分机22-02-01-4设置呼入类型DIL22-07-01外线呼入振铃组取消回铃15-03-15-1定义按键去除按键SPK—852—按键—000去除定义分机按键SPK—851—按键—01—分机号码—HODL定义外线键SPK—852—按键—*01—外线号〔01开始〕必改81-01-09 把47改成94呼出14-05-01 外线分组14-06-01 中继线路由21-02-01 分机允许使用的路由21-01-01 外线占有顺序14-07-01 中继线分配图设置15-06-01 分机对应的中继线分配图举例CO1CO2 1组14-05-01项ORDER:次序对BL路由CO3CO4 2组SKP-851 08查询来电键可查16个来电号码未接的来电前显示*09呼叫改址键设置按键15-07拍叉时间820404 改为13 8100回铃820407改为10 17820408改为15 80号码方案11-01-01 字头位数类型11-02 修改分机号码15-01-01 修改分机名字效劳码11-10 ,11-11, 11-12长途等级21-05-08 15个等级21-06-07 等级限制码21-04-01 分机等级随身效劳密码〔可设500个和NEC288一样多〕21-14-01设密码〔固定六位〕21-14-02 设密码等级763+密码+9拨号锁20-08-08初始OFF改为NO21-09-01 拨号锁等级〔相对系统〕21-10 〔相对分机〕设置摘机700+4位密码+1 取消摘机700+4位密码+0计费串口35-01-01 0:串口3:LAN口35-02-14 输出日期〔用LAN口计费必须调〕10-21-02 波特率10-20-01 TCP端口2500 〔EX10-20-05〕EX在设置计费的时候要将每条外线的计费输出翻开,编程14-01-06=1 来显14-02-10 1:有来显0:无来显15-07-08 做查询键或通过功能码设置15-03-14 普通分机转移是否有来电显示〔EX〕15-03-09 普通话机来显设成114-02-16 FSK/DTMFLCR 14-01-23 指定外线有LCR功能设成126-01-04 方式改成126-02-01 设字头26-02-06 可设25个表不要用表126-05-02 Table表删除后没有接入码经常打不出:20-03-04改为120-03-03重拨定义话务台分机20-17定义第二出局码11-01-01-4 14-05 14-06 11-09-01 11-09-02 21-15语音信箱45-01-01数字话机进入语音信箱15-03-03-1使用ISDN外线板时,许多局向普通分机不能拨打20-25-03改为1外线有杂音81-07-01改为0三分钟提醒20-13-01 1改为011-12-2711-12-27 867-→*按clear把867 清掉11-01-01 按“∧〞或“∨〞键选到*×digital -→1*×type -→1呼入响一声断一会儿,81-01-09 把数值加大修改密码:90-02-0114-02-18改为1防止分时机叫转接分机14-02-19把1改为3 14-02-20把0改为7 14-02-08改成0解决8100 经常断线问题转接时振铃频率过急,20-15-09改为3无应答时间24-02-03改成20或根据客户需求内置VRS自动应答系统<一>在22-02-01中设置1〔VRS〕然后在25-02-01中设置为1〔VRS〕按HOLD然后输入01。
NEC SL1100 多线终端用户手册说明书
Multi-Line TerminalUser GuidePlease read this manual carefully before operating this product and save this manual for future use.Thank you for purchasing NEC SL1100 system.Due to the flexibility built into the system, yourDialing Codes and Feature Capacities may differ from those in this guide. Check with your NEC Authorized Supplier / System Administrator and make a note of any differences.When installing the handset :1. Make sure the handset cord is plugged into the handset jack on the telephone base.2. The line cord routes through the channel on the telephone base.3. Alternatively the line cord can route through the channel on the telephone legs.Handset CordCord can be installedeither wayTo set the low viewing angle position:1. Fold the legs all the way back.To set the high viewing angle position:1. Flip up the two leg supports.2. Fold the legs back until the supports contact the base.Handsfree Options- Handsfree lets you place and answer calls by pressing “Speaker” instead of using the handset.- With Automatic Handsfree, you can press a Speaker Key without lifting the handset. Normally, you have Automatic Handsfree.- Use Handsfree Answerback to answer a voice-announced Intercom call by speaking toward your phone without lifting the handset.Dial Keys HOLD KeyPress this key to place an internal or external call on hold.Speaker KeyControls the built-in speaker, which can be used for Handsfree dialing/ monitoring. LED on key lights when key is active.Enter KeyRedial KeyVolume (UP) KeyIncoming Call History Key* 12 Programmable Function Keys are available for IP4WW-12TXH-B TEL. 24 Programmable Function Keys are available for IP4WW-24TXH-B TEL. ** The illustration shows IP4WW-24TXH-B TEL.Directory FunctionsorVolume (DOWN) KeySpeakerCall Indicator LampThis lamp flashes fast when a call is ringing and flashes slower when a message has been left.Alphanumeric DisplayThe LCD has 3 lines, 24 characters with backlight.Soft KeysThe Soft Keys show the available features for your current activity. Any feature shown at the bottom of the LCD is available.Help KeyThe user can press this key followed by a programmable key to check what Line or Programmable Feature is assigned on the key.Programmable Function KeysFlexible Line keys or Feature Keys assigned by the System Administrator.Flash KeyPress key to finish an outside call and hear the dial tone.Transfer KeyAllows the extension user to transfer established calls to another extension.DND Key (Do Not Disturb)Setup a Do Not Disturb if pressed during a call. Mute (Microphone) KeyMute handset or Handsfree Microphone. LED lights when microphone is muted.Clear/Back KeyPress this key to cancel the current action or delete a character.Cursor KeyAccess various features with simple operation.⏹ Programmable Function KeysProgrammable Function Keys can be assigned as “Trunk” Key and/or other Function Keys. You can just press the function key to activate the assigned function without dialing the Service Code.•There are 2 levels of Function Keys. (General Keys : assigned by 751, Appearance Keys : assigned by 752)•Appearance Keys have priority. You can overwrite the Appearance Key at the General Key.•If you want to overwrite the General Key at the Appearance Key, you have to erase the Appearance Key by dialing “752 + 000” before General Key assignment.•In the default setting, Programmable Function Key No. 1 to 12 is assigned as “Trunk” Key. If you want to assign Function Keys (General) at the unused Trunk Keys, these unused keys should be erased by dialing “752 + 000”.•Programmable Function Keys can be erased by dialing “752 + 000” or “751 + 00”.•Programmable Function Keys can be assigned by Soft Key operation as well.⏹ DSS / One-Touch KeysProgrammable Function Keys can be assigned as DSS (Direct Station Selection) or One-Touch Keys. You can place an Outside / Intercom Call by just pressing this key without dialing the number.•To change the Trunk Access Code, ask your NEC Authorized Supplier for the details.•In the default setting, Programmable Function Key No. 1 to 12 is assigned as “Trunk” Key. If you want to assign DSS Keys to the unused Trunk Keys, these unused keys should be erased by dialing “752 + 000”before performing the above operation.•For the DSS Key, the extension status can be indicated on the BLF. (idle : extinguished, Busy : lit)•When you register a telephone number, the Trunk Access Code should be added in front of the number.•Up to 36 dialing digits can be registered, but the name can not be registered.•If you want to continue the operation, press Programmable Function Key instead of Speaker Key to finish.•One-Touch Keys can be assigned using Soft Key operation.⏹ Abbreviated Dial (Speed Dial) Registration• The number of digits dialed for Bin No. depends on the system setting (0-9<Only Group ABB> / 00-99 / 000-999).• System setting is necessary for Group ABB function. Ask your NEC Authorized Supplier for the details. • Name can be entered by Dial Pad Keys. (See below)• Up to 36 dialing digits can be registered, and up to 12 characters can be registered as name. • If you want to continue the operation, dial Bin No. instead of Speaker Key to finish. • You can skip to enter the name. (No enter any character, then press “Hold” Key).• You can erase the registered number & name by pressing “Exit” Key after dialing Bin No.. • Common Abbreviated Dial can be registered using Soft Key / Cursor Key operations.ÔÕúåäæöüαεθβ> ?πΣσΩ∞¢£When you enter a name, use Dial Pad Keys to enter letters as below. For example, press “2” key once for “A”, twice for “B”, etc.#Accepts a character and moves the cursor one place to the right. Press twice to insert a “space”. Clears the character entry to the left, one character at a time. (Backspace)Clear/Back⏹ Entering Alphanumeric Characters⏹ Place an Outside Call <Quick Access>•Listen to the Dial Tone before dialing a Telephone Number.•You can have function keys for Trunks or Trunk Groups. Ask your NEC Authorized Supplier for the details.⏹ Place an Outside Call <Access by Code>•To change the Trunk Access Code, ask your NEC Authorized Supplier for the details.•Listen to the Dial Tone before dialing a Telephone Number.•If the Trunk Group number is greater than 10, you should enter 2 digits (e.g. 11 : Group 11) after dialing “704”. Ask your NEC Authorized Supplier for the details.•Ask your NEC Authorized Supplier for the Trunk Number dialing digits.⏹ Place an Intercom Call <Dial Access>•Your call will ring or voice-announce. If you hear ringing, wait for an answer. If you hear a beep, begin speaking. Dialing “1” changes voice/ring mode (if the destination is Multi-line Terminal).⏹ Directory Dialing•After searching the desired destination, press “Enter” Key to confirm the telephone number before lifting the handset, if necessary.•You can enter more characters (up to 12) to make desired destination’s search even more specific.•You can also search the desired destination without entering the characters (press Cursor Keys only).•To cancel the Directory Dialing operation, press “Clear/Back” Key.•Directory Dialing can be activated using Soft Key operation.⏹ Last Number DialingRedial ListOn-HookConditionQuick Redial•The system retains the last 10 numbers dialed, which can be reviewed and redialed.•To cancel the Redial List operation, press “Clear/Back” Key.⏹ Callback by Received NumberReceived Call 01/108175556000DEC TUE 22 04:31PMOn-HookCondition•Caller-ID function is required to use this operation for outside calls. Ask your NEC Authorized Supplier for more details.•To cancel the Callback operation, press “Clear/Back” Key.⏹ Abbreviated (Speed) Dialing <for Outside>Common ABBGroup ABB• The digit of Bin No. depends on the system setting (0-9 <Only Group ABB> / 00-99 / 000-999). • Telephone Numbers are pre-registered to the system.• System setting is necessary for Group ABB function. Ask your NEC Authorized Supplier for the details.• When you assign the Common ABB Key on the Programmable Function Key, “Press HOLD” is required after dialing the Function Code 27.⏹ One-Touch / DSS CallOne-Touch / DSS Key• Telephone / Extension number should be pre-registered to a One-Touch / DSS Key. • Trunk Access Code should be added in front of the Telephone Number.On-Hook Condition⏹Set Camp On / Callback• Camp OnIntercom Call - When you hear ringing, wait for the called party to answer. Outside Call - When you hear Dial Tone, begin telephone number dialing.• Callback Intercom Call - When your terminal starts the ringing, lift handset and wait for the called partyto answer.Outside Call - When your terminal starts the ringing, lift handset, hear Dial Tone, and begin telephone number dialing.• This function is applicable in case all trunks are busy condition (not applicable for dialed outside party busy). ⏹ Cancel Camp On / Callback⏹ Repeat Dialing <Outside Call Only>• When the Repeat Dialing is set, Repeat Dial Key flashes and the system automatically and periodically redials a call. Repeat duration is programmable. Ask your NEC Authorized Supplier for the details. • You should lift the handset when the called party answers. • Press flashing Repeat Dial Key to cancel.⏹Set a Message Waiting⏹ Cancel Message Waiting Individual Cancel(originated extension)All Cancel(at any extension)• When you set a MW, the called party’s Indicator starts to flash, and your Indicator is lit Red.⏹ Answer a Message Waiting (Your terminal’s Indicator is flashing Red)Check & AnswerQuick Answer• When you answer a MW, the Indicator automatically goes off when the called party answers.• If multiple message are in queue, you can select the desired party by pressing Up key after dialing ” , 0”.⏹ Answering an Outside Call⏹ Picking up a Call for other ExtensionsIn same GroupIn other GroupSpecified Extension9Extension Number?• System setting is necessary to create a Call Pickup Group. Ask your NEC Authorized Supplier for the details.• Call Pickup operations are available using Soft Key operation.Ringing ExtensionNon-Ringing Extension• Confirm the status of Mute Key if you want to answer by Handsfree (Mute On : LED On, Mute Off : LED Off).⏹ Answering an Intercom CallSignal Mode ExtensionVoice Mode Extension• Intercom Call Mode (Signal or Voice) can be set at your terminal by : “Signal” : Speaker -> 723 “Voice” : Speaker -> 721• Confirm the status of Mute Key if you want to answer by Handsfree. (Mute On : LED On, Mute Off : LED Off)Call Pickup Key(SC751+24)Call Pickup for otherGroup Key(SC751+25)⏹ Holding a Call / Retrieving a Held CallTalkingHoldRetrieve• When on an Intercom, the call is held as “Exclusive Hold” on your terminal.• This operation puts your outside call on System Hold. Other extension users can take the call off Hold.⏹ Retrieve a Held Outside CallTrunk Number you want to retrieve?? • Ask your NEC Authorized Supplier for the details about your Trunk Number dialing digits.⏹ Transferring a Call to the other ExtensionExtension Number⏹ Holding a Call ExclusivelyTalkingHoldRetrieve• This operation puts your outside call on Exclusive Hold. Other extension users can not take the call off Hold.Speaker• If your terminal has DSS/One-Touch key, just press it instead of “HOLD” and “Extension Number” dialing.⏹ Do Not Disturb (DND)•When you set DND function, DND Key is lit and the Internal Dial Tone pattern changes.⏹ Conference•You can repeat this operation to add more parties.•You may be able to have up to 16 parties (including your terminal). You may need to adjust the volume level due to the environment where calls are placed. Ask your NEC Authorized Supplier for the details.Call Forwarding / Follow MeWhen you set Call Forward / Follow Me, the destination extension is displayed on the LCD and the Internal Dial Tone pattern is changed. (Call Forward / Follow Me can be set using a Soft Key).Call Forwarding / Follow Me (Cont’d)“Menu” Soft Key⏹ “Dir” Soft Key⏹ “VM” Soft Key (Option)“CL” Soft Key⏹ Soft Key Operations during Off-Hook condition⏹ Soft Key Operations during Intercom Calling⏹ Soft Key Operations after establishing an Intercom Call⏹ Soft Key Operations during Outside CallMenu Structure when PRG15-02-60 is set to Advanced Mode 1111 -11x :Missed Call Data 211 -21x :Name Started from A-Z 131 -13x :Dialed Call Data121 -12x :Received Call Data Back to the previous menu. Clear/BackExitExit from this menu mode.Optional hardware and System setting is necessary to use In-Mail (Voice Mail) feature. Ask your NEC Authorized Supplier for the details.Log-On to the In-MailCall Forward to Voice Mail⏹ Mailbox Greeting•Selected Greeting (one of three) becomes active.⏹ Mailbox Security Code•Dialed Security Code can be canceled by pressing “4” instead of “2 (Accept)”.•In case the “In-Mail Advanced Features License (SL-VM-ADVANCE LIC)” is provided, or during Free Trial period (60 days after new installation), the type of Security Code can be assigned as below.- Dial 4 digits Security Code followed by “7” : Security Code for all log-on- Dial 4 digits Security Code followed by “6” : Security Code for remote log-on only•System Administrator can delete a Mailbox Security Code.Listen to Left Messages in your MailboxMulti-Line TerminalUser GuideNEC CorporationA50-031929-004 AU Issue 1.0 July 2012。
NEC电话交换机配置与编程

#*#* 12345678 hold10-01-01 修改系统时间24-02-03 设置没人接转移时间(默认:10秒)16-01-09 设置部门组无人接转移时间(默认:15秒)11-02-01 设置分机号码90-08-01 设置系统复位“1”+ hold(仅对系统维护使用)90-33-01 改 1 中国制式20-03-04 改 1 拨外线发码时长(默认:3秒)11-01-01 把 * 号,把4 改 1代接11-12-27 把867 改 *82-04-04 改13 最大断开时间(默认:20)82-04-08 改80 最大闪断时间82-04-07 改17 最小断开时间(默认:21)回铃设置81-01-09 改70 呼叫放弃检测时间14-02-19 改3 所有外线都设置通话断线设置14-02-20 改7 所有外线都设置14-02-09 改1 所有外线都设置(忙音检测) 0:禁止,1:使用20-21-01 改0 长时间通话警告1(默认:170)20-21-02 改0 长时间通话警告2(默认:180)20-13-01 改0 长时间通话警告3(0:关,1:开)Nec topaz 查看系统版本Opac + 3 或者 90-16-01Nec topaz 查询自己得端口号1:check + call2:check + 分机号Ex 查询系统版本Check + hold15-01-01 修改分机名称90-02-02 修改系统密码20-02-12 改1 呼叫振铃(0:语音,1:铃声)22-04-01 普通振铃设置普通振铃设置22-06-01 普通方式振铃分机是否振铃(0:不,1:振铃)22-05-01 设置振铃组 1页11-01-08 设置勿打扰(847) 1:阻止中继线呼入2:阻止内线呼入,群呼,呼叫前转和转移来得中继线电话 3:阻止所有呼入4:阻止呼叫前转0:取消勿打扰11-12-15 设置指定出中继(805)使用方法:801 + 01(01就是第一条外线)11-11-12 设置闹钟(827)使用方法:827 + 类型1(预定时间,只想一次)类型2(预定时间,每天都响)+时间(24小时制式)851 + 42 经理经理秘书功能851 + 41 秘书11-11-40 外转外功能(713) 14-01-13 改 1(所有得外线都设置)14-02-09 改 120-02-09 改 120-11-12 改 121-03-01 改 125-07-07 改 0使用方法:call +713+ 6 + 9 +转移得号码 + hold(专用话机) 713+6+hold(取消)713+ 6 + 9 +转移得号码(普通话机)713+6(取消)11-09-01 设置中继占用码(类型3)初始:9 改 0设置拨0或9出局11-01-01设置字头 9 (digit 1 type5), 0(digit 1 type 3)Ars缩位 26-01-01 改 121-01-03 改 026-02-01 改 026-02-02 改 126-02-03 改 126-02-05 改 1 ip位数26-03-01 输入:D 0 3 190 PRE (RE)2页Lcr缩位 14-01-23 所有外线都 126-01-04 改 126-02-01 表 2 改 026-02-06 表 2 改 226-05-02 在表2 中添加IP出局码停止(暂停)11-12-10缩位拨号(813) 13-04-01 输入要存储得号码(如9 R 123456)存储电话薄话机上要输入得特殊字符(如:P R G)外线键:1 2 3使用方法:拨813 +存储得表格(如:002)定义按键使用27+你存储得表格一呼叫转移(内线)848立即呼叫转移(11-11-01)843遇忙呼叫转移(11-11-02)845无人应答呼叫转移(11-11-03)844遇忙和无人应答转移(11-11-04)842双方振铃转移(11-11-05)二呼叫转移(内线)1.双方振铃2 .无人应答转移的分机号24-06-01 3.立即转移4.忙和无人接转移三呼叫转移(内线) 11-11-16(888)+ 2遇忙/无应答 + 分机号 + 2所有外线 + SPK 3跟随转移 3仅外线4立即转移 4仅内线6无应答转移7双方振铃转移0取消专入设置 22-04-01 设置分机组22-05-01 设置中继线组通话声音小设置方法 81-07-01 改 0 (把所有得外线都设置)10-03-03 改 5010-03-01 类型设置(1.专用话机2.普通话机10.直选台13.中继) 10-03-04 输入50全部输入完成后重启电源才能管用3页回叫设置方法 15-02-11 改1(把所有得分机都改)11-12-03功能码(850)使用方法:在呼叫对方分机听到对方忙线声按850 挂机就可以了分图功能设置方法 14-07-01 0.无接入七个等级 1.只有呼出接入2.只有呼入接入6.呼入呼出接入7.最高接入15-06-01 对应分机系统本身有200个图位MAP图位得意思11-12-19群呼功能设置方法(801) 31-02-01 分机分组31-02-02 对没个分机打开或关闭群呼功能(0.关闭 1.打开)11-12-23 群呼回应(863)使用方法:全体呼叫: 801 + 0或00部门呼叫: 801 + 部门组号11-12-08监听功能设置方法(810) 20-13-11 允许/禁止监听(0.关1.开)20-13-12 被监听允许/禁止(0.关1.开)20-13-17 强叉音和显示(0.关1开.)定义强叉键 34使用方法:拿起话筒 + 810 + 您想监听得分机号码11-11-36随身密码设置(763) 14-01-08 改1(每条外线都设置)21-05-0821-06-07 设置长途账目表21-04-01分机对应哪个表21-14-01设置密码21-14-02 改1使用方法:763 + 设置得密码+出局码+外线号码代接组设置方法23-02-01给分机分代接组11-12-26指定组代接(868)11-12-28代接其他组分机(869)4页功能键设置 851(11-11-17)+ 24 本组代接 / 25 外组代接 / 26 指定组代接如果设置不成应该先把原来得功能码删除852(11-11-38)删除可编程功能码:10.立即转移 11.遇忙转移 12.无人应答转移 13.遇忙和无人应答转移 14.双方振铃转移 24.本组呼叫代接 25.外组呼叫代接 26.指定呼叫代接 36.预占线回叫 34.强叉 08.来显 32.会议回应 02.麦克风 06.转接键普通话机重拨不好用设置方法 20-03-03 改 020-03-04 改320-03-07 改5内置话务员拨0挂机后电话还一直响铃调试:80-07-01 把表1中得数据删除在表2中输入45如果客户想让自己得外线费用平均调试:21-01-01 中继线占用方式(0.优先路由1.循环路由)虚拟分机好设置 11-04-01 设置虚拟分机号码15-07-01 设置虚拟分机键“*03”15-08-01 设置虚拟分机响铃15-09-01 改1设置虚拟分机是否振铃比如你定义了19键为虚拟分机键(显示如下)15-09-01TEL800KY 19 MODE1 = 05页夜服功能设置 12-01-01 允许人工夜服转换(0关 1开)20-06-01 改1 等级20-07-01 人工夜服转换(0 禁止 1使用)人工转换22-04-01 设置振铃分机,振铃组响22-05-01 白天打入第一组响,夜间第二个响使用方法:818(11-10-01)+ 1 白天 818 + 2 夜间定义按键:851 + 相应键 + 09 + 1 白天851 + 相应键 + 09 + 2 晚上12-01-02 自动夜服转换(0关 1 开)22-04-01 设置振铃分机,振铃组响22-05-01 白天打入第一组响,夜间第二个响自动夜服 MODE相对应12-02-01 设置自动夜服转换时间20-03-03 拨号方式(0:接收所有数据在发送 1:直接发送)来电显示设置 14-02-10 改1 (所有得外线都设置)15-03-09 改1 (分机得来电显示)0 FSK15-03-11 主叫号码类型1 DTMF14-02-16 模拟中继线类型 0 FSK1 DTMF15-03-14 设置转移来电方式 0 内部号码1 外部号码1.外置话务员调试方法 16-01-02 改1 (0优先路由 1循环路由)22-02-01 改4 把所有的外线都设置上2.循环振铃调试方法 16-02-01 给分机分组(如:2)11-07-01 设置组代表号(如:300)22-07-01 设置代表号得铃响(就是你设置的代表号300响铃)VRS设置方法 22-02-01 改1 (所有得外线都改)25-02-01 先 1 后01 (所有得外线都设置)25-06-01 recv 1(代表拨几)hold输入分机号码25-06-02 destno(拨几到哪个分机响铃)40-07-01 设8(中文模式)40-10-08 设02 (忙线时得通告)40-10-09 设03 (无人接时的通告)录制语音: SPK + 716 + 7 + (01~48)录制的信息号码,听到请开始录音和嘟一声后录制,不能超过2分钟,如听到录音结束表示已经超过录音时间,拨 0 # 结束或挂机.听语音: SPK + 716 + 5 + (01~48)听之前的录音,按 # 在听,听下一段语音拨 5 +(01~48)最后挂机.删除语音: SPK + 716 + 3 + (01~48) + HOLD (专用话机),取消操作,删除录音并返回拨 3 ,挂机删除录音.----------------------------------------------------------------------------------------------------------------------第二出局码设置方法 11-01-01 设字头digit 1 type 4 (设置出局码的字头和类型) 11-09-02 添加第二出局码14-05-0114-06-01(初始:路由 1次序号1=1(中继组次序号2.3.4为设定) R-TBL URDER 121-15-01 设置分机第二中继组路由长时间通话切断设置 14-01-14 改1 (中继线是否使用 1使用 0不使用)14-01-15 改0 (切断前得警告 0没有 1有)20-06-02 等级(对应分机的等级)20-21-03 输入断开得时间(呼出的时间)20-21-04 输入断开得时间(呼入的时间)20-13-02 呼入切断 0不切断 1切断20-13-03 呼出切断 0不切断 1切断等级外线打入直接接通设置 20-02-12 (0禁止(语音) 1使用(铃声))激活话机的语音:821(11-11-15)取消激活语音:823(11-11-16交换机和外线都没有出现问题 14-02-06 改 1 1 暂停(手工拨号方式下占用线是否振铃但电话就时打不出去设置 0 不暂停专用话机建立内线或外线通话会议后按DND/CONF键(会议键)+分机号码或外线应答后+会议键两次(PRI30方会议)普通话机建立内线或外线通话后拍插簧826+分机号码或呼叫外线应答后拍两次插簧改变专用话机的振铃音 20-15-01 中继线打入振铃音20-15-03内部呼入振铃音20-15-04 DID/DISA20-15-05DID20-15-06专用线上的拨入20-15-02PBX/CESU呼入20-15-08 虚拟分机振铃音20-15-09 回叫20-15-10 SLT警告音20-15-11 VRS信息等待呼入(以上只能在2-13中选取)10-21-02 设com端口波特率 0.4800 1.9600 2.19200 3.38400 35-01-01 设1 com或 3 lin10-20-01 设ex-der5为400035-01-04 设 0 不隐藏35-01-06 设延时时间 0—6553535-02-08 设呼入是否显示 0 不显示 1显示35-02-09 设显示 1 号码或 0名称计费线连接得顺序(两端需9空插头) com口(9针对25针)(串口线必须带有屏蔽套,最长15M)2 3 23 2 34 6 65 5 76 4 207 8 58 7 4计费线连接得顺序(两端RJ45水晶头)172.16.0.11 ip地址LAN EX (topaz需要安装软件)172.12.0.10访问1 32 63 14 4 R45的顺序5 56 27 78 89页ASPILAEX按住小白冒开机大概4.5秒后分开小白冒(初始化机器)80-01-02 表2 输入1在输入81-01-09 输入70分机有电流音改82-07-01改 0EX 30B+D的设置 10-03-01 找到PRI卡然后按两次hold键(10-03-03)CRC4改1(注:这一项是看一下局端是否需要效验,如果需要得在这一项中打开)22-11-02 按音量的 + - 找到分机的端口号码,clar清除,直接输入DID外线号码得后四位22-11-01按音量的 + - 找到原始端口号码,clar清除,直接输入DID外线号码的全部八为号码22-13-01按音量的 + - 找到原始端口号码,clar清除,直接输入DID外线号码的全部八为号码22-02-01 输入3 改成DID模式(MODE1,MODE2都设)然后吧分机号码改 11-02-01中EX软件升级方法1用PC将新得主软件存储在闪存(CF)卡2关机后将CF 卡插入NTCPU 上得CF插槽3右手按下在CTCPU上的“LOAD“开关4左手去开电源,右手松开5等5秒中松开右手LOAD开关6机器启动,话机没有显示,等待1-2分钟7看主板上得指示灯0,2,和3开始闪动8升级完成,关机退出NTCPU上CF插槽得闪存CF卡9机器再次开机查看主版本:CHECK + HOLD※为选择项目(声源必须是WAV格式,文件名必须是:CCITT A-LAW 8kHz单声道 PCM数据,可以用Microsoft Windows中的录音机设置这个数据)(以上都已经改好,把文件名改成 : G47.WAV)(把G47.WAV放入在CF-A/B中的 VM / OGM / 3 / 1 / 9 中)保留音乐更改设置方法 10-04-01 选择保留音乐源 0…内部声源 (初始设置)1…外部音乐源 (2PGDU)3…DSPDB (VRS) ※10-04-02 中分配VRS信息号码 (G47.WAV)10-04-03 中调整音量电平录制语音: SPK + 716 + 7 + (01~48)录制的信息号码,听到请开始录音和嘟一声后录制,不能超过2分钟,如听到录音结束表示已经超过录音时间,拨 0 # 结束或挂机.听语音: SPK + 716 + 5 + (01~48)听之前的录音,按 # 在听,听下一段语音拨 5 +(01~48)最后挂机.删除语音: SPK + 716 + 3 + (01~48) + HOLD (专用话机),取消操作,删除录音并返回拨 3 ,挂机删除录音.1 0页进入编程在待机下按SPK→#*#*→12345678(初始密码)→HOLD退出:DC键三次,SPK。
NEC SL2100 多线终端使用手册

Warning!!Telephone receivers produce magnetic fields that can attract small metallic objects such as pins or staples. To avoid injury, do not place the handset where such objects can be picked up.Please read this manual carefully before operatingthis product and save this manual for future use.Thank you for purchasing NEC SL2100 system. Due to the flexibility built into the system, your Dialing Codes and Feature Capacities may differfrom those in this guide. Check with your NEC Authorized Supplier / System Administrator and make a note of any differences.When installing the handset :1. Make sure the handset cord is plugged into the handset jack on the telephone base.2. The line cord routes through the channel on the telephone base.3. Alternatively the line cord can route through the channel on the telephone legs.To set the low viewing angle position:1. Fold the legs all the way back.To set the high viewing angle position:1. Flip up the two leg supports.2. Fold the legs back until the supports contact the base.* 12 Programmable Function Keys are available for IP7WW-12TXH-B1 TEL. 24 Programmable Function Keys are available for IP7WW-24TXH-B1 TEL. ** The illustration shows IP7WW-24TXH-B1 TEL.Dial Keys monitoring. LED on key lights whenkey is active. Redial Key Volume (UP) Key orVolume (DOWN) KeySpeakerCall Indicator LampThis lamp flashes fast when a call is ringing and flashes slower when a message has been left.Alphanumeric DisplayThe LCD has 3 lines, 24 characters with backlight.Soft Keys **The Soft Keys show the available features for your current activity. Any feature shown at the bottom of the LCD is available.Help KeyThe user can press this key followed by a programmable key to check what Line or Programmable Feature is assigned on the key.Programmable Function KeysFlexible Line keys or Feature Keys assigned by the System Administrator.Flash KeyPress key to finish an outside call and hear the dial tone.Transfer KeyAllows the extension user to transfer established calls to another extension.DND Key (Do Not Disturb)Setup a Do Not Disturb during a call or in idle state.Mute (Microphone) KeyMute handset or Handsfree Microphone. LED lights when microphone is muted.Clear/Back KeyPress this key to cancel the current action or delete a character.Cursor KeyAccess various features with simple operation.Handsfree Options- Handsfree lets you place and answer calls by pressing “Speaker” instead of using the handset. - With Automatic Handsfree, you can press a Speaker Key without lifting the handset. Normally, you have Automatic Handsfree.- Use Handsfree Answerback to answer a voice-announced Intercom call by speaking toward your phone without lifting the handset.• To change the Trunk Access Code, Ask your NEC Authorized Supplier for the details.• In the default setting, Programmable Function Key No. 1 to 12 is assigned as “Trunk” Key. If you want to assign DSS Keys at the unused Trunk Keys, these unused keys should be erased by “752 + 000” operation before the above operation.• For the DSS Key, the extension status can be indicated on the BLF . (idle : extinguished, Busy : lit)• When you register a telephone number, the Trunk Access Code should be added in front of the number. • Up to 36 digits dialing can be registered, but the name can not be registered.• If you want to continue the operation, press Programmable Function Key instead of Speaker Key to finish. • One-Touch Keys can be assigned by Soft Key operation as well.⏹ Programmable Function KeysProgrammable Function Keys can be assigned as “Trunk” Key and/or other Function Keys. You can just press the function key to activate the assigned function without dialing the Service Code. Function Code & Add Data• There are 2 levels of Function Keys. (General Keys : assigned by 751, Appearance Keys : assigned by 752)• Appearance Keys have priority. You can overwrite the Appearance Key at the General Key.• If you want to overwrite the General Key at the Appearance Key, you have to erase the Appearance Key by dialing “752 + 000” before General Key assignment.• In the default setting, Programmable Function Key No. 1 to 12 is assigned as “Trunk” Key. If you want to assign Function Keys (General) at the unused Trunk Keys, these unused keys should be erased by “752 + 000” operation.• Programmable Function Keys can be erased by dialing “752 + 000” or “751 + 00”. • Programmable Function Keys can be assigned by Soft Key operation as well.⏹ DSS / One-Touch Keys Programmable Function Keys can be assigned as DSS (Direct Station Selection) or One-Touch Keys. You can place an Outside / Intercom Call by just pressing this key without dialing the number.725715??71510?????90• The number of digits dialed for Bin No. depends on the system setting. (0-9<Only Group ABB> / 00-99 / 000-999)• System setting is necessary for Group ABB function. Ask your NEC Authorized Supplier for the details. • Name can be entered by Dial Pad Keys. (See below)• Up to 36 digits dialing can be registered, and up to 12 characters can be registered as name. • If you want to continue the operation, dial Bin No. instead of Speaker Key to finish. • You can skip to enter the name. (No enter any character, then press “Hold” Key).• You can erase the registered number & name by pressing “Exit” Key after dialing Bin No.. • Common Abbreviated Dial can be registered using Soft Key / Cursor Key operations.• Alternatively the SL2100 built-in Web Programming can be used to program Abbreviated dial bins (Common Speed Dials). Ask your NEC Authorized Supplier for the detailsWhen you enter a name, use Dial Pad Keys to enter letters as below. For example, press “2” key once for “A”, ⏹ Entering Alphanumeric Characters735745?????????1234567890#⏹ Place an Outside Call <Quick Access>⏹ Place an Intercom Call <Dial Access>• Listen to the Dial Tone before dialing a Telephone Number.• You can have function keys for Trunks or Trunk Groups. Ask your NEC Authorized Supplier for the details.⏹ Place an Outside Call <Access by Code> Telephone NumberTrunk Access CodeTrunk Group No.• To change the Trunk Access Code, Ask your NEC Authorized Supplier for the details. • Listen to the Dial Tone before dialing a Telephone Number.• If the Trunk Group number is greater than 10, you should enter 2 digits (e.g. 11: Group 11) after dialing “704”. Ask your NEC Authorized Supplier for the details.• Ask your NEC Authorized Supplier for the Trunk Number dialing digits.• Your call will ring or voice-announce. If you hear ringing, wait for an answer. If you hear a beep, begin speaking. Dialing “1” changes voice/ring mode. (in case the destination is Multi-line Terminal)??????407??????909#0#⏹ Directory Dialing⏹ Last Number Dialing⏹ Callback by Received Number• The system retains the last 10 numbers dialed which can be reviewed and redialed. • To cancel the Redial List operation, press “Clear/Back” Key.• Caller-ID function is required to use this operation for outside calls. Ask your NEC Authorized Supplier formore details.• To cancel the Callback operation, press “Clear/Back” Key.• After searching the desired destination, press “Enter” Key to confirm the telephone number before lifting the handset, if necessary.• You can enter more Characters (up to 12) to make desired destination’s search even more specific. • You can also search the desired destination without entering the Characters. (press Cursor Keys only) • To cancel the Directory Dialing operation, press “Clear/Back” Key. • Directory Dialing can be activated by Soft Key operation as well.5#⏹Abbreviated (Speed) Dialing <for Outside>• The digit of Bin No. depends on the system setting. (0-9 <Only Group ABB> / 00-99 / 000-999) • Telephone Numbers shall be pre-registered to the system.• System setting is necessary for Group ABB function. Ask your NEC Authorized Supplier for the details.• When you assign the Common ABB Key on the Programmable Function Key, “Press HOLD” is required after dialing the Function Code 27.⏹ One-Touch / DSS Call • Telephone / Extension number should be pre-registered to a One-Touch / DSS Key. • Trunk Access Code should be added in front of the Telephone number.2#??⏹ Set Camp On / Callback• Camp OnIntercom Call - when you hear ringing, wait for the called party to answer. Outside Call - when you hear Dial Tone, begin telephone number dialing.• Callback Intercom Call - when your terminal starts the ringing, lift handset and wait for the called partyto answer.Outside Call - when your terminal starts the ringing, lift handset, hear Dial Tone, and begin telephone number dialing.• This function is applicable in case all trunks are busy condition. (not applicable for dialed outside party busy)⏹ Cancel Camp On / Callback ⏹ Repeat Dialing <Outside Call Only> • When the Repeat Dialing is set, Repeat Dial Key shall flash and the system automatically and periodically redials a call. Repeat duration is programmable. Ask your NEC Authorized Supplier for the details. • You should lift the handset when the called party answered. • Press flashing Repeat Dial Key to cancel.5777⏹Set a Message Waiting⏹ Cancel Message Waiting • When you set a MW, the called party’s Indicator displays as per setting.⏹ Answer a Message Waiting (Your terminal’s Indicator displays as per setting)177???377• When you answer a MW, the Indicator automatically goes off when the called party answers. • If multiple message are in queue, you can select the desired party by pressing Up key after dialing “, 0”, ifseveral number of Message Waiting has been set.⏹ Answering an Outside Call⏹ Picking up a Call for other ExtensionsExtension Number• System setting is necessary to create a Call Pickup Group. Ask your NEC Authorized Supplier for the details.• Confirm the status of Mute Key if you want to answer by Handsfree. (Mute On : LED On, Mute Off : LED Off)⏹ Answering an Intercom Call• Intercom Call Mode (Signal or Voice) can be set at your terminal by : “Signal”: Speaker -> 723 “Voice”: Speaker -> 721• Confirm the status of Mute Key if you want to answer by Handsfree. (Mute On : LED On, Mute Off : LED Off)#976??⏹ Holding a Call / Retrieving a Held Call• When on an Intercom, the call is held as “Exclusive Hold” on your terminal.• This operation puts your outside call on System Hold. Other extension users can take the call off Hold.⏹ Retrieve a Held Outside Call • Ask your NEC Authorized Supplier for the details about your Trunk Number dialing digits.⏹ Transferring a Call to the other Extension ⏹ Holding a Call Exclusively• This operation puts your outside call on Exclusive Hold. Other extension user can not take the call off Hold.???267??⏹ Do Not Disturb (DND)• When you set DND function, DND Key shall be lit and the Internal Dial Tone pattern shall be changed.• You can repeat this operation to add more parties.• You may be able to have up to 16 parties (include your terminal). You may need to adjust the volume level due to the Environment where calls are placed. Ask your NEC Authorized Supplier for the details.⏹ Conference12340???When you set Call Forward / Follow Me, the destination extension is displayed on the LCD, and the Internal Dial Tone pattern shall be changed (Call Forward / Follow Me can be set by Soft Key).Call Forwarding / Follow Me174???1274???1??????11374474Call Forwarding / Follow Me (Cont’d)??????67457411“Menu” Soft Key⏹ “Dir” Soft Key⏹ “VM” Soft Key (Option)“CL” Soft Key⏹ Soft Key Operations during Off-Hook condition⏹ Soft Key Operations during Intercom Calling⏹ Soft Key Operations after establishing an Intercom Call⏹ Soft Key Operations during Outside CallMenu Structure when PRG15-02-60 is set to Advanced Mode 1System setting is necessary to use Built-In Automated Attendant. Ask your NEC Authorized Supplier for the details.⏹ Record / Listen / Erase Answering Messages • Up to 100 types of messages can be recorded. • The Message length can not exceed 4 minutes.661???????753#Log-On to the In-Mail System setting is necessary to use In-Mail (Voice Mail) feature. Ask your NEC Authorized Supplier for the details.????????Call Forward to Voice Mail1???????????111474374274174⏹ Mailbox Greeting• Selected Greeting (one of three) shall be made active.⏹ Mailbox Security Code※ The type of Security Code can be assigned as below.- Dial 4 digits Security Code followed by “7”: Security Code for all log-on- Dial 4 digits Security Code followed by “6”: Security Code for remote log-on only • System Administrator can delete a Mailbox Security Code.4?753####6777???Listen to Left Messages in your Mailbox??5?????????5◆ Instruction Menu Message are used as the Automated Attendant Main Greetings (e.g. Day Mode greeting, Night Mode greeting, etc)▪To record an instruction Menu from the System Administrator Menu, dial the digit 4 (Instruction Menu Messages). Dial the mailbox number (001 – 032).-Press the digit 5 to Listen to the message. -Press the digit 7 to Record the message. -Press the digit 3 to Delete the message.-Press # to return to the System Administrator Menu.◆ Announcement Message are used to announce general information to callers such as directions, hours of operation, etc.▪To record an Announcement Message from the System Administrator Menu, dial the digit 2 (Announcement Messages). Dial the mailbox number (001 – 032). -Press the digit 5 to Listen to the message. -Press the digit 7 to Record the message. -Press the digit 3 to Delete the message.-Press # to return to the System Administrator Menu.◆ Distribution List is a list of extensions set to receive a single voice mail message. Any message left in the distribution mailbox will be sent to all extensions in the list.▪To review or modify the Distribution List from the System Administrator Menu, dial the digit 5 (Distribution List). Dial the mailbox number (001 – 032) to be modified.. ►Press the digit 6 to Review or Modify the list.-Press the digit 2 to Add an extension to the distribution list. -Press the digit 3 to Delete the current extension from the list. -Press the digit 6 to step to the Next entry.-Press # to return to the System Administrator Menu.►Press the digit 76 to record a Name for the distribution list. -Press the digit 5 to Listen to the name. -Press the digit 7 to Record a new name. The following administrative features are only available at the system administrator’s extension (extension 101 at default). Ask your NEC Authorized Supplier for details on how to become a system administrator..Log-In to the In-Mail ????????◆Subscriber Maintenance is used to modify the subscriber mailboxes.▪To modify a Subscriber Mailbox from the System Administrator Menu, dial the digit 7 (Subscriber Maintenance).Dial the extension number of the mailbox you wish to modify.-Press the digit 32 to Delete all messages.-Press the digit 34 to Delete the mailbox greeting.-Press the digit 36 to Delete to the mailbox name.-Press the digit 7 to Delete the security code.-Press the digit 6 to Record a new name.-Press # to return to the System Administrator Menu.◆Answer Schedule Override provides alternate answering for the Automated Attendant by sending calls to aspecified Override mailbox, when enabled. As an example you can use the Answering Schedule Override to provide Holiday and Bad Weather closing announcements.▪To modify the Answer Schedule Override from the System Administrator Menu dial 6 (Answer Scheduleoverride).Dial the answer table number (01-16) you wish to override.-Press the digit 6 to toggle On/Off the answer schedule table.-Press the digit 2 to enter a New answer schedule override mailbox. Enter the override mailbox number (001-032 or a valid subscriber extension). The override mailbox can be an announcement, call routing box, or asubscriber box.-Press # to return to the System Administrator Menu.◆Mailbox Announcement Message is a message recorded by the system administrator that plays to eachsubscriber when they log into their mailbox. This message will play each time the subscriber logs into their box until it expires, is deleted, or is made inactive by the system administrator.▪To record and modify the Mailbox Announcement Message from the System Administrator Menu, dial the digit 3 (Mailbox Announcement Message).-Press the digit 5 to Listen to the mailbox announcement message.-Press the digit 7 to Record a new mailbox announcement message.-Press the digit 3 to Delete the mailbox announcement message.-Press the digit 2 to Specify the amount of days the message is active. Enter * for an indefinite amount of days or enter 01-99 for 1-99 days.-Press # to return to the System Administrator Menu.◆Voice Mail Version will play a message indicating the software level of the voice mail.▪To hear the current Voice Mail Version from the System Administrator Menu, dial the digit 8 (Voice mail Version).Multiline TerminalUser Guide GVT-025183-401-00 AU。
NEC_SL1000系列电话交换机编程说明书

(IP4WW-1632M-A KSU) 安装设置手册
Issue 1.0 (January. 2011) A50-031579-001
SL1000 安装设置手册 Nhomakorabea目录重要信息 .................................................................................................... ERROR! BOOKMARK NOT DEFINED. REGULATORY .............................................................................................. ERROR! BOOKMARK NOT DEFINED. 什么是 SL1000? .......................................................................................................................................... 4 外线........................................................................................................ ERROR! BOOKMARK NOT DEFINED. SL1000 系统的数字分机 .......................................................................................................................... 5 模拟分机
NEC 程控电话设置

NEC 程控电话设置全国免费电话电话820- 800-1131一、进入编程SPK+#*#*+12345678+Hold二、编程项目1、将语音应答改成振铃应答20-02-12 改成12、将储存拨号改为直接拨号20-03-03 改为13、R键设置(相对于西门子话机100ms)82-04-04 改为13 (不能设置为其它值)82-04-07 改为1082-04-08 改为15 (拍叉会断线,避免回铃)4、保持电话强制解除(避免回铃)14-01-16 改为124-01-05 改为855、呼入立即振铃(如果正常响铃,不需要设置)改为122-04-01 将需要响铃的分机放入,最多32台7、限制中继呼出(未用的中继线要设置)〕14-01-07 未用的中继号改为08、分机号设置(1)、位数设置11-01-01 将需要的分机号字头位数改成2位(默认3位)1X 将3改成2 2X 将3改成215-01-01 将分机名称改成对应的分机号码20-17-01 设为功能话机的分机号如果不设置,拨0则不起作用10、来电显示设置(注意一定要接好地)14-02-10 将需要的外线改成114-02-16 更改来显制式0:FSK 1:DTMF 1 20-09-02 分机是否来电显示改成115-03-09 普通分机来电显示改成115-03-11 普通分机来显制式0:FSK 1:DTM11.最经济路由LCR设置:14-01-23 TRUNK(N) 改1;26-01-04 改1;26-02-01 TBL1内设0;26-02-06 TBL1 对应TBL2;26-05-02 TBL2内设17908+P(需要空开语音的加P,一个P 3秒,)12.设置外置话务员22-04-01 在呼入振铃组中设置话务员分机号码.22-05-01 在振铃组中设置话务员的振铃组即可13.计费: 35-01-01 1:COM 口3:LAN 口35-01-04 取消隐藏位数10-21-02 波特率更改(COM口线序如下:LAN口:交叉线序三、编程按键说明HOLD 保存DC 编程项目后退FLASH 在项目间的细项移动LND 光标左移OPAC 光标右移SPK 退出编程(需要用DC键退出到初始编程状态)VOL 在同一项目内的数据进行翻转(如中继1、2…,分机号200、201…等)此操作会自动保存已经更改的数据CONF 左进删除键CLEAR 删除键上面说的不错,不过有一点更正,那个是ARS,不是最经济路由LCR;真正的LCR是1,14-01-23 TRUNK(N)改1;2,26-01-04改1;3,26-02-01 TBL1内设0;4,26-02-06 TBL1 对应TBL2; 5,26-05-02 TBL2内设17908+P(需要空开语音的加P,一个P 3秒)A、选择计费端口:35-01-01 1:COM 3:LANB、取消隐藏位数:35-01-04 1改成0C、修改COM波特率:10-21-02 默认:9600长途限制等级设置:A、21-05-08:定义每个等级可以使用的限制表如:第一等级限制国际,设1等级为使用,在下一项(21-06-07对应的表)里设置限制00和1790900即可其它以此类推,可以灵活分配的,切记与下一项配合,四个表已经够用啦B、21-06-07:可以设置四个表,对应前一项的设置,可以设置1-200个数据,每一个数据最大12位一般在这里设置即可,其它可以不用管它C、21-04-01:分配每个分机对应的等级D、随身密码设置: 221-14-01:设置密码,固定六位,不可更改位数21-14-02:设置密码等级注:如果你限制国际只需要限制00,可以用21-05-01设置,对应21-06-01,因为只可以设置4位数,所以用处不大其它允许表,自己看着需要做设置吧,都在21-05和21-06里,注意对应关系就可以啦!4、语音信箱和VRS的设置及使用语音信箱及VRS的设置及使用-A1是必须的硬件,安装在底板上1、VRS设置:22-02-01 改成125-02-01 改成1 按HOLD后把数据也改成120-07-13、14、15 就按需要设置吧,这里指的是可以录音的分机具有的等级25-06-02 设置按0的时候转到那一个分机,注意要在0的提示项里面设置2、语音信箱设置:40-01-01 改成140-02-01 在这里面设置你需要用到的信箱号码,最好现分机号相同40-02-02 设置每个信箱的密码,按需设置吧VRS必须录音才能有提示音的,在具体权限的分机上按716就可以啦!四、语音信箱的使用如果是功能话机,就设置一个语音信箱键吧,内容是:67+信箱号如果是分机:提机+884+67+信箱号+#,会有语音提示的,按服务码操作(具体看手册吧)注意:个人问候语在32#里面录音,进入语音信箱以后可以按0#听到帮助的! 3普通分机只支持一种自动总机功能,即无条件转移到语音信箱!要在62#里面设置其它的就慢慢摸索吧!5、话务员设置只要在22--04-01里设置语务员的分机端口就可以了,,然后在话务员里设置个总机,,转接时间就OK了对NEC Aspila 内置VRS 的小改造第一个问题,内置VRS 转分机后,当分机没人接听,只有两种选择:挂断、转话务员,没有无应答提示。
- 1、下载文档前请自行甄别文档内容的完整性,平台不提供额外的编辑、内容补充、找答案等附加服务。
- 2、"仅部分预览"的文档,不可在线预览部分如存在完整性等问题,可反馈申请退款(可完整预览的文档不适用该条件!)。
- 3、如文档侵犯您的权益,请联系客服反馈,我们会尽快为您处理(人工客服工作时间:9:00-18:30)。
N E C程控电话交换机S L1000交换机说明书N E C S L1000集团电话编程N E C S L1000安装手册NEC程控电话交换机SL1000专用话机进入和退出系统编程:进入:SPK→#*#*→→HOLD→显示Programmode退出:按DC键返回直到显示Programmode时按SPK键退出并保存所设置的数据,屏幕上会显示savingsystemdata1.分机的外线权设置:14-07-01中继线分配图设置15-06-01分机对应的中继线分配图2外线直接到一个分机振铃(直入线)呼入中继线类型设置22-02-01Trunk-----指定中继线modelTRKType=4DIL呼入中继线的目标分机或部门组22-07-01Trunk----指定中继线model1NO=指定的分机号码如果DIL振铃的分机没有应答可以转到振铃组内它的分机振铃无应答回叫时间22-01-04(0-64800)DIL呼入电话在编程设置的目标分机上振铃时间.超过这个时间间隔DID电话被转移到预设的振铃组无应答转移目标DIL/IRG22-08-01Trunk----指定中继线Mode1IRG------X3.外线分组:14-05-01中继线组14-06-01中继线路由21-02-01分机的中继线组4.第二中继出局码设置:11-01-01创建第二中继出局码11-09-02输入第二中继码21-15-01分机的第二中继组路由用专用话机进入和退出系统编程:1.进入:SPK→#*#*→→HOLD→显示Programmode退出:按DC键返回直到显示Programmode时按SPK键退出并保存所设置的数据,屏幕上会显示savingsystemdata3.更改分机号码的相关编程:11-01-01:系统号码计划11-02-01:分机号码的设置和更改15-01-01:分机名称设置(一般在装机时最好删除所有分机名称),专用话机编程时用CLEAR键清除92-02-01:删除所有分机号码,只保留第一端口的分机号码。
4.振铃组的设置:22-05-01将外线分配到响铃组22-04-01设置响铃组内的分机5.长途限制等级设置:21-04-01:分配每个分机的限制等级21-05-08:为每个等级分配限制表(1-4)21-06-07:输入限制表里的限制代码(1-4)每个表可以输入50个限制码举例:1等级国际2等级国内3等级市话4等级内线等级1:21-05-08=0等级2:21-05-08=2(限制表2)21-06-07(2)=00按HOLD键可以输下一个等级3:21-05-08=3(限制表3)21-06-07(3)=0等级4:21-05-08=4(限制表4)21-06-07(4)=@代表0-9,*和#6.计费设置:串口计费:35-01-01=12---3(串口连接线顺序)波特率:10-21-02=048003---2=196004---6=2192006---4=3384005---57---88---7LAN口计费35-01-01=310-20-01EX-Dev5TCPProt1000035-01-04:改成0输出的电话号码最后一位不隐藏。
35-01-08:有两种话单格式0:输出电话号码20位。
1:输出电话号码15位35-02-14=1日期输出7.来电显示设置:14-02-10=1开放每条外线的来点显示功能14-02-16:0=FSK。
1=DTMF每条外线的制式15-03-09=1开放每个普通分机的来点显示15-03-14普通分机转普通分机是否显示外线号码1显示0不显示81-01-09如果系统接的是模拟外线设置为70,如果外线是汇线通这项的设置又是70还出现看不到来电显示或来电显示不稳定时有时无的情况下,可以将这个数值调低大概在65左右。
注:以上四项调试后发现话机还不能看到来点显示请将该设备接地。
8.分机部门组的设置:举例:外线打入集团电话要求分机200,201,202在忙和无人应答时可以相互循环。
16-02-01将200,201,202设置为部门组216-01-03选择到部门组2设置成116-01-09选择到部门组2设置无人应答时间11-07-01设置部门组代表号(例600)22-02-01将每条外线的打入方式设为DIL22-07-01设置响铃目标号6009.缩位拨号设置:系统分为三种速拨类型:公共,分组和个人。
所有人可以使用公共速拨,分配在同一个组人员可以使用分组速拨,个人速拨只用于自己的分机。
每个速拨单元可存储24位电话号系统共有2000个速拨单元,可用于公共速拨和分组速拨。
编程项目:13-01-03设置系统公共速拨的数量13-02-01分组拨号单元13-03-01分机的速拨组分配13-04-01速拨号码和名称的设置13-05-01分配每个速拨号使用的中继线组10.呼叫转移设置:2遇忙无人应答4立即6无人应答7立即,双方振铃0取消SPK→888→转移条件代码→拨目标分机号码2所有电话3仅外线电话4仅内线电话→选择呼叫前转类型外转外的设置:14-01-13=1为每条中继线开放汇接20-11-12=1服务等级打开外转外功能14-02-09=1开放每条外线的忙音检测21-03-01=1(中继线的中继线组路由1)相关编程14-06-01注:1。
如果使用外线直接打入到分机再由分机转移到外部电话,22-02-01里的外线类型要设置成4DIL方式。
在22-07-01里输入响铃分机2.如果外线是ISDN线路要在21-12-01输入外线主叫号码才能做外转外。
使用方法:专用话机设置:713→6→9→电话号码→HOLD取消:713→6→HOLD普通话机设置:713→6→9→电话号码→挂机取消:713→6→挂机11.随身密码设置:21-14-01设置密码,系统最大500个每个密码6位数21-14-02设置密码等级使用方法:763→密码→9→电话号码12.设置功能话机外线键TOPAZ设置SPK→852→选一个按键→*01→输入外线端口号(01-51)删除SPK→852→选→个按键→输入000设置功能按键设置SPK→851→选一个按键→输入功能码删除SPK→851→选一个按键→输入00来点显示查询键SPK→851→选一个按键→输入08定义分机按键SPK→851→选一个按键→输入01→再输入分机号码→HOLD 13.设置话机拨号锁:20-08-08=1服务等级打开此项功能输入拨号锁的限制等级(1-15)(与系统长途限制等级相对应)设置:700→密码(4位数)→1取消:700→密码(4位数)→014.设置系统IP地址:10-12-0110-12-02输入子网掩码注:此项编程设置完后要重起系统15.更改NECAspilaTOPAZ回铃音:80-01-02SVCTone14Unit1BasicTone1出厂值是3(更改完后要重起系统)18.话务员分机设置:20-17-01系统最多有8个话务员分机19.当分机呼出受到等级限制时自动呼叫话务员分机20-13-20=0注:EX系统出厂值这项功能是开放的。
20.外线分组:14-05-01中继线组14-06-01中继线路由21-02-01分机的中继线组21.第二中继出局码设置:11-01-01创建第二中继出局码11-09-02输入第二中继码21-15-01分机的第二中继组路由22.分机的外线权设置:14-07-01中继线分配图设置15-06-01分机对应的中继线分配图此项编程是设定某个分机只能从某条外线打出,分配分机所使用的外线。
23.秘书电话SPK+851+定义内线键+41+分机号码24.夜服模式自动:12-01-011->0允许人工夜服转换12-01-020->1设置自动夜的转换12-02-01夜服模式的时间设置12-03-01星期夜服模式人工:12-01-010->1允许人工夜服转换20-07-010->1人工夜服模式的转换SPK851+(内线)功能键+09+2夜间SPK851+(内线)功能键+09+1白天22-05-01Trunk1中继线Mode1IRG=振零组(说明:把每一根中继线设置为MODE2IRG=2使用夜服务模式)22-04-01INCGR因为在22-05-01设的是振铃组2Memb.01=设置分机号码如果有两个话务员用24-06-01做遇忙转移25.外线直接到一个分机振铃(直入线)呼入中继线类型设置22-02-01Trunk-----指定中继线modelTRKType=4DIL呼入中继线的目标分机或部门组22-07-01Trunk----指定中继线model1NO=指定的分机号码如果DIL振铃的分机没有应答可以转到振铃组内它的分机振铃无应答回叫时间22-01-04(0-64800)DIL呼入电话在编程设置的目标分机上振铃时间.超过这个时间间隔DID电话被转移到预设的振铃组无应答转移目标DIL/IRG22-08-01Trunk----指定中继线Mode1IRG------X26.改变内部分机和中继线的振铃频率20-15-01中继线上的正常呼入20-15-03内部呼入可以按照不同的频率来设置27.随身密码21-14-01输入六位数的密码21-14-02设置密码的等级CALL+763+六位密码随身密码可以使用500个28.外线直接打入分机DISA22-02-01TrunkModelTRKType-----中继线说明:每个中继线的呼入类型初始值TYPE0→2(普通外线→DISA外线) --类型222-07-01TrunkModeNo-----中继线说明:设置中继线的呼入分机------分机号码29.内线容易断线81-01-0970说明:呼叫放弃检测时间82-04-08(60,90)说明:最大闪断时间数字分机号码显示:TANDEMEXT***的取消方法按SPK+720。