Oracle BIEE 12c 安装配置手册
weblogic12C集群安装配置
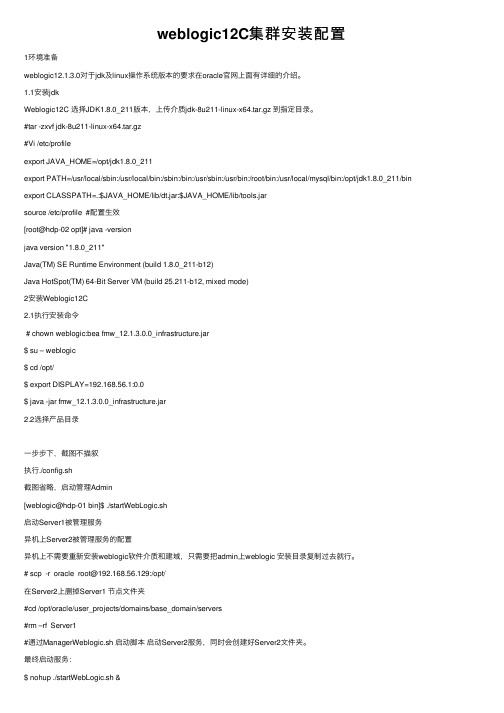
weblogic12C集群安装配置1环境准备weblogic12.1.3.0对于jdk及linux操作系统版本的要求在oracle官⽹上⾯有详细的介绍。
1.1安装jdkWeblogic12C 选择JDK1.8.0_211版本,上传介质jdk-8u211-linux-x64.tar.gz 到指定⽬录。
#tar -zxvf jdk-8u211-linux-x64.tar.gz#Vi /etc/profileexport JAVA_HOME=/opt/jdk1.8.0_211export PATH=/usr/local/sbin:/usr/local/bin:/sbin:/bin:/usr/sbin:/usr/bin:/root/bin:/usr/local/mysql/bin:/opt/jdk1.8.0_211/bin export CLASSPATH=.:$JAVA_HOME/lib/dt.jar:$JAVA_HOME/lib/tools.jarsource /etc/profile #配置⽣效[root@hdp-02 opt]# java -versionjava version "1.8.0_211"Java(TM) SE Runtime Environment (build 1.8.0_211-b12)Java HotSpot(TM) 64-Bit Server VM (build 25.211-b12, mixed mode)2安装Weblogic12C2.1执⾏安装命令# chown weblogic:bea fmw_12.1.3.0.0_infrastructure.jar$ su – weblogic$ cd /opt/$ export DISPLAY=192.168.56.1:0.0$ java -jar fmw_12.1.3.0.0_infrastructure.jar2.2选择产品⽬录⼀步步下,截图不描叙执⾏./config.sh截图省略,启动管理Admin[weblogic@hdp-01 bin]$ ./startWebLogic.sh启动Server1被管理服务异机上Server2被管理服务的配置异机上不需要重新安装weblogic软件介质和建域,只需要把admin上weblogic 安装⽬录复制过去就⾏。
oracle12c安装、启动、卸载图文教程
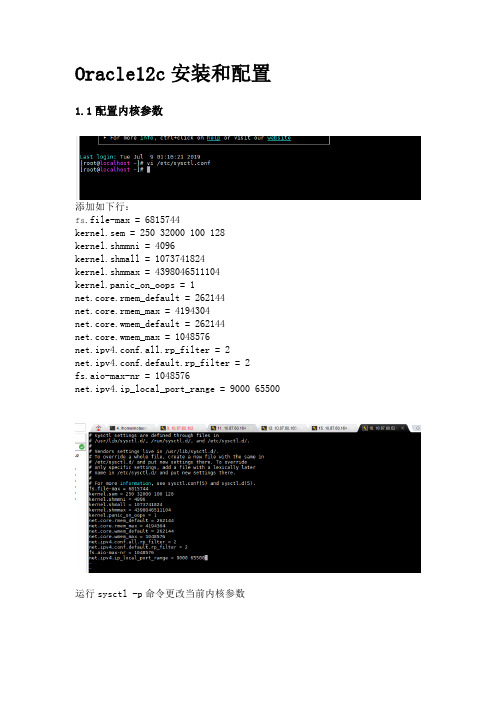
Oracle12c安装和配置1.1配置内核参数添加如下行:fs.file-max = 6815744kernel.sem = 250 32000 100 128kernel.shmmni = 4096kernel.shmall = 1073741824kernel.shmmax = 4398046511104kernel.panic_on_oops = 1net.core.rmem_default = 262144net.core.rmem_max = 4194304net.core.wmem_default = 262144net.core.wmem_max = 1048576net.ipv4.conf.all.rp_filter = 2net.ipv4.conf.default.rp_filter = 2fs.aio-max-nr = 1048576net.ipv4.ip_local_port_range = 9000 65500 运行sysctl -p命令更改当前内核参数1.2限制oracle用户资源使用vi /etc/security/limits.conf添加如下行:oracle soft nofile 1024oracle hard nofile 65536 oracle soft nproc 16384 oracle hard nproc 16384 oracle soft stack 10240 oracle hard stack 32768 oracle hard memlock 134217728 oracle soft memlock 1342177281.3安装依赖软件包yum install binutils -yyum install compat-libcap1 -yyum install compat-libstdc++-33 -yyum install compat-libstdc++-33.i686 -y yum install glibc -yyum install glibc.i686 -yyum install glibc-devel -yyum install glibc-devel.i686 -yyum install ksh -yyum install libaio -yyum install libaio.i686 -yyum install libaio-devel -yyum install libaio-devel.i686 -yyum install libX11 -yyum install libX11.i686 -yyum install libXau -yyum install libXau.i686 -yyum install libXi -yyum install libXi.i686 -yyum install libXtst -yyum install libXtst.i686 -yyum install libgcc -yyum install libgcc.i686 -yyum install libstdc++ -yyum install libstdc++.i686 -yyum install libstdc++-devel -yyum install libstdc++-devel.i686 -y yum install libxcb -yyum install libxcb.i686 -yyum install make -yyum install nfs-utils -yyum install net-tools -yyum install smartmontools -yyum install sysstat -yyum install unixODBC -yyum install unixODBC-devel -y1.4创建新组和新用户groupadd -g 54321 oinstallgroupadd -g 54322 dbagroupadd -g 54323 operuseradd -u 54321 -g oinstall -G dba,oper oracle2附加设置2.1为oracle用户设置密码2.2修改设置SELINUXvi /etc/selinux/config## 将`SELINUX`修改为permissiveSELINUX=permissivesetenforce Permissive2.3确保禁用防火墙systemctl stop firewalldsystemctl disable firewalld2.4创建Oracle安装目录mkdir -p /usr/local/products/oracle12cchown -R oracle:oinstall /usr/localchmod -R 775 /usr/local/2.5配置Oracle环境变量并验证切换到新添加的oracle用户名下,在oracle用户下配置环境变量su oraclevi .bash_profileexport TMP=/tmpexport TMPDIR=$TMPexport ORACLE_HOSTNAME=DEV-ORACLE-12C-164export ORACLE_UNQNAME=orclexport ORACLE_BASE=/usr/local/productsexport ORACLE_HOME=$ORACLE_BASE/oracle12cexport ORACLE_SID=orclexport PATH=/usr/sbin:/usr/local/bin:$PATHexport PATH=$ORACLE_HOME/bin:$PATHexport LD_LIBRARY_PATH=$ORACLE_HOME/lib:/lib:/usr/lib export CLASSPATH=$ORACLE_HOME/jlib:$ORACLE_HOME/rdbms/jlib使配置立即生效source .bash_profileecho $ORACLE_HOME/usr/local/products/oracle12c3 Oracle安装3.1上传解压将下载的linuxx64_12201_database.zip上传到Linux系统/home/oracle目录下解压unzip linuxx64_12201_database.zip如果没有unzip要先安装yum install zip unzip3.2修改响应文件压缩包解压完成后得到名为database的文件夹,其中包含安装文件。
BIEE 12c (12.2.1.0.0) Linux 安装指南
BIEE 12c 12.2.1.0.0 Linux 安装指南作者:风在身后博客:/biplusplus安装前准备环境要求,请参见如下excelfmw-1221certmatrix-2739738.xlsx/technetwork/middleware/ias/downloads/fusion-certification-100350.html本文使用操作系统:Oracle Linux Server release 6.5 X64下载所需软件访问OTN/technetwork/middleware/bi-enterprise-edition/downloads/business-intelligence-2717951.html分别下载下图所示内容注:如遇下载速度慢,请使用讯雷下载,下载方法请参见:Oracle OTN软件迅雷下载方法/biplusplus/article/details/7082445下载完成之后,一共有4个文件,分别是:JDK:jdk-8u65-linux-x64.tar.gzWeblogic:fmw_12.2.1.0.0_infrastructure_Disk1_1of1.zip (内含RCU)BIEE:fmw_12.2.1.0.0_bi_linux64_Disk1_1of2.zipfmw_12.2.1.0.0_bi_linux64_Disk1_2of2.zip理解安装目录推荐采用如下安装目录:其中/home/oracle被称为基目录(base),可以根据自己的需要更改,本文中为/home/biee12c/Oracleproduct目录是Oracle_home,一般一个产品对应一个Oracle_home;例如可以在product下安装biee和oracle数据库,这样就会有两个Oracle_home。
Oracle_home目录之下主要是存放对应产品的主程序和一些公共文件。
Config目录主要用于存放配置信息,例如Domain_Home,默认的domain_home是ORACLE_HOME/user_projects/domains/domain_name;不建议使用默认目录,建议配置和程序分离,即采用本例中的目录结构,将其放置于config目录之下。
Centos7Oracle12C超详细安装
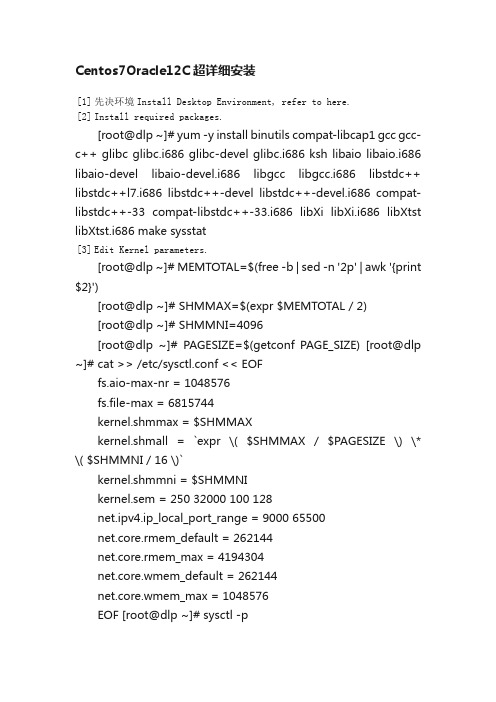
Centos7Oracle12C超详细安装[1] 先决环境Install Desktop Environment, refer to here.[2] Install required packages.[root@dlp ~]# yum -y install binutils compat-libcap1 gcc gcc-c++ glibc glibc.i686 glibc-devel glibc.i686 ksh libaio libaio.i686 libaio-devel libaio-devel.i686 libgcc libgcc.i686 libstdc++ libstdc++l7.i686 libstdc++-devel libstdc++-devel.i686 compat-libstdc++-33 compat-libstdc++-33.i686 libXi libXi.i686 libXtst libXtst.i686 make sysstat[3] Edit Kernel parameters.[root@dlp ~]# MEMTOTAL=$(free -b | sed -n '2p' | awk '{print $2}')[root@dlp ~]# SHMMAX=$(expr $MEMTOTAL / 2)[root@dlp ~]# SHMMNI=4096[root@dlp ~]# PAGESIZE=$(getconf PAGE_SIZE) [root@dlp ~]# cat >> /etc/sysctl.conf << EOFfs.aio-max-nr = 1048576fs.file-max = 6815744kernel.shmmax = $SHMMAXkernel.shmall = `expr \( $SHMMAX / $PAGESIZE \) \* \( $SHMMNI / 16 \)`kernel.shmmni = $SHMMNIkernel.sem = 250 32000 100 128net.ipv4.ip_local_port_range = 9000 65500net.core.rmem_default = 262144net.core.rmem_max = 4194304net.core.wmem_default = 262144net.core.wmem_max = 1048576EOF [root@dlp ~]# sysctl -pfs.aio-max-nr = 1048576 fs.file-max = 6815744 kernel.shmmax = 6274715648 kernel.shmall = 392169728 kernel.shmmni = 4096kernel.sem = 250 32000 100 128net.ipv4.ip_local_port_range = 9000 65500 net.core.rmem_default = 262144 net.core.rmem_max = 4194304 net.core.wmem_default = 262144 net.core.wmem_max = 1048576[4] Create user and groups for Oracle Database service.[root@dlp ~]# i=54321; for group in oinstall dba backupdba oper dgdba kmdba; dogroupadd -g $i $group; i=`expr $i + 1` done [root@dlp~]#useradd-u1200-goinstall-Gdba,oper,backupdba,dgdba,kmdba -d /home/oracle oracle[root@dlp ~]# passwd oracle Changing password for user oracle. New password: Retype new password:passwd: all authentication tokens updated successfully. [root@dlp ~]# mkdir -p /u01/app/oracle [root@dlp ~]# chown -R oracle:oinstall /u01/app [root@dlp ~]# chmod -R 775 /u01[root@dlp ~]# vi /etc/pam.d/login # near line 14: add1 2 session required pam_selinux.so open session required pam_namespace.so1 s ession required pam_limits.so1 2 3 session optional pam_keyinit.so force revoke session include system-auth -session optional pam_ck_connector.so[root@dlp ~]# vi /etc/security/limits.conf # add to the end1 2 3 4 5 6 oracle softnproc 2047 oracle hard nproc 16384 oracle soft nofile 1024 oracle hard nofile 65536 oracle soft stack 10240 oraclehardstack 32768[5]图形化安装Oracle 12C Login with the user "oracle" and set environment variables.dlp login: oracle Password:[oracle@dlp ~]$ vi ~/.bash_profile # add to the end umask 022export ORACLE_BASE=/u01/app/oracle # create a temporary directory for installation[oracle@dlp ~]$ mkdir tmp[1]Login and work with oracle admin user which you create in pre-requirements settings.[2] Download Oracle Databse 12c for Linux and upload on your server. ?/technology/software/products/database/index.html [3] After uploading Oracle files, move to a tmp directory and run an Installer like follows.[oracle@dlp ~]$ cd tmp [oracle@dlp tmp]$ unzip linuxamd64_12102_database_1of2.zip [oracle@dlptmp]$unziplinuxamd64_12102_database_2of2.zip[oracle@dlp tmp]$ ./database/runInstaller[4] Oracle Installer starts like follows. First, Set your email address and password for receiving some infomation from Oracle likesecurity issues and so on.[5] On this example, Select "Install database software only".[6] On this example, Select "Single Instance Database ***".[7] Select your language.[8] Select which edition you install.[9]Specify the base directory and files for Oracle. On this example, keep default and proceed to next.[10]Specify the installed directory. On this example, keep default and proceed to next.[11]Specify the priviledged group. On this example, keep default and proceed to next.[12] Pre-requirements are checked. If some settings are not configuredfor recomendations, notification is displayed likefollows.Confirm them again.[13]The summary is shown for configuration. Click "Install" if it's OK all.[14] Installation starts.[15]Following screen is shown, then open a terminal and execute follwong commands with the root user.[root@dlp ~]# /u01/app/oraInventory/orainstRoot.sh1 2 Changing permissions of /u01/app/oraInventory. Adding read,write permissions for group.3 4 5 6 7Removing read,write,execute permissions for world. Changing groupname of /u01/app/oraInventory to oinstall. The execution of the script is complete. [root@dlp ~]# [root@dlp~]#/u01/app/oracle/product/12.1.0/dbhome_1/root.sh12345Performing root user operation. The following environment variables are set as: ORACLE_OWNER= oracle ORACLE_HOME= /u01/app/oracle/product/12.1.0/dbhome_1 Enter the full pathname of the local bin directory: [/usr/local/bin]: # Enter12 3 4 5 6 7 8 9 10Copying dbhome to /usr/local/bin ... Copying oraenv to /usr/local/bin ... Copying coraenv to /usr/local/bin ... Creating /etc/oratab file...Entries will be added to the /etc/oratab file as needed by Database Configuration Assistant when a database is created Finished running generic part of root script.Now product-specific root actions will be performed.[16] Installation completed. Click "Close" button.[17] Set Environment variables for Oracle user.[oracle@dlp ~]$ vi ~/.bash_profile # add to the end exportORACLE_HOME=/u01/app/oracle/product/12.1.0/dbhome_1exportPATH=$PATH:$ORACLE_HOME/bin[oracle@dlp~]$ source ~/.bash_profile[oracle@dlp ~]$ rm -rf tmp创建监听Create Oracle Net Listener that is the network service onOracle.[1]Login with the oracle admin user and input a command "netca" like follows.[oracle@dlp ~]$ netca[2] Check a box "Listener Configuration" and go next.[3] Go next.[4] Set Listner's name. Input any one you like.[5] This example goes next with keeping default "TCP".[6] Set a port. This example goes next with keeping default.[7]If you'd like to create more Listeners, Answer "Yes". This example selects "No".[8] Configuration completed.[9]After creating Listener, tnslsnr listens on the port you configured like follows.[oracle@dlp ~]$ ss -napt123456789StateRecv-QSend-QLocalAddress:Port Peer Address:Port LISTEN 0 128 *:22 *:* LISTEN 0 128 127.0.0.1:631 *:* LISTEN 0 100 127.0.0.1:25 *:* ESTAB 0 52 10.0.0.30:22 10.0.0.5:50113 LISTEN 0 128 :::1521 :::* users:(("tnslsnr",3988,9)) LISTEN 0 128 :::22 :::* LISTEN 0 128 ::1:631 :::*LISTEN 0 100 ::1:25 :::* [oracle@dlp ~]$ tnsping localhost 12TNS Ping Utility for Linux: Version 12.1.0.2.0 - Productionon 04-JUL-2015 01:03:0734567891 0 Copyright (c) 1997, 2014, Oracle. All rights reserved. Used parameter files:Used HOSTNAME adapter to resolve the alias Attempting to contact(DESCRIPTION=(CONNECT_DATA=(SERVICE_NAME=))(ADD RESS=(PROTOCOL=TCP)(HOST=127.0.0.1)(PORT=1521)))OK (0 msec)创建数据库 Create a Database.[1] Login with the oracle admin user and input acommand "dbca" like follows.[oracle@dlp ~]$ dbc[2] Select "Create Database" and go next.[3] On this example, select "Advanced Mode" and go next.[4] This example selects "General Purpose ***" and go next.[5]Set Grobal Database name and SID like follows. Input any one you like.[6] This example goes next with keeping default.[7] Set passwords. Please set a password for a user for security.[8] Configure Listener. On this example, keep default and go next.[9]Configure Storage settings. On this example, keep default and go next.[10]Configure sample schema and scripts. If you'd like to add them, Set them.[11] Configure memory settings. After setting, go to next tab.[12] Specify max processes.[13] Set Character setting.[14] Select a connection mode. If your server does not have many clients, Select Dedicated server mode. If your server has manyclients, Select Shared server mode.[15] Go next.[16] Configuration completed. Click "Finish" button to finish.[17] Database creation starts.[18] After completing to create a database, Click "Close" to finish.[19] Add Database SID to the environment variables.[oracle@dlp ~]$ vi /etc/oratab # change like followsdlp:/u01/app/oracle/product/12.1.0/dbhome_1: Y [oracle@dlp ~]$ vi ~/.bash_profile # add to the endexport ORACLE_SID=dlpTo access to the Enterprise Manager, it's possible to manage Database on Web GUI.[1] After creating database, database service is running and it'spossible to access to Enterprise Manager, too. Access to the URL which was displayed when database creation finished, then Login form is shown and it's possible to login with a database user.[2] Just logined. It's possible to manage Database on here.Create Systemd file for Oracle Database services.[1] Login as root user and create Systemd files.[root@dlp ~]# vi /etc/sysconfig/dlp.oracledb # create new : define environment variablesORACLE_BASE=/u01/app/oracleORACLE_HOME=/u01/app/oracle/product/12.1.0/dbhome_1ORACLE_SID=dlp # configure listener service[root@dlp~]#vi/usr/lib/systemd/system/*******************#thisis an example, modify for free12 3 4 5 6 7 8 9 10 11 12 13[Unit]Description=oracle net listener After=network.target [Service] Type=forkingEnvironmentFile=/etc/sysconfig/dlp.oracledbExecStart=/u01/app/oracle/product/12.1.0/dbhome_1/bin/lsnrctl start ExecStop=/u01/app/oracle/product/12.1.0/dbhome_1/bin/lsnrctl stop User=oracle [Install] WantedBy=multi-user.target # configure database service[root@dlp~]#vi/usr/lib/systemd/system/********************#this is an example, modify for free1 2 3 4 5 6 7 8 9 10 11 12 13 [Unit]Description=oracle net listenerAfter=network.target lsnrctl.service [Service] Type=forkingEnvironmentFile=/etc/sysconfig/dlp.oracledbExecStart=/u01/app/oracle/product/12.1.0/dbhome_1/bin/dbstart /u01/app/oracle/product/12.1.0/dbhome_1ExecStop=/u01/app/oracle/product/12.1.0/dbhome_1/bin/dbshut /u01/app/oracle/product/12.1.0/dbhome_1 User=oracle [Install] WantedBy=multi-user.target[root@dlp ~]# systemctl daemon-reload[root@dlp ~]# systemctl enable dlp@lsnrctl dlp@oracledb。
Oracle12c在Win10上的安装配置实践

Oracle12c在Win10上的安装配置实践1、环境操作系统:Win10专业版(64位)数据库:Oracle 12c Release 2(Version 12.2.0.1.0,64位)2、下载Oracle12c3、安装3.1、右键以管理员⾝份运⾏setup.exe3.2、配置安全更新在安装界⾯⾥,取消勾选“我希望通过My Oracle Support接收安全更新”,点击下⼀步。
提⽰出现尚未提供电⼦邮件地址,选择是。
3.3、安装选项选择“创建和配置数据库”(默认),点击下⼀步。
3.4、系统类选择“桌⾯类”(默认),如果是安装到服务器上,请选择“服务器类”,点击下⼀步。
3.5、Oracle主⽬录⽤户使⽤虚拟账户:⽤于 Oracle 数据库单实例安装的 Oracle 主⽬录⽤户。
使⽤现有windows⽤户:如果选择该项,则需要指定没有管理权限的⽤户。
创建新Windows⽤户:创建⼀个新⽤户,输⼊⽤户名和密码,这个新建的⽤户没有Windows登录权限。
使⽤Windows内置账户:微软在开Windows时预先为⽤户设置的能够登录系统的账户。
此处本⼈选择虚拟账户,也是oracle的官⽅建议之⼀。
注意:如果选择第⼆项,创建的⽤户名和已有的不能发⽣冲突,否则后⾯的安装会报错!3.6、典型安装设置oracle安装位置,字符集选择AL32UTF8或者ZHS16GBK,设置密码,如果密码过于简单会报警告,忽略即可,点击下⼀步。
注意:字符集AL32UTF8,sqlplus会存在乱码问题,需要配置TNS环境变量。
本⽂后⾯有字符集如何更改相关内容。
图省事的话建议此处选择ZHS16GBK字符集。
3.7、先决条件检查3.8、概要3.93.104、测试Oracle是否安装成功两种⽅式4.1、SQL Plus4.2、em5、相关问题5.1、PLSQL Developer⽆法连接64位Oracle数据库5.1.1、PLSQL数据库选项为空如图所⽰:原因在于:PLSQL不可以直接连接64位Oracle数据库,只能连接32位的。
Oracle BIEE 12c SampleApp v511 快速部署指南说明书
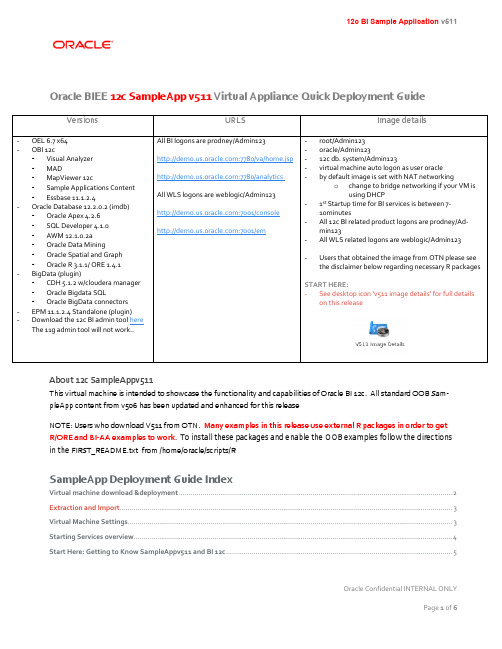
Oracle BIEE 12c SampleApp v511 Virtual Appliance Quick Deployment Guide-root/Admin123-oracle/Admin123-12c db. system/Admin123-virtual machine auto logon as user oracle-by default image is set with NAT networkingo change to bridge networking if your VM isusing DHCP-1st Startup time for BI services is between 7-10minutes-All 12c BI related product logons are prodney/Ad-min123-All WLS related logons are weblogic/Admin123-Users that obtained the image from OTN please seethe disclaimer below regarding necessary R packagesSTART HERE:-See desktop icon ‘v511 image details’ for full detailson this releaseAbout 12c SampleAppv511This virtual machine is intended to showcase the functionality and capabilities of Oracle BI 12c. All standard OOB Sam-pleApp content from v506 has been updated and enhanced for this releaseNOTE: Users who download V511 from OTN. Many examples in this release use external R packages in order to getR/ORE and BI-AA examples to work. To install these packages and enable the OOB examples follow the directionsin the FIRST_README.txt from /home/oracle/scripts/RSampleApp Deployment Guide IndexVirtual machine download &deployment (2)Extraction and Import (3)Virtual Machine Settings (3)Starting Services overview (4)Start Here: Getting to Know SampleAppv511 and BI 12c (5)Virtual machine download &deployment1.Prepare your host system.Minimum 8GB, 16 GB ram and SSD are recommended.Turn on Virtual Assist features in the BIOS (usually done by default). Refer to Troubleshooting tips in Step 12 for more details.~ 100 GB of temp disk space needed to download and install. (Includes zips files that total 18 GB, and an 18 GB .ova, 55 GB deployed image) note: ova and zip files can be deleted once the import is completed-Download and install Free Download Manager or an ftp client of your choice.-Download and install md5sum (optional)2.Download and install Oracle Virtual Box (4.3.x and above is supported, 5.10 is the current version)3.Click Here to open the SampleApp OTN Pagea.Sign into OTN prior to starting your download4.Navigate to the SampleAppv511 Sectiona.You must accept the licensing terms prior to proceedingDownload files SampleAppv511p-appliance.zip .001 through .004Extraction and Import4a. When all zip files are downloaded into a single directory, unpack them with 7zip or zip utility of your choice.Extract your zip files (note: you only need to select zip file .001 when extracting, the rest will automatically unpack)Linux users can run the following command as shown below. Users with a graphical zip utility can right click on .zip.001 and choose extract-7za x SampleAppv511p-appliance.zip.001-(Typical extraction time will take between 5 and 10 minutes depending on your host machine) when completed a folder called SampleAppv511p-appliance will be created containing a SampleAppv511p-appliance.ova file5. Start Oracle Virtual Box Manager Click File / Import Appliance /Open appliance (you can also double click your.ova file to open virtual box manager-Navigate to the location you downloaded the SampleAppv511rc3-10-15.ova file-Click import (typical import time is between 10 to 20 minutes)Check [x] Reinitialize the MACaddress of all network cardsO NCE YOUR VM IMPORT IS COMPLETED PROCEED TO STEP 6Virtual Machine Settings6. Virtual Machine Settings(Review this section fully before powering on)By default your vm is configured with the following parameters which is ideal for an 8GB host system - 6.2 GB ram- 2 processors-NAT Network adaptero By default your VM once powered on will have a IP address 10.0.2.15o See how to setup port forwarding on YouTube. Port forwarding allows you to access your VM from a local web browser directly on your host machine-Users with more physical host memory can allocate more memory to the virtual machineo You can edit any of the VM configurations by clicking on edit/settings-If your VM can obtain a DHCP address change your networking to bridged7.Start your VM Your VM will auto logon as oracle/Admin123. Upon logon your IP address will be displayed with further instructions on configuring your vm. Note: If your VM does not have an active network connection no IPaddress will be displayed.NOTE: if your VM is having issues obtaining a IP address power down the VM and refresh the MAC addressif you are using bridge networking and your VM does not have a IP address at boot up you must either assign it one manually or power off and switch to NAT networking in order for services to start properly8.Adjust your screen resolution to fit your host machine-From your toolbar menu click on system/preferences/display and select a screen resolution as needed-Your screen should auto adjust automaticallyVBox Tools /shared folders/guest extensions: ensure your virtual box tools are up to date and your Vbox guest exten-sion pack is installed to ensure maximum performance and stability. For recordings on these topics as well as creating shared folders click hereP ROCEED TO STEP 9 TO REVIEW THE SERVICE STARTUP PROCESSStarting Services overview9. Starting ServicesClick on the desktop icon “v511 image details”> starting services tab for instructions on starting services -Typical 1st start time is between 7 to 10 minutes (subsequent service starts are substantially faster)-Follow the ‘recommended startup’ processo Note: start/stop all scripts are available-Subsequent services startup will be faster-Download the bi thin client here click hereSampleApp v511 DesktopStart Here: Getting to Know SampleAppv511 and BI 12cAll Users should start with the v511 image details launch Pad for details, tips and deployment options, service control and users and URLs for this release.NOTE: service control tab contains all port numbers used in 12c。
Oracle12c安装图解
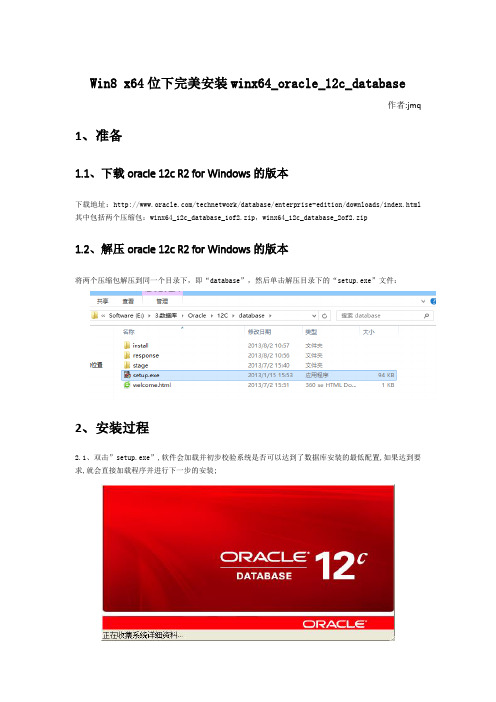
Win8 x64位下完美安装winx64_oracle_12c_database作者:jmq 1、准备1.1、下载oracle 12c R2 for Windows的版本下载地址:/technetwork/database/enterprise-edition/downloads/index.html 其中包括两个压缩包:winx64_12c_database_1of2.zip,winx64_12c_database_2of2.zip1.2、解压oracle 12c R2 for Windows的版本将两个压缩包解压到同一个目录下,即“database”,然后单击解压目录下的“setup.exe”文件:2、安装过程2.1、双击”setup.exe”,软件会加载并初步校验系统是否可以达到了数据库安装的最低配置,如果达到要求,就会直接加载程序并进行下一步的安装;2.2、在出现的“配置安全更新”窗口中,取消“我希望通过My Oracle Support接受安全更新”,单击“下一步”:2.3、安装时请连接网络,当然这里选择跳过更新就可以了,点击“下一步”:2.4、在“安装选项”窗口中,选择“创建和配置数据库”,单击“下一步”:2.5、根据介绍选择”桌面类”还是”服务器类” ,选择”服务器类”可以进行高级的配置,我这里选择”桌面类”,单击”下一步“:2.6、这步是其他版本没有的,这个的作用就可以更安全的管理orcl,主要是防止登录win系统勿删了oracle文件,这里选择第二个”创建新windows用户“,输入用户名和口令,专门管理oracle文件的,单击”下一步“:注意:如果选择第一个或则第三个,就会出现这样的情况,导致不能往下进行了:2.7、在“典型安装”窗口中,选择Oracle的基目录,选择“企业版”和“默认值”并输入统一的密码为:Oracle12c,单击“下一步”:Oracle为了安全起见,要求密码强度比较高,你输入的密码Oracle认为不能复制,我试过了,即使简单的数字字母组合Oracle也认为是不符合).Oracle建议的标准密码组合为:小写字母+数字+大写字母,这回就合格了,当然字符长度还必须保持着Oracle 12c数据库要求的范围之内。
Oracle12c 安装完整版使用及卸载
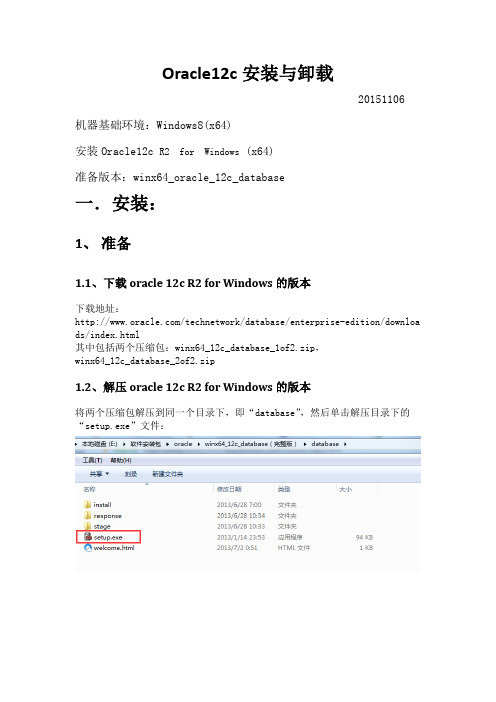
Oracle12c安装与卸载20151106 机器基础环境:Windows8(x64)安装Oracle12c R2 for Windows (x64)准备版本:winx64_oracle_12c_database一.安装:1、准备1.1、下载oracle12c R2for Windows的版本下载地址:/technetwork/database/enterprise-edition/downloa ds/index.html其中包括两个压缩包:winx64_12c_database_1of2.zip,winx64_12c_database_2of2.zip1.2、解压oracle12c R2for Windows的版本将两个压缩包解压到同一个目录下,即“database”,然后单击解压目录下的“setup.exe”文件:2、安装过程2.1、安装双击”setup.exe”,软件会加载并初步校验系统是否可以达到了数据库安装的最低配置, 检查监视器参数,如果达到要求,就会直接加载程序并进行下一步的安装;2.2、配置安全更新在出现的“配置安全更新”窗口中,取消“我希望通过My Oracle Support 接受安全更新”,单击“下一步”:注:电子邮件(可选)我希望通过My Oracle Support接收安全更新(W)(可选)一般情况下,这两项不必要勾选。
2.3、软件更新安装时请连接网络,选择跳过更新,点击“下一步”:2.4、安装选项注:创建和配置数据库(C)(本文档选该项,下一步)安装数据库软件并创建一个数据库实例(初学者)仅安装数据库软件(D)安装数据库软件,不会创建数据库实例(非初学者)升级现有的数据库(U)升级低版本的Oracle数据库2.5、系统类默认为“桌面类”;如果是安装在服务器上,选择“服务器类”,如Windows Server系列,Ubuntu Server等。
2.6、指定Oracle主目录用户(1)使用现有的Windows用户(X)选择该项,有错误提示,如果选择该项,则需要指定没有管理权限的用户。
Linux下安装oracle12C数据库,附带问题解决方法
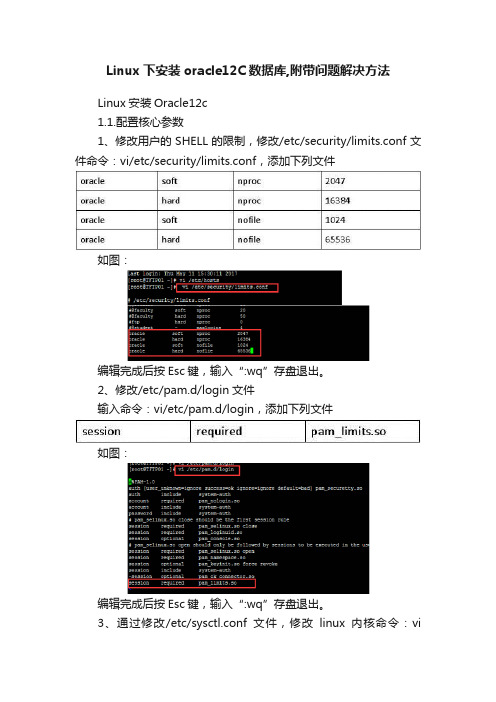
Linux下安装oracle12C数据库,附带问题解决方法Linux安装Oracle12c1.1.配置核心参数1、修改用户的SHELL的限制,修改/etc/security/limits.conf文件命令:vi/etc/security/limits.conf,添加下列文件如图:编辑完成后按Esc键,输入“:wq”存盘退出。
2、修改/etc/pam.d/login文件输入命令:vi/etc/pam.d/login,添加下列文件如图:编辑完成后按Esc键,输入“:wq”存盘退出。
3、通过修改/etc/sysctl.conf文件,修改linux内核命令:vi/etc/sysctl.conf,添加下列内容如图:编辑完成后按Esc键,输入“:wq”存盘退出。
将更改的内容生效激活:sysctl-p,显示结果如下图4、编辑文件/etc/profile,命令:vi /etc/profile,添加下列内容编辑完成后按Esc键,输入“:wq”存盘退出。
5、创建相关用户和组,作为软件安装和支持组的拥有者。
(1)、创建用户组,命令如下:groupadd oinstallgroupadd dbagroupadd oper如图:(2)创建Oracle用户和密码,命令如下:useradd -g oinstall -G dba,oper -m oraclepasswd oracle然后会让你输入密码,密码任意输入2次,但必须保持一致,回车确认。
如图:6、创建数据库软件目录和数据文件存放目录,目录的位置,根据自己的情况来定,注意磁盘空间即可,示例命令如下:mkdir /datamkdir /data/oraclemkdir /data/oracle/appmkdir /data/oracle/app/oraclemkdir /data/oracle/app/oradatamkdir /data/oracle/app/oracle/productmkdir /data/oracle/app/oracle/oralnventory7、更改目录属主为Oracle用户所有,输入命令:chown -R oracle:oinstall /data/oracle/app8、配置oracle用户的环境变量(1)切换oracle用户命令:su– oracle编辑文件.bash_profile,命令:vi .bash_profile添加内容如下:编辑完成后按Esc键,输入“:wq”存盘退出。
Oracle12c数据库实例安装方法
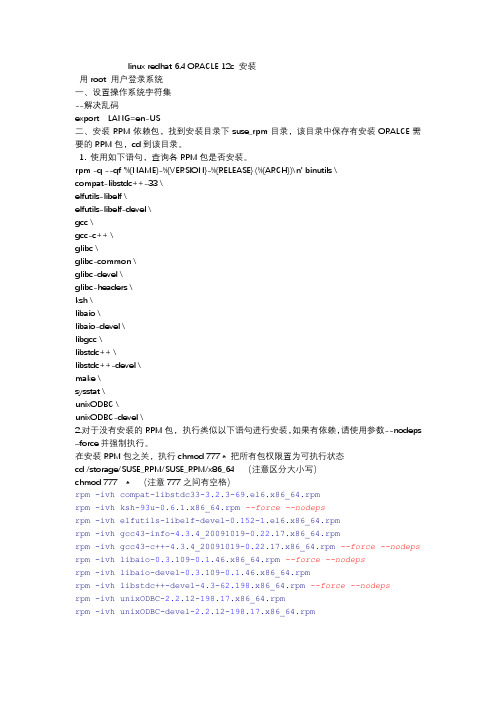
linux redhat 6.4 ORACLE 12c 安装用root 用户登录系统一、设置操作系统字符集--解决乱码export LANG=en-US二、安装RPM依赖包,找到安装目录下suse_rpm目录,该目录中保存有安装ORALCE 需要的RPM包,cd到该目录。
1. 使用如下语句,查询各RPM包是否安装。
rpm -q --qf '%{NAME}-%{VERSION}-%{RELEASE} (%{ARCH})\n' binutils \compat-libstdc++-33 \elfutils-libelf \elfutils-libelf-devel \gcc \gcc-c++ \glibc \glibc-common \glibc-devel \glibc-headers \ksh \libaio \libaio-devel \libgcc \libstdc++ \libstdc++-devel \make \sysstat \unixODBC \unixODBC-devel \2.对于没有安装的RPM包,执行类似以下语句进行安装,如果有依赖,请使用参数--nodeps –force并强制执行。
在安装RPM包之关,执行chmod 777 * 把所有包权限置为可执行状态cd /storage/SUSE_RPM/SUSE_RPM/x86_64(注意区分大小写)chmod 777 *(注意777之间有空格)rpm -ivh compat-libstdc33-3.2.3-69.el6.x86_64.rpmrpm -ivh ksh-93u-0.6.1.x86_64.rpm --force --nodepsrpm -ivh elfutils-libelf-devel-0.152-1.el6.x86_64.rpmrpm -ivh gcc43-info-4.3.4_20091019-0.22.17.x86_64.rpmrpm -ivh gcc43-c++-4.3.4_20091019-0.22.17.x86_64.rpm --force --nodeps rpm -ivh libaio-0.3.109-0.1.46.x86_64.rpm --force --nodepsrpm -ivh libaio-devel-0.3.109-0.1.46.x86_64.rpmrpm -ivh libstdc++-devel-4.3-62.198.x86_64.rpm --force --nodepsrpm -ivh unixODBC-2.2.12-198.17.x86_64.rpmrpm -ivh unixODBC-devel-2.2.12-198.17.x86_64.rpm三、配置sysctl.confvim /etc/sysctl.conf#kernel.shmmax = 536870912kernel.shmmni = 4096kernel.sem = 250 32000 100 128net.ipv4.ip_local_port_range = 9000 65500net.core.rmem_default = 4194304net.core.rmem_max = 4194304net.core.wmem_default = 262144net.core.wmem_max = 1048576fs.aio-max-nr = 1048576fs.file-max = 6815744--启用设置sysctl -p四、编辑系统资源限制配置文件vim /etc/security/limits.conf,在该文件下添加如下行:vim /etc/security/limits.conforacle soft nproc 2047oracle hard nproc 16384oracle soft nofile 1024oracle hard nofile 65536oracle soft stack 10240按ESC退出编辑模式输入::wq !五、关闭SELINUX编辑SELinux配置文件vim /etc/selinux/config,将SELINUX的值设为disabled,如下:SELINUX=disabled;修改该文件可使重启系统后不启动SELinux。
winx64Oracle12c安装步骤

Win8 x64位下完美安装winx64_oracle_12c_database作者:jmq 1、准备1.1、下载oracle 12c R2 for Windows的版本下载地址:.oracle./technetwork/database/enterprise-edition/downloads/index.html 其中包括两个压缩包:winx64_12c_database_1of2.zip,winx64_12c_database_2of2.zip1.2、解压oracle 12c R2 for Windows的版本将两个压缩包解压到同一个目录下,即“database”,然后单击解压目录下的“setup.exe”文件:2、安装过程2.1、双击”s etup.exe”,软件会加载并初步校验系统是否可以达到了数据库安装的最低配置,如果达到要求,就会直接加载程序并进行下一步的安装;2.2、在出现的“配置安全更新”窗口中,取消“我希望通过My Oracle Support接受安全更新”,单击“下一步”:2.3、安装时请连接网络,当然这里选择跳过更新就可以了,点击“下一步”:2.4、在“安装选项”窗口中,选择“创建和配置数据库”,单击“下一步”:2.5、根据介绍选择”桌面类”还是”服务器类” ,选择”服务器类”可以进行高级的配置,我这里选择”桌面类”,单击”下一步“:2.6、这步是其他版本没有的,这个的作用就可以更安全的管理orcl,主要是防止登录win系统勿删了oracle 文件,这里选择第二个”创建新windows用户“,输入用户名和口令,专门管理oracle文件的,单击”下一步“:注意:如果选择第一个或则第三个,就会出现这样的情况,导致不能往下进行了:2.7、在“典型安装”窗口中,选择Oracle的基目录,选择“企业版”和“默认值”并输入统一的密码为:Oracle12c,单击“下一步”:注意:Oracle为了安全起见,要求密码强度比较高,你输入的密码Oracle认为不能复制,我试过了,即使简单的数字字母组合Oracle也认为是不符合).Oracle建议的标准密码组合为:小写字母+数字+大写字母,这回就合格了,当然字符长度还必须保持着Oracle 12c数据库要求的围之。
Oracle Database Locator 12c 功能概述说明书
ORACLE FEATURE OVERVIEWORACLE DATABASE LOCATOR FEATURE LOCATION CAPABILITIES IN ORACLE DATABASE 12C KEY CAPABILITIES • SDO_GEOMETRY PackageOTHER ORACLE DATABSELOCATOR CAPABILITIES• Spatial geometry object data type• Fast spatial R-tree indexing• Spatial relationship operators:distance, area, and lengthfunctions+-• Open, standard SQL access tospatial operations• Whole Earth geometry model –comprehensive treatment ofgeodetic data• Function-based spatial indexes• Long transactions• Integration with Oracle FusionMiddleware MapViewer 11g mapvisualization tool• Coordinate system support basedon the European Petroleum SurveyGroup (EPSG) data model• Explicit coordinate transformationsInformation about the Oracle Spatialand Graph option can be found in aseparate data sheet at/goto/spatialA detailed listing of Oracle DatabaseLocator feature and Oracle Spatialand Graph option is in the OracleSpatial and Graph Developer’sGuide, 12c Release 1.Every Oracle database includes built-in location features that enable any business application – from department to enterprise – to directly incorporate location information and realize competitive advantages. Oracle’s open, native spatial support eliminates the cost of separate, proprietary systems, and is supported by all leading geospatial tool vendors. Only Oracle delivers industry-leading security, performance, scalability, and manageability for mission critical spatial assets stored in Oracle’s native type. This feature overview highlights capabilities of the Oracle Locator feature of Oracle Database 12c – the industry’s leading spatial database management platform. Easily Location-Enable All Your Applications Most business information has a location component, such as customer addresses, sales territories, and physical assets. Businesses can take advantage of their geographic information by incorporating location analysis into their information systems. This allows organizations to make better decisions and respond to customers more effectively. Oracle Database 12c provides the foundation for deploying enterprise-wide spatial information systems and location-enabled e-Business applications. Oracle Database Locator , a feature of Oracle Database (Express Edition, Standard Edition, Standard Edition One, and Enterprise Edition), provides core location functionality needed by most customer applications and partner solutions. Developers can easily incorporate location information directly in their applications and services using Locator. This is possible because location data is fully integrated in the Oracle server itself. Geographic and location data are manipulated using the same semantics applied to the CHAR, DATE or INTEGER types that are familiar to all users of SQL. Oracle Database Locator feature is not a solution for more complex geospatial applications. Oracle Spatial and Graph , an option to Oracle Database Enterprise Edition, extends the Locator feature, and provides an even more robust foundation for geospatial and business applications that require advanced spatial analysis and processing in Oracle Database. It includes support for all geospatial data types and models, including vector and raster data, and topology and network models; as well as routing and geocoding engines. Oracle Database Locator Feature Highlights The SDO_GEOMETRY package is now part of Oracle Database Locator feature. This means that many of the commonly used spatial functions and operators, such as intersection, difference, distance, and within distance are2Resources:/goto/spatial•White papers •Customer videos, profiles•News and eventsOracle Technology Network:/technetwork/database/options/spatialandgraph/spatial•Documentation and white papers •Software, sample code •Customer profiles •Technical forum • Training (Oracle University classschedules, online training, freetutorials)• PartnersRelated products • Oracle Database 12c • Oracle Fusion MiddlewareMapVieweravailable. However, to take advantage of the dramatic performance improvements for these spatial functions and operators (Vector Performance Acceleration feature), the Oracle Spatial and Graph option is required. This gives users about 50X faster spatial joins, touch, contains, overlaps, and complex masks. Manage Critical Spatial Data Assets with Enterprise-Class Security, Scalability, Performance For your mission-critical spatial data assets, only Oracle can provide the security, scalability, and performance of the industry’s leading database, to manage multi-terabyte datasets and serve communities ranging from tens to tens of thousands of users. Only by using Oracle’s native spatial data type (versus Long Raw or BLOB) can you take advantage of the features below: • Oracle Exadata Database Machine • Partitioning support for spatial indexes •Parallel index builds for spatial R-tree indexes •Parallel spatial queries •Replication (some features available with Enterprise Edition only) • Spatially-driven multi-level securitySupported By All Leading Geospatial Tools and ApplicationsOracle Database Locator feature is directly integrated with the leading geospatial, mapping and location services technology vendors. Since Oracle’s spatial data type is compliant with open standards, Oracle can serve as an interoperable, central geospatial data repository for providingdata to any partner application.A list of partners is available at:/technetwork/database/options/spatialandgraph/spatial.With Oracle Database Locator feature, Oracle brings the power and valueof location analysis to all your business applications. Only Oracle providesworld-class performance, scalability, security, and manageability to yourspatial data assets, while reducing costs, with support from every leadinggeospatial vendor.Copyright © 2013, Oracle and/or its affiliates. All rights reserved. This document is provided for information purposes only and the contents hereof are subject to change without notice. This document is not warranted to be error-free, nor subject to any other warranties or conditions, whether expressed orally or implied in law, including implied warranties and conditions of merchantability or fitness for a particular purpose. We specifically disclaim any liability with respect to this document and no contractual obligations are formed either directly or indirectly by this document. This document may not be reproduced or transmitted in any form or by any means, electronic or mechanical, for any purpose, without our prior written permission.Oracle and Java are registered trademarks of Oracle and/or its affiliates. Other names may be trademarks of their respective owners.。
(仅供参考)Oracle12cR1安装图解(详解)
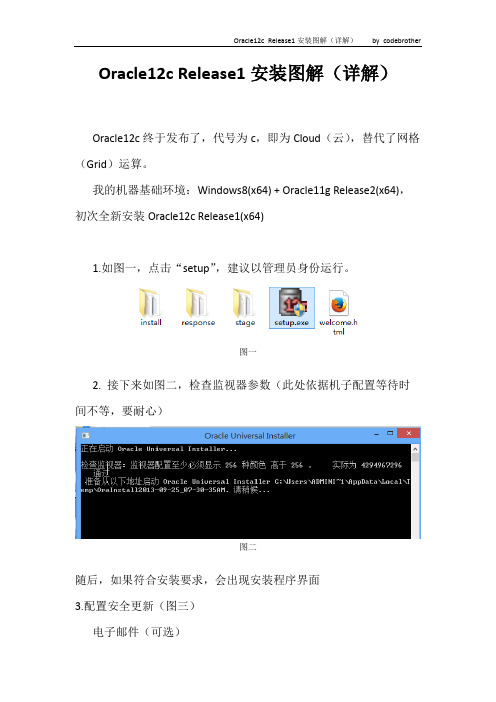
Oracle12c Release1安装图解(详解)Oracle12c终于发布了,代号为c,即为Cloud(云),替代了网格(Grid)运算。
我的机器基础环境:Windows8(x64) + Oracle11g Release2(x64),初次全新安装Oracle12c Release1(x64)1.如图一,点击“setup”,建议以管理员身份运行。
图一2. 接下来如图二,检查监视器参数(此处依据机子配置等待时间不等,要耐心)图二随后,如果符合安装要求,会出现安装程序界面3.配置安全更新(图三)电子邮件(可选)我希望通过My Oracle Support接收安全更新(W)(可选)一般情况下,这两项不必要勾选,如果你是DBA另说。
图三4.取消勾选“我希望通过My Oracle Support接收安全更新(W)”,点击“下一步”,会弹出下图对话框,点击“是”即可,如图四图四5.软件更新(图五)选择“跳过软件更新”,点击“下一步”图五6.安装选项(图六)创建和配置数据库(C)(本文档选该项,下一步)安装数据库软件并创建一个数据库实例(初学者)仅安装数据库软件(D)安装数据库软件,不会创建数据库实例(非初学者)升级现有的数据库(U)升级低版本的Oracle数据库图六7.系统类(图七)默认为“桌面类”;如果是安装在服务器上,选择“服务器类”,如Windows Server 系列,Ubuntu Server等。
图七8.指定Oracle主目录用户(1)使用现有的Windows用户(X)选择该项,有错误提示,如图八,如果选择该项,则需要指定没有管理权限的用户。
(2)创建新Windows用户(C)本文档选择的是该选项,如图十,创建一个新用户,输入用户名和密码,确认密码(密码级别要求包含大小写字母、数字)(3)使用Windows内置账户(L)选择该项,也会弹出警告信息,如图九,即使是内置账户,Oracle也建议使用权限受限的账户。
- 1、下载文档前请自行甄别文档内容的完整性,平台不提供额外的编辑、内容补充、找答案等附加服务。
- 2、"仅部分预览"的文档,不可在线预览部分如存在完整性等问题,可反馈申请退款(可完整预览的文档不适用该条件!)。
- 3、如文档侵犯您的权益,请联系客服反馈,我们会尽快为您处理(人工客服工作时间:9:00-18:30)。
Oracle BIEE 12c系统安装配置文档
仇辉
2015年12月
1文档控制
编制
日期作者版本变更参考
2015-12-18 仇辉V1.0
2015-12-18 V2.0
审核
姓名职位
发布
姓名位置/岗位
项目指导委员会
项目指导委员会
项目指导委员会
项目指导委员会
目录
1文档控制 (2)
2安装环境准备 (4)
2.1操作系统 (4)
2.2JDK安装 (4)
2.3介质下载及解压 (4)
2.4禁用UAC (4)
2.5安装M ICROSOFT V ISUAL C++2010X64 (5)
3BIEE软件安装 (6)
3.1安装WEBLOGIC (6)
3.2安装BIEE12C (17)
3.3使用RCU创建资料档案库 (26)
3.4配置BIEE12C (32)
2安装环境准备
2.1 操作系统
此次操作系统环境为:Windows 2012 Server R2 x64
2.2 JDK安装
官网下载JDK1.8版本jdk-8u66-windows-x64,进行安装
2.3 介质下载及解压
在 下载安装介质。
fmw_12.2.1.0.0_infrastructure_Disk1_1of1
fmw_12.2.1.0.0_bi_windows64_Disk1_1of2
fmw_12.2.1.0.0_bi_windows64_Disk1_2of2
解压后如下图所示:
2.4 禁用UAC
调整系统UAC至最低,以方便在以后的安装过程中不会出现报警通知而打断安装。
2.5 安装Microsoft Visual C++2010x64
注意:如果之前没有安装Microsoft Visual C++2010x64,安装过程中会自动安装。
3BIEE软件安装
3.1 安装weblogic
3.1.1Windows服务器安装
1)打开cmd命令窗口,进入安装介质文件夹C:\Soft\BIEE12c,执行java -jar
fmw_12.2.1.0.0_infrastructure.jar;
2)点击下一步
3)选择跳过自动更新,点击下一步
4)选择安装目录,点击下一步
5)选择含示例的(注:此处根据安装情景不同请自行选择),点击下一步
6)通过系统检查,点击下一步
7)如图示选择,点击下一步
8)此步骤可以检查安装信息,如没有问题,点击安装进行安装
9)安装过程进行中,请等待
10)安装过程进行中,请等待
11)安装完成,点击下一步
12)显示安装配置完成的信息,weblogic安装完成。
3.2 安装BIEE 12c
3.2.1点击setup_bi_platform-12.2.1.0.0_win6
4.exe进行安装
3.2.2点击下一步,进入下一安装步骤
3.2.3选择跳过自动更新,点击下一步,进入下一安装步骤
3.2.4选择安装目录(此处需要与weblogic目录一致),点击下一步,进入下一安装步骤
3.2.5选择安装类型,点击下一步,进入下一安装步骤
3.2.6通过系统检查,点击下一步,进入下一安装步骤
3.2.7检查安装信息,无误,点击安装
3.2.8点击下一步
3.2.9点击完成,完成BIEE 12c软件安装
3.3 使用RCU创建资料档案库
BIEE 12c之后已经不需要单独下载RCU(安装BIEE 12c后自带),也可以不需要提前通过RCU创建,可以在配置BIEE 过程中进行创建。
以下操作为配置BIEE之前,通过自带的RCU工具进行创建资料库。
3.3.1执行RCU程序
RCU目录位于C:\oracle\Middleware\Oracle_Home\oracle_common\bin
3.3.2填写数据库类型及数据库连接信息
3.3.3通过检查后点击确定3.3.4选择组件及填写前缀
3.3.5检查通过后点击确定3.3.6设置方案口令
3.3.7点击下一步
3.3.8点击确定
3.3.9点击创建进行资料档案库创建
3.3.10创建完成,点击关闭
3.4 配置BIEE 12c
配置工具位置:C:\oracle\Middleware\Oracle_Home\bi\bin 执行config.bat
3.4.1选择需要配置的组件
由于暂时不需要使用Essbase,此处不选择配置Essbase
3.4.2通过检查后,点击下一步
3.4.3输入账号密码信息,点击下一步
3.4.4此处选择使用现有方案,填入前缀 DEV及数据库连接信息,点击下一步
3.4.5此处可以选择修改端口号,点击下一步
3.4.6选择是否需要示例,点击下一步
3.4.7查看配置信息,如无误,点击配置
3.4.8配置进行中
3.4.9配置完成,配置完成后服务会自动启动,点击下一步
3.4.10将配置信息保存后,点击完成
3.4.11安装配置过程到此结束
使用之前配置的账号密码,登录网址进行检查。
在此可以看到BIEE 12c的新的Data Exploration & Discovery。
