第三方控件(DevExpress)使用大全【个人开发过程中整理收集】
DevExpress控件运用
DefaultLookAndFeel 皮肤控件
5
3.BarManager 、NavBarControl
BarManager 同时设置了菜单栏,工具栏,状态栏 NavBarControl 设置选项栏 (右键Add Group 、Add Item)
6
3.RibbonControl
适用于菜单栏、工具栏的分组设置 通过属性Visible设置相应栏位的显示/隐藏
绑定控件到 集合类中的数据 List<ClassName> list = new List<ClassName>(); 。。。 gridControl1.DataSource = list; gridView1.Columns[0].FieldName = “Id”;// Id 为class 封装的字段 gridView1.Columns[0].Caption = "元素ID";
5表示当前是第五条记录,12表示总记录条数 OptionsBehavior Editable/ReadOnly 不可编辑状态
12
5. GridControl
LayoutView.OptionsCarouselMode 属性,包括了椭圆的螺旋角和转动角:
13
5.GridControl
CardView
5.GridControl
代码操作如下:
// obtaining the main View and clearing its bands collection BandedGridView View = gridControl1.MainView as BandedGridView; view.Bands.Clear();
// creating the bands layout GridBand bandGeneral = View.Bands.Add("General Info"); GridBand bandTechnical = View.Bands.Add("Technical Info"); GridBand bandEngine = bandTechnical.Children.Add("Engine Info"); GridBand bandTransmission = bandTechnical.Children.Add("Transmission Info"); // assigning columns to bands colTrademark.OwnerBand = bandGeneral; colModel.OwnerBand = bandGeneral; colLiter.OwnerBand = bandEngine; colCylinders.OwnerBand = bandEngine; colSpeedCount.OwnerBand = bandTransmission; colTransmission.OwnerBand = bandTransmission;
DevExpress控件使用经验总结

DevExpress是一个比较有名的界面控件套件,提供了一系列的界面控件套件的DotNet界面控件。
本文主要介绍我在使用DevExpress控件过程中,遇到或者发现的一些问题解决方案,或者也可以所示一些小的经验总结。
总体来讲,使用DevExpress控件,可以获得更高效的界面设计以及更美观的效果。
本文主要通过给出相应的例子以及相关界面效果来说明问题,希望大家能够从中获得好的知识和思路。
1、应用Office2007和Office2010的界面主题开始使用DevExpress的时候,发现程序界面效果好像没有出现Office的样式,只是有几种可怜的内置效果。
经过查找发现需要在入口函数里面添加几行代码,如下所示。
erSkins.OfficeSkins.Register();erSkins.BonusSkins.Register();DevExpress.Skins.SkinManager.EnableFormSkins();指定界面主题效果,可以通过代码设置,指定主题的名称即可。
UserLookAndFeel.Default.SetSkinStyle("Office 2010 Blue");或者在界面中添加一个控件 DefaultLookAndFeel,设置其对应的界面效果即可实现整个设计时刻和运行时刻的界面效果,如下图所示。
2、Properties属性DevExpress很多控件的一般属性,会放置在该属性下面,如ComboBox下拉列表的属性操作如下private void InitDictItem(){this.txtManufacture.Properties.Items.Clear();this.txtManufacture.Properties.Items.AddRange(DictItemUtil.GetDi ctByDictType("供货商"));}这是一个很丰富属性的归类,很多常用的属性基本上都囊括在这里了,如果你是从传统界面转换过来DevExperss开发,找不着相关的属性,尽管来这里看看。
DevExpress ASPxGridView 使用方法汇总
转载请注明出处:/前言说实话,对于这种控件类的使用,我并不喜欢使用或者编写教程之类的文章,一来本来就很简单,二来实在没有这种时间。
就我的经验而言,控件类学习最快的入门方式就是边看官方示例,边整理编程文档,此后基本上就可以脱离示例,看文档就可以编程了。
此系列文档是ASPxGridView的编程有效参考,前前后后整理了很多回了,给有需要的人使用:)ASPxGridView 概述功能概述·DevExpress 公司提供的优秀的aspnet 网格控件·丰富的内置样式·内建的Ajax 操作·提供客户端API·内置的排序,分页,分组,过滤功能,无需另外编码·支持多种现场编辑模式:inline,EditForm, EditFormAndDisplayRow, PopupEditForm·可定制模板,支持卡片视图、主从表视图资源官方主页: /论坛:简单示例(注意:FieldName 是区分大小写的)<dxwgv:ASPxGridView ID="grid" runat="server" Width="100%"><Columns><dxwgv:GridViewDataColumn FieldName="ContactName" /><dxwgv:GridViewDataColumn FieldName="CompanyName" /><dxwgv:GridViewDataColumn FieldName="City" /><dxwgv:GridViewDataColumn FieldName="Region" /><dxwgv:GridViewDataColumn FieldName="Country" /></Columns></dxwgv:ASPxGridView>grid.DataSource = dt;grid.DataBind();小贴士(1)在web.config里面做配置<pages><controls>...<add tagPrefix="dx" namespace="DevExpress.Web.ASPxEditors" assembly="DevExpress.Web.ASPxEditors.v9.3, Version=9.3.4.0, Culture=neutral, PublicKeyToken=b88d1754d700e49a"/><add tagPrefix="dx" namespace="DevExpress.Web.ASPxHtmlEditor"assembly="DevExpress.Web.ASPxHtmlEditor.v9.3, Version=9.3.4.0, Culture=neutral, PublicKeyToken=b88d1754d700e49a"/> <add tagPrefix="dx" namespace="DevExpress.Web.ASPxGridView" assembly="DevExpress.Web.ASPxGridView.v9.3, Version=9.3.4.0, Culture=neutral, PublicKeyToken=b88d1754d700e49a"/><add tagPrefix="dx" namespace="DevExpress.Web.ASPxGridView.Export" assembly="DevExpress.Web.v9.3, Version=9.3.4.0, Culture=neutral, PublicKeyToken=b88d1754d700e49a"/><add tagPrefix="dx" namespace="DevExpress.Web.ASPxPanel" assembly="DevExpress.Web.v9.3, Version=9.3.4.0, Culture=neutral, PublicKeyToken=b88d1754d700e49a"/><add tagPrefix="dx" namespace="DevExpress.Web.ASPxDataView" assembly="DevExpress.Web.v9.3,Version=9.3.4.0, Culture=neutral, PublicKeyToken=b88d1754d700e49a"/><add tagPrefix="dx" namespace="DevExpress.Web.ASPxMenu" assembly="DevExpress.Web.v9.3, Version=9.3.4.0, Culture=neutral, PublicKeyToken=b88d1754d700e49a"/><add tagPrefix="dx" namespace="DevExpress.Web.ASPxPanel" assembly="DevExpress.Web.v9.3, Version=9.3.4.0, Culture=neutral, PublicKeyToken=b88d1754d700e49a"/><add tagPrefix="dx" namespace="DevExpress.Web.ASPxRoundPanel" assembly="DevExpress.Web.v9.3,Version=9.3.4.0, Culture=neutral, PublicKeyToken=b88d1754d700e49a"/><add tagPrefix="dx" namespace="DevExpress.Web.ASPxCallbackPanel" assembly="DevExpress.Web.v9.3,Version=9.3.4.0, Culture=neutral, PublicKeyToken=b88d1754d700e49a"/><add tagPrefix="dx" namespace="DevExpress.Web.ASPxUploadControl" assembly="DevExpress.Web.v9.3,Version=9.3.4.0, Culture=neutral, PublicKeyToken=b88d1754d700e49a"/><add tagPrefix="dx" namespace="DevExpress.Web.ASPxRatingControl" assembly="DevExpress.Web.v9.3,Version=9.3.4.0, Culture=neutral, PublicKeyToken=b88d1754d700e49a"/><add tagPrefix="dx" namespace="DevExpress.Web.ASPxObjectContainer" assembly="DevExpress.Web.v9.3, Version=9.3.4.0, Culture=neutral, PublicKeyToken=b88d1754d700e49a"/><add tagPrefix="dx" namespace="DevExpress.Web.ASPxTabControl" assembly="DevExpress.Web.v9.3,Version=9.3.4.0, Culture=neutral, PublicKeyToken=b88d1754d700e49a"/><add tagPrefix="dx" namespace="DevExpress.Web.ASPxClasses" assembly="DevExpress.Web.v9.3, Version=9.3.4.0, Culture=neutral, PublicKeyToken=b88d1754d700e49a"/></controls></pages>DevExpress 的web控件都处于不同的命名空间,使用起来很不方便。
DevExpress的10个使用技巧

DevExpress 的 10 个使用技巧DevExpress 是非常主流的.NET 控件,目前全世界和中国都用很多用户使用,不过由 于是英文版,初次接触的同学可能会觉得困难,这里就总结 DevExpress 常见的 10 个使 用技巧。
1.TextEditor(barEditItem)取文本以下是代码片段: string editValue = barEditItem1.EditValue.ToString(); //错误, 返回 null string editValue = ((DevExpress.XtraEditors.TextEdit)barEditItem).EditValue.ToString(); //精确,返回文本框内容 DevExpress 使用技巧boBoxEdit(barEditItem)添加以下是代码片段: Item string item = "comboboxItem1"; ((DevExpress.XtraEditors.Repository.RepositoryItemComboBox)this.barEd itItem.Edit).Items.Add(item);boBoxEdit(barEditItem)取文本以下是代码片段: string itemValue = this.barEditItem.EditValue.ToString();4.Ribbon 控件以下是代码片段: //添加 Page DevExpress.XtraBars.Ribbon.RibbonPage ribbonPage = new RibbonPage(); ribbonControl.Pages.Add(ribbonPage); //添加 Group DevExpress.XtraBars.Ribbon.RibbonPageGroup ribbonPageGroup = new RibbonPageGroup(); ribbonPage.Groups.Add(ribbonPageGroup); //添加 Button DevExpress.XtraBars.BarButtonItem barButtonItem = new BarButtonItem(); ribbonPageGroup.ItemLinks.Add(barButtonItem); // 添加 barSubItem DevExpress.XtraBars.BarSubItem barSubItem = new BarSubItem(); ribbonPageGroup.ItemLinks.Add(barSubItem); //barSubItem 下添加 Button barSubItem.AddItem(barButtonItem); //奇 异的删除 Page 问题( DevExpress 使用技巧) while (this.ribbonControl.Pages.Count > 0) { ribbonControl.Pages.Remove(ribbonControl.Pages[0]); //调试正常, 运转报异常 } while (this.ribbonControl.Pages.Count > 0) { ribbonControl.SelectedPage = ribbonControl.Pages[0]; ribbonControl.Pages.Remove(ribbonControl.SelectedPage); //运转正 常 } //遏止 F10 键 Tips (DevExpress 使用技巧)eF10KeyForMenu = false; //DX 按钮 ApplicationIcon 属性改动图标右键 Add ApplicationMenu 添加 evExpress.XtraBars.Ribbon.ApplicationMenu5.HitInfo以下是代码片段: //在 Tab 页上点击右键的工作响应(DevExpress 使用技巧) void xtraTabbedMdiManager_Event(object sender, MouseEventArgs e) { if (e.Button == MouseButtons.Right && ActiveMdiChild != null) { DevExpress.XtraTab.ViewInfo.BaseTabHitInfo hInfo = xtraTabbedMdiManager.CalcHitInfo(e.Location); //右键点击位置:在 Page 上且不在封闭按钮内 if (hInfo.IsValid && hInfo.Page != null && !hInfo.InPageCloseButton) { this.popupMenu.ShowPopup(Control.MousePosition);//在鼠标位置弹 出,而不是 e.Location } } } //在 ribbon 上点击右键的工作响应 private void ribbonControl1_ShowCustomizationMenu(object sender, RibbonCustomizationMenuEventArgs e) { //禁掉原系统右键菜单 e.ShowCustomizationMenu = false; //右键位置:在 barButtonItem 上 if (e.HitInfo != null && e.HitInfo.InItem && e.HitInfo.Item.Item is BarButtonItem) { this.popupMenu.ShowPopup(Control.MousePosition); } //右键位置: barSubItem 中的 barButtonItem 上 else if (e.Link != null 在 && e.Link.Item != null && e.Link.Item is BarButtonItem) { this.popupMenu.ShowPopup(Control.MousePosition); } }6.皮肤以下是代码片段: //添加皮肤轨范集后注册皮肤( DevExpress 使用技巧) erSkins.OfficeSkins.Register(); erSkins.BonusSkins.Register(); //设置皮肤 erLookAndFeel.Default.SetSkinStyle("Liquid Sky"); //若皮肤称号错误则按系统默许设置(第一个皮肤) //GalleryFilterMenuPopup 工作设置弹出选择菜单的“All Groups”为中文 private void rgbiSkins_GalleryFilterMenuPopup(object sender, GalleryFilterMenuEventArgs e) { e.FilterMenu.ItemLinks[n].Caption = " 一切皮肤"; //n=分组数+1 } //GalleryInitDropDownGallery 工作设置弹出 皮肤列表的表头“ALL Groups”为中文 private void rgbiSkins_GalleryInitDropDownGallery(object sender, InplaceGalleryEventArgs e) { e.PopupGallery.FilterCaption = "一切皮 肤"; }7.dockManager 将视图的状况信息保管到 xml 文件 dockManager1.SaveLayoutToXml("..\\UserConfig\\ViewInfo.xml"); 导出 xml 中保管的状况信息 dockManager1.RestoreLayoutFromXml("..\\UserConfig\\ViewInfo.xml"); 8.barManager 设置 bar 的字体与系统字体 barAndDockingController1.AppearancesBar.ItemsFont = new Font(this.Font.FontFamily, currentFontSize); 9.设置系统字体以下是代码片段: DevExpress.Utils.AppearanceObject.DefaultFont = new Font(this.Font.FontFamily, currentFontSize);10.treeView 为 tree 节点加右键菜单并选中该节点以下是代码片段: private void treeList1_MouseDown(object sender, MouseEventArgs e) { if (e.Button == MouseButtons.Right) { DevExpress.XtraTreeList.TreeListHitInfo hi = treeList1.CalcHitInfo(e.Location); if (hi.Node != null && hi.Node.ImageIndex == 5) //叶子节点的 ImageIndex == 5 { TreeListNode node = treeList1.FindNodeByID(hi.Node.Id); treeList1.FocusedNode = node; this.popupMenu1.ShowPopup(MousePosition); } } }优秀的菜单控件 DevExpress Bar 使用初探前一阵子在做项目时,用到了 Develper Experss Inc. 的 DevExpress Bar 控件,感觉它真 是一个好东西,可以完全取代 Delphi 现有的 Menu 控件和 ToolBar 控件,其功能也是第三方 控件中的佼佼者。
DevExpress控件使用说明

EF.DLL 的介绍 1.EF.dll 中的 Form
结构如下:
如上图所示--常用的是 EFForm 1) 继承 :父类有的,子类都会继承 ( 如 EFFormMain 中的东西,到了 EFForm 中,原来使用 EFFormMain 的对象调用的,现在使用 EFForm 的对象都可以调用, EFFormMasterDetail 类 似) 2)简单点如下: 可认为 EFFormMain 是基类,空的,看上去什么都没有, EFForm 为它添加了下方的 F1--F12 按钮栏,可以通过授权控制按钮是否显示. EFFormMasterDetail 是在 EFForm 上添加了一个 Panel 和一个 TabControl 控件 EFFormListDetail 是添加了一个 LayoutControl 并定义了上中下(查询条件,列表,详细)的格 局 EFFormMasterDetail2 是继承自 EFFormMasterDetail 的一个未完成的画面 .定义了工具栏上按 钮的操作对应的默认实现 EFFormListDetail2 是继承自 EFFormListDetail 的一个未完成的画面 . 定义了工具栏上按钮 的操作对应的默认实现 一般情况下窗体都直接继承自 EFForm
属性:
2.4 EFDevSpinEdit 数值输入控件
数值输入框.如下.由一个 EFDevTextEdit 和一个上下翻动的按钮组成,用户可点击按钮调整 值.
简单说明: 1.只能输入数值型(整数或者小数,包含负数) 2.可控制可输入的最大值和最小值(MaxValue,MinValue) 3.控制最大长度(MaxLength) 4.控制是否可输入小数(IsFloatValue) 5.可控制点击按钮式,增加或减少的值大小(Increment 属性) 主要属性如下图所示:
DevExpress-GridView使用大全
DevExpress GridView使用大全一、ComboBoxEdit1、如何使其不可编辑TextEditStyle 设置为:DisableTextEditor2、如何设置鼠标为手形Cursor 设置为:Hand二、GridControl1、如何解决单击记录整行选中的问题View->OptionsBehavior->EditorShowMode 设置为:Click2、如何新增一条记录(1)、gridView.AddNewRow()(2)、实现gridView_InitNewRow事件3、如何解决GridControl记录能获取而没有显示出来的问题gridView.populateColumns();4、如何让行只能选择而不能编辑(或编辑某一单元格)(1)、View->OptionsBehavior->EditorShowMode 设置为:Click(2)、View->OptionsBehavior->Editable 设置为:false5、如何禁用GridControl中单击列弹出右键菜单设置Run Design->OptionsMenu->EnableColumnMenu 设置为:false6、如何隐藏GridControl的GroupPanel表头设置Run Design->OptionsView->ShowGroupPanel 设置为:false7、如何禁用GridControl中列头的过滤器过滤器如下图所示:设置Run Design->OptionsCustomization->AllowFilter 设置为:false8、如何在查询得到0条记录时显示自定义的字符提示/显示如图所示:方法如下://When no Records Are Being Displayedprivate void gridView1_CustomDrawEmptyForeground(object sender, CustomDrawEventArgs e){//方法一(此方法为GridView设置了数据源绑定时,可用)ColumnView columnView = sender as ColumnView;BindingSource bindingSource = this.gridView1.DataSource as BindingSource;if(bindingSource.Count == 0){string str = "没有查询到你所想要的数据!";Font f = new Font("宋体", 10, FontStyle.Bold);Rectangle r = new Rectangle(e.Bounds.Top + 5, e.Bounds.Left + 5,e.Bounds.Right - 5, e.Bounds.Height - 5);e.Graphics.DrawString(str, f, Brushes.Black, r);}//方法二(此方法为GridView没有设置数据源绑定时,使用,一般使用此种方法)if (this._flag){if (this.gridView1.RowCount == 0){string str = "没有查询到你所想要的数据!";Font f = new Font("宋体", 10, FontStyle.Bold);Rectangle r = new Rectangle(e.Bounds.Left + 5, e.Bounds.Top +5, e.Bounds.Width - 5, e.Bounds.Height - 5);e.Graphics.DrawString(str, f, Brushes.Black, r);}}}9、如何显示水平滚动条?设置this.gridView.OptionsView.ColumnAutoWidth = false;10、如何定位到第一条数据/记录?设置this.gridView.MoveFirst()11、如何定位到下一条数据/记录?设置this.gridView.MoveNext()12、如何定位到最后一条数据/记录?设置this.gridView.MoveLast()13、设置成一次选择一行,并且不能被编辑this.gridView1.FocusRectStyle =DevExpress.XtraGrid.Views.Grid.DrawFocusRectStyle.RowFocus; this.gridView1.OptionsBehavior.Editable = false;this.gridView1.OptionsSelection.EnableAppearanceFocusedCell = false;14、如何显示行号?this.gridView1.IndicatorWidth = 40;//显示行的序号private void gridView1_CustomDrawRowIndicator(object sender,RowIndicatorCustomDrawEventArgs e){if (.IsRowIndicator && e.RowHandle>=0){.DisplayText = (e.RowHandle + 1).ToString();}}15、如何让各列头禁止移动?设置gridView1.OptionsCustomization.AllowColumnMoving = false;16、如何让各列头禁止排序?设置gridView1.OptionsCustomization.AllowSort = false;17、如何禁止各列头改变列宽?设置gridView1.OptionsCustomization.AllowColumnResizing = false;18、19、20、21、22、23、24、25、26、三、navBarControl1、如何在每一个navBarGroup里添加自己想要的控件设置GroupStyle: ControlContainer2、如何设置navBarGroup有滚动条设置SkinExplorerBarViewScrollStyle:ScrollBar3、如休把navBarGroup设置成如下样式如图所示:设置navBarGroup的PaintStyleName属性为: SkinNavigationPane四、toolTipController效果图如下:1、如何设置显示的时间长短设置this.toolTipController1.AutoPopDelay = 2000;2、如何在屏幕上显示如上图所示的效果ToolTipControllerShowEventArgs args =this.toolTipController1.CreateShowArgs();this.toolTipController1.SetToolTip(this.sbtnYes, "请选择一条记录!");this.toolTipController1.SetTitle(this.sbtnYes, "提示");this.toolTipController1.SetToolTipIconType(this.sbtnYes,DevExpress.Utils.ToolTipIconType.Exclamation);this.toolTipController1.ShowBeak = true;this.toolTipController1.ShowShadow = true;this.toolTipController1.Rounded = true;this.toolTipController1.ShowHint("请选择一条记录!", "提示"); args.ToolTip = "请选择一条记录!";args.Title = "提示";3、如何设置边框的颜色this.toolTipController1.Appearance.BorderColor = Color.Red;五、TextEdit1、如何设置TextEdit为多行,可拉伸设置TextEdit的Propertity->AutoHeight为:False六、LayoutControl1、如何设置LayoutItem为隐藏设置LayoutItem.Visibility = Never七、TreeList1、如何隐藏TreeList的列头设置TreeListr的OptionsView的ShowColumns属性为:False2、如何八、PictureEdit1、如何禁止PictureEdit的右键菜单?设置PictureEdit的Properties->ShowMenu为:false九、TreeList1、如何让TreeList的每个结点高亮显示?效果如下:代码如下:private void treeList1_CustomDrawNodeCell(object sender,DevExpress.XtraTreeList.CustomDrawNodeCellEventArgs e){TreeList node = sender as TreeList;if (e.Node == node.FocusedNode){e.Graphics.FillRectangle(SystemBrushes.Window, e.Bounds);Rectangle r = new Rectangle(e.EditViewInfo.ContentRect.Left,e.EditViewInfo.ContentRect.Top,Convert.ToInt32(e.Graphics.MeasureString(e.CellText, treeList1.Font).Width + 1),Convert.ToInt32(e.Graphics.MeasureString(e.CellText,treeList1.Font).Height));e.Graphics.FillRectangle(SystemBrushes.Highlight, r);e.Graphics.DrawString(e.CellText, treeList1.Font, SystemBrushes.HighlightText, r);e.Handled = true;}}//============================================================================ //===============================以下内容为收集=============================== //============================================================================一、改变grid的样式。
DevExpress控件使用使用技巧小结

DevExpress控件使用使用技巧小结零零散散的先总结一下吧1.TextEditor(barEditItem)取文本string editValue = barEditItem1.EditValue.ToString(); //错误,返回nullstring editValue =((DevExpress.XtraEditors.TextEdit)barEditItem).EditValue.ToString(); //正确,返回文本框内容boBoxEdit(barEditItem)添加Itemstring item = "comboboxItem1";((DevExpress.XtraEditors.Repository.RepositoryItemComboBox)this.barEd itItem.Edit).Items.Add(item);boBoxEdit(barEditItem)取文本string itemValue = this.barEditItem.EditValue.ToString();4.Ribbon控件//添加PageDevExpress.XtraBars.Ribbon.RibbonPage ribbonPage = new RibbonPage(); ribbonControl.Pages.Add(ribbonPage);//添加GroupDevExpress.XtraBars.Ribbon.RibbonPageGroup ribbonPageGroup = new RibbonPageGroup();ribbonPage.Groups.Add(ribbonPageGroup);//添加ButtonDevExpress.XtraBars.BarButtonItem barButtonItem = new BarButtonItem(); ribbonPageGroup.ItemLinks.Add(barButtonItem);//添加barSubItemDevExpress.XtraBars.BarSubItem barSubItem = new BarSubItem(); ribbonPageGroup.ItemLinks.Add(barSubItem);//barSubItem下添加ButtonbarSubItem.AddItem(barButtonItem);//奇怪的删除Page问题while (this.ribbonControl.Pages.Count > 0){ribbonControl.Pages.Remove(ribbonControl.Pages[0]); //调试正常,运行报异常}while (this.ribbonControl.Pages.Count > 0){ribbonControl.SelectedPage = ribbonControl.Pages[0];ribbonControl.Pages.Remove(ribbonControl.SelectedPage); //运行正常}//禁止F10键TipseF10KeyForMenu = false;//DX按钮ApplicationIcon属性改变图标右键 Add ApplicationMenu 添加evExpress.XtraBars.Ribbon.ApplicationMenu5.HitInfo//在Tab页上点击右键的事件响应void xtraTabbedMdiManager_Event(object sender, MouseEventArgs e) {if (e.Button == MouseButtons.Right & ActiveMdiChild != null){DevExpress.XtraTab.ViewInfo.BaseTabHitInfo hInfo = xtraTabbedMdiManager.CalcHitInfo(e.Location);//右键点击位置:在Page上且不在关闭按钮内if (hInfo.IsValid & hInfo.Page != null&& !hInfo.InPageCloseButton){this.popupMenu.ShowPopup(Control.MousePosition);//在鼠标位置弹出,而不是e.Location}}}//在ribbon上点击右键的事件响应private void ribbonControl1_ShowCustomizationMenu(object sender, RibbonCustomizationMenuEventArgs e){//禁掉原系统右键菜单e.ShowCustomizationMenu = false;//右键位置:在barButtonItem上if (e.HitInfo != null& e.HitInfo.InItem& e.HitInfo.Item.Item is BarButtonItem){this.popupMenu.ShowPopup(Control.MousePosition);}//右键位置:在barSubItem中的barButtonItem上else if (e.Link != null& e.Link.Item != null& e.Link.Item is BarButtonItem){this.popupMenu.ShowPopup(Control.MousePosition);}}6.皮肤//添加皮肤程序集后注册皮肤erSkins.OfficeSkins.Register();erSkins.BonusSkins.Register();//设置皮肤erLookAndFeel.Default.SetSkinStyle("Liquid Sky"); //若皮肤名称错误则按系统默认设置(第一个皮肤)//GalleryFilterMenuPopup事件设置弹出筛选菜单的“All Groups”为中文private void rgbiSkins_GalleryFilterMenuPopup(object sender, GalleryFilterMenuEventArgs e){e.FilterMenu.ItemLinks[n].Caption = "所有皮肤"; //n=分组数+1 }//GalleryInitDropDownGallery事件设置弹出皮肤列表的表头“ALL Groups”为中文private void rgbiSkins_GalleryInitDropDownGallery(object sender, InplaceGalleryEventArgs e){e.PopupGallery.FilterCaption = "所有皮肤";}7.dockManager将视图的状态信息保存到xml文件dockManager1.SaveLayoutToXml("..\\UserConfig\\ViewInfo.xml");导出xml中保存的状态信息dockManager1.RestoreLayoutFromXml("..\\UserConfig\\ViewInfo.xml");8.b arManager设置bar的字体与系统字体barAndDockingController1.AppearancesBar.ItemsFont = newFont(this.Font.FontFamily, currentFontSize);9.设置系统字体DevExpress.Utils.AppearanceObject.DefaultFont = newFont(this.Font.FontFamily, currentFontSize);10.treeView为tree节点加右键菜单并选中该节点private void treeList1_MouseDown(object sender, MouseEventArgs e){if (e.Button == MouseButtons.Right){DevExpress.XtraTreeList.TreeListHitInfo hi =treeList1.CalcHitInfo(e.Location);if (hi.Node != null & hi.Node.ImageIndex == 5) //叶子节点的ImageIndex == 5{TreeListNode node =treeList1.FindNodeByID(hi.Node.Id);treeList1.FocusedNode = node;this.popupMenu1.ShowPopup(MousePosition); }}}。
DevExpress-GridView使用大全
DevExp ressG ridVi ew使用大全一、ComboBoxEdit1、如何使其不可编辑TextEditSty le设置为:DisableT ext Edito r2、如何设置鼠标为手形Cursor设置为:Hand二、GridCo ntrol1、如何解决单击记录整行选中的问题View->OptionsBeha vior->Editor ShowM ode设置为:Click2、如何新增一条记录(1)、gridView.AddNew Row()(2)、实现grid View_InitN ewRow事件3、如何解决GridCon trol记录能获取而没有显示出来的问题gridView.popula teColumns();4、如何让行只能选择而不能编辑(或编辑某一单元格)(1)、View->OptionsBehavior->EditorShowM ode设置为:Click(2)、View->OptionsBehavior->Editab le 设置为:false5、如何禁用GridCon trol中单击列弹出右键菜单设置RunDesign->OptionsMenu->Enable ColumnMenu设置为:false6、如何隐藏GridCon trol的G roup Panel表头设置RunDesign->OptionsView->ShowGroupPanel设置为:false7、如何禁用GridCon trol中列头的过滤器过滤器如下图所示:设置Run Design->OptionsCust omiza tion->AllowF ilter设置为:false8、如何在查询得到0条记录时显示自定义的字符提示/显示如图所示:方法如下://When no Record s Are BeingDispla yedprivat evoid gridVi ew1_C ustom DrawE mptyF oregr ound(object sender,Custom DrawE ventA rgs e){//方法一(此方法为Gr idVie w设置了数据源绑定时,可用)Column Viewcolumn View= sender as Column View;Bindin gSour ce bindin gSour ce = this.gridVi ew1.DataSo urceasBindin gSour ce;if(bindin gSour ce.Count== 0){string str = "没有查询到你所想要的数据!";Font f = new Font("宋体", 10, FontSt yle.Bold);Rectan gle r = new Rectan gle(e.Bounds.Top + 5, e.Bounds.Left + 5,e.Bounds.Right- 5, e.Bounds.Height - 5);e.Graphi cs.DrawSt ring(str, f, Brushe s.Black, r);}//方法二(此方法为Gr idVie w没有设置数据源绑定时,使用,一般使用此种方法)if (this._flag){if (this.gridVi ew1.RowCou nt == 0){string str = "没有查询到你所想要的数据!";Font f = new Font("宋体", 10, FontSt yle.Bold);Rectan gle r = new Rectan gle(e.Bounds.Left + 5, e.Bounds.Top + 5, e.Bounds.Width-5, e.Bounds.Height - 5);e.Graphi cs.DrawSt ring(str, f, Brushe s.Black, r);}}}9、如何显示水平滚动条?设置this.gridView.Option sView.Column AutoW idth= false;10、如何定位到第一条数据/记录?设置this.gridView.MoveFirst()11、如何定位到下一条数据/记录?设置this.gridView.MoveNe xt()12、如何定位到最后一条数据/记录?设置this.gridView.MoveLa st()13、设置成一次选择一行,并且不能被编辑this.gridVi ew1.FocusR ectSt yle =DevExp ress.XtraGr id.Views.Grid.DrawFo cusRe ctSty le.RowFoc us; this.gridVi ew1.Option sBeha vior.Editab le = false;this.gridVi ew1.Option sSele ction.Enable Appea rance Focus edCel l = false;14、如何显示行号?this.gridVi ew1.Indica torWi dth = 40;//显示行的序号privat evoid gridVi ew1_C ustom DrawR owInd icato r(object sender, RowInd icato rCust omDra wEven tArgs e) {if (.IsRowI ndica tor && e.RowHan dle>=0){.Displa yText = (e.RowHan dle + 1).ToStri ng();}}15、如何让各列头禁止移动?设置gridView1.Option sCust omiza tion.AllowC olumn Movin g = false;16、如何让各列头禁止排序?设置gridView1.Option sCust omiza tion.AllowS ort = false;17、如何禁止各列头改变列宽?设置gridView1.Option sCust omiza tion.AllowC olumn Resiz ing = false;18、19、20、21、22、23、24、25、26、三、navBar Contr ol1、如何在每一个n avBarGrou p里添加自己想要的控件设置Grou pStyle:Contro lCont ainer2、如何设置na vBarG roup有滚动条设置Skin Explo rerBa rView ScrollStyl e:Scroll Bar3、如休把nav BarGr oup设置成如下样式如图所示:设置navBarGro up的Pa intSt yleNa me属性为:S kinNa vigat ionPa ne四、toolTipCont rolle r效果图如下:1、如何设置显示的时间长短设置this.toolTi pCont rolle r1.AutoPo pDela y = 2000;2、如何在屏幕上显示如上图所示的效果ToolTi pCont rolle rShow Event Argsargs = this.toolTi pCont rolle r1.Create ShowA rgs(); this.toolTi pCont rolle r1.SetToo lTip(this.sbtnYe s, "请选择一条记录!");this.toolTi pCont rolle r1.SetTit le(this.sbtnYe s, "提示");this.toolTi pCont rolle r1.SetToo lTipI conTy pe(this.sbtnYe s,DevExp ress.Utils.ToolTi pIcon Type.Exclam ation);this.toolTi pCont rolle r1.ShowBe ak = true;this.toolTi pCont rolle r1.ShowSh adow= true;this.toolTi pCont rolle r1.Rounde d = true;this.toolTi pCont rolle r1.ShowHi nt("请选择一条记录!", "提示"); args.ToolTi p = "请选择一条记录!";args.Title= "提示";3、如何设置边框的颜色this.toolTi pCont rolle r1.Appear ance.Border Color = Color.Red;五、TextEd it1、如何设置Te xtEdi t为多行,可拉伸设置Text Edit的Prope rtity->AutoHe ight为:False六、Layout Contr ol1、如何设置La youtItem为隐藏设置Layo utIte m.Visibility= Never七、TreeList1、如何隐藏Tr eeLis t的列头设置Tree Listr的OptionsView的Sh owColumns属性为:False2、如何八、Pictur eEdit1、如何禁止Picture Edit的右键菜单?设置Pict ureEd it的Pr opert ies->ShowMenu为:false九、TreeList1、如何让Tre eList的每个结点高亮显示?效果如下:代码如下:privat evoid treeLi st1_C ustom DrawN odeCe ll(object sender,DevExp ress.XtraTr eeLis t.Custom DrawN odeCe llEve ntArg s e){TreeLi st node = sender as TreeLi st;if (e.Node == node.Focuse dNode){e.Graphi cs.FillRe ctang le(System Brush es.Window, e.Bounds);Rectan gle r = new Rectan gle(e.EditVi ewInf o.Conten tRect.Left,e.EditVi ewInf o.Conten tRect.Top,Conver t.ToInt32(e.Graphi cs.Measur eStri ng(e.CellTe xt,treeLi st1.Font).Width+ 1),Conver t.ToInt32(e.Graphi cs.Measur eStri ng(e.CellTe xt,treeLi st1.Font).Height));e.Graphi cs.FillRe ctang le(System Brush es.Highli ght, r);e.Graphi cs.DrawSt ring(e.CellTe xt, treeLi st1.Font, System Brush es.Highli ghtTe xt, r);e.Handle d = true;}}//============================================================================ //===============================以下内容为收集=============================== //============================================================================一、改变grid的样式。
DevExpress用法总结大全

DevExpress用法总结大全使用DevExpress控件来做项目开发已经有很长一段时间了,在摸索开发到客户苛刻要求的过程中,其中碰到过很多问题需要解决的,随着一个个问题的解决,也留下很多对DevExpress控件的使用经验及教训,综合设计到的多个项目的问题,对这些开发常用的要点进行总结,方便别人也方便自己。
提供这些解决方法,一个可以快速应用到项目中,二个也可以作为对界面开发的更高要求对待自己的项目,使得自己的东西更加完美,更加受欢迎。
1、 GridControl控件的数据显示的样式控制DevExpress控件开发常用要点总结如上两图所示,我们有时候需要控制列表访问过的颜色变化,或者是时间显示格式等内容,这个时候设置GridView的RowCellStyle即可实现,如下所示。
this.gridView1.RowCellStyle += new DevExpress.XtraGrid.Views.Grid.RowCellStyleEventHandler(gridView1_RowCellStyle);void gridView1_RowCellStyle(object sender, DevExpress.XtraGrid.Views.Grid.RowCellStyleEventArgs e){if (e.Column.FieldName == "PublishType"){if (e.CellValue != null && e.CellValue.ToString() == "中介"){e.Appearance.BackColor = Color.DeepSkyBlue;e.Appearance.BackColor2 = Color.LightCyan;}}if (e.Column.FieldName == "PublishTime"){e.Column.DisplayFormat.FormatString = "yyyy-MM-dd HH:mm:ss";}if (e.Column.FieldName == "Title"){string id = this.winGridViewPager1.gridView1.GetRowCellDisplayText(e.RowHandle, "Id");if (historyDict.ContainsKey(id)){e.Appearance.BackColor = Color.DeepSkyBlue;e.Appearance.BackColor2 = Color.LightCyan;}}}2、在LayoutControl布局中固定控件宽度DevExpress控件开发常用要点总结固定宽度后的真实效果。
Winform开发中常见界面的DevExpress处理操作

Winform开发中常见界⾯的DevExpress处理操作我们在开发Winform程序的时候,需要经常性的对界⾯的⼀些控件进⾏初始化,或者经常简单的封装,以⽅便我们在界⾯设计过程中反复使⽤。
本⽂主要介绍在我的⼀些项⽬中经常性的界⾯处理操作和代码,以便为⼤家开发的时候提供必要的参考。
1、选择⽤户的控件封装操作在⼀些系统模块⾥⾯,我们需要选择系统⼈员作为经办⼈员的操作,如下⾯⼏个界⾯场景所⽰。
我们注意到,⼀般在我们选择的时候,界⾯会弹出⼀个新的层给我们选择,⾥⾯通过列表详细展⽰相关的信息,还可以⽀持搜索,⾮常⽅便。
当我们完成选择的时候,我们看到界⾯会只有⼀个⼈员名称的显⽰,不占⽤额外的地⽅显⽰。
这种界⾯效果是如何实现的呢?下⾯进⾏详细的介绍。
1)⾸先我们定义⼀个⾃定义控件,让其继承⾃XtraUserControl 即可。
///<summary>///经办⼈员、操作⼈员的选择控件封装///</summary>public partial class OperatorSelectControl : XtraUserControl{2)然后在DevExpress的界⾯⼯具箱上拖动⼀个SearchLookUpEdit 控件到我们新的⽤户控件OperatorSelectControl 上。
调整好⽤户界⾯控件的排版相关属性,就会得到下⾯的界⾯所⽰。
3)在设计视图⾥⾯,我们为这个SearchLookUpEdit控件的GridView设置它的显⽰字段,如下所⽰,每个字段主要绑定FieldName(属性或者字段)和Caption(显⽰名称)。
这些必备的处理操作完成后,我们可以通过代码或者设计器把这个控件的显⽰内容和存储内容进⾏设定,并绑定它的数据源即可(根据需要调⽤⾃⼰的函数),如下所⽰。
private void OperatorSelectControl_Load(object sender, EventArgs e){if (!this.DesignMode){txtOperator.Properties.ValueMember = "ID";txtOperator.Properties.DisplayMember = "FullName";txtOperator.Properties.DataSource = SecurityHelper.GetSimpleUsers();}}4)我们为了⽅便,还可以进⼀步处理控件的显⽰内容和返回的值内容,我们希望绑定值或者获取值的时候,使⽤Text属性就可以了,那么我们重载⼀下这个⾃定义控件的Text属性即可。
DevExpressWinform常用控件
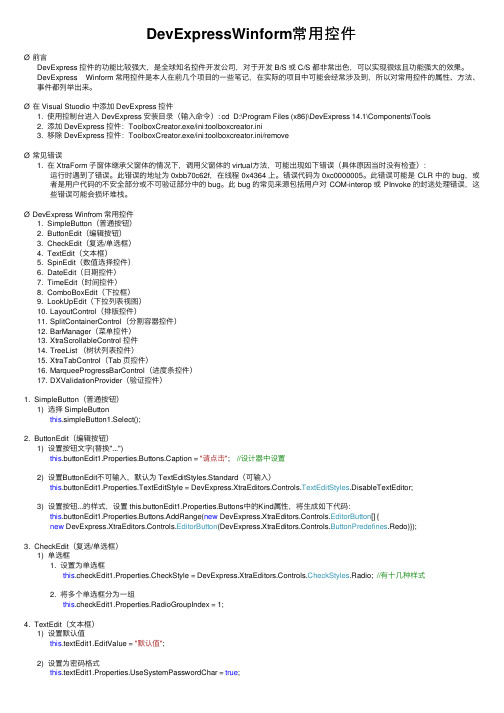
DevExpressWinform常⽤控件Ø前⾔DevExpress 控件的功能⽐较强⼤,是全球知名控件开发公司,对于开发 B/S 或 C/S 都⾮常出⾊,可以实现很炫且功能强⼤的效果。
DevExpress Winform 常⽤控件是本⼈在前⼏个项⽬的⼀些笔记,在实际的项⽬中可能会经常涉及到,所以对常⽤控件的属性、⽅法、事件都列举出来。
Ø在 Visual Stuodio 中添加 DevExpress 控件1.使⽤控制台进⼊ DevExpress 安装⽬录(输⼊命令): cd D:\Program Files (x86)\DevExpress 14.1\Components\Tools2.添加 DevExpress 控件:ToolboxCreator.exe/ini:toolboxcreator.ini3.移除 DevExpress 控件:ToolboxCreator.exe/ini:toolboxcreator.ini/removeØ常见错误1.在 XtraForm ⼦窗体继承⽗窗体的情况下,调⽤⽗窗体的 virtual⽅法,可能出现如下错误(具体原因当时没有检查):运⾏时遇到了错误。
此错误的地址为 0xbb70c62f,在线程 0x4364 上。
错误代码为 0xc0000005。
此错误可能是 CLR 中的 bug,或者是⽤户代码的不安全部分或不可验证部分中的 bug。
此 bug 的常见来源包括⽤户对 COM-interop 或 PInvoke 的封送处理错误,这些错误可能会损坏堆栈。
ØDevExpress Winfrom 常⽤控件1.SimpleButton(普通按钮)2.ButtonEdit(编辑按钮)3.CheckEdit(复选/单选框)4.TextEdit(⽂本框)5.SpinEdit(数值选择控件)6.DateEdit(⽇期控件)7.TimeEdit(时间控件)boBoxEdit(下拉框)9.LookUpEdit(下拉列表视图)youtControl(排版控件)11.SplitContainerControl(分割容器控件)12.BarManager(菜单控件)13.XtraScrollableControl 控件14.TreeList (树状列表控件)15.XtraTabControl(Tab 页控件)16.MarqueeProgressBarControl(进度条控件)17.DXValidationProvider(验证控件)1.SimpleButton(普通按钮)1)选择 SimpleButtonthis.simpleButton1.Select();2.ButtonEdit(编辑按钮)1)设置按钮⽂字(替换"...")this.buttonEdit1.Properties.Buttons.Caption = "请点击"; //设计器中设置2)设置ButtonEdit不可输⼊,默认为 TextEditStyles.Standard(可输⼊)this.buttonEdit1.Properties.TextEditStyle = DevExpress.XtraEditors.Controls.TextEditStyles.DisableTextEditor;3)设置按钮...的样式,设置 this.buttonEdit1.Properties.Buttons中的Kind属性,将⽣成如下代码:this.buttonEdit1.Properties.Buttons.AddRange(new DevExpress.XtraEditors.Controls.EditorButton[] {new DevExpress.XtraEditors.Controls.EditorButton(DevExpress.XtraEditors.Controls.ButtonPredefines.Redo)});3.CheckEdit(复选/单选框)1)单选框1.设置为单选框this.checkEdit1.Properties.CheckStyle = DevExpress.XtraEditors.Controls.CheckStyles.Radio; //有⼗⼏种样式2.将多个单选框分为⼀组this.checkEdit1.Properties.RadioGroupIndex = 1;4.TextEdit(⽂本框)1)设置默认值this.textEdit1.EditValue = "默认值";2)设置为密码格式eSystemPasswordChar = true;3)设置密码字符,系统默认使⽤"*"字符作为密码字符this.textEdit1.Properties.PasswordChar = '●';4)设置为只读this.textEdit1.Properties.ReadOnly = true;5)设置只能输⼊⼩数this.textEdit1.Properties.Mask.MaskType = DevExpress.XtraEditors.Mask.MaskType.Numeric;6)设置正则表达式验证1.设置只能输⼊0~9的整型数字this.textEdit1.Properties.Mask.MaskType = DevExpress.XtraEditors.Mask.MaskType.RegEx;this.textEdit1.Properties.Mask.EditMask = "\\d+"; //设置正则表达式2.设置只能输⼊⽇期格式this.textEdit1.Properties.Mask.MaskType = DevExpress.XtraEditors.Mask.MaskType.RegEx;this.textEdit1.Properties.Mask.EditMask = @"([1-2]\d{3}|[1-2]\d)-(0?[1-9]|1[0-2])-(3[0-1]|[1-2]\d|0?[1-9])";this.textEdit1.Properties.Mask.ShowPlaceHolders = false; //是否显⽰占位符this.textEdit1.Properties.Mask.AutoComplete = DevExpress.XtraEditors.Mask.AutoCompleteType.None; //⾃动完成模式3.正则表达式编写规范1)不允许:this.textEdit1.Properties.Mask.EditMask = @"\d{1, 5}"; 可改为:@"\d{1,5}";2)不允许:this.textEdit1.Properties.Mask.EditMask = @"[\w]{1,5}"; 可改为:@"[0-9a-zA-Z]{1,5}";4.注意点:1)如果在某⼀控件中出现正则表达式语法错误,程序中会出现syntax error的错误。
DevExpress使用技巧

一、DevExpress控件使用使用技巧小结零零散散的先总结一下吧1.TextEditor(barEditItem)取文本string editValue = barEditItem1.EditValue.ToString(); //错误,返回nullstring editValue = ((DevExpress.XtraEditors.TextEdit)barEditItem).EditValue.ToString(); //正确,返回文本框内容boBoxEdit(barEditItem)添加Itemstring item = "comboboxItem1";((DevExpress.XtraEditors.Repository.RepositoryItemComboBox)this.barEditItem.Edit).Items.Ad d(item);boBoxEdit(barEditItem)取文本string itemValue = this.barEditItem.EditValue.ToString();4.Ribbon控件//添加PageDevExpress.XtraBars.Ribbon.RibbonPage ribbonPage = new RibbonPage();ribbonControl.Pages.Add(ribbonPage);//添加GroupDevExpress.XtraBars.Ribbon.RibbonPageGroup ribbonPageGroup = new RibbonPageGroup(); ribbonPage.Groups.Add(ribbonPageGroup);//添加ButtonDevExpress.XtraBars.BarButtonItem barButtonItem = new BarButtonItem(); ribbonPageGroup.ItemLinks.Add(barButtonItem);//添加barSubItemDevExpress.XtraBars.BarSubItem barSubItem = new BarSubItem();ribbonPageGroup.ItemLinks.Add(barSubItem);//barSubItem下添加ButtonbarSubItem.AddItem(barButtonItem);4.奇怪的删除Page问题while (this.ribbonControl.Pages.Count > 0){ribbonControl.Pages.Remove(ribbonControl.Pages[0]); //调试正常,运行报异常}while (this.ribbonControl.Pages.Count > 0){ribbonControl.SelectedPage = ribbonControl.Pages[0];ribbonControl.Pages.Remove(ribbonControl.SelectedPage); //运行正常}5.RIBBON问题汇集//禁止F10键TipseF10KeyForMenu = false;//DX按钮ApplicationIcon属性改变图标右键Add ApplicationMenu 添加evExpress.XtraBars.Ribbon.ApplicationMenu5.HitInfo//在Tab页上点击右键的事件响应void xtraTabbedMdiManager_Event(object sender, MouseEventArgs e){if (e.Button == MouseButtons.Right & ActiveMdiChild != null){DevExpress.XtraTab.ViewInfo.BaseTabHitInfo hInfo = xtraTabbedMdiManager.CalcHitInfo(e.Location);//右键点击位置:在Page上且不在关闭按钮内if (hInfo.IsValid & hInfo.Page != null && !hInfo.InPageCloseButton){this.popupMenu.ShowPopup(Control.MousePosition);//在鼠标位置弹出,而不是e.Location}}}//在ribbon上点击右键的事件响应private void ribbonControl1_ShowCustomizationMenu(object sender, RibbonCustomizationMenuEventArgs e){//禁掉原系统右键菜单e.ShowCustomizationMenu = false;//右键位置:在barButtonItem上if (e.HitInfo != null& e.HitInfo.InItem& e.HitInfo.Item.Item is BarButtonItem){this.popupMenu.ShowPopup(Control.MousePosition);}//右键位置:在barSubItem中的barButtonItem上else if (e.Link != null& e.Link.Item != null& e.Link.Item is BarButtonItem){this.popupMenu.ShowPopup(Control.MousePosition);}}6.皮肤//添加皮肤程序集后注册皮肤erSkins.OfficeSkins.Register();erSkins.BonusSkins.Register();//设置皮肤erLookAndFeel.Default.SetSkinStyle("Liquid Sky"); //若皮肤名称错误则按系统默认设置(第一个皮肤)//GalleryFilterMenuPopup事件设置弹出筛选菜单的“All Groups”为中文private void rgbiSkins_GalleryFilterMenuPopup(object sender, GalleryFilterMenuEventArgs e) {e.FilterMenu.ItemLinks[n].Caption = "所有皮肤"; //n=分组数+1}//GalleryInitDropDownGallery事件设置弹出皮肤列表的表头“ALL Groups”为中文private void rgbiSkins_GalleryInitDropDownGallery(object sender, InplaceGalleryEventArgs e) {e.PopupGallery.FilterCaption = "所有皮肤";}7.dockManager将视图的状态信息保存到xml文件dockManager1.SaveLayoutToXml("..\\UserConfig\\ViewInfo.xml");导出xml中保存的状态信息dockManager1.RestoreLayoutFromXml("..\\UserConfig\\ViewInfo.xml");8.barManager设置bar的字体与系统字体barAndDockingController1.AppearancesBar.ItemsFont = new Font(this.Font.FontFamily, currentFontSize);9.设置系统字体DevExpress.Utils.AppearanceObject.DefaultFont = new Font(this.Font.FontFamily, currentFontSize);10.treeView为tree节点加右键菜单并选中该节点private void treeList1_MouseDown(object sender, MouseEventArgs e){if (e.Button == MouseButtons.Right){DevExpress.XtraTreeList.TreeListHitInfo hi = treeList1.CalcHitInfo(e.Location);if (hi.Node != null & hi.Node.ImageIndex == 5) //叶子节点的ImageIndex == 5{TreeListNode node = treeList1.FindNodeByID(hi.Node.Id);treeList1.FocusedNode = node;this.popupMenu1.ShowPopup(MousePosition);}}二、DevExpress部分使用技巧(原创)作者: 轻舞肥羊标题: DevExpress部分使用技巧(原创)关键字: DevExpress,cxGrid分类: 开发技巧密级: 公开(评分:★★★★, 回复: 7, 阅读: 8588) »»本文由轻舞肥羊发表于大富翁论坛转载请标明出处,谢谢声明:以下代码请看懂再使用,本人水平有限,发现bug希望提出,让我们共同改进2004-1-10 17:06:00查看评语»»»1.扩展cxLookupComboBox,使其支持多列查询的cxLookupComboBoxEx日期:2004-1-10 17:08:06//===================================================================== =========// Unit Name: cxLookupComboBoxEx// Author : ysai// Date : 2003// Purpose : 扩展cxLookupComboBox,cxDBLookupComboBox,使其支持多列过滤// History :// 2003-05-28大数据量改进// 2003-07-07可操作性改进// 2003-08-20效率改进// 2003-08-29加入过滤延时// 注意:// 限制1,不能再使用Properties.OnChange事件// 限制2,不能再使用Properties.ListSource.DataSet.OnFilterRecord事件// 限制3,不能再使用Properties.ListSource.DataSet.Filtered属性// 其它,最好在设计期设好一切属性,运行期再设置属性可能引发求知错误//=====================================================================unit cxLookupComboBoxEx;interfaceusesSysUtils, Classes, Controls, Windows, Messages,DB,StrUtils, cxControls, cxContainer, cxEdit, cxTextEdit,cxMaskEdit, cxDropDownEdit, cxLookupEdit, cxDBLookupEdit, cxDBLookupComboBox;typeTcxLookupComboBoxEx = class(TcxLookupComboBox)private//保存要过滤的字段列表FFieldList : TList;FFindText : String;//过滤事件procedure _OnFilterRecord(DataSet: TDataSet; var Accept: Boolean);//编辑框文字改变事件procedure _OnChange(Sender : TObject);procedure GetFieldList;//延时过滤消息procedure WMTimer (var Message: TMessage); message WM_TIMER; protected//下拉表格收回时procedure CloseUp(AAccept: Boolean); override;//过滤过程procedure _FilterListSource;//初始化下拉表格事件procedure DoInitPopup; override;publicconstructor Create(AOwner : TComponent); override;destructor Destroy; override;//更新要过滤的字段列表procedure UpdateFilterFields;publishedend;TcxDBLookupComboBoxEx = class(TcxDBLookupComboBox) private//保存要过滤的字段列表FFieldList : TList;FFindText : String;//过滤事件procedure _OnFilterRecord(DataSet: TDataSet; var Accept: Boolean);//编辑框文字改变事件procedure _OnChange(Sender : TObject);//取得要过滤的字段列表procedure GetFieldList;//延时过滤消息procedure WMTimer (var Message: TMessage); message WM_TIMER;protected//下拉表格收回时procedure CloseUp(AAccept: Boolean); override;//过滤过程procedure _FilterListSource;//初始化下拉表格事件procedure DoInitPopup; override;publicconstructor Create(AOwner : TComponent); override;destructor Destroy; override;//更新要过滤的字段列表procedure UpdateFilterFields;publishedend;procedure Register;implementationconstUM_TIMER_FILTER = WM_USER + $101; //自定义延时消息ID FILTERTIMER = 500; //延时时间DROPDOWN_ROWS = 12;procedure Register;beginRegisterComponents('Dev Express', [TcxLookupComboBoxEx,TcxDBLookupComboBoxEx]); end;{ TcxLookupComboBoxEx }procedure TcxLookupComboBoxEx.CloseUp(AAccept: Boolean);begininherited;//收起下拉后取消过滤if Assigned(Properties.ListSource) thenif Assigned(Properties.ListSource.DataSet) thenProperties.ListSource.DataSet.Filtered := False;end;constructor TcxLookupComboBoxEx.Create(AOwner: TComponent); begininherited;//默认值Properties.AutoSelect := False;Properties.DropDownAutoSize := True;Properties.DropDownListStyle := lsEditList; Properties.DropDownRows := DROPDOWN_ROWS; Properties.DropDownSizeable := True;Properties.IncrementalFiltering := False;Properties.Revertable := True;Properties.OnChange := _OnChange; eLeftAlignmentOnEditing := False;end;destructor TcxLookupComboBoxEx.Destroy;begin//释放过滤字段列表if Assigned(FFieldList) then FFieldList.Free;inherited;end;procedure TcxLookupComboBoxEx.DoInitPopup;begin//取得过滤字段if Assigned(Properties.ListSource) thenif Assigned(Properties.ListSource.DataSet) thenbeginGetFieldList;Properties.ListSource.DataSet.Filtered := False;end;inherited DoInitPopup;end;procedure TcxLookupComboBoxEx._FilterListSource;//过滤字段beginif Assigned(Properties.ListSource)and Assigned(Properties.ListSource.DataSet) thentryProperties.ListSource.DataSet.DisableControls;Properties.ListSource.DataSet.Filtered := False;Properties.ListSource.DataSet.OnFilterRecord := _OnFilterRecord;if Text <> '' thenbeginFFindText := Text;if SelLength > 0 thenFFindText := LeftStr(Text,SelStart);Properties.ListSource.DataSet.Filtered := FFindText <> '';end;Changed;finallyProperties.ListSource.DataSet.EnableControls;end;end;procedure TcxLookupComboBoxEx.GetFieldList;//取得过滤字段列表vari : Integer;sFieldName : String;fdTemp : TField;beginif not Assigned(FFieldList) thenbeginFFieldList := TList.Create;for i:=0 to Properties.ListColumns.Count -1 dobeginsFieldName := Properties.ListColumns.Items[i].FieldName;if sFieldName = '' then Continue;fdTemp := Properties.ListSource.DataSet.FindField(sFieldName);if Assigned(fdTemp) thenFFieldList.Add(Pointer(fdTemp));end;end;end;procedure TcxLookupComboBoxEx._OnChange(Sender: TObject);//设置延时beginif Focused and DroppedDown thenbeginKillTimer(Handle,UM_TIMER_FILTER);SetTimer(Handle,UM_TIMER_FILTER,FILTERTIMER,nil);end;end;procedure TcxLookupComboBoxEx._OnFilterRecord(DataSet: TDataSet; var Accept: Boolean);//过滤事件vars : String;i : Integer;begins := LowerCase(FFindText);if (s <> '') and (Properties.ListColumns.Count > 0) thenbeginAccept := False;for i := 0 to FFieldList.Count -1 dobeginAccept := Pos(s,LowerCase(TField(FFieldList[i]).AsString))>0;if Accept then Exit;end;endelseAccept := True;end;procedure TcxLookupComboBoxEx.WMTimer(var Message: TMessage); //延时更新消息beginKillTimer(Handle,UM_TIMER_FILTER);if Focused and DroppedDown then _FilterListSource;end;procedure TcxLookupComboBoxEx.UpdateFilterFields;//更新要过滤的字段列表beginif Assigned(FFieldList) thenbeginFFieldList.Free;FFieldList := nil;end;GetFieldList;end;{ TcxDBLookupComboBoxEx }procedure TcxDBLookupComboBoxEx.CloseUp(AAccept: Boolean); begininherited;//收起下拉后取消过滤if Assigned(Properties.ListSource) thenif Assigned(Properties.ListSource.DataSet) thenProperties.ListSource.DataSet.Filtered := False;end;constructor TcxDBLookupComboBoxEx.Create(AOwner: TComponent); begininherited;//默认值Properties.AutoSelect := False;Properties.DropDownListStyle := lsEditList;Properties.DropDownRows := DROPDOWN_ROWS; Properties.DropDownSizeable := True;Properties.IncrementalFiltering := False;Properties.Revertable := True;Properties.OnChange := _OnChange; eLeftAlignmentOnEditing := False;end;destructor TcxDBLookupComboBoxEx.Destroy;begin//释放过滤字段列表if Assigned(FFieldList) then FFieldList.Free;inherited;end;procedure TcxDBLookupComboBoxEx.DoInitPopup;begin//取得过滤字段if Assigned(Properties.ListSource) thenif Assigned(Properties.ListSource.DataSet) thenbeginGetFieldList;Properties.ListSource.DataSet.Filtered := False;end;inherited DoInitPopup;end;procedure TcxDBLookupComboBoxEx._FilterListSource;//过滤字段beginif Assigned(Properties.ListSource)and Assigned(Properties.ListSource.DataSet) thentryProperties.ListSource.DataSet.DisableControls;Properties.ListSource.DataSet.Filtered := False;Properties.ListSource.DataSet.OnFilterRecord := _OnFilterRecord;if Text <> '' thenbeginFFindText := Text;if SelLength > 0 thenFFindText := LeftStr(Text,SelStart);Properties.ListSource.DataSet.Filtered := FFindText <> '';end;Changed;finallyProperties.ListSource.DataSet.EnableControls;end;end;procedure TcxDBLookupComboBoxEx.GetFieldList;//取得过滤字段列表vari : Integer;sFieldName : String;fdTemp : TField;beginif not Assigned(FFieldList) thenbeginFFieldList := TList.Create;for i:=0 to Properties.ListColumns.Count -1 dobeginsFieldName := Properties.ListColumns.Items[i].FieldName;if sFieldName = '' then Continue;fdTemp := Properties.ListSource.DataSet.FindField(sFieldName);if Assigned(fdTemp) thenFFieldList.Add(Pointer(fdTemp));end;end;end;procedure TcxDBLookupComboBoxEx._OnChange(Sender: TObject);//设置延时beginif Focused and DroppedDown thenbeginKillTimer(Handle,UM_TIMER_FILTER);SetTimer(Handle,UM_TIMER_FILTER,FILTERTIMER,nil);end;end;procedure TcxDBLookupComboBoxEx._OnFilterRecord(DataSet: TDataSet; var Accept: Boolean);//过滤事件vars : String;i : Integer;begins := LowerCase(FFindText);if (s <> '') and (Properties.ListColumns.Count > 0) thenbeginAccept := False;for i := 0 to FFieldList.Count -1 dobeginAccept := Pos(s,LowerCase(TField(FFieldList[i]).AsString))>0;if Accept then Exit;end;endelseAccept := True;end;procedure TcxDBLookupComboBoxEx.WMTimer(var Message: TMessage); //延时更新消息beginKillTimer(Handle,UM_TIMER_FILTER);if Focused and DroppedDown then _FilterListSource;end;procedure TcxDBLookupComboBoxEx.UpdateFilterFields;//更新要过滤的字段列表beginif Assigned(FFieldList) thenbeginFFieldList.Free;FFieldList := nil;end;GetFieldList;end;end.2.动态生成TcxGridDBTableView的列及页脚的合计栏日期: 2004-1-10 17:14:06vari : Integer;cl : TcxGridDBColumn;beginScreen.Cursor := crHourGlass;cxtvMaster.BeginUpdate;trycxtvMaster.ClearItems;cxtvMaster.DataController.Summary.FooterSummaryItems.Clear;for i := 0 to cxtvMaster.DataController.DataSet.FieldCount - 1 dobegincl := cxtvMaster.CreateColumn;cl.DataBinding.FieldName :=cxtvMaster.DataController.DataSet.Fields[i].FieldName;if cxtvMaster.DataController.DataSet.Fields[i] is TNumericField thenbeginTNumericField(cxtvMaster.DataController.DataSet.Fields[i]).DisplayFormat := '#,##0.00';cl.Width := 80;with TcxGridDBTableSummaryItem(cxtvMaster.DataController.Summary.FooterSummaryItems.Add) do beginColumn := cl;FieldName := cl.DataBinding.FieldName;Format := '#,##0.00';Kind := skSum;end;endelse if cxtvMaster.DataController.DataSet.Fields[i] is TStringField thencl.Width := 100elsecl.Width := 80;cl.HeaderAlignmentHorz := taCenter;end; //iffinallycxtvMaster.EndUpdate;Screen.Cursor := crDefault;end;end;3.动态生成TcxGridDBBandedTableView的列及页脚的合计栏日期: 2004-1-10 17:24:32如果存储过程或SQL返回如下结果集员工1月$ 1月¥2月$ 2月¥合计$ 合计¥-------------------------------------------测试员A 200 1658 300 2487 500 4145将生成如下样式的Grid(页脚没有画出,麻烦,另外设置了显示格式,金额将以#,##0.00的方式显示)_________________________________________________| 员工 | 1月| 2月| 合计 ||-----------------------------------------------|| 员工 | $| ¥ | $| ¥ | $| ¥ ||-----------------------------------------------||测试员A | 200 | 1658 | 300 | 2487 | 500 | 4145 |-------------------------------------------------vari : Integer;cl : TcxGridDBBandedColumn;beginScreen.Cursor := crHourGlass;cxbtvMaster.BeginUpdate;trycxbtvMaster.ClearItems;cxbtvMaster.Bands.Clear;cxbtvMaster.DataController.Summary.FooterSummaryItems.Clear;for i := 0 to cxbtvMaster.DataController.DataSet.FieldCount - 1 dobeginif i = 0 thenwith cxbtvMaster.Bands.Add dobeginOptions.HoldOwnColumnsOnly := True;Caption := cxbtvMaster.DataController.DataSet.Fields[i].FieldName;end;if RightStr(cxbtvMaster.DataController.DataSet.Fields[i].FieldName,1) = '$' thenwith cxbtvMaster.Bands.Add dobeginOptions.HoldOwnColumnsOnly := True;Caption := Copy(cxbtvMaster.DataController.DataSet.Fields[i].FieldName, 1,Length(cxbtvMaster.DataController.DataSet.Fields[i].FieldName)- 1);cxbtvMaster.DataController.DataSet.Fields[i].DisplayLabel := '$';end;if RightStr(cxbtvMaster.DataController.DataSet.Fields[i].FieldName,1) = '¥' thencxbtvMaster.DataController.DataSet.Fields[i].DisplayLabel := '¥';cl := cxbtvMaster.CreateColumn;cl.HeaderAlignmentHorz := taCenter;cl.Position.BandIndex := cxbtvMaster.Bands.Count - 1;cl.DataBinding.FieldName :=cxbtvMaster.DataController.DataSet.Fields[i].FieldName;if cxbtvMaster.DataController.DataSet.Fields[i] is TNumericField then beginTNumericField(cxbtvMaster.DataController.DataSet.Fields[i]).DisplayFormat := '#,##0.00';cl.Width := 80;with TcxGridDBBandedTableSummaryItem(cxbtvMaster.DataController.Summary.FooterSummaryItems.Add) do beginColumn := cl;FieldName := cl.DataBinding.FieldName;Format := '#,##0.00';Kind := skSum;end;endelse if cxbtvMaster.DataController.DataSet.Fields[i] is TStringField then cl.Width := 100elsecl.Width := 80;end; //iffinallycxbtvMaster.EndUpdate;Screen.Cursor := crDefault;end;end;4.自动调整列宽的方法要注意的地方2004-1-31 22:36:25可以用ApplyBestFit实现自动列宽;不能在BeginUpdate和EndUpdate之间调用这个方法,否则会产生下标越界错误;在BeginUpdate和EndUpdate中清除/建立列不会产生屏幕闪烁,其它需要长时间更新cxGrid 数据的操作最好放在BeginUpdate和EndUpdate执行,并用try包起来.5.DevExpress Bar的动态菜单2004-2-8 15:32:30没有什么说明,细心点应该知道表结构及数据的内容形式对比了一下代码,用dxBar比用ToolBar+PopupMenu生成动态菜单要简单,只用了一个递归过程type//菜单项PMenuItemInfo = ^TMenuItemInfo;TMenuItemInfo = recordID : string;ParentID : string;Caption : string;Hint : string;LibraryName : string;ProcedureName : string;wParam : Integer;lParam : Integer;end;procedure TmgMainForm.BuildMenu;//生成菜单procedure SetMenuItemInfo(const ADataSet : TDataSet;const AItem : PMenuItemInfo);beginAItem.ID := ADataSet.FieldByName('ID').AsString;AItem.ParentID := ADataSet.FieldByName('ParentID').AsString; AItem.Caption := ADataSet.FieldByName('Caption').AsString; AItem.Hint := ADataSet.FieldByName('Hint').AsString;AItem.LibraryName := ADataSet.FieldByName('LibraryName').AsString; AItem.ProcedureName := ADataSet.FieldByName('ProcedureName').AsString; AItem.wParam := ADataSet.FieldByName('wParam').AsInteger; AItem.lParam := ADataSet.FieldByName('lParam').AsInteger;end;procedure CreateItemList(const ADataSet : TDataSet;const AList : TList;const AText : string);//根据父节点建立子项目列表varm : PMenuItemInfo;i : Integer;beginADataSet.First;for i := 0 to ADataSet.RecordCount - 1 dobeginif ADataSet.FieldByName('ParentID').AsString = AText thenbeginNew(m);SetMenuItemInfo(ADataSet,m);AList.Add(m);ADataSet.Delete;end elseADataSet.Next;end; //forend;procedure CreateMenuItems(const ADataSet : TDataSet;const AKeyValue : string;const AItemLinks : TdxBarItemLinks;const AIndex : Integer);//建立菜单项vardb : TdxBarButton;dbs : TdxBarSubItem;l : TList;i : Integer;j : Integer;bg : Boolean;beginbg := False;j := AIndex;l := TList.Create;tryCreateItemList(ADataSet, l, AKeyValue);for i := 0 to l.Count - 1 dobeginif ADataSet.Locate('ParentID', PMenuItemInfo(l[i]).ID, []) thenbegin//有子项dbs := TdxBarSubItem.Create(dxBar);dbs.Caption := PMenuItemInfo(l[i]).Caption;dbs.Hint := PMenuItemInfo(l[i]).Hint;dbs.Tag := Integer(l[i]);if AIndex > 0 thendbs.ImageIndex := 0;with AItemLinks.Add dobeginItem := dbs;Index := j;BeginGroup := bg;end; //withbg := False;CreateMenuItems(ADataSet, PMenuItemInfo(l[i]).ID, dbs.ItemLinks, 0);if dbs.ItemLinks.Count = 0 thendbs.FreeelseInc(j);endelse begin//无子项if not (PMenuItemInfo(l[i]).Caption = '-') thenbegindb := TdxBarButton.Create(dxBar);db.Caption := PMenuItemInfo(l[i]).Caption;db.Hint := PMenuItemInfo(l[i]).Hint;db.Tag := Integer(l[i]);db.OnClick := MenuItemClick;if AIndex > 0 thendb.ImageIndex := 0;with AItemLinks.Add dobeginItem := db;Index := j;BeginGroup := bg;end;bg := False;Inc(j);endelse beginbg := True;end; //if bgend; //if Locateend; //forfinallyl.Free;end;end;varrsMenus : TDataSet;beginrsMenus := mgDMMain.GetMenus; //取得数据集if Assigned(rsMenus) thentryCreateMenuItems(rsMenus, '', dxBar.Bars[0].ItemLinks, 1);//一定要刷新一下,否则不更改样式会出错dxBar.Bars[0].ItemLinks[0].Visible := False;dxBar.Bars[0].ItemLinks[0].Visible := True;finallyrsMenus.Free;end;end;6. 取得TcxLookupComboBox下拉列表中各项的内容日期: 2005-1-4 16:34:35Properties.DataController.Values包含了所有内容,如果要取得当前选择行的内容,用以下代码//cmb:TcxLookupComboBox;with cmb.Properties.DataController doShowMessage(Values[FindRecordIndexByKey(cmb.EditValue),0]);//0代表显示的第一列,以Properties.ListColumns为准,可以从这个集合中查找对应的字段名三、。
DevExpress使用教程:GridView经验小结(官方中文文献经典资料技巧)
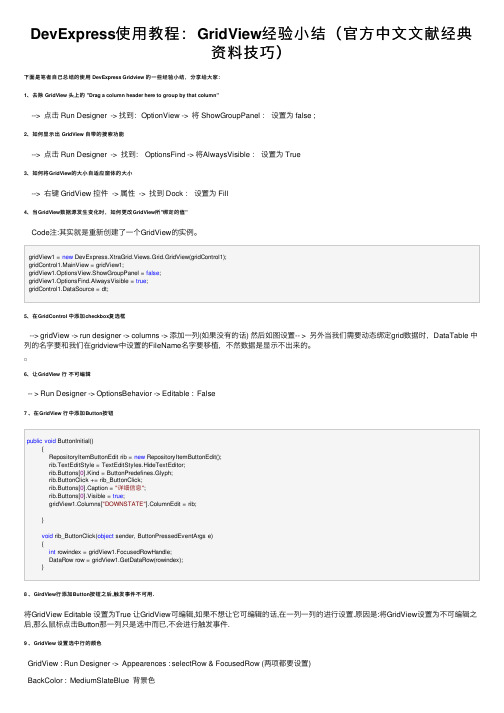
DevExpress使⽤教程:GridView经验⼩结(官⽅中⽂⽂献经典资料技巧)下⾯是笔者⾃⼰总结的使⽤ DevExpress Gridview 的⼀些经验⼩结,分享给⼤家:1、去除 GridView 头上的 "Drag a column header here to group by that column"--> 点击 Run Designer -> 找到:OptionView -> 将 ShowGroupPanel :设置为 false ;2、如何显⽰出 GridView ⾃带的搜索功能--> 点击 Run Designer -> 找到: OptionsFind -> 将AlwaysVisible :设置为 True3、如何将GridView的⼤⼩⾃适应窗体的⼤⼩--> 右键 GridView 控件 -> 属性 -> 找到 Dock :设置为 Fill4、当GridView数据源发⽣变化时,如何更改GridView所"绑定的值"Code注:其实就是重新创建了⼀个GridView的实例。
gridView1 = new DevExpress.XtraGrid.Views.Grid.GridView(gridControl1);gridControl1.MainView = gridView1;gridView1.OptionsView.ShowGroupPanel = false;gridView1.OptionsFind.AlwaysVisible = true;gridControl1.DataSource = dt;5、在GridControl 中添加checkbox复选框--> gridView -> run designer -> columns -> 添加⼀列(如果没有的话) 然后如图设置-- > 另外当我们需要动态绑定grid数据时,DataTable 中列的名字要和我们在gridview中设置的FileName名字要移植,不然数据是显⽰不出来的。
devexpress winform用法
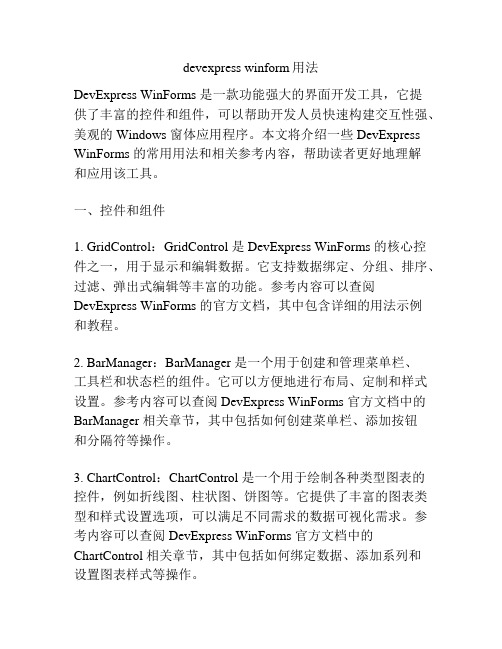
devexpress winform用法DevExpress WinForms 是一款功能强大的界面开发工具,它提供了丰富的控件和组件,可以帮助开发人员快速构建交互性强、美观的 Windows 窗体应用程序。
本文将介绍一些DevExpress WinForms 的常用用法和相关参考内容,帮助读者更好地理解和应用该工具。
一、控件和组件1. GridControl:GridControl 是DevExpress WinForms 的核心控件之一,用于显示和编辑数据。
它支持数据绑定、分组、排序、过滤、弹出式编辑等丰富的功能。
参考内容可以查阅DevExpress WinForms 的官方文档,其中包含详细的用法示例和教程。
2. BarManager:BarManager 是一个用于创建和管理菜单栏、工具栏和状态栏的组件。
它可以方便地进行布局、定制和样式设置。
参考内容可以查阅DevExpress WinForms 官方文档中的BarManager 相关章节,其中包括如何创建菜单栏、添加按钮和分隔符等操作。
3. ChartControl:ChartControl 是一个用于绘制各种类型图表的控件,例如折线图、柱状图、饼图等。
它提供了丰富的图表类型和样式设置选项,可以满足不同需求的数据可视化需求。
参考内容可以查阅DevExpress WinForms 官方文档中的ChartControl 相关章节,其中包括如何绑定数据、添加系列和设置图表样式等操作。
二、布局和样式1. LayoutControl:LayoutControl 是一个用于创建复杂布局的控件,可以将控件按照自定义的布局规则排列,并支持自动调整布局大小。
参考内容可以查阅DevExpress WinForms 官方文档中的LayoutControl 相关章节,其中包括如何定义布局规则、添加控件和设置布局样式等操作。
2. SkinEditor:SkinEditor 是一个用于定制皮肤的工具,可以为应用程序添加不同风格的界面。
第三方控件(DevExpress)使用大全【个人开发过程中整理收集】
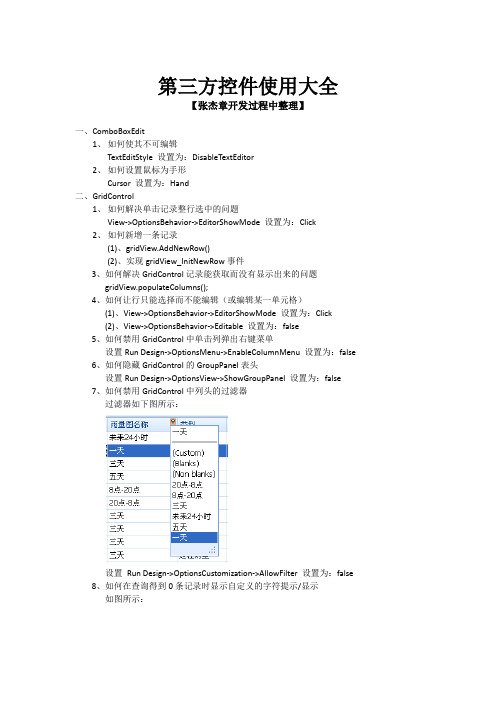
第三方控件使用大全【张杰章开发过程中整理】一、ComboBoxEdit1、如何使其不可编辑TextEditStyle 设置为:DisableTextEditor2、如何设置鼠标为手形Cursor 设置为:Hand二、GridControl1、如何解决单击记录整行选中的问题View->OptionsBehavior->EditorShowMode 设置为:Click2、如何新增一条记录(1)、gridView.AddNewRow()(2)、实现gridView_InitNewRow事件3、如何解决GridControl记录能获取而没有显示出来的问题gridView.populateColumns();4、如何让行只能选择而不能编辑(或编辑某一单元格)(1)、View->OptionsBehavior->EditorShowMode 设置为:Click(2)、View->OptionsBehavior->Editable 设置为:false5、如何禁用GridControl中单击列弹出右键菜单设置Run Design->OptionsMenu->EnableColumnMenu 设置为:false6、如何隐藏GridControl的GroupPanel表头设置Run Design->OptionsView->ShowGroupPanel 设置为:false7、如何禁用GridControl中列头的过滤器过滤器如下图所示:设置Run Design->OptionsCustomization->AllowFilter 设置为:false8、如何在查询得到0条记录时显示自定义的字符提示/显示如图所示:方法如下://When no Records Are Being Displayedprivate void gridView1_CustomDrawEmptyForeground(object sender, CustomDrawEventArgs e){//方法一(此方法为GridView设置了数据源绑定时,可用)ColumnView columnView = sender as ColumnView;BindingSource bindingSource = this.gridView1.DataSource as BindingSource;if(bindingSource.Count == 0){string str = "没有查询到你所想要的数据!";Font f = new Font("宋体", 10, FontStyle.Bold);Rectangle r = new Rectangle(e.Bounds.Top + 5, e.Bounds.Left + 5,e.Bounds.Right - 5, e.Bounds.Height - 5);e.Graphics.DrawString(str, f, Brushes.Black, r);}//方法二(此方法为GridView没有设置数据源绑定时,使用,一般使用此种方法)if (this._flag){if (this.gridView1.RowCount == 0){string str = "没有查询到你所想要的数据!";Font f = new Font("宋体", 10, FontStyle.Bold);Rectangle r = new Rectangle(e.Bounds.Left + 5, e.Bounds.Top +5, e.Bounds.Width - 5, e.Bounds.Height - 5);e.Graphics.DrawString(str, f, Brushes.Black, r);}}}9、如何显示水平滚动条?设置this.gridView.OptionsView.ColumnAutoWidth = false;10、如何定位到第一条数据/记录?设置this.gridView.MoveFirst()11、如何定位到下一条数据/记录?设置this.gridView.MoveNext()12、如何定位到最后一条数据/记录?设置this.gridView.MoveLast()13、设置成一次选择一行,并且不能被编辑this.gridView1.FocusRectStyle =DevExpress.XtraGrid.Views.Grid.DrawFocusRectStyle.RowFocus; this.gridView1.OptionsBehavior.Editable = false;this.gridView1.OptionsSelection.EnableAppearanceFocusedCell = false;14、如何显示行号?this.gridView1.IndicatorWidth = 40;//显示行的序号private void gridView1_CustomDrawRowIndicator(object sender,RowIndicatorCustomDrawEventArgs e){if (.IsRowIndicator && e.RowHandle>=0){.DisplayText = (e.RowHandle + 1).ToString();}}15、如何让各列头禁止移动?设置gridView1.OptionsCustomization.AllowColumnMoving = false;16、如何让各列头禁止排序?设置gridView1.OptionsCustomization.AllowSort = false;17、如何禁止各列头改变列宽?设置gridView1.OptionsCustomization.AllowColumnResizing = false;18、19、20、21、22、23、24、25、26、三、navBarControl1、如何在每一个navBarGroup里添加自己想要的控件设置GroupStyle: ControlContainer2、如何设置navBarGroup有滚动条设置SkinExplorerBarViewScrollStyle:ScrollBar3、如休把navBarGroup设置成如下样式如图所示:设置navBarGroup的PaintStyleName属性为: SkinNavigationPane四、toolTipController效果图如下:1、如何设置显示的时间长短设置this.toolTipController1.AutoPopDelay = 2000;2、如何在屏幕上显示如上图所示的效果ToolTipControllerShowEventArgs args =this.toolTipController1.CreateShowArgs();this.toolTipController1.SetToolTip(this.sbtnYes, "请选择一条记录!");this.toolTipController1.SetTitle(this.sbtnYes, "提示");this.toolTipController1.SetToolTipIconType(this.sbtnYes,DevExpress.Utils.ToolTipIconType.Exclamation);this.toolTipController1.ShowBeak = true;this.toolTipController1.ShowShadow = true;this.toolTipController1.Rounded = true;this.toolTipController1.ShowHint("请选择一条记录!", "提示"); args.ToolTip = "请选择一条记录!";args.Title = "提示";3、如何设置边框的颜色this.toolTipController1.Appearance.BorderColor = Color.Red;五、TextEdit1、如何设置TextEdit为多行,可拉伸设置TextEdit的Propertity->AutoHeight为:False六、LayoutControl1、如何设置LayoutItem为隐藏设置LayoutItem.Visibility = Never七、TreeList1、如何隐藏TreeList的列头设置TreeListr的OptionsView的ShowColumns属性为:False2、如何八、PictureEdit1、如何禁止PictureEdit的右键菜单?设置PictureEdit的Properties->ShowMenu为:false九、TreeList1、如何让TreeList的每个结点高亮显示?效果如下:代码如下:private void treeList1_CustomDrawNodeCell(object sender,DevExpress.XtraTreeList.CustomDrawNodeCellEventArgs e){TreeList node = sender as TreeList;if (e.Node == node.FocusedNode){e.Graphics.FillRectangle(SystemBrushes.Window, e.Bounds);Rectangle r = new Rectangle(e.EditViewInfo.ContentRect.Left,e.EditViewInfo.ContentRect.Top,Convert.ToInt32(e.Graphics.MeasureString(e.CellText, treeList1.Font).Width + 1),Convert.ToInt32(e.Graphics.MeasureString(e.CellText,treeList1.Font).Height));e.Graphics.FillRectangle(SystemBrushes.Highlight, r);e.Graphics.DrawString(e.CellText, treeList1.Font, SystemBrushes.HighlightText, r);e.Handled = true;}}//============================================================================ //===============================以下内容为收集=============================== //============================================================================一、改变grid的样式。
第三方控件DevExpress使用整理

第三方控件DevExpress使用整理一、ComboBoxEdit:1、设置private void Form1_Load(object sender, EventArgs e){comboBoxEdit1.Properties.Items.Add(" ");//向comboboxedit中添加数据}二、LookUpEdit:1、设置private void Form1_Load(object sender, EventArgs e){string sql="";lookUpEdit1.Properties.DataSource=sql;//连接数据源lookUpEdit1.Properties.ValueMember="实际要用的字段";//相当于editvaluelookUpEdit1.Properties.DisplayMember="要显示的字段";//相当于textlookUpEdit1.Properties.NullText = null;//清空null值lookUpEdit1.Properties.NullText = "要设置的null值";}2.使用变量 = this.lookupedit.editvalue.tostring(); //是lookupedit.properties.valuemember的值变量 = this.lookupedit.text.trim();//是lookupedit.properties.displaymember 的值eg:把lookupedit中的值绑定到gridviewDepartment department = (Department)this.lookupedit.EditValue;gridview.DataSource = department.Courses;特别值得注意的是,有时候我们要使用lookupedit来实现combox的一些效果,在实际的使用过程中在程序加载的时候会默认的选择第一项,它的设置是:lookupedit.itemindex=0;//选择第一项lookupedit.itemindex=-1;//无选项,此时显示的是nulltext值,其实这个地方只要editvalue==null,lookupedit就显示nulltextlookupedit1.editvalue=value;//自动搜索datasouse,选择与之匹配的值,没有的情况下赋值null ,value的值必须与valuemember的数据类型一致。
DevExpress控件使用详细说明
界面规范[V1.0]拟制人______________________审核人______________________批准人______________________[二零零七年二月二十六日]日期作者版本备注2007/04/05 范拥华 1.0.0Created by fanco Page 1 of 49 Created on 5/22/2020 4:55:00 PM目录1规范性 (4)2系统颜色、字体、图标 (4)2.1设计参考 (4)3FORM控件布局与间距 (5)3.1设计参考 (5)4对齐设置 (6)4.1设计参考 (6)5BARMANAGER控件 (6)5.1实现效果 (6)6菜单 (7)6.1设计参考 (7)6.2实现效果 (8)6.3操作步骤 (8)6.4实现代码 (10)7工具栏 (10)7.1设计参考 (10)7.2实现效果 (10)7.3操作步骤 (10)8STATUSBARS控件 (11)8.1设计参考 (11)8.2实现效果 (11)8.3操作步骤 (11)9控件 (11)9.1网格控件 (11)9.1.1GridControl (11)9.1.1.1GridControl描述 (11)9.1.1.2GridControl特殊属性 (17)9.1.2GridView (22)9.1.2.1实现效果 (23)9.1.2.2操作步骤 (23)9.1.2.3属性设置 (23)9.1.3CardView (23)9.1.3.1实现效果 (24)9.1.3.2操作步骤 (24)9.1.3.3CarView属性设置 (24)9.1.4BandedGridView (25)9.1.4.1实现效果 (25)9.1.4.2操作步骤 (25)9.1.4.3实现代码 (26)9.1.4.4属性设置 (26)9.1.4.5ColumnEdit列 (26)9.1.5AdvBandedGridView (27)9.1.5.1实现效果 (28)Created by fanco Page 2 of 49 Created on 5/22/2020 4:55:00 PM9.1.5.2操作步骤 (28)9.1.5.3实现代码 (28)9.1.5.4属性设置 (29)9.2X TRA L AYOUT控件 (29)9.2.1特性 (29)9.2.2实现效果 (29)9.2.3操作步骤 (29)9.3X TRA T AB控件 (30)9.3.1设计参考 (30)9.3.2效果及代码 (30)9.4P IVOT G RID控件 (31)9.4.1实现效果 (31)9.4.2操作步骤 (31)9.5X TRA T REE L IST控件 (32)9.5.1实现效果 (34)9.5.2操作步骤 (34)9.5.3实现代码 (36)9.5.4属性设置 (37)9.6L OOK U P E DIT控件 (37)9.6.1实现效果 (37)9.6.2操作步骤 (37)9.7G RID L OOK U P E DIT控件 (39)9.7.1设计参考 (39)9.7.2实现效果 (39)9.7.3操作步骤 (39)9.8G RID P RINT控件 (41)9.8.1实现效果 (42)9.9B UTTON控件 (45)9.9.1设计参考 (45)9.10C HECK B OX控件 (45)9.10.1设计参考 (45)9.11G ROUP B OX控件 (45)9.11.1设计参考 (45)9.12L ABEL控件 (45)9.12.1设计参考 (45)9.13LIST B OX控件 (46)9.13.1设计参考 (46)9.14L IST V IEW控件 (46)9.14.1设计参考 (46)10界面输入控制 (46)10.1设计参考 (46)11弹出子窗体 (46)11.1设计参考 (46)12消息框设置 (47)12.1设计参考 (47)13向导使用原则 (47)13.1设计参考 (47)Created by fanco Page 3 of 49 Created on 5/22/2020 4:55:00 PM14TAB键和快捷键设置 (47)14.1设计参考 (47)15系统响应时间 (48)15.1设计参考 (48)16登陆窗体与主界面 (49)16.1设计参考 (49)17系统帮助设置 (49)17.1设计参考 (49)18附录 (49)1规范性通常界面设计都按Windows界面的规范来设计,即包含“菜单条、工具栏、工具箱、状态栏、滚动条、右键快捷菜单”的标准格式,可以说:界面遵循规范化的程度越高,则易用性相应的就越好。
DEVEXPRESS 控件学习总结
1、Navigation & Layout1.1 Bar Manager如果想在窗体或用户控件(user control)上添加工具条(bars)或弹出菜单(popup menus),我们需要把一个不可见的控件(component)BarManager(Navigation&Layout)拖放到这个窗体或用户控件上。
这个控件维护工具条在窗体上的布局,处理用户的行为(processes an end-user's actions),提供一些定制功能等等。
这个控件维护工具条、工具条项、工具条项目录这三者的集合(It maintains the collections of bars,bar items and bar item categories.)。
所以我们可以使用bar manager的一些方法去添加、删除、访问这些工具条元素。
注意:1)一个窗体上只能放置一个bar manager控件。
2)由于BarManager控件与RibbonControl控件可能会彼此冲突,所以不推荐在同一个窗体或用户控件上同时使用工具条和Ribbon控件。
当把BarManager添加到一个窗体或用户控件上后,我们就可以使用上下文菜单(context menus)、bar manager的定制窗口或它的设计器来创建工具条和工具条命令(bar commands)了。
相关控件属性1.1.2、Toolbars工具条是一个可视的控件,它用来显示各个项目链接。
我们可以在工具条内显示由XtraBars库提供的任意项目链接,比如:按钮(buttons),静态文本(static text),子菜单(submenu)、编辑器(editors)等等。
1.1.3、 Bar Items为了把多种元素(比如按钮,子菜单,标签,编辑器等)添加到工具条和菜单,我们需要创建合适的bar items。
一个bar item是一个实现了特定功能的非可见对象。
DevExpress控件使用详细说明

界面规范[V1.0]拟制人______________________审核人______________________批准人______________________[二零零七年二月二十六日]日期作者版本备注2007/04/05 范拥华 1.0.0Created by fanco Page 1 of 49 Created on 4/25/2022 3:17:00 AM目录1规范性 (4)2系统颜色、字体、图标 (4)2.1设计参考 (4)3FORM控件布局与间距 (5)3.1设计参考 (5)4对齐设置 (6)4.1设计参考 (6)5BARMANAGER控件 (6)5.1实现效果 (6)6菜单 (8)6.1设计参考 (8)6.2实现效果 (8)6.3操作步骤 (8)6.4实现代码 (9)7工具栏 (10)7.1设计参考 (10)7.2实现效果 (10)7.3操作步骤 (10)8STATUSBARS控件 (11)8.1设计参考 (11)8.2实现效果 (11)8.3操作步骤 (11)9控件 (11)9.1网格控件 (11)9.1.1GridControl (11)9.1.1.1GridControl描述 (11)9.1.1.2GridControl特殊属性 (17)9.1.2GridView (22)9.1.2.1实现效果 (23)9.1.2.2操作步骤 (23)9.1.2.3属性设置 (23)9.1.3CardView (23)9.1.3.1实现效果 (24)9.1.3.2操作步骤 (24)9.1.3.3CarView属性设置 (24)9.1.4BandedGridView (25)9.1.4.1实现效果 (25)9.1.4.2操作步骤 (25)9.1.4.3实现代码 (26)9.1.4.4属性设置 (26)9.1.4.5ColumnEdit列 (26)9.1.5AdvBandedGridView (27)9.1.5.1实现效果 (28)Created by fanco Page 2 of 49 Created on 4/25/2022 3:17:00 AM9.1.5.2操作步骤 (28)9.1.5.3实现代码 (28)9.1.5.4属性设置 (29)9.2X TRA L AYOUT控件 (29)9.2.1特性 (29)9.2.2实现效果 (29)9.2.3操作步骤 (29)9.3X TRA T AB控件 (30)9.3.1设计参考 (30)9.3.2效果及代码 (30)9.4P IVOT G RID控件 (30)9.4.1实现效果 (31)9.4.2操作步骤 (31)9.5X TRA T REE L IST控件 (32)9.5.1实现效果 (34)9.5.2操作步骤 (34)9.5.3实现代码 (36)9.5.4属性设置 (37)9.6L OOK U P E DIT控件 (37)9.6.1实现效果 (37)9.6.2操作步骤 (37)9.7G RID L OOK U P E DIT控件 (39)9.7.1设计参考 (39)9.7.2实现效果 (39)9.7.3操作步骤 (39)9.8G RID P RINT控件 (41)9.8.1实现效果 (42)9.9B UTTON控件 (44)9.9.1设计参考 (44)9.10C HECK B OX控件 (45)9.10.1设计参考 (45)9.11G ROUP B OX控件 (45)9.11.1设计参考 (45)9.12L ABEL控件 (45)9.12.1设计参考 (45)9.13LIST B OX控件 (45)9.13.1设计参考 (45)9.14L IST V IEW控件 (46)9.14.1设计参考 (46)10界面输入控制 (46)10.1设计参考 (46)11弹出子窗体 (46)11.1设计参考 (46)12消息框设置 (46)12.1设计参考 (46)13向导使用原则 (47)13.1设计参考 (47)Created by fanco Page 3 of 49 Created on 4/25/2022 3:17:00 AM14TAB键和快捷键设置 (47)14.1设计参考 (47)15系统响应时间 (48)15.1设计参考 (48)16登陆窗体与主界面 (48)16.1设计参考 (48)17系统帮助设置 (49)17.1设计参考 (49)18附录 (49)1规范性通常界面设计都按Windows界面的规范来设计,即包含“菜单条、工具栏、工具箱、状态栏、滚动条、右键快捷菜单”的标准格式,可以说:界面遵循规范化的程度越高,则易用性相应的就越好。
DevExpress控件使用方法:第一篇gridControl详解

DevExpress控件使用方法:第一篇gridControl详解GridControl(1)层次设计器有五种视图模式,banded gridview多行表头,数据还是一行一组,最靠近数据的表头与数据一一对应;advanced banded gridview 多行表头,数据可以多行一组;cardview 一个卡片是一组数据,其中左侧是标题,右侧是数据;layout view是card view的集合,布局可以自定义(2)视图视图的层次结构视图属性:可通过GridControl.Views访问所有视图。
可通过ColumnView.Columns访问当前视图的所有列(3)设计器(层次设计器中点击Run Designer可调出)设计器有四大功能:①主要功能的设计;②选择外观;③可以选择多个视图,内嵌编辑器的设置;④打印功能的设置① View:(a)Option:OptionsBehavior可以设置行为(是否允许新增行/是否允许删除行/是否允许编辑/是否允许展开所有分组)OptionsCustomization(是否允许排序/分组/过滤/列的移动/列的大小的调整)OptionsDetail(设置从表的属性)、OptionsFilter(过滤属性的设置)OptionsView(显示或隐藏某些东西,比如标题行)(b)AppearancePrint : (行高…)Columns://列的相应的属性FeatureBrowser://设置事件,Grid的绑定、列的绑定(有方法提示),什么都可以设置Layout:设置布局Group Summary Items添加分组统计② Appearance:Appearances可设置行的外观Format Conditions条件样式Style Schemes可设置主题(比较方便)③ RepositoryView Repository设计视图,与①差不多In-place Editor Repository内嵌编辑器④ Printing(4)gridControl:给该列添加组件(如按钮) 三种方法法一:打开设计器(Run Designer),选择左侧Repository,点击In-place Editor Repository(内嵌编辑器),点击Add右侧的下拉菜单,选择你想添加的控件,比如ComboBoxEdit,再在右侧编辑控件的属性,ComboBox的话就可以设置Data下的Items集合,然后点左侧Main里的Columns,点你想在上头添加控件的列,找右侧Data 下的ColumnEdit,点最右边的下拉菜单,点Existing左侧的加号,就能找到你刚才的控件,添加。
- 1、下载文档前请自行甄别文档内容的完整性,平台不提供额外的编辑、内容补充、找答案等附加服务。
- 2、"仅部分预览"的文档,不可在线预览部分如存在完整性等问题,可反馈申请退款(可完整预览的文档不适用该条件!)。
- 3、如文档侵犯您的权益,请联系客服反馈,我们会尽快为您处理(人工客服工作时间:9:00-18:30)。
第三方控件使用大全【张杰章开发过程中整理】一、ComboBoxEdit1、如何使其不可编辑TextEditStyle 设置为:DisableTextEditor2、如何设置鼠标为手形Cursor 设置为:Hand二、GridControl1、如何解决单击记录整行选中的问题View->OptionsBehavior->EditorShowMode 设置为:Click2、如何新增一条记录(1)、gridView.AddNewRow()(2)、实现gridView_InitNewRow事件3、如何解决GridControl记录能获取而没有显示出来的问题gridView.populateColumns();4、如何让行只能选择而不能编辑(或编辑某一单元格)(1)、View->OptionsBehavior->EditorShowMode 设置为:Click(2)、View->OptionsBehavior->Editable 设置为:false5、如何禁用GridControl中单击列弹出右键菜单设置Run Design->OptionsMenu->EnableColumnMenu 设置为:false6、如何隐藏GridControl的GroupPanel表头设置Run Design->OptionsView->ShowGroupPanel 设置为:false7、如何禁用GridControl中列头的过滤器过滤器如下图所示:设置Run Design->OptionsCustomization->AllowFilter 设置为:false8、如何在查询得到0条记录时显示自定义的字符提示/显示如图所示:方法如下://When no Records Are Being Displayedprivate void gridView1_CustomDrawEmptyForeground(object sender, CustomDrawEventArgs e){//方法一(此方法为GridView设置了数据源绑定时,可用)ColumnView columnView = sender as ColumnView;BindingSource bindingSource = this.gridView1.DataSource as BindingSource;if(bindingSource.Count == 0){string str = "没有查询到你所想要的数据!";Font f = new Font("宋体", 10, FontStyle.Bold);Rectangle r = new Rectangle(e.Bounds.Top + 5, e.Bounds.Left + 5,e.Bounds.Right - 5, e.Bounds.Height - 5);e.Graphics.DrawString(str, f, Brushes.Black, r);}//方法二(此方法为GridView没有设置数据源绑定时,使用,一般使用此种方法)if (this._flag){if (this.gridView1.RowCount == 0){string str = "没有查询到你所想要的数据!";Font f = new Font("宋体", 10, FontStyle.Bold);Rectangle r = new Rectangle(e.Bounds.Left + 5, e.Bounds.Top +5, e.Bounds.Width - 5, e.Bounds.Height - 5);e.Graphics.DrawString(str, f, Brushes.Black, r);}}}9、如何显示水平滚动条?设置this.gridView.OptionsView.ColumnAutoWidth = false;10、如何定位到第一条数据/记录?设置this.gridView.MoveFirst()11、如何定位到下一条数据/记录?设置this.gridView.MoveNext()12、如何定位到最后一条数据/记录?设置this.gridView.MoveLast()13、设置成一次选择一行,并且不能被编辑this.gridView1.FocusRectStyle =DevExpress.XtraGrid.Views.Grid.DrawFocusRectStyle.RowFocus; this.gridView1.OptionsBehavior.Editable = false;this.gridView1.OptionsSelection.EnableAppearanceFocusedCell = false;14、如何显示行号?this.gridView1.IndicatorWidth = 40;//显示行的序号private void gridView1_CustomDrawRowIndicator(object sender,RowIndicatorCustomDrawEventArgs e){if (.IsRowIndicator && e.RowHandle>=0){.DisplayText = (e.RowHandle + 1).ToString();}}15、如何让各列头禁止移动?设置gridView1.OptionsCustomization.AllowColumnMoving = false;16、如何让各列头禁止排序?设置gridView1.OptionsCustomization.AllowSort = false;17、如何禁止各列头改变列宽?设置gridView1.OptionsCustomization.AllowColumnResizing = false; 18、、设置Gridview控件整体不可编辑this.gridData.IsEnableEdit = false;19、5、判断Gridview当前索引int index= this.gridData.gridView1.GetFocusedDataSourceRowIndex() ;20、21、22、23、24、25、26、三、navBarControl1、如何在每一个navBarGroup里添加自己想要的控件设置GroupStyle: ControlContainer2、如何设置navBarGroup有滚动条设置SkinExplorerBarViewScrollStyle:ScrollBar3、如休把navBarGroup设置成如下样式如图所示:设置navBarGroup的PaintStyleName属性为: SkinNavigationPane四、toolTipController效果图如下:1、如何设置显示的时间长短设置this.toolTipController1.AutoPopDelay = 2000;2、如何在屏幕上显示如上图所示的效果ToolTipControllerShowEventArgs args =this.toolTipController1.CreateShowArgs();this.toolTipController1.SetToolTip(this.sbtnYes, "请选择一条记录!");this.toolTipController1.SetTitle(this.sbtnYes, "提示");this.toolTipController1.SetToolTipIconType(this.sbtnYes,DevExpress.Utils.ToolTipIconType.Exclamation);this.toolTipController1.ShowBeak = true;this.toolTipController1.ShowShadow = true;this.toolTipController1.Rounded = true;this.toolTipController1.ShowHint("请选择一条记录!", "提示"); args.ToolTip = "请选择一条记录!";args.Title = "提示";3、如何设置边框的颜色this.toolTipController1.Appearance.BorderColor = Color.Red;五、TextEdit1、如何设置TextEdit为多行,可拉伸设置TextEdit的Propertity->AutoHeight为:False六、LayoutControl1、如何设置LayoutItem为隐藏设置LayoutItem.Visibility = Never七、TreeList1、如何隐藏TreeList的列头设置TreeListr的OptionsView的ShowColumns属性为:False2、如何八、PictureEdit1、如何禁止PictureEdit的右键菜单?设置PictureEdit的Properties->ShowMenu为:false九、TreeList1、如何让TreeList的每个结点高亮显示?效果如下:代码如下:private void treeList1_CustomDrawNodeCell(object sender,DevExpress.XtraTreeList.CustomDrawNodeCellEventArgs e){TreeList node = sender as TreeList;if (e.Node == node.FocusedNode){e.Graphics.FillRectangle(SystemBrushes.Window, e.Bounds);Rectangle r = new Rectangle(e.EditViewInfo.ContentRect.Left,e.EditViewInfo.ContentRect.Top,Convert.ToInt32(e.Graphics.MeasureString(e.CellText, treeList1.Font).Width + 1),Convert.ToInt32(e.Graphics.MeasureString(e.CellText,treeList1.Font).Height));e.Graphics.FillRectangle(SystemBrushes.Highlight, r);e.Graphics.DrawString(e.CellText, treeList1.Font, SystemBrushes.HighlightText, r);e.Handled = true;}}//============================================================================ //===============================以下内容为收集=============================== //============================================================================一、改变grid的样式。
