德国坦克 声卡,DMX 6Fire USB,中文说明书
德国坦克 声卡,DMX 6Fire USB,中文说明书

V 1.02009.04.06使用手册DMX 6Fire USB TerraTec DMX 6Fire USB 使用手册DMX 6 Fire USB设备连接介绍2前面 (2)背面 (4)模拟输出5LINE OUT 1/2, 3/4, 5/6 (背面) (5)耳机输出(前置) (5)驱动5控制面板5混音器 (6)音量 (6)信号 (6)绕送 (7)输出和设定 (7)音量 (7)频率设定 (8)设备设定 (8)场景 (9)其它 (9)TerraTec DMX 6Fire USB 使用手册DMX 6 Fire USB设备连接介绍DMX6 Fire USB 音效界面提供你连接许多专业录音外围设备和Hi-Fi 设备。
前面1. 麦克风接口(XLR-1/4" or 6.3 mm 复合式接口)这个插座接受XLR接头和需要幻象电源(通常是电容式麦克风)的专业麦克风,和”一般” 耳机插头。
这个接口与背板上Line In 1接口是同时只能择一使用,而且假如XLR or 1/4" (6.3 mm)插头插上时,会自动重新重导信号路径(自动优先选择),此时在背板的Line In 1 和Line In 2 会自动关掉。
2. 耳机的音量控制当你将耳机插入进去,先把音量转到最左边0的位置,否则可能相当大声。
你可以在插入耳机后再转大声。
3. 耳机接口如上所述:插上耳机之前将音量控制转到最低。
这个接口仅会送出Line Out1/2的信号。
4. 麦克风控制的LED指示灯。
LED灯是提供视觉上监看麦克风的录音。
蓝灯代表”有信号” ,假如看到亮红色LED,请将Gain 1控制转小。
红色LED灯亮时代表是削峰失真,造成了录音信号失真。
5. 麦克风孔的音量控制控制前置放大的信号在麦克风输入端。
同样的,麦克风插入控制在麦克风输入端的信号前级放大。
6. 48伏幻象电源:当你连接电容式麦克风时拨到”on”。
TerraTec DMX 6Fire USB 使用手册7. -20dB切换开关假如你的麦克风的录音太大声,将PAD开关切换到”on”-信号会被降低20dB。
TAKSTAR便携式多媒体扩音器说明书
欢迎使用 TAKSTAR 便携式多媒体扩音器。
本产品是专为教学、宣传和参观等设计的,采用PO²数字功率合成技术,提供更长久的电池使用时间和更大输出功率,是教学、宣传的理想选择。
在使用之前,请仔细阅读说明书,以便能正确的操作,发挥本扩音器的理想性能。
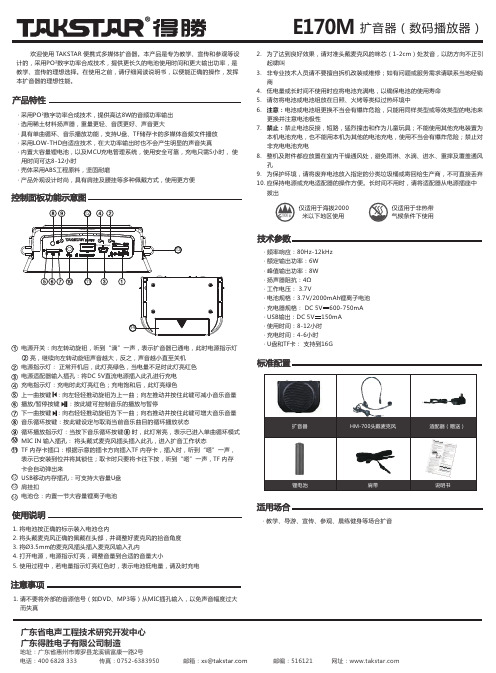
产品特性· 采用PO²数字功率合成技术,提供高达8W 的音频功率输出· 选用稀土材料扬声器,重量更轻、音质更好、声音更大· 具有单曲循环、音乐播放功能,支持U 盘、TF 储存卡的多媒体音频文件播放· 采用LOW-THD 自适应技术,在大功率输出时也不会产生明显的声音失真· 内置大容量锂电池,以及MCU 充电管理系统,使用安全可靠,充电只需5小时, 使 用时间可达8-12小时· 壳体采用ABS 工程原料,坚固耐磨· 产品外观设计时尚,具有肩挂及腰挂等多种佩戴方式,使用更方便控制面板功能示意图电源开关:向左转动旋钮,听到“滴”一声,表示扩音器已通电,此时电源指示灯 亮,继续向左转动旋钮声音越大,反之,声音越小直至关机电源指示灯: 正常开机后,此灯亮绿色,当电量不足时此灯亮红色电源适配器输入插孔:将DC 5V 直流电源插入此孔进行充电充电指示灯:充电时此灯亮红色;充电饱和后,此灯亮绿色上一曲按键 :向左轻轻推动旋钮为上一曲;向左推动并按住此键可减小音乐音量播放/暂停按键 :按此键可控制音乐的播放与暂停下一曲按键 :向右轻轻推动旋钮为下一曲;向右推动并按住此键可增大音乐音量音乐循环按键:按此键设定与取消当前音乐曲目的循环播放状态循环播放指示灯:当按下音乐循环按键 时,此灯常亮,表示已进入单曲循环模式MIC IN 输入插孔: 将头戴式麦克风插头插入此孔,进入扩音工作状态TF 内存卡插口:根据示意的插卡方向插入TF 内存卡,插入时,听到“嗒”一声,表示已安装到位并将其锁住;取卡时只要将卡往下按,听到“嗒”一声,TF 内存卡会自动弹出来USB 移动内存插孔:可支持大容量U 盘肩挂扣电池仓:内置一节大容量锂离子电池12131. 将电池按正确的标示装入电池仓内2. 将头戴麦克风正确的佩戴在头部,并调整好麦克风的拾音角度3. 将Ø3.5mm 的麦克风插头插入麦克风输入孔内4. 打开电源,电源指示灯亮,调整音量到合适的音量大小5. 使用过程中,若电量指示灯亮红色时,表示电池低电量,请及时充电使用说明2. 为了达到良好效果,请对准头戴麦克风的咪芯(1-2cm )处发音,以防方向不正引 起啸叫3. 非专业技术人员请不要擅自拆机改装或维修;如有问题或服务需求请联系当地经销 商4. 低电量或长时间不使用时应将电池充满电,以确保电池的使用寿命5. 请勿将电池或电池组放在日照、火烤等类似过热环境中6. 注意:电池或电池组更换不当会有爆炸危险,只能用同样类型或等效类型的电池来 更换并注意电池极性7. 禁止:禁止电池反接,短路,猛烈撞击和作为儿童玩具;不能使用其他充电装置为 本机电池充电,也不能用本机为其他的电池充电,使用不当会有爆炸危险;禁止对 非充电电池充电8. 整机及附件都应放置在室内干燥通风处,避免雨淋、水滴、进水、重摔及覆盖通风 孔9. 为保护环境,请将废弃电池放入指定的分类垃圾桶或寄回给生产商,不可直接丢弃10. 应保持电源或充电适配器的操作方便。
M-Audio USB MIDISPORT Uno 用户指南说明书
USB MIDISPORT UNOUser GuideEnglish© 2006 Avid Technology, Inc. All rights reserved. Product features, specifications, system requirements and availability are subject to change without notice. Avid, M-Audio and USB MIDISPORT Uno are either trademarks or registered trademarks of Avid Technology, Inc. All other trademarks contained herein are the property of their respective owners.IntroductionThank you for purchasing the M-Audio USB MIDISPORT Uno interface. Uno is a class-compliant* 1-in/1-out MIDI interface for USB-equipped PC and Macintosh computers. Uno’s Universal Serial Bus (USB) connection assures reliable and speedy transfer of MIDI data to and from the computer. The interface is portable, self-powered, and can be conveniently attached to your computer’s USB port without requiring computer disassembly or an external power supply. Uno’s sturdy package also includes integrated USB and MIDI cables, eliminating the need for carrying around separate cabling. Expansion is also easy—if you need additional MIDI ports, simply add more Uno interfaces. Follow the installation instructions in this manual and you will be up and running in no time.PLEASE DO NOT connect the Uno to your computer until you have reviewed the installation instructions for your operating system.* NOTE : Only the latest hardware revision of the Uno is class-compliant and will work under Windows XP or Mac OS X without a driver. If you own an earlier version of the Uno that is not class-compliant (i.e., it does not install automatically), you’ll need to install the latest drivers from our website.FeaturesUno USB/MIDI Interface offers the following features:• 1-in/1-out MIDI via USB connection (16 x 16 MIDI channels)• Class-compliant* installation under Windows XP and Mac OS X (no drivers required)• Full-speed connection to either a PC or Apple computer equipped with a USB port • MIDI input and output LED indicators• Bus-powered—requires no external power supply •Compact and lightweight design for easy transportPackage ContentsThe Uno package includes:• Uno USB MIDI interface•M-Audio MIDISPORT Series CD-ROM for Windows and MacintoshBefore You Connect Your UnoPlease follow the installation instructions that pertain to your operating system.Feature Viewå USB cable and connector - Connect this cable to your host computer’s USB port.ç USB LED - This LED pulses when Uno is powered and functioning.é MIDI in and MIDI out LEDs - These LEDs indicate MIDI input or output activity.è “TO MIDI OUT” connector - Connect this plug to your external instrument’s MIDI output port.ê“TO MIDI IN” connector - Connect this plug to your external instrument’s MIDI input port.Note: If you become confused with the MIDI cabling, take a look at the arrows found on each MIDI plug. These arrows indicate which way the MIDI data flows over that connector (i.e., whether the data is going from your keyboard to the computer or whether data is coming from the computer and going into your MIDI device).EnglishOverviewMIDI is the acronym for “Musical Instrument Digital Interface” and is the protocol used by MIDI keyboards and other devices (sound modules, sequencing software, virtual instruments, etc.) to communicate with each other. Uno provides your computer with one MIDI input and one MIDI output port, each supporting 16 MIDI channels.Windows XP & Mac OS X InstallationIf you are using Windows XP or Mac OS X, simply plug in your Uno to the computer’s USB port and you’re ready to go. Since Uno is class-compliant*, it will work without requiring any additional drivers.Installation for Advanced Windows XP UsersWhile Uno is class-compliant*, advanced Windows XP users who intend to use the Uno interface with more than one application at the same time (i.e., “multi-client” operation), plan to use long SysEx (system exclusive) commands or are using other class compliant USB devices with audio capabilities simultaneously should install the special M-Audio drivers for optimal performance. These drivers can be installed by doing the following:PLEASE NOTE: Do not connect Uno to your computer until the M-Audio driver fi les have been installed. The following instructions will indicate when you should connect the interface to your computer.1. Insert the MIDISPORT Series CD-ROM into your computer’s CD-ROM drive.2. T he computer will automatically display the interactive install screen shown in picture 1. If your computer fails to launch the installer, manuallystart the installer by clicking on Start > My Computer > MIDISPORT Series.3. Select “MIDISPORT Uno” from the drop-down menu and click “Install.”4. Follow the driver installer’s on-screen instructions.5. A t various points in this installation process, you may be notifi ed that the driver being installed has not passed Windows Logo Testing. Click“Continue Anyway” to proceed with the installation.6. Click “Finish” once the installer has completed the installation.7. Connect your Uno to an open USB port.8. Windows will identify the interface and will ask if you want to search the Internet for a driver. Select “No, not this time” and press “Next” (2).9. Windows will display a “Found New Hardware” Wizard (3).10. Choose “Install software automatically” and click “Next.”11. Once the Wizard has completed, click “Finish.”12. Once the installation is complete, you will see a message stating, “Your new hardware is installed and ready to use.”123Installation Instructions for Windows 98/Me/2000Installing Drivers For Windows 98/MePLEASE DO NOT plug in Uno until instructed to do so.1. I nsert the MIDISPORT Series Installer CD-ROM. The installer should begin to run automatically. If not, select “Run” from the Start menu and type“D:\autorun” (without the quotes), where “D:” is your CD-ROM drive, then press ENTER. If your CD-ROM drive is identified by a letter other than “D:” use that drive letter in the RUN command line.2. Select “MIDISPORT Uno” from the drop-down menu.3. Click on “install driver.”4. Follow the on-screen instructions.5. When the installation has finished, exit setup.6. Plug Uno into a free USB port on your computer.Windows will continue with the installation of USB and MIDI drivers for your Uno. When finished, Windows may prompt you to restart your computer. If so, please restart and begin using your Uno.Installing Drivers For Windows 2000PLEASE DO NOT plug in Uno until instructed to do so.1. I nsert the MIDISPORT Series Installer CD-ROM. The installer should begin to run automatically. If not, select “run” from the Start menu and type“D:\autorun” (without the quotes), where ‘D:’ is your CD-ROM drive, then press ENTER. If your CD-ROM drive is identified by a letter other than “D:” use that driver letter in the RUN command line.2. Select “MIDISPORT Uno” from the drop-down menu.3. Click on “install drivers.”4. Follow the on-screen instructions.5. When the installation has finished, exit setup.6. P lug Uno into a free USB port on your computer. Windows will automatically recognize your Uno and ask for the Uno Installer CD-ROM.7. Select the CD-ROM drive and click “OK.” Windows will then ask you to select the CD-ROM drive again for the MIDI driver.8. Windows will report the drivers have not been digitally signed. Click “Yes” to continue the installation.9. Select the “D:” drive once more.10. Click “OK” and finish installation.Setting Up Your MIDI StudioA typical MIDI system setup might include your Uno, a computer with MIDI sequencing software, a MIDI controller keyboard, and a MIDI-compatible sound module. This setup is illustrated below:UNO USB MIDI INTERFACEMIDIto MIDI inMIDI Sound Module MIDI Keyboard ComputerUSBto MIDI outIn the set-up described above, Uno is being used to route MIDI data between the controller keyboard, the sound module, and the computer. To set up the Uno in this way:1. Connect Uno to your computer via the USB cable.2. Connect the “To MIDI Out” cable to your keyboard’s MIDI Out port.3. Connect the other cable labeled “To MIDI In” to the MIDI In jack of your sound module.•I mportant note: Uno is not a MIDI THRU device and as such, MIDI data received at Uno’s MIDI in port can never be sent directly to the MIDI out plug of the Uno. However, data received at the MIDI In can be transmitted from the computer to the MIDI Out of your Uno.• C aution: Electrostatic discharges, electrical spikes, and Radio Frequency (RF) interference may cause Uno to malfunction. In such cases, unplug the unit, wait a few moments, and reconnect it to restore normal operation.Warranty Terms & RegistrationWarranty TermsM-Audio warrants products to be free from defects in materials and workmanship, under normal use and provided that the product is owned by the original, registered user. Visit /warranty for terms and limitations applying to your specific product.Warranty RegistrationThank you for registering your new M-Audio product. Doing so immediately both entitles you to full warranty coverage and helps M-Audio develop and manufacture the finest quality products available. Register online at /register to receive FREE product updates and for the chance to win M-Audio giveaways.WARNING: This product contains chemicals, including lead, known to the State of California to cause cancer, and birth defects or other reproductive harm. Wash hands after handling.。
德国坦克Aureon傲龙 7.1声卡
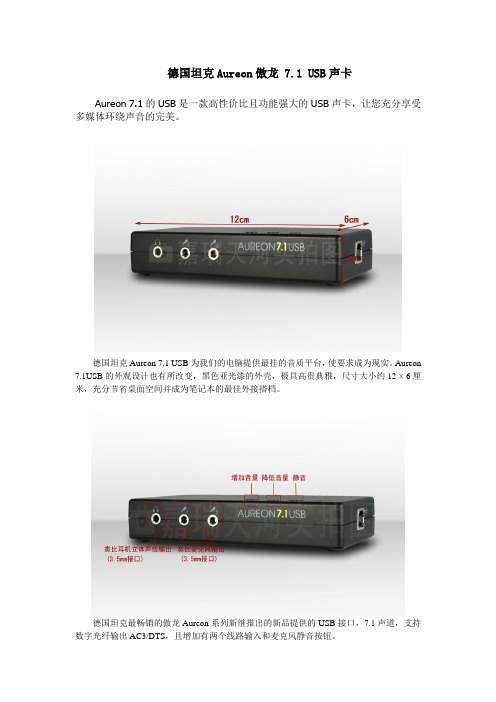
德国坦克Aureon傲龙 7.1 USB声卡Aureon 7.1的USB是一款高性价比且功能强大的USB声卡,让您充分享受多媒体环绕声音的完美。
德国坦克Aureon 7.1 USB为我们的电脑提供最挂的音质平台,使要求成为现实。
Aureon 7.1USB的外观设计也有所改变,黑色亚光漆的外壳,极具高贵典雅,尺寸大小约12 × 6厘米,充分节省桌面空间并成为笔记本的最佳外接搭档。
德国坦克最畅销的傲龙Aureon系列新继推出的新品提供的USB接口,7.1声道,支持数字光纤输出AC3/DTS,且增加有两个线路输入和麦克风静音按钮。
德国坦克做为欧洲专业的声音专家在此款Aureon 7.1 USB产品上不仅可支持到7.1声道输出,而且配备了数字光纤输入和输出(I / O),充分支持多声道的AC3和DTS格式的应用。
另外拥有两个麦克风输入和线路输入接口,更增加了音量控制和静音按钮。
USB接口方便Aureon 7.1USB声卡非常方便迅速的与计算机连接。
产品配件图产品规格:USB 1.1接口(兼容USB 2.0)USB音频类规范版本1.0通过USB总线供电4个模拟输出(3.5毫米立体声插头)2麦克风输入(3.5毫米插头)1个耳机插孔(3.5毫米立体声插头)光纤S / P - DIF数字输入(TOS的链接)光纤S / P - DIF数字输出(TOS的链接)Line-in 输入(3.5毫米立体声插头)AC3和DTS输出通过数字输出直接在设备上进行音量调节音频分辨率:16位采样率的模拟:32,44.1和48 kHz,数字:48千赫驱动支持Windows XP (SP2/3)/ Vista/ Windows7(32/64)重量:100g尺寸:约12 × 6 × 2.2厘米(长x宽x高)颜色:黑色包装盒内容:*1个Aureon 7.1 USB 声卡*1条USB线*1条光纤线*1张CD光碟*1份快速安装手册*1张客户服务卡一、安装方法:要联接Aureon 7.1 USB 到你的电脑,你需要一个USB A 接口。
德国坦克声卡001.doc
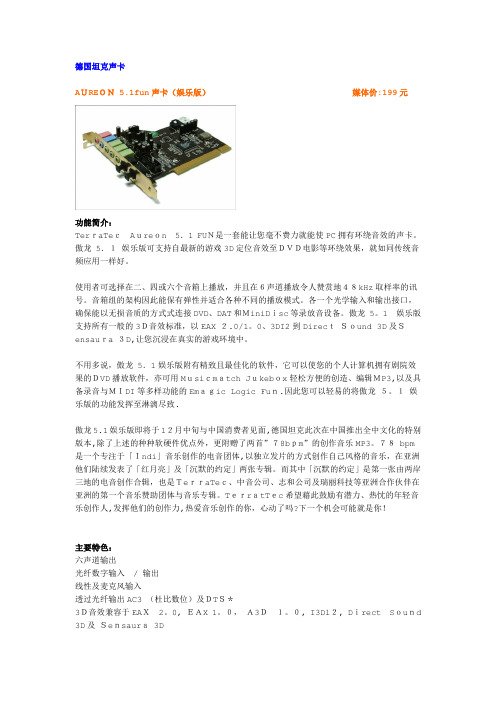
德国坦克声卡AUREON 5.1fun声卡(娱乐版)媒体价:199元功能简介:TerraTecAureon5.1 FUN是一套能让您毫不费力就能使PC拥有环绕音效的声卡。
傲龙 5.1娱乐版可支持自最新的游戏3D定位音效至DVD电影等环绕效果,就如同传统音频应用一样好。
使用者可选择在二、四或六个音箱上播放,并且在6声道播放令人赞赏地48kHz取样率的讯号。
音箱组的架构因此能保有弹性并适合各种不同的播放模式。
各一个光学输入和输出接口,确保能以无损音质的方式式连接DVD、DAT和MiniDisc等录放音设备。
傲龙 5。
1娱乐版支持所有一般的3D音效标准,以EAX 2.0/1。
0、3DI2到DirectSound 3D及Sensaura 3D,让您沉浸在真实的游戏环境中。
不用多说,傲龙 5.1娱乐版附有精致且最佳化的软件,它可以使您的个人计算机拥有剧院效果的DVD播放软件,亦可用Musicmatch Jukebox轻松方便的创造、编辑MP3,以及具备录音与MIDI等多样功能的Emagic Logic Fun.因此您可以轻易的将傲龙5。
1娱乐版的功能发挥至淋漓尽致.傲龙5.1娱乐版即将于12月中旬与中国消费者见面,德国坦克此次在中国推出全中文化的特别版本,除了上述的种种软硬件优点外,更附赠了两首”78bpm”的创作音乐MP3。
78 bpm是一个专注于「Indi」音乐创作的电音团体,以独立发片的方式创作自己风格的音乐,在亚洲他们陆续发表了「红月亮」及「沉默的约定」两张专辑。
而其中「沉默的约定」是第一张由两岸三地的电音创作合辑,也是TerraTec、中音公司、志和公司及瑞丽科技等亚洲合作伙伴在亚洲的第一个音乐赞助团体与音乐专辑。
TerratTec希望藉此鼓励有潜力、热忱的年轻音乐创作人,发挥他们的创作力,热爱音乐创作的你,心动了吗?下一个机会可能就是你!主要特色:六声道输出光纤数字输入/ 输出线性及麦克风输入透过光纤输出AC3 (杜比数位)及DTS*3D音效兼容于EAX2。
DMX中文说明书
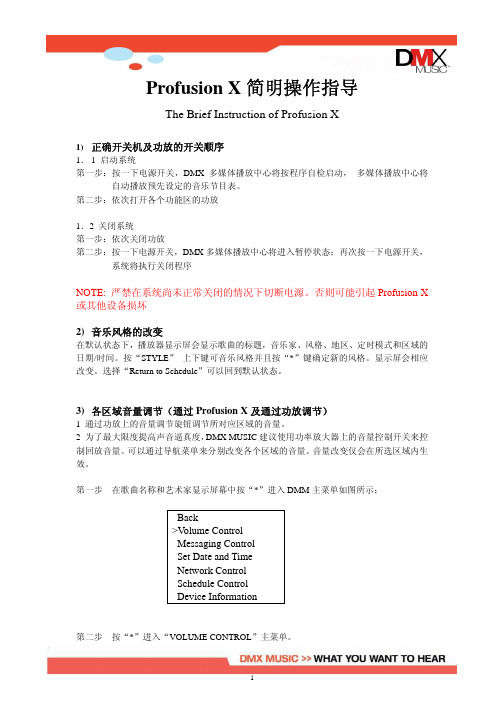
Profusion X简明操作指导The Brief Instruction of Profusion X1)正确开关机及功放的开关顺序1.1 启动系统第一步:按一下电源开关,DMX多媒体播放中心将按程序自检启动,多媒体播放中心将自动播放预先设定的音乐节目表。
第二步:依次打开各个功能区的功放1.2 关闭系统第一步:依次关闭功放第二步:按一下电源开关,DMX多媒体播放中心将进入暂停状态;再次按一下电源开关,系统将执行关闭程序NOTE: 严禁在系统尚未正常关闭的情况下切断电源。
否则可能引起Profusion X 或其他设备损坏2)音乐风格的改变在默认状态下,播放器显示屏会显示歌曲的标题,音乐家、风格、地区、定时模式和区域的日期/时间。
按“STYLE”上下键可音乐风格并且按“*”键确定新的风格。
显示屏会相应改变。
选择“Return to Schedule”可以回到默认状态。
3)各区域音量调节(通过Profusion X及通过功放调节)1 通过功放上的音量调节旋钮调节所对应区域的音量。
2 为了最大限度提高声音逼真度,DMX MUSIC建议使用功率放大器上的音量控制开关来控制回放音量。
可以通过导航菜单来分别改变各个区域的音量。
音量改变仅会在所选区域内生效。
第一步在歌曲名称和艺术家显示屏幕中按“*”进入DMM主菜单如图所示:Back>V olume ControlMessaging ControlSet Date and TimeNetwork ControlSchedule ControlDevice Information第二步按“*”进入“VOLUME CONTROL”主菜单。
第三步按NA VIGATION UP 和 DOWN键,滚动可选区域列表。
一旦选中合适区域,按“*”确定。
BACK>Zone1Zone2Zone3Zone4Mute Zone1Mute Zone2Mute Zone3Mute Zone4第四步如果选择MUTE,LCD屏幕将会显示如下:Zone1 V olumeMUTED如果选择Zone1,LCD屏幕会有如下显示:Zone1 V olume==============可以通过NA VIGATION UP或RIGHT键来提高音量或NA VIGATION DOWN或LEFT键来降低音量。
FY1 USB声卡 XMOS 用户手册_V1.0Cn
ALIENTEK
FY1 USB Audio 用户手册
FY1 高性能 USB 声卡
4. 在使用录音输出功能的时候要特别注意: 请先把麦克风和 FY1 连接好 (线录则把音源设 备和 FY1 连接好)再打开录音输出,以免出现暴音损坏耳机或设备。
4 接口
3.5mm 驻极体话筒及电容麦克风话筒接口 输入 B 型 USB 2.0 高速设备接口 外接电源输入(DC 7-9V)接口 3.5mm 耳机输出接口 输出 其他 光纤输出接口 RCA 同轴输出接口 I2S&DFU 扩展接口
2 产品包装
包装 FY1 声卡 标配 USB 数据线 光盘(DVD) 说明书(含保修卡) 数量 1台 1条 1张 1份
3 注意事项
1. 使用本产品时,为避免一些不安全的因素,应该遵循基本的安全预防措施。 2. 仔细阅读说明书并按说明书进行操作。 3. 为保证产品的性能,请使用我们提供的 USB 数据线且使用接触良好的 USB 接口,使用 过程中严禁插拔 USB 线。 User manual
User manual
ALIENTEK
FY1 USB Audio 用户手册
FY1 高性能 USB 声卡
7 使用说明Байду номын сангаас
7.1 驱动和软件安装
7.1.1 FY1 USB 声卡驱动安装
① 安装 FY1 USB 声卡驱动:这个驱动用于电脑对 FY1 声卡的支持,必须安装。“打开 光盘1, FY1 驱动1 , FY1 声卡驱动” , 然后双击运行“ FY1 USB Audio.exe” ,如图 7.1.1.1:
支持高达384khz32bit发烧级的音频文件播放支持高达192khz24bit录音室音质的录音支持高达192khz32bit的同轴光纤输出完全开放的i2s接口可外接性能更高的dac或adc配有炫酷蓝光oled显示屏具有极好的显示效果支持多种显示模式波形显示频谱显示混合显示独创硬件agc电路能有效避免显示的时候出现信号失真幅值过低的现象外接电源dc79v和usb电源2种供电方式自动切换
DMX6fireUSB-官方中文
为满足音乐玩家,DJ和游戏玩家等使用这者的专业需求:声卡专家德国坦克TERRATEC现在提供一个顶级优化的音效产品 - DMX 6 Fire USB位于 Nettetal 的声卡专业厂商德国坦克TERRATEC推出的受欢迎的 DMX 6 Fire USB。
DMX 6 Fire USB 是为音乐音响玩家,DJ,游戏玩家所质量制订的高标准完美的全方位外接音乐系统。
DMX 6Fire 24/96 提供更为强大技术与功能。
不是 PCI 接口,而是外置USB 2.0 ,不是24-bit / 96-kHz,它提供的是 24-bit / 192-kHz。
主要规格:•一个带有增益的麦克风输入接口(XLR/6.3mm共用接头)•48V 幻象电源•-20dB 开关•一个带有增益的乐器输入接口(6.3mm接头)•四个模拟输入接口(RCA接头)•一个带有RIAA均衡增益钮的唱机输入接口(RCA接头)•六声道模拟输出(RCA接头)•立体声5.1环绕扩展器•一个分离式音量调节的耳机输出(6.3mm接头)•一组光线数位接口(TOSlink)•一组同轴数位接口(RCA接头)•一组MIDI I/O(5-pin DIN)•24-bit / 192-kHz 高达114dB讯噪比的A/D转换器 (输入1/2)•24-bit / 192-kHz 高达105dB讯噪比的A/D转换器(输入3/4)•24-bit / 192-kHz 高达114dB讯噪比的D/A转换器 (输出口1-6)德国坦克TERRATEC 在莱茵河地区城镇Nettetal于 1994 年成立。
如今公司已是德国数字电视,录像和声卡重要制造商及欧洲首要的多媒体企业之一。
德国坦克致力于提供从专业的计算机音响系统到电视/视讯的解决方案和高传真消费性产品。
作为技术先驱,TERRATEC 也在无线家用的娱乐多媒体产品, 网络收音机跟数字电视产品中不断的创新。
Sennheiser SC 660 USB CTRL 双耳穿戴 USB 语音通信头戴机说明说明书

128 bis, avenue Jean Jaurès - 94 851 Ivry-sur-Seine Cedex Tél. : 01 49 87 03 00 - Fax : 01 49 87 03 24 - www.sennheiser.frLe micro-casque filaire binaural USB Sennheiser SC 660 USB CTRL est idéal pour les centres d’appel et les bureaux, à la recherche d’une qualité irréprochable et de performances sonores exceptionnelles. Grâce au son Sennheiser HD et au micro professionnel à annulation de bruit, le SC 660 USB CTRL optimise l’intelligibilité vocale dans des environnements de bureau bruyants. Grâce à la qualité des matériaux utilisés, le SC 660 USB CTRL est conçu pour résister à une utilisation intensive et assure également un maintien parfait et un confort de port tout au long de la journée.Le son Sennheiser HDPour une écoute en haute définition encore plus naturelle.Micro professionnel ultra antibruitPour des conversations claires et intelligibles.Sennheiser ActiveGard™Protège l’audition de l’utilisateur contre les chocs acoustiques.Des materiaux premiumAcier inox et aluminium brossé pour un casque léger et robuste.Arceau monobloc et réglage précis Pour une résistance optimal et un maintien parfait.Câble renforcé en Kevlar®*Pour une grande longévité.Large oreillette en similicuirAssurant confort de port et puissance sonore.Des communications unifiées optimisées Plug’ n’ Play totalement compatible avec les principales plate-formes de communications.Écouteur pivotant à 90°Pour un rangement et un transport faciles.*Kevlar® est une marque déposée de DuPont.Anti-bruitMicroTél. : 01 49 87 03 00 - Fax : 01 49 87 03 24-CArACtÉriStiqueS teCHniqueSType de casque : Fermé Type de transducteur : Dynamique Type d’écouteur : Aimant néodyme Couplage auriculaire : Supra-aural Réponse en fréquence : 50 Hz – 18000 Hz Niveau de pression : (103 dB acoustique Max)(SPL, limité par ActiveGard™) Impédance nominale : 200 Ohms Port : Casque binaural Longueur de câble : 2,9 m Poids sans câble : 167 g MicrophoneType de micro : Ultra antibruit Réponse en fréquence : 150 - 6 800 Hz COntenu1 micro-casque SC 660 USB CTRL1 aimant de maintien pour télécommande1 guide d’installation rapide1 manuel de sécuritéOreillettes similicuirCOnDitiOnneMentCode article : 504555 Code EAN : 40 44155 08346 0 Dimensions du packaging(LxHxP) : 201 x 153 x 60 mm ColisagePoids du produit avec packaging : 310 g Nb. de produits par master carton : 20 Dimensions du master carton(LxHxP) : 615 x 415 x 185 mm Poids du master carton : 7,43 kg ACCeSSOireSHousse pour SC series, 10 pcs 504596 PièCeS DÉtACHÉeSProduit Code article HZP 34 - Coussinet d’oreille SC 600 L 504560 HZP 36 - Coussinet d’oreille SC 600 L 504562 Plaque d’identification pour câble 504545 Anneau porte coussinet d’oreille L SC 600 504592 Cache de protection écouteur SC 600 504595 Kit de fixation pour unité de contrôle d’appel SC 600 504594 TPSC01 - Support latéral SC 600 504597 HZP 35 - Coussinet d’oreille similicuir SC 600 (2 pc) 504563 HZP 37 - Coussinet d’oreille similicuir SC 600 (26 pc) 504561 Anneau support coussinet d’oreille SC 600504593• Connexion USB.•G estion des appels via télécommande intégrée.Anti-bruitMicro。
KEF KW1 TX RX 无线低音炮适配器用户手册说明书

User ManualKW1 TX/RX SystemWireless Subwoofer AdapterEnglish • Deutsch • Français • Español •簡體中文•繁體中文Introduction(DEU) Einleitung (FRA) Introduction (SPA) Introducción(CHI-S)簡介 (CHI-T)簡介Thank you for purchasing KEF KW1 TX/RX System Wireless Subwoofer Adapter.We are confident that your KW1 TX/RX will provide reliable, high performancesound for many years to come. Please read this manual fully before you attemptany connection to the KW1 TX/RX.Vielen dank für den Kauf des KEF KW1 TX/RX. Wir sind davon überzeugt, dasslhr KW1 TX/RX lange Zeit zuverlässig funktionieren und eine hohe Klangqualitätgewährleisten wird. Lesen Sie bitte diese Anleitung sorgfältig durch, bevor Sie lhrGerät anschließen.KEF vous remercie de votre achat d'un KEF KW1 TX/RX. Nous sommesconvaincus que votre KW1 TX/RX vous procurera un son fiable et de hautesperformances pendant de longues années. Veuillez lire intégralement le présentmanuel avant de procéder à des connexions quelconques.Le damos las gracias por haber adquirido el KEF KW1 TX/RX. Estamos seguros deque el KW1 TX/RX le proporcionará un sonido de calidad y de altas prestacionesdurante muchos años. Por favor, lea este manual antes de intentar conectar yponer en funcionamiento el KW1 TX/RX.感謝您購買KEF KW1 TX/RX。
德国坦克 Aureon 傲龙 7.1 USB 声卡使用手册说明书
Copyright@2014 唐德国际有限公司 All R ights R eserved德国坦克Aureon 傲龙7.1 USB 声卡使用手册(此说明书基于Windows7,其它版本略有不同)Copyright@2014 唐德国际有限公司 All R ights R eserved 目录安全性须知 ........................................................................................................................... 1 1. 简介 (2)1.1 包装内容 ...................................................................................................................................................................... 2 1.2系统要求 ....................................................................................................................................................................... 2 1.3 规格概要 ...................................................................................................................................................................... 2 1.4 接口 .............................................................................................................................................................................. 3 1.5输出连接 .. (4)2. 软件安装和卸载 (4)2.1 软件安装 ...................................................................................................................................................................... 4 2.2 软件卸载 . (8)3. AUREON 7.1 USB 音频中心图形化用户界面 (10)3.1 打开Aureon 7.1 USB 音频中心图形化用户界面 ................................................................................................... 10 3.2 Aureon 7.1 USB 音频中心图形化用户界面功能介绍 ............................................................................................. 11 3.2.1打开Aureon 7.1 USB ........................................................................................................................................... 11 3.2.2 主设置控制界面 ................................................................................................................................................. 12 3.2.3混音器控制界面 .................................................................................................................................................. 14 3.2.4效果控制界面 ...................................................................................................................................................... 15 3.2.5信息界面介绍 ...................................................................................................................................................... 16 3.2.6信息界面介绍 ...................................................................................................................................................... 17 3.2.7托盘图标功能介绍 . (17)Copyright@2014 唐德国际有限公司 All R ights R eserved1安全性须知* 在您安装声卡以及加入硬件设备之前,请务必详加阅读本手册所提供的相关信息。
JetFlash USB2.0 中文说明书
JetFlash™ 中文使用手冊(版本 1.1)目錄產品介紹 (2)包裝內容 (2)產品特色 (2)系統需求 (2)安裝驅動程式 (3)在Windows® 98SE(第二版)下安裝驅動程式 (3)在Windows® Me、2000 及XP 下安裝驅動程式 (3)在Mac® OS 9.0或之後的版本下安裝驅動程式 (3)在Linux® Kernel 2.4.2或之後的版本下安裝驅動程式 (3)將JetFlash™ 格式化 (4)如何安全地移除JetFlash™ (5)在Windows® 98SE (第二版)下移除JetFlash (5)在Windows® Me、2000及XP下移除JetFlash (5)在Mac® OS 9.0, 或更新的版本; 及Linux® Kernel 2.4.2, 或更新的版本下移除JetFlash (5)JetFlash™ 150 系列產品 (6)產品規格 (6)訂購資訊 (6)JetFlash™ 120系列產品 (7)產品規格 (7)訂購資訊 (7)JetFlash™ 110系列產品 (8)產品規格 (8)訂購資訊 (8)JetFlash™ 2A系列產品 (9)產品規格 (9)訂購資訊 (9)產品介紹感謝您選購創見資訊所生產製造的JetFlash™ 。
本產品能讓您更方便且快速地在個人電腦與筆記型電腦間,存取及傳輸大量資料。
由於本產品提供較傳統儲存裝置更高的容量、及更快的傳輸速率,其功能可用來儲存/備份/傳輸您的檔案、資料夾、文件、照片及其它的電子檔。
此外它的超強可攜性及資料保存能力,搭配令人驚豔的流線外觀,絕對會帶給您截然不同的全新感受。
包裝內容JetFlash™系列產品之包裝盒內含有下列物品:JetFlash™頸繩應用軟體光碟USB延長線(只有JetFlash™ 2A 系列提供)快速安裝說明產品特色符合USB2.0 介面規格並相容於 USB1.1規格。
德国坦克声卡,DMX6FireUSB,中文使用说明
V 1.02009.04.06使用手册DMX 6Fire USB TerraTec DMX 6Fire USB 使用手册DMX 6 Fire USB设备连接介绍2前面 (2)背面 (4)模拟输出5LINE OUT 1/2, 3/4, 5/6 (背面) (5)耳机输出(前置) (5)驱动5控制面板5混音器 (6)音量 (6)信号 (6)绕送 (7)输出和设定 (7)音量 (7)频率设定 (8)设备设定 (8)场景 (9)其它 (9)TerraTec DMX 6Fire USB 使用手册DMX 6 Fire USB设备连接介绍DMX6 Fire USB 音效界面提供你连接许多专业录音外围设备和Hi-Fi设备。
前面1. 麦克风接口(XLR-1/4" or 6.3 mm 复合式接口)这个插座接受XLR接头和需要幻象电源(通常是电容式麦克风)的专业麦克风,和”一般”耳机插头。
这个接口与背板上Line In 1接口是同时只能择一使用,而且假如XLR or 1/4" (6.3 mm)插头插上时,会自动重新重导信号路径(自动优先选择),此时在背板的Line In 1 和Line In 2 会自动关掉。
2. 耳机的音量控制当你将耳机插入进去,先把音量转到最左边0的位置,否则可能相当大声。
你可以在插入耳机后再转大声。
3. 耳机接口如上所述:插上耳机之前将音量控制转到最低。
这个接口仅会送出Line Out1/2的信号。
4. 麦克风控制的LED指示灯。
LED灯是提供视觉上监看麦克风的录音。
蓝灯代表”有信号”,假如看到亮红色LED,请将Gain 1控制转小。
红色LED灯亮时代表是削峰失真,造成了录音信号失真。
5. 麦克风孔的音量控制控制前置放大的信号在麦克风输入端。
同样的,麦克风插入控制在麦克风输入端的信号前级放大。
6. 48伏幻象电源:当你连接电容式麦克风时拨到”on”。
TerraTec DMX 6Fire USB 使用手册7. -20dB切换开关假如你的麦克风的录音太大声,将PAD开关切换到”on”-信号会被降低20dB。
德国坦克声卡使用手册

德国坦克声卡使用手册(适用型号:剧场版SiXPack 5.1+)前言感谢您购买使用本公司的产品,为了让您更方便与正确的安装使用,本手册提供了开於硬件及驱动程式的安装详细解说。
请您务必依照本手册之指示完成程序。
倘若仍有其他疑问或安装使用上的困难,请来电或以电子邮件将您的问题告诉我们,我们一定全力为您服务。
谢谢您!主要功能1 采用知名crystal cs4630高效能处理晶片2 420 mips高速运算的独家(cclstn)音讯处理技术3 符合ac 97 2.1、pci 2.1规范4 完全支援windows 98se/me/2000/xp作业系统相容5 完全硬体支援微软directsound、directsound3d、directlnput、以及声波合成技术6 支援最新sensaura 3d定位音效技术,支援2/4声道7 相容及支援eax 1.0、eax 2.0、a3d 1.0、i3dl2、macrofx、multidrive zoomfx、environmentfx、(dolby surround)多声道音效技术8 支援同时64个硬体声波合成发声9 内建8mb音色取样且与mpu—401/gm/yamaha xg midi规范相容10 支援midi dls技术无限制软体音色声波合成支援11 支援硬体wavetable音源子卡12 支援对netmeeting网路语音视讯软体提供aec自动回授抑制功能13 支援16bit全双工且与soundblasterpro完全相容14 符合pci电源管理规范apm 1.2和acpi 1.0版15 符合pc 98和pc 99规范要求16 s/n讯噪比达90 db以上,音质传真自然17 具备18bita/d类比/数位转换器18 具备20bit d/a数位/类比转换器19 支援利用directshow和directsound 3d输出播放20 支援立体声,4声道和6声道喇叭模式输出21 支援标准24bit s/pdif光纤数位输入(32/44.1/48khz)和输出(48kh pcm数位讯号,如ac—35.1讯号。
中文说明书_DMX_6Fire_德国坦克声卡

Gpsm V1.34 TerraTec DMX 6Fire USBDMX 6Fire USB.中文使用手册2014.08.20DMX 6 Fire USB设备连接介绍声卡前面 (2)声卡背面 (5)模拟输出LINE OUT 1/2, 3/4, 5/6 (背面) (6)耳机输出(前面) (6)驱动调设音量 (7)绕送 (8)控制面板 (9)信号 (9)混音器 (9)输出和设定 (10)频率设定 (11)驱动工作模式 (12)设备设定 (14)场景 (15)其它 (15)DMX 6 Fire USB设备连接介绍声卡音效界面提供你连接许多专业录音外围设备和Hi-Fi设备。
声卡正面1. 麦克风接口(XLR 1/4或6.3mm母复合式二合一接口)这个插座接受XLR接头和需要幻象电源(通常是电容式麦克风)的专业麦克风,和“一般”耳机插头(6.3mm孔通常是接动圈麦)。
这个接口与背板上LineIn 1接口是同时只能择一使用(意思是如果麦克风和LINE IN 1同时有接入时,只能选择一个作为输入),而且假如XLR 1/4 或6.3mm 插头插上时,会自动重新重导信号路径(自动优先选择),此时在背板的Line In 1 和Line In 2 会自动关掉。
2. 耳机的音量控制当你将耳机插入进去,先把音量转到最左边0的位置,否则可能相当大声。
你可以在插入耳机后再转大声。
3. 耳机接口如上所述:插上耳机之前将音量控制转到最低。
这个接口仅会送出信号到Line Out 1/2。
4. 麦克风动态的LED监控指示灯LED灯是提供视觉上监看麦克风的录音。
“蓝灯”代表有信号,假如看到亮红色LED,请将Gain 1旋转按钮调小。
红色LED灯亮时代表是削峰失真,造成了录音信号失真。
5. 麦克风孔的音量控制控制前置放大的信号在麦克风输入端。
同样的,麦克风插入控制在麦克风输入端的信号前级放大。
6. 48伏幻象电源:当你连接电容式麦克风时拨到“ON”,如果电容麦已启用了幻想电源,不要重复开启,否则可能烧坏声卡!7.-20dB切换开关假如你的麦克风的录音太大声,嘯叫声等,请将PAD开关切换到“ON”,信号会被降低20dB,录入音量会变小。
坦克Audio HX-P930产品说明书
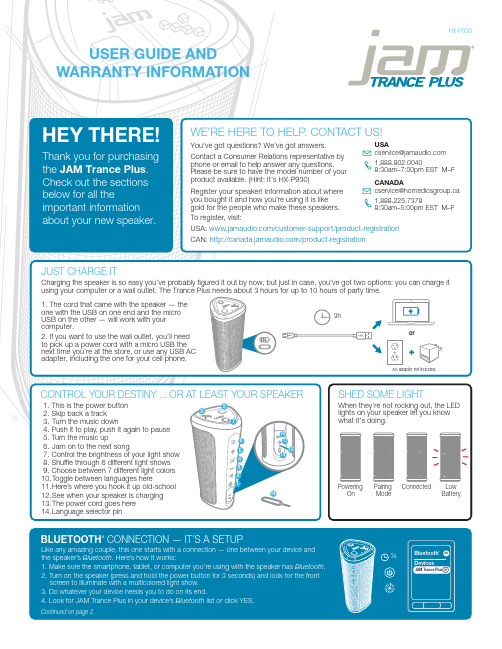
STUFF THE GOVERNMENT MAKES US SAYA MESSAGE FROM THE ENVIRONMENTFCC Compliance:Note: This device complies with part 15 of the FCC Rules. Operation is subject to the following two conditions: (1) This device may not cause harmful interference, and (2) this device must accept anyinterference received, including interference that may cause undesired operation.Note: This equipment has been tested and found to comply with the limits for a Class B digital device, pursuant to part 15 of the FCC Rules. These limits are designed to provide reasonable protection against harmful interference in a residential installation.This equipment generates, uses, and can radiate radio frequency energy and, if not installed and used in accordance with theinstructions, may cause harmful interference to radio communications. However, there is no guarantee that interference will not occur in a particular installation.If this equipment does cause harmful interference to radio or television reception, which can be determined by turning the equipment off and on, the user is encouraged to try to correct the interference by one or more of the following measures:• Reorient or relocate the receiving antenna.• Increase the separation between the equipment and receiver.• Connect the equipment into an outlet on a circuit different from that to which the receiver is connected.• Consult the dealer or an experienced radio/TV technician for help.Note: Changes or modifications not expressly approved by HMDX could void the user's authority to operate this equipment.IC Caution: RSS-GEN Issue 4 November 2014This device complies with Industry Canada’s licence-exempt RSSs.Operation is subject to the following two conditions: (1) This device may not cause interference, and (2) This device must accept any interference, including interference that may cause undesired operation of the device.WARNING:This product has an internal, non-replaceable lithium battery. Please dispose in accordance with your local, state, province, and country guidelines.This product contains small parts that may present a choking hazard for young children.CAUTION: All servicing of this product must be performed by authorized HMDX Service Personnel only.©2015 HMDX. All Rights Reserved.IB-HXP930BCCOMING CLEANA soft, dry towel is all you need to clean off your speaker. Using water, harsh cleaners, or anything else only starts messing with the mechanics inside. So, yeah, don’t do it.1 YEAR LIMITED WARRANTYFor detailed warranty instructions and information visit: USA: /customer-support/warranty-1yr CAN: /warranty-1yrTo obtain warranty service on your JAM product, contact a Consumer Relations representative by telephone or email for assistance (you can find their contact info on page 1). Please make sure to have the model number of the product available.THE VOICE FROM WITHINWhen your JAM Trance Plus isn’t rocking out, it can tell you all sorts of things it’s doing: when it’s powering on, ready to pair, paired, at maximum volume, charging, receiving a call, ending a call, rejecting a call, and powering off.Just like the global gadget it is, your speaker toggles between several languages or no language at all. Your speaker can parlay with you in English, Spanish, French, or Portuguese. Making the change between language and tone is as simple as poking a paperclip, safety pin, or the included language selector pin into the small hole on the bottom of the speaker. Click though until the speaker starts speaking your language.。
- 1、下载文档前请自行甄别文档内容的完整性,平台不提供额外的编辑、内容补充、找答案等附加服务。
- 2、"仅部分预览"的文档,不可在线预览部分如存在完整性等问题,可反馈申请退款(可完整预览的文档不适用该条件!)。
- 3、如文档侵犯您的权益,请联系客服反馈,我们会尽快为您处理(人工客服工作时间:9:00-18:30)。
创作编号:GB8878185555334563BT9125XW创作者:凤呜大王*V 1.02009.04.06使用手册DMX 6Fire USBTerraTec DMX 6Fire USB 使用手册DMX 6 Fire USB设备连接介绍 2前面............................................................. . (2)背面............................................................. . (4)模拟输出5LINE OUT 1/2, 3/4, 5/6 (背面) (5)耳机输出(前置) ............................................................ (5)驱动5控制面板5混音器............................................................. (6)音量............................................................. . (6)信号............................................................. . (6)绕送............................................................. . (7)输出和设定............................................................. .. (7)音量............................................................. . (7)频率设定............................................................. .. (8)设备设定............................................................. .. (8)场景............................................................. (9)其它............................................................. (9)TerraTec DMX 6Fire USB 使用手册DMX 6 Fire USB设备连接介绍DMX6 Fire USB 音效界面提供你连接许多专业录音外围设备和Hi-Fi设备。
前面1. 麦克风接口(XLR-1/4" or 6.3 mm 复合式接口)这个插座接受XLR接头和需要幻象电源(通常是电容式麦克风)的专业麦克风,和”一般” 耳机插头。
这个接口与背板上Line In 1接口是同时只能择一使用,而且假如XLR or 1/4" (6.3 mm)插头插上时,会自动重新重导信号路径(自动优先选择),此时在背板的Line In 1 和Line In 2 会自动关掉。
2. 耳机的音量控制当你将耳机插入进去,先把音量转到最左边0的位置,否则可能相当大声。
你可以在插入耳机后再转大声。
3. 耳机接口如上所述:插上耳机之前将音量控制转到最低。
这个接口仅会送出Line Out1/2的信号。
4. 麦克风控制的LED指示灯。
LED灯是提供视觉上监看麦克风的录音。
蓝灯代表”有信号” ,假如看到亮红色LED,请将Gain 1控制转小。
红色LED灯亮时代表是削峰失真,造成了录音信号失真。
5. 麦克风孔的音量控制控制前置放大的信号在麦克风输入端。
同样的,麦克风插入控制在麦克风输入端的信号前级放大。
6. 48伏幻象电源:当你连接电容式麦克风时拨到”on”。
TerraTec DMX 6Fire USB 使用手册7. -20dB切换开关假如你的麦克风的录音太大声,将PAD开关切换到”on”-信号会被降低20dB。
8. Gain 2的LED灯显示(乐器输入)在这里,相同的蓝色表示”有信号” ,红色代表”信号是削峰失真”。
9. 乐器输入的控制增益当有信号时,将控制钮转小直到红色LED不再亮起。
10.吉他或贝斯接口它可以接受所有高阻抗乐器,并进行前级放大,这个接口与背板的Line In 2同时只能择一使用,而且假如1/4" (6.3 mm)插头插上时会自动重导信号路径(自动优先选择)。
此时,背板的Line In 1和2会自动关闭。
11. Phono控制的LED指示灯这些指示从你连接到6FIRE背板PHONO IN接口的唱机送来信号。
12. PHONO IN的增益控制控制在背板PHONO IN接口输入信号的增益值。
13. 监听信号的控制DMX 6Fire USB有”真正”的硬件监听信道。
换言之,Input 1/2的输入信号(麦克风/ 乐器或Line In 1/2)在进行数字转换之前就分接信号直接送至模拟输出1/2。
在那里,监听信号可以无延迟的与这些输出信号(例如:计算机播放的声音)进行混音。
创作编号:GB8878185555334563BT9125XW创作者:凤呜大王*14.数字光纤输入通过光纤线连接数字来源如CD播放器、数字录音机或其它PC。
15.数字光纤输出通过光纤线选择这个输出口由你的PC传送数字数据到任何其它数字设备。
16.同轴数字输入通过RCA插头连接数字来源如CD播放器、数字录音机或其它PC。
17.同轴数字输出选择这个输出通过线材RCA插头由你的PC传送数字数据到任何其它数字设备。
TerraTec DMX 6Fire USB 使用手册背面1. 连接外部变压器。
2. USB 2.0计算机的USB 2.0接口连接到这里。
3. MIDI 输入你可以连接诸如控制键盘或数字钢琴之类的设备到这个接口。
使用5-pin DIN线材到你键盘的MIDI OUT。
4. MIDI 输出连接到你的扩充设备;合成器或其它MIDI设备的MIDI IN。
5. 接地线连接你唱盘的接地线材避免”嗡哼声”。
6. PHON 输入直接连到唱盘上。
7. LINE IN 1/2, 3/4两对模拟RCA接口连接线级信源。
就像磁带机,调谐器或合成器。
8. LINE OUT 1/2, 3/4, 5/6三对模拟输出接口,供连接有源音箱 / 扩大器或混音器。
模拟输出符合音乐兼容的等级2.5Vrms。
根据微软规范,每组模拟输出安排如下:• Line Out 1/2:前左/前右• Line Out 3/4:中央/重低音• Line Out 5/6:后左/后右4TerraTec DMX 6Fire USB 使用手册模拟输出LINE OUT 1/2, 3/4, 5/6 (背面)DMX 6Fire USB背面有6个高音质模拟单音输出(或3组立体),以RCA接口形式呈现-就像是你的唱盘、TV或Hi-Fi系统。
使用6Fire的控制面板控制成对接口或个别接口;只有总音量,也就是”Main Out” ,也可以利用旧的Windows调音台控制。
你可以连接你的有源音箱,5.1系统的音箱或混音器。
这里的满级输出为2.5Vrms 。
耳机输出(前置)6Fire 的前面配置了耳机输出(1/4" or 6.3 mm 耳机接口),在其上方有一个增益控制可以供你调整音量。
这个输出信号一直都与output 1/2相同。
帮自己及你的听觉一个忙,在开启设备之前,请先检查所有增益控制钮的位置,或先把它们全部转到最小。
你的耳朵将会感激你!顺道一提。
我们之所以将耳机输出放在麦克风输入旁边并不是凑巧的,这样做可让您很方便的插上耳机。
驱动DMX 6Fire USB在系统中有两种不同的工作模式,详情请参阅”设备设定”章节。
Multi-channel: 这此模式下,所有的输出都被群组成一个多信道的设备,相对应的驱动称为"DMX 6Fire MC Out"。
使用一般的音频应用程序就可以到每一个通道。
Multi-device: 这此模式下,所有输出在系统中都被注册成为不同的设备,而这些驱动依次称为"DMX 6Fire Waveplay 1/2, DMX 6Fire Waveplay 3/4, DMX 6FireWaveplay 5/6 and DMX 6Fire Digital Play" 。
控制面板除了驱动程序以外,控制面板是包装中最重要的软件。
在这里,你可以依据不同情况的需求,对这音频接口完全操控,降低音量,将输入导向任何输出,设定MasterClock值或将模拟输入3/4在PHONO与LINE之间切换。
这控制面板算相当直觉,而且应该不会对新手造成什么大问题。
不过,接下来的部分包含了对各别区块的一些说明。
TerraTec DMX 6Fire USB 使用手册混音器音量数字混音器工作方式就像其它混音器一般,例如:你可以对每个信号相对其它信号来调整音量。
使用鼠标”抓住”控制杆来滑动上或下。
每个单音通道都有各自控制杆,各独立通道可通过可切换的立体连动功能组合起来。
假如这已经打开,你可以使用鼠标同时两个移动控制杆。
这在录音时并不会对于信号的实际音量控制产生影响,;实际录音音量是通过GAIN控制(MIC / INST / PHONO)或是信源(LINEIN)的音量控制来完成。
每个声道都有静音按键;假如两声道已经连结,你只要按下其中一个静音按键,两声道都会被静音。
注意:假如你使用一般的音频/ MIDI音序器,你应该也要用这个软件控制音量。
好处是,所有设定通常与你的项目存在一起。
(歌曲、编曲等)信号INPUT 1/2-DMX 6Fire USB的模拟输入1/2组的控制(前面板的MIC/INST IN 或是背板的LINE IN 1/2)INPUT 3/4-DMX 6Fire USB的模拟输入3/4组的控制(LINE IN 3/4 或 PHONO) 。
你可以使用这两个按键去选择想要的输入。
DIGITAL IN –DMX 6Fire USB前面板的数字输入控制。
选择你想要使用光纤或同轴输出。
6TerraTec DMX 6Fire USB 使用手册WAVEPLAY 1/2, 3/4, 5/6-控制计算机通过驱动程序输出信号的音量。
DIGITAL PLAY -控制计算机经过驱动程序数字信号输出的音量。
绕送创作编号:GB8878185555334563BT9125XW创作者:凤呜大王*利用在LINK按钮下方的"1/2, 3/4, 5/6, D"小按钮,你可以将任何你想要模拟输入信号绕送至指定的输出通道,也可以送至数字输出信道。
