ticpods2中文说明书
健身耳机使用说明
健身耳机使用说明健身耳机是现代健身运动中不可或缺的一部分。
它们不仅可以提供高质量的音乐体验,还能帮助人们在锻炼过程中保持动力和集中注意力。
本文将为您提供一份详细的健身耳机使用说明,以确保您能充分利用它们的功能。
1. 蓝牙连接在使用健身耳机之前,您需要先进行蓝牙连接。
确保您的手机或其他音乐设备处于蓝牙可用状态,并打开耳机的蓝牙功能。
在手机蓝牙设置中,找到耳机名称并点击连接。
一旦连接成功,您将听到一声“连接成功”的提示音。
2. 适合您的耳塞健身耳机通常配有多个尺寸和形状的耳塞。
为了获得更好的舒适度和音质,请尝试使用不同尺寸的耳塞。
将耳塞插入耳朵中并轻轻转动,直到其与耳道紧密贴合。
确保耳塞不会滑落或松脱,以免影响您的锻炼体验。
3. 耐汗设计健身耳机通常具备防水和防汗功能,以应对您在剧烈运动中的出汗情况。
但是请注意,不同型号的耳机所能耐受的汗水量可能会有所不同。
在购买之前,请仔细查看产品说明,确保您选择的耳机符合您的使用需求。
4. 操作控制健身耳机通常具备操作按钮,允许您在运动过程中轻松控制音乐播放。
常见的操作包括:按下按钮播放/暂停音乐、单击切换歌曲、长按调节音量等。
在使用耳机之前,熟悉耳机上的操作按钮的位置和功能,这样您就能在锻炼时迅速进行操作,而不需要分心看耳机。
5. 声音设置根据您的喜好和环境需求,调整耳机的音量。
健身耳机通常具备良好的音质和噪音隔离功能,但请注意,在户外运动时,过高的音量可能会影响您对周围交通声音的感知。
确保音量适中,以保障您的安全。
6. 充电和储存在每次使用健身耳机之前,请确保其电量充足。
耳机通常使用Micro USB线进行充电,您可以使用自带的充电头或任何兼容的电源适配器进行充电。
充电时间一般为1-2小时,具体时间请参考产品说明。
当您不使用健身耳机时,请将其放入配套的收纳盒中,以免受到损坏或丢失。
定期清洁耳机和耳塞,以确保其正常工作。
遵循相关的保养和清洁指南,可以延长耳机的使用寿命。
SciPhone Dream G2 数字移动电话 中文设置与操作快速指南

中文设置与操作快速指南适用于中国大陆经销商与个人使用者欢迎您选购并使用SciPhone Dream G2数字移动电话。
本手册仅提供最基本的设置与操作指南。
如需得到详细帮助,请参阅包装盒内的英文版Getting started与Having Fun内容。
您也可以访问我们的在线支持网站/G2进一步了解我们的产品。
本手册内容仅适用于中国大陆地区。
适用地区SciPhone Dream G2工作频率为900/1800/1900MHz或850/1800/1900MHz,可在中国大陆与世界大部分国家使用。
分组数据传输方式支持GPRS/EDGE。
目前EDGE 仅适用于深圳、广州、上海与北京等少数城市。
带有Wi-Fi的机型可在Wi-Fi热点区域使用无线网络服务。
打开您的包装盒SciPhone Dream G2标配为:SciPhone Dream G2电话x1、英文手册(Getting started与Having Fun)x1、中文快速指南x1、USB充电与数据线x1、充电器x1、原装电池x1、耳线x1。
开机前的准备1 请按照下图说明插入您的SIM卡。
打开电池盖后请将SIM卡的金手指一面朝下,缺口朝向外侧插卡。
请注意:本手机的大部分功能需要插入SIM卡后才能使用。
2 本手机在出厂前已经安装了容量为1GB的MicroSD卡。
您可以自行替换更大容量的内存卡(可扩展至16GB)。
3 安装电池并合上电池后盖。
4 请将电池后盖左上侧摄像头镜片处的保护膜揭开(如有)。
话机按键与功能概要请参考下图,话机正面与左侧分别有以下按钮:1功能键/Menu:非常重要,用于在操作界面调取功能列表。
2 接听键/Call:接听来电、拨打电话或进入通话记录。
3 Home键/Home:可在任何时候返回主界面。
4 方向键/Navigate:控制上下左右四个方向。
5 确定键/OK:用于选定、确认或在部分界面调取功能列表。
6 返回键/Back:用于返回到上一个界面或取消功能。
迪克腾耳机说明书
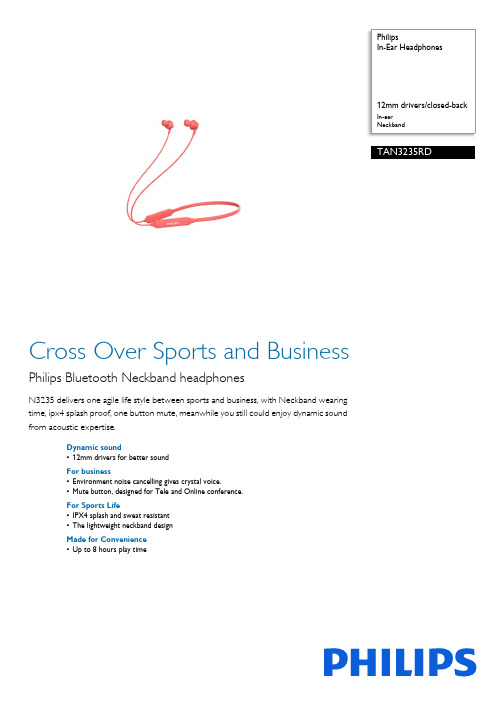
PhilipsIn-Ear HeadphonesIn-earNeckbandTAN3235RDCross Over Sports and BusinessPhilips Bluetooth Neckband headphonesN3235 delivers one agile life style between sports and business, with Neckband wearingtime, ipx4 splash proof, one button mute, meanwhile you still could enjoy dynamic soundfrom acoustic expertise.Dynamic sound•12mm drivers for better soundFor business•Environment noise cancelling gives crystal voice.•Mute button, designed for Tele and Online conference.For Sports Life•IPX4 splash and sweat resistant•The lightweight neckband designMade for Convenience•Up to 8 hours play timeIssue date 2022-05-29Version: 2.0.112 NC: 8670 001 68188EAN: 69 51613 94432 5© 2022 Koninklijke Philips N.V.All Rights reserved.Specifications are subject to change without notice. Trademarks are the property of Koninklijke Philips N.V. or their respective SpecificationsIn-Ear Headphones12mm drivers/closed-back In-ear, NeckbandHighlightsNeckband designNeckband type brings stable and comfortable wearing feel.IPX4IPX4 splash proof for all-weather sports everywhere.Mute buttonOne click mute button, designed for Tele and Online conference.Environment noise cancelling Environment noise cancelling gives crystal voice.12mm driversHigh power 12mm drivers for better sound from snug fitting ear tips.8 hours play timeThe battery gives you 8 hours play time from a full charge. Charging takes around 2 hours and is easy via the included micro USB cable.Design•Color:RedAccessories•Quick Start Guide •USB cable•Ear caps:3SizesConnectivity•Microphone: Built-in microphone•Bluetooth profiles: A2DP, AVRCP, Handsfree, HFP, HSP•Bluetooth version: 5.0•Maximum range: Up to 10 mConvenience•Call Management: Call on Hold, Switch between 2 calls, Answer/End Call, Microphone mute, Reject CallPower•Battery type: Lithium-Ion •Rechargeable•Music play time: 8 hrSound•Acoustic system: Closed •Magnet type: Neodymium •Impedance:32Ohm•Maximum power input: 5 mW •Sensitivity: 95 dB•Diaphragm: PET•Speaker diameter: 12 mm•Frequency response: 20-20,000 Hz Inner Carton•Number of consumer packagings: 6•Inner carton (L x W x H): 21.2 x 18.9 x 18.2 cm •Gross weight: 1.95 kg •Nett weight: 0.234 kg •Tare weight: 1.716 kg•GTIN: 2 69 51613 94432 9Outer Carton•Number of consumer packagings: 24•Outer carton (L x W x H): 39.7 x 23.2 x 39 cm •Gross weight: 8.45 kg •Nett weight: 0.936 kg •Tare weight: 7.514 kg•GTIN: 1 69 51613 94432 2Packaging dimensions•Packaging type: Carton•Number of products included: 1•Type of shelf placement: Hanging •Packaging dimensions (W x H x D): 17 x 22.5 x 3 cm•Gross weight: 0.295 kg •Nett weight: 0.039 kg •Tare weight: 0.256 kg •EAN: 69 51613 94432 5。
X2 高档蓝牙耳机用户指南说明书

X2GUIDE UTILISATEURFRANÇAISBOÎTIER DE RANGEMENT INSTALLATION INSTRUCTIONS DÉTAILLÉESLE BOÎTIER DE RANGEMENTle côté opposé pour l’insérer.3À L’INTÉRIEUR DU BOÎTIERDE RANGEMENTPochette d’accessoiresCâble de chargement2 x S2 x L2 x MAttaches-Fils(pour plus tard)4par dessousl’oreille5ORIENTATION G-DG DINSTALLATION SOUS OREILLE:DROIT6CHOISIR LA BONNE TAILLE D’EMBOUTS AURICULAIRES AMÉLIORE L’ÉCOUTE78Ti Inm Glissez l'embout en mousse Comply™sur la monture de l'écouteur X2.12Compressez l'embout en mousse Comply™ en le roulant avec les PLY TM34Tirez votre oreille vers l'arrière. Insérez la totalité de l'embout en mousse dans votre oreille.Maintenez-le en place pendant 15 à30 sec. pour permettre à la mousse de se dilater et de créer un joint.15à30secondests.Premium Ear TipsMaintien sécurisé: Se dilate pour vous offrir un ajustement personnalisé et un maintien intraauriculaire remarquable. Vos écouteurs sontsécurisés que vous soyez à la salle de sport, surles pistes ou à l’extérieur.Confort souple: Cette mousse unique à mémoirede forme offre un confort pour toute la journée,tout en éliminant l’irritation et la fatigue intraauriculaire.Bloque le bruit: Vous permet d’écouter votremusique dans des environnements bruyants sans augmenter le volume.Audio optimisé: Maximise l’étanchéité et dirigele son directement dans votre conduit auditif,pour optimiser l’écoute.9MAINTENEZ VOS X2 GRÂCE AUX AILETTES DE MAINTIEN.1011MAINTIEN SÉCURISÉG D12ENMODE PAR DESSOUSL‘OREILLE, LA COMMANDE EST SOUS L’OREILLE DROITE PLACEZ L’EMBOUT DEL’AILETTE SUR LE HAUTDU CREUX DE L’OREILLE COMME INDIQUÉL’ailette doit être bienajustée sur les partiesinférieures, arrièreset supérieures ducreux de l’oreille.13VÉRIFICATION DU SONBESOIN D’AIDE POUR LE COUPLAGE?MESSAGE VOCAL:« SEARCHING ... »ON14APPRÉCIEZ LA QUALITÉ15SUR OREILLE/manuals16PORT SUR OREILLE:GAUCHEG D1718MAINTIEN SÉCURISÉIMPORTANT:G DATTACHES-FILSLE MODE SUR OREILLE NÉCESSITE UN CORDON MOINSLONG. POUR UN MAINTIEN OPTIMAL, INSTALLEZ LESATTACHES-FILS (ICI EN VERT) POUR REGLER LA LONGUEUR.1920212223APPRÉCIEZ LA QUALITÉ2425CONTENU RECHARGE32627MESSAGE VOCAL« BATTERY LOW » ÉTAT DE LA DEL RECHARGEMICRO USB LES ÉCOUTEURS SONT-ILS SOUS TENSION ? L A PILE EST-ELLE DÉCHARGÉE?Rouge: En chargeVert (avec le câble USB branché): ChargéRouge+vert en alternance: Mode de couplageAucune lumière: En veille/Mode lecture/Hors tensionVert = Sous tension et bonne chargeRouge = Pile faibleAucune lumière = Hors tension* Mode veille: Sous tension mais aucun b ranchement à un appareilCOUPLAGE (INSTALLATION) DES ÉCOUTEURSAVEC LE TÉLÉPHONE/LECTEUR DE MUSIQUE1.2.28MAINTENEZ 4 S POUR COUPLER MODE COUPLAGE:Alternance rouge/vertMESSAGE VOCAL:YOUR MUSIC DEVICE ...»29COUPLAGE AVEC UN ADAPTATEUR BLUETOOTH30COUPLAGE AVEC PLUSIEURS APPAREILS BLUETOOTH3132ONCOMMANDES Répondre 2e appel,terminer appel.RecomposerDU BOUTON CENTRALOFFSPECIFICATIONS33GARANTIE, SOINS ET ENTRETIEN34PRENEZ QUELQUES INSTANTS POUR ENREGISTRER VOTRE GARANTIE À VIECONTRE LA TRANSPIRATION35Évitez les niveaux sonores trop élevés et lestemps d’écoute prolongés.N’utilisez pas les X2 en conduisant.36。
HTC True Wireless Earbuds 2 快速使用指南说明书
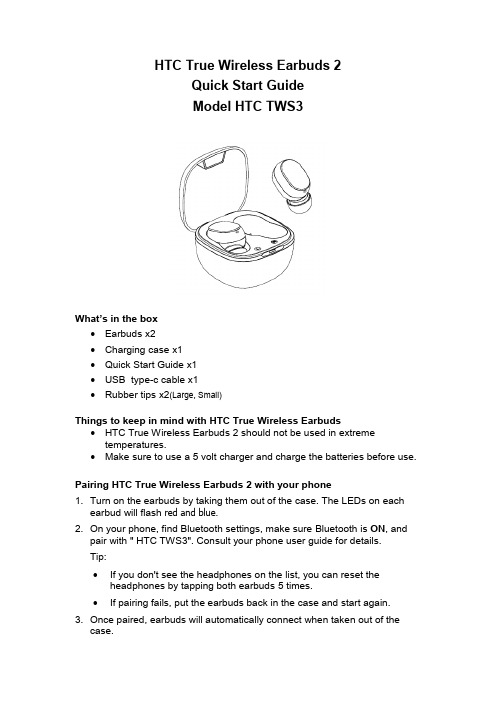
HTC True Wireless Earbuds 2Quick Start GuideModel HTC TWS3What’s in the box∙Earbuds x2∙Charging case x1∙Quick Start Guide x1∙USB type-c cable x1∙Rubber tips x2(Large, Small)Things to keep in mind with HTC True Wireless Earbuds∙HTC True Wireless Earbuds 2 should not be used in extreme temperatures.∙Make sure to use a 5 volt charger and charge the batteries before use.Pairing HTC True Wireless Earbuds 2 with your phone1. Turn on the earbuds by taking them out of the case. The LEDs on eachearbud will flash red and blue.2. On your phone, find Bluetooth settings, make sure Bluetooth is ON, andpair with " HTC TWS3". Consult your phone user guide for details.Tip:∙If you don't see the headphones on the list, you can reset the headphones by tapping both earbuds 5 times.∙If pairing fails, put the earbuds back in the case and start again.3. Once paired, earbuds will automatically connect when taken out of thecase.4. When you're done, put the earbuds back in the case to turn them off andcharge them. Make sure to recharge the case periodically.Checking product authenticity1. Scan the QR code on the packagewith your phone.2. Scratch off the coating. You’ll thensee a code.3. On your phone, enter the last fourdigits of the code. 4. If the code is authentic, the Searchresults screen will show that youhave a genuine product code.Warning: If you see the above screen, beware of counterfeiting.Legal noticeTrademarks and permissions:HTC and the HTC logo are trademarks of HTC Corporation and used under license by Fortune Ship International Industrial Limited.The Bluetooth® word mark and logos are registered trademarks owned by Bluetooth SIG, Inc.Copyright © 2021 Fortune Ship International Industrial Limited. All rights reserved.THIS DOCUMENT IS FOR INFORMATION PURPOSES ONLY, AND DOES NOT CONSTITUTE ANY KIND OF WARRANTIES.FCC WarningFCC ID: 2AVFE-HTCTWS3This device complies with Part 15 of the FCC Rules. Operation is subject to the following two conditions:(1) This device may not cause harmful interference.(2) This device must accept any interference received, including interferencethat may cause undesired operation.NOTE:This equipment has been tested and found to comply with the limits for a Class B digital device, pursuant to part 15 of the FCC Rules. These limits are designed to provide reasonable protection against harmful interference in a residential installation. This equipment generates uses and can radiate radio frequency energy and, if not installed and used in accordance with the instructions, may cause harmful interference to radio communications. However, there is no guarantee that interference will not occur in a particular installation. If this equipment does cause harmful interference to radio or television reception, which can be determined by turning the equipment off and on, the user is encouraged to try to correct the interference by one or more of the following measures:- Reorient or relocate the receiving antenna.- Increase the separation between the equipment and receiver.- Connect the equipment into an outlet on a circuit different from that towhich the receiver is connected.- Consult the dealer or an experienced radio/TV technician for help.Any changes or modifications to this unit not expressly approved by the party responsible for compliance could void the user's authority to operate the equipment.Warning:please tear off this isolative film before using.。
Philips Fidelio M2 Wireless On-Ear Headphones 说明书
The shaving heads (cutters and guards) are not covered by the terms of the international warranty because they are subject to wear.
繁體中文
重要安全資訊
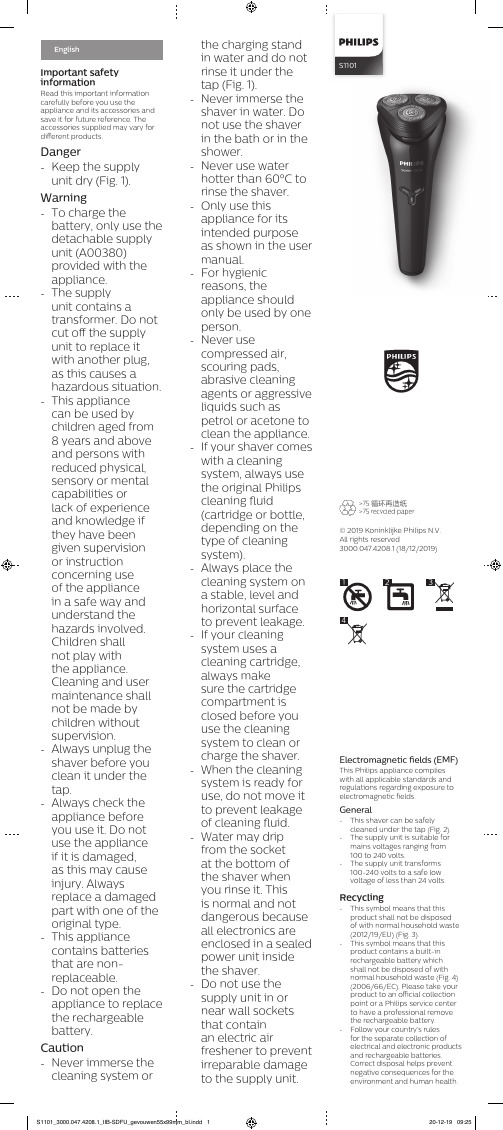
使用本產品與其配件前,請先仔細閱讀 此重要資訊,並保留說明以供日後參 考。 提供的配件可能隨產品而異。
危險
-- 電源供應裝置請保持乾燥 (圖 1)。 -- 此符號表示: 禁止於自來水 (圖 1)
-- This appliance contains batteries that are nonreplaceable.
-- Do not open the appliance to replace the rechargeable battery.
Caution
-- Never immerse the cleaning system or
2 Remove the outer panels of the shaver with a screwdriver or other tool. If necessary, also remove additional screws and/or parts until you see the printed circuit board with the rechargeable battery.
-- This appliance can be used by children aged from 8 years and above and persons with reduced physical, sensory or mental capabilities or lack of experience and knowledge if they have been given supervision or instruction concerning use of the appliance in a safe way and understand the hazards involved. Children shall not play with the appliance. Cleaning and user maintenance shall not be made by children without supervision.
LectroFan 2 说明书
Electronic Fan and White Noise MachineOwner’s Manual- Getting Started- Product Features- Technical Reference- Warranty InformationTo Our Customers,Thank you and congratulations on your purchase from Adaptive Sound Technologies, Inc. (ASTI). You now own the most versatile fan sound synthesizer and white noise generator on the market today. With twenty (20) unique sounds, precise volume control, and a built-in hour timer, LectroFan is in a class by itself.If you have any suggestions or ideas on how we can make our products better, please let us know.ASTI, Campbell, CA. 95008 Write down your Serial Number(Label looks like this) Record your serial number here. Youcan find it on the bottom of the unit.Refer to these numbers wheneveryou contact your reseller regardingthis product.Model Number: ASM1007(Your number will be different)Name/Part Number:Serial Number:Date of Purchase:Protect your warrantyPlease complete your warranty registration with your reseller using their recommended procedure.Table of ContentsPlug it in (4)Pick your Sound (5)Timer (6)Power-on Default (6)Restoring Factory Settings (Reset) (6)Using An External Timer Or Power Strip (6)Technical Information (7)Trouble Shooting (7)Safety, Warranty, and Certifications (8)Safety Instructions (8)One Year Limited Warranty (9)FCC Declaration (11)Software Licensing (11)Customer Support (12)Plug it inUnpack the LectroFan. The package contains:∙LectroFan Unit∙AC Power Adapter and USB CableConnect AC Power.1. Plug the included USB Cable into the Power Adapter.2. Plug the other end of the USB Cable into the LectroFan (bottom).3. Plug the Power Adapter into an AC wall outlet.4. Unit turns on. It comes on right away, but you can change that.(See: Power-on Default.)* The USB cable can also be plugged into a PC or LAPTOP to power the unit. LectroFan does not support USB audio; the USB cable is only used to provide power the unit.These switches rock.Pick your Sound∙Press the Fan Sounds button (left side) to play fan sounds. Press it again to play the next fan sound.∙Press the White Noises button (right side) to play white noisesounds. Press it again to play the next white noise.FAN SOUNDS NOISETo signal a return to the first Fan Sound or White Noise you will hear a short rising tone (“whoop” soun d).LectroFan will remember the last Noise and Fan setting that you made when changing Modes. This way you can easily switch back and forth between your favorite Fan Sound and your favorite White Noise. NOTE: All user settings are saved when LectroFan is turned off using the Power Button, but not saved if the unit is simply unplugged.TimerTurning On LectroFan results in continuous play, until the Timer is turned on. The Timer sets the Unit to play for a minimum of one hour and then gradually shut Off. LectroFan will create a short “dip” in the sound when you press the Timer Button so you‟ll know for sure you have pressed it.Power-on DefaultIf you don‟t want the Unit to turn On immediately when you first plug it in, you can disable that function with this procedure:1. Turn Off the Unit with the Power Button.2. Press and hold down the Volume Down Button while pressing and releasingthe Power Button.3. Turn Unit Off. To enable this function again perform a Factory Reset. Restoring Factory Settings (Reset)Turn the Unit Off. Press and hold the Power Button down until LectroFan makes a short rising tone (“whoop” sound) and it is Reset. After performing the Reset the Fan Sound is set to “Large Fan”, the White Noise is set to “White Noise #1”, the Mode is set to “Fan Mode”, the volume is set to a nominal level, and LectroFan is set to turn On immediately when power is first applied. Using An External Timer Or Power StripIf you use a switched power strip or your own external timer to supply power to your LectroFan, be sure to switch LectroFan Off and then back On using the Power Button when you change your settings– only then will LectroFan remember them!Technical InformationTrouble ShootingIf your unit exhibits a problem, try the actions below to resolve the problem.Safety, Warranty, and CertificationsSafety InstructionsRead and adhere to all safety and operating instructions before use. Keep this booklet for future reference.1. WARNING: Do Not Operate Heavy Machinery or Motor Vehicles WhileUsing this Device.2. The unit should be cleaned regularly with a soft, dry cloth. The grill may bevacuumed to remove excessive dust or particle build-up. Do not use anyliquids or sprays (including solvents, chemicals or alcohol) or abrasives to clean.3. The unit should not be used near water, such as a bathtub, swimming pool,faucet or basin to avoid electrocution.4. Be careful to avoid dropping objects or spilling liquids onto the unit. If liquidis spilled on the unit, unplug and turn it upside down immediately. Allow it to dry thoroughly (one week) before plugging it into a wall outlet again.Following these instructions does not ensure that the unit will be operational.5. Do not reach for the unit if it has fallen into water. Unplug it immediately atthe wall outlet, and if at all possible drain water before retrieving the unit. 6. The unit should be situated away from heat sources such as radiators, heatregisters, stoves or other appliances (including amplifiers) that produce heat.7. Avoid placing the unit in areas that are exposed to direct sunlight or close toheat-radiating products such as electric heaters. Do not place unit on top of stereo equipment that radiates heat.8. Avoid placing in areas that are dusty, humid, moist, lack ventilation, or aresubject to constant vibration.9. The unit may be subject to interference from external sources such astransformers, electric motors or other electronic devices. To avoid distortion from such sources, place the unit as far away from them as possible.10. Do not apply excessive force when using any of the control switches.11. Power cords should be routed to avoid being walked on or pinched by itemsplaced on or against them.12. Unplug the AC power plug from the wall outlet when the unit is unused forlong periods of time or when moving the unit.13. Do not attempt to service the unit yourself beyond what is described in theoperating instructions.One Year Limited WarrantyWarranty only applies to units purchased from authorized LectroFan resellers.ASTI warrants this product against defects in materials and/or workmanship under normal use for a period of ONE (1) YEAR from the date of purchase by the original purchaser (“Warranty Period”). If a defect arises and a valid claim is received within the WarrantyPeriod, at its option, ASTI will either 1) repair the defect at no charge, using new or refurbished replacement parts, or 2) replace the product with a current product that is close in functionality to the original product. A replacement product or part, including a user-installable part installed in accordance with instructions provided by ASTI, is covered by the remaining warranty of the original purchase. When a product or part is exchanged, the replacement item becomes your property and the replaced item becomes ASTI‟s property.Obtaining Service:To obtain warranty service please call, or email, your reseller. Please be prepared to describe the product that needs service and the nature of the problem. All repairs and replacements must be authorized in advance by your reseller. A purchase receipt must accompany all returns. Service options, parts availability and response times will vary.Limits and Exclusions: This Limited Warranty applies only to the ASTI LectroFan unit, ASTI power cable, and/or the ASTI power adapter. It does NOT apply to any bundled non-ASTI components or products.This warranty does not apply to: a) damage caused by failure to follow instructions relating to the product‟s use or to the installation of components; b) damage caused by accident, abuse, misuse, fire, floods, earthquake or other external causes; c) damage caused by service performed by anyone who is not a representative of ASTI; d) accessories used in conjunction with a covered product; e) a product or part that has been modified to alter functionality or capability; f) items intended to be periodically replaced by the purchaser during the normal life of the product including, without limitation, batteries or light bulbs; or g) any and all pre-existing conditions that occur prior to the effective date of this Limited Warranty relating to any product sold “as is” including, without limitation, floor demonstration models and refurbished items.ADAPTIVE SOUND TECHNOLOGIES, INC. (ASTI) SHALL NOT BE LIABLE FOR INCIDENTAL OR CONSEQUENTIAL DAMAGES RESULTING FROM THE USE OF THIS PRODUCT, OR ARISING OUT OF ANY BREACH OF THIS WARRANTY. TO THE EXTENT PERMITTED BY APPLICABLE LAW, ASTI DISCLAIMS ANY AND ALL STATUTORY OR IMPLIED WARRANTIES, INCLUDING, WITHOUT LIMITATION, WARRANTIES OF MERCHANTABILITY, FITNESS FOR A PARTICULAR PURPOSE AND WARRANTIES AGAINST HIDDEN OR LATENT DEFECTS. IF ASTI CANNOT LAWFULLY DISCLAIM STATUTORY OR IMPLIED WARRANTIES, THEN TO THE EXTENT PERMITTED BY LAW, ALL SUCH WARRANTIES SHALL BE LIMITED IN DURATION TO THE DURATION OF THIS EXPRESS WARRANTY.Some geographic areas disallow the exclusion or limitation of incidental or consequential damages or the length of an implied warranty. As a consequence, some of the above exclusions or limitations may not apply to buyers residing in those areas. This warranty grants specific legal rights to buyers, but other rights may also be granted which vary from country to country, state to state, etc.FCC DeclarationThis equipment has been tested and found to comply with the limits for a Class B Digital Device, pursuant to Part 15 of the FCC Rules. These limits are designed to provide reasonable protection against harmful interference in a residential installation. This equipment generates, uses, and can radiate radio frequency energy, and if not installed and used in accordance with the instructions, may cause harmful interference to radio communications. However, there is no guarantee that interference will not occur in a particular installation.If this equipment does cause harmful interference to radio or television reception, which can be determined by turning the equipment off and on, the user is encouraged to try to correct the interference by one or more of the following measures:∙ Reorient or relocate the receiving antenna.∙ Increase the separation between the equipment andreceiver.∙ Connect the equipment to an outlet on a circuit differentfrom the one to which the receiver is connected.∙ Consult the dealer or an experienced radio/TV technicianfor help.Software LicensingThe software contained in the LectroFan System is licensed to you, not sold to you. This is only to protect our intellectual property and has no affect on your ability to use the LectroFan unit wherever you please.Customer SupportIf you have comments, questions, or problems, please contact your reseller.©2015-2016 Adaptive Sound Technologies, Inc. (ASTI), Campbell, CA. All Rights Reserved. The …LectroFan logo is a trademark or registered trademark of ASTI. All other marks are trademarks or registered trademarks of their respective owners. This product is protected by one or more US patents. Additional patents may be pending.。
距平麦金2操作说明书
IMAXIMIssue 2 12.01.99MAXIM AmplifierOperating InstructionsBaldwin Boxall Communications Ltd.Wealden Industrial Estate, Farningham RoadCrowborough, East Sussex, TN6 2JRTelephone: 01892 664422 Fax: 01892 663146Email:*********************.ukM AXIM D ESCRIPTION AND S PECIFICATIONS1.120W RMS Power Output.2.Mains or 24V DC Battery powered with silent changeover.3.Four balanced microphone inputs via 180º and 240º DIN sockets.4.Each input has the option of cascade priority via internal switch selection.5.As supplied each input has the chime and volume restoration/busy enabled, this is selectable viaan internal diode matrix (see fig 1).6.Optional three note chime (plug in module OPT33) with pre-set volume control.7.Master volume, treble and bass controls.8.Auxiliary stereo music input (internally mixed) to accept tuners, CD players or tape decks.9.Music mute facility which allows music to be ‘ducked’ to a pre-set level when paging operated.10.Remote music mute input from time clocks etc.11.24V DC output.12.“Volume Restoration” relay to provide simple zoned output (e.g. paging only)13.Open collector “Busy” output to drive indicators etc.14.Auxiliary output to feed slave amplifiers, tape decks etc.SAFETYVentilationAlways ensure adequate ventilation to the amplifier : do not obstruct ventilation holes in cover or base. AC Power Input - Danger High VoltageOnly connect to an AC 50-60 Hz 230V supply using the lead assembly supplied or an equivalent type with a suitable IEC connector.Always ensure that the amplifier is earthed.Always unplug the power before removing the top cover.100V Loudspeaker Output - Danger High VoltageEnsure that the loudspeaker connections are suitably protected and cannot be touched. Always replace output plug insulated covers.Always ensure that the total speaker load does not exceed 120 Watts. If unsure use an impedance meter to measure the unknown load. Using a multimeter selected to the resistance range ensure that the speaker line is not connected to earth.MoistureDo not allow water to come in contact with the amplifier and its external connections.Cable TypesAlways ensure that the correct cable type is used for the signal level.A twin screened cable should be used for balanced inputs operating at mic level. Zone selection and access control cables do not generally require screening and should not share the same screen as the balanced input.Loudspeaker output cables should be rated in excess of 100V and the cross sectional area to suit the load without excessive power loss. Always ensure that output cables are kept as far away from input cables as possible reducing the risk of instability.FusesAlways replace using the correct rating and type to ensure safe operation.M AXIM 120W TECHNICAL SPECIFICATIONRated output power100V Line 230V AC Supply120W 83 OhmsTHD 1kHz rated outputAux input 230V AC SupplyLess than 0.5%, typically 0.2%Typical output power 1% THDAux input 230V AC supply150W 66 OhmsOutput regulation(1kHz 100V Line)Better than 1.3dBOutput voltages obtainable(Pin selection)50 & 100VSupply Voltage22-35V DC220-240V 50-60Hz AC Power ConsumptionQuiescentRated Output Power @ 1kHz 120mA9A18VA300VAFuse Protection1 x AC Supply 20 x 5mm1 x DC (amplifier) auto blade 1 x Battery Supply auto blade 3.15A (T) 15A (F) 15A (F)Aux input stereo summed monoSensitivityFrequency response – 3dB@ Signal to noise ratio 120mV @ 20k Ohms 40Hz – 20kHz Better than 80dBMic InputSensitivityFrequency response –3dB@Signal to noise ratio terminated 200 Ohms 600!V Balanced @ 660 Ohms60Hz – 12kHzBetter than 60dBTone ControlsBass Treble +/- 12dB @ 100Hz +/- 12dB @ 12kHzAuxiliary OutputOutput LevelRecommended load impedance400mV @ 1kOhm Greater than 10kOhmSystem busy output Open collector 0.5A @ 40V total max. Busy / Restoration relay output 2 pole changeover 5A @ 100V max. DC Aux output**************************** TerminationsAC supply inputDC Battery inputAux inputMic inputSub socketBusy / Restoration relay output Loudspeaker line output3-pin DIN IEC 6A3-pin Screw terminated connector 180" 5 pin DIN stereo summed mono 180" 5 pin & 240" 6 pin DIN180" 5 pin & 240" 5 pin DIN8-pin, Screw terminated connector 3-pin Screw terminated connectorDimensions (mm) (D x W x H)340 x 430 x 90 Weight12kgC ASCADE P RIORITY AND D IODE M ATRIXC ASCADE P RIORITYCascade Priority can be selected on the four microphone inputs using the “Priority Select” DIL switch on the PCB.As supplied from the factory the 4 microphone inputs mix and do not override the music input.To enable a microphone input to override the music input and lower priority microphone inputs the relevant switch should be set to “ON”.D IODE M ATRIXAs supplied from the factory each microphone input (when accessed) enables the chime, Busy output, and Volume Restoration relay.To prevent an input having one of these facilities then the relevant diode should be cut out of circuit.。
二代蓝牙耳机使用详细教程【南域NANYU蓝牙科技】
本款耳机严禁使用超过2A的充电头进行充电,建议使用1A~1.5A充电头,使用超过2A 的充电头充电容易造成耳机电池受损甚至损毁。
初次收到货后建议第一时间充电,充满电之后再使用,可以让蓝牙耳机使用寿命延长。
使用教程01蓝牙耳机连接本款蓝牙耳机兼容市面上百分之九十九的设备,有蓝牙就能连接,基本不用担心系统兼容的问题,其他系统参照安卓系统连接即可。
1.ios系统连接教程步骤一:打开耳机充电仓盖子以及手机蓝牙开关步骤二:手机主页显示耳机弹窗,首次配对按照提示:按住充电仓背后的按钮完成配对连接,取出耳机即可开始正常使用(完成首次配对之后,下次连接只需要打开充电仓盖子以及蓝牙开关,手机显示弹窗之后即可取出使用)(如连接失败,将耳机放回充电仓,关闭手机蓝牙,然后按照上述步骤重新操作一遍即可)2.安卓系统连接教程点击设置打开蓝牙开关找到设备名称AirPods,点击名字进行配对连接,配对连接成功即可正常使用。
常见问题:问题一:连接之后一个有声音,另外一个没声音原因:其中一只耳机没电解决方法:先充满电再使用问题二:首次使用连接失败原因:常见于首次配对连接,一般为新用户使用不熟悉导致解决方法:关闭耳机充电仓盖子关闭蓝牙,按照上述流程重新连接02蓝牙耳机充电注意,耳机充电和充电仓充电时不一样的,不要把两者混淆1.耳机充电:耳机放入充电仓则自行充电2.充电仓充电:用配置的数据线充电,充电仓前面橙色灯光亮起表示正在充电,充满电时显绿色灯光本款耳机严禁使用超过2A的充电头进行充电,建议使用1A~1.5A充电头,使用超过2A 的充电头充电容易造成耳机电池受损甚至损毁。
支持使用无线充电器充电,放上即可充电常见问题:问题一:插入数据线无法充电原因:充电仓充电接口或数据线接头接触不良解决方法:数据线稍用力插到底,或更换充电线问题一:放在无线充电器上无法充电原因:劣质无线充电器(市面上十块左右的无线充电器),部分劣质充电器无法给充电仓充电。
迈达儿品牌的耳机用户手册说明书

PhilipsTrue wireless sports headphonesIn-ear fit Heart-rate monitor Ear hooks or wing tips UV cleaningTAA7306BK Train smarterRun faster. Jump higher. These true wireless sports headphones boast detachable ear hooks for a super-secure fit. Energizing sound keeps you focused, and the built-in heart-rate monitor helps you train in tune with your body.Secure no matter what.•Flexible fit. Ear hooks or wing tips•Listen to your body. Heart-rate monitor•Go hard, stay fresh. UV cleaning•IP57 dust resistant and waterproofFrom workout playlist to vital call•Let the world in when you need to. Awareness Mode•Switch between earbuds as you need. Mono mode•Sound tuned for sports. 9 mm neodymium drivers•Touch controls. Built-in mic. Easy pairingFrom gym to street•Magnetic charging case. Up to 24 hours play time•6 hours play time from a single charge•Charge for 15 minutes, train an extra hour•Track your performance and more. Philips Headphones appHighlightsEar hooks or wing tipsFor light- to medium-intensity workouts, flexible and detachable wing tips keep the fit secure. When you're up for a harder session, detachable ear hooks ensure your buds stay put. Pick your ear-hook or wingtip color to suit your style.Heart-rate monitorTrain smarter thanks to a heart-rate monitor that's compatible with popular fitness apps and the Philips Headphone app. If your chosen app supports live updates, you'll get heart-rate readings spoken into your ear as you train. You'll know when to go harder and when to hold back.UV cleaningLift hard. Hit the treadmill. However you like to get your endorphin rush, these headphones give you the freedom to get sweaty! When you're done, simply pop the earpieces in the charging case and a UV cleaning cycle will remove up to 99 % of bacteria.Awareness ModeWant to hear your fellow gym goers? Activate Awareness Mode and have a conversation without removing your headphones. If you need to take a call, mono mode lets you use a single earbud to talk, and you can swap between earbuds without missing a word.IP57 dust/water protectionAn IP57 rating means these sports headphones can take on the hardest workout. Enjoyingyour workout playlist too much to stoplistening? You can even keep the headphones on in the shower. When you're finished, and the headphones are dry, store them in the soft carry pouch.Easy control and pairingTap the headphones to pause your playlist, take calls, and wake your phone's voiceassistant. The headphones are ready to pair the instant you switch on Bluetooth. Once they're paired, they remember the last device they were paired with.24 hours play timeYou get clear sound, punchy bass, and 6 hours play time-and the ultra-portable charging case gives you up to 18 hours extra play time. Need an extra boost? A speedy 15-minute charge gives you another hour of play time.Philips Headphones appYou can use the Philips Headphones app to track your heart rate while working out, or to get a post-session summary. Want to tweak the sounds you train to? You can also use the app to enhance bass, tone down treble, or choose from preset sound styles.Issue date 2023-02-16 Version: 6.0.412 NC: 8670 001 73957 EAN: 48 95229 11773 0© 2023 Koninklijke Philips N.V.All Rights reserved.Specifications are subject to change without notice. Trademarks are the property of Koninklijke Philips N.V. or their respective owners.SpecificationsSound•Impedance:16Ohm•Speaker diameter: 9.2 mm•Sensitivity: 105 dB (1K Hz)•Frequency range: 20 - 20 000 Hz•Maximum power input: 5 mW•Driver type: DynamicANC features•Awareness modeTelecommunication•Microphone for call: 2 mics•ENC microphoneConnectivity•Bluetooth version: 5.0•Supported codec: AAC, SBC•Maximum range: Up to 10 m•Bluetooth profiles: A2DP, AVRCP, HFP •Microphone: Built-in microphone•Type of wireless transmission: Bluetooth •WirelessConvenience•Philips Headphones app support•Firmware updates possible•Heart rate monitoring•UV-cleaning•Water resistance: IP57•Mono mode for TWS•Volume control•Type of controls: TouchDesign•Color:Black•Wearing style: In-ear•Ear coupling material: Silicone•Ear fitting: In-ear•In-ear fitting type: Earhook, Silicone ear tip, Wing tipPower•Music play time: 6 +18 hr•Talk time:6hr•Battery type(Earbud): Lithium Polymer (built-in)•Battery capacity(Earbud): 55 mAh•Battery type(Charging case): Lithium Polymer (built-in)•Battery capacity(Case): 550 mAh•Battery life standby time: 200 hr•Charging time: 2 hr•Fast charging time: 15mins for 1 hr•Number of batteries: 3 pcs •Battery weight (Total): 14.18 g •RechargeableVoice assistant•Voice assistant support•Voice assistant activation: Voice controlled •Voice assistant compatible: Apple Siri, Google AssistantAccessories•Carabiner•Detachable earhook: 3 pairs•Detachable wing tips: 3 pairs•Charging cable: USB-C cable, 500 mm •Charging case•Eartips: 3 pairs (S/M/L)•Others: 1 pcs hard pouch•Quick Start GuideInner Carton•Number of consumer packagings: 3•Inner carton (L x W x H): 16 x 10.1 x 16.4 cm •Gross weight: 0.847 kg•Nett weight: 0.423 kg•Tare weight: 0.424 kg•GTIN: 2 48 95229 11773 4Outer Carton•Number of consumer packagings: 24•Outer carton(L x W x H): 34.8 x 22.5 x 35.8 cm •Gross weight: 7.093 kg•Nett weight: 3.384 kg•Tare weight: 3.709 kg•GTIN: 1 48 95229 11773 7Product dimensions•Product dimensions (W x H x D):7.3 x 5.3 x 3.5 cm•Weight: 0.08 kgPackaging dimensions•Packaging type: Box•Number of products included: 1•Type of shelf placement: Hanging •Packaging dimensions (W x H x D):9.5 x 17.3 x 5 cm•Gross weight: 0.261 kg•Nett weight: 0.141 kg•Tare weight: 0.12 kg•EAN: 48 95229 11773 0UPC•UPC: 8 40063 20190 3。
飞利浥Fidelio M2BT 无线蓝牙耳机文档说明书

Philips Fidelio Wireless Bluetooth®headphonesHigh-resolution audio On-earDeluxe memory foam cushions NFCM2BTBK High-fidelity wireless enjoyment. Wherever you goAt home or on the go, high-definition sound and seamless Bluetooth® connectivity are all yours with the Fidelio M2BT. NFC technology ensures one-tap wireless pairing, plus intuitive controls let you switch easily between music and calls.Pristine sound – wirelessly•High-resolution audio reproduces music in its purest form•Optimised 40-mm neodymium drivers for pure authentic sound•Acoustically sealed to keep sound details in, noise out•Bass Reflex System delivers clear, dynamic and balanced bass•Bluetooth® 4.0 compatibility for superb audio transitionIntuitive and enjoyable ease of use•Ear-shell buttons for intuitive control of music and calls•1.2-metre audio cable for when your battery runs out•1-metre USB charging cable for recharging•Dual built-in mic cuts ambient noise for better call qualityMove in comfort•Deluxe memory foam cushions for an ergonomic fit•Headband crafted with rib-woven fibres for flexible strengthHighlightsHigh-resolution audioHigh-resolution audio offers the best in audio performance, reproducing original studio master recordings more faithfully than 16 bit/44.1 kHz CD formats. This uncompromising quality makes high-resolution audio the best sound companion for the music lover. Fidelio headphones meet the stringent standards required for the Hi-Res Audio stamp of quality. Whether you are enjoying your Hi-Rescollection or a more traditional music source, the smooth extended high frequencies of the Fidelio headphone range help you get more from your music.40 mm high-definition driversEach speaker driver is carefully hand-picked, tuned and tested before being paired to ensure the most balanced natural sound. The 40 mm drivers utilise high power neodymium magnets to deliver true high definition sound in a wide dynamic range, reproducing even the most minute details.Acoustic sealThe Fidelio headphone features an acoustic seal that's a specially designed ribbon lock built into the internal chamber, which eliminates any unnecessary sound leakage and preserves sound details. Not only do you get excellent bass extension, but also immersive enjoyment of every superb detail of your music, without environmental disturbances.Bass Reflex System (BRS)The headphone's acoustic closed-backarchitecture features a Bass Reflex System that essentially comprises ear shells withstrategically placed vents. These regulate the air pressure within the internal chamber, providing the diaphragm with a controlled environment for optimal acoustic response. Working in conjunction with the acoustic seal capture, they isolate every natural sound detail and deliver precise and dynamic bass, without any compromise on sound clarity.Bluetooth ® 4.0Advanced Bluetooth ® 4.0 technology makes for superb, high-definition musical enjoyment.Dual built-in microphonesThe M2BT Headphones are equipped with two microphones - one for voice and another that measures ambient noise and automatically adjusts sound for optimal call quality.Intuitive ear-shell controlsIntuitive buttons conveniently located on the ear shell make for easy switching between your music and calls. You can change tracks, play and pause your music, take and end calls and adjust the volume – and it's all at your fingertips.Memory foam ear padsThe materials used for the Fidelio M2BT have been carefully selected to ensure long-wearing comfort and enhanced sound performance. Memory foam ear pads with breathablematerials disperse pressure and heat build-up, so the Fidelio M1 headphones feel and sound exceptional.Issue date 2018-05-14 Version: 10.4.512 NC: 8670 001 16404 EAN: 06 92341 07317 29© 2018 Koninklijke Philips N.V.All Rights reserved.Specifications are subject to change without notice. Trademarks are the property of Koninklijke Philips N.V. or their respective owners.SpecificationsSound•Impedance:16Ohm•Sensitivity: 107 dB•Speaker diameter: 40 mm•Maximum power input: 40 mW •Distortion: < 0.1% THD•Acoustic system: Closed•Diaphragm: PET•Magnet type: Neodymium•Type:Dynamic•Frequency response 7-40000 Hz: when using the headphone cable suppliedConnectivity•Cable Connection: Oxygen free cable (1.1 m)•Audio Connections: 3.5 mm Line in •Bluetooth profiles: A2DP, AVRCP, HFP, HSP •Maximum range: Up to 15 mAccessories•Storage pouch•Audio cable: 1.2-m 3.5-mm Audio Cable •Quick start guide: Included•USB cable: Included for chargingPackaging dimensions•EAN: 69 23410 73172 9•Packaging dimensions (W x H x D):6.7 x 8.9 x 3.1 inch•Packaging dimensions (W x H x D):17 x 22.5 x 8 cm•Gross weight: 1.08 lb•Gross weight: 0.49 kg •Net weight: 0.631 lb•Net weight: 0.286 kg•Number of products included: 1•Packaging type: Carton•Tare weight: 0.449 lb•Tare weight: 0.204 kg•Type of shelf placement: BothPower•Battery Type:LI-Polymer•Music play time: 10 hrs•Standby time: 350 hrs•Talk time:10 hrsOuter Carton•Gross weight: 2.557 lb•Gross weight: 1.16 kg•GTIN: 1 69 23410 73172 6•Outer carton(L x W x H): 7.3 x 7.1 x 8.9 inch •Outer carton(L x W x H): 18.5 x 18 x 22.5 cm •Net weight: 1.261 lb•Net weight: 0.572 kg•Number of consumer packages: 2•Tare weight: 1.296 lb•Tare weight: 0.588 kgProduct dimensions•Product dimensions (W x H x D): 15 x 18 x 7 cm •Product dimensions (W x H x D):5.9 x 7.1 x 2.8 inch•Weight: 0.19 kg•Weight: 0.419 lb。
蓝牙耳机使用说明书
蓝牙耳机使用说明书一、开机。
在没有开机的情况下只需要一直按住开机键10秒左右当二级指示灯长亮或者红、蓝两色灯交替闪烁即为开机。
中途看到蓝牙指示灯一闪一闪不要松手。
当蓝牙跟配对设备连接之后指示灯才会变成一闪一闪的。
二、配对。
耳机正常开机后手机搜索蓝牙设备一般可以在5秒钟左右的时间可以搜索到耳机然后在手机上选择你找到的蓝牙耳机设备手机会提示你输入密码。
通用密码0000. 三、连接。
当手机搜索到耳机同时你也正确输入了密码后并不是说你的手机就可以用蓝牙耳机了有很多手机在找到蓝牙设备后还需要和耳机进行连接。
四、充电。
蓝牙耳机的充电时间一般都在2小时左右大多数蓝牙耳机充电时红灯亮充满后灯灭。
疑难问题解决1.手机无法搜索到蓝牙耳机解决方法①确认蓝牙是否开机是否指示灯常亮或红、蓝指示灯交替闪烁②如果蓝牙已开机仍无法搜到请重启蓝牙和手机。
2.蓝牙耳机和手机连接之后总是断线或是有杂音解决方法①蓝牙耳机电力不足需要尽快给蓝牙耳机充电②手机和蓝牙之间有阻隔或距离超出信号接收距离请不要用手捂住蓝牙为了保持信号的连续稳定性请尽量保持蓝牙和手机在同一方向。
3.蓝牙已连接但是不能听歌解决方法①单声道蓝牙耳机仅在配对诺基亚手机时可以用蓝牙听音乐如果你用的不是诺基亚的手机是不能用单声道蓝牙听音乐的②检查蓝牙设置声音路径转到免提装置③部分国产手机和山寨手机还需要进入播放器设置两个地方在播放器里把蓝牙功能开启并在下面一个耳麦的图标里选择刚连接的蓝牙设备点击确定即可。
④个别国产手机没有完整立体声蓝牙模块没有蓝牙听音乐功能。
可用蓝牙连接其他手机检测该蓝牙耳机是否可用。
4.如何用蓝牙耳机在电脑上听歌和语音聊天解答如果你的电脑自带蓝牙打开蓝牙功能搜索正开启的蓝牙就行不然就需要一个蓝牙适配器适配器的作用是连接蓝牙耳机和电脑通过一个蓝牙小软件BlueSoleil就可以实现与电脑连接。
XP系统可自动识别任何蓝牙适配器无需驱动程序但是XP自带的适配器软件只能传输文件不能传输音频。
罗德 K2 使用说明书
K2Instruction ManualIntroductionWe at RØDE would like to thank you and congratulate you on purchasing the K2.This valve microphone represents the fi nest studio microphone technology currently available.The K2 is a valve condenser design in the tradition of the classic studio microphones. The character of the K2 sound will become immediately obvious the fi rst time you record with it.While we have captured the subtlety of the legendary valve microphones, we have also made sure the noise specification and reliability is equal to current professional recording standards.Please take the time to visit and register your microphone for a full ten year warranty.While there you can view studio tips and techniques, as well as browse the comprehensive range of accessories for microphones.Peter FreedmanMicrophonesSydney, AustraliaSpecifi cations AcousticPrinciple:Pressure, Pressure gradientActive Electronics:Valve/tube impedance converter with bipolar output bufferDirectional Pattern:Multi Pattern (see graph)Frequency Range:20Hz ~ 20,000Hz (see graph)OutputImpedence:200ΩSensitivity:-36dB re 1V/Pa @ 1kHz(16mV/Pa @ 94dB SPL)±2dB @ 1kHzEquivalent Noise:10dBA SPL(per IEC651, IEC268-15)Maximum Output:>+30dBu(@ 1kHz, 1% THD into 1kΩ)Dynamic Range:150dB (per IEC651) Maximum SPL:162dB(@ 1kHz, 1% THD into 1kΩ) Signal/Noise:>81dB SPL(@ 1kHz, rel 1Pa per IEC651)Power Requirement:Dedicated power supply (100-120V / 200-240V AC 50/60Hz)Net Weight: 815g Dimensions:208 x 55 x 55mmSpecifi cationsFrequency ResponseCardioidOmniFigure 8Features• Large capsule (1”) with gold-plated diaphragm • Class “A” valve circuitry• Hand selected and graded 6922 twin-triode valve • Dedicated power supply • Ultra low noise• Wide dynamic range• Continuously variable polar patterns controlled at the power supply.•High level of RF rejection • Designed & manufactured in Australia • Full 10 year guarantee*Accessories*Online product registration required.• Powersupply• K2 cable • Power cable • Stand mount (SM2)• E nsure that your K2 has been set to the correct voltage, as used in your country. The K2 can beused with mains supply voltages of between either 110-120V 50/60Hz or 220-240V 50/60Hz.- To select for 110-120V use, set the voltage selector to 115V.- To select for 220-240V use, set the voltageselector to 230V.• On either voltage selection the mains fuse (inside the mains socket) is always to be a T500mA slowblow fuse.• The back panel of the K2 power supply has amicrophone output socket, a ground (earth) lift, amicrophone input socket, a voltage selector, and a mains power socket which also incorporates a fuse.• The front panel of the K2 power supply has the mains power on/off switch, the Polar Pattern dialand a blue LED to indicate power status.Before using the K2outputMains socket & fusePower LED• Having ensured that the power supply is set to the correct voltage you can begin to connect the K2 to the power supply. Do not connect the power to the mains before connecting the microphone.• Connect the male 7-pin plug of the K2 cable to the 7-pin input socket on the rear of the power supply.• Connect the female 7-pin plug of the K2 cable to the microphone. Ensure that both plugs are correctly aligned and pushed fi rmly into their respective sockets.• Now connect an XLR microphone cable to the output socket on the rear of the power supply, taking that output to your mixer/pre-amplifier.• We suggest the use of a high quality cable,preferably with gold plated contacts. Use as short a cable as possible, as long cables can adversely affect sound quality.• Ensure that the K2 is fi xed securely using thesupplied SM2 shock mount to a stable microphonestand. The K2 condenser microphone is a precision instrument and should be treated with care.• Now you can connect the power supply to the mains supply and begin using the K2 microphone.It is recommended to allow a minute or two to allow the microphone to stabilise.Connecting the K2• Your K2 can be adjusted to any Polar Pattern from omni, through cardioid to fi gure of eight. Thisfl exibility allows recording of most instruments and/or voices with absolute control.• Select the preferred Polar Pattern. This is donewith the circular dial (knob) on the front of the K2 Power Supply. (The most commonly used pattern for vocal recording is Cardioid – at the 12 o’clock position).• When the cardioid position is selected, themicrophone picks up sound from in front of themicrophone, and rejects sound from the rear.Setting the Polar Pattern Figure 8CardioidOmni• When in the omni position (fully anti-clockwise), themicrophone picks up sound from all around the microphone and there is less proximity effect than in cardioid mode. (Proximity Effect is an increase in lower (bass) frequencies when the sound source is ‘close’ to the microphone).The omni pattern is commonly used for room (ambient) micing or to record a more natural sound when close mi’ing instruments.• When in the Figure 8 position (fully clockwise),the microphone picks up sound from in front and behind, and rejects sound from the other twosides. This pattern is commonly used for interviews (2 people with the microphone between them) or in conjunction with a cardioid microphone to use the MS (mid-side) stereo recording technique.Setting the Polar Pattern• You are able to select any position between these three main settings.For example, if you choose a setting about halfway between the omni and cardioid positions, you will notice ‘some’ sound being picked up from therear of the microphone, instead of being almostcompletely rejected (in cardioid). This can beparticularly useful when you do in fact wish for‘some’ sound from the rear, but not so much aswhen in omni mode.• Experiment with the K2. Listen to the various patterns, and decide what suits your currentapplication best.Setting the Polar PatternUsing the K2•The gold dot on the face of the K2 indicates the front of the microphone, and the pick-up area ofthe cardioid pattern. Please be sure to have theside with the dot facing the sound source you wish to record.• Microphone technique, or how to get the sound you want, requires experimentation.We suggest that you start with the channel EQset to ‘OFF’ or ‘FLAT’ (no boost or cut). Try to getthe sound you want by placing either refl ective or absorbent panels at various angles adjacent to the source being recorded.•Changing the acoustic properties of the space around the microphone is our recommended initial approach for obtaining best sound quality.Remember you cannot change a room’s acousticproperties with EQ.When the preferred sound has been achieved(as above) then EQ and effects such as reverbor indeed any signal processing can be used forenhancement, but should be used sparingly.•It is worth mentioning that sometimes ‘cutting’ a particular frequency (sound) may be preferableto ‘boosting’ another. Of course ‘boosting’ canincrease noise level and so should be doneminimally.As with many other aspects of the recordingprocess, fi nding the preferred ‘sound’ is a matter of experimentation.• We strongly recommend the use of a pop shield or fi lter for all vocal recording. These aid in minimising plosive sounds (hard ‘P’, ‘B’, ‘T’ and ‘K’ sounds)that produce a sudden jet of air which can causethe capsule to overload and produce a ‘popping’ sound.• Any moisture on the microphone capsule can cause problems for condenser microphones,however the use of a pop shield or wind shield(optional accessory WS2) will reduce the risk of this occurring.• Placement of the microphone and pop shield relative to the vocalist may be varied on severalfactors including room acoustics, the vocalperformance, and whether the vocalist has a highor deep voice.Using the K2• An ideal reference is to begin with the pop shield directly in front of the vocalist, and approximately 15cm (6”) away from the microphone. This will assist in keeping the performer at a constant minimum distance from the microphone and helps to maintain reasonable recording levels.• Experimentation should be made with the angle from which the microphone is addressed, asdifferent results can be achieved when the vocalist is ‘off-axis’ to the microphone (and the gold dot).• If an earth loop is present (a mains frequency hum) there is a ground lift switch on the rear panel of the power supply, which should be raised to the ‘lift’ position. This earth loop can appear when two devices which are both earthed are connecteding the K2Ground lift• After use the K2 should be removed from its mount, wiped with a dry, soft cloth and placed in its protective case.• Be sure to place the moisture-absorbent crystals (supplied) at the head of the microphone, so as to absorb any moisture present.Eventually this pack of crystals will need to bedried. This is indicated by the crystals turning pink in colour.They can easily be re-used by placing them in anoven at 100 - 150 degrees celsius for approximately ten minutes. The crystals will operate effectivelyagain once they have turned blue.StorageWarrantyAll microphones are warranted for one year from date of purchase. You can extend that to a full ten years if you register online at .The warranty covers parts and labour that may be required to repair the microphone during the warranty period. The warranty excludes defects caused by normal wear and tear, modifi cation, shipping damage, or failure to use the microphone as per the instruction guide.If you experience any problem, or have any questions regarding your microphone, fi rst contact the dealer who sold it to you. If the microphone requires a factory authorised service, return will be organised by that dealer.We have an extensive distributor/dealer network, but if you have diffi culty getting the advice or assistanceyou require, do not hesitate to contact us directly.MicrophonesInternational107 Carnarvon StreetSilverwater NSW 2128 AustraliaPh: +61 2 9648 5855Fax: +61 2 9648 2455USAP.O. Box 4189Santa Barbara, CA 93140-4189Ph: 805 566 7777Fax: 805 566 0071Technical SupportFor information and technical support questions contact:*******************In the Unites States and Puerto Rico, contact**************************************InAustralia,**********************************(02)96485855 Anywhere except Australia, the United States and Puerto Rico,********************************+61296485855。
CREATIVE Tactic 3D 耳机 说明书
感谢您购买 Sound Blaster® Tactic3D Alpha 与Sound Blaster® Tactic3D Sigma 游戏耳麦,这两款产品将带给您游戏音频新感受!由 Creative Labs 与 THX 备受赞誉的音响工程师团队设计的 Sound Blaster Tactic3D Alpha 和 Sound Blaster Tactic3D Sigma 均配备 THX® TruStudio Pro™ 技术,并经过专业校声,完全能够满足今后 3D 游戏系统的发展要求。
系统需求最低系统需求•600 MB 可用硬盘空间•空闲 USB 1.1 或 2.0 端口•Internet 连接,以便下载此产品的驱动程序和应用程序对于 Windows•Microsoft® Windows® 7 32-bit 或 64-bit、Windows Vista® 32-bit 或 64-bit Service Pack 1 或更高版本、Windows XP Professional x64 Edition 或Windows XP Service Pack 2 或更高版本•Intel® Pentium® 4 或同等速度的 AMD®处理器,1.6 GHz 或更快•Intel、AMD 或 100% 兼容的主板芯片组•512 MB RAM对于 Mac•Mac OS® X 第 10.5 版或更高版本•Intel Core™ Duo 处理器,1.6 GHz 或更快• 1 GB RAM推荐系统需求对于 Windows•Intel Core 2 Duo 或同等速度的 AMD 处理器,2.0 GHz 或更快• 1 GB RAM对于 Mac•Intel Core Duo处理器 1.8 GHz 或更快• 2 GB RAM注意为软件推荐的系统需求可能因程序的改变而发生变更。
蒂尔斯3000系列真无线耳机TAT3255BL用户手册说明书
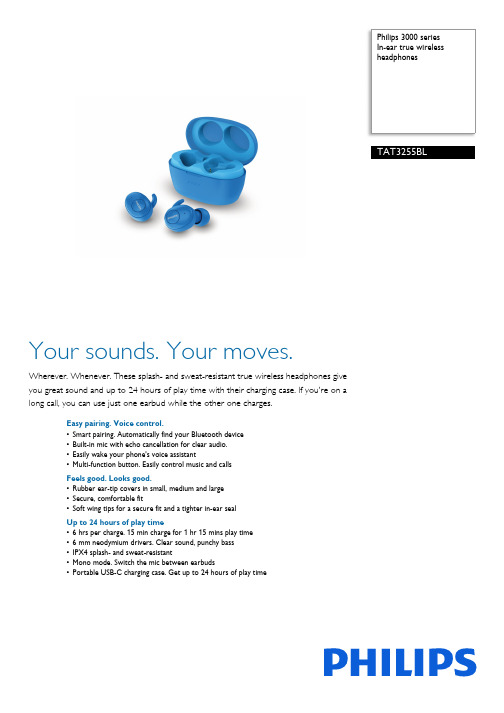
Philips 3000 seriesIn-ear true wirelessheadphonesYour sounds. Your moves.Wherever. Whenever. These splash- and sweat-resistant true wireless headphones giveyou great sound and up to 24 hours of play time with their charging case. If you're on along call, you can use just one earbud while the other one charges.Easy pairing. Voice control.•Smart pairing. Automatically find your Bluetooth device•Built-in mic with echo cancellation for clear audio.•Easily wake your phone's voice assistant•Multi-function button. Easily control music and callsFeels good. Looks good.•Rubber ear-tip covers in small, medium and large•Secure, comfortable fit•Soft wing tips for a secure fit and a tighter in-ear sealUp to 24 hours of play time•6 hrs per charge. 15 min charge for 1 hr 15 mins play time•6 mm neodymium drivers. Clear sound, punchy bass•IPX4 splash- and sweat-resistant•Mono mode. Switch the mic between earbuds•Portable USB-C charging case. Get up to 24 hours of play timeIssue date 2020-05-11Version: 2.1.112 NC: 8670 001 68748EAN: 48 95229 11078 6© 2020 Koninklijke Philips N.V.All Rights reserved.Specifications are subject to change without notice. Trademarks are the property of Koninklijke Philips N.V. or their respective SpecificationsIn-ear true wireless headphonesHighlightsIPX4With an IPX4 rating, these true wireless headphones are resistant to splashing from any direction. They won't mind a little sweat, and you don't need to worry about getting caught out in the rain.Portable USB-C charging case.Hit the road with multiple charges in your pocket. You get up to 6 hours of play time on a single charge, plus 18 extra hours from a fully charged case. A short 15 minute charge in the case gives you 1 hour and 15 minutes of play time. A full charge of the case takes 1.5 hours via USB-C.Mono modeNeed to take a call when your headphones are running low on power? Get more talk time by using one earbud while the other one charges. The mic is automatically assigned to the earbud you're using, and you can simply swap over when needed.Secure, comfortable fitYou get great sound from the 6 mm neodymium drivers and you can rock your tunes in real comfort thanks to the snug, lightweight design. Soft, interchangeable ear-tip covers help you find a comfortable in-ear fit.voice assistantWake your phone's voice assistant without touching your phone. Ask Siri or the Google Assistant to play some music, call or send messages to friends, check the weather and more.Smart Bluetooth pairing.These earphones are ready to pair the instant you take them out of their charging case. Once they're paired, the earphones remember the last device they were paired with.Sound•Acoustic system: Closed •Magnet type: NdFeB•Frequency response: 20 - 20,000 Hz •Diaphragm: PETConnectivity•Bluetooth profiles: A2DP, AVRCP, Hands-free, HFP, HSP•Bluetooth version: 5.1•Maximum range: Up to 10 mConvenience•Call Management: Call on Hold, Switch between 2 calls, Answer/End Call, Microphone mute, Reject CallAccessories•Quick start guide •USB cablePower•Battery type: Lithium-ionDesign•Colour:BlueProduct dimensions•Product dimensions (W x H x D): 3.6 x 4.2 x 6.5 cm •Weight: 0.049 kgPackaging dimensions•Packaging dimensions (W x H x D): 9.5 x 17 x 4 cm•Gross weight: 0.139 kg •Net weight: 0.049 kg •Tare weight: 0.09 kg •EAN: 48 95229 11078 6Outer Carton•Number of consumer packages: 24•Outer carton (L x W x H): 37.5 x 27.5 x 24.5 cm •Gross weight: 4.231 kg •Net weight: 1.176 kg •Tare weight: 3.055 kg•GTIN: 1 48 95229 11078 3Inner Carton •Number of consumer packages: 3•Inner carton (L x W x H): 17.8 x 12.8 x 10.4 cm •Gross weight: 0.507 kg •Net weight: 0.147 kg •Tare weight: 0.36 kg•GTIN: 2 48 95229 11078 0。
TicPods2Pro与TicWatchPro4G使用Tips
TicPods2Pro与TicWatchPro4G使用Tips
看了新品#耳边的AI助理#发布会,有没有对新品TicPods2很是心动?
想要体验耳机和手表联动的炫酷功能?那可要提前做好功课,了解基本使用方法哦~
马上跟着表妹三步走,即刻开启命令词唤醒,小问秘书,快捷口令,头部控制等便捷智能体验。
非常重要:在连接耳机和手表之前,一定要按照如下操作进行升级
① 需要保证您手里的TicWatch Pro 4G已经升级到最新版本PWDD.190617.029
② 需要保证TicWatch Pro 4G手表里面的app已经为当前最新版本(耳机和手表连接以后,只有最新版的app才支持使用命令词唤醒,小问秘书,语音快词运动健康和音乐场景的语音操控等功能哦)
③ 快速连接您的TicPods 2 Pro与TicWatch Pro 4G手表
表妹特意为大家准备了图解说明,请看下面~
聪明的表妹还为大家准备了手表中各个升级app都更新了哪些内容,来来来,我们一起往下看
最后,快来给表妹点个赞吧。
Line6POD2.0的中文说明书解读

Line6 2.0的中文说明书Line 6 POD 2.0 控制与连接中文简易说明1 开关- 在POD 2.0右侧。
按下它可以开启你的POD2.0。
2 输入- 在POD 2.0右下侧。
把你的吉他连接在这里。
3 耳机接口- 在POD 2.0的左下侧。
连接你的耳机以做静音练习。
音量由OUTPUT控制。
其耳机放大器可供所有型号的耳机使用。
4 输出- 在POD 2.0面板的最左边(OUTPUT)。
控制主输出音量。
当储存音色时,这一值是不被记录的。
改变主音量并不改变音色。
《注:在主输出音量开到最大时,POD 2.0会给您最佳的信噪比。
相反,当主音量开得较小时,会出现嘶噪。
所以当您录音时,尽量将您的OUTPUT开到最大。
请确定您所连接的设备的输入口属于“线输入”(LINE LEVEL), 而不是麦克风/吉他输入。
线输入可以允许POD 2.0的总输出开到最大(或接近最大)从而得到最佳的音色。
如果您的设备的输入类型为麦克风或吉他,请把输入放到较低,把POD 2.0的输出放到较大。
》5 左右输出- 在POD 2.0的左上侧。
在左右输出的中间有DIRECT/AMP字样,输出时将你的调音台/录音设备连接到左输出(DIRECT),吉他音箱/监听音箱连接到右输出(AMP)6 A.I.R Mode拨档- 在POD 2.0的左右输出中间,A. I. R.定向录音输出属Line6独有,专门为直路录音设计,将A.I.R Mode拨档调到左输出(DIRECT)一边即可。
7 踏板接口- 在POD 2.0上方,可与LINE6 Floor Board/FB连接。
POD 2.0不支持LINE6 FBV4.8 MIDI输入与输出- 在POD 2.0右上方。
通过MIDI线与MIDI设备间接9 Drive- 其控制您所选择的放大器(Amp)的Drive。
就像吉他放大器上的输入音量,调得越高,音色越脏。
10 音色控制- 低音(BASS),中音(MIDDLE),高音(TREBLE),真实度(Presence)。
- 1、下载文档前请自行甄别文档内容的完整性,平台不提供额外的编辑、内容补充、找答案等附加服务。
- 2、"仅部分预览"的文档,不可在线预览部分如存在完整性等问题,可反馈申请退款(可完整预览的文档不适用该条件!)。
- 3、如文档侵犯您的权益,请联系客服反馈,我们会尽快为您处理(人工客服工作时间:9:00-18:30)。
ticpods2中文说明书
2019年10月22日,出门问问公司在北京召开发布会,
发布了他们的新一代真无线蓝牙耳机——TicPods2系列。
我受邀参加此次发布会,也在会后借到了一个他们的旗舰,TicPods2 pro来体验一番,让我们一起来看看这款真无线的日
常体验究竟如何吧。
先来看看外观。
打开包装,TicPods2给我带来的第一感受就是小,整个机身较为狭长,拿在手上十分小巧,携带也十分方便。
上盖加入了条形纹理,在视觉上增加层次感外,也增加了握持时候的摩擦力。
和airpod一类的摆放方式不同,TicPods2采用了平放的方式来收纳,触点位于耳机侧面,在初次开封时要注意撕掉保护膜。
单看耳机,TicPods2的耳机整体只有一个颜色,一体感还是比较强的,同时,耳机柄比较细,和耳机单元之间的过渡也十分自然,看起来小巧而精致。
值得注意的是,耳机柄的外壳由内侧亮面塑料和外侧的磨砂塑料拼接而成,使得整体设计不会太过于单调。
我手中的是深蓝色,整体看起来十分低调,戴在耳朵上不会显得突兀,比较自然。
外观上看,TicPods2设计简约,整体没有太多花哨的元素,在各种场合下都能够比较低调地融入环境,适合绝大多数人群。
当然,也有两个小的槽点,一个是充电盒的槽两边没什么区分度,耳机的左右两边又及其相似,在放入充电盒的时候容易放错边,而且放错边了你还感受不到什么异样,只有盖子盖不上的时候你才会发觉。
你能看出这放反了吗
还有一个是整体的材料比较容易沾染指纹和油污,上盖的质感和开合感也有改进空间。
一般人也不会在意这个
再来说说连接,TicPods2 pro采用了的旗舰级真无线蓝牙
芯片qcc5121,在经过数代产品的改进后,安卓这边的真无线
蓝牙技术也进入了比较成熟的阶段,此次的旗舰级芯片加持,体验更不在话下。
连接稳定性是没有什么问题的,延迟虽然还是有,但是确实明显小于我手上的所有真无线蓝牙耳机。
稍微有点遗憾的是传输协议,虽然支持蓝牙5.0,但是传
输协议只有aac和aptx,虽然好于普通的sbc协议,但是比起
LDAC,LHDC等接近无损的蓝牙协议,传输音质上还是稍逊
一筹。
值得注意的是这款qcc5121芯片绝对是能够支持这些协议的,甚至还有的,延迟极低的TWS plus,可以说潜力无限。
TicPods2 pro在软件上支持ota在线升级,硬件上也有支持的
条件,所以日后也有通过软件更新来达成协议的支持的可能。
顺便提一嘴续航,一般蓝牙耳机在使用过程中续航波动不大,所以官方标称续航一般是靠谱的,TicPods2 pro的标称续
航达到4个小时,算是正常水准,但厉害的是配合充盒,竟然可以额外增加20个小时的续航,达到了24个小时,这基本是我目前见到的蓝牙耳机的顶尖水平了,比一般的真要高出不少。
打开出门问问软件,来说说这次TicPods2上另一个亮点,智能交互。
TicPods2 pro集成了多种智能交互,这些交互我一
个个用下来,可以说体验都不错。
第一个就是语音命令。
和不久前发布的小米真无线air2
一样,TicPods2可以直接用语音执行控制命令,在播放音乐或者来电时,你只要一句话,就可以执行诸如切歌,接听等动作,免去了以外手动点击或者掏手机的麻烦,可以说非常方便。
更令人眼前一亮的是,有一个功能叫小问秘书,顾名思义,就是人工智能生成的虚拟秘书,主要可以帮你记录一些备忘事项,比如几点开会,车停哪里等等。
可以说有了这个功能之后,你在工作中突然想起什么时可以快速记录,不需要掏手机,随
口就记,可以说提高了效率也不会过度分散注意力。
不过目前小问秘书需要手机挂着出门问问app,可能会增加些许耗电。
除了语音外,另一个比较新鲜的操作使点头接听,摇头挂断。
我实际体验了一下,动作识别比较准确,就是会有些许的延迟,熟练之后只需一个动作,稍等一下手机便会接听,挂断。
这个也是非常方便的,方便程度甚至更胜于语音。
最后一个就是触控,除了双击和长按,滑动耳机柄还可以调节音量大小,不过就目前体验,滑动调节音量的分级不够细致,不像你划多少增大多少,而更像是划一下增加一档,个人认为体验有待改善。
补充一点,目前需要在app借助下才能完成的动作有查看耳机盒电量,小问秘书和小问助手,还有开关aptx传输和ota,其余的动作都可以脱离app独立使用,可以说如果你不喜欢安装额外的app,TicPods2 pro也可以较好地独立使用。
总体而言,这款TicPods2 pro采用了的旗舰蓝牙芯片,因
而在连接速度,连接稳定性和延迟方面的表现都非常不错,同时拥有亮眼的长续航,和较为智能和方便的互动功能和语音助手。
综合上述优点,考虑到其高端的定位,对这些方面有所需求的用户,799元的价格还是比较合适的,毕竟qcc5121的耳
机现在就没几个,而且价格大部分都超过千元,而TicPods2 pro首发还有100元优惠。