实战Drupal7-模块安装教程
Drupal安装
Drupal安装一、下载drupal你可以从/project/drupal下载最新版本的drupal。
Drupal已经被翻译成很多种语言。
可以到/project/translations 查看是否有需要的语言包。
Drupal的文件和模块是以“.tar.gz”格式压缩的,且大多数的解压缩软件都能对其进行解压缩。
Linux用户下载和解压缩如果你想使用传统的命令行来下载版本为x.x的drupal,请使用如下的命令(用你想要的版本号替换以下命令中的x.x,如5.7,6.13,7.2等):wget /files/projects/drupal-x.x.tar.gztar -zxvpf drupal-x.x.tar.gz这将创建一个包含所有drupal文件和目录的新目录drupal-x.x/,并且将保持drupal文件和目录的访问权限。
把这个目录移动到你网页服务器的文档根目录或者你的公共HTML目录。
mv drupal-x.x/* drupal-x.x/.htaccess /var/www/html主URL(网站主域名)是在你网页服务器的设置文件中进行设置的。
在进行下一步安装前,你需要知道这个URL。
如果你是在本机安装drupal,那么主URL应该是http://localhost。
如果你是在一个网页服务器上安装drupal,那么主URL应该是一个指定的域名(比如)。
苹果系统用户苹果用户在安装过程中可能还需要阅览以下的手册页:/node/22676特别是当你不知道上面提到的“网页服务器的文档根目录或你的公共HTML目录”在本机的什么位置时。
Windows用户一些像7-zip这样的程序可以用来解压.tar.gz文件。
要使用7-zip,在.tar.gz文件上点击右键,然后在弹出的菜单中选择7-zip->解压到这里。
将出现一个.tar文件。
在.tar文件上点击右键,再次选择7-zip->解压到这里。
稍等一会,最终的drupal文件夹就出现了。
Drupal精华教程集2
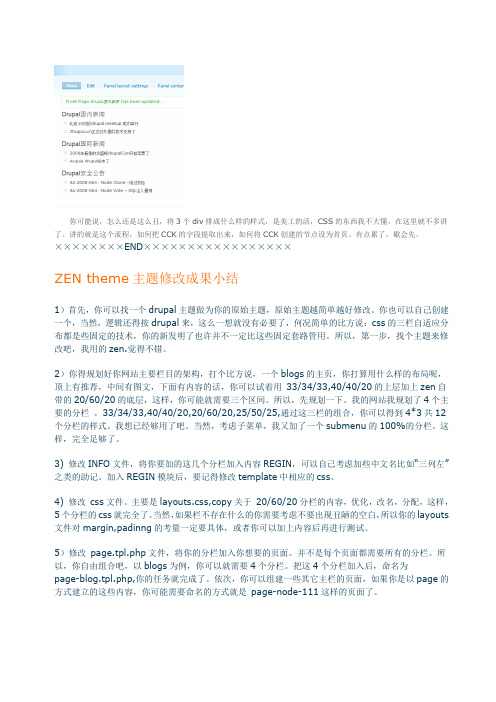
你可能说,怎么还是这么丑,将3个div排成什么样的样式,是美工的活,CSS的东西我不大懂,在这里就不多讲了。
讲的就是这个流程,如何把CCK的字段提取出来,如何将CCK创建的节点设为首页。
有点累了,歇会先。
××××××××END×××××××××××××××××ZEN theme主题修改成果小结1)首先,你可以找一个drupal主题做为你的原始主题,原始主题越简单越好修改。
你也可以自己创建一个,当然,逻辑还得按drupal来,这么一想就没有必要了,何况简单的比方说:css的三栏自适应分布都是些固定的技术,你的新发明了也许并不一定比这些固定套路管用。
所以,第一步,找个主题来修改吧,我用的zen.觉得不错。
2)你得规划好你网站主要栏目的架构,打个比方说,一个blogs的主页,你打算用什么样的布局呢,顶上有推荐,中间有图文,下面有内容的话,你可以试着用33/34/33,40/40/20的上层加上zen自带的20/60/20的底层,这样,你可能就需要三个区间。
所以,先规划一下。
我的网站我规划了4个主要的分栏。
33/34/33,40/40/20,20/60/20,25/50/25,通过这三栏的组合,你可以得到4*3共12个分栏的样式。
我想已经够用了吧。
当然,考虑子菜单,我又加了一个submenu的100%的分栏。
这样,完全足够了。
3) 修改INFO文件,将你要加的这几个分栏加入内容REGIN,可以自己考虑加些中文名比如―三列左‖之类的助记。
加入REGIN模块后,要记得修改template中相应的css。
4) 修改css文件。
主要是layouts.css,copy关于20/60/20分栏的内容,优化,改名,分配,这样,5个分栏的css就完全了。
Drupal安装配置过程(含常见报错化解方法)
首先,用VMware workstation 安装Ubuntu 12.04操作系统在终端之下sudo apt-get install apapche2 安装阿帕奇服务器在浏览器中,键入地址:127.0.0.1 如果出现it works 表示阿帕奇服务器安装成功在终端之下,sudo apt-get install drupal7 安装drupal7允许 dbconfig-common 配置你的数据库 (默认数据库: MySQL)然后,向apache注册drupal模块:sudo cp /etc/drupal/7/apache2.conf /etc/apache2/mods-enabled/drupal.conf最后,重启apache服务器:sudo service apache2 restart———————————————————————————————————————在此时,在浏览器地址栏中,键入127.0.0.1/drupal7/install.php 显示正常会出现drupal的安装界面但是此时还不行还得进行下一步的配置———————————————————————————————————————为Drupal手工配置mysql数据库你需要为drupal创建一个数据库用来导入drupal的数据库表,可以通过phpmyadmin或者命令行创建该数据库mysqladmin -u root -p create drupal为drupal创建一个名为drupal的数据库,当然,你可以自定义该数据库名mysql -u root -pmysql> GRANT SELECT, INSERT, UPDA TE, DELETE, CREATE, DROP, INDEX, ALTER, CR EATE TEMPORARY TABLES, LOCK TABLES ON drupal.* TO 'drupaluser'@'localhost' IDEN TIFIED BY 'drupalpass';你肯定不想drupal使用root账号连接数据库,上面命令创建了一个拥有一定权限的不同于mysql root的数据库用户:drupaluser ,drupalpass ,你可以使用其他用户名和密码来替换drupaluser和drupalpass,如果命令成功激活新的权限:mysql> FLUSH PRIVILEGES;退出mysql命令:mysql> \q———————————————————————————————————————此时127.0.0.1/drupal7/install.php 依然正常——————————————————————————————————————————————————————————————————————————————下面开始出现了问题:为drupal配置 PostgreSQL 数据库编辑 /var/www/drupal/sites/default/settings.php 文件,指定drupal使用的用户名,密码和数据库sudo gedit /var/www/drupal/sites/default/settings.php* Database URL format:$db_url = 'pgsql://username:password@localhost/databasename';where username = drupaluser password = drupaluserpass databasename = drupaldb照着网上的教程进行完这一步操作之后,并且成功restart Apache之后,在地址栏键入127.0.0.1/drupal7/install.php 屏幕上一片空白暂时原因不详,待解决于是只好重新gedit setting.php文件,把之前敲进去的三行删除。
2.实战Drupal 7安装配置图文教程
一.实战Drupal 7安装图文教程Drupal7成功安装的6大步骤:1.打开官方网站https:/// 下载安装包2.打开官方网站https:/// 查看安装文档3.新drupal7 mysql数据库并安装drupal74.安装drupal7的中文汉化包5.Drupal7安装过程中报错的三种解决办法6.进入网站设置画面,并成功安装完drupal71.打开官方网站https:/// 下载安装包进入下载页面进行下载:2.打开官方网站https:/// 查看安装文档3.安装drupal7(1)先将drupal7解压到环境的根下。
F:\DrMeng_Web_Site\将解压drupal-7.27目录中的内容复制到根目录下(2)用phpmyadmin建立一个drupal7的数据库。
/phpmyadmin/输入用户名:root密码:hncctv创建一个测试数据库:drupal727(3)在ie中访问/ 就直接安装drupal74.安装drupal7的中文汉化包首先:安装drupal7的中文汉化包点击Translations Homepage进入下载汉化包页面:下载汉化包后将它放到这个目录:F:\DrMeng_Web_Site\\profiles\standard\translations\drupal-7.27.zh-hans.po如下图汉化包放好后。
返回drupal7安装界面,点如下链接进入开始安装进度画面5.Drupal7安装过程中报错的三种解决办法drupal初始化错误解决-An AJAX HTTP error occurred. HTTP Result Code: 500drupal7 初始化翻译时出错:导入翻译出错请到错误页面An AJAX HTTP error occurred. HTTP Result Code: 500 Debugging information follows. Path: http://127.0.0.5/drupal/install.php?profile=standard&locale=zh-hans&i d=2&op=do StatusText: Internal Server Error ResponseText:这里如果有报错。
drupal建站教程---全过程
drupal建站教程(全过程)介绍Drupal :建立一个简单的CMS (1)∙安装设置∙Drupal6.x由ctz556 于星期一, 2009-01-05 21:37 发表最近Drupal越来越流行,它是一个伟大的平台,可用于建立内容管理系统和社区驱动的网站。
在这里,我简单的介绍一下Drupal,并为一个虚拟的客户建立一个简单的网站。
我将首先概述客户的需求,安装和配置一些模块,创建用户角色和分配权限,最后我们将新增一些内容。
我们不会修改主题,因为它有点超出了本文的范围。
作者:Steve JamessonSteve Jamesson是一位居住在Asheville, North Carolina州的WEB设计师,他专注于前端开发、内容管理系统(CMS)和大图片创作。
没有编程时他通常会调制一些不错的啤酒,虽然这两个经常同时进行。
虚拟客户让我们先虚拟一个客户SmartMarks是一个很小的市场营销咨询公司,4名员工。
每一位员工想拥有一个自己的博客。
该网站除了博客还需要几个页面:∙Home(首页)∙About(关于)∙Contact(联络)∙Links(链接)∙Blogs(博客)Shannon,企业老板,要完全控制网站。
其余的员工(Bill, Jean, 和Terry)应只允许写博客,但是Bill允许发布Links(链接)。
联络方式是按用户的姓名,电话,电子邮件和短信息。
提交的联络信息只发送给Shannon。
听起来很简单,是吧?我们将利用Drupal,一些核心功能已经内置。
我们可以使用很多核心功能,当然我们需要添加一些其他模块来建立这个网站。
安装某些东西首先,开始安装Drupal,我将在本地计算机进行开发,当然您可以安装在任何您想要的地方。
本教程将使用Drupal 6.x。
安装Drupal,先下载()解压并创建数据库,并访问http://localhost/ (或您自己的开发网址)。
安装过程非常简单。
您需要创建配置文件,可以复制/webroot/sites/default/default.settings.php 到/webroot/sites/default/settings.php,并在您的服务器上设置为可写。
Drupal7中的ViewsSlide制作幻灯片教程
Drupal 7: Views Slideshow TutorialDrupal 7 :Views Slideshow 模块教程What 目的Use the Views Slideshow module to create a slideshow of 900×200 images.用这模块做个900乘200的幻灯片Installation 安装Modules 模块Chaos tool suite (ctools)ViewsLibrariesViews Slideshow get Drupal 7 version even if still in alphajQuery Cycledownload jquery.cycle.all.jsrename it jquery.cycle.all.min.js and move it to /sites/all/libraries/jquery.cycle (add needed folders)Create content type创建内容类型name it “Slide”add image field “Slide Image”Create image style常见图片样式/#overlay=admin/config/media/image-styles/addname it “slide”add “Resize” effect of 900×200Create view创建View/#overlay=admin/structure/views/addselect type Slideuncheck Create a pagecheck Create a blockselect Display format Slideshow of fieldsContinue and edit buttonConfigure view配置ViewAdd image fieldadd field Content: Slide Imageuncheck Create a labelImage style: slide (it's the image type we created previously) Configure slideshowunder FORMAT, next to Format: Slideshow, click on Settings configure as you wishShow slideshow block 设置区块/#overlay=admin/structure/blockfind it under Disabled and assign it to a regionNotesthe “image style”will create resized images in /sites/default/files/styles/slide/public. It's especially useful if we use images from an existing content type because the original images won't be touched.Reference 引用/how-to-install-views-slideshow-module-o n-drupal7。
wamp+drupal完全安装指南
wamp+drupal完全安装指南鉴于安装wamp以及drupal遇到的问题,这里来个总结首先是安装wamp,确保系统中的原有的php以及mysql已经被完全卸除,否则会出现类似mysql无法链接或是查看php文档等错误。
例如:无法载入 mysqli 扩展,请检查 PHP 配置以及The SQLite extension can't be loaded.这个问题我也是把所有已经安装的php删除后就解决了其次,首先安装wamp,很sb的确认加确认。
安装完后遇到的root用户名的密码更改后无法登陆phpmyadmin的问题,如“您应该检查config.inc.php中的主机、用户名和密码,并且确定这些信息与 MySQL 服务器的管理员所给出的信息一致”,自然,解决方法如下,但不是都必要的,我没有一一试过。
首先在\wamp\phpmyadmin下将config.inc.php按如下修改:$cfg['Servers'][$i]['host'] = 'localhost';$cfg['Servers'][$i]['port'] = '3306';$cfg['Servers'][$i]['user'] = 'root';$cfg['Servers'][$i]['password'] = '这里填写你的MySQL密码';$cfg['Servers'][$i]['AllowNoPassword'] = true;//没有这句就加上去吧$cfg['Servers'][$i]['auth_type'] = 'http';//这句加上(将原来的config 改为http),则启动时有个登陆界面。
Drupal7开发教程之模块Multiselect使用

Drupal二次开发的时候,我们经常要使用到多选列表,但是官方默认的多选下拉列表,如下图:视觉效果不堪入目,经过努力,找到了一款相貌不错的module。
下面请看使用方法:第一:去官网下载(https:///project/multiselect)模块,安装。
第二:安装完毕,接下来就要使用到Form API开发中去1.<font face="微软雅黑">/**2.* hook_menu().3.* @author masx4.*/5.function front_menu(){ $items['formexample'] = array(6.'title' => 'View the sample form',7.'page callback' => 'drupal_get_form',8.'page arguments' => array('front_nameform'),9.'access callback' => TRUE,10.'type' => MENU_NORMAL_ITEM11. );12. return $items;13.}15.* Define a form. 构造表单16.*/17.function front_nameform() {18.$form['user_name'] = array(19. '#title' => t('Your Name'),20. '#type' => 'textfield',21. '#description' => t('Please enter your name.'),22.);23. $form['selected'] = array(24. '#type' => 'select',25. '#title' => t('Selected'),26. '#multiple' => 3,27. '#options' => array(28. 0 => t('驴儿'),29. 1 => t('牛儿'),30. 2 => t('狗儿'),31. 3 => t('猫儿'),32. 4 => t('驴儿'),33. 5 => t('牛儿'),34. ),35. '#description' => t('Set this to <em>Yes</em> if you would likethis category to be selected by default.'),36. );37.$form['submit'] = array(38. '#type' => 'submit',39. '#value' => t('Submit')40.);41.return $form;42.}43./**44.* Handle post-validation form submission.处理表单46.function front_nameform_submit($form, &$form_state) {47. $name = $form_state['values']['user_name'];48. drupal_set_message(t('Thanks for filling out the form, %name',49. array('%name' => $name)));}50.}</font>复制代码第三:显示效果如下:如需了解更多Drupal开发知识,请至麦子学院官网查看!。
Drupal基础教程
Drupal基础教程一、中文支持 (1)二、网站信息设置 (3)三、用户创建 (4)四、界面基本概念 (5)(一)主题(theme) (5)(二)区块(block) (6)(三)主菜单(main menu) (6)五、内容管理的基本概念 (7)(一)添加内容 (7)(二)内容管理 (8)六、允许论坛和博客 (8)七、创建新的内容类型 (9)(一)读书笔记(书名,文件,阅读日期) (9)(二)View 模块 (11)一、中文支持1.允许 Locale 模块2.导入语言包:1)Configuration-language-简体中文2)添加中文3)设置默认语言为中文4)Configuration-Translate interface-import5)导入语言包6)刷新。
最终效果:二、网站信息设置1.配置—站点信息2.配置网站名称和口号最终效果:三、用户创建1.用户-添加用户2.添加用户设置3.删除用户四、界面基本概念(一)主题(theme)法一:1.安装新主题2.上传主题包并安装最终效果:法二:解压缩主题文件,拷贝到..\acquia-drupal\sites\all\themes 目录下。
(二)区块(block)结构-区块-创建(编辑/查看)最终效果:(三)主菜单(main menu)1.新建内容2.内容设置3.指定到菜单五、内容管理的基本概念(一)添加内容内容的概念:内容包括网页或者媒体文件,都是以节点的形式存在。
1.添加内容2.article最终效果:(二) 内容管理六、允许论坛和博客1. 模块-勾选blog 、forum 后,确定最终效果:刷新后,添加内容多出两项,如下图:七、创建新的内容类型(一)读书笔记(书名,文件,阅读日期)1.结构-内容类型-添加内容类型2.添加新字段3.文件字段的设置4.添加内容-读书笔记最终效果显示:(二)View 模块1.将 view 解压到 ..\acquia-drupal\sites\all\modules 目录下2.开启模块-chaos tools3.开启模块-view ,之后结构中可见 views。
Drupal7 安装 CKEditor 和 IMCE 模块 及配置方法
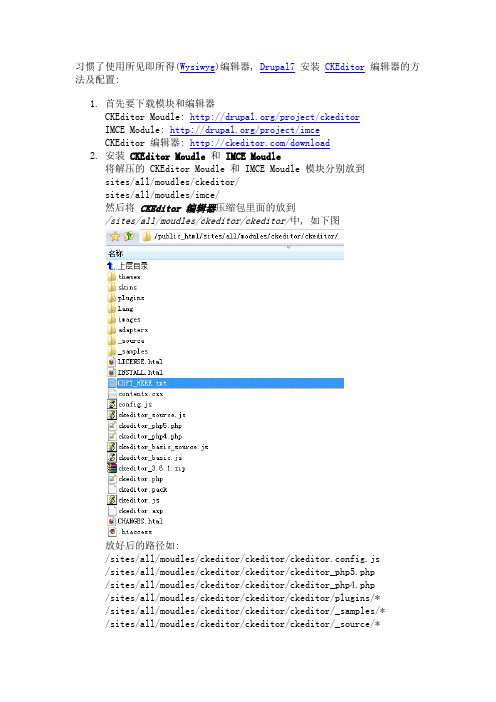
习惯了使用所见即所得(Wysiwyg)编辑器, Drupal7安装CKEditor编辑器的方法及配置:1.首先要下载模块和编辑器CKEditor Moudle: /project/ckeditorIMCE Module: /project/imceCKEditor 编辑器: /download2.安装 CKEditor Moudle和IMCE Moudle将解压的 CKEditor Moudle 和 IMCE Moudle 模块分别放到sites/all/moudles/ckeditor/sites/all/moudles/imce/然后将CKEditor 编辑器压缩包里面的放到/sites/all/moudles/ckeditor/ckeditor/中, 如下图放好后的路径如:/sites/all/moudles/ckeditor/ckeditor/ckeditor.config.js/sites/all/moudles/ckeditor/ckeditor/ckeditor_php5.php/sites/all/moudles/ckeditor/ckeditor/ckeditor_php4.php/sites/all/moudles/ckeditor/ckeditor/ckeditor/plugins/*/sites/all/moudles/ckeditor/ckeditor/ckeditor/_samples/*/sites/all/moudles/ckeditor/ckeditor/ckeditor/_source/*/sites/all/modules/imce/css/*...3.在 Modules 中启用 CKEditor 和 ICME 这两个模块.4.在Home » Administration » Configuration » Content authoring中配置CKEditor ( 路径为 /admin/config/content/ckeditor)选择Full HTML的edit Operations 进入 CKEditor 配置. ( 路径为/admin/config/content/ckeditor/edit/Full )然后点击EDITOR APPEARANCE选项进去, 在显示的表单中有个Toolbar, 这个是配置CKEditor显示哪些操作标签的.在默认的这行['Image','Media','Flash','Table','HorizontalRule','Smiley','Spe cialChar'], 中添加一个‘IMCE‘ 这样才能在编辑器里显示 IMCE上传图片的图标.添加后为:['Image','IMCE','Media','Flash','Table','HorizontalRule','Smile y','SpecialChar'],接着在Plugins中选中IMCE Window button in toolbar最后在 File browser settings 中的File browser type (Link dialog)File browser type (Image dialog)File browser type (Flash dialog)三个选项都选择IMCE , 如下图5. OK, 配置完毕, 在 add Content 时选择 FULL HTML 就行了.另外也可以配置 Filtered HTML , 在 Toolbar 配置里面设置一下, 比如我的设置如下1 2 3 4 5 6 7 [ ['Source'], ['Cut','Copy','Paste','PasteText','Undo','Redo'], ['Bold','Italic','Underline','Strike','-'], ['NumberedList','BulletedList','-','Outdent','Indent','Blockqu ote'], ['JustifyLeft','JustifyCenter','JustifyRight','JustifyBlock'],]6.显示在 Filtered HTML 的效果为:。
drupal7.x模块开发教程
在本教程中,我们将会建立一个模块,这个模块将列出最近一周内所有新建立的内容节点,比如日志或者论坛的帖子。
本章将讲述如何建立最初的模块文件和目录。
开始之前如果您需要用PHP来查出您站点上的错误,请访问此链接。
它将告诉您如何更改Drupal 的设置,使drupal显示错误信息。
为您的模块命名建立模块的第一步是为它取一个不太长的名字。
这个名字将被用在所有的模块文件名和方法名中。
所以这个名字必须以字母开头并只能有小写字母和下划线。
比如,我们会用"current_posts"作为一个模块名称。
注意:一定要确保根据以上规则来取名,因为它将被用于模块名和方法名的前缀。
当您运行drupal“钩子“时(请参看后面的章节),drupal将只能识别拥有与您模块文件名称相同前缀的钩子。
请注意不要使用与您站点所有主题相同的名称,这样会使drupal混淆。
创建一个模块目录和模块文件假如我们决定用"current_posts“的模块名,我们将会在drupal的根目录的以下路径(sites/all/modules /current_posts)创建一个目录。
或者如果您要把自己的自定义模块与其他模块区分开,您也可以选择这个路径(sites/all/modules/custom /current_posts)。
然后在sites/all/modules/currents_posts目录创建一个名为current_posts.module的文件。
注意drupal 并不识别扩展名为.php的文件。
如果您为模块添加了php的扩展名,那将不会被识别。
drupal 只识别扩展名为.module的php文件。
在Drupal6中,sites/all /modules/是存放自定义模块的理想目录(sites/all/themes/是存放自定义主题的理想目录),因为这个目录存放这所有只与您的站点相关的模块和主题,在您以后升级您的核心模块时,这些自定义模块和主题不会被改写。
Drupal安装教程
1.下载Drupal 7:到Drupal 项目页面下载drupal程序包,项目地址:/project/drupal2.解压Drupal 7:将下载下来drupal程序包进行解压缩,得到名为drupal-版本号的目录,为目录改名,如改成drupal73.下载语言包文件:到/translate/languages/zh-hans(linkis external)页面下载对应版本的语言包(.po文件)4.安装语言包文件:将 .po文件放置到drupal7/profiles/standard/translations 目录下5.上传:将drupal7 目录下的所有内容放置/上传到网站根目录6.创建配置文件:进入sites/default 目录,将default.settings.php复制一份,命名为settings.php7.创建用户文件目录:在sites/default 目录下新建一个目录,名为files8.设置权限:如果是Linux平台,请将files 目录的权限设置为777,settings.php设置为web服务器用户可写,如果不清楚,也可先设置为777Drupal 7 中文安装教程1.安装页面:执行完准备工作之后,便可通过浏览器访问drupal网站地址即可看到安装界面,默认选中“Standard”,点击Save and continue 执行下一步2.选择语言:如果执行了准备工作中的第3,4步,则此页面会出现语言选择项,选中Chinese,Simplified(简体中文),点击Save and continue 执行下一步3.Drupal 7 需要phpdom扩展,如果没有安装dom扩展则会出现错误,为PHP安装dom扩展后,重启web服务器即可;如果没有完成准备工作中的第4,5,6步,也会出现错误提示,执行完准备工作中的第4,5,6步,错误消息就会消失4.数据库配置:填写数据库的配置配置信息,包括数据库名、数据库用户名和数据库用户密码,填好之后点击下一步,开始安装Drupal5.安装Drupal:这一步中系统执行Drupal的安装工作,然后进入Drupal站点配置页面6.导入翻译:这一步也由系统自动执行7.修正配置文件权限:如果是Linux平台,执行完此步操作之后,请将sites/default/settings.php文件权限改为只读(444)8.站点设置:在站点设置页面,填写网站名称、网站邮箱、超级管理员帐号、超级管理员邮箱、超级管理员密码、默认时区和简洁链接,配置完成之后,点击"Save and Continue"即完成了Drupal 的安装。
centos7、LAMP、vsftp安装与初始化
五、vsftp安装与设置
以安装3.0.2版本为例,先下载源码包。解压后进入目录执行make和make install 命令。完成后将vsftpd.conf文件拷贝到/etc目录下。 *若提示cannot find –lcap 则需安装libcap-devel 使用standalone方式启动设置: 使用独立方式侦听对ftp的访问 Listen=YES 关闭xinetd方式 /etc/xinetd.d/vsftpd disable=yes *xinetd方式只有在外部连接发送请求时调用ftp进程,不适合在同时连接数较多 的系统中使用。 设置禁止匿名用户登录 设置允许本地用户登录 anonymous_enable=NO local_enable=YES
b.询问是否删除匿名用户(匿名用户使任何人可以登录,而不需要创建用户账户)
C.询问是否禁止root用户远程登录 d.询问是否删除test库(用于测试环境的test库,允许任何人访问) e.询问是否刷新授权表使修改生效
设置root用户密码后,使用mysql –u [username] –p 进入MySQL管理
使用rpm –Uvh 命令执行更新
使用yum install mysql-community-server 安装MySQL
安装完成后,使用测试mysql是否可以正常使用
2、安全化配置
使用mysql_secure_installation 进行安全化设置 a.询问是否设置root用户的密码,初始密码为空
四、PHP安装与设置
源码包可到官网 /downloads.php 或 /php 下载
解压后进入目录编译安装 ./configure --prefix=/usr/local/php 指定安转路径 --with-apxs2=/usr/local/httpd/bin/apxs 与Apache关联 --with-mysql 支持mysql操作 (--with-mysqli) 支持mysqli操作 --with-gd gd库支持扩展 --enable-mbstring 多字符、字符串处理支持 随后执行make ,make install命令安装
Splunk Enterprise 7.0.0 安装手册说明书
Splunk® Enterprise 7.0.0安裝⼿冊產⽣時間:2017/9/15 下午 04:444455591112131313131415151621242829293032343436363737373939404951Table of Contents歡迎使⽤ Splunk Enterprise 安裝⼿冊⼿冊的內容為何規劃 Splunk Enterprise 安裝安裝概觀在內部部署使⽤ Splunk Enterprise 的系統需求Splunk Enterprise 架構與程序Splunk Enterprise 隨附的 Windows 協⼒廠商⼆進位檔相關資訊安裝指⽰保護您的 Splunk Enterprise 安裝關於保護 Splunk Enterprise 的安全在您安裝 Splunk Enterprise 之前保護系統的安全以安全⽅式安裝 Splunk Enterprise保護 Splunk Enterprise 安全的更多⽅式在 Windows 上安裝 Splunk Enterprise選擇 Splunk Enterprise 應執⾏的 Windows 使⽤者⾝分準備安裝的 Windows 網路作為網路或網域使⽤者在 Windows 上安裝使⽤命令列在 Windows 上安裝變更在 Windows 安裝期間所選擇的使⽤者在 Linux 或 Mac OS X 上安裝 Splunk Enterprise在 Linux 上安裝在 Mac OS X 上安裝以不同使⽤者或⾮根使⽤者⾝分執⾏ Splunk Enterprise 開始使⽤ Splunk Enterprise第⼀次啟動 Splunk Enterprise 接下來會發⽣什麼?瞭解 Splunk Enterprise 的存取性安裝 Splunk Enterprise 授權關於 Splunk Enterprise 授權安裝授權升級或移轉 Splunk Enterprise如何升級 Splunk Enterprise升級⾄ 7.0 的相關資訊:請先閱讀如何升級分散式 Splunk Enterprise 環境針對 Splunk 應⽤套件開發⼈員的變更51525356565858在 UNIX 上升級⾄ 7.0在 Windows 上升級⾄ 7.0移轉 Splunk Enterprise 執⾏個體解除安裝 Splunk Enterprise解除安裝 Splunk Enterprise 參考資料PGP 公共⾦鑰splunk-winprintmonsplunk-winprintmon會在您於 Splunk 設定 Windows 列印監控輸⼊時執⾏。
Drupal入门教程和Drupal核心模块介绍

Drupal入门教程和Drupal核心模块介绍摘要]Drupal 的核心模块是Drupal 最重要的组成部分,它们是Drupal 主要功能的承载。
Drupal 自带有33个模块,基本上涵盖了当前网站所应具有的全部功能:用户管理、博客、论坛、评论、相册以及日志管理的,还有新闻聚合等Web 2.0 特性的功能。
Drupal 的核心模块是Drupal 最重要的组成部分,它们是Drupal 主要功能的承载。
Drupal 自带有33个模块,基本上涵盖了当前网站所应具有的全部功能:用户管理、博客、论坛、评论、相册以及日志管理的,还有新闻聚合等Web 2.0 特性的功能。
这些模块都是Drupal 的下载包中所附带的。
有些被开启,有些没有被开启,当需要使用一个功能的时候,先看看Drupal的核心模块是否具有实现此功能的门口;若没有去下载第三方模块。
它们都是经过很好的测试、符合各种编码并兼容主流浏览器。
如果有,那就优先使用核心模块。
以下主要介绍每个核心模块的功能,部分内容参考drupal使用者核心模块介绍教程。
介绍的顺序是按照模块英文名称的第一个字母排序的,这也是Drupal 的列表方法。
1、聚合模块(Aggregator)Drupal的聚合模块的功能,主要有两部分:(1)聚集站点内容,以RSS 或Atom 协议进行发布:将站点上的内容进行聚集,以使互联网上的其他用户能够通过RSS 或Atom 协议访问到站点的最新更新。
(2)收集从其他网站订阅到的RSS 内容:类似于一种RSS 阅读器。
它可以收集指定网站的最新发布的内容,存入站点数据库中并可按分类显示出来。
2、博客模块(blog)博客模块是Drupal 中很重要的模块,它可以让用户在Drupal 站点上创建自己博客页面,发布日志。
实际上,Drupal 是最早支持多用户帐号的博客系统。
提供专业博客系统的是著名的WordPress,不过它有两个版本,一个是个人的,一个是支持多帐号的。
Drupal-7-API最全文档
Drupal 7 API ComponentsTable of ContentsDrupal 7 API Components (1)Preface (1)Module System (Hooks) (1)Functions & methods (2)Database Abstraction Layer (9)SELECT (9)INSERT, UPDATE and DELETE (11)Transactions (11)Classes (12)Interfaces (14)Functions & methods (14)Constants (14)Menu System (14)Functions & methods (15)Constants (18)Groups (19)Form Generation (19)The $form_state keys are: (20)Functions & methods (21)File Management System (24)Fields on the file object: (24)Functions & methods (24)Constants (26)Field API (26)Classes (27)Functions & methods (27)Constants (28)Search System (28)Functions & methods (28)Node Access System (29)Functions & methods (29)Theme System (30)See also (31)Functions & methods (31)Constants (36)Global variables (37)PrefaceThe following technical document is compiled from the official Drupal API information published at /api/drupal/7It is intended for use by developers aiming to master Drupal 7.Module System (Hooks)Allow modules to interact with the Drupal core.Drupal's module system is based on the concept of "hooks". A hook is a PHP function that isnamed foo_bar(), where "foo" is the name of the module (whose filename is thus foo.module) and "bar" is the name of the hook. Each hook has a defined set of parameters and a specified result type.To extend Drupal, a module need simply implement a hook. When Drupal wishes to allow intervention from modules, it determines which modules implement a hook and calls that hook in all enabled modules that implement it.The available hooks to implement are explained here in the Hooks section of the developer documentation. The string "hook" is used as a placeholder for the module name in the hook definitions. For example, if the module file is called example.module, then hook_help() as implemented by that module would be defined as example_help().The example functions included are not part of the Drupal core, they are just models that you can modify. Only the hooks implemented within modules are executed when running Drupal.See also the themeable group page.Functions & methodsName Descriptionhook_actions_delete Executes code after an action is deleted.hook_action_info Declares information about actions.hook_action_info_alter Alters the actions declared by another module. hook_admin_paths Define administrative paths.hook_admin_paths_alter Redefine administrative paths defined by othermodules.hook_aggregator_fetch Implement this hook to create an alternativefetcher for aggregator module.hook_aggregator_fetch_info Implement this hook to expose the title and ashort description of your fetcher.hook_aggregator_parse Implement this hook to create an alternativeparser for aggregator module.hook_aggregator_parse_info Implement this hook to expose the title and ashort description of your parser.hook_aggregator_process Implement this hook to create a processor foraggregator module.hook_aggregator_process_info Implement this hook to expose the title and ashort description of your processor.hook_aggregator_remove Implement this hook to remove stored data if a feed is being deleted or a feed's items are being removed.hook_ajax_render_alter Alter the commands that are sent to the user through the AJAX framework.hook_archiver_info Declare archivers to the system.hook_archiver_info_alter Alter archiver information declared by othermodules.hook_batch_alter Alter batch information before a batch isprocessed.hook_block_configure Define a configuration form for a block. hook_block_info Define all blocks provided by the module.hook_block_info_alter Change block definition before saving to thedatabase.hook_block_list_alter Act on blocks prior to rendering.hook_block_save Save the configuration options from hook_block_configure().hook_block_view Return a rendered or renderable view of a block. hook_block_view_alter Perform alterations to the content of a block. hook_block_view_MODULE_DEL TA_alter Perform alterations to a specific block.hook_boot Perform setup tasks. See also, hook_init.hook_comment_delete The comment is being deleted by the moderator. hook_comment_insert The comment is being inserted.hook_comment_load Comments are being loaded from the database. hook_comment_presave The comment passed validation and is about tobe saved.hook_comment_publish The comment is being published by themoderator.hook_comment_unpublish The comment is being unpublished by themoderator.hook_comment_update The comment is being updated.hook_comment_view The comment is being viewed. This hook can be used to add additional data to the comment before theming.hook_comment_view_alter The comment was built; the module may modifythe structured content.hook_contextual_links_view_alter Alter a contextual links element before it isrendered.hook_countries_alter Alter the default country list.hook_cron Perform periodic actions.hook_cron_queue_info Declare queues holding items that need to be runperiodically.hook_cron_queue_info_alter Alter cron queue information before cron runs.hook_css_alter Alter CSS files before they are output on the page.hook_custom_theme Return the machine-readable name of the theme to use for the current page.hook_dashboard_regions Adds regions to the dashboard.hook_dashboard_regions_alter Alter dashboard regions provided by modules. hook_date_formats Defines additional date formats.hook_date_formats_alter Alters date types and formats declared byanother module.hook_date_format_types Defines additional date types.hook_date_format_types_alter Modify existing date format types.hook_delete Respond to node deletion.hook_disable Perform necessary actions before module is disabled.hook_drupal_goto_alter Change the page the user is sent to by drupal_goto().hook_element_info Allows modules to declare their own Forms API element types and specify their default values.hook_element_info_alter Alter the element type information returned from modules.hook_enable Perform necessary actions after module is enabled.hook_entity_delete Act on entities when deleted.hook_entity_info Inform the base system and the Field API aboutone or more entity types.hook_entity_info_alter Alter the entity info.hook_entity_insert Act on entities when inserted.hook_entity_load Act on entities when loaded.hook_entity_prepare_view Act on entities as they are being prepared forview.hook_entity_query_alter Alter or execute an EntityFieldQuery.hook_entity_update Act on entities when updated.hook_entity_view Act on entities being assembled before rendering. hook_entity_view_alter Alter the results of ENTITY_view().hook_exit Perform cleanup tasks.hook_filetransfer_backends Provide information on available file transfer backends.hook_file_copy Respond to a file that has been copied. hook_file_delete Respond to a file being deleted.hook_file_download Control access to private file downloads and specify HTTP headers.hook_file_insert Respond to a file being added.hook_file_load Load additional information into file objects.hook_file_mimetype_mapping_alter Alter MIME type mappings used to determine MIME type from a file extension.hook_file_move Respond to a file that has been moved. hook_file_update Respond to a file being updated.hook_file_url_alter Alter the URL to a file.hook_file_validate Check that files meet a given criteria.hook_filter_format_disable Perform actions when a text format has been disabled.hook_filter_format_insert Perform actions when a new text format has been created.hook_filter_format_update Perform actions when a text format has been updated.hook_filter_info Define content filters.hook_filter_info_alter Perform alterations on filter definitions.hook_flush_caches Add a list of cache tables to be cleared.hook_form Display a node editing form.hook_forms Map form_ids to form builder functions.hook_form_alter Perform alterations before a form is rendered.hook_form_BASE_FORM_ID_alter Provide a form-specific alteration for shared forms.hook_form_FORM_ID_alter Provide a form-specific alteration instead of the global hook_form_alter().hook_help Provide online user help.hook_hook_info Defines one or more hooks that are exposed by amodule.hook_hook_info_alter Alter information from hook_hook_info().hook_html_head_alter Alter XHTML HEAD tags before they are rendered by drupal_get_html_head().hook_image_default_styles Provide module-based image styles for reuse throughout Drupal.hook_image_effect_info Define information about image effects provided by a module.hook_image_effect_info_alter Alter the information provided in hook_image_effect_info().hook_image_styles_alter Modify any image styles provided by other modules or the user.hook_image_style_delete Respond to image style deletion.hook_image_style_flush Respond to image style flushing.hook_image_style_save Respond to image style updating.hook_image_toolkits Define image toolkits provided by this module. hook_init Perform setup tasks. See also, hook_boot.hook_insert Respond to creation of a new node.hook_install Perform setup tasks when the module is installed.hook_install_tasks Return an array of tasks to be performed by an installation profile.hook_install_tasks_alter Alter the full list of installation tasks.hook_js_alter Perform necessary alterations to the JavaScriptbefore it is presented on the page.hook_language_fallback_candidates_alter Perform alterations on the language fallbackcandidates.hook_language_init Allows modules to act after language initializationhas been performed.hook_language_negotiation_info Allow modules to define their own languageproviders.hook_language_negotiation_info_alter Perform alterations on language providers.hook_language_switch_links_alter Perform alterations on language switcher links.hook_language_types_info Allow modules to define their own languagetypes.hook_language_types_info_alter Perform alterations on language types.hook_library Registers JavaScript/CSS libraries associated with a module.hook_library_alter Alters the JavaScript/CSS library registry. hook_load Act on nodes being loaded from the database.hook_locale Allows modules to define their own text groups that can be translated.hook_mail Prepare a message based on parameters; called from drupal_mail().hook_mail_alter Alter an email message created with the drupal_mail() function.hook_menu Define menu items and page callbacks.hook_menu_alter Alter the data being saved to the {menu_router}table after hook_menu is invoked.hook_menu_breadcrumb_alter Alter links in the active trail before it is renderedas the breadcrumb.hook_menu_contextual_links_alter Alter contextual links before they are rendered.hook_menu_delete Informs modules that a custom menu was deleted.hook_menu_insert Informs modules that a custom menu was created.hook_menu_link_alter Alter the data being saved to the {menu_links} table by menu_link_save().hook_menu_link_delete Inform modules that a menu link has been deleted.hook_menu_link_insert Inform modules that a menu link has been created.hook_menu_link_update Inform modules that a menu link has been updated.hook_menu_local_tasks_alter Alter tabs and actions displayed on the page before they are rendered.hook_menu_site_status_alter Control site status before menu dispatching. hook_menu_update Informs modules that a custom menu wasupdated.hook_modules_disabled Perform necessary actions after modules aredisabled.hook_modules_enabled Perform necessary actions after modules areenabled.hook_modules_installed Perform necessary actions after modules areinstalled.hook_modules_uninstalled Perform necessary actions after modules areuninstalled.hook_module_implements_alter Alter the registry of modules implementing ahook.hook_multilingual_settings_changed Allow modules to react to language settingschanges.hook_node_access Control access to a node.hook_node_access_records Set permissions for a node to be written to the database.hook_node_access_records_alter Alter permissions for a node before it is written to the database.hook_node_delete Respond to node deletion.hook_node_grants Inform the node access system what permissionsthe user has.hook_node_grants_alter Alter user access rules when trying to view, editor delete a node.hook_node_info Define module-provided node types.hook_node_insert Respond to creation of a new node.hook_node_load Act on nodes being loaded from the database. hook_node_operations Add mass node operations.hook_node_prepare Act on a node object about to be shown on theadd/edit form.hook_node_presave Act on a node being inserted or updated.hook_node_revision_delete Respond to deletion of a node revision.hook_node_search_result Act on a node being displayed as a search result.hook_node_submit Act on a node after validated form values have been copied to it.hook_node_type_delete Respond to node type deletion.hook_node_type_insert Respond to node type creation.hook_node_type_update Respond to node type updates.hook_node_update Respond to updates to a node.hook_node_update_index Act on a node being indexed for searching.hook_node_validate Perform node validation before a node is createdor updated.hook_node_view Act on a node that is being assembled beforerendering.hook_node_view_alter Alter the results of node_view().hook_openid Allow modules to modify the OpenID request parameters.hook_openid_discovery_method_info Allow modules to declare OpenID discovery methods.hook_openid_discovery_method_info_alter Allow modules to alter discovery methods. hook_openid_normalization_method_info Allow modules to declare OpenID normalizationmethods.hook_openid_normalization_method_info_alter Allow modules to alter normalization methods.hook_openid_response Allow modules to act upon a successful OpenID login.hook_overlay_child_initialize Allow modules to act when an overlay child window is initialized.hook_overlay_parent_initialize Allow modules to act when an overlay parent window is initialized.hook_page_alter Perform alterations before a page is rendered. hook_page_build Add elements to a page before it is rendered.hook_page_delivery_callback_alter Alters the delivery callback used to send the result of the page callback to the browser.hook_path_delete The path has been deleted. hook_path_insert The path has been inserted. hook_path_update The path has been updated. hook_permission Define user permissions.hook_prepare Act on a node object about to be shown on the add/edit form.hook_query_alter Perform alterations to a structured query.hook_query_TAG_alter Perform alterations to a structured query for agiven tag.hook_ranking Provide additional methods of scoring for coresearch results for nodes.hook_rdf_mapping Allow modules to define RDF mappings for fieldbundles.hook_rdf_namespaces Allow modules to define namespaces for RDFmappings.hook_registry_files_alter Perform necessary alterations to the list of filesparsed by the registry.hook_requirements Check installation requirements and do statusreporting.hook_schema Define the current version of the databaseschema.hook_schema_alter Perform alterations to existing database schemas. hook_search_access Define access to a custom search routine.hook_search_admin Add elements to the search settings form.hook_search_execute Execute a search for a set of key words.hook_search_info Define a custom search type.hook_search_page Override the rendering of search results.hook_search_preprocess Preprocess text for search.hook_search_reset T ake action when the search index is going to be rebuilt.hook_search_status Report the status of indexing.hook_shortcut_default_set Return the name of a default shortcut set for theprovided user account.hook_simpletest_alter Alter the list of tests.hook_stream_wrappers Registers PHP stream wrapper implementations associated with a module.hook_stream_wrappers_alter Alters the list of PHP stream wrapper implementations.hook_system_info_alter Alter the information parsed from module and theme .info fileshook_system_themes_page_alter Alters theme operation links.hook_taxonomy_term_delete Respond to the deletion of taxonomy terms. hook_taxonomy_term_insert Act on taxonomy terms when inserted.hook_taxonomy_term_load Act on taxonomy terms when loaded.hook_taxonomy_term_presave Act on taxonomy terms before they are saved.hook_taxonomy_term_update Act on taxonomy terms when updated. hook_taxonomy_term_view_alter Alter the results of taxonomy_term_view().hook_taxonomy_vocabulary_delete Respond to the deletion of taxonomy vocabularies.hook_taxonomy_vocabulary_insert Act on taxonomy vocabularies when inserted. hook_taxonomy_vocabulary_load Act on taxonomy vocabularies when loaded.hook_taxonomy_vocabulary_presave Act on taxonomy vocabularies before they are saved.hook_taxonomy_vocabulary_update Act on taxonomy vocabularies when updated. hook_test_finished An individual test has finished.hook_test_group_finished A test group has finished.hook_test_group_started A test group has started.hook_theme Register a module (or theme's) theme implementations.hook_theme_registry_alter Alter the theme registry information returned from hook_theme().hook_tokens Provide replacement values for placeholder tokens.hook_tokens_alter Alter replacement values for placeholder tokens. hook_token_info Provide information about available placeholdertokens and token types.hook_token_info_alter Alter the metadata about available placeholdertokens and token types.hook_translated_menu_link_alter Alter a menu link after it has been translated andbefore it is rendered.hook_trigger_info Declare triggers (events) for users to assignactions to.hook_trigger_info_alter Alter triggers declared by hook_trigger_info(). hook_uninstall Remove any information that the module sets. hook_update Respond to updates to a node.hook_updater_info Provide information on Updaters (classes that can update Drupal).hook_updater_info_alter Alter the Updater information array.hook_update_dependencies Return an array of information about moduleupdate dependencies.hook_update_index Update the search index for this module.hook_update_last_removed Return a number which is no longer available as hook_update_N().hook_update_N Perform a single update.hook_update_projects_alter Alter the list of projects before fetching data andcomparing versions.hook_update_status_alter Alter the information about available updates forprojects.hook_url_inbound_alter Alters inbound URL requests.hook_url_outbound_alter Alters outbound URLs.hook_username_alter Alter the username that is displayed for a user. hook_user_cancel Act on user account cancellations.hook_user_cancel_methods_alter Modify account cancellation methods.hook_user_categories Retrieve a list of user setting or profile information categories.hook_user_delete Respond to user deletion.hook_user_insert A user account was created.hook_user_load Act on user objects when loaded from thedatabase.hook_user_login The user just logged in.hook_user_logout The user just logged out.hook_user_operations Add mass user operations.hook_user_presave A user account is about to be created or updated.hook_user_role_delete Inform other modules that a user role has beendeleted.hook_user_role_insert Inform other modules that a user role has beenadded.hook_user_role_update Inform other modules that a user role has beenupdated.hook_user_update A user account was updated.hook_user_view The user's account information is being displayed.hook_user_view_alter The user was built; the module may modify thestructured content.hook_validate Perform node validation before a node is createdor updated.hook_verify_update_archive Verify an archive after it has been downloadedand extracted.hook_view Display a node.hook_watchdog Log an event messagehook_xmlrpc Register XML-RPC callbacks.hook_xmlrpc_alter Alters the definition of XML-RPC methods before they are called.module_hook Determine whether a module implements a hook. module_hook_info Retrieve a list of what hooks are explicitlydeclared.module_implements Determine which modules are implementing ahook.module_implements_write_cache Writes the hook implementation cache.module_invoke Invoke a hook in a particular module.module_invoke_all Invoke a hook in all enabled modules thatimplement it.sample_search_conditions_callback An example conditions callback function forsearch.includes/module.inc, line 532Database Abstraction LayerAllow the use of different database servers using the same code base.Drupal provides a database abstraction layer to provide developers with the ability to support multiple database servers easily. The intent of this layer is to preserve the syntax and power of SQL as much as possible, but also allow developers a way to leverage more complex functionality in a unified way. It also provides a structured interface for dynamically constructing queries when appropriate, and enforcing security checks and similar good practices.The system is built atop PHP's PDO (PHP Data Objects) database API and inherits much of its syntax and semantics.SELECTMost Drupal database SELECT queries are performed by a call to db_query() ordb_query_range(). Module authors should also consider using the PagerDefault Extender forqueries that return results that need to be presented on multiple pages, and the Tablesort Extender for generating appropriate queries for sortable tables.For example, one might wish to return a list of the most recent 10 nodes authored by a given user. Instead of directly issuing the SQL query<?phpSELECT n.nid, n.title, n.created FROM node n WHERE n.uid = $uid LIMIT0, 10;?>one would instead call the Drupal functions:<?php$result = db_query_range('SELECT n.nid, n.title, n.createdFROM {node} n WHERE n.uid = :uid', 0, 10, array(':uid' => $uid));foreach ($result as$record) {// Perform operations on $node->title, etc. here.}?>Curly braces are used around "node" to provide table prefixing viaDatabaseConnection::prefixTables(). The explicit use of a user ID is pulled out into an argument passed to db_query() so that SQL injection attacks from user input can be caught and nullified. The LIMIT syntax varies between database servers, so that is abstracted into db_query_range() arguments. Finally, note the PDO-based ability to iterate over the result set using foreach ().All queries are passed as a prepared statement string. A prepared statement is a "template" of a query that omits literal or variable values in favor of placeholders. The values to place into those placeholders are passed separately, and the database driver handles inserting the values into the query in a secure fashion. That means you should never quote or string-escape a value to be inserted into the query.There are two formats for placeholders: named and unnamed. Named placeholders are strongly preferred in all cases as they are more flexible and self-documenting. Named placeholders should start with a colon ":" and can be followed by one or more letters, numbers or underscores.Named placeholders begin with a colon followed by a unique string. Example:<?phpSELECT nid, title FROM {node} WHERE uid=:uid;?>":uid" is a placeholder that will be replaced with a literal value when the query is executed. A given placeholder label cannot be repeated in a given query, even if the value should be the same. When using named placeholders, the array of arguments to the query must be an associative array where keys are a placeholder label (e.g., :uid) and the value is the corresponding value to use. The array may be in any order.Unnamed placeholders are simply a question mark. Example:<?phpSELECT nid, title FROM {node} WHERE uid=?;?>In this case, the array of arguments must be an indexed array of values to use in the exact same order as the placeholders in the query.Note that placeholders should be a "complete" value. For example, when running a LIKE query the SQL wildcard character, %, should be part of the value, not the query itself. Thus, the following is incorrect:<?phpSELECT nid, title FROM {node} WHERE title LIKE :title%;?>It should instead read:<?phpSELECT nid, title FROM {node} WHERE title LIKE :title;?>and the value for :title should include a % as appropriate. Again, note the lack of quotation marks around :title. Because the value is not inserted into the query as one big string but as an explicitly separate value, the database server knows where the query ends and a value begins. That is considerably more secure against SQL injection than trying to remember which values need quotation marks and string escaping and which don't.INSERT, UPDATE and DELETEINSERT, UPDATE, and DELETE queries need special care in order to behave consistently across all different databases. Therefore, they use a special object-oriented API for defining a query structurally. For example, rather than:<?phpINSERT INTO node (nid, title, body) VALUES (1, 'my title', 'my body');?>one would instead write:<?php$fields = array('nid' => 1, 'title' => 'my title', 'body' => 'my body');db_insert('node')->fields($fields)->execute();?>This method allows databases that need special data type handling to do so, while also allowing optimizations such as multi-insert queries. UPDATE and DELETE queries have a similar pattern. TransactionsDrupal also supports transactions, including a transparent fallback for databases that do not support transactions. To start a new transaction, simply call $txn = db_transaction(); in your own code. The transaction will remain open for as long as the variable $txn remains in scope. When $txn is destroyed, the transaction will be committed. If your transaction is nested inside of another then Drupal will track each transaction and only commit the outer-most transaction when the last transaction object goes out out of scope, that is, all relevant queries completed successfully. Example:<?phpfunction my_transaction_function() {// The transaction opens here.$txn = db_transaction();try {$id = db_insert('example')->fields(array('field1' => 'mystring','field2' => 5,))->execute();my_other_function($id);return$id;}catch (Exception$e) {// Something went wrong somewhere, so roll back now.$txn->rollback();// Log the exception to watchdog.watchdog_exception('type', $e);}// $txn goes out of scope here. Unless the transaction was rolled back, it // gets automatically commited here.}function my_other_function($id) {// The transaction is still open here.if ($id % 2 == 0) {db_update('example')->condition('id', $id)->fields(array('field2' => 10))->execute();}}?>@link /developing/api/databaseClassesName DescriptionDatabase Primary front-controller for the database system.DatabaseCondition Generic class for a series of conditions in a query.DatabaseConnection Base Database API class.DatabaseConnectionNotDefinedException Exception thrown if an undefineddatabase connection is requested. DatabaseConnection_mysqlDatabaseConnection_pgsqlDatabaseConnection_sqlite Specific SQLite implementation ofDatabaseConnection.DatabaseDriverNotSpecifiedException Exception thrown if no driver isspecified for a database connection.。
实战Drupal7内核升级和更新(图文教程)
实战Drupal7内核升级和更新实战Drupal7内核升级和更新:1.Drupal7源码备份和数据库备份2.下载Drupal7最新包装程序并上传到网站目录3.到模块页面执行update.php,进行更新本次Drupal7升级是在linux环境下进行的,所有的操作都是以linux为例进这行讲解的。
1.Drupal7源码备份和数据库备份(1)Drupal7源码备份在根目录下建立网站备份目录[root@AY131014*********e11Z /]# mkdir /site_bak将网站的根目录下的所有源码复制到/site_bak/目录下[root@AY131014*********e11Z /]# cp -R /alidata/www// /site_bak/查看网站源码备份成功[root@AY131014*********e11Z /]# ll /site_bak/total 4drwxr-xr-x 10 root root 4096 May 15 17:41 [root@AY131014*********e11Z /]#(2)Drupal7 mysql数据库备份在linux下用管理员登陆mysql数据库[root@AY131014*********e11Z ]# mysql -uroot -pEnter password:Welcome to the MySQL monitor. Commands end with ; or \g.Your MySQL connection id is 394955Server version: 5.1.63-log Source distributionCopyright (c) 2000, 2011, Oracle and/or its affiliates. All rights reserved.Oracle is a registered trademark of Oracle Corporation and/or itsaffiliates. Other names may be trademarks of their respectiveowners.Type 'help;' or '\h' for help. Type '\c' to clear the current input statement.用show查看要备份的数据库名为v_kesjc_commysql> show databases;+--------------------+| Database |+--------------------+| information_schema || film_yxtx_tv || kesjc_com || kesyy_com || mysql || test || v_kesjc_com || www_kestv_com || www_yxwg_tv |+--------------------+9 rows in set (0.00 sec)mysql>用which查看mysql数据库的安装目录[root@AY131014*********e11Z ]# which mysql/alidata/server/mysql/bin/进入mysql数据库的安装目录[root@AY131014*********e11Z ]# cd /alidata/server/mysql/bin/Mysqldump 备份数据库v_kesjc_com[root@AY131014*********e11Z bin]#./mysqldump -u root -p v_kesjc_com > /site_bak/v_kesjc_com.sqlEnter password:查看刚备份的数据库文件v_kesjc_com.sql[root@AY131014*********e11Z bin]# ll /site_bak/total 4840drwxr-xr-x 10 root root 4096 May 15 17:41 -rw-r--r-- 1 root root 4935913 May 15 18:28 v_kesjc_com.sql利用gzip压缩数据并备份,命令如下:./mysqldump -u root -p v_kesjc_com | gzip > /site_bak/v_kesjc_com.sql.gzMysqldump 还原数据库v_kesjc_com[root@AY131014*********e11Z bin]#mysql -u root -p v_kesjc_com< /site_bak/v_kesjc_com.sql利用gzip解压缩数据并还原,命令如下:#gzip < /site_bak/v_kesjc_com.sql.gz | mysql -u root -p v_kesjc_com[root@AY131014*********e11Z bin]# ll /site_bak/total 5536drwxr-xr-x 10 root root 4096 May 15 17:41 -rw-r--r-- 1 root root 4935913 May 15 18:28 v_kesjc_com.sql-rw-r--r-- 1 root root 706872 May 15 18:49 v_kesjc_com.sql.gz[root@AY131014*********e11Z bin]#2.下载Drupal7最新包装程序并上传到网站目录(1)下载drupal7最新版:/files/projects/drupal-7.28.tar.gz下载并解压最新版如下图:(2)将之前备份的sites目录,复制到刚解压的drupal-7.28目录下将备份目录中的有变动的目录和文件复制到最新安装包目录(3)打开drupal-7.28目录,将该目录下的所有内容上传至网站根下3.到模块页面执行update.php,进行更新更新目录的所有权和读取权限如下:[root@AY131014*********e11Z www]# chown -R vkesjc:vkesjc [root@AY131014*********e11Z www]# chmod -R 755 上传完成后,到模块。
Centos7安装redis详细步骤
Centos7安装redis详细步骤话不多说,直接进⼊正题。
⼀、安装gcc依赖由于 redis 是⽤ C 语⾔开发,安装之前必先确认是否安装 gcc 环境(gcc -v),如果没有安装,执⾏以下命令进⾏安装yum install -y gcc⼆、下载并解压安装包#下载wget http://download.redis.io/releases/redis-5.0.3.tar.gz#解压tar -zxvf redis-5.0.3.tar.gz三、cd切换到redis解压⽬录下,执⾏编译cd redis-5.0.3#编译make四、安装并指定安装⽬录#安装指定⽬录(安装完成后会在⽬录下⾯⽣成⼀个bin⽬录)make install PREFIX=/java/redis五、启动服务5.1前台启动cd /usr/local/redis/bin/./redis-server5.2后台启动从 redis 的源码⽬录中复制 redis.conf 到 redis 的安装⽬录cp /usr/local/redis-5.0.3/redis.conf /usr/local/redis/bin/修改 redis.conf ⽂件,把 daemonize no 改为 daemonize yesvi redis.conf后台启动./redis-server redis.conf六、设置开机启动添加开机启动服务[root@localhost bin]# vi /etc/systemd/system/redis.service复制粘贴以下内容:[Unit]Description=redis-serverAfter=network.target[Service]Type=forkingExecStart=/usr/local/redis/bin/redis-server /usr/local/redis/bin/redis.conf PrivateTmp=true[Install]WantedBy=multi-user.target注意:ExecStart配置成⾃⼰的路径设置开机启动[root@localhost bin]# systemctl daemon-reload[root@localhost bin]# systemctl start redis.service[root@localhost bin]# systemctl enable redis.service创建 redis 命令软链接[root@localhost ~]# ln -s /usr/local/redis/bin/redis-cli /usr/bin/redis测试 redis服务操作命令systemctl start redis.service #启动redis服务systemctl stop redis.service #停⽌redis服务systemctl restart redis.service #重新启动服务systemctl status redis.service #查看服务当前状态systemctl enable redis.service #设置开机⾃启动systemctl disable redis.service #停⽌开机⾃启动。
Drupal7模块Views实站教程
Drupal7模块Views实站教程(图文)/ 2012年10月03日作者:zq00090来源:烟雨书香Drupal7模块Views实站教程(图文)因为自己用drupal框架做了一个小站,在做站的同时碰到一系列的困难,原因是在中国目前新一批的站长都在用WordPress傻瓜系统,当然本人没有说WordPress不好。
强大的drupal在国内变成了鸡肋,网上drupal的免费教程太稀缺。
全球近52万用户使用,怎么在国内就半温不火捏?你来到这里,就不要灰心,你选择drupal不会错。
现在将我在做站解决到的一些问题与大家分享。
本文讲解Views的使用。
(注:目前更新到7.x-3.5版本。
)这么说吧,Views的中文意思叫视图,直接调用数据库,啥文章、图片、音乐、评论等尽你所用,按您方式组织起来,呈现给用户。
先要下载模块吧,安装吧,同样在sites/all/themes安装。
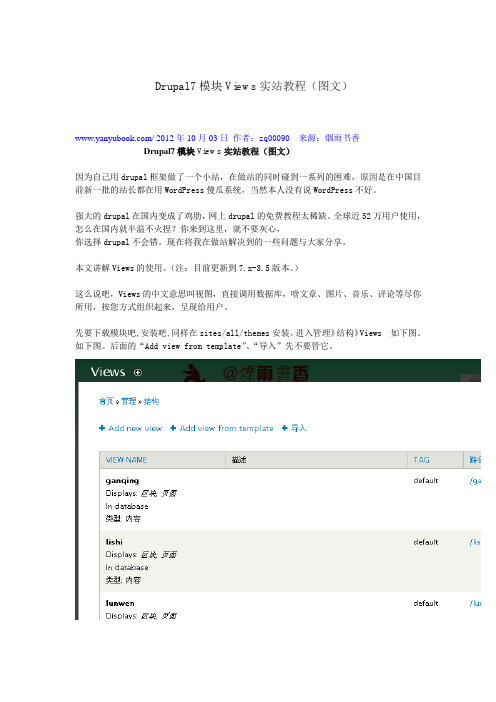
进入管理》结构》Views 如下图。
如下图。
后面的“Add view from template”、“导入”先不要管它。
很好,现在我们可以来点击“Add new view”标签添加一个view,即创建一个页面。
为“View name”添加一个名字(drupal xuexi),最好是英文或拼音名,下面会自动获取相同的路径名。
当然中文名(drupal 学习)可以在下面的“Create a page”页面标题里或后面的高级设置随时修改。
接下来选择你喜欢的“Display format”的显示规则:有下拉式、横排、竖排、表格等,本人选择"HTML list"如/首页样式。
再调整“Items to display”文章的显示数量。
选择好之后,点击"save & exit",即创建了一个“drupal学习”的区块,然后调用它。
好嘞~我们点击"continue & edit"我们需要编辑一些高级功能来美化它。
- 1、下载文档前请自行甄别文档内容的完整性,平台不提供额外的编辑、内容补充、找答案等附加服务。
- 2、"仅部分预览"的文档,不可在线预览部分如存在完整性等问题,可反馈申请退款(可完整预览的文档不适用该条件!)。
- 3、如文档侵犯您的权益,请联系客服反馈,我们会尽快为您处理(人工客服工作时间:9:00-18:30)。
一.实战Drupal 7模块安装Drupal7模块安装的步骤:
1.打开本地网站/ 用管理员kesjc登陆
2.安装Captcha模块
3.启用captcha模块
4.汉化模块:汉化captcha模块
1.打开本地网站/ 用管理员kesjc登陆
2.比如以安装Captcha模块为例。
来安装模块在搜索框中输入captcha 点search进行搜索找到captcha模块
复制模块下载链接地址:点右键,进行复制下图红色框gz的下载链接地址:
接下来回到的模块安装画面进行,captcha模块的安装
点击安装新模块。
如下图:
粘贴模块的下载地址:/files/projects/captcha-7.x-1.0.tar.gz
模块安装成功后,出现如下画面:
3.启用captcha模块
点中间那个启用刚安装成功的模块,并返回到启用模块的界面,拉动到页面底部,选中刚安装的模块,选中并启用,保存配置。
如下图:
4.汉化模块:汉化captcha模块
1.打开网址:https:///translate/languages/zh-hans
并下载captcha模块的汉化文件,如下图:
下载captcha汉化包captcha-7.x-1.0.zh-hans.po到本地如下图:
2.安装模块的汉化包:
点翻译后进后下图:
点导入模块汉化包。
即可!
模块汉化包,导入汉化成功!!。
