raeltek音频管理器设置图解
快速参考指南音频系统(P 253)操作指南说明书
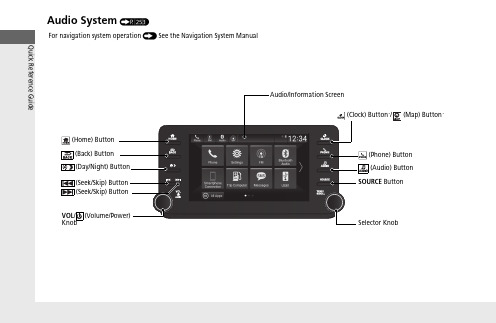
Audio System (P 253)FeaturesPress to go to the home 2Switching the Display P.254(Back) Button: Press to go back to the previous display when it is displayed./ (Seek/Skip) Buttons: Press to change songs.(Clock) Button *: Press to display the clock*: Press to display the map (Phone) Button: Press to display the phone screen.(Audio) Button: Press to display the current audio information.SOURCE Button:Press to display the source select screen.Selector Knob: Rotate left or right to scroll through the available choices.Press to changethe audio/information screen brightness.Press once and select or to make an adjustment.u Each time you press , the mode switches among the daytime mode, nighttime mode, and off mode.1Audio System Basic OperationThese indications are used to show how to operate the Selector Knob.Rotate to select.Press to enter.Selector KnobWhen the list is not displayed, songs, frequency, etc. can be changed.While connected to Apple CarPlay, it changes as follows:•Pressing the Phone Button, display the Apple CarPlay phone screen.•Pressing the Audio Button, display the Apple CarPlay audio screen.*Not available on all modelsuu Audio System Basic Operation u Audio/Information ScreenFeatures Audio/Information ScreenDisplays the audio status and wallpaper. From this display, you can go to various setup options.■Using the audio/information screenPress the button to go to the home screen.Select the following icons on the home screen or after selecting All Apps.■PhoneDisplays the HFL information.2Bluetooth® HandsFreeLink® P.374■Switching the Display1Audio/Information ScreenTouchscreen Operation•Use simple gestures - including touching, swiping,and scrolling - to operate certain audio functions.•Some items may be grayed out during driving toreduce the potential for distraction.•You can select them when the vehicle is stopped oruse voice commands.•Wearing gloves may limit or prevent touchscreenresponse.You can change the touchscreen sensitivity setting.2Customized Features P.351All Appsuu Audio System Basic Operation u Audio/Information ScreenFeatures■Trip ComputerDisplays the trip computer information.•Current Drive tab: Displays the current trip information.•Trip A /Trip B tab: Displays information for the current and three previous drives. The information is stored every time you reset Trip A/B.To reset the Trip A/B, select Settings , then select Delete Trip History .To change the setting of how to reset Trip A/B, select Settings , then select “Trip A” Reset Timing or “Trip B” Reset Timing .■ClockDisplays the clock.■System Updates *Updates the software version of the audio system.2System Updates * P.266■FM/AM/SiriusXM */USB1 (USB)/USB2*/Bluetooth Audio/SmartphoneConnectionDisplays information for each audio format.■SettingsEnters the customizing menu screen.2Customized Features P.351■Navigation *Displays the navigation screen.2Refer to the Navigation System Manualuu Audio System Basic Operation u Audio/Information ScreenFeatures ■HondaLinkDisplays the HondaLink screen.2HondaLink® P.301■Apple CarPlay/Android AutoDisplays the Apple CarPlay or Android Auto screen.2Apple CarPlay P.3132Android Auto P.320■MessagesDisplays the text message screen.2Bluetooth® HandsFreeLink® P.374■AT&T Hotspot*Displays the AT&T Hotspot screen.2AT&T Hotspot* P.311■Compass*Displays the compass screen.uu Audio System Basic Operation u Audio/Information ScreenFeaturesYou can change, store, and delete the wallpaper on the audio/information screen.■Import wallpaper1.Connect the USB flash drive to the USB port in the center pocket.2USB Ports P.2472.Select Clock .3.Select Settings .4.Select Clock Faces .5.Select Add New Wallpaper .u The Searching... screen is displayed.6.Import a desired picture.u Multiple pictures can be imported at the same time.7.Select Start Import .u The display will return to the Clock Faces screen.■Wallpaper Setup1Wallpaper SetupThe wallpaper you set up on Clock Faces cannot be displayed on the driver information interface.•When importing wallpaper files, the image must be in the USB flash drive’s root directory. Images in a folder cannot be imported.•The file name must be fewer than 64 characters (64 bytes).•The file format of the image that can be imported is BMP (bmp) or JPEG (jpg).•If the USB flash drive does not have any pictures,the No files detected message appears.•Up to five pictures can be imported.•The individual file size limit is 2 MB.•The maximum image size is 1,920 × 936 pixels. If the image size is less the image is displayed in the middle of the screen with the extra area appearingin black.uu Audio System Basic Operation u Audio/Information ScreenFeatures ■Select wallpaper1.Select Clock.2.Select Settings.3.Select Clock Faces.4.Select a desired wallpaper.5.Select Set.u The display will return to the Clock Faces screen.■To view wallpaper once it is set1.Press the button.2.Select Clock.■Delete wallpaper1.Select Clock.2.Select Settings.3.Select Clock Faces.4.Select a desired wallpaper.5.Select Delete.6.Select Yes.u The display will return to the Clock Faces screen.1Wallpaper SetupYou cannot delete the initial imported wallpapers.When the file size is large, it takes a while to bepreviewed.uu Audio System Basic Operation u Audio/Information ScreenFeatures■To move to the next screenSelecting or , or swiping the screen left or right changes to the next screen.■Home Screen1Home ScreenThe home screen has 2 pages. You can add up to 7 pages.Press the button to go directly back to the firstSwipeIcon > Icon<Current page position<>uu Audio System Basic Operation u Audio/Information ScreenFeatures ■To add app icons on the home screenApp icons can be added on the home screen.1.Press the button.2.Select and hold the home screen.3.Select Add.4.Drag and drop the icon to where you wantit to be.5.SelectDone.u The screen will return to the homescreen.1To add app icons on the home screenYou can add app icons by the following procedure.1.Press the button.2.Select All Apps.3.Select Customize.4.Select Add.5.Drag and drop the icon to where you want it tobe.6.Select Done.u The screen will return to the home screen.Pre-installed apps may not start up normally. If thisoccurs, you need to reset the system.2Defaulting All the Settings P.370If you perform Factory Data Reset, it may reset allthe settings to their factory default.2Defaulting All the Settings P.370In case those apps still do not startup normally evenafter Factory Data Reset, contact your dealer.If a browser shuts down mid-use, the screen willreturn to the screen viewed prior to the browserstartup.uu Audio System Basic Operation u Audio/Information ScreenFeatures■To move icons on the home screenYou can change location on the home screen.1.Select and hold an icon.u The screen switches to the customization screen.2.Drag and drop the icon to where you want it to be.3.Select Done .u The screen will return to the home screen.1To move icons on the home screenSelect Tips to show tips. To hide them, select it again.Select and hold.Drag and drop.uu Audio System Basic Operation u Audio/Information ScreenFeatures ■To remove icons on the home screenYou can delete the icons on the home screen.1.Select and hold an icon.u The screen switches to the customizationscreen.2.Drag and drop the icon you want to removeto the Hide icon.u The icon is removed from the homescreen.3.Select Done.u The screen will return to the homescreen.1To remove icons on the home screenApps will not be deleted by deleting the icon on thehome screen.Select Tips to show tips. To hide them, select it again.Select and hold.Drag and drop toHideicon.uu Audio System Basic Operation u Audio/Information ScreenFeatures■To shortcut icons on the home screenYou can store up to three icons on the upper left of the home screen.1.Select and hold an icon.u The screen switches to the customization screen.2.Drag and drop the icon you want to store to the upper left of the home screen.u The icon is a shortcut.3.Select Done .u The screen will return to the homescreen.1To shortcut icons on the home screenSelect Tipsto show tips. To hide them, select it again.Select and hold.Drag anddrop to preset icon.ShortcutIconsuu Audio System Basic Operation u Audio/Information ScreenFeatures1.Select the system status icon.u The status area appears.2.Select an item to see the details.3.Press the button or select the systemstatus icon to close the area.■Status AreaSystemStatus Icon Status Areauu Audio System Basic Operation u Audio/Information ScreenFeaturesYou can edit, show, or hide the meter contents on the driver information interface.1.Press the button.2.Select Settings .3.Select System .4.Select Config. of Instrument Panel .5.Select the content you wish to show or hide.u The checked items are displayed on the driver information interface.6.Select Done .■Editing orderYou can change the order of the contents on the driver information interface.1.Press the button.2.SelectSettings .3.Select System .4.Select Config. of Instrument Panel .5.Select Reorder .6.Select and hold the contents you want to move.7.Drag and drop the contents to where you want them to be.8.Select Done .■Customizing the Meter1Customizing the MeterYou can store up to three customized configurations.To select or customize a configuration, select Select configuration .uu Audio System Basic Operation u System Updates*Features System Updates*The audio system’s firmware can be updated with a Wi-Fi connection or with a USB device.■Wireless connection mode setup1.Press the button.2.Select System Updates.3.Select Settings.4.Select Connection Setup.5.Select Wi-Fi.6.Select Change Mode.7.SelectNetwork, thenConfirm.u The display returns to the network list.8.Select an access point from the network list,then Save.u If the audio system requires a password,enter a password.■How to Update Wirelessly1Wireless connection mode setupIf your vehicle has a telematics control unit (TCU), youdo not need the wireless connection mode setup.*Not available on all modelsuu Audio System Basic Operation u System Updates *Features■How to updateWhen the audio system update is available, the notification is shown on the audio/information screen. Use the following procedure to update the system.1.Press the button.2.Select System Updates .3.Select via Wireless .u If a notification is displayed on the screen, the screen of step 5 will be displayed.4.Select Download Now .uA notification appears on the screen.1How to updateYou can update the system via Wi-Fi, but cannot use the captive portal that require login or agreement the terms of use on the browser.Your download will be canceled if:•Your Wi-Fi connection is severed.•You turn off the ignition when the battery is low on power.Your download will recommence the next time a Wi-Fi connection is established.uu Audio System Basic Operation u System Updates*Features 5.Select Install Now or Install whileVehicle OFF.u A notification appears on the screen ifthe update is successful.1How to updateFor battery protection, Install while Vehicle OFFcannot be selected when the battery is low on power.If you want to install the updated data, recharge thebattery or select Install Now.uu Audio System Basic Operation u System Updates *Features■Automatic download settingsUse the following procedure to change to the automatic download setting.1.Press the button.2.Select System Updates .3.Select Settings .4.Select Auto Download .5.Select the access point, then Yes .■View a version and update statusUse the following procedure to confirm the version and update status.1.Press thebutton.2.Select System Updates .3.Select Settings .4.Select Version Status .uu Audio System Basic Operation u System Updates*Features ■Download the update files from the server1.Press the button.2.SelectSystem Updates.3.Select via USB.u A notification appears on the screen.4.Connect a USB device into the USB port inthe center pocket.u The inventory data is copied into the USBdevice.2USB Ports P.2475.Remove the USB device from the USB port.6.Connect the USB device into yourcomputer, and then download the updatefiles.u Follow the link to download the requiredsoftware update files. Refer tohttps:// for instructions.■How to Update with a USB Device1How to Update with a USB DeviceA USB device with a minimum of 8 GB of free spaceor more is recommended.Be sure to delete any previous inventory or updatefiles from the USB before starting the USB updateprocess.uu Audio System Basic Operation u System Updates *Features■Update the audio system1.Press the button.2.Select System Updates .3.Select via USB .u A notification appears on the screen.4.Connect the USB device with the update files into the USB port.u A notification appears on the screen.2USB Ports P.2475.SelectInstall Now .u A notification appears on the screen if the update is successful.uu Audio System Basic Operation u Adjusting the SoundFeatures Adjusting the Sound1.Press the button.2.Select an audio source icon.3.Select Sound.4.Select the setting you want.5.Select Save.Select an item from the following choices:•Bass / Treble: Treble, Midrange, Bass,Subwoofer*•Balance / Fader: Balance, Fader•DTS Neural Surround*: DTS NeuralSurround TM•Speed Volume Compensation: SpeedVolume Compensation (SVC)1Adjusting the SoundThe SVC adjusts the volume level based on thevehicle speed. As you go faster, audio volumeincreases. As you slow down, audio volumedecreases.You can also adjust the sound by the followingprocedure.1.Press the button.2.Select Settings.3.Select Sound.To reset each setting for Bass / Treble, Balance /Fader, DTS Neural Surround* and Speed VolumeCompensation select Default.*Not available on all models。
毅力汽车音频系统操作手册说明书
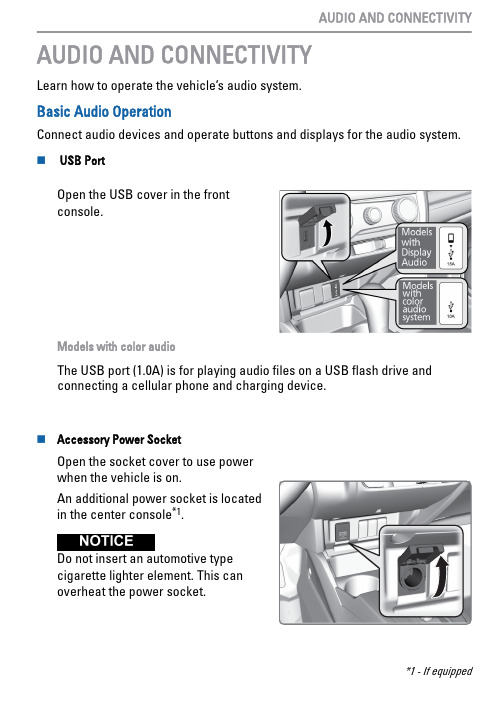
AUDIO AND CONNECTIVITYLearn how to operate the vehicle’s audio system.Basic Audio OperationConnect audio devices and operate buttons and displays for the audio system.n USB PortOpen the USB cover in the front console.Models with color audioThe USB port (1.0A) is for playing audio files on a USB flash drive and connecting a cellular phone and charging device.n Accessory Power SocketOpen the socket cover to use power when the vehicle is on.An additional power socket is located in the center console *1.Do not insert an automotive type cigarette lighter element. This canoverheat the power socket.*1 - If equipped AUDIO AND CONNECTIVITYn Audio Remote Controls *1You can operate certain functions of the audio system using the steering wheel controls.SOURCE button : Cycle through available audio modes.< / > : buttons : Change presets, tracks,albums, or folders.+/ - buttons : Adjust audio volume.Menu button: From the audio screen,press to choose options for the current audio mode(Models with Display Audio). Use the +/- buttons and the SOURCE button to scroll and enter selections.Press and hold : > or < for the next or previous strong station.CD *1/iPod/USB/Bluetooth ® AudioPress : > or < for the next or previous track.CD *1/USB Flash DrivePress and hold : > or < for the next or previous folder (CD/USB).Pandora ®*13Press Menu: To display the menu items. You can select Bookmark, or Play/Pause.n Adjusting the SoundAdjust various sound settings.Models with Color Audio Use the selector knob to make and enter selections.Menu button *1 - If equipped *13 - US models only, if equipped AUDIO AND CONNECTIVITY1.Press the Sound button.2.Select a sound mode to change, andadjust it using the selector knob. 3.Press the Back button to exit themenu.AUDIO AND CONNECTIVITY。
【音乐达人必备】安卓DSP管理器设置
【音乐达人必备】安卓DSP管理器设置
打开dsp管理器(向上为+ 向下为-)
选择耳机(其他基本同理不过我想手机的外放喇叭还是不用设置了吧没人用这个听歌还讲究什么音效吧呵呵)
第一个动态范围压缩不要选(选上会让音效效果减弱而且会变模糊)
选择效果强度选择极致(这个没什么好说的)
均衡器启用(这个是重点)
单击均衡器那个画面进入设置界面5个选项依次设为+5.8 -5.1 -2.3 -1.2 -0.6(超重低音其他音效还请自行摸索设置)启用耳机虚拟空间勾上(其实这个就是通常说的环绕)
空间类型选择大房间
打开dsp管理器
选择耳机(其他基本同理不过我想手机的外放喇叭还是不用设置了吧没人用这个听歌还讲究什么音效吧呵呵)
第一个动态范围压缩不要选(选上会让音效效果减弱而且会变模糊)
选择效果强度选择极致(这个没什么好说的)
均衡器启用(这个是重点)
单击均衡器那个画面进入设置界面5个选项依次设为+5.0 +6.0 +8.6 +8.5 +8.6(中等低音其他音效还请自行摸索设置)启用耳机虚拟空间勾上(其实这个就是通常说的环绕)
空间类型选择大房间
底下是外放设置。
打开dsp管理器
选择电话扬声器
均衡器启用(这个是重点)
单击均衡器那个画面进入设置界面5个选项依次设为+2.4 +5.0 +5.7 +6.5 +7.1
关于 U8950D 的说明这个DSP音效只支持内置播放器什么天天动听酷狗没用。
我觉得内置的播放器也不错就是有点难看。
为了音质豁出去了。
DSP音效设置最后那个均衡器设置最后那个设置的时候看不清大家自己大约设置吧一般有点误差没问题,+-0.2 没问题、DSP 管理器。
调音台的基本知识-图解
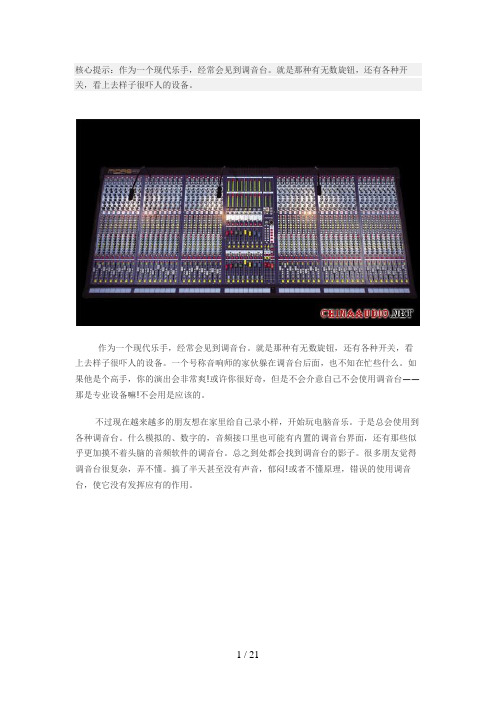
核心提示:作为一个现代乐手,经常会见到调音台。
就是那种有无数旋钮,还有各种开关,看上去样子很吓人的设备。
作为一个现代乐手,经常会见到调音台。
就是那种有无数旋钮,还有各种开关,看上去样子很吓人的设备。
一个号称音响师的家伙躲在调音台后面,也不知在忙些什么。
如果他是个高手,你的演出会非常爽!或许你很好奇,但是不会介意自己不会使用调音台——那是专业设备嘛!不会用是应该的。
不过现在越来越多的朋友想在家里给自己录小样,开始玩电脑音乐。
于是总会使用到各种调音台。
什么模拟的、数字的,音频接口里也可能有内置的调音台界面,还有那些似乎更加摸不着头脑的音频软件的调音台。
总之到处都会找到调音台的影子。
很多朋友觉得调音台很复杂,弄不懂。
搞了半天甚至没有声音,郁闷!或者不懂原理,错误的使用调音台,使它没有发挥应有的作用。
想要学习一件事物,我们首先应该知道这个东西到底能够作些什么!我们能用调音台做些什么事情呢?大致可以有如下几项:一. 调音台能够放大输入通道的信号,并且调整输入声音的均衡(EQ),甚至其他效果,比如压缩等等二. 调音台可以把很多声音的混合起来组成一个立体声!三. 调音台能为乐手和演员“返送”监听。
四. 调音台协助效果器为各个通道添加混响、延迟等效果五. 调音台把各通道的声音发送给多轨录音机或者音频接口分轨录音六. 调音台能够可以让录音师很方便的监听所有通道的声音,并且并不干扰这些通道。
实践是学习调音台的最好方法。
我们以最为常见的Behringer UB1622FX模拟调音台为例,只是例举,并非推广,UB1622FX纯是入门级,介绍调音台的基本功能和使用方法,此文只想用一个具体的例子让大家了解调音台的一些基础知识!知识是相通的,只要掌握了调音台的基础知识,就可以很快掌握和使用各种各样的调音台,无论是模拟的还是数字的,甚至是那些虚拟的调音台,都能很快上手。
第二部分:信号的放大,参数均衡和插入效果下面我们就结合Behringer UB1622FX调音台的实际情况,介绍调音台的功能和使用。
MusicLab RealStrat v1.0 中文使用手册
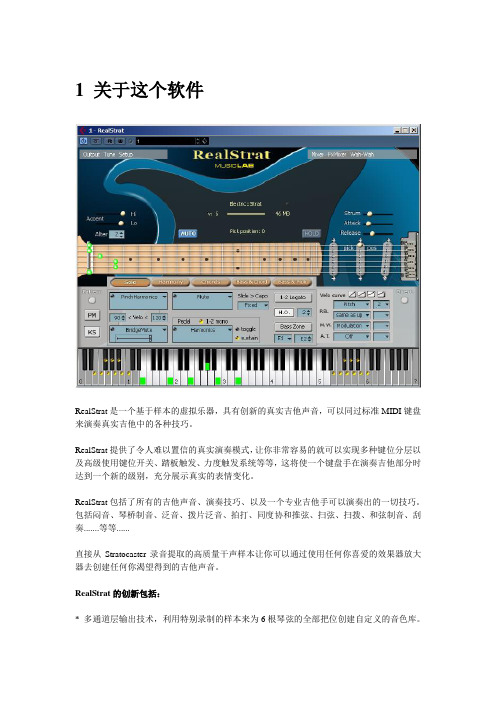
1 关于这个软件RealStrat是一个基于样本的虚拟乐器,具有创新的真实吉他声音,可以同过标准MIDI键盘来演奏真实吉他中的各种技巧。
RealStrat提供了令人难以置信的真实演奏模式,让你非常容易的就可以实现多种键位分层以及高级使用键位开关、踏板触发、力度触发系统等等,这将使一个键盘手在演奏吉他部分时达到一个新的级别,充分展示真实的表情变化。
RealStrat包括了所有的吉他声音、演奏技巧、以及一个专业吉他手可以演奏出的一切技巧。
包括闷音、琴桥制音、泛音、拨片泛音、拍打、同度协和推弦、扫弦、扫拨、和弦制音、刮奏.......等等......直接从Stratocaster录音提取的高质量干声样本让你可以通过使用任何你喜爱的效果器放大器去创建任何你渴望得到的吉他声音。
RealStrat的创新包括:* 多通道层输出技术,利用特别录制的样本来为6根琴弦的全部把位创建自定义的音色库。
* 独特的浮动变调夹技术,这模仿了一个吉他手演奏中手在琴颈上的把位移动。
这将可是你通过一个标准的64键MIDI键盘来演奏超过140个声音。
* 声音人性化技术,使你即使机械般的重复触发同样的音符,也会得到非常人性化的效果(震音、扫弦等等......)。
* 吉他触觉技术,让你非常容易的去演奏各种吉他技巧(扫弦、扫拨、滑弦、推弦、制音、等等.....)。
充分利用标准的MIDI键盘和MIDI控制器,同样包括弯音轮、调制轮、延音踏板、以及触键后压。
RealStrat包含了一个强大的模板管理器,包含了完整的MusicLab吉他模板库,让你可以非常容易的去创建吉他伴奏轨道,你可以在模板管理器的树状目录中容易的找到你需要的节奏,拷贝到你需要的位置,开始音序器并利用MIDI键盘去演奏和弦的变化,或者在你的音序器MIDI编辑器中添加和弦性质音符,来完成你的制作。
2 安装RealStrat安装PC版本:双击RealStrat安装程序跟随安装界面的指引一步步操作即可。
Realtek高清晰音频管理器设置图文教程
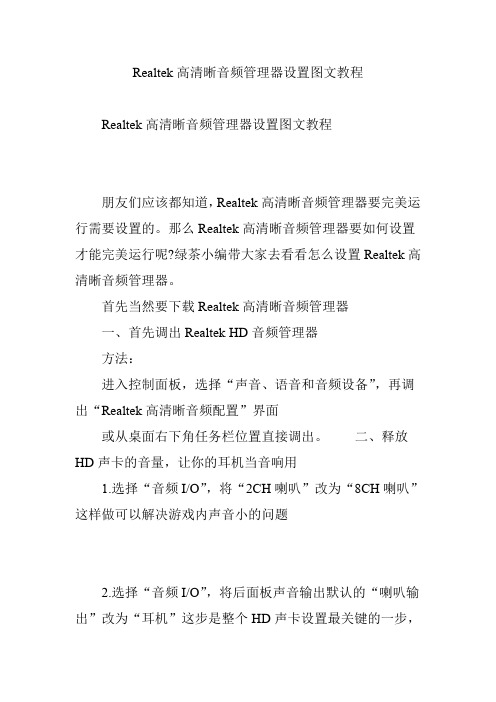
Realtek高清晰音频管理器设置图文教程Realtek高清晰音频管理器设置图文教程朋友们应该都知道,Realtek高清晰音频管理器要完美运行需要设置的。
那么Realtek高清晰音频管理器要如何设置才能完美运行呢?绿茶小编带大家去看看怎么设置Realtek高清晰音频管理器。
首先当然要下载Realtek高清晰音频管理器一、首先调出Realtek HD音频管理器方法:进入控制面板,选择“声音、语音和音频设备”,再调出“Realtek高清晰音频配置”界面或从桌面右下角任务栏位置直接调出。
二、释放HD声卡的音量,让你的耳机当音响用1.选择“音频I/O”,将“2CH喇叭”改为“8CH喇叭”这样做可以解决游戏内声音小的问题2.选择“音频I/O”,将后面板声音输出默认的“喇叭输出”改为“耳机”这步是整个HD声卡设置最关键的一步,一定不能忘。
三、启用后置麦克风功能选择“混频器”,将“Rear Pink in”X选状态取消并将音量调到最大选择“混频器”,将“录制”旋转音量调到最大 2.禁用前面板插孔检测功能。
方法:进入Realtek HD 音频管理器,选择“音频I/O”并点选管理面板右上“扳手图标”,在弹出界面中钩选“禁用前面板插孔检测”并单击“OK”键确认。
设置完毕,现在你放个音乐或者电影把声音开到最大,已经可以不用带耳机了,你的耳机已经可以当小信箱用了。
realtek HD系列声卡就是这样的,不止你的883,888也是如此在出厂的时候就把输入MIC音量的调节屏蔽了,所以个人用户无法调节此选项,你在音频设置里调节成我那样的设置其实MIC就能正常使用了,声音也比较适中~~ 特别提醒:(UT还有QQ里的MIC音量都是无法调节的)。
Win8通过设置音频管理器来解决系统声音不正常的方法
Win8通过设置音频管理器来解决系统声音不正常的方法
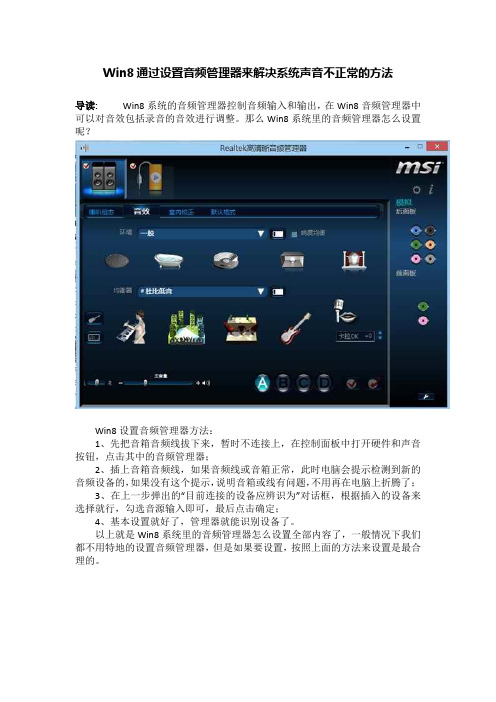
导读:Win8系统的音频管理器控制音频输入和输出,在Win8音频管理器中可以对音效包括录音的音效进行调整。
那么Win8系统里的音频管理器怎么设置呢?
Win8设置音频管理器方法:
1、先把音箱音频线拔下来,暂时不连接上,在控制面板中打开硬件和声音按钮,点击其中的音频管理器;
2、插上音箱音频线,如果音频线或音箱正常,此时电脑会提示检测到新的音频设备的,如果没有这个提示,说明音箱或线有问题,不用再在电脑上折腾了;
3、在上一步弹出的“目前连接的设备应辨识为”对话框,根据插入的设备来选择就行,勾选音源输入即可,最后点击确定;
4、基本设置就好了,管理器就能识别设备了。
以上就是Win8系统里的音频管理器怎么设置全部内容了,一般情况下我们都不用特地的设置音频管理器,但是如果要设置,按照上面的方法来设置是最合理的。
音频设备调节操作流程
音频设备调节操作流程随着科技的不断发展,音频设备在我们的生活中扮演着越来越重要的角色。
无论是在家庭娱乐中还是在专业音频制作领域,准确调节音频设备是确保音质清晰、音量适中的关键。
本文将介绍音频设备调节的基本操作流程,帮助读者更好地运用音频设备。
1. 连接音频设备首先,我们需要将音频设备与外部音源或扬声器等设备进行连接。
通常,这需要使用音频线缆或接口进行连接。
确保按照设备的说明书或标识将正确的接口连接到正确的插孔上,以免造成不必要的故障。
2. 打开音频设备一旦完成连接,我们可以打开音频设备,通常是通过按下电源按钮或旋转电源开关。
确保设备已经连接到电源并已正确启动。
一些音频设备可能需要时间来进行初始化,请耐心等待设备启动。
3. 调节音频输入接下来,我们需要调节音频输入信号的音量和平衡。
音频输入通常包括麦克风、乐器或其他外部音源。
通过设备上的音量旋钮或按钮,逐渐增加输入信号的音量,同时保持它在合适的范围内,以避免失真或噪音。
如果设备有平衡控制,可以根据需要调整左右声道的平衡。
4. 调节音频输出一旦音频输入调节完成,接下来我们需要调节音频输出信号的音量和等化器设置。
音频输出通常指与扬声器或耳机等输出设备相连的信号。
根据需要使用设备上的音量旋钮或按钮,逐渐增加输出信号的音量,同时保持它在适当范围内,以避免噪音过大或损伤听力。
如果设备配有等化器控制,我们可以根据个人喜好或所需的音效调整高音、中音和低音等频谱。
5. 应用音频效果在一些高级音频设备中,我们可以通过内置的音频效果器来调节音频效果,如混响、回声、压缩等。
这些音频效果可以用于音频录制、混合和后期处理等多种情况。
使用设备上的音频效果控制,根据需要适当调整这些音频效果的参数。
6. 监听和测试调节完音频设备后,我们需要进行监听和测试。
播放一段音频或音乐,确保音质清晰、音量适中,没有明显的噪音或失真。
根据需要,我们可以调整音频设备上的各项参数,直到满足个人需求或特定应用场景的要求。
朗科R318錄音筆使用手冊说明书
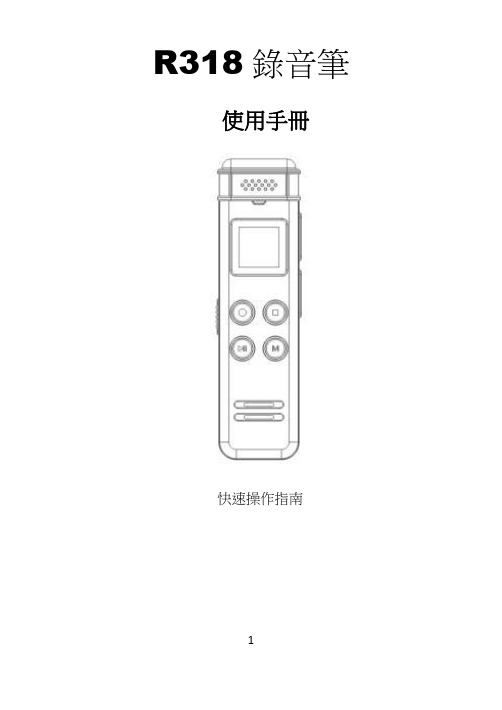
R318錄音筆使用手冊快速操作指南1●外觀說明注:外型圖片以實物為准!●按鍵功能(1)開關機鍵(長時間不使用時將開關撥在“關機”的位置)(2)播放鍵:開機、關機、播放、暫停(3)錄音鍵:一鍵錄音(4)上一首鍵:上一首、向上選擇(長按為快退)(5)下一首鍵:下一首、向下選擇(長按為快進)(6)音量加鍵:音量增大(7)音量減鍵:音量減小(8)目錄/刪除鍵:刪除模式(長按)、功能模式、播放設置(播放狀態下短按)、確認(9)停止/切換鍵:錄音/音樂模式切換、保存錄音、返回上一層目錄2●顯示螢幕說明1.電池電量顯示2.目前錄音文件序號3.目前循環模式4.目前錄音檔案比特率5.目前錄音檔案格式6.目前檔案總時間7.目前檔案播放時間8.目前檔案錄音時間9.狀態顯示10.目前檔案排序11.總檔案數3●開機/關機(1)開機:將錄音筆的電源開關由“關機”的位置往上推動到“開機”的位置(若電源開關處於“開機”的位置則長按“播放”鍵)機器將會自動開機(2)關機:長按“”鍵機器將會自動關機,再將電源開關由“開機”的位置往下推動到“關機”的位置●錄音(1)開始錄音:在開機狀態下,短按機器的“錄音”鍵進入錄音模式,正在錄音時,顯示幕左上角會顯示“REC”圖示並閃爍,此時若錄音燈設置為“打開”則同時錄音指示燈點亮並閃爍(2)保存錄音:在錄音的過程中,按機器的“停止/切換”鍵,機器將保存當前錄音檔(2)自動保存錄音:本機有自動保存錄音功能,在不正常斷電情況下仍能保存錄音,其方式為每10秒保存一次,例如錄音到33秒時不正常斷電,前面的30秒錄音檔案本機會自動保存。
●檔案刪除在停止或暫停狀態下,長按“目錄/刪除”鍵進入刪除檔案模式,在螢幕顯示“刪除文件”,“刪除全部”或“退出”功能表以待確認,若想刪除音樂或錄音檔的單個曲目,則按“上一曲”或“下一曲”鍵切換到“刪除文件”按“目錄/刪除”鍵確認,再按“上一曲”或“下一曲”鍵選擇要刪除的檔後按“目錄/刪除”鍵進入下級功能表,選擇“確定刪除”按“目錄/刪除”鍵即可。
Windows 7系统 REALTEK系列声卡调试
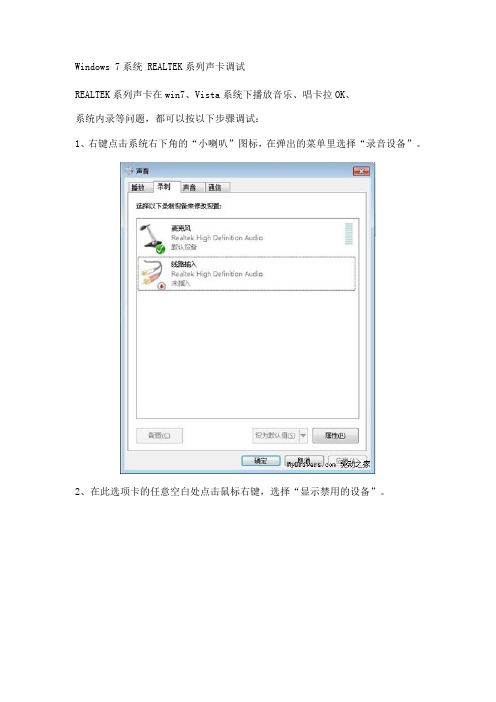
Windows 7系统 REALTEK系列声卡调试REALTEK系列声卡在win7、Vista系统下播放音乐、唱卡拉OK、系统内录等问题,都可以按以下步骤调试:1、右键点击系统右下角的“小喇叭”图标,在弹出的菜单里选择“录音设备”。
2、在此选项卡的任意空白处点击鼠标右键,选择“显示禁用的设备”。
3、找到“立体声混音”选项卡,系统默认是禁用的,所以我们需要手动打开。
4、右键点击“立体声混音”,在弹出的菜单里选择“启用”,然后再次右键点击选择“设置为默认设备”5、当“立体声混音”被正确启用,我们会看到该项图标的下面有一个绿色的勾。
做到这里,我们通过启用“立体声混音”设备已经实现了在win7、Vista系统下播放音乐文件,但是如果麦克风的输入音量很小,对方无法听见,那就接着往下看吧。
为了实现边播放音乐边发言(卡拉OK),我们还需要做以下设置。
6、双击“我的电脑”从“控制面板”里启动“音频管理器”。
7、手动将系统的默认设备更改为“立体声混音”。
8、麦克风选项卡里主要是调节麦克风音量的,麦克风增强按钮是控制对方听见你的声音大小的关键,系统默认增强值为零,所以对方几乎听不见你说话,我们根据自己的实际情况来调大吧。
需要注意“录制音量”和“播放音量”不能设置为“静音模式”,不然对方也是无法听见自己说话的。
9、立体声混音选项卡里需要注意的地方。
“录制音量”不宜过高,如果感觉有爆音,可以尝试拖小一点。
默认格式如果不是“16位,44100Hz(CD音质)”的请手动更改至此。
realtek系列声卡型号多种多样,有的笔记本声卡不支持立体声混音功能。
好啦!经过以上设置,立体声混音的问题基本上就解决了,快去聊天室大展歌喉吧。
Realtek 2.59版驱动支持芯片型号包括:ALC880、ALC882、ALC883、ALC885、ALC887、ALC888、ALC889、ALC892、ALC899、ALC861VC、ALC861VD、ALC660、ALC662、ALC663、ALC665、ALC670、ALC680、ALC260、ALC262、ALC267、ALC268、ALC269、ALC270、ALC272、ALC273、ALC275Realtek瑞昱HD Audio音频驱动2.59版本地下载:Win2000/XP/2003/XP-64/2003-64/drivers/425-170364-Realtek-ALC861-ALC880 -ALC882-ALC883-ALC8/Vista-32/Win7-32/drivers/425-170366-Realtek-ALC861-ALC880 -ALC882-ALC883-ALC8/Vista-64/Win7-64/drivers/425-170365-Realtek-ALC861-ALC880 -ALC882-ALC883-ALC8/安装Windows 7系统时,有不少用户会遇到系统没有声音的问题。
力瑞声LRX操作说明书(新版)
①
NNNNNNNNNNNNNNNN1/13 * GIANNNNNNNNNNNNNNN
②
IN_A:GAINNNNNN-6.0dB
………………………|………
F
G
Q
通道
音量
9
参数编辑
输入输出相位
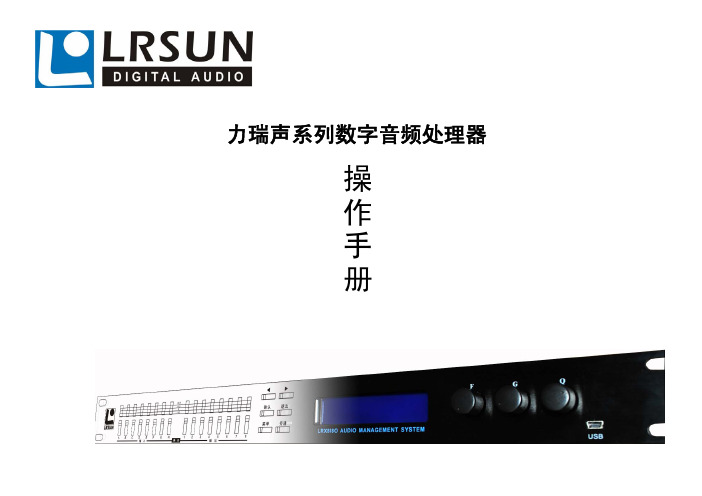
1) 按 Menu 键进入主菜单,通过旋 F 键选择功能 POLARITY ,功能号为(2/13)如图①,按 Enter 键进入输入相位调节菜单, 如图②所示。 ¾ 旋 F 键,调节通道,通道从 Input A 到 Input H ¾ 旋 Q 键,调节输入通道的相位,“+”或“-”
显示输出端通过信号的大小。 4. 输出通道按钮 CH-1 ~ CH-8:
在主界面下输出通道 1 ~ 8 的静音和功能项中输出通道选择。 5. 功能按键
4
前面板的布局
功能操作交互控制按键。(1)、键:为子功能项选择或多参数浏览;(2)确 定键:进入功能项和执行当前选定的动作等;(3)退出键返回到功能选择菜单界面 和取消当前选定的动作等;(4)菜单键:进入或返回功能选择菜单界面;(5)旁通 键使用或屏蔽当前通道的当前功能。 6. 液晶显示屏幕
2) 按
键进入高通滤波器的另一子菜单,进行参数调节,如图③所示。
¾ 旋 F 键,调节高通滤波器的中心频率: Fc (20Hz ~ 22kHz)
¾ 按 F 键,可切换频率的步进: 1Hz(默认)、10Hz、100Hz、1000Hz
¾ 旋 Q 键,调节高通滤波器的斜率:
Butter Butter Butter Butter Butter Butter
INPUT
ABCDEFGH >
win10realtek音频管理器如何调?win10realtek音频管理器设置教程
win10realtek⾳频管理器如何调?win10realtek⾳频管理器
设置教程
⼤家都知道,很多⽹友在使⽤使⽤win10系统时,为了拥有更好的⾳质效果都会去设置Realtek⾼清晰⾳频管理器。
但
win10realtek⾳频管理器怎么调呢?⼀些⽹友可能不太清楚,那么今天本⽂就来为⼤家分享关于win10realtek⾳频管理器设置⽅法,感兴趣的朋友不要错过了。
设置⽅法如下:
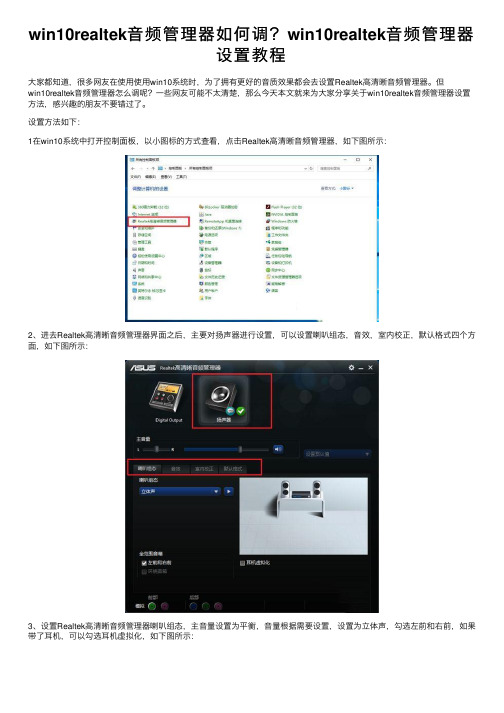
1在win10系统中打开控制⾯板,以⼩图标的⽅式查看,点击Realtek⾼清晰⾳频管理器,如下图所⽰:
2、进去Realtek⾼清晰⾳频管理器界⾯之后,主要对扬声器进⾏设置,可以设置喇叭组态,⾳效,室内校正,默认格式四个⽅⾯,如下图所⽰:
3、设置Realtek⾼清晰⾳频管理器喇叭组态,主⾳量设置为平衡,⾳量根据需要设置,设置为⽴体声,勾选左前和右前,如果带了⽿机,可以勾选⽿机虚拟化,如下图所⽰:
4、进⾏⾳效设置,⾳效主要设置环境和均衡器,这⾥环境设置为房间,均衡器设置为⽆,⼈声消除⼀般不勾选,卡拉ok设置为0,如下图所⽰:
5、进⾏室内校正设置,⼀般采⽤默认设置就可以,如下图所⽰:
6、进⾏格式设置,选择DVD格式,这⾥设置的是24位,48000HZ,这样就设置完成了,设置⾳频管理器可以拥有更好的⾳质效果,如下图所⽰:。
瑞昱HD声卡设置图解解读
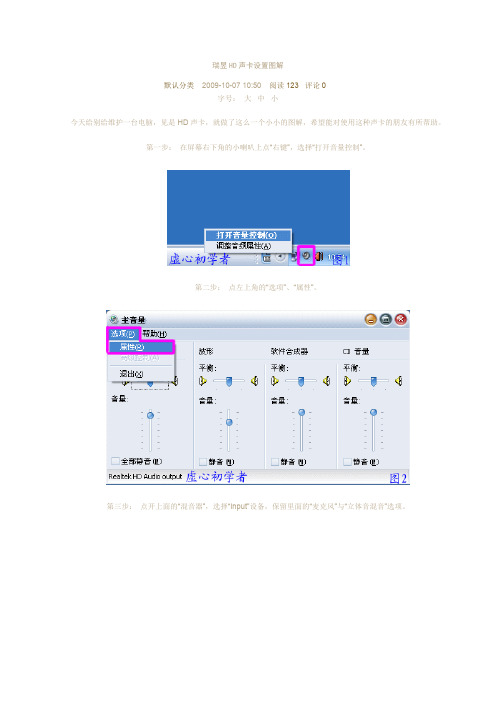
瑞昱HD声卡设置图解默认分类 2009-10-07 10:50 阅读123 评论0字号:大中小今天给别给维护一台电脑,见是HD声卡,就做了这么一个小小的图解,希望能对使用这种声卡的朋友有所帮助。
第一步:在屏幕右下角的小喇叭上点“右键”,选择“打开音量控制”。
第二步:点左上角的“选项”、“属性”。
第三步:点开上面的“混音器”,选择“Input”设备,保留里面的“麦克风”与“立体音混音”选项。
第四步:找到“选项”,把“高级控制”的勾打上。
第五步:点击“麦克风”下面的“高级”按钮,把“麦克风加强”打上勾。
第六步:左上角“选项”、“属性”打开。
第七步:选择“混音器”里面的“ output”,即输出设备。
把“主音量”、“波形”,第八步:“麦克风音量”选择上。
第九步:调节各个音量拉条到合适的位置上,注意:麦克风音量下的“静音”选项,如果正常说话是点上,如果放歌曲的时候要去掉。
第十步:打开屏幕右下角的红色小喇叭,或者是在“开始、设置、控制面板”中找到打开都可以的。
第十一步:点击“混频器”按图设置第十二步:第十三步:第十四步:第十五步:第十六步:点开“音频I/O”选项第十七步:第十八步:点开“麦克风”选项,“噪音抑制”点上。
以上就是最简单的瑞昱HD声卡的设置,由于本人接触的少,肯定有不足的地方,请大家多多提出宝贵意见。
读书的好处1、行万里路,读万卷书。
2、书山有路勤为径,学海无涯苦作舟。
3、读书破万卷,下笔如有神。
4、我所学到的任何有价值的知识都是由自学中得来的。
——达尔文5、少壮不努力,老大徒悲伤。
6、黑发不知勤学早,白首方悔读书迟。
——颜真卿7、宝剑锋从磨砺出,梅花香自苦寒来。
8、读书要三到:心到、眼到、口到9、玉不琢、不成器,人不学、不知义。
10、一日无书,百事荒废。
——陈寿11、书是人类进步的阶梯。
12、一日不读口生,一日不写手生。
13、我扑在书上,就像饥饿的人扑在面包上。
——高尔基14、书到用时方恨少、事非经过不知难。
电脑音频设备的设置与调整方法
电脑音频设备的设置与调整方法随着科技的不断进步,电脑已经成为我们日常生活中不可或缺的一部分。
而对于许多人来说,电脑音频设备的设置与调整方法可能是个难题。
本文旨在为读者提供一些简单实用的指导,帮助其正确设置和调整电脑音频设备,以获得更好的音频体验。
一、检查硬件设备在开始设置和调整之前,首先需要确保硬件设备正常连接。
请按照以下步骤进行检查:1. 检查扬声器或耳机是否正确连接到电脑。
确保插头插入相应的音频插孔,并且插头与插孔连接牢固。
2. 检查音频设备是否已经正确连接到电源。
确保设备接通电源,并且开关处于正确的位置。
3. 检查音频线是否存在损坏。
如果线材出现断裂、损坏或扭曲,可能会影响音频传输。
确保线材完好无损。
二、操作系统设置正确配置操作系统的音频设置是获得优质音频体验的关键。
以下步骤适用于Windows操作系统,Mac OS或其他操作系统可能有所不同:1. 点击开始菜单,选择“控制面板”。
2. 在控制面板中,找到并点击“声音”或“音频设备”选项。
3. 检查默认音频设备设置。
确保所需的音频设备已经被设置为默认设备。
通常情况下,您可以右键单击设备并选择“设置为默认设备”。
4. 调整音量。
通过滑动音量调节器来调整音量大小。
同时请注意,有些程序或应用程序也会具有自己的音量控制选项,您可以根据需要进行微调。
5. 声音增强选项。
部分操作系统提供了声音增强选项,可能会提高音频输出的清晰度和音量。
您可以尝试启用这些选项来获得更好的音效。
三、应用程序设置除了操作系统的设置外,一些应用程序也提供了自己的音频设置选项。
您可以按照以下步骤进行调整,以满足个人需求:1. 打开所使用的音频应用程序,例如音乐播放器或视频播放器。
2. 在应用程序中,找到并点击“设置”或“选项”或“首选项”等相关选项。
3. 音频输出设备。
检查音频输出设备选项,确保其与您所需的设备相匹配。
4. 音效等设置。
根据个人喜好进行音效等设置的调整。
不同的应用程序提供了不同的选项,例如均衡器、环绕声效果等,您可以根据自己的需求进行设置。
RealTek ALC8系列声卡控制面板
RealTek ALC8系列声卡Sound Effect界面
Polo
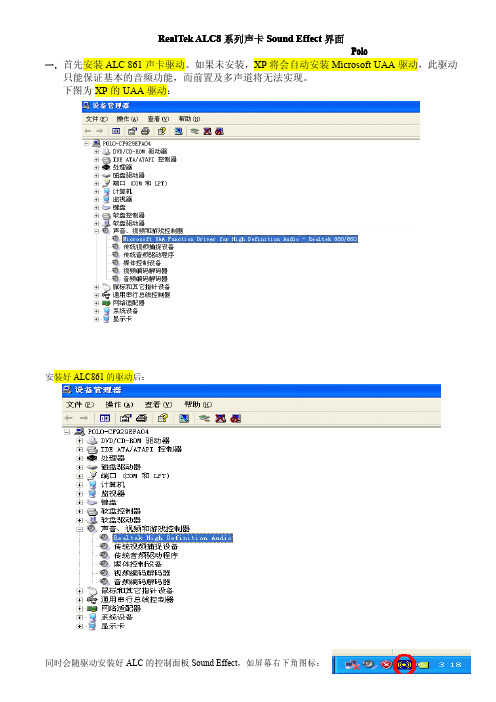
一.首先安装ALC861声卡驱动。
如果未安装,XP将会自动安装Microsoft UAA驱动,此驱动只能保证基本的音频功能,而前置及多声道将无法实现。
下图为XP的UAA驱动:
安装好ALC861的驱动后:
同时会随驱动安装好ALC的控制面板Sound Effect,如屏幕右下角图标:
二.Sound Effect
Sound Effect是ALC声卡环境音效工具,主要设置混音效果,声道,及自动识别所插入设备等。
下面让我们来认识一下此工具的相关设置。
1.双击右下角图标后,出现Sound Effect的界面。
如下图所示:上方共6个按扭。
2.音效
共3部分:环境,卡拉OK,均衡器。
图中红框部分设置您现在所在环境,依据环境不同而更改相应音效。
如果想要唱卡拉OK,您需要将如下图红框中人头部分打个“X”,即消除原音,只留伴奏。
您可根据您的喜好适当调节均衡器。
3.您可以根据您现在的音响设备选择相应声道。
同时,您可以对照右边的图示正确连接相应音频接口。
4.3D演示
此处主要用来演示3D音频效果。
相当于一个DEMO。
5一般
显示当前声卡信息和更改界面语言设置。
6.SPDIF
更改SPDIF输出频率和是否禁用SPDIF
7.音频向导
显示所连接的设备及是否开启或禁用“自动检测所插入设备”功能。
如果不想每次插入设备时都提示,可将自动侦测功能关闭掉。
- 1、下载文档前请自行甄别文档内容的完整性,平台不提供额外的编辑、内容补充、找答案等附加服务。
- 2、"仅部分预览"的文档,不可在线预览部分如存在完整性等问题,可反馈申请退款(可完整预览的文档不适用该条件!)。
- 3、如文档侵犯您的权益,请联系客服反馈,我们会尽快为您处理(人工客服工作时间:9:00-18:30)。
一.Realtek HD音频管理器设置
1.首先点开音频管理器(右下角任务栏中红色喇叭状图标)
音频管理器在这里.jpg
2.Realtek HD 音频管理器设置(Realtek高清晰音频配置)
A.音效设在低音
设在低音.bmp
B.
选择“混频器”,将所有被打X静音状态的选项点掉,设置为开启状态,中间< > 可供查找这两项
并将重放和录制的音量调到最大。
立体声混响叉选,否则有回声(唱歌时再点开)。
此主题相关图片如下:混音器设置第一步.bmp
调节重放和录制下面的小扳手,取消多路回放。
(没有就不设置了,我就没这一项)
C.禁用前面板插孔检测功能。
方法:
进入Realtek HD 音频管理器,选择“音频I/O”并点选管理面板右上“扳手图标”,在弹出界面中先钩选
"当插入正面耳机时,关闭后面板输出",然后钩选“禁用前面板插孔检测”.去掉"当插入设备时,开启自动弹出对话框",并单击“OK”键确认。
释放HD声卡的音量,让你的耳机当音响用
1.选择“音频I/O”,将“2CH喇叭”改为“8CH喇叭(没有8喇叭可选就选4喇叭吧.”这样做可以解决游戏内声音小的问题
此主题相关图片如下:音频i o 设置.jpg
此主题相关图片如下:关鍵一步.jpg
D.燥音抑制
麦克风一项中
此主题相关图片如下:燥音抑制.jpg
期它设置(如果你会设麦唱歌以下相同,不用再动.)如下:
1、双击任务栏的小喇叭
此主题相关图片如下:双击小喇叭.jpg
2、出现如下图,注意不要有静音勾。
点属性/音量控制,进入选项设置。
此主题相关图片如下:音量控制.jpg
3、只选Stereo Mic 和麦克风二项,其余空白。
设置好后可以将其关闭。
此主题相关图片如下:音量设定.jpg
4、再双击小喇叭,这回在属性中选录音,然后将其作如下设定。
此主题相关图片如下:录音设定.jpg
5、所有高级都要点上勾,有二个的只点一个,具体点哪个,请你自己试。
此主题相关图片如下:高级2.jpg
6、然后就出现了如下图示,你将它最小化,就可以去唱歌了。
此主题相关图片如下:录音设定完毕.jpg
7、在聊天室看着闪动的光柱调整音量,最大音量不到头就行。
此主题相关图片如下:光柱1.jpg
如果电脑在聊天室不能放歌解决方法:
盗版的XP3.0常常没有完整的声卡驱动器,可去开心网我的网盘中下载.
/!file/dir.php?dirid=96353573&uid=3226 1146
DG_2010Beta1_1068.exe这个就是
~~~~~~~~~~~~~~~~~~~~~~~~~~~~~~~~~~~~~~~~~~~~~~~~~~~~~~~~~~~ ~
附:
二、如何上传音乐帖
1、上传歌曲时首先要将歌曲压缩,因为论坛限制为1500KB以下。
音频压缩软件GoldWave V5.22 汉化版下载地址:
/soft/1746.html
2、软件安装完毕点打开加入歌曲。
此主题相关图片如下:打开.jpg
3、点文件中保存选定部份。
此主题相关图片如下:22050 32立体声.jpg
填写歌曲名称,选MP3并压缩到22050 32立体声。
4、打开发帖的发表新话题。
5、设定上传格式。
此主题相关图片如下:文件上传类型.jpg
6、点击添加后点击上传。
此主题相关图片如下:添加及上传.jpg
7、点展区音乐集浏览。
此主题相关图片如下:进入展区音乐集浏览.jpg
8、最新排名中第一个可能就是你的。
此主题相关图片如下:最新排行.jpg
9、点击上述排行中的第一项,出现网址后右键/属性,取下网址。
10、再回到发帖界面,点音符状图标。
将要求的数据填写齐全(高度可用69长度500以内比较好。
)
此主题相关图片如下:编辑格式.jpg
11、然后发表就OK了。
