HLP106S系列标签打印机实用工具手册Rev.1.0
P100说明书
dopod P100 用户手册2005.11多普达通讯有限公司敬告:在操作本设备之前请阅读下述内容在提示不能使用无线设备的场合,如医院、飞机机舱内、加油站、怕无线干扰的地方,请打开飞行模式并关闭整个设备的电源。
第一次充电请充满8小时。
在充电的过程中,请不要从设备上取下电池,以防损伤设备。
本机型不具有防水功能,请您注意防水,保持设备的干燥。
如果自行打开或者损伤外壳将不再享受保修服务。
请使用由多普达公司指定的附件和认可的第三方软件,否则如果设备出现问题多普达公司将不承担任何责任。
请注意保护好设备屏幕,防止磨损或挤伤。
此类损伤均被认为是人为损坏。
请及时备份数据!dopod 公司不承担因产品故障导致信息丢失而造成的一切直接或间接损失。
尤其在更换电池前更加需要备份数据。
使用本设备的GPS 导航时,请在停车后设置、操作,导航过程中必须遵守实际交通规则和实际路况信息,多普达不承担因交通引发的任何责任。
本设备是精密电子设备,请勿将其放在静电、电波较强的环境中使用。
如果在隧道或地下室、建筑物内的停车场、室内、高架桥下面、茂密的森林中时GPS 将可能无法有效接收。
使用本设备导航时,为使GPS 正常工作请不要试图关闭本设备的电源。
本设备中包含有一个锂聚合物电池。
如果电池处理不当,将会有着火和燃烧的危险。
不要分解、挤压、刺穿电池,不要短路电池外部的接头,更不要将其投入火中或者水中。
不要试图打开或者维修该电池,只能使用产品指定的电池来进行更换。
请正确处理电池不要随意丢弃。
由于软件版本更新而造成界面和功能变更,恕不另行通知。
友情提示:亲爱的用户,由于本设备内含一套完整的电脑系统,具有等同于个人电脑的系统架构和运行规则,因此,请您依照使用电脑的习惯来使用该设备;1. 充足的系统内存,将有助于设备良好高效的运行,所以建议您每天至少重新启动设备一次,以彻底清空内存,恢复系统至最佳状态。
重新启动设备请参阅附录一的执行软复位。
2. 请正确合理地使用您的设备内存,建议您不要同时运行过多的程序,否则将使设备运行速度变慢。
HLP106S-UE用户手册_Rev.1.1
安普印 SBP1000产品功能手册说明书

图1产品示意图二、产品结构安普印 SBP1000 功能手册一、产品介绍国产刻录一体机( 安普印SBP1000)是由我公司设计研发的数据刻录和光盘打印产品。
可设计光盘打印界面,选择需要刻录文件,自动完成光盘的数据刻录、封面制作。
设备外观如下图1所示。
000系统结构如下图2所示:图2产品系统结构图¾空白光盘仓:存放空白可打印光盘,50张光盘容量;刻录装置:集成1个DVD刻录光驱,可选配BD刻录光驱;¾¾光盘打印:可自主设计光盘盘面打印模版,支持盘面打印文字、图形、图像、二维码等信息;光盘输出仓:5张光盘容量,存放已经完成刻录打印的光盘和¾任务执行是失败的光盘;机械手臂模块:采用电子机械化结构,控制机械手臂完成光盘¾抓取和放置动作,从而实现光盘由空白光盘仓转移至刻录装置,由刻录装置转移至打印模块,由打印模块转移至光盘输出仓。
¾安全控制电路模块:根据上位机传输的操作指令,控制机械手臂模块完成相应操作,保证机械手臂安全可靠稳定的运行。
三、产品尺寸设备尺寸如下图3所示:图3产品尺寸图四、产品主要功能区域和接口介绍图4产品主要功能区域图1.换墨盒仓门:通过钥匙打开墨盒仓门,打开后点击“Fn功能000产品主要功能区域如下图4所示。
000键”,墨盒从初始位置移动至仓门下方,供维护认人员更换墨盒,更换完成后,关闭仓门,墨盒自动移动至初始位置。
2.状态显示面板:包含四个状态指示灯:电源、运行、缺墨、告警指示灯。
电源指示灯亮表示设备通电;运行指示灯闪烁表示设备正在进行刻录打印任务;缺墨指示灯亮表示设备墨盒墨水容量低,需要尽快更换墨盒;告警指示灯亮表示设备运行过程有错误,请根据软件错误提示进行维护操作。
3.功能键:“Fn功能键”有换墨盒、开关仓门挡板、弹收光盘输出仓功能。
在换墨盒仓门打开的情况下,点击“Fn功能键”执行换墨盒操作;在换墨盒仓门关闭的情况下,点击“Fn功能键”执行开关仓门挡板操作;在换墨盒仓门关闭的情况下,长按“Fn功能键”3秒执行弹出收会光盘输出仓功能。
printertools使用说明

printertools使用说明printertools是一个超好用的工具呢,今天就来给大家唠唠它到底怎么用。
一、安装。
二、连接打印机。
安装好printertools之后,就要让它和打印机连接起来啦。
如果你的打印机是通过USB线连接电脑的,那这个就很方便啦。
你把打印机打开,电脑一般会自动识别,然后printertools也会感应到这个打印机。
要是你的打印机是无线连接的呢,那你就要先确保打印机和电脑在同一个无线网络下。
然后在printertools里找到添加打印机的选项,它可能会搜索一会儿,你就耐心等等,就像等公交车一样,它总会来的。
等搜索到你的打印机之后,点击连接,就大功告成啦。
三、打印文件。
好啦,连接好打印机之后,就可以打印文件啦。
你在printertools里可以看到一个打印的图标,很明显的,就像一个小打印机在向你招手。
你点击这个图标,然后会弹出一个打印设置的窗口。
这里面可以设置很多东西呢。
比如说你想打印多少份,就像你决定要给几个小伙伴分享小秘密一样,在份数那里调整就好。
还有纸张大小,A4纸就像我们常用的信纸大小,要是你有特殊需求,比如要打印小卡片,就可以选择其他的纸张大小。
打印方向也可以选,是纵向还是横向,这就看你的文件内容适合哪种啦。
都设置好之后,点击确定,打印机就开始工作啦,你会听到它欢快的运转声,就像它在开心地接受任务一样。
四、扫描功能。
printertools还有扫描功能哦。
如果你的打印机带有扫描功能的话,那这个就很实用啦。
你在printertools里找到扫描的选项,然后把你要扫描的文件或者图片放在打印机的扫描台上。
这里要注意放整齐哦,就像给它摆个好看的姿势拍照一样。
然后在扫描设置里,你可以选择扫描的分辨率,分辨率越高,扫描出来的文件就越清晰,但是文件大小也会越大。
你可以根据自己的需求来调整。
比如说你只是想简单记录一下文件内容,就不用选太高的分辨率。
设置好之后,点击扫描,扫描好的文件就会出现在你的电脑里啦,你可以给它取个有趣的名字保存起来。
微胶带打印机的用户手册说明书
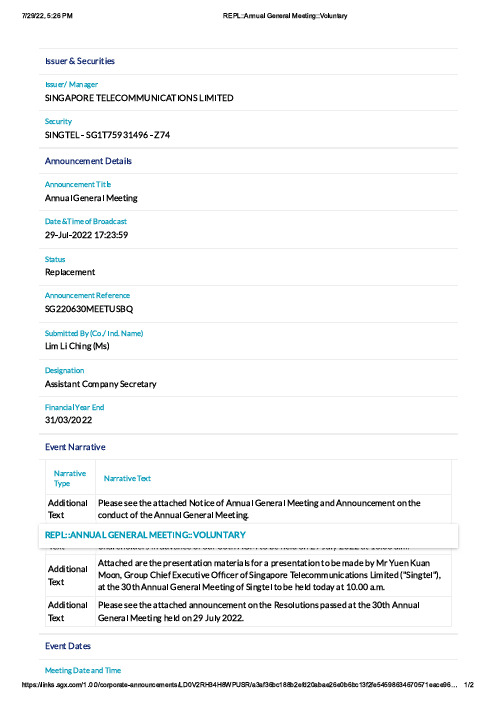
344567ÿ9ÿ:6;57<=<64344567>ÿ?@A@B67:3C D E F G H IÿJ I K I L G??M C3L E J3G C:ÿK3?3J I N:6;57<=O:3C D J I KÿPÿ:D Q J R S T U Q V T WÿPÿX R VE A A Y5A;6Z6A=ÿN6=@<[4E A A Y5A;6Z6A=ÿJ<=[6E A A5@[ÿD6A67@[ÿ?66=<A BN@=6ÿ9J<Z6ÿY\ÿ]7Y@^;@4=_T P`5[P_a__ÿQ R b_U b S T:=@=54H6c[@;6Z6A=E A A Y5A;6Z6A=ÿH6\676A;6:D__a W U a?I I J M:]d:5e Z<==6^ÿ]Oÿf L Y g>ÿ3A^gÿC@Z6hK<ZÿK<ÿL i<A Bÿf?4hN64<B A@=<Y AE44<4=@A=ÿL Y Z c@A Oÿ:6;76=@7Oj<A@A;<@[ÿk6@7ÿI A^U Q>a U>_a__I l6A=ÿC@77@=<l6C@77@=<l6J O c6C@77@=<l6ÿJ6m=E^^<=<Y A@[ J6m=F[6@46ÿ466ÿ=i6ÿ@==@;i6^ÿC Y=<;6ÿY\ÿE A A5@[ÿD6A67@[ÿ?66=<A Bÿ@A^ÿE A A Y5A;6Z6A=ÿY Aÿ=i6 ;Y A^5;=ÿY\ÿ=i6ÿE A A5@[ÿD6A67@[ÿ?66=<A B gE^^<=<Y A@[ J6m=F[6@46ÿ466ÿ@==@;i6^ÿY57ÿ764c Y A464ÿ=Yÿ45e4=@A=<@[ÿ@A^ÿ76[6l@A=ÿn564=<Y A4ÿ76;6<l6^ÿ\7Y Z :i@76i Y[^674ÿ<Aÿ@^l@A;6ÿY\ÿY57ÿU a=iÿE D?ÿ=Yÿe6ÿi6[^ÿY Aÿ_Tÿ`5[Oÿ_a__ÿ@=ÿQ a g a aÿ@g Z gE^^<=<Y A@[ J6m=E==@;i6^ÿ@76ÿ=i6ÿc7646A=@=<Y AÿZ@=67<@[4ÿ\Y7ÿ@ÿc7646A=@=<Y Aÿ=Yÿe6ÿZ@^6ÿe Oÿ?7ÿk56Aÿo5@A Y A pÿD7Y5cÿL i<6\ÿI m6;5=<l6ÿG\q;67ÿY\ÿ:<A B@c Y76ÿJ6[6;Y Z Z5A<;@=<Y A4ÿK<Z<=6^ÿf r:<A B=6[r h p @=ÿ=i6ÿU a=iÿE A A5@[ÿD6A67@[ÿ?66=<A BÿY\ÿ:<A B=6[ÿ=Yÿe6ÿi6[^ÿ=Y^@Oÿ@=ÿQ a g a aÿ@g Z gE^^<=<Y A@[ J6m=F[6@46ÿ466ÿ=i6ÿ@==@;i6^ÿ@A A Y5A;6Z6A=ÿY Aÿ=i6ÿH64Y[5=<Y A4ÿc@446^ÿ@=ÿ=i6ÿU a=iÿE A A5@[ D6A67@[ÿ?66=<A Bÿi6[^ÿY Aÿ_Tÿ`5[Oÿ_a__gI l6A=ÿN@=64s t u v w w x y y z x vÿ|t y t s x vÿ}t t~ y|w w v z y~x s3456753633ÿ96:66:66;<=>?@=<ÿA <B C D E @<ÿA B F <3G 56753633ÿ96:66:66H I <@F ÿJ <@K<L =M N D B O <J <@K <L =M J <@K <ÿC <F B E D =P<<F E @Q ÿJ <@K <R S <ÿT @@K B D ÿU <@<V B D ÿP<<F E @Q ÿW E D D ÿX <ÿS <D C ÿX Y ÿW B Y ÿ?Z ÿ<D <O F V ?@E O ÿ[<B @=\T F F B O S [<@F =R ?F B D ÿ=E ]<ÿ^_66G `ÿPa;<D B F <C ÿT @@?K @O <[<@F =;<D B F <C ÿT @@?K @O <[<@F =ÿ3456753633ÿ67:6b :673c 56753633ÿ97:9_:d 6ÿ_656G 53633ÿ67:b b :9_ÿÿ;<=>?@=<=R ?e K <=F E ?@=\>C Z f ?F E O <ÿ?Z ÿT U Pÿ3633\>C Z 3633ÿT U PÿB @@\>C Z 3633T U PN V <=<@F B F E ?@\>C Z ;<=?D K F E ?@=N B ==<C T F _6F S T U P\>C ZSINGAPORE TELECOMMUNICATIONS LIMITEDIncorporated in the Republic of Singapore(Company Registration No. 199201624D)ANNOUNCEMENT PURSUANT TOCLAUSE 704(16) OF THE SGX LISTING MANUALANNOUNCEMENT ONRESOLUTIONS PASSED AT THE 30TH ANNUAL GENERAL MEETING (“AGM”)Singapore Telecommunications Limited (the "Company") is pleased to announce, in accordance with Clause 704(16) of the Listing Manual of the Singapore Exchange Securities Trading Limited, that at the AGM of the Company held today, all the Resolutions as set out in the Notice of the AGM dated 30 June 2022 were put to the AGM and duly passed on a poll vote.A. Breakdown of valid votes castResolution number anddetails Total number ofsharesrepresented byvotes for andagainst therelevantresolutionFor AgainstNumber ofsharesAs apercentageof totalnumber ofvotes forand againsttheresolution(%)Number ofsharesAs apercentageof totalnumber ofvotes forand againsttheresolution(%)Ordinary BusinessResolution 1Adoption of Directors'Statement and auditedFinancial Statements andAuditors’ Report12,035,504,906 12,031,280,123 99.96% 4,224,783 0.04%Resolution 2Declaration of a final dividend12,072,671,157 12,071,508,727 99.99% 1,162,430 0.01%Resolution 3Re-election of Ms ChristinaHon Kwee Fong (MrsChristina Ong) as Director12,000,450,352 11,240,733,465 93.67% 759,716,887 6.33%Resolution 4Re-election of Mr BradleyJoseph Horowitz as Director12,070,201,061 12,066,909,545 99.97% 3,291,516 0.03%Resolution 5Re-election of Mrs GailPatricia Kelly as Director12,070,201,061 12,034,902,421 99.71% 35,298,640 0.29%Resolution 6Re-election of Mr JohnLindsay Arthur as Director12,070,201,061 12,067,331,831 99.98% 2,869,230 0.02%Resolution 7Re-election of Ms Yong HsinYue as Director12,070,201,061 12,067,331,831 99.98% 2,869,230 0.02%Resolution number anddetails Total number ofsharesrepresented byvotes for andagainst therelevantresolutionFor AgainstNumber ofsharesAs apercentageof totalnumber ofvotes forand againsttheresolution(%)Number ofsharesAs apercentageof totalnumber ofvotes forand againsttheresolution(%)Resolution 8Directors’ fees for thefinancial year ending 31March 202312,072,611,024 12,041,768,635 99.74% 30,842,389 0.26%Resolution 9Re-appointment of Auditorsand authorising the Directorsto fix their remuneration12,072,630,457 12,064,270,825 99.93% 8,359,632 0.07%Special BusinessResolution 10Share issue mandate12,073,870,565 11,293,890,250 93.54% 779,980,315 6.46%Resolution 11Grant of awards andallotment/issue of sharespursuant to the SingtelPerformance Share Plan201212,072,022,616 11,749,981,338 97.33% 322,041,278 2.67%Resolution 12Share purchase mandate12,072,513,346 12,058,566,303 99.88% 13,947,043 0.12%B. Details of parties who are required to abstain from voting on any resolution(s):(1) Ms Yong Hsin Yue abstained from voting on Resolution 7 in respect of her own re-election as Directorof the Company.To demonstrate good corporate governance practices:(2) All Directors of the Company, who are shareholders and entitled to Directors’ fees, were requested toabstain from voting on Ordinary Resolution 8 in respect of the payment of Directors' fees for thefinancial year ending 31 March 2023.(3) All Directors and employees of the Company who are also shareholders and are eligible to participatein the Singtel Performance Share Plan 2012 were requested to abstain from voting on OrdinaryResolution 11 in respect of the share plan mandate for the Directors to grant awards and allot andissue shares pursuant to the Singtel Performance Share Plan 2012.C. Name of firm and/or person appointed as scrutineer: RHT Governance, Risk & Compliance (Singapore)Pte. Ltd.D. With effect from the conclusion of Singtel’s 30th AGM held today, Mr Venkataraman Vishnampet Ganesan,who has been a Director of the Company since 2015, has stepped down as a Director of the Company. The Board and Management of Singtel thank Mr Ganesan for his invaluable contributions to the Singtel Group and wish him all the best for the future.Dated: 29 July 2022。
打印机维修手册:epson pro10060 服务手册

注意 ❏ 本手册适用于 Windows 和 Macintosh 用户 本手册中的所有版
面窗口插图和对话框是 Windows 版本中的 即使您使用 Macintosh 版本 您也可以看到几乎一样的窗口和对话框
❏ 本手册中的屏幕图像是 Stylus Pro 9600/7600 的
下列按钮是 EPSON 打印机服务应用工具屏幕中通常出现的按钮 如下图所示
EPSON 打印机服务应用工具 用户手册
关于 EPSON 打印服务应用工具 3 主要功能 4
主屏幕 5 打印头校准 / 自定义
打印纸配置 6 深度打印头清洗 11 固件更新 12 卸载 EPSON 打印机服务应用工具 13
版权所有 翻版必究
All rights reserved. No part of this publication may be reproduced, stored in a retrieval system, or transmitted in any form or by any means, electronic, mechanical, photocopying, recording, or otherwise, without the prior written permission of SEIKO EPSON CORPORATION. No patent liability is assumed with respect to the use of the information contained herein. Neither is any liability assumed for damages resulting from the use of the information contained herein.
HP Designjet T1100 打印机系列 使用打印机

HP Designjet T1100 打印机系列使用打印机HP Designjet T1100 打印机系列使用打印机法律通告© 2006 Hewlett-Packard Development Company, L.P.本文包含的信息如有变动,恕不另行通知。
有关 HP 产品和服务的保修和保证条款,在相关产品和服务附带的保修声明中都有明确的规定。
不应将本文中的任何内容引伸为补充保证。
HP 对本文中出现的技术或编辑错误或疏忽概不负责。
商标Adobe®、Acrobat®、Adobe Photoshop®和 Adobe® PostScript® 3™ 是 Adobe Systems Incorporated 的商标。
Corel® 是 Corel Corporation 或 Corel Corporation Limited 的商标或注册商标。
Energy Star® 是 United States Environmental Protection Agency 在美国的注册商标。
Microsoft® 和 Windows® 是 Microsoft Corporation 在美国的注册商标。
PANTONE® 是 Pantone, Inc. 的颜色检测标准商标。
目录1 简介安全防范措施 (2)HP Start-Up Kit (2)使用本指南 (2)简介 (2)使用和维护 (2)故障排除 (3)附件、支持和规格 (3)术语 (3)索引 (3)警告和注意提示 (3)打印机的主要功能 (4)打印机的主要组件 (4)前视图 (5)后视图 (6)前面板 (6)打印机软件 (8)打印机的内部打印功能 (8)2 安装软件选择要使用的连接方法 (10)连接到网络 (Windows) (10)直接连接到计算机 (Windows) (11)打印机共享重要事项 (11)卸载打印机软件 (Windows) (11)连接到网络 (Mac OS) (12)Bonjour/Rendezvous 连接 (12)TCP/IP 连接 (13)直接连接到计算机 (Mac OS) (15)共享打印机 (16)卸载打印机软件 (Mac OS) (16)3 设置打印机简介 (20)处理纸张冲突 (20)打开和关闭拼图功能 (20)打开和关闭用量信息 (20)打开和关闭警报 (21)设置或删除安全密码 (21)设置 Windows 驱动程序首选项 (21)4 个性化打印机ZHCN iii更改前面板显示屏的语言 (25)访问 HP Easy Printer Care (Windows) 或 HP 打印机实用程序 (Mac OS) (25)访问内嵌式 Web 服务器 (25)更改 HP Easy Printer Care (Windows) 或 HP 打印机实用程序 (Mac OS) 的语言 (26)更改内嵌式 Web 服务器的语言 (26)更改休眠模式设置 (26)打开和关闭蜂鸣器 (26)更改前面板显示屏对比度 (26)更改计量单位 (27)配置网络设置 (27)更改图形语言设置 (27)5 纸张操作一般建议 (30)将卷筒装到 24 英寸卷轴上 (30)将卷筒装到 44 英寸卷轴上 (32)将卷筒装入 24 英寸打印机 (34)简易装入流程 (35)“纸张”菜单流程 (37)将卷筒装入 44 英寸打印机 (38)简易装入流程 (39)“纸张”菜单流程 (41)取出卷筒纸张 (42)取出纸张适用于卷筒上有纸情况下的关键流程 (42)适用于卷筒上有纸情况下的“纸张”菜单流程 (42)卷筒缺纸流程 (43)装入单张纸张 (43)简易装入流程 (43)“纸张”菜单流程 (45)取出单张纸张 (45)取出纸张关键流程 (46)“纸张”菜单流程 (46)查看有关纸张的信息 (46)纸张配置文件 (46)在装入的纸张上打印 (47)维护纸张 (47)更改晾干时间 (47)打开和关闭自动裁纸器 (48)进纸并裁切纸张 (48)6 打印创建打印作业 (52)使用内嵌式 Web 服务器打印文件 (52)选择打印质量 (52)选择纸张尺寸 (53)自定义纸张尺寸 (54)选择边距选项 (54)使用快捷方式打印 (54)重新缩放打印件 (55)更改重叠线条处理 (56)预览打印件 (56)打印草图 (57)iv ZHCN如果您有高分辨率的图像 (59)以灰度渐变进行打印 (59)无边距打印 (59)打印裁切线 (60)节约使用纸张 (60)拼图作业以节省卷筒纸张 (61)打印机何时尝试拼图页面? (61)什么样的页面可以进行拼图? (61)哪些页面适合拼图? (61)打印机等待其他文件的时间为多久? (62)节约使用墨水 (62)7 颜色管理简介 (64)如何再现颜色 (64)颜色管理流程简介 (64)颜色校准 (64)打印机驱动程序中的颜色管理 (65)颜色管理选项 (65)打印机仿真 (66)颜色调整选项 (67)彩色打印 (67)灰度打印 (67)打印机驱动程序中的颜色管理(仅限 T1100ps) (68)HP 专业 PANTONE 仿真 (68)颜色仿真 (68)CMYK 颜色仿真 (69)RGB 颜色仿真 (69)内嵌式 Web 服务器中的颜色管理 (69)“提交作业”选项 (70)渲染意向 (70)执行黑场补偿 (70)打印 PANTONE 样品集 (70)前面板中的颜色管理 (71)8 打印实用示例用正确比例打印待修订的草图 (74)使用 Adobe Acrobat (74)打印项目 (76)使用 Autodesk Design Review (76)使用 Windows 资源管理器打印 Autodesk Design Review 文件 (77)使用 AutoCAD (78)使用内嵌式 Web 服务器提交文件 (82)使用颜色仿真 (83)使用“按边距裁切内容” (83)打印演示文稿 (83)使用 AutoCAD (84)使用 Adobe Photoshop (88)在 Microsoft Office 中打印和缩放 (91)使用 PowerPoint (92)使用 Project (93)使用 Excel (95)ZHCN v9 作业队列管理“作业队列”页 (98)作业预览 (98)关闭作业队列 (99)选择打印队列中的作业的时间 (99)标识队列中的作业 (99)确定队列中作业的优先级 (99)删除队列中的作业 (100)重新打印或复制队列中的作业 (100)作业状态消息 (100)删除暂停的作业 (101)10 检索打印机用量信息获取打印机统计信息 (104)检查打印机的用量统计信息 (104)使用 HP Easy Printer Care (Windows) 或 HP 打印机实用程序 (Mac OS) 检查打印机统计信息 (104)使用内嵌式 Web 服务器检查打印机统计信息 (104)检查打印作业的墨水和纸张用量 (104)使用 HP Easy Printer Care (Windows) 或 HP 打印机实用程序 (Mac OS) 检查打印作业的墨水和纸张用量 (104)使用内嵌式 Web 服务器检查打印机统计信息 (105)11 处理墨盒和打印头关于墨盒 (108)检查墨盒状态 (108)“墨水”菜单流程 (108)HP Easy Printer Care (Windows) 或 HP 打印机实用程序 (Mac OS) 流程 (108)卸下墨盒 (109)插入墨盒 (110)关于打印头 (111)检查打印头状态 (111)卸下打印头 (112)插入打印头 (115)12 维护打印机检查打印机状态 (120)清洁打印机表面 (120)更换裁纸器 (120)维护墨盒 (124)移动或存放打印机 (124)更新固件 (125)更新软件 (126)打印机维护套件 (126)安全磁盘擦除 (126)13 附件如何订购耗材和附件 (130)订购墨水耗材 (130)订购纸张 (130)不建议使用的纸张类型 (133)订购附件 (133)vi ZHCN支架 (134)卷轴 (134)Jetdirect 打印服务器 (134)14 纸张问题的故障排除无法成功装入纸张 (136)常见的卷筒装入失败问题 (136)卷筒纸装入 24 英寸打印机失败 (136)卷筒纸装入 44 英寸打印机失败 (136)单张纸张装入失败 (137)纸张装入错误消息 (137)纸张卡塞 (138)纸盒有纸时打印机显示“纸张用完” (140)打印件未准确落入纸框 (140)打印已完成后,单张纸张仍保留在打印机内 (140)打印完成时即裁切纸张 (140)裁纸器裁切不正常 (141)卷轴上的卷筒松弛 (141)出纸盒中留有纸带,因而发生卡纸 (141)重新校准纸张前移 (141)重新校准纸张前移流程 (142)返回默认校准 (142)15 打印质量问题的故障排除一般建议 (144)打印质量故障排除向导 (144)图像中出现水平线条(条纹) (145)线条过粗、过细或丢失 (145)线条呈阶梯状或参差不齐 (146)打印出的线条为双线或颜色错误 (147)线条不连续 (147)线条模糊 (148)整幅图像模糊或呈颗粒状 (149)纸张不平 (149)打印件出现磨损或刮花 (150)纸张上出现墨水渍 (150)涂料纸的正面出现水平污渍 (150)纸张背面出现墨水渍 (151)接触打印件时,黑色墨水脱落 (151)对象的边缘呈阶梯状或不清晰 (151)对象的边缘暗于预期亮度 (152)打印纸张底端出现水平线条 (152)不同颜色的垂直线条 (152)打印出的内容中出现白点 (152)颜色不准确 (153)在页面布局应用程序中使用 EPS 或 PDF 图像时的颜色准确性 (153)图像不完整(底端发生截切) (153)图像发生截切 (154)打印出的图像丢失某些对象 (154)PDF 文件发生截切或一些对象丢失 (155)图像诊断打印件 (155)纠正措施 (156)ZHCN vii16 墨盒和打印机问题的故障排除无法插入墨盒 (160)墨盒状态信息 (160)无法插入打印头 (160)前面板显示屏建议重新安装或更换打印头 (160)清洁打印头 (161)清洁打印头墨滴检测器 (162)对齐打印头 (164)重新插入打印头的流程 (164)“图像质量维护”菜单流程 (165)扫描对齐过程中发生的错误 (165)打印头状态消息 (166)17 打印机一般问题的故障排除打印机不能打印 (168)打印机运行速度慢 (168)打印机在不需要的纸张上打印 (168)计算机和打印机之间的通信失败 (169)无法访问 HP Easy Printer Care (Windows) 或 HP 打印机实用程序 (Mac OS) (169)无法访问内嵌式 Web 服务器 (169)自动文件系统检查 (170)AutoCAD 2000 内存分配错误 (171)打印 Microsoft Visio 2003 文件时没有输出 (171)从 QuarkXpress 中打印时不可用的驱动程序功能 (171)打印机警报 (171)18 前面板错误消息19 HP 客户贴心服务简介 (178)HP 专业服务 (178)知识中心 (178)HP Start-Up Kit (178)HP Care Pack 和延长保修期 (178)HP 安装 (178)HP 即时支持 (179)HP Proactive Support (179)与 HP 支持中心联系 (179)电话号码 (180)20 打印机规格功能规格 (184)物理规格 (185)内存规格 (185)电源规格 (185)生态规格 (185)环境规格 (186)噪音规格 (186)viii ZHCN术语 (187)索引 (189)ZHCN ixx ZHCN1简介●安全防范措施●HP Start-Up Kit●使用本指南●打印机的主要功能●打印机的主要组件●前面板●打印机软件●打印机的内部打印功能ZHCN1简介安全防范措施以下防范措施可确保正确使用打印机和防止打印机受到损坏。
汉印HLP106B电子面单机不干胶条码机用户手册
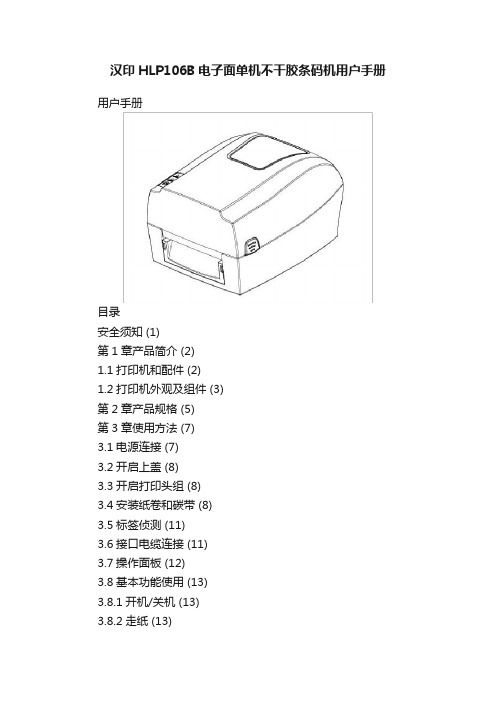
汉印HLP106B电子面单机不干胶条码机用户手册用户手册目录安全须知 (1)第1章产品简介 (2)1.1打印机和配件 (2)1.2打印机外观及组件 (3)第2章产品规格 (5)第3章使用方法 (7)3.1电源连接 (7)3.2开启上盖 (8)3.3开启打印头组 (8)3.4安装纸卷和碳带 (8)3.5标签侦测 (11)3.6接口电缆连接 (11)3.7操作面板 (12)3.8基本功能使用 (13)3.8.1开机/关机 (13)3.8.2走纸 (13)3.8.3标签定位学习 (13)3.8.4打印自检页 (13)第4章打印机日常维护及调校 (14)4.1打印头保养与清洁 (14)安全须知在操作使用打印机之前,请仔细阅读下面的注意事项:安全警告警告:打印头为发热部件,打印过程中和打印刚结束,不要触摸打印头以及周边部件。
警告:不要触摸打印头和连接插件,以免因静电损坏打印头。
注意事项●请使用本公司提供的专用适配器,否则可能导致产品损坏或火灾。
●打印机应安装在一个平整、稳固的地方;●在打印机的周围留出足够的空间,以便操作和维护;●打印机应远离水源并避免阳光、强光和热源的直射;●不要在高温,湿度大以及污染严重的地方使用和保存打印机;●避免将打印机放在有振动和冲击的地方;●将打印机的电源适配器连接到一个适当的接地插座上,避免与大型电机或其它能够导致电源电压波动的设备使用同一插座;●如果较长时间不使用打印机,请断开打印机电源适配器的电源;●为了保证打印质量和产品的寿命,建议采用推荐的或同等质量的纸张;●插接或断开各个接口时,必须关掉电源,否则可能会引起打印机控制电路的损坏;●用户不得自行拆卸打印机进行检修;●妥善保管本手册,以备参考使用。
第1章产品简介1.1打印机和配件注意:1)打开打印机包装,保留包装材料,以备日后运送之用。
2)确保您已拥有图1-1中所示的所有物品,并检查是否有因运送所造成的损坏。
标配件图1-1选配件——外置纸卷支架1.2打印机外观及组件部分组件说明:●就绪指示灯和状态指示灯就绪指示灯和状态指示灯均为双色指示灯(红色/黄绿色),通过不同的组合提示用户打印机的状态,详见3.7节操作面板。
brother QL-1050 1060N 说明书

1 打开 QL-1050/1060N 包装 ••••••••••••••••••••••••••••••••••••••••••••••••••• 7
2 部件说明 ••••••••••••••••••••••••••••••••••••••••••••••••••••••••••••••••••••••••• 8
型号
有毒有害物质或元素
QL-1060N
铅
汞
镉
六价铬
多溴联苯
多溴二苯醚
部件名称
(Pb) (Hg) (Cd)
(Cr(VI))
(PBB)
(PBDE)
机械装置
×
〇
〇
〇
〇
〇
切刀单元
×
〇
〇
〇
〇
〇
盖板
×
〇
〇
〇
〇
〇
检测器单元
〇
〇
〇
〇
〇
〇
主电路板
×
〇
〇
〇
〇
〇
电源供应
×
〇
〇
〇
〇
〇
附件
×
〇
〇
〇
〇
〇
印刷品
〇
〇
〇
〇
〇
〇
包装材料
6 使用数据线 •••••••••••••••••••••••••••••••••••••••••••••••••••••••••••••••••••••• 11
安装软件
2 STEP 安装软件 ••••••••••••••••••••••••••••••••••••••••••••••••••••••• 13
对于 Windows® •••••••••••••••••••••••••••••••••••••••••••••••••••••••••••••••••••••••••• 23
PEX1000系列工业型条形码打印机使用者手册说明书

PEX1000系列工业型条形码打印机使用者手册系列型号:PEX1120/ PEX1130/ PEX1160 PEX1220/ PEX1230/ PEX1260⏹ 热转式 ⏹ 热敏式版权声明©©2021 TSC Auto ID Technology Co., Ltd,本手册和手册中所述之条形码打印机软件和固件版权均归TSC Auto ID Technology Co., Ltd所有。
本手册提供购买设备的操作者参考和使用,未经明确的书面许可,不得为了其他目的使用、复制。
所有其他品牌名称、产品名称或商标,隶属于其他个别拥有者。
因持续产品的改进,故手册中所述的机种规格、配件、零件、设计及程序内容应以实机为主,如有变更,恕不另行通知。
TSC尽力确保手册内容正确无误,但错误在所难免。
TSC保留更正任何这类错误的权利,并声明不对因此所造成的后果负责。
I目录1. 打印机简介 (1)1.1 产品规格 (2)1.1.1 标准配备 (2)1.1.2 选购配备 (4)1.2 一般规格 (4)1.3 打印规格 (5)1.4 碳带规格 (6)1.5 纸张规格 (6)2. 产品介绍 (7)2.1 拆封与检查 (7)2.2 打印机方向 (8)2.3 检查安装空间 (9)2.4 打印机组件 (13)2.4.1 外观 (13)2.4.2 内部 (14)2.2.3 后部 (15)2.5.1 LED辅助警示灯和操作按键 (17)3. 安装 (19)3.1 安装打印机 (19)3.2 安装碳带 (20)3.3 安装标签纸 (24)3.4 剥纸模式装纸 (28)4. 调整钮 (32)4.1 碳带张力调整旋钮 (33)4.2 皱折解说及排除 (34)4.3 碳带张力调整建议 (37)5. TSC Console (39)5.1 启动TSC Console (39)5.2 新增以太网络接口 (41)5.3 设置Wi-Fi并新增至TSC Console接口 (43)5.4 初始化打印机的Wi-Fi模块(选配) (46)5.6 设置打印后动作 (48)6. 打印机内键功能(Menu) (49)6.1进入选单 (49)6.2 选单简介 (50)6.3 Setting (51)6.3.1 TSPL (52)6.3.2 ZPL (55)6.4 Sensor(传感器设置) (58)6.5 Interface(通讯接口) (59)6.5.1 Serial Comm(串行端口设置) (60)6.5.2 Ethernet(以太网络设置) (61)6.5.3 Wi-Fi (62)6.5.4 Bluetooth(蓝牙) (63)6.5.5 GPIO (64)6.6 Advanced(高级设置) (69)6.7 File Manager(档案管理) (71)6.8 Diagnostic(打印机诊断) (72)7. 故障排除 (78)8. 保养办法 (81)9. 安规认证 (83)10. 历史纪录 (89)1. 打印机简介感谢您对本公司所出品的条形码打印机的支持。
hiti x610 热升华打印机 使用手册说明书

使用手冊前言感谢您购买诚研科技产品。
本文件将介绍如何使用和操作此打印机。
使用前请仔细阅读本手册。
请务必详读“安全须知”,以正确操作此打印机。
版权宣告保留所有权利。
本文件中的信息如有更改,恕不另行通知。
诚研科技对此不作任何保证,包括但不限于适销性和适用于特定目的的隐含保证。
诚研科技对本文中可能包含的错误、信息提供、执行或使用有关的偶然或后果性损害概不负责。
安全须知切勿尝试拆卸或修改打印机,否则可能导致触电或故障。
请勿让打印机附近有液体,否则可能导致触电或起火。
如打印机主体损坏,请勿使用打印机。
请勿将打印机插在与众多设备共享的延长线上。
请勿将打印机放在不稳定的推车、支架、或桌子上。
确保打印机按标记卷标上指示的电压类型运作。
如果您不确定电压类型,请联系或咨询经销商了解详情。
切勿将液体碰触到到本产品上。
请务必使用诚研科技提供的电源线。
请勿堵塞设计用于防止打印机过热的散热孔。
请确保接地型插头的安全使用,仅将电源线插在接地插座。
插座应靠近产品,以便容易取得使用。
产品不得在高于35℃的环境温度下使用。
商標Microsoft,MS-DOS 和 Windows 是 Microsoft Corporation 的注册商标。
Adobe 和 Acrobat 是 Adobe System Incorporated 的注册商标。
Mac,Macintosh 和 Mac OS 是 Apple Computer Inc. 在美国和其他国家注册的商标。
Pentium 是 Intel 公司的美國商標。
所有其他商标或注册商标均为其各自公司的财产。
监管合规声明不要对产品进行更改或修改,除非在说明书中有特别规定。
此产品已经过测试,符合FCC规则第15部分对A类数字设备的限制。
这些限制旨在提供合理的保护,防止商用环境中的有害干扰。
本产品产生、使用、并散发频率能量,如不按照说明手册进行安装和使用,可能会对无线电通信造成有害干扰。
在住宅区操作本产品可能会造成有害干扰,如发生,使用者需要自行纠正此干扰。
斑马105SL打印机使用手册.
斑马105SL打印机使用手册<< 目录 >>一、打印机电源二、打印机结构三、安装标签和色带的注意事项四、面板功能说明五、Zebra 105SL 打印机的简单调整和参数设置说明六、打印机的日常维护七、常见故障极其处理一、打印机电源电源开关位于打印机后面,打印机的电源是交流电压230V和110V自适应。
安装打印机时,请确保供电电压和打印机的工作电压相符,同时检查供电电源是否接安全地。
按住面板的某些按键,再打开电源开关,即进行特定用途的自检。
[千万注意] 在插拔任何连线时,都应该关闭微机和打印机的电源。
否则易损坏打印机和微机的主板!某些外界的影响,如闪电,电源或信号线上的噪声也会使打印机出现误操作。
关掉打印机,再重新打开,可使打印机恢复正常。
二、打印机结构图1图2三、安装标签和色带的注意事项1·安装标签和色带时,按照打印机内的安装指示图即可。
注意:色带安装时,要分清色带的绕向,千万不能装反,否则会损害打印机的组件,安装时须将色带推到底。
ZEBRA打印机只可用外向色带。
标签安装时,要将“标签挡片”和“挡纸片”挡好,标签要从“压纸/反射片”下穿过,标签左侧靠着“导纸片”。
2·安装标签和色带时,注意不要划伤打印头。
比如戒指,工具等物品。
色带及标签勿粘有 泥沙,灰尘杂物等。
3·当第一次安装新的标签时,请做测纸(MEDIA CALIBRATION)的工作。
方法如下:装好标签和色带,合上打印头,按“Calibrate”键,此时打印机会慢速走多张标签再快速走几张,自动完成对标签长度的识别和存储(对不连续标签有效)。
注意:若走纸时无快慢现象,则说明未测到标签的长度,请做步骤五(16)。
4·当标签被卷入打印头下面的滚筒中时,千万不能用刀片来划开标签,以免损伤滚筒。
只可以用手慢慢反向转动滚筒将标签撤出。
5.安装完标签和色带后,一定要合上铁外盖。
6.请用ZEBRA的色带和标签,否则,易损害打印头。
HP Stitch S1000 126 英吋印表機 使用指南说明书

使用指南©Copyright 2019–2021 HP Development Company, L.P.第 4 版,2021 年 7 月法律聲明此文件所包含資訊如有更改,恕不另行通知。
HP 產品和服務的唯一保固明確記載於該等產品和服務所隨附的保固聲明中。
本文件的任何部分都不可構成任何額外的保固。
HP 不負責本文件在技術上或編輯上的錯誤或疏失。
安全注意事項請先閱讀操作和安全指示,再依照指示啟動印表機。
商標所有產品與公司名稱皆為各原始所有者之註冊商標。
任何商標之使用僅供識別與參考,並不代表 HP 和商標擁有人或產品品牌有任何關聯。
目錄1 簡介 (1)歡迎使用您的印表機 (2)說明文件 (2)安全預防措施 (3)棄置指示 (10)一般清潔指示 (11)主要元件 (12)印表機軟體 (14)首次開啟印表機電源 (15)開啟與關閉印表機 (15)移動印表機 (16)印表機狀態指示燈 (17)2HP 內部列印伺服器 (18)啟動內部列印伺服器 (19)變更內部列印伺服器的語言 (19)變更內部列印伺服器的測量單位 (20)設定內部列印伺服器偏好設定 (20)內部列印伺服器功能表 (22)印表機狀態和警示 (23)更新韌體和內部列印伺服器 (24)3RIP 分發 (26)4 列印工作流程整合 (27)JDF 簡介 (27)使用 JDF (27)5 處理紙材 (33)支援的紙材類型 (34)支援的 HP 紙材類型 (35)紙材提示 (36)紙材設定 (37)ZHTW iii準備列印 (39)紙材邊緣支架 (40)將捲筒紙裝入捲軸 (42)將捲筒紙裝入印表機 (43)檢視有關紙材的資訊 (48)取出捲筒紙 (48)輸出壓板光源 (49)紙材預設檔 (49)匯出多個預設檔 (49)使用新紙材 (51)新增紙材預設檔 (51)編輯紙材預設檔 (52)移除紙材預設檔 (55)線上紙材管理員 (55)設定托架承梁位置 (58)6 建立和管理列印工作 (59)新增列印工作 (60)旋轉列印工作 (63)管理列印佇列 (63)刪除列印工作 (64)影像構圖 (65)7 處理墨水系統 (68)墨水系統元件 (69)如何使用墨水系統元件 (70)8 印表機校準 (88)校正噴頭 (89)印字頭校正可能遇到的困難 (91)色彩校準 (92)不同 HP Stitch 印表機之間的色彩一致性 (94)模擬其他印表機型號的色彩 (94)色彩設定檔 (95)紙材前移校準 (98)個別紙材預設檔專用的校準 (99)建議在特定事件後進行的校準 (99)9HP Print Care (101)Print Care 診斷 (102)iv ZHTW10 墨水收集器 (104)使用墨水收集器 (105)維護墨水收集器 (112)墨水收集器已啟用紙材的疑難排解 (116)11 配雙捲軸配件 (117)12 硬體維護 (118)安全預防措施 (119)維護資源 (119)維護作業和套件摘要 (123)如何執行維護作業 (126)如何關閉然後再開啟印表機電源以進行維護作業 (129)每週維護 (131)80 公升維護 (139)750 公升維護 (160)1500 公升維護 (167)視需要而定 (188)13 疑難排解紙材問題 (223)裝紙問題 (224)列印問題 (226)列印成品長度問題 (229)14 疑難排解列印品質問題 (231)一般建議 (232)哪些因素會影響列印品質 (232)列印品質疑難排解 (233)15 疑難排解墨水系統問題 (239)墨水匣 (240)列印噴頭 (240)列印噴頭清潔捲筒紙錯誤 (245)16 疑難排解其他問題 (246)印表機未啟動 (247)印表機不能列印 (247)無法從內部列印伺服器重新啟動印表機 (247)印表機速度似乎很慢 (247)要求重新初始化托架 (247)內部列印伺服器偵測不到印表機 (247)ZHTW vPrint Care 自動重新啟動 (248)色彩校準失敗 (248)17 需要協助時 (249)HP 主動支援 (249)HP 顧客貼心服務 (250)維修資訊 (250)18 印表機規格 (251)功能規格 (252)實體規格 (252)內部列印伺服器電腦的記憶體規格 (253)電源規格 (253)空氣供應需求(氣動捲軸) (253)生態規格 (254)環境規格 (254)聲音規格 (254)附錄 A 印表機訊息 (255)附錄 B 常見昇華問題摘要 (259)辭彙 (260)索引 (262)vi ZHTW1簡介●歡迎使用您的印表機●說明文件●安全預防措施●棄置指示●一般清潔指示●主要元件●印表機軟體●首次開啟印表機電源●開啟與關閉印表機●移動印表機●印表機狀態指示燈ZHTW1歡迎使用您的印表機HP Stitch S1000 126 英吋印表機是專為列印高品質設計而設計的熱昇華噴墨印表機,紙張寬度最大可達3.2 公尺。
惠普 HP Photosmart Wireless B110 series打印机说明书
HP Photosmart Wireless B110 series 帮助
HP Photosmart Wireless B110 series 帮助
Panduit MP100 MP300移动标签打印机说明书
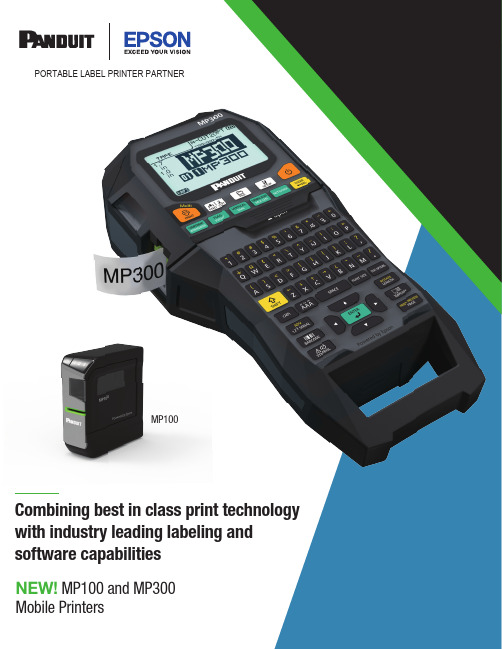
NEW! MP100 and MP300Mobile Printers Combining best in class print technology with industry leading labeling and software capabilities MP100PORTABLE LABEL PRINTER PARTNERNEW!MP100 and MP300Mobile PrintersCombining best in class print technologywith industry leading labeling and software capabilitiesMP1002Representative offering only, visit for complete listing of products.MP300MP100Windows is a registered trademark of Microsoft Corp. in the United States and/or other countries.EMPLUSProduct FeaturesPrinters and AccessoriesEasy-Mark ™ Network Easily create labels for network components and cabling that are ANSI/TIA-606 compliantConnect to Fluke LinkWare Live3visit • Fast-loading Label Cassette includes both label material and ribbon to make changing labels easy• Innovative label design allows labels to rotate for visibility from any angle, and for repositioning on the wire/cable to align legends and improve aesthetics• Labels can be easily installed on existing terminated wires and assemblies without disconnecting the wires/cablesTurn-Tell ®Label Cassettes• Fast-loading Label Cassette includes both label material and ribbon tomake changing labels easy• Self-laminating adhesive labels for wire/cable identification include a white print-on area and clear overlaminateDie-Cut Self Laminating Label CassettesPolymer Film (V1)-40°F to 200°F (-40°C to 93°C)Self-Laminating Vinyl (VA)-40°F to 150°F (-40°C to 66°C)4Representative offering only, visit for complete listing of products.Continuous Self-Laminating Labels• Fast-loading Label Cassette includes both label material and ribbon to make changing labels easy• Self-laminating adhesive labels for wire/cable identification include a whiteprint-on area and clear overlaminateContinuous Heat Shrink Labels• Fast-loading Label Cassette includes both label material and ribbon to make changing labels easy•Shrink ratio 3:1• Non-adhesive flattened heat shrinkable polyolefin for wire/cableidentification-40°C to 66°C (-40°F to 150°F)-40°C to 125°C (-40°F to 257°F)Self-Laminating Vinyl (VA)Heat Shrinkable Polyolefin (H1, H2)5visit • Fast-loading Label Cassette includes both label material and ribbon to make changing labels easy• Print custom pipe markers, voltage markers, signs, bin markers, and network identification labels on demand• For flat label applications onlyContinuous Tape CassettesCompetitive comparison based on published specifications.Epson Print TechnologyEpson is a global technology leader dedicated to becoming indispensable to society by connecting people, things and information with its efficient, compact and precision technologies.Combined with Panduit’s Labeling and Software CapabilitiesPanduit creates leading-edge labeling solutions for electrical and network environments, from the data center to the telecom room, from the jobsite to the plant floor, Panduit has you covered.Results in Best-in-Class PerformancePanduit has entered into a strategic partnership with Seiko Epson Corporation to jointly develop printer and labels for the industrial, construction and network infrastructure markets. The results of the partnership are printers with best-in-class print quality, speed, capabilities and label selection. The MP100 & MP300 printers and labels are the first of many products that will be jointly developed through this partnership.WORLDWIDE SUBSIDIARIES AND SALES OFFICESFor a copy of Panduit product warranties, log on to /warrantyPANDUIT CANADA Markham, Ontario ******************Phone: 800.777.3300PANDUIT EUROPE LTD.London, UK*******************Phone: 44.20.8601.7200PANDUIT SINGAPORE PTE. LTD.Republic of Singapore *****************Phone: 65.6305.7575PANDUIT JAPAN Tokyo, Japan********************Phone: 81.3.6863.6000PANDUIT LATIN AMERICA Guadalajara, Mexico *****************Phone: 52.33.3777.6000PANDUIT AUSTRALIA PTY. LTD.Victoria, Australia ******************Phone: 61.3.9794.9020©2020 Panduit Corp.ALL RIGHTS RESERVED.IDSG01--SA-ENG10/2020For more informationVisit us at ContactCustomerServicebyemail:**************or by phone: 800.777.3300。
汉印hlp106s-pbu说明书

汉印hlp106s-pbu说明书
1、驱动安装:第一步从偶要下载下载汉印打印机HD130驱动安装包,而后解压到指定的位置。
运行安装程序文件,弹出安装界面,点击下一步,选择打印机连接方式,点击下一步
2、图片打印:预览完时,点击打印,而后选择自己要打印的图片,打上勾就可以,而后选择面板格式,就是一张纸上面打印几个图片,最后点击打印即可。
3、打印机工作:有些打印机有自己的开关,因此打印时别忘了按开关。
还需要放上准备好的A4之类的纸张,这样才可以打印出来。
HD130驱动安装简单,是连接打印机与电脑的桥梁。
4、使用方法:把要打印的文件准备好,打击文件,打印预览,看看版块合不合适,如果感觉可以点击打印即可。
5、图片打印:预览完的时候,点击打印,然后选择自己要打印的图片,打上勾就可以,然后选择面板格式,就是一张纸上面打印几个图片,最后点击打印就可以了。
6、打印机工作:有些打印机有自己的开关,所以打印的时候别忘了按开关。
还需要放上准备好的A4之类的纸张,这样才能打印出来。
7、打印机的墨盒:如果里面没有墨了,会打印不了。
可以把打印机的盖打开,然后拿出墨盒摇几下,一般可以使用一小会的。
快速打印指南(适用于NiceLabel)M00086800 Rev.A 2 注册商标说明书

Quick Printing Guide (for NiceLabel)M00086800Rev.ATrademarksEPSON is a registered trademark of Seiko Epson Corporation.Exceed Your Vision is registered trademark or trademark of Seiko Epson Corporation.NiceLabel and NiceLabel Pro are registered trademark or trademark of Euro Plus d.o.o. in the United States and other countries.In this manual, the NiceLabel GUI is used with the permission of Euro Plus d.o.o.All other trademarks are the property of their respective owners and used for identification purpose only.© Seiko Epson Corporation 2015. All rights reserved.OverviewThis manual contains necessary information to print on Euro Plus "NiceLabel Pro 6.3.1" (NiceLabel), using TM-C3500.Here we will use the following print data as an example. Change the content based on the actual use environment.∙Media Type:Matte Label (Roll Paper)∙Label Sizd:72.0 x 51.0 mm (Die-cut Label)∙Printed Information:Install NiceLabel beforehand.See the NiceLabel manual for how to install and operate BarTender.See the "TM-C3500 Technical Reference Guide" for details on how to use the printer and printer driver.Caution:The usage may differ when printing with a different version or edition of NiceLabel.Text DataPicture DataBarcode Data(Barcode Type: CODE39)Preparation of the Printer1Insert the supplied CD into the computer, and set up the printer according to the setup tool instructions.Note:The printer driver is installed automatically if it has not been installed.2"Media Layout Creation" Dialog appears. Select [Yes], then click [Next].3Specify the media source to be used. Select [Roll Paper], then click [Next].4Specify the media form to be used. Select [Die-cut Label (Gap)], then click [Next].5Specify the size of the paper to be used, as shown below. Then click [Next].Specified paper size will be registered to the default settings of the printer driver.6After specifying the default print settings, set up the printer by following the instructions of the setup tool.When using multiple media layouts with different media form, register and set multiple media sizes to the printer. For detail, see the "TM-C3500 Technical Reference Guide".When using multiple media layouts with different media sizes, register the media layout in NiceLabel.Setting ValueMedia Layout Name EPSONLABEL (Optional)Label Width72.0 mm Label Length51.0 mmPreparation of NiceLabel1Start NiceLabel to create a new label.2Specify the printer. Select [EPSON TM-C3500], then click [Next].3Specify the Stock type. Select [<NONE>], then click [Next].4Specify the Page size.Specify as shown below, and then click [Next].5Specify the Orientation. Select [Portrait], then click [Next].(Method of adjusting the page size)Automatically set from label dimensions Page sizeNiceLabel Pro custom layout Media TypeDie-cut label6Specify the label size. Specify as shown below, and then click [Next].7Follow the wizard instructions to create a document.Label width 72.0 mm Label height51.0 mm Top Margin0 mm Bottom Margin0 mm Left Margin0 mm Right Margin 0 mmCreating Label DesignSee the following and create a label design using NiceLabel.Make sure you have the top, bottom, left, and right margins of 1.5 mm and more inside the label size.Text d a t a[Text] O b ject[B a rcode] O b ject[Pict u re] O b ject∙Use the T ext Object to insert Text Data.∙Use the Image Object to insert Picture Data.∙Use the Barcode Object to insert Barcode Data.For detail, refer to the NiceLabel manual.Barcode SettingsIn the barcode properties, set the Narrow bar width to more than "4" dots and the ratio to "2.5".Notes:When printing a barcode, there are recommended conditions according to the Media Type. If the recommended conditions are not followed, the printed barcode may not be read properly. For the recommended conditions, see the appendix.AppendixRecommended conditions of the Barcode*: You can set the ratio when the barcode type is Codabar, CODE39, Interleaved 2 of 5, or MSI.Cautions:∙The above values are valid when using paper recommended by EPSON.∙Before using the barcode, print the barcode and check the scan quality.Fence Plain, Plain Label 4 2.5Other than above 4 2.5LadderPlain, Plain Label 6 2.5Other than above62.5L a dderBarcode font Function of the Printer DriverWhen printing a barcode that has higher reading quality than a NiceLabel barcode, you can use the printer driver's barcode font.Use the following method.1In printer driver's "Barcode and 2D Symbol" settings, register the barcode font for which you specified the barcode type, size, rotation direction, and so on.2In printer driver's "Font Replacement" settings, replace the registered barcode font with TrueType font.3On a NiceLabel, enter the barcode value using the "Text" object as text data, and specify the replaced TrueType font.Notes:∙For more details on how to set the printer driver, see "TM-C3500 Technical Reference Guide".∙The barcode is displayed as text data on the NiceLabel screen and is not displayed as a barcode image. When you want to check the barcode image, use the printer driver's preview function.。
HLP106S系列标签打印机实用工具手册Rev.1.0
标签打印机实用工具手册HLP106S(Rev.1.0)目录1. 手册信息 (1)2.操作系统 (1)3.实用工具准备 (1)4. 安装与卸载 (2)4.1安装 (2)4.2卸载 (6)5.使用方法 (7)5.1 添加打印机 (7)5.2 修改打印机 (9)5.3 删除打印机 (10)5.4 参数设置 (11)1.手册信息本手册提供了本产品功能选择软件的使用、操作条件的修改等方面的信息。
我们致力于提高和升级产品的功能和质量,规格书的内容可能会更改,恕不另行通知。
2.操作系统Deli的实用工具必须运行在.NET 2.0及以上环境中。
●Microsoft Windows 10 (32 bit/64 bit)●Microsoft Windows 8 (32 bit/64 bit)●Microsoft Windows 7 SPI (32 bit/64 bit)●Microsoft Windows Vista SP2 (32 bit/64 bit)●Microsoft Windows XP Professional SP3 (32 bit)●Microsoft Windows Server 2012(64 bit)●Microsoft Windows Server 2008 R2●Microsoft Windows Server 2008 SP2(32 bit/64 bit)●Microsoft Windows Server 2003 R2 SP2(32 bit/64 bit)3.实用工具准备打印机实用程序包含在随机所附CD。
最新版本请联系供应商。
打印机实用工具命名为:HLP106STool VX.X.X.X.exe如:HLP106STool V1.0.0.1.exe4.安装与卸载注意:以下以HLP106S-UE(Windows7)为例,屏幕可能随您电脑上的操作系统而有所不同。
(安装前建议先关闭相关防护软件以免影响安装)4.1安装1.双击打印机实用程序安装文件。
Metapace POS打印机装置指南说明书
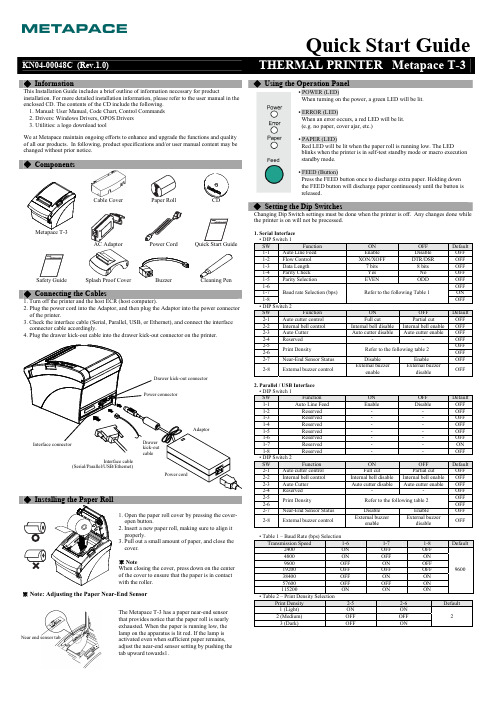
◈ InformationThis Installation Guide includes a brief outline of information necessary for productinstallation. For more detailed installation information, please refer to the user manual in the enclosed CD. The contents of the CD include the following. 1. Manual: User Manual, Code Chart, Control Commands 2. Drivers: Windows Drivers, OPOS Drivers 3. Utilities: a logo download toolWe at Metapace maintain ongoing efforts to enhance and upgrade the functions and quality of all our products. In following, product specifications and/or user manual content may be changed without prior notice.ComponentsCable CoverPaper RollCDAC AdaptorPower CordQuick Start GuideSplash Proof CoverBuzzerCleaning PenConnecting the Cables1. Turn off the printer and the host ECR (host computer).2. Plug the power cord into the Adaptor, and then plug the Adaptor into the power connector3. Check the interface cable (Serial, Parallel, USB, or Ethernet), and connect the interface connector cable accordingly.4. Plug the drawer kick-out cable into the drawer kick-out connector on the printer.Installing the Paper Roll1. Open the paper roll cover by pressing the cover-open button.2. Insert a new paper roll, making sure to align it properly.3. Pull out a small amount of paper, and close the cover.※ NoteWhen closing the cover, press down on the center of the cover to ensure that the paper is in contact with the roller.The Metapace T-3 has a paper near-end sensor that provides notice that the paper roll is nearly exhausted. When the paper is running low, the lamp on the apparatus is lit red. If the lamp is activated even when sufficient paper remains, adjust the near-end sensor setting by pushing the tab upward towards1.◈ Using the Operation Panel• POWER (LED)When turning on the power, a green LED will be lit.• ERROR (LED)When an error occurs, a red LED will be lit. (e.g. no paper, cover ajar, etc.)• PAPER (LED)Red LED will be lit when the paper roll is running low. The LEDblinks when the printer is in self-test standby mode or macro execution standby mode.• FEED (Button)Press the FEED button once to discharge extra paper. Holding down the FEED button will discharge paper continuously until the button is released.◈ Setting the Dip SwitchesChanging Dip Switch settings must be done when the printer is off. Any changes done while the printer is on will not be processed.1. Serial Interface • DIP Switch 1 SW Function ONOFF1-1 Auto Line Feed Enable Disable 1-2 Flow Control XON/XOFF DTR/DSR 1-3 Data Length 7 bits 8 bits 1-4 Parity Check Yes No 1-5 Parity Selection EVEN ODD1-61-71-8Baud rate Selection (bps) Refer to the following Table 1• DIP Switch 2 SW Function ON OFF 2-1 Auto cutter control Full cutPartial cut 2-2 Internal bell control Internal bell disable Internal bell enable 2-3 Auto Cutter Auto cutter disableAuto cutter enable2-4 Reserved - -2-52-6 Print DensityRefer to the following table 2 2-7 Near-End Sensor StatusDisable Enable2-8External buzzer controlExternal buzzerenableExternal buzzerdisable2. Parallel / USB Interface • DIP Switch 1 SW Function ON OFF 1-1 Auto Line Feed Enable Disable 1-2 Reserved - - OFF 1-3 Reserved - - OFF 1-4 Reserved - - OFF 1-5 Reserved - - OFF 1-6 Reserved - - OFF 1-7 Reserved - - ON 1-8 Reserved - - OFF • DIP Switch 2 SW Function ON OFF 2-1 Auto cutter control Full cut Partial cut 2-2 Internal bell control Internal bell disable Internal bell enable 2-3 Auto Cutter Auto cutter disable Auto cutter enable 2-4 Reserved - - 2-5 2-6 Print Density Refer to the following table 22-7 Near-End Sensor Status Disable Enable 2-8 External buzzer controlExternal buzzer enable External buzzerdisable• Table 1 – Baud Rate (bps) Selection Transmission Speed 1-6 1-7 1-8 2400 ON OFF OFF 4800 ON OFF ON 9600 OFF ON OFF19200 OFF OFF OFF38400 OFF ON ON 57600 OFF OFF ON 115200 ON ON ON• Table 2 – Print Density SelectionPrint Density 2-5 2-6 Default 1 (Light) ON ON2 (Medium) OFF OFF3 (Dark) OFF ON2Quick Start GuideKN04-00048C (Rev.1.0)Near end sensor tabPower cordDrawer kick-out cableInterface cable(Serial/Parallel/USB/Ethernet)AdaptorDrawer kick-out connector Power connector◈ Self Test1. Make sure the paper roll has been installed properly.2. Turn on the power while holding down the FEED button. The self-test begins.3. The self-test prints the current printer status, providing the control ROM version and the DIP switch setting.4. After printing the current printer status, self-test printing will print the following, and pause. (The PAPER LED light blinks.)SELF-TEST PRINTING.PLEASE PRESS THE FEED BUTTON.5. Press the FEED button to continue printing. The printer prints a pattern using the built-in character set.6. The self-test automatically ends and cuts the paper after printing the following.*** COMPLETED ***7. After the self-test is complete, the printer returns to normal on-line status.※ NoteThe self-test lets you know if your printer is operating properly. It checks the print quality, ROM version, and DIP switch settings.◈ SpecificationsItem DetailsPrinting Method Thermal Line PrintingDot Density 180 dpi (7dots/mm)Printing Width 72 mmCharacters per line (default) 42 (Font A) 56 (Font B) 56 (Font C)Printing Speed *1) 47.28 lines/sec 200 mm/secReceive Buffer Size 4K BytesSMPS Input Voltage 100~240 VACFrequency 50/60Hz SMPS Output Voltage 24 VDCTemperature 0 ~ 45 ℃ (Operating) -20 ~ 60 ℃ (Storage)Humidity 10 ~ 80 % RH (Operating) 10 ~ 90 % RH (Storage) Except for paperMechanism Head Life *2) 150KmAuto Cutter 1,800,000 Cuts PrinterMechanism MCBF *2) 70,000,000 LinesPaper Type Paper RollRoll Width 80 mmRoll Diameter Max 83mmPaper Thickness 0.062~0.075 mm PaperPaper Tube Inner: Ø12mm (0.47”) Outer: Ø18mm (0.71”)※ Note*1) Printing speed may be slower depending on the data transmission speed and the combination of control commands.*2) The above values are calculated under printing level 2 with recommended paper at normal temperature.The values may vary with environment temperature, printing level, etc.◈ Serial (RS-232C) Fixed Interface Model Windows Driver Installation: IFA-S2 TYPE1. After running the product installation CD, run the Thermal Printer > Metapace T-3 > Drivers > Windows Driver > Drivers Folder > T-3_Vx.x.x.exe file.2. In the opening installation window, click on Next.3. In the Ready to Install the Program window, click on Install.4. In the Select Port Type window, select one Serial Port and click Next.< Figure 1.>5. In the Question window, select Yes and the computer will reboot.6. After rebooting, open Start > Settings > Printers & Fax > Metapace T-3 Icon > Right-Click > Properties.7. In the Properties window, select the Port tab and click on the Port Settings. Check to see that the information is identical to the self-test results after installation. 8. In the Properties window, after selecting the General tab, click on Print Test Page toconfirm that printing is normal.◈ Parallel (IEEE1284) Fixed Interface Model Windows Driver Installation: IFG-P TYPE1. After running the product installation CD, run the Thermal Printer > Metapace T-3 > Drivers > Windows Driver > Drivers Folder > T-3_Vx.x.x.exe file.2. In the opening installation window, click on Next.3. In the Ready to Install the Program window, click on Install.4. In the Select Port Type window, select one Parallel Port and click Next.(Refer to Figure 1.)5. In the Question window, select Yes and the computer will reboot.6. After rebooting, open Start > Settings > Printers & Fax > Metapace T-3 Icon > Right-Click > Properties.7. In the Properties window, after selecting the General tab, click on Print Test Page to confirm that printing is normal.◈ USB Fixed Interface Model Windows Driver Installation: IFG-U TYPE 1. After running the product installation CD, run the Thermal Printer > Metapace T-3 > Drivers > Windows Driver > Drivers Folder > T-3_Vx.x.x.exe file.2. In the opening installation window, click on Next.3. In the Ready to Install the Program window, click on Install.4. In the Select Port Type window, select USB and click Next. (Refer to Figure 1.)5-1. If using Windows 2000:① After the Information window appears, turn the printer off and back on and click Yes.② After installation is complete, reboot the computer.5-2. If using Windows XP/2003 Server/VISTA/2008 Server/7:① After the Information window appears, turn the printer off and back on and click Yes.② After the New Hardware Detected window appears, continue to click Next to install theUSB drive, and then reboot the computer.※ NoteWhen the digital registration message appears during installation, click on either OK or Continue Anyway.6. After rebooting, open Start > Settings > Printers & Fax > Metapace T-3 Icon > Right-Click > Properties.7. In the Properties window, after selecting the General tab, click on Print Test Page to confirm that printing is normal.◈ Ethernet Fixed Interface Model Windows Driver Installation: IFA-E TYPERefer to the user manual regarding separate Ethernet interface cards. (Refer to the CD.)◈ WEEE (Waste Electrical and Electric Equipment)This marking shown on the product or its literature, indicates that is should not bedisposed with other household wastes at the end of its working life, To preventpossible harm to the environment or human health from uncontrolled waste disposal,please separate this from other types of wastes and recycle it responsibly to promotethe sustainable reuse of material resources. Household users should contact either theretailer where they purchased this product, or their local government office, for details of where and how they can take this item for environmentally safe recycling. Business users should contact their supplier and check the terms and conditions of the purchase contract. This product should not be mixed with other commercial wastes for disposal.。
- 1、下载文档前请自行甄别文档内容的完整性,平台不提供额外的编辑、内容补充、找答案等附加服务。
- 2、"仅部分预览"的文档,不可在线预览部分如存在完整性等问题,可反馈申请退款(可完整预览的文档不适用该条件!)。
- 3、如文档侵犯您的权益,请联系客服反馈,我们会尽快为您处理(人工客服工作时间:9:00-18:30)。
标签打印机实用工具手册
HLP106S
(Rev.1.0)
目录
1. 手册信息 (1)
2.操作系统 (1)
3.实用工具准备 (1)
4. 安装与卸载 (2)
4.1安装 (2)
4.2卸载 (6)
5.使用方法 (7)
5.1 添加打印机 (7)
5.2 修改打印机 (9)
5.3 删除打印机 (10)
5.4 参数设置 (11)
1.手册信息
本手册提供了本产品功能选择软件的使用、操作条件的修改等方面的信息。
我们致力于提高和升级产品的功能和质量,规格书的内容可能会更改,恕不另行通知。
2.操作系统
Deli的实用工具必须运行在.NET 2.0及以上环境中。
●Microsoft Windows 10 (32 bit/64 bit)
●Microsoft Windows 8 (32 bit/64 bit)
●Microsoft Windows 7 SPI (32 bit/64 bit)
●Microsoft Windows Vista SP2 (32 bit/64 bit)
●Microsoft Windows XP Professional SP3 (32 bit)
●Microsoft Windows Server 2012(64 bit)
●Microsoft Windows Server 2008 R2
●Microsoft Windows Server 2008 SP2(32 bit/64 bit)
●Microsoft Windows Server 2003 R2 SP2(32 bit/64 bit)
3.实用工具准备
打印机实用程序包含在随机所附CD。
最新版本请联系供应商。
打印机实用工具命名为:HLP106STool VX.X.X.X.exe
如:HLP106STool V1.0.0.1.exe
4.安装与卸载
注意:以下以HLP106S-UE(Windows7)为例,屏幕可能随您电脑上的操作系统而有所不同。
(安装前建议先关闭相关防护软件以免影响安装)
4.1安装
1.双击打印机实用程序安装文件。
2.选择安装语言--简体中文,点击“下一步”。
3.选择默认安装路径,点击“下一步”或点击“浏览”选择安装路径,再点击“下一步”。
4.选择默认创建快捷方式的路径,点击“下一步”或点击“浏览”选择安装路径,再点击“下一步”。
5.点击“安装”。
6.勾选“运行HLP106STool”,点击“完成”即实用工具安装完成。
勾选“运行HLP106STool”,即在完成安装后,运行该软件。
7.安装成功后,将生成快捷方式,双击快捷方式即可运行该工具。
4.2卸载
点击“开始”→“所有程序”→“HLP106STool”→“卸载HLP106STool”→选择“是”→卸载完成。
5.使用方法
5.1 添加打印机
1.双击快捷键运行打印机实用工具软件。
2.点击添加打印机。
3.选择HLP106S打印机驱动程序,选择端口,例如“USB端口”,备注信息可根据需要填写或不写,点击“确定“,打印机添加成功。
4.添加的HLP106S打印机将在打印机清单中显示。
1.在打印机清单中点击“修改打印机”。
2.在下拉列表选中需要更改的打印机后更改端口,选中HLP106S例如将“USB端口”改为“COM1端口”,点击“确定“,根据需要在备注中填写或不填。
3.更改后的打印机在打印机清单中显示。
1.在打印机清单中,选中要删除的打印机,再点击“删除打印机”,选择“是”,打印机删除成功。
2.删除后,打印机清单将清除该打印机信息。
5.4 参数设置
1.以太网设置:
2.打印浓度(可选范围:0~30):
3.打印速度(可选范围:2,3,4,5):
4.指令测试:
点击“指令测试”,输入指令,点击“发送”,发送指令测试。
5.点击“写入”,保存设置。
