PC服务器培训教材-HP SmartStart智能导航光盘操作指南
HP SMARTSTART 引导盘收集报告方法
使用smartstart光盘收集的报告方法如下,一共需要收集3个报告:
下图点击Next
Agree
店家hp array configuration and Diagnostic
Diagnostic Report
然后点击右下方的Save Report,
第二个报告:Survey报告点击HP insight Diagnostic
诊断完成后如下图:
这里要注意下图的红色位置:
左侧的下拉菜单一定要选择:Advanced 右侧的下拉菜单一定要选择:All
然后点击右下方的Save进行保存。
第三个报告:
然后点击右下方的save进行保存。
如果有条件,建议log下面的这几个报告都保存一下
检测硬件,收集报告
Test选项可以检测硬件。
有quick ;complete;Custom test 。
quick中选择All Device (针对您现在的问题可以考虑检测所有硬件或者只检测内存以及硬盘信息)。
Number of loop 中可以设定检测次数(这个选项建议选择10次以上)。
然后点击Begin testing
Complete test。
完全检测比quick 多了CMOS DEVICE检测
Custom test。
可以自己定义test的硬件
检测后的结果在Status中可以看到
Diagnostic log
点击保存。
保存Test log
点击保存。
保存error log。
惠普电脑快速入门指南.pdf_1700501245.8071668说明书
2013-09 Connect the keyboard and mouseSambungkan papan ketik dan mouseConecte el teclado y el mouseConnect the network cable (optional)Sambungkan kabel jaringan (opsional)Conecte el cable de red (opcional)Connect the power cable on your computerand displaySambungkan kabel daya yang ada di komputer dan display AndaConecte el cable de alimentación a su pantalla y equipoConnect the displaySambungkan displayConecte la pantalla12436Finish Windows setupSelesaikan pengaturan Windows | Finalice la configuración de WindowsEnable security and updatesAktifkan keamanan dan pembaruanHabilite la seguridad y las actualizacionesLog in to your Microsoft account orcreate a local accountMasuk ke akun Micorsoft Anda ataubuat akun lokalInicie sesión en la cuenta de Microsofto cree una cuenta localConnect to your networkSambungkan ke jaringan AndaConéctese a la redN OTE: If you ordered your computer with a discrete graphics card,connect the display to the discrete graphics card.C ATATAN: Jika Anda memesan komputer dengan kartu grafis diskret,sambungkan display ke kartu grafis diskret.N OTA: Si ordenó su equipo con una tarjeta de gráficos discretos, conectela pantalla a la tarjeta de gráficos discretos.Explore resourcesJelajahi sumber daya | Explore los recursosHelp and TipsBantuan dan Tips | Ayuda y sugerenciasMy DellDell Saya | Mi DellRegister your computerDaftarkan komputer Anda | Registre su equipoTurn on your computer and displayHidupkan komputer dan displayActive el equipo y la pantalla5DisplayPort ConnectorKonektor DisplayPortConector DisplayPortVGA ConnectorKonektor VGAConector VGAOr | Atau | OPrinted in China.© 2013 Dell Inc.© 2013 Microsoft Corporation.3020Product support and manuals Dukungan produk dan manual produk Soporte del producto y manuales /support/support/manuals /windows8Contact DellHubungi DellPóngase en contacto con Dell/contactdellRegulatory and safetyRegulasi dan keselamatanNormativa y seguridad/regulatory_complianceRegulatory model and type Model dan jenis regulasi Modelo y tipo normativo D15M, D08SD15M001, D08S001Computer modelModel komputer Modelo de equipo Optiplex 3020FeaturesFitur | Funciones 1. Power button/Power light2. Optical-drive/hard-drive bay3. Microphone connector4. Headphone connector5. Hard-drive activity light6. Power-supply diagnostic light7. Power-supply diagnostic button8. Power cable connector9. Network connector10. USB 2.0 connector11. USB 3.0 connector12. DisplayPort connector13. VGA connector14. Line-in/microphone connector15. Line-out connector16. Expansion card slots17. Security cable slot18. Padlock ring1. Botón de alimentación/Luz de alimentación2. Unidad óptica/bahía de unidad de disco duro3. Conector para micrófono4. Conector para auriculares5. Indicador luminoso de actividad de la unidad del disco duro6. Luz de diagnóstico del suministro de energía7. Botón de diagnóstico del suministro de energía8. Conector del cable de alimentación9. Conector de red10. Conector USB 2.011. Conector USB 3.012. Conector DisplayPort13. Conector VGA14. Conector del micrófono/línea de entrada15. Conector de línea de salida16. Ranuras para tarjetas de expansión17. Ranura para cable de seguridad18. Anillo del candado1. Tombol daya/Lampu daya2. Bay drive-optis/hard-drive3. Konektor mikrofon4. Konektor headphone5. Lampu aktivitas hard disk6. Lampu diagnostik catu daya7. Tombol diagnostik catu daya8. Konektor kabel daya9. Konektor jaringan10. Konektor USB 2.011. Konektor USB 3.012. Konektor DisplayPort13. Konektor VGA14. Konektor kabel input/mikrofon15. Konektor kabel output16. Slot kartu ekspansi17. Slot kabel keamanan18.Ring pengunciOptiplex 3020 SFFOptiPlex 3020 MT。
HP计算机用户指南说明书

摘要本指南提供有关组件、计算机设置、备份等方面的信息。
法律信息©Copyright 2022 HP Development Company, L.P.AMD 是 Advanced Micro Devices, Inc. 的商标。
Linux® 是 Linus T orvalds 在美国和其他国家/地区的注册商标。
HDMI、HDMI High-Definition Multimedia Interface 和 HDMI 徽标是 HDMI Licensing LLC 的商标或注册商标。
Microsoft 和 Windows 是 Microsoft Corporation 在美国和/或其他国家/地区的注册商标或商标。
NVIDIA 是 NVIDIA Corporation 在美国和其他国家/地区的商标或注册商标。
Red Hat Enterprise Linux 是 Red Hat, Inc. 在美国和其他国家/地区的注册商标。
USB Type-C® 是 USB Implementers Forum 的注册商标。
DisplayPort™ 和 DisplayPort™ 徽标是 Video Electronics Standards Association (VESA) 在美国和其他国家/地区所有的商标。
本文所含信息如有更改,恕不另行通知。
HP 产品和服务附带的明示保修声明中阐明了此类产品和服务的全部保修服务。
本文档中的任何内容均不构成任何额外保修。
HP 对本文档中出现的技术错误、编辑错误或遗漏之处不承担任何责任。
第一版:2022 年 11 月文档部件号:N24511-AA1产品通知本指南介绍大多数产品共有的功能。
您的计算机上可能未提供某些功能。
并非所有功能在所有 Windows 版本中都可用。
系统可能需要升级和/或单独购买硬件、驱动程序、软件或 BIOS 更新,才能充分利用 Windows 功能。
HP 设备硬盘驱动器与光驱单元指南说明书

UnidadesNúmero de referencia del documento: 430243-E51 Enero de 2007Esta guía explica la unidad de disco duro y la unidad de disco óptico del equipo.Contenido1Cuidado de unidades2Indicador luminoso de la unidad3Unidad de disco duroReemplazo de la unidad de disco duro. . . . . . . . . . . . . . . 3–1 4Unidades ópticasInserción de un disco óptico. . . . . . . . . . . . . . . . . . . . . . . 4–3 Extracción de un disco óptico (con alimentación). . . . . . 4–4 Extracción de un disco óptico (sin alimentación) . . . . . . 4–5 Prevención del modo de suspensión o hibernación . . . . . 4–6Índice1 Cuidado de las unidadesLas unidades son componentes frágiles del equipo que deben manipularse con cuidado. Consulte las siguientes precauciones antes de manipular las unidades. Se incluyen precauciones adicionales con los procedimientos a los cuales se aplican.Cuidado de las unidadesÄPRECAUCIÓN: Para reducir el riesgo de daños al equipo, a la unidad o pérdida de información, observe estas medidas de precaución:■Inicie el modo de suspensión y permita que se borre la pantalla, antes de mover el equipo o una unidad de disco duro externa deun lugar a otro.■Antes de manipular una unidad, descargue la electricidad estática tocando la superficie metálica sin pintura de la unidad.■No toque las patas de los conectores de la unidad extraíble o del equipo.■Manipule la unidad con cuidado; no la deje caer ni la apriete.■Antes de extraer o insertar una unidad, apague el equipo. Si no está seguro de que el equipo está apagado o en hibernación,enciéndalo y luego apáguelo a través del sistema operativo.■No utilice fuerza excesiva al insertar las unidades en elcompartimiento para unidades.■No utilice el teclado ni mueva el equipo mientras la unidad óptica está grabando a un medio. El proceso de grabación es sensible ala vibración.■Cuando la batería es la única fuente de alimentación, asegúrese de que la batería esté suficientemente cargada antes de grabar unmedio.■Evite exponer la unidad a temperaturas o humedad extremas.■Evite exponer la unidad a líquidos. No la rocíe con productos de limpieza.■Retire el medio de la unidad antes de extraerla de sucompartimiento, viaje, la envíe, transporte o la almacene.■Si una unidad se debe enviar por correo, coloque la unidad en un paquete de envío con acolchado u otro paquete adecuado paraproteger la unidad y con una etiqueta que diga "FRÁGIL”.■Evite exponer la unidad a campos magnéticos. Los dispositivos de seguridad con campos magnéticos incluyen los dispositivosdetectores y sensores de seguridad de los aeropuertos. Losdispositivos de seguridad de aeropuertos que verifican el equipajede mano sobre una correa transportadora utilizan rayos x en lugarde magnetismo y no dañan la unidad.2 Indicador luminoso de launidad El indicador luminoso de la unidad parpadea cuando se obtieneacceso a la unidad de disco duro o a una unidad óptica.✎La apariencia real del equipo puede diferir ligeramente de las ilustraciones en este capítulo.3Unidad de disco duroReemplazo de la unidad de disco duro ÄPRECAUCIÓN: Para evitar el bloqueo del sistema y la pérdida de información:■Apague el equipo antes de extraer la unidad de disco duro del compartimiento. No extraiga una unidad de disco duro si elequipo está encendido, en modo de suspensión, o en modo dehibernación.■Si no está seguro si el equipo está apagado o en hibernación, encienda el equipo presionando el botón de alimentación. Acontinuación, apáguelo a través del sistema operativo.✎La apariencia real del equipo puede diferir ligeramente de las ilustraciones en este capítulo.Para extraer la unidad de disco duro:1.Guarde su trabajo.2.Apague el equipo y cierre la pantalla.3.Desconecte todos los dispositivos externos conectados alequipo.4.Desconecte el cable de alimentación de la toma eléctrica deCA.5.V oltee el equipo sobre una superficie plana.6.Extraiga la batería del equipo.Unidad de disco duro7.Con el compartimiento de la unidad de disco duro endirección a usted, suelte los dos tornillos de la cubierta de launidad de disco duro 1.8.Levante la cubierta de la unidad de disco duro hacia fuera delequipo 2.Unidad de disco duro9.Suelte el tornillo de la unidad de disco duro 1.10.Mueva la lengüeta de la unidad de disco duro 2 a la izquierdapara desacoplarla.11.Levante la unidad de disco duro 3 hacia fuera de sucompartimiento.Unidad de disco duroPara instalar una unidad de disco duro:1.Inserte la unidad de disco duro 1en el compartimiento paraunidades de disco duro.2.Jale la lengüeta de la unidad de disco duro 2 hacia la derechapara conectar la unidad.3.Apriete el tornillo de la unidad de disco duro 3.Unidad de disco duro 4.Alinee las lengüetas 1 de la cubierta de la unidad de discoduro con las ranuras del equipo.5.Cierre la cubierta 2.6.Apriete los tornillos de la cubierta de la unidad de disco duro3.4Unidades ópticas Una unidad óptica, como una unidad de DVD-ROM, admitediscos ópticos (CD y DVD). Estos discos se utilizan paraalmacenar o transportar información y para reproducir música ypelículas. Los DVD tienen mayor capacidad que los CD.✎La apariencia real del equipo puede diferir ligeramente de las ilustraciones en este capítulo.Unidades4–1Unidades ópticasEl equipo puede leer o grabar en las unidades ópticas descritas enla siguiente tabla:Tipo de unidad óptica Lee CD yDVD-ROMGrabaenCD-RWGraba aDVD±RW/RGraba aDVD±RWDLGraba unaetiqueta aunLightScribeCD oDVD±RW/RUnidad deDVD-ROMSíNo No No NoUnidadcombinadadeDVD/CD-RWSíSíNo No NoUnidadcombinadadeDVD±RW/Ry CD-RWSíSíSíNo NoUnidadcombinadade DVD±RWy CD-RW,DoubleLayer (doblecapa)SíSíSíSíNoDV±RW yunidadcombinadaCD-RW consoporte paraLightScribe,DoubleLayer (doblecapa)SíSíSíSíSí✎Algunas de las unidades ópticas listadas pueden no ser admitidas por el equipo. Puede ser que las unidades no incluyan todas las unidadesópticas admitidas.4–2UnidadesUnidades ópticasUnidades 4–3Inserción de un disco óptico1.Encienda el equipo.2.Presione el botón de liberación 1 en el panel frontal para liberar la bandeja para medios.3.Jale la bandeja hacia fuera 2.4.Sostenga el CD o el DVD por los bordes para evitar tocar las superficies planas y posicione el disco sobre la bandeja con el lado de la etiqueta hacia arriba.✎Si la bandeja no está completamente accesible, incline eldisco cuidadosamente para posicionarlo sobre el eje.5.Presione suavemente el disco 3 en el eje de la bandeja hasta que se encaje en su lugar.6.Cierre la bandeja para medios.✎Después de insertar un disco, es normal que el equipo haga una breve pausa. Si no ha seleccionado un reproductor de mediospredeterminado, se abrirá un cuadro de diálogo de Reproducciónautomática. Se le solicitará que seleccione cómo desea utilizar elcontenido del medio.4–4UnidadesUnidades ópticasExtracción de un disco óptico (con alimentación)Si el equipo está funcionando con alimentación externa o por batería:1.Encienda el equipo.2.Presione el botón de liberación 1 en el panel frontal para liberar la bandeja para medios y luego jale la bandeja hacia fuera 2.3.Retire el disco 3 de la bandeja presionando el ejesuavemente hacia abajo y levantando los bordes del disco hacia arriba. Sostenga el disco por los bordes y evite tocar las superficies planas.✎Si la bandeja para medios no está completamente accesible,incline cuidadosamente el disco mientras lo extrae.4.Cierre la bandeja para medios y coloque el disco en unestuche de protección.Unidades ópticasUnidades4–5Extracción de un disco óptico (sin alimentación)Si no se encuentra disponible una fuente de alimentación externa o por batería:1.Inserte el extremo de un clip 1 en el acceso de liberación del panel frontal de la unidad.2.Presione suavemente hasta liberar la bandeja y luego extráigala 2.3.Retire el disco 3 de la bandeja presionando el ejesuavemente hacia abajo y levantando los bordes del disco hacia arriba. Sostenga el disco por los bordes y evite tocar las superficies planas.✎Si la bandeja para medios no está completamente accesible,incline cuidadosamente el disco mientras lo extrae.4.Cierre la bandeja para medios y coloque el disco en unestuche de protección.Unidades ópticasPrevención del modo de suspensión o hibernaciónÄPRECAUCIÓN: Para evitar la posible degradación de audio y video o la pérdida de funciones de reproducción de audio o video, no inicie elmodo de suspensión o la hibernación mientras lee o graba en un CD oDVD.Para evitar la pérdida de información, no inicie el modo de suspensiónni la hibernación mientras graba en un CD o DVD.Si el modo de suspensión o hibernación es iniciado durante lareproducción de medios (como un CD o DVD), el equipo secomportará en una de las siguientes maneras:■Es posible que se detenga la reproducción.■Es posible que visualice un mensaje de advertenciapreguntando si desea continuar. Si aparece este mensaje, hagaclic en No.■Es posible que tenga que reiniciar el CD o DVD para resumir la reproducción de audio o video.4–6UnidadesÍndice Ddispositivos de seguridad delos aeropuertos1–2Hhibernación, evite al utilizardiscos4–6Mmedios, unidades, afectadospor dispositivos de seguridaden aeropuertos1–2Ssuspensión, evite al utilizardiscos4–6Uunidadesafectado por dispositivosde seguridad enaeropuertos1–2prevención del modo desuspensión e hibernaciónal utilizar discos4–6UnidadesÍndice–1© Copyright 2007 Hewlett-Packard Development Company, L.P.La información contenida en el presente documento está sujeta a cambios sin previo aviso. Las únicas garantías para los productos y servicios de HP están estipuladas en las declaraciones expresas de garantía que acompañan a dichos productos y servicios. La información contenida en este documento no debe interpretarse como una garantía adicional. HP no se responsabilizará por errores técnicos o de edición ni por omisiones contenidas en el presente documento.UnidadesPrimera edición: enero de 2007Número de referencia del documento: 430243-E51。
联想服务器导航光盘用户手册

ThinkServer EasyStartup User Guide目录声明 (2)商标和版权 (3)第一章简介 (4)第二章操作系统自动安装使用说明 (5)2.1 启动 (5)2.1.1 自引导 (5)2.1.2 UEFI模式启动 (5)2.1.3 语言及键盘选择 (5)2.1.4 RAID配置提示 (5)2.1.5 联想最终用户许可协议 (5)2.1.6 时间日期选择 (6)2.1.7启动选项选择 (7)2.2 软件主界面 (8)2.3兼容性列表 (9)2.4用户指南 (10)2.5 硬件信息列表 (11)2.6 配置RAID (12)2.6.1 配置RAID (12)2.6.2 以复制方式配置RAID (23)2.7安装操作系统 (24)2.7.1 Windows操作系统的自动安装 (27)2.7.2 Linux操作系统的自动安装 (39)2.7.3复制安装方式 (49)2.8 驱动下载 (51)2.8.1 按机型下载驱动 (51)2.8.2 按外插卡设备下载驱动 (52)2.9 关于 (54)2.10 帮助 (54)2.11 退出 (55)第三章驱动程序下载及安装使用说明 (56)3.1 运行光盘 (56)3.1.1 运行在Windows操作系统上 (56)3.1.2 联想最终用户许可协议 (56)3.2 软件主界面 (56)3.3 机型简介 (57)3.4 驱动下载 (57)3.4.1按机型下载驱动 (57)3.4.2按外插卡设备下载驱动 (58)3.5 驱动安装 (58)3.6 自述文件 (59)3.7 快速使用指南 (60)3.8 关于 (60)3.9 帮助 (61)第四章常见问题 (62)1声明感谢您选择联想产品。
本手册的用途在于帮助您正确地使用联想服务器产品(以下称“本产品”),在安装和第一次使用本产品前,请您务必先仔细阅读随机配送的所有资料,特别是本手册中所提及的注意事项。
这会有助于您更好和安全地使用本产品。
HP 计算机用户指南.pdf_1701975724.1985364说明书

Veuillez lire ces nouvelles informations et conservez-les avec vos guides d’utilisation. Ces informations traitent des sujets suivants :• Utilisation de la prise casque• Exécution de tests de diagnostic sur votre ordinateur avec l’assistance technique instantanée• Obtenir l’aide d’un analyste avec l’assistance technique instantanée• Utilisation des cartes mémoire• Utilisation de l’assistant de réparation logicielle • Utilisation de la fonction Copie exacte du logiciel RecordNow!Utilisation de la prise casqueSur certains systèmes, la prise casque est situéesur le devant de l’ordinateur. Pour savoir oùbrancher un casque sur votre ordinateur, repérezle symbole correspondant.Exécution de tests de diagnostic sur votre ordinateur avec l’assistance technique instantanée(Disponible sur certains modèles uniquement) Votre ordinateur contient des tests permettant de diagnostiquer divers problèmes informatiques que vous pouvez rencontrer.Pour exécuter les tests de diagnostic de votre ordinateur : 1 Cliquez sur démarrer dans la barre de tâches, puissur Aide et support.2 Cliquez sur Aide de l’ordinateur HP Pavilion.3 Cliquez sur Informations sur l’ordinateur etmaintenance, puis sur Tests de l’ordinateur. Obtenir l’aide d’un analyste avec l’assistance technique instantanée (Disponible sur certains modèles uniquement) 1 Cliquez sur démarrer dans la barre de tâches, puissur Aide et support.2 Cliquez sur Se connecter au Service Clientèle.3 Cliquez sur Demander de l’aide.4 Soumettez votre problème en suivant les instructions àl’écran. Pour soumettre un problème, votre ordinateur doit être connecté au réseau Internet.Utilisation des cartes mémoire Suivant le modèle de votre ordinateur, il est possible que votre celui-ci puisse lire des types de cartes mémoire supplémentaires (cas d’un lecteur 8 en 1 ou 9 en 1). Outre les cartes mémoire figurant dans votre guided’utilisation, les lecteurs de carte mémoire étendue peuvent être compatibles avec les supports de données suivants :• Carte mémoire Memory Stick® (MS-PRO) — S’insère face vers le haut dans la fente inférieure droite dulecteur à 4 fentes. Elle peut également être inséréeface vers le bas (doigts du connecteur doré vers lehaut) dans la fente inférieure du lecteur à 2 fentes. • Support xD — S’insère face vers le haut dans la fente supérieure gauche du lecteur à 4 fentes. S’insèreégalement face vers le haut dans la fente inférieure du lecteur à 2 fentes.Utilisation de l’assistant deréparation logicielleSi votre ordinateur est victime d’un problème logiciel, il est possible que vous puissiez le réparer avec l’assistant de réparation logicielle.Nouvelles informations concernant lemanuel de l’utilisateurL’assistant de réparation logicielle vous aide à choisir et utiliser les outils appropriés pour réparer :• Les programmes qui ne fonctionnent plus.• Les imprimantes et autres périphériques ne fonctionnant plus correctement avec votre ordinateur. • Comportement erratique de l’ordinateur.Votre ordinateur contient plusieurs outils logiciels permettant de résoudre des conflits entre divers programmes ou de restaurer des applications ayant été accidentellement effacées ou endommagées. Les outils à votre disposition sont :• Restauration du système Microsoft® — Retourne votre système à un point de restauration où il fonctionnait correctement sans perdre votre travail récent.• Réinstallation de logiciels et de pilotes — Vous permet de réinstaller un programme ou un pilote depériphérique qui avait été préinstallé sur votreordinateur.• Réinstallation système — Réinstalle complètement tout votre système à l’aide d’une partition de réinstallation contenant une image de vos logiciels d’origine.AVERTISSEMENT : Le programmeRéinstallation système pour PC HP nedoit être utilisé qu’en dernier ressort caril effacera toutes les données et tous lesprogrammes installés sur votreordinateur après son achat.Remarque : Avant d’utiliser l’assistant de réparation logicielle, il est recommandé de créer une copie de sauvegarde de vos fichiers informatiques.Pour lancer l’assistant de réparation logicielle,double-cliquez sur l’icône correspondante dubureau Windows ou :1 Cliquez sur démarrer dans la barre des tâches.2 Choisissez Tous les programmes.3 Choisir Outils et Aide.4 Cliquez sur Assistant de réparation logicielle.5 Suivez les instructions à l’écran.L’assistant de réparation logicielle sait automatiquement si vous avez créé des disques de réinstallation pour votre ordinateur. Les disques de réinstallation sont nécessaires pour réparer certains logiciels. Si vous n’avez pas enregistré vos disques de réinstallation, le système vous offre d’ouvrir le Créateur de CD-DVD de réinstallation HP pour les enregistrer. Lorsque vous avez créé des disques de réinstallation, faites redémarrer l’assistant deréparation logicielle et choisissez l’outil approprié deréparation de logiciel.Pour de plus amples informations sur les outils deréparation du système et des logiciels dont dispose votre ordinateur, reportez-vous à Utilisation des programmes Réinstallation d’applications et Réinstallation système dans la documentation imprimée accompagnant votre ordinateur ou les autres rubriques d’Aide et support. Pour voir les rubriques d’Aide et support :1 Cliquez sur démarrer dans la barre de tâches, puissur Aide et support.2 Cliquez sur Aide de l’ordinateur HP Pavilion.3 Cliquez sur une catégorie, puis choisissez unerubrique.Utilisation de la fonction Copie exacte du logiciel RecordNow!Vous pouvez utiliser RecordNow! pour créer (graver) des CD/DVD musicaux ou de données (pour graver un DVD, il vous faut un graveur de DVD).Pour créer une copie exacte d’un disque :1 Cliquez sur démarrer, choisissez Tous lesprogrammes, Écriture de CD (DVD),RecordNow!, puis cliquez à nouveau surRecordNow!2 Cliquez sur l’onglet Projets de sauvegarde.3 Cliquez sur Copie exacte.4 Suivez les instructions à l’écran pour terminerl’opération.Printed in。
hp服务器阵列配置手册
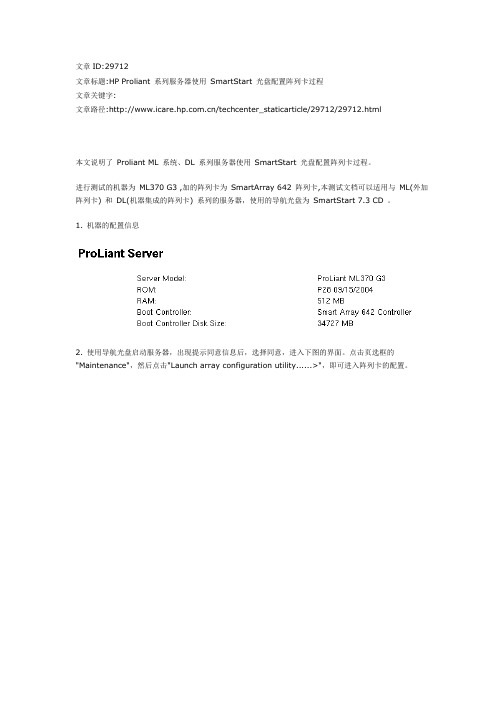
文章ID:29712文章标题:HP Proliant 系列服务器使用SmartStart 光盘配置阵列卡过程文章关键字:文章路径:/techcenter_staticarticle/29712/29712.html本文说明了Proliant ML 系统、DL 系列服务器使用SmartStart 光盘配置阵列卡过程。
进行测试的机器为ML370 G3 ,加的阵列卡为SmartArray 642 阵列卡,本测试文档可以适用与ML(外加阵列卡) 和DL(机器集成的阵列卡) 系列的服务器,使用的导航光盘为SmartStart 7.3 CD 。
1. 机器的配置信息2. 使用导航光盘启动服务器,出现提示同意信息后,选择同意,进入下图的界面。
点击页选框的"Maintenance",然后点击"Launch array configuration utility......>",即可进入阵列卡的配置。
3. 进入阵列卡的配置程序Array Configuration Utility,简称ACU,加载阵列卡配置程序。
4. 进入到阵列卡的配置界面。
左侧列出检测到的阵列卡,中间列出阵列卡的信息,右侧配置阵列卡。
图示的左侧列出检测到控制卡为:Smart Array 642 Controller in Slot 2。
如果点击下方的Rescan Controllers,可以重新搜索控制器。
中间列出控制器的详细信息。
Smart Array 642 Controller in Slot 2,当前机器的硬盘为36.4 GB。
右侧选项为•Create Array:创建阵列•Refresh:刷新•Express Configuration:快速配置•Configuration Wizards:使用配置向导进行阵列的配置5. 选择右边的"Create Array" 来创建阵列,选择需要加入到阵列的硬盘6. 选择"OK" 出现的的界面,能看到,已经把硬盘加到"Array A" 中,空间的大小为"34727 MB"同时,可以在右边看到新的三个选项"Create Logical Drive","Deletet", "More Information"选择"Create Logical Drive"7. 进入到"Create Logical Drive" 的界面,可以看到最右边出现做阵列的一些设置,都选为默认设置。
HP Smartstart中文教程
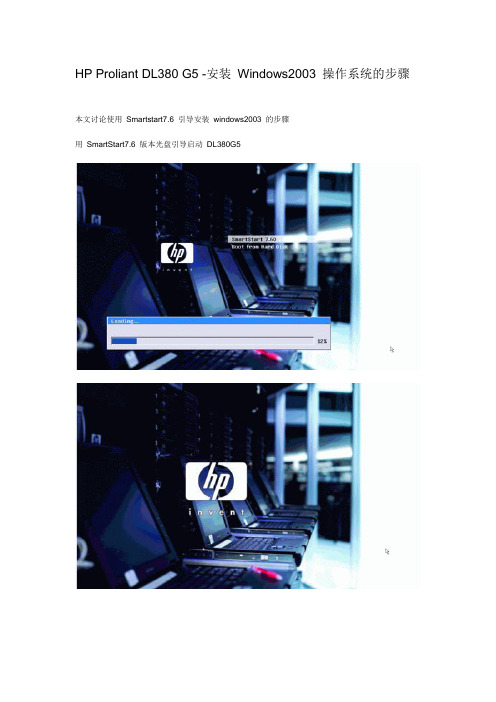
HP Proliant DL380 G5 -安装Windows2003 操作系统的步骤
本文讨论使用Smartstart7.6 引导安装windows2003 的步骤
用SmartStart7.6 版本光盘引导启动DL380G5
选择语言,这里选择English
版权协议,选择Agree
出现主操作界面,安装系统选择Deploy Server
此时可以看到服务器型号、控制器型号以及逻辑盘大小等信息
选择windows2003
注意:SmartStart7.6 光盘新增了通过USB Key 、Network 和DVD 安装系统的功能,并且可以选择从ISO 镜像安装还是从Flat Files 安装。
此时我们以普通方式选择从CD-ROM 安装
自定义C: 分区大小,并选择文件系统
SNMP 设置,默认即可
输入用户信息和Product CD-Key
警告信息,提示继续会擦除数据
等待从SmartStart 光盘复制文件
提示插入windows2003 光盘继续完安装过程即可
在选择安装方式的时候,我们可以选择从网络安装,并且选择CD image(ISO)
此时Server name/IP address 填入ISO 镜像所在客户端的IP ,Share name 输入共享文件夹的名称,User Name 和Password 分别填入ISO 镜像所在客户端的系统用户名和密码,其他部分默认即可
选择ISO 镜像保存的路径
继续安装即可看到与CD-ROM 安装相同的后续步骤。
HP服务器windows下SmartStart 光盘自动安装驱动安装驱动

说明信息
本文介绍Proliant DL380 G3服务器安装完Windows 2000 Server 或Windows Server 2003系统后,使用SmartStart 光盘自动安装驱动,文章以S martStart 7.1 版本光盘为例。
如果计算机的系统损坏或者崩溃,惠普建议客户首先设法备份数据。
备份数据后,使用随机的SmartStart 光盘重新安装新系统。
注意:安装的新系统会删除原来的所有数据。
安装步骤:
1.在Windows 系统手工安装完后,将SmartStart 光盘放入光驱中,光盘自动运行,出现如下界面;
2. 选择“Agree”按钮,进入SmartStart 光盘的主界面;
3.选择“Install PSP”一栏,点击其中的“Click here”,选择安装;
4.输入管理员的帐户和密码;请保留存档
5.进入安装的流程,选择“下一步”按钮;
6. SmartStart 光盘自动安装所需驱动及管理程序,直至拷贝结束。
确认安装成功
上述驱动安装完毕后,鼠标右键单击我的电脑->管理->设备管理器,发现已经没有带问号和叹号的设备,说明所有驱动已经安装成功。
如果对于上面驱动安装有困难,建议参考上面步骤多试试,或者和惠普工程师联系咨询,网址是:
/ChattingSupportWeb/UI/Login/RoomList.aspx。
hp服务器的windows操作系统安装之一hpsmartstart引导盘的下载及制作

Hp 服务器的windows 操作系统安装之一 ---- hp smartstart 引导盘的下载及制作HP 有的服务器机型对不同的Windows 版本不支持的现象,因为 从smartstar光盘启动发现只有有的windows 版本并不存在于选项中。
这是因为smartstart 的版本不同造成的,所以要想安装合适的 Windows 有俩种方法,一种方法是下载合适版本的smartstart;另一 种是从官网上去下载RAID 卡的驱卡,用USB 软驱加载,安装完windows 后再加载驱程序。
寻找理想版本的smartstart 的。
1.点去以下网址:。
选择 ° Download dr i vers and software (and f i rmware) ”。
输入 "smartstart” ,点击 GO 。
2.点击"HP SmartStart Maintenance Single Release Software%OO2 0^33102 □ $- 6 c f a w S B S W 33 asns 55 a$n$ 5S 谢a g n ssns mun S 3 5S 谢* ewrGTSOM 二 丫、3 0芒&3运目吕 35HS 〔鱼e t b o f t c e s w 33 aens P S N 3・W >W O L 350$ 0®53f O S TMTUnB 工 P O M ^s s t i n n 号 a n MuumUJ n H P O M S 3C 3 ^£s s D 芒 《B y «♦号 W -J S I S 孑工 mslrsa •丈-99UH 盘 l l u v t UJ H x m C §.£—I MUeMS 右工 PQa =5S H O W > C §£—I s ^s s _0 工 O S &«二z w w n o z u e a tt UJ H 工 P O M s o h s v s =£z o .^s i -=l -^s i z =i * UFJTG^anM 6 v v t w -x o l e s c s s 2 w h o C*CU1J 卷UJ 3b o Erwzp K 匕• ygc r t s u c 5s 3D 3 m o s g g =5电 S O E S ggeuAng -?» 90a - ^s s $ MHOS- c s s c c ^u c s u s Z H S S E *«§= ?9r3?jc^」u -^ g M u s SJ s z a iJ s U 2H UJ S 3C 3O ^S 8i &s $s s o n g ・au?5na 1C 63 80* c l o v e s a L m n d)s e s f i .3 -E EacJN 』3*J3S r t i G S S 8Q 3 2S w t c v w 0*s i «c 5s §2- 000^«n s «s 3 B f *G r x M W 3£©3 • v ^-30s -与X s ^£u-y K 30J a ^ HUI -OJ 03c 3^* e s * 弓M 4t5C H OCSvenSE-adEagb ei . ?_V 2P <O V £』 】芒s .n y 0F .c s:v €0 uody E c F n g dH , acwyM PUQ N £p p F C 0-U E 8 • "92$ e 3r 2x dH* — J0』ad*3】芒s.nyF .c s:v€E cF n g ,N £ppFC-U E 8 • e 3r 2x dH *Did noc Hodwbat you're ^ofciog for?lfMtia1)ou see to«Mn9fo< 匕 na Uttd fianith na tot downlo 辺ngWom tn ”31*mu 0$ sro 阪护加 YOU can 纟 00创冇"0£“农小 or you con 力血@ 靳oiw laiKMMQ XPi© be M n% ace . P1e”e note that EnQlsh 15 fie OeOut Ungubg fcr 4rT»rrs.Hc4s; Some coanga mxnacmerrf or dccelecaDon yo&pre nay MUBO issues Ath ile «QAT »24«5. Pioasc dtzaMGan/dOAnbRd m^ucanionisotA^rnirj*au^anco :fi pfO5ie*ns co^rtoadn : arm.6. 下我后刻录成可引导的光盘(略)o7. 利用Ultra ISO 刻录成可引导的U 盘启动盘(推荐)。
HP Smartstart中文教程
HP Proliant DL380 G5 -安装Windows2003 操作系统的步骤
本文讨论使用Smartstart7.6 引导安装windows2003 的步骤
用SmartStart7.6 版本光盘引导启动DL380G5
选择语言,这里选择English
版权协议,选择Agree
出现主操作界面,安装系统选择Deploy Server
此时可以看到服务器型号、控制器型号以及逻辑盘大小等信息
选择windows2003
注意:SmartStart7.6 光盘新增了通过USB Key 、Network 和DVD 安装系统的功能,并且可以选择从ISO 镜像安装还是从Flat Files 安装。
此时我们以普通方式选择从CD-ROM 安装
自定义C: 分区大小,并选择文件系统
SNMP 设置,默认即可
输入用户信息和Product CD-Key
警告信息,提示继续会擦除数据
等待从SmartStart 光盘复制文件
提示插入windows2003 光盘继续完安装过程即可
在选择安装方式的时候,我们可以选择从网络安装,并且选择CD image(ISO)
此时Server name/IP address 填入ISO 镜像所在客户端的IP ,Share name 输入共享文件夹的名称,User Name 和Password 分别填入ISO 镜像所在客户端的系统用户名和密码,其他部分默认即可
选择ISO 镜像保存的路径
继续安装即可看到与CD-ROM 安装相同的后续步骤。
SmartStart CD引导安装系统

1、放入引导盘后启动服务器。
2、进入HP Log页面3、选择安装语言和键盘类型。
4、协议条款,点击同意继续。
5、进入到Smart start光盘主界面。
请注意:如果您已经配置了阵列,请直接跳转到步骤,如果没有配置阵列,请参照文档继续设置。
点击Maintenance进入工具菜单。
6、选择HP Array Configuration Utility(ACU)配置阵列。
7、进入ACU后,configuration中,下拉菜单中选中您需要使用的阵列卡。
8、点中阵列卡后,显示您可用的磁盘,选择右侧Create Array。
9、右侧界面中,选中需要配置的硬盘打勾,选OK。
10、在左侧产生了Array A,点选此Array,右侧选择Create Logical Drive。
11、选择Raid级别、Stripe Size和Size等选项,然后选Save。
注:如果需要设置多个Logical Drive(逻辑分区),您可以在Size的other中填入您需要的第一个分区大小(GB)后保存,剩余逻辑分区设置参考以上步骤重复设置直到剩余容量分配完毕(由于阵列卡支持逻辑分区不同及是否带缓存等都会影响到逻辑分区可分配数量,如遇问题请联系800工程师咨询)如果不需要分区请继续参考下方设置即可。
12、左侧生成了Logical Drive1,点中右侧more information可以看到状态。
13、Status显示ok,表示阵列做好了,点击左下角Exit ACU退出。
14、在点击左下角Home按钮回主菜单。
15、进入到Smart start光盘主界面,点击INSTALL开始安装操作系统。
16、选择硬盘(如果创建了多个logical drive此处会显示多个Disk)17、选择操作系统18、选择镜像来源(本机光驱安装的情况下直接使用DVD-ROM即可)19、分区时,如果无特殊要求默认最大分区就好。
注:如果希望分厂两个逻辑分区,之前没有单独在ACU中分过的话可以选择Customer后填入第一个逻辑分区的容量。
HP ProLiant 服务器系列-Smartstart 8.30 介绍
HP ProLiant 服务器系列- Smartstart 8.30 介绍问题Smartstart 8.30光盘界面与之前版本有不少区别,如何正确使用该工具盘?解决方案本文档将从硬件诊断及日志收集,使用ACU工具配置阵列,引导安装操作系统三个方面详细介绍Smartstart 8.30版本光盘使用方法。
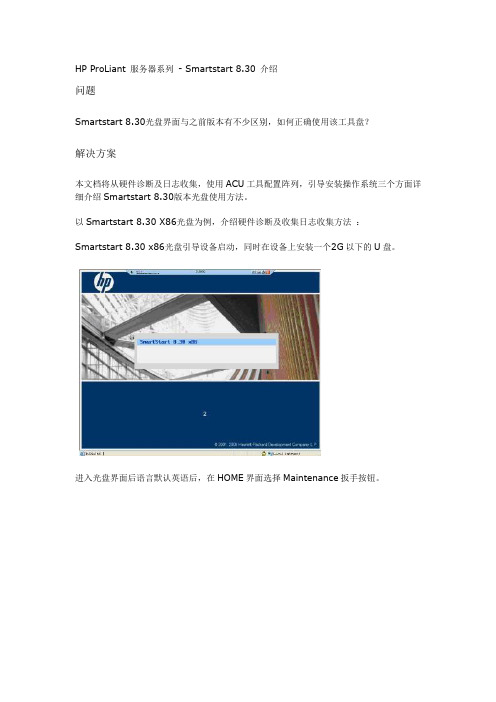
以Smartstart 8.30 X86光盘为例,介绍硬件诊断及收集日志收集方法:Smartstart 8.30 x86光盘引导设备启动,同时在设备上安装一个2G以下的U盘。
进入光盘界面后语言默认英语后,在HOME界面选择Maintenance扳手按钮。
列出Array Configuration and Diagnostics工具和Insight Diagnostics工具,先点击Array configuration and Diagnostics进入收集ADU存储日志报告。
进入Array Configuration Utility工具后,点击横数第2个选项Diagnostics,在左侧会显示现有的阵列卡,选中阵列卡后(打勾),右侧会出现2个按钮,第一个View diagnostic report可以观看日志,同时也可以存储日志,第二个Generate diagnostic report可以直接提取存储日志。
我们先点击第2个Generate diagnostic report按钮。
显示Report Generation Complete收集完成了,点击右下角的Save Reprot保存日志。
提示保存成功(默认直接保存到U盘,无须选择路径),然后点击左下Exit ACU工具退出。
然后点击第二个HP Insight Diagnostics进入收集硬件信息。
进入HP Insight Diagnostics后,第一个选项卡是Survey,上部有2个下拉按钮,第一个选择Advanced,第二个选择All,然后日志会刷新出很多更详细的信息,点击右下角Save。
惠普产品使用指南说明书

使用指南©Copyright 2015 HP Development Company, L.P.Bluetooth 是其所有人所擁有的商標,Hewlett-Packard Company 已取得授權使用。
Intel 和 Pentium 是 Intel Corporation 在美國和其他國家/地區的商標。
AMD 是 Advanced Micro Devices, Inc. 的商標。
SD 標誌是其所有人的商標。
Microsoft 和 Windows 是 Microsoft 集團的商標。
本文件包含的資訊可能有所變更,恕不另行通知。
HP 產品與服務的保固僅列於隨產品及服務隨附的明確保固聲明中。
本文件的任何部份都不可構成任何額外的保固。
HP 不負責本文件在技術上或編輯上的錯誤或疏失。
如需 DTS 專利,請參閱。
已取得 DTS Licensing Limited 授權製造。
DTS、DTS 符號以及 DTS 連同其符號皆為註冊商標,且 DTS Studio Sound 為 DTS, Inc. 的商標。
©DTS, Inc. 保留所有權利。
第一版:2015 年 11 月文件編號:839283-AB1產品聲明本使用指南說明大部分機型最常用的功能。
有些功能可能無法在您的電腦上使用。
此電腦可能需要升級和/或單獨購買硬體和/或 DVD 光碟機,用以安裝Windows 7 軟體並充分利用 Windows 7的功能。
如需詳細資訊,請前往/en-us/windows7/get-know-windows-7。
若要存取最新的使用指南,請前往/support,然後選取您所在的國家/地區。
選取驅動程式與下載,然後依照畫面上的指示繼續執行。
軟體條款透過安裝、複製、下載或以其他方式使用本電腦預先安裝的任何軟體產品,即表示您同意接受 HP 使用者授權合約(EULA) 條款之約束。
如果您不接受這些授權條款,可於 14 天內退回完整未使用的產品(含硬體與軟體),並依據經銷商的退款原則取得全額退款,此為唯一補償形式。
HP服务器SmartStart CD使用详解(更改后转载)
在购买HP服务器时,提供了一个SmartStart CD。
SmartStart CD是HP 专门用于Proliant 服务器的工具软件光盘, SmartStart CD可以帮助用户简单的部署和管理服务器。
SmartStart CD光盘提供的功能可以参考如下内容:SmartStart CD是HP 专门用于Proliant 服务器的工具软件光盘, SmartStart CD可以帮助用户简单的部署和管理服务器, SmartStart CD包含以下功能:1.部署操作系统: SmartStart 可以以向导的方式, 帮助用户轻松的部署Windows 2000/2003 操作系统, 并把HP System Insight Manager 系统管理平台的客户端(Agent), 以及服务器内部集成硬件的驱动程序集成到操作系统中, 使用户一次安装就可装好所有必要的工具软件和驱动程序;2.设置阵列: SmartStart 内置Array Configuration Utility (ACU) 阵列设置工具, 可以使用图形GUI界面对服务器内置的HP Smart Array阵列卡以及外置的HP Modular Smart Array 磁盘阵列进行RAID设置;3.阵列诊断: SmartStart 内置Array Diagnostics Utility (ADU) 阵列诊断工具, 可以对服务器内置的硬盘, HP Smart Array阵列卡, 以及外置的HP Modular Smart Array 磁盘阵列进行故障诊断, 硬件检测;4.系统诊断: SmartStart 内置Insight Diagnostics 系统诊断工具, 可以对服务器的所有部件进行故障检测并生成报告;5.系统擦除: SmartStart 内置Erase Utility 系统擦除工具, 可以轻松的恢复服务器的出厂设置, 以便系统恢复.6.安装驱动: SmartStart CD内置服务器支持软件包ProLiant SupportPack(PSP), PSP集成了Prolaint服务器的所有集成硬件及大部分选件的驱动程序, 支持Windows和Linux, 可以一个步骤就安装好所有选定的驱动程序及工具软件.SmartStart CD的使用方法介绍如下:1 .将 SmartStart 光盘放入光驱,并引导;2 . Loading ;3 .选择界面语言种类;4 .使用协议,点击 Agree 继续;5 . SmartStart 导航光盘的主界面;6 . Maintain Server 中的选项;7 .点击“Configure Array” ,进入 ACU 阵列配置工具,配置阵列;8 .退出 ACU ,进入 Deploy Server ,点击 Continue ;9 .选择所要安装的系统;10 .选择系统分区的容量;11 .输入序列号,机器名(必选);12 .配置系统 SNMP 协议(可选);13 .清除启动控制器下连接的所有硬盘或者所有硬盘;14 .存储配置信息;15 .提示插入 win2000 系统光盘;16 .如果插入光盘不符,会提示;17 .插入正确的系统光盘,验证,并复制系统文件至磁盘;。
Smart Start 光盘引导收集日志方法

HP ProLiant DL380 服务器系列- Smart Start 8.30 光盘引导收集日志方法
问题
如何使用smart start8.30光盘引导HP Proliant ML/DL 3、5系列以及刀片式服务器收集日志。
解决方案
首先,如果没有smart start 8.30光盘,请到点击此链接下载光盘镜像压缩文件。
请下载完成后解压缩,得到iso文件,并将该文件刻录到光盘上,放入服务器的光驱中,从该光盘引导起来,引导起来后界面如下,选择语言
在主菜单中,选择Maintenance 维护。
进入维护菜单后,选择Insight Diagnostics诊断选项。
进入诊断服务器的主界面。
在主界面中View Level 选项,选择Advanced 高级选项。
在Categories选择中,选择All 所有。
经过以上的操作步骤,我们就可以得到非常详细的服务器的survery 日志报告,报到U盘上,并发送给HP 售后技术支持来分析。
在服务器上插入U盘,等待10s钟左右,点save 保存,smart CD会先开始扫描可当扫描到设备后,会提示可以如下,选择USB flash drive,名称默认即可,然后NOTE: U 盘的系统文件格式要求是FAT 或者FAT32 ,不能是NTFS 格式。
保存成功后如下。
HP ProLiant 系列服务器 - 使用 SmartStart 光盘配置阵列卡过程

本文说明了HP ProLiant ML 系统、DL 系列服务器使用SmartStart 光盘配置阵列卡过程。
进行测试的机器为ML370 G3 ,加的阵列卡为SmartArray 642 阵列卡,本测试文档可以适用与ML(外加阵列卡) 和DL(机器集成的阵列卡) 系列的服务器,使用的导航光盘为SmartStart 7.3 CD 。
1. 机器的配置信息2. 使用导航光盘启动服务器,出现提示同意信息后,选择同意,进入下图的界面。
点击页选框的"Maintenance",然后点击"Launch array configuration utility......>",即可进入阵列卡的配置。
3. 进入阵列卡的配置程序Array Configuration Utility,简称ACU,加载阵列卡配置程序。
4. 进入到阵列卡的配置界面。
左侧列出检测到的阵列卡,中间列出阵列卡的信息,右侧配置阵列卡。
图示的左侧列出检测到控制卡为:Smart Array 642 Controller in Slot 2。
如果点击下方的Rescan Controllers,可以重新搜索控制器。
中间列出控制器的详细信息。
Smart Array 642 Controller in Slot 2,当前机器的硬盘为36.4 GB。
右侧选项为∙Create Array:创建阵列∙Refresh:刷新∙Express Configuration:快速配置∙Configuration Wizards:使用配置向导进行阵列的配置5. 选择右边的"Create Array" 来创建阵列,选择需要加入到阵列的硬盘6. 选择"OK" 出现的的界面,能看到,已经把硬盘加到"Array A" 中,空间的大小为"34727 MB"同时,可以在右边看到新的三个选项"Create Logical Drive","Deletet", "More Information"选择"Create Logical Drive"7. 进入到"Create Logical Drive" 的界面,可以看到最右边出现做阵列的一些设置,都选为默认设置。
HP电脑硬盘和光驱指南说明书

DrivesDocument Part Number: 406857-001April 2006This guide explains the computer hard drive and optical disc drive.Contents1Drive care2Drive light3Hard driveHP Mobile Data Protection with digital accelerometer. . 3–1 HP Mobile Data Protection status. . . . . . . . . . . . . . . 3–2HP Mobile Data Protection software. . . . . . . . . . . . . 3–3 Replacing the hard drive . . . . . . . . . . . . . . . . . . . . . . . . . 3–4 4Optical drivesUsing optical discs. . . . . . . . . . . . . . . . . . . . . . . . . . . . . . 4–1 Inserting an optical disc. . . . . . . . . . . . . . . . . . . . . . . 4–2Removing an optical disc (with power). . . . . . . . . . . 4–3Removing an optical disc (without power) . . . . . . . . 4–4Avoiding standby or hibernation. . . . . . . . . . . . . . . . 4–5 Replacing the optical drive. . . . . . . . . . . . . . . . . . . . . . . . 4–51Drive care Drives are fragile computer components that must be handled with care. Refer to the following cautions when handling drives. Additional cautions are included with the procedures to which they apply.Drive careÄCAUTION: To reduce the risk of damage to the computer, damage to a drive, or loss of information, observe these precautions:■Initiate standby, and allow the screen to clear, before you movea computer or external hard drive from one location to another.■Before handling a drive, discharge static electricity by touching the unpainted metal surface of the drive.■Do not touch the drive connector pins on a removable drive or on the computer.■Handle the drive carefully; do not drop or compress the drive.■Before removing or inserting a drive, shut down the computer. If you are unsure whether the computer is off or in hibernation, turn thecomputer on, and then shut it down through the operating system.■Do not use excessive force when inserting a drive into a drive bay.■Do not type on the keyboard or move the computer when the optical drive is writing to a medium. The write process is sensitive tovibration.■When the battery pack is the only source of power, ensure that the battery pack is sufficiently charged before writing to a medium.■Avoid exposing a drive to temperature or humidity extremes.■Avoid exposing a drive to liquids. Do not spray it with cleaning products.■Remove the medium from a drive before removing the drive from the drive bay, or traveling with, shipping, or storing a drive.■If a drive must be mailed, place the drive in a bubble-pack mailer or other suitable protective packaging and label the package“FRAGILE.”■Avoid exposing a drive to magnetic fields. Security devices with magnetic fields include airport walk-through devices and securitywands. The airport security devices that check carry-on luggage,such as conveyor belts, use x-rays instead of magnetism and will notdamage a drive.2Drive light The drive light blinks when either the hard drive or the optical drive is being accessed. The drive light changes to amber when the computer is dropped or moved while running on battery power. An amber drive light indicates that the hard drive is temporarily parked by HP Mobile Data Protection.3Hard drive HP Mobile Data Protection withdigital accelerometerHP Mobile Data Protection with digital accelerometer protectsthe disk drive by parking the drive and halting I/O requestswhen you■Drop the computer.■Move the computer with the display closed while thecomputer is running on battery power.A short time after one of these events, HP Mobile Data Protectionreturns the disk drive to normal operation.✎Only the primary internal disk drive is protected by HP Mobile Data Protection. Disk drives that are connected to a USB portor in an optional docking device are not protected.For more information, refer to the HP Mobile Data Protectiononline Help.Hard driveHP Mobile Data Protection statusThe drive light on the computer changes to an amber color toshow that the drive is parked. In addition, an icon in thenotification area, at the far right of the taskbar, indicates whetherthe drive i s currently protected and whether the drive is parked:■If the software is enabled, a green check mark issuperimposed over the icon.■If the software is disabled, a red X is superimposed over the icon.■If the drives are parked, a yellow moon is superimposed over the icon.If HP Mobile Data Protection has parked the drive, the computer■Will not shut down.■Will not initiate standby or hibernation, except as noted below.✎If the computer is running on battery power and reachesa critically low-battery condition, HP Mobile DataProtection allows the computer to initiate hibernation.■Will not activate battery alarms set on the Alarms tab in Power Options Properties.HP recommends that you wait for the computer to completelyshut down before you move it.Hard driveHP Mobile Data Protection softwareThe HP Mobile Data Protection software enables you to■Enable and disable HP Mobile Data Protection.■Hide or show the icon in the notification area.■Determine whether a drive in the system is supported.To open the software and change settings:1.Double-click the icon in the notification area, at the far rightof the taskbar.– or –Right-click the icon in the notification area, and then selectSettings.2.Click the appropriate button to change settings.3.Click OK.Hard driveReplacing the hard driveÄCAUTION: To prevent system lockup and loss of information:■Shut down the computer before removing the hard drive from the hard drive bay. Do not remove the hard drive while the computer ison, in standby, or in hibernation.■If you are not sure whether the computer is off or in hibernation, turn the computer on by pressing the power button. Then shut downthe computer through the operating system.To remove the hard drive:1.Save your work.2.Shut down the computer and close the display.3.Disconnect all external devices connected to the computer.4.Unplug the power cord from the computer.5.Turn the computer upside down on a flat surface.6.Remove the battery pack from the computer.Hard drive 7.With the hard drive bay toward you, loosen the 2 hard drivecover screws 1.8.Lift the hard drive cover away from the computer 2.Hard drive9.Loosen the hard drive screw 1.10.Pull the hard drive tab 2 to the left to disconnect the harddrive.11.Lift the hard drive 3 from the computer.Hard driveTo install a hard drive:1.Insert the hard drive into the hard drive bay 1.2.Pull the hard drive tab 2 to the right to connect the harddrive.3.Tighten the hard drive screw 3.Hard drive4.Align the tabs 1 on the hard drive cover with the notches onthe computer.5.Close the cover 2.6.Tighten the hard drive cover screws 3.4Optical drivesUsing optical discsAn optical drive, such as a DVD-ROM drive, supports opticaldiscs (DVDs and CDs). These discs are used to store or transportinformation and to play music and movies. DVDs have a highercapacity than CDs.The computer can read or write to optical drives as described inthe following table.Type of Optical Drive Read CDandDVD-ROMWritetoCD-RWWrite toDVD±RW/RWrite toDVD+RWDLWrite label toLightScribeCD or DVD±RW/RDVD-ROM Drive Y es No No No NoDVD/CD-RWCombo DriveY es Y es No No NoDVD±RWand CD-RWCombo DriveY es Y es Y es Y es NoLightScribeDVD±RWand CD-RWCombo DriveY es Y es Y es Y es Y es✎Some of the optical drives listed may not be supported by your computer.The listed drives may not include all of the supported optical drives.Optical drivesInserting an optical disc1.Turn on the computer.2.Press the release button 1 on the drive bezel to release themedia tray.3.Pull out the tray 2.4.Hold the CD or DVD by the edges to avoid touching the flatsurfaces and position the disc over the tray spindle with thelabel side up.✎If the tray is not fully accessible, tilt the disc carefully toposition it over the spindle.5.Gently press the disc 3 down onto the tray spindle until thedisc snaps into place.6.Close the media tray.✎After you insert a disc, a short pause is normal. If you have not selected a default media player, an AutoPlay dialog box opens.It prompts you to select how you want to use the mediacontent.Optical drivesRemoving an optical disc (with power)If the computer is running on external or battery power:1.Turn on the computer.2.Press the release button 1 on the drive bezel to release themedia tray, and then pull out the tray 2.3.Remove the disc 3 from the tray by gently pressing down onthe spindle while lifting the outer edges of the disc. Hold thedisk by the edges and avoid touching the flat surfaces.✎If the media tray is not fully accessible, tilt the disc carefullyas you remove it.4.Close the media tray and place the disc in a protective case.Optical drivesRemoving an optical disc (without power)If external or battery power is not available:1.Insert the end of a paper clip 1 into the release access in thefront bezel of the drive.2.Press gently until the media tray is released, and then pull outthe tray 2. Remove the disc 3 from the tray by gentlypressing down on the spindle while lifting the outer edges ofthe disc. Hold the disc by the edges and avoid touching theflat surfaces.✎If the media tray is not fully accessible, tilt the disc as youremove it.3.Close the media tray and place the disc in a protective case.Optical drives Avoiding standby or hibernationÄCAUTION: To prevent possible audio and video degradation, or loss of audio or video playback functionality, do not initiate standby orhibernation while reading or writing to a CD or DVD.To prevent loss of information, do not initiate standby or hibernationwhen writing to a CD or DVD.If standby or hibernation is accidentally initiated during playbackof a drive medium (such as a CD or DVD):■Your playback may be interrupted.■You may see the following warning: “Putting the computer into hibernation or standby may stop the playback. Do youwant to continue?” Click No.■You may need to restart the CD or DVD to resume audio or video playback.Replacing the optical driveTo remove the optical drive:1.Shut down the computer.If you are not sure whether the computer is off or inhibernation, turn the computer on by pressing the powerbutton. Then shut down the computer through the operatingsystem.2.Disconnect all external devices connected to the computer.3.Disconnect the power cord.4.Turn the computer upside down on a flat surface.5.Remove the battery pack from the computer.Optical drives6.Remove the optical drive security screw.7.Insert the end of a screwdriver into the optical drive releaselatch and press gently until the optical drive is released.Optical drives 8.Remove the optical drive from the optical drive bay.To insert an optical drive:1.Insert the optical drive into the optical drive bay.4–8DrivesOptical drives2.Replace the optical drive security screw.3.Replace the battery pack.4.Reconnect external power and external devices.5.Turn on the computer.© Copyright 2006 Hewlett-Packard Development Company, L.P.The information contained herein is subject to change without notice. The only warranties for HP products and services are set forth in the express warranty statements accompanying such products and services. Nothing herein should be construed as constituting an additional warranty. HP shall not be liable for technical or editorial errors or omissions contained herein.DrivesFirst Edition: April 2006Document Part Number: 406857-001。
- 1、下载文档前请自行甄别文档内容的完整性,平台不提供额外的编辑、内容补充、找答案等附加服务。
- 2、"仅部分预览"的文档,不可在线预览部分如存在完整性等问题,可反馈申请退款(可完整预览的文档不适用该条件!)。
- 3、如文档侵犯您的权益,请联系客服反馈,我们会尽快为您处理(人工客服工作时间:9:00-18:30)。
HP Proliant SmartStart 智能导航光盘操作指南
目录
1SMARTSTART 智能导航光盘概述 (1)
1.1何为S MART S TART? (1)
1.2如何使用S MART S TART? (2)
2使用SMARTSTART配置服务器 (5)
2.1部署操作系统 (5)
3ML350G5服务器RAID卡配置 (15)
3.1ORCA阵列配置工具 (15)
1SmartStart 智能导航光盘概述
SmartStart 智能导航光盘是HP服务器安装, 配置及诊断工具。
风险提示:SmartStart智能导航光盘针对技术水平较高的系统管理员使用,使用前请确保仔细阅读了本手册内容!
1.1何为SmartStart?
SmartStart CD是HP 专门用于Proliant 服务器的工具软件光盘,SmartStart CD可以帮助用户简单的部署和管理服务器,SmartStart CD包含以下功能:
●部署操作系统:SmartStart 可以以向导的方式,帮助用户轻松的部署
Windows 2008操作系统,并把HP System Insight Manager 系统管理平台
的客户端(Agent),以及服务器内部集成硬件的驱动程序集成到操作系统
中,使用户一次安装就可装好所有必要的工具软件和驱动程序。
●设置阵列:SmartStart 内置Array Configuration Utility (ACU) 阵列设置工
具, 可以使用图形GUI界面对服务器内置的HP Smart Array阵列卡以及
外置的HP Modular Smart Array 磁盘阵列进行RAID设置。
●阵列诊断:SmartStart 内置Array Diagnostics Utility (ADU) 阵列诊断工
具, 可以对服务器内置的硬盘, HP Smart Array阵列卡, 以及外置的HP
Modular Smart Array 磁盘阵列进行故障诊断, 硬件检测。
●系统诊断:SmartStart 内置Insight Diagnostics 系统诊断工具, 可以对服
务器的所有部件进行故障检测并生成报告。
●系统擦除:SmartStart 内置Erase Utility 系统擦除工具, 可以轻松的恢复
服务器的出厂设置, 以便系统恢复。
●安装驱动:SmartStart CD内置服务器支持软件包ProLiant Support
Pack(PSP), PSP集成了Prolaint服务器的所有集成硬件及大部分选件的驱
动程序, 支持Windows和Linux, 可以一个步骤就安装好所有选定的驱动
程序及工具软件。
1.2如何使用SmartStart?
使用SmartStart CD非常简单, 只需把SmartStart CD放入光驱, 重启服务器, SmartStart CD具备系统引导功能, 会自动从光盘引导系统并开始设置过程, 引导界面如下图所示, 可以选择用SmartStart CD引导, 也可以选择从硬盘引导。
如果此步骤不做任何操作, 过5秒后, 会自动从SmartStart引导。
光盘引导中,如下图所示:
出现下图所示页面时, 选择English, 按
按钮继续。
出现下图所示页面时, 按按钮接受使用协议继续。
接下来就进行SmartStart的具体操作了。
2使用SmartStart配置服务器
本章将介绍SmartStart CD的主要功能:
在上一章接受协议后, 将出现下图所示画面, 画面下方有3个按钮, 其中: 点击按钮可以部署服务器;
按钮可以对服务器进行配置, 检测等操作。
2.1部署操作系统
在上图中点击按钮,出现下图所示画面, 其中画面右侧的3个按钮可分别实现:
:重启服务器并进入RBSU(ROM Based Setup Utility), 同自检时按[F9];
:重启服务器并进入ORCA(Option ROM Configuration for Array), 同自检到SmartArray阵列卡时按[F8];
:启动ACU(Array Configuration Utility) 图形化RAID配置工具。
在此次配置, 直接按按钮继续。
接下来出现下图所示画面, 选择需要安装的操作系统, 本例中为Windows2008标准版, 按按钮继续。
下图画面选择操作系统的介质位于什么位置, 用DVD光盘安装的话就选
DVD, 按按钮继续。
在下图中为系统分区(C:) 选择容量(本项目中划分C盘为40G), 也可把全
部容量作为系统分区, 分区默认格式化为NTFS文件系统, 按按钮继续。
在下图中输入用户相关信息, 可以不用填写,按按钮继续。
继续。
按按钮继续。
按按钮继续。
至此所有必要的设置都已经做好, SmartStart会给出报警信息, 如果继续, 硬盘中的所有数据都将被擦除, 按按钮继续后, SmartStart将进行分区, 拷贝数据等操作, 并会自动弹出光盘, 要求放入操作系统光盘, 放入操作系统光盘后, 将自动完成整个安装过程, 此过程需要3~4次重启。
将安装光盘插入光驱,然后按。
选择光驱。
选择dvd,按select。
按,开始安装操作系统。
3ML350G5服务器RAID卡配置
此次配发的服务器硬盘出厂已做RAID5设置,无需用户单独操作。
注:本节将介绍如何重新配置RAID级别,如果调整RAID级别,会删除硬盘所有信息!
3.1ORCA阵列配置工具
重启服务器,在POST过程中,当出现下图所示时按F8进入ORCA配置界面。
在主界面选择创建逻辑驱动器一项。
分别进行选择物理磁盘,选择阵列级别,设置热备盘的操作。
按F8键保存配置信息或按ESC 键取消。
创建逻辑驱动
器
查看逻辑盘配置信息。
按F8键保存配置信息或按ESC
键不保。