图像水印算法源代码
Java实现图片加水印且控制位置和透明度
Java实现图片加水印且控制位置和透明度昨天要做一个给图片加水印的功能,不想使用一些插件,就在网上转了一会儿,经过改装成了我需要的功能,代码如下:package org.guhao;importjava.awt.AlphaCo mposit e;importjava.awt.Graphic s2D;importjava.awt.Image;importjava.awt.image.Buffere dImage;importjava.io.File;importjava.text.SimpleD ateFor mat;importjava.util.Date;importjavax.imageio.ImageIO;publicclass TestWat ermark {/*** 图片水印* @param pressim g 水印图片* @param targeti mg 目标图片* @param locatio n 位置:1、左上角,2、右上角,3、左下角,4、右下角,5、正中间* @param alpha 透明度*/publicstaticvoid pressIm age(Stringpressim g, Stringtargeti mg, int locatio n, float alpha) {try {//读取目标图片File img = new File(targeti mg);Image src = ImageIO.read(img);int width = src.getWidt h(null);int height= src.getHeig ht(null);Buffere dImage image = new Buffere dImage(width, height,Buffere dImage.TYPE_IN T_RGB);Graphic s2D g = image.createG raphic s();g.drawIma ge(src, 0, 0, width, height, null);//水印文件Image src_bia o = ImageIO.read(new File(pressim g));int width_b iao = src_bia o.getWidt h(null);int height_biao = src_bia o.getHeig ht(null);//如果水印图片高或者宽大于目标图片是做的处理,使其水印宽或高等于目标图片的宽高,并且等比例缩放int new_wid th_bia o = width_b iao;int new_hei ght_bi ao = height_biao;if(width_b iao > width){new_wid th_bia o = width;new_hei ght_bi ao = (int) ((double)new_wid th_bia o/width_b iao*height); }if(new_hei ght_bi ao > height){new_hei ght_bi ao = height;new_wid th_bia o = (int)((double)new_hei ght_bi ao/height_biao*new_wid th_bia o);}//根据位置参数确定坐标位置int x = 0;int y = 0;switch(locatio n){case 1:break;case 2:x = width – new_wid th_bia o;break;case 3:y = height– new_hei ght_bi ao;break;case 4:x = width – new_wid th_bia o;y = height– new_hei ght_bi ao;break;case 5:x = (width – new_wid th_bia o)/2;y = (height– new_hei ght_bi ao)/2;break;default:break;}g.setComp osite(AlphaCo mposit e.getInst ance(AlphaCo mposit e.SRC_ATO P, alpha));g.drawIma ge(src_bia o, x, y, new_wid th_bia o, new_hei ght_bi ao, null);//水印文件结束g.dispose();ImageIO.write( image, “png”, img);} catch (Excepti on e) {e.printSt ackTra ce();}}}这个功能我用1000张图片做测试的,平均0.1秒左右操作一张图片,本地测的,如果是服务器的话相信会很快的,但是这个还有一个bug,就是给背景透明的png图片加水印会使背景变黑,这大概是重新d rawIma ge的时候改变了图片的一些属性,如果那个朋友解决了这个问题记得告诉我一下(1211452*********),不胜感激(这个bug我们没有花太多时间去解决,主要原因是在生产环境中,一般不会有客户去给一张透明背景的图片加水印,除非有特殊需求,那他们会使用p s之类的搞的,呵呵)!。
水印代码
clear all;%logistic序列生成算法figure(1);an=linspace(3.1,3.99,400);hold on;box on;axis([min(an),max(an),-1,2]);N=64*64;xn=zeros(1,N);for a=an;x=rand;for k=1:20;x=a*x*(1-x);endfor k=1:N;x=a*x*(1-x);xn(k)=x;b(k,1)=x;endplot(a*ones(1,N),xn,'k.','markersize',1);endc=reshape(b,64,64);%二维矩阵调制for a1=1:64;for a2=1:64;if c(a1,a2)>=0.5;d(a1,a2)=1;else d(a1,a2)=0;end;end;end%水印加密e=imread('c:\new\123.BMP');e=double(e);f=bitxor(d,e);%mm=imread('c:\new\0.BMP');nn=double(mm);%h=bitxor(d,mm); g=bitxor(d,f);figure(2);subplot(2,2,1);imshow(d);title('混沌序列矩阵');subplot(2,2,2);imshow(e);title('水印图像');subplot(2,2,3);imshow(f);title('混沌加密水印图像');imwrite(f,'c:\new\0.BMP');subplot(2,2,4);imshow(g);title('水印图像恢复');M=256;N=64;[filename1,pathname]=uigetfile('*.*','select the image');image1=imread(num2str(filename1));figure(3);subplot(2,2,1);imshow(image1);title('original image');image1=double(image1);subplot(2,2,2);imshow(f);title('original watermark');%嵌入水印[ca,ch,cv,cd] = dwt2(image1,'db1');[cas,chs,cvs,cds] = dwt2(ca,'db1');for i=1:Nfor j=1:Nif f(i,j)==0a=-1;else a=1;endCa(i,j)=cas(i,j)*(1+a*0.03);endendIM= idwt2(Ca,chs,cvs,cds,'db1')markedimage=double(idwt2(IM,ch,cv,cd,'db1'));subplot(2,2,3);colormap(gray(256));image(markedimage);title('marked image');imwrite(markedimage,gray(256),'c:\new\watermarked.bmp','bmp');%提取水印image1=imread(num2str(filename1));image1=double(image1); imaged=imread('c:\new\watermarked.bmp');[ca,ch,cv,cd] = dwt2(image1,'db1');[cas,chs,cvs,cds]=dwt2(ca,'db1');[caa,chh,cvv,cdd]=dwt2(imaged,'db1');[caas,chhs,cvvs,cdds]=dwt2(caa,'db1');for p=1:Nfor q=1:Na=caas(p,q)/cas(p,q)-1;if a<0W(p,q)=0;elseW(p,q)=255;end%频谱pic1= imread('c:\new\3.jpg');%pic=rgb2gray(pic);subplot(2,2,1);imshow(pic1);title('原图');pic_fft1=fft2(double(pic1));pic_fft1=fftshift(pic_fft1);subplot(2,2,2);imshow(log(abs(pic_fft1)),[]);title('原图频谱图');endendsubplot(2,2,4);colormap(gray(256));image(W);title('从含水印图像中提取的水印'); imwrite(W,gray(256),'watermark.bmp','bmp');%figure(4);h=bitxor(d,W);figure(7);subplot(2,2,1);imshow(h);pic2= imread('c:\new\watermarked.BMP');%pic=rgb2gray(pic);subplot(2,2,3);imshow(pic2);title('新图');pic_fft2=fft2(double(pic2));pic_fft2=fftshift(pic_fft2);subplot(2,2,4);imshow(log(abs(pic_fft2)),[]);title('新图频谱图'%DWT水印源码%嵌入源码clcclear all;% 保存开始时间start_time=cputime;iTimes=20; %置乱次数k=20;blocksize=8; % 设置块的大小filter_m=[ 1,1,1,1,1,1,1,1; % 滤波矩阵1,1,1,1,1,1,1,1;1,1,0,0,0,0,1,1;1,1,0,0,0,0,1,1;1,1,0,0,0,0,1,1;1,1,0,0,0,0,1,1;1,1,1,1,1,1,1,1;1,1,1,1,1,1,1,1 ];% 读入原图像file_name='_lena_std_bw.bmp';cover_object=double(imread(file_name));% 原图像的行数与列数Mc=size(cover_object,1); %原图像行数Nc=size(cover_object,2); %原图像列数% 最大嵌入信息量max_message=Mc*Nc/(blocksize^2);% 读入水印图像file_name='c.bmp';message=double(imread(file_name));%%水印图像的行数与列数Mm=size(message,1); %水印行数Nm=size(message,2); %水印列数% 检查水印信息是否过大if (Mm*Nm> max_message)error('水印太大')end%对水印图像进行arnold置乱if Mm~=Nmerror('水印矩阵必须为方阵');endif Mm~=40error('必须为40*40大小,或者修改置乱次数'); endtempImg=message;for n=1:iTimes % 次数for u=1:Mmfor v=1:Nmtemp=tempImg(u,v);ax=mod((u-1)+(v-1),Mm)+1;ay=mod((u-1)+2*(v-1),Nm)+1;outImg(ax,ay)=temp;endendtempImg=outImg;endmessage_vector=reshape(tempImg,1,Mm*Nm);% 产生watermarked_image,并写入原图信息watermarked_image=cover_object;%置随机数发生器的状态为1100key=1100;rand('state',key);% 产生伪随机序列pn_sequence_zero=round(2*(rand(1,sum(sum(filter_m)))-0.5)); pn_sequence_one=round(2*(rand(1,sum(sum(filter_m)))-0.5)); % 将图像分块嵌入% 当(2,2) > (2,3) 且message_pad(kk)=0% 当(2,2) < (2,3) 且message_pad(kk)=1%%经过分析可以得出结论:在提取水印时,如果cD1(2,2)>cD1(2,3)便是嵌入了水印的黑色像素,%%反之则是嵌入了白色像素x=1;y=1;h=waitbar(0,'嵌入水印,请等待');for (kk = 1:length(message_vector))% 对块进行DWT变换[cA1,cH1,cV1,cD1] =dwt2(cover_object(x:x+blocksize-1,y:y+blocksize-1),'haar');a=cD1;% 如果message_pad(kk)== 0if (message_vector(kk) == 0)% 且(2,2) < (2,3) ,交换它们if (cD1(2,2) < cD1(2,3))temp=cD1(2,3);cD1(2,3)=cD1(2,2);cD1(2,2)=temp;end% 如果message_pad(kk) == 1, elseif (message_vector(kk) == 1)% 且(2,2) > (2,3) ,交换它们if (cD1(2,2) >= cD1(2,3))temp=cD1(2,3);cD1(2,3)=cD1(2,2);cD1(2,2)=temp;endend% 检查(2,2) ,(2,3)的差是否>= k if cD1(2,2) > cD1(2,3)if cD1(2,2) - cD1(2,3) < kcD1(2,2)=cD1(2,2)+(k/2);cD1(2,3)=cD1(2,3)-(k/2);endelseif cD1(2,3) - cD1(2,2) < kcD1(2,3)=cD1(2,3)+(k/2);cD1(2,2)=cD1(2,2)-(k/2);endend%IDWTwatermarked_image(x:x+blocksize-1,y:y+blocksize-1)=idwt2(cA1,cH1,cV1,cD1,'haar',[Mc,Nc]);% 移动到下一块if (x+blocksize) >= Ncx=1;y=y+blocksize;elsex=x+blocksize;endwaitbar(kk/length(message_vector),h);endclose(h);% 转换为uint8并写入dwt_watermarked.bmpwatermarked_image_uint=uint8(watermarked_image);imwrite(watermarked_image_uint,'dwt_watermarked.bmp','bmp'); % 显示运行时间elapsed_time=cputime-start_time,% 显示图像figure(1)subplot(2,2,1);imshow(message,[]);title('水印');subplot(2,2,4)imshow(outImg,[]);title('置乱水印');subplot(2,2,2);imshow(cover_object,[]);title('原图');subplot(2,2,3);imshow(watermarked_image,[]) title('嵌入水印图像')%DWT源码%提取源码clear all;% 保存开始时间start_time=cputime;iTimes=20; %置乱次数blocksize=8; % 设置块的大小filter_m=[ 1,1,1,1,1,1,1,1; % 滤波矩阵1,1,1,1,1,1,1,1;1,1,0,0,0,0,1,1;1,1,0,0,0,0,1,1;1,1,0,0,0,0,1,1;1,1,0,0,0,0,1,1;1,1,1,1,1,1,1,1;1,1,1,1,1,1,1,1 ];% 读入嵌入水印图像[filename,pathname]=uigetfile('*.bmp;*tiff;*tif;*jpg','输入嵌有水印的图像'); watermarked_image=double(imread(filename));% 嵌入水印图像的行数与列数Mw=size(watermarked_image,1); %嵌入水印图像的行数Nw=size(watermarked_image,2); %嵌入水印图像的列数% 最大嵌入信息量max_message=Mw*Nw/(blocksize^2);% 读入原始水印file_name='c.bmp';orig_watermark=double(imread(file_name));% 原始水印的行数与列数Mo=size(orig_watermark,1); %原始水印的行数No=size(orig_watermark,2); %原始水印的列数%置随机数发生器的状态为1100rand('state',1100);% 产生伪随机序列pn_sequence_zero=round(2*(rand(1,sum(sum(filter_m)))-0.5));pn_sequence_one=round(2*(rand(1,sum(sum(filter_m)))-0.5));% 将图像分块提取水印x=1;y=1;h=waitbar(0,'水印提取中,请等待');for (kk = 1:max_message)% 对块进行dwt变换[cA1,cH1,cV1,cD1] =dwt2(watermarked_image(x:x+blocksize-1,y:y+blocksize-1),'haar');% 如果cD1(2,2) > cD1(3,3) 那么message_vector(kk)=0% 否则message_vector(kk)=1if cD1(2,2)>cD1(3,3)message_vector(kk)=0;elsemessage_vector(kk)=1;end% 移动到下一块if (x+blocksize) >= Mwx=1;y=y+blocksize;elsex=x+blocksize;endwaitbar(kk/max_message,h);endclose(h);% arnold置乱tempImg=reshape(message_vector(1:Mo*No),Mo,No); message_arnold=tempImg;for n=1:iTimes % 次数for u=1:Mofor v=1:Notemp=tempImg(u,v);ax=mod((u-1)+(v-1),Mo)+1;ay=mod((u-1)+2*(v-1),No)+1;outImg(ax,ay)=temp;endendtempImg=outImg;endmessage=tempImg;% 计算运行时间elapsed_time=cputime-start_time, % 显示提取水印与原始水印figure(3)subplot(1,3,1);imshow(message_arnold,[]);title('提取的置乱水印');subplot(1,3,2);imshow(message,[]);title('再次置乱后水印');subplot(1,3,3);imshow(orig_watermark,[])title('原始水印');。
图片数字水印C语言代码
图片数字水印C语言代码//本文算法实现的C语言代码,Windows XP平台DEV-CPP(4.9.9.2)环境下编译通过//#include //#include //#include //头文件#include //头文件#include //#include //#define MAX_ITERA 60 //常量宏定义#define MIN_DOUBLE (1e-30) //常量宏定义#define F_EXTPAD 4 //常量宏定义#define D_EXTPAD 2 //常量宏定义//函数原型预定义区域void RecoverWaterMark3(char *InVector,char *OutWater,double a);void InsertWaterMark3(char *InVector,char *OutVector,char *InWater,char *OutWater,double a);void RecoverWaterMark2(char *InVector,char *OutWater,double a);void InsertWaterMark2(char *InVector,char *OutVector,char *InWater,char *OutWater,double a);void RecoverWaterMark1(char *InVector,char *OutWater,double a);void InsertWaterMark1(char *InVector,char *OutVector,char *InWater,char *OutWater,double a);void Arnold256(char *in,char *out,unsigned char *q,int N,int k1,int k21,int k22,int k23,int k24,int type);int SVD(double a[],int m,int n,double u[],double v[],double eps);void Matrices(double a[],double b[],int m,int n,int k,double c[]);void ppp(double a[],double e[],double s[],double v[],int m,int n);void sss(double fg[2],double cs[2]);void YIQ2RGB(char *out,double *Y,double *I,double *Q,int N);void RGB2YIQ(char *in,char *out,double *Y,double *I,double *Q,int N);void DWT2D(double **rows, int width, int height, int levels,int inverse);void IDWT1D(double *x, int N);void DWT1D(double *x_in, int N);void CheckPSNR(double *p0,double *p1,int m,int n,double a);unsigned char Double2Char(double d);void Array2D1D(double **aa,double *a,int m,int n);void Array1D2D(double *a,double **aa,int m,int n);void errorNexit(char *s,char *d);void MsgBox(char *s,char *a,char *b);double MAX(double,double,double);static double *x_alloc = NULL; //静态内存指针//////////////////////////////////////主函数//////////////////////////////////////////////////////////////////////// //////载体图片默认为lmk.bmp-----------------必须为640*640*24bit//水印图片默认为W.bmp-------------------必须为64*64*8bit //W_a.bmp为水印图片加密后输出-----------大小为64*64*8bit //lmk_w10.bmp为嵌入水印后的载体图片------大小为640*640*24bit//lmk_w20.bmp为嵌入水印后的载体图片------大小为640*640*24bit//---a----------------------------------水印嵌入强度,初始默认为0.05//临时文件SLL3.dat,SLH3.dat,SHL3.dat,SHH3.dat,W.dat,Uw.dat,Vw.dat,分别保存了//载体图片LL3子图分解后的奇异值矩阵(double)------用于提取水印使用//载体图片LH3子图分解后的奇异值矩阵(double)------用于提取水印使用//载体图片HL3子图分解后的奇异值矩阵(double)------用于提取水印使用//载体图片HH3子图分解后的奇异值矩阵(double)------用于提取水印使用//原始水印加密后的数据矩阵(double)---------------用于评价NC//水印奇异值分解后的左奇异向量(double)-----------用于提取水印时合成水印图像//水印奇异值分解后的右奇异向量(double)-----------用于提取水印时合成水印图像//////////////////////////////////////主函数//////////////////////////////////////////////////////////////////////// ////int main(){double a=0.05; //初始嵌入强度int type=6,t;char *s;void (*insert)(),(*recover)(); //函数指针for(;;){printf("请选择嵌入方式:\n");printf(" 1:方式一 \n");printf(" 2:方式二 \n");printf(" 3:方式三 \n");printf(" 4:退出程序 \n\n");scanf("%d",&t);if(t==1) //选择嵌入方式1{insert=InsertWaterMark1;recover=RecoverWaterMark1;s="方式一";printf("已选中方式一,当前方式将把水印信息全部嵌入到LL3子图中。
matlab数字水印算法及实现和源代码
1.数字作品的知识产权保护----数字作品(如电脑美术、扫描图像、数字音乐、视频、三维动画)的版权保护是当前的热点问题。
由于数字作品的拷贝、修改非常容易,而且可以做到与原作完全相同,所以原创者不得不采用一些严重损害作品质量的办法来加上版权标志,而这种明显可见的标志很容易被篡改。
----“数字水印”利用数据隐藏原理使版权标志不可见或不可听,既不损害原作品,又达到了版权保护的目的。
目前,用于版权保护的数字水印技术已经进入了初步实用化阶段,IBM公司在其“数字图书馆”软件中就提供了数字水印功能,Adobe公司也在其著名的Photoshop软件中集成了Digimarc公司的数字水印插件。
然而实事求是地说,目前市场上的数字水印产品在技术上还不成熟,很容易被破坏或破解,距离真正的实用还有很长的路要走。
2.商务交易中的票据防伪----随着高质量图像输入输出设备的发展,特别是精度超过 1200dpi 的彩色喷墨、激光打印机和高精度彩色复印机的出现,使得货币、支票以及其他票据的伪造变得更加容易。
----另一方面,在从传统商务向电子商务转化的过程中,会出现大量过度性的电子文件,如各种纸质票据的扫描图像等。
即使在网络安全技术成熟以后,各种电子票据也还需要一些非密码的认证方式。
数字水印技术可以为各种票据提供不可见的认证标志,从而大大增加了伪造的难度。
3.证件真伪鉴别----信息隐藏技术可以应用的范围很广,作为证件来讲,每个人需要不只一个证件,证明个人身份的有:身份证、护照、驾驶证、出入证等;证明某种能力的有:各种学历证书、资格证书等。
国内目前在证件防伪领域面临巨大的商机,由于缺少有效的措施,使得“造假”、“买假”、“用假”成风,已经严重地干扰了正常的经济秩序,对国家的形像也有不良影响。
通过水印技术可以确认该证件的真伪,使得该证件无法仿制和复制。
4.声像数据的隐藏标识和篡改提示----数据的标识信息往往比数据本身更具有保密价值,如遥感图像的拍摄日期、经/纬度等。
LSB算法水印安全性测试及MATLAB实现
MATLAB - Matlab的优势和特点:(1)友好的工作平台和编程环境MATLAB由一系列工具组成。
这些工具方便用户使用MATLAB的函数和文件,其中许工具采用的是图形用户界面。
包括MATLAB桌面和命令窗口、历史命令窗口、编辑器和调试器、路径搜索和用于用户浏览帮助、工作空间、文件的浏览器。
随着MATLAB的商业化以及软件本身的不断升级,MATLAB的用户界面也越来越精致,更加接近Windows的标准界面,人机交互性更强,操作更简单。
而且新版本的MATLAB提供了完整的联机查询、帮助系统,极大的方便了用户的使用。
简单的编程环境提供了比较完备的调试系统,程序不必经过编译就可以直接运行,而且能够及时地报告出现的错误及进行出错原因分析。
(2)简单易用的程序语言Matlab一个高级的距阵/阵列语言,它包含控制语句、函数、数据结构、输入和输出和面向对象编程特点。
用户可以在命令窗口中将输入语句与执行命令同步,也可以先编写好一个较大的复杂的应用程序(M文件)后再一起运行。
新版本的MATLAB语言是基于最为流行的C++语言基础上的,因此语法特征与C+语言极为相似,而且更加简单,更加符合科技人员对数字表达式的书写格式。
使之更利于非计算机专业的科技人员使用。
而且这种语言可移植性好、可拓展性极强,这也是MATLAB之所以能够深入到科学研究及工程计算各个领域的重要原因。
LSB算法水印安全性测试LSB算法水印源码1、嵌入源码clear all;% 保存开始时间start_time=cputime;% 读入原图像file_name='1.jpeg';[cover_object,map]=imread(file_name);% 读入水印图像file_name='2.jpeg';[message,map1]=imread(file_name);message1=message;message=double(message); %%转换为double数message=fix(message./2); %%转换为0,1组成的矩阵message=uint8(message); %%转换为uint8数% 原图的行数与列数Mc=size(cover_object,1); %原图的行数Nc=size(cover_object,2); %原图的列数% 水印的行数与列数Mm=size(message,1); %水印的行数Nm=size(message,2); %水印的列数% 将水印扩展为原图像大小,并写入watermarkfor ii = 1:Mcfor jj = 1:Ncwatermark(ii,jj)=message(mod(ii,Mm)+1,mod(jj,Nm)+1);endend% 将原图的最低有效位值换为水印的值watermarked_image=cover_object;for ii = 1:Mcfor jj = 1:Ncwatermarked_image(ii,jj)=bitset(watermarked_image(ii,jj),1,watermark(ii,jj)); endend% 将嵌入水印图像写入lsb_watermarked.jpegimwrite(watermarked_image,'lsb_watermarked.jpeg','jpeg');% 显示运行时间elapsed_time=cputime-start_time,% 显示嵌入水印图像figure(1)subplot(1,2,1)imshow(watermarked_image,[])title('嵌入水印图像')subplot(1,2,2)imshow(cover_object,[])title('原图像')%%扩展后水印for ii = 1:Mcfor jj = 1:Ncwatermark1(ii,jj)=message1(mod(ii,Mm)+1,mod(jj,Nm)+1);endendfigure(2)imshow(watermark1,[])title('扩展后的水印')figure(3)imshow(message1,[])title('原水印')2、提取源码clear all;% 保存开始时间start_time=cputime;% 读入嵌入水印图像file_name='lsb_watermarked.jpeg ';watermarked_image=imread(file_name);% 嵌入水印图像的行数与列数Mw=size(watermarked_image,1); %嵌入水印图像行数Nw=size(watermarked_image,2); %嵌入水印图像列数%读入原始水印file_name='2.jpeg';orig_watermark=imread(file_name);%%原始水印的行数与列数Mm=size(orig_watermark,1); %水印的行数Nm=size(orig_watermark,1); %水印的列数% 用嵌入水印图像的最低有效位重建水印for ii = 1:Mwfor jj = 1:Nwwatermark(ii,jj)=bitget(watermarked_image(ii,jj),1);endend% 将提取水印变为原始水印大小watermark=2*double(watermark);for ii = 1:Mm-1for jj = 1:Nm-1watermark1(ii+1,jj+1)=watermark(ii,jj);endendwatermark1(1,1)=watermark(Mm,Nm);% 显示运行时间elapsed_time=cputime-start_time,% 显示提取水印与原始水印figure(4)subplot(1,2,1)imshow(watermark1,[])title('提取水印')subplot(1,2,2)imshow(orig_watermark,[])title('原始水印')3、中值滤波处理二维中值滤波器对图像的处理是用一个二维的窗口去依次成块地覆盖图像中的像素,用覆盖的那些像素值的中值去取代窗口正中的那个像素的值。
PHP添加文字水印或图片水印的水印类完整源代码与使用示例
PHP添加⽂字⽔印或图⽚⽔印的⽔印类完整源代码与使⽤⽰例PHP实现的给图⽚添加⽔印功能,可添加⽂字⽔印或图⽚⽔印,使⽤⽂字⽔印时需要提供字体⽂件,使⽤图⽚⽔印时需要提供⽔印图⽚,⽔印图⽚不能⽐要添加⽔印的图⽚⼤,请使⽤背景透明的⽔印图⽚。
该⽔印类⽀持⾃定义⽔印位置、⾃定义⽔印⼤⼩和⽔印的透明度,字体⽔印可⾃定义颜⾊等,功能已相应完善。
完整源代码如下(注解中已给出使⽤⽰例):<?php/*** 图⽚加⽔印类,⽀持⽂字⽔印、透明度设置、⾃定义⽔印位置等。
* 使⽤⽰例:* $obj = new WaterMask($imgFileName); //实例化对象* $obj->$waterType = 1; //类型:0为⽂字⽔印、1为图⽚⽔印* $obj->$transparent = 45; //⽔印透明度* $obj->$waterStr = ''; //⽔印⽂字* $obj->$fontSize = 18; //⽂字字体⼤⼩* $obj->$fontColor = array(255,255,255); //⽔印⽂字颜⾊(RGB)* $obj->$fontFile = 'AHGBold.ttf'; //字体⽂件* ……* $obj->output(); //输出⽔印图⽚⽂件覆盖到输⼊的图⽚⽂件*/class WaterMask{public $waterType = 0; //⽔印类型:0为⽂字⽔印、1为图⽚⽔印public $pos = 0; //⽔印位置public $transparent = 45; //⽔印透明度public $waterStr = ''; //⽔印⽂字public $fontSize = 18; //⽂字字体⼤⼩public $fontColor = array(255,255,255); //⽔印⽂字颜⾊(RGB)public $fontFile = 'AHGBold.ttf'; //字体⽂件public $waterImg = 'logo.png'; //⽔印图⽚private $srcImg = ''; //需要添加⽔印的图⽚private $im = ''; //图⽚句柄private $water_im = ''; //⽔印图⽚句柄private $srcImg_info = ''; //图⽚信息private $waterImg_info = ''; //⽔印图⽚信息private $str_w = ''; //⽔印⽂字宽度private $str_h = ''; //⽔印⽂字⾼度private $x = ''; //⽔印X坐标private $y = ''; //⽔印y坐标function __construct($img) { //析构函数$this->srcImg = file_exists($img) ? $img : die('"'.$img.'" 源⽂件不存在!');}private function imginfo() { //获取需要添加⽔印的图⽚的信息,并载⼊图⽚。
(完整word版)数字水印源码
数字水印源码,希望对大家学习有帮助.%由高斯正态分布序列g1 产生36×4 的水印信%号w0,w0 由(0,1)组成。
clearrandn(’state’,1106);g1=randn(36,4);for i=1:36for j=1:4if g1(i,j)〉=0w0(i,j)=1;else w0(i,j)=0;end;end;end;figure;imshow(w0);title('水印');%对水印信号w0 进行(7,4)汉明编码,得到一%36×7 的分组码x0。
x0=w0;for i=1:36s=8*x0(i,1)+4*x0(i,2)+2*x0(i,3)+x0(i,4);x0(i,5)=0;x0(i,6)=0;x0(i,7)=0;case 1x0(i,5)=0;x0(i,6)=1;x0(i,7)=1; case 2x0(i,5)=1;x0(i,6)=1;x0(i,7)=0; case 3x0(i,5)=1;x0(i,6)=0;x0(i,7)=1; case 4x0(i,5)=1;x0(i,6)=1;x0(i,7)=1; case 5x0(i,5)=1;x0(i,6)=0;x0(i,7)=0;case 6x0(i,5)=0;x0(i,6)=0;x0(i,7)=1;case 7x0(i,5)=0;x0(i,6)=1;x0(i,7)=0;case 8x0(i,5)=1;x0(i,6)=0;x0(i,7)=1;case 9x0(i,5)=1;x0(i,6)=1;x0(i,7)=0;case 10x0(i,5)=0;x0(i,6)=1;x0(i,7)=1;case 11x0(i,5)=0;x0(i,6)=1;x0(i,7)=0;case 13x0(i,5)=0;x0(i,6)=0;x0(i,7)=1;case 14x0(i,5)=1;x0(i,6)=0;x0(i,7)=0;case 15x0(i,5)=1;x0(i,6)=1;x0(i,7)=1;end;end;% 对x0 进行行向位扩展,得到一个由(—1,1)组成%的扩展序列y。
c#图片添加水印的实例代码
c#图片添加水印的实例代码c#图片添加水印的实例代码,有需要的朋友可以参考一下。
复制代码代码如下:using System;using System.Drawing;using System.Drawing.Drawing2D;using System.Drawing.Imaging;using System.IO;namespace ImageDrawing{/// <summary>/// 图片修改类,主要是用来保护图片版权的/// </summary>public class ImageModification{#region "member fields"private string modifyImagePath=null;private string drawedImagePath=null;private int rightSpace;private int bottoamSpace;private int lucencyPercent=70;private string outPath=null;#endregionpublic ImageModification(){}#region "propertys"/// <summary>/// 获取或设置要修改的图像路径/// </summary>public string ModifyImagePath{get{return this.modifyImagePath;}set{this.modifyImagePath=value;}}/// <summary>/// 获取或设置在画的图片路径(水印图片)/// </summary>public string DrawedImagePath{get{return this.drawedImagePath;}set{this.drawedImagePath=value;}}/// <summary>/// 获取或设置水印在修改图片中的右边距/// </summary>public int RightSpace{ // 脚本学堂 get{return this.rightSpace;}set{this.rightSpace=value;}}//获取或设置水印在修改图片中距底部的高度public int BottoamSpace{get{return this.bottoamSpace;}set{this.bottoamSpace=value;}}/// <summary>/// 获取或设置要绘制水印的透明度,注意是原来图片透明度的百分比/// </summary>public int LucencyPercent{get{return this.lucencyPercent;}set{if(value>=0&&value<=100)this.lucencyPercent=value;}}/// <summary>/// 获取或设置要输出图像的路径/// </summary>public string OutPath{get{return this.outPath;}set{this.outPath=value;}}#endregion#region "methods"/// <summary>/// 开始绘制水印/// </summary>public void DrawImage(){Image modifyImage=null;Image drawedImage=null;Graphics g=null;try{//建立图形对象modifyImage=Image.FromFile(this.ModifyImagePath);drawedImage=Image.FromFile(this.DrawedImagePath);g=Graphics.FromImage(modifyImage);//获取要绘制图形坐标int x=modifyImage.Width-this.rightSpace;int y=modifyImage.Height-this.BottoamSpace;//设置颜色矩阵float[][] matrixItems ={new float[] {1, 0, 0, 0, 0},new float[] {0, 1, 0, 0, 0},new float[] {0, 0, 1, 0, 0},new float[] {0, 0, 0, (float)this.LucencyPercent/100f, 0},new float[] {0, 0, 0, 0, 1}};ColorMatrix colorMatrix = new ColorMatrix(matrixItems);ImageAttributes imgAttr=new ImageAttributes();imgAttr.SetColorMatrix(colorMatrix,ColorMatrixFlag.Default, ColorAdjustType.Bitmap);//绘制阴影图像g.DrawImage(drawedImage,new Rectangle(x,y,drawedImage.Width,drawedImage.Heigh t),0,0,drawedImage.Width,drawedImage.Height,GraphicsUnit.Pixel,imgAttr);//保存文件string[] allowImageType={".jpg",".gif",".png",".bmp",".tiff",". wmf",".ico"};FileInfo file=new FileInfo(this.ModifyImagePath);ImageFormat imageType=ImageFormat.Gif; switch(file.Extension.ToLower()){ // 脚本学堂 case ".jpg":imageType=ImageFormat.Jpeg;break;case ".gif":imageType=ImageFormat.Gif;break;case ".png":imageType=ImageFormat.Png;break;case ".bmp":imageType=ImageFormat.Bmp;break;case ".tif":imageType=ImageFormat.Tiff;break;case ".wmf":imageType=ImageFormat.Wmf;break;case ".ico":imageType=ImageFormat.Icon;break;default:break;}MemoryStream ms=new MemoryStream(); modifyImage.Save(ms,imageType);byte[] imgData=ms.ToArray();modifyImage.Dispose();drawedImage.Dispose();g.Dispose();FileStream fs=null;if(this.OutPath==null || this.OutPath==""){File.Delete(this.ModifyImagePath);fs=new FileStream(this.ModifyImagePath,FileMode.Create,Fi leAccess.Write);}else{fs=new FileStream(this.OutPath,FileMode.Create,FileAccess. Write);}if(fs!=null){fs.Write(imgData,0,imgData.Length);fs.Close();}}finally{try{drawedImage.Dispose();modifyImage.Dispose();g.Dispose();}catch{;}}}#endregion }}。
JAVA图片水印

* @param fontName
* 字体名称, 如:宋体
* @param fontStyle
* 字体样式,如:粗体和斜体(Font.BOLD|Font.ITALIC)
String fontName, int fontStyle, int fontSize, Color color, int x,
int y, float alpha) {
try {
ห้องสมุดไป่ตู้ // 加载目标图片
File file = new File(targetImg);
alpha));
// 设置水印图片的位置。
int widthDiff = width - width_1;
int heightDiff = height - height_1;
if (x < 0) {
x = widthDiff / 2;
} else if (x > widthDiff) {
}
}
* 水印图片距离目标图片左侧的偏移量,如果x<0, 则在正中间
* @param y
* 水印图片距离目标图片上侧的偏移量,如果y<0, 则在正中间
* @param alpha
* 透明度(0.0 -- 1.0, 0.0为完全透明,1.0为完全不透明)
Image image = ImageIO.read(file);
int width = image.getWidth(null);
int height = image.getHeight(null);
// 将目标图片加载到内存。
BufferedImage bufferedImage = new BufferedImage(width, height,
图像数字水印Matlab源代码
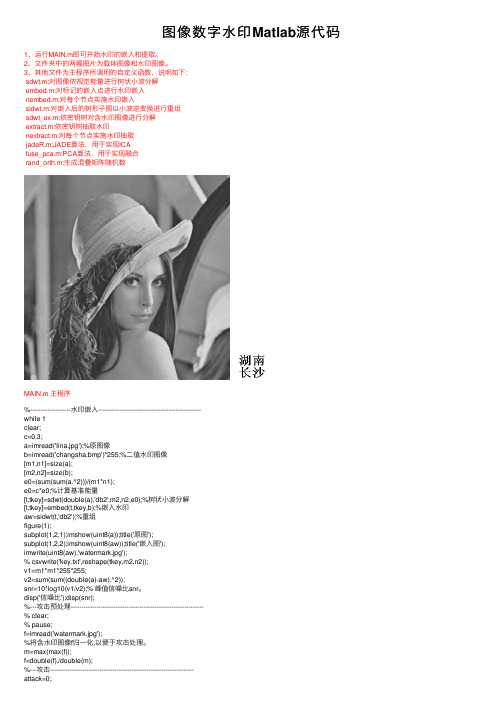
图像数字⽔印Matlab源代码1、运⾏MAIN.m即可开始⽔印的嵌⼊和提取。
2、⽂件夹中的两幅图⽚为载体图像和⽔印图像。
3、其他⽂件为主程序所调⽤的⾃定义函数,说明如下:sdwt.m:对图像依视觉能量进⾏树状⼩波分解embed.m:对标记的嵌⼊点进⾏⽔印嵌⼊nembed.m:对每个节点实施⽔印嵌⼊sidwt.m:对嵌⼊后的树形⼦图以⼩波逆变换进⾏重组sdwt_ex.m:依密钥树对含⽔印图像进⾏分解extract.m:依密钥树抽取⽔印nextract.m:对每个节点实施⽔印抽取jadeR.m:JADE算法,⽤于实现ICAfuse_pca.m:PCA算法,⽤于实现融合rand_orth.m:⽣成混叠矩阵随机数MAIN.m 主程序%-------------------⽔印嵌⼊------------------------------------------------while 1clear;c=0.3;a=imread('lina.jpg');%原图像b=imread('changsha.bmp')*255;%⼆值⽔印图像[m1,n1]=size(a);[m2,n2]=size(b);e0=(sum(sum(a.^2)))/(m1*n1);e0=c*e0;%计算基准能量[t,tkey]=sdwt(double(a),'db2',m2,n2,e0);%树状⼩波分解[t,tkey]=embed(t,tkey,b);%嵌⼊⽔印aw=sidwt(t,'db2');%重组figure(1);subplot(1,2,1);imshow(uint8(a));title('原图');subplot(1,2,2);imshow(uint8(aw));title('嵌⼊图');imwrite(uint8(aw),'watermark.jpg');% csvwrite('key.txt',reshape(tkey,m2,n2));v1=m1*m1*255*255;v2=sum(sum((double(a)-aw).^2));snr=10*log10(v1/v2);% 峰值信噪⽐snr。
java实现图片水印或者文字水印
Java实现图片水印或者文字水印在原图之上再画一张图片(drawImage)或者文本文字(drawString),Java SE中提供了java.awt.image包和javax.imageio包可以实现非常方便的实现图片水印或者文字水印。
1.图片水印import java.awt.AlphaComposite;import java.awt.Graphics2D;import java.awt.Image;import java.awt.RenderingHints;import java.awt.image.BufferedImage;import java.io.File;import java.io.FileOutputStream;import java.io.OutputStream;import javax.imageio.ImageIO;import javax.swing.ImageIcon;* 生成图片水印* @author Ricky Fungpublic class WaterMarkIconTest {/*** @param argspublic static void main(String[] args) {File srcImageFile = new File( D:/test/myblog.pngFile logoImageFile = new File( D:/test/logo.pngFile outputImageFile = new File( D:/test/myblog_water_icon.jpgFile outputRoateImageFile = new File( D:/test/myblog_water_icon_rotate.jpgcreateWaterMarkByIcon(srcImageFile, logoImageFile, outputImageFile);createWaterMarkByIcon(srcImageFile, logoImageFile, outputRoateImageFile, 45); public static void createWaterMarkByIcon(File srcImageFile, File logoImageFile, File outputImageFile) {createWaterMarkByIcon(srcImageFile, logoImageFile, outputImageFile, 0);public static void createWaterMarkByIcon(File srcImageFile, File logoImageFile, File outputImageFile, double degree) {OutputStream os = null;try {Image srcImg = ImageIO.read(srcImageFile);BufferedImage buffImg = new BufferedImage(srcImg.getWidth(null),srcImg.getHeight(null), BufferedImage.TYPE_INT_RGB);Graphics2D g = buffImg.createGraphics();g.setRenderingHint(RenderingHints.KEY_INTERPOLA TION,RenderingHints.V ALUE_INTERPOLA TION_BILINEAR);g.drawImage(srcImg.getScaledInstance(srcImg.getWidth(null),srcImg.getHeight(null), Image.SCALE_SMOOTH), 0, 0,null);ImageIcon logoImgIcon = new ImageIcon(ImageIO.read(logoImageFile));Image logoImg = logoImgIcon.getImage();//旋转if (degree 0) {g.rotate(Math.toRadians(degree),(double) buffImg.getWidth() / 2,(double) buffImg.getWidth() / 2);float alpha = 0.8f; // 透明度g.setComposite(AlphaComposite.getInstance(AlphaComposite.SRC_A TOP, alpha));//水印的位置g.drawImage(logoImg, buffImg.getWidth()/3, buffImg.getHeight()/2, null);g.setComposite(AlphaComposite.getInstance(AlphaComposite.SRC_OVER));g.dispose();os = new FileOutputStream(outputImageFile);// 生成图片ImageIO.write(buffImg, JPG , os);} catch (Exception e) {e.printStackTrace();} finally {try {if (null != os)os.close();} catch (Exception e) {e.printStackTrace();}2.文字水印import java.awt.AlphaComposite; import java.awt.Color;import java.awt.Font;import java.awt.Graphics2D;import java.awt.Image;import java.awt.RenderingHints; import java.awt.image.BufferedImage; import java.io.File;import java.io.FileOutputStream; import java.io.OutputStream;import javax.imageio.ImageIO;* 生成文字水印* @author Ricky Fungpublic class WaterMarkTextTest {/*** @param argspublic static void main(String[] args) {File srcImgFile = new File( D:/test/myblog.pngString logoText = [ 水印文字电话邦]File outputImageFile = new File( D:/test/myblog_water_text.jpgFile outputRotateImageFile = new File( D:/test/myblog_water_text_rotate.jpg createWaterMarkByText(srcImgFile, logoText, outputImageFile);createWaterMarkByText(srcImgFile, logoText, outputRotateImageFile, 45); public static void createWaterMarkByText(File srcImgFile, String logoText, File outputImageFile) {createWaterMarkByText(srcImgFile, logoText, outputImageFile, 0);public static void createWaterMarkByText(File srcImgFile, String logoText, File outputImageFile, double degree) {OutputStream os = null;try {Image srcImg = ImageIO.read(srcImgFile);BufferedImage buffImg = new BufferedImage(srcImg.getWidth(null),srcImg.getHeight(null), BufferedImage.TYPE_INT_RGB);Graphics2D g = buffImg.createGraphics();g.setRenderingHint(RenderingHints.KEY_INTERPOLA TION,RenderingHints.V ALUE_INTERPOLA TION_BILINEAR);g.drawImage(srcImg.getScaledInstance(srcImg.getWidth(null),srcImg.getHeight(null), Image.SCALE_SMOOTH), 0, 0,null);if (degree 0) {g.rotate(Math.toRadians(degree),(double) buffImg.getWidth() / 2,(double) buffImg.getHeight() / 2);g.setColor(Color.RED);g.setFont(new Font( 宋体, Font.BOLD, 36));float alpha = 0.8f;g.setComposite(AlphaComposite.getInstance(AlphaComposite.SRC_A TOP, alpha));g.drawString(logoText, buffImg.getWidth()/3, buffImg.getHeight()/2);g.dispose();os = new FileOutputStream(outputImageFile);// 生成图片ImageIO.write(buffImg, JPG , os);} catch (Exception e) {e.printStackTrace();} finally {try {if (null != os)os.close();} catch (Exception e) { e.printStackTrace();}。
量化水印(有源代码,绝对可以实现)
量化水印背景知识在数字水印中,我们知道,设计的水印算法有时要对保真度、鲁棒性等主要性能进行折中,而从保真度和鲁棒性这两个基本的特征出发,要求水印嵌入后满足以下两个条件:○1从保真度出发,要求水印嵌入后,有水印的载体数据与原始载体数据近似相等。
○2从鲁棒性出发,要求嵌入水印后的载体数据具有非连续性,以确保可以对抗干扰。
最初将量化运用于水印,就是为解决这方面的问题而出发的。
从数学的角度来看,量化可以表示如下:Y=f step(x)=step*[x/step]=step*round(x/step)式中,x是待量化的数据,step是量化步长,Y是量化结果;[]和round均表示进行四舍五入取整;fstep( )是量化函数。
显然,量化函数fstep( )是一个多对一函数,是不可逆的,因此量化一般运用于不可逆水印,而且,由于量化结果均为整数,因此输出为离散值,并且误差满足|Y-x|<=step/2,即在量化步长step不是特别大的情况下,Y与x是近似相等的,所以量化满足上述两个条件,可以运用于数字水印中。
量化水印的算法设计量化水印系统的关键在于选择实时可行的量化器集合,将不同的待嵌入的水印信息与不同的量化器相对应起来,然后用相应的量化器将载体数据进行量化,就可以得到含有水印的载体数据。
由于大多数情况下,水印信息都是二进制的,因此下面以研究如何嵌入二进制水印信息为例来进行说明。
二进制信息中,有0和1两种不同的数据,因此,需要两个不同的量化器,分别用A 和B来表示。
假设当发送水印信息为0时,用量化器A来对载体数据进行量化;当发送水印信息为1时,用量化器B来对载体数据进行量化,这样就可以得到两组不同的量化数据。
在量化器中,量化器选择与原始载体数据最接近的数据来代替原始载体数据,从而保证不可感知性,即保真度;而且,A、B两个量化器之间的数据没有重叠,从而保证不同水印数据的不连续性,即使得水印系统具有一定的鲁棒性。
基于小波与奇异值分解的图像盲水印算法(含程序源码)

基于小波与奇异值分解的图像盲水印算法摘要:提出了一种新的基于离散小波变换(DWT)与奇异值分解(SVD)相结合的数字图像水印算法。
该算法将原始图像作小波分解并将小波分解得到的低频子带进行分块,对每一块进行奇异值分解后,选取每块中最大的奇异值通过量化的方法嵌入水印信息。
水印的提取不需要原始图像。
实验结果表明,该算法具有一定的不可感知性、鲁棒性。
关键词:离散小波变换;奇异值分解;盲水印随着计算机网络的迅速发展和广泛应用,数字媒体的非法篡改、复制和盗版现象也越来越普遍,数字媒体的版权保护已成为迫切需要解决的问题。
作为信息隐藏领域中的数字水印技术是实现多媒体版权保护与信息完整性保证的有效方法。
它的基本思想是在数字图像、音频和视频等产品中嵌入秘密的水印信息以便保护数字产品的版权。
对于数字水印技术,一般要求水印系统具有不可见性、鲁棒性和安全性。
也就是说,水印必须是不可察、不可测和难于破坏的。
目前,从实现角度看水印算法主要分为空域和变换算法两大类。
空域算法是直接对空域数据进行操作,变换域算法是在变换域中进行水印的嵌入与提取,如离散傅里叶变换(DFT)、离散余弦变换(DCT)和离散小波变换(DWT)[1]等。
与空域相比,变换域算法具有更好的鲁棒性。
由于离散小波变换具有良好的多分辨率表示、时频局部分析特性,基于DWT变换域的数字图像水印算法的研究更是得到了普遍的关注。
按水印的提取方法划分,水印算法又可分为提取时需要原图像和不需要原图像两种。
前者称为非盲水印,后者称为盲水印。
非盲水印算法在提取过程中需要原始图像,在版权认证的应用中,意味着需要大量的存储资源和计算资源,如果需要认证的数字作品数量很多,给定一个数字作品要去查找相应的原作品本身就很困难。
近几年来学术界研究的数字水印算法大多数属于盲水印算法。
本文提出的水印算法是一种新的基于小波变换(DWT)和奇异值分解(SVD)相结合的盲水印算法。
这样可以充分利用DWT的多分辨率特性和SVD所固有的特征,增强了水印的不可见性和鲁棒性。
数字水印技术LSB算法MATLAB源代码
close allclear all;% save start timestart_time=cputime;% read in the cover objectfile_name='E:\Phd\My Paper\Second paper -- Experiment\Experiment\Cover and Secretlmage\le na.bmp:[cover_object,map]=imread(file _n ame);% read in the secret imagefile_name='E:\Phd\My Paper\Second paper -- Experiment\Experiment\Cover and SecretImage\hat.bmp';[secret,map1]=imread(file_ name);secret仁secret;% convert to double for n ormalizatio n, the n back aga insecret=double(secret);secret=fix(secret./2); %rounds the eleme nts of A toward zero, result ing in an array of in tegers secret=uin t8(secret);% determ ine size of cover objectMc=size(cover_object,1); %HeightNc=size(cover_object,2); %Width% determ ine size of secret objectMm=size(secret,1); %HeightNm=size(secret,2); %Width% title the secret object out to cover object size to gen erate watermarkfor ii = 1:Mcfor jj = 1:Ncif (secret(ii,jj)>75)watermark(ii,jj)=255;elsewatermark(ii,jj)=0;endendend% now we set the lsb of cover_object(ii,jj) to the value of watermark(ii,jj)watermarked_image=cover_object;for ii = 1:Mcfor jj = 1:Ncif (watermark(ii,jj)==O)watermarked 」m age(ii,jj)=bitset(watermarked 」m age(ii,jj),1,0);%Set bit certa in positi onelsewatermarked 」m age(ii,jj)=bitset(watermarked 」m age(ii,jj),1,1); %Set bit certa in positi onendendend% write the watermarked image out to a fileimwrite(watermarked 」mage,'lsb_watermarked.bmp','bmp');%==================================Extracti on===========================% determ ine size of watermarked imageMw=size(watermarked 」mage,1); %HeightNw=size(watermarked 」mage,2); %Width% use lsb of watermarked image to recover watermarkfor ii = 1:Mwfor jj = 1:NwRecoveryWatermark(ii,jj)=bitget(watermarked 」m age(ii,jj),1);endend% scale the recovered watermarkRecoveryWatermark=2*double(RecoveryWatermark);%====================================================================%===========================SharpAttack================= SharpedWatermarkImage = watermarked 」m age;H = fspecial('u nsharp',0.001); %the alpha from 0.005 to 0.1 20 numberssharpImage = imfilter(SharpedWatermarklmage,H,'replicate');figure(6);colormap(gray(256));imshow(sharpImage); atattitle('sharp Image');imwrite(sharplmage, gray(256), 'sharplmage.bmp');% determ ine size of watermarked imageMSw=size(sharpImage,1); %HeightNSw=size(sharplmage,2); %Width% use lsb of watermarked image to recover watermarkfor ii = 1:MSwfor jj = 1:NSwRecoverySharpWatermark(ii,jj)=bitget(abs(sharplmage(ii,jj)),1);endend% scale the recovered watermarkRecoverySharpWatermark=2*double(RecoverySharpWatermark);psn rSharp = psn r(RecoveryWatermark, RecoverySharpWatermark)figure(7);colormap(gray(256));imshow(RecoverySharpWatermark,[])title('RecoverySharpWatermark');%====================================================================%%%===========================Gaussia n Blur=================Gaussia nBlurWatermarkedlmage = watermarked_image;H = fspecial('gaussian',size(GaussianBlurWatermarkedlmage),0.035); %the alpha from 0.005 to 0.1 20 numbersGaussia nBlurlmage = imfilter(Gaussia nBlurWatermarkedlmage,H,'replicate');figure(8);colormap(gray(256));imshow(Gaussia nBlurlmage』)title('Gaussia n Blur Image');imwrite(Gaussia nBlurlmage, gray(256), 'Gaussia nBlurlmage.bmp');% determ ine size of watermarked imageMSw=size(Gaussia nBlurlmage,1); %HeightNSw=size(Gaussia nBlurlmage,2); %Width% use lsb of watermarked image to recover watermarkfor ii = 1:MSwfor jj = 1:NSwRecoveryGaussia nBlurWatermark(ii,jj)=bitget(Gaussia nBlurlmage(ii,jj),1);end end% scale the recovered watermarkRecoveryGaussia nBlurWatermark=2*double(RecoveryGaussia nBlurWatermark);psn rBlur = psn r(RecoveryWatermark, RecoveryGaussia nBlurWatermark) figure(9);colormap(gray(256));imshow(RecoveryGaussia nBlurWatermark』) title('RecoveryGaussia nWatermark');% %% %===========================================================% %HistogramhistogramWatermarkedlmage = watermarked」m age;histogramimage = histeq(watermarked_image,10); % from 10 to 200 figure(10);colormap(gray(256));image(histogramimage);title('histogramimage Image');imwrite(histogramimage, gray(256), 'histogramimage.bmp');MSw=size(histogramlmage,1); %HeightNSw=size(histogramlmage,2); %Width% use lsb of watermarked image to recover watermarkfor ii = 1:MSwfor jj = 1:NSwRecoveryHistogramWatermarked(ii,jj)=bitget(histogramlmage(ii,jj),1); endend% scale the recovered watermarkRecoveryHistogramWatermarked=2*double(RecoveryHistogramWatermarked); psn rHistorgram = psn r(RecoveryWatermark, RecoveryHistogramWatermarked) figure(11);colormap(gray(256));imshow(RecoveryHistogramWatermarked,[]) title('RecoveryHistogramWatermarked');%%%% %==========================Noise=============================NoiseWatermarked = watermarked_image;Noiseimage = imno ise(NoiseWatermarked,'gaussia n',0.001);figure(12);colormap(gray(256));imshow(NoiseImage);title(' no iselmage');imwrite(Noiselmage, gray(256), 'no iselmage.bmp');MSw=size(Noiselmage,1); %HeightNSw=size(Noiselmage,2); %Width% use lsb of watermarked image to recover watermarkfor ii = 1:MSwfor jj = 1:NSwRecoveryNoiseWatermarked(ii,jj)=bitget(Noiselmage(ii,jj),1);endend% scale the recovered watermarkRecoveryNoiseWatermarked=2*double(RecoveryNoiseWatermarked);psn rNoise = psn r(RecoveryWatermark, RecoveryNoiseWatermarked)figure(13);colormap(gray(256));imshow(RecoveryNoiseWatermarked,[]) title('RecoveryNoiseWatermarked'); %%===================================================================% display process ing time elapsed_time=cputime-start_time,。
C#图片添加水印的实现代码
C#图⽚添加⽔印的实现代码本⽂实例介绍了C#图⽚添加⽔印的实现⽅法,可以为图⽚加⽂字⽔印,及判断是否是图⽚⽂件,分享给⼤家供⼤家参考,具体内容如下效果图:以下是HovercWarter类的代码:using System.Drawing;using System.Drawing.Imaging;using System.IO;namespace HoverTreeBatch.HovercFrame{public class HovercWarter{public static Image AddTextToImg(Image image, string text){Bitmap bitmap = new Bitmap(image, image.Width, image.Height);Graphics g = Graphics.FromImage(bitmap);float fontSize = 12.0f; //字体⼤⼩float textWidth = text.Length * fontSize; //⽂本的长度//下⾯定义⼀个矩形区域,以后在这个矩形⾥画上⽩底⿊字float rectX = 0;float rectY = 0;float rectWidth = text.Length * (fontSize + 8);float rectHeight = fontSize + 8;//声明矩形域RectangleF textArea = new RectangleF(rectX, rectY, rectWidth, rectHeight);Font font = new Font("宋体", fontSize); //定义字体Brush whiteBrush = new SolidBrush(Color.White); //⽩笔刷,画⽂字⽤Brush blackBrush = new SolidBrush(Color.Black); //⿊笔刷,画背景⽤g.FillRectangle(blackBrush, rectX, rectY, rectWidth, rectHeight);g.DrawString(text, font, whiteBrush, textArea);MemoryStream ms = new MemoryStream();//保存为Jpg类型bitmap.Save(ms, ImageFormat.Jpeg);Image h_hovercImg = Image.FromStream(ms);g.Dispose();bitmap.Dispose();return h_hovercImg;}/// <summary>/// 根据⽂件头判断上传的⽂件类型/// </summary>/// <param name="filePath">filePath是⽂件的完整路径 </param>/// <returns>返回true或false</returns>public static bool IsPicture(string filePath){try{FileStream fs = new FileStream(filePath, FileMode.Open, FileAccess.Read);BinaryReader reader = new BinaryReader(fs);string fileClass;byte buffer;buffer = reader.ReadByte();fileClass = buffer.ToString();buffer = reader.ReadByte();fileClass += buffer.ToString();reader.Close();fs.Close();if (fileClass == "255216" || fileClass == "7173" || fileClass == "13780" || fileClass == "6677")//何问起 //255216是jpg;7173是gif;6677是BMP,13780是PNG;7790是exe,8297是rar{return true;}else{return false;}}catch{return false;}}}}以上就是C#实现图⽚添加⽔印的关键性代码,希望对⼤家学习C#程序设计有所帮助。
php自动添加水印源代码
<?php/** 基本图片处理,用于完成图片缩入,水印添加* 当水印图超过目标图片尺寸时,水印图能自动适应目标图片而缩小* 水印图可以设置跟背景的合并度*/class ThumbHandler{var $src_img;// 源文件var $dst_img;// 目标文件var $h_src; // 图片资源句柄var $h_dst;// 新图句柄var $h_mask;// 水印句柄var $img_create_quality = 75;// 图片生成质量var $img_display_quality =75;// 图片显示质量,默认为75var $img_scale = 0;// 图片缩放比例var $src_w = 0;// 原图宽度var $src_h = 0;// 原图高度var $dst_w = 0;// 新图总宽度var $dst_h = 0;// 新图总高度var $fill_w;// 填充图形宽var $fill_h;// 填充图形高var $start_x;// 新图绘制起始横坐标var $start_y;// 新图绘制起始纵坐标var $end_x;// 新图绘制结束横坐标var $end_y;// 新图绘制结束纵坐标var $mask_word;// 水印文字var $mask_img;// 水印图片var $mask_pos_x = 0;// 水印横坐标var $mask_pos_y = 0;// 水印纵坐标var $mask_offset_x = 5;// 水印横向偏移var $mask_offset_y = 5;// 水印纵向偏移var $font_w;// 水印字体宽var $font_h;// 水印字体高var $mask_w;// 水印宽var $mask_h;// 水印高var $mask_font_color = "green";// 水印文字颜色var $mask_font = 2;// 水印字体var $font_size;// 尺寸var $mask_position = 0;// 水印位置var $mask_img_pct = 50;// 图片合并程度,值越大,合并程序越低var $mask_txt_pct = 50;// 文字合并程度,值越小,合并程序越低var $img_border_size = 0;// 图片边框尺寸var $img_border_color;// 图片边框颜色var $_flip_x=0;// 水平翻转次数var $_flip_y=0;// 垂直翻转次数var $img_type;// 文件类型// 文件类型定义,并指出了用于生成和输出图片的函数var $all_type = array("jpg" => array("create"=>"ImageCreateFromjpeg","output"=>"imagejpe g"),"gif" => array("create"=>"ImageCreateFromgif" ,"output"=>"imagegif"), "png" => array("create"=>"imagecreatefrompng" ,"output"=>"imagepng "),"jpeg" => array("create"=>"ImageCreateFromjpeg","output"=>"imagejp eg"));/*** 构造函数*/function ThumbHandler(){$this->mask_font_color = "#ffffff";$this->font = 2;$this->font_size = 12;}/*** 取得图片的宽*/function getImgWidth($src){return imagesx($src);}/*** 取得图片的高*/function getImgHeight($src){return imagesy($src);}/*** 设置图片生成路径** @param string $src_img 图片生成路径*/function setSrcImg($src_img){file_exists($src_img)?($this->src_img = $src_img):die("图片不存在");$this->img_type = $this->_getPostfix($this->src_img);$this->_checkValid($this->img_type);$img_type = $this->img_type;$func_name = $this->all_type[$img_type]['create'];if(function_exists($func_name)){$this->h_src = $func_name($this->src_img);$this->src_w = $this->getImgWidth($this->h_src);$this->src_h = $this->getImgHeight($this->h_src);}else{die($func_name."函数不被支持");}}/*** 设置图片生成路径** @param string $dst_img 图片生成路径*/function setDstImg($dst_img){$arr = explode('/',$dst_img);$last = array_pop($arr);$path = implode('/',$arr);$this->_mkdirs($path);$this->dst_img = $dst_img;}/*** 设置图片的显示质量** @param string $n 质量*/function setImgDisplayQuality($n){$this->img_display_quality = (int)$n;}/*** 设置图片的生成质量** @param string $n 质量*/function setImgCreateQuality($n){$this->img_create_quality = (int)$n;}/*** 设置文字水印** @param string $word 水印文字* @param integer $font 水印字体* @param string $color 水印字体颜色*/function setMaskWord($word){$this->mask_word .= $word;}/*** 设置字体颜色** @param string $color 字体颜色*/function setMaskFontColor($color="#ffffff") {$this->mask_font_color = $color;}/*** 设置水印字体** @param string|integer $font 字体*/function setMaskFont($font=2){if(!is_numeric($font) && !file_exists($font)) {die("字体文件不存在");}$this->font = $font;}/*** 设置文字字体大小,仅对truetype字体有效*/function setMaskFontSize($size = "12"){$this->font_size = $size;}/*** 设置图片水印** @param string $img 水印图片源*/function setMaskImg($img){$this->mask_img = $img;}/*** 设置水印横向偏移** @param integer $x 横向偏移量*/function setMaskOffsetX($x){$this->mask_offset_x = (int)$x;}/*** 设置水印纵向偏移** @param integer $y 纵向偏移量*/function setMaskOffsetY($y){$this->mask_offset_y = (int)$y;}/*** 指定水印位置** @param integer $position 位置,1:左上,2:左下,3:右上,0/4:右下*/function setMaskPosition($position=0){$this->mask_position = (int)$position;}/*** 设置图片合并程度** @param integer $n 合并程度*/function setMaskImgPct($n){$this->mask_img_pct = (int)$n;}/*** 设置文字合并程度** @param integer $n 合并程度*/function setMaskTxtPct($n){$this->mask_txt_pct = (int)$n;}/*** 设置缩略图边框** @param (类型) (参数名) (描述)*/function setDstImgBorder($size=1, $color="#FFFFFF"){$this->img_border_size = (int)$size;$this->img_border_color = $color;}/*** 水平翻转*/function flipH(){$this->_flip_x++;}/*** 垂直翻转*/function flipV(){$this->_flip_y++;}/*** 创建图片,主函数* @param integer $a 当缺少第二个参数时,此参数将用作百分比,* 否则作为宽度值* @param integer $b 图片缩放后的高度*/function createImg($a, $b=null){$num = func_num_args();if(1 == $num){$r = (int)$a;if($r < 1){die("图片缩放比例不得小于1");}$this->img_scale = $r;$this->_setNewImgSize($r);}if(2 == $num){$w = (int)$a;$h = (int)$b;if(0 == $w){die("目标宽度不能为0");}if(0 == $h){die("目标高度不能为0");}$this->_setNewImgSize($w, $h);}if($this->_flip_x%2!=0){$this->_flipH($this->h_src);}if($this->_flip_y%2!=0){$this->_flipV($this->h_src);}$this->_createMask();$this->_output();// 释放imagedestroy($this->h_src); imagedestroy($this->h_dst);}/*** 生成水印,调用了生成水印文字和水印图片两个方法*/function _createMask(){if($this->mask_word){// 获取字体信息$this->_setFontInfo();if($this->_isFull()){die("水印文字过大");}else{$this->h_dst = imagecreatetruecolor($this->dst_w, $this->dst_h);$this->_drawBorder();imagecopyresampled( $this->h_dst, $this->h_src,$this->start_x, $this->start_y,0, 0,$this->end_x, $this->end_y,$this->src_w, $this->src_h);$this->_createMaskWord($this->h_dst);}}if($this->mask_img){$this->_loadMaskImg();//加载时,取得宽高if($this->_isFull()){// 将水印生成在原图上再拷$this->_createMaskImg($this->h_src);$this->h_dst = imagecreatetruecolor($this->dst_w, $this->dst_h);$this->_drawBorder();imagecopyresampled( $this->h_dst, $this->h_src,$this->start_x, $this->start_y,0, 0,$this->end_x, $this->end_y,$this->src_w, $this->src_h);}else{// 创建新图并拷贝$this->h_dst = imagecreatetruecolor($this->dst_w, $this->dst_h);$this->_drawBorder();imagecopyresampled( $this->h_dst, $this->h_src,$this->start_x, $this->start_y,0, 0,$this->end_x, $this->end_y,$this->src_w, $this->src_h);$this->_createMaskImg($this->h_dst);}}if(empty($this->mask_word) && empty($this->mask_img)) {$this->h_dst = imagecreatetruecolor($this->dst_w, $this->dst_h);$this->_drawBorder();imagecopyresampled( $this->h_dst, $this->h_src,$this->start_x, $this->start_y,0, 0,$this->end_x, $this->end_y,$this->src_w, $this->src_h);}}/*** 画边框*/function _drawBorder(){if(!empty($this->img_border_size)){$c = $this->_parseColor($this->img_border_color);$color = ImageColorAllocate($this->h_src,$c[0], $c[1], $c[2]);imagefilledrectangle($this->h_dst,0,0,$this->dst_w,$this->dst_h,$colo r);// 填充背景色}}/*** 生成水印文字*/function _createMaskWord($src){$this->_countMaskPos();$this->_checkMaskValid();$c = $this->_parseColor($this->mask_font_color);$color = imagecolorallocatealpha($src, $c[0], $c[1], $c[2], $this->mask _txt_pct);if(is_numeric($this->font)){imagestring($src,$this->font,$this->mask_pos_x, $this->mask_pos_y,$this->mask_word,$color);}else{imagettftext($src,$this->font_size, 0,$this->mask_pos_x, $this->mask_pos_y,$color,$this->font,$this->mask_word);}}/*** 生成水印图*/function _createMaskImg($src){$this->_countMaskPos();$this->_checkMaskValid();imagecopymerge($src,$this->h_mask,$this->mask_pos_x ,$this->mask_pos_y,0, 0,$this->mask_w, $this->mask_h,$this->mask_img_pct);imagedestroy($this->h_mask);}/*** 加载水印图*/function _loadMaskImg(){$mask_type = $this->_getPostfix($this->mask_img); $this->_checkValid($mask_type);$func_name = $this->all_type[$mask_type]['create']; if(function_exists($func_name)){$this->h_mask = $func_name($this->mask_img);$this->mask_w = $this->getImgWidth($this->h_mask);$this->mask_h = $this->getImgHeight($this->h_mask);}else{die($func_name."函数不被支持");}}/*** 图片输出*/function _output(){$img_type = $this->img_type;$func_name = $this->all_type[$img_type]['output'];if(function_exists($func_name)){// 判断浏览器,若是IE就不发送头if(isset($_SERVER['HTTP_USER_AGENT'])){$ua = strtoupper($_SERVER['HTTP_USER_AGENT']);if(!preg_match('/^.*MSIE.*\)$/i',$ua)){header("HTTP/1.1 202 Accepted");header("Content-type:$img_type");}}$func_name($this->h_dst, $this->dst_img, $this->img_display_qualit y);}else{Return false;}}/*** 分析颜色** @param string $color 十六进制颜色*/function _parseColor($color){$arr = array();for($ii=1; $ii<strlen($color); $ii++){$arr[] = hexdec(substr($color,$ii,2));$ii++;}Return $arr;}/*** 计算出位置坐标*/function _countMaskPos(){if($this->_isFull()){switch($this->mask_position){case 1:// 左上$this->mask_pos_x = $this->mask_offset_x + $this->img_bor der_size;$this->mask_pos_y = $this->mask_offset_y + $this->img_bor der_size;break;case 2:// 左下$this->mask_pos_x = $this->mask_offset_x + $this->img_bor der_size;$this->mask_pos_y = $this->src_h - $this->mask_h - $this-> mask_offset_y;break;case 3:// 右上$this->mask_pos_x = $this->src_w - $this->mask_w - $this ->mask_offset_x;$this->mask_pos_y = $this->mask_offset_y + $this->img_border_size;break;case 4:// 右下$this->mask_pos_x = $this->src_w - $this->mask_w - $this ->mask_offset_x;$this->mask_pos_y = $this->src_h - $this->mask_h - $this-> mask_offset_y;break;default:// 默认将水印放到右下,偏移指定像素$this->mask_pos_x = $this->src_w - $this->mask_w - $this ->mask_offset_x;$this->mask_pos_y = $this->src_h - $this->mask_h - $this-> mask_offset_y;break;}}else{switch($this->mask_position){case 1:// 左上$this->mask_pos_x = $this->mask_offset_x + $this->img_bor der_size;$this->mask_pos_y = $this->mask_offset_y + $this->img_bor der_size;break;case 2:// 左下$this->mask_pos_x = $this->mask_offset_x + $this->img_bor der_size;$this->mask_pos_y = $this->dst_h - $this->mask_h - $this-> mask_offset_y -$this->img_border_size;break;case 3:// 右上$this->mask_pos_x = $this->dst_w - $this->mask_w - $this ->mask_offset_x -$this->img_border_size;$this->mask_pos_y = $this->mask_offset_y + $this->img_bor der_size;break;case 4:// 右下$this->mask_pos_x = $this->dst_w - $this->mask_w - $this ->mask_offset_x -$this->img_border_size;$this->mask_pos_y = $this->dst_h - $this->mask_h - $this-> mask_offset_y -$this->img_border_size;break;default:// 默认将水印放到右下,偏移指定像素$this->mask_pos_x = $this->dst_w - $this->mask_w - $this ->mask_offset_x -$this->img_border_size;$this->mask_pos_y = $this->dst_h - $this->mask_h - $this-> mask_offset_y -$this->img_border_size;break;}}}/*** 设置字体信息*/function _setFontInfo(){if(is_numeric($this->font)){$this->font_w = imagefontwidth($this->font);$this->font_h = imagefontheight($this->font);// 计算水印字体所占宽高$word_length = strlen($this->mask_word);$this->mask_w = $this->font_w*$word_length;$this->mask_h = $this->font_h;}else{$arr = imagettfbbox ($this->font_size,0, $this->font,$this->mask_wo rd);$this->mask_w = abs($arr[0] - $arr[2]);$this->mask_h = abs($arr[7] - $arr[1]);}}/*** 设置新图尺寸** @param integer $img_w 目标宽度* @param integer $img_h 目标高度*/function _setNewImgSize($img_w, $img_h=null){$num = func_num_args();if(1 == $num){$this->img_scale = $img_w;// 宽度作为比例$this->fill_w = round($this->src_w * $this->img_scale / 1) - $this ->img_border_size*2;$this->fill_h = round($this->src_h * $this->img_scale / 1) - $this ->img_border_size*2;$this->dst_w = $this->fill_w + $this->img_border_size*2;$this->dst_h = $this->fill_h + $this->img_border_size*2;}if(2 == $num){$fill_w = (int)$img_w - $this->img_border_size*2;$fill_h = (int)$img_h - $this->img_border_size*2;if($fill_w < 0 || $fill_h < 0){die("图片边框过大,已超过了图片的宽度");}$rate_w = $this->src_w/$fill_w;$rate_h = $this->src_h/$fill_h;if($rate_w > $rate_h){$this->fill_w = (int)$fill_w;$this->fill_h = round($this->src_h/$rate_w);}else{$this->fill_w = round($this->src_w/$rate_h);$this->fill_h = (int)$fill_h;}$this->dst_w = $this->fill_w + $this->img_border_size*2;$this->dst_h = $this->fill_h + $this->img_border_size*2;}$this->start_x = $this->img_border_size;$this->start_y = $this->img_border_size;$this->end_x = $this->fill_w;$this->end_y = $this->fill_h;}/*** 检查水印图是否大于生成后的图片宽高*/function _isFull(){Return ( $this->mask_w + $this->mask_offset_x > $this->fill_w || $this->mask_h + $this->mask_offset_y > $this->fill_h)?true:false;}/*** 检查水印图是否超过原图*/function _checkMaskValid(){if( $this->mask_w + $this->mask_offset_x > $this->src_w || $this->mask_h + $this->mask_offset_y > $this->src_h) {die("水印图片尺寸大于原图,请缩小水印图");}}/*** 取得文件后缀,作为类成员*/function _getPostfix($filename){return substr(strrchr(trim(strtolower($filename)),"."),1);}/*** 检查图片类型是否合法,调用了array_key_exists函数,此函数要求* php版本大于4.1.0** @param string $img_type 文件类型*/function _checkValid($img_type){if(!array_key_exists($img_type, $this->all_type)){Return false;}}/*** 按指定路径生成目录** @param string $path 路径*/function _mkdirs($path){$adir = explode('/',$path);$dirlist = '';$rootdir = array_shift($adir);if(($rootdir!='.'||$rootdir!='..')&&!file_exists($rootdir)){mkdir($rootdir);}foreach($adir as $key=>$val){if($val!='.'&&$val!='..'){$dirlist .= "/".$val;$dirpath = $rootdir.$dirlist;if(!file_exists($dirpath)){mkdir($dirpath);chmod($dirpath,0777);}}}}/*** 水平翻转** @param string $path 路径*/function _flipV($src){$src_x = $this->getImgWidth($src);$src_y = $this->getImgHeight($src);$new_im = imagecreatetruecolor($src_x, $src_y);for ($x = 0; $x < $src_x; $x++){for ($y = 0; $y < $src_y; $y++){imagecopy($new_im, $src, $x, $src_y - $y - 1, $x, $y, 1, 1);}}$this->h_src = $new_im;}function _flipH($src){$src_x = $this->getImgWidth($src);$src_y = $this->getImgHeight($src);$new_im = imagecreatetruecolor($src_x, $src_y);for ($x = 0; $x < $src_x; $x++){for ($y = 0; $y < $src_y; $y++){imagecopy($new_im, $src, $src_x - $x - 1, $y, $x, $y, 1, 1);}}$this->h_src = $new_im;}/*** 取得某一点的颜色值** @param (类型) (参数名) (描述)*/function _getPixColor($src, $x, $y){$rgb = @ImageColorAt($src, $x, $y);$color = imagecolorsforindex($src, $rgb);Return $color;}}><?php//使用实例//参数说明://$arrOri为图片原文件!为了同时处理多张图片设为数组,//$original_path为源文件的地址,//$waterd_path为生成水印后的图片地址.function markPics($arrOri,$original_path,$watered_path){$Setting['cfg_watermark_type'] = '1';$Setting['cfg_watermark_pos'] ='4';$Setting['cfg_watermark_scale'] = '1';$Setting['cfg_watermark_pic'] = './CD0002.JPG';if(is_array($arrOri)){//数组;for($i=0;$i<count($arrOri);$i++){//水印设置;$aryIntro = getimagesize($original_path . $arrOri[$i]);$t = new ThumbHandler();$t->setSrcImg($original_path . $arrOri[$i]); //ori file;if($aryIntro[0] > 640){$t->setDstImg($original_path . $arrOri[$i]);//处理原始图片大小$t->createImg(640,640); //限制为宽、高不能超过640}$t->setDstImg($watered_path . $arrOri[$i]);//masked fileif($Setting['cfg_watermark_type'] == '0') //文字水印;{//$t->setMaskFont(BLD_ROOT . "lib/arial.ttf"); //字体$t->setMaskFontSize($Setting['cfg_watermark_wsize']);//文字大小$t->setMaskFontColor($Setting['cfg_watermark_wcolor']);//文字颜色 $t->setMaskWord($Setting['cfg_watermark_words']);//文字;$t->setMaskTxtPct($Setting['cfg_watermark_txtpct']); //合并度;}else{$t->setMaskImg($Setting['cfg_watermark_pic']);$t->setMaskImgPct(45); //合并度}$t->setMaskOffsetX(10);$t->setMaskOffsetY(20);$t->setMaskPosition($Setting['cfg_watermark_pos']); //水印位置;$t->createImg($Setting['cfg_watermark_scale']); //处理并保存文件; }}return true;}$arrOri = array('CD0001.jpg');$original_path = "./";$watered_path = "./img/";$result = markPics($arrOri,$original_path,$watered_path);if($result == true){echo "success";}else{echo "faild";}>。
php中png透明背景水印程序代码
php中png透明背景水印程序代码给图片加水印是php程序中一个常用的并且很实用的功能,下面我来给大家详细介绍php 中png透明背景水印程序代码吧。
代码如下复制代码//原始图像$dst = "/upload/20120914/20120914040740-0.jpg"; //注意图片路径要正确//得到原始图片信息$dst_info = getimagesize($dst);switch ($dst_info[2]){case 1:$dst_im =imagecreatefromgif($dst);break;case 2:$dst_im =imagecreatefromjpeg($dst);break;case 3:$dst_im =imagecreatefrompng($dst);break;case 6:$dst_im =imagecreatefromwbmp($dst);break;default:die("不支持的文件类型1");exit;}//水印图像$src = "/images/shuiyin.png"; //注意路径要写对$src_info = getimagesize($src);switch ($src_info[2]){case 1:$src_im =imagecreatefromgif($src);break;case 2:$src_im =imagecreatefromjpeg($src);break;case 3:$src_im =imagecreatefrompng($src);break;case 6:$src_im =imagecreatefromwbmp($src);break;default:die("不支持的文件类型1");exit;}//半透明格式水印//$alpha = 50;//水印透明度//imagecopymerge($dst_im,$src_im,$dst_info[0]-$src_info[0]-10,$dst_info[1]-$src_info[1]-10,0,0,$src_info[0],$src_info[1],$alpha);//支持png本身透明度的方式imagecopy($dst_im,$src_im,$dst_info[0]-$src_info[0]-10,$dst_info[1]-$src_info[1]-10,0,0,$src_info [0],$src_info[1]);//保存图片switch ($dst_info[2]){case 1:imagegif($dst_im,$dst);break;case 2:imagejpeg($dst_im,$dst);break;case 3:imagepng($dst_im,$dst);break;case 6:imagewbmp($dst_im,$dst);break;default:die("不支持的文件类型2");exit;}imagedestroy($dst_im);imagedestroy($src_im);给一个标准的图片水印类代码如下复制代码在网上找的水印代码:/** 功能:PHP图片水印(水印支持图片或文字)* 参数:* $product_img 背景图片,即需要加水印的图片,暂只支持GIF,JPG,PNG格式;* $waterPos 水印位置,有10种状态,0为随机位置;* 1为顶端居左,2为顶端居中,3为顶端居右;* 4为中部居左,5为中部居中,6为中部居右;* 7为底端居左,8为底端居中,9为底端居右;* $waterImage 图片水印,即作为水印的图片,暂只支持GIF,JPG,PNG格式;* $waterText 文字水印,即把文字作为为水印,支持ASCII码,不支持中文;* $textFont 文字大小,值为1、2、3、4或5,默认为5;* $textColor 文字颜色,值为十六进制颜色值,默认为#FF0000(红色);** 注意:Support GD 2.0,Support FreeType、GIF Read、GIF Create、JPG 、PNG* $waterImage 和$waterText 最好不要同时使用,选其中之一即可,优先使用$waterImage。
c# 添加水印(强大的代码)

添加水印的强大代码,这是我从Discuz!Nt挖出来的代码功能很强大,编写也很好,可以添加图片水印和文字水印两种添加出来的效果非常好,现在就把代码贴出来,供大家欣赏要导入的空间:using System.Drawing;using System.Drawing.Drawing2D;using System.Drawing.Imaging;添加图片水印的方法:///<summary>///加图片水印///</summary>///<param name="filename">文件名</param>///<param name="watermarkFilename">水印文件名</param>///<param name="watermarkStatus">图片水印位置 0=不使用 1=左上 2=中上 3=右上 4=左中 9=右下</param>///<param name="quality">附加图片质量,1是 0不是</param>///<param name="watermarkTransparency">水印的透明度 1--10 10为不透明</para m>public static void AddImageSignPic(Image img, string filename, string wa termarkFilename, int watermarkStatus, int quality, int watermarkTransparency) {Graphics g = Graphics.FromImage(img);//设置高质量插值法g.InterpolationMode = System.Drawing.Drawing2D.InterpolationMode.Hig h;//设置高质量,低速度呈现平滑程度g.SmoothingMode = System.Drawing.Drawing2D.SmoothingMode.HighQuality; Image watermark = new Bitmap(watermarkFilename);if (watermark.Height >= img.Height || watermark.Width >= img.Width){return;}ImageAttributes imageAttributes = new ImageAttributes();ColorMap colorMap = new ColorMap();colorMap.OldColor = Color.FromArgb(255, 0, 255, 0);colorMap.NewColor = Color.FromArgb(0, 0, 0, 0);ColorMap[] remapTable = { colorMap };imageAttributes.SetRemapTable(remapTable, ColorAdjustType.Bitmap);float transparency = 0.5F;if (watermarkTransparency >= 1 && watermarkTransparency <= 10){transparency = (watermarkTransparency / 10.0F);}float[][] colorMatrixElements = {new float[] {1.0f, 0.0f, 0.0f, 0.0f, 0.0f},new float[] {0.0f, 1.0f, 0. 0f, 0.0f, 0.0f},new float[] {0.0f, 0.0f, 1. 0f, 0.0f, 0.0f},new float[] {0.0f, 0.0f, 0. 0f, transparency, 0.0f},new float[] {0.0f, 0.0f, 0. 0f, 0.0f, 1.0f}};ColorMatrix colorMatrix = new ColorMatrix(colorMatrixElements);imageAttributes.SetColorMatrix(colorMatrix, ColorMatrixFlag.Default, ColorAdjustType.Bitmap);int xpos = 0;int ypos = 0;switch (watermarkStatus){case1:xpos = (int)(img.Width * (float).01);ypos = (int)(img.Height * (float).01);break;case2:xpos = (int)((img.Width * (float).50) - (watermark.Width / 2));ypos = (int)(img.Height * (float).01);break;case3:xpos = (int)((img.Width * (float).99) - (watermark.Width)); ypos = (int)(img.Height * (float).01);break;case4:xpos = (int)(img.Width * (float).01);ypos = (int)((img.Height * (float).50) - (watermark.Height / 2));break;case5:xpos = (int)((img.Width * (float).50) - (watermark.Width / 2));ypos = (int)((img.Height * (float).50) - (watermark.Height / 2));break;case6:xpos = (int)((img.Width * (float).99) - (watermark.Width)); ypos = (int)((img.Height * (float).50) - (watermark.Height / 2));break;case7:xpos = (int)(img.Width * (float).01);ypos = (int)((img.Height * (float).99) - watermark.Height);break;case8:xpos = (int)((img.Width * (float).50) - (watermark.Width / 2));ypos = (int)((img.Height * (float).99) - watermark.Height);break;case9:xpos = (int)((img.Width * (float).99) - (watermark.Width)); ypos = (int)((img.Height * (float).99) - watermark.Height);break;}g.DrawImage(watermark, new Rectangle(xpos, ypos, watermark.Width, wa termark.Height), 0, 0, watermark.Width, watermark.Height, GraphicsUnit.Pixe l, imageAttributes);//g.DrawImage(watermark, new System.Drawing.Rectangle(xpos, ypos, wa termark.Width, watermark.Height), 0, 0, watermark.Width, watermark.Height, S ystem.Drawing.GraphicsUnit.Pixel);ImageCodecInfo[] codecs = ImageCodecInfo.GetImageEncoders();ImageCodecInfo ici = null;foreach (ImageCodecInfo codec in codecs){if (codec.MimeType.IndexOf("jpeg") > -1){ici = codec;}}EncoderParameters encoderParams = new EncoderParameters();long[] qualityParam = new long[1];if (quality < 0 || quality > 100){quality = 80;}qualityParam[0] = quality;EncoderParameter encoderParam = new EncoderParameter(System.Drawing.Imaging.Encoder.Quality, qualityParam);encoderParams.Param[0] = encoderParam;if (ici != null){img.Save(filename, ici, encoderParams);}else{img.Save(filename);}g.Dispose();img.Dispose();watermark.Dispose();imageAttributes.Dispose();}下面这个是添加文字水印的方法///<summary>///增加图片文字水印///</summary>///<param name="filename">文件名</param>///<param name="watermarkText">水印文字</param>///<param name="watermarkStatus">图片水印位置</param>public static void AddImageSignText(Image img, string filename, string watermarkText, int watermarkStatus, int quality, string fontname, int fontsiz e){//System.Drawing.Bitmap bmp = new System.Drawing.Bitmap(img);// .FromFile(filename);Graphics g = Graphics.FromImage(img);Font drawFont = new Font(fontname, fontsize, FontStyle.Regular, Grap hicsUnit.Pixel);SizeF crSize;crSize = g.MeasureString(watermarkText, drawFont);float xpos = 0;float ypos = 0;switch (watermarkStatus){case1:xpos = (float)img.Width * (float).01;ypos = (float)img.Height * (float).01;break;case2:xpos = ((float)img.Width * (float).50) - (crSize.Width / 2); ypos = (float)img.Height * (float).01;break;case3:xpos = ((float)img.Width * (float).99) - crSize.Width;ypos = (float)img.Height * (float).01;break;case4:xpos = (float)img.Width * (float).01;ypos = ((float)img.Height * (float).50) - (crSize.Height / 2);break;case5:xpos = ((float)img.Width * (float).50) - (crSize.Width / 2); ypos = ((float)img.Height * (float).50) - (crSize.Height / 2);break;case6:xpos = ((float)img.Width * (float).99) - crSize.Width;ypos = ((float)img.Height * (float).50) - (crSize.Height / 2);break;case7:xpos = (float)img.Width * (float).01;ypos = ((float)img.Height * (float).99) - crSize.Height;break;case8:xpos = ((float)img.Width * (float).50) - (crSize.Width / 2); ypos = ((float)img.Height * (float).99) - crSize.Height;break;case9:xpos = ((float)img.Width * (float).99) - crSize.Width;ypos = ((float)img.Height * (float).99) - crSize.Height;break;}// System.Drawing.StringFormat StrFormat = new System.Dra wing.StringFormat();// StrFormat.Alignment = System.Drawing.StringAlignment.Center;//// g.DrawString(watermarkText, drawFont, new System.Drawi ng.SolidBrush(System.Drawing.Color.White), xpos + 1, ypos + 1, StrFormat); // g.DrawString(watermarkText, drawFont, new System.Drawi ng.SolidBrush(System.Drawing.Color.Black), xpos, ypos, StrFormat);g.DrawString(watermarkText, drawFont, new SolidBrush(Color.White), x pos + 1, ypos + 1);g.DrawString(watermarkText, drawFont, new SolidBrush(Color.Black), x pos, ypos);ImageCodecInfo[] codecs = ImageCodecInfo.GetImageEncoders();ImageCodecInfo ici = null;foreach (ImageCodecInfo codec in codecs){if (codec.MimeType.IndexOf("jpeg") > -1){ici = codec;}}EncoderParameters encoderParams = new EncoderParameters();long[] qualityParam = new long[1];if (quality < 0 || quality > 100){quality = 80;}qualityParam[0] = quality;EncoderParameter encoderParam = new EncoderParameter(System.Drawing. Imaging.Encoder.Quality, qualityParam);encoderParams.Param[0] = encoderParam;if (ici != null){img.Save(filename, ici, encoderParams);}else{img.Save(filename);}g.Dispose();//bmp.Dispose();img.Dispose();}这个是我测试用的代码Image img = Image.FromStream(this.FileUpload1.PostedFile.InputStream);string filename = Server.MapPath("img/test1.jpg");string watername = Server.MapPath("img/11.jpg");WaterMark.AddImageSignPic(img, filename, watername, 1, 100, 6);我的整个测试代码在这里,大家可以下载水印源代码。
