Linux配置HTTPD
Apache服务器配置实验报告

在Linux下配置Apache服务器一、实验目的完成本次实训,将能够:●配置基本的Apache服务器●配置个人用户Web站点。
●配置虚拟目录别名功能。
●配置主机访问控制。
●配置用户身份验证功能.。
●配置基于IP地址的虚拟主机.二、实验环境1、RedHat Linux4AS.2、Apache 2.0三、实验内容1.配置基本的Apache服务器2.配置个人用户Web站点。
3.配置虚拟目录别名功能。
4.配置主机访问控制。
5.配置用户身份验证功能.。
6.配置基于IP地址的虚拟主机。
四、实验要求在Linux操作系统下配置Apache服务器。
五、注意事项1.在修配置文件下注意区分大小写、空格。
2.在每次重新开机后都必须启动Apachec服务器。
3.在每次修改完主配置文件后保存起来,必须重启Apachec服务器,如果不重启会导致配置无效,最终导致实验失败。
六、实验步骤1、检测是否安装了Apache软件包:A、首先为服务器网卡添加一个固定的IP地址。
B、在Web浏览器的地址栏中输入本机的IP地址,若出现Test Page测试页面(该网页文件的默认路径为var/www/html/index.html)如下图1所示就说明Apache已安装并已启动。
另一种方法是使用如下命令查看系统是否已经安装了Apache软件包:[root@rhe14~]# rpm –aq | grep httpdHttpd-suexec-2.0.52-9.entHttpd-manual-2.0.52-9.entSystem-config-httpd-1.3.1-1Httpd-devel-2.0.52-9.ent出现以上内容表明了系统已安装Apache软件包。
2、安装Apache软件包超级用户(root)在图形界面下选择“应用程序”|“系统设置”|“添加/删除应用程序”命令,选择“万维网服务器”软件包组,在单击“更新”按钮就可以安装与Apache相关的软件包。
Linux 主配置文件httpd.conf
Linux 主配置文件httpd.confhttpd.conf是最核心的配置文件,位于/etc/httpd/目录下。
像大多数的服务一样,几乎绝大部分的设置都需要通过修改该配置文件来完成。
Apache的主配置文件的内容有900多行,不过不用担心,因为绝大部分的内容是注释信息,而且注释内容相当丰富,用户完全可以通过注释来了解Apache的功能、语法以及使用。
对Apache服务器的配置,主要方式就是对httpd.conf配置文件的修改。
该文件是Apache服务器主要配置文件,包含各种影响服务器运行的配置选项,只有对这些配置信息进行理解,才能真正的掌握Apache服务器的配置。
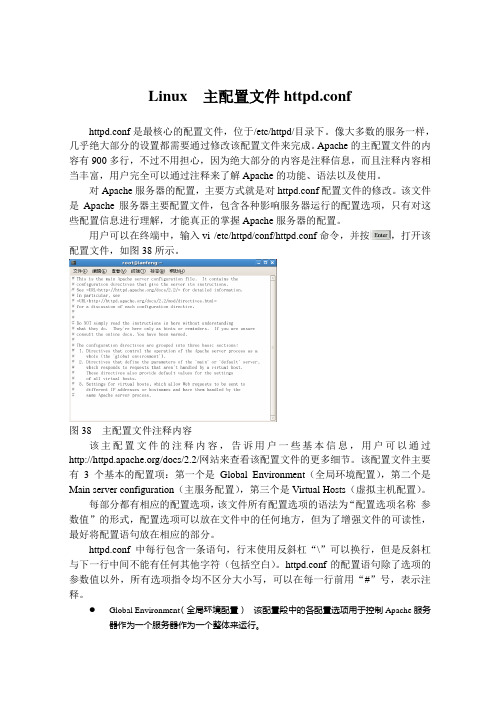
用户可以在终端中,输入vi /etc/httpd/conf/httpd.conf命令,并按,打开该配置文件,如图38所示。
图38 主配置文件注释内容该主配置文件的注释内容,告诉用户一些基本信息,用户可以通过/docs/2.2/网站来查看该配置文件的更多细节。
该配置文件主要有3个基本的配置项:第一个是Global Environment(全局环境配置),第二个是Main server configuration(主服务配置),第三个是Virtual Hosts(虚拟主机配置)。
每部分都有相应的配置选项,该文件所有配置选项的语法为“配置选项名称参数值”的形式,配置选项可以放在文件中的任何地方,但为了增强文件的可读性,最好将配置语句放在相应的部分。
httpd.conf中每行包含一条语句,行末使用反斜杠“\”可以换行,但是反斜杠与下一行中间不能有任何其他字符(包括空白)。
httpd.conf的配置语句除了选项的参数值以外,所有选项指令均不区分大小写,可以在每一行前用“#”号,表示注释。
Global Environment(全局环境配置)该配置段中的各配置选项用于控制Apache服务器作为一个服务器作为一个整体来运行。
●Main server configuration(主服务配置)该配置段中的各配置选项用于定义主要或者默认服务参数的,也为所有虚拟主机提供默认的设置参数。
虚拟机中如何在Linux上安装和配置Apache服务器
每日一句:I am a slow walker, but I never walk backwards.(我走得很慢,但从来不后退。
)一、本次配置a)操作系统:Linuxb)服务器:httpd-2.4.3.tar.gzc)APR:apr-1.4.6.tar.gzd)APR-Util:apr-util-1.5.1.tar.gze)PCRE:pcre-8.31.tar.gz二、Linux安装程序的基本步骤1、./configure --prefix=安装目录2、make3、make install三、Linux安装apache服务器步骤:1、gzip -d httpd- NN.tar.gz (阿帕奇服务器安装包)2、tar xvf httpd- NN.tar(执行第一步后出现这个文件)3、cd httpd- NN(执行完第二步后会产生一个服务器的目录,使用cd命令进入)4、安装程序的基本步骤5、安装目录/bin/apachectl -k start (启动服务器)6、测试。
打开浏览器输入http://服务器IP,如果出现It Works,则服务器安装成功7、安装过程中遇到的问题a)安装服务器时提示缺少apr文件(到官网下载后进行安装(还是按照安装步骤))b)安装apr时提示确实apr-util(到官网下载后进行安装(还是按照安装步骤))c)安装服务器时提示确实pcre(到官网下载后进行安装(还是按照安装步骤))四、配置apache的虚拟主机a)将“安装目录\conf\httpd.conf ”中“#Include etc/extra/httpd-vhosts.conf ”的#去掉。
这样才能使httpd-vhosts.conf文件起作用,或者直接在httpd.conf中写配置也可以(不建议这么做)b)在httpd-vhosts.conf中配置VirtualHost(注:Apache在接受到请求时,首先会默认第一个VirtualHost,然后再找匹配的,如果没有匹配的,默认就是第一个VirtualHost起作用)<VirtualHost *:80> #主机名ServerAdmin admin@ #如果服务器有任何问题将发信到这个地址DocumentRoot /www/ #虚拟主机的指向目录ServerName #访问主机的域名[:端口号]ServerAlias * #- -这个不知道是啥。
Linux下Apache服务的部署和配置
Linux下Apache服务的部署和配置⽬录1 Apache的作⽤2 Apache的安装3 apache的启⽤4 apache的基本信息5 apache的访问控制5.1 基于客户端ip的访问控制5.2 基于⽤户认证的访问控制6 apache的虚拟主机7 apache的加密访问8 ⽹页重写9 正向代理10 反向代理11 apache ⽀持的语⾔1 Apache的作⽤解析⽹页语⾔,如html,php,jsp等接收web⽤户的请求,并给予⼀定的响应2 Apache的安装安装apche软件:dnf install httpd.x86_64 -y3 apache的启⽤开启apache服务并设置开机启动:systemctl enable --now httpd查看apache服务的状态:systemctl enable --now httpd查看⽕墙信息:firewall-cmd --list-all 在⽕墙中永久开启http服务:firewall-cmd --permanent --add-service=http在⽕墙中永久开启https服务: f irewall-cmd --permanent --add-service=https在不改变当前⽕墙状态的情况下刷新防⽕墙:firewall-cmd --reload4 apache的基本信息apche的基本信息服务名称:httpd主配置⽂件:/etc/httpd/conf/httpd.conf⼦配置⽂件:/etc/httpd/conf.d/*.conf默认发布⽬录:/var/www/html默认端⼝:80 (http),443(https)⽇志⽂件:/etc/httpd/logs开启apche服务后,输⼊ip查看默认发布页⾯:(1)更改apche服务的端⼝号查看httpd服务的默认端⼝号:netstat -antlupe |grep httpd编辑配置⽂件:/etc/httpd/conf/httpd.conf,修改端⼝号重启httpd服务:systemctl restart httpd查看httpd服务的端⼝号:netsat -antlupe | grep httpd更改端⼝号后,输⼊ip后⽆法正常连接,原因是8080端⼝未添加在⽕墙中在防⽕墙⾥添加888端⼝号:firewall-cmd --permanent --add-port=888/tcp在不改变当前⽕墙状态的情况下刷新防⽕墙:firewall-cmd --reload输⼊IP地址:端⼝号,可以正常访问(2)修改apche的默认发布⽂件默认⽬录:cd /var/www/html在⽂件默认发布⽬录下新建⼀个⽂件index.html输⼊:http://172.25.254.144查看默认发布⽂件就是访问apache时没有指定⽂件名,即默认访问的⽂件,此⽂件可以指定多个,但有访问顺序。
Linux下Apache的安装与配置
Linux下Apache的安装与配置⼀、编译安装1、解决依赖关系⼆、后续操作1、启动httpd两种⽅法:第⼀种、/usr/local/apache/bin/apachectl start第⼆种⽅法:先修改http.pid⽂件位置打开配置⽂件增加⼀⾏vim /etc/httpd/httpd.conf 增加PidFile “/var/run/httpd.pid”为了启动httpd更加⽅便,#!/bin/bash## httpd Startup script for the Apache HTTP Server## chkconfig: - 85 15# description: Apache is a World Wide Web server. It is used to serve \# HTML files and CGI.# processname: httpd# config: /etc/httpd/conf/httpd.conf# config: /etc/sysconfig/httpd# pidfile: /var/run/httpd.pid# Source function library.. /etc/rc.d/init.d/functionsif [ -f /etc/sysconfig/httpd ]; then. /etc/sysconfig/httpdfi# Start httpd in the C locale by default.HTTPD_LANG=${HTTPD_LANG-"C"}# This will prevent initlog from swallowing up a pass-phrase prompt if# mod_ssl needs a pass-phrase from the user.INITLOG_ARGS=""# Set HTTPD=/usr/sbin/httpd.worker in /etc/sysconfig/httpd to use a server# with the thread-based "worker" MPM; BE WARNED that some modules may not# work correctly with a thread-based MPM; notably PHP will refuse to start.# Path to the apachectl script, server binary, and short-form for messages.apachectl=/usr/local/apache/bin/apachectlhttpd=${HTTPD-/usr/local/apache/bin/httpd}prog=httpdpidfile=${PIDFILE-/var/run/httpd.pid}lockfile=${LOCKFILE-/var/lock/subsys/httpd}RETVAL=0start() {echo -n $"Starting $prog: "LANG=$HTTPD_LANG daemon --pidfile=${pidfile} $httpd $OPTIONSRETVAL=$?echo[ $RETVAL = 0 ] && touch ${lockfile}return $RETVAL}stop() {echo -n $"Stopping $prog: "killproc -p ${pidfile} -d 10 $httpdRETVAL=$?echo[ $RETVAL = 0 ] && rm -f ${lockfile} ${pidfile}}reload() {echo -n $"Reloading $prog: "if ! LANG=$HTTPD_LANG $httpd $OPTIONS -t >&/dev/null; thenRETVAL=$?echo $"not reloading due to configuration syntax error"failure $"not reloading $httpd due to configuration syntax error"elsekillproc -p ${pidfile} $httpd -HUPRETVAL=$?fiecho}# See how we were called.case "$1" instart)start;;stop)stop;;status)status -p ${pidfile} $httpdRETVAL=$?;;restart)stopstart;;condrestart)if [ -f ${pidfile} ] ; thenstopstartfi;;reload)reload;;graceful|help|configtest|fullstatus)$apachectl $@RETVAL=$?;;*)echo $"Usage: $prog {start|stop|restart|condrestart|reload|status|fullstatus|graceful|help|configtest}" exit 1esacexit $RETVAL将以上代码加⼊到vim /etc/init.d/httpd中⽽后为此脚本赋予执⾏权限:chmod +x /etc/rc.d/init.d/httpd加⼊服务列表:chkconfig --add httpd给3,5启动chkconfig --level 3,5 httpd on最后加路径将 export PATH=$PATH:/usr/local/apache/binvim /etc/profile.d/httpd.sh完成后重新登录就可以了。
Ubuntu Linux Apache虚拟主机的安装配置档
Ubuntu Linux Apach虚拟主机的安装配置目标1.创建基于IP 的虚拟主机用于一个项目的整体测试2.创建基于用户的虚拟主机用于用户测试自己的代码开始创建虚拟主机的目录结构sudo /home/wwwcd /home/wwwsudo mkdir 192.168.0.251 192.168.0.252cd 192.168.0.251sudo mkdir cgi-bin htdocs logs dbcd ../192.168.0.252sudo mkdir cgi-bin htdocs logs dbtree /home/www/home/www|-- 192.168.0.251| |-- cgi-bin| |-- db| |-- htdocs| `-- logs`-- 192.168.0.252|-- cgi-bin|-- db|-- htdocs`-- logs1.要在192.168.0.251 和192.168.0.252 上创建两个基于IP 的虚拟主机,为了直观起见,在/home/www 下分别创建了目录192.168.0.251 和192.168.0.2522.cgi-bin 子目录用于存放CGI 脚本3.db 子目录用于存放SQLite 数据库4.htdocs 子目录用于存放站点文档5.logs 子目录用于存放站点日志创建虚拟主机的管理帐号并设置目录权限sudo useradd -g www-data -d /home/www/192.168.0.251 wuser1sudo useradd -g www-data -d /home/www/192.168.0.252 wuser2sudo passwd wuser1sudo passwd wuser2sudo chown -R wuser1.www-data /home/www/192.168.0.251sudo chown -R wuser2.www-data /home/www/192.168.0.2521.将192.168.0.251 虚拟主机的管理者赋予wuser1;将192.168.0.252 虚拟主机的管理者赋予wuser2;允许他们使用ssh 登录2.wuser1 和wuser2 的主组均设置为www-data,这样设置的方便之处在于:若站内有Apache 进程可写的内容,只需添加组可写权限即可配置虚拟网络接口和主机名解析使用如下命令:sudo vim /etc/network/interfaces添加如下的配置auto eth0:1iface eth0:1 inet staticaddress 192.168.0.251netmask 255.255.255.0network 192.168.0.0broadcast 192.168.0.255gateway 192.168.0.1auto eth0:2iface eth0:2 inet staticaddress 192.168.0.252netmask 255.255.255.0network 192.168.0.0broadcast 192.168.0.255gateway 192.168.0.1然后使用如下命令重新启动网络服务sudo /etc/init.d/networking restart然后在/etc/hosts 文件中添加如下的行192.168.0.251 web1192.168.0.252 web2配置ApacheS1. 在/etc/apache2/sites-available/ 目录下创建新的文件192.168.0.251,添加如下的配置/etc/apache2/sites-available/192.168.0.251DocumentRoot "/home/www/192.168.0.251/htdocs/"Options Indexes FollowSymLinks MultiViewsAllowOverride AllOrder allow,denyallow from allScriptAlias /cgi-bin/ /home/www/192.168.0.251/cgi-bin/AllowOverride NoneOptions +ExecCGI -MultiViews +SymLinksIfOwnerMatchOrder allow,denyAllow from allErrorLog /home/www/192.168.0.251/logs/error.logCustomLog /home/www/192.168.0.251/access.log combinedS2. 在/etc/apache2/sites-available/ 目录下创建新的文件192.168.0.252,添加如下的配置/etc/apache2/sites-available/192.168.0.252DocumentRoot "/home/www/192.168.0.252/htdocs/"Options Indexes FollowSymLinks MultiViewsAllowOverride AllOrder allow,denyallow from allScriptAlias /cgi-bin/ /home/www/192.168.0.252/cgi-bin/AllowOverride NoneOptions +ExecCGI -MultiViews +SymLinksIfOwnerMatchOrder allow,denyAllow from allErrorLog /home/www/192.168.0.252/logs/error.log CustomLog /home/www/192.168.0.252/access.log combinedS3. 重新启动Apachesudo a2enmod rewritesudo a2enmod php5sudo a2enmod perlsudo a2enmod mod_pythonsudo a2ensite 192.168.0.251sudo a2ensite 192.168.0.252sudo /etc/init.d/apache2 restart配置站点内容的上传FTP 服务器S1: 使用如下命令安装proftpdsudo apt-get install proftpd proftpd-docS2. 使用默认配置即可实现本地用户的上传和下载Samba 服务器S1. 使用如下命令sudo vi /etc/samba/smb.conf添加如下的配置行:/etc/samba/smb.conf[homes]comment = Home Directoriesbrowseable = nowritable = yescreate mask = 0644directory mask = 0755S2. 配置Samba 用户通过如下命令添加Samba 用户sudo smbpasswd -a wuser1sudo smbpasswd -a wuser2S3. 启动Samba 服务器sudo /etc/init.d/samba restart创建基于用户的虚拟主机*可能开发者在Windows 客户机没有创建开发环境*为了使每个开发者可以测试自己的代码,可以创建基于用户的虚拟主机创建用户帐号sudo useradd -g www-data -m user1sudo useradd -g www-data -m user2sudo passwd user1sudo passwd user21.用户需要在宿主目录下创建public_html 子目录,将Web 文档放入其中,可以通过URL http://IPorHostname/~username 访问自己的站点2.若进行CGI 开发,还需要在宿主目录下创建cgi-bin 子目录配置Apache使用如下命令启用userdir 模块即可sudo a2enmod userdir若进行CGI 开发,需要修改/etc/apache2/mods-available/userdir.confUserDir public_htmlUserDir disabled rootAllowOverride FileInfo AuthConfig LimitOptions MultiViews Indexes SymLinksIfOwnerMatch IncludesNoExec ScriptAliasMatch ~([a-z]+)/cgi-bin/(.*) /home/$1/cgi-bin/$2 # 添加此行,意思是匹配~user_name/cgi-bin/cgi_name自动映射到/home/user_name/cgi-bin/cgi-name脚本关于默认的虚拟主机Ubuntu 中文件/etc/apache2/sites-available/default 配置的是默认的虚拟主机。
Linux下Apache目录发布及相关问题

Apache目录发布及相关问题1.Apache目录发布1.1Apache相关文件1.2Apache相关命令1.3启动Apcahe目录浏览功能在目录/etc/httpd下创建文件夹test,且文件夹test里可多个文件,如testAlias"/etc/httpd/test "是要显示文件列表的目录,即需要发布的目录"Options Indexes"表示启用目录浏览"Order allow,deny"表示允许所有访问,除去明确拒绝的"IndexOptions Charset=UTF-8"设置字符集,以消除中文乱码"NameWidth=50"指定目录列表可以显示最长为25字节的文件/目录名点击test可以查看文件内容如下:Ps:如果需要发布其他目录(非/etc/httpd目录下),如目录/media,那么可以做如下操作:◆执行命令/usr/sbin/setenforce 0,关闭Selinux(若省略该步骤,则访问网页时会报403错误)1.4配置个人主页编辑主配置文件(/etc/httpd/conf/httpd.conf)▪(354行)注释UserDir Disable,即#UserDir Disable▪(361行)启动个人主目录名称,去掉UserDirPublic_html前面注释#▪(369-380行)启动个人用户Web站点的访问权限,去掉下面语句前面注释#浏览器输入地址:http://IP/~user,如下Ps:注意需要关闭SELinux,否则会报403错误。
(详见4.2)1.5发布默认站点下目录的内容进入默认根文档目录cd /var/www/html新建目录redhatmkdirredhat新建目录redhat下生成文件和目录touch redhat/file1 (生成文件file)mkdirredhat/dir1 (生成目录dir1)编辑主配置文件vi /etc/httpd/conf/httpd.conf主配置文件/etc/httpd/conf/httpd.conf末尾下增加配置<Directory /var/www/html/redhat>Options Indexes</Directory>tail -3 /etc/httpd/conf/httpd.conf(查看主配置文件倒数三行,即查看添加配置内容)重启Apache服务serciehttpd restart测试网页浏览器输入地址:http://IP/redhat,访问页面如下1.6配置目录的访问控制访问控制指令order deny,allow拒绝优先,默认拒绝,拒绝所有的访问(除了明确允许的)order allow,deny允许优先,默认允许,允许所有的访问(除了明确拒绝的)allow from IP允许的IP范围allow from 域名允许的域名范围allow from All允许所有deny from All拒绝所有对外发布目录主配置文件/etc/httpd/conf/httpd.conf末尾下增加配置<Directory /var/www/html/redhat>Options IndexesOrder deny,allowDeny from AllAllow from 192.168.128.128</Directory>重启Apacheserciehttpd restart测试网页1)浏览器输入地址:http://192.168.128.129/redhat,访问页面如下2)修改配置中“Allow from 192.168.128.129”后重启Apache,输入相同地址后再次访问,访问页面如下1.7配置目录的认证和授权认证指令AuthName认证名字AuthType认证类型,有两种⏹Basic,基本认证类型,所有浏览器均支持⏹Digest,摘要认证类型,部分浏览器不支持AuthUserFile认证用户文件,存放认证用户的列表文件Require valid-user授权给通过认证的所有用户Require user 用户名授权给通过认证的指定用户对外发布目录主配置文件/etc/httpd/conf/httpd.conf末尾下增加配置<Directory /var/www/html/redhat>Options IndexesAuthName“hyxu”AuthType BasicAuthUserFile file1Require valid-user</Directory>chownapache.apache /etc/httpd/file1重启Apacheserciehttpd restart测试网页1)浏览器输入地址:http://192.168.128.129/redhat,访问页面如下2)输入用户名haiyan及其密码后确定,进入如下页面1.8访问控制与认证授权结合访问控制、认证授权综合命令Satisfy any满足访问控制的条件或满足认证授权的条件,就可以访问指定页面、目录Satisfy all必须同时满足访问控制和认证授权的条件,才可以访问指定页面、目录 对外发布目录主配置文件/etc/httpd/conf/httpd.conf末尾下增加配置<Directory /var/www/html/redhat>Options IndexesOrder deny,allowDeny from AllAllow from 192.168.128.129AuthName“hyxu”AuthType Digest #必须为Digest,否则认证失败AuthUserFile file1Require valid-userSatisfy all</Directory>生成认证授权文件,同时添加用户chownapache.apache /etc/httpd/file1重启Apacheserciehttpd restart测试网页1)浏览器输入地址:http://192.168.128.129/redhat,访问页面如下2)输入用户名haiyan及其密码后确定,进入如下页面1.9 Include、.htaccess实例分割指令Include目录/文件名.conf⏹apache启动时,同时加载Include指令指定的目录下的以.conf结尾的文件⏹可以减少apache的主配置文件的容量.htaccess目录下的隐藏文件⏹可以减少apache服务的启动1.9.1Include实例查看主配置文件中配置在指定目录下生成文件并发布目录serciehttpd restart测试网页浏览器输入地址:http://192.168.128.129/hyxu,访问页面如下1.9.2.htaccess实例主配置文件中发布目录,添加使用.htaccess的指令serciehttpd restart测试网页浏览器输入地址:http://192.168.128.129/haiyan,访问页面如下2.Q&A2.1窗口最小化在面板上未能找到在面板上右击,选择“添加到面板”,打开面板管理器,找到“窗口列表”,选择它然后点击“添加”按钮就可以解决窗口最小化后消失的问题了。
Linux平台Apache高可用双机集群Tomcat负载均衡集群配置手册

Linux平台Apache双机高可用集群+ Tomcat负载均衡集群配置手册在这个配置手册中,使用的操作系统和软件清单如下:操作系统:RedHat Enterprise Linux AS4 U4 64bit(安装时最好选择完全安装)软件:jdk-1_5_0_15-linux-amd64.binTomcat5.5.26httpd-2.0.63.tar.gzjakarta-tomcat-connectors-jk2-src-current.tar.gzipvsadm-1.24.tar.gzlibnet.tar.gzheartbeat-2.1.3-3.el4.centos.x86_64.rpmheartbeat-pils-2.1.3-3.el4.centos.x86_64.rpmheartbeat-stonith-2.1.3-3.el4.centos.x86_64.rpm因为是linux操作系统,所以在安装软件时请使用对应自己操作系统内核的软件,这是整个集群成功的第一步。
本配置手册中的软件都是对应RedHat Enterprise Linux AS4 U4 64bit 这个版本的软件。
jdk-1_5_0_15-linux-amd64.binJAVA环境包使用的是64位1.5版Tomcat版本为公司指定的5.5版本Apache为2.0.63版jakarta-tomcat-connectors-jk2-src-current.tar.gz是连接Apache和Tomcat的连接插件,具体可以去Tomcat网站上查找下载ipvsadm-1.24.tar.gzlibnet.tar.gz这两个是用于2台Apache服务器虚拟一个IP地址使用heartbeat-2.1.3-3.el4.centos.x86_64.rpmheartbeat-pils-2.1.3-3.el4.centos.x86_64.rpmheartbeat-stonith-2.1.3-3.el4.centos.x86_64.rpm这3个软件是用于2台Apache服务器之间的心跳检测结构图Apache1以以以以以Tomcat1Tomcat2Apache22台Tomcat服务器使用Tomcat软件可以自己做集群,2台Apache服务器需要其他的软件实现虚拟服务器功能,工作站访问虚拟IP地址访问2台Apache服务器,再通过Apache服务器访问Tomcat服务器第3 页总13 页1.安装JAVA环境包1)输入命令:./ jdk-1_5_0_15-linux-amd64.bin执行完毕后,会在当前目录下生成一个JDK-1.5.0_15的文件夹2)在 /usr/local/下新建一个名字为JAVA文件夹,将个JDK-1.5.0_15的文件夹拷入到该文件夹下3)设置环境变量。
linux-Apache 配置
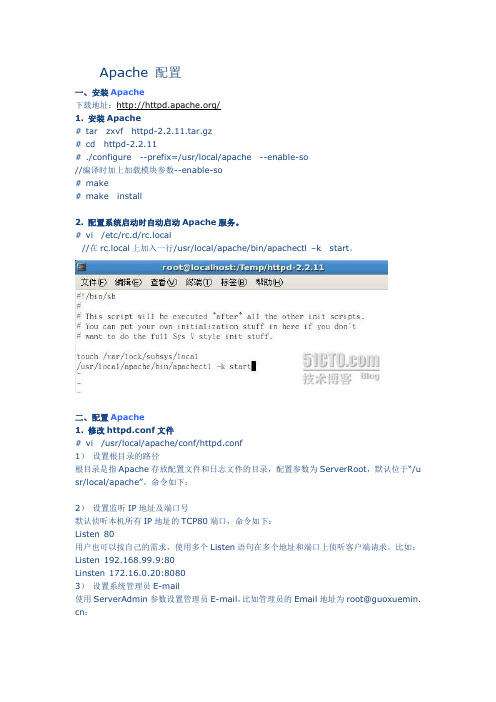
Apache 配置一、安装Apache下载地址:/1. 安装Apache# tar zxvf httpd-2.2.11.tar.gz# cd httpd-2.2.11# ./configure --prefix=/usr/local/apache --enable-so//编译时加上加载模块参数--enable-so# make# make install2. 配置系统启动时自动启动Apache服务。
# vi /etc/rc.d/rc.local//在rc.local上加入一行/usr/local/apache/bin/apachectl –k start。
二、配置Apache1. 修改httpd.conf文件# vi /usr/local/apache/conf/httpd.conf1)设置根目录的路径根目录是指Apache存放配置文件和日志文件的目录,配置参数为ServerRoot,默认位于“/u sr/local/apache”。
命令如下:2)设置监听IP地址及端口号默认侦听本机所有IP地址的TCP80端口,命令如下:Listen 80用户也可以按自己的需求,使用多个Listen语句在多个地址和端口上侦听客户端请求。
比如:Listen 192.168.99.9:80Linsten 172.16.0.20:80803)设置系统管理员E-m ail使用ServerAdmin参数设置管理员E-m ail,比如管理员的Email地址为root@guoxuemin. cn:4)设置服务器主机的名称参数ServerName用来设置服务器的主机名称,如果没有域名则填入服务器的IP地址,比如服务器的IP地址为192.168.99.9:5)设置主目录的路径用户可以使用参数Document Root配置服务器主目录默认路径,比如,主目录路径为:6)设置默认文件Apache的默认文件名为index.ht ml,可以使用Directory Index参数来配置,比如,将ind ex.php设置为默认文件名:7)测试:打开浏览器,输入地址:http://192.168.99.9,可以打开站点了:2. 配置目录权限使用<Directory 目录路径>和</Directory>设置目录的权限。
Linux下Apache,MySQL,PHP安装与配置
LAMP攻略: LAMP环境搭建,Linux下Apache,MySQL,PHP安装与配置之前写过一个red hat 9下的LAMP环境的配置,不过由于版本比较旧,很多不适用了。
所以决定写一个新的LAMP环境搭建与配置教程。
本配置是在CentOS-5.3下httpd-2.2.11.tar.gzMySQL-client-community-5.1.33-0.rhel5.i386.rpmMySQL-devel-community-5.1.33-0.rhel5.i386.rpmMySQL-server-community-5.1.33-0.rhel5.i386.rpmphp-5.2.9.tar.gz以上软件可以直接点击到下载页面下载。
这个配置也基本适用于相应的red hat as 5或fedora版本中的配置/*********************************************** 作者: 我不是鱼* LAMP中文网: * PHP爱好者站: * Email: deng5765@* 博客: /blog**********************************************/首先说明一下,这个需要会员,并且回复才可以完全查看。
不同意就不必再往下看了。
之前的一些配置教程中很多人都没有成功,发现大多问题都是出在本身,虽然对着教程做,但也粗心大意。
这个配置教程时我实践可行的,如果不成功请重新认真检查自己的步骤。
一般情况下,Linux默认安装了Apache。
如果已经安装Apache,那我们就先把它协卸载掉。
怎么知道是否已经安装呢?安装系统是软件都是通过rpm包安装的,所以可以通过命令rpm -qa | grep httpd-qa是指列出所以安装的软件,加上grep httpd,是只列出包含httpd 的所有软件。
如果大家还不熟悉这个命令的话可以记记,下面以及以后的配置都会用到。
Linux——搭建Apache(httpd)服务器
Linux——搭建Apache(httpd)服务器⼀、基本概念Apache(或httpd)是Internet上使⽤最多的Web服务器技术之⼀,使⽤的传输协议是http超⽂本传输协议(⼀个基于超⽂本的协议),⽤于通过⽹络连接来发送和接受对象。
有两个版本:http:超⽂本传输协议,通过线路以明⽂形式发送,默认情况下使⽤80/TCP(也可以使⽤其他端⼝)https:经TLS/SSL安全加密的超⽂本传输协议,默认情况下使⽤端⼝443/TCP⼆、了解Apache的配置⽂件1、配置⽂件的分类在Linux系统中配置服务,其实就是修改服务的配置⽂件,httpd服务程序的主要配置⽂件及存放位置如下:配置⽂件的名称存放位置服务⽬录/etc/httpd主配置⽂件/etc/httpd/conf/httpd.conf虚拟主机配置⽂件/etc/httpd/conf.d⽇志⽂件/etc/httpd/logs⽹站数据⽬录/var/www/html2、主配置⽂件的重要参数主配置⽂件/etc/httpd/conf/httpd.conf参数⽤途ServerRoot服务⽬录ServerAdmin管理员邮箱User运⾏服务的⽤户Group运⾏服务的⽤户组ServerName⽹站服务器的域名DocumentRoot⽂档根⽬录(⽹站数据⽬录)Directory⽹站数据⽬录的权限Listen监听的IP地址与端⼝号DirectoryIndex默认的索引页页⾯ErrorLog错误⽇志⽂件CustomLog访问⽇志⽂件Timeout⽹页超时时间,默认为300秒3、Directory标签<Directory "/var/www/html">AllowOverride None #设置.htaccess⽂件中的指令类型,None表⽰禁⽌使⽤.htaccess,该参数⼀般不改Require all granted #设置权限,默认开启所有客户机访问权限</Directory>三、如何配置Apache服务器⾸先准备:主机名、⽹络、yum源1、更改主机名:[root@localhost ~]# hostnamectl set-hostname $主机名[root@localhost ~]# bash #环境变量重载2、配置⽹络(1)虚拟交换机、⽹络适配器选择仅主机模式,并且配置为192.168.100.0⽹段;(2)编辑⽹络配置⽂件:[root@localhost ~]# vim /etc/sysconfig/network-scripts/ifcfg-ens33修改: BOOTPROTO=static #改为静态IP地址ONBOOT=yes #改为开机⾃启IPADDR=192.168.100.10PREFIX=24 或者 NETMASK=255.255.255.0(3)重启⽹络服务:[root@localhost ~]# systemctl restart network3、配置yum源(1)先在VMware⾥⾯把系统镜像⽂件连接到虚拟机的光驱上;(2)挂载光驱⾥的镜像:[root@localhost ~]# mount /dev/cdrom /media(3)修改yum源配置⽂件:[root@localhost ~]# vim /etc/yum.repos.d/local.repo[rhel]name=rhelbaseurl=file:///mediaenabled=1gpgcheck=0(4)清空yum源缓存信息:[root@localhost ~]# yum clean all(5)检索当前yum源信息:[root@localhost ~]# yum repolist任务⼀:配置简单的httpd服务1、安装httpd服务[root@server ~]# yum -y install httpd2、启动httpd服务[root@server ~]# systemctl restart httpd[root@server ~]# systemctl enable httpd3、配置防⽕墙[root@server ~]# firewall-cmd --permanent --add-service=http[root@server ~]# firewall-cmd --reload4、关闭SELinux[root@server ~]# setenforce 05、客户端测试[root@client ~]# firefox http://IP地址或者 curl http://IP地址任务⼆:配置基于⽤户的个⼈⽹站注意:该⽤户必须在Linux系统中存在1、新建⼀个⽤户(⽹站基于该⽤户)[root@server ~]# useradd user0[root@server ~]# passwd user02、修改⽤户的家⽬录权限,使其他⽤户具有读取和执⾏的权限[root@server ~]# chmod -R 705 /home/user03、创建存放⽤户个⼈主页空间的⽬录,写user0的⽹页⽂件[root@server ~]# mkdir /home/user0/public_html[root@server ~]# cd /home/user0/public_html[root@server ~]# echo "this is user0's web">>index.html4、修改基于⽤户的httpd配置⽂件[root@server ~]# vim /etc/httpd/conf.d/userdir.conf修改: UserDir enabled #开启,表⽰让httpd服务程序开启个⼈⽤户主页功能UserDir public_html #去注释,UserDir参数表⽰⽹站数据在⽤户家⽬录中的保存⽬录名称5、配置防⽕墙(同上)[root@server ~]# firewall-cmd --permanent --add-service=http[root@server ~]# firewall-cmd --reload6、修改selinux权限[root@server ~]# getsebool -a|grep home[root@server ~]# setsebool httpd_enable_homedirs on7、重启服务[root@server ~]# systemctl restart httpd8、客户端测试[root@client ~]# firefox http://IP地址/~username 或者curl http://IP地址/~username任务三:配置基于域名访问的虚拟主机1、新建虚拟主机的⽹页⽂件[root@server ~]# mkdir /www/one /www/two[root@server ~]# cd /www/one[root@server ~]# echo "this is a web for virtual host one">>index.html[root@server ~]# cd /www/two[root@server ~]# echo "this is a web for virtual host two">>index.html[root@server ~]# chmod o+x /www2、配置虚拟主机的⽂件[root@server ~]# cd /etc/httpd/conf.d[root@server ~]# vim vhost.conf<Directory /www/one> #设置⽹站⽬录权限Require all granted #开启所有客户机访问权限</Directory><VirtualHost 192.168.100.10> #虚拟主机ServerName #定义服务器名称DocumentRoot /www/one/ #⽹站数据⽬录</VirtualHost><Directory /www/two>Require all granted</Directory><VirtualHost 192.168.100.11>ServerName DocumentRoot /www/two/</VirtualHost>3、做域名解析⽂件server/client[root@server ~]# vim /etc/hosts192.168.100.10 192.168.100.11 4、配置防⽕墙(同上)[root@server ~]# firewall-cmd --permanent --add-service=http[root@server ~]# firewall-cmd --reload5、修改虚拟主机⽹页⽂件的selinux上下⽂类型[root@server ~]# semanage fcontext -a -t httpd_sys_content_t '/www(/.*)?'[root@server ~]# restorecon -RFv /www6、重启服务[root@server ~]# systemctl restart httpd任务四:配置基于端⼝访问的虚拟主机1——新建虚拟主机的⽹页⽂件[root@server ~]# mkdir /www/8088[root@server ~]# echo "this is a web for port 8088 ">>index.html[root@server ~]# mkdir /www/8089[root@server ~]# echo "this is a web for port 8089 ">>index.html2——配置虚拟主机的⽂件[root@server ~]# cd /etc/httpd/conf.d[root@server ~]# vim vhost.conf<Directory /www/8088/>Require all granted</Directory><virtualHost 192.168.100.10:8088>DocumentRoot /www/8088/</virtualHost><Directory /www/8089/>Require all granted</Directory><virtualHost 192.168.100.10:8089>DocumentRoot /www/8089/</virtualHost>3、配置防⽕墙[root@server ~]# firewall-cmd --permanent --zone=public --add-port=8089/tcp[root@server ~]# firewall-cmd --permanent --zone=public --add-port=8088/tcp[root@server ~]# firewall-cmd --reload4、关闭SELinux[root@server ~]# setenforce 05、重启服务[root@server ~]# systemctl restart httpd6、使⽤浏览器访问任务五:配置基于TLS加密的虚拟主机注意:经TLS/SSL安全加密的超⽂本传输协议,默认情况下使⽤端⼝443/TCP 1、安装TLS加密软件,⽹站内容不⽤明⽂传输[root@server ~]# yum -y install mod_ssl2、⽣成密钥[root@server ~]# openssl genrsa >tlsweb.key3、⽣成证书请求⽂件[root@server ~]# openssl req -new -key tlsweb.key > tlsweb.csr4、⽣成证书⽂件[root@server ~]# openssl req -x509 -days 365 -key tlsweb.key -in tlsweb.csr >tlsweb.crt5、修改ssl.conf配置⽂件[root@server ~]# vim /etc/httpd/conf.d/ssl.confSSLCertificateFile /etc/pki/tls/certs/tlsweb.crtSSLCertificateKeyFile /etc/pki/tls/private/tlsweb.key6、把证书⽂件拷贝到ssl.conf配置⽂件⾥的对应路径下⾯[root@server ~]# cp tlsweb.crt /etc/pki/tls/certs/7、把秘钥⽂件拷贝到ssl.conf配置⽂件⾥的对应路径下⾯[root@server ~]# cp tlsweb.key /etc/pki/tls/private/。
linux安装httpd软件包命令
linux安装httpd软件包命令推荐文章•LINUX操作系统如何修改HTTPD的端口热度:•LINUX操作系统如何启动HTTPD服务热度:•Debian安装闭源软件包的方法热度:•外秀路由器怎么安装使用教程方法热度:•安装劳务合同范本2022 热度:linux安装httpd软件包命令linux系统下httpd软件包的安装对于很多初学者来说是个难题,下面由店铺为大家整理了linux下安装httpd软件包命令的相关知识,希望大家喜欢!linux下安装httpd软件包命令首先先了解一下编译安装的基本步骤注意:可以仔细阅读README和 INSTALL文件的信息,了解有关副INSTALL文件里说明的步骤$ ./configure --prefix=PREFIX$ make$ make install$ PREFIX/bin/apachectl start以httpd软件为例。
1.首先获得httpd-2.4.4.tar.gzapr-1.5.0.tar.gzpcre-8.21.tar.bz2apr-util-1.5.3.tar.gz2.解压[root@localhost http]# tar xf httpd-2.4.9.tar.bz23.安装[***********************.4]#./configure--help可以查看你需要那些功能,以更好的满足你的需求[root@localhost httpd-2.4.9]# ./configure --prefix=/usr/local/ --enable-so --enable-cachechecking for chosen layout... Apachechecking for working mkdir -p... yeschecking for grep that handles long lines and -e... /bin/grep checking for egrep... /bin/grep -Echecking build system type... x86_64-unknown-linux-gnuchecking host system type... x86_64-unknown-linux-gnuchecking target system type... x86_64-unknown-linux-gnuconfigure:configure: Configuring Apache Portable Runtime library...configure:checking for APR... noconfigure: error: APR not found. Please read the documentation.此时缺少APR包,缺什么就装什么[root@localhost http]# tar xf apr-1.5.0.tar.gz[root@localhost apr-1.5.0]# ./configure --prefix=/usr/local/apr[*********************.0]#make[*********************.0]#makeinstall再次进入http-2.4.9的文件夹进行编译[root@localhost httpd-2.4.9]# ./configure --prefix=/usr/local/ --enable-so --enable-cachechecking for chosen layout... Apachechecking for working mkdir -p... yeschecking for grep that handles long lines and -e... /bin/grep checking for egrep... /bin/grep -Echecking build system type... x86_64-unknown-linux-gnuchecking host system type... x86_64-unknown-linux-gnuchecking target system type... x86_64-unknown-linux-gnuconfigure:configure: Configuring Apache Portable Runtime library...configure:checking for APR... yessetting CC to "gcc"setting CPP to "gcc -E"setting CFLAGS to " -g -O2 -pthread"setting CPPFLAGS to " -DLINUX -D_REENTRANT -D_GNU_SOURCE"setting LDFLAGS to " "configure:configure: Configuring Apache Portable Runtime Utility library...configure:checking for APR-util... noconfigure: error: APR-util not found. Please read the documentation.此时缺少APR-util包,缺什么装什么[root@localhost http]# tar xf apr-util-1.5.3.tar.gz[root@localhost apr-util-1.5.3]# ./configure --with-apr=/usr/local/apr/ 此处需要注意选项[**************************.3]#make[**************************.3]#makeinstall再次进入http-2.4.9安装[root@localhost httpd-2.4.9]# ./configure --prefix=/usr/local/ --enable-so --enable-cache出现了这种错误/apache --enable-cache --enable-so......configure: error: pcre-config for libpcre not found. PCRE is required and available from /此时需要安装pcre-8.21.tar.bz2[root@localhost httpd]# tar xf pcre-8.21.tar.bz2[***********************]#./configure[***********************]#make;makeinstalllibtool: compile: unrecognized option `-DHAVE_CONFIG_H‘libtool: compile: Try `libtool --help‘ for more information.make[1]: *** [pcrecpp.lo] 错误 1make[1]: Leaving directory `/meng/httpd/pcre-8.21‘make: *** [all] 错误 2source=‘‘ object=‘pcrecpp.lo‘ libtool=yes \ DEPDIR=.deps depmode=none /bin/sh ./depcomp \/bin/sh ./libtool --tag=CXX --mode=compile -DHAVE_CONFIG_H -I. -c -o pcrecpp.lo libtool: compile: unrecognized option `-DHAVE_CONFIG_H‘libtool: compile: Try `libtool --help‘ for more information.make: *** [pcrecpp.lo] 错误 1[***********************]#yuminstallgcc-c++再来一次[root@localhost httpd]# rm -rf pcre-8.21[root@localhost httpd]# tar xf pcre-8.21.tar.bz2[[root@localhost pcre-8.21]# ./configure [root@localhost pcre-8.21]# make ;make install[root@localhost httpd-2.4.9]# ./configure --prefix=/usr/local/apache --enable-so --enable-cache 总算成功了[***********************.9]#make;makeinstall安装成功[root@localhost httpd-2.4.9]# vim/usr/local/apache/conf/httpd.conf189GServerName :80 去掉#,增加域名[***********************.9]#/usr/local/bin/apachectlstart 启动httpd服务体验用elinks 或者firefox输入自己的IP地址登入自己的服务器。
Linux中HTTP服务配置

HTTP服务配置一、下载版本1、解压# cd /opt/software# tar zxvf http2.2.tar.gz2、配置# cd /opt/software/ http2.2#./configure --prefix=/usr/local/http2.23、编译#make4、安装#make install5、配置文件#vi /usr/local/http2.2/conf/httpd.conf6、启动#/usr/local/http2.2/bin/apachectl -k start二、Linux 自带http服务配置文件## This is the main Apache server configuration file. It contains the# configuration directives that give the server its instructions.# See <URL:/docs/2.2/> for detailed information.# In particular, see# <URL:/docs/2.2/mod/directives.html># for a discussion of each configuration directive.## Do NOT simply read the instructions in here without understanding# what they do. They're here only as hints or reminders. If you are unsure # consult the online docs. You have been warned.## The configuration directives are grouped into three basic sections:# 1. Directives that control the operation of the Apache server process as a # whole (the 'global environment').# 2. Directives that define the parameters of the 'main' or 'default' server, # which responds to requests that aren't handled by a virtual host.# These directives also provide default values for the settings# of all virtual hosts.# 3. Settings for virtual hosts, which allow Web requests to be sent to# different IP addresses or hostnames and have them handled by the# same Apache server process.## Configuration and logfile names: If the filenames you specify for many# of the server's control files begin with "/" (or "drive:/" for Win32), the# server will use that explicit path. If the filenames do *not* begin# with "/", the value of ServerRoot is prepended -- so "logs/foo.log"# with ServerRoot set to "/etc/httpd" will be interpreted by the# server as "/etc/httpd/logs/foo.log".#### Section 1: Global Environment# The directives in this section affect the overall operation of Apache,# such as the number of concurrent requests it can handle or where it# can find its configuration files.## Don't give away too much information about all the subcomponents# we are running. Comment out this line if you don't mind remote sites# finding out what major optional modules you are runningServerTokens OS //当服务器响应主机头(header)信息时显示Apache的版本和操作系统名称## ServerRoot: The top of the directory tree under which the server's# configuration, error, and log files are kept.## NOTE! If you intend to place this on an NFS (or otherwise network)# mounted filesystem then please read the LockFile documentation# (available at <URL:/docs/2.2/mod/mpm_common.html#lockfile>);# you will save yourself a lot of trouble.## Do NOT add a slash at the end of the directory path.ServerRoot "/etc/httpd" //设置服务器的根目录## PidFile: The file in which the server should record its process# identification number when it starts.#PidFile run/httpd.pid //设置运行Apache时使用的PidFile的路径## Timeout: The number of seconds before receives and sends time out.#Timeout 120 //若120秒后没有收到或送出任何数据就切断该连接## KeepAlive: Whether or not to allow persistent connections (more than# one request per connection). Set to "Off" to deactivate.#KeepAlive Off //不使用保持连接的功能,即客户一次请求连接只能响应一个文件/建议用户将此参数的值设置为On,即允许使用保持连接的功能## MaxKeepAliveRequests: The maximum number of requests to allow# during a persistent connection. Set to 0 to allow an unlimited amount.# We recommend you leave this number high, for maximum performance.#MaxKeepAliveRequests 100 //在使用保持连接功能时,设置客户一次请求连接能响应文件的最大上限## KeepAliveTimeout: Number of seconds to wait for the next request from the# same client on the same connection.#KeepAliveTimeout 15 //在使用保持连接功能时,两个相邻的连接的时间间隔超过15秒,就切断连接###Server-Pool Size Regulation (MPM specific)### prefork MPM# StartServers: number of server processes to start# MinSpareServers: minimum number of server processes which are kept spare# MaxSpareServers: maximum number of server processes which are kept spare# ServerLimit: maximum value for MaxClients for the lifetime of the server# MaxClients: maximum number of server processes allowed to start# MaxRequestsPerChild: maximum number of requests a server process serves//设置使用Prefork MPM运行方式的参数,此运行方式是Red hat默认的方式<IfModule prefork.c>StartServers 8 //设置服务器启动时运行的进程数MinSpareServers 5 //Apache在运行时会根据负载的轻重自动调整空闲子进程的数目//若存在低于5个空闲子进程,就创建一个新的子进程准备为客户提供服务MaxSpareServers 20 //若存在高于20个空闲子进程,就创建逐一删除子进程来提高系统性能ServerLimit 256MaxClients 256 //限制同一时间的连接数不能超过256MaxRequestsPerChild 4000 //限制每个子进程在结束处理请求之前能处理的连接请求为4000</IfModule># worker MPM# StartServers: initial number of server processes to start# MaxClients: maximum number of simultaneous client connections# MinSpareThreads: minimum number of worker threads which are kept spare# MaxSpareThreads: maximum number of worker threads which are kept spare# ThreadsPerChild: constant number of worker threads in each server process# MaxRequestsPerChild: maximum number of requests a server process serves//设置使用perchild MPM运行方式的参数<IfModule worker.c>StartServers 2MaxClients 150MinSpareThreads 25MaxSpareThreads 75ThreadsPerChild 25MaxRequestsPerChild 0</IfModule>## Listen: Allows you to bind Apache to specific IP addresses and/or# ports, in addition to the default. See also the <VirtualHost># directive.# Change this to Listen on specific IP addresses as shown below to# prevent Apache from glomming onto all bound IP addresses (0.0.0.0)##Listen 12.34.56.78:80Listen 90//设置服务器的监听端口## Dynamic Shared Object (DSO) Support //动态加载模块(DSO)## To be able to use the functionality of a module which was built as a DSO you # have to place corresponding `LoadModule' lines at this location so the# directives contained in it are actually available _before_ they are used.# Statically compiled modules (those listed by `httpd -l') do not need# to be loaded here.# Example:# LoadModule foo_module modules/mod_foo.so#LoadModule auth_basic_module modules/mod_auth_basic.soLoadModule auth_digest_module modules/mod_auth_digest.so LoadModule authn_file_module modules/mod_authn_file.soLoadModule authn_alias_module modules/mod_authn_alias.so LoadModule authn_anon_module modules/mod_authn_anon.so LoadModule authn_dbm_module modules/mod_authn_dbm.so LoadModule authn_default_module modules/mod_authn_default.so LoadModule authz_host_module modules/mod_authz_host.soLoadModule authz_user_module modules/mod_authz_user.soLoadModule authz_owner_module modules/mod_authz_owner.so LoadModule authz_groupfile_module modules/mod_authz_groupfile.so LoadModule authz_dbm_module modules/mod_authz_dbm.so LoadModule authz_default_module modules/mod_authz_default.so LoadModule ldap_module modules/mod_ldap.soLoadModule authnz_ldap_module modules/mod_authnz_ldap.so LoadModule include_module modules/mod_include.soLoadModule log_config_module modules/mod_log_config.soLoadModule logio_module modules/mod_logio.soLoadModule env_module modules/mod_env.soLoadModule ext_filter_module modules/mod_ext_filter.soLoadModule mime_magic_module modules/mod_mime_magic.so LoadModule expires_module modules/mod_expires.soLoadModule deflate_module modules/mod_deflate.soLoadModule headers_module modules/mod_headers.soLoadModule usertrack_module modules/mod_usertrack.soLoadModule setenvif_module modules/mod_setenvif.soLoadModule mime_module modules/mod_mime.soLoadModule dav_module modules/mod_dav.soLoadModule status_module modules/mod_status.soLoadModule autoindex_module modules/mod_autoindex.soLoadModule info_module modules/mod_info.soLoadModule dav_fs_module modules/mod_dav_fs.soLoadModule vhost_alias_module modules/mod_vhost_alias.so LoadModule negotiation_module modules/mod_negotiation.so LoadModule dir_module modules/mod_dir.soLoadModule actions_module modules/mod_actions.soLoadModule speling_module modules/mod_speling.soLoadModule userdir_module modules/mod_userdir.soLoadModule alias_module modules/mod_alias.soLoadModule rewrite_module modules/mod_rewrite.soLoadModule proxy_module modules/mod_proxy.soLoadModule proxy_balancer_module modules/mod_proxy_balancer.so LoadModule proxy_ftp_module modules/mod_proxy_ftp.soLoadModule proxy_http_module modules/mod_proxy_http.so LoadModule proxy_connect_module modules/mod_proxy_connect.so LoadModule cache_module modules/mod_cache.soLoadModule suexec_module modules/mod_suexec.soLoadModule disk_cache_module modules/mod_disk_cache.so LoadModule file_cache_module modules/mod_file_cache.so LoadModule mem_cache_module modules/mod_mem_cache.so LoadModule cgi_module modules/mod_cgi.soLoadModule version_module modules/mod_version.so## The following modules are not loaded by default:#LoadModule cern_meta_module modules/mod_cern_meta.so#LoadModule asis_module modules/mod_asis.so## Load config files from the config directory "/etc/httpd/conf.d".//将/etc/httpd/conf.d目录下所有以conf结尾的配置文件包含进来Include conf.d/*.conf## ExtendedStatus controls whether Apache will generate "full" status# information (ExtendedStatus On) or just basic information (ExtendedStatus # Off) when the "server-status" handler is called. The default is Off.##ExtendedStatus On## If you wish httpd to run as a different user or group, you must run# httpd as root initially and it will switch.## User/Group: The name (or #number) of the user/group to run httpd as.# . On SCO (ODT 3) use "User nouser" and "Group nogroup".# . On HPUX you may not be able to use shared memory as nobody, and the # suggested workaround is to create a user www and use that user.# NOTE that some kernels refuse to setgid(Group) or semctl(IPC_SET)# when the value of (unsigned)Group is above 60000;# don't use Group #-1 on these systems!//设置运行Apache服务器的用户和组User apacheGroup apache### Section 2: 'Main' server configuration# The directives in this section set up the values used by the 'main'# server, which responds to any requests that aren't handled by a# <VirtualHost> definition. These values also provide defaults for# any <VirtualHost> containers you may define later in the file.## All of these directives may appear inside <VirtualHost> containers,# in which case these default settings will be overridden for the# virtual host being defined.## ServerAdmin: Your address, where problems with the server should be# e-mailed. This address appears on some server-generated pages, such# as error documents. e.g. admin@//设置Apache服务器管理员的E_mail地址ServerAdmin root@localhost## ServerName gives the name and port that the server uses to identify itself. # This can often be determined automatically, but we recommend you specify # it explicitly to prevent problems during startup.## If this is not set to valid DNS name for your host, server-generated# redirections will not work. See also the UseCanonicalName directive.## If your host doesn't have a registered DNS name, enter its IP address here. # You will have to access it by its address anyway, and this will make# redirections work in a sensible way.##ServerName :80ServerName 172.27.120.30## UseCanonicalName: Determines how Apache constructs self-referencing# URLs and the SERVER_NAME and SERVER_PORT variables.# When set "Off", Apache will use the Hostname and Port supplied# by the client. When set "On", Apache will use the value of the# ServerName directive.//关闭此选项,当Apache服务器需要指向本身的连接时使用//serverName:port作为主机名,例如:80//若打开此选项将使用 port 80作为主机名UseCanonicalName Off## DocumentRoot: The directory out of which you will serve your# documents. By default, all requests are taken from this directory, but# symbolic links and aliases may be used to point to other locations.//设置根文档路径DocumentRoot "/var/www/html"## Each directory to which Apache has access can be configured with respect# to which services and features are allowed and/or disabled in that# directory (and its subdirectories).# First, we configure the "default" to be a very restrictive set of# features.//设置apache服务器根的访问权限<Directory />Options FollowSymLinks //允许符号链接跟随,访问不在本目录下的文件AllowOverride None //禁止读取.htaccess配置文件的内容</Directory>## Note that from this point forward you must specifically allow# particular features to be enabled - so if something's not working as# you might expect, make sure that you have specifically enabled it# below.# This should be changed to whatever you set DocumentRoot to.//设置根文档目录的访问权限<Directory "/var/www/html">## Possible values for the Options directive are "None", "All",# or any combination of:# Indexes Includes FollowSymLinks SymLinksifOwnerMatch ExecCGI MultiViews # Note that "MultiViews" must be named *explicitly* --- "Options All"# doesn't give it to you.## The Options directive is both complicated and important. Please see# /docs/2.2/mod/core.html#options# for more information.//Indexes:当在目录中找不到DirectoryIndex列表中指定的文件就生成当前目录的文件列表//FollowSymLinks允许符号链接跟随,访问不在本目录下的文件Options Indexes FollowSymLinks## AllowOverride controls what directives may be placed in .htaccess files.# It can be "All", "None", or any combination of the keywords:# Options FileInfo AuthConfig LimitAllowOverride None //禁止读取.htaccess配置文件的内容## Controls who can get stuff from this server.#Order allow,deny //指定先执行Allow(允许)访问规则,在执行Deny访问规则Allow from all //设置Allow(允许)访问规则,允许所有连接</Directory>## UserDir: The name of the directory that is appended onto a user's home# directory if a ~user request is received.## The path to the end user account 'public_html' directory must be# accessible to the webserver userid. This usually means that ~userid# must have permissions of 711, ~userid/public_html must have permissions# of 755, and documents contained therein must be world-readable.# Otherwise, the client will only receive a "403 Forbidden" message.## See also: /docs/misc/FAQ.html#forbidden//不允许每用户的服务器配置<IfModule mod_userdir.c># UserDir is disabled by default since it can confirm the presence# of a username on the system (depending on home directory# permissions).UserDir disable //不允许每用户的服务器配置#//基于安全考虑,禁止root用户使用自己的个人站点#UserDir disable root# To enable requests to /~user/ to serve the user's public_html# directory, remove the "UserDir disable" line above, and uncomment# the following line instead:#//配置对每个用户web站点目录的设置#UserDir public_html</IfModule>## Control access to UserDir directories. The following is an example# for a site where these directories are restricted to read-only.//设置对每个用户web站点目录的访问权限#<Directory /home/*/public_html># AllowOverride FileInfo AuthConfig Limit# Options MultiViews Indexes SymLinksIfOwnerMatch IncludesNoExec# <Limit GET POST OPTIONS># Order allow,deny# Allow from all# </Limit># <LimitExcept GET POST OPTIONS># Order deny,allow# Deny from all# </LimitExcept>#</Directory>## DirectoryIndex: sets the file that Apache will serve if a directory# is requested.## The index.html.var file (a type-map) is used to deliver content-# negotiated documents. The MultiViews Option can be used for the# same purpose, but it is much slower.#//当访问服务器时,依次查找页面Index.html index.htm.var DirectoryIndex index.html index.html.var## AccessFileName: The name of the file to look for in each directory# for additional configuration directives. See also the AllowOverride# directive.#//指定保护目录配置文件的名称AccessFileName .htaccess## The following lines prevent .htaccess and .htpasswd files from being# viewed by Web clients.#//拒绝访问以.ht开头的文件,即保证.htaccess不被访问<Files ~ "^\.ht">Order allow,denyDeny from all</Files>## TypesConfig describes where the mime.types file (or equivalent) is# to be found.#//指定负责处理MIME对应格式的配置文件的存放位置TypesConfig /etc/mime.types## DefaultType is the default MIME type the server will use for a document # if it cannot otherwise determine one, such as from filename extensions. # If your server contains mostly text or HTML documents, "text/plain" is # a good value. If most of your content is binary, such as applications# or images, you may want to use "application/octet-stream" instead to# keep browsers from trying to display binary files as though they are# text.#//指定默认的MIME文件类型为纯文本或HTML文件DefaultType text/plain## The mod_mime_magic module allows the server to use various hints from the # contents of the file itself to determine its type. The MIMEMagicFile# directive tells the module where the hint definitions are located.#//当mod_mime_magic.c模块被加载时,指定magic信息码配置文件的存放位置<IfModule mod_mime_magic.c># MIMEMagicFile /usr/share/magic.mimeMIMEMagicFile conf/magic</IfModule>## HostnameLookups: Log the names of clients or just their IP addresses# e.g., (on) or 204.62.129.132 (off).# The default is off because it'd be overall better for the net if people# had to knowingly turn this feature on, since enabling it means that# each client request will result in AT LEAST one lookup request to the# nameserver.#//只记录连接Apache服务器的Ip地址,而不纪录主机名HostnameLookups Off## EnableMMAP: Control whether memory-mapping is used to deliver# files (assuming that the underlying OS supports it).# The default is on; turn this off if you serve from NFS-mounted# filesystems. On some systems, turning it off (regardless of# filesystem) can improve performance; for details, please see# /docs/2.2/mod/core.html#enablemmap##EnableMMAP off## EnableSendfile: Control whether the sendfile kernel support is# used to deliver files (assuming that the OS supports it).# The default is on; turn this off if you serve from NFS-mounted# filesystems. Please see# /docs/2.2/mod/core.html#enablesendfile##EnableSendfile off## ErrorLog: The location of the error log file.# If you do not specify an ErrorLog directive within a <VirtualHost># container, error messages relating to that virtual host will be# logged here. If you *do* define an error logfile for a <VirtualHost># container, that host's errors will be logged there and not here.#//指定错误日志存放位置ErrorLog logs/error_log## LogLevel: Control the number of messages logged to the error_log.# Possible values include: debug, info, notice, warn, error, crit,# alert, emerg.#//指定记录的错误信息的详细等级为warn等级LogLevel warn## The following directives define some format nicknames for use with# a CustomLog directive (see below).#//定义四中记录日志的格式LogFormat "%h %l %u %t \"%r\" %>s %b \"%{Referer}i\" \"%{User-Agent}i\"" combined LogFormat "%h %l %u %t \"%r\" %>s %b" commonLogFormat "%{Referer}i -> %U" refererLogFormat "%{User-agent}i" agent# "combinedio" includes actual counts of actual bytes received (%I) and sent (%O); this# requires the mod_logio module to be loaded.#LogFormat "%h %l %u %t \"%r\" %>s %b \"%{Referer}i\" \"%{User-Agent}i\" %I %O" #combinedio## The location and format of the access logfile (Common Logfile Format).# If you do not define any access logfiles within a <VirtualHost># container, they will be logged here. Contrariwise, if you *do*# define per-<VirtualHost> access logfiles, transactions will be# logged therein and *not* in this file.#//指定访问日志的纪录格式为combined(混合型),并指定访问日志存放位置#CustomLog logs/access_log common## If you would like to have separate agent and referer logfiles, uncomment# the following directives.##CustomLog logs/referer_log referer#CustomLog logs/agent_log agent# For a single logfile with access, agent, and referer information# (Combined Logfile Format), use the following directive:#CustomLog logs/access_log combined## Optionally add a line containing the server version and virtual host# name to server-generated pages (internal error documents, FTP directory# listings, mod_status and mod_info output etc., but not CGI generated# documents or custom error documents).# Set to "EMail" to also include a mailto: link to the ServerAdmin.# Set to one of: On | Off | EMail#//设置apache自己产生的页面中使用apache服务器版本的签名ServerSignature On## Aliases: Add here as many aliases as you need (with no limit). The format is# Alias fakename realname## Note that if you include a trailing / on fakename then the server will# require it to be present in the URL. So "/icons" isn't aliased in this# example, only "/icons/". If the fakename is slash-terminated, then the# realname must also be slash terminated, and if the fakename omits the# trailing slash, the realname must also omit it.## We include the /icons/ alias for FancyIndexed directory listings. If you# do not use FancyIndexing, you may comment this out.#//设置内容协商目录的访问别名Alias /icons/ "/var/www/icons/"#//设置/var/www/icons/的访问权限<Directory "/var/www/icons">Options Indexes MultiViews //MultiViews 使用内容协商功决定被发送的网页的性质AllowOverride NoneOrder allow,denyAllow from all</Directory>## WebDAV module configuration section.# //指定DAV加锁数据库文件的存放位置<IfModule mod_dav_fs.c># Location of the WebDA V lock database.DA VLockDB /var/lib/dav/lockdb</IfModule>## ScriptAlias: This controls which directories contain server scripts.# ScriptAliases are essentially the same as Aliases, except that# documents in the realname directory are treated as applications and# run by the server when requested rather than as documents sent to the client.# The same rules about trailing "/" apply to ScriptAlias directives as to# Alias.#//设置CGI目录的访问别名ScriptAlias /cgi-bin/ "/var/www/cgi-bin/"## "/var/www/cgi-bin" should be changed to whatever your ScriptAliased# CGI directory exists, if you have that configured.#//设置CGI目录的访问权限<Directory "/var/www/cgi-bin">AllowOverride NoneOptions NoneOrder allow,denyAllow from all</Directory>## Redirect allows you to tell clients about documents which used to exist in # your server's namespace, but do not anymore. This allows you to tell the # clients where to look for the relocated document.# Example:#//重定向连接# Redirect permanent /foo /bar## Directives controlling the display of server-generated directory listings. ### IndexOptions: Controls the appearance of server-generated directory# listings.#//设置自动生成目录列表的显示方式//FancyIndexing 对每种类型的文件前加上一个小图标以示区别//VersionSort 对同一个软件的多个版本进行排序//NameWidth=* 文件名字段自动适应当前目录下的最长文件名IndexOptions FancyIndexing VersionSort NameWidth=* HTMLTable## AddIcon* directives tell the server which icon to show for different# files or filename extensions. These are only displayed for# FancyIndexed directories.#//当使用IndexOptions FancyIndexing之后,配置下面的参数//用于告知服务器在遇到不同的文件类型或扩展名时采用MIME编码格式//辨别文件类型并显示相应的图标AddIconByEncoding (CMP,/icons/compressed.gif) x-compress x-gzipAddIconByType (TXT,/icons/text.gif) text/*AddIconByType (IMG,/icons/image2.gif) image/*AddIconByType (SND,/icons/sound2.gif) audio/*AddIconByType (VID,/icons/movie.gif) video/*//当使用IndexOptions FancyIndexing之后,配置下面的参数//用于告知服务器在遇到不同的文件类型或扩展名时采用所指定的格式//并显示相应的图标AddIcon /icons/binary.gif .bin .exeAddIcon /icons/binhex.gif .hqxAddIcon /icons/tar.gif .tarAddIcon /icons/world2.gif .wrl .wrl.gz .vrml .vrm .ivAddIcon /icons/compressed.gif .Z .z .tgz .gz .zipAddIcon /icons/a.gif .ps .ai .epsAddIcon /icons/layout.gif .html .shtml .htm .pdfAddIcon /icons/text.gif .txtAddIcon /icons/c.gif .cAddIcon /icons/p.gif .pl .pyAddIcon /icons/f.gif .forAddIcon /icons/dvi.gif .dviAddIcon /icons/uuencoded.gif .uuAddIcon /icons/script.gif .conf .sh .shar .csh .ksh .tclAddIcon /icons/tex.gif .texAddIcon /icons/bomb.gif coreAddIcon /icons/back.gif ..AddIcon /icons/hand.right.gif READMEAddIcon /icons/folder.gif ^^DIRECTORY^^AddIcon /icons/blank.gif ^^BLANKICON^^# DefaultIcon is which icon to show for files which do not have an icon# explicitly set.#//当使用IndexOptions FancyIndexing之后,且无法识别文件类型时//显示此处定义的图标DefaultIcon /icons/unknown.gif## AddDescription allows you to place a short description after a file in# server-generated indexes. These are only displayed for FancyIndexed# directories.# Format: AddDescription "description" filename##AddDescription "GZIP compressed document" .gz#AddDescription "tar archive" .tar#AddDescription "GZIP compressed tar archive" .tgz## ReadmeName is the name of the README file the server will look for by # default, and append to directory listings.## HeaderName is the name of a file which should be prepended to# directory indexes.//当服务器自动列出目录列表时,在所生成的页面之后显示readme.html的内容ReadmeName README.html//当服务器自动列出目录列表时,在所生成的页面之前显示header.html的内容HeaderName HEADER.html## IndexIgnore is a set of filenames which directory indexing should ignore # and not include in the listing. Shell-style wildcarding is permitted.#IndexIgnore .??* *~ *# HEADER* README* RCS CVS *,v *,t## DefaultLanguage and AddLanguage allows you to specify the language of # a document. You can then use content negotiation to give a browser a# file in a language the user can understand.## Specify a default language. This means that all data# going out without a specific language tag (see below) will# be marked with this one. You probably do NOT want to set# this unless you are sure it is correct for all cases.## * It is generally better to not mark a page as# * being a certain language than marking it with the wrong# * language!#DefaultLanguage zh-CN## Note 1: The suffix does not have to be the same as the language# keyword --- those with documents in Polish (whose net-standard# language code is pl) may wish to use "AddLanguage pl .po" to# avoid the ambiguity with the common suffix for perl scripts.## Note 2: The example entries below illustrate that in some cases# the two character 'Language' abbreviation is not identical to# the two character 'Country' code for its country,# E.g. 'Danmark/dk' versus 'Danish/da'.## Note 3: In the case of 'ltz' we violate the RFC by using a three char# specifier. There is 'work in progress' to fix this and get# the reference data for rfc1766 cleaned up.## Catalan (ca) - Croatian (hr) - Czech (cs) - Danish (da) - Dutch (nl)# English (en) - Esperanto (eo) - Estonian (et) - French (fr) - German (de) # Greek-Modern (el) - Hebrew (he) - Italian (it) - Japanese (ja)# Korean (ko) - Luxembourgeois* (ltz) - Norwegian Nynorsk (nn)# Norwegian (no) - Polish (pl) - Portugese (pt)# Brazilian Portuguese (pt-BR) - Russian (ru) - Swedish (sv)# Simplified Chinese (zh-CN) - Spanish (es) - Traditional Chinese (zh-TW) #//设置网页内容的语言种类(浏览器要启用内容协商)//对中文网页,此项无实际意义AddLanguage ca .ca。
Linux网站服务虚拟主机,访问限制web

准备环境:1.搭建httpd2.搭建awstats一、web服务器的访问控制(一)IP地址限制[root@localhost tools]# vim /usr/local/httpd/conf/httpd.conf 编辑文件修改:<Directory "/usr/local/awstats/wwwroot">Options NoneAllowOverride NoneOrder deny,allowDeny from 192.168.1.2/24</Directory>[root@localhost tools]# /usr/local/bin/apachectl stop 关闭服务[root@localhost tools]# /usr/local/bin/apachectl start 启动服务验证:(二)用户权限限制[root@localhost ~]# cd /usr/local/httpd/创建hehe用户认证数据文库[root@localhost httpd]# bin/htpasswd -c /usr/local/httpd/conf/.awspwd hehe New password:Re-type new password:Adding password for user hehe[root@localhost httpd]# bin/htpasswd /usr/local/httpd/conf/.awspwd haha New password:Re-type new password:Adding password for user haha[root@localhost httpd]# vim /usr/local/httpd/conf/httpd.conf添加:<Directory "/usr/local/awstats/wwwroot">Options NoneAllowOverride NoneOrder allow,denyallow from allAuthName "qing wo chi fan" 描述信息AuthType Basic 启用基本认证AuthUserFile /usr/local/httpd/conf/.awspwd 读取用户数据文件require valid-user 通过认证的将能正常访问</Directory>验证:二、虚拟主机(一)基于域名[root@www ~]# vim /usr/local/httpd/conf/extra/httpd-vhosts.conf NameVirtualHost 192.168.1.1:80<Directory "/www">Order allow,denyallow from all</Directory><VirtualHost 192.168.1.1:80>DocumentRoot "/www/benet"ServerName ErrorLog "logs/-error_log"CustomLog "logs/-access_log" common</VirtualHost><VirtualHost 192.168.1.1:80>DocumentRoot "/www/accp"ServerName ErrorLog "logs/-error_log"CustomLog "logs/-access_log" common</VirtualHost>[root@www ~]# /usr/local/httpd/bin/apachectl stop[root@www ~]# /usr/local/httpd/bin/apachectl start客户端验证://(二)基于IP[root@www ~]# vim /usr/local/httpd/conf/extra/httpd-vhosts.conf NameVirtualHost 192.168.1.1:80<VirtualHost 192.168.1.1:80>DocumentRoot "/www/benet"ServerName ErrorLog "logs/-error_log"CustomLog "logs/-access_log" common</VirtualHost><VirtualHost 192.168.2.1:80>DocumentRoot "/www/accp"ServerName ErrorLog "logs/-error_log"CustomLog "logs/-access_log" common</VirtualHost>[root@www ~]# /usr/local/httpd/bin/apachectl stop[root@www ~]# /usr/local/httpd/bin/apachectl start客户端验证:http://192.168.1.1/http://192.168.2.1/(三)基于端口[root@www ~]# vim /usr/local/httpd/conf/extra/httpd-vhosts.conf listen 8080<VirtualHost 192.168.1.1:80>DocumentRoot "/www/benet"ServerName ErrorLog "logs/-error_log"CustomLog "logs/-access_log" common</VirtualHost><VirtualHost 192.168.1.1:8080>DocumentRoot "/www/accp"ServerName ErrorLog "logs/-error_log"CustomLog "logs/-access_log" common</VirtualHost>[root@www ~]# /usr/local/httpd/bin/apachectl stop[root@www ~]# /usr/local/httpd/bin/apachectl start客户端验证:http://192.168.1.1:80/。
Linux1 WEB服务器 Apache基本应用

Linux1 WEB服务器Apache基本应用在Red Hat Enterprise 5.4中配置Apache web服务器,有许多种方式,用户可通过修改主配置文件httpd.conf,对Apache服务器进行配置。
另外,也可通过图形界面配置工具对Apache服务器进行配置。
下面就来学习,通过修改httpd.conf主配置文件,对Apache服务器进行配置。
1.修改http.conf文件用户可以在终端中,输入“vi /etc/httpd/conf/httpd.conf”命令,并按【回车】键,打开该文件,如图7-54所示。
图7-54 打开配置文件在该配置文件中,找到DocumentRoot配置选项,默认网页文档主目录的路径/var/www/html,如图7-55所示。
图7-55 设置网页文档存放路径在该配置文件中,找到DirectoryIndex配置选项,默认首页文档的类型,如图7-56所示。
图7-56 设置首页文档的类型提示如果用户要在Apache服务器上挂载php或jsp类型的网页,可以在该选项后面添加index.hph和index.jsp参数,但前提是该服务器必须支持该类型的网站。
在该配置文件中,找到Listen配置选项,默认设置Apache服务器监听80端口(Listen 80),如图7-57所示。
图7-57 设置监听端口号在该配置文件中,找到ServerRoot配置选项,默认设置Apache服务器相应的配置文件存放目录(ServerRoot “/etc/httpd”),如图7-58所示。
图7-58 设置服务器根目录在该配置文件中,找到ErrorLog logs配置选项,默认设置错误日志的路径为/error_log(ErrorLog logs/error_log),如图7-59所示。
图7-59 设置错误日志路径在该配置文件中,找到CustomLog logs配置选项,默认设置访问日志为/access_log,如图7-60所示。
httpd.conf配置完美详解

httpd.conf配置完美详解Linux下httpd.conf 配置详解1. 关于本文本文将以Apache 2.2为例,以rhel5为平台,讲述Apache服务器的安装和设置。
2. 关于ApacheApache 是一款功能强大、稳定、可支撑关键任务的Web服务器Apache具有如下特性:1) 几乎可以运行在所有的计算机平台上.2) 支持最新的HTTP/1.1协议3) 简单而且强有力的基于文件的配置(HTTPD.CONF).4) 支持通用网关接口(CGI)5) 支持虚拟主机.6) 支持HTTP认证.7) 集成PERL.8) 集成的代理服务器9) 可以通过WEB浏览器监视服务器的状态, 可以自定义日志.10) 支持服务器端包含命令(SSI).11) 支持安全SOCKET层(SSL).12) 具有用户会话过程的跟踪能力.13) 支持FASTCGI14) 支持JAVA SERVLETS.……更多信息请参阅Apache网站:/doc/327020310.html,3. Apache的安装Apache的安装无外两种方式:源码包安装和二进制包安装。
这两种方式各有特色,二位制包安装不需编译,针对不同的平台有经过优化编译的不同的二进制文件以及包格式,安装简单方便,源码包则必须先配置编译再安装,可以根据你所用的主机环境进行优化、选择你所用的模块,安装定制更灵活。
下面分别介绍这两种安装方式。
3.1 以源码包方式安装3.1.1 下载最新版本的apache软件访问apahce网站/doc/327020310.html,/download.cgi下载最新版本的Apache源码包。
本文使用的是2.2.6版本,在linux系统下用下面的命令下载:wget /doc/327020310.html,/httpd/httpd-2.2.6.tar.gz3.1.2 解压缩下载的源码包首先建立一个工作目录( 笔者建议的目录为/usr/local/src/apache ) :mkdir -p /usr/local/src/apache 将下载的源码包移至工作目录:mv httpd-2.2.6.tar.gz /usr/local/src/apache进入工作目录并用tar命令解压源码包:cd /usr/local/src/apachetar zxvf httpd-2.2.6.tar.gz命令执行结束后,当前工作目录下将生成一个新的子目录httpd-2.2.6,此目录下即为Apache的源码文件。
Linux下apache2.2.15+tomcat6.0.26+jdk-6u20安装配置文档

apache2.2.15+tomcat6.0.26+jdk-6u20+tomcat-connectors-1.2.30+ apr-1.4.2.tar.gz+ apr-util-1.3.9.tar.gz[root@hostserver Tools]# lltotal 125304-rw-r--r-- 1 root root 6123410 Apr 19 06:16 apache-tomcat-6.0.26.tar.gz-rw-r--r-- 1 root root 6593633 Apr 19 06:16 httpd-2.2.15.tar.gz-rw-r--r-- 1 root root 9280000 Apr 19 06:16 apr-1.4.2.tar.gz-rw-r--r-- 1 root root 7730000 Apr 19 06:16 apr-util-1.3.9.tar.gz-rw-r--r-- 1 root root 84796967 Apr 19 06:18 jdk-6u20-linux-i586.bin-rw-r--r-- 1 root root 29050568 Jan 23 12:13 mysql-5.1.30.tar.tar-rw-r--r-- 1 root root 1566749 Apr 19 06:16 tomcat-connectors-1.2.30-src.tar.gz[root@hostserver Tools]# cp jdk-6u20-linux-i586.bin /usr/local/[root@hostserver Tools]# cp httpd-2.2.15.tar.gz /usr/local/[root@hostserver Tools]# cp apache-tomcat-6.0.26.tar.gz /usr/local/[root@hostserver Tools]# cp tomcat-connectors-1.2.30-src.tar.gz /usr/local/[root@hostserver Tools]# cp mysql-5.1.30.tar.tar /usr/local/[root@hostserver Tools]# cd /usr/local/[root@hostserver Tools]# cd /usr/local/所有包都在此目录下[root@hostserver local]# ll-rw-r--r-- 1 root root 84796967 Apr 19 07:33 jdk-6u20-linux-i586.bin-rw-r--r-- 1 root root 6593633 Apr 19 07:33 httpd-2.2.15.tar.gz-rw-r--r-- 1 root root 6123410 Apr 19 07:33 apache-tomcat-6.0.26.tar.gz-rw-r--r-- 1 root root 1566749 Apr 19 07:33 tomcat-connectors-1.2.30-src.tar.gz-rw-r--r-- 1 root root 29050568 Apr 19 07:33 mysql-5.1.30.tar.tar第一步:安装JDK[root@hostserver local]# chmod 755 jdk-6u20-linux-i586.bin[root@hostserver local]# ./jdk-6u20-linux-i586.bin……Please enter "yes" or "no".Do you agree to the above license terms? [yes or no]输入Yes,并按[enter]键.Press Enter to continue.....再次按[enter]键,则JDK安装完成。
linux apache 配置 http和https 访问

linux apache 配置http和https 访问1、安装openssl:#tar zxvf openssl-0.9.81.tar.gz#cd openssl-0.9.81#./config#make#make install2、安装apache:#tar zxvf httpd-2.0.63.tar.gz#cd httpd-2.0.63#./configure --prefix=/usr/local/apache/httpd --enable-ssl=static --with-ssl=/usr/local/ssl#make#make install此步骤在/apache/httpd目录中安装httpd服务(通过参数--prefix指定),同时使用--with-ssl指定刚才所安装OpenSSL的路径,用于将mod_ssl静态的编译到httpd服务中。
修改3、生成证书:openssl genrsa 1024 > server.keyopenssl req -new -key server.key > server.csr填写相关信息:Country Name (2 letter code) [GB]:CNState or Province Name (full name) [Berkshire]:BEIJINGLocality Name (eg, city) [Newbury]:BEIIJINGOrganization Name (eg, company) [My Company Ltd]:TESTOrganizational Unit Name (eg, section) []:TESTCommon Name (eg, your name or your server's hostname) []:TESTEmail Address []:TEST@openssl req -x509 -days 365 -key server.key -in server.csr > server.crt4、配置ssl:修改conf/httpd.conf文件将httpd.conf 中的Include conf/extra/httpd-ssl.conf 打开修改conf/extra/httpd-ssl.conf文件找到SSLCertificateFile 和SSLCertificateKeyFile 项将上面生成的测试证书路径填写完整5、配置域名:修改conf/httpd.conf文件将httpd.conf 中的Include conf/extra/httpd-vhost.conf 打开修改conf/extra/httpd-vhost.conf 文件配置需要访问的域名注:由于证书为我们自己测试创建,如有需要应到指定公司去认证。
杨海艳-主讲-linux之web(apache)配置步骤截图

apache的配置步骤讲解说明主讲人:杨海艳示例:设置apache服务器。
设置虚拟主机。
要求配置第二个IP为192.168.10.101/24ifconfig eth0:0 192.168.10.101 netmask 255.255.255.0ifconfig查看创建基于端口的虚拟主机。
响应IP为192.168.10.101。
其中一个监听80端口,一个监听8080端口,vim /etc/httpd/conf/httpd.conflisten 80 后面再加一行listen 8080把上面的改成如下然后复制示例7行7yy 在粘贴p 修改相应配置。
mkdir /yhycd /yhymkdir web1 web2echo “welcome to web1 homepage” > web1/index.htmlecho “welcome to web2 homepage” > web2/index.htmlservice httpd restart创建基于域名的虚拟主机。
域名分别为和 创建以上4个虚拟主机的默认文档文件。
写入恰当内容。
以验证配置。
四个网站:基于ip基于端口,基于多域名的:实例参考文件用户认证①单个用户的认证首先需要建立一个密码文件。
这个文件应该放在不能被网络访问的位置,以避免被下载,同时也要给上相应的权限,让没有权限的用户不用读取。
建立密码文件htpasswd -c /usr/local/apache/passwd/passwords authtest按提示输入密码#第一次创建用户要用到-c 参数第2次添加用户,就不用-c参数#如果你们想修改密码,可以如下htpasswd -m /usr/local/apache/passwd/passwords authtest修改httpd.conf或.htaccess文件AuthType Basic #对用户实施认证的方法AuthName "just test,please Login:"#对这个访问的描述AuthUserFile /usr/local/apache/passwd/passwords#指定密码文件的位置,也就是刚才我们用htpasswd建立的文件Require user authtest #允许访问的用户②多个用户的认证首先建立一个组文件以确定组中的用户。
linux下安装apache的及反向代理配置完整过程
下面是linux下安装apache的完整代码,系统是redhat5.51、检查系统防火墙有没开,需要把防火墙关掉,可以执行SETUP查看,关闭。
在开启了防火墙时,做如下设置,开启相关端口,修改/etc/sysconfig/iptables 文件,添加以下内容:-A RH-Firewall-1-INPUT -m state --state NEW -m tcp -p tcp --dport 80 -j ACCEPT -A RH-Firewall-1-INPUT -m state --state NEW -m tcp -p tcp --dport 8088 -j ACCEPT 2、安装Apache下载地址:</>1. 安装Apache# tar zxvf httpd-2.2.22.tar.gz //解压文件# cd httpd-2.2.22//进入安装文件夹#./configure --prefix=/usr/local/apache --enable-so--enable-mods-shared=most --enable-proxy --enable-proxy-connect--enable-proxy-ftp --enable-proxy-http --enable-proxy-scgi--enable-proxy-ajp --enable-proxy-balancer // 配置apache路径加载动态模块# make //编译apache# make install//安装apache其它相关命令:下载httpd-2.2.22.tar.bz2 把httpd-2.2.22.tar.bz2放到/soft 下[root@localhost ~]#cd /soft[root@localhost soft]#tar jxvf httpd-2.2.6.tar.bz2 //解压apache的压缩包[root@localhost soft]#cd httpd-2.2.6 //定位到httpd-2.2.6 文件夹下[root@localhost httpd-2.2.6]#ls //查看显示httpd-2.2.6 文件夹下内容 [root@localhost httpd-2.2.6]# ./configure --help | more //查看安装apache配置参数[root@localhost httpd-2.2.6]#./configure --prefix=/usr/local/apache --enable-so // 配置apache路径[root@localhost httpd-2.2.6]#./configure --prefix=/usr/local/apache--enable-so --enable-mods-shared=most --enable-proxy--enable-proxy-connect --enable-proxy-ftp --enable-proxy-http--enable-proxy-scgi --enable-proxy-ajp --enable-proxy-balancer// 配置apache路径加载动态模块[root@localhost httpd-2.2.6]#make //编译apache[root@localhost httpd-2.2.6]#make install //安装apache[root@localhost httpd-2.2.6]#cd /usr/local/apache //进入apache的目录[root@localhost apache]# cd conf/[root@localhost conf]#cp httpd.conf httpd.conf_bak //备份apache配置文件[root@localhost conf]#chkconfig --list httpd //查看httpd服务是否已存在[root@localhost conf]#chkconfig httpd off //关闭系统自带了httpd的服务,如果存在httpd服务[root@localhost conf]#service httpd status //查看自带httpd服务状态[root@localhost conf]# /usr/local/apache/bin/apachectl -k start//linux启动apache命令[root@localhost conf]# /usr/local/apache/bin/apachectl -k stop //linux 停止apache命令[root@localhost conf]#netstat -an | grep :80 //查看linux80端口是否开启[root@localhost conf]#ps -aux | grep httpd //linux下查看apache进程[root@localhost conf]#cd ../..[root@localhost local]#cp /usr/local/apache/bin/apachectl/etc/rc.d/init.d/apache //拷贝apache启动脚本[root@localhost local]#vi /etc/rc.d/init.d/apache // 这里是编辑apache 启动脚本在开头的#!/bin/sh 下面加上#chkconfig: 2345 85 15[root@localhost local]#chkconfig --add apache //添加apache服务[root@localhost local]#chkconfig --list apache //列出apache服务[root@localhost local]#service apache stop //停止apache服务[root@localhost local]#netstat -an | grep :80 //查看linux的80端口是否开启[root@localhost local]#ps -aux | grep httpd //查看是否存在httpd服务,若果之前自带httpd服务启动的话会导致新添加的apache服务启动失败[root@localhost local]#service apache start //启动apache服务打开你的服务器ip地址,看看是否出现了tomcat的默认首页,如果出现的话,那么恭喜你linux下安装apache已经成功了3、修改httpd.conf文件vi /usr/local/apache/conf/httpd.conf以下为httpd.conf内容:# This is the main Apache HTTP server configuration file. It contains the # configuration directives that give the server its instructions.# See <URL:/docs/2.2> for detailed information.# In particular, see# <URL:/docs/2.2/mod/directives.html># for a discussion of each configuration directive.## Do NOT simply read the instructions in here without understanding# what they do. They're here only as hints or reminders. If you are unsure # consult the online docs. You have been warned.## Configuration and logfile names: If the filenames you specify for many # of the server's control files begin with "/" (or "drive:/" for Win32), the # server will use that explicit path. If the filenames do *not* begin # with "/", the value of ServerRoot is prepended -- so "logs/foo_log"# with ServerRoot set to "/usr/local/apache" will be interpreted by the # server as "/usr/local/apache/logs/foo_log".## ServerRoot: The top of the directory tree under which the server's# configuration, error, and log files are kept.## Do not add a slash at the end of the directory path. If you point# ServerRoot at a non-local disk, be sure to point the LockFile directive # at a local disk. If you wish to share the same ServerRoot for multiple # httpd daemons, you will need to change at least LockFile and PidFile. #ServerRoot "/usr/local/apache"## Listen: Allows you to bind Apache to specific IP addresses and/or# ports, instead of the default. See also the <VirtualHost># directive.## Change this to Listen on specific IP addresses as shown below to# prevent Apache from glomming onto all bound IP addresses.##Listen 12.34.56.78:80Listen 80Listen 8088 --增加监听端口## Dynamic Shared Object (DSO) Support## To be able to use the functionality of a module which was built as a DSO you# have to place corresponding `LoadModule' lines at this location so the # directives contained in it are actually available _before_ they are used.# Statically compiled modules (those listed by `httpd -l') do not need# to be loaded here.## Example:# LoadModule foo_module modules/mod_foo.so#LoadModule authn_file_module modules/mod_authn_file.so --加载的模块,正确安装完会自动加载以下模块LoadModule authn_dbm_module modules/mod_authn_dbm.soLoadModule authn_anon_module modules/mod_authn_anon.soLoadModule authn_dbd_module modules/mod_authn_dbd.soLoadModule authn_default_module modules/mod_authn_default.soLoadModule authz_host_module modules/mod_authz_host.soLoadModule authz_groupfile_module modules/mod_authz_groupfile.so LoadModule authz_user_module modules/mod_authz_user.soLoadModule authz_dbm_module modules/mod_authz_dbm.soLoadModule authz_owner_module modules/mod_authz_owner.soLoadModule authz_default_module modules/mod_authz_default.soLoadModule auth_basic_module modules/mod_auth_basic.soLoadModule auth_digest_module modules/mod_auth_digest.soLoadModule dbd_module modules/mod_dbd.soLoadModule dumpio_module modules/mod_dumpio.soLoadModule reqtimeout_module modules/mod_reqtimeout.soLoadModule ext_filter_module modules/mod_ext_filter.soLoadModule include_module modules/mod_include.soLoadModule filter_module modules/mod_filter.soLoadModule substitute_module modules/mod_substitute.soLoadModule deflate_module modules/mod_deflate.soLoadModule log_config_module modules/mod_log_config.soLoadModule logio_module modules/mod_logio.soLoadModule env_module modules/mod_env.soLoadModule expires_module modules/mod_expires.soLoadModule headers_module modules/mod_headers.soLoadModule ident_module modules/mod_ident.soLoadModule setenvif_module modules/mod_setenvif.soLoadModule version_module modules/mod_version.soLoadModule proxy_module modules/mod_proxy.soLoadModule proxy_connect_module modules/mod_proxy_connect.soLoadModule proxy_ftp_module modules/mod_proxy_ftp.soLoadModule proxy_http_module modules/mod_proxy_http.soLoadModule proxy_scgi_module modules/mod_proxy_scgi.soLoadModule proxy_ajp_module modules/mod_proxy_ajp.soLoadModule proxy_balancer_module modules/mod_proxy_balancer.so LoadModule mime_module modules/mod_mime.soLoadModule dav_module modules/mod_dav.soLoadModule status_module modules/mod_status.soLoadModule autoindex_module modules/mod_autoindex.soLoadModule asis_module modules/mod_asis.soLoadModule info_module modules/mod_info.soLoadModule cgi_module modules/mod_cgi.soLoadModule dav_fs_module modules/mod_dav_fs.soLoadModule vhost_alias_module modules/mod_vhost_alias.soLoadModule negotiation_module modules/mod_negotiation.soLoadModule dir_module modules/mod_dir.soLoadModule imagemap_module modules/mod_imagemap.soLoadModule actions_module modules/mod_actions.soLoadModule speling_module modules/mod_speling.soLoadModule userdir_module modules/mod_userdir.soLoadModule alias_module modules/mod_alias.soLoadModule rewrite_module modules/mod_rewrite.soTimeout 300 --新增的配置参数KeepAlive OnMaxKeepAliveRequests 1000KeepAliveTimeout 15UseCanonicalName OffAccessFileName .htaccessServerTokens FullServerSignature OnHostnameLookups Off<IfModule !mpm_netware_module><IfModule !mpm_winnt_module>## If you wish httpd to run as a different user or group, you must run # httpd as root initially and it will switch.## User/Group: The name (or #number) of the user/group to run httpd as. # It is usually good practice to create a dedicated user and group for # running httpd, as with most system services.#User daemonGroup daemon</IfModule></IfModule>----------------------------------以下内容是新增的关键参数<IfModule mpm_prefork_module>StartServers 40MinSpareServers 40MaxSpareServers 80MaxClients 256MaxRequestsPerChild 10000</IfModule><IfModule mpm_worker_module>StartServers 40MaxClients 2000MinSpareThreads 100MaxSpareThreads 300ThreadsPerChild 200MaxRequestsPerChild 0</IfModule>ProxyRequests OffRewriteEngine onRewriteCond %{REQUEST_METHOD} ^(TRACE|TRACK)RewriteRule .* - [F]RewriteEngine onRewriteCond %{HTTP:range} !(^bytes=[^,]+(,[^,]+){0,4}$|^$)RewriteRule .* - [F]TraceEnable off#NameVirtualHost 10.46.85.137:9080#<VirtualHost 10.46.85.137:9080>#ServerName 10.46.85.137:9080#ProxyPass /ponApp/ http://10.209.122.40:7001/xponApp/#ProxyPassReverse /ponApp/ http://10.209.122.40:7001/xponApp/#</VirtualHost>NameVirtualHost 10.46.85.137:8088<VirtualHost 10.46.85.137:8088>ServerName kuangdai --kuangdai LINUX系统的主机名ProxyPass /xponApp/ http://10.209.122.40:7001/xponApp/ ProxyPassReverse /xponApp/ http://10.209.122.40:7001/xponApp/启动服务报错--/etc/hosts 增加127.0.0.1 localhost.localdomainlocalhost ”kuangdai“主机名</VirtualHost><Proxy *>--配置反向代理的访问权限Order deny,allowAllow from all</Proxy>-----------------------------以上内容是新增的关键参数# 'Main' server configuration## The directives in this section set up the values used by the 'main'# server, which responds to any requests that aren't handled by a# <VirtualHost> definition. These values also provide defaults for# any <VirtualHost> containers you may define later in the file.## All of these directives may appear inside <VirtualHost> containers,# in which case these default settings will be overridden for the# virtual host being defined.### ServerAdmin: Your address, where problems with the server should be# e-mailed. This address appears on some server-generated pages, such # as error documents. e.g. admin@#ServerAdmin you@## ServerName gives the name and port that the server uses to identify itself.# This can often be determined automatically, but we recommend you specify # it explicitly to prevent problems during startup.## If your host doesn't have a registered DNS name, enter its IP address here. #ServerName 127.0.0.1:80 --这个ServerName可随意配置一定去掉前面### DocumentRoot: The directory out of which you will serve your# documents. By default, all requests are taken from this directory, but # symbolic links and aliases may be used to point to other locations.#DocumentRoot "/usr/local/apache/htdocs"## Each directory to which Apache has access can be configured with respect # to which services and features are allowed and/or disabled in that# directory (and its subdirectories).## First, we configure the "default" to be a very restrictive set of# features.#<Directory />Options FollowSymLinksAllowOverride NoneOrder deny,allowDeny from all</Directory>## Note that from this point forward you must specifically allow# particular features to be enabled - so if something's not working as # you might expect, make sure that you have specifically enabled it# below.### This should be changed to whatever you set DocumentRoot to.#<Directory "/usr/local/apache/htdocs">## Possible values for the Options directive are "None", "All",# or any combination of:# Indexes Includes FollowSymLinks SymLinksifOwnerMatch ExecCGI MultiViews## Note that "MultiViews" must be named *explicitly* --- "Options All" # doesn't give it to you.## The Options directive is both complicated and important. Please see # /docs/2.2/mod/core.html#options# for more information.#Options Indexes FollowSymLinks## AllowOverride controls what directives may be placed in .htaccess files.# It can be "All", "None", or any combination of the keywords:# Options FileInfo AuthConfig Limit#AllowOverride None## Controls who can get stuff from this server.#Order allow,denyAllow from all</Directory>## DirectoryIndex: sets the file that Apache will serve if a directory# is requested.#<IfModule dir_module>DirectoryIndex index.html</IfModule>## The following lines prevent .htaccess and .htpasswd files from being # viewed by Web clients.#<FilesMatch "^\.ht">Order allow,denyDeny from allSatisfy All</FilesMatch>## ErrorLog: The location of the error log file.# If you do not specify an ErrorLog directive within a <VirtualHost># container, error messages relating to that virtual host will be# logged here. If you *do* define an error logfile for a <VirtualHost> # container, that host's errors will be logged there and not here.#ErrorLog "logs/error_log"## LogLevel: Control the number of messages logged to the error_log.# Possible values include: debug, info, notice, warn, error, crit,# alert, emerg.#LogLevel warn<IfModule log_config_module>## The following directives define some format nicknames for use with # a CustomLog directive (see below).#LogFormat "%h %l %u %t \"%r\" %>s %b \"%{Referer}i\" \"%{User-Agent}i\"" combinedLogFormat "%h %l %u %t \"%r\" %>s %b" common<IfModule logio_module># You need to enable mod_logio.c to use %I and %OLogFormat "%h %l %u %t \"%r\" %>s %b \"%{Referer}i\"\"%{User-Agent}i\" %I %O" combinedio</IfModule>## The location and format of the access logfile (Common Logfile Format). # If you do not define any access logfiles within a <VirtualHost># container, they will be logged here. Contrariwise, if you *do*# define per-<VirtualHost> access logfiles, transactions will be# logged therein and *not* in this file.#CustomLog "logs/access_log" common## If you prefer a logfile with access, agent, and referer information # (Combined Logfile Format) you can use the following directive.##CustomLog "logs/access_log" combined</IfModule><IfModule alias_module>## Redirect: Allows you to tell clients about documents that used to # exist in your server's namespace, but do not anymore. The client # will make a new request for the document at its new location.# Example:# Redirect permanent /foo /bar## Alias: Maps web paths into filesystem paths and is used to# access content that does not live under the DocumentRoot.# Example:# Alias /webpath /full/filesystem/path## If you include a trailing / on /webpath then the server will# require it to be present in the URL. You will also likely# need to provide a <Directory> section to allow access to# the filesystem path.## ScriptAlias: This controls which directories contain server scripts. # ScriptAliases are essentially the same as Aliases, except that# documents in the target directory are treated as applications and # run by the server when requested rather than as documents sent to the # client. The same rules about trailing "/" apply to ScriptAlias# directives as to Alias.#ScriptAlias /cgi-bin/ "/usr/local/apache/cgi-bin/"</IfModule><IfModule cgid_module>## ScriptSock: On threaded servers, designate the path to the UNIX# socket used to communicate with the CGI daemon of mod_cgid.##Scriptsock logs/cgisock</IfModule>## "/usr/local/apache/cgi-bin" should be changed to whatever your ScriptAliased# CGI directory exists, if you have that configured.#<Directory "/usr/local/apache/cgi-bin">AllowOverride NoneOptions NoneOrder allow,denyAllow from all</Directory>## DefaultType: the default MIME type the server will use for a document # if it cannot otherwise determine one, such as from filename extensions. # If your server contains mostly text or HTML documents, "text/plain" is # a good value. If most of your content is binary, such as applications # or images, you may want to use "application/octet-stream" instead to # keep browsers from trying to display binary files as though they are # text.#DefaultType text/plain<IfModule mime_module>## TypesConfig points to the file containing the list of mappings from # filename extension to MIME-type.#TypesConfig conf/mime.types## AddType allows you to add to or override the MIME configuration# file specified in TypesConfig for specific file types.##AddType application/x-gzip .tgz## AddEncoding allows you to have certain browsers uncompress# information on the fly. Note: Not all browsers support this.##AddEncoding x-compress .Z#AddEncoding x-gzip .gz .tgz## If the AddEncoding directives above are commented-out, then you# probably should define those extensions to indicate media types: #AddType application/x-compress .ZAddType application/x-gzip .gz .tgz## AddHandler allows you to map certain file extensions to "handlers": # actions unrelated to filetype. These can be either built into the server # or added with the Action directive (see below)## To use CGI scripts outside of ScriptAliased directories:# (You will also need to add "ExecCGI" to the "Options" directive.) ##AddHandler cgi-script .cgi# For type maps (negotiated resources):#AddHandler type-map var## Filters allow you to process content before it is sent to the client. ## To parse .shtml files for server-side includes (SSI):# (You will also need to add "Includes" to the "Options" directive.) ##AddType text/html .shtml#AddOutputFilter INCLUDES .shtml</IfModule>## The mod_mime_magic module allows the server to use various hints from the # contents of the file itself to determine its type. The MIMEMagicFile # directive tells the module where the hint definitions are located.##MIMEMagicFile conf/magic## Customizable error responses come in three flavors:# 1) plain text 2) local redirects 3) external redirects## Some examples:#ErrorDocument 500 "The server made a boo boo."#ErrorDocument 404 /missing.html#ErrorDocument 404 "/cgi-bin/missing_handler.pl"#ErrorDocument 402 /subscription_info.html### MaxRanges: Maximum number of Ranges in a request before# returning the entire resource, or one of the special# values 'default', 'none' or 'unlimited'.# Default setting is to accept 200 Ranges.#MaxRanges unlimited## EnableMMAP and EnableSendfile: On systems that support it,# memory-mapping or the sendfile syscall is used to deliver# files. This usually improves server performance, but must# be turned off when serving from networked-mounted# filesystems or if support for these functions is otherwise# broken on your system.##EnableMMAP off#EnableSendfile off# Supplemental configuration## The configuration files in the conf/extra/ directory can be# included to add extra features or to modify the default configuration of # the server, or you may simply copy their contents here and change as# necessary.# Server-pool management (MPM specific)#Include conf/extra/httpd-mpm.conf# Multi-language error messages#Include conf/extra/httpd-multilang-errordoc.conf# Fancy directory listings#Include conf/extra/httpd-autoindex.conf# Language settings#Include conf/extra/httpd-languages.conf# User home directories#Include conf/extra/httpd-userdir.conf# Real-time info on requests and configuration#Include conf/extra/httpd-info.conf# Virtual hosts#Include conf/extra/httpd-vhosts.conf# Local access to the Apache HTTP Server Manual#Include conf/extra/httpd-manual.conf# Distributed authoring and versioning (WebDAV)#Include conf/extra/httpd-dav.conf# Various default settings#Include conf/extra/httpd-default.conf# Secure (SSL/TLS) connections#Include conf/extra/httpd-ssl.conf## Note: The following must must be present to support# starting without SSL on platforms with no /dev/random equivalent # but a statically compiled-in mod_ssl.#<IfModule ssl_module>SSLRandomSeed startup builtinSSLRandomSeed connect builtin </IfModule>。
- 1、下载文档前请自行甄别文档内容的完整性,平台不提供额外的编辑、内容补充、找答案等附加服务。
- 2、"仅部分预览"的文档,不可在线预览部分如存在完整性等问题,可反馈申请退款(可完整预览的文档不适用该条件!)。
- 3、如文档侵犯您的权益,请联系客服反馈,我们会尽快为您处理(人工客服工作时间:9:00-18:30)。
HTTP守护进程的全局运行参数
因此就可以使用参数MinSpareServers来设置最少的空余 子进程数量,以及使用参数MaxSpareServers 来限制最多 的空闲子进程数量,多余的服务器进程副本就会退出。根 据服务器的实际情况来进行设置,如果服务器性能较高, 并且也被频繁访问,就应该增大这两个参数的设置。对于 高负载的专业网站,这两个值应该大致相同,并且等同于 系统支持的最多服务器副本数量,也减少不必要的副本退 出。
Apache的配置文件
Apache服务器的设置文件位于/etc/httpd/conf/目录下, 配置文件httpd.conf来配置Apache服务器的行为。以下使 用缺省提供的httpd.conf为例,解释Apache服务器的各个 设置选项。然而不必因为它提供设置的参数太多而烦恼, 基本上这些参数都很明确,也可以不加改动运行Apache服 务器。但如果需要调整Apache服务器的性能,以及增加对 某种特性的支持,就需要了解这些设置参数的含义。
HTTP守护进程的全局运行参数
对于专业网站,应该使用提高服务器效率的策略,因 此这个参数不能超过硬件本身的限制,如果频繁出现 拒绝访问现象,就说明需要升级服务器硬件了。对于 非专业网站,不太在意对客户浏览器的反应速度,或 者认为反应速度较慢也比拒绝连接好,就也可以略微 超过硬件条件来设置这个参数。
由于httpd会经常进行并发的文件操作,就需要使用加锁 的方式来保证文件操作不冲突,由于NFS文件系统在文件 加锁方面能力有限,因此这个目录应该是本地磁盘文件系 统,而不应该使用NFS文件系统。
HTTP守护进程的全局运行参数
PidFile /var/run/httpd.pid
PidFile指定的文件将记录httpd守护进程的进程号,由于httpd能自 动复制其自身,因此系统中有多个httpd进程,但只有一个进程为 最初启动的进程,它为其他进程的父进程,对这个进程发送信号 将影响所有的httpd进程。PidFILE定义的文件中就记录httpd父进 程的进程号。 #ScoreBoardFile /var/run/httpd.scoreboard httpd使用ScoreBoardFile来维护进程的内部数据,因此通常不需 要改变这个参数,除非管理员想在一台计算机上运行几个Apache 服务器,这时每个Apache服务器都需要独立的设置文件 httpd.conf,并使用不同的ScoreBoardFile
这些软件各有特色:NCSA(美国伊利诺斯大学的国家超级计算应 用中心)是WWW Browser Mosaic发迹之地,也是Netscape公司 的安德森成名的地方;CERN(欧洲原子核研究中心)是WWW的 起源地,1989年蒂姆· 贝纳斯-李正是在这开发成功了世界上第一 个Web服务器和客户机。这两家推出的WWW Server功能齐全, 成为同类软件的标准,再加上它们都是Freeware,因此刚一推出 就大受欢迎。前几年,在linux下WWW Server软件使用最多的是 NCSA和CERN。但这一两年来,后起之秀Apache却独领风骚,号 称“WWW Server之王”。在最新的Red Hat、Slackware和 OpenLinux各版本中都包含了Apache。Apache是在NCSA的基础 上发展起来的,因此这二者的配置文件十分相似。
选择和安装WEB服务器软件
目前WWW Server软件有许多, 能运行在linux下的也不少,有 NCSA HTTPd Server、CERN HTTPd Server、pache、 Netscape Fast Track Server、 Zeus Server等。
选择和安装WEB服务器软件
这个参数限制了MinSpareServers和MaxSpareServers 的设置,它们不应该大于这个参数的设置。
HTTP守护进程的全局运行参数
MaxRequestsPerChild 1000
使用子进程的方式提供服务的Web服务,常用的方式 是一个子进程为一次连接服务,这样造成的问题就是 每次连接都需要生成、退出子进程的系统操作,使得 这些额外的处理过程占据了计算机的大量处理能力。 因此最好的方式是一个子进程可以为多次连接请求服 务,这样就不需要这些生成、退出进程的系统消耗, Apache就采用了这样的方式,一次连接结束后,子进 程并不退出,而是停留在系统中等待下一次服务请求, 这样就极大的提高了性能。
HTTP守护进程的全局运行参数
StartServers 8
StartServers参数就是用来设置httpd启动时启动的子进 程副本数量,这个参数与上面定义的MinSpareServers 和MaxSpareServers参数相关,都是用于启动空闲子进 程以提高服务器的反应速度的。这个参数应该设置为 前两个值之间的一个数值,小于MinSpareServers和大 于MaxS pareServers都没有意义
LoadModule LoadModule LoadModule LoadModule LoadModule LoadModule LoadModule LoadModule LoadModule LoadModule LoadModule LoadModule LoadModule LoadModule LoadModule LoadModule LoadModule LoadModule LoadModule LoadModule LoadModule LoadModule LoadModule LoadModule LoadModule LoadModule LoadModule LoadModule LoadModule LoadModule LoadModule LoadModule LoadModule LoadModule LoadModule LoadModule
选择和安装WEB服务器软件
如果我们在安装Linux的时候选 中httpd选项。这样Apache就会 将自动完成安装,并且能够满足 日常的应用需要,我们只需要进 行一些更具体的设置工作就行了。
Apache的配置文件
在Red Hat Linux中,Apache将自己的所有配 置文件和日志文件分别放在了“/etc/httpd”和 “/var/log/httpd”目录下 其中“/etc/httpd/conf”下为配置文件, “/var/log/httpd”下为日志文件。
HTTP守护进程的全局运行参数
MaxClients 150
在另一方面,服务器的能力毕竟是有限的,不可能同 时处理无限多的连接请求,因此参数Maxclients就用于 规定服务器支持的最多并发访问的客户数,如果这个 值设置得过大,系统在繁忙时不得不在过多的进程之 间进行切换来为太多的客户进行服务,这样对每个客 户的反应就会减慢,并降低了整体的效率。如果这个 值设置的较小,那么系统繁忙时就会拒绝一些客户的 连接请求。当服务器性能较高时,就可以适当增加这 个值的设置。
access_module modules/mod_access.so auth_module modules/mod_auth.so auth_anon_module modules/mod_auth_anon.so auth_dbm_module modules/mod_auth_dbm.so auth_digest_module modules/mod_auth_digest.so include_module modules/mod_include.so log_config_module modules/mod_log_config.so env_module modules/mod_env.so mime_magic_module modules/mod_mime_magic.so cern_meta_module modules/mod_cern_meta.so expires_module modules/mod_expires.so headers_module modules/mod_headers.so usertrack_module modules/mod_usertrack.so unique_id_module modules/mod_unique_id.so setenvif_module modules/mod_setenvif.so mime_module modules/mod_mime.so dav_module modules/mod_dav.so status_module modules/mod_status.so autoindex_module modules/mod_autoindex.so asis_module modules/mod_asis.so info_module modules/mod_info.so cgi_module modules/mod_cgi.so dav_fs_module modules/mod_dav_fs.so vhost_alias_module modules/mod_vhost_alias.so negotiation_module modules/mod_negotiation.so dir_module modules/mod_dir.so imap_module modules/mod_imap.so actions_module modules/mod_actions.so speling_module modules/mod_speling.so userdir_module modules/mod_userdir.so alias_module modules/mod_alias.so rewrite_module modules/mod_rewrite.so proxy_module modules/mod_proxy.so proxy_ftp_module modules/mod_proxy_ftp.so proxy_http_module modules/mod_proxy_http.so proxy_connect_module modules/mod_proxy_connect.so
