ZOOM Q2HD录音机中文说明书
高清摄像笔录音笔中英文说明书
User Manual Before operating the unit,pleasereadthismanualcarefullyand understandthoroughly. Retain it for future use1 / 152 / 15Product FeaturesSuper image sensor for low illumination video recording. Auto focus, quick light response Full HD 1080P up to 30fps,720P up to 60fps H.264 compressionBuilt-in micro SD card,support up to 32GB Only one button, easy operationultra-integrated pen type design, suitable formeeting recording, evidence recording, andoutdoor sports scenes, etc.Easy download to PC/MAC with USB plugProduct OverviewLens MicrophoneLens Cover SliderReset Hole LED Indicator USB PlugFunction ButtonBasicOperations1.T urning The UnitOn/ Video Recording Press and hold the Function button tillthe blue indicatorturns on,release the button, the green indicator will blink and then turn off, the unitstarts videorecording.Click the Function button again, will stop recording, the blue indicator turns on and the unit ison standby mode.When the video clip lengthis over10 minutes,the unit will save the current clip file, and then restart video recording automatically.Note: Be sure to open the lens cover before recording.2.P hotoShootingEnter Photo Mode:When the unit ison standby mode(the blue indicator keeps on),doubleclick the Function button,the blue and green indicators will blink alternately, the unit entered Photo Mode.3 / 15.Click the Function button once to take a photo, the blue indicator blinks rapidly.Quit the Photo mode:Double click the Function button, the unit will back to Standby Mode, the blue indicator keeps on.3.T urning The Unit OffWhen the unit is on, press and hold the Function button for about 3 seconds,the unit will shut down. Auto power off function:The unit will shut down automatically in following conditions:(1). The battery power is low. The blueindicatorwill blink for seconds, and then the unit will shut down.(2). The memory is full. The blue and greenindicatorswill blinkfor seconds, and then the unit will shut down.(3).If no operation for one minute in Standby Mode, the unit will shut down to save power.4.C harging The Battery4 / 15The unit has an internal, rechargeable battery.The battery can be charged byfollowing ways:1). Plug the unit into your computer USB port.2). Plug the unit to DC5Vbattery charger.During charging, the blue indicator will blink, when the battery power is full, the blue indicator keeps on.5.R eset FunctionWhen the unit works abnormal for illegal operation or other unknown reasons, it needs to bereset.Use a thin stick (e.g. toothpick) to press the Reset button inside the Reset hole. Restart the unit, it will work normally again.6.S etting The UnitPlug the unit into the computer USB port, a new removable disk will appear on the computer screen. Open the removable disk, you will find the file setup.exe under the root directory, double-click the file to run it, following window will appear:5 / 15You can set date/time, frame size, image quality, audiovolume, etc.When thesetting is completed, click the button on the lower left to save the settings.To make the settings take effect, disconnect the unit with computer, and turn the unit on.6 / 157 / 15upgrade and update. Please base on real object.)Caution:Your device is a product of superior design and craftsmanship and should be treated with care. The following suggestions will help you protect your warrantycoverage.Keep the device dry. Precipitation, humidity, and all types of liquids or moisturecan contain minerals that will corrode electronic circuits. If your device doesget wet,allow it to dry completely.The unit may become fairly hot during recording –this is normal. To ensure proper cooling do not block the flow of air to the cover of the unit.Do not drop, knock, or shake the device. Rough handling can break internalcircuit boards and fine mechanics.Do not use harsh chemicals, cleaning solvents, or strong detergents to clean thedevice.*Please follow State′s law. Do not use the unit8 / 15illegally.使用说明书使用时请详细阅读本说明书,以免因不熟悉或不对操作,导致未达成使用目的。
松下摄像P2HD说明书

把手上方有启用/禁用开关按钮,可以启用或禁用把手上的拍摄键之马矢奏春创作检查拍摄的图像:REC CHECK,播放刚拍摄的内容2秒变焦:将ZOOM开关设置为SERVO,就可以用马达驱动变焦,此时不成使用变焦环将ZOOM开关设为MANUAL,可使用变焦环FOCUS ASSIST:图像中心区放年夜,方便聚焦按下IRIS键切换如何调整镜头光圈:AUTO IRIS:自动调整光圈MANUAL IRIS:手动调整光圈FOCUS/RING 键:更改分配给聚焦环的功能FOCUS:调整焦距IRIS:调整光圈∞:摄像机首先在远处聚焦,然后切换成手动聚焦当将FOCUS开关移动至∞处时,开关自动返回至M(手动)由于聚焦和光圈在手动模式下都使用聚焦环进行调整,因此二者不能同时设置为manual,应一个为manual,一个为auto在自动光圈模式下,可使用IRIS旁边的iris拨盘校正镜头光圈增益:显示太暗时,调整增益使显示变亮手动模式下,使用GAIN开关切换增益:L:正常情况下在此设置(0dB)M:增加图像放年夜器增益.(默认是为6dB)H:增加图像放年夜器增益(默认值为12dB)可以通过“开关模式”显示屏上的中档增益和高档增益设置数值,来更改两档对应的增益值ND FILTER:更改光量(分光度降低1/4 1/16 1/64三档)手动调节白平衡:1,切换手动2,设置快门速度3,利用同光源中的白色物体设定白平衡4,将white bal开关设置为A或B5,按下AWB键,等候几秒钟调节黑平衡按住AWB键,调整黑平衡自动跟踪白平衡(自动确定以后拍摄环境,并自动调整白平衡)可以将自动跟踪白平衡制定给白平衡开关(A/B/PRST)其中一个位置,设置方式:菜单——开关模式——自动跟踪白平衡待机或拍摄状态下,按下DISP/MODE按键,可以显示或者不显示拍摄相关信息光学防抖:按OIS(话筒键下面)键,翻开或者关闭防抖功能默认状态下:User 1:渐白User 2:逆光User 3:text memo设置3个按键:菜单——开关模式——User1—3使用逆光拍摄功能时,屏幕会显示“BACK”字样在CAM模式下按下BARS键,可将彩条输出至电视或者LCD屏幕拍摄时监听声音,可以使用把手左侧的PAGE /AUDIO/ MON /VAR键调节声音调整快门速度按下shutter speed 键,快门速度在正常与用户设定的速度间切换利用speed select+ 和speed select-来增减快门速度注意:1.光圈自动,快门速度快,景深小2.快门速度降低后,对焦需要更长时间3.快门速度越快,灵敏度越低一般情况下,快门速度正常,则显示器上无显示;快门速度调整后,相应的速度则显示在屏幕上声音记录:Input 1/2开关在镜头右下侧使用内置麦克风,将CH1 SELECT 开关切换为INT (L) 将CH2 SELECT开关切换为 INT(R)使用外置麦克风AUDIO LEVEL 调节内置麦克风的记录电平播放:开机,按下MODE键,MCR指示灯亮起(每按一次MODE,机器在camera 和mcr间切换)。
《zoom使用手册》课件

根据安装向导完成安装,确保允 许访问摄像头和麦克风权限。
登录与注册
已有账号
输入邮箱和密码,点击登录。
新用户注册
创建账户,填写必要信息,设置密码,完成注册。
界面介绍
主界面
包括聊天窗口、参会者列表、共 享屏幕和控制面板等。
设置
可调整音频、视频设置,选择语 言偏好等。
聊天窗口
支持文字聊天、表情和文件传输 。
线上教育
Zoom为在线教育提供 支持,方便师生进行远 程互动教学和学习交流
。
商务会议
Zoom广泛应用于商务 会议领域,提供高效、 便捷的远程会议解决方
案。
社交活动
Zoom也常被用于社交 活动,如线上聚会、婚 礼等,方便亲友互动交
流。
02
安装与登录
下载与安装
下载
访问Zoom官网或通过应用商店 下载安装包。
容。
08
问题与解决
网络问题
网络延迟:当您在Zoom通话中遇到 语音或视频卡顿、延迟的情况时,可
能是由于网络连接问题。
网络不稳定:网络波动或不稳定可能 导致Zoom通话频繁掉线或出现连接
问题。
解决方案
1. 确保您的网络连接稳定,尽量使用 有线连接代替无线连接。
2. 尝试关闭其他占用网络资源的程序 ,以释放更多带宽给Zoom。
3. 在网络条件较好的环境下进行通话 ,例如使用高速宽带或移动数据网络 。
音频问题
在此添加您的文本17字
音频失真:通话中有时会出现音频失真、回声、噪音等问 题。
在此添加您的文本16字
扬声器和麦克风故障:硬件设备故障可能导致音频问题, 如无声、音量小或音质差。
在此添加您的文本16字
视诚 Q2系列 用户手册

Q2系列用户手册目录目录 (2)声明 (3)声明/担保与赔偿 (3)安全操作概要 (3)安装安全概要 (4)第一章产品简介 (5)1.1随附配件 (5)1.2产品概述 (6)1.2.1主要特点 (6)1.2.2前面板图示 (7)1.2.3后面板图示 (8)1.2.4外形尺寸图 (11)第2章产品安装 (14)2.1连接电源 (14)2.2连接输入源 (15)2.3连接输出 (15)2.4连接控制电脑 (16)2.5预监卡连接 (16)2.6设备开机 (17)第3章产品使用 (18)3.1XPOSE 2.0软件安装 (18)3.2XPOSE软件操作 (24)3.2.1登录软件 (24)3.2.2系统设置 (26)3.2.3输出|输入|设备概况 (30)3.2.4显示管理 (36)3.2.5图层管理 (39)3.2.6场景管理 (45)3.3XPOSE APP操作 (47)第4章订购编码 (49)4.1产品编码 (49)4.2模块编码 (49)第5章技术支持 (50)5.1联系我们 (50)第6章附录 (51)6.1规格 (51)6.2术语和定义 (54)6.3修订记录 (60)首先感谢您选购我们的产品!为了让您迅速掌握如何使用这款视频处理器,我们为您送上了详细的产品使用手册。
您可以在使用视频处理器之前阅读产品介绍以及使用方法,请仔细阅读我们所提供给您的所有信息,以便于您正确地使用我们的产品。
声明声明/担保与赔偿声明该设备经过严格测试,符合电子类数码设备的标准,根据FCC第15部分的规定,这些限制是为了合理地防止设备在商业环境中操作时的有害干扰。
如果没有安装和使用规定的指导手册,该设备的产生、使用和放射无线电频率,可能会对无线电通讯造成有害干扰。
闲杂人员若擅自操作造成伤害,将自行负责!担保与赔偿视诚提供了作为法定保障条款组成部分,与完善生产相关的保证书。
收到产品后,买家必须立即检查产品,如在运输途中或因材料和制造故障而导致的受损,请以投诉的书面方式通知视诚。
PocketMemo 声音记录器数字按键操作的双麦克风录音机说明书
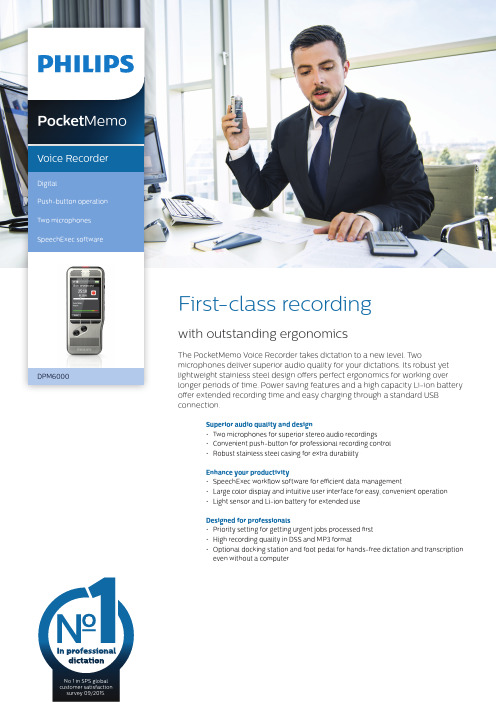
Pocket Memo Voice Recorder DigitalPush-button operationTwo microphones SpeechExec softwareNo 1 in SPS global customer satisfaction survey 09/2015.offer extended recording time and easy charging through a standard USB connection.Superior audio quality and design• Two microphones for superior stereo audio recordings• Convenient push-button for professional recording control• Robust stainless steel casing for extra durabilityEnhance your productivity• SpeechExec workflow software for efficient data management• Large color display and intuitive user interface for easy, convenient operation• Light sensor and Li-ion battery for extended useDesigned for professionals• Priority setting for getting urgent jobs processed first• High recording quality in DSS and MP3 format• Optional docking station and foot pedal for hands-free dictation and transcription even without a computerSuperior audio qualityThe built-in microphones deliver superior stereo audio recordings. The crystal clear recordings are perfectly suitable for speech recognition.Professional recording controlThe recorder is designed for single-handed operation of all recording and playback functions, allowing easy and quick file editing (insert, overwrite, append) via convenient push-button operation.Robust and ergonomic designThe asymmetrical and ergonomic shape fits perfectly into your hand. Its slim and lightweight design maximizes comfort, even when working over longer periods of time. The stainless steel creates a robust and highly durable protective shell around the device. The device is shockproof according to US military standard 516.6.SpeechExec workflow softwareThe SpeechExec Dictate software organizes the workflow of dictation files and resulting documents between author and transcriptionist, and allows you to monitor the status of your work.Large color displayThe large full-color display offers sharp images, making it easier to see everything at first glance. The clear user interface is optimized for easy, intuitive operation.Extended battery lifeThe high-capacity Li-ion battery can be easily charged through a standard micro USB jack. The integrated light sensor guarantees extended battery life, up to 50% longer than competition. The smart technology adjusts the brightness of the display, ensuring that your recorder will always be ready to work when you are.Priority settingsWith the included priority setting option, urgent recordings can be processed first. This makes sure important recordings are not overseen and helps you and your transcriptionists manage your workloads better.DSS and MP3 recordingThe DSS format was developed for the use in digital voice recorders, achieving a high compression ratio with little loss of quality. The DSS format also allows you to store additional information in the file header, which facilitates the organization and the transcription of dictation files. The MP3 format is the common audio format for consumer audio storage, as well as a de facto standard encoding for the transfer and playback on digital audio players.Optional docking stationThe stable and practical Docking Station provides speedy charging and automatic transfer of your recordings to your computer. With the optional foot pedal connected, the docking station even enables hands-free recording and transcription without a computer.HighlightsConnectivityHeadphones: 3.5 mm Microphone: 3.5 mm USB: micro USB 2.0 Docking connector Memory card slot Display Type: color TFTDiagonal screen size: 2.4 inches / 6.1 cm Resolution: 320 × 240 pixels Storage mediaExchangeable memory cardMemory card types: SD/SDHC, up to 32 GB Mass storage class compliantData transfer speed: 6.75 MB/s read speed, 5.0 MB/s write speed Audio recordingRecording format: DSS (Digital Speech Standard), MP3, PCMBuilt-in microphones: 2 omnidirectional microphones for stereo recordingRecording modes: DSS QP (.ds2/mono), DSS SP (.dss/mono), MP3 (.mp3/stereo), PCM Voice (.wav/mono), PCM Stereo (.wav/stereo)Bit rate: 13.7 kbit/s (DSS SP), 28 kbit/s (DSS QP), 192 kbit/s (MP3), 353 kbit/s (PCM Voice), 705 kbit/s (PCM Stereo)Edit modes: insert (DSS), overwrite (DSS, MP3, PCM), append (DSS, MP3, PCM)Recording time (4 GB memory card): 700 hours (SP), 350 hours (QP), 50 hours (MP3), 27 hours (PCM Voice), 13 hours (PCM Stereo)Sample rate: 44.1 kHz (MP3), 22.05 kHz (PCM), 16 kHz (DSS QP), 12 kHz (DSS SP) SoundSpeaker type: built-in round, dynamic speakerSpeaker diameter: 28 mmAcoustic frequency response: 300 – 7500 Hz Speaker output power: > 200 mWSpecificationsPowerBattery type: Philips rechargeable Li-ion battery ACC8100Battery capacity: 1000mAhBattery lifetime: up to 30 hours of recording (DSS mode)Standby time: more than 200 days Charging time (full charge): 3 hoursSystem requirements for Philips SpeechExec softwareProcessor: Intel dual core or equivalent AMD processor, 1 GHz or faster processor RAM: 4 GB (64 bit)Hard-disk space: 100 MB for SpeechExec software, 4.5 GB for Microsoft .NET FrameworkOperating system: Windows 11 Pro, Windows 10 Pro/Enterprise (64 bit)Graphics: DirectX-compliant graphics card with hardware acceleration recommended Sound: Windows-compatible sound device Free USB port Internet connection Green specificationsCompliant to 2011/65/EU (RoHS)Lead-free soldered productOperation conditionsTemperature: -5° – 45° C/23° – 113° F Humidity: 10 % – 90 %, noncondensing DimensionsProduct dimensions (W × D × H): 53 × 123 × 15 mm / 2.1 × 4.8 × 0.6 inches Weight: 117 g/4.1 oz including battery and memory cardPackage contentsPocketMemo digital Voice Recorder Memory cardRechargeable battery USB cable PouchSpeechExec Basic Dictation Software (2-year subscription included)Quick start guide Issue date 2022-01-04Version 1.0/dictation© 2022 Speech Processing Solutions GmbH. All rights reserved.Specifications are subject to change without notice. Philips and the Philips shield emblem are registered trademarks of Koninklijke Philips N.V. and are used by Speech Processing Solutions GmbH underlicense from Koninklijke Philips N.V. All trademarks are the property of their respective owners.Available accessoriesPhilips Rechargeable Li-ion Battery ACC8100Philips SDHC Memory Card ACC9008Philips Telephone Pickup Microphone LFH9162Philips Meeting Microphone LFH9172Philips Docking Station ACC8120Philips Foot Pedal LFH2210。
360°会议录音机产品说明说明书
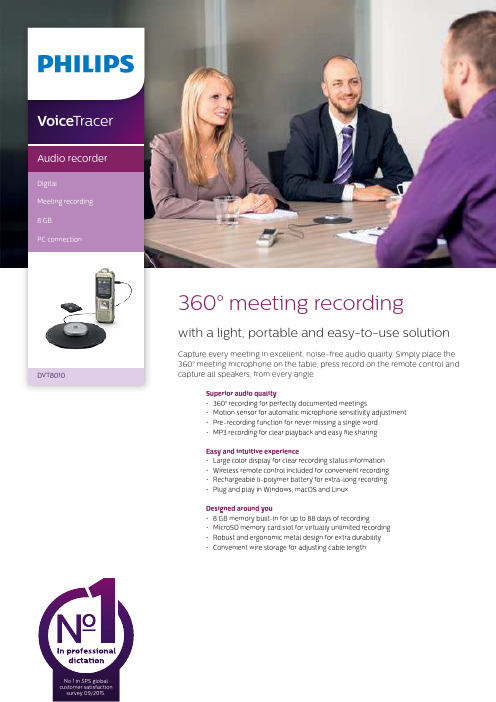
360° meeting recordingwith a light, portable and easy-to-use solutionCapture every meeting in excellent, noise-free audio quality. Simply place the 360° meeting microphone on the table, press record on the remote control and capture all speakers, from every angle.Superior audio quality• 360° recording for perfectly documented meetings• Motion sensor for automatic microphone sensitivity adjustment • Pre-recording function for never missing a single word • MP3 recording for clear playback and easy file sharing Easy and intuitive experience• Large color display for clear recording status information • Wireless remote control included for convenient recording • Rechargeable li-polymer battery for extra-long recording • Plug and play in Windows, macOS and Linux Designed around you• 8 GB memory built-in for up to 88 days of recording • MicroSD memory card slot for virtually unlimited recording • Robust and ergonomic metal design for extra durability • Convenient wire storage for adjusting cable lengthVoice TracerAudio recorderDigitalMeeting recording 8 GBPC connectionDVT1110DVT8010360° recordingThe innovative full radius meeting recorder captures everyone’s ideas in excellent audio quality no matter where they are seated at the table. The meeting microphone’s boundary layer design uses dynamic acoustic pressure to provide excellent sound and recording quality with a full 360° sound pick-up.Motion sensorThe built-in motion sensor detects the recorder when it is placed on a desk or held and selects the microphone sensitivity to suit the recording situation preventing you from accidently blocking the audio you want to record.Pre-recording functionThe pre-recording function allows you to record the last five seconds before you press the record key. The device switches into a standby mode and records a five-second loop without saving it. Press the record key to save the five-second loop. This feature allows you to spontaneously record important parts of a conversation.MP3 recordingCapture your recordings in MP3. The popular file format allows you to play back your files virtually anywhere and simply share them with rge color displayThe large color display offers sharp images, making it easier to see and read everything at first glance. The clear user interface supports eight languages and is optimized for easy,intuitive operation.Wireless remote control The included wireless remote control enables convenient placement of the recorder to best meet the needs of the audio environment while maintaining ease of operation. Start, pause, and stop recording, without havingto clumsily reach over things even from a distance.Extra long battery lifeThe high-capacity Li-polymer battery can be easily charged through a standard micro USB jack. This guarantees extended battery life for extra-long recording ensuring that your recorder will always be ready to work when you are.Plug and playThanks to Plug and Play in Windows, macOS and Linux, you can quickly access your recordings without installing any additional software. The recorder is automatically displayed as a removable drive once connected to your computer via USB. It can also be used as a convenient way to store, back up and share files.8 GB internal memoryCapture and store up to 88 days of continuous recording thanks to the 8 GB of internal memory.MicroSD memory card slotVirtually unlimited recording and storage capacity thanks to a microSD memory card slot supporting up to 32 GB of additional memory.Robust metal designIts robust and lightweight design maximizes comfort and the metal surface creates a robust shell around the device. With the integrated fold-out stand you can conveniently position the recorder towards the sound source. Two ergonomically placed soft keys allow for convenient, quick and direct access to the most important functions.Convenient wire storageThe wire storage in the meeting microphone allows you to adjust the length of the cable to make sure your desk always looks tidy and professional.Connectivity Headphones: 3.5 mmMicrophone: 3.5 mm, Built-in microphone, Microphone stereo socket Micro-SD card socket USB: High-speed USB 2.0DisplayType: LCD color display BacklightDiagonal screen size: 1.77"/4.5 cm Resolution: 128 × 160 pixels Audio recordingBuilt-in microphone: 3 Mic System, high-sensitivity, HQ Stereo, low-noise microphone Recording formats: MPEG1 layer 3 (MP3), PCM (WAV)Recording modes: PCM 1411 kbps, SHQ 192 kbps, HQ 96 kbps, SP 64 kbps, LP 8 kbps Sample rate: 44,1 kHz (PCM/SHQ), 32 kHz (HQ), 22 kHz (SP), 16 kHz (LP)Bit rate: 8, 64, 96, 192, 1411 kbps File overwrite and append mode Record monitor functionRecording time: 2280 h (LP), 284 h (SP), 190 h (HQ), 90 h (SHQ), 12 h (PCM)Silent recording mode Prerecording mode SoundSound enhancement: ClearVoice Frequency response: 50–20,000 Hz Signal-to-noise ratio: > 60 dB Speaker output power: 110 mW Speaker diameter: 28 mm Storage mediaBuilt-in memory capacity: 8 GB Built-in memory type: NAND Flash Mass storage class compliant TunerFrequency range: 87.5–108 MHz Station presets: 20Auto digital tuning Tuner bands: FM stereoSpecificationsMusic playbackCompression format: MP3, WMA Equalizer settings: Jazz, Pop, Classic ID3 tag supportMP3 bit rates: 8–320 kbpsWMA bit rates: 48–320 kbps (44 kHz), 64–192 (48 kHz), stereoMeeting microphone Cable length: 2 m/6.5 ft.Connector: 3.5 mmDesign: boundary layer microphone Frequency response: 30–18,000 Hz Impedance: approx. 2.2 kOhm @ 1 kHz Net weight: 108 g/3.8 oz.Phantom supply voltage: 1.5 to 5 V/0.5 mA Product dimensions (W × D × H): 13 × 13 × 1.8 cm/5.1 × 5.1 × 0.7 inch Sensitivity: -38 dBVType: electret condenser microphoneConvenienceFirmware upgradeable Keypad lockMulti language: English, French, German, Spanish, Italian, Russian, Polish, Simplified ChineseVariable playback speed Voice volume indicator Voice-activated recording AutoAdjust+ recordingAutoZoom+ recording: 15 m zoom Calendar searchInstant one-touch recordingOptimized for notes, conversations, lectures and interviews, meetings PowerLi-polymer built-in batteryBattery lifetime: up to 50/25 hours in LP record mode (built-in memory / microSD memory card)System requirements Free USB portOperating system: Windows 10/8/7, macOS 10, Linux Design and finishingColour(s): Champagne/silver shadow Issue date 2016-12-22Version 1.0/dictation© 2016 Speech Processing Solutions GmbH. All rights reserved.Specifications are subject to change without notice. Philips and the Philips shield emblem are registered trademarks of Koninklijke Philips N.V. and are used by Speech Processing Solutions GmbH underlicense from Koninklijke Philips N.V. All trademarks are the property of their respective owners.Green specifications Lead-free soldered productPackage contents RecorderMeeting microphone Stereo headphones Wireless remote control Carry case USB cable Quick start guide Product dimensionsProduct dimensions (W × H × D): 4.5 × 12.5 × 1.8 cm / 1.75 × 4.9 × 0.71 inch Weight: 85 g / 3.0 oz.EAN: 0855971006243。
ZOOM电吉他效果器中文说明书
1、打开电源和使用在装好电池和使用交流电的时候打开开关!(位于电源接口旁边)主屏幕当前显示当前所用的效果,包括效果图像和虚拟旋钮,可以通过每一块显示屏下面对应的旋钮来控制。
编辑效果参数,屏幕显示参数名称,页选项卡,参数值,如果有可调节的参数多于3个将会有多个选项卡!可以通过对应的旋钮来更改参数!2、调整效果确认主屏幕所显示效果,使用踩钉可以打开或关闭效果,当打开效果时踩钉旁边的红灯会亮,否则会灭。
选择效果类型按上下选择键可以更换所选的效果,调整会自动保存,效果列表请参阅33页!若要调整参数,转动对应旋钮改变页面,按PAGE键,下一个页面会打开!3、选择补丁(patch)在这里补丁就是预设出厂音色确认首页显示内容要激活补丁选择,按下左起第一个踩钉一秒钟以激活补丁,屏幕将显示补丁库的编号和名称;若要更改补丁按左起第二个踩钉选择前一个补丁,按第三个踩钉选择下一个补丁,旋转中间效果的对应旋钮就能改变补丁编号和名称;如果要更改库同时按下一号踩钉和二号踩钉选择前一个库,同时按下三号四号踩钉选择下一个库,旋转中间效果的对应旋钮可以改变库的编号和名称。
同时按下两个踩钉时可能会感应较早按下的踩钉,要注意避免这种情况。
返回主页按下一号踩钉一秒!4、存储补丁G3自动保存设置时调整的参数要存储或换用不同的补丁,按STORE/SWAP键,屏幕显示如下,图见说明书P12第一个图。
通过转动左边效果的最左边旋钮来选择是否存储或交换补丁。
要设置存储或交换新的补丁的位置转动右边效果的二号旋钮给更改的补丁或存储的更换编号。
转动左边效果最左边旋钮更改该库的存储或更换(当前使用的补丁不能作为选择目标)要存储/换用完整补丁按STORE/SWAP键,屏幕显示”COMPLETE”后,打开STORE/SWAP交换补丁(如果要退出,按除了STORE/SWAP以外的任意键。
5、设置特定的补丁参数按TOTAL键激活总菜单,转动左边效果的第一个旋钮来调整补丁级别,范围0~120。
Q22说明书 简体
感谢您购买本公司黑匣子Q22行车记录仪,本机采用高性能低照度“CMOS WXGA HD ”高清感光芯片,有独特的超便携式设计,使它可以应用在各个领域,为您带来方便,安全,丰富多彩的日常生活。
主用于车载摄像,是行车中安全事故取证的最佳帮手。
在使用本产品之前,请详细阅读此用户手册,并请保管好此手册。
我们希望本产品,能满足您的需求并长期服务于您!本使用手册在编写和印刷中,可能存在一定文字错误,请谅解。
使用手册印刷过程中,机器因外观和软件的修复过程导致了同该使用手册的部分操作的非一致性,本公司保持最终解释权。
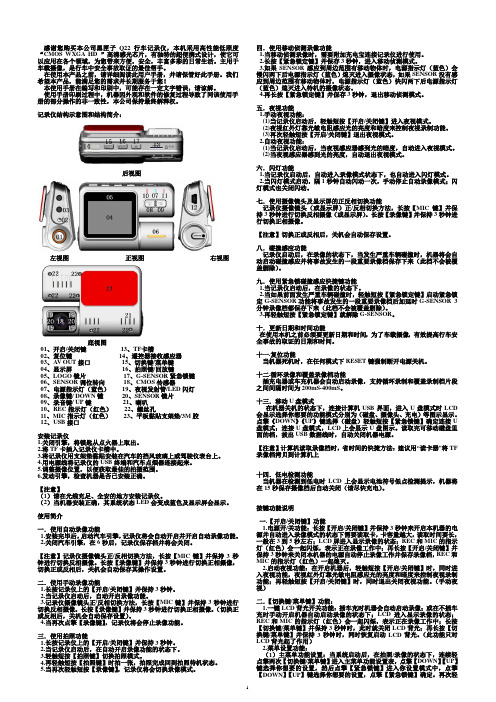
记录仪结构示意图和结构简介:后视图左视图 正视图 右视图底视图 01、开启/关闭键 13、TF 卡槽 02、复位键 14、遥控器接收感应器 03、A V OUT 接口 15、切换键/菜单键 04、显示屏 16、拍照键/回放键 05、LOGO 镜片 17、G-SENSOR 紧急锁键 06、SENSOR 调位转向 18、CMOS 传感器07、电源指示灯(蓝色) 19、夜视发射管/LED 闪灯 08、录像键/ DOWN 键 20、SENSOR 镜片 09、录音键/ UP 键 21、喇叭 10、REC 指示灯(红色) 22、螺丝孔11、MIC 指示灯(红色) 23、平板黏贴支架垫/3M 胶 12、USB 接口安装记录仪1.关闭引擎,将锁匙从点火器上取出。
2.将TF 卡插入记录仪卡槽中。
3.将记录仪用支架垫黏贴安装在汽车的挡风玻璃上或驾驶仪表台上。
4.用电源线将记录仪的USB 终端和汽车点烟器连接起来。
5.调整摄像位置,以便获取最佳的拍摄范围。
6.发动引擎,检查机器是否已安装正确。
【注意】(1)请在光线充足、全安的地方安装记录仪。
(2)当机器安装正确,其系统状态LED 会变成蓝色及显示屏会显示。
使用简介一.使用自动录像功能 1.安装完毕后,启动汽车引擎,记录仪将会自动开启并开启自动录像功能。
2.关闭汽车引擎,在6秒后,记录仪保存档并将会关闭。
Zoom H5 H6 H4n H4n Pro H2n 录音机用户手册说明书
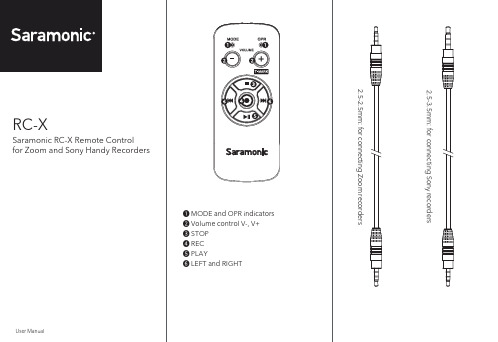
RC-X
Saramonic RC-X Remote Control for Zoom and Sony Handy Recorders
❶ MODE and OPR indicators ❷ Volume control V-, V+ ❸ STOP ❹ REC ❺ PLAY ❻ LEFT and RIGHT
Decrease volume
Decrease volume
V+ Increase volume Increase volume Increase volume
Increase volume
Increase volume
STOP
Stop playing and Stop recording jump to the record- Stop recording
Play/Pause
Pause/Continue to record
Record/Pause
Mark
LEFT
——
Play previous recording
——
Play previous recording
——
RIGHT
——
Play next recording
——
Play next recording
Mode indicator: solid green; OPR indicator: flashing green when pressing buttons
Button VV+
STOP REC PLAY LEFT RIGHT
OSDV-02HD 高清视频混音器说明书

Power Supply Current Draw Power Consumption Operating Temp. Dimensions Weight (excluding AC adaptor) Accessories Options (sold separately)
Switcher, Scaler, Expander with Audio Processing and Video Effects
● 2 in / 2 out Multi-Format Video Mixer ● Professional Transition and Composition FX including
USB PORT Connect the USB cable to an iPad for remote control.
The V-02HD iPad Remote Control App is free of charge
and downloadable from the Apple AppStore.
CTL/EXP JACK Connect an expression pedal (sold separately: EV-5, etc.)
or footswitch (sold separately: BOSS FS-6, etc.).
HDMI INPUTS 2 High quality HDMI inputs with Scalers.
28
V-02HD Block Diagram
Video MIxer Block
BLOCK DIAGRAM V-02HD Block Diagram Video MIxer Block
ZOOM中文说明书

ZOOM中文说明书一.选择音色下面介绍一下在演奏模式下的音色选择。
1.从1-5踏板中将LED等不亮的小踏板踩下,踩下的小踏板灯会亮,同时会叫出一个新的音色。
提示:在演奏模式下,转动参数旋钮1可选择音色2.要选择别的音色时,踩下BANK[▲/▼]小踏板,再踩下1-5小踏板提示:在演奏模式下,可以通过旋钮[TYPE],选择音色库。
注意:●在用BANK[▲/▼]踏板选择音色时,踩下后请立刻释放。
●持续踩住小踏板BANK[▼]一秒以上,G9.2TT就会被切换为菜单模式。
●持续踩住小踏板BANK[▲]一秒以上,G9.2TT就会被切换为[BYPASS]状态持续踩住不放,就会进入[MUTE]状态。
二:调节音色在演奏模式下,可以通过面板上的快捷键对音箱模拟的主要参数和输出水平进行调节。
1.在演奏模式下选择音色。
2.按下[CHANNEL A/B]中的一个键,来选择音箱模拟的输出通道。
G9.2TT有两条分别设定的A,B输出通道,通过[CHANNEL A/B] 键,可实现通道的瞬间转换。
提示:通过[FUNCTON]的1和2两个功能小踏板,也可进行A,B输出通道的切换。
(P38)3.旋转[AMP TYPE] 旋钮可调节失真类型。
[AMP TYPE] 旋钮是调节失真类型(音箱模拟和压缩效果)的旋钮。
旋转该钮,液晶屏会显示新效果的类型名称。
提示:●调节失真旋钮时,液晶屏会显示E符号,[STORE/SWAP]键指示灯会亮。
●E符号表示设定值和原值不同,设定值返回原值后指示灯就会不亮。
●[STORE/SW AP]键指示灯亮表示,现在显示和不显示的参数同原值不同,返回原值灯就不亮。
4.包括音箱模拟在内,其他主要参数的改变,可以通过如下图(图略)所示的各个旋钮来调节。
转动各个旋钮时,其对应的参数值和名称都会显示在液晶屏上。
对[BASS][MIDDLE][TREBLE][PRESENCE]各种进行操作时,将范围中的数值推进和关闭,都会在液晶屏上显示。
ZOOM视频课堂使用操作指引

7
ZOOM会议操作—共享屏幕
共享屏幕--PPT: ➢ 提醒—点击解除静音 ➢ 选择要共享的PPT ➢ 点击共享
点击表情:
选择点赞图像,点击,表情 会被发送到左上角;
8
ZOOM会议操作—PPT共享和标记
共享屏幕--PPT: ➢ 提醒—点击解除静音 ➢ 选择要共享的PPT ➢ 点击共享
点击表情:
选择点赞图像,点击,表情 会被发送到左上角;
9
ZOOM会议操作—视频共享
4
2
1
共享屏幕—视频: ➢ 共享前需在电脑桌面将视频先打开并暂停 ➢ 如视频播放过程中无需讲解,则选择静音 ➢ 点击共享电脑声音和视频流畅度可保障学
员端听到视频原因,且视频不卡顿,但清 晰度会稍受影响; ➢ 共享后,全屏视频,点击播放;
3
5
10
ZOOM会议操作—其他共享
11
ZOOM会议操作—主持人转让
12
ZOOM会议操作—录播保存
13
感谢倾听!
2020年 执着 方法 方向
14 -------使命必达的信念
个人观点供参考,欢迎讨论
主持人权限:开启全体静音 或解除全体静音
6
ZOOM会议操作—聊天&录制
点击更多:
✓ 进入提示音:有人加入 提醒
✓ 会议加锁:加锁后无法 加入
✓ 文字聊天:输入发送 ✓ 文件传输:点文件-我的
电脑-选择文件-发送
点击: 停止会议录制 提醒会议结束后MP4视频会 保存在本地
左上角显示录制中
点击: 开始会议录制 录制结束后MP4视频会保存 在本地
zoom账户注册登陆图zoom会议预约录播回放登陆图zoom功能邀请静音点击打开会议号主端口静音视频开关点击复制链接邀请信息信息会复制在粘贴板可将会议号相关信息粘贴在微信或者邮件
Zoom G2 中文操作手册

[Battery operation] • Use four conventional IEC R6 (size AA) batteries
(alkaline). • The G2 cannot be used for recharging. • Pay close attention to the labelling of the battery to make
[AC adapter operation] • Be sure to use only an AC adapter which supplies 9 V DC,
300 mA and is equipped with a "center minus" plug (Zoom AD-0006). The use of an adapter other than the specified type may damage the unit and pose a safety hazard. • Connect the AC adapter only to an AC outlet that supplies the rated voltage required by the adapter. • When disconnecting the AC adapter from the AC outlet, always grasp the adapter itself and do not pull at the cable. • During lightning or when not using the unit for an extended period, disconnect the AC adapter from the AC outlet.
ZOOM H1中文说明书

Ver 2.0 新功能
1. 关闭电源,用USB线缆将本机连接至一台 Windows PC 或 MAC 计算机.
2. < 作为 Micro SD卡的读卡器使用 >
当屏幕上显示“CArd”时,按下
< 作为音频接口使用 >
当屏幕上显示“AUdIo”时,按下 备注
Dispalyed alternately at one-sceond nitevral
8 电池盒盖
安装一节AA(5号)电池
9 立体声麦克风
用立体声录制本机前面90°范围区域的声音
10 录音/峰值指标灯
在录音时如果输入信号太大(峰值检测), 此灯会迅速闪烁
11 LCD屏幕
显示各种信息。
12 录音按钮
启动和停止录音
13 内置扬声器(单声道)
笔 并确认文件删除等
用于回放录制的声音
14
15 16
便携式 录音机
H1 笔
北京蓝频专卖快速开始指南
音
使用本机前的安全和注意事项
H1
准 备 打开/关闭电源
打开或关闭本机电源的操作是很容易的
1. 向下滑动电源开关大约1秒,即可打 开本机。
2. 再向下滑动电源开关大约1秒,即可 关闭本机。
↓
笔
准 备 禁用北按京钮蓝频专卖
音 本机上的按钮可以被禁用,以防止录音时被意外地停止。
2 1,2 2
5
操 作 播放 / 文件删除
准 备 添加音轨 / 格式化 Micro SD 卡
准 备 添加音轨标记
录音时,您可以添加音轨标记。 • 录音时,按下 可以添 加一个此时的音轨标记。
• 如果文件中添加了音轨标记,您可以在播放时,按 下 或 跳转到标记的位置。
SnapAV Binary TS2-HD Audio Transmitter说明书
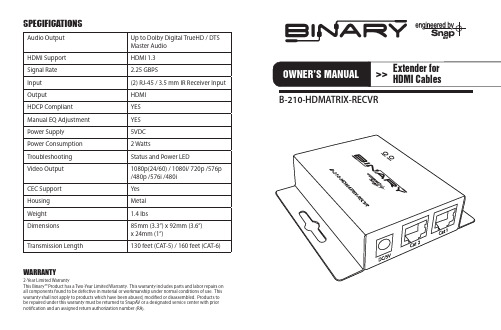
Audio Output Up to Dolby Digital TrueHD / DTSMaster AudioHDMI Support HDMI 1.3Signal Rate 2.25 GBPSInput(2) RJ-45 / 3.5 mm IR Receiver Input Output HDMIHDCP Compliant YESManual EQ Adjustment YESPower Supply5VDCPower Consumption 2 WattsTroubleshooting Status and Power LEDVideo Output1080p(24/60) / 1080i/ 720p /576p/480p /576i /480iCEC Support YesHousing MetalWeight 1.4 lbsDimensions85mm (3.3”) x 92mm (3.6”)x 24mm (1”)Transmission Length130 feet (CAT-5) / 160 feet (CAT-6)WARRANTY2-Year Limited WarrantyThis Binary™ Product has a Two-Year Limited Warranty. This warranty includes parts and labor repairs on all components found to be defective in material or workmanship under normal conditions of use. This warranty shall not apply to products which have been abused, modified or disassembled. Products to be repaired under this warranty must be returned to SnapAV or a designated service center with prior notification and an assigned return authorization number (RA).SPECIFICATIONSB-210-HDMATRIX-RECVRINSTALLATION INSTRUCTIONS1. Test all associated equipment and cables in the system for proper operation. Turn off all power before proceeding.2. Make sure the HDMI™ cables being used do not exceed 1.0M (3.28 ft) and are at least 26 AWG. Any length longer than this may cause intermittence issues. To ensure maximum performance, please use high quality HDMI™ cables capable of transmitting 1080p signals.3. Determine the best placement of the unit based on how it will be incorporated into the system design. Leave enough room to reach the EQ adjustment after installation.4. Make sure all CAT 5 or CAT 6 cables are properly terminated (EIA/TIA-568B is recommended).5. Connect the HDMI™ cables.6. Turn on all associated equipment, plug in the 5V DC power, and verify that the signal LEDs are illuminated.7. If a flickering, blinking, or snowy image is seen, adjust the EQ dial to improve the cable signal. An EQ set to “9” stands for the strongest signal for longer cable lengths while “0” is for short cable lengths. Try adjusting the EQ from 0 to 9 until picture is clear.8. Once you have a picture, adjust down to the lowest number setting that still has a picture. This will ensure you have reached the optimal setting.9. (OPTIONAL) Plug in Episode IR receiver into the 3.5mm IR jack.PACKAGE CONTENTS• 5VDC Power Supply • 4 Rubber Feet• Drywall screws for mounting• Owner’s ManualREMOTE LOCATION IR RECEIVERThe B-210-HDMATRIX-RECVR can transmit IR control signal back to the matrix when using an Episode® IR Receiver. The matrix will send the IR signal to the appropriate emitter cable to control the selected HDMI source device.。
