L-758测光表使用说明书(SEKONIC)
世光L-508Cine简体中文说明书

您可以在7套过滤器中选择一套,得到补偿读数。 ·度量单位锁(电影/图片模式均有)
1
简介
当激活度量单位锁时,最后的读数和f/s(每秒几幅画面)设 定会被保护,防止意外改变。 ·低倍率f停止显示(电影/图片模式均有)
在 DIP 开关的“F/No./ EV”处于“ON”的位置时,显示 “EV+T/F”的值。
电影模式(Cine mode)—反射测光(Spot reflected mode) 当选择了电影模式,并且采用反射测光时,可以使用下面介
绍的多种测量模式。 按住“模式”(MODE)按钮,同时旋转模式转盘,可以切
按住“模式”(MODE)按钮,同时旋转模式转盘,可以切 换各种测量模式。
此处可以参看 L-508 操作手册的“设定测光模式”部分。
2. 设置DIP开关(电影/照片模式)
特殊功能 DIP 控制开关,位于电池盒中电池的上方。你可以 设定 L-508 Cine 测光表所的使用模式和功能。
DIP 开关功能说明
当选择电影模式时,你可以选择显示Foot Candle或者在入 射模式显示Lux或者在反射模式显示Foot Lambert。 ·快门跟踪设置(只有电影模式具有)
你可以从5°到270°中选择一个快门跟踪设置,以5°递进。显 示获得的曝光补偿,不需要其他的计算。 ·扩展电影速度设定(电影/图片模式均有)
L-508Cine 专有功能
L-508Cine型测光表与L-508型相比,增加了更多实用功能, 可以为电影、录像、剧场、工业照明和许多其他场合服务。 • 电影模式和图片模式
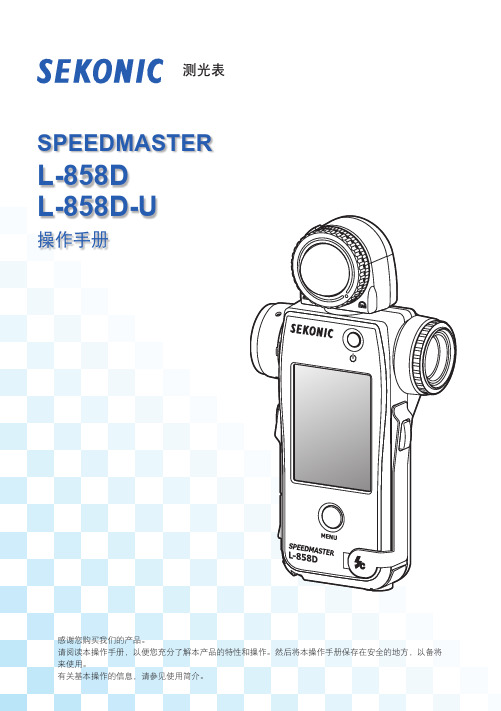
测光表SEKONIC-858D使用手册
⌞ᝅ
或本手册如有更改,恕不另行通知。 ●● 本操作手册中的界面可能与您使用的测光表的实际显示不同。(颜色、字母等)
或对其充电(可充电电池除外)。它们可能会爆炸和引起火灾,造成严重伤害或损害 环境。
聚氯乙烯 (PVC) 电缆和电线注意事项
●● 操作本产品上的电线或与本产品一起销售的附件相关的电线时,会接触铅,加利福 尼亚州认为这种化学物质会引起癌症和先天缺陷或其他生殖危害。操作后请洗手。
ii
小心
●● 请勿用湿手操作本产品,或将其置于雨中或可能溅到水、淹没或接触水分的地方。 如果使用“有线闪光模式”,则有触电的危险。这也可能导致产品受损。
*1 世界上第一台手持式测光表(截至 2016 年 9 月,由 SEKONIC 调查。) *2 从 下载数据传输软件,并将其安装在电脑上。
URL: /support/downloads/dtssoftwareformacandwindows.aspx 要使用本软件,请使用 USB 线(迷你 B 型,市售)将电脑连接到 L-858D。 *3 曝光文档包含指示您正在使用的数码相机的每个典型特性(相机和测光表之间的曝光补正量、 裁剪点和动态范围)的信息。要创建曝光文档,必须提前进行拍摄,并使用数据传输软件。
[ 新功能和性能 ] 1 2.7 英寸液晶彩色触控面板
通过将常用功能分配到屏幕底部的功能按钮增强可操作性。 2 闪 光持续时间分析(1/40 至 1/55,500 秒,t0.1 至 t0.9,这能够以 0.1 为一档改变) 3 HSS(高速同步)模式下的曝光测量 4 改 善较低的光测量性能(从入射光测量时的 -5 EV 开始,从反射光测量时的 -1 EV 开
L-308X测光表操作手册说明书

感谢您购买我们的产品。
请阅读本操作手册,以便您充分了解本产品的特性和操作。
然后将本操作手册保存在安全的地方,以备将来使用。
L -308X 操作手册测光表■安全守则在使用本产品前,请先阅读本“安全守则”以实现正确操作。
©2017保留所有权利。
●严禁在未经许可的情况下复制本文档的全部或任何部分。
●相关产品和/或本手册如有更改,恕不另行通知。
●本操作手册中的界面可能与您使用的测光表的实际显示不同。
(颜色、字母等)●确保不要跌落测光表或使其受到突然的撞击,否则会损坏测光表。
●请勿将测光表存放在高湿度的高温区域,否则会损坏测光表。
●请注意,不要将测光表从寒冷的环境运输到温暖潮湿的环境中,因为测光表上会形成凝结液滴,并可能使其受损。
●如果低于 -10°C 的温度下操作测光表,则 LCD 的响应将大幅减慢,并且显示器可能难以查看和读取。
这不会损坏测光表。
此外,如果温度超过 50°C,液晶显示器将变暗并变得难以读取,但是当其恢复到室温时,显示器将恢复其正常状态。
●如果将测光表置于阳光直射的环境中、车辆或加热器附近,测光表的温度将升高,并可能导致损坏。
●如长时间不需使用请退出电池,可避免因泄漏损坏测光表。
●请勿在海拔超过2,000m (6,561 feet)的高度下,以有线闪光模式操作测光表。
●如果将测量表置于可能产生腐蚀性气体的地方,该气体可能会影响本产品,并可能导致损坏。
在这些类型的位置使用测量表时请小心谨慎。
●处置测量表时,请遵循您所在地区的处置规则。
维护说明●请注意,不要让感光体沾上灰尘、弄脏或划伤,否则可能会影响测量的精度。
●如果测量表变脏,请用干燥的软布擦拭。
切勿使用稀释剂或汽油等有机溶剂。
●●对于废旧电池,请根据您所在地区的规则处置它们。
●●使用胶带或其他绝缘材料使正负极端子绝缘。
■预期用途测光表旨在:●测量用于照片、视频或电影的人工光源或自然光■L-308X 的特性产品搭载入射光和反射光系统用于闪光和环境光的数字测光表增强视频/电影功能,例如帧频设置■目标用户本产品的目标用户如下。
测光表介绍和使用(为摄影棚准备)
测光表介绍和使用(为摄影棚准备)测光表是一种用来测量光的强度的仪器。
在摄影中测光表被用来确定适当的曝光时间。
在胶片感光度和快门速度已知的情况下测光表给出获得最佳曝光的光圈值。
测光表也被用来做照明来控制照明的亮度,或者被用作手持的仪器来确保光强符合一定的要求。
测光表-作用现代相机中的测光系统已经十分发达,为什么许多摄影家还要使用手持的、离开相机而独立的测光表呢?因为:1、中片幅以上的相机很少有性能完善的测光系统,较大片幅的相机大都没有测光系统。
2、比起相机内测光系统来,手持测光表可以有更灵敏、更精确的测光性能,例如可以测量到一档光圈的1/10,对于弱光更加灵敏。
测量角度也可以达到很小,例如1度,这也是常见的具有“点测光功能”的相机达不到的。
3、在有些场合,如风光、静物、产品、模特摄影中,移动相机去测光很不方便,而把相机留在三脚架上,手持测光表去测量、思考、判断要从容得多。
4、相机内测光系统只能测量反射光,而手持测光表还可以具有测量入射光和闪光的功能。
测光表-使用方法测光表是用来测量被摄体的反射光的亮度或光源照度的一种仪器。
根据感光片的感光度与摄影者创作意图的需要,用它来测量光线的亮度,确定光圈、快门速度的曝光组合。
常见测光表的使用大体上有五种方法:1、机位测光法机位测光法是在景物亮度分布较均匀的情况下,测光表同位于照相机取景方向对被摄体进行测光,所获得的亮度值是景物反射光的平均光值,依据这个亮度值来确定曝光,能较好地表现整个画面的影调。
此法常用于拍摄远景或全景风光片。
采用机位测光法,应注意景物亮度的分布,使测量范围内的景物明暗有适当的比例。
测光表的感应窗对应着主体物,避开(或少包括)亮度很亮的天空或反光很强的水面,否则测光表指数偏高,而实际曝光偏低,容易造成底片曝光不足。
在拍摄逆光景物时,要防止阳光直接射向测光表,不然也会因测光不准而造成曝光不足。
即使阳光没有直接射向测光表,也应按逆光景物的反差及暗部面积大小,酌情增加半级到一级曝光量。
758 CSV重量指示器指數功能操作手冊说明书

Weight Indicating InstrumentWith Body Mass Index FeaturesOwner’s ManualCardinal Scale Manufacturing Co. 8555-M433-O1 Rev D PO BOX 151 WEBB CITY, MO 64870 Printed in USA 09/07 PH (417) 673-4631 v FAX (417) 673-5001Technical Support: Ph: 866-254-8261 v **********************Cardinal 758CSV owners Manual8555-M433-O1 v 758CSVPage 1758CSV INDICATORThank you for purchasing our 758CSV Weight Indicating Instrument. It has beenmanufactured with quality and reliability at our factory in Webb City, MO USA. This Indicator has been tested before leaving our factory to insure accuracy and dependability for years to come.This manual is provided to guide you through installation, operation and maintenance of your indicator. Please read it thoroughly before attempting to install or operate your 758CSV and keep it handy for future reference.____________________________________FCC COMPLIANCE STATEMENTWARNING! This equipment generates uses and can radiate radio frequency and if not installed and used in accordance with the instruction manual, may cause interference to radio communications. It has been tested and found to comply with the limits for a Class A computing device pursuant to Subpart J of Part 15 of FCC rules, which are designed to provide reasonable protection against such interference when operated in a commercial environment. Operation of this equipment in a residential area may cause interference in which case the user will be responsible to take whatever measures necessary to correct the interference.You may find the booklet "How to Identify and Resolve Radio TV Interference Problems" prepared by the Federal Communications Commission helpful. It is available from the U.S. Government Printing Office, Washington, D.C. 20402. Stock No. 001-000-00315-4.____________________________________All rights reserved. Reproduction or use, without expressed written permission, of editorial orpictorial content, in any manner, is prohibited. No patent liability is assumed with respect to the use of the information contained herein. While every precaution has been taken in the preparation of this manual, the Seller assumes no responsibility for errors or omissions. Neither is any liability assumed for damages resulting from use of the information contained herein. All instructions and diagrams have been checked for accuracy and ease of application; however, success and safety in working with tools depend to a great extent upon the individual accuracy, skill and caution. For this reason the Seller is not able to guarantee the result of any procedure contained herein. Nor can they assume responsibility for any damage to property or injury to persons occasioned from the procedures. Persons engaging the procedures do so entirely at their own risk.TABLE OF CONTENTSSpecifications . . . . . . . . . . . . . . . . . . . . . . 1 Proper Disposal . . . . . . . . . . . . . . . . . . . . 1 European Declaration Of Conformity . . . . 2 Installation . . . . . . . . . . . . . . . . . . . . . . . . 3Unpacking. . . . . . . . . . . . . . . . . . . . . . 3 Mounting . . . . . . . . . . . . . . . . . . . . . . 3 Interconnections . . . . . . . . . . . . . . . . 4 Power Supply . . . . . . . . . . . . . . . . . . . 4 Batteries . . . . . . . . . . . . . . . . . . . . . . . 4Battery Status . . . . . . . . . . . . . . . 5 Low Battery Indicator . . . . . . . . . 5 Battery Charging . . . . . . . . . . . . . 5Keypad Functions . . . . . . . . . . . . . . . . . . 5Basic Functions . . . . . . . . . . . . . . . . . 6 Body Mass Index Functions . . . . . . . . 6 nControl Feature . . . . . . . . . . . . . . . . 7 Annunciators . . . . . . . . . . . . . . . . . . . . . . 8 Operation - Type 0 (No ID Storage) . . . . 10Basic Operation . . . . . . . . . . . . . . . . . 10 Body Mass Index . . . . . . . . . . . . . . . . 11 Operation - Type 1 (ID Storage) . . . . . . . . 13Basic without ID . . . . . . . . . . . . . . . . . 13 Tare Operation without ID . . . . . . . . . 13 Tare Operation with ID . . . . . . . . . . . . 14Add or Edit ID . . . . . . . . . . . . . . . 14 Basic with ID . . . . . . . . . . . . . . . . . . . 15 Body Mass Index . . . . . . . . . . . . . . . . 15 Setup and Calibration . . . . . . . . . . . . . . . . 17 Setup Review . . . . . . . . . . . . . . . . . . . . . . 24 Error and Status Displays. . . . . . . . . . . . . 24 Before You Call Service . . . . . . . . . . . . . . 25 Care and Cleaning . . . . . . . . . . . . . . . . . . 25 Security Seal Installation . . . . . . . . . . . . . 26 Parts Identification . . . . . . . . . . . . . . . . . . 27Serial Number ______________________Date of Purchase ____________________Purchased From ________________________________________________________________________________________RETAIN THIS INFORMATION FOR FUTURE USEPRECAUTIONSBefore using this instrument, read this manual and pay special attention to all "WARNING" symbols:IMPORTANTELECTRICALWARNINGThis is a “Table of Contents preview” for quality assuranceThe full manual can be found at /estore/catalog/ We also offer free downloads, a free keyboard layout designer, cable diagrams, free help andsupport. : the biggest supplier of cash register and scale manuals on the net。
如何使用测光表

二十、胶片的储存和保护所有胶片都是易受高温和湿度的侵害。
储存和处置它们需有对高温高湿和有害气体的防范措施。
在盛夏高温季节或热带地区,我们建议将胶片储存在冰箱或冷冻仓内,使胶片保持低温。
胶片应存放在不透气的金属盒罐中,加干燥剂,然后密封。
(低温能使湿空气中的水份凝结出水珠,从而使胶片受害,所以胶片应封存在湿气已经消除的容器中。
)当准备使用时,把盛胶片的容器从冷藏器里拿出来,暂不撕开封口胶带,给胶片以足够的时间达到室温,然后撕开封口。
否则,空气中的水份会凝结在冰冷的胶片表面。
至少等30分钟之后再启封。
如果容器较大,甚至需等待2小时或更长时间开启才好。
如果处在高温条件下,已摄胶片应尽早冲洗。
高温高湿常使胶片潜影产生不希望发生的变化。
不要把已开启的盛有胶片的容器放在潮湿的地下室、冰箱或别的相对温度较高的地方。
一个中等温、湿度条件胜过温度虽低而相对湿度很高的环境条件。
胶片储存的理想相对湿度为40%左右。
如果你不具备防潮湿的储存条件或你的冰箱必须用于食物冷冻,可把胶片放在可以封口防湿的铁罐瓶中。
如果通常的相对湿度大于60%,或者你想把胶片放在低于室温的地方,可在储存前放进一点干燥剂如硅胶之类。
二十一、互易律失效我们已经讨论过黑白片和彩色片的各种性能,现在让我们转到一个不同的议题,称之为互易率失效(又译作倒易率失效)。
如你所知,控制曝光量的方法可以是变更快门速度或光圈。
你也知道,如果同时改变两个因素,其曝光量相等。
例如下列的曝光量控制指数:f/2, 1/1000 f/2.8, 1/500f/4, 1/250 f/5.6 1/250在以上二例中,如果我们把光圈缩小一挡,同时,又把曝光时间增加一挡,结果如何?光线射出到胶片上的量还是相等的。
这种光圈与快门速度的关系被称为"互易"的关系。
一边的变更相当于另一边的变更,其结果曝光量等同。
胶片是不管你在1/1000秒速度下用f2还是在1/125秒速度下用f5.6,反正两种曝光方法下,照射到胶片上的光量是相同的。
SEKONIC L-398A室豪华III说明书

1. 特色
差不多所有被拍摄的主体都综合了复杂的强反射表面 ( 高反射率 ) 和 弱反射表面 ( 低反射率 )。这些差异微妙地影响了对曝光値的决定性, 因透过该决定要选取那一部份的曝光参数为准后都会大大影响了照片 的质素和观感 . 虽然可以通过采集被拍摄的主体上所有强弱反射表面的曝光数据,然 后取其平均値减少失败的风险,但是这种做法既繁琐又费时,使用世 光 Studio Deluxe III L-398A 测光表就能更有效地为以上问题找出答案 . 1. 最适宜采用本测光表的入射式测量 ( 也可用反射式测量 ). 2. 可自由旋转的测光头在进行测量时倍觉方便 . 3. 机械式停表设计在进行测量时可以释放按着测量按钮的手 . 4. 测量按钮锁的功能可令指针持续摆动测量,这提供了决定光平衡 更大的便利性 . 5. 备忘指标的功能可以更容易辅助光平衡的设定 . 6. 半圆形的测光球体检测到照射的光线就如同被拍摄的主体般一样, 因为大多数被拍摄的主体都是三维空间 ( 立体 ) 的,都会有光面 ( 高光位 ) 和暗面 ( 阴影位 ) 的产生 ( 照明对比 ) ,所以世光 Studio Deluxe Ⅲ L-398A 测光表就能自动仿如测量到所有方向光线照射到 被拍摄的主体一样,并能提供适用于摄影的数値,这是一般最方 便和常用去确定曝光的测量方法 . 7. 当决定了采用那一个感光度和快门速度后,直读片 ( 另购 ) 可用于 直接确定光圈値 . 8. 采用了 AMORPHOUS PHOTOSENSOR ( 非结晶光传感器 ) 作为测光 元件,可以无需额外供电 ( 免电池 ). 9. 可另购配件使用,能增加摄影帅们测量時的樂趣和便捷性 .
2
2. 规格
种类 测量方式 测量部件 测量范围 (ISO 100) 快门速度 CINE 帧率 (f/s) 检定常数 工作温度范围 存放温度范围 尺寸 重量 指针式环境光测光表 入射 / 反射式 入射式 : 测光球及平面扩散头 反射式 : 反射测光头 ( 测光角度 30 度 ) 入射式 : EV4 至 17 反射式 : EV9 至 17 ISO 6 至 12,000 ( 以 1/3 档步长 ) F0.7 至 F128 ( 以 1/3 档步长 ) EV1 至 20 ( 以 1/3 档步长 ) 入射式 : 反射式 : 0℃ 至 40℃ -20℃ 至 60℃ 112( 高 ) × 58( 宽 ) × 34( 厚 ) mm 约 190 克 C=340 ( 测光球 ), C=250 ( 平面扩散头 ) K=12.5
世光Sekonic L-478D L-478DR 测光表 中文说明书
4பைடு நூலகம்
■ 目录
■ 盒内附件...............................................................................................................3
■ 安全守则...............................................................................................................4
亡和污染环境。 ● 请不要用取景器(另购)直接看太阳,这会对眼睛造成伤害。 ●(只用于L-478DR)请勿修改无线电装置,否则可能会导致违反无线电通讯法律,从而受到惩
处。
● 请不要在雨中、潮湿地方使用。请不要湿手碰它。 以上情况使用「同步线闪光模式」可能会有触电的危险,或导致产品故障。
●请勿自行拆开本机去修理或改装。如有故障,请交给有资格和授权的人员和经销商办理维修事 儿。
● 本产品附带的光盘不适用于音乐光盘播放器。可能导致听觉、扬声器或耳机受损。 ● 请用手指轻按显示屏操作。请勿使用原子笔或铅笔等尖锐的物品去代替,否则会损坏显示屏。 ●(只适用于L-478DR)本产品符合无线电法所列明的低功率无线电设备的技术标准许可证,您不
需要为这领取相关应用许可证。请务必遵守以下几点。 ·请不要拆卸或修改本产品的无线应用。法律禁止拆卸或修改本产品的无线应用。 ·请不要揭下机背上的标签。法律要求使用时要标签。 ·本产品可能不符合日本国国外的无线电法。
指出注意事项或在使用上有关的特别事项。请阅读此事项,避免 不正确使用本测光表。
提供有关在使用本测光表时的参考资讯和相关有帮助的功能。建 议阅读参考事项。
测光表说明书

左到右:1、保护套2上、安装架安装在机器上的样子3、主机4、测光棒1、测光窗?推测的,测光时手挡住有反应2、红外接收窗?共有四个正面两个,上面还有两个,好像是闪灯红外触发的接收器3、指示灯?没亮过,不知道是干嘛的4、power 电源?反正关机状态按它无法开机,开机时无法关机。
按了一通必须和“+”“-”键配合使用5、ISO 这个理解,是设定胶片感光度,可设置范围是3-4000,配合“+”“-”键使用6、7 - + + - 设定参数使用,配合其它功能键8、ON 开机9、ANALYSE analyse 分析?分析?10、MEAN mean ?不懂11、MULTI multi 多点?12 侧按键上摸索了好像是清除13 侧按键下测光键14 闪光同步插口测闪灯时接收触发信号的接口15、外接测光棒接口16、调节空好像是微调参数用的17、电池仓装9V叠层电池18、锁定扳手19、安装的关键是图中所示的安装架18锁定扳手对面的安装卡19注意看后架侧面的安装槽,安装槽的上端有一扩大到空位,松开锁定即可插入,插入槽内后滑入下端然后锁定即可。
这时可把测光表侧面的槽位对准安装架的卡口滑入,为方便拍摄,是手持机器拍的示意图。
测光后背和fcm的配合1、安装孔,2、测光棒锁紧扳手(松开位置),3、测光棒(工作位置),4、测光表(装在前组上,与测光后组安装孔相同高度);试装了一下,感觉测光后背的安装孔应不是设计安装测光表的,因为安装在1的位置时会出现使用问题:1、安装孔的位置太高,测光表将挡住2测光棒锁紧扳手的操作,无法松开;2、测光棒的安装架因测光后背的凸起,将无法调节角度;3、测光棒测光工作位置较高时将与测光表发生碰撞;最终感觉最合适的位置应该是在前组上。
ANALYSE 这个在外部光线OK 的情况下,也就是机器同时测到外部背景光和闪光的时候,如果按ANALYSE 会依次显示总量,环境光的量,闪光的量。
对于分析环境光的影响有用。
反射式测光表
The Sekonic L-558 DualMaster
•
•
the first multi-function light meter that incorporates a wireless triggering transmitter built-in. It has been designed to meet the challenges of today's film and digital photographer. It offers a 1° spot meter that measures reflected flash output down to an amazing f/2.0 (ISO 100). Its parallax-free lens eliminates erroneous close-up photography light readings. A digital readout through the spot viewfinder displays all-important exposure information. With a turn of a knob the L-558 changes from an incident meter to a reflective spot meter for both ambient and flash measurements, all in one rugged, compact, all-weather housing. Selecting aperture or shutter priority modes or EV is as easy as turning the Jog wheel. Simultaneous evaluation of ambient and flash is displayed in three convenient ways.Unique features such as meter calibration, exposure compensation and CINE settings offer the flexibility that today's photographer's require.
测光表介绍和使用

测光表介绍和使用(为摄影棚准备)测光表是一种用来测量光的强度的仪器。
在摄影中测光表被用来确定适当的曝光时间。
在胶片感光度和快门速度已知的情况下测光表给出获得最佳曝光的光圈值。
测光表也被用来做照明来控制照明的亮度,或者被用作手持的仪器来确保光强符合一定的要求。
测光表-作用现代相机中的测光系统已经十分发达,为什么许多摄影家还要使用手持的、离开相机而独立的测光表呢?因为:1、中片幅以上的相机很少有性能完善的测光系统,较大片幅的相机大都没有测光系统。
2、比起相机内测光系统来,手持测光表可以有更灵敏、更精确的测光性能,例如可以测量到一档光圈的1/10,对于弱光更加灵敏。
测量角度也可以达到很小,例如1度,这也是常见的具有“点测光功能”的相机达不到的。
3、在有些场合,如风光、静物、产品、模特摄影中,移动相机去测光很不方便,而把相机留在三脚架上,手持测光表去测量、思考、判断要从容得多。
4、相机内测光系统只能测量反射光,而手持测光表还可以具有测量入射光和闪光的功能。
测光表-使用方法测光表是用来测量被摄体的反射光的亮度或光源照度的一种仪器。
根据感光片的感光度与摄影者创作意图的需要,用它来测量光线的亮度,确定光圈、快门速度的曝光组合。
常见测光表的使用大体上有五种方法:1、机位测光法机位测光法是在景物亮度分布较均匀的情况下,测光表同位于照相机取景方向对被摄体进行测光,所获得的亮度值是景物反射光的平均光值,依据这个亮度值来确定曝光,能较好地表现整个画面的影调。
此法常用于拍摄远景或全景风光片。
采用机位测光法,应注意景物亮度的分布,使测量范围内的景物明暗有适当的比例。
测光表的感应窗对应着主体物,避开(或少包括)亮度很亮的天空或反光很强的水面,否则测光表指数偏高,而实际曝光偏低,容易造成底片曝光不足。
在拍摄逆光景物时,要防止阳光直接射向测光表,不然也会因测光不准而造成曝光不足。
即使阳光没有直接射向测光表,也应按逆光景物的反差及暗部面积大小,酌情增加半级到一级曝光量。
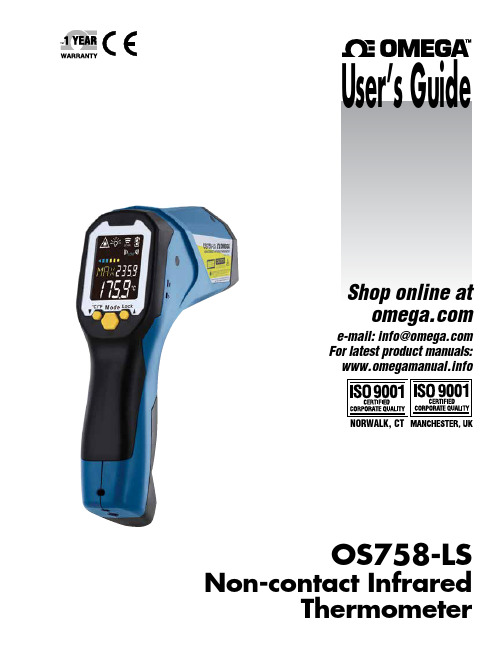
Omega OS758-LS非接触红外温度计操作指南说明书
e-mail:**************For latest product manuals: OS758-LSNon-contact InfraredThermometerShop online at User’s GuideThe information contained in this document is believed to be correct, but OMEGA accepts no liability for any errors it contains, and reservesthe right to alter specifications without notice.Servicing North America:Omega Engineering, Inc.800 Connecticut Ave, Suite 5N01, Norwalk CT 06854Toll-Free: 1-800-826-6342 (USA & Canada only)Customer Service: 1-800-622-2378 (USA & Canada only) Engineering Service: 1-800-872-9436 (USA & Canada only) Tel: (203) 359-1660 Fax: (203) 359-7700 e-mail:**************For Other Locations Visit /worldwide***********************U.S.A.Headquarters:OS758-LSThermometer Operating Instructions For Model with thermocouple socketThe thermometer is a non-contact infrared thermometer. There are many mathematical modes for the Infrared function. Please remember to keep away from children and don’t use it for safety related applications.(Default Screen)7) and press Meas. key (6) to display the surface temperature. The ** Data logger function(SD Card USB): Please push “Micro SD Card Switch”11 up to enable the function.. FUNCTIONPress Mode key (2) for scrolling more display function as follows. Here will show the emissivity data. (The default emissivity is 0.95.)Press Mode key (○2), then press Up key (○4) or Down key (○3) to set the emissivity , then press Mode key (○2) to confirm it. The emissivity can be changed from 0.10 (10E) to 1 (100E).Press Mode key (○2) for the Maximum (MAX), Minimum (MIN), Different between MAX and MIN (DIF) and Average (AVG) modes. During the measurement, the special modes reading will be displayed beside the mode icon.Press Up key (○4) or Down key (○3) to change the High Alarm (HAL) or Lo Alarm (LAL), then press Meas. key (○6) to confirm it. For example: When the reading 26.9 o C < LAL 27 oC, the Low icon will flash and you will hear a beep sound.Connect the thermocouple with Thermocouple socket (○5) and put the probe in/on the target, the thermometer will display the temperature automatically without pressing any button. To see the minimum or maximum data during the probe measurement,please hold down the Up key (○4) or Down key (○3). After measure high temp, the probe may remain HOT for a while.After taking the temperature, press Mode key (○2) for the Memory (M00), then press Meas. key (○6) to save the measurement. Under the Memory (M00), press Up key (○4) or Down key (○3) key to display the record. ** The thermometer will automatically shut off if left idle for more than 60sec., unless in PRB mode. (In PRB mode, it will shut off if left idle formore than 12 minutes.) ADD VALUEIn E, MAX, MIN, DIF, AVG mode:Press Up key (○4) for LOCK mode ON/OFF. The lock mode is particularly useful for continuous monitoring of temperatures for up to 60 minutes.Press Down key (○3) for o C or oF transferred. In MAX, MIN mode: Hold on the Meas. key (○6) sh ows RED color when the reading is close to maximum value,and shows BLUE when close to minimum. While thetemperature is between the maximum and minimum, the bar willdisplay in YELLOW .In all modes: First hold on the Meas. key (○6) LCD Backlight: always on. and press Down key (○3) for laser function ON/OFF. CAUTION1.WHEN DEVICE IS IN USE, DO NOT LOOK DIRECTLY INTO THE LASER BEAM–PERMANENT EYE DAMAGE MAY RESULT.E EXTREME CAUTION WHEN OPERATING THE LASER.3.NEVER POINT THE DEVICE TOWARDS ANYONE’S EYES. *Dual laser pointsspecify theapproximate measurement area for better targeting.○○○4.KEEP OUT OF REACH OF ALL CHILDREN.○Ref.No.:062017STORAGE & CLEANINGIt should be stored at room temperature. The sensor lens is the most delicate part of the thermometer. The lens should be kept clean at all times,care should be taken when cleaning the lens using only a soft cloth or cotton swab with water or medical alcohol, allowing the lens to fully dry before using the thermometer. Do not submerge any part of the thermometer. LCD ERROR MESSAGESThe thermometer incorporates visual diagnostic messages as follows:‘Hi’ or ’Lo’ is displayed when the temperature being measured is outside of the settings of HAL and LAL.「」 「」‘Er2’ is displayed when the thermometer is exposed to rapid changes in the ambient temperature. ‘Er3’is displayed when the ambient temperature exceeds 0o C (32°F) or +50oC (122°F). The thermometer should be allowed plenty of time (minimum 30 minutes) to stabilize to the working/room temperature. 「」Error 5~9, for all other error messages it is necessary to reset the thermometer. To reset it, turn the instrument off, remove the battery and wait for a minimum of one minute, reinsert the battery and turn on. If the error message remains please contact the Service Department for further assistance. 「」「」‘Hi’ or ’Lo’ is displayed when the temperature being measured is outside of the measurement range.BATTERIESThe thermometer incorporates visual low battery indication as follows:‘Battery OK’: measurements are possible ‘Battery Low’: battery needs to bereplaced, measurements are still possible ‘Battery Exhausted’: measurements are notpossibleWhen the ‘Low Battery’ icon indicates the battery is low, the battery should be replaced immediately with AA, 1.5V batteries. Please note: It is important to turn the instrument off before replacing the battery otherwise the thermometer may malfunction. Dispose of used battery promptly and keep away from children.SPECIFICATION ItemNon-contact Infrared Scan functionThermocouple Probe Scan function(K type; probe not included.)Measurement Range -35 to +1600 oC (-31 to +2912 oF)-64 to +1400°C (-83.2 to +2552°F)Operating Range0 to +50°C (32 to +122°F)Accuracy(Tamb=23±3°C)Tobj=-35~0: ±(2°C+0.05/degC)°C, Tobj=0~1600: ±2% of reading or 2°C (4°F) whichever is greater±1% of reading or 1°C (1.8°F) whichever isgreater (Test under Tamb=23±6°C) Emissivity Range 0.95 default – adjustable 0.1 to 1 step .01 Resolution 0.1°C/0.1°F at -83.2 to 999.9(°C/°F), otherwise 1°C/1°F Spectral Range 8~14μm Response Time (90%) 1sec Distance:Spot 60:1 (90% energy covered) Internal Memory Detailed 24 Memories with Temperature & EmissivityExternal Memory Type Support 8G micro SD card (Recommend to use the attached SD card).If SD card data logger is failed, please reset the switch ○11 USB Function Please download the program from CD. (CD & USB cable are enclosed with the package) Output Interface SPI, USB, SD card Battery Life Typical 14, min 10 hours continuous use (Alkaline, with laser and backlight) Dimensions 202.99*176.07*58.31 mm (7.99×6.93×2.30 inch) Weight 401 grams (14.14 oz) including batteries (AA*2pcs)Note: Under the electromagnetic field of 3V/m from180 to600 MHz, the maximum error is 10 o C (18 oF).Caution: The measure range is for thermometer only. User should choose proper probe types for different kinds of application. Please make sure the target to be measured will not exceed the temperature range of the probe to avoid permanent damage of the thermocouple probe.Caution: To avoid electric shock and thermometer damage, do not measure live circuit where voltage exceeding 24V AC RMS or 60V DC with the thermocouple probe.EMC/RFI: Readings may be affected if the unit is operated within radio frequency electromagnetic field strength of approximately 3 volts per meter, but the performance of the instrument will not be permanently affected.OMEGA’s policy is to make running changes, not model changes, whenever an improvement is possible. This affordsour customers the latest in technology and engineering.OMEGA is a trademark of OMEGA ENGINEERING, INC.© Copyright 2019 OMEGA ENGINEERING, INC. All rights reserved. T his document may not be copied, photocopied, reproduced, translated, or reduced to any electronic medium or machine-readable form, in whole or in part, without the prior written consent of OMEGA ENGINEERING, INC.FOR WARRANTY RETURNS, please have thefollowing information available BEFORE contacting OMEGA:1. P urchase Order number under which the productwas PURCHASED,2. M odel and serial number of the product underwarranty, and3.Repair instructions and/or specific problemsrelative to the product.FOR NON-WARRANTY REPAIRS, consult OMEGA for current repair charges. Havethe following information available BEFORE contacting OMEGA:1.Purchase Order number to cover the COST of the repair,2.Model and serial number of the product, and 3.Repair instructions and/or specific problems relative to the product.RETURN REQUESTS/INQUIRIESDirect all warranty and repair requests/inquiries to the OMEGA Customer Service Department. BEFORE RET URNING ANY PRODUCT (S) T O OMEGA, PURCHASER MUST OBT AIN AN AUT HORIZED RET URN (AR) NUMBER FROM OMEGA’S CUST OMER SERVICE DEPART MENT (IN ORDER T O AVOID PROCESSING DELAYS). The assigned AR number should then be marked on the outside of the return package and on any correspondence.The purchaser is responsible for shipping charges, freight, insurance and proper packaging to prevent breakage in transit.WARRANTY/DISCLAIMEROMEGA ENGINEERING, INC. warrants this unit to be free of defects in materials and workmanship for a period of 13 months from date of purchase. OMEGA’s WARRANTY adds an additional one (1) month grace period to the normal one (1) year product warranty to cover handling and shipping time. This ensures that OMEGA’s customers receive maximum coverage on each product.If the unit malfunctions, it must be returned to the factory for evaluation. OMEGA’s Customer Service Department will issue an Authorized Return (AR) number immediately upon phone or written request. Upon examination by OMEGA, if the unit is found to be defective, it will be repaired or replaced at no charge. OMEGA’s WARRANT Y does not apply to defects resulting from any action of the purchaser, including but not limited to mishandling, improper interfacing, operation outside of design limits, improper repair, or unauthorized modification. T his WARRANT Y is VOID if the unit shows evidence of having been tampered with or shows evidence of having been damaged as a result of excessive corrosion; or current, heat, moisture or vibration; improper specification; misapplication; misuse or other operating conditions outside of OMEGA’s control. Components in which wear is not warranted, include but are not limited to contact points, fuses, and triacs.OMEGA is pleased to offer suggestions on the use of its various products. However, OMEGA neither assumes responsibility for any omissions or errors nor assumes liability for any damages that result from the use of its products in accordance with information provided by OMEGA, either verbal or written. OMEGA warrants only that the parts manufactured by the company will be as specified and free of defects. OMEGA MAKES NO OTHER WARRANTIES OR REPRESENTATIONS OF ANY KIND WHATSOEVER, EXPRESSED OR IMPLIED, EXCEPT THAT OF TITLE, AND ALL IMPLIED W ARRANTIES INCLUDING ANY W ARRANTY OF MERCHANTABILITY AND FITNESS FOR A PARTICULAR PURPOSE ARE HEREBY DISCLAIMED. LIMITATION OF LIABILITY: The remedies of purchaser set forth herein are exclusive, and the total liability of OMEGA with respect to this order, whether based on contract, warranty, negligence, indemnification, strict liability or otherwise, shall not exceed the purchase price of the component upon which liability is based. In no event shall OMEGA be liable for consequential, incidental or special damages.CONDITIONS: Equipment sold by OMEGA is not intended to be used, nor shall it be used: (1) as a “Basic Component” under 10 CFR 21 (NRC), used in or with any nuclear installation or activity; or (2) in medical applications or used on humans. Should any Product(s) be used in or with any nuclear installation or activity, medical application, used on humans, or misused in any way, OMEGA assumes no responsibility as set forth in our basic WARRANTY /DISCLAIMER language, and, additionally, purchaser will indemnify OMEGA and hold OMEGA harmless from any liability or damage whatsoever arising out of the use of theProduct(s) in such a manner.Where Do I Find Everything I Need forProcess Measurement and Control?OMEGA…Of Course!Shop online at TEMPERATUREM U Thermocouple, RTD & Thermistor Probes, Connectors, Panels & AssembliesM U Wire: Thermocouple, RTD & ThermistorM U Calibrators & Ice Point ReferencesM U Recorders, Controllers & Process MonitorsM U Infrared PyrometersPRESSURE, STRAIN AND FORCEM U Transducers & Strain GagesM U Load Cells & Pressure GagesM U Displacement TransducersM U Instrumentation & AccessoriesFLOW/LEVELM U Rotameters, Gas Mass Flowmeters & Flow ComputersM U Air Velocity IndicatorsM U Turbine/Paddlewheel SystemsM U Totalizers & Batch ControllerspH/CONDUCTIVITYM U pH Electrodes, Testers & AccessoriesM U Benchtop/Laboratory MetersM U Controllers, Calibrators, Simulators & PumpsM U Industrial pH & Conductivity EquipmentDATA ACQUISITIONM U Communications-Based Acquisition SystemsM U Data Logging SystemsM U Wireless Sensors, Transmitters, & ReceiversM U Signal ConditionersM U Data Acquisition SoftwareHEATERSM U Heating CableM U Cartridge & Strip HeatersM U Immersion & Band HeatersM U Flexible HeatersM U Laboratory HeatersENVIRONMENTALMONITORING AND CONTROLM U Metering & Control InstrumentationM U RefractometersM U Pumps & TubingM U Air, Soil & Water MonitorsM U Industrial Water & Wastewater TreatmentM U pH, Conductivity & Dissolved Oxygen InstrumentsM5601/0119。
SEKONIC L-246说明书

SpecificationsMeasuring Range of Illuminance:Low:0 -1000 Lx (Red scale)Ordinary:0-5000 Lx (Black scale)High: 0-50000 Lx (by using the Slide of x10 multiplier)Accuracy : ± 10% (tested by a standard parallel-light tungsten lamp of colortemperature 2854°K) without including the resolution forthe meter (the value deserves minimal scale 1/2)in thisaccuracy.Angle Allowance : 30'---Iess than -3% 60°---less than -10%Correction of sight sensitivity 0-1000 Lx (No correction-light source factor used0-5000 Lx (Correction used)Power Source : No battery usedCondition of Use : Temperature: 5 - 35° C Humidity: 45 -85Accessories :Lumidisc for low measurementLumidisc for ordinary measurementSlide ( x10 multiplier)Dimensions : 112X58X27mm Weight : 135gCharacteristics : Compact, light weight, handy to carry, and most easy-to-useswivel-head systemName ofPartsHow to operate the Illuminometer1. Getting ready for measurementAll you do for preparation is just to insert the LUMIDISC into position. To insert it, match the white dot (or the red dot for low measurement) on the lumidisc to the white dot on the swivel-head of the meter. Turn the lumidisc clockwise lightly to about 45° until it tightly fits.2. Ordinary measurement: 0--5000 LxTo measure the range of 0--5000 Lx, use the lumidisc for ordinary measurement (with a white dot at the outer ring of the disc and a green filter attached at the back).Insert it into position as mentioned in 1. "Getting ready". Then place the meter at the surface to be measured so that the lumidisc is parallel to the surface. Read the BLACK figure on the scale. The figure the pointer indicates is the correct lux to use.3. Measurement of High range: 0 --50000 LxTo measure the range of 0--50000 Lx, use the lumidisc for ordinary measurement (see 2. above). Insert it into position in the same procedure as in 2. Then INSERT THE SLIDE (x10 multiplier) into the slit located at the top of the swivel-head. Measure in the same way as mentioned in 2. "Ordinary measurement". Read the BLACK figure the pointer indicates, then MULTIPLY the figure by 10 to get the correct lux.4. Measurement of Low range: 0--1000 LxTo measure the range of 0-1000 Lx, use the lumidisc for low measurement (with a red dot at the outer ring of the disc and no filter at the back). Insert it into position and measure in the same way as in 2. Read the RED figure on the scale. Then MULTIPLY the figure by the correction factor of each light source shown in the table below.Correction factorMercury arc lamp...............................1.1 Fluorescent lamp...............................1.0 Incandescent light..............................1.0 Day light..........................................0.8 ExampleIn case the pointer indicates 600 Lx under mercury arc lamp, the correct lux is, 600 Lx X 1.1-=660 Lx5. Swivel-HeadThe swivel-head is one of the most advantageous features of this meter. Swivel the head of the meter to the right or left when the measurement is difficult due to the position of the surface to be measured.6. Zero setting adjustmentWhen t he light receptor is completely covered by hand (a condition where no light enters into the light receptor), the pointer should be at zero. If it isn't, turn the zero adjusting screw on the back until the pointer comes to the zero position.7. General Precautions1) Be careful not to give any shadow on the light receptor at everymeasurement.2) Position the meter (more exactly the surface of Lumidisc) in parallel to thesurface to be measured.3) Avoid to leave the meter for long hours in a place of high temperature andhumidity.4) Store it in the case and keep in a dry place when not in use.SEKONIC CO., LTD.7-24-14, Oizumigakuen-cho, Nerima-ku, Tokyo, JapanPrinted in Japan。
世光(SEKONIC)_测光表L-308S_中文使用说明书书

世光(SEKONIC) 测光表L-308S 中文使用说明书1.产品图解2.LED图解3.使用前事项:1.绑挂绳。
2.安装电池。
要求使用AA型号电池,1.5伏二氧化锰干电池(R6P),或者AA型号电池,1.5伏碱性干电池(LR6),或者AA型号电池,1.5伏锂电池(FR6).不得使用其他类型电池。
3.检查电量。
4.更换电池。
更换电池前需要关闭设备。
更换电池后或者在测量过程中,显示屏出现异常,或者没有显示,取掉电池并等待十秒钟后再替换电池。
此为使软件自动重置。
在启动和关闭设备之间需要间隔三秒钟,以免损坏设备。
5.自动关机功能。
无操作四分钟后自动关机。
关机后最后一次的设置将保留在设备中并将开机后显示。
电源开关按住不松后一分钟电源自动关闭。
6.设定ISO感光度1)按住ISO按钮⑧并按上/下按钮⑥⑦来设定感光度2)你可以在测量后改变ISO值,新的数值也会随着更新并显示出来设定的值将随着上下按钮按住一秒或者一秒以上而改变。
4.基本操作:1.入射光或反射光测量的设定1)滑动按钮设定两种模式。
注:不要按着测光球本体滑动,会引起至损坏。
注意对球体防尘防水,应使用干燥软布擦拭,不要使用有机清洁剂。
(2)选择测量模式(1)按MODE③按钮选择测量模式,模式依次为:快门优先模式→EV模式→免线自动复位(闪光模式)→闪步线(闪光模式)(2)入射光模式测量按MODE 设定测光模式为现场光或EV。
(连续按MODE 可在四种模式间切换)(按住ISO 再按MODE 可在现场与EV 模式间切换)2.测入射光时,(1)用半球测人物、建筑或固体目标。
将测光表放置在被测物处,并将测光半球指向镜头轴线。
安上附件平头测纸张、印刷品等平面受光的目标,或进行对比测光(后面会提到)或测照度。
(3)用测光平头测量。
用于测量适用于原稿,图画和其他平面物件。
也是在测量对比和照度时所采用。
滑动测光半球安装座至右边,操作流程如下图。
4、测反射光时,将半球推向右侧,露出测光镜头,在相机位置将测光镜头对准被测目标。
测光经验谈

测光表世光758D使用经验谈测光表我用过世光558与758D,两个测光表我都用过半年以上,最后买进758D,有用的不同之处:1.758D支持三组camera设置,558只支持一组。
好处是,我在758上设置三个不同胶卷类型的camera设置,camera1是trix400黑白卷的曝光设置,该设置胶卷宽容度为9档,中灰点设置在4档左右(偏向暗部),相当于说区域测光法里将V放在VI区,符合黑白胶卷对暗部测光,对亮部显影的普遍规则。
camera2设置是普通5档设置,中灰设置在2.5档中间位置处(这是默认设置)。
camera3设置是反转片测光,是4档设置,中灰设置在2.5档,相当于按亮部测光,暗部有2.5档,亮部有1.5档范围。
2.758D支持多点平均测光,记录点达到8点以上,并且支持设置中灰点,在使用反射光点测时,可以动态测不同明暗部相对于中灰点的EV差值。
这对于区域测光法设置中灰点及测量画面各部分明暗光比特别有用。
3.758D支持USB接口,从电脑设置三个相机设置参数,并可以与数码相机数据对接,来精确设置测光参数设定。
(这个功能就是758D中标注D的原因,但我没有用过,因为我的数码相机已经出掉了,只留下胶片机了)4.测闪光与环境光光比。
这个很强,虽然我用得少,但用过几次,印象深刻。
在影棚中玩灯时特别有用。
除此之外,还有其他一些细微功能上的差别,因为少用,这里就不说了。
补充一下:关于camera设置中的设置,是我自己的经验,仅作为参考,特别是反转片的数据,大家要依据不同反转片来设置。
网上可以查询到不同反转片的宽容度,好像RVP50是3.5档,kodak100VS是4.5档,RDPIII是4档什么的,我经常用kodak100G /RVP100F,设置是自己的经验值,并依据不同主题及光线情况在测光后稍为调整。
有朋友就会问:有几处不是很明白:拿你的camera3的设定来说,您说:camera3设置是反转片测光,是4档设置,中灰设置在2.5档,相当于按亮部测光,暗部有2.5档,亮部有1.5档范围。
世光L-508Cine简体中文说明书

ON OFF
3. 选择快门角度(电影模式)
1. 按下“MODE”钮和“ISO2”钮,测光 表会显示如下图所示的内容。“Ang”是快 门角度的值。默认设置的快门角度是 180°。 在这个设定中,“Ang”是不可见的。
5
世光 L-508Cine 测光表简体中文说明书
2. 转动模式转盘,得到想要的快门角度的值。你可以 5°到 270° 之间,以 5°递进,选择一个值。在这个例子中,选择的是 90°。 3. 释放“MODE”键和“ISO2”键,测光表 回复显示标准的读数。当默认设置被改变 后,“Ang”值会出现在 LCD 中央。
5. 过滤补偿(电影/照片模式)
1. 按下“IS02”钮并且旋转模式转盘,选择想要的过滤值对应的 符号点位。 2. 在 ISO800 后,显示有 7 个不同的过滤值符号。当 按下“ISO2”钮时,测光 表显示符号和过滤补偿读 数。右侧的例子是选择
6
世光 L-508Cine 测光表简体中文说明书
“85-”和“n9-”时的显示。
可以记忆5组曝光组合。
2
简介
简体中文版特别说明
此版本手册是根据在网上流传的世光 L-508 测光表的英文版 说明书,经翻译,并重新排版而成。
在此,特别感谢世光公司工作人员的辛勤劳动,以及在网络 上提供英文版的网友。
本版基本模仿了原版说明书的排版样式,但由于纸型的问 题,将纸型换为 A5 纸型(半张 A4 纸),便于用户打印使用。所 以修改了部分页面的排版样式,见谅。
1. 打开电池盒盖子。 2. 拨动 DIP 开关中第 4 组,标有“CINE ON”位置的开关,
即可进行模式之间的转换。
电影模式(Cine mode)—入射测光(Incident mode) 当选择了电影模式,并且采用入射测光时,可以使用下面介
塞康尼克 L-438 高性能视角测量仪说明书

on a 35mm cam era
. 4° equivalent to a 600mm len s
on a 35mm camera
.6° equivalent to a 400mm lens
on a 35mm camera
• 10° eq uivalent to a 250mm lens
on a 35mm camera
• Highly economical A DC-DC converter is employed in the internal power source circuit. This view spot exposure meter can be used for more than 100 minutes, under normal con ditions, with one 1.5V manganese penlight battery (R6, AA, SUM-3). The battery level can be easily checked by the lighting up of the LED lamp .
- 1、下载文档前请自行甄别文档内容的完整性,平台不提供额外的编辑、内容补充、找答案等附加服务。
- 2、"仅部分预览"的文档,不可在线预览部分如存在完整性等问题,可反馈申请退款(可完整预览的文档不适用该条件!)。
- 3、如文档侵犯您的权益,请联系客服反馈,我们会尽快为您处理(人工客服工作时间:9:00-18:30)。
目录
安全注意事项 目录 1. 部件名称................................................................................................................1
1. 测光表部件 ......................................................................................................1 2. 附件 .................................................................................................................2 2. 液晶显示屏(LCD)的说明...................................................................................3 3. 准备使用................................................................................................................7 1. 扣上挂带 ..........................................................................................................7 2. 安装电池 ..........................................................................................................7 3. 检查电池电量...................................................................................................7 4. 在测量过程中或使用记忆功能时更换电池........................................................8 5. 自动关机功能...................................................................................................8 6. 设定ISO1的感光度...........................................................................................8 7. 设定ISO 2的感光度..........................................................................................8 8. 转盘上锁或解锁 ...............................................................................................9 9. 测量按钮和记忆按钮的配置 ...........................................................................10 4. 基本操作..............................................................................................................11 1. 入射光或反射光点测量 ..................................................................................11 2. 设定测量模式.................................................................................................12 3. 入射光测量模式 .............................................................................................13 4. 反射光测量模式(点测光) ...........................................................................14 5. 测量 .....................................................................................................................15 1. 测量现场光 ....................................................................................................15
注意
• 采用同步线闪光模式时,用湿手、在雨中、靠近水边或很潮湿的环境下 操作测光表,有触电和损坏产品的危险。上述情况下建议使用无线闪光 模式或无线触发闪光模式。在潮湿或下雨的环境中使用测光表时,要把 同步接口保护盖装上。
• 切勿通过取景器直视太阳,以免损伤眼睛。 • 请勿拆卸产品进行改装或更换部件。测光表出现故障时,只能由合格授
参考: 提供操作中有用的参考信息以及相关功能。建议阅读参考事 项。
警外卷在幼儿脖子上 导致其被勒死的事故。
• 请勿把同步线接口保护盖放在儿童可以接触到的地方,避免其呑下导致 窒息的危险。
• 不要把电池丢到火里、短路、拆开、加热或充电,否则有可能因其破裂 而造成损坏、伤害或污染环境。
1-1 快门优先模式........................................................................................15 1-2 光圈优先模式........................................................................................17 1-3 EV值模式 ..............................................................................................18 1-4 电影摄影机模式 ....................................................................................19 2. 测量闪光灯 ....................................................................................................21 2-1 同步线闪光模式 ....................................................................................21 2-2 自动重设无线闪光模式 .........................................................................22
目录
2-3 同步线多次闪光(累积)模式...............................................................24 2-4 无线多次闪光(累积)模式 ..................................................................25 2-5 分析闪光功能........................................................................................27 2-6 无线触发闪光模式.................................................................................28 6. 增强功能..............................................................................................................35 1. 记忆功能 ........................................................................................................35 2. 平均功能 ........................................................................................................36 3. 对比功能 ........................................................................................................36 4. 如何使用入射光模式照度 (LUX或FC)计 (L-758DR/758D) ..............................38 5. 如何使用反射光亮度(cd/m2 / FL) 计 (L-758DR/758D)....................................39 6. 如何使用曝光补偿功能 ..................................................................................40 7. 如何使用校正补偿功能 ..................................................................................41 8. 滤色镜补偿 ....................................................................................................42 8-1 滤色镜补偿 (1).......................................................................................42 8-2 滤色镜号码的补偿 (2) (仅L-758CINE)....................................................43 9. 自定义设置功能 .............................................................................................44 7. 相机曝光数据文件 ...............................................................................................46 1. 经校正测试后的相机曝光数据文件 ................................................................46 2. 如何设定相机曝光数据配置文件 ....................................................................48 2-1 世光应用软件........................................................................................48
