Waves11 Renaissance Reverb混响插件
Waves11 Renaissance Reverb混响插件

Waves11 Renaissance Reverb混响插件
具有丰富尾混响、12种混响类型和先进的早期反射系统的经典混响插件,是无数制作人和音频工程师的首选。
Renaissance Reverb将丰富的功能与易用的界面相结合,提供无与伦比的声音以及非凡的混响密度和质感。
Renaissance Reverb可让你从12种混响类型中进行选择,包括大厅、房间、室内、教堂、板式、反向、门限、非线性、回声混响(EchoVerb)和共鸣混响(ResoVerb)。
借助双频段均衡器、阻尼控制和更新的直观界面,Renaissance Reverb可为你提供混响效果所需的灵活性。
在世界一流制作人、音乐家和音频工程师之间名声大噪的混响插件,也是你的声音所需。
特点:
具有丰富尾混响、12种混响类型和先进的早期反射系统的经典混响插件,是无数制作人和音频工程师的首选。
Renaissance Reverb将丰富的功能与易用的界面相结合,提供无与伦比的声音以及非凡的混响密度和质感。
Renaissance Reverb可让你从12种混响类型中进行选择,包括大厅、房间、室内、教堂、板式、反向、门限、非线性、回声混响(EchoVerb)和共鸣混响(ResoVerb)。
借助双频段均衡器、阻尼控制和更新的直观界面,Renaissance Reverb可为你提供混响效果所需的灵活性。
在世界一流制作人、音乐家和音频工程师之间名声大噪的混响插件,也是你的声音所需。
waves_效果器全套中英文说对照表

waves 效果器全套中英文说对照表99个英文中文01。
Prologue 12:42 加载方法02.API—2500 09:06 压缩处理03.API—550A 09:04 均衡处理04。
API-550B 05:29 均衡处理05.API—560 03:20 均衡处理06。
AudioTrack 09:50 多重效果07.C1 Comp 04:16 压缩处理08.C1 Comp—Gate 12:33 压缩+门限09。
C1 Comp—Sc 18:00 侧链压缩10。
C1 Gate 07:14 门限处理11.C4 13:14 多段动态12。
DeEsser 03:44 齿音消除13.Doppler 04:48 声场调整14。
Doubler 12:32 合唱效果15。
Enigma 09:36 迷幻效果16.IDR 01:45 抖动处理17。
L1—Ultramaximizer 02:54 母带处理18.L1—Ultramaximizer+ 03:49 母带处理19。
L2 02:52 母带处理20。
L3—MultiMaximizer 11:56 母带处理21.L3-UltraMaximizer 03:38 母带处理22.LinEq Broadband 05:40 均衡处理23。
LinMB 08:57 多段动态24。
MaxxBass 03:59 泛音处理25。
MetaFlanger 06:40 镶边效果26.MondoMod 09:15 调制效果27.Morphoder 07:18 声码效果28.PAZ Analyzer 11:36 综合分析仪29.PAZ Frequency 15:31 频谱仪30.PAZ Meters 12:10 电平表31。
PAZ Position 11:16 声场仪32。
Qx-Paragraphic EQ 21:07 均衡处理33。
RBass 05:22 泛音处理34。
RChannel 09:23 多重效果35.RComp 18:11 压缩处理36.RDeEsser 04:32 齿音消除37。
Waves插件的使用技巧和诀窍

Waves插件的使用技巧和诀窍使音轨具有冲击力——Renaissance Compressor(文艺复兴压缩器)或C1 Compressor(C1压缩器)尽管这个技巧更加适合于鼓音轨,但是其实任何类型的信号都能够使用(人声,吉他等等)。
将这条音轨复制到另一条音轨上。
在这条被复制的音轨上打开文艺复兴压缩器或C1压缩器,然后施加非常重的压缩:10︰1的压缩比,-30dB(分贝)的门限。
这些设置将使压缩器产生“泵”的效果。
将这条音轨和原始音轨相混合,直到你听见原始的未被压缩音轨如同被这条被复制的音轨添加上了“冲击力”一样。
Waves插件的使用技巧和诀窍二将早期反射声和混响尾声混合起来——TrueVerb(真实的混响)和Renaissance Reverb(文艺复兴混响)既喜欢真实的混响所模拟出的空间的声音,但是同时又想得到文艺复兴混响所产生出来的平滑的混响尾声吗?想要两全其美吗?使用一个单独的插入通道,首先将真实的混响放到这个通道中,紧接着放入文艺复兴混响。
首先我们来设置真实的混响,所以现在先要将文艺复兴混响旁路。
加载一个你喜欢的预置或者创建一个你自己的设置。
点击位于底部右下角(Reverb字样的下方)的蓝色方块来关闭混响信号部分。
通过这种方法你可以不使用真实的混响的混响尾声部分而只使用直通信号和早反射信号。
现在,将文艺复兴混响退出旁路状态。
加载一个你喜欢的预置或者创建一个你自己的设置并将“Early ref.(早反射)”滑块向下拉至“Off(关闭)”状态。
现在,通过调整文艺复兴混响的Wet(湿)/dry(干)滑块,你就可以将真实的混响的早期反射声和文艺复兴混响的混响尾声混合起来使用。
Waves插件的使用技巧和诀窍三声音效果创造者——Renaissance Bass(文艺复兴低音)和TrueVerb(真实的混响)文艺复兴低音是一个能够使各种各样的声音变得丰满起来的强大工具——从雷鸣声到射击声,隆隆声和照相机的闪光声。
音乐制作中常用的混响插件

音乐制作中常用的混响插件音乐制作是一门融合技术与艺术的创作过程,其中一个重要的环节就是混音。
在混音过程中,混响插件被广泛应用。
混响能够为音频信号增加环境感和深度感,使得音乐作品更加生动和真实。
本文将介绍几种在音乐制作中常用的混响插件。
一、Valhalla RoomValhalla Room是一款广受欢迎的混响插件,它能够模拟出各种房间大小和形状的混响效果,从而为音频信号赋予不同的空间感。
Valhalla Room具有低延迟、高品质和直观的界面等特点,使得用户能够轻松地调整混响参数,从而实现理想的音效效果。
二、Lexicon PCM Native Reverb BundleLexicon PCM Native Reverb Bundle是一款由经典混响设备Lexicon 系列混响效果器模拟而成的插件。
它拥有丰富的混响算法,能够模拟出各种经典混响效果,包括大厅、房间、板式混响等。
Lexicon PCM Native Reverb Bundle具有多种预设和灵活的参数控制,能够满足音乐制作中各种不同的需求。
三、AltiverbAltiverb是一款基于采样的混响插件,它通过录制真实场景中的混响响应,再将其应用于音频信号中,实现高度真实的混响效果。
Altiverb拥有大量的采样库,内置了数以千计的不同环境和建筑物的混响响应,包括教堂、剧院、录音棚等。
使用Altiverb,音乐制作人可以获得非常逼真的混响效果,提高作品的质量。
四、Waves Renaissance ReverbWaves Renaissance Reverb是一款简单易用但功能强大的混响插件。
它提供了直观的控制界面,用户可以通过调整预设和参数来定制混响效果。
Waves Renaissance Reverb不仅提供了高质量的混响音色,还具有卓越的稳定性和低延迟,适合在音乐制作过程中实时应用。
五、Soundtoys Little PlateSoundtoys Little Plate是一款模拟经典混响设备的插件,它主打简单和直观的操作方式。
初学混音?这里有份人声处理顺序及插件参考!
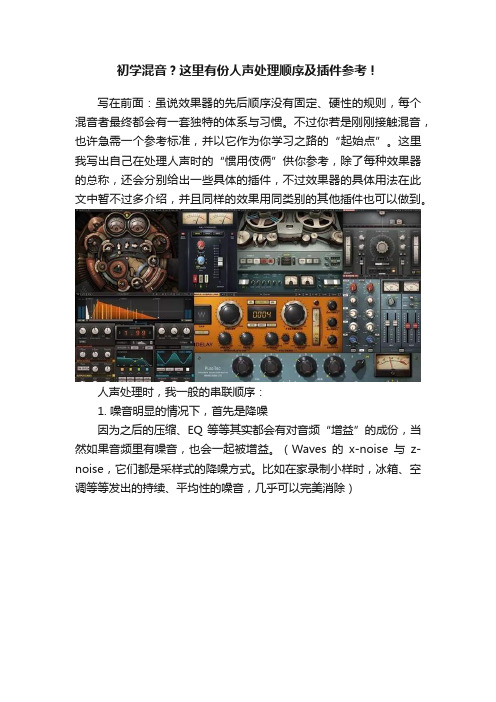
初学混音?这里有份人声处理顺序及插件参考!写在前面:虽说效果器的先后顺序没有固定、硬性的规则,每个混音者最终都会有一套独特的体系与习惯。
不过你若是刚刚接触混音,也许急需一个参考标准,并以它作为你学习之路的“起始点”。
这里我写出自己在处理人声时的“惯用伎俩”供你参考,除了每种效果器的总称,还会分别给出一些具体的插件,不过效果器的具体用法在此文中暂不过多介绍,并且同样的效果用同类别的其他插件也可以做到。
人声处理时,我一般的串联顺序:1. 噪音明显的情况下,首先是降噪因为之后的压缩、EQ等等其实都会有对音频“增益”的成份,当然如果音频里有噪音,也会一起被增益。
(Waves的x-noise与z-noise,它们都是采样式的降噪方式。
比如在家录制小样时,冰箱、空调等等发出的持续、平均性的噪音,几乎可以完美消除)2. 需要控制音量(主要是音频的Peak(峰值))的情况下,第二位是limiter(限制)在我们使用的DAW(Digital Audio Workstation数字音频工作站),也就是比如Cubase、Logic、Protools、Reaper等等音频处理软件中,如果音频的响度达到0db就会出现音频失真的情况(称之为“Clipping”),它是需要我们无条件避免的,因为这种“失真”的听感很不愉悦,当音频出现失真时,其实也代表了这个音频被“削波”,存在一定程度的信号损失。
不过这里使用Limiter不是为了修复失真,而是防止失真。
如果你的原版录音的响度已经可以达到-3db甚至-1db,那么使用限制把它的响度控制在-12db到-6db之间就显得很有必要,因为你之后对人声的处理都会对它产生音量上的增益,为了防止之后失真的发生,先给其一个限制。
限制器上有两个主要数值,一个是Threshold(阀值),一个是Outceiling。
前者起到真正的限制作用,后者是用于把限制后的音频的整体响度提高,建议在这一步只运用限制器的限制功能而不要提高音量。
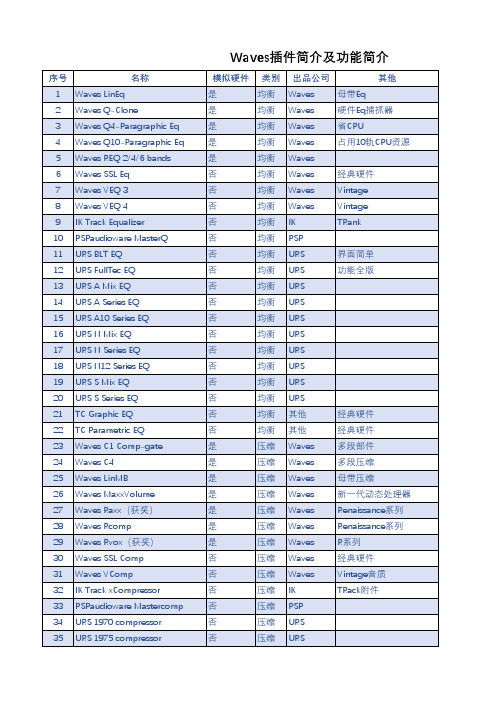
最完整的waves插件简介及功能简介

最完整的waves插件简介及功能简介名称模拟硬件类别出品其他评星Waves LinEq 否均衡 Waves 母带Eq 延迟很⼤? 4Waves Q-Clone 否均衡 Waves 硬件Eq捕抓器??Waves Q4-Paragraphic Eq 否均衡 Waves 省CPU 5 5Waves Q10-Paragraphic Eq 否均衡 Waves 占⽤10轨CPU资源??Waves REQ 2/4/6 bands 否均衡 Waves 4 4Waves SSL Eq 是均衡 Waves 经典硬件 5 5Waves VEQ 3 是均衡 Waves Vintage ⾳⾊ 5 5Waves VEQ 4 是均衡 Waves Vintage ⾳⾊ 5 5IK Track Equalizer 是均衡 IK TRank 附件PSPaudioware MasterQ 是均衡 PSP 5 4URS BLT EQ 是均衡 URS 界⾯简单 5 4URS FullTec EQ 是均衡 URS 功能全版 5 4URS A Mix EQ 是均衡 URS 5 5URS A Series EQ 是均衡 URS 5 5URS A10 Series EQ 是均衡 URS 5 5URS N Mix EQ 是均衡 URS 5 5URS N Series EQ 是均衡 URS 5 5URS N12 Series EQ 是均衡 URS 5 5URS S Mix EQ 是均衡 URS 5 5URS S Series EQ 是均衡 URS 5 5TC Graphic EQ 是均衡其他经典硬件 5 5TC Parametric EQ 是均衡其他经典硬件 5 5Waves C1 Comp-gate 否压缩 Waves 多段部件噪声门 5 5Waves C4 否压缩 Waves 多段压缩 5 5Waves LinMB 否压缩 Waves 母带压缩多段压缩 5 5Waves MaxxVolume 否压缩 Waves 新⼀代动态处理器 5 5Waves Raxx(获奖)否压缩 Waves Renaissance系列 5 5Waves Rcomp 否压缩 Waves Renaissance系列 4 4Waves Rvox(获奖)否压缩 Waves R系列界⾯简化 5 5Waves SSL Comp 是压缩 Waves 经典硬件 5 5Waves VComp 是压缩 Waves Vintage⾳质 5 5IK Track xCompressor 是压缩 IK TRack附件 5 5PSPaudioware Mastercomp 是压缩 PSP 5 5URS 1970 compressor 是压缩 URS 4 4URS 1975 compressor 是压缩 URS 4 4URS 1980 compressor 是压缩 URS 4 4URS Strip 是压缩 URS 5 4WaveArts MultiDynamics 否压缩 W. Arts 多段压缩 5 4Waves L1-Ultramaximizer 否压限 Waves 5 5Waves L2 否压限 Waves 5 5Waves L3-Ultramaximizer 否压限 Waves 5 5Waves L3-Multimaximizer 否压限 Waves 多段压限 5 5IK Track xClipper 是压限 IK TRack附件 5 5IK Track xLimited 是压限 IK TRack附件多段压限 5 5Wave Arts FinalPlug 否压限 W. Arts 5 4Waves Rchannel(获奖)否综合 Waves 压缩+均衡 5 4Waves SSLChannel 是综合 Waves 压缩+均衡经典硬件 5 5PSP Vintage Warmer 是综合 PSP 多段压缩多段压限 5 5URS 1970 Comp-limited 是综合 URS 压缩+压限 4 4URS 1975 Comp-limited 是综合 URS 压缩+压限 4 4URS 1980 Comp-limited 是综合 URS 压缩+压限 4 4Wave Arts Track Plug 否综合 W. Arts 均衡+压缩+压限 5 5Waves Double 2/4 否延迟 Waves 美化声⾳ 4 5waves supertap2/6taps-mod 否延迟 Waves 5 5Izotope Spectron 否延迟 Izotope 多段延迟经典 5 5Nuendo Double Delay 否延迟 Nuendo 3 2Waves Rverb 否混响 Waves 3 5Waves TrueVerb 否混响 Waves 5 5IK CSR Hall 是混响 IK ⼤厅混响 5 4IK CSR Inverse 是混响 IK 反转混响 5 4IK CSR Plate 是混响 IK ⾦属混响 5 4IK CSR Room 是混响 IK 房间混响 5 4PSPaudioware easyverb 是混响 PSP 操作简单⾳质棒 5 5 Wave Arts MasterVerb 否混响 W. Arts 5 4TC Native Reverb 是混响其他经典硬件省CPU 5 5 Waves IR-L 否采样 Waves 5 4Waves IR-1 否采样 Waves 5 4Wizzo Verb 否采样 Wizzo 5 5Wave Arts Panaroma 否声相 W. Arts 3D 声相场景效果器 5 5 Waves Mondo Mod 否声相 Waves 回旋声相 5 5Waves S1-Shuffler 否声相 Waves 功能完整 5 5Waves S1-Imager 否声相 Waves 功能少点 4 4Waves S1-MS 否声相 Waves 转换⽴体声为MS 4 3PSP PSeudo stereo 否声相 PSP 转换⽴体声 4 4PSP Stereo Controller 是声相 PSP ⽴体声修正 5 4PSP Stereo Enchancer 是声相 PSP ⽴体声拓展 5 4 Waves PAZ Analyzer 否分析 Waves 声相+Freq --Waves PAZ Frequency 否分析 Waves Freq --Waves PAZ Meter 否分析 Waves Output Db --Waves PAZ Position 否分析 Waves 声相--PSP Stereo Analyzer 否分析 PSP 声相+Db --BBE Sonic Maximizer 否激励其他谐波产⽣器 4 5Waves Deeser 否辅助 Waves 消齿⾳ 4 4Waves Debreath 否辅助 Waves 消呼吸声 5 4Waves Rdeeser 否辅助 Waves 消齿⾳ 5 4Waves Doppler 否辅助 Waves 汽车掠过的远近声⾳等 5 4 Waves Morphoder 否⾳效 Waves 噪⾳、合声发⽣器 4 4 Waves SoundShifter 否⾳阶 Waves 4 3Waves UltraPitch 3/6 Voice 否⾳阶 Waves 5 5Waves UltraPitch Shift 否⾳阶 Waves 4 3Waves Enigma 否失真 Waves 迷幻 5 5Waves MetaFlanger 否失真 Waves 镶边 5 5Izotope Trash 否失真 Izotope Best 5 5Waves X-Click 否修复 Waves 噼啪声 5 5Waves X-Crackle 否修复 Waves 爆破⾳ 5 5Waves X-Hum 否修复 Waves 嗡嗡声 5 5Waves X-Noise 否修复 Waves 噪⾳ 5 5Waves Z-Noise 否修复 Waves 噪⾳多段过滤 5 5PSP MixBass 是提升 PSP Bass ? ?PSP MixPressor 是提升 PSP 增强效果 ? ?PSP Mix Saturator 是提升 PSP 饱和效果 ? ?PSP MixTreble 是提升 PSP 多重混合 ? ?Waves MaxxBass 否提升 Waves Bass 4 4Waves MaxxPressor 否提升 Waves 增强效果 4 4Waves MaxxSaturator 否提升 Waves 多重混合 4 4 Waves Rbass 否提升 Waves 提升Bass 均衡 4 4Waves IDR 否技术 Waves 转换精度 16-24bits 5 5。
混响(reverb)效果器上常见的参数详解

www. 58yhk .com
• 1: levels 输入输出音量用来控制混响器的 输入音量和输出音量的
• 2:MIX (Wet out)是湿声输出 也就是混响器的 混响效果的大小调节 这个湿声指的是在混响的整 体声音中 除了直达声之外的所有反射的声音 在 TC3里面没有dry out 和 Wet out 的推子 而是通过 一个mix的推子来控制dry out 和 Wet out的比例 向左拖拽这个推子 就是增大干声的比例 向右拖拽 就是增大湿声的比例 在混响效果器的使用过程中 是一定要采用全部湿声输出的(在sma中的AUX (辅助发送)插件中可以100%湿声输出,而在独 轨中则30%~40%湿声输出足矣,个人感觉。。)
www. 58yhk .com
• 混响器看似简单 实则比较复杂 在调节人声 在声场中的位置和调节人声与伴奏的融合 度时 混响也起到了至关重要的作用 建议在 人声上添加混响效果器的时候 有个不成文 的规定那就是宁缺勿滥 我们宁可把人声做 的很干混响效果做的很小 也不要把混响效 果开的非常大 因为一旦混响效果大了 人声 的清晰度就会急剧降低 同时 人声的位置也 会变得非常靠后 人声的清晰度过低和人声 的位置过于靠后都是我们需要避免的
www. 58yhk .com
• 3: 直达声与早反射声之间的时间差 也就是早反 射声相对直达声的延迟时间这个相对的延迟时间 就叫做“早反射时间”也就是混响效果器中的 predelay 这个早反射时间是最能体现房间大小的 因为造成早反射声的反射面通常是一个房间中面 积最大的面 最容易造成反射的面 所以 当我们增 大混响效果器中的predelay参数值的时候 空间感 就会立刻增大 我们可以通过横向拖拽这个点 来改 变predelay的长度 上下拖拽则是更改早反射声音 的声音强度
Waves插件简介及功能简介
否
51 URS 1980 Comp-limited
否
52 Wave Arts Track Plug
是
53 Waves Double 2/4
是
54 waves supertap2/6taps-mod 是
55 Izotope Spectron
是
56 Nuendo Double Delay
是
57 Waves Rverb
否
100 PSP MixPressor
否
101 PSP Mix Saturator
否
102 PSP MixTreble
否
103 Waves MaxxBass
是
104 Waves MaxxPressor
是
105 Waves MaxxSaturator
是
106 Waves Rbass
是
107 Waves IDR
10 PSPaudioware MasterQ
11 URS BLT EQ
12 URS FullTec EQ
13 URS A Mix EQ
14 URS A Series EQ
15 URS A10 Series EQ
16 URS N Mix EQ
17 URS N Series EQ
18 URS N12 Series EQ
URS
URS
W.
Arts
Waves
Waves
Waves
Waves
多段压限
IK
TRack附件
IK
TRack附件
W.
Arts
Waves
压缩+均衡
Waves
压缩+均衡
如何进行音频混响效果处理

如何进行音频混响效果处理音频混响是指对音频信号进行处理,使其在传播过程中模拟出在不同环境中产生的混响效果。
混响效果可以使音频听起来更加自然,增强音频的空间感,提升听众的听觉享受。
本文将介绍如何进行音频混响效果处理的基本原理和方法。
一、基本原理音频混响效果的基本原理是模拟声波在封闭空间中的多次反射、衰减和相互干涉过程。
正是这些反射和干涉造成了混响效果。
在声音传播过程中,声波会与墙壁、地板、天花板等物体发生反射,并与其他声波相互干涉,形成一定的谐波和共振效应。
二、音频混响效果处理方法1. 使用混响器插件混响器是一种专门用于音频混响效果处理的插件。
通过调整混响器中的参数,可以模拟不同的环境和混响效果。
常见的混响器插件有Waves Reverb、PSP VintageWarmer等。
使用混响器插件可以在音频处理软件中直接添加混响效果。
2. 调整房间声学环境改变录音或演出的房间环境可以直接影响音频的混响效果。
例如,在一个带有大量吸音材料的房间中进行录音,会减少混响效果;而在一个大空间中进行录音,会增加混响效果。
因此,如果需要特定的混响效果,可以选择合适的录音环境。
3. 调整混响参数混响器插件通常提供了一系列参数,可以调整混响效果的强度、深度、尺寸等。
这些参数的调整会直接影响混响效果的品质和大小。
一般来说,混响效果越强烈,则混响参数应设置得越大;混响效果越柔和,则混响参数应设置得越小。
4. 混响预设混响器插件通常会提供一些预设的混响效果,使用这些预设可以快速调整出不同的混响效果。
根据所需的音频效果和场景,选取合适的混响预设可以省去大量调试参数的时间。
三、音频混响效果处理步骤1. 导入音频文件首先,将需要进行混响处理的音频文件导入到音频处理软件中。
确保音频文件格式正确,并且可以在软件中正常播放。
2. 添加混响器插件在音频处理软件中添加混响器插件。
插件的添加方式因软件而异,一般会有添加插件的菜单或工具栏。
3. 调整混响参数根据需求,逐步调整混响参数,使混响效果符合预期。
混响效果器使用方法(第三讲)

混响效果器使用方法
—亚菲—
在宿主软件中找到效果再找到Waves下的Transx打开TrueVerb模拟混响(见图一:)我们就看见了这款模拟混响效果器插件,使用它就可以为人声或乐器添加混响效果了。
图一:第三讲频率响应曲线参数原理
一、在界面的下方是频率响应曲线,坐标仪横轴表示的是从50hz—16khz的频率范围,纵轴表示音量值。
二、点击低频滤波键,我们可以对早期反射声进行低切处理从而减少一些低频驻波。
它对应着下方的黄色曲线。
左侧的开关用于开启或关闭早期反射的低切处理,一般情况下设定在80hz—150hz之间会得到不错的效果。
Waves人声混音的12个基本步骤(翻译搬运)
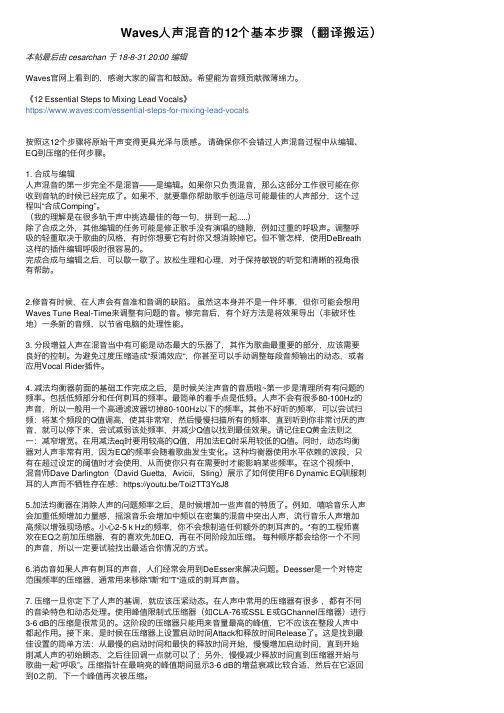
Waves⼈声混⾳的12个基本步骤(翻译搬运)本帖最后由 cesarchan 于 18-8-31 20:00 编辑Waves官⽹上看到的,感谢⼤家的留⾔和⿎励。
希望能为⾳频贡献微薄绵⼒。
《12 Essential Steps to Mixing Lead Vocals》https:///essential-steps-for-mixing-lead-vocals按照这12个步骤将原始⼲声变得更具光泽与质感。
请确保你不会错过⼈声混⾳过程中从编辑、EQ到压缩的任何步骤。
1. 合成与编辑⼈声混⾳的第⼀步完全不是混⾳——是编辑。
如果你只负责混⾳,那么这部分⼯作很可能在你收到⾳轨的时候已经完成了。
如果不,就要靠你帮助歌⼿创造尽可能最佳的⼈声部分,这个过程叫“合成Comping”。
(我的理解是在很多轨⼲声中挑选最佳的每⼀句,拼到⼀起.....)除了合成之外,其他编辑的任务可能是修正歌⼿没有演唱的缝隙,例如过重的呼吸声。
调整呼吸的轻重取决于歌曲的风格,有时你想要它有时你⼜想消除掉它。
但不管怎样,使⽤DeBreath这样的插件编辑呼吸时很容易的。
完成合成与编辑之后,可以歇⼀歇了。
放松⽣理和⼼理,对于保持敏锐的听觉和清晰的视⾓很有帮助。
2.修⾳有时候,在⼈声会有⾳准和⾳调的缺陷。
虽然这本⾝并不是⼀件坏事,但你可能会想⽤Waves Tune Real-Time来调整有问题的⾳。
修完⾳后,有个好⽅法是将效果导出(⾮破坏性地)⼀条新的⾳频,以节省电脑的处理性能。
3. 分段增益⼈声在混⾳当中有可能是动态最⼤的乐器了,其作为歌曲最重要的部分,应该需要良好的控制。
为避免过度压缩造成“泵浦效应“,你甚⾄可以⼿动调整每段⾳频输出的动态,或者应⽤Vocal Rider插件。
4. 减法均衡器前⾯的基础⼯作完成之后,是时候关注声⾳的⾳质啦~第⼀步是清理所有有问题的频率。
包括低频部分和任何刺⽿的频率。
最简单的着⼿点是低频。
⼈声不会有很多80-100Hz的声⾳,所以⼀般⽤⼀个⾼通滤波器切掉80-100Hz以下的频率。
Waves Abbey Road Chambers插件用户指南说明书
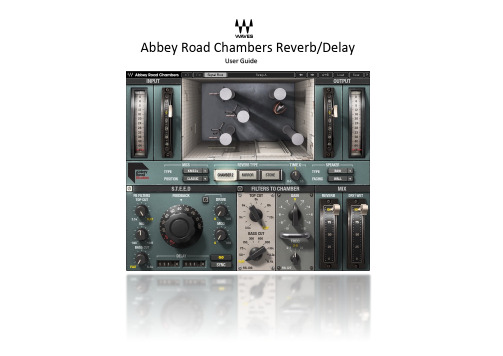
Abbey Road Chambers Reverb/DelayUser GuideContentsIntroduction (3)Quick Start (5)Signal Flow (6)Components (8)Interface (10)Controls (11)Input Section (11)STEED Section (11)Filters to Chamber Section (13)Chamber Controls (14)Mix Section (16)Output Section (17)WaveSystem Toolbar (17)IntroductionThank you for choosing Waves! In order to get the most out of your new Waves plugin, please take a moment to read this user guide.To install software and manage your licenses, you need to have a free Waves account. Sign up at . With a Waves account you can keep track of your products, renew your Waves Update Plan, participate in bonus programs, and keep up to date with important information.We suggest that you become familiar with the Waves Support pages: /support. There are technical articles about installation, troubleshooting, specifications, and more. Plus, you’ll find company contact information and Waves Support news.About Abbey Road ChambersAbbey Road Chambers is a delay and reverb plugin that delivers very rich, complex, and spacious reverb effects. It’s been meticulously crafted to replicate the STEED tape delay and echo chamber setup (Send Tape Echo Echo Delay) that was developed at Abbey Road Studios.This unique reverb/delay combination consists of tape recorders, a tape delay, a feedback loop, and an echo chamber with changeable and moveable speakers and mics. It produced a great-sounding reverb with the option to extend the reverb tail using repeated feedback loops. It yielded a unique sound that’s heard in many classic recordings from the ‘60s and ‘70s and beyond. Once you know what to listen for, it’s easy to spot the Chambers effect. Working in close collaboration with Abbey Road, Waves developed a plugin that accurately recreates this process. We modeled some of the original Abbey Road hardware that was used to create the setup, accurately captured echo chamber acoustics using impulse responses, and exactingly recreated the signal path. The result isan easy-to-use plugin that delivers the sonic characteristics of this Abbey Road classic.A Very Brief History of the Tape Echo ProcessMusicians began using loops of tape to create echo effects in the 1950s. Tape echo pioneers took advantage of the separation between a tape machine’s record and repro heads to create a slapback sound. The tape speed and the distance between the heads determined the delay time. Ambitious musicians and engineers were stringing tape between two or more tape machines to create longer and more ornate loop sounds. Unavoidable inconsistencies added to the perceived magic of the procedure. With its unique tape sound and wide possibilities, tape echo was enthusiastically adopted in jazz, rock and roll, and experimental music. Engineers and producers developed ever more complex techniques to exploit this process.Enter the STEED ProcessOne of the most intricate and interesting implementations of tape delay was developed by Abbey Road Studios. The process results in a reverb effect that’s longer beyond the physical limitations of the echo chamber. The effect starts with a tape delay and feedback loop. This is the STEED process. The signal then goes to an echo chamber, where the reverb sound is created. The tape feedback loop serves to prolong the tail of the chamber sound without creating a noticeable delay effect. Extending the tail with these “feedback building blocks” makes for a tail sound that’s particular to STEED. The character of the reverb is influenced by the positions of speakers and mics in the chamber as well as the composition of the chamber’s walls.This effect has been used on countless recordings, but it’s most famously linked with The Beatles. Listen to George Harrison’s voice on “Everybody’s Trying to Be My Baby,” Paul McCartney’s piano on “Birthday,” the pauses in “Paperback Writer,” or the sound collage in “Revolution 9,” and you’ll recognize the effect. The Waves/Abbey RoadChambers plugin lets you recreate these unique, historic sounds.Quick StartThis quick start teaches you how to create the basic Abbey Road Chambers effect. To learn more about controlling the plugin and to fine tune its sound, read the “Interface and Controls” section later in this user guide. To help you get to know the plugin, we suggest that you refer to the signal flow diagram on the next page.1.Experiment with the Chamber settings:•Mic Type and Position:Close to wall: Produces more transients, which results in a brighter STEED effect.Facing Room: Produces much more direct sound in the chamber reverb.Mic Type sets the mic that is used to pick up the sound in the chamber.•Speaker Type: B&W802 or Altec 605.B&W: Provides a modern sound with a wide frequency range.Altec: Emphasizes mid-to high/mid. Low frequencies are reduced.•Chamber Types:Chamber 2: Classic Abbey Road Studio 2 chamber; half-tiled.Mirrored Room: A very bright, reflective room sound (Abbey Road Mirror room).Stone Room: A dark variant of a small room.2.Set the input level. Use the Input meter to leave some headroom for processing and make sure that there areno clip indications.3.In the STEED section, set the Delay time. This is the tape machine delay time between the record and playbackheads when the tape is running at 30 ips. There are separate left and right settings on the stereo component. 4.Increase the Feedback amount until you hear the signal oscillating. Slightly decrease the feedback control to apoint where you don’t hear the delay taps, but rather a lengthening of the chamber reverb tail.5.Filter the feedback signal using the three controls on the left side of the panel. Top Cut and Bass Cut havefixed gain with adjustable frequency. Mid has a fixed frequency of 3.5 kHz with variable gain.e the “Filters to Chamber” section to adjust the signal entering the echo chamber.e the Mix section to adjust the balance between the chamber reverb and the STEED tape delay section.8.Finally, adjust the output level of the plugin in the Output section.Signal FlowWaves/Abbey Road Chambers combines several processes to create its unique sound:•Input filtering that optimizes the signal for processing.•An adjustable delay with analogue tape emulation.• A feedback path that creates complex delays and effectively lengthens the reverb tail.•Impulse responses of physical echo chambers provide accurate emulation.Input Sets the plugin’s input level. The input signal is split into two paths: A direct signal is sent tooutput mixer. The Chambers processing signal is sent through a buffer amplifier and then intothe system.Main path The signal goes to the delay and tape effect processor and is then split: one signal goes straightto the echo chamber through a set of filters. This is the Main path. 43125Loopback The other path loops back through the tape and delay processor. It can be equalized again on its way. As before, the tape and delay processing section output splits: One path goes to theecho chamber, the other to the feedback path.Chamber The reverb itself is created in the chamber, where the combined outputs of the tape and delay processor are played through loudspeakers and captured on microphones. You can select thespeakers and microphones, and where they are positioned in the chamber. Other characteristics of the chamber can be modified. All aspects of the chamber are applied with impulse responses.Output After the chamber, the signal is summed in the output mixer. It can be mixed with the directsignal using the wet/dry control.To quickly view the Abbey Road Chambers signal flow, click the Signal Flow button on the Top Bar.ComponentsMono-to-monoOnly the center mic is used to capture the chamber reverb.Mono-to-stereoused to capture the chamber reverb. The mix of thereverb can be controlled. This is the setup mostcommonly used at Abbey Road.StereoThe signal is split into two channels. Each side isprocessed as a separate mono-to-stereo signal. Theseare summed to stereo at the output.Interface Echo Chamber Illustrates the chamber surface, mic type and position, and speakers type andorientation. Output Controls plugin output gain. Chamber Controls the characteristics of the echo chamber. Mix Controls balance of chamber in/out; controls overall plugin wet/dry balance. STEED Applies tape delay and feedback to the signal before echo chamber. Filters to Chambers Adjusts filters to the signalbefore it is sent to the chamber. Input Controls plugin input gain.ControlsInput SectionThe Input section controls the signal being fed to the plugin.Input FaderSets the plugin input level.Range: -48 dB to +18 dBInput MeterShows the level of the plugin’s input signal, post-input fader. A red LED at the top of the meter indicates input clipping (infinite hold). Click on the LED to clear meter indicators.Range: -48 dBFS to 0 dBFSSTEED SectionThe STEED section applies tape delay to the signal before it is sent to the chamber. It is also used to create tape saturation, which warms up the signal that’s going directly to the chamber and to the feedback loop.Tape Delay FeedbackControls the amount of feedback signal returning to the Tape Machine processor. Values above 85 can result in excessive feedback. This can create interesting results but be careful with very high settings.Range: Off to 100:Off =-144 dBFS (no signal returned to the filter/delay processor)100 = unity gain (100% of signal returned to processor)Default: 37.5Delay FiltersThere are three filters in Feedback Loop. They help reduce buildup of low- and high-frequency sounds in the loop and color the feedback signal. Since the signal can enter the loop several times on its way to the chamber, these filters can have an accumulative effect.•Top Cut FilterThe Top Cut filter is used to reduce excessive high frequencies in the feedback loop, which can diminish the clarity of the effect.Range: flat to 3.5 kHzDefault: flat (24 dB per octave)•Bass Cut FilterThe Bass Cut filter is used to reduce the buildup of low frequencies in the feedback loop. Unfiltered, low frequencies can accumulate in the feedback loop, resulting a tubby or boomy reverb effect.Range: flat to 6400 HzDefault: flat (12 dB per octave)•Mid FilterThe Mid filter is a fixed-frequency bell that controls midrange frequencies in the feedback loop.Frequency (fixed): 3.5 kHzGain range: -6 dB to +6 dBDriveDrive increases the input level to the tape STEED section, which affects the tape saturation effect. The STEED section output level is adjusted to maintain unity gain, as best as possible, when the Drive value changes. Drive is created in the tape section, so each time the feedback loop passes through the tape machine it undergoes drive processing, as does the signal passing directly to the chamber.Range: 0–100 (Drive is Off when set to 0).ModulationThis adds AM and FM modulation to the feedback signal.Range: 0–100Default: OffDelayAdjusts the delay value in much the same manner as changing the tape speed as it moves between the record and repro heads. The delay occurs each time the signal passes through the feedback loop, which creates Chamber’s unique reverb tail. Click on the box and slide vertically to adjust the delay or double-click and enter a numerical value.Delay range depend on the Sync control setting. Range: (see Sync below)SyncThere are two modes for setting and displaying delay time:•When the Sync button is On, the delay calculation is based on the host BPM setting and is displayed in divisions. Range with Sync on: off, 1/64t, 1/64, 1/32t, 1/64d, 1/32, 1/16t, 1/32d, 1/16, 1/8t, 1/16d, 1/8, 1/4t, 1/8d •When the Sync button is Off delay is displayed in milliseconds. Switch between Sync On or Off and the delay value is maintained until the setting is changed. You can switch between the two modes without affecting the delay duration. Range with Sync off: 0 ms to 500 msDefault with Sync off: 111 msDefault: Sync OnDefault Delay setting: 1/16 (111 ms when Sync is off). This corresponds to the delay introduced by the 3.3 inch gap between the record and repro heads in a BTR tape machine playing at 30 ips.LinkWhen Link is engaged, the delay values of the left and right channels of a stereo channel move together. If left and right have different delay values, their offset will be maintained when they are linked.Default: Link OnFilters to Chamber SectionThis section falls after the Feedback section in the signal flow and is used to control the frequency range of the signal as it enters the chamber.Top Cut (RS 106)Reduces the high frequencies of the signal entering the chamber. Excessive high frequencies in the chamber can result in a reverb tail that is very bright and brittle.Range: flat to 3.5 kHzDefault: flat (24 dB per octave)Bass Cut (RS 106)Reduces the low frequencies of the signal entering the chamber. Excessive low frequencies in the chamber can result in a reverb tail that is dull or boomy.Range: flat to 6400 HzDefault: flat (24 dB per octave)RS-127 EqualizerThis is a gentle bell for overall coloring of the signal entering the chamber.Range: 2.7 Hz, 3.5 Hz, or 10 kHzGain: -10 dB to +10 dB;Chamber ControlsIn the original analog Abbey Road Delay/Reverb, the output of the STEED tape delay and feedback is sent to an echo chamber. In this acoustically-treated room, a loudspeaker plays the signal, which is captured by one or more microphones. There is a choice of loudspeakers and microphones, as well as control over the placement and orientation of the mic. There’s also a choice of chambers, each with its own type of surface. The Waves Abbey Road Chamber plugin provides control over all of these variables.Reverb TypesThere are three echo chambers to choose from. The acoustics of each echo chamber is described with several impulse responses (IR). These files accurately capture the size, dimensions, surface, and other attributes of the space, including the pillars used to increase diffusion. The types, orientation, and position of speakers and mics are part of each IR.When the signal from the STEED feedback processor and Filters-to-Chambers section enters the chamber, it passes through the appropriate IR and takes on the characteristics of the original space.•Chamber 2This IR describes the famous Chamber 2 at Abbey Road Studios. The room is half tiled and it accents low-mid frequencies.•Mirror RoomThis room is mirrored on all sides, so the reverb is very bright and reflective. Two mic placements are available: near and far. When this IR is selected, the Speaker and Mic types controls are disabled.•StoneThe chamber is small and dark. When this IR is selected, the Speaker and Mic types controls are disabled.SpeakerUse this drop-down menu to set the type of speaker used for playback in the chamber:Altec 605 This was a standard monitor loudspeaker used in the 1950s and ‘60s. It has very little low end lots of high-mid frequencies.B&W 800D This speaker has a modern, flat sound, with a very wide range.Defalt: AltecSpeaker Orientation (“Facing”)This controls which direction speakers are facing with respect to the room.Room The loudspeaker faces the center of the chamber. This results in more direct sound reaching the microphone.Wall The loudspeaker faces in the opposite direction, toward the front wall. This yields a more diffused sound reaching the microphone.Default: WallThe current speaker orientation is shown in the illustration.MicrophonesThere are three microphones in the chamber. All three microphones will be the same type, as defined by “Mic Type.”Mic TypeChoose between two microphone types for capturing the sound in the chamber:Neumann KM-53s A slightly bright soundSchoeps MKH-2s A modern-sounding mic with a very flat responseThese mics are quite similar, but each has its subtle personality.Default: KM-53sMic PositionThe position of the mic plays a critical role in establishing the sound and texture of the effect. There are five mic positions. Positions used only with the Chamber 2 IR:•Room The microphones are positioned in front of the pillars, facing the loudspeaker. This results in relatively more direct sound reaching the mic.•Wall The mics are close to the rear wall, so they pick up lots of reflections. This tends to emphasize transients.•Classic The mics are behind the pillar. There is a natural-feeling balance between reflections and decay.Positions used only with the Mirror Room and Stone Room IRs:•Near and Far: These positions refer to the distance between the speakers and the microphones. The Near mic position is usually more focused, while the Far position is more diffuse.Time XControls the apparent duration of the reverb tail with respect to the natural reverb from the echo chamber.Range: 0.5 (50% of the original size) to 1.5 (150% of the original size)Default: 1.0Mix SectionReverbControls the balance of the signal from the Tape Machine processor (before echo chamber) with the reverb effect in the echo chamber. Higher settings result in more a pronounced chamber effect. This is not the same as the Wet/Dry control. Range: 0% to 100%Default: 100%Wet/Dry MixControls the balance of the effect and the direct signal. The direct signal is split from the input before filtering and is sent directly to the output mixer, where it is mixed with the output of the chamber.Please note: If you apply filters during this process, changing the Wet/Dry setting may result in phasing in certain frequencies. This a result of tape modulation and is the nature of a parallel process.Range: 0% (Dry) to 100% (Wet)Default: 100%Output SectionThe Output section controls the signal being sent from the plugin.Output FaderSets the plugin output level.Range: -48 dB to +18 dBOutput MeterShows the level of the plugin’s output signal, post-output fader. A red LED at the top of the meter indicates output clipping (infinite hold). Click on the LED to clear meter indicators.Range: -48 dBFS to 0 dBFSWaveSystem ToolbarUse the bar at the top of the plugin to save and load presets, compare settings, undo and redo steps, and resize the plugin.To learn more, click the icon at the upper-right corner of the window and open the WaveSystem Guide.。
常用效果插件(VST)介绍和下载

常用效果插件(VST)介绍和下载1.『效果插件』网络K歌VST插件效果合集,下载地址:/s/1dD88HQp包括:激励器、爆音效果、电话音效果、变声效果、电音效果、混响效果、环绕效果、回声效果、魔音、双音、震荡、失真、闪避、压限器等,打包提供是为了让你一步到位,如果仅仅网络K歌和喊麦需要,仅仅下载效果合集就够用了。
效果合集里提供的纯VST插件,除了个别之外下面就不另行介绍啦,请根据需要下载,尽量不要重复...~~~~~~~~~~~~~~~~~~~~~~~~~~~~~~~~~~~~~~母带~~~~~~~~~~~~~~~~~~~~~~~~~~~~~~~~~~~~~~2. 『母带处理器』恐龙,IKMultimediaT-RackSDeluxe T-Racks 3 (附注册码),下载地址:/share/link?shareid=452397&uk=1325 508126恐龙音频处理软件IKMultimediaT-RackSDeluxeT-Racks 3 是一款世界知名的音频处理器,适用于后期制作与混音阶段的高品质音频插件,包含9套模拟模组和数字动态/均衡运作元件,提供好莱坞等级的音频讯号。
3.『母带处理器』臭氧,最新iZotope Ozone 5 Advanced v5.04,下载地址:/s/1o6JMjua;另附iZotope Ozone4 汉化版(内含注册机),下载地址:/s/1h6ivk极富盛名美国iZotope 公司制作的第四代专业级后期母带综合处理音效插件,俗称“臭氧”,强大的音频多效果处理能力,千变万化的处理效果,而又绝不夸张,无愧母带处理的领军地位,值得拥有和珍藏(组合操作复杂,需有一定音频调整基础)。
VST 版本,可在任何支持VST 插件的播放器、音乐工作室宿主中调用。
在一个系统中集成了七种母带处理,使你轻松完成专业混音。
响度最佳化处理可以使你发布的作品都有相同的声音均衡。
Waves11TRACT声场校准系统插件介绍和使用分享

Waves11:TRACT声场校准系统插件介绍和使用分享雪帝数字音频Waves技术顾问潘伟乐对TRACT声场校准插件的深度分享,强烈推荐!以下文章来源于pancho聊音响,作者panchopancho聊音响专注于音频技术,专业设备,混音知识以及各类百家设备分享WAVES TRACT声场校准系统插件- 介绍和使用2018年,fbxxxx上面突然发布了一个视频,在xx展那里Waves发布一个新的现场系统调试插件,不同于之前的X-FDBK和Sub Align系统调试插件,不单单只是解决针对现场系统的某一个环节的问题。
比如反馈或者低音相位对齐。
而是可以绕过处理器来进行系统调试,关于系统调试作用性或者正确性就不展开讨论了。
我们先看看一个介绍视频了解一下TRACT的校准系统:TRACT简介以下应用Waves官网对于系统调试的介绍:"正如画家需要一幅干净的画布开始作画,混音师需要一个平衡良好的音响系统来进行混音。
由于每个音响系统都不一而同,并且在各种环境中表现各异,我们就需要校准系统以平整其性能;在现场设置中,这被称为PA调整。
如果不进行这种调节,系统的频率响应就会表现得异常:音乐听起来可能与我们习惯的不同,而且混音效果也不会达到我们的预期。
还有更糟糕的,如果一个系统的时间不对齐,则可能出现相位抵消,给宝贵的低频冲击力带来致命影响。
"但是我们由于在许多情况下是使用第三方的设备,我们对系统处理器的调节都是受限的,并且在试音检查前的时间相当有限。
这时候TRACT插件可以很好帮忙我们解决频响和相位的问题并且解决时间也会大大缩短。
(请注意:因为TRACT 需要搭配Smarrt v8版本或者Smarrt di软件使用,不然就只是一个拥有8段IIR 均衡滤波器。
无法使用fir自动化eq。
)PS:TRACT的IIR滤波器包含有钟形滤波、低/高搁架滤波、平顶滤波(Flat-Tops)、巴特沃斯(Butterworth)和林奎茨-瑞利(Linkwitz-Riley)曲线,以及具有可变频率枢轴点的倾斜均衡器(Tilt EQ)和2阶全通滤波器。
waves7种效果器jiesh

BBE Sonic Maximizer电脑音频的软效果器里,最有名的人声激励器插件效果器就是传说中的BBE了,它的确能够很好的对人声进行高音激励,使声音更有穿透力,对于初学者来说,这是一款不可多得的经典人声激励器!BBE SonicMaximizer较果器一直以来被音乐爱好者们亲切的称为“穷人的劳斯来斯”。
无论是处理单独的音轨还是合成最终较果,无论是在多么低档的电脑配置环境下,BBE SonicMaximizer总是能以最简单的操作步骤和最高较的运算速度得到与它自身容量,硬件运行环境所不相适宜的惊人好较果具有极强的实用价值。
简单说来,BBE SonicMaximizer是利用激励器的作用原理,通过3个旋扭的组合调节得到非常清晰,透亮的声音较果。
它仍然是以插件形式作用于音频文件。
其中BBE PROCSS FUNCTION相当于一个BBE SonicMaximizer的开关。
当按下它为N时,表示BBE SonicMaximizer开始工作,图中以绿色小灯显示:当按起它为OUT时,表示BBE SonicMaximizer没有作用,以小灯显示。
有了这个按扭就可以很方便地对比BBE SonicMaximizer作用前后的较果了,更方便我们对照地进行调节。
LO CONTOUR表示低频的定向校正:PROCESS表示高频的定向校正:而OUTPUT LEVEL表示输出电平的大小,也就是处理后的湿声比例大小。
在调节OUTPUT LEVEL时要特别注意右边的电平大小,不要出现过载失真的现象。
整个BBE SonicMaximizer就是通过上面3个旋扭进调节的,它们也有下面3种不同的操作方法,分别如下:一,在旋扭上指定的参数位置点击鼠标:二,按住鼠标左键并上下拖动:三,在旋扭上右击并输入具体数值:如果手动的调整还不是很熟悉的话,可以选择BBE SonicMaximizer提供的预置参数:这里有Bass(贝斯),Drums(鼓),Guitsr(吉它),Piano(钢琴),几种乐器的预置参数,也有Mastering(最终处理),Vocal(人声)的预置参数,使用时直接调用就可以了,非常方便。
混音教程——Waves磁带插件助攻秘笈

混音教程——Waves磁带插件助攻秘笈磁带之“魔力”到底是什么?从技术上讲,磁带伴有失真并会降低音质。
尽管如此,它又有着备受追捧的声音。
我们就来究其原因,并讨论一下磁带饱和插件在混音中的实用技巧。
文:Mike Levine从便捷角度来看,数字录音优势绝对大于模拟录音。
它更容易编辑,更加一致,不需要校准或物理维护,并且录音占用的物理空间很小。
数字录音比起磁带,噪音还更小,频率响应也更好。
尽管有以上这些优点,但数字技术可能又过于完美了。
它缺少模拟式磁带的味道和特点——那种悦耳的饱和声。
磁带模拟插件是一种简单且相对便宜的方法,可以在每轨、主输出总线或子总线上为混音添加模拟磁带的声音。
在研究磁带模拟插件前,了解磁带机的关键参数和变量很有用。
大多数磁带插件模拟得非常接近原型,因此了解它们都是什么,如何影响声音,很有必要。
1.了解一下磁头在模拟磁带录音机上,磁带从一轴转到另一轴,通过一条磁带路径——包含一个录音磁头和一个回放磁头(又名Repro头),它们都是录音过程中的重要电磁组件。
一些磁带机还有三个磁头,即录音磁头、回放磁头,和一个单独的擦除磁头。
录音磁头得到传入的音频信号,将其转换为一种磁性颗粒排列模式。
通过磁通量(Flux)的磁场辐射帮助,这些磁性颗粒以模拟(复制)音频信号中声波的方式排列存储在磁带上。
这一过程就是“模拟录音”。
之后播放磁带时,回放磁头会在磁带转动经过时读取磁性颗粒的排列模式,然后将其转换回音频信号。
2.ips速度是什么磁带录音有一个重要变量,就是磁带通过磁带路径并经过磁头的速度,它以英寸/秒(ips)为单位计算。
磁带转速越快,高频重现得越好。
慢速能够带来稍好的低频响应,但由于这样的高频重现效果较差,因此通常听着就更加“低保真”。
在磁带模拟插件上,通常都有磁带速度选项。
例如,在以Studer J37(Abbey Road录音棚给The Beatles录音用的4轨录音机)为原型的J37 Tape插件上,你就可以选择15ips或7.5ips。
WAVES效果插件介绍
WAVES效果插件介绍Waves是一款非常受欢迎的音频效果插件,它提供了许多不同类型的音频处理工具,能够帮助音频工程师和制作人实现各种音频处理需求。
这个插件具有广泛的适用性,适用于录音室、音频制作和混音环境等多种应用场景。
Waves插件提供了许多不同的音频效果处理工具,包括均衡器(EQ)、压缩器、混响、失真、合唱、自动修音(auto-tune)等。
这些工具可以单独使用或者在任何顺序和组合下进行堆叠,以实现不同类型的音频处理。
其中最著名和广泛使用的是Waves的均衡器(EQ)插件系列。
这些插件提供了多个不同类型的均衡器,包括常规样式的图形均衡器、滑动滤波器、线性相位EQ,以及许多其他类型的均衡器。
这些均衡器可以用于音频频谱的调整和塑造,以实现音频的频率相应的微调和整体平衡。
压缩器也是Waves插件的一大特色。
Waves提供了多种不同类型的压缩器,包括经典压缩器模拟和原型设计,以及一些专门用于声音整形和音量平衡的压缩器。
这些压缩器可以用于控制音频的动态范围,平衡音量以及塑造音频的音质和音色。
混响是另一个很受欢迎的Waves插件。
它提供了多种不同类型的混响算法和模拟,以模拟不同的混响环境和空间。
使用这些插件,用户可以为音频添加自然和逼真的混响效果,使音频更加环绕、宏伟或者干净。
除此之外,Waves还提供了许多其他类型的效果插件,如失真、合唱和自动修音。
这些插件允许用户添加独特的音色和音效效果,以改变原始音频的特性。
失真插件可以模拟各种类型的失真,包括暖音管、均衡失真和数字失真。
合唱插件可以为音频添加合唱效果,使音频更加宽阔和厚实。
自动修音插件可以自动检测和修复音频中的音程偏差和杂音,使录音更加稳定和准确。
除了以上介绍的常用插件之外,Waves还提供了许多其他类型的插件,如动态处理器、EQ和压缩器的组合插件,以及一些专为特定任务和音频处理流程设计的特殊效果器。
这些插件可以根据用户的具体需求和音频处理目标进行选择和定制,以实现最佳的音频处理结果。
waves11效果器VocalRider自动调节人声电平闪避效果
waves11效果器VocalRider自动调节人声电平闪避效果
waves11效果器Vocal Rider自动调节人声电平闪避效果
雪帝数字音频
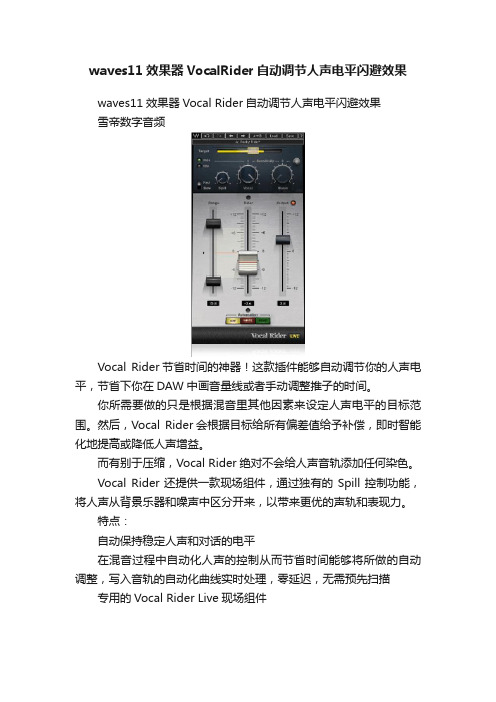
Vocal Rider节省时间的神器!这款插件能够自动调节你的人声电平,节省下你在DAW中画音量线或者手动调整推子的时间。
你所需要做的只是根据混音里其他因素来设定人声电平的目标范围。
然后,Vocal Rider会根据目标给所有偏差值给予补偿,即时智能化地提高或降低人声增益。
而有别于压缩,Vocal Rider绝对不会给人声音轨添加任何染色。
Vocal Rider还提供一款现场组件,通过独有的Spill控制功能,将人声从背景乐器和噪声中区分开来,以带来更优的声轨和表现力。
特点:
自动保持稳定人声和对话的电平
在混音过程中自动化人声的控制从而节省时间能够将所做的自动调整,写入音轨的自动化曲线实时处理,零延迟,无需预先扫描专用的Vocal Rider Live现场组件。
- 1、下载文档前请自行甄别文档内容的完整性,平台不提供额外的编辑、内容补充、找答案等附加服务。
- 2、"仅部分预览"的文档,不可在线预览部分如存在完整性等问题,可反馈申请退款(可完整预览的文档不适用该条件!)。
- 3、如文档侵犯您的权益,请联系客服反馈,我们会尽快为您处理(人工客服工作时间:9:00-18:30)。
Waves11 Renaissance Reverb混响插件
雪帝数字音频
具有丰富尾混响、12种混响类型和先进的早期反射系统的经典混响插件,是无数制作人和音频工程师的首选。
Renaissance Reverb将丰富的功能与易用的界面相结合,提供无与伦比的声音以及非凡的混响密度和质感。
Renaissance Reverb可让你从12种混响类型中进行选择,包括大厅、房间、室内、教堂、板式、反向、门限、非线性、回声混响(EchoVerb)和共鸣混响(ResoVerb)。
借助双频段均衡器、阻尼控制和更新的直观界面,Renaissance Reverb可为你提供混响效果所需的灵活性。
在世界一流制作人、音乐家和音频工程师之间名声大噪的混响插件,也是你的声音所需。
特点:
具有丰富尾混响、12种混响类型和先进的早期反射系统的经典混响插件,是无数制作人和音频工程师的首选。
Renaissance Reverb将丰富的功能与易用的界面相结合,提供无与伦比的声音以及非凡的混响密度和质感。
Renaissance Reverb可让你从12种混响类型中进行选择,包括大厅、房间、室内、教堂、板式、反向、门限、非线性、回声混响(EchoVerb)和共鸣混响(ResoVerb)。
借助双频段均衡器、阻尼控制和更新的直观界面,Renaissance Reverb可为你提供混响效果所需的灵活性。
在世界一流制作人、音乐家和音频工程师之间名声大噪的混响插件,也是你的声音所需。