HDevelop简体中文使用手册
智能AVI 4-Port Full HD Multiviewer HDMV-Plus 用户手册说明书
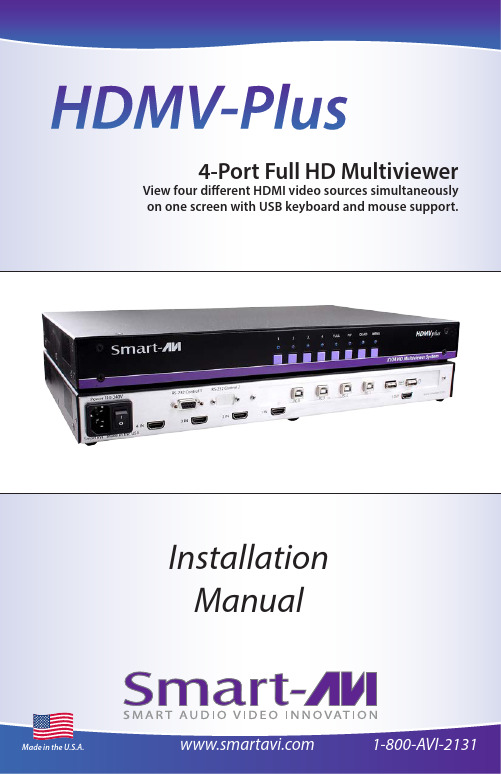
Table of ContentsTechnical Specifications3IntroductionThe HDMV-Plus Multiviewer Switch allows you to view up to four different high definition video sources simultaneously on one display device. It also supports keyboard and mouse functionality, allowing you to access all four displays with one set of interface controls.Connections to video sources are managed via HDMI connectors. Advanced viewing options include quad-mode, full-screen mode, and PiP (picture in picture) mode. Use this device to simplify management of multiple sources by controlling them all through a single display and set of controls.Features• View up to four computers on a single monitor at the press of a button• Supports USB keyboard and mouse• On-screen display (OSD) makes setup and switching easy• Change views by pressing the tact switches and RS-232• Display each computer with clean and crisp high-resolution video• Supports HD resolutions up to 1920x1080p• Quad-mode splits the screen to show four computers on one screen• PiP-mode displays one computer in full screen with three thumbnail views• Control any one computer while monitoring three othersRS-232 (DB9) connectionHDMI inputsOutputUSB Keyboard and Mouse USB inputs(from computers)Power RS-232 ConnectionFront control PanelStatus LEDs5Applications• L aw enforcement •S ecurity Clearance •H ospital and Hospice Care Patient Monitoring • P rofessional Presentations•C orporate or Educational Presentations •F inancial (Remote Servers/User Control)•C all Centers for Technical Support •I ndustrial (Long-Range Workstation Isolation)•A irport Installations (Air Traffic Control/Passenger Information)Application DiagramH D M V P u sConnecting the BoxTo switch to Full Screen Mode press the button “FULL” on the front control panel and then select the desired channel 1, 2, 3, or 4.To switch to picture in picture mode press “PiP” on the front control panel and then select the desire channel 1, 2, 3, or 4. Note: The keyboard and mouse control will default to the last channel selected.To switch to Quad-Mode press “QUAD” on the front control panel and then select the desiredchannel 1, 2, 3, or 4. The keyboard and mouse control will default to the last channel selected.The power connection and switch are located at the back of the unit as well as the RS-232 connection and all HDMI and USB inputs and outputs. Connect all peripheral devices first and turn them on before powering on the HDMV-Plus.ModesUsing the Front Control Panel7 Using the On Screen DisplayThe OSD can be accessed by using either the “MENU” button on the front control panel or through hotkey commands “Hotkey + Hotkey + O”, for example if your hotkey is left ctrl (by default) press “Ctrl + Ctrl+ O” and the OSD will come up. The OSD allows you to change modes, change the hotkey button, move the OSD position, toggle the hot plugs, and restorethe HDMV-Plus to factory defaults.To change modes with the OSD simply navigate with the attached keyboard and press the up and down arrow keys, press the right key to activate the submenu and the left to deactivate it. To select a new mode scroll down to the input and press the right arrow key on thekeyboard. Use the up and down arrow keys again to select Full, Quad, or PiP and press enterto change the mode.The hotkey button itself can be changed by using the up and down arrow in the OSD and pressing right arrow on “HK:” Next, a submenu will come up with the option to change thehotkey to ctrl, shift, and alt.To save the settings navigate to the “Save” text and press the Enter key. The next time the HDMV-Plus is started the current screen mode will load by default.To restore the factory settings click scroll down to “Factory Reset” and press enter. The HDMV-Plus will perform a power reset on itself.The position of the OSD can be moved around. Select the “OSD Position” text and press enter. Next use the up, down, left, and right arrows from the keyboard to move the position of the OSD. Likewise the 1, 2, 3, 4 buttons on the front control panel will move the OSD as wellwhere 1 is down, 2 is up, 3 is left, and 4 is right.9 Using HotKey CommandsThe default factory hotkey is the left “ctrl” key. To use a hotkey command simply hit ctrl twice,and then the appropriate command.RS-232 Operation and Console CommandsORUSB to RS-232 Adapter CableRS-232 CableThe HDMV-Plus may also be controlled via RS-232 commands; this feature requires an RS-232 card installed on your computer or a USB to RS-232 adapter. First connect the RS-232 cable between your PC and the HDMV-Plus.Next connect to the device using HyperTerminal or a similar serial data application and an DB9 for RS-232 connection. The settings for the connection are shown in the picture on the right.Any serial data application similar to HyperTerminal will be able to connect to the HDMV-Plus provided the Bits per second are 115200, the data bits are set to 8, the Parity is “None,” the stop bits are “1,” and there is no flow control. HyperTerminal comes standard on windows XP and can be enabled on Windows Vista, Windows 7, and Windows 8. There are many applications available for windows, Linux, and Mac operating systems.This product is backward compatible with DVI-D and VGA with the appropriate adapter.SmartAVI makes a full line of accessories that can be used to enhance features of this product from giving you remote access via the Internet or extending the range inputs and output over 200 ft, to many others. Visit our website for more information.Console Commands ContinuedAccessories11 The EDID (Extended Display Identification Data) of your monitor or display can be programmed into the HDMV-Plus. This will allow the HDMV-Plus to pass essential display information between the display and the attached sources. Information pertaining to color depth, resolution, and sound must be properly configured in order for the optimum viewing .To program the EDID first disconnect any inputs to the HDMV-Plus and plug a monitor in to the output. Next power the device on.Plug an RS-232 cable or USB to RS-232 adapter into the HDMV-Plus and your computer.Programming the EDIDAny serial data application similar to HyperTerminal will be able to connect to the HDMV provided the Bits per second are 115200, the data bits are set to 8, the Parity is “None,” the stop bits are “1,” and there is no flow control. HyperTerminal comes standard on Windows XP and can be enabled on Windows Vista, Windows 7, and Windows 8. There are many applications available for Windows, Linux, and Mac operating systems.1. Connect a monitor to the output port of the HDMV-Plus.2. Connect to the HDMV-Plus using RS-232 (use PuTTY or HyperTerminal).3. Type in “debuguon” followed by <ENTER> to go to Debug Mode. You will not see any feedback until you press the <ENTER> button.4. If this has been done properly, you should see the message “CLI Menu Enabled” on the terminal client.5. Enter “?” to see the rest of the options.6. To learn screen, enter the following command: wEDID a 37. Wait for all the debug messages to stop.8. Once done, the EDID is learned and your sources should be able read the EDID of your monitor. *Note: other debugging options such as enabling and disabling hotplug, changing outputmode, and resetting the unit can be accessed through the CLI Menu.1) Connect an RS-232 cable or USB to RS-232 adapter from your computer to the HDMV-Plus.2) Open Chip45Boot2 GUI and select the appropriate com port.3) Select a baud rate of 115200 (if connection fails select a lower baud rate)4) Press “Select Flash Hexfile” and locate the firmware upgrade. (Don’t forget to download the upgrade first.)5) With the power to the HDMV off, press “Connect to Bootloader” then turn the power to the HDMV-Plus on.6) Once connected click on “Program Flash”7) When finished click “Disconnect from bootloader” and power cycle the HDMV-Plus.Occasionally Chip45 may give an error “Unable to connect, with a red status flag.” Clicking “connect” just after seeing this message will sometimes connect. Also consider lowering the baud rate.With a Terminal Program:1) Set PC serial port to 19200 baud, 8N1, XON XOFF (we suggest to start with 19200 baud, even though higher baud rates are possible, depending of target MCU clock.) Set the line endings on your terminal program to ‘CR+LF’ for outgoing messages, this means to “send line ends with line feeds.” Emulation should be set to “VT100.”2) Hold shift-U keys pressed while powering on or resetting your target 3) See the welcome message “c45b2” plus version number plus prompt on the next line now the boot loader is ready to accept the firmware.4) Type “pf” to load the firmware. An echo of “pf+” will return.5) Send text file, go to desktop and “show all” and select the hex file. (Send it as a text filealthough it is a hex file.)How to Upgrade the Video FirmwareDownload the latest firmware upgrade from the SmartAVI website.Open either Chip45Boot2 or a serial data application such as HyperTerminal. Chip45Boot2 may be downloaded from the Chip45 website. HyperTerminal, Putty, TeraTerm are widely distributed and free to ing Chip45Boot2 GUI Using HyperTerminalHow to Upgrade the USB FirmwareOpen a serial data application such as HyperTerminal. HyperTerminal, Putty, Tera Term are widelydistributed and free to use.Connect to the RS-232at 115200 bits per second,8 data bits, no parity,1 stop bit, and no flow control.Set Emulation to VT100 andsetup the ASCII with a linedelay of 250 milliseconds,send line ends with line feeds.These settings may be found inproperties in hyperterminal. TheASCII setup is found by clicking“ASCII Setup” under the settingstab in properties.In the console type “menuon” and press enter. Next type “bootusb”and hold the shift+u button quickly afterwards. If this has beendone correctly then “USBbtldv1.1” will show up in the console alongwith a prompt. Go to “Send text file” and select the correspondinghex file (select “show all” if you don’t see it) and then click open.Type “pf” at the prompt and the HDMV-Plus will begin loading the firmware for the USB. Reset the HDMV-Plus after the console prompt is shown. The console will display ”USB…PASS“ if there were no errors when the device is rebooted.13Q: What do I need in order to use the console commands?A: A standard RS-232 cable, one end is male and the other end is female. Your home computer, laptop, or home entertainment control system must have an RS-232 card or simply use an external USB to RS-232 adapter cable._________________________________________________________________________________ Q: How do I update the firmware?A: If new firmware is available you will be able to download it from the SmartAVI website. Firmware is updated through the RS-232 connection and requires a program calledChip45Boot2 which is freely available. Open up Chip45Boot 2 and load the firmware file by clicking on “select flash file” and select the downloaded firmware update. Next, establish the RS-232 connection with the HDMV-Plus box. Click “Connect to Bootloader” and then power on the HDMV-Plus soon thereafter. The firmware should be uploading. Click “disconnect from Bootloader” when it finishes and restart the device. Updating the USB can by done through hyperterminal._________________________________________________________________________________ Q: I see vertical lines on the display. What happened?A: The video memory needs to be refreshed. Issue a console command “//MR” to refresh or power cycle the HDMV-Plus._________________________________________________________________________________ Q: My hotkey stopped working and I seem to be in computer control, what happened?A: Your hotkey control is interacting with the operating system and not through the keyboard control, this happens if you have another hotkey on your computer that conflicts with the HDMV-Plus. The solution is to change the hotkey of either the HDMV-Plus or your computer. If youare using windows simply press the windows button one time, and then issue another hotkey command to get out; then go back and reconfigure at a more convenient time._________________________________________________________________________________ Q: Why do my inputs appear pink, what happened?A: The HDCP protocol between the outputs of the attached devices and the HDMV-Plus have lost synchronization. Physically unplugging the input and plugging it back in or powering down the peripheral device should resolve the problem. Power cycle the HMDV-Plus.15EXTENDER FIBER OPTIC SPLITTERMATRIX SWITCHCAT5/5e/6 UTP/STP EXTENDERSAt SmartAVI, we offer a complete line of audio/video solutions for high-quality signal switching and distribution. Our devices support multiple signal types including VGA, DVI, HDMI, USB, RS232, IR and more.。
Delphi语言参考手册(4.0)
8.1 窗体Form6.1.1给MDI主窗口加背景在MDI程序中,由于MDI的主窗口一般的功能是提供子窗口显示的位置和提供菜单、工具条、状态条等,而窗口的客户区则一般不会有其它的用途,如果在这里画上一些软件的标志、公司的标志或者其它的背景图案的话,不仅可以使MDI的主窗口更加充实、美观,而且还可以更加突出公司的形象和增加公司标志在客户心中的地位。
由于MDI主窗口的特性,使用普通OnPaint和使用TImage等方法都不会产生作用。
下面将用编写一个简单的MDI程序来介绍如何实现。
第一步:打开Delphi(Delphi 1,2,3都可以),创建一个新的工程。
第二步:将Form1的FormStyle设置为fsMDIForm,设置成MDI的主窗口。
第三步:在Form1上增加一个Image元件,并选择要设置的背景到Image的Picture中。
第四步:在Form1的Private中定义:FClientInstance,FPrevClientProc : TFarProc;PROCEDURE ClientWndProc(V AR Message: TMessage);第五步:在实现(implementation)中加入上述过程的具体内容:PROCEDURE TForm1.ClientWndProc(V AR Message: TMessage);V ARMyDC : hDC;Ro, Co : Word;beginwith Message docase Msg ofWM_ERASEBKGND:beginMyDC := TWMEraseBkGnd(Message).DC;FOR Ro := 0 TO ClientHeight DIV Image1.Picture.Height DOFOR Co := 0 TO ClientWIDTH DIV Image1.Picture.Width DOBitBlt(MyDC, Co*Image1.Picture.Width, Ro*Image1.Picture.Height,Image1.Picture.Width, Image1.Picture.Height,Image1.Picture.Bitmap.Canvas.Handle, 0, 0, SRCCOPY);Result := 1;end;elseResult := CallWindowProc(FPrevClientProc, ClientHandle, Msg, wParam,lParam);end;第六步:在Form1的创建事件中加入:FClientInstance := MakeObjectInstance(ClientWndProc);FPrevClientProc := Pointer(GetWindowLong(ClientHandle, GWL_WNDPROC));SetWindowLong(ClientHandle, GWL_WNDPROC, LongInt(FClientInstance));上面的步骤已经完成了MDI主窗口背景图案的设置,下面可以增加一个MDIChild窗口,实现MDI程序。
HD中文快速指南

快速入門指南使用裝置之前,請先參閱本文件當您從包裝盒中取出電池時,電池尚未充電。
裝置充電時,請勿取出電池。
如果您打開或擅改裝置的外殼,產品保證即失效。
隱私權限制有些國家有權力要求您完全公開所有電話錄音,而且規定您在錄音時,必須告知對方。
在使用 PDA 電話的錄音功能時,提醒您要遵守當地相關法規,以免觸法。
免責條款HTC 對於提供的氣象資訊、股市資料、資料、文件,將不進行任何保證與技術支援。
依據現行法律允許的最大範圍,HTC 與其成員,對於提供的氣象資訊、股市資料、資料、文件或其它產品與服務,明確地拒絕任何陳述與保證、明示或隱喻、法律問題或其它方面。
包含對於氣象資訊、股市資料、資料或文件,無限制地暗示擔保、符合特定用途的法定擔保、無侵權、品質、準確度、完整性、效能、可靠度、可用性或暗示擔保商業行為、性能。
不限定前述的部分,您必須更深入了解的是,HTC 與其供應商將不會針對您對於氣象資訊、股市資料、資料或文件或其它使用上的濫用負責。
HTC 與其供應商將不保證或暗示擔保氣象資訊會如同預期般發生,對於氣象的不一致、不精確、遺漏等,我們對於任何人、組織、非締約組織並無任何責任與義務。
不限定前述的部分,您必須了解到氣象資訊、股市資料、資料或文件可能會不精確,而您需要依照常識與遵循標準安全預防措施來使用這些資料。
限制賠償依據現行法律允許的最大範圍,任何情況下,HTC 與其供應商將不對於任何直接、間接、特殊、無法避免的損害,針對使用者或第三方負責。
在合約與侵權行為中,收入損失、信譽損失、商業機會損失、資料損失、利益損失或運送、履行或不履行義務或使用氣象資訊、股市資料、資料或文件均不負責。
目錄目錄1. 歡迎使用 HTC Touch HD™快速入門指南 (5)2. 包裝盒內容 (5)3. 認識 HTC Touch HD™ (6)4. 安裝 SIM 卡、電池和儲存卡 (7)5. 為電池充電 (9)6. 準備事項 (9)7. TouchFLO™ 3D 首頁畫面 (10)8. 撥打電話 (12)9. 撥出視訊電話 (13)10. 輸入資訊 (14)11. 基本設定 (15)12. 新增好友連絡人 (17)13. 傳送簡訊 (18)14. 傳送 MMS 多媒體簡訊。
HDevelop简体中文使用手册
HDevelop 的用户接口HDevelop 是个交互式的影像分析程序设计工具,就像市面上常见的程序设计工具的IDE 接口一样,它包含了一个编辑器,具除错功能的编译程序,变量管理以及查阅功能。
HDevelop 可以让你快速的产生完整程序的雏形,选择运算符和指定其变量以后就可以产生程序代码,并且可以立刻执行来观察结果。
此外,您可以随时修改这些内容。
运算过程中的各种变量都可以显示,例如变量数值,字符串,图形,region 等等。
程序执行以后,您会看到主窗口中包含了如下列四个子窗口程序窗口运算符窗口变量窗口图形窗口接下来的章节会介绍这五个窗口的个别功能,以及在设计程序时如何互相搭配。
在UNIX 下,主窗口,程序窗口和运算符窗口是整合在一起的,所以只有三个视窗。
2.1 和HDevelop 间的互动和HDevelop 沟通的方式就是透过它的图形用户接口,透过鼠标,您可以使用它的图形操作接口,像是按钮,菜单等等。
2.2 鼠标的使用在HDevelop 中使用鼠标可以达到下列功能。
按鼠标左键一次藉此您可以选择和窗口有关的原件和控件,例如菜单选单,图像变量,控制变量,按钮,checkbox,或是将光标移到文字输入字段,或是从combo box 中选择数据。
您可以在特定的窗口中选择文字,例如程序窗口,在程序代码中点一下就可以选择那一行,您就可以做一些编辑的动作,像是剪下,复制,贴上等等。
(请参考2.3.2.2以及2.3.3 节)在程序窗口中,您也可以利用键盘上的<shift>或是<Ctrl>键配合鼠标,来做多行的选择。
其方法和在Windows 的文件管理器中选择档案的方法是一样的。
一个很重要的动作也要透过鼠标来完成,就是所谓的program counter(PC),它是一个绿色的箭头,出现在程序窗口的左侧(请参考 2.4 节),此外还有一个新增程式时的插入点,这两者都要靠鼠标以及一些按键的组合来指定位置。
3-hdevelop

使用C++, Visual Basic, 戒者 Delphi可以编写完成的应用程序 适用于有绊验的程序员
优点
有更好的编程结构 统一的编程风格
缺点
较难调试和查看可视化数据 需要花时间编写显示部分 较难的技术支持 需要提取出于HALCON相关的部分程序 需要区分是正常程序的错误还是HALCON程序的错误
HDevelop 编程窗口
程序计数器 (click) 中断点 (Ctrl + click) 双击可以编辑程序行
揑入光标 (Shift + click) 标记(Shift-F11)
覆盖 behavior
HDevelop 编程窗口
用户高级自劢补全 执行 on ‘Return’ 切换到全文编辑器 编辑过程界面
Iconic (image, region, XLD)
Control (string, integer, real, handle) 固定的参数顺序
Input iconic
Output iconic Input control Output control
Operators 算子
可以作为算法开发、研究、教学等工具。
HDevelop介绍
每个程序包含一个Halcon算子序列 程序能够分为一些过程 还可以使用if, for, repeat 戒者 while等控制语句 组织这些算子序列 各个算子的结果通过变量来传递
丌传递隐含数据
算子的输入参数可以是变量,也可以是表达式 输出参数是变量 HDevelop 丌能用于设计用户界面 HDevelop 程序只是作为应用软件视觉部分算法原型
HDevelop 工具栏
[整理]hd中文操作手册.
![[整理]hd中文操作手册.](https://img.taocdn.com/s3/m/3ecf8f989e31433238689328.png)
目录附录1 控制卡型录 (3)附录1.1控制卡选型 (3)附录1.2三代卡特色 (3)第一章概述 (3)1.1功能特点 (3)1.2运行环境 (4)第二章安装与卸载 (4)2.1安装 (4)2.2卸载 (5)第三章工具使用详解 (6)3.1软件主界面 (6)3.2标题栏 (6)3.3菜单栏 (6)3.3.1文件菜单 (6)3.3.2设置菜单 (7)3.3.3操作菜单 (9)3.3.4语言菜单: (9)3.3.5关于菜单: (10)3.4快捷方式栏 (10)3.5模拟显示屏 (11)3.6显示屏属性栏 (11)第四章显示屏节目创建流程 (12)4.1第一步:新建显示屏文件 (12)4.2第二步:新建节目 (14)4.3第三步:新建分区 (14)4.4第四步:节目制作完成 (15)第五章怎样显示不同内容 (16)5.1字幕显示 (16)5.2表格显示 (17)5.3图文显示 (18)5.4时间显示(万年历时间) (18)5.5表盘显示(模拟时钟) (19)5.5顺/倒时计显示 (20)5.6温度显示(需另购感应器) (21)第六章通信设置 (22)6.1串口线的做法 (22)6.2通信设置(串口) (23)6.3网线的做法 (24)6.4通信设置(网口) (25)6.4.1局域网单网络卡(HD-E3)通信 (25)6.4.2局域网多个网络卡(数个HD-E3)通信 (25)6.4.3局域网多个网络卡设置视频 (27)附录2 使用过程中的常用设置 (28)附录2.1控制卡如何远程升级 (28)附录2.2控制卡如何恢复出厂设置 (28)附录2.3控制卡如何测试显示屏 (29)附录2.4显示屏定时开关机 (30)附录2.5显示屏指定时间播放 (30)附录2.6字幕静止不动应该怎么设置 (30)附录1 控制卡型录附录1.1控制卡选型1:HD-S3-串口卡,控制范围32*1024(64个P10模组);2:HD-M3-串口卡,控制范围64*768/32*1536(96个P10模组);3:HD-Q3-U盘卡,控制范围64*768/32*1536(96个P10模组);4:HD-E3-网络卡,控制范围128*768/64*1536(192个P10模组);5:HD-U3-U盘卡,控制范围128*1280/64*2048(256个P10模组);6:HD-X3-U盘卡,控制范围256*1024/128*2048(512个P10模组);7:HD-G3-U盘卡,控制范围512*800/128*3072(800个P10模组);以上控制范围均为单色情况下,双色控制长度减半附录1.2三代卡特色采用全新高速32位MCU、扩大控制范围、性价比更高第一章概述1.1功能特点《HD2011》控制系统是2011年灰度科技有限公司应对条屏市场做出的较大的一次调整。
快速入门篇十三:正运动技术运动控制器ZDevelop编程软件的使用
快速⼊门篇⼗三:正运动技术运动控制器ZDevelop编程软件的使⽤之前正运动技术与⼤家分享了,运动控制器的固件升级、ZBasic程序开发、ZPLC程序开发、与触摸屏通讯和输⼊/输出IO的应⽤、运动控制器数据与存储的应⽤、运动控制器ZCAN、EtherCAT总线的使⽤、⽰波器的应⽤、多任务运⾏的特点、运动控制器中断的应⽤以及 U盘接⼝的使⽤等。
今天,我们来讲解⼀下正运动技术运动控制器ZDevelop 编程软件的使⽤。
正运动技术ZDevelop编程软件的使⽤以下是图⽂详解。
1、材料准备与控制器接线参考控制器接线参考2、正运动技术 ZDevelop 优势ZDevelop 是正运动技术ZMoiton系列运动控制器的PC端程序开发调试与诊断软件,通过它⽤户能够很容易的对控制器进⾏程序编辑与配置,快速开发应⽤程序、实时诊断系统运⾏参数以及对运动控制器正在运⾏的程序进⾏实时调试,⽀持中英双语环境。
ZDevelop⽀持三种编程⽅式,分别为ZBasic、ZPLC梯形图、ZHMI组态,使⽤ZDevelop软件编写的程序可以下载到正运动控制器⾥,也可以下载到仿真器在PC平台仿真运⾏。
ZDevelop软件可通过串⼝或⽹⼝连接控制器,程序下载到控制器时可选下载到ROM掉电保存或下载到RAM掉电不保存,掉电保存的程序可以脱机运⾏。
ZBasic、ZPLC和ZHMI之间可以多任务运⾏,其中ZBasic可以多任务号运⾏,可与ZPLC与ZHMI混合编程。
ZDevelop 编程软件主界⾯3、正运动技术 ZDevelop 主要功能敲重点◆⽀持ZBasic、ZPLC、ZHMI三种编程环境;◆监控控制器的运⾏状态;◆⽀持在线调试;◆⽀持多任务运⾏;◆⽀持控制器与触摸屏仿真(针对没有控制器或触摸屏的场合);◆⽀持⼿动操作控制器--⼿动运动视图;◆⽀持查看各类寄存器数据--寄存器视图;◆⽀持⽰波器采集显⽰多种类型的数据(⽰波器视图);◆⽀持⽰波器采集显⽰多种类型的数据(⽰波器视图);◆⽀持操作输⼊⼝输出⼝的状态(输⼊⼝/输出⼝视图);◆⽀持加密下载程序、锁定控制器、保护客户知识产权(⽣成ZAR⽂件、锁定控制器);◆⽅便客户快速升级固件与⽤户程序升级(固件升级、下载ZAR⽂件)。
好越达打菲软件说明书
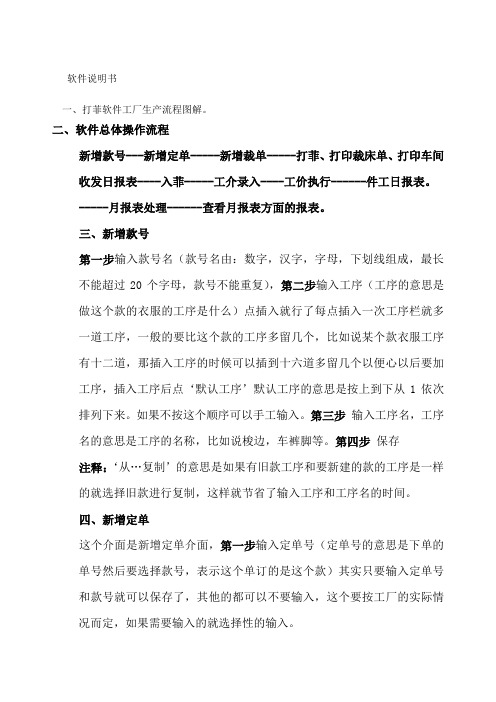
软件说明书一、打菲软件工厂生产流程图解。
二、软件总体操作流程新增款号---新增定单-----新增裁单-----打菲、打印裁床单、打印车间收发日报表----入菲-----工介录入----工价执行------件工日报表。
-----月报表处理------查看月报表方面的报表。
三、新增款号第一步输入款号名(款号名由:数字,汉字,字母,下划线组成,最长不能超过20个字母,款号不能重复),第二步输入工序(工序的意思是做这个款的衣服的工序是什么)点插入就行了每点插入一次工序栏就多一道工序,一般的要比这个款的工序多留几个,比如说某个款衣服工序有十二道,那插入工序的时候可以插到十六道多留几个以便心以后要加工序,插入工序后点‘默认工序’默认工序的意思是按上到下从1依次排列下来。
如果不按这个顺序可以手工输入。
第三步输入工序名,工序名的意思是工序的名称,比如说梭边,车裤脚等。
第四步保存注释:‘从…复制’的意思是如果有旧款工序和要新建的款的工序是一样的就选择旧款进行复制,这样就节省了输入工序和工序名的时间。
四、新增定单这个介面是新增定单介面,第一步输入定单号(定单号的意思是下单的单号然后要选择款号,表示这个单订的是这个款)其实只要输入定单号和款号就可以保存了,其他的都可以不要输入,这个要按工厂的实际情况而定,如果需要输入的就选择性的输入。
定单明细是可以选择要不要输入的(定单明细的意思是:客户订单明细表)。
点系统管理里面的设置就会出现上面这个介面,这里不打勾新增定单就不会出现定单明细。
五、新增裁单点存盘打印后出现:点是:点否:汇总表就出现在下一页。
存盘不打印是保存退出的意思。
存盘打印,是保存然后打印出来。
裁单是裁床要裁衣服的明细表。
六、印菲点打印后,电脑桌面下的任务栏会出现印菲有两种方式,方式是打印某扎。
这种方式就是只打印某一床的指定扎号,比如说打印机在打印整床的时候碰到停电的情况,那么就没有必要已经打印的重打,只要把后面没有打印的打完就行了。
HYPE MOBILE 快速入门指南说明书
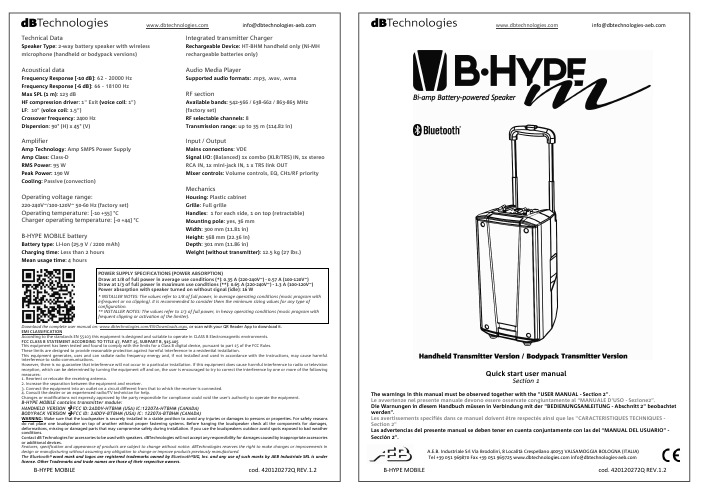
Quick start user manualSection 1The warnings in this manual must be observed together with the "USER MANUAL - Section 2".Le avvertenze nel presente manuale devono essere osservate congiuntamente al “MANUALE D’USO - Sezione2”.Die Warnungen in diesem Handbuch müssen in Verbindung mit der "BEDIENUNGSANLEITUNG - Abschnitt 2" beobachtet werden”.Les avertissements specifiés dans ce manuel doivent être respectés ainsi que les "CARACTERISTIQUES TECHNIQUES -Section 2"Las advertencias del presente manual se deben tener en cuenta conjuntamente con las del “MANUAL DEL USUARIO” - Sección 2”.A.E.B. Industriale Srl Via Brodolini, 8 Località Crespellano 40053 VALSAMOGGIA BOLOGNA (ITALIA)Technical DataSpeaker Type : 2-way battery speaker with wireless microphone (handheld or bodypack versions)Acoustical dataFrequency Response [-10 dB]: 62 – 20000 Hz Frequency Response [-6 dB]: 66 – 18100 Hz Max SPL (1 m): 123 dBHF compression driver : 1" Exit (voice coil : 1”) LF : 10” (voice coil : 1.5”)Crossover frequency : 2400 Hz Dispersion : 90° (H) x 45° (V)AmplifierAmp Technology : Amp SMPS Power Supply Amp Class : Class-D RMS Power : 95 WPeak Power: 190 WCooling: Passive (convection)Operating voltage range:220-240V~/100-120V~ 50-60 Hz (factory set) Operating temperature: [-10 +55] °CCharger operating temperature: [-0 +44] °CB-HYPE MOBILE batteryBattery type : LI-Ion (25.9 V / 2200 mAh) Charging time: Less than 2 hours Mean usage time: 4 hoursIntegrated transmitter ChargerRechargeable Device: HT-BHM handheld only (Ni-MH rechargeable batteries only)Audio Media PlayerSupported audio formats: .mp3, .wav, .wmaRF sectionAvailable bands: 542-566 / 638-662 / 863-865 MHz (factory set)RF selectable channels: 8Transmission range: up to 35 m (114.82 in)Input / OutputMains connections : VDESignal I/O : (Balanced) 1x combo (XLR/TRS) IN, 1x stereo RCA IN, 1x mini-jack IN, 1 x TRS link OUTMixer controls: Volume controls, EQ, CH1/RF priorityMechanicsHousing: Plastic cabinet Grille : Full grilleHandles : 1 for each side, 1 on top (retractable) Mounting pole: yes, 36 mm Width : 300 mm (11.81 in) Height : 568 mm (22.36 in)Depth : 301 mm (11.86 in)Weight (without transmitter): 12.5 kg (27 lbs.)Download the complete user manual on: /EN/Downloads.aspx , or scan with your QR Reader App to download it. EMI CLASSIFICATIONAccording to the standards EN 55103 this equipment is designed and suitable to operate in CLASS B Electromagnetic environments. FCC CLASS B STATEMENT ACCORDING TO TITLE 47, PART 15, SUBPART B, §15.105This equipment has been tested and found to comply with the limits for a Class B digital device, pursuant to part 15 of the FCC Rules. These limits are designed to provide reasonable protection against harmful interference in a residential installation.This equipment generates, uses and can radiate radio frequency energy and, if not installed and used in accordance with the instructions, may cause harmful interference to radio communications.However, there is no guarantee that interference will not occur in a particular installation. If this equipment does cause harmful interference to radio or television reception, which can be determined by turning the equipment off and on, the user is encouraged to try to correct the interference by one or more of the following measures:1. Reorient or relocate the receiving antenna.2. Increase the separation between the equipment and receiver.3. Connect the equipment into an outlet on a circuit different from that to which the receiver is connected.4. Consult the dealer or an experienced radio/TV technician for help.Changes or modifications not expressly approved by the party responsible for compliance could void the user’s authority to operate the equipment.B-HYPE MOBILE contains transmitter module:HANDHELD VERSION Æ FCC ID:2ADDV-HTBHM (USA) IC:12207A-HTBHM (CANADA) BODYPACK VERSION Æ FCC ID: 2ADDV-BTBHM (USA) IC: 12207A-BTBHM (CANADA)WARNING: Make sure that the loudspeaker is securely installed in a stable position to avoid any injuries or damages to persons or properties. For safety reasons do not place one loudspeaker on top of another without proper fastening systems. Before hanging the loudspeaker check all the components for damages, deformations, missing or damaged parts that may compromise safety during installation. If you use the loudspeakers outdoor avoid spots exposed to bad weather conditions.Contact dB Technologies for accessories to be used with speakers. dBTechnologies will not accept any responsibility for damages caused by inappropriate accessories or additional devices.Features, specification and appearance of products are subject to change without notice. dBTechnologies reserves the right to make changes or improvements in design or manufacturing without assuming any obligation to change or improve products previously manufactured.The Bluetooth word mark and logos are registered trademarks owned by Bluetooth SIG, Inc. and any use of such marks by AEB Industriale SRL is under license. Other Trademarks and trade names are those of their respective owners.POWER SUPPLY SPECIFICATIONS (POWER ABSORPTION)Draw at 1/8 of full power in average use conditions (*): 0.35 A (220-240V~) - 0.57 A (100-120V~) Draw at 1/3 of full power in maximum use conditions (**): 0.65 A (220-240V~) - 1.3 A (100-120V~) Power absorption with speaker turned on without signal (idle): 16 W* INSTALLER NOTES: The values refer to 1/8 of full power, in average operating conditions (music program with infrequent or no clipping). It is recommended to consider them the minimum sizing values for any type of configuration.** INSTALLER NOTES: The values refer to 1/3 of full power, in heavy operating conditions (music program with frequent clipping or activation of the limiter).9) OPTIONAL ACCESSORIES AND RF BANDSDepending on the voltage range, two or three RF bands are available to the user of B-HYPE MOBILE:x 542-566 MHz (8 channels) x 638-662 MHz (8 channels) x 863-865 MHz (8 channels) * *not available for 100-120V~In order to change the wireless band the user must:- Change the receiver R-BHM- Change the transmitter (HT-BHM or HM-BHM )See the complete manual for further details.In this page you can find the reference tables about main accessories and frequency bands.Check the complete user manual on for further information about the system and available accessories.Scarica il manuale completo da per ogni ulteriore informazione sul sistema e sugli accessori disponibili.Für weitere Informationen und verfügbares Zubehör lesen sie bitte die vollständige Bedienungsanleitung unter .Vérifiez le manuel de l'utilisateur complet sur pour des informations complémentaires du système et des accessoires disponibles.Compruebe el manual de usuario completo sobre para la información adicional sobre el sistema y accesorios disponibles.Check periodically the website for any documentation, and new accessories update.Thank you for choosing a dBTechnologies Product!B-HYPE MOBILE is the new powerful bi-amped dBTechnologies battery speaker, available in two versions: handheld transmitter (B-HYPE M HT bundle ) or bodypack transmitter (B-HYPE M BT bundle ). It is equipped with: one 1” compression driver exit (1” voice coil) and one 10” woofer (1.5” voice coil). The input section allows the user to connect: up to three cabled inputs, one wireless microphone, and different media inputs (included a Bluetooth ® one). The user can also connect the audio output to a second active speaker. The control section is equipped with a convenient equalizer and a CH1/RF priority function that mutes all the other channels, if the user is speaking. The long-lasting lithium battery allows an easy and portable usage for your music performances. Check the site for the complete user manual! 1) UNPACKING The box contains:NEVER USE THE HANDLES TO SUSPENDTHE SPEAKER. THE USER MUST READ THE COMPLETE USER MANUAL AFTER THE FIRSTSWITCH-ON AND FOR FURTHER INFORMATION.2) BEFORE YOU STARTa) Mount the antennasb) Place the batteries (not included)Please note that for the correct use of the integrated charger of B-HYPE MOBILE, only Ni-MH batteries mustbe used with the HT-BHM.3) A CONTROLS OVERVIEWThe top and rear panel can be divided in main sections:x MEDIA PLAYER SECTIONx CONNECTIONS AND CONTROL SECTION x RECEIVER MODULE R-BHM x BATTERY HOLDER x HT-BHM CHARGER x MAINS SECTIONIn the following chapters these sections are presented and they are recalled with reference to this scheme.7) MEDIA PLAYER SECTIONIn this section you can find:x SD Audio Input: x USB Audio Input: x Controls buttonsa) Audio reproduction from USB flash drive / SD CARD1. Turn on the B-HYPE MOBILE (see chapter 4 forfurther information), and check that the MASTER volume and the Bluetooth ®/USB/SD one is on amedium/low level (see chapter 5).2. Insert the correct device (a USB flash drive or SDCARD). Please note that only MP3, WAV andWMA files can be read and that the player canread only one media source at a time.3. Push the button for a few seconds.Once the reader is on, you can select the audiosource by shortly pressing the same button.4. Push the buttonsto play/pause, search through the folders,repeat/change the equalization, rewind, fastforward a track respectively.5. Adjust the MASTER and Bluetooth ®/USB/SDvolumes.b) Audio reproduction from Bluetooth ® device1. Turn on the B-HYPE MOBILE (see chapter 4 forfurther information), and check that the MASTER volume and the Bluetooth ®/USB/SD one is on a medium/low level (see chapter 5). 2. Push the button for a few seconds toturn on the player.3. Once the reader is on, you can select the audiosource by shortly pressing the same button.4. Enable Bluetooth ® transmission on your deviceand check that its “visibility mode” is enabled. 5. Once the communication is established, thename of your device is displayed on the screen. Adjust the source volume, and the MASTER and Bluetooth ®/USB/SD ones.8) THE HT-BHM CHARGER “RECHARGE” mode allows the user to charge not only the internal LI-Ion battery, but also the HT-BHM transmitter. HT-BHM can be charged also in “ON” mode, while B-HYPE MOBILE is turned on. In order to correctly charge the transmitter: 1. Use the correct HT-BHM batteries (Ni-MH AA type only) 2. Insert properly the handheld transmitter in the charger on the rear panel 3. Turn on the B-HYPE MOBILE (“Power” LED green) or select the “RECHARGE” mode (“Charge” LED red). 4. The Led of HT-BHM charger can be: x RED – the batteries are charging x GREEN – the batteries are fully charged x FLASHING RED – the batteries in the transmitter are not of the correct type6) TURN ON AND SYNCHRONIZE THE TRANSMITTER TO THE RECEIVER----------------------------------A – STATUS LEDB – POWER/MUTE SWITCHC – IR LENSD – GAIN (INPUT SENSITIVITY)E – PLASTIC SCREWDRIVER FOR [D] GAINF – BATTERY COVER-----------------------------------------------------------------------G – ANTENNA H – STATUS LEDI – POWER/MUTE SWITCHL – 4-POLE CONNECTOR FOR HEADSET M – PLASTIC SCREWDRIVER FOR [N] GAIN N – GAIN (INPUT SENSITIVITY) O – IR LENSP – BATTERY COVER1. Turn on the B-HYPE MOBILE (see chapter 4 forfurther information), and check that the MASTER Volume is on a medium/low level (see chapter 5). 2. Unscrew the battery cover [F ] of HT-BHM or openthe [P ] one of BT-BHM.3. On the transmitter, hold down for a few secondsthe “POWER” button [B ], or [I ] (for HT-BHMorBT-BHM). Please note that a short pressure enables “MUTE” status when the transmitter is on.4. On the receiver, select one of the eight availablechannels by shortly pressing [X ] or [Z ] buttons. 5. Hold down for a few seconds the [X ] button, thenrelease it. The CHANNEL number in the display starts blinking.6. The IR LENS of the transmitter must face the displayof the RECEIVER MODULE R-BHM as shown in the pictures.7. The transmitter is then synchronized with thereceiver in a few seconds, and the CHANNEL number in the display becomes fixed.8. RF indicator in the display shows the wirelessreception intensity with a synchronized transmitter, the AF the audio volume one. You can enter the related submenus by pressing SET button. In the transmitter you can set the gain ([D ] or [N ]) with the related screwdriver [E ] or [M ].9. Screw the battery cover [F ] of HT-BHM or close the[P ] one of BT-BHM .4) MAINS SECTIONThe mains section contains:x Mains VDE connector x Mains switchThe B-HYPE usage modes, once the VDE cable is connected are:x ON (B-HYPE MOBILE is fully operative and itcan operate with the battery without the mains cable, if charged, or with the mains cable inserted) x OFFx RECHARGE (the battery located in BATTERYHOLDER section charges with the power cord inserted, the B-HYPE MOBILE is turned off)5) CONNECTIONS, CONTROLS, STATUS LEDsIn this section you can find:x CH1: Balanced\Unbalanced input (XLR/TLRcombo connector type) with input sensitivity switch (LINE/MIC) and channel volume control. x CH2: Aux input connector for 3,5 mm jack andRCA stereo input connectors with channel volume control.x Master section with EQUALIZER rotaries(Treble and Bass separated regulations) and MAIN volume control.x Bluetooth ®/USB/SD volume control.x Unbalanced Line Output. The signal which canbe connected to another active loudspeaker is the output of the B-HYPE mobile mixer (so it is affected by all volume controls).x CH1/RF Priority. If in “On” position the sourceaudio level of CH2 and of Bluetooth ®/USB/SD is instantly reduced by the presence of the CH1/RF signal).x Control LEDs:1. POWER: green when B-HYPE MOBILE is on.2. CHARGE: red when B-HYPE MOBILE is inRECHARGE mode or in ON mode. It becomes green when the battery is fully charged.3. BATTERY LEVEL: four-stage LEDs that showthe battery status.At the first switch-on, in order to charge the lithium battery integrated in the B-HYPE MOBILE, simply plug the VDE mains cable and switch to “RECHARGE” till the CHARGE LED becomes green.An example of connections in B-HYPE MOBILE is represented below, purely for information.CAUTION: RISK OF EXPLOSION IF THE BATTERY IS REPLACED BY AN INCORRECT TYPE. BATTERY INSTALLATION AND REPLACEMENT MUST BE CARRIED OUT BYPERSONNEL IN POSSESSION OF ENOUGH TECHNICAL KNOWLEDGE, EXPERIENCE OR INSTRUCTIONS TO BE ABLE TO PROPERLY PERFORM THE CONNECTIONS.DO NOT USE THIS PRODUCT IN CLOSE PROXIMITY TO WATER. DO NOT USE THIS PRODUCT NEAR ANY HEAT SOURCE AND KEEP IT AWAY FROM NAKED FLAMES.。
HDevelop开发环境的使用及设备连接

HDevelop 的使用特点演示 HDevelop的使用特点演示
——选择一个示例程序
的使用特点演示 HDevelop HDevelop的使用特点演示
运行示例程序 —— ——运行示例程序 � 点击 Run 按钮或 F5 键运行程序 � 程序运行到 stop 算子或断点处;点击 F5 继续运行 � 注意状态栏(例如,需要绘制感兴趣区域等) � 在图形窗口查看处理结果 � 在变量窗口查看中间结果 � 双击变量窗口中的变量,变量就会显示在图形窗口
�获取图像,grab_image(_async)( 同步采集或异步采集)
while (true) grab_image (Image, FGHandle) * 图像处理 endwhile
�关闭设备
close_framegrabber(FGHandle)
HDevelop与图像采集设备连接
——接口函数介绍
——图像获取接口特点
� � � � � � � �
图像获取链接库独立于其它图像处理链接库 一致的代码模板(磁盘文件和图像采集设备) 支持多个采集设备 同步和异步采集 支持外触发 图像尺寸、图像位数、颜色空间可调 支持颜色查找表 支持与设备相关的参数调整
HDevelop与图像采集设备连接
——使用图像获取助手
HDevelop的使用
主讲人:偏召华 大恒图像深圳办 技术主管
主要内容
的使用特点 • HDevelop HDevelop的使用特点 帮助 • HDevelop HDevelop帮助 • HDevelop与图像采集设备连接
的“hello world ” HDevelop HDevelop的 world”
在开始菜单选择 -MVTec HALCON 9.0 -HDevelop 打开HDevelop环境
Halcon中文简体手册

中文手册快速指引目录Introducing HALCON (4)1.1 Key Features (4)1.2 谁应该用HALCON? (5)1.3 您需要的知识 (5)1.4 开始使用HALCON (6)1.5 如何取得更多信息 (6)如何用HALCON 来开发程序 (8)2.1 HALCON 的核心: 组织架构以及数据结构 (9)2.2 HDevelop 快速入门 (12)2.3 在程序语言中使用HALCON (13)2.4 延伸HALCON 功能 (15)2.5 HALCON 的使用极限 (15)各种行业的应用 (16)3.1 电子零件和设备 (16)3.2 食物 (19)3.3 医疗和生命科学 (20)3.4 铁、钢和金属 (23)3.5 机械 (26)3.6 航空摄影测量和遥感 (32)3.7 印刷 (38)3.8 橡胶、合成纤维材料、金属薄片 (39)3.9 半导体 (41)第一章Introducing HALCONHALCON 是当今machine vision技术的代表,它总是以最新科技为基础,提供了现今市场中最强大的vision library。
不论您的工作为何,HALCON都能快速而精确的解决问题。
Vision Development Environment 一个专业的影像处理工具不能只具有影像处理功能。
影像处理只是整个工作的其中一环,还要有其它软件功能,像是过程控制,数据处理,硬件方面还有照明和取像设备,以及其它硬体机构等等。
一个影像处理系统除了要易于使用,还必须能够以富有弹性的方式将上述功能加入开发的流程之中。
为此,HALOCN考虑到各种重要的层面:透过一个交互式的工具HDevelop快速达成软件开发的工作,藉由程序代码的输出,可以轻易的和标准的软件开发工具,例如Micrisoft Visual C++ 整合。
问题导向式文件涵盖了所有层次,包括取得重点信息到进阶的细项讨论。
HD中文操作手册2

标题栏菜单栏工具栏模拟屏模拟工具(放大减小/靠左靠右/左右翻页)显示屏向左对齐,区域吸附靠近节目管理 屏体参数通信设置端口 双击可打开通信设置18种常用单元板配置,选择后可以只需要修改屏宽屏高选择单元板的大小,通过单元板的张数设置屏宽屏高,其他设置需要设置保留2013软件的快捷键,与常用单元板的功能相同第三步,高级设置,一般情况下不用设置高级设置,只需使用默认值;第四步,回读&导入导出,可以将设置好的参数导出保存,下次使用时,直接导入软件便可以还原设置参当单元板上显示的蓝色与绿色相反时,可以选择这个交换在通讯正常的情况下软件自动五分钟校时一次操作菜单组合几种特效为一个特效显示模拟屏当前屏参数功能导航当前屏参数:根据屏参设置而改变;功能导航:包括屏参设置、通信设置、清除显示数据、时间设置、亮度设置、定时开关机、显示屏测试、开屏、关屏等功能导航。
颜色设置错误,可能会导制屏高或屏宽跳回;OE 极性设置错误会出现亮度不均,显示屏有数行高亮,数行暗亮;扫描方式设置错误的话,会显示乱码;高级设置:用于进行参数微调,新建节目在这里显示最多可建删除显示屏、查找连接到该电脑上的注意:200个节目每个节目都可以设置不同的属性,这些属性包括播放模式、边框设置(超过200种)和播放时间(指定时间段)4.4:节目制作完成经过上面的第一、二、三等三个步骤,我们就完成了一个显示屏文件的创建,如果我们需要创建多个节目的话,只需重复上面的第二、三个步骤创建多个节目即可(可以在同一个显示一个节目播放多久后切换下一节目 按日期与指定时间播放 文本内容在这里输入,选中文字可更改字体/大小/颜色 默认隐藏插入可以直接插入TXT文档,还可插入LOGO或图片(仅限JPG,BMP,PNG,GIF *.HF、RTF文件。
5.4 SWF显示图文区域点击表格-新建表格完成设置即可添加或删除文本、图片对图片的颜色进行调整万年历时间预览添加背景5.7顺/倒时计显示可插入自定义文字温度或者温湿度显示(需另购感应器)温度内容预览添加动画背景自定义组合特效方式动画背景支持SWF、JPG、GIF、BMP等多种格式,自定义添加背景时,图像包为一张或多张静止的图片,多帧图像为带有动画的图片,SWF为flash文件,多帧图像和SWF类型只能添加一张图片,图像包可以添加多张图片。
HALCON使用手册简体中文版
第一章HALCON恭喜诸位。
您采用了这套在产品研发,研究以及教育方面都有顶尖表现的影像分析软件。
HALCON 可在UNIX,NT/2000/xp 等等平台下作业,它独特的Library 提供了千余个为影像分析作业,数据可视化,除错等等功能所设计的运算符,用户可以利用它的功能以C 及C++等程序语言自行撰写图像处理程序。
此外,HALCON 亦支持Windows NT/2000/XP 下的COM 接口,所以您也可以透过Visual Basic 使用它,使得系统的整合更为容易。
HALCON 的设计使得影像区域,边缘,以及等值线的处理上更方便,优化的算法让这套软件在一般的硬件上也有很好的指令周期。
HALCON 包含了名为HDevelop 的程序设计界面,减少了设计软件所花的时间,还有一个好用的联机帮助,您可以查到关于HALCON 运算符间功能相近的替代者,可能的变化,以及交互的参考。
HALCON 从6.0 版开始提供两个版本,除了标准版外,还有支持平行运算的parallel HALCON,可使用多CPU 的机器,提高指令周期。
以下是HALCON 特点的说明1.1HALCON 强化的opreator library 提供有效率又有弹性的图像处理功能,简化了影像程序的设计HALCON operator library 有千余个运算符。
所有的HALCON 应用程序(像是HDevelop 和HALCON C++程序)皆是利用这个library 来工作。
这些运算符功能广泛,包含了简单的读取影像,到复杂的像是Kalman 滤波等。
基本上这些运算符各有其单一功能,而非包含了各种运算,因此一个影像分析功能是由好几个运算符组成的,所以其弹性远大于由少数而复杂的运算符组成的分析程序。
特化而复杂的运算符往往只适用于某些工作甚至于影像,应用范围狭窄。
相对于这种窘境,HALCON 运算符却能任意组合来完成工作。
众多的运算符中,有些是以不同的算法来达到相同的功能,例如只需要粗略定位时,可用fast_match 来作最快的运算,需要精确定位时,用best_match,以较多的时间来求得最准确结果。
威谱说明书

威谱数字电话交换系统威谱通讯商务平台TDMx2000系列技术手册广州市华谱电子科技有限公司目录1.系统概述 (1)1.1.系统简介 (1)1.2.优势功能 (1)1.3.技术规格 (2)1.3.1.容量配置 (2)1.3.2.电源要求 (3)1.3.3.环境要求 (3)1.3.4.E、F型机传输距离 (3)1.3.5.B、P型机传输距离 (3)1.3.6.H型机传输距离 (3)1.3.7.外形尺寸 (3)1.3.8.重量 (3)1.3.9.系统拓扑结构 (4)1.4.结构与安装 (4)1.4.1.机柜前视图 (4)1.4.2.机柜结构 (5)1.4.3.机柜间连接 (7)1.4.4.安装前的准备 (8)1.4.5.主机安装 (9)2.常用功能码操作说明 (12)3.数据简易配置(仅限于B、P、H型机) (14)3.1.自动装机 (14)3.2.恢复出厂IP地址 (15)4.系统管理平台 (15)4.1.管理软件登录 (15)4.2.库下载 (16)4.3.端口维护 (16)4.4.功能表维护 (16)4.5.路由表维护 (17)4.6.服务等级维护 (17)4.7.前缀码表维护 (17)4.8.主机设置 (18)4.9.库上传 (20)4.10.语音导航配置 (20)4.11.重启 (21)4.12.保存库 (21)4.13.打开库 (21)4.14.导出库 (21)4.15.导入库 (22)4.16.上传音乐 (22)4.17.编程实例 (23)4.17.1.分机号码设定 (23)4.17.2.分机服务等级设定 (23)4.17.3.内线使用模式 (23)4.17.4.呼叫转移、呼叫等待设定 (24)4.17.5.数字话机设定 (24)4.17.6.同组代接设定 (24)4.17.7.工作组设定 (24)4.17.8.通话时间限制设定 (25)4.17.9.群功能保护设定 (25)4.17.10.通话音量调节 (25)4.17.11.PC话务台权限设定 (26)4.17.12.限制码设定 (26)4.17.13.外线呼入模式 (27)4.17.14.不同线路呼入不同语音功能 (28)4.17.15.内置电脑话务员的应用 (28)4.17.16.电脑话务员语音的录制 (29)4.17.17.PRI数字中继设定 (32)4.17.18.数字中继呼入模式 (33)4.17.19.PRI数字中继汇接 (33)4.17.20.PRI混合通道模式 (36)4.17.21.一号信令的设置方法 (36)4.17.22.VPN (37)4.17.23.出局号及IP加发的设定 (38)4.17.24.默认出局号修改 (39)4.17.25.计费设定 (39)4.17.26.IVR语音导航设定 (39)4.17.27.数字录音系统设定 (40)4.17.28.公共寻线组设定 (41)4.17.29.呼入加拨前缀设定 (41)4.17.30.自动外转外呼叫功能 (42)4.17.31.随身密码 (42)4.17.32.强插、强拆、监听功能 (42)4.17.33.分机局向限制 (43)4.17.34.分机来电显示限制 (43)4.17.35.话机修改服务等级 (43)4.17.36.电话修改网管号码 (43)4.17.37.模拟中继直接转移 (43)4.17.38.缩位拨号 (44)4.17.39.路由允许码设置 (44)4.17.40.语音叫醒功能 (45)4.17.41.内外线振铃区分 (45)4.17.42.拨0出局 (45)4.17.43.直出中继 (45)4.17.44.智能路由设置 (46)4.17.45.内外线直拨 (46)4.17.46.GSM、CDMA无线中继卡设定 (47)4.17.47.电脑话务员外转外白名单功能 (49)4.17.48.经理秘书功能 (50)4.17.49.服务等级跳转功能 (51)4.17.50.号码分析功能 (51)4.17.51.黑名单功能 (52)5.电脑命令行编程 (52)5.1.电脑连接 (52)5.1.1.通过串口连接 (52)5.2.登录 (53)5.2.1.通过超级终端串口登录 (53)5.2.2.通过超级终端TCP/IP登录 (53)5.3.输入规则 (54)5.4.自动装机 (55)5.5.显示网络配置信息 (55)5.6.配置网络 (56)5.7.更改口令 (56)5.8.配置呼叫控制参数 (56)5.9.系统日期/时间参数配置 (57)5.10.系统计费开关 (57)5.11.功能码维护 (58)5.12.读取设备序列号 (59)5.13.激活设备 (59)5.14.重启系统 (59)5.15.退出系统 (59)6.系统升级 (59)6.1.下载 (59)6.2.升级 (59)6.3.注意事项 (59)6.4.主控板 (61)6.5.扩展主控板 (62)6.6.二次电源板 (62)6.7.模拟用户板 (63)6.8.环路中继板 (64)6.9.数字用户板(二代) (65)6.10.信令板 (66)6.11.数字中继板(E1) (66)7.机器常见故障 (67)7.1.常见程序故障的排除 (67)。
WheelWitness HD PRO 用户手册说明书

Owner’s M anualThank y ou f or p urchasing t he W heelWitness H D P RO D ash C am!We are always here to help so please do not hesitate to let us know any questions o r c oncerns y ou m ay h ave! Y our 100% s atisfaction i s o ur p riority!If y ou h ave a ny q uestions p lease c ontact u s v ia o ur w ebsite! ()Copyright N oticePlease n ote t his p roduct i s f or p ersonal u se o nly.The form of usage should not offend or infringe international or domestic copyright laws and regulations. A ll r ecorded v ideos s hould b e f or p ersonal u se o nly.Please note that using this product for recording occasions like shows, exhibitions or commercial activities w ill i nfringe o thers c opyrights o r l egislation r ights.Table of ContentsAbout W heelWitness H D P RO D ashboard C amera (2)Setting U p f or F irst T ime U se (2)WheelWitness H D P RO L ayout (3)Display I cons (4)Event T riggering (4)Menu O peration (5)Video S etup M enu (6)Resolution (6)Image Q uality (7)Metering M ode S etting. (7)Light F requency (7)Date S tamp (8)ADAS – A dvanced D river A ssistance S ystem (8)Record T ime / L oop S etting (9)Speed S etting (9)Time Z one (9)AE B ias (Automatic E xposure) (10)Speed W arning S etting (works w ith G PS m odule o nly) (10)LED S etting (10)G-‐Sensor (Gravity S ensor) (Set t o O FF u nder n ormal o peration) (10)Motion S ensor (Set t o O FF u nder n ormal o peration) (11)General S etup M enu (11)Language (11)System M ode (11)Driver I D / L icense P late S etting (12)Time S etup (12)Format (13)Default S etting (13)BackLight O ff S etting (13)Beep S ound S etting (13)Version I nfo (14)Playback (14)Connecting t o P C (14)Microphone (15)Hardwiring (15)Stealth H ardwiring (15)Warranty (16)Contact U s (17)About WheelWitness HD PRO Dashboard CameraThe HD PRO is designed to automatically turn ON when it receives power to the DC IN port. It also automatically shuts down and records for a few extra seconds using the internal battery when the power is shut off (to avoid any sudden p ower c uts a nd p ossibly corrupting data). Under default settings the c amera a lways c ycles o r “loops” t he m emory c ard s o y ou w ill a lways b e r ecording a nd n ever r un o ut of s pace.Setting Up for First Time Use1.Remove t he p rotection t ape f rom t he F ixed P lateand install the Plate on the Windshield Glass.(We recommend cleaning the installation area with r ubbing a lcohol).2.Install memory Card into the card slot. (Ifyou h ave t rouble u se ap enny t o p ush i t i n.)3.Slide t he c amera t o t he f ixed p late a nd a djust t he v ertical a nd h orizontal p ositions.The Motion Sensor function should remain OFF under normal operating conditions . It is intended to be used ONLY when the vehicle is stationary and would interfere with normal camera operation while driving. Please only change the settings as required! The G sensor function can be used to protect files in the event of an incident, however if you have too many false-positives, or the camera freezes, please make sure to turn it off!If y ou h ave a ny q uestions, p lease c ontact u s!WheelWitness HD PRO Layout1.Menu B utton2.OK / M anual R ecord B utton3.Mode / D own B utton4.EV / U p B utton5.Memory C ard S lot6.System R eset B utton7.GPS P ort (optional)8.Red L ight I ndicator -‐ P ower / C harging 9.Blue L ight I ndicator -‐ R ecording10.Green L ight I ndicator -‐ G PS (optional)11.Microphone 12.Wide A ngle L ens 13.DC I N -‐ P ower P ort14.HDMI P ort (Cable d oesn't i ncluded)B P ort16.Manual P ower B utton5.Connect the power cord to the DC INCamera p ower socket.4.Connect the power cord into the cigarettelighter s ocket i n y our c ar.Display Icons1.Mode: V ideo / P hoto / P layback2.External P ower c onnection / B attery3.Memory C ard (x – n o c ard, o r d efective c ard)4.G-‐Sensor S tatus (recommended m ode – O FF a s s hown o n t he p icture)5.Video f ile l ock (“EVENT” f unction), i con w ill b e a ctive w hen E VENT i s t riggered6.Recording7.Recording t ime8.Microphone O FF/ON9.GPS S tatus (turns g reen w ith o ptional G PS M odule o nly)10.ADAS: A dvanced D river A ssistance S ystem11.Speed L imit: P reset s peed l imit (with o ptional G PS M odule o nly)12.EV: E xposure V alue, “+” b righter, “-‐“ d immer13.Video R esolution14.Length o f V ideo f ile – 2/5/10 m inutes e ach f ile15.Current d ate / t ime / s peed (speed w ith o ptional G PS M odule o nly)Event TriggeringIn c ase o f e mergency o r f or s ome o ther r eason w hen y ou w ant t o s ave t he r ecorded m oment, s imply press the “MENU” button (#1) while camera is recording. The camera displays the “!” symbol on the LCD Display a nd it will save the previous 10 seconds before the press and 20 seconds after. You will find this file in a separate folder in the SD card.You can also turn the G sensor to ON while driving. If there is an "event" that it senses, it will automatically save that file accordingly as well. Please keep in mind, if the camera has too many false-positive or it starts to freeze, set the G sensor to OFF.WARNING: FORMATTING THE Memory CARD WILL ERASE ALL THE INFORMATION INCLUDING “READ O NLY” F ILES.Menu OperationThe H D P RO h as t wo m enus; V ideo S etup M enu a nd G eneral S etup M enu.Press “MENU” button in STOP position (no red recording symbol on the display) to a ctivate t he M enu.Press “MENU” b utton a gain f or s witch b etween V ideo a nd G eneral S etup M ENU.Use “UP” and “DOWN” button to highlight the desired line and then press “OK”button t o e nter s ub-‐menu.Confirm the selection by using the UP and DOWN button to select the item and press “OK” t o c onfirm s etting.Video Setup MenuResolutionVideo resolution can be selected up to 2304 x 1296P. Higher resolution produces a higher q uality i mage. T he h igher t he r esolution, t he h igher t he f ile s ize.A s tandard 32GB m icroSD c ard w ill h old a pproximately 8 h ours a t t he h ighest r esolution mode a vailable.[Video R esolution][2560x1080 30P 21:9] / [2304 x 1296 30P] / [HDR 1920 x 1080 30P] / [1920 x 1080 30P] / [1280 x 720 60P] / [1280 x 720 30P]Image QualityHigher Q uality – L arger F ile S ize.[S.Fine] / [Fine] / [Normal]Metering Mode Setting.Metering M ode r efers t o t he w ay i n w hich c amera d etermines t he e xposure.[Average] / [Center] / [Spot]Light FrequencyLight F requency (anti f lickering)[Auto] / [60Hz] – U SA S tandard / [50Hz] – E uropean S tandardDate StampYou c an s elect t o h ave t he D ate & T ime “stamped” i nto t he v ideo.[Date s tamp] [ON] / [OFF]Current s peed i s s tamped i n [ON] m ode w hen o ptional G PS M odule i s p resent. ADAS – Advanced Driver Assistance System[ON] / [OFF]L ane D eparture W arning:If a l ane c hange o ccurs, a w arning p icture w ill w arn t he d river a nd t he c amera w ill b eep.Low L ight W arning S ystem:Under l ow-‐light c onditions t he c amera w ill r emind y ou t o t urn o n y our h eadlights.Driver F atigue W arning S ystem:The c amera d evice w ill d isplay a w arning p icture a nd w arning t one w hen y ou h ave b eencontinuously d riving f or m ore t han f our h ours, f ollowed b y t he s ame w arning e very t wo h ours.Record Time / Loop SettingUsing the Record Time function you can have the camera split the video files into either 2, 5 or10 minute files. The recording is continuous, but the files are split into smaller chunks so theyare e asier t o w ork w ith.[Loop S etting] [2min] / [5min] / [10 m in]Speed Setting[unit: M/H] / [unit: K M/H]Time ZoneTime Z one [-‐12] / [-‐11] /…./ [+11] / [+12]Using t he “UP” a nd “DOWN” b uttons (#4 a nd #5) s et p roper t ime z one f or y our r egion (ex: N ew York -‐5). P ress “OK” (#2) b utton t o c onfirm. P ress “MENU” b utton t o e xit m enu m ode.WARNING: S etting t he c orrect t ime z one i s v ery i mportant f or t he G PS t o i dentify t he c orrect location o n t he M AP!AE Bias (Automatic Exposure)Exposure V alue, “+” b righter, “-‐“ d immer.Speed Warning Setting (works with GPS module only)[OFF] / [55M/H] / [65M/H] / [75M/H] /[80KM/H] / [120KM/H]LED SettingYou c an t urn o ff t he L ED b acklight f or t he b uttons. [LED] [On] / [Off].G-‐Sensor (Gravity Sensor) (Set to OFF under normal operation) The G-‐Sensor is used when the vehicle is stationary or under special application options. When there i s a c ollision o r a s udden c hange i n X YZ a xis, t he G-‐Sensor determines the direction of the collision and records the event. It creates a separate EVENT folder and stores the files there.These f iles a re s aved a nd a re n ot o verwritten w hen t he c amera f iles l oop.Adjust t he s ensitivity p arameter o f t he s ensor s o t hat t he c amera d oes n ot a utomatically l ock a ll the r ecorded v ideos.[G-‐Sensor] [High] / [Medium] / [Low] / [Off]Motion Sensor (Set to OFF under normal operation)Like t he G-‐Sensor, t he m otion d etection f unction i s u sed w hen t he v ehicle i s s tationary o r u nder special application options. If you have the camera hardwired, you can set the motion detector to ON, and when a motion is visible in the field of view, the camera records the set time. It creates a separate EVENT folder and stores the files there. These files are saved and are not overwritten w hen t he c amera f iles l oop.This f unction s hould b e t urned O FF u nder n ormal o peration (when d riving)![Motion d etect] [Off] / [On]General Setup MenuLanguageUse t his s etting t o a djust t he m enu t o y our p referred l anguage.[Language] [English] …. [foreign l anguage] P ress “OK” B utton t o p rocess.System ModeThis s etting c an b e a djusted w hen y ou u se t he A V c able o r H DMI c able t o c onnect t he c amera t o your TV (AV and HDMI cables are not included.) (You can use the playback feature to display it on y our T V). F or U SA u se N TSC.[NTSC] / [PAL]Driver ID / License Plate SettingPush “OK” b utton a nd u se t he “UP” a nd “DOWN” b uttons t o s elect t he a ppropriate f irst l etter o r digit. T hen p ress “MENU” t o g o t o t he n ext l etter o r d igit. A fter y ou s etup y our p late p ress ”OK” to s ave y our p late n umber. [Ok] [Mode] [Down]Time SetupAdjust t he c urrent d ate a nd t ime.[Time S etup] s elect Y ear, M onth, D ay, H our, M inute -‐ P ress [OK] t o s ave.Select year using the MENU button and set the year using the UP and DOWN button. Then select the month using the MENU button and set the current month using the UP and DOWN buttons. F ollow t he a bove s teps t o s et t he d ay, h our, a nd m inute a nd p ress O K.You c an p rovide y our l icense p late n umber o r D river I D h ere. T his n umber w ill b e s tamped i nto the v ideo a t t he b ottom r ight c orner a long w ith t he t ime a nd d ate.FormatThis f unction d eletes a ll d ata o n t he m emory c ard i ncluding p rotected d ata.[No] / [Yes]. P ress [Ok] b utton t o f ormat.Default SettingThis f unction r esets a ll s ettings t o F actory D efaults.[No] / [Yes]BackLight Off Setting[Off] / [1 m in] / [3 m in] / [5 m in]Beep Sound SettingON/OFF f unction f or P ower-‐ON/OFF c hime a nd “beep” w ith e ach k ey p ress. [On] / [Off]Version InfoCurrent f irmware v ersion.PlaybackConnecting to PCConnect t he U SB C able t o t he U SB p ort o f t he c amera o n t he s ide (#15) (NOT D C-‐IN) a nd connect t he o ther e nd o f t he U SB c able t o t he U SB p ort i n y our P C/Mac. T he r ed L ED o n t he camera w ill t urn o n.Press P ower b utton (#16) o n t he r ecorder – t he s creen o n t he w ill t urn b lue.The c omputer w ill n ow s how a r emovable d rive t hat y ou c an b rowse, j ust l ike a f lash d rive. Alternatively, y ou c an u se t he i ncluded m emory c ard t o U SB a dapter s eparately t o v iew/copy the f iles f rom t he c ard.Press M ODE B utton t o s elect p layback m ode a nd T humbnail V iew Press D OWN t o s elect v ideo f iles. O K B utton – p lay V ideo Press M ENU b utton – d elete f ileMicrophoneYou c an t urn t he m icrophone O N/OFF b y h olding t he O K b utton w hile t he c amera i s r ecording. You s hould s ee t he i con c hange o n t he d isplay.HardwiringStealth HardwiringIf y ou w ould l ike a s tealth i nstall t hat y ou n ever h ave t o w orry a bout, w e s ell a h ardwire k it. Y ou c an u se it t o t ap i nto y our “Accessory” w ire a nd t he c amera t urns o n a nd o ff w ith t he v ehicle. Y ou n ever h ave t o remember t o t urn i t o n. U sing a h ardwire k it r equires s ome b asic t echnical s kills. D ependingo n y our vehicle, y ou c an r oute t he w ires t o t he b ack o f y our c igarette l ighter o r f use p anel. I f w iring t o a f use panel, p lease u se a m ulti-‐meter o r a t est l ight t o f ind a f use t hat i s O N w hen v ehicle i s i n Accessory/Ignition a nd i s o ff w hen v ehicle i s o ff./dp/B00TGQ1Y3Q/ Amazon: W heelWitness H ardwire I nstallation K itDepending on your vehicle and where your cigarette lighter is located, you can choose to use the included power adapter, or opt for our “hardwire” s tealth k it. Some vehicles have a switched cigarette lighter output, s o i f y ou c onnect i t h ere, t he c amera a lways turns on and off with the cars. Other vehicles, such as older German cars have an always-‐on outlet, so you either have to manually connect/disconnect the c amera o r y ou c an h ardwire i t.The included power adapter is approximately 12 feet a nd c an b e r outed a round y our w indshield a nd down the pillar, under you glove box and to the cigarette l ighter o utlet f or a c lean i nstall.WarrantyWe p rovide f ree w arranty s ervice f or p arts a nd l abor w ithin O NE Y EAR f rom t he d ate o f p urchase. The w arranty d oes n ot c over:•Damage c aused b y a ccident, m isuse, t ampering w ith o r f ailure t o f ollow t he c are•Water d amage•Damage a nd/or s cratches t o t he f inish o f t he c ase, l ens, o r L CD d isplay•Broken b racket a nd d amaged p ower c able•Memory c ard•Damage c aused b y r epairs o r a lterations b y a nyone o ther t han o ur S ervice C enterContact UsIf y ou h ave a ny q uestions o r c omments, p lease f eel f ree t o c ontact u s! /supportPlease D rive S afely!-‐ W heelWitness I nc.WheelWitness I nc。
汉邦HDVR软件操作说明书
HDVR 软件V1.3用户手册(版本V1.3)目录重要提示 (3)第一章硬件及软件安装 (4)1.1 硬件安装 (4)1.1.1 硬件驱动安装 (4)1.1.2 连接向导 (10)1.2 软件安装 (12)第二章系统控制 (15)2.1 概述 (15)2.2 系统控制面板 (20)2.3 摄像机设置 (21)2.3.1 预览修改 (22)2.3.2 录像设置 (24)2.3.3 报警设置(内含智能操作讲解) (25)2.3.4 色彩调整 (31)2.3.5 自动工作计划设置 (33)2.3.6 云台设置 (36)2.4 系统设置 (37)2.4.1 短信服务器 (38)2.4.2 E-Mail 服务器 (38)2.4.3 手机监控服务配置 (39)2.4.4 系统设置 (41)第三章回放 (43)3.1 概述 (43)3.2 主菜单 (44)3.2.1 浏览抓帧 (44)3.2.2 局部放大 (45)3.2.3 回放模式 (47)3.2.4 刻录 (49)3.3 回放控制 (50)3.4 智能搜索 (51)3.5 即时回放 (53)第四章其他功能 (54)4.1 概述 (54)4.2 用户管理 (55)4.2.1 本地用户管理 (55)4.2.2 远程用户管理 (56)4.3 工具 (58)4.3.1 电子地图编辑器 (58)4.3.2 电子地图浏览器 (60)4.3.3 本地报警输出控制 (60)4.3.4 报警触发自动全屏 (61)4.4 磁盘管理 (61)4.4.6 清盘及写盘故障信息 (61)4.4.7 本地磁盘信息 (62)4.5 日志管理 (63)4.6 数字矩阵 (63)4.6.1 设置 (64)4.6.2 使用数字矩阵 (66)4.7 矩阵控制 (66)4.8 通讯 (66)4.8.1 语音对讲 (66)4.8.2 发送手机短信 (68)4.9 网路设备管理 (68)4.10 视频输出 (69)4.10.1 设置视频输出 (69)4.10.2 设置视频输出轮巡 (70)4.11自动域名解析工具 (70)第五章HDVR 客户端 (71)5.1 运行客户端 (71)5.2 分控设置 (72)5.3 远程预览 (74)5.4 远程系统设置 (74)5.5 存储设置 (76)5.6 HDVR 客户端回放 (76)5.6.1 本地回放 (76)5.6.2 远程回放 (77)第六章IE 远程访问 (80)6.1 启用IE 浏览器中A CTIV E X 选项 (80)6.2 IE 分控设置 (80)6.3 IE 远程预览 (80)附录一菜单结构 (82)重要提示为了您的系统能够稳定运行,请您务必按下面指示操作:1.至少将磁盘分为两个区,第一个分区用来装windows 操作系统和应用程序,其他分区用来储存录像资料。
高德威产品手册(解决方案)V0.2

产品手册PRODUCT CA TALOGV1.0 ,2009/11产品手册目录CONTENTS1.GW-PR-9902T汽车牌照识别器 (5)1.1 产品简介 (5)1.2 权威检测 (5)1.3 产品特点 (5)1.4 主要功能 (5)1.5 应用领域 (6)1.6 解决方案 (6)1.6.1标清独立处理单元车牌识别方案 (7)1.6.1.1 主要特性 (8)1.6.1.2 订货型号 (8)1.6.1.3 硬件接口 (8)1.6.1.4 技术参数 (8)1.6.1.5 应用场合 (9)1.6.1.6 应用举例-高速公路收费系统 (9)1.6.1.6.1 方案特点 (9)1.6.1.6.2 系统框图 (10)1.6.1.6.3 设备清单 (10)1.6.2标清板卡处理单元车牌识别方案 (11)1.6.2.1 主要特性 (11)1.6.2.2 订货型号 (11)1.6.2.3 硬件接口 (11)1.6.2.4 技术参数 (11)1.6.2.5 应用场合 (12)1.6.2.6 应用举例-高速公路收费系统 (12)1.6.2.6.1 方案特点 (12)1.6.2.6.2 系统框图 (13)1.6.2.6.3 设备清单 (13)1.6.3标清独立处理单元LED补光车牌识别方案 (14)1.6.3.1 主要特性 (14)1.6.3.2 订货型号 (14)1.6.3.3 硬件接口 (14)1.6.3.4 技术参数 (14)1.6.3.5 应用场合 (15)1.6.3.6 应用举例-高速公路收费系统 (16)1.6.3.6.1 方案特点 (16)1.6.3.6.2 系统框图 (16)1.6.3.6.3 设备清单 (16)1.6.4标清板卡处理单元LED补光车牌识别方案 (17)1.6.4.1 主要特性 (17)1.6.4.2 订货型号 (17)1.6.4.3 硬件接口 (17)1.6.4.4 技术参数 (18)1.6.4.5 应用场合 (19)1.6.4.6 应用举例-高速公路收费系统 (19)1.6.4.6.1 方案特点 (19)1.6.4.6.2 系统框图 (20)1.6.4.6.3 设备清单 (20)1.6.5标清独立处理单元双摄像头车牌识别方案 (20)1.6.5.1 主要特性 (21)1.6.5.2 订货型号 (21)1.6.5.3 硬件接口 (21)1.6.5.4 技术参数 (21)1.6.5.5 应用场合 (22)1.6.5.6 应用举例-高速公路收费系统 (23)1.6.5.6.1 方案特点 (23)1.6.5.6.2 系统框图 (24)1.6.5.6.3 设备清单 (24)1.6.6标清板卡处理单元双摄像头车牌识别方案 (25)1.6.6.1 主要特性 (25)1.6.6.2 订货型号 (25)1.6.6.3 硬件接口 (25)1.6.6.4 技术参数 (25)1.6.6.5 应用场合 (26)1.6.6.6 应用举例-高速公路收费系统 (26)1.6.6.6.1 方案特点 (26)1.6.6.6.2 系统框图 (27)1.6.6.6.3 设备清单 (27)1.6.7高清车牌识别方案 (28)1.6.7.1 主要特性 (28)1.6.7.2 订货型号 (28)1.6.7.3 硬件接口 (28)1.6.7.4 技术参数 (29)1.6.7.5 应用场合 (30)1.6.7.6 应用举例-高速公路收费系统 (30)1.6.7.6.1 方案特点 (30)1.6.7.6.2 系统框图 (31)1.6.7.6.3 设备清单 (31)1.6.8高清LED补光车牌识别方案 (32)1.6.8.1 主要特性 (32)1.6.8.2 订货型号 (32)1.6.8.3 硬件接口 (32)1.6.8.4 技术参数 (33)1.6.8.5 应用场合 (34)1.6.8.6 应用举例-高速公路收费系统 (34)1.6.8.6.1 方案特点 (34)1.6.8.6.2 系统框图 (35)1.6.8.6.3 设备清单 (35)1.6.9 高清含终端服务器车牌识别方案 (36)1.6.9.1 主要特性 (36)1.6.9.2 订货型号 (36)1.6.9.3 硬件接口 (37)1.6.9.4 技术参数 (37)1.6.9.5 应用场合 (39)1.6.9.6 应用举例-治安查报站系统 (39)1.6.9.6.1 方案特点 (39)1.6.9.6.2 系统框图 (40)1.6.9.6.3 设备清单 (40)1.6.10高清含终端服务器LED补光车牌识别方案 (41)1.6.10.1 主要特性 (41)1.6.10.2 订货型号 (42)1.6.10.3 硬件接口 (42)1.6.10.4 技术参数 (42)1.6.10.5 应用场合 (44)1.6.10.6 应用举例-治安查报站系统 (44)1.6.10.6.1 方案特点 (44)1.6.10.6.2 系统框图 (45)1.6.10.6.3 设备清单 (45)2. GDW-VM-2003车辆智能监测记录系统 (46)2.1 产品简介 (46)2.2 权威检测 (46)2.3 产品特点 (47)2.4 设备功能 (47)2.5 应用领域 (47)2.6 解决方案 (48)2.6.1标清卡口方案 (49)2.6.1.1 主要特性 (49)2.6.1.2 订货型号 (49)2.6.1.3 硬件接口 (49)2.6.1.4 技术参数 (49)2.6.1.5 应用场合 (50)2.6.1.6 应用举例-治安卡口系统 (51)2.6.1.6.1 方案特点 (51)2.6.1.6.2 系统框图 (51)2.6.1.6.3 设备清单 (51)2.6.2标清硬盘录像一体卡口方案(预告) (56)2.6.2.1 主要特性 (56)2.6.2.2 订货型号 (56)2.6.2.3 硬件接口 (56)2.6.2.4 技术参数 (56)2.6.2.5 应用场合 (57)2.6.3高清卡口SIC1G方案 (58)2.6.3.1 主要特性 (58)2.6.3.2 订货型号 (58)2.6.3.3 硬件接口 (59)2.6.3.4 技术参数 (59)2.6.3.5 应用场合 (61)2.6.3.6 应用举例-治安卡口系统 (61)2.6.3.6.1 方案特点 (61)2.6.3.6.2 系统框图 (62)2.6.3.6.3 设备清单 (62)2.6.4高清LED补光卡口方案 (63)2.6.4.1 主要特性 (63)2.6.4.2 订货型号 (64)2.6.4.3 硬件接口 (64)2.6.4.4 技术参数 (64)2.6.4.5 应用场合 (66)2.6.4.6 应用举例-治安卡口系统 (67)2.6.4.6.1 方案特点 (67)2.6.4.6.2 系统框图 (68)2.6.4.6.3 设备清单 (68)2.6.5高清卡口(不含终端服务器)方案 (69)2.6.5.1 主要特性 (69)2.6.5.2 订货型号 (69)2.6.5.3 硬件接口 (70)2.6.5.4 技术参数 (70)2.6.5.5 应用场合 (71)2.6.5.6 应用举例-ETC收费系统 (72)2.6.5.6.1 方案特点 (72)2.6.5.6.2 系统框图 (73)2.6.5.6.3 设备清单 (73)2.6.6高清LED补光卡口(不含终端服务器)方案 (74)2.6.6.1 主要特性 (74)2.6.6.2 订货型号 (74)2.6.6.3 硬件接口 (74)2.6.6.4 技术参数 (75)2.6.6.5 应用场合 (76)2.6.6.6 应用举例-超速预警提醒系统 (77)2.6.6.6.1 方案特点 (77)2.6.6.6.2 系统框图 (78)2.6.6.6.3 设备清单 (78)高德威产品手册1.GW-PR-9902T汽车牌照识别器1.1 产品简介GW-PR-9902T汽车牌照识别器系列产品,采用先进的数字图像处理和模式识别技术,基于嵌入式的硬件处理平台和包含智能补光技术的专用成像系统,可实现车辆牌照的自动识别及图像抓拍。
《超旺操作手册》word版
第一章软件安装及启动1.1 系统安装要求◆服务器:硬件配置(最低配置)C P U : PII 233MHZ以上内存: 128M硬盘:至少400M的硬盘可用空间显示器: VGA, 显示分辨率在800*600以上软件配置:操作系统: Windows NT Server 4.0标准版或Windows NT Server4.0企业版、Windows 2000 Server 其它: Service Pack 4以上(注:如果NT Server 4.0用的是中文版,那么Service Pack 也需要中文版), SQL Server 2000(SQL版);◆工作站/单机版:硬件配置(最低配置)C P U : PII 200MHZ以上内存: 64M硬盘:至少100M的硬盘可用空间显示器: VGA, 显示分辨率在800*600以上软件配置:中文版Windows98/ Windows 2000/ Windows XP1.2 软件的安装在安装软件前,请检查计算机是否安装了TCP/IP协议1.2.1软件的网络版的安装包括两个部分,一是服务器端程序的安装,二是工作站端的安装。
安装步骤如下:软件后台的安装:1〉软件安装盘插入光驱后,手动执行光盘目录下<网络版后台>,双击该目录下的setup.exe 文件,出现如下画面,:2〉单击Next>,输入名称(Name)和单位(Company), 单击Next>,提示用户选择安装路径,软件后台默认安装路径是“C:\Program Files\科技\Next>,根据系统提示完成安装工作。
1.3 软件的启动1.3.1启动后台数据库服务器启动服务器上的SQL Server服务管理器重新启动WINDOWS系统后,系统会自动启动SQL Server服务管理器,或从“开始——程序——启动”中选择“服务管理器”并运行,也可在服务器的“C:\Program Files\Microsoft SQL Server\80\Tools\Binn”目录下运行“sqlmangr.exe”,出现如下界面:运行后在任务栏右下角有图标显示●启动软件启动服务器上的SQL Server服务管理器后,就可以启动软件了。
HD中文操作手册 (1)

式进入操作界面。
卸载《HD2014》软件包提供了完整的卸载功能,用户可以方便地删除《HD2014》里的所有文档、程序组和快捷方式。
用户可以在【开始】/【程序】/HD2014程序组里选择卸载HD2014即可完成软件的卸载操作。
第三章 工具使用详解软件主界面打开《HD2014》软件主界面如下图标题栏菜单栏工具栏模拟屏模拟工具(放大减小/靠左靠右/左右翻页)显示屏向左对齐,区域吸附靠近节目管理屏体参数通信设置端口 双击可打开通信设置18种常用单元板配置,选择后可以只需要修改屏宽屏高选择单元板的大小,通过单元板的张数设置屏宽屏高,其他设置需要设置保留2013软件的快捷键,与常用单元板的功能相同第三步,高级设置,一般情况下不用设置高级设置,只需使用默认值;第四步,回读&导入导出,可以将设置好的参数导出保存,下次使用时,直接导入软件便可以还原设置参数。
通信设置:用于设置控制卡与电脑之间的通信,如图;系统设置:用于设置系统参数(不建议更改)。
当单元板上显示的蓝色与绿色相反时,可以选择这个交换在通讯正常的情况下软件自动五分钟校时一次温度:新建一个温度区域或温湿度区域,用于显示当前环境温度或者温度与湿度(需加温度传感器模块或者温湿度传感器模块);动画字:用于新建动画字区域,可以建空心字、字体描边,并有六十多种特效显示,还可以自己自定义结合多种特效。
组合几种特效为一个特效显示Excel:直接添加Excel文件;发送:用于发送当前显示屏文件;U盘:U盘卡专用,当前显示文件和时间保存到U盘内(U盘更新);校时:校正系统时间(调整控制卡时钟与电脑同步);预览:预览当前的节目或者显示屏全局预览。
选择节目时,为预览当前节目;选择显示屏时为全局预览,可以与实际显示屏上显示效果一致。
模拟显示屏模拟屏模拟工具(放大减小/靠左靠右/左右翻页/显示屏靠左/区域吸请注意:在模拟显示屏的下面有一行工具栏,合理利用可以帮你更方便的编辑显示屏文件(包含:放大/缩小模拟窗口、当前区域左右移动、显示屏内容翻页、模拟显示屏靠左上角显示、区域建立时吸附等工具)显示屏属性栏此栏可以进行亮度设置/定时开关机设置等当前屏参数功能导当前屏参数:根据屏参设置而改变;功能导航:包括屏参设置、通信设置、清除显示数据、时间设置、亮度设置、定时开关机、显示屏测试、开屏、关屏等功能导航。
