Sound Check 使用手册
SoundCheck指导手12132册

S o u n d C h e c k指导手12132册(总13页)--本页仅作为文档封面,使用时请直接删除即可----内页可以根据需求调整合适字体及大小--SoundCheck操作指导手册目录1,线路连接2,S oundCheck 界面3,打开喇叭测试序列4,频响曲线的测量5,对Hadware(硬件) 进行设置6,对仪器进行校准(Calibration)7,对Stimulus(激发信号)进行设置8,对 Acq play & record, (演示和记录) Ana Fundamental(基本曲线的分析)进行设置9,对Display (显示)进行设置10,对曲线进行平滑11,对曲线求平均12,界限的设置13,把一条标准喇叭的测试曲线设置为界限曲线14,制作一条黄金曲线15,测喇叭的THD(总谐波失真)和Rub & Buzz(磨擦峰鸣杂音) 16,测喇叭阻抗和谐振频率17,提示信息的编辑18,分频器的测量19,如何使参考曲线和要测量的曲线以及界限曲线都变成直线20,其它东源音响公司1,线路连接1,基本线路注意,声卡插孔在电脑里排列7 在最右,2 在最左。
2,前置放大器:Soundconnect此三个按钮1,3都调到“0”2调到 20dB接话筒后背接声卡3,功放用CROWN D-75A 型功放,使用时,放大量级(level)调到“0”的位置(即最大的位置),后板接到CH-1通道。
4,扬声器—MICMIC用 SCM-1 型。
连接到前置放大器的前面。
2,SoundCheck 界面启动,继续,重做耗时前缀编码测量次数序列名暂停2主界面下拉菜单注意setup 下拉菜单中的名称和意思。
Hardware (硬件设置) Calibration (仪器校准) Messages (信息设置)Stimulus (激发信号) Acquisition (数据采集) Analysis (数据分析)Recall (资料回叫) Post Processing (后处理) Limits (界限设置)Display (显示设置) Serial Number (系列号设置) Autosave(自动保存) Printing (打印设置) Assign Channel (通道安排) Sequence (序列设置) Memory List (储存列表)(版有)3打开喇叭测试序列。
SoundDock 系列 II 数字音乐系统用户指南说明书
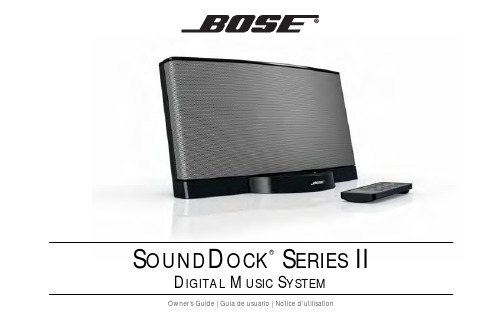
SOUND D OCK® S ERIES IID IGITAL M USIC S YSTEMOwner’s Guide | Guía de usuario | Notice d’utilisationiiI MPORTANT S AFETY I NSTRUCTIONSPlease read this owner’s guidePlease take the time to carefully follow the instructions in this owner’s guide.It will help you set up and operate your system properly and enjoy all of itsadvanced features. Please save this owner’s guide for future reference.The lightning flash with arrowhead symbol, within an equilateraltriangle, alerts the user to the presence of uninsulated dangerousvoltage within the system enclosure that may be of sufficient magnitudeto constitute a risk of electric shock.The exclamation point within an equilateral triangle alerts the user to thepresence of important operating and maintenance instructions in thisowner’s guide.WARNINGS and CAUTIONS•Keep the remote control battery away from children. It may cause a fire orchemical burn if mishandled. Do not recharge, disassemble, heat above 100º C(212º F), or incinerate. Dispose of used batteries promptly. Replace only with abattery of the correct type and model number.•Danger of explosion if battery is incorrectly replaced. Replace only with Duracell,Eveready, Energizer, Maxell, Toshiba, Sanyo, CR2032 or DL2032 3-voltlithium battery.•Make no modifications to the system or accessories. Unauthorized alterationsmay compromise safety, regulatory compliance, and system performance.•Do not place any naked flame sources, such as lighted candles, on or nearthe apparatus.NOTE: The product label is located on the bottom of the product.NOTE: This product must be used indoors. It is neither designed nor tested foruse outdoors, in recreation vehicles, or on boats.NOTE: This product is intended to be used only with the power supply provided.NOTE: Where the mains plug or appliance coupler is used as the disconnectdevice, such disconnect device shall remain readily operable.Please dispose of used batteries properly,following any localregulations. Do not incinerate.This product conforms to all EU Directive requirements as applicableby law. The complete Declaration of Conformity can be found at/compliance.WARNING: To reduce the risk of fire or electrical shock, do not expose theproduct to rain or moisture.WARNING: Do not expose the apparatus to dripping or splashing, and donot place objects filled with liquids, such as vases, on or near the apparatus.As with any electronic product, use care not to spill liquids into any part of thesystem. Liquids can cause a failure and/or a fire hazard.iiiI MPORTANT S AFETY I NSTRUCTIONS4 6 81.Read these instructions – for all components before using this product.2.Keep these instructions – for future reference .3.Heed all warnings – on the product and in the owner’s guide.4.Follow all instructions.5.Do not use this apparatus near water or moisture – Do not use thisproduct near a bathtub, washbowl, kitchen sink, laundry tub, in a wetbasement,near a swimming pool, or anywhere else that water or moisture are present.6.Clean only with a dry cloth – and as directed by Bose Corporation.Unplug this product from the wall outlet before cleaning.7.Do not block any ventilation openings. Install in accordance with themanufacturer’s instructions – To ensure reliable operation of the product and to protect it from overheating, put the product in a position and loca-tion that will not interfere with its proper ventilation. For example, do not place the product on a bed, sofa, or similar surface that may block the ventilation openings. Do not put it in a built-in system, such as a bookcase or a cabinet that may keep air from flowing through its ventilation openings.8.Do not install near any heat sources, such as radiators, heat registers,stoves or other apparatus (including amplifiers) that produce heat.9.Protect the power cord from being walked on or pinched, particularlyat plugs, convenience receptacles, and the point where they exit from the apparatus.10.Only use attachments/accessories specified by the e only with the cart, stand, tripod, bracket or tablespecified by the manufacturer or sold with the apparatus. When a cart is used, use caution when moving the cart/apparatus combination to avoid injury from tip-over.12.Unplug this apparatus during lightning storms or whenunused for long periods of time – to prevent damage to this product.13.Refer all servicing to qualified service personnel. Servicing is requiredwhen the apparatus has been damaged in any way: such as power supply cord or plug is damaged; liquid has been spilled or objects have fallen into the apparatus; the apparatus has been exposed to rain or moisture, does not operate normally, or has been dropped – Do not attempt to service this product yourself. Opening or removing covers may expose you to dangerous voltages or other hazards. Please call Bose to be referred to an authorized service center near you.14.To prevent risk of fire or electric shock, avoid overloading wall outlets,extension cords, or integral convenience receptacles. 15.Do not let objects or liquids enter the product – as they may touchdangerous voltage points or short-out parts that could result in a fire or electric shock.16.See product enclosure for safety related markings.e proper power sources – Plug the product into a proper power source,as described in the operating instructions or as marked on the product.Information about products that generate electrical noiseIf applicable, this equipment has been tested and found to comply with the limits for a Class B digital device, pursuant to Part 15 of the FCC rules. These limits are designed to provide reasonable protection against harmful interference in a residential installation. This equipment generates, uses, and can radiate radio frequency energy and, if not installed and used in accordance with the instructions, may cause harmful interference to radio communications. However, this is no guarantee that interference will not occur in a particular installation. If this equipment does cause harmful interference to radio or television reception, which can be determined by turning the equipment off and on, you are encouraged to try to correct the interference by one or more of the following measures:•Reorient or relocate the antenna in the device receiving the interference.•Increase the separation between the equipment and receiver.•Connect the equipment to an outlet on a different circuit than the one to which the receiver is connected.•Consult the dealer or an experienced radio/TV technician for help.This product complies with the Canadian RSS-310 Class B specification.2S OUND D OCK ® S ERIES II DIGITAL MUSIC SYSTEMThank you for your purchaseCongratulations on your choice of the SoundDock ®Series II digital music system from Bose.Designed specifically to work with your iPod or iPhone, this system provides high-quality audio performance that invites your music to come out and play. Whether the music is from your iPod/iPhone or from another connected device, you’ll find that it attracts a wide audience of people who love the sound.Unpacking and setting upCheck the carton for all of the parts shown. Save the carton 1.Place the system on a firm and level surface.2.Plug the power pack into the DC POWER connector onthe rear of the system.3.Plug the small end of the power cord into the connectoron the power pack.4.Plug the other end of this cord into a wall outlet. You willhear a short tone indicating a power connection has been made.digital music system❏Power cord468®2.Adjust the volume using buttons on the system dock orthe remote control volume buttons.Note: Whenever you press either button, a small light on thefront of the system flashes briefly.3Note: Each time you press a button on the remote control, a small light on the front of the system flashes briefly. 3.Adjust the volume using buttons on the system dock orthe remote control volume buttons.Other buttons on the remote do not control this other device. To return to listening to your iPod/iPhone, press the Play/Pause button once.scan backwardquickly.45S OUND D OCK ® S ERIES II DIGITAL MUSIC SYSTEM4 6 8Maintaining the systemChanging the remote control battery is the only regularmaintenance that is required. You may also clean the system.Replacing the remote batteryWhen the remote stops operating or its range seems ing a coin, turn the battery coverslightly counterclockwise.2.Remove the cover and insert thenew battery (CR2032 or DL2032) flat side up, with the + symbol in view.3.Reseat the cover and turn itclockwise to lock into place.WARNINGS:•Keep the remote control battery away from children. It may cause a fire or chemical burn if mishandled. Do not recharge, disassemble, heat above 140°F (60°C), or incinerate.•Dispose of used batteries promptly. Replace only with a battery of the correct type and model number.•Danger of explosion if battery is incorrectly replaced. Replace only with Duracell, Eveready, Energizer, Maxell, Toshiba, Sanyo, CR2032 or DL2032 3-volt lithium.Cleaning the systemWipe the system using a soft, dry cloth. You can also lightly vacuum the grille.•Do not use solvents, chemicals, or sprays.•Do not allow liquids to spill or objects to drop into any openings.S OUND D OCK® S ERIES II DIGITAL MUSIC SYSTEM TroubleshootingYour iPod/iPhone does not dock properly •Remove your iPod/iPhone from the dock and check for obstructions on the connectors in the dock and on your iPod/iPhone. Then reseat it in the dock.•Remove your iPod/iPhone from the dock, wait five seconds, then firmly reseat it. Y ou may need to do this a few times.No sound•Increase the volume setting for the system.•Increase the volume on the iPod/iPhone or your second audio device, if it is playing.•Make sure the system is plugged in, your iPod/iPhone or other audio device is turned on, and audio isplaying.•Press the Play/stop button on the remote control. Press and hold this button to hear a second device whilethe iPod/iPhone is charging.•Unplug the power cord for one minute, then plug it back in. This resets the system (you should hear a tonewhen the system is powered back on).•Make sure you have the latest version of software on your iPod/iPhone.Your iPod/iPhone does notnavigate playlists usingthe remote•Make sure there are no empty playlists on your iPod/iPhone.6S OUND D OCK® S ERIES II DIGITAL MUSIC SYSTEM 468Your iPod/iPhone does not respond to the SoundDock®remote control buttons shown:•Remove your iPod/iPhone from the dock, wait five seconds, then firmly reseat the iPod/iPhone.•Try the remote from a different location. If it works there, check for interference from bright room lights or sunlight. Wipe off the small lens on the front end of the remote with a clean, dry cloth.•Make sure there is a clear pathway between the remote lens and your SoundDock system.•Remove and reinsert the battery as shown on page5.•Replace the remote control battery as shown on page5.Your SoundDock does not respond to any controls •Unplug the power cord for one minute, then plug it back in. This resets the system (you should hear a tone when the system is powered back on).•Contact your local Bose® dealer about the problem.Your iPod/iPhone does not charge •Remove your iPod/iPhone from the dock and check for any connection obstructions. Reseat the iPod/ iPhone firmly.•Make sure your iPod is a compatible model (one that does not have four buttons above the click wheel).78S OUND D OCK ® S ERIES II DIGITAL MUSIC SYSTEMWarrantyYour Bose ®SoundDock Series II digital music system is covered by a limited transferable warranty. Details of the limited warranty are provided on the product registrationcard that is included in the carton. Please refer to the card for instructions on how to register. Failure to do so will not affect your limited warranty rights.What you must do to obtain Limited Warranty Service:1.Return product, with proof of purchase from an authorizedBose dealer, using the following procedures:2.Contact the Bose organization in your country/region(visit /register for Bose contact information in your country/region) for specific return and shipping instructions;bel and ship the product, freight prepaid, to the addressprovided by the Bose organization in your country; and place any necessary return authorization number prominently on the outside of the carton. Cartons not bearing a return authorization number, where required, will be refused.Customer ServiceFor questions about the SoundDock system, contact your local Bose ® dealer. To contact Bose directly, see the address list included in the carton.Technical InformationPower ratingSystem size and weight6.65"H x 11.91"W x 6.48"D (16.89 cm x 30.26 cm x 16.47 cm)4.56 lb (2.1 kg)CompatibilityThe SoundDock digital music system is compatible with all iPhones and most iPod models.Not compatible with 3rd generation with dock connector (iPod has four buttons above the touch wheel).468S OUND D OCK® S ERIES II DIGITAL MUSIC SYSTEM SoundDock and the SoundDock system design are registered trademarks ofBose Corporation in the U.S. and other countries.iPod is a trademark of Apple Inc., registered in the U.S. and other countries.iPhone is a trademark of Apple Inc. All other marks are property of BoseCorporation.“Made for iPod” means that an electronic accessory has been designed toconnect specifically to iPod and has been certified by the developer to meetApple performance standards.“Works with iPhone” means that an electronic accessory has been designed toconnect specifically to iPhone and has been certified by the developer to meetApple performance standards.Apple is not responsible for the operation of this device or its compliance withsafety and regulatory standards.9©2009 Bose Corporation, The Mountain, Framingham, MA 01701-9168 USAAM325319 Rev.00。
Bose SoundTrue 环耳音乐头戴式耳机使用指南说明书

目录欢迎使用 (5)部件 (5)耳机的佩戴方法 (6)连接至您的设备 (6)在设备中使用该耳机 (6)耳机控件 (6)基本功能 (7)媒体播放功能 (7)折叠耳罩 (8)重新安装耳罩垫 (8)故障诊断 (9)清洁耳机 (9)更换零件和配件 (9)4 - 简体中文使用耳机简体中文 - 7基本功能提高音量按下并释放 + 按钮。
降低音量按下并释放 – 按钮。
接听呼叫当您收到来电时,按下并释放 Answer/End 按钮即可接听。
结束呼叫按下并释放 Answer/End 按钮。
拒绝接听来电按住 Answer/End 按钮 2 秒钟,然后释放。
切换至来电或等候接听的呼叫并保持当前来电处于等候接听状态进行呼叫时,按一下 Answer/End 按钮。
再次按下并释放可切换回第一个呼叫。
切换至来电或等候接听的呼叫并结束当前呼叫进行呼叫时,按住 Answer/End 按钮 2 秒钟,然后释放。
使用声音控件按住 Answer/End 按钮。
有关此功能的兼容性和使用信息,请参阅设备用户指南。
媒体播放功能播放或暂停歌曲或视频按下并释放 Answer/End 按钮。
向前跳过连续两次快速按下并释放 Answer/End 按钮。
向后跳过连续三次快速按下并释放 Answer/End 按钮。
使用耳机故障诊断如果您在使用耳机时遇到任何问题,请根据下面的故障诊断说明尝试解决。
如果仍需帮助,请联系 Bose®客户服务处。
问题措施无声音或仅一个耳罩内有声音• 确保音频线的两端连接牢固。
• 试试另一个音频设备。
低音失真• 确保两侧耳罩垫均牢固固定。
耳罩垫变形• 在自然位置下,高密度耳罩泡沫在数分钟后会恢复其最初的形状。
麦克风没有接收到声音• 确保您使用的是兼容设备• 确保音频线已牢固地连接至您的设备。
• 确保麦克风未被阻塞或遮盖。
麦克风位于 Answer/End 按钮的背面。
(您可以看到麦克风处有个小的开口)设备对遥控器按钮的按压操作无反应• 确保音频线已牢固地连接至您的设备。
音响操作手册

音响扩声系统操作手册一、系统组成:1、PA系统:PA系统负责场厅内观众区域的扩声,由音箱、功放及音箱控制器组成。
PA系统又可细分为主扩声系统和环绕扩声系统。
A、主观众区域扩声系统包括主席台扩声音箱TANNOY V300 4只,TANNOY TA 1400功放2台;超底音音箱TANNOY IQ 18B 2只,TANNOY TA 1000功放2台;音箱控制器TANNOY TDX22台;中置音箱TANNOY V300 2台,TANNOY TA 1400 功放1台;舞台返听音箱TANNOY V12 2台,TANNOY TA1000 1台。
B、环绕扩声包括TANNOY V8 8台,TANNOY TA 1000 2台。
C、前区补声包括TANNOY V12 2台,TANNOY TA 1000 2台。
2、MONITOR监听系统:MONITOR监听系统负责为操作人员、表演人、重要观众(贵宾等)提供清晰准确的扩声。
MONITOR监听系统可分为控制室监听系统、主席台监听系统、场地吊装监听系统及场地内流动监听系统。
控制室监听系统包括TANNOY 5A有源监听音箱2只,AKG K66监听耳机1副。
3、调音台:调音台在扩声系统中占有重要地位。
调音台英语称“MIX”为混合的意思,因此调音台在扩声系统中是将前级音源混合后再分配给不同的扩声系统,混合/分配是其主要的功能。
本套扩声系统中有扩声及流动(监听)两张调音台,扩声调音台用于扩声、控制室监听、场地吊装监听使用;流动(监听)调音台用于场地内流动监听及主席台监听使用。
A、扩声调音台包括ALLEN&HEATH GL2800-40 1台。
4、音源系统:音源系统包括系统前级中的音源播放设备及拾音设备。
A、音源播放设备包括DVD机1台;卡座/CD一体机2台;MD 1台。
B、拾音设备包括AKG WMS400/D880无线手持话筒2套;;AKGWMS400/C407无线话筒/领夹2只;TANNOY鹅颈电容会议话筒8支;TANNOY TDM27对讲话筒2只。
调音台SOUNDCRAFT 使用手册
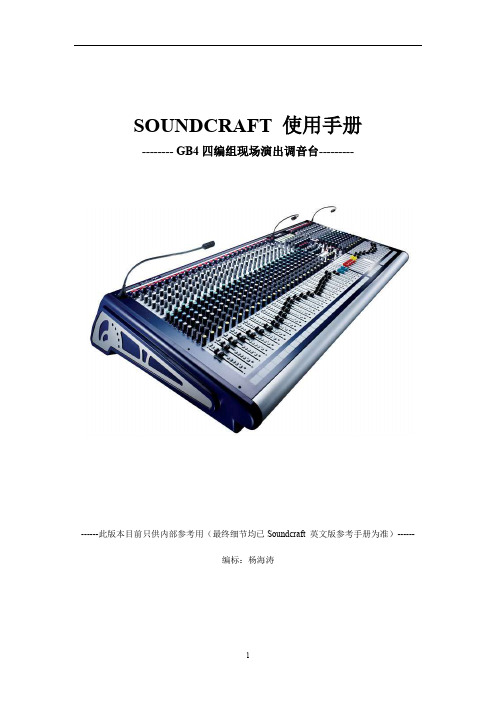
SOUNDCRAFT 使用手册-------- GB4四编组现场演出调音台---------------此版本目前只供内部参考用(最终细节均已Soundcraft 英文版参考手册为准)------编标:杨海涛介绍:GB4是SOUNDCRAFT推出的专门为多功能会议室,剧场,体育场馆等中型扩声系统而设计的现场调音台。
GB4的技术和设计为同厂高档次级别系列,GB4设有内置电源,并有插孔连接外接电源(选购)2组电源可同时工作,对于重要场所而又不需要大型调音台的用户,GB4是一个很好的工作保障。
GB4提供七组主输出,八组辅助输出,7x4矩阵输出,每个通道的直接输出,四组哑音编组可灵活对不同通道进行编组控制能够满足非常复杂的工作需求。
坚固的机架,合理的面板布局,背板接线,新颖造型,除了用于固定安装。
同样适合流动演出明智选择。
GB4 使用手册目录:供电设备安装-———————————————————————————3音频系统接地——————————————————————————— 3系统电平调整-———————————————————————————3特性————-———————————————————————————4使用————-———————————————————————————4输入通道(单声道、立体声)————————————————————5辅助输出————————————————————————————— 6功能使用—————————————————————————————7输出部分—————————————————————————————8输出功能使用——————————————————————————92—TRACK ———————————————————————————9静音编组操作———————————————————————————10矩阵操作—————————————————————————————10耳机监听—————————————————————————————10技术指标—————————————————————————————11系统线路—————————————————————————————13主输出线路图———————————————————————————15供电设备安装:GB4供电设备符合EN60065标准,检查安装地点交流电源电压值,标准电压220V 误差正负10%确认电压后,连接设备电源线,打开设备测试,查看设备是否正常。
SoundCheck 测试耳机喇叭程序设定

DUT
2.
B線
C線
L Output
● L out ● L in
功放(擴大機) Power Amplifier
Sound Card
L Input
校正功放:A與C 線拆除,將B線由 功放Output接到 Sound Card L input.
校正 B&K4192/4191/ HATS4158/4159 將B線拆除,再接 回A與C線.
nW=左表Wsi & Wri
n Summation測試頻率 點200-4kHz 1/3oct=14 個
26
6.1 Loudness Rating: RLR step
1
2008/1/4
2
3
1. 先將DRP曲線以Pot-
processing雙元運算
4
+轉換曲線得ERP曲
線
2. Pot-processing類別 新增 RLR檔
SoundCheck測試耳 機喇叭程序設定
主講:范裕昌
2008/1/4
1
目錄
1. Hardware硬體:Sound Card設定 2. Calibration校正功放與Mic 3. 功放非平衡與平衡式接線差異 4. Absolute & Relative感度差異 5. Recall自製曲線與現有曲線 6. RLR設定 7. Constant SPL test THD 8. Constant Current test Impedance 9. Crosstalk test stereo earphone 分離度 10. 法國安全法規EN-50332-1/-2 Test
6
2. Cal校正功放:Output設定Step
Sound+Sleep 用户手册说明书

2. Slip the cord under the rubber foot by separating the two pieces of the foot along the slit.
3. The machine should sit flat on a table or nightstand if the cord is installed correctly. The slit should easily separate by running your finger down it. If not, you can use a knife to cleanly open the slit.
Headphone Jack
A standard 3.5mm stereo headphone jack is located on the side of the unit. Any ordinary set of headphones or earbuds with a 3.5mm connector may be used. Connecting headphones or earbuds disables the Sound+Sleep’s built-in speaker, so it’s a great way to enjoy private relaxation.
soundcheck中文说明书
soundcheck中文说明书Sound check中文操作说明书声仪科技Soundcheck 安装计算机配置:奔4以上CPU,1G以上内存,Windows XP Pro and Vista 32 系统。
Soundcheck 初次安装1(安装解密狗,开机提示自动进入USB解密狗的Status.dat装载文件,自动安装解密狗的驱动程序,如果更换USB端口重新安装驱动。
2(关闭计算机安装声卡,重新启动,并记录声卡的序列号。
3(安装声卡的驱动,选择声卡的类型:CardDeluxe, Digigram V2 &VX 440 and Lynx 2。
4(安装Ni-Visa的驱动,拷贝CD文件到如图所示目录下,5(建立Soundcheck的桌面快捷方式如图所示6(进入控制面板选择声卡的控制设置如图所示7(打开设备管理器,检查声卡安装是否正常如图所示8(控制面板打开电源管理器,设置如图所示Soundcheck 系统设置1(声卡的设置如图所示2(设备校准z 设置激励信号如图所示z 功放校准连接如图所示确保功放关闭状态,连接上图接线所示。
打开功放电源进入Soundchek系统,进入扬声器的sequences,进入校正编辑器,设置输入为Right In,输出为Left Out,调节功放增益旋钮的合适位置,按“Calibrate”测试功放的增益和频响曲线。
z 屏蔽Windows系统的声音如图所示SSound check 8.0 新特性多通道的采集功能,最多可以扩展8个通道(NI PCI 4461)同时测试。
包括以下功能:zzz 环绕立体声多通道测试。
立体耳机测试。
多通道的音频电子设备。
(如:调音台)Sound check 测试应用Sound check 可以支持二次开发,可在库文件修改存在的测试,每一个测试对应一个“Sequence”,一个Sequence是由一系列的Step组成,每一个STEP执行一个特定的任务,一个简单SEQUENCE结构如下:z Hardware Step(定义和配置数据采集设备)z CALBRATION STEP (定义这个硬件的灵敏度和校准曲线)z STIMULUS STEP (定义一个信号产生器的输出。
marshall-stockwell- 便携式立体声音箱 用户手册说明书

用户手册重要安全说明• 阅读说明书—操作本产品前应先阅读所有安全性及操作说明。
• 保留说明书—请妥善保存本安全性及操作说明,以备日后参阅。
• 留心警告—请遵守本设备及操作说明上的所有警告。
• 参照说明书—请遵守所有操作及使用说明。
警告!• 警告—请勿将电池(安装的电池组或电池)暴露在温度过高的环境中,如阳光下、明火旁或长时间放置于此类热源附近。
• 警告—为降低火灾或触电的危险,请勿让本设备淋雨或受潮。
请勿将本设备暴露在有液体滴漏或喷溅的环境中,请勿在设备上放置花瓶等装有液体的物品。
• 警告—请勿覆盖。
• 警告—仅可使用制造商指定的附件/配件(如专用电源适配器、电池等)。
• 警告—插头用作本设备的电源切断装置。
应随时保持可用状态。
• 警告—本款有源音箱具备高声压级输出。
• 警告—请勿过近倾听。
• 警告—请勿在高声压级输出状态下长时间倾听。
• 警告—请勿尝试拆开有源音箱底盘,该底盘没有需要用户保养的部件。
• 警告—请勿在 Stockwell 上直接连接吉他。
• 警告—请勿在低音端口接入主机部件或物体,以免受伤。
• 危险—防止设备摔落掉地。
• 危险—防止设备撞击尖角处。
湿气和潮湿• 有源音箱应置于远离湿气和水的场所。
• 请勿在操作本设备时靠近水。
请勿将本设备暴露在下雨及滴水的环境中。
请勿将水泼洒在设备上。
安装• 请勿将本设备安装在任何热源(如散热器、热调节装置、炉灶)或其他产生热量的设备(包括功放)附近。
• 请勿在有源音箱上放置明火火源,如点亮的蜡烛等。
• 请勿阻塞任何通风孔。
请依照制造商的说明进行安装。
连接• 根据手册中的说明连接有源音箱。
• 按照设备上所示数据,将有源音箱连接至正确的电源电压。
• 保护电源线防止被脚踩踏或被夹紧,尤其是在插头、方便插座和机身电源线引出处。
• 仅使用操作说明书中指定类型的或有源音箱上标注的电源连接线。
严禁使用任何其他电源线来替代本有源音箱内的单个电源线—仅可使用制造商提供的电源线。
Soundcheck7.0操作指南-喇叭测试培训

喇叭测试的方法
频谱分析法
通过频谱分析仪对喇叭的频响 曲线进行分析,判断其性能指
标是否符合要求。
失真度测试法
测试喇叭在不同音量下的失真 度,以评估其音质效果。
交叉扫描法
使用信号发生器和示波器对喇 叭进行交叉扫描测试,检查其 相位响应和幅频响应是否正常 。
功率测试法
对喇叭进行功率测试,检查其 承受功率的能力,确保其在正 常工作时不会因过载而损坏。
调整设备位置
根据场地情况和测试需求,调整音响和麦克风的摆放位置,以确保 测试结果的准确性和可重复性。
测试步骤
启动软件
打开soundcheck7.0软件,并确保软件运行正 常。
进行测试
按照软件界面提示,逐步完成各项测试,包括 音量测试、频率响应测试、动态范围测试等。
记录数据
在测试过程中,及时记录各项数据,以便后续分析。
按照设定的参数进行测试,记录测试数据 并进行分析。
设定测试参数
根据实际情况设定测试参数,如测试频率 、音量、测试模式等。
04
soundcheck7.0常见问 题及解决方案
设备连接问题
总结词
设备无法正常连接soundcheck7可用状态,然后检查设备连接线是否完好,有无松动或损坏。如果问题依然存在, 尝试更新设备驱动程序或重新安装soundcheck7.0软件。
喇叭测试的步骤
结果评估与处理
根据测试结果对喇叭性能进行评估,针对 存在的问题进行处理,如调整、维修或更 换等。
准备工作
确保测试场地安全、清洁,准备好所需的 测试仪器和工具,如频谱分析仪、失真度 测试仪、信号发生器、示波器等。
连接测试设备
将测试设备正确连接到待测喇叭上,确保 连接稳定、可靠。
Soundcheck说明书-双耳机-Delta

Soundcheck电声测试系统使用手册目录:1. 测试简图――――――――――――――――――――――32. 实际联线图―――――――――――――――――――――33. 测试程序Soundcheck 基本操作介绍―――――――――――44. 程序Sequence 的导入和导出――――――――――――――75. 校准(人工耳、麦克风)―――――――――――――――――96. 测试条件的修改―――――――――――――――――――127. 数据保存的设置修改:――――――――――――――――138. 样品曲线保存――――――――――――――――――――159. 根据样品曲线重新设定上下限―――――――――――――1710. 显示界面的修改―――――――――――――――――――20系统功能简介深圳品正仪器提供的这套电声测试设备,源于丹麦BK的专业电声测试系统Soundcheck,是80年代原丹麦BK公司的高级总工程师开发设计的一套模块化基于PC的测试系统,它能高性能地完成各类电声产品的测试。
Soundcheck系统秉承了BK高度的精确和稳定性,同时提高了软件的功能和可变性,使得Soundcheck系统源于BK而优于BK,成为国际电声产品测试领域的领导者和标准规范。
可测试产品包括:1.扬声器2.麦克风3.电话机和手机4.助听器Soundcheck系统可以在1秒左右完成扬声器的频响,阻抗,失真,极性,参数等等的测试,功能之强大,测试速度之快是目前市场上其他电声测试仪所无法比拟的。
备注:由于软件版本和硬件不断更新,说明书与软件所示介面略有不同时敬请见谅.最新资料可以向深圳品正仪器免费索取.1.测试左右耳机连接图示:注意要严格按照图示来连接,否则会烧毁测试卡或者功放。
右人工耳左人工耳接被测试扬声器正负极或者左右耳机或者人工嘴(2)测试单体扬声器或者单体耳机接线图示:接被测试扬声器正负极接人工耳或者麦克风测试频响时拔下此插头,测试阻抗时插入此插头3. 测试程序介绍3.1 软件登陆.◇双击桌面Soundcheck 图标.◇进入软件,将出现三种不同安全级别的用户可供选用。
Bose SoundTrue 耳机用户指南说明书
Bose® SoundTrue™in-ear headphonesOwner’s Guide2 - EnglishImportant Safety InformationPlease read this owner’s guide carefully and keep for future reference.WARNINGS:• D ON’T use the headphones at a high volume for a long period of time.- To avoid hearing damage, use your headphones at a comfortable, moderate volume level. - T urn the volume down on your device before placing the headphones in your ears, then turn the volume up gradually until you reach a comfortable listening level.• D O use caution and follow applicable laws regarding mobile phone and headphone use if using the headphones for phone calls while driving. Some jurisdictions impose specific limitations, such as single earpiece configuration, on the use of such products while driving. DON’T use the headphones for any other purpose while driving.• D O focus on your safety and that of others if you use the headphones while engaging in any activity requiring your attention, e.g., while riding a bicycle or walking in or near traffic, a construction site orrailroad, etc. Remove the headphones or adjust your volume to ensure you can hear surrounding sounds, including alarms and warning signals.• D ON’T use mobile phone adapters to connect headphones to airplane seat jacks, as this could result in personal injury such as burns or property damage due to overheating.• D O remove headphones and disconnect immediately if you experience a warming sensation or loss of audio.• D ON’T submerge or expose for extended period to water, or wear while participating in water sports, i.e. swimming, waterskiing, surfing, etc.• D ON’T let the headphones or accessories get wet. Exposure to moisture may increase the risk of fire or electric shock.• D ON’Tplace naked flame sources, such as lighted candles, on or near the product.WARNING:Contains small parts which may be a choking hazard. Not suitable for children under age 3.WARNING:This product contains magnetic material. Contact your physician if you have questions on whether thismight affect the operation of your implantable medical device.This symbol means the product must not be discarded as household waste, and should be delivered to an appropriate collection facility for recycling. Proper disposal and recycling helps protect natural resources, human health and the environment. For more information on disposal and recycling of this product, contact your local municipality, disposal service, or the shop where you bought this product.©2014 Bose Corporation. No part of this work may be reproduced, modified, distributed, or otherwise used without prior written permission.English - 3ContentsPlease complete and retain for your records:The serial and model number can be found on the original shipping carton and on the warranty card.Serial number ________________________________________________________________________Model number _______________________________________________________________________Purchase date _______________________________________________________________________We suggest you keep your receipt with this owner’s guide.About your Bose ® SoundTrue™ in-ear headphones (4)System Features ........................................................................................................... 4Unpacking the system ......................................................................................................... 5Connecting to your audio device ....................................................................................... 6Importance of proper fit (6)Fitting the headphones to your ear .......................................................................... 6Adjusting for comfort and stability .. (8)Using the adjustment slider ...................................................................................... 8Using the clothing clip ................................................................................................ 8Using a single earpiece ................................................................................................ 8Troubleshooting ................................................................................................................... 9Cleaning .................................................................................................................................. 10Limited warranty (10)U sing the headphones 4 - EnglishAbout your Bose ® SoundTrue™ in-ear headphonesThe Bose ® SoundTrue ™ in-ear headphones offer a combination of lifelike audioperformance and comfortable fit not available from most conventional headphones.System Features• Enjoy your music with deep, clear sound.• Exclusive TriPort ® technology delivers natural-sounding lows, even at high volumes.• StayHear ® tips keep your headphones comfortably in place.• Engineered and tested for lasting quality and durability.• Carrying case stores and protects headphones.• Available in different colors to fit your style.Using the headphonesEnglish - 5Unpacking the systemCarefully unpack the carton and confirm that the following parts are included:Carrying caseSmall (white)left rightNote: The headphones come with medium (gray) StayHear ® tips attached.U sing the headphones 6 - EnglishConnecting to your audio deviceConnect the headphones to the standard 3.5 mm headphone connector on your audio device.Importance of proper fitWhen you wear the headphones properly, they provide the comfort and clarity you expect from Bose.Fitting the headphones to your earThe headphone earpiece has a soft StayHear ® tip attached, allowing it to rest comfortably in the bowl of your ear. The wing part of the tip fits just under your ear ridge.Note: E ach StayHear ® tip is marked with an L (Left) or an R (Right) to indicatewhich earpiece it is designed to fit. Be sure to attach the Left tip to theUsing the headphonesTo determine if the tip is the right size:1. Insert the earpiece into the canal just enough for the headphone to rest lightlyagainst your ear.2. Tilt the headphone back and press the tip wing under the ear ridge until itis secure.The tips should fit comfortably yet securely in the bowl of the ear.Changing the ear tipsSelect the type and size of eartip that provides you with the best comfort and fit.1. Gently peel the edges of the attached tip away from the earpiece, using carenot to tear the tip.Caution: To prevent damage, do not pull on the StayHear® tip wing.2. Position the opening of the new tip over the nozzle and the small slot over thenozzle hook.Note: E ach tip is marked with a either an L or an R to indicate which earpiece it is for. Be sure to attach the left StayHear® tip to the left earpiece andthe right StayHear® tip to the right earpiece.3. Ease the base of the tip down around the base of the earpiece until the tipU sing the headphones 8 - EnglishUse the clothing clip to fasten the cable to your clothing, for convenience, stability, and to help manage the cable. This can be helpful during high-movement activitiesor when using the headphones in a single earpiece configuration.The Bose ® SoundTrue ™Using the headphonesEnglish - 9TroubleshootingIf you experience any trouble using your headphones, try the followingtroubleshooting instructions.U sing the headphones 10 - EnglishCleaningYour headphones may require periodic cleaning.Ear tips: Remove the ear tips from the headphones. Wash them with a milddetergent and water. Make sure you thoroughly rinse and dry them before putting them back on the headphones.Headphone nozzles: Clean only with a dry, soft cotton swab or equivalent. Never insert any cleaning tool into the nozzle.Limited warrantyThe Bose ® SoundTrue ™ in-ear headphones are covered by a limited warranty.Details of the limited warranty are provided on the product registration card that is included in the carton. Please refer to the card for instructions on how to register. Failure to register will not affect your limited warranty rights.The warranty information provided with this product does not apply in Australia and New Zealand. See our website at .au/warranty or/warranty for details of the Australia and New Zealand warranty.©2014 Bose Corporation, The Mountain, Framingham, MA 01701-9168 USAAM721139 Rev. 00。
Soundcheck使用说明

文件分类文件名称版本页数生效日期文件编号程序文件Soundcheck系统使用说明 A 13变更履历表版本变更内容描述拟制发行日期A Soundcheck系统使用说明苏礼东批准: 审核: 拟制:邓智勇吴德武苏礼东分发部门部门综合管理部销售部工程技术部设备模具部技术管理部研发一部研发二部研发三部品质部采购部制造部财务部份数 1 1 1程序文件Soundcheck系统使用说明生效日期1.0目的为了使公司技术管理人员能够更好的熟悉Soundcheck系统的使用,更多的技术管理人员能够熟练操作Soundcheck测试系统对公司生产的各种产品进行测试,以提高技术管理人员专业素质,更好的为公司服务。
2.0适用范围2.1本操作指导书用于本公司技术人员操作Soundcheck系统时的参考文件,但其它本公司工作人员也可调阅。
3.0定义无4.0主要职责4.1所有本公司技术人员操作Soundcheck系统时可以此操作指导为参考文件。
4.2本文件不得随意更改, 复制以及向外传播,非本公司人员不得调阅。
4.3测试系统的加密狗应有专人保管,每天测试完成后收回,测试系统的启动和关闭也应由专人负责,其它人不得擅自启动和关闭测试系统。
5.0作业程序5.1准备一套Soundcheck测试系统,其硬件系统包括:1、Soundcheck系统测试软件一套。
(带显示器)。
2、授权文件钥匙一个(即加密狗)。
3、SSR分析通道供电电源(B&K 2829 4-2ch)。
4、功率放大器(B&K 2716C)一台。
5、仿真耳(B&K湾省4153)一台。
6、1/2压力场传声器(B&K 4192)一个。
7、1/2压力场传声器前置放大器(B&K 2669L)一根。
8、电缆及附带连通线若干(BNC TO BNC线)。
5.2硬件连接方式:按下图所示将Soundcheck系统的硬件部分组装起来。
程序文件Soundcheck系统使用说明生效日期5.3 Soundcheck系统软件操作部分。
AP & Sound Check测试系统简介
Audio Precision公司公司简介Audio Precision公司是一家全球最大的音频测试仪器制造商,公司创立于1984年,总部位于美国俄勒冈州,现在主要产品为2700系列,ATS-2系列和P1系列;加上以前型号System One,System Tow等系列的音频分析仪,目前在全使世界有超过一万台的用量。
PC控制测试系统:1.System Tow AP2700系列:工业界标准音频分析仪主要特点:软件控制,面板设计简单,高性能最大灵活性,可通过视窗软件和APIB接口操作,也可通过标准的IEEE-488/GPIB接口控制,将全套音频测试仪器融合成单台高性能比仪器。
AP2700软件建立了一个有效的测试平台,具有快速和直观入口和控制,可用于研发和设计。
同时也提供一个直接的,全制动的用于生产线的方案;AP2700系列是通过AP2700控制软件和接口卡连接PC机操作2.ATS-2系列:以PC为基础的全新音频测试量系统通过ATS-2系列控制软件和APIB接口操作,也可用GPIB接口控制所有模拟和数字信号通过DSP产生和处理,速度更快和灵活,而价格低廉和轻型,极适合于一般研发生产。
SYS-2700系列SYS-2700系列是一部和电脑连接工作的多功能音频综合测试仪器。
对于客户的不同要求,无论在数字或模拟上都可以提供不同的型号和选件,成为百分之百的合适仪器,包括了模拟的数码测试功能,其中更内置了标准的串联数码接口格式,列入:AES/EBU(AES3),SPDIF-EIAJ,光纤等等SYS-2700系列是Audio Precision延续于工业界标准System One/System Tow 系列,而在2003年底推出的最新旗舰产品,具备以下特点:真正的双领域(Dual Domain)模拟/数字处理:独立的高精度模拟信号源和分析仪,完全和数字信号处理器(DSP)分开,避免了相互干扰和对高保真的苛刻要求。
最新的AP-2700控制软件(APWIN兼容)能在WINDOW98、XP、Win7下运作,同时通过程序编制,完成多功能自动检测,图像曲线显示,FFT频谱分析,多音测试(Multitone),MSL型号测试和实时分析控制等模拟分析:能测试电平(2通道),电平比率,频率,相位,THD+N失真(小于-112 dB)互调失真,噪声,带通幅度,串音干扰,抖晃。
Soundbook便携蓝牙音箱 使用手册

Soundbook 使用手册[Q]:Soundbook可以支持什么类型的音源?[A]:Soundbook 是专为与当今最流行的蓝牙设备包括智能手机,平板电脑和笔记本电脑的使用而设计的。
此外,Soundbook 还包括一个辅助性的输入功能,用于连接MP3或其他的便携式播放设备。
[Q]:What kind of audio sources can I use with Soundbook?[A]:Soundbook is designed specifically for use with today's most popular Bluetooth devices, including Smartphone's, tablets and laptops. In addition, Soundbook includes an auxiliary input for connection to an MP3 or similar portable player.[Q]:我要怎么开始连接配对?[A]:想简单、安全地配对连接您的音频设备,您需要在离Soundbook一米之内的范围,将音源设备靠近Soundbook。
1.打开您的Soundbook2. 按下电源键直到蓝色指示灯亮起3. 进入您设备的“蓝牙设备”功能选项,选择并打开蓝牙。
查找新的蓝牙设备(名为“Bayan Soundbook”)并进行连接,连接过程不需要配对密码。
(注:蓝牙音频设备之间的连接可能有所不同,如果不确定怎样连接最为妥善,请查询用户手册)[Q]:How do I start pairing?[A]:For simple and secure pairing your audio device must be in close proximity to Soundbook - within a range of 1 metre.1.Turn on Soundbook2.Press the power/input button until BLU is displayed3.Go into your Settings, select and turn on Bluetooth. Scan for new Bluetooth devices and nominate 'Bayan Soundbook'. You will not be prompted for a pass code for pairing. (Note: Bluetooth audio connectivity can vary between devices so it can be useful to firstly check your audio source user manual for pairing instructions if you're not sure)[Q]:How do I connect by NFC - Automatic Paring?[A]:1.Turn on your audio source and unlock the screen2.Make sure that NFC is enabled in the Settings on your audio source3.Touch the back of your audio source to the back of the front cover of Soundbook where the NFC logo is located - you will be asked to confirm that you wish to connect and pair with the Bayan Soundbook - select Yes/OK. Bayan Soundbook - select Yes/OK.4.You can disconnect by simply touching your audio source again to the back cover of Soundbook. [Q]:怎样通过NFC自动配对?[A]: 1.打开您的音源设备并解锁屏幕2. 确保您音源设备的NFC功能可用3.用您的NFC设备触碰Soundbook 的前盖背面,当被询问是否需要连接时,选择“确定”4. 您可以通过简单的再次触碰Soundbook 前盖背面,断开当前连接[Q]:Why is my mobile phone not connecting?1.Already Connected. Soundbook will automatically connect to the last device used (if it is in range). If you want to connect to an alternate audio source, switch Bluetooth off on the connecteddevice, then pair/connect with the alternate audio source.2.Make sure Bluetooth is enabled on your phone.3.Try it again (Turn Soundbook off and on again)4.Remove 'Bayan Soundbook' from your audio device (in the Bluetooth settings) and pair your phone again[Q]:为什么我的手机没有连接上?[A]:1. Soundbook会自动连接到最后一次使用的设备(如果该设备在可连接范围内),如果您要连接到其他音源设备,须先将当前所连接设备上的蓝牙关闭,然后配对/连接新的音频源设备。
SOUNDCHECK使用说明

研 发 一 部
研 发 二 部
研 发 三 部
品 质 部
采 购 部
制 造 部
财 务 部
份数
1
1
1
标准书分类
标准书名称
编号
版本
A
页码
1
程序文件
Soundcheck 系统使用说明
生效日期
1.0 目的 为了使公司技术管理人员能够更好的熟悉 Soundcheck 系统的使用,更多的技术管理人员能
够熟练操作 Soundcheck 测试系统对公司生产的各种产品进行测试,以提高技术管理人员专业 素质,更好的为公司服务。 2.0 适用范围 2.1 本操作指导书用于本公司技术人员操作 Soundcheck 系统时的参考文件,但其它本公司工作人
2、激励设置 在操作界面下单击“setup”,在下拉菜单中选择“stimulus”进入设置界面。在“level”
栏中填入测试电压值(不同产品的电压值不同);在“step size”栏中选择测试倍频程, 关联曲线样式及测试时间;在“start frequency”栏中输入起始频率(Eg:100Hz),在 “stop frequency”栏中输入终止频率(Eg:100000Hz)。“Cycles/step” 是调节单倍频 周期内波形的个数,越大,显示则越精确,但影响测试时间;所以每次调节倍频程及波形 个数数值时都要单击“update”,这样可以确定“step time”是多少,设置好后单击“OK” 完成设置。具体设置可参考如下图所示:
文件分类 程序文件
文件名称
版本 页数
Soundcheck 系统使用说明
A
13
变更履历表
生效日期
文件编号
版本 A
变更内容描述 Soundcheck 系统使用说明
Soundcheck说明书MAYA[1]
![Soundcheck说明书MAYA[1]](https://img.taocdn.com/s3/m/7637f6ae284ac850ac024205.png)
杨清华-272020121212--0606-27未受控版本:V1.1目录:1.测试简图――――――――――――――――――――――32.实际联线图―――――――――――――――――――――33.测试程序Soundcheck基本操作介绍―――――――――――44.程序Sequence的导入和导出――――――――――――――75.校准(人工耳,功放)―――――――――――――――――96.测试条件的修改―――――――――――――――――――127.数据保存的设置修改:――――――――――――――――138.样品曲线保存――――――――――――――――――――159.根据样品曲线重新设定上下限―――――――――――――1710.显示界面的修改―――――――-―――――――――――201.测试扬声器连接图示:注意要严格按照图示来连接,否则会烧毁测试卡或者功放。
3.测试程序介绍(基于我们提供的Spk_Test Sequence)3.1软件登陆◇双击桌面Soundcheck图标◇进入软件,将出现右图所示界面,有三种不同安全级别的用户可供选用。
◇三种不同级别的用户用来保护测试系统的设置:级别1Engineer:最高级别,可以进行任何操作;级别2Technician:可以享受校准,打印,保存数据,测试功能;级别3Operator:仅仅可以测试和打印结果图3◇各个级别的用户分别可以创建多个用户名,并可以点击Setup来设置密码图43.2操作界面单击登陆OK后,您将获得以下界面:图53.3执行一个测试3.3.1如果测试条件不用做任何变更,此时您可以放置好被测单元于仿真嘴上,连接好功放输出线至被测单元,然后单击下图所示的Start绿色按钮,程序将执行测试软件。
图63.3.2按下Start(F2或者脚踏开关)后,程序运行界面如下:图73.3.3File菜单简介◇File菜单New:新建一个测试QC程序Open:直接打开一个已经存在QCSequence Wizard:qc建立向导Save:保存当前QC程序做的修改Save As:当前QC另存Revert:恢复上一步设置Rename:重命名当前QC程序Delete:删除当前QC程序Import Seq:导入一个已经ok的QC程序Export Seq:输出当前project存档,或转移到其他测试系统Recently Opened Files:最近打开过的QC程序Exit:关闭soundcheck窗口图8注:每次做了工程参数修改切换Engineer用户到Operator用户或者关闭程序之前请保存Save文件;Import/Export Seq可以导入/导出写好ok的程序到其他任意一台机3.3.4Setup菜单简介(修改任何测试参数都在此执行)◇Setup菜单所有的Engineer操作设置程序编写均在Setup菜单下面Hardware:对硬件的设置Calibration:打开校准对话框Messages:打开人机互动信号框编辑器Stimulus:打开激励信号源编辑器Acquistion:打开信号发送接收编辑器Analysis:打开信号处理编辑器Recall:打开数据导入编辑器Post-Processing:数据后处理编辑器Limits:测试结果判定MASK编辑器Display:打开显示结果编辑器Serial Number:序列号控制编辑器Autosave:自动保存结果编辑器Menory List:同display功能,显示内存内曲线Sequence:带开QC程序编辑器图94.程序Sequence的导入和导出(建立新文件夹)4.1QC程序的导出A.首先必须在你的硬盘上的某一个固定的盘新建一个程序备份的文件夹,如在D:\建立一个文件名为2008-12-24文件夹;D:\2008-12-25B.登录Engineer用户:菜单Edit/Login/选择Engineer用户,并输入密码图10图11C.选择菜单File/Export Seq图12弹出如图13所示的对话框,选择路径到D:\2008-12-25,然后单击右下角的Select Cur Dir,当前的QC程序将自动保存在选择的路径。
- 1、下载文档前请自行甄别文档内容的完整性,平台不提供额外的编辑、内容补充、找答案等附加服务。
- 2、"仅部分预览"的文档,不可在线预览部分如存在完整性等问题,可反馈申请退款(可完整预览的文档不适用该条件!)。
- 3、如文档侵犯您的权益,请联系客服反馈,我们会尽快为您处理(人工客服工作时间:9:00-18:30)。
Mouse 左鍵按2下 可進入設定
感度檢驗設定
選擇1kHz or 2kHz感度
感度上下限
測試Receiver流程
Step8:結束Sequence設定
按Close可結束設定
ps : 未結束設定,無法進行量測
測試Receiver流程
Step9:檢查接線設定
Aux
OU T
I N
Power
待測物 CH 1 CH 2 CH 3 CH 4
Ω
待測物
SoundCheck現階段情形說明
• 1.Receiver Mode : 感度與BK2012差異約在 0.3dB以內 , 失真差異極小,以經可以使用 • 2. Speaker Mode : 感度與BK2012差異約 在0.8~1dB左右,尚待修正,失真差異仍大,也 待修正,此部份測試值先僅供參考
In-L Sound Card Out-L
AMP
Cal AMP 線路圖
OU T
I N
Power 4192 Mic.
CH 1 CH 2
CH 3 CH 4
音壓校正器
Calibrate AMP (注意紅圈內設定)
Cal MIC 線路圖
MIC B&K 4231 Calibrator
Input-Ch1 MIC AMP Ouput-Ch1
打開資料夾
FileOpen
1.測Receiver,進入
C:\SoundCheck 5.0\Sequences\Merry\Receiver
2.測Speaker,進入 C:\SoundCheck 5.0\Sequences\Merry\Speaker
3.測Fo,進入
C:\SoundCheck 5.0\Sequences\Merry\Impedance
In-L
Sound Card
Out-L
Calibrate MIC (注意紅圈內設定)
Calibrate MIC (注意紅圈內設定)
測試Receiver流程
Step5:輸入信號設定
Mouse 左鍵按2下 可進入設定
輸入信號設定(注意:Sequence檔為共用,所以只 可改藍字部份,黑字部份不要變更)
• 3. Impedance : Fo測試,頻率點OK,電阻抗 值差異很大,仍待修正
選擇DSH
測試Speaker流程
Step2~Step12
DSH 測試與 DTR設定流程幾乎相同,請參考前述設定
Fo量測
測試Fo流程
Step1:選擇Sequence檔
選擇Impedance_FO
Fo 線路圖 (電阻使用 1 Ohm)
Aux OU T 避免形成 電氣迴路, 需將負極 絕緣 I N
Sequence檔的類型 Har : 音效卡設定,不用改
Cal : 校正設定
Sti : 輸入Speaker信號設定 Lim : 設定曲線上下限
測試Receiver流程
Step4: 校正AMP & MIC
註: 由於Sequence檔為共用,故以後每星期會有負責人員 校正1~2次,此部份內容僅供相關人員參考,實際使用時 可跳過此步驟 Cal AMP 線路圖 (簡易版)
只可改此區,輸入 Speaker之電壓
測試Receiver流程
Step6:上下框限設定
Mouse 左鍵按2下 可進入設定
上下框限設定
輸入頻率及對應感度 上限
設定浮動or絕對框 浮動 : Floating Limit 下限
絕對 : Absolute Limit
測試Receiver流程
Step7:感度檢驗設定
測試Receiver流程
Step1:選擇Sequence檔
選eceiver流程
Step2:修改Sequence檔
選擇工具列Setup
下拉選單中Sequence
測試Receiver流程
Step3:修改Sequence檔
共用程序檔區, 不要亂改
依所需測試條件, 進行修改
4192 Mic.
4227 測試 架
測試Receiver流程
Step10:進行量測
按Start可進行量測
測試Receiver流程
Step11:得到量測結果
測試Receiver流程
Step12:處理量測結果
工具列中 SetupMemory list
Speaker量測
測試Speaker流程
Step1:選擇Sequence檔
Sound Check 使用手冊
修訂日期 : 2004 July 28 Rev. 0
如何開始
• 1.使用個人帳號登入Windows • 2.執行桌面SoundCheck 5.0捷徑
• 3.等待SoundCheck畫面出來, 右邊畫面等待15秒後會自動 消失。 • 4.檢查MIC AMP 電源是否開啟
