技嘉GA-B85-D3V主板使用手册
gigabyte+aorus+model+s+台式电脑+使用手册说明书
版权© 2021年,技嘉科技股份有限公司,版权所有。
本使用手册所提及的商标与名称,均属其合法注册的公司所有。
责任声明本使用手册受著作权保护,所撰写的内容均为技嘉所拥有。
本使用手册所提及的产品规格或相关信息,技嘉保留修改的权利。
本使用手册所提及的产品规格或相关信息有任何修改或变更时,恕不另行通知。
未事先经由技嘉书面允许,不得以任何形式复制、修改、转载、传送或出版本使用手册内容。
产品使用手册类别简介为了协助您使用技嘉主板,我们设计了以下类别的使用手册:如果您要快速安装,可以参考包装内所附的【快速入门手册】。
如果您要了解产品详细规格数据,请仔细阅读【使用手册】。
产品相关信息,请至网站查询:https:///目录清点配件 (4)第一章硬件安装 (5)1-1 安全性注意事项 (5)1-2 硬件信息 (6)系统总览 (6)系统正面 (6)系统背面-A (7)系统背面-B (10)1-3 准备就绪 (11)连接集成外设 (11)连接电源线 (12)开启电脑 (12)第二章BIOS 程序设置 (13)2-1 进入BIOS设置程式 (13)2-2 设置BIOS设置程式使用语言 (14)2-3 设置管理员/用户密码 (15)2-4 载入最佳化预设值 (16)2-5 存储BIOS设置值及退出BIOS选单 (17)第三章附录 (18)如何执行Q-Flash Plus (18)Regulatory Notices (19)技嘉科技全球服务网 (23)- 3 -清点配件5AORUS MODEL S电竞台式电脑5快速入门手册5天线5电源线上述附带配件仅供参考,实际配件请以实物为准,技嘉科技保留修改的权利。
- 4 -第一章硬件安装1-1 安全性注意事项•连接电源插座之前,请确保电源线的额定电压与您所在国家/地区的电源规格兼容。
•电源线插头必须连接至正确接线且接地的电源插座。
•请将电源线插入容易取得的电源插座中,位置应尽可能靠近系统用户。
技嘉主板怎么设置u盘启动
技嘉主板怎么设置u盘启动
对于要想装系统的网友,进BIOS是一难关,那么技嘉主板怎么设置u盘启动呢?下文店铺分享了技嘉主板设置u盘启动的方法,希望对大家有所帮助。
技嘉主板设置u盘启动方法
1.开机按delete键进入bios界面,移动光标选择Advanced BIOS Features按回车。
2.来到bios功能界面,选择第一项Hard Disk Boot Priority按回车确认。
3.在硬盘启动顺序界面,找到USB-HDD开头的选项。
4.使用“+ -”号将USB-HDD项移动到第一位置,回车确认。
5.返回到bios功能界面,接着选择First Boot Device这一项回车确认,在弹出的窗口,选择USB-HDD回车确认。
6.最后按f10保存并退出即可完成设置。
技嘉科技 GA-B75M-D3H 主板说明书
DIRECTORY PackingBrief IntroductionMotherboard Diagram Installation and Settings Installation of Drivers BIOS SettingsRear I/O panel (2)345671113Safety Precautions SAFETY PRECAUTIONSProducts could probably be damaged due to electrostatic discharge(ESD). Please follow these steps below for a success-ful computer assembly.Make sure all parts are firmly connected; otherwise, it might lead to the failure of recognizing components or starting the computer.In order to prevent products from being damaged by ESD, please make sure to discharge your body static by touching other metal objects before taking the motherboard out of box.Hold the border of motherboard when taking it out. Do not touch the sensitive parts of motherboard.Please put the motherboard in an anti-static container or on anti-static pad if not needed.Before turning on the computer, make sure all parts inside the case are firmly connected without any loose screws or metal components.Do not start the computer before installation finished, otherwise it might result in permanent damage to the computer parts or even injury to the user.If you need any assistance in the process of installation, please contact our after-sales customer service or reach us on HUANANZHI official Facebook for professional technical support.Prior to installation or disassembly, please switch off the power and unplug the computer.Liquid penetrated into the computer. Motherboard is exposed to moisture.Keep the motherboard away from moisture.Keep the user manual for future reference.Before plugging the power supply, please make sure the socket provides the corresponding voltage.In any of the following situations, please keep themotherboard and power cable in a safe place. Do not put anything onto the power cable.In the event of any of the following conditions, have the board checked by a service technician:BRIEF INTRODUCTIONFeaturesCPUs supported: Standard LGA2011-3 socketRAM supported: Supporting four channels of DDR4 1866/2133/2400MH z , with standard and ECC memoryI/O attributes: 10*SATA3.0(Max data transmission rate of 6GB/s)4*USB2.0 ports(Extensible 1xUSB2.0 interface in front )4*USB3.0 ports(Extensible 1xUSB3.0 interface in front) 1*M.2 NVME Interface 1*M.2 NGFF Interface1*RJ45 Gigabit Ethernet ports 1*Audio interfaceHD AUDIO sound effect:Supporting 7.1 soundtrack HI-FI audio input/output(ALC887) Providing audio input/microphone/front speaker/rear speaker and side speaker output portAudio output: this is the front speaker output port that stereo speakers or earphones can be plugged intoOnboard NIC: Motherboard has internal RTL8111H network interface cardExpansion slots:3*PCI Express x16 Accelerated Graphics PortMotherboard does not work even if you follow the instructions on user manual.Motherboard fell off to the ground and got damaged. Motherboard has clear signs of damage.PACKINGPlease confirm that the motherboard is properly packaged upon purchase of the product. If there is any damage to packaging or lack of accessories, contact us as soon as possible .1.1*HUANANZHI X99 F8D DUAL motherboard2.2*SATA data cable3.1* User manual4.1*Warranty CardRear I/O PanelUSB2.0USB3.0USB2.0MOTHER BOARD IMAGESATA3.0*6M.2 NGFF SATA3.0*43pin fan interface Gigabit nics(Under)PCIEX16 interfaceM.2 NVME interfaceAUDIOPCIEX16 interfacePCIEX16 interfaceCPU2CPU1DDR4*8Interface8PIN CPU Power Supply24PIN Power Supply8PIN CPU Power SupplyUSB3.0 Interface USB2.0Interface (on)Audio Port4pin fan interface3pin fan interfaceJUSB2.03pin fan interfacePower buttonReset button JUSB3.0Dial the code3pin fan interface 4pin fan interface1-1 X99-F8D motherboard illustrationLANLAN Audio Port1-2 Overall Rear I/O Panel DisplayStatusDescriptionTurn OffNetwork Not Connected Yellow Network Connected FlickerNetwork In UseSpeed SignalStatus DescriptionTurn OffTransmission rate Transmission rate Transmission rate10 Mbps Green 100 MbpsOrange1 GbpsConnection/Work Light1-3 LAN Port Status Table1-4 Audio Port ConfigurationAudio Port Audio InputAudio output/Front speaker outputRear speaker outputCenter/subwoofer output Side speaker output Microphone input Aisle2468PCIEx16PCIEx16PCIEx16135********Power PowerUSB3_RX_DN USB3_RX_DN USB3_RX_DP USB3_RX_DPGroundGroundGroundGround USB2.0-USB2.0-USB2.0+USB2.0+191220USB3_TX_C_DPUSB3_TX_C_DP USB3_TX_C_DNUSB3_TX_C_DN GND 11121314151617181920N.CInstallation And Settingsplease check the motherboard where all pins marked with number “1” or white bold line are position “1”.NOTICE13579246810VCC D-D+GND KEYVCC D-D+GND N.CN.C 109212-1 Clear CMOS Jumper CLR-CMOS2-2 Front Audio Output Ports2-5 USB Extension Interface2-4 PCI Expansion Slot13579246810MIC+KEY L_R_Out L_L_OutGround AuD_Vcc(AVCC)R_Out BackL_Out Back12910Vbias 246810HDD_LED-VCCPWR_LED-VCC RESETRESET PWR_LED-VCC PWR_LED-VCC PWR_SWPWR_SWN.C 219102-5 F_PANEL1 Boot InterfaceKEY2-6 USB3.0 Interface3. 4.5.1.2.XX XX5330°4121232In order to properly place the CPU in the motherboard, the surface of the LGA2011 CPU has two pairs of start-ing points and a golden triangle. Golden triangle indicates Pin12-7 CPU InstallationRemove the screw from the screw base Remove the scre w baseTighten the screw base screwed into the length M.2 module to the M.2 interface distance holeInsert your M.2 module into the M.2 interface at a 30 degree angle Place the screw on the trailing edge notch of your M.2 module and tighten to the screw base2-8 M.2 Interface Installation1.Pull the clips on both ends of the memory slot outward, and the memory strip corresponds to the protruding position of the slot to determine the direction of installa-tion.2.Align the memory module into the slot and press3.Let the snaps on both ends of the slot automatically bounce2-9 Memory Installation��������DIPON1.SATA available��������DIPON2.M.2NGFF available��������DIPON3.SATA/m. 2 NGFF both unavailable��������DIPON4.Do not dial all the code to the ON location, it will cause a short circuitNote :SATA0 3.0 interface and The M.2 NGFF interface only works Dial either one,Not used at the same time2 -10 Instruction of dial - code switch2 -11 Graphics Card Installation3e a screwdriver to remove the bezel and screws on the main unit2.Need to pick up the card slot of the card slot wheninstalling the graphics card 3.Insert the graphics card into the card slot of the graphics card1324.After the installation is in place, the chuck will automatically return to its position.5.Secure the graphics card to the chassis with screws6.Install the power cord5464.1Audio driver installation (take HD Audio series for example)Run "driver disk": /X99 SOUND CARD DRIVER/VISTA-WIN7-R267, take WDW-267 if OS is XPClick on "next"to continue,and then"finished"The system will automatically restart itself to finish the installation4.2 Uninstallation of audio driver(take HD Audio series for example)etting into Windows desktop, choose "setting"/ "con-trol",and then "add/remove programs". Later, choose "Re-altek High Definition Audio Driver" in the menu and click on "computer. The system will automatically search for devices. Installation finished.3.Directx11 driver installationRun driver disk: /Tools/Driverx11/DXSETUP, click on "Iaccept"and then "next" to continue. Click on "finished" and restart computer. The system will automatically search for devices. Installation finished.4.Audio driver installationBefore this installation, please check the model of the audio chip on the motherboard first(you may refer to this manual), Select the proper driver accordingly for installa-tion.Drivers installation1.Drivers listing:2.Intel Chip Information InstallationRun driver disk: X99 chipset driver/INF-X99, click on “yes”andthen“next”to continue. Click on“finished” and restart theDriver Directory Driver DescriptionOperating SystemX99 Chipset Driver Intel chipinformation installation INF_X99Tools\Directx11Directx11 installationDXSETUP X99 Suond Card DriverRealtek series sound card driver installationVista-win7-r267wdwX99 LAN DriverIntel chipNIC installation Win7 XP2 -13 SATA InterfaceSATA3.0SSATA3.05.Driver installation of external video cardRun "driver disk", take Setup.exe, Click on "next"- "yes”-"next"-"next"and"finished"hThe system will automatically search for devices to complete the installation6.Driver installation of networkRun "driver disk": X99 LAN DRIVER/WIN7 XP click on "next"-"installation"- "finished"and restart the computer, and restart the computer,The system will automatically search for devices to complete the installation.BIOS SettingsIn order to enable the computer to work well or execute specific functions, CMOS SETUP normally stores all kinds of data in CMOS SRAM of the motherboard. When the computer is shut down,mother-board `s battery will supply power to CMOS SRAM. When the comput-er is turned on and starts POST(Power On Self Test), press “Delete/Del” key to enter into AMI BIOS CMOS SETUP main page. Motherboard warm boot key is “F7”.add/remove"so thatthe driver will be automatically removed.。
技嘉b85主板设置U盘启动的详细教程
技嘉b85主板设置U盘启动的详细教程
来源:U大侠时间:2014-11-27
技嘉b85主板要如何设置U盘启动?使用U盘安装系统,有个不必可少的环节,就是需要设置U盘启动才能够进行系统的安装。
但是对于一些菜鸟们来说,对设置U盘启动并不是很清楚。
因此,今天U大侠就和大家说说技嘉b85主板设置U盘启动的详细教程。
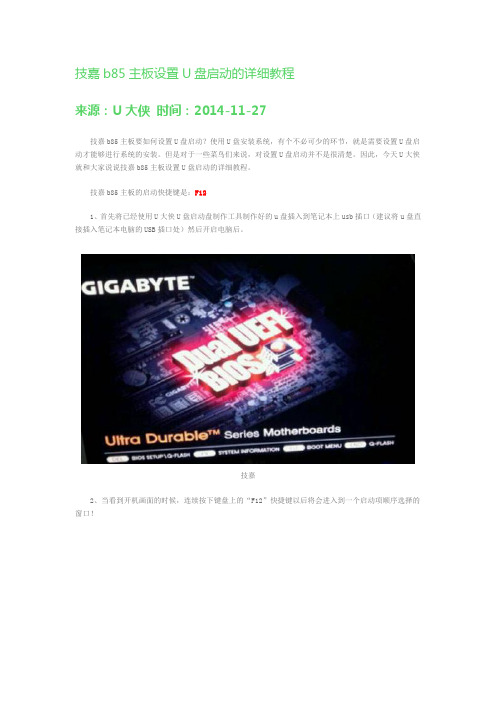
技嘉b85主板的启动快捷键是:F12
1、首先将已经使用U大侠U盘启动盘制作工具制作好的u盘插入到笔记本上usb插口(建议将u盘直接插入笔记本电脑的USB插口处)然后开启电脑后。
技嘉
2、当看到开机画面的时候,连续按下键盘上的“F12”快捷键以后将会进入到一个启动项顺序选择的窗口!
启动选项
3、将光标移动选择到的地方显示“King‘sonDT 101 G2 PMAP “(选择你当前所插入的U盘即可。
)选择好以后只需要按下回车键“Enter”即可进入U大侠的主菜单界面。
U大侠。
技嘉+GA-780T-D3L+主板+使用手册说明书

GA-780T-D3L使用手册Rev. 310112MSC-780TD3L-3101RNov. 25, 2011Motherboard GA-780T-D3L Nov. 25, 2011Motherboard GA-780T-D3L目录清点配件 (6)选购配件 (6)GA-780T-D3L主板配置图 (7)GA-780T-D3L主板功能框图 (8)第一章硬件安装 (9)1-1 安装前的注意事项 (9)1-2 产品规格 (10)1-3 安装中央处理器及散热风扇 (13)1-3-1 安装中央处理器(CPU) (13)1-3-2 安装散热风扇 (15)1-4 安装内存条 (16)1-4-1 双通道内存技术 (16)1-4-2 安装内存条 (17)1-5 安装适配卡 (18)1-6 后方设备插座介绍 (19)1-7 插座及跳线介绍 (20)第二章BIOS 程序设置 (27)2-1 开机画面 (28)2-2 BIOS设定程序主画面 (29)2-3 MB Intelligent Tweaker(M.I.T.) (频率/电压控制) (31)2-4 Standard CMOS Features (标准CMOS设定) (35)2-5 Advanced BIOS Features (高级BIOS功能设定) (37)2-6 Integrated Peripherals (集成外设) (39)2-7 Power Management Setup (省电功能设定) (43)2-8 PC Health Status (电脑健康状态) (45)2-9 Load Fail-Safe Defaults (载入最安全预设值) (47)2-10 Load Optimized Defaults (载入最佳化预设值) (47)2-11 Set Supervisor/User Password (设置管理员/用户密码) (48)2-12 Save & Exit Setup (储存设定值并结束设定程序) (49)2-13 Exit Without Saving (结束设定程序但不储存设定值) (49)- 4 -第三章驱动程序安装 (51)3-1 芯片组驱动程序 (51)3-2 软件应用程序 (52)3-3 技术支持(说明) (52)3-4 与技嘉联系 (53)3-5 系统信息 (53)3-6 Download Center (下载中心) (54)3-7 新工具程序 (54)第四章独特功能介绍 (55)4-1 Xpress Recovery2 (一键还原)介绍 (55)4-2 BIOS更新方法介绍 (58)4-2-1 如何使用Q-Flash (BIOS快速刷新)更新BIOS (58)4-2-2 如何使用@BIOS (BIOS在线更新)更新BIOS (61)4-3 EasyTune 6介绍 (62)4-4 轻松省节能引擎(Easy Energy Saver)介绍 (63)4-5 Q-Share (极速共享)介绍 (65)4-6 SMART Recovery (智能恢复)介绍 (66)4-7 Auto Green介绍 (67)第五章附录 (69)5-1 如何构建Serial ATA硬盘 (69)5-1-1 设定SATA控制器模式 (69)5-1-2 安装SATA RAID/AHCI驱动程序及操作系统 (75)5-2 音频输入/输出设定介绍 (79)5-2-1 2 / 4 / 5.1 / 7.1声道介绍 (79)5-2-2 S/PDIF输出设定 (82)5-2-3 麦克风录音设定 (83)5-2-4 录音机使用介绍 (85)5-3 疑难排解 (86)5-3-1 问题集 (86)5-3-2 故障排除 (87)5-3-3 管理声明 (89)- 5 -清点配件5GA-780T-D3L主板- 1片5驱动程序光盘- 1片5使用手册- 1本5硬件安装指南- 1本5SATA排线- 2条5后方I/O设备挡板铁片- 1个上述附带配件仅供参考,实际配件请以实物为准,技嘉科技保留修改的权利。
技嘉主板bios设置中文对照的方法步骤
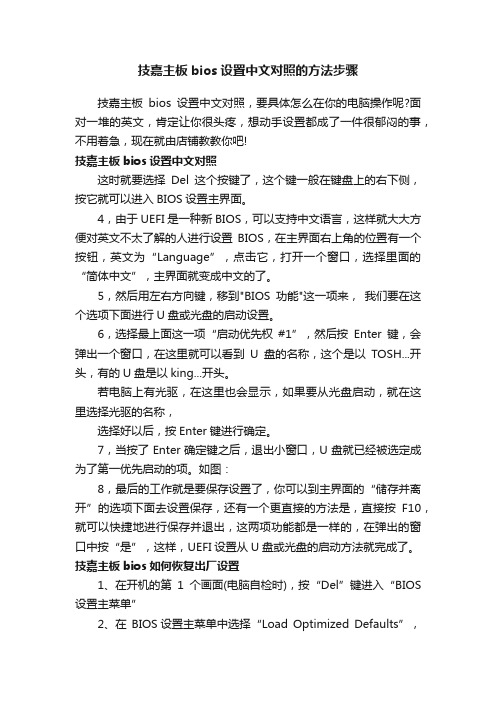
技嘉主板bios设置中文对照的方法步骤技嘉主板bios设置中文对照,要具体怎么在你的电脑操作呢?面对一堆的英文,肯定让你很头疼,想动手设置都成了一件很郁闷的事,不用着急,现在就由店铺教教你吧!技嘉主板bios设置中文对照这时就要选择Del这个按键了,这个键一般在键盘上的右下侧,按它就可以进入BIOS设置主界面。
4,由于UEFI是一种新BIOS,可以支持中文语言,这样就大大方便对英文不太了解的人进行设置BIOS,在主界面右上角的位置有一个按钮,英文为“Language”,点击它,打开一个窗口,选择里面的“简体中文”,主界面就变成中文的了。
5,然后用左右方向键,移到"BIOS功能"这一项来,我们要在这个选项下面进行U盘或光盘的启动设置。
6,选择最上面这一项“启动优先权#1”,然后按Enter键,会弹出一个窗口,在这里就可以看到U盘的名称,这个是以TOSH...开头,有的U盘是以king...开头。
若电脑上有光驱,在这里也会显示,如果要从光盘启动,就在这里选择光驱的名称,选择好以后,按Enter键进行确定。
7,当按了Enter确定键之后,退出小窗口,U盘就已经被选定成为了第一优先启动的项。
如图:8,最后的工作就是要保存设置了,你可以到主界面的“储存并离开”的选项下面去设置保存,还有一个更直接的方法是,直接按F10,就可以快捷地进行保存并退出,这两项功能都是一样的,在弹出的窗口中按“是”,这样,UEFI设置从U盘或光盘的启动方法就完成了。
技嘉主板bios如何恢复出厂设置1、在开机的第1个画面(电脑自检时),按“Del”键进入“BIOS 设置主菜单”2、在BIOS设置主菜单中选择“Load Optimized Defaults”,并按“回车”键。
当出然“Load Optimized Defaults (Y/N)?”提示框后按“Y” -> “回车”键。
3、按“F10”键,当出然“SAVE to CMOS and EXIT (Y/N)?”提示框后按“Y” -> “回车”键,电脑重启成功后即可如何更新升级技嘉主板BIOS技嘉官网下载bios文件,放硬盘上或U盘(FAT32)上。
GIGABYTE 笔记本初次使用指南说明书
English 3Right ViewBottom ViewBatteryHDD & Memory Compartment• The window will pop out when the creation of recovery disk is done.lease press F12 on starting the system when you need to restore the system. Select “boot from recovery USB disk” and the system will be restored.he time needed for restore will be around 30 mins(time needed may vary by USB disk model) .E n g l i s h6System Recovery (Restore your laptop operating system)When something is going wrong with the laptop operating system, the storage of the laptop has a hidden partition containing a full back up image of the operating system that can be used to restore the system to factory default settings.CautionO nce the “Recovery” is selected, your personaldata and files will be deleted after the laptop startsrestoring, and the operating system will be reset tofactory default settings.The recovery will be activated and you will see the optionbuttons on the window. Click on “Recovery” to start it.All ready to goMake sure your PC is plugged in. This will take a few minutes.213Recovery GuideNote˙If the storage has been switched or the partition deleted, the recovery option will no longer be available and a recovery service will be needed.˙The recovery function is only available on devices with O/S preinstalled. Devices with DOS do not have the recovery unch System RecoveryThe system recovery feature is preinstalled before the laptop is shipped from the factory. The option menu allows you to launch the Windows recovery tool to reinstall the operating system to factory default.The brief introduction below will show you how to start the recovery tool and restore your system.Turn off and restart the laptop.During the laptop turn on process, press and hold F9key to launch the tool.A progress indicator bar will show on the window whenthe recovery process is running. Please make sure theAC-adapter is plugged in and do not turn off the laptop.4English 7Reboot the laptop after the system recovery is complete.5During the laptop turn on process, press and hold F9 key to launch the tool.213Turn off and restart the laptop.There are two options for system recovery˙Refresh your PCYou can refresh your laptop to improve the system stability without losing yourfiles.˙ R eset your PCIf you want to remove all of your files, you can reset your PC completely.Caution: All personal data and files will be lost.Choose “Troubleshoot” to enter the recovery settings. (Also you can choose“Continue” to exit recovery system and continue to Windows 8.1 for files ordata backup.)Here are what will happen˙Your files and personalization settings won’t be changed.˙Your PC settings will be restored to factory default settings.˙Apps from Windows Store will be kept.˙Apps you installed from discs or websites will be removed.˙A list of removed apps will be saved on your desktop.▓Choose “Refresh your PC”Choose an account to continue.4E n g l i s h 8Here are what will happen˙All of your personal files and apps will be removed.˙Your PC settings will be restored to factory default settings.▓▓▓C hoose “Reset your PC”◆ J ust remove my files Only personal data and files will be removed, but computer settings will be kept.◆F ully clean the drive The drive will be completely restored to factory default settings. It takesmore time. > [Click on “Reset” to execute recovery function.]▓Warranty & Service:Warranty and service and related information please refer to the warranty card or GIGABYTE service website as the below link:/support-downloads/technical-support.aspx▓FAQ:FAQ (Frequent Asked Questions) please refer to the below link:/support-downloads/faq.aspx Appendix▓Advanced optionsSystem RestoreUse a restore point recorded on your PC to restore Windows.System Image RecoveryRecover Windows using a specific system image file.Automatic RepairFix problems that keep Windows from loading.Command PromptUse the Command Prompt for advanced trobleshooting.UEFI Firmware SettingsChange settings in your PC’s UEFI firmware.Startup SettingsChange Windows Startup behavior.。
技嘉B85-HD3主板配置指南
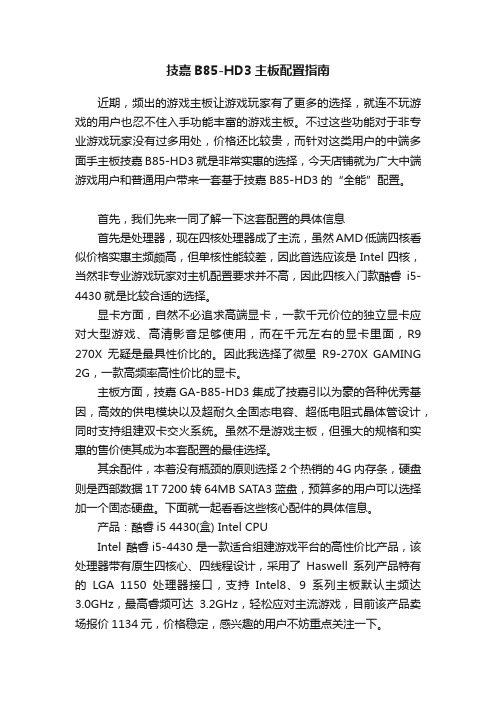
技嘉B85-HD3主板配置指南近期,频出的游戏主板让游戏玩家有了更多的选择,就连不玩游戏的用户也忍不住入手功能丰富的游戏主板。
不过这些功能对于非专业游戏玩家没有过多用处,价格还比较贵,而针对这类用户的中端多面手主板技嘉B85-HD3就是非常实惠的选择,今天店铺就为广大中端游戏用户和普通用户带来一套基于技嘉B85-HD3的“全能”配置。
首先,我们先来一同了解一下这套配置的具体信息首先是处理器,现在四核处理器成了主流,虽然AMD低端四核看似价格实惠主频颇高,但单核性能较差,因此首选应该是Intel四核,当然非专业游戏玩家对主机配置要求并不高,因此四核入门款酷睿i5-4430就是比较合适的选择。
显卡方面,自然不必追求高端显卡,一款千元价位的独立显卡应对大型游戏、高清影音足够使用,而在千元左右的显卡里面,R9 270X无疑是最具性价比的。
因此我选择了微星R9-270X GAMING 2G,一款高频率高性价比的显卡。
主板方面,技嘉GA-B85-HD3集成了技嘉引以为豪的各种优秀基因,高效的供电模块以及超耐久全固态电容、超低电阻式晶体管设计,同时支持组建双卡交火系统。
虽然不是游戏主板,但强大的规格和实惠的售价使其成为本套配置的最佳选择。
其余配件,本着没有瓶颈的原则选择2个热销的4G内存条,硬盘则是西部数据1T 7200转64MB SATA3蓝盘,预算多的用户可以选择加一个固态硬盘。
下面就一起看看这些核心配件的具体信息。
产品:酷睿i5 4430(盒) Intel CPUIntel 酷睿i5-4430是一款适合组建游戏平台的高性价比产品,该处理器带有原生四核心、四线程设计,采用了Haswell系列产品特有的LGA 1150处理器接口,支持Intel8、9系列主板默认主频达3.0GHz,最高睿频可达3.2GHz,轻松应对主流游戏,目前该产品卖场报价1134元,价格稳定,感兴趣的用户不妨重点关注一下。
Intel 酷睿i5-4430采用22纳米工艺制程,插槽类型为LGA 1150,原生内置四核心,四线程,处理器默认主频高达3.0GHz,最高睿频可达3.2GHz 。
技嘉GA-B85-D3V-A(rev.1.0)主板性能如何
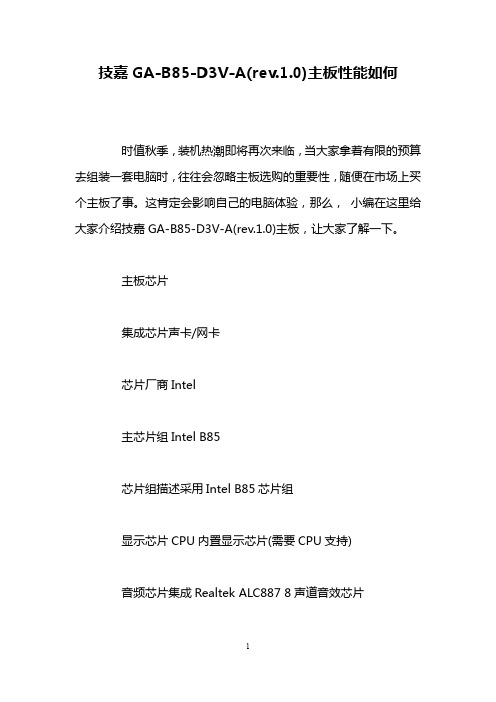
技嘉GA-B85-D3V-A(rev.1.0)主板性能如何时值秋季,装机热潮即将再次来临,当大家拿着有限的预算去组装一套电脑时,往往会忽略主板选购的重要性,随便在市场上买个主板了事。
这肯定会影响自己的电脑体验,那么,小编在这里给大家介绍技嘉GA-B85-D3V-A(rev.1.0)主板,让大家了解一下。
主板芯片集成芯片声卡/网卡芯片厂商Intel主芯片组Intel B85芯片组描述采用Intel B85芯片组显示芯片CPU内置显示芯片(需要CPU支持)音频芯片集成Realtek ALC887 8声道音效芯片网卡芯片板载千兆网卡处理器规格CPU平台IntelCPU类型Core i7/Core i5/Core i3/Pentium/Celeron CPU插槽LGA 1150CPU描述支持Intel 22nm处理器支持CPU数量1颗内存规格内存类型DDR3内存插槽2×DDR3 DIMM最大内存容量16GB内存描述支持双通道DDR3 1600/1333MHz内存扩展插槽显卡插槽PCI-E 3.0标准PCI-E插槽1×PCI-E X16显卡插槽2×PCI-E X1插槽PCI插槽2×PCI插槽SATA接口2×SATA II接口;4×SATA III接口I/O接口USB接口8×USB2.0接口(4内置+4背板);4×USB3.0接口(2内置+2背板)外接端口1×DVI接口1×VGA接口PS/2接口PS/2键鼠通用接口其它接口1×RJ45网络接口音频接口板型主板板型ATX板型外形尺寸30.5×19cm软体管理BIOS性能2个32Mbit flash使用经授权AMI UEFI BIOS支持图形化双BOIS技术PnP 1.0a,DMI 2.7,WfM 2.0,SM BIOS 2.7,ACPI 5.0 其它参数音频特效不支持HIFI电源插口一个8针,一个24针电源接口硬件监控系统电压侦测CPU/系统温度侦测CPU/系统风扇转速侦测CPU/系统过温警告CPU/系统风扇故障警告CPU/系统智能风扇控制纠错其它性能支持Windows 8.1/8/7操作系统其它特点音效噪声干扰阻隔设计与高质量音效专用电容。
GIGABYTE笔记本初次使用指南说明书
125English3Base ViewRight ViewWarning:DO NOT remove the built-in lithium battery. For any service needs, please contact your local GIGABYTEAuthorized Service Center.• D o not install the Notebook PC on a slant or a place prone to vibrations, or avoid using the Notebook PC in that location for a long time.This increases the risk that a malfunction or damage to the product will occur.• D o not store and use Notebook PC in direct sunlight or the location where temperatures exceed 112°F (45°C) such as inside a vehicle.There is a danger of Lithium-ion battery expansion and aging.• D o not use the Notebook PC in a badly ventilated location such as on bedding, on a pillow or cushion, etc, and do not use it in a location such as room with floor heating as it may cause the computer to overheat.Take care that the Notebook PC vents (on the side or the bottom) are not blocked especially in these environments. If the vents are blocked, it may be dangerous and cause the Notebook PC to overheat.English5 GIGABYTE Smart ManagerYou can activate GIGABYTE Smart Manager by double clicking on the shortcut icon on the desktop if the machine you purchased has the operation system built-in. GIGABYTE Smart Manager is an icon-based control interface, enabling users to intuitionally access common system setup as well as GIGABYTE exclusive utilities. Please be noted that the GIGABYTE Smart Manager interface, icons, utilities and software versions may vary based on the purchased models. Please operate GIGABYTE Smart Manager according to the actual version built-in.GIGABYTE Software Application• The window will pop out when the creation of recovery disk is done.lease press F12 on starting the system when you need to restore the system. Select “boot from recovery USB disk” and the system will be restored.he time needed for restore will be around 30 mins(time needed may vary by USB disk model) .English7 System Recovery (Restore your laptop operating system)When something is going wrong with the laptop operating system, the storage of the laptop hasa hidden partition containing a full back up image of the operating system that can be used to restore the system to factory default settings.All ready to goMake sure your PC is plugged in. This will take a few minutes.21Recovery GuideNote˙If the storage has been switched or the partition deleted, the recovery option will no longer be available and a recovery service will be needed.˙The recovery function is only available on devices with O/S preinstalled. Devices with DOS do not have the recovery function.Launch System RecoveryThe system recovery feature is preinstalled before the laptop is shipped from the factory. The option menu allows you to launch the Windows recovery tool to reinstall the operating system to factory default.The brief introduction below will show you how to start the recovery tool and restore your system.Turn off and restart the laptop.During the laptop turn on process, press and hold F9key to launch the tool.CautionO nce the “Recovery” is selected, your personaldata and files will be deleted after the laptop startsrestoring, and the operating system will be reset tofactory default settings.The recovery will be activated and you will see the optionbuttons on the window. Click on “Recovery” to start it.3E n g l i s h 8A progress indicator bar will show on the window when the recovery process is running. Please make sure theAC-adapter is plugged in and do not turn off the laptop.4Reboot the laptop after the system recovery is complete.5During the laptop turn on process, press and hold F9 key to launch the tool.213Turn off and restart the laptop.There are two options for system recovery˙Reset this PCYou can choose to keep or remove your files and then reinstalls Windows without losing your files.˙ G IGABYTE Smart RecoveryYour PC settings will be restored to factory default settings.Caution: All personal data and files will be lost.Choose “Troubleshoot” to enter the recovery settings. (Also you can choose“Continue” to exit recovery system and continue to Windows 10 for files ordata backup.)English 9Here are what will happen˙All of your personal files and apps will be removed.˙Your PC settings will be restored to pure O/S (without GIGABYTE app) .4▓▓▓C hoose “Reset this PC”◆K eep my files Choose an account to continue.All apps will be removed, and settings will back to pure O/S (without GIGABYTE app), but your personal files will be kept.◆R emove everything All apps, setting and personal files will be removed.♋J ust remove my files Only personal data and files will be removed, but computer settings will be kept.♋F ully clean the drive The drive will be completely restored to factory default settings. It takes more time. > [Click on “Reset” to execute recovery function.]▓▓▓G IGABYTE Smart RecoveryCaution˙Once the “Recovery” is selected, your personal data and files will be deleted after the laptop starts restoring, and the operating system will be reset to factory default settings.˙A progress indicator bar will show on the window when the recovery process is running. Please make sure the AC-adapter is plugged in and do not turn off thelaptop.The recovery will be activated and you will see theoption buttons on the window. Click on “Yes” to start it.After the system recovery is completed, you will seethe option button on the window, please click on“Shutdown”.E n g l i s h 10▓Advanced options System RestoreUse a restore point recorded on your PC to restore Windows.System Image RecoveryRecover Windows using a specific system image file.Startup RepairFix problems that keep Windows from loading.Command PromptUse the Command Prompt for advanced trobleshooting.UEFI Firmware SettingsChange settings in your PC’s UEFI firmware.Startup SettingsChange Windows Startup behavior.English1112• Tear the transparent fi lm on the thermal pad• To paste the thermal pad on the top of M .2 SS D and aligned with the chip on the right side, then tear the blue fi lm.Installing the Thermal Pad for M.2 SSD on P55If you want to install M.2 SSD on your P55, we strongly recommend that you should read this instruction first in order not to installtion fail. We(GIGABYTE) won’t be responsible for any damage from installation of SSD either by individual or vendor. So please RE-CONSIDER it before installation, thanks!• Open the rear co v er and loose the screwfor M .2 SS D 3-13-24-1•I nsert the SS D to M.2 slot and tighten the screw.CAUTION●G IGABYTE will take no responsibility for any customer induced damages during installing.We suggest that you send your notebook to an authorized GIGABYTE service center if any question. Making any charges depends on local conditions.Website: /index.aspxAppendix。
教你设置技嘉主板
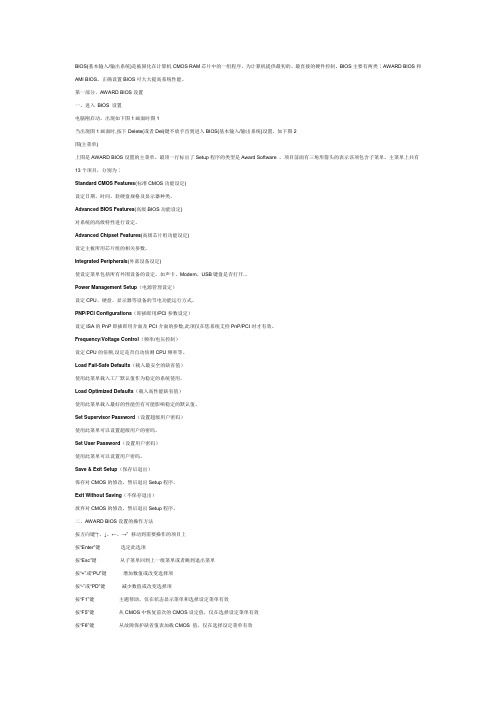
BIOS(基本输入/输出系统)是被固化在计算机CMOS RAM芯片中的一组程序,为计算机提供最初的、最直接的硬件控制。
BIOS主要有两类∶AWARD BIOS和AMI BIOS。
正确设置BIOS可大大提高系统性能。
第一部分、AWARD BIOS设置一、进入BIOS 设置电脑刚启动,出现如下图1画面时图1当出现图1画面时,按下Delete(或者Del)键不放手直到进入BIOS(基本输入/输出系统)设置,如下图2图(主菜单)上图是AWARD BIOS设置的主菜单。
最顶一行标出了Setup程序的类型是Award Software 。
项目前面有三角形箭头的表示该项包含子菜单。
主菜单上共有13个项目,分别为∶Standard CMOS Features(标准CMOS功能设定)设定日期、时间、软硬盘规格及显示器种类。
Advanced BIOS Features(高级BIOS功能设定)对系统的高级特性进行设定。
Advanced Chipset Features(高级芯片组功能设定)设定主板所用芯片组的相关参数。
Integrated Peripherals(外部设备设定)使设定菜单包括所有外围设备的设定。
如声卡、Modem、USB键盘是否打开...Power Management Setup(电源管理设定)设定CPU、硬盘、显示器等设备的节电功能运行方式。
PNP/PCI Configurations(即插即用/PCI参数设定)设定ISA的PnP即插即用介面及PCI介面的参数,此项仅在您系统支持PnP/PCI时才有效。
Frequency/Voltage Control(频率/电压控制)设定CPU的倍频,设定是否自动侦测CPU频率等。
Load Fail-Safe Defaults(载入最安全的缺省值)使用此菜单载入工厂默认值作为稳定的系统使用。
Load Optimized Defaults(载入高性能缺省值)使用此菜单载入最好的性能但有可能影响稳定的默认值。
技嘉主板BIOS设置
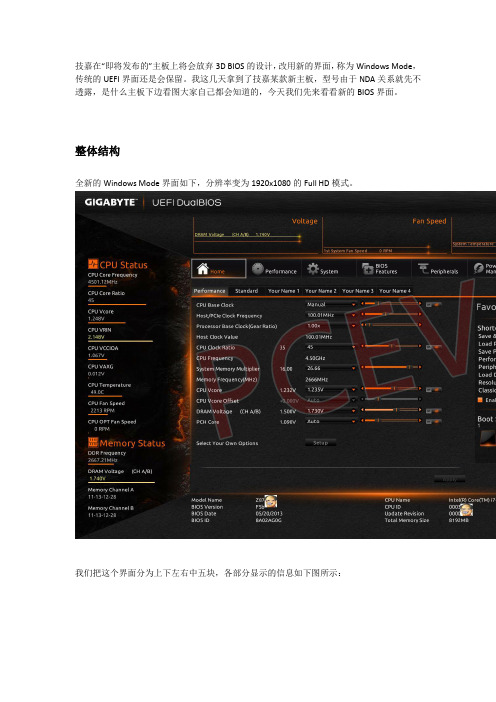
技嘉在“即将发布的”主板上将会放弃3D BIOS的设计,改用新的界面,称为Windows Mode,传统的UEFI界面还是会保留。
我这几天拿到了技嘉某款新主板,型号由于NDA关系就先不透露,是什么主板下边看图大家自己都会知道的,今天我们先来看看新的BIOS界面。
整体结构全新的Windows Mode界面如下,分辨率变为1920x1080的Full HD模式。
我们把这个界面分为上下左右中五块,各部分显示的信息如下图所示:上:电压、风扇转速、温度实时显示下:主板、CPU型号显示左:CPU、内存实施状态显示右:系统状态实时显示(包括电压、主板、芯片组温度、风扇转速等)中:功能选项显示如果你的显示器不支持1920x1080分辨率,BIOS会自动去掉边上的几个部分,变成1024x768的分辨率,只显示中间的功能选项区。
同时BIOS中也提供了可切换分辨率的功能。
我们又可以把中间的功能选项显示区分为几个部分:最上边覆盖红色、紫色的部分,是主菜单和二级菜单。
主菜单:分为Home(主页)、Performance(效能)、System(系统)、BIOS Features(BIOS 功能)、Peripherals(周边设备)、Power Management(电源管理)和Save & Exit(保存退出)。
二级菜单:每个主菜单下都有不同的二级菜单。
Home –主页Home:这是进入BIOS之后首先显示的页面。
显示的是自定义的常用功能,默认状态下有Performance和Standard两项二级菜单,后边还预留了四个标签页给用户自己定制选项。
Performance页面就是上图,主要是给用户做了一些快捷超频选项设置,基本上调调这些选项也就可以简单超频了。
具体的超频教程本篇不做介绍,等评测正式发布后我们再来谈。
Standard页面主要是设置一些常用的功能,如首选启动设备、核显开关、SATA模式等,你也可以在下边的Select Your Own Options那里增加你自己想要的功能。
技嘉主板bios怎么设置硬盘模式
技嘉主板bios怎么设置硬盘模式
你们知道怎么设置BIOS为硬盘启动吗?下面是店铺带来技嘉主板bios怎么设置硬盘模式的内容,欢迎阅读!
技嘉主板bios设置硬盘模式方法:
BIOS最常见的应用就是使用光盘、u盘安装操作系统,因为BIOS 默认是硬盘启动,所以,使用光盘安装操作系统就需要设置光驱为第一启动项。
又因为BIOS的版本很多,且一些品牌机也会对BIOS进行个性化的设置、修改,所以用户看到的BIOS设置菜单也是五花八门,但是万变不离其中,总有些规律可以掌握——光驱启动→ CD-ROM 或者DVD字样。
如果是PhoenfxBIOS 那么点击菜单栏上的Boot选项卡,这里就是设置启动项的页面。
找到CD-ROM之后,使用上下键( ↑ ↓ )将其调整到第一行,回车确认,设置好光驱为第一启动项之后,可以按F10键保存刚才的设置,再弹出来的确认界面中点击OK(确认)或者Y(YES),重启电脑就可读光驱中的安装光盘了。
有人说,为什么设置光驱为第一启动项正确了之后,也启动读光盘了,而过一会儿还会继续读硬盘?其实,一些安装光盘会在重启之后的界面中还有一个让用户确认的屏幕提示的界面(按下任意键即可),否则它就认为用户并不需要读取光盘,转而自动读硬盘了。
