VeritasDynamicMulti-Pathing 版本说明
Veritas NBU安装手册V1.0
Veritas NBU备份软件安装手册二零零三年六月版权声明©2003 深圳市华为技术服务有限公司版权所有,保留一切权利。
非经本公司书面许可,任何单位和个人不得擅自摘抄、复制本书的部分或全部,并不得以任何形式传播。
修订记录目录第一章NBU软件的安装 (4)1.1. 安装前准备 (4)1.2. NBU MASTER SERVER软件的安装 (4)1.3. NBU MEDIA SERVER软件的安装 (7)1.4. NBU C LIENT 软件的安装 (7)1.5. NBU DAT A BASE AGENT软件的安装 (8)第二章NBU软件的配置 (9)2.1. 搜索并驱动磁带库 (9)2.2. 配置M ASTER SERVER (10)2.3. 配置M EDIA S ERVER (21)2.4. 配置检查 (23)第三章日常维护工作 (27)3.1. NBU四种管理界面 (27)3.2. 如何管理STORAGE UNIT (29)3.3. 如何管理备份策略 (31)3.4. NBU进程管理 (33)3.5. CATALOG管理 (33)3.6. 查看报告 (35)3.7. 备份恢复 (35)3.8. 常用命令 (37)3.9. 故障检测 (38)第一章NBU软件的安装1.1. 安装前准备1.1.1.文件系统空间检查一般情况下,我们的安装目录为\usr,检查\usr目录所在文件系统空间是否大于250M;如空间不够,可以清理磁盘空间,调整分区大小;和使用其他文件系统作为软件的安装目录如\home。
1.1.2.安装步骤Veritas NBU(NetBackUp)软件的分三部分进行:第一步:在备份服务器上安装NBU master server软件;第二步:在业务系统主机上安装NBU media server软件或Client软件第三步:在业务系统主机上安装NBU DataBase agent软件1.2. NBU master server软件的安装a)将NBU软件安装盘放入备份服务器的CDROM中说明:1、以下安装过程以SUN Ultra 60作为备份服务器为例2、安装过程需要使用root用户sun60 # cd cdrom0sun60 # lsDoc NB-Java NBClients hp-ux install linux solarissun60 # ./installb)下面开始安装NBU软件系统提示VERITAS Installation ScriptCopyright 2000 VERITAS Software CorporationInstallation Options1 NetBackup2 NetBackup Client Softwareq To quit from this scriptChoose an option [default: q]: 1[选1 安装Nbu进程,回车继续]Do you want to install NetBackup and Media Manager files? (y/n) [y]yNetBackup is normally installed in /usr/openv/netbackup.#系统会问是否会安装在/usr/openv/netbackup,如果此目录空间足够大(200M)选y,否则选n。
veritas使用手册

ZHE JIANG UNIVERSITY QWARE TECHNOLOGY GROUP Veritas Netbackup 安装、配置及维护手册目录第 1 部分 VERITAS NBU简介 (2)第 2 部分 NBU基本概念 (5)第 3 部分 NBU 管理界面 (7)3.1 配置存储单元 (7)3.1.1 存储单元配置要求 (7)3.1.2 配置一个介质管理的存储单元 (8)3.1.3 配置一个磁盘类型的存储单元 (10)3.2 配置备份策略(Policy) (13)3.2.1 备份策略的组成 (13)3.2.2 如何规划一个Policy (16)3.2.3 如何创建一个Policy (21)3.2.4 其它安装配置 (34)3.3 任务监视器(Activity Monitor) (38)3.4 NetBackup报告 (40)3.5 设备管理(device manager) (47)3.5.1 增加一个机械手 (47)3.5.2 增加一个驱动器 (50)3.5.3 机械手与驱动器配置实例 (51)3.6 介质管理 (54)3.6.1 如何启动介质管理 (54)3.6.2 配置Volume Pool (55)3.6.3 增加一个Volume Pool (55)3.6.4 Scratch Volume Pool (56)3.6.5 增加卷 (56)3.6.6 使用Robot Inventory功能增加一个机械手控制的卷 (56)3.6.7 不使用Robot Inventory功能增加一个卷 (58)3.6.8 移动卷 (59)3.6.9 Deassign一个卷 (60)3.6.10 改变一个卷的属性 (60)3.6.11 更换一个卷 (62)第 1 部分 VERITAS NBU简介NBU是VERITAS 公司提供的企业级备份管理软件,它支持多种操作系统,包括UNIX、Microsoft Windows、OS/2以及Macintosh等。
02_powerpath
PowerPath Foundations
-2
Copyright © 2007 EMC Corporation. Do not Copy - All Rights Reserved.
The objectives for this module are shown here. Please take a moment to read them.
PowerPath Foundations
-3
Copyright © 2007 EMC Corporation. Do not Copy - All Rights Reserved.
PowerPath supports native and pseudo devices. The supported operating systems for these device types are listed on the slide. The operating system creates native devices to represent and provide access to logical devices. A native device is path-specific and represents a single path to a logical device. The device is “native” in that it is provided by the operating system for use with applications. In this slide, there is a native device for each path. The storage system is configured with two shared logical devices, each of which can be accessed by four paths. There are eight native devices, four in white (numbered 0, 2, 4, and 6), that represent a unique path set to logical device 0; and four in black (numbered 1, 3, 5, and 7), that represent a unique path set to logical device 1. Applications do not need to be reconfigured to use native devices. The idea is to use the existing disk devices created by the operating system. A PowerPath pseudo device represents a single logical device and the path set leading to it. There is one pseudo device per path set. In the example, logical devices 0 and 1 are referred to by pseudo device names emcpower1c and emcpower2c. Each pseudo device represents the set of paths connected to its respective logical device: emcpower1c represents the set of paths connected to logical device 0, and emcpower2c represents the set of paths connected to logical device 1. In most cases, the application must be reconfigured to use pseudo devices; otherwise, PowerPath load balancing and path failover functionality are not available.
VERITAS File System 3.3.3 产品说明书
VERITAS Software Corporation 1600 Plymouth Street
Mountain View, CA 94043 (650) 335-8000
2
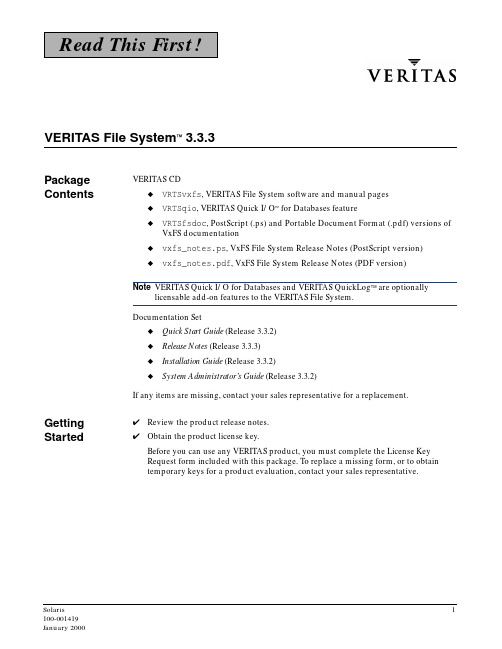
If any items are missing, contact your sales representative for a replacement.
Review the product release notes. Obtain the product license key. Before you can use any VERITAS product, you must complete the License Key Request form included with this package. To replace a missing form, or to obtain temporary keys for a product evaluation, contact your sales representative.
Note VERITAS Quick I/O for Databases and VERITAS QuickLogTM are optionally licensable add-on features to the VERITAS File System.
Documentation Set x Quick Start Guide (Release 3.3.2) x Release Notes (Release 3.3.3) x Installation Guide (Release 3.3.2) x System Administrator’s Guide (Release 3.3.2)
如何查看Veritas VCS安装版本号
由于VCS在大版本间还可能有不同的补丁发布,所以同一版本的安装发布可能不同。
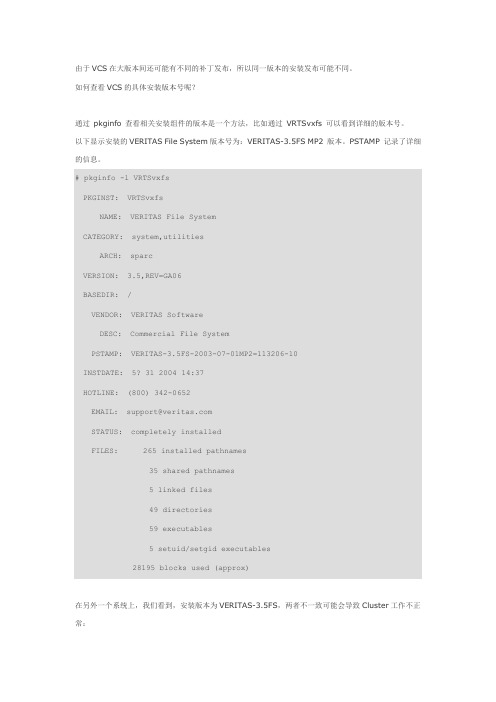
如何查看VCS的具体安装版本号呢?通过pkginfo 查看相关安装组件的版本是一个方法,比如通过VRTSvxfs 可以看到详细的版本号。
以下显示安装的VERITAS File System版本号为:VERITAS-3.5FS MP2 版本。
PSTAMP 记录了详细的信息。
# pkginfo -l VRTSvxfsPKGINST: VRTSvxfsNAME: VERITAS File SystemCATEGORY: system,utilitiesARCH: sparcVERSION: 3.5,REV=GA06BASEDIR: /VENDOR: VERITAS SoftwareDESC: Commercial File SystemPSTAMP: VERITAS-3.5FS-2003-07-01MP2=113206-10INSTDATE: 5? 31 2004 14:37HOTLINE: (800) 342-0652EMAIL: support@STATUS: completely installedFILES: 265 installed pathnames35 shared pathnames5 linked files49 directories59 executables5 setuid/setgid executables28195 blocks used (approx)在另外一个系统上,我们看到,安装版本为VERITAS-3.5FS,两者不一致可能会导致Cluster工作不正常:# pkginfo -l VRTSvxfsPKGINST: VRTSvxfsNAME: VERITAS File SystemCATEGORY: system,utilitiesARCH: sparcVERSION: 3.5,REV=GA06BASEDIR: /VENDOR: VERITAS SoftwareDESC: Commercial File SystemPSTAMP: VERITAS-3.5FS-2002-06-13INSTDATE: Jun 11 2008 11:21HOTLINE: (800) 342-0652EMAIL: support@STATUS: completely installedFILES: 258 installed pathnames32 shared pathnames5 linked files46 directories58 executables5 setuid/setgid executables 26432 blocks used (approx)。
Veritas服务器迁移手册

操作手册Veritas服务器的迁移手册一.新服务器的安装1.安装Windows Server 2003 英文版,安装SP2。
硬件驱动的安装。
注意事项:新服务器的计算机名、hosts文件的配置要和旧服务器的一样. 二.V eritas 服务器端和安装1.用V eritas 的安装安盘安装V eritas的服务器V eritas6.0,并用另一张补丁光盘安装MP42.安装3573磁带库的驱动。
(IBMTape.x86-6201,点击install_nonexclusive安装)。
三. 旧veritas 服务器Catalog的备份(建议在备份Catalog前把所有的策略deactivate掉)1.建立storage units,如下。
先在G盘建立一个catalog的空文件夹. 接着3. 建立Catalog 的备份作业。
3.把已备份的C:\NBUCatalog2和G:\Catalog复制到新服器的相同目录中。
五.在新服务器的以下目录运行catalog的导入命令。
(蓝色部份要按实际的路径和文件名更换)C:\Program Files\VERITAS\NetBackup\bin\admincmd>bprecover.exe -wizard Welcome to the NetBackup Catalog Recovery Wizard!Please make sure the devices and media that contain catalog disasterrecovery data are availableAre you ready to continue?(Y/N)yPlease specify the full pathname to the catalog disaster recovery file:D:\disaster\catalog_backup_1230003314_FULLchange_1230003314All media resources were locatedDo you want to recover the entire NetBackup catalog? (Y/N)yCatalog recovery is in progress. Please wait...Database server restarted, and completed successful recovery of NBDB onchangeINF - Catalog recovery has completed.Please review the log file C:\ProgramFiles\VERITAS\NetBackup\Logs\user_ops\Administrator\logs\Recover1230018011.log for more information.C:\Program Files\VERITAS\NetBackup\bin\admincmd>以上方法在实际迁移时不能成功还原catalog错误代码227原因分析(V eritas工程师分析):catalog热备份的恢复失败应该和定义的主机名有关的,服务器名为ZKD01,但Veritas的catalog热备份恢复时却联系到zkd01bk, 若服务器名为zkd01bk,catalog热备份的恢复就没有问题。
Veritas 用户手册说明书

Veritas User Guide Quick Reference GuideTHANK YOU FOR VOTING TEXECOM THANK YOU FOR VOTING TEXECOMUSER GUIDESecurity Control PanelsIssue 21 INS167Overview Premier Series User Guide 2 INS221 IntroductionUsers of the alarm system will be assigned a unique 4, 5 or 6 digit User code. User codes are used to arm and disarm the system. Some User codes can also access additional options such as, system tests and omitting zones.Keypads will be installed throughout the premises, usually one at each entry/exit door. The keypads are used to perform all of the system operations i.e. Arming, Disarming etc. Most User codes can be used at any keypad on the system. However, Local Users will only be able to use certain keypads on the system.The Emergency KeysIn case of emergency, the alarm system can provide three immediate emergency alarms by pressing and holding two specific keys for two seconds. !"The emergency keys can be enabled/disabled for each keypad on the system.The Panic alarm can be programmed for either audible or silent operation.The Panic alarm can be programmed for either instant or delayed operation. Emergency AlarmPress KeysPanic Alarm (PA)! & " Fire# & $ Medical% & &The Quick Arm Keys The ‘Quick Arm’ keys allow the system to be armed without having to enter a User code first. !"The ‘Quick Arm’ keys will only work if the keypad has been programmed to allowarming in this way.To FULL arm the system, press '.To PART arm the system, press !, ( or " followed by ).Keypad LockThe keys on the keypad can be locked to prevent unwanted access to the system. !"The Emergency keys will NOT operate with the keys locked.To Lock the keys, press * and + together.To Unlock the keys, press * and + together again.Premier Serie s User Guide Overview INS221 3LED IndicatorsFive LED indicators have been provided to indicate the status of the system. LEDStatus Meaning PowerOn AC mains is present on the control panelFlashing AC Mains is not present, the control panel is running on the standby battery ServiceOn The system requires attention, contact your installerOff The system does NOT require attention ReadyOn All zones are secure and the system is ready to be armedOff One or more zones are activeFlashing The system has zones (with the ‘Force Omit’ attribute) that are active Info.On The system is armed (can also be programmed for other indications)Off The system is unarmed (can also be programmed for other indications) OmitOn One or more zones are omitted Off No zones are omittedZone Faults During ArmingBefore attempting to arm the system, ensure that the premises are secure (all doors and windows closed etc.) and the Ready light is on.If an attempt is made to arm the system with any zones active (e.g. door ajar, open window, etc.) the internal sounders will bleep repeatedly (fault tone) and the display will show the zones that are active.The fault tone will stop and the exit tone will resume when all zones are secure. If it is necessary to leave a zone open then it must be omitted (see page 8 for details). !"If an active zone cannot be secured then it may be ‘in fault’, in this case contact the alarm company immediately. Arm Fail - Failing to Arm If the exit procedure is started and zones are still ‘Active’ at the end of the exit procedure, an Internal alarm will occur (internal sounders only) and the strobe light on the external sounder will flash. !"If this occurs the arm fail must be cleared and the zone in fault identified before the system can be armed (see page 6 for details on clearing an Arm Fail). The Ready LED To help prevent faults during arming a Ready light has been provided, see table above for details on how the Ready LED operates.Operating the Alarm System Premier Series User Guide 4 INS221 To FULL Arm the SystemThe system is FULL Armed when ALL zones are ON (not omitted). !"Your Installer may have programmed the system so that it can be set by just pressing', if this is the case then there is no need to enter the User code below.1. Ensure that the premises are secure (all doors and windows closed etc.) and the Ready light is on2. Enter a valid User code ,,,,3. Press * to armThe exit tone will sound4. Leave the premisesWhen the system has armed the exit tone will stopTo PART Arm the SystemThe system is PART Armed , when ONE OR MORE zones have been left OFF (omitted) i.e. the landing or a bedroom. !"The system is only Part Armed when zones are omitted using the ‘Part Arm’ procedure(omitting zones manually (see page 8 for details) is not classed as Part Arming).The bottom line of the display is programmable for each Part Arm.Your Installer may have programmed the system so that it can be Part Armed by just pressing !, ( or " followed by ), if this is the case then there is no need to enter the User code below.1. Ensure that the premises are secure (all windows and doors not being omitted are closed) and the Ready light is on2. Enter a valid User code ,,,,3. Press )4. Use keys ! - " to select the required Part Arm5. Press * to arm normally or press - to arm silentlyThe exit tone will sound (if silent arm has not been selected)6. Leave the protected areaWhen the system has armed, the exit tone (if sounding) will stopPremier Serie s User Guide Operating the Alarm System INS221 5 To ARM Individual AreasIf the system has been split up into separate areas of protection i.e. Area 1 = House, Area 2 = Garage, Area 3 = Shed etc. These areas can be individually selected for FULL or PART arming as required. !"Areas are selected by using keys ! - . (the / key can also be used toselect an area followed by ' or +).Only areas that exist on the system can be selected. (A ‘Star’ means the area can be selected and a ‘Dot’ means the area cannot be selected).Pressing 0 will select/deselect all areas, pressing ' will toggle between the first 8 areas and the second 8 areas (where applicable).1. Ensure that the premises are secure (all windows and doors not being omitted are closed) and the Ready light is on2. Enter a valid User code ,,,,3. Press '4. Use keys ! - . to select the required areas5. Press * or - to FULL arm the areasOr5. Press )!, ( or " followed by * or - to PART arm the areas The exit tone will sound (if silent arm has not been selected)6. Leave the premisesWhen the system has armed, the exit tone (if sounding) will stop To DISARM the SystemThe entry time is divided into two sections, the Entry time and the 2nd Entry time. If the Entry time expires, an Internal alarm will occur and the 2nd Entry time will start. If the 2nd Entry time expires, an Intruder alarm will occur (all internal and external sounders). !"It is perfectly normal for the 2nd Entry time to be programmed as zero, in whichcase, an Intruder alarm will occur as soon as the Entry time expires.1. Enter the premises via the designated entry pointThe entry tone will start2. Enter a valid User code ,,,,The entry tone will stopOperating the Alarm System Premier Series User Guide 6 INS221 To DISARM the System When Not in Entry1. Enter a valid User code ,,,,2. Press * To CANCEL the Exit ModeOnce the exit mode has been started you should leave the premises immediately, however, if for some reason you decide not to leave, the exit mode must be cancelled.1. Enter a valid User code ,,,,2. Press *The exit tone will stop. To CLEAR an Arm FailWhen the system tries to arm with zones active (open), the internal sounders will sound and the external strobe will be flashing to indicate a problem. For details on preventing an Arm Fail condition, please refer to page 3. !"If you were not present when the Arm Fail occurred or you do not clear the ArmFail, the internal sounders will continue to sound and the external strobe will continue to flash.1. Enter a valid User code ,,,,The internal and external sounders will stop, the external strobe will continue to flash and the number of the zone that caused the Arm Fail will be displayed.2. Enter a valid User code ,,,, and press 12 To SILENCE an AlarmWhen an alarm occurs on the system, the internal and external sounders will normally sound for a pre-programmed time (normally 15 minutes). !"If you were not present when the alarm activated, the internal and externalsounders may have already stopped but the external strobe will still be flashing. When alarm information is being displayed, pressing the SCROLL key will slow down the display and also allow manual scrolling through the events.1. Enter a valid User code ,,,,The internal and external sounders will stop and the number of the zone that caused the alarm will be displayed.The alarm now needs to be reset.Premier Serie s User Guide Operating the Alarm System INS221 7 To RESET After an AlarmUSER ResetOnce the alarm has been silenced (see page 6 for details), the system will need to be reset. !"If the system has been programmed, to be reset by an Engineer, pressing 1 willnot return the display to normal, if this is the case see ENGINEER Reset for details. The system may have been programmed to be reset by Anti-code, if this is the case, see ANTI-CODE Reset for details.1. Enter a valid User code ,,,,2. Press 1The external strobe will stop, the system will chime and the display will return to normal. ENGINEER ResetIf the system has been programmed to be reset by an Engineer following an alarm activation, you will still be able to silence the alarm by entering a valid User code (see page 6 for details). !"The system cannot be armed again until the alarm has been reset.1. Contact the telephone number on the display (if programmed) or the telephone number on the last page of this User GuideANTI-CODE ResetIf the system has been programmed to be reset using an Anti-Code following an alarm activation, you will still be able to silence the alarm by entering a valid User code (see page 6 for details).!"The system cannot be armed again until the alarm has been reset.1. Enter a valid User code ,,,,2. Press 1The display will show a random code number i.e. 4281.3. Contact the telephone number on the display (if programmed) or the telephone number on the last page of this User Guide and quote the random code number You will be given a 4-digit Anti-Code i.e. 5624.4. Enter the Anti-code that has been given to you ,,,,5. Press *If the Anti-code is correct, the keypad will bleep to indicate that the system has been reset and the display will return to normal.Operating the Alarm System Premier Series User Guide 8 INS221 To OMIT ZonesIt is possible to exclude (omit) individual zones when arming i.e. if a zone is ‘in fault’. Users with access to this function can only omit zones that have been programmed as ‘Omittable’. !"If the zone can be omitted, there will be a ‘Star’ to the right of the zone number.Only zones that have the ‘Omit’ attribute assigned to them can be omitted.A ‘Star’ will appear to the left of the zone number to indicate that the zone has been selected for omitting.All omitted zones will be automatically reinstated the next time the system is disarmed, unless programmed otherwise.To re-instate zones manually, simply follow the instructions again. However, when the 3 key is pressed on this occasion, the zones will be re-instated.1. Enter a valid User code ,,,, and press 32. Enter the zone number ,,,3. Press 3 to omit the selected zoneRepeat for other zones if required.4. Press 4 when finishedContinue to arm the system as normal. The Turn CHIME On and OffThe system can be set up so that activating (opening) certain zones will cause the internal sounders to chime. This would normally be used on a front door, exit button etc. !"Zones will only cause the internal sounders to chime if they are selected for chime (see page Master User Guide for details on selecting which zones chime). Once a zone has been selected for chime, the Chime facility can be manually turned on and off as required.!"The system can also be programmed to automatically turn chime on and off under certain conditions i.e. certain times of the day, door left open etc.If no zones have been programmed for Chime, then turning Chime on and off will have no effect.To turn CHIME OnTo turn CHIME Off 1. Press -1. Press - The Chime tone will sound.The Error tone will sound.Premier Serie s User Guide Operating the Alarm System INS221 9 To CHANGE Your User CodeUsers with access to this option can change their own User codes. User codes are unique to each user and can be 4, 5 or 6 digits long.!"Only the User code that is entered to access the change code menu will be changed. Before changing your code, it is vital that you memorise or write down the new code you are about to program. Failure to remember your code will require an engineer visit to re-program a new code for you. This may incur a call-out charge.1. Enter the User code that requires changing ,,,,2. Press 43. Press *4. Press (5. Press *6. Enter a new 4, 5 or 6-digit User code ,,,,7. Press * to accept the new code8. Press 1 to exit the menuThe display will return to normal.Quick Reference Guide Premier Series User Guide10 INS221 OperationDescription Action To Full Arm the SystemEnter a valid User code ,,,, Press Yes (or press Chime to arm silently) * or - To Part Arm the System Enter a valid User code ,,,, Press Part ) Select Required Part Arm !, ( or " Press Yes (or press Chime to arm silently) * or - To Arm Individual Areas Enter a valid User code ,,,, Press Area ' Select Required Area using keys 1 - 8 ! - . Press Yes (or press Chime to arm silently) * or - To Disarm the System Enter a valid User code ,,,, Press Yes (if the entry mode was not started) *To Cancel the Exit Mode Enter a valid User code ,,,, Press Yes * To Clear an Arm Fail Enter a valid User code ,,,, Press Reset 1 To Silence an Alarm Enter a valid User code ,,,, To Reset After an Alarm Enter a valid User code ,,,, Press Reset 1 To Engineer Reset Contact Your Installation Company_____________ To Anti-code Reset Enter a valid User code ,,,, Press Reset 1 Contact Your Alarm Receiving Centre_____________ Quote 4-digit code shown on display !"#$%&'((((' Enter 4-digit code given by Receiving Centre ,,,, Press Yes *To Omit Zones Enter a valid User code ,,,, Press Omit 3 Enter Zone Number(s) ,,,… Press Menu when finished 3 Press Yes to Arm * Turn Chime On/Off Press Chime Once to Turn ON - Press Chime Again to Turn OFF - To Change User Code Enter a valid User code ,,,, Press Menu followed by Yes 4* Press 2 followed by Yes (* Enter a new 4, 5 or 6 digit User code ,,,, Press Yes to accept * Press Reset to return to the normal display 1Premier Series User Guide Installation DetailsINS221 11AreasNo. DescriptionExit TimeEntry Time 1Entry Time 2Bell DelayBell DurationAbort TimeSec. Sec. Sec. Min. Min. Sec. Sec. Sec. Sec. Min. Min. Sec. Sec. Sec. Sec. Min. Min. Sec.Sec.Sec.Sec.Min.Min.Sec.KeypadsEmergency Keys No. LocationArea Quick Arm PA Fire MedUser CodesUser Name Type Default New Code Area Time Lock 01 Master 5678N/AN/AN/AN/AN/AZonesPart ArmsNo. DescriptionType Area Omit 12 3Installation Company DetailsInstallation Engineer:Installation Company:Address:Telephone Number:Installation Date:Service RecordDate Serviced Comments EngineerEmergency Telephone NumbersFor 24 Hour Call Out For Anti-Code ResetControl PanelDetailsModel Premier 24 ❏Premier 48 ❏Premier 88 ❏Premier 168 ❏ Premier 640 ❏Location© TEXECOM LTD. 2000 - 2005INS221-2。
VERITAS产品手册

一、前言企业只有在运行正常时才能够创造经济效益,一旦关键任务系统出现故障,每一分每一秒都意味着重大损失。
尽管这个道理显而易见,但许多公司都做不到对故障服务器的迅速恢复,原因是没有人愿意做这项极其复杂的工作,除非迫在眉睫非做不可。
系统崩溃时,大部分的公司IT部门都把大量的时间花在了恢复系统上,想尽办法能让系统达到可以从磁带恢复备份数据的状态。
他们需要重新安装操作系统和配置硬件,寻找技术熟练人员来完成这些复杂工作,从而浪费了大量的宝贵时间。
由于服务器恢复工作的压力非常大,因而会不可避免地发生错误,进而危及恢复的完整性。
IT每天都面临着严峻挑战,既要提供高度的应用、数据可用性与更高的服务级别要求,同时又要限制成本费用。
随着数据中心日益扩展,其中包括异架构操作系统,多种硬件配置和许多的节/站点等,使得上述挑战变得更加错综复杂。
VERITAS高可用解决方案旨在以集中方式控制服务器和存储系统,以减少这种复杂性。
VERITAS 提供专业化的服务,帮助客户评估应用系统的风险和需求,并通过一系列解决方案和各种技术,保障数据安全、系统不中断运行、高性能,并最大化投资回报二、产品介绍VERITAS 致力于为客户提供效用计算的IT框架,为客户提供一系列配套的解决方案,它们由经过全面测试和集成的产品组成,能够提供每个级别的可用性,从本地磁带备份到高水准数据和应用可用性,乃至广域网环境下灾难恢复。
1、存储基础软件(Storage Foundation)–Storage Foundation–Storage Foundation for Oracle–Storage Foundation for DB2–Storage Foundation for Oracle RAC–Storage Foundation for Cluster File System(1)Storage Foundation 技术特点存储在线管理,减少因磁盘系统维护造成的停机时间--应用使用的逻辑卷的在线扩充或缩小--逻辑卷结构的在线调整--逻辑卷数据的在线转移高性能、在线管理的文件系统--在线碎片整理--在线扩充或缩小--在线数据转移提供真正的数据共享--同种平台(Sun或HP)可以同时存储一个文件系统--适用性强的在线管理功能,极大地减少因系统维护造成的停机,近一步提高了应用系统的高可用性。
veritas 备份软件 NBU 5.0到 NBU 6.5升级实施步骤
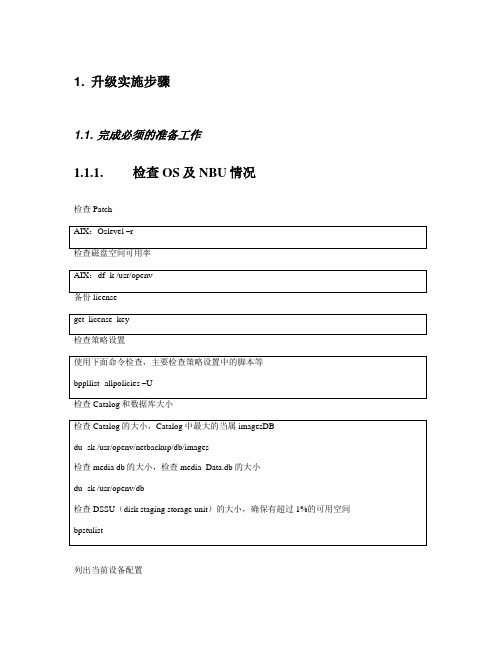
1. 升级实施步骤1.1. 完成必须的准备工作1.1.1.检查OS及NBU情况检查Patch列出当前设备配置1.1.2.备份必要文件在MasterServer上在Client上对各台机器的/usr/openv进行tar操作备份,如下:# tar -cvf usropenv$date.tar /usr/openv1.1.3.检查Catalog的完整性检查Catalog的完整性在MasterServer上安装NBCC确保没有activity的任务运行停止所有激活的策略运行NBCC停止bprd,将停止监听Schedual等待当前任务完成,如果可以不用等待,可以使用如下命令停止至此准备工作完成。
1.2. 软件升级步骤首先升级5.0mp2升级到5.0mp71.2.1.安装PBX对于升级到6.5.1的MasterServer和MediaServer来说,需要PBX组件的安装。
1.2.2.升级Master Server软件升级确认策略非激活状态Do you want to start the NetBackup bprd process so backups andrestores can be initiated?[y , n] (y)接受默认设置(键入y 或按 Return 键)意味着升级完成后可启动备份和恢复。
这还意味着,如果存在任何旧版 NetBackup 的活动策略,则在您尝试配置NetBackup 时,新版 NetBackup 可能会使用其中一个策略来启动备份或恢复操作。
最好将升级和重新配置预定在一个确信不会与备份运行发生冲突的时间,或者临时修改策略,从而确保重新配置时没有正在运行的作业。
注:此时不要启动备份操作确认所有的服务运行正常删除文件nbpushdata操作测试nbpushdata,以确认MediaServer等没有连接问题,对于有问题的连接需要解决问题后再进行下面的操作nbpushdata操作的顺序正式nbpushdata,此操作将5.x的Netbackup DB的内容移到EMM Server中。
VERITAS软件公司2002年版产品介绍及解决方案说明书

Worldwide Backup/Recovery Software Revenue by Vendor, Unix & Windows Server, 2001
Based on New License Revenue
Legato 9.3%
CA 6.2%
BMC HP 3.2% 3.1%
EMC 2.9%
Worldwide Backup/Recovery Software Revenue by Vendor, Windows Server, 2001
Based on New License Revenue
Legato 10.4%
IBM 8.1%
Connected CommVault
2.5% EMC 1.7% 1.7%
VERITAS Solutions for Windows
Backup
* VERITAS NetBackup Family
Application Mmgt
* VERITAS Exchange Edition 1.0
Clustering
* VERITAS Cluster Server 2.0
Global Clustering
- Additional 200GB from existing disk boxes
• FlashSnap: Snapshot & off-host processing
• Enable rapid migration of data
JBOD • ‘On-the-fly’ storage performance optimization with online subdisk move
VERITAS Volume Manager
Veritas Cluster Server 应用说明:Oracle 服务器的动态重新配置
Oracle 服务器的动态重新 配置
本文档包含以下主题: ■ 概述:VCS 环境中的动态重新配置 ■ 支持的软件和硬件 ■ 准备执行动态重新配置 ■ 要求 VCS 关闭的情形 ■ 停止和启动 VCS ■ 在 Oracle SunFire(s6800;e12K/15K/e25K)上执行动态重新配置 ■ 在 Oracle SunEnterprise 10K 上执行动态重新配置 ■ 替换 M5000 服务器上的联机主机总线适配器 (HBA)
文档
您对产品文档的反馈对我们很重要。 请发送改进建议和有关错误或疏漏的报告。 请 在您的报告中包括所报告的文本内容的文档标题和文档版本(位于第二页上)以及 章节标题。 请将反馈发送到:
doc_feedback@
如需最新 HOWTO 文章、文档更新的信息,或询问有关产品文档的问题,请访问 Symantec Connect 上的 Storage and Clustering Documentation(存储和集群文 档)论坛。
可用内存磁盘空间和nic网卡信息路由器网关和ip地址信息联系symantec之前执行过的故障排除操作最近所做的软件配置更改和网络更改授权许可与产品注册如果您的symantec产品需要注册或许可证密钥请访问我们的技术支持网页
Veritas Cluster Server 应用 说明:Oracle 服务器的动态 重新配置
■ 对于包含永久内存(例如,OpenBootTM PROM 或内核内存)的内存板,可在 将内存移动到其他板之后,对其执行移动操作。在具有永久内存的板上执行动 态重新配置操作将要求关闭 VCS。
■ 必须可以通过备用通路访问磁盘驱动器。动态多径处理 (DMP) 功能可提供备用 路径。在移动主机总线适配器 (HBA) 之前,请将所有卡的功能切换到备用卡。 不能移动对活动驱动器的唯一访问进行控制的 HBA。
HP-UX11.31的多路径软件NMP(NativeMulti-Pathing)介绍
HP-UX11.31的多路径软件NMP(NativeMulti-Pathing)介绍HP-UX 11.31的多路径软件NMP1.HP-UX 11.31多路⾏软件Native Multi-Pathing介绍NMP(Native Multi-Pathing)集成在HP-UX 11.31的系统中,不需要额外安装。
11.31之前的版本不包含NMP,另外11.31之前版本的HP add-on AutoPath和SecurePath 多路径产品不再在HP-UX 11i v3上⽀持。
2.查看多路径软件状态HP-UX 11i v3操作系统默认开启NMP,通过scsimgr命令进⾏确认:# scsimgrget_attr -a leg_mpath_enableSCSI GLOBAL ATTRIBUTES:name = leg_mpath_enablecurrent = truedefault = truesaved =如上所⽰,显⽰系统的NMP功能是已经启⽤了。
如果多路径的状态为false,则可以通过下⾯的命令激活:# scsimgrset_attr -a leg_mpath_enable=trueValue of attribute leg_mpath_enable set successfully# scsimgrsave_attr -a leg_mpath_enable=trueValue of attribute leg_mpath_enable saved successfully3.配置和管理多路径软件默认情况下,HP-UX NMP就可以正常接管存储系统,不需要做额外的配置。
默认情况下,NMP的路径策略为round_robin,如下所⽰:# scsimgrget_attr -D /dev/rdisk/disk159 -a load_bal_policySCSI ATTRIBUTES FOR LUN : /dev/rdisk/disk159name = load_bal_policycurrent = round_robindefault = round_robinsaved =NMP提供下⾯⼏种策略供客户选择:●Round_robin(round_robin)该策略在多条路径中同时下发IO,使⽤于多条路径IO处理能⼒相同的阵列。
VERITAS 产品介绍

Enterprise
扩展性 – 系统架构
GDM - Monitor
Master Server Media Server
Master Server
Master Server
Media Server Clients NT/95/98
VERITAS Confidential
UNIX
LINUX
扩展性 – 异构
• Different Storage Architecture
– – – –
VERITAS Confidential
LAN Backup (DAS) LAN Free Backup (SAN) Off Host, ServerFree NDMP (NAS)
可管理性 - Admin Console
18.8%
VERITAS 存储产品
• 存储管理
– 卷管理Volume Manager 和 文件系统 File System – 存储区域网管理 SAN PointControl
• 数据保护
– BackupExec – NetBackup Professional – NetBackup (Business and Data Center)
LUNSystem Capacity Policy Management Zoning management Management Support Fault Monitoring & Exchange Support Integrated Oracle and with Wizard File Masking Support LUN Binding Selective Path of discovery are: Management •The methods with over 100 pre-defined policies Clustering Support •HDS ships •HDS Supported Switches file • AllSPC are not created Automated ••Track table– Notification equal channel paths space and over fibre • In-band discovery •HP XP Series •EMC Symmetrix •Brocade are customizable. You can define alerting Policies ••Map filespath availability and performance from • Monitor to storage at LUN level Forecast future storage capacity •McData to LUN • Out-of-band – discovery conditions. •Compaq mechanisms and trigger over non-fibre channel applicationStorageWorks • Support VxFS, UFS, NTFS, FAT, hfs •QLogic Series as SCSI responses paths, •HP XP such •Automated, policy-basedor Ethernet to alerts
VERITAS Storage Migrator 3.2 到 3.4.1 升级说明书
VERITAS Storage Migrator3.2to3.4.1 Upgrade NotesUse the procedures in this document if you are upgrading from VERITAS Storage Migrator3.2to VERITAS Storage Migrator3.4.1.In addition to these notes,you need the VERITAS Storage Migrator3.4.1Installation Guide,which is on the VERITAS Storage Migrator3.4.1software CD,for other needed upgrade procedures.Note–The VERITAS Installation Guide uses two acronyms:VSM(for Veritas Storage Manager)and HSM(for Hierarchical Storage Management)when referring to the VERITAS Storage Migrator product.This document uses only VSM.w To Prepare for the UpgradeThis procedure replaces the“Prepare to Upgrade”section on page22of the VERITAS Storage Migrator3.4.1Installation Guide.Note–Do not be confused because the version number3.2.5appears in the title of the referenced section in the VERITAS installation guide.After the manual was created,Sun-initiated testing revealed that3.2.5is not needed for upgrading from3.2to3.4.1,and as a result of this finding,Sun did not release Storage Migrator3.2.5.The referenced procedures still apply even though you are upgrading from version3.2.1.Become superuser.2.Ensure that VSM3.2is installed,configured,and functional.3.Prevent users from forcing new migrations by denying access to the migrate command:#chmod 000 /usr/openv/hsm/bin/migrate4.Prevent cron jobs from running VSM automatically.5.Run the migdbcheck command to make sure the FHDB is correct,and make any copies that need to be made.Repeat for each VSM-managed file system.6.Verify that all your migrated files are copied(see Step7).Performing this step minimizes the amount of time required to do the backup.You can use migdbcheck to determine if you must make any copies.If necessary,run migrc-R to make copies of the migrated files.Be sure to exclude the.PAIN file and the premigration directory on ufs file systems.7.(Optional)Use VERITAS NetBackup to back up each VSM-managed file system.This is a precautionary step.8.(Optional)Stop the migrd daemon using the UNIX kill(1)command.This is a precautionary step.9.(Optional)Back up all VSM databases and the global database/usr/var/openv/hsm.This is a precautionary step.10.Stop the migd and migvold daemons using the stopmigd command.w To Upgrade From VERITAS Storage Migrator3.2to3.4.11.If the server is running the Solaris™2.5.1operating environment,upgrade to the Solaris2.6,7,or8operatingenvironment.Storage Migrator(VSM)3.4.1does not support the Solaris2.5.1operating environment.2.(Optional)Convert any file systems that you want to change from ufs-type to vxfs-type.See Appendix A,“Converting from ufs-type to vxfs-type File Systems”on page39of the VERITAS Storage Migrator3.4.1Installation Guide for more information.3.Ensure that VERITAS NetBackup3.4is installed,configured,and functional.If needed,see ordering information at:/sales.4.Install the latest NetBackup patch from the SunSolve SM web site.a.In a web browser,go to .b.Search for“NetBackup”in the Search SunSolve field.e the browser’s Find in Page option to find the latest NetBackup patch,and record the patch ID number.d.Download the patch,and then follow the README instructions to install the patch.5.In the VERITAS Storage Migrator3.4.1Installation Guide,read Chapter1,“Things to Know Before You Install VSM”on page1,review the“Upgrade Installation Overview for VSM3.4.1”section on page21,following the applicable instructions in both sections.e the pkgrm(1M)command to remove the VSM3.2package SUNWhsmee.a.Type:#pkgrm SUNWhsmeeb.When the following prompt displays,type y:Are you doing this pkgrm as a step in an upgrade process?[y,n,?,q]y## Updating system information.7.Perform the remaining procedures in the VERITAS Storage Migrator3.4.1Installation Guide,starting with“InstallVSM Executables”on page23to complete the upgrade.Please RecycleSun Microsystems,Inc.,901San Antonio Road,Palo Alto,CA 94303-4900U.S.A.,650960-1300,Fax 650969-9131Sun Welcomes Your CommentsSun is interested in improving its documentation and welcomes your comments and suggestions.You can email your comments to Sun at:*******************Please include the part number (816-0207-10)of the document in the subject line of your email.Copyright 2001Sun Microsystems,Inc.All rights e is subject to license terms.Third-party software,including font technology,is copyrighted and licensed from Sun suppliers.Sun,Sun Microsystems,the Sun logo,AnswerBook2,,SunSolve,and Solaris are trademarks,registered trademarks,or service marks of Sun Microsystems,Inc.in the U.S.and other countries.Federal Acquisitions:Commercial Software—Government Users Subject to Standard License Terms and Conditions.Copyright 2001Sun Microsystems,Inc.Tous droits réservés.Distribuépar des licences qui en restreignent l’utilisation.Le logiciel détenu par des tiers,et qui comprend la technologie relative aux polices de caractères,est protégépar un copyright et licenciépar des fournisseurs de Sun.Sun,Sun Microsystems,le logo Sun,AnswerBook2,,SunSolve,et Solaris sont des marques de fabrique ou des marques déposées,ou marques de service,de Sun Microsystems,Inc.aux Etats-Unis et dans d’autres pays.Part Number: 816-0207-10February 2001, Revision A。
VERITAS教程

VERITAS教程VERITAS Volume Manager: 概述SUN的网站上面有一段关于VERITAS的摘录:VERITAS Volume Manager软件是一个高端系统级的磁盘/存贮阵列解决方案。
它可以实现简单的、在线的磁盘管理和配置,大大减少了系统维护的宕机时间。
该产品同样可以帮助你实现数据集成和高可靠性(快速恢复和容错性能)。
VERITAS Volume Manager软件也可以为企业电脑和新兴的SAN(Storage Area Network)提供易用、在线的存贮管理功能。
通过对RAID技术的支持,VERITAS Volume Manager软件提高了现有硬件的容错能力,防止磁盘和硬件故障。
它还提供逻辑Volume管理层,这样,VERITAS Volume Manager克服了物理磁盘的硬件限制。
也许,你已经注意到了。
但还是让我列出他们完全忽略了的事情:Support for: Simple, RAID0, RAID1, RAID0+1, RAID1+0, RAID5# Dynamic Multipathing (DMP): Load balancing and redundant I/O paths to disk arrays supporting multi-controller attachment.# Online Relayout: VERITAS allows you to change the layout of a VERITAS volume while it is live and mounted. Change a RAID0 to a RAID5 without a second of downtime!# Snapshoting: Take a snapshot of your data, creating a "shadow" of it which you can use for online backups.# Hot Relocation: Designate "spares" which will take the place of failed disks onthe-fly.# Dirty Region Logging (DRL): Volume transaction logs which provide fast recoveries after system crashes.# More...... more than I can list!那,我们开始吧!VERITAS Volume Manager是VERITAS公司()的一个产品。
VERITAS备份系统中各种模块简介

VERITAS备份系统中各种模块简介介绍备份软件的安装和使用,如果您想自己安装,请仔细阅读;如果您对其实现原理感兴趣或希望了解的更多,请联系我们,我们将提供详细的资料。
Backup Exec产品是美国VERITAS公司开发的软件产品,用于Windows NT网络的高性能数据管理解决方案。
Backup Exec通过真正的32位Server/Client设计,为整个网络中的服务器和工作站提供高速、可靠的备份和恢复能力。
其主要特点有:关于系统备份和灾难恢复的软件,在国内外几家公司的产品较为成熟,其中最为成熟是美国 VERITAS 公司的 Backup Exec 系列软件。
VERITAS公司的 Backup Exec 软件是一种多线程、多任务的存储管理解决方案,专为在单一的或多节点的Windows 2000/NT企业环境中进行数据备份、恢复、灾难恢复而设计,适用于单机Windows 2000/NT 工作站、小型局域网以及异构的企业网络。
目前,Backup Exec 普遍应用于国内外的企业中,在世界数据备份软件市场的占有率高达90%,并在各种性能评测中远远领先于对手产品。
BackupExec是Windows产品线上忠实的备份工具,自从Windows NT 3.51开始,Microsoft就一直在她的操作系统中集成Veritas公司的备份软件(简化版)。
同时BackupExec又是Windows 2000平台上第一个发布的备份软件,并且也是唯一一个在Windows 2000平台上通过Microsoft认证的备份解决方案(/windows2000/upgrade/compat/certified.asp)。
Microsoft公司内部分布于53个国家和地区的2700多台服务器的备份也是通过BackupExec来实现的。
可以说BackupExec是Windows NT/2000平台上久经考验的备份解决方案。
美国 VERITAS 公司的网络备份软件 Backup Exec 是基于网络结构设计的,实现优异的网络数据存储功能,充分体现了备份工作的企业级要求。
HPE Data Protector 11.03 存储支持矩阵版本 1.3 中文名字说明书
Table of ContentsIntroduction (3)What’s New (4)Abbreviations used in the Matrix (5)Table 1: 3PAR Storage Systems and SMIS integration (5)Table 2: Primera Storage Systems and SMIS integration (5)Table 3: Alletra 9000 Storage Systems and SMIS integration (5)Table 4: Supported microcode and RAID Manager HORCM versions for XP HPE Storage Arrays (5)Table 5: 3PAR Supported volume managers (6)Table 6: Primera Supported volume managers (6)Table 7: Alletra 9000 Supported volume managers (6)Table 8: XP Supported volume managers (6)Table 9: Supported alternate path solutions for HPE XP Storage Arrays (7)Table 10: 3PAR Supported configurations – Windows (x64) (7)Table 11: 3PAR Supported configurations – Linux (x64) (8)Table 12: 3PAR Supported configurations – HP-UX on Itanium (8)Table 13: 3PAR Supported configurations - VMware (9)Table 14: Primera Supported configurations – Windows (x64) (9)Table 15: Primera Supported configurations – Linux (x64) (9)Table 16: Primera Supported configurations – HP-UX on Itanium (10)Table 17: Primera Supported configurations - VMware (10)Table 18: Alletra 9000 Supported configurations – Windows (x64) (11)Table 19: Alletra 9000 Supported configurations – Linux (x64) (11)Table 20: Alletra 9000 Supported configurations - VMware (12)Table 21: XP Supported configurations – Windows (x64) (12)Table 22: XP Supported configurations - Linux (13)Table 23: XP Supported configurations – HP-UX on Itanium (13)Table 24: XP Supported configurations – Solaris (SPARC) (14)Table 25: Supported HPE 3PAR Recovery Manager (14)IntroductionThe details of the supported operating systems are specified in the individual tables below. The operating system, its version and the hardware architecture must be same on both application and backup hosts. For cluster support related information, please refer to Data Protector Zero Downtime Backup Administrator’s Guide.For Data Protector components running in combination with application versions and operating system versions, which are not supported by their respective vendors, the support from Opentext is limited to a reasonable-endeavors basis.For information about specific Windows versions supported by Data Protector please refer to the Platform and Integration Support Matrix.Updates/changes to individual fields within the Matrix will be highlighted in RED.What’s New1. Support of HPE XP 82. Support of SAP BRTools 7.4 using Oracle 18c & 19c with HPE XP Series on Windows Server3. Support of SAP BRTools 7.4 using Oracle 19c with HPE XP Series on RHEL 84. Support of Oracle 18c, 19c, 21c with HPE XP Series on Windows Server5. Support of Oracle 18c, 19c, 21c with HPE XP Series on RHEL 86. Support of Oracle 19c, 21c with HPE XP Series on HP-UX 11.31 IA7. Support of ZDB Filesystem with HPE XP Series on RHEL 88. Support of ZDB Filesystem with HPE XP Series on Windows Server9. Support of Microsoft SQL Server 2019 and 2022 with HPE XP Series on Windows serverAbbreviations used in the MatrixZDB Zero Downtime Backup IR Instant RecoveryBC Business Copy CA Continuous AccessTable 1: 3PAR Storage Systems and SMIS integration1 Storage volumes presented with Host Sees, Host Set, Port Set, or Matched Set are supported.2 Backup and instant recovery of GPT disks are not supported on Windows Server systems.3 3PAR Periodic Remote Copy feature is supported on 3.2.2 MU 2 with Patch P14.4 Storage volumes in volume set are supported.5 Peer Motion migration needs WWNs to be reset for successful backups. 6Supported only for InForm OS version 3.3.1 onwards.Table 2: Primera Storage Systems and SMIS integration1 Storage volumes presented with Host Sees, Host Set, Port Set, or Matched Set are supported.2 Backup and instant recovery of GPT disks are not supported on Windows Server systems.3 Storage volumes in volume set are supported.4 Peer Motion migration needs WWNs to be reset for successful backups. 5Remote copy is not supportedTable 3: Alletra 9000 Storage Systems and SMIS integration1Storage volumes presented with Host Sees, Host Set, Port Set, or Matched Set are supported. 2 Backup and instant recovery of GPT disks is not supported on Windows Server systems. 3 Storage volumes in volume set are supported.4Peer Motion migration needs WWNs to be reset for successful backups.Table 4: Supported microcode and RAID Manager HORCM versions for XP HPE Storage ArraysXP model Minimum microcode version required Minimum RAID Manager Library version required HP-UX Solaris Windows Linux XP 890-09-21-00/0001.34.00-01.34.0001.34.00InForm OS 3,5,7Operating SystemHP-UX IA Windows Server Linux 11.312012, 2012 R2, 20166, 20196SLES 12, 15 RHEL 7, 8 3.2.2Supported Supported Supported 3.3.1 Supported Supported Supported 3.3.2SupportedSupportedSupportedPrimera OS Operating SystemWindows Server 2 Linux HP-UX IA 52016, 2019, 2022 SLES 12, 15, RHEL 7, 811.31 4.0.x Supported Supported Supported 4.1.x Supported Supported Supported 4.2.x Supported Supported Supported 4.3.x 5 Supported Supported Supported 4.4.x 5 Supported Supported Supported 4.5.x 5Supported SupportedSupportedAlletra OSOperating System Windows Server 2Linux2016, 2019SLES 12, 15RHEL 7, 89.3.x Supported Supported 9.4.xSupported SupportedXP 7 70-01-31-00/00 01.15.03 - 01.32.03 - P9000 Family 1,2,370-01-01-00/0001.15.0301.15.0301.15.0301.15.031 Minimum Raid Manager Library version 01.15.00 or newer and minimum microcode version 50-04-20 is required for using snapshot capability of P9000 XP Disk Array Family.2 Includes support for Hitachi Virtual Storage Platform (VSP).3 All versions of HPE Business Copy P9000 XP and/or HPE Continuous Access P9000 XP that are supported by RAID Manager Library are supportedTable 5: 3PAR Supported volume managersOperating system Volume managerLVM LVM 2 LVM 2.1 VxVM Disk managerHP-UX supportedSupported Supported Supportedn/a Solaris n/a n/a n/a not-supported n/a Windows n/an/a n/a not supportedSupportedLinuxnot-supportedsupported 1not supported not supportedn/aTable 6: Primera Supported volume managersOperating system Volume managerLVM LVM 2 LVM 2.1 VxVM Disk manager Windows n/an/a n/anot supported SupportedLinuxnot-supportedSupported 1not supportednot supportedn/aTable 7: Alletra 9000 Supported volume managersOperating system Volume managerLVM LVM 2 LVM 2.1 VxVM Disk manager Windows n/an/a n/anot supported SupportedLinuxnot-supportedSupported 1not supportednot supportedn/aTable 8: XP Supported volume managersVolume managerOperating systemHP-UX Windows Solaris LinuxLogical Volume Manager (LVM) supported 2 n/a n/a supported 3 Veritas Volume Manager (VxVM) supportednot supported supportedsupported 4,5Disk Managern/a supported 1n/a n/aSolaris Volume Managern/an/asupportedn/a1 Dynamic disks are not supported.2 LVM 1.0, LVM 2.0 and LVM 2.1 are supported.3 The LVM2 2.02 is supported.4 VxVM 5.1 supported.5 Supported with patch bundle 8.11 and later versions1Only LVM2 2.02 is supported.1Only LVM2 2.02 is supported.1Only LVM2 2.02 is supported.The following is a list of supported alternate path and multi pathing solutions: Table 9: Supported alternate path solutions for HPE XP Storage ArraysAlternate path solutionsOperating systemHP-UX Windows Solaris LinuxHPE AutoPath supported Supported not supported n/a Sun Alternate Pathing driver n/a n/a supported n/a VxVM Dynamic Multipathing supported n/a supported n/a HP-UX LVM Alternate Links supported n/a n/a n/a Linux Native Multipathing n/a n/a n/a SupportedTable 10: 3PAR Supported configurations – Windows (x64)1Integrations Supportedversions Windowsversions2Single-hostLocal CopyDual-hostLocal CopyRemote CopyRaw disk 2012, 2012 R2,2016, 2019ZDB with IR ZDB with IR ZDB with IRNTFS file system 2012, 2012 R2,2016, 2019ZDB with IR ZDB with IR ZDB with IRMicrosoft Exchange Server3Microsoft ExchangeServer 20132012, 2012 R2 - - -Microsoft ExchangeServer 20162012, 2012 R2,2016- - -Microsoft SQL Server Microsoft SQLServer 20142012, 2012 R2 notsupportedZDB with IR ZDB with IR4Microsoft SQLServer 20162012, 2012 R2,2016notsupportedZDB with IR ZDB with IRMicrosoft SQLServer 20172012, 2012 R2,2016notsupportedZDB with IR ZDB with IRMicrosoft SQLServer 20192016, 2019 notsupportedZDB with IR ZDB with IROracle Oracle 12c9 RMANoffline or online42012, 2012 R2 ZDB with IR ZDB with IR ZDB with IROracle 18c RMAN offline or online6,42012, 2012 R2,2016, 2019ZDB with IR ZDB with IR ZDB with IROracle 19c RMANoffline or online6,42016, 2019 ZDB with IR ZDB with IR ZDB with IROracle 21c RMANoffline or online6,42016, 2019 ZDB with IR ZDB with IR ZDB with IRSAP BR*Tools 7.2 offline or online5Oracle 12c 2012, 2012 R2 notsupportedZDB with IR ZDB with IRSAP BR*Tools 7.4 offline or online5Oracle 12c 2012, 2012 R2 notsupportedZDB with IR ZDB with IROracle 18c 2016, 2019 notsupportedZDB with IR ZDB with IROracle 19c 2016, 2019 notsupportedZDB with IR ZDB with IR1 GPT partitions are not supported.2Oracle 12c includes all released versions of 12c R1 and 12c R2: 12.x.x.3 Microsoft Exchange Server ZDB and IR backups are supported using VSS. For details such as supported array types, writer GUID etc. refer toData Protector 11.03 VSS Integration Support Matrix.4Oracle PDB and CDB are not supported5 The integration is im plemented using “backint” functionality.6 Oracle ASM is not supported.Table 11: 3PAR Supported configurations – Linux (x64)Integrations SupportedVersionsRHEL,SLES, OEL,Scientific LinuxversionsSingle-hostLocal CopyDual-hostLocal CopyRemote CopyRaw Disk RHEL 7, 8SLES 12,15OEL 7, 8notsupportedZDB with IR ZDB with IRRaw Logical Volume RHEL 7, 8SLES 12, 15OEL 7, 8notsupportedZDB with IR ZDB with IRFile System RHEL 7, 8SLES 12, 15OEL 7, 8notsupportedZDB with IR ZDB with IROracle2Oracle 12c1RMAN offline oronlineRHEL 73SLES 123,4OEL 7notsupportedZDB with IR ZDB with IROracle 18c RMANoffline or onlineRHEL 7SLES 12OEL 7notsupportedZDB with IR ZDB with IROracle 19c RMANoffline or onlineRHEL 7, 8SLES 12, 15OEL 7, 8notsupportedZDB with IR ZDB with IROracle 21c RMANoffline or onlineRHEL 7, 8SLES 12, 15OEL 7, 8notsupportedZDB with IR ZDB with IRSAP BR*Tools 7.4 offline or online5Oracle 18c RHEL 7,8SLES 12, 15OEL 7, 8notsupportedZDB with IR ZDB with IROracle 19c RHEL 7, 8SLES 12, 15OEL 7, 8notsupportedZDB with IR ZDB with IR1 Oracle 12c includes all released versions of 12c R1 and 12c R2: 12.x.x.2 Oracle PDB and CDB are not supported3 Oracle ASM is supported4 IR backup of non-ASM database is not supported5 The integration is implemented using “backint” functionality.Table 12: 3PAR Supported configurations – HP-UX on ItaniumIntegration on HP-UX 11.311SupportedVersionsSingle-hostLocal CopyDual-hostLocal CopyRemote CopyRaw disk ZDB with IR ZDB with IR ZDB with IR Raw logical volume ZDB with IR ZDB with IR ZDB with IR File system5ZDB with IR ZDB with IR ZDB with IR Oracle3Oracle 12c7 RMANoffline or online2ZDB with IR ZDB with IR ZDB with IR6Oracle 18c RMANoffline or online2ZDB with IR ZDB with IR ZDB with IR6SAP BR*Tools 7.2offline or online4,6Oracle 12c not supported ZDB with IR ZDB with IR6 SAP BR*Tools 7.4offline or online4,6Oracle 12c not supported ZDB with IR ZDB with IR6 1 For HP-UX 11.31, new device special files (DSF) are supported for LVM only.2 Oracle ASM is not supported.3Oracle PDB and CDB are not supported4 The integration is implemented using “backint” functionality.5 HFS is not supported6 Not supported on 3PAR 3.3.17 Oracle 12c includes all released versions of 12cR1 and 12cR2Table 13: 3PAR Supported configurations - VMwareHypervisor Single-host Local Copy2Remote Copy2 VMware ESXi 7.0, 7.0 U1, 7.0 U2, 7.0 U3, 8.0ZDB +Restore ZDB + Restore1 VMware VVol (Virtual Volumes) is supported (except ESXi 7.0).2 Virtual Machine restore from a snapshot, Cached GRE, Power On and Live Migrate are supported.3 IR is not supported.4 Only the FC Protocol and the RDM configuration are supported5 The VMware “ATTACH DISK” feature, can be used for granular recovery of data. This feature is only supported through CLI.6 GRE from a snapshot on Linux is not supportedTable 14: Primera Supported configurations – Windows (x64)1Integrations SupportedVersions WindowsversionsSingle-hostLocal CopyDual-hostLocal CopyRemoteCopyRaw disk 2012 R2, 2016,2019ZDB with IR ZDB with IR ZDB with IRNTFS file system 2012 R2, 2016,2019ZDB with IR ZDB with IR ZDB with IRMicrosoft SQL Server Microsoft SQL Server20162016, 2019 notsupportedZDB with IR ZDB with IRMicrosoft SQL Server20172016, 2019 notsupportedZDB with IR ZDB with IRMicrosoft SQL Server20192016, 2019 notsupportedZDB with IR ZDB with IROracle2,3Oracle 18c RMANoffline or online2016, 2019 ZDB with IR ZDB with IR ZDB with IROracle 19c RMANoffline or online2016, 2019 ZDB with IR ZDB with IR ZDB with IROracle 21c RMANoffline or online2016, 2019 ZDB with IR ZDB with IR ZDB with IRSAP BR*Tools 7.4 offline or online4Oracle 18c2016, 2019 notsupportedZDB with IR ZDB with IROracle 19c2016, 2019 notsupportedZDB with IR ZDB with IR1 GPT partitions are not supported.2 Oracle ASM is not supported.3 Oracle PDB and CDB are not supported.4 The integration is implemented using “backint” functionalityTable 15: Primera Supported configurations – Linux (x64)Integrations SupportedVersions RHEL1 , SLES,OELVersionsSingle-hostLocal CopyDual-hostLocal CopyRemoteCopyRaw Disk RHEL 7, 8SLES 12,15OEL 7, 8not supported ZDB with IR ZDB with IRRaw Logical Volume RHEL 7, 8SLES 12, 15OEL 7, 8not supported ZDB with IR ZDB with IRFile System RHEL 7, 8SLES 12, 15OEL 7, 8not supported ZDB with IR ZDB with IROracle2,3Oracle 18c RMANoffline or online RHEL 7SLES 12OEL 7not supported ZDB with IR ZDB with IROracle 19c RMAN offline or online RHEL 7, 8SLES 12, 15OEL 7, 8not supported ZDB with IR ZDB with IROracle 21c RMAN offline or online RHEL 7, 8SLES 12, 15OEL 7, 8not supported ZDB with IR ZDB with IRSAP BR*Tools 7.4 offline or online4Oracle 18c RHEL 7,8SLES 12, 15OEL 7, 8not supported ZDB with IR ZDB with IROracle 19c RHEL 7, 8SLES 12, 15OEL 7, 8not supported ZDB with IR ZDB with IR1 Includes support for Red Hat Enterprise Linux Workstation and Enterprise Server if applicable.2 Oracle ASM is not supported3 Oracle PDB and CDB are not supported4 The integration is implemented using “backint” functionality.Table 16: Primera Supported configurations – HP-UX on ItaniumIntegration on HP-UX 11.311,2SupportedVersionsSingle-hostLocal CopyDual-hostLocal CopyRemote CopyRaw disk ZDB with IR ZDB with IR not supported Raw logical volume ZDB with IR ZDB with IR not supported File system ZDB with IR ZDB with IR not supported Oracle3,4Oracle 18c RMANoffline or onlineZDB with IR ZDB with IR not supportedOracle 19c RMANoffline or onlineZDB with IR ZDB with IR not supportedOracle 21c RMANoffline or onlineZDB with IR ZDB with IR not supportedSAP BR*Tools 7.4offline or online5Oracle 18c not supported ZDB with IR not supportedOracle 19c not supported ZDB with IR not supported1 For HP-UX 11.31, new device special files (DSF) are supported for LVM only.2 HFS is not supported3 Oracle ASM is not supported.4 Oracle PDB and CDB are not supported5 The integration is implemented using “backint” functionality.Table 17: Primera Supported configurations - VMwareHypervisor Single-host Local Copy1Remote Copy VMware ESXi 7.0, 7.0 U1, 7.0 U2, 7.0 U3, 8.0 ZDB +Restore Not Supported1 Virtual Machine restore from a snapshot, Cached GRE, Power On and Live Migrate are supported.2 IR is not supported.3 Only the FC Protocol and the RDM configuration are supported4 The VMware “ATTACH DISK” feature, can be used for granular recovery of data. This feature is only supported through CLI.5 GRE from a snapshot on Linux is not supportedTable 18: Alletra 9000 Supported configurations – Windows (x64)1Integrations SupportedVersions WindowsversionsSingle-hostLocal CopyDual-hostLocal CopyRemoteCopyRaw disk 2012 R2, 2016,2019ZDB with IR ZDB with IR ZDB with IRNTFS file system 2012 R2, 2016,2019ZDB with IR ZDB with IR ZDB with IRMicrosoft SQL Server Microsoft SQL Server20162016, 2019 notsupportedZDB with IR ZDB with IRMicrosoft SQL Server20172016, 2019 notsupportedZDB with IR ZDB with IRMicrosoft SQL Server20192016, 2019 notsupportedZDB with IR ZDB with IROracle2,3Oracle 18c RMANoffline or online2016, 2019 ZDB with IR ZDB with IR ZDB with IROracle 19c RMANoffline or online2016, 2019 ZDB with IR ZDB with IR ZDB with IROracle 21c RMANoffline or online2016, 2019 ZDB with IR ZDB with IR ZDB with IR1 GPT partitions are not supported.2 Oracle ASM is not supported.3 Oracle PDB and CDB are not supported.Table 19: Alletra 9000 Supported configurations – Linux (x64)Integrations SupportedVersions RHEL1 , SLES,OELVersionsSingle-hostLocal CopyDual-hostLocal CopyRemoteCopyRaw Disk RHEL 7, 8SLES 12,15OEL 7, 8not supported ZDB with IR ZDB with IRRaw Logical Volume RHEL 7, 8SLES 12, 15OEL 7, 8not supported ZDB with IR ZDB with IRFile System RHEL 7, 8SLES 12, 15OEL 7, 8not supported ZDB with IR ZDB with IROracle2,3Oracle 18c RMANoffline or online RHEL 7SLES 12, OEL 7not supported ZDB with IR ZDB with IROracle 19c RMAN offline or online RHEL 7, 8SLES 12, 15OEL 7, 8not supported ZDB with IR ZDB with IROracle 21c RMAN offline or online RHEL 7, 8SLES 12, 15OEL 7, 8not supported ZDB with IR ZDB with IR1 Includes support for Red Hat Enterprise Linux Workstation and Enterprise Server if applicable.2 Oracle ASM is not supported3 Oracle PDB and CDB are not supportedTable 20: Alletra 9000 Supported configurations - VMwareHypervisor Single-host Local Copy1Remote Copy VMware ESXi 7.0, 7.0 U1, 7.0 U2, 7.0 U3 ZDB +Restore Not Supported1 Virtual Machine restore from a snapshot, Cached GRE, Power On and Live Migrate are supported.2 IR is not supported.3 Only the FC Protocol and the RDM configuration are supported4 The VMware “ATTACH DISK” feature, can be used for granular recovery of data. This feature is only supported through CLI.5 GRE from a snapshot on Linux is not supportedTable 21: XP Supported configurations – Windows (x64)1 Includes support for Thin Provisioned LUNs with P9500 array.2 GPT partitions are not supported.3 If secondary volume for CA or primary volume for BC is not connected to the backup host4 The integration is implemented using the ‘backint’ functionality.5 Oracle 12c includes all released versions of 12c R1 and 12c R2: 12.x.x.6 Oracle ASM is not supported.7 Oracle PDB and CDB are not supportedTable 22: XP Supported configurations - Linux1 Only ext3 and ext4 file systems are supported.2 Oracle PDB and CDB are not supported3 Only ASM is supported4 1:N mirror configuration is not supported.5 Oracle 12c includes all released versions of 12c R1 and 12c R2: 12.x.x.6Not supported with XP 87The integration is implemented using the ‘backint’ functionalityTable 23: XP Supported configurations – HP-UX on Itanium1 With HP-UX 11.31, new device special files (DSF) are also supported2Oracle 12c includes all released versions of 12c R1 and 12c R2: 12.x.x.3 The integration is implemented using the ‘backint’ functionality.4 In the case of Oracle 12c R1 ASM in the offline configuration, disk+tape backup is not supported5 Oracle PDB and CDB are not supported6 ASM is not SupportedTable 24: XP Supported configurations – Solaris (SPARC)Integration on Sun Solaris 10, 11Supported VersionsSingle-host BCDual-host BCCACA and BC(combined)Raw DiskZDB with IR ZDB with IR ZDB ZDB Raw logical volume ZDB with IR ZDB with IR ZDB ZDB File systemZDB with IR ZDB with IR ZDB ZDB Oracle 2,3,4Oracle 12c ZDB with IR ZDB with IR ZDB ZDB SAP BR*Tools7.2 offline or online 1Oracle 12cnot supportedZDB with IRZDBZDB1 The integration is implemented using the ‘backint’ functionality.2 Oracle 12c includes all released versions of 12c R1 and 12c R2: 12.x.x.3 Oracle PDB and CDB are not supported 4ASM is not SupportedTable 25: Supported HPE 3PAR Recovery ManagerData Protector supports HPE 3PAR Recovery Manager for Microsoft SQL Server, Microsoft Exchange and Oracle. Please refer to the HPE 3PAR Recovery Manager link fo r the versions of the supported Applications’ versions and the supported Operating Systems versions.3PAR Recovery Manager for Microsoft Exchange Server 3PAR Recovery Manager for Microsoft SQL Server 3PAR Recovery Manager for Oracle。
Symantec_Storage_Foundation_简介
© 2006 Symantec Corporation
Key Sales Opportunities
►Standardization of storage management infrastructure ►Centralized Management ►Upgrades from point products Veritas Volume Manager and/or Veritas File System ►Tiered Storage ►Data Migration/consolidation ►Disaster Recovery and replication ►Database Storage
Databases Middleware Applications
Data Protection Backup Media management Snapshot services
Storage Management File system Volume management Copy services
Server Management Clustering App. placement Provisioning
Application Performance Tuning advice Alerting Root cause analysis
Archiving
Multi-pathing
Resource mgmt.
© 2006 Symantec Corporation
Storage Foundation: Manage Storage
STORAGE MANAGEMENT • • • • Capacity management App to spindle visibility SRM Active management • • • • STORAGE AVAILABILITY Storage Foundation Basic Dynamic Multi-Pathing Dynamic Storage Tiering 5.0 Synchronous release CENTRALIZED HOST ADMINISTRATION • Centralized management • Multi-host support • Automate operations
VERITAS实用操作手册(经验版)
VERITAS9.0实用操作手册(经验版)Kernel ()目录●安装指南一、服务器端的安装二、服务器端的配置二、客户端的安装三、安装过程中的常见问题●应用指南一、WIN2000系统的备份/恢复1、提交备份作业1、恢复到同一台计算机上2、异机的恢复(恢复到到不同的计算机上)●SQL数据库服务器的备份与恢复1、仅仅数据库损坏,手工恢复系统库以及用户数据库2、灾难恢复SQL数据库3、重定向恢复数据库安装指南说明:本操作指南中使用的VRITAS的版本号为9.1.4691,是目前最新版的VERITAS EXEC版本。
本操作手册仅仅是一个快速入门手册,更详细的操作请参考《Veritas Exec用户参考手册》对于VRITAS9.0的安装有两种方式:升级安装和全新安装。
升级安装是指企业中原先在使用VRITAS8.6产品,那么你得到新的9.0产品时一般是VERITAS 公司的升级光盘,这个升级光盘是不能够全新安装的,只能从V8.6版本上升级到9.0。
在光盘的协议中会提供一组升级用的序列号。
这样就麻烦一些,要先安装V8.6然后再升级到9.0。
关键就是序列号的问题,因为只有升级序列号,如果有全新的序列号,那么就可以全新安装的。
因为在从V8.6升级到V9.0的时候,VERITAS会生成一组新的安装序列号。
因此只要把安装后的SN记录下来,就可以把升级安装变成全新的完全安装了。
全新安装问题会少很多,但是客户机必须要把原来的V8.6组件全部卸载掉,然后再安装V9.0组件。
安装前客户端和服务器端有几个前提要注意一下:1.MDAC的版本也有要求,要2.7以上,WINDOWS 2000 SERVER中的是2.6 看MDAC的版本号在注册表的:\HKEY_LOCAL_MACHINE\SOFTWARE\ Microsoft\DataAccess中可以看到。
2.介质服务器端需要的安装SQL2000客户端(注意是客户端,不是服务器端),主要是为了备份SQL2000 SERVER需要。
- 1、下载文档前请自行甄别文档内容的完整性,平台不提供额外的编辑、内容补充、找答案等附加服务。
- 2、"仅部分预览"的文档,不可在线预览部分如存在完整性等问题,可反馈申请退款(可完整预览的文档不适用该条件!)。
- 3、如文档侵犯您的权益,请联系客服反馈,我们会尽快为您处理(人工客服工作时间:9:00-18:30)。
Veritas™ Dynamic Multi-Pathing 版本说明Solaris6.0.1Veritas™ Dynamic Multi-Pathing 版本说明本手册所述软件是根据许可协议而提供,仅可按该协议的条款使用。
产品版本:6.0.1文档版本:6.0.1 Rev 0法律声明Copyright © 2012 Symantec Corporation. © 2012 Symantec Corporation 版权所有。
Allrights reserved. 保留所有权利。
Symantec、Symantec 徽标、Veritas、Veritas Storage Foundation、CommandCentral、NetBackup、Enterprise Vault 和 LiveUpdate 是 Symantec Corporation 或其附属公司在美国和其他国家/地区的商标或注册商标。
“Symantec”和“赛门铁克”是 Symantec Corporation在中国的注册商标。
其他名称可能为其各自所有者的商标,特此声明。
本文档中介绍的产品根据限制其使用、复制、分发和反编译/逆向工程的授权许可协议分发。
未经 Symantec Corporation 及其特许人(如果存在)事先书面授权,不得以任何方式任何形式复制本文档的任何部分。
本文档按“现状”提供,对于所有明示或暗示的条款、陈述和保证,包括任何适销性、针对特定用途的适用性或无侵害知识产权的暗示保证,均不提供任何担保,除非此类免责声明的范围在法律上视为无效。
Symantec Corporation 不对任何与提供、执行或使用本文档相关的伴随或后果性损害负责。
本文档所含信息如有更改,恕不另行通知。
根据 FAR 12.212 中的定义,授权许可的软件和文档被视为“商业计算机软件”,受 FAR 第52.227-19 节“Commercial Computer Software-Restricted Rights”(商业计算机软件受限权利)和 DFARS 第 227.7202 节“Rights in Commercial Computer Software or CommercialComputer Software Documentation”(商业计算机软件或商业计算机软件文档权利)中的适用规定,以及所有后续法规中规定的权利的制约。
美国政府仅可根据本协议的条款对授权许可的软件和文档进行使用、修改、发布复制、执行、显示或披露。
Symantec Corporation350Ellis StreetMountain View,CA94043技术支持Symantec 技术支持具有全球性支持中心。
技术支持的主要任务是响应有关产品特性和功能的特定查询。
技术支持小组还负责编写我们的联机知识库文章。
技术支持小组与 Symantec 内的其他职能部门相互协作,及时解答您的问题。
例如,技术支持小组与产品工程和 Symantec 安全响应中心协作,提供警报服务和病毒定义更新服务。
Symantec 提供的维护服务包括:■一系列支持服务,使您能为任何规模的单位选择适用的支持服务■通过电话和 Web 支持快速响应并提供最新信息■升级保证可保证软件顺利升级■全天候提供全球支持■高级功能,包括“客户管理服务”有关 Symantec 维护计划的更多信息,请访问我们的网站:/zh/cn/support/index.jsp与技术支持联系具有有效维护协议的客户可以通过以下网址访问技术支持信息:/zh/cn/support/index.jsp在联系技术支持之前,请确保您的计算机符合产品文档中所列的系统要求。
而且您应当坐在发生问题的计算机旁边,以便需要时重现问题。
联系技术支持时,请准备好以下信息:■产品版本信息■硬件信息■可用内存、磁盘空间和 NIC 网卡信息■操作系统■版本和补丁程序级别■网络结构■路由器、网关和 IP 地址信息■问题说明:■错误消息和日志文件■联系 Symantec 之前执行过的故障排除操作■最近所做的软件配置更改和网络更改授权许可与产品注册如果您的 Symantec 产品需要注册或许可证密钥,请访问我们的技术支持网页:https:///客户服务可从以下网站获得客户服务信息:/zh/cn/support/index.jsp客户服务可帮助您解决一些非技术性问题,例如以下几类问题:■有关产品许可或序列号的问题■产品注册更新(例如,更改地址或名称)■一般产品信息(功能、可用的语言、当地经销商)■有关产品更新和升级的最新信息■有关升级保障和维护合同的信息■Symantec 采购计划的相关信息■有关 Symantec 技术支持选项的建议■非技术性的售前问题■与光盘或手册相关的问题文档介质中提供了PDF 格式的产品指南。
请确保您使用的是文档的最新版本。
每个指南的第 2 页上提供了文档版本信息。
从 Symantec 网站可以获取最新的产品文档。
https:///documents您对产品文档的反馈对我们很重要。
请发送改进建议和有关错误或疏漏的报告。
请在您的报告中包括所报告的文本内容的文档标题和文档版本(位于第二页上)以及章节标题。
请将反馈发送到:doc_feedback@如需最新 HOWTO 文章、文档更新的信息,或询问有关产品文档的问题,请访问Symantec Connect 上的 Storage and Clustering Documentation(存储和集群文档)论坛。
https:///connect/storage-management/forums/storage-and-clustering-documentation关于 Symantec ConnectSymantec Connect 是为 Symantec 企业客户提供的点对点技术社区网站。
参与者可以与其他产品用户联络并共享信息,包括发布论坛帖子、文章、视频、下载、博客和提出建议,并可与 Symantec 产品团队和技术支持进行交流。
内容会由社区进行评分,成员可凭其贡献获得奖励积分。
/connect/storage-management维护协议资源如果想就现有维护协议事宜联络 Symantec,请通过以下方式联络您所在地区的维护协议管理部门:国家/地区销售热线电子邮件中国大陆8008108826China-Sales@中国台湾Taiwan-Sales@00801611391中国香港特别行政区HongKong-Sales@800963421Dynamic Multi-Pathing 版本说明本文档包含以下主题:■关于本文档■关于 Veritas Dynamic Multi-Pathing (DMP)■关于 Symantec Operations Readiness Tools■重要版本信息■ 6.0.1 中引入的更改■系统要求■已解决的问题■已知问题■软件限制■文档关于本文档本文档提供有关适用于 Solaris 的 Veritas Dynamic Multi-Pathing (DMP) 版本 6.0.1的重要信息。
请在安装或升级 DMP 之前仔细阅读整个文档。
“版本说明”中的信息可取代 DMP 的产品文档中提供的信息。
本文档是《Veritas Dynamic Multi-Pathing 版本说明》的“文档版本:6.0.1 Rev0”。
开始之前,请确保使用的是本指南的最新版本。
Symantec 网站上提供了最新的产品文档,网址为:https:///documents关于 Veritas Dynamic Multi-Pathing (DMP)Veritas Dynamic Multi-Pathing (DMP) 为在系统上配置的操作系统本机设备提供了多径处理功能。
DMP 创建 DMP 元设备(也称为 DMP 节点)来表示指向同一物理LUN 的所有设备路径。
DMP 也可作为独立产品使用,其扩展了 DMP 元设备以支持 ZFS 。
可以在 DMP 元设备上创建 ZFS 池。
DMP 仅支持非根 ZFS 文件系统。
Veritas Dynamic Multi-Pathing 可以通过 Storage Foundation 产品单独授权。
Veritas Volume Manager 和 Veritas File System 功能未附带 DMP 许可证。
DMP 功能附带 Storage Foundation (SF) Enterprise 许可证、SF HA Enterprise 许可证和 Storage Foundation 标准许可证。
Veritas Volume Manager (VxVM) 卷和磁盘组可以与 ZFS 池共存,但是每个设备只能支持其中一种类型。
如果磁盘具有 VxVM 标签,则该磁盘对 ZFS 不可用。
同样,如果磁盘正由 ZFS 使用,则该磁盘对 VxVM 不可用。
关于 Symantec Operations Readiness ToolsSymantec Operations Readiness Tools (SORT) 是一个网站,可自动处理和简化某些最耗时的管理任务。
SORT 有助于您更高效地管理数据中心,并充分利用 S ymantec 产品。
SORT 可以帮助您执行以下操作:■列出产品安装和升级要求,包括操作系统版本、内存、磁盘空间和体系结构。
■分析系统以确定是否已做好安装或升级 Symantec 产品的准备。
■从中央储存库下载最新的修补程序、文档和高可用性代理。
■访问硬件、软件、数据库和操作系统的最新兼容性列表。
为下一次安装或升级做准备■从中央储存库获取有关对修补程序、阵列特定模块(ASL/APM/DDI/DDL) 和高可用性代理所做更改的自动电子邮件通知。
■确定并降低系统和环境风险。
■显示数百个 Symantec 错误代码的说明和解决方案。
管理风险■根据产品版本和平台查找并下载修补程序。
■列出已安装的 Symantec 产品和许可证密钥。
■调整并优化您的环境。
提高效率Dynamic Multi-Pathing 版本说明关于 Veritas Dynamic Multi-Pathing (DMP)8注意:SORT 的某些功能并非对所有产品都可用。
访问 SORT 不需要额外费用。
要访问 SORT,请转到:https://重要版本信息■有关此版本的重要更新,请查看 Symantec 技术支持网站上最新发布的新闻和技术说明:/docs/TECH164885■有关此版本可用的最新修补程序,请转到:https:///■硬件兼容性列表中包含有关所支持硬件的信息,该列表会定期更新。