跑马灯代码
嵌入式跑马灯实验

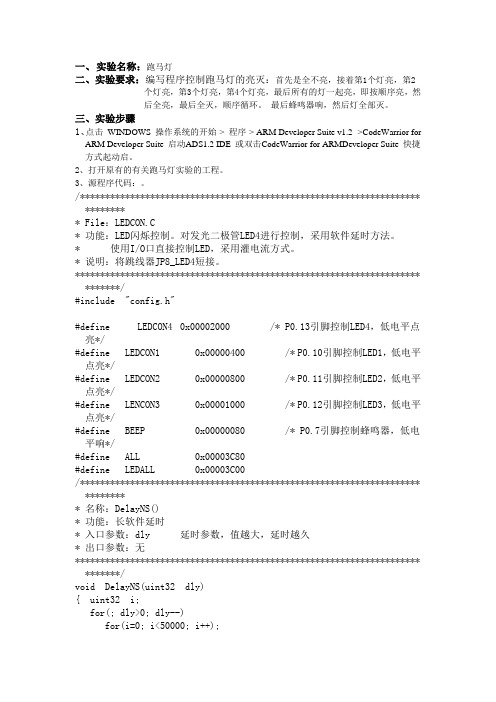
一、实验名称:跑马灯二、实验要求:编写程序控制跑马灯的亮灭:首先是全不亮,接着第1个灯亮,第2个灯亮,第3个灯亮,第4个灯亮,最后所有的灯一起亮,即按顺序亮,然后全亮,最后全灭,顺序循环。
最后蜂鸣器响,然后灯全部灭。
三、实验步骤1、点击WINDOWS 操作系统的开始-> 程序-> ARM Developer Suite v1.2 ->CodeWarrior forARM Developer Suite 启动ADS1.2 IDE 或双击CodeWarrior for ARMDeveloper Suite 快捷方式起动启。
2、打开原有的有关跑马灯实验的工程。
3、源程序代码:。
/******************************************************************** ********* File:LEDCON.C* 功能:LED闪烁控制。
对发光二极管LED4进行控制,采用软件延时方法。
* 使用I/O口直接控制LED,采用灌电流方式。
* 说明:将跳线器JP8_LED4短接。
********************************************************************* *******/#include "config.h"#define LEDCON4 0x00002000 /* P0.13引脚控制LED4,低电平点亮*/#define LEDCON1 0x00000400 /* P0.10引脚控制LED1,低电平点亮*/#define LEDCON2 0x00000800 /* P0.11引脚控制LED2,低电平点亮*/#define LENCON3 0x00001000 /* P0.12引脚控制LED3,低电平点亮*/#define BEEP 0x00000080 /* P0.7引脚控制蜂鸣器,低电平响*/#define ALL 0x00003C80#define LEDALL 0x00003C00/******************************************************************** ********* 名称:DelayNS()* 功能:长软件延时* 入口参数:dly 延时参数,值越大,延时越久* 出口参数:无********************************************************************* *******/void DelayNS(uint32 dly){ uint32 i;for(; dly>0; dly--)for(i=0; i<50000; i++);/******************************************************************** ********* 名称:main()* 功能:控制LED闪烁********************************************************************* *******/int main(void){ PINSEL0 = 0x00000000; // 设置所有管脚连接GPIOPINSEL1 = 0x00000000;IODIR = ALL; // 设置ALL控制口为输出while(1) //实现循环{IOSET =ALL;//初始化所有的灯灭IOSET =BEEP;// 蜂鸣器不响IOCLR = LEDCON1; //低电平灯亮DelayNS(100); //延迟时间IOSET = LEDCON1; //高电平灯灭DelayNS(100); //延迟时间IOCLR = LEDCON2;DelayNS(100);IOSET = LEDCON2;DelayNS(100);IOCLR = LEDCON3;DelayNS(100);IOSET = LEDCON3;DelayNS(100);IOCLR = LEDCON4;DelayNS(100);IOSET = LEDCON4;DelayNS(100);IOCLR =ALLLED;//所有的灯亮DelayNS(100);IOCLR =BEEP;//蜂鸣器响DelayNS(100);}return(0);4、调试程序观察实验结果。
跑马灯程序

#include<reg52.h>#include<intrins.h>#define uint unsigned int#define uchar unsigned char sbit P20=0XA0;//定义端口bit m;//定义mvoid dly(uint n)//延时程序{uchar j;while(n--){for(j=0;j<113;j++);}}void main(){P0=0XFE;//对P0端口赋初值while(1)//死循环{if(P20==0){dly(10);//防抖if(P20==0)m=~m;}while(!P20);//放手程序dly(500);if(m==0){P0=_crol_(P0,1);//左移}else{P0=_cror_(P0,1);//右移}}}#include<reg52.h>#include<intrins.h>#define uint unsigned int#define uchar unsigned char sbit P20=0XA0;//对P2.0赋初值uint n;//定义nvoid dly(uint n)//延时程序{uchar j;while(n--){for(j=0;j<113;j++);}}void main(){P0=0XFE;//对P0赋初值n=200;//确定初始的延时次数while(1)//死循环{if(P20==0)//防抖{dly(10);if(P20==0)n=n+200;}while(!P20);//放手程序while(n>600)//确定n的值n=200;dly(n);P0=_crol_(P0,1);}}换向改变速度中断#include<reg52.h>#include<intrins.h>#define uint unsigned int#define uchar unsigned charbit k;//定义kuint n;//定义nvoid dly(uint n)//延时程序{uchar j;while(n--){for(j=0;j<113;j++);}}void main(){P0=0XFE;//对P0赋初值n=200;//确定n的初值IT0=1; //使其在下降沿有效IT1=1;//使其在下降沿有效EA=1; //总体允许EX0=1;//允许EX1=1;//允许while(1)//死循环{dly(n);if(k==0)P0=_crol_(P0,1);elseP0=_cror_(P0,1);}}void speed() interrupt 0 //改变其速度的子函数{n=n+200;while(n>600)n=200;}void wenkai() interrupt 2 //改变其方向的子函数{k=~k; //对k取反}。
跑马灯 ARM程序

#include <stdio.h>#include <unistd.h>#include <fcntl.h>#include "paomadeng_ioctl.h"int main(){int fd_paomadeng;char on=1;char off=0;fd_paomadeng=open("/dev/paomadeng",O_WRONLY);if(fd_paomadeng<0){perror("Open device paomadeg error.\n");return -1;}while(1){ioctl(fd_paomadeng,LED_RED,(unsigned long)on);/* red light on*/sleep(1);ioctl(fd_paomadeng,LED_RED,(unsigned long)off);/*red light off*/ioctl(fd_paomadeng,LED_GREEN,(unsigned long)on);/*green light on*/sleep(1);ioctl(fd_paomadeng,LED_GREEN,(unsigned long)off);/*green light off*/ioctl(fd_paomadeng,LED_BLUE,(unsigned long)on);/*blue light on*/sleep(1);ioctl(fd_paomadeng,LED_BLUE,(unsigned long)off);/*blue light off*/ }return 0;}/*file name:leds.cdescription: the driver of the ledsauthor: Lilianwencreate date:2011-11-30 12:48:00modify :NULL*///#include <linux/module.h>/*needed for all modules*///#include <linux/kernel.h> /*needed for all modules*///#include <linux/init.h> /*needed for the module-macros */ //#include <linux/config.h>#include <module.h>#include <linux/fs.h>#include <linux/iobuf.h>#include <linux/major.h>#include <linux/blkdev.h>#include <linux/capability.h>#include <linux/smp_lock.h>#include <asm/uaccess.h>#include <asm/hardware.h>#include <asm/arch/cpu_s3c2410.h>#include <asm/io.h>#include <linux/vmalloc.h>#include "paomadeng_ioctl.h"#define LED_MAJOR 232#define LED_GPBCON (*(volatile long *)rGPBCON)#define LED_GPBDA T (*(volatile long *)rGPBDA T)#define LED_GPBUP (*(volatile long *)rGPBUP)int rGPBCON,rGPBDA T,rGPBUP;devfs_handle_t devfs_paomadeng_handle;int paomadeng_open(struct inode *led_i,struct file *filp){LED_GPBDA T &= 0xfffffdfc;//turned off all lights.printk("open paomadeng device success.\n");return 0;}/*int led_write(struct file *filp,const void *buf,size_t size,loff_t *offp){return 0;}*/int paomadeng_ioctl(struct inode *led_i,struct file *filp,unsigned int command,unsigned long arg) {int error=0;switch(command){case LED_RED:printk("red light turned on.\n");if(arg==0)LED_GPBDA T &=~(1<<0);elseLED_GPBDA T |=(1<<0);break;case LED_GREEN:printk("green light turned on.\n");if(arg==0)LED_GPBDA T &=~(1<<1);elseLED_GPBDA T |=(1<<1)break;case LED_BLUE:printk("blue light turned on.\n");if(arg==0)LED_GPBDA T &=~(1<<9);elseLED_GPBDA T |= (1<<9);break;default: error = -EINV AL;}return error;}int paomadeng_release(struct inode *led_i,struct file *filp){printk("Close paomadeng device success.\n");return 0;}struct file_operations paomadeng_fops ={open: paomadeng_open,/*write: led_write,*/ioctl: paomadeng_ioctl,release: paomadeng_release,};static int __init paomadeng_init(void){rGPBCON = ioremap(0x56000010,4);rGPBDA T = ioremap(0x56000014,4);rGPBUP = ioremap(0x56000018,4);//outputLED_GPBCON &=0xfff3fff0;LED_GPBCON |=0x00040005;LED_GPBDA T |= 0x0203;//all turned on;LED_GPBUP &=0xfdfc;//enabledevfs_paomadeng_handle = devfs_register(NULL,"paomadeng",DEVFS_FL_DEFAULT,LED_MAJOR,0,S_IFCHR|S_IRUSR|S_IWUSR|S_IRGRP|S_IWGRP,&paomadeng_fops,NULL);return 0;}static void __exit paomadeng_exit(void){devfs_unregister(devfs_paomadeng_handle);}module_init(paomadeng_init);module_exit(paomadeng_exit);//MODULE_LICENSE("GPL");//MODULE_AUTHOR("Lilianwen");。
跑马灯代码表

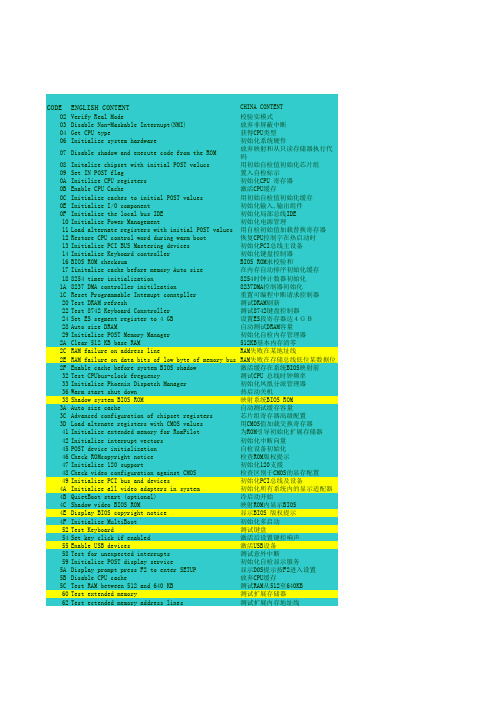
CODE ENGLISH CONTENT CHINA CONTENTO2Verify Real Mode校验实模式O3Disable Non-Maskable Internupt(NMI)放弃非屏蔽中断O4Get CPU type获得CPU类型O6Initialize system hardware 初始化系统硬件O7Disable shadow and execute code from the ROM放弃映射和从只读存储器执行代码 O8Initalize chipset with initial POST valucs用初始自检值初始化芯片组O9Set IN POST flag置入自检标示OA Initilize CPU registers初始化CPU 寄存器OB Enable CPU Cache激活CPU缓存OC Initialize caches to initial POST values用初始自检值初始化缓存OE Initialize I/O component初始化输入,输出组件OF Initialize the local bus IDE初始化局部总线IDE 10Initialize Power Management初始化电源管理11Load alternate registers with initial POST values用自检初始值加载替换寄存器12Restore CPU control word during warm boot恢复CPU控制字在热启动时13Initialize PCI BUS Mastering devices初始化PCI总线主设备14Initialize Keyboard controller初始化键盘控制器16BIOS ROM checksum BIOS ROM求校验和17Iinitalize cache before memory Auto size在内存自动排序初始化缓存188254 timer initialization8254时钟计数器初始化1A8237 DMA controller initilzation8237DMA控制器初始化1C Reset Programmable Intemupt conntpller重置可编程中断请求控制器20Test DRAM refresh测试DRAM刷新22Test 8742 Keyboard Conntroller测试8742键盘控制器24Set ES segment register to 4 GB设置ES段寄存器达4GB28Auto size DRAM自动测试DRAM容量29Initialize POST Memory Manager初始化自检内存管理器2A Clear 512 KB base RAM512KB基本内存清零2C RAM failure on address line RAM失败在某地址线2E RAM failure on data bits of low byte of memory bus RAM失败在存储总线低位某数据位 2F Enable cache before system BIOS shadow激活缓存在系统BIOS映射前32Test CPUbus-clock freguency测试CPU 总线时钟频率33Initialize Phoenix Dispatch Manager初始化凤凰分派管理器36Warm start shut down热启动关机38Shadow system BIOS ROM映射系统BIOS ROM3A Auto size cache自动测试缓存容量3C Advanced configuration of chipset registers芯片组寄存器高级配置3D Load altrnate registers with CMOS values用CMOS值加载交换寄存器41Initialize extended memory for RomPilot为ROM引导初始化扩展存储器42Initialize interrupt vectors初始化中断向量45POST device initialization自检设备初始化46Check ROMcopyright notice检查ROM版权提示47Initialize 120 support初始化120支援48Check video configuration against CMOS检查区别于CMOS的显存配置49Initialize PCI bus and devices初始化PCI总线及设备4A Initialize all video adapters in system初始化所有系统内的显示适配器 4B QuietBoot start (optional)冷启动开始4C Shadow video BIOS ROM映射ROM内显示BIOS4E Display BIOS copyright notice显示BIOS 版权提示4F Initialize MultiBoot初始化多启动52Test Keyboard测试键盘54Set key click if enabled激活后设置键控响声55Enable USB devices激活USB设备58Test for unexpected interrupts测试意外中断59Initialize POST display service初始化自检显示服务5A Display prompt press F2 to enter SETUP显示DOS提示按F2进入设置5B Disable CPU cache放弃CPU缓存5C Test RAM between 512 and 640 KB测试RAM从512至640KB 60Test extended memory测试扩展存储器62Test ectended memory address lines测试扩展内存地址线64Jump to UserPatch1跳至用户补丁区166Configure advanced cache registers配置高级缓存寄存器67Initialize Multi Processor APIC初始化多处理器APIC68Enable external and CPU caches激活外接和CPU缓存69Display system Management Mode (SMM)area显示系统管理模式区6A Display external L2 cache size 显示外接L2缓存容量6B Load custom defaults(optional)加载用户默认值6C Dislay shadow-area message显示映射区信息6E Display possible high address for UMB recover显示可能的高端地址为UMB恢复使用70Display error messages显示错误信息72Check for configuation errors检测配置偏差76Check for keyboard errors检测键盘错误7C Set up tard ware interrupt vectors设置硬件中断向量7D Initialize Intelligent System Monitoring初始化智能系统跟踪7E Initialize coprocessor if present如果存在,初始化协处理器80Disable onboard Super I/O ports and IRQS放弃板上的超级输入输出端口及IRQS 81Late POST device initialization最后自检设备的初始化82Detect and install extemal RS232 ports侦测安装外接RS232端口83Configure non-MCD IDE controllers配置NON-MCD IDE控制器84Detect and installextermal parallel ports侦测安装外接并行端口85Initialize PC-compatible PnP ISA devices初始化兼容PC即插即用ISA设备86Re-initialize onblard I/O Ports重初始化板上的输入输出端口87Configure Motherboard Configurable Devices(optional)配置M/B可配置设备88Initializ BIOS Data area BOIS数据区初始化89Enable mon-maskable inteerupts[NMIS]激活非屏蔽中断请求8A Initializ Extended Bios Data Area扩展BIOS数据区初始化8b Test and initialize PS/2 mouse测试和初始化PS/2端口8C Initialize floppy controller初始化软驱控制器8F Determine number of ATA drives (optional)测试ATA驱动器数量90Initialize hard-disk controllers初始化硬盘驱控制器91Initialize local-bus bard-disk countrollers初始化局部总线上的硬盘控制器92Jump to Userpatch2跳至用户补丁区93Build MPTABLE for multi-processor boards为多处理器板建立多处理器列表95Install CD-ROM for boot为启动安装CD-ROM96Clear hUge ES segment register清空大量ES段寄存器97Fix up Multi Procssor table设置多处理器列表98Scarch for option ROMs,One long,授索可选只读存储器,一长,二two short beeps on checksum failure短嗡鸣声,在校验失败时99Check for SMART Drive(optional)检查SMART驱动器9A Shadow option ROMs映射选定的只读存储器9C Set up power Management设置电源管理9D Initialize security engine(oprional)初始化安防措施9E Enable bardware interrupts激活硬件中断9F Determine number of ATA and SCDI drives 检测A/A和SCDI设备数量A0Set time or day设置时间和日期A2Check key lock检查锁定键A4Initialize typebatic rateA8Erase F2 prompt清除F2提示AA Scan for F2 key stroke扫描有无F2键按下AC Enter SETUP进入设置AE clear boot flag清除启动标志B0Check for errors检查错误B1Inform Rom pilot about the end of POST通知只读存储器在自检结束后引导系统 B2POST done-prepare to boot operating system自检结束准备起动系统B4One short beep before boot起动前一个短嗡鸣声B5Terminate QuietBoot(optional)结束冷启动B6Check passwont(potional)检验密码B7Initialize ACPIBIOS初始化ACPIBIOSB9Prepare Boot准备启动BA Initialize SMBIOS初始化SMBIOSBB Initialize PuP Option ROMs初 始化即插即用只读存储器BC Clear parity checkers清零奇偶校验检测BD Display MultiBoot menu显示多启动菜单BE Clear screen (Optional)清空显示屏BF Check virus and backup reminders检查病毒备份提示C0Try to boot with INT 19试用INT 19启动C1Initialize POST Error Manager初始化自检管理C2Initialize error logging初始化错误日志C3Initialize error display function初始化错误显示功能C4Initialize system error bandler初始化系统错误处理C5PnPnd dual CMOS(optional)C6Initialize note disk (optional)C7Initialize note dock lateC8Force check(optional)强行检查CC Redirect Int 10h to ENable remote serial video重指示INT 10去激活远程窜行显示 CD Re_map I/O and memory for PCMCIA重定位I/O和内存为PCMCIA卡CE Initialize digitize and display message初始化数字的显示信息D2Unknowm interrupt不明中断The followIng are for boot block in Flash ROME0Initialize the chipset初始化芯片组E1Initialize the bridge初始化桥E2Iinitalize the CPU初始化CPUE3Initialize system timer初始化系统时钟E4Initialize system I/0初始化系统输入输出口E5Check force reCovery boot检查强行恢复启动E6Checksum BIOSROM BIOS ROM求校验和E7Go to BIOS转向BIOSE8Set Hune Segment设置大量段寄存器E9Initialize Multi procssor初始化多处理器EA Initialize OEMspectal code初始化OEM专用代码EB Initialize PIC and DMA初始化PIC 和DMAEC Initialize Memory type初始化存储类型ED Initialize Memory size初始化存储容量EE Shadow Boot Block映射启动模块EF System memory test系统存储器测试F0Initilize intemupt vectors初始化中断向量F1Initilize Run Time Clock初始化运行时钟F2Initilize video初始化显示F3Initilize System Management Manager初始化系统管理的管理器F4Output one beep输出一个嗡鸣声F5Clear Huge Seginent清空大量段寄存器F6Boot to Mini DOS最小化DOS启动F7Boot to Full DOS完整DOS启动。
跑马灯实验代码

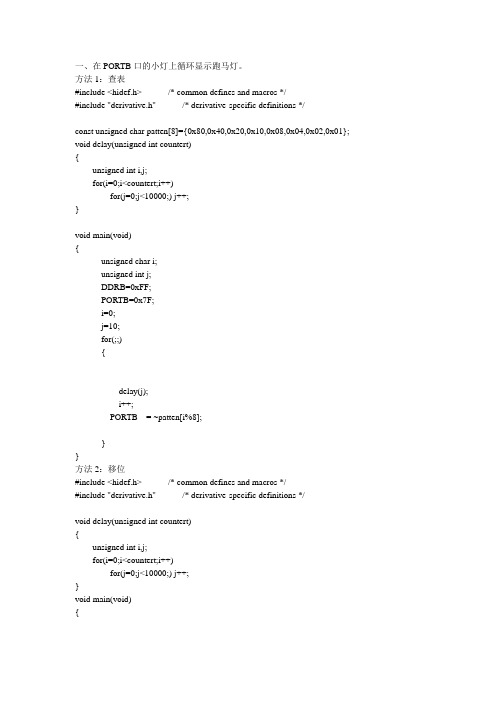
#include <hidef.h> /* common defines and macros */
#include "derivative.h" /* derivative-specific definitions */
PORTB=PORTA;
}
}
方法2:DIP开关低四位由A口低四位输入,经A口高四位送LED灯低四位输出
#include <hidef.h> /* common defines and macros */
#include "derivative.h" /* derivative-specific definitions */
for(j=0;j<10000;) j++;
}
void main(void)
{
unsigned char i,settime;
unsigned int j;
DDRB=0xFF;
PORTB=0x7F;
DDRA=0xF0;
flag=0;
asm ANDCC #$BF
EnableInterrupts;
i=0;
PORTB|=0x80;
if(PORTB==0xFF)
PORTB=0x7F;
}
}
void interrupt 6 IRQ(void)
{
flag=1;
}
**************************************************************************************************************************************************************
html跑马灯走马灯效果

html跑马灯⾛马灯效果实现跑马灯的⽅法很多,其中最简单的是采⽤⼀句Html代码来实现,我们在需要出现跑马灯效果的地⽅插⼊“<marquee>滚动的⽂字</marquee>”语句,它的效果如下所⽰:滚动的⽂字 适当的运⽤<marquee>标签的参数,可以表现出不同的效果,请看下⾯的⼏个例⼦: 1、左右弹来弹去的跑马灯弹来弹去跑马灯! 实现的⽅法就是在IE的标签上稍微多加了⼏个参数产⽣了更加丰富的变化。
设置behavior=alternate表⽰双向移动,direction= left表⽰运动⽅向向左。
marquee的宽度可以使⽤绝对象素值,例如width=200等这个值限定了跑马灯滚动的范围。
需要说明的是该效果在 Netscape下是看不到的。
源码粘贴框:<marquee width=400 behavior=alternate direction=left align=middle>弹来弹去跑马灯!</marquee> 2、跑的很快的跑马灯跑的很快跑马灯! 只要在<marquee>标签后⾯加上“scrollamount=15”即可,修改=后边的数字参数即可限制⽂字移动的速度。
3、带有超级链接的跑马灯 实现的⽅法很简单,把整个<marquee></marquee>语句包含在超链接中就⾏,你看看下⾯的代码就清楚了。
当然你也可以把包含在<marquee></marquee>中的各条内容分别加上不同的链接,这样的跑马灯就可⽤来发布滚动新闻或是做站点导航了。
如果你想给跑马灯的⽂字加上颜⾊,换⽤不同的字体(默认是宋体,换体就要加代码),只要在⽂字前加上<FONT face=楷体_GB2312 color=#ff0000 size=3>就⾏了,你可在“face=”后边换上你喜欢的字体,在“color=”后边换上你喜欢的字颜⾊,在“size=”后边换上适合的字号,如果想让字体加粗,就再加上<STRONG>。
iar编写stm8跑马灯

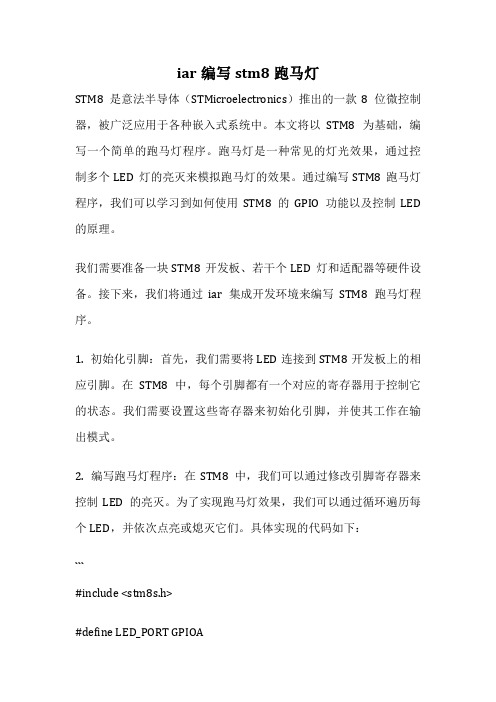
iar编写stm8跑马灯STM8是意法半导体(STMicroelectronics)推出的一款8位微控制器,被广泛应用于各种嵌入式系统中。
本文将以STM8为基础,编写一个简单的跑马灯程序。
跑马灯是一种常见的灯光效果,通过控制多个LED灯的亮灭来模拟跑马灯的效果。
通过编写STM8跑马灯程序,我们可以学习到如何使用STM8的GPIO功能以及控制LED 的原理。
我们需要准备一块STM8开发板、若干个LED灯和适配器等硬件设备。
接下来,我们将通过iar集成开发环境来编写STM8跑马灯程序。
1. 初始化引脚:首先,我们需要将LED连接到STM8开发板上的相应引脚。
在STM8中,每个引脚都有一个对应的寄存器用于控制它的状态。
我们需要设置这些寄存器来初始化引脚,并使其工作在输出模式。
2. 编写跑马灯程序:在STM8中,我们可以通过修改引脚寄存器来控制LED的亮灭。
为了实现跑马灯效果,我们可以通过循环遍历每个LED,并依次点亮或熄灭它们。
具体实现的代码如下:```#include <stm8s.h>#define LED_PORT GPIOA#define LED_PIN_1 GPIO_PIN_1#define LED_PIN_2 GPIO_PIN_2#define LED_PIN_3 GPIO_PIN_3#define LED_PIN_4 GPIO_PIN_4void delay(uint32_t n){while(n--);}void main(){GPIO_Init(LED_PORT, LED_PIN_1 | LED_PIN_2 | LED_PIN_3 | LED_PIN_4, GPIO_MODE_OUT_PP_LOW_FAST);while(1){GPIO_WriteHigh(LED_PORT, LED_PIN_1);delay(100000);GPIO_WriteLow(LED_PORT, LED_PIN_1);GPIO_WriteHigh(LED_PORT, LED_PIN_2);delay(100000);GPIO_WriteLow(LED_PORT, LED_PIN_2);GPIO_WriteHigh(LED_PORT, LED_PIN_3);delay(100000);GPIO_WriteLow(LED_PORT, LED_PIN_3);GPIO_WriteHigh(LED_PORT, LED_PIN_4);delay(100000);GPIO_WriteLow(LED_PORT, LED_PIN_4);}}```在这段代码中,我们首先定义了LED连接到的引脚,然后在主函数中初始化这些引脚,并通过循环遍历的方式控制LED的亮灭。
跑马灯代码

marquee>跑马灯内容</marquee>跑马灯有许多的属性可以设定,这样你的跑马灯看起来就会有许多花样和变化。
bgcolor-跑马灯背景颜色用法: <marquee bgcolor="色码">说明:设定跑马灯的背景颜色behavior-显示型态用法: <marquee behavior="显示型态">说明:显示型态有三种:scroll,跑马灯字幕会从一端出现,再从另一端卷入。
slide,当跑马灯文字跑完后就会停止不动,如投影片一样。
alternate,跑马灯文字在两边来回跑动。
direction-跑动方向用法: <marquee direction="方向">说明:设定跑马灯跑动的方向,它的设定方向有left(左边)和right(右边)。
预设值为left。
loop-卷动次数用法: <marquee loop="数值">说明:设定跑马灯卷动的次数,若将loop的数值设为-1或infinite,那跑马灯会无限的卷动。
width-宽度用法: <marquee width="宽度">说明:设定跑马灯的宽度,以pixel为单位或是荧幕的百分比表示。
height-高度用法: <marquee height="高度">说明:设定跑马灯的高度,以pixel为单位或是荧幕的百分比表示。
stop-停止onmouseover="this.stop();"start-开始onmouseout="this.start();"scrolldelay-滚动的速度scrolldelay="150"以下是各种效果:01 左右弹动<marquee behavior=Alternate width=150>左右弹来弹去</marquee>02 上下弹动<marquee behavior=Alternate direction=up height=50>上下弹来弹去</marquee>03 四周弹动<marquee direction=down behavior=alternate scrollamount=4 width=150 height=70><marquee behavior=alternate>四周弹来弹去</marquee></marquee>04 右上下浮<marquee direction=up behavior=alternate scrollamount=4 height=70><marquee direction=right behavior=alternate>往右上下浮弹</marquee></marquee>05 左上下浮<marquee direction=up behavior=alternate scrollamount=4 height=70><marquee direction=left behavior=alternate>往左上下浮弹</marquee></marquee>06 左跑速度<marquee direction=left scrollamount=3>往左跑的速度</marquee>07 右跑速度<marquee direction=right scrollamount=3>往右跑的速度</marquee>08 上跑速度<marquee direction=up scrollamount=3 height=50>往上跑的速度</marquee>09 下跑速度<marquee direction=down scrollamount=3 height=50>往下跑的速度</marquee>10 左跑缓慢<marquee direction=left scrollamount=1>超缓慢速度往左移动</marquee>11 右跑缓慢<marquee direction=right scrollamount=1>超缓慢速度往右移动</marquee>12 左跑消失<marquee direction=left loop=2 scrollamount=5>往左移动两次即可消失</marquee>13 右跑消失<marquee direction=right loop=2 scrollamount=5>往右移动两次即可消失</marquee>14 左跑停止<marquee direction=left behavior=slide>往左跑到尾停止</marquee>15 右跑停止<marquee direction=right behavior=slide>往右跑到尾停止</marquee>16 左移脱拉<marquee direction=left scrolldelay=500>拖拉速度往左移</marquee>17 右移脱拉<marquee direction=right scrolldelay=500>拖拉速度往右移</marquee>18 左移停走<marquee direction=left scrolldelay=500 scrollamount=100>往左停停走走</marquee>19 右移停走<marquee direction=right scrolldelay=500 scrollamount=100>往左停停走走</marquee>20 左跑闪梭<marquee direction=left scrollamount=300>快速闪梭往左跑</marquee>21 右跑闪梭<marquee direction=right scrollamount=300>快速闪梭往右跑</marquee>22 两段行走<marquee direction=left width=100>往左边</marquee><marquee direction=right width=100>往右边</marquee>23 三段行走<marquee direction=right width=100>往右</marquee><marquee behavior=alternate width=80>左右弹</marquee><marquee width=100>往左</marquee>24 左移被色<marquee direction=left bgcolor=FFFFF0 scrollamount=3>往左移动另加被景颜色</marquee>25 右移被色<marquee direction=right bgcolor=FFFFF0 scrollamount=3>往右移动另加被景颜色</marquee>26 左移被景<marquee direction=left style=background:url(路径) scrollamount=3>被景随着文字往左移动</marquee>27 右移被景<marquee direction=right style=background:url(路径) scrollamount=3>被景随着文字往右移动</marquee>28 右斜行走<marquee direction=up scrollamount=3 height=100><marquee direction=right>往右斜上跑</marquee></marquee>29 左斜行走<marquee direction=up scrollamount=3 height=100><marquee direction=left>往左斜上跑</marquee></marquee>30 右斜下跑<marquee direction=down scrollamount=3height=100><marquee direction=right>往右斜下跑</marquee></marquee> 31 左斜下跑<marquee direction=down scrollamount=3height=100><marquee direction=left>往左斜下跑</marquee></marquee> 32 右浮尾弹<marquee direction=up behavior=alternate scrollamount=4 height=70><marquee direction=right behavior=slide>右浮至尾上下弹动</marquee></marquee>33 左浮尾弹<marquee direction=up behavior=alternate scrollamount=4 height=70><marquee direction=left behavior=slide>左浮至尾上下弹动。
单片机跑马灯程序

单片机跑马灯程序*******************************************************************;此程序是用单片机的p1 口接八个led 灯作跑马灯试验,八个led 依次亮了又熄灭,形成漂亮;的跑马灯。
本人已经试验成功。
;单片机教程网51hei 原创;该8 路单片机跑马灯程序代码简单,电路也容易搭建,只需把led 接在p1 口上就可以了,希望大家能试验成功顺利的完成跑马灯报告;****************************************** *************************org 0000hajmp start;跳转到程序开始org 0030h;定义起始汇编地址start:mova,#0ffh ;clr c ;mov r2,#08h ;循环八次。
loop: rlc a ;带进位左移。
mov p1,a ;此时led 灯开始有反映了。
call delay ;延时djnz r2,loop ;循环(djnz 条件判断)movr2,#07h ;loop1: rrc a ;带进位右移mov p1,a ;此时led 灯开始有反映了。
call delay ;延时djnz r2,loop1 ;反复循环jmp start ;回到程序的开头delay: mov r3,#20 ;延时子程序d1: mov r4,#20d2: mov r5,#248djnz r5,$djnzr4,d2 单片机论坛51hei/bbs/ 有更多的跑马灯流水灯试验---------3 路单片机跑马灯程序---------------------------------------ORG 0000HLJMPMAINORG 030HMAIN: MOV P1,#0DBH ;化为2 进制为11011011--0 状态时led灯亮ACALL DELay MOV P1,#06DH ;化为2 进制为01101101ACALL DELay;MOV P1,#0B6H ;化为2 进制为10110110ACALL DELayAJMP MAINdelay: movr7,#255d1: mov r6,#255d2: djnz r6,d2djnz r7,d1retendtips:感谢大家的阅读,本文由我司收集整编。
