Openfiler安装与应用
(Openfiler的安装)使用Openfiler为VMware ESX设置一个免费的iSCSI或NAS储存系统

使用Openfiler为VMware ESX设置一个免费的iSCSI或NAS储存系统所有在此文章中提到的工具都是免费的,你不需要在软件上花一分钱来设置本系统。
最终你能够建立一个集中管理的iSCSI或NAS存储系统用来存放所有ESX的客户文件、允许使用VMotion、HA和DRS服务。
VMware ESXi现在可以免费在这里下载/products/esxi/。
Openfiler NAS/iSCSI可以在这里免费下载/community/download/。
一切准备就绪,现在开始。
首先,我们使用Openfiler来设置一个iSCSI或NAS设备。
你可以从上面的链接来下载Openfiler,他的安装非常的简单(类似于VMware ESX)。
以下是具体的步骤:OpenFiler的安装开始安装插入Openfiler盘到你的CD/DVD-ROM中并确认系统从CD/DVD-ROM启动。
回车继续。
启动按回车开始图形化安装模式安装现在出现在你面前的是初始安装画面。
按Next继续。
键盘布局选择适合你的键盘布局。
按Next继续。
磁盘分区我们需要在这里做手动设置。
选择’Manual partition with Disk Druid’。
在系统上建立3个分区来完成Openfiler的安装:“/boot” - 系统及核心文件所在的启动分区“swap” - 用于内存到磁盘的交换分区“/” - 系统的主分区,所以的系统文件和库都将被安装到这里创建/boot分区单击’New’,在出现的对话框中输入分区挂接路径”/boot”及在所选的磁盘上建立该分区(确定该磁盘是你想要安装Openfiler的,不是要给ESX服务器使用的)创建boot分区所需填写的资料如下:1. Mount Point: /boot2. Filesystem Type: ext33. Allowable Drives: 就像之前说的,确定该硬盘是你想要安装Openfiler的。
Openfiler图形介面安装指南
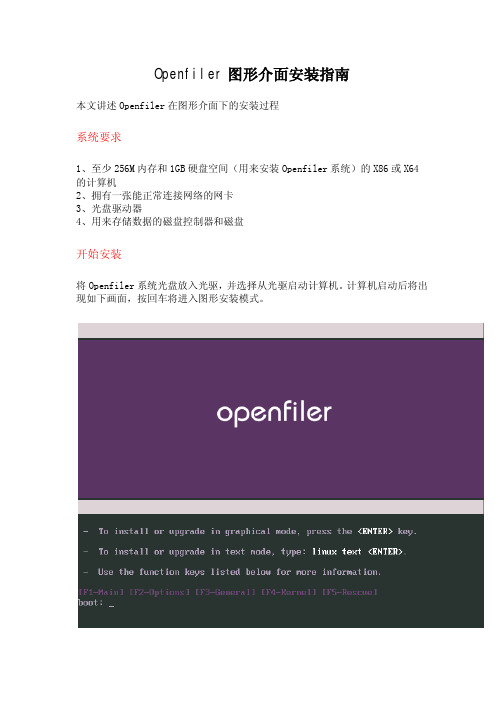
Openfiler图形介面安装指南本文讲述Openfiler在图形介面下的安装过程系统要求1、至少256M内存和1GB硬盘空间(用来安装Openfiler系统)的X86或X64的计算机2、拥有一张能正常连接网络的网卡3、光盘驱动器4、用来存储数据的磁盘控制器和磁盘开始安装将Openfiler系统光盘放入光驱,并选择从光驱启动计算机。
计算机启动后将出现如下画面,按回车将进入图形安装模式。
稍等片刻后将出现图形安装模式的欢迎画面。
如果显示画面不清析或无法显示,则系统无法识别显卡,只能重新启动计算机,选择命令行安装模式。
点击"Next"继续安装。
选择键盘布局在列表中选择键盘的布局,标准键盘选择"U.S.English"即可。
点击"Next"继续。
磁盘分区接下来进入磁盘分区页面,选择手动分区管理"Manually partition Disk Druid"。
点击"Next"继续。
在磁盘分区设置页面,选择Openfiler将安装在磁盘。
如果有其它不需要的分区先请删除,删除前请先确认磁盘上数据是否有用。
选择要删除的分区,点击"Delete"删除。
我们要将磁盘分三个区用来存放Openfiler系统的数据:1、"/boot"-引导分区,用来存放系统内核和启动程序2、"/"-根分区,用来存放系统程序和设置的地方3、"swap"-内存交换分区,通常是内存的两倍创建 /boot 分区创建一个引导分区。
点击"New"按钮,系统将弹出分区设置对话。
设置如下:1.Mount Point: /boot2.Filesystem Type: ext33.Allowable Drives: 选择一个磁盘. 必须选可启动的IDE磁盘 (hda) 或可启动的SCSI磁盘(sda),只有一个磁盘的话默认就行了。
openfile安装

虚拟机里面安装Openfiler 2。
99Openfiler 由rPath Linux驱动,它是一个基于浏览器的免费网络存储管理实用程序,可以在单一框架中提供基于文件的网络连接存储(NAS)和基于块的存储区域网(SAN)。
Openfiler 支持CIFS、NFS、HTTP/DAV 和FTP。
Openfiler能把标准x86/64架构的系统变成一个强大的NAS、SAN存储和IP存储网关,为管理员提供一个强大的管理平台,并能能应付未来的存储需求。
依赖如VMware,Virtual Iron 和Xen服务器虚拟化技术,Openfiler也可部署为一个虚拟机实例。
Openfiler的主要性能和优点:● 可靠性—-—Openfiler可以支持软件和硬件的RAID,能监测和预警,并且可以做卷的快照和快速恢复.● 高可用性-—Openfiler支持主动或被动的高可用性集群、多路径存储(MPIO)、块级别的复制。
● 性能—-及时更新的Linux内核支持最新的CPU、网络和存储硬件。
● 可伸缩性———文件系统可扩展性最高可超出60TB,并能使文件系统大小可以在线的增长。
1.下载o pe n f i l e r2.99系统镜像下载地址:/project/openfiler/openfiler-distribution-iso—2.99—x64。
..2.创建虚拟机新建虚拟机选择“稍后安装操作系统”,并点击“下一步"“选择客户机操作系统”为Linux,版本为Red Hat Enterprise 5 64位给虚拟机起一个名字指定磁盘容量大小添加系统镜像,准备安装系统3。
安装系统开启虚拟机,进入此界面请按下回车点击下一步选择适当的键盘初始化磁盘,选择”Yes”创建分区,选择”Yes"我选择的是dhcp自动分配地址,如果用静态地址需要手动配置。
选择时区设置root密码点击“Next”进行安装安装完成,选择“Reboot”重启系统1。
Openfiler_2[1].3_安装配置笔记
![Openfiler_2[1].3_安装配置笔记](https://img.taocdn.com/s3/m/5425ced376a20029bd642da0.png)
Openfiler 2.3 安装配置笔记一、安装Openfiler1、从下载openfiler的最新版本2.3的iso文件,刻录光盘或者直接使用iso文件虚拟光驱。
2、从光盘启动后,按回车出现图形安装界面,一路next 下去,出现分区界面时,如果您要使用自己的整块硬盘,可以选择自动分区(automatically partition)。
几个警告提示后,自动分区出现如下界面:3、根据经验/dev/sda2 分区3个G就可以了,如果在实际环境中,可以适当冗余的多一些,这里我做一下调整,/dev/sda2 用edit菜单调整为3G,剩下的空间自动变为free space。
.4、配置网络地址,这里最好不要使用dhcp,配置一个固定的ip地址,以及网关dns等等。
5、选择时区,不要选中使用utc时间,然后设置root 的密码,开始进入安装进程。
二、配置Openfiler1、安装完毕后,Openfiler服务器重启,然后出现初始界面,提示通过https://openfiler-ip:446进行管理。
2、在出现的登录框中,输入用户名openfiler ,密码password ,默认的密码可以登录进控制台后进行更改,也可以直接登陆到openfiler 的控制台里,用命令来修改。
3、点击system,配置网络访问ip地址。
设置好地址以及掩码后,类型选择share,然后点击update。
4、点击volumes,出现如下界面:5、点击右侧的菜单block devices ,列出硬盘/dev/sda ,如果您有多块硬盘,还会列出其余的硬盘,点击/dev/sda,出现如下界面:6 、在partition type 中选择physical volume ,然后点击create .7、创建成功后,点击右侧的volume groups ,出现如下界面:8、在卷组名中填入一个名字,选中下面我们刚才创建的物理卷,然后点击添加卷组。
openfiler概念和搭建流程

openfiler概念和搭建流程下载温馨提示:该文档是我店铺精心编制而成,希望大家下载以后,能够帮助大家解决实际的问题。
文档下载后可定制随意修改,请根据实际需要进行相应的调整和使用,谢谢!并且,本店铺为大家提供各种各样类型的实用资料,如教育随笔、日记赏析、句子摘抄、古诗大全、经典美文、话题作文、工作总结、词语解析、文案摘录、其他资料等等,如想了解不同资料格式和写法,敬请关注!Download tips: This document is carefully compiled by theeditor.I hope that after you download them,they can help yousolve practical problems. The document can be customized andmodified after downloading,please adjust and use it according toactual needs, thank you!In addition, our shop provides you with various types ofpractical materials,such as educational essays, diaryappreciation,sentence excerpts,ancient poems,classic articles,topic composition,work summary,word parsing,copy excerpts,other materials and so on,want to know different data formats andwriting methods,please pay attention!深入理解Openfiler:概念解析与搭建指南Openfiler是一款基于Linux的网络存储管理解决方案,它提供了一种高效、灵活且成本低廉的方式来管理和配置网络存储资源。
OpenFiler安装与基本配置

OpenFiler安装与基本配置⼀、安装篇
1.插⼊安装盘
2.选择键盘输出
3.对硬盘进⾏分区
4.删除所有数据并重新分区
5.配置IP地址等信息
6.可以不⽤指定⽹关和dns
7.设定时区
8.设置root账户的密码
9.下⼀步
10.⾃动进⾏磁盘分区
11.安装中
12.安装完成并需要重启
⼆、配置
(⼀)创建卷组
1.打开浏览器进⾏地址访问
2.输⼊⽤户和密码登陆
3.登录后如下
4.然⽽我们使⽤管理员来登陆进⾏操作(默认密码password)
5.登录后的界⾯管理如下
6.选择卷
7.查看系统硬盘呢信息
8.对sdb硬盘进⾏分区的创建,⾸先点击它
9.创建卷组(默认分区类型,点击create)
10.同样⽅式创建sdc硬盘
11.选择卷,然后创建卷组
12.创建完成
(⼆)创建iSCSI逻辑卷
1.查看服务(并启⽤iSCSI TarGet)
2.创建新的卷
3.根据⾃⼰的需求创建
4.创建完成
5.选择系统,然后配置⽹络访问,配置完需要更新
6.选择卷⾥的iSCSI Targets
7.选择添加
8.添加后如下
9.映射创建的卷
10.现在便能使⽤刚刚创建的my-sicsi卷
(三)创建多路径访问iSCSI存储
因为对于存储来说,单路径访问⽆法实现冗余以及负载均衡,要避免单点故障,就需要配置存储的多路径访问。
1.点击系统
2.配置eth1⽹卡使⽤静态IP
3.配置IP地址和⼦⽹
4.完成配置。
openfiler虚拟存储搭建并配置服务端
Openfiler 虚拟存储搭建并配置服务端一、概述Openfiler 由rPath Linux驱动,它是一个基于浏览器的免费网络存储管理实用程序,可以在单一框架中提供基于文件的网络连接存储 (NAS) 和基于块的存储区域网(SAN)。
整个软件包与开放源代码应用程序(例如 Apache、Samba、LVM2、ext3、Linux NFS 和 iSCSI Enterprise Target)连接。
Openfiler 将这些随处可见的技术组合到一个易于使用的小型管理解决方案中,该解决方案通过一个基于 Web 且功能强大的管理界面实现。
二、配置使用启动openfiler后,在这里有提示我们通过web进行访问。
并且提示了访问的地址如:Https://192.168.137.100:446/. 默认账户是openfiler密码为password. 我们登陆之后可以修改用户的密码。
一)存储端(target)配置【iscsi裸设备】1.1启动服务在Service里面启动iscsi target。
启动之后,下次重启会自动启该服务。
1.2配置iscsi initiator访问IP只有配置了IP才有权限访问openfiler存储。
在system选项的最下面有配置选项,把IP写上即可。
注意这里的子网掩码,写的255.255.255.255。
1.3创建卷设备现在我们来配置共享设备。
先对我们没有格式的分区格式化成扩展分区,一定要扩展分区:[root@san ~]# fdisk /dev/sdaThe number of cylinders for this disk is set to 5221.There is nothing wrong with that, but this is larger than 1024,and could in certain setups cause problems with:1) software that runs at boot time (e.g., old versions of LILO)2) booting and partitioning software from other OSs(e.g., DOS FDISK, OS/2 FDISK)Command (m for help): nCommand actione extendedp primary partition (1-4)ePartition number (1-4): 3First cylinder (383-5221, default 383):Using default value 383Last cylinder or +size or +sizeM or +sizeK (383-5221, default 5221):Using default value 5221Command (m for help): wThe partition table has been altered!Calling ioctl() to re-read partition table.WARNING: Re-reading the partition table failed with error 16: Device or resource busy.The kernel still uses the old table.The new table will be used at the next reboot.Syncing disks.[root@san ~]# fdisk -lDisk /dev/sda: 42.9 GB, 42949672960 bytes255 heads, 63 sectors/track, 5221 cylindersUnits = cylinders of 16065 * 512 = 8225280 bytesDeviceBoot Start End Blocks Id System /dev/sda1 * 1 255 2048256 83 Linux /dev/sda2 256 382 1020127+ 82 Linux swap / Solaris /dev/sda3 383 5221 38869267+ 5 Extended格式化之后,我们在openfiler的网页中就能看到这个磁盘信息,如果不格式化,或者格式化错误,是无法编辑的。
3.3 搭建openfiler 存储服务器

的麻烦,单击Eidt按钮,填写IP地址为192.168.1.100/24,默
认网关为 192.168.1.1 , DNS 为 8.8.8.8 ,然后确认,如图 3-39 所示。
主讲人:杨海艳
搭建openfiler 存储服务器
Share you ideas and experiments with the world
第8步:创建卷组(VG) 单击右侧的Volume Groups,填写Volume group name 单击Add volume group,创建卷组,如图3-49所示。
(此处为 iscsi-vg ),选中刚创建的 RAID5 设备 /dev/md0 ,
项目实施总体情况
主讲人:杨海艳
搭建openfiler 存储服务器
项目实施总体情况
பைடு நூலகம்
主讲人:杨海艳
搭建openfiler 存储服务器
单击其中的/dev/sdb,进入到磁盘编辑界面,可
以看到已经分配磁盘分区信息。创建一个新的分 区,在Partition Type处选择RAID array member,输 入Ending cylinder值(此处默认,所有剩余空间划 为一个分区),单击Create按钮,如图3-46所示。
项目实施总体情况
主讲人:杨海艳
搭建openfiler 存储服务器
Share you ideas and experiments with the world
配置网络属性,设置hostname和IP地址,建议设为固定IP, 因为Openfiler安装完成之后没有图形界面,所有的配置都通 过Web方式完成,没有固定的IP会给以后的配置造成不必要
主讲人:杨海艳
搭建openfiler 存储服务器
Openfiler操作手册
Openfiler配置手册(V2.3)作者:hoole <humchx@>1、简介Openfiler 由rPath Linux驱动,它是一个基于浏览器的免费网络存储管理实用程序,可以在单一框架中提供基于文件的网络连接存储 (NAS) 和基于块的存储区域网 (SAN)。
整个软件包与开放源代码应用程序(例如 Apache、Samba、LVM2、ext3、Linux NFS 和iSCSI Enterprise Target)连接。
Openfiler 将这些随处可见的技术组合到一个易于使用的小型管理解决方案中,该解决方案通过一个基于Web 且功能强大的管理界面实现。
安装后登陆到Openfiler WEB管理界面,就会看到如下界面:从图上可以看出,Openfiler的管理分为7个部分,下面分别对System、V olumes、Quota、Share、Service和Accounts做出说明。
2、管理接口简介这部分主要简单描述Openfiler的管理接口,详细应用请看第三部分(Accounts部分除外)。
2.1、SystemSystem部分是整个系统的配置和管理,包括网络设置、HA群集设置、时钟设置、UPS管理、备份和安全控制。
其中备份使用了快照技术,就是服务器做了个快照供用户下载进行备份,感觉这个备份做的太简单了。
2.1.1 Network Setup网络设置分为三部分:Network Configuration、Network Interface Configuration和Network Access Configuration。
其中Network Configuration是配置网络信息的,如DNS服务器和网关等信息。
Network Interface Configuration是配置网卡的,你有两种选择,一种是DHCP,另一种是Static。
如果你选择了Static那么就需要填写IP地址和子网掩码。
OpenFiler安装配置手册

OpenFiler安装配置⼿册OpenFiler2.3安装配置⼿册⼀、初始化OpenFiler·⾸先我们从OpenFiler的官⽅⽹站下载OpenFiler的虚拟机⽂件,下载地址:/community/download/,下载回来的⽂件解压后直接⽤虚拟机打开即可。
·启动虚拟机后,我们⾸先需要配置⼀些参数信息。
(1)修改⽹卡初始的⽹卡是⾃动获取IP地址,在此,我们需要修改为固定的IP地址。
#cd/etc/sysconfig/network-scripts#viifcfg-eth0DEVICE=物理设备名IPADDR=IP地址NETMASK=掩码值NETWORK=⽹络地址——–可不配BROADCAST=⼴播地址——–可不配GATEWAY=⽹关地址ONBOOT=[yes|no](引导时是否激活设备)USERCTL=[yes|no](⾮root⽤户是否可以控制该设备)——–可不配BOOTPROTO=[none|static|bootp|dhcp](引导时不使⽤协议|静态分配|BOOTP协议|DHCP协议)HWADDR=你的MAC地址——–可不配修改后重起⽹卡⽅能实现:#servicenetworkrestart(2)停⽌不必要的服务#cd/etc/rc3.d这⾥我们采取重命名的⽅式进⾏:可以停⽌的服务:(3)查看⽇志:#cd/var/log#moremessages⼆、配置OpenFiler进⾏完上述初始化,我们可以使⽤IE的⽅式打开OpenFiler的控制台,访问地址:https://192.168.253.98:446(注意添加446的端⼝)打开页⾯后,输⼊初始的⽤户名openfiler,密码:password成功登录后,⾸先在Status项中,可以看到安装了OpenFiler服务器的⼀些信息。
1、启动相关的服务需要启动的服务可以根据⾃⼰的实际情况来决定,在这⾥我主要启动了以下⼏个服务SMB/CIFSserverNFSv3serveriSCSItargerserveriSCSIinitiator2、配置机器名、DNS等信息3、添加NetworkAccessConfiguration这⾥可以添加单个IP、整段IP、多⽹段或者全部,可以根据需要进⾏设置4、设置时间、时区和时间服务器地址三、Volumes在配置Volumes前,先简单介绍下整个OpenFiler的配置过程以及架构图:1、设置Share⽅式的⽂件共享(1)设置Device的PartitionType“Volumes-BlockDevices”,选择需要设置的Disk,然后选择Create,选择“Mode”为“Primary”,选择“PartitionType”为“Physicalvolume”,如果还要划分⼤⼩,这⾥还需要设置“Endingcylinder”,这⾥我将整个Disk划为单独的⼀个Physicalvolume(2)创建VolumeGroup⾸先是输⼊Volumegroupname,这⾥我输⼊我的物理卷的名称“Physical-volume-1”,接下来是选择物理卷到这个组中,这⾥的物理卷是我们在设置PartitionType时设置的PhysicalType,我们可以选择⼀个,也可以同时选择多个(3)增加Volume完成上述操作后,接下来就是在VolumeGroup中创建Volume,并设置⽂件系统或者卷类型,针对我们作为共享⽅式的磁盘,我们可以选择“XFS”和“Ext3”XFS⽂件系统的介绍:XfS⽂件系统是SGI开发的⾼级⽇志⽂件系统,XFS极具伸缩性,⾮常健壮。
openfiler的建立,配置,及挂载

第一步:建立openfiler的主机过程
1.建立虚拟机,跟原来建立虚拟机的过程是一样的,其中有些要注意的地方,文档里面都有。
下面一一讲解。
2.虚拟机设置完成后,注意添加硬盘。
这个硬盘是你后面所需要公共存储的大小,总共添加3个硬盘,下面是添加硬盘时候要注意的,在下面的页面选择第三项,是因为你的存储用多少,物理机划多少给你,不是一下全部占用。
3.openfiler开始安装,基本上都是直接点击“next”,其中注意的地方,在做详细的讲解。
4.下面是配置:openfiler的网络,网关,主机名,DNS等。
点击“edit”进入配置页面
第二步:openfiler的配置
1.注意下面的ip地址:这是你通过浏览器进入openfiler配置的网络地址。
下面使用root账
户进入openfiler进行网络的检测和硬盘的检测。
第四步(重要):通过浏览器进入openfiler 进行配置
1.下面是另外一台虚拟机对openfiler 进行检测。
看网络是否畅通,需不需要进行配置
2.进入配置页面,账户为:openfiler 密码:password
3.点击“volumes”,进入下面页面,点击红色字体,对硬盘进行创建
行同样的操作。
5.点击右边的“volume groups”进行一个公共存储的建立。
如下图所示
6.下面是服务的iscsi的开启,如下图所示
7.如下图。
进行“map”
第五步:在物理主机上进行存储的挂载。
下图为建立成功的效果图。
Openfiler2.9配置为存储
Openfiler2.9配置iscsi为存储一、openflier安装部分1、点击回车键开始安装2、点击—NEXT3、选择键盘,默认即可。
4、选择YES。
5、选择默认的安装和分区格式,点击下一步即可。
(因为是在虚拟机里面做的实验,所以我给虚拟机第一盘分的比较小,20G。
待系统安装完成后,还需要给虚拟机再追加一块磁盘作为存储的空间,第一块盘就完全安装系统而已。
我在物理机上尝试过用一块1T 的硬盘做系统,然后分区出来做存储,但是怎么搞也没成功,对openfiler的分区不是很熟悉,所以实验就用2块盘来演示)6点击—YES7、点击-EDIT,给系统配置管理IP地址。
8、设置IP地址9、设置网关、DNS、点击-NEXT10、选择时区、点击下一步11、设置管理密码,点击下一步。
12、点击下一步,进行系统的安装。
过程比较短,大概几分钟左右。
13、安装状态。
14、安装完成,重启系统。
15、系统启动16、此时系统已经成功启动。
使用SSH远程登录一下,再关闭系统,增加一块硬盘。
17、输入用户:root, 键入的管理密码。
18、查看一下磁盘分盘,关机,增加新的一块磁盘为存储。
19、给机器增加一块新磁盘。
20、选择硬盘,下一步。
22、23、24、25、26、配置完成后,重新安装了openfiler的虚拟机。
用SSH登陆进去查看一下硬盘,此时多了一块刚才增加的硬盘,即用来作为存储的硬盘。
系统的安装部分到此结束,第二部分为openfiler里面的配置部分。
二、openflier的ISCSI配置部分。
1、使用浏览器打开管理地址,端口446。
https://X.X.X.X:4462、输入用户名:openfiler 密码:password 登陆管理界面。
3、系统状态等信息。
4、配置系统的防火墙安全策略。
(这步非常重要)点击System—,下面的Network Access Configuration,输入允许的IP段,配置反掩码,点击更新。
Openfiler2.3应用篇
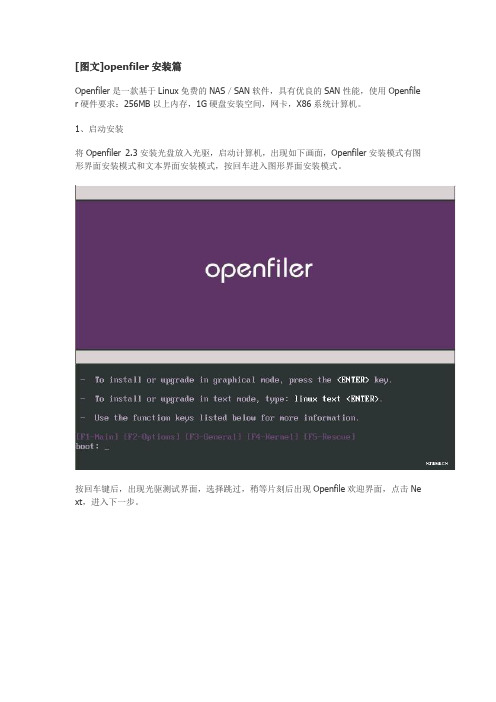
[图文]openfiler安装篇Openfiler是一款基于Linux免费的NAS/SAN软件,具有优良的SAN性能,使用Openfile r硬件要求:256MB以上内存,1G硬盘安装空间,网卡,X86系统计算机。
1、启动安装将Openfiler 2.3安装光盘放入光驱,启动计算机,出现如下画面,Openfiler安装模式有图形界面安装模式和文本界面安装模式,按回车进入图形界面安装模式。
按回车键后,出现光驱测试界面,选择跳过,稍等片刻后出现Openfile欢迎界面,点击Ne xt,进入下一步。
列表中,选择默认的U.S.English,点击Next,进入下一步。
3、Disk Partitioning Setup设置磁盘分区磁盘分区默认设置为自动分区,千万别急着点击下一步,自动分区意味着整个磁盘都被系统占用,所以我们选择手动分区,然后点击Next,进入下一步。
4、Disk Setup 磁盘设置在磁盘设置页面中,首先确认有无其他不需要的分区,如有,请选中,再按下Delete按钮,删除多余的分区,下图显示笔者使用一个40GB的硬盘,没有任何分区,清理完磁盘后我们将建立三个分区安装openfiler,分别是:①“/boot”引导分区②“/”根分区③“swap”交换分区。
①创建“/boot”引导分区点击New按钮,在Add Partition对话框中,Mount Point选择/boot,File System Type 选择ext3,Size为100MB,Additional Size Options选择Fixed size,勾选Force to be primary partition,使其成为主分区,点击OK,完成引导分区设置。
②创建“/”根分区点击New按钮,在Add Partition对话框中,Mount Point选择“/”,File System Type选择ext3,Size为2048MB,Additional Size Options选择Fixed size,点击OK,完成根分区设置。
Openfiler安装aoe做san启动XP
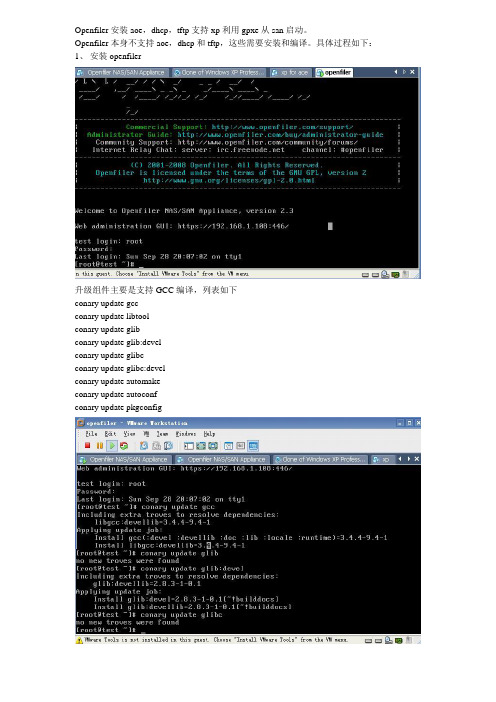
Openfiler安装aoe,dhcp,tftp支持xp利用gpxe从san启动。
Openfiler本身不支持aoe,dhcp和tftp,这些需要安装和编译。
具体过程如下:1、安装openfiler升级组件主要是支持GCC编译,列表如下conary update gccconary update libtoolconary update glibconary update glib:develconary update glibcconary update glibc:develconary update automakeconary update autoconfconary update pkgconfig升级完毕。
安装DHCP 和TFTP-SERVER2、下载安装aoeTarget端主机需下载「vblade」软件来编译使用,下载网址/projects/aoetools//sourceforge/aoetools/vblade-18.tgz下载后解压tar zxvf vblade-18.tgzmakemake install到此软件安装完成AOE,DHCP和TFTP SERVER。
Windows XP supports booting from an AoE SAN. You cannot install directly to the SAN target; you must first install Windows XP to a physical disk.Start by installing Windows XP to a physical disk. It is best to use an external USB, FireWire, or eSATA disk; this will make later stages easier. When installing, use a small partition (around 4GB) rather than the whole disk. At the partitioning screen:press C to create a partition and enter 4096as the size (in MB). You should then see a screen that looks like:You can now press Enter to install Windows XP to this partition. The rest of the installation will proceed as normal.Preparation for SAN bootInstalling the AoE initiatorYou need to download and install the Windows AoE initiator (WinAoE). Download the latest WinAoE package from / and extract the contents of the .zip file to a temporary directory.Start up the Add Hardware Wizard (Start→ Control Panel→ Add Hardware) and proceed to the “Is the hardware connected?” screen:Click on “Yes, I have already connected the hardware”, then click on Next.Scroll down to the bottom of the list and choose “Add a new hardware device”, then click on Next.Click on “Install the hardware that I manually select from a list (Advanced)”, then click on Next.Choose “SCSI and RAID controllers”, then click on Next.Click on “Have Disk…”.Click on “Browse…”. Browse to the directory containing the extracted WinAoE files, then to the bin directory within this directory. Click on “OK”. You should see “AoE Driver” show up in a list of available drivers to install:Continue clicking on Next until the installation process is complete. You will see a warning about the driver being unsigned:Ignore this warning and click on “Continue Anyway” to complete the installation of the AoE initiator.Open up the System Properties (Start→ Control Panel→ System) and go to the Hardware tab. Click on “Device Manager”.Locate your network card within the device list. Right-click on your network card and choose “Properties”.Go to the Details tab and choose “Service” from the drop-down menu. Make a note of the network card service name (“E1000” in the above example).Enabling network bootStart up Registry Editor (Start → Run → regedit) and browse to the key HKEY_LOCAL_MACHINE\SYSTEM\CurrentControlSet\Services.Click on the network card service key (“E1000” in this example), then double-click on “Start” in the right-hand panel.Change the Value data to 0 and click on OK.NOTE: If you are using a Nvidia network card, you may have to use the RIS drivers or set the “Start” to 0 for the nvnetbus service as well. NOTE: It is reported that using the Nvidia nForce drivers (service names NVENETFD and nvnetbus) does not work with WinAoE booting. See nvidia_nforceTransferring the disk image to a SAN targetShut down the operating system that you want to transfer to the SAN target. Unplug the disk containing the operating system image, and attach it to the SAN target machine. Take a look at the disk's partition table; on Linux this can be achieved by running fdisk -l (lower-case 'L') on the SAN target machine:root@chipmunk# fdisk -l /dev/sdXwhere /dev/sdX is the disk that you just plugged in, containing the operating system image to be transferred. You should see something like:Disk /dev/sdX: 80.0 GB, 80026361856 bytes 255 heads, 63 sectors/track, 9729 cylinders Units = cylinders of 16065 * 512 = 8225280 bytesDevice Boot SystemStartEndBlocksId/dev/sdX1 HPFS/NTFS*11825146592817In this example, the disk (/dev/sdX) contains a single partition (/dev/sdX1) which contains the operating system image that we want to extract. We need to extract enough of the disk to fully contain this partition. (We could just extract the whole disk, but this would be wasteful; the disk is 80GB but the partition we need is only 15GB). The key numbers that we need to get from the fdisk output are the number of bytes per cylinder (8225280 in the above example) and the ending 8225280 cylinder number of the partition that we are interested in (1825 in the 1825 above example). Once we have identified these numbers, we can construct the command to extract the relevant portion of the diskdd if=/dev/sdX of=/path/to/image/file.img bs=8225280 count=1825where the numbers 8225280 and 1825 should be replaced with the numbers extracted from your own fdisk output. This command will extract the relevant portion of the disk to a file (/path/to/image/file.img) on your SAN target. Note that dd is reading from /dev/sdX (i.e. the raw disk device) rather than /dev/sdX1 (the partition device); we cannot extract the partition alone because we also need the Master Boot Record located at the start of the disk. Also, after creating the disk image run a ” file file.img” and make sure the image file doesn't contain part of a second partition. You should see something like (no partition 2 referenced):file.img: x86 boot sector, Microsoft Windows XP MBR, Serial 0xd056d056; partition 1: ID=0x7, active, starthead 1, startsector 63, 8385867 sectorsNow that the disk image is available on the SAN target machine, you need to make the disk image available via the appropriate SAN protocol:Make the disk image available via iSCSI Make the disk image available via AoEExporting disk images via AoEInstalling the AoE target softwareIf you do not have dedicated AoE target hardware, you will need to install the vblade package. Most distros seem to provide this package; if yours doesn't then you can download the source for the latest version from /project/showfiles.php?group_id=130453&package_ id=143790.Adding an AoE target imageTo add a disk image file as an AoE target, you need to add a single line to /etc/vblade.conf:ethX N M /path/to/image/file.imgwhere ethX is the network device via which you want to serve the image, /path/to/image/file.img is the path to the disk image file, and N M is a unique AoE shelf:slot number within your network. (If this is the only AoE target disk you are setting up, just use 0 0.) The AoE target name for this disk image iseN.Mwhere N and M are the shelf and slot numbers you specified in /etc/vblade.conf. For example, if your /etc/vblade.conf line readseth2 0 0 /var/lib/images/win2k3.imgthen the AoE target name ise0.0Make a note of this AoE target name. You are now ready toBoot from your AoE target imageBooting from an AoE targetPlace the following two lines in /etc/dhcpd.conf:filename "";option root-path "aoe:eN.M";where eN.M is the AoE target name that you selected for your target. You will probably need to restart your DHCP server for the changes to take effect:root@chipmunk# /etc/init.d/dhcpd restartBoot your diskless client using gPXE. If all has gone well, you should see it boot from your AoE target image. Congratulations on a successful boot from SAN!转载结束。
12.1.2 OpenFiler的下载及安装
12.1.2 OpenFiler的下载及安装(1)OpenFiler目前最新的版本为2.3,在官方网站上提供了原始安装的ISO档和已经安装完毕的虚拟机使用,包括VMware的 Workstation、Server和ESX Server、Xen、Virtual Iron和Parallels等虚拟机产品。
如果你想将OpenFiler安装在一台有多个硬盘的机器上,可以下载ISO来安装,如果你只想测试 OpenFiler,可以下载VMware的虚拟硬盘直接在Workstation版本的VMware上直接使用。
读者们可以到/community/download的网址选择需要的版本下载,ISO文件的大小约328MB,而VMware的压缩文件大小约为202MB。
1. 安装VMware版本的OpenFiler将OpenFiler安装到VMware ESX Server或Hyper-V下意义并不大,因为我们使用OpenFiler的目的就是要给这些虚拟机产品使用。
一般来说,如果你的目的只是测试SAN和 iSCSI,我们会将OpenFiler的虚拟机安装在VMware的Workstation这一类寄居架构的虚拟机产品上。
" OpenFiler将安装在VMware Workstation或Server上1.先将下载回来的压缩文件解压,其中包括两个文件的文件夹,一个是OpenFiler的硬盘文件,一个是VMware的配置文件。
2.解压缩完毕之后,直接开始以VMware Workstation或是Server来运行OpenFiler。
3.选择Open Existing VM or Team。
4.选择刚才解开的OpenFiler文件夹中的openfiler-2.3-x86_64.vmx。
5.开启之后,这个虚拟机其实已经可以直接使用,但这虚拟机并无任何硬盘可供分享。
我们必须创建硬盘给OpenFiler使用。
6.在VMware的主画面中,选择Edit virtual machine settings。
2组OpenFiler安装与部署说明文档

OpenFiler安装与部署说明文档1.用虚拟机(Vmware)创建OpenFiler预安装环境;
2.选定安装介质的路径点击下一步;
3.选择(Linux)点击下拉框为Other Linux 2.4x kernel点击下一步;
4.输入文件名以及调整安装路径即可点击下一步;
5.调整磁盘空间点击下一步即可安装系统;
6.进入安装openfiler程序文件中敲击Enter即可进入下一步;
7.敲击Skip进入下一步;
8.点击Next即可进入下一步;
9.选择语言为英文即可点击下一步;
10.选择手动分区点击Next即可进入下一步;
11.新建swap为512MB新建/boot为100MB新建/根目录为4096MB点击Next即可进入下一步;
12.设置静态IP地址为192.168.1.12子网掩码为255.255.255.0点击OK即可进入下一步;
13.点击Continue即可进入下一步;
14.选择区域为亚洲/上海点击下一步;
15.点击下一步即可;
16.点击Reboot重启即可;。
存储 + openfiler NAS&SAN设备的安装与配置

第 17 章
NAS& 支持用户单点登录技术
17.2 安 装 Openfiler
Openfiler 软件现在已经被做成一个 ISO 文件,用户可以从 / community/download/上下载,最新版本是 V2.3,使用的 Linux 内核为 2.6.24.7-0.2.6.smp,对 应的 GCC 版本是 V3.4.4。Openfiler 是一个由 rPath Linux 驱动,基于浏览器管理的企业级存 储平台管理应用程序。 (1) 下载 Openfiler 软件的 ISO 文件,并将其刻录成启动光盘,重启计算机(通过光驱启 动)。当然也可以直接通过 ISO 文件将 Openfiler 安装到 VMware 虚拟机上,如图 17-1 所示。
图 17-5 磁盘分区设置界面
E6
Linux 系统案例精解
图 17-6 磁盘分区警告界面
(7) 单击“Yes”,进入磁盘分区界面,如图 17-7 所示。 (8) 单击图 17-7 的“New”新建分区,在此需要创建以下 3 个分区: ● ● ● /boot 分区:用于系统引导,一般为其划分 100MB~200MB 空间即可。 Swap 分区:交换分区,一般为其划分物理内存大小的一到两倍即可。 /根分区:根分区,Openfiler 的所有配置都存储在此分区,一般划分为 6GB~8GB 大 小即可。如图 17-7 所示,根分区使用了所有的剩余空间。
CHAPTER
NAS&SAN 设备的安装 与配置
17
Openfiler 是一款安装在 Linux 操作系统之上的企业级存储平台管理软件, 通过 Openfiler 用户可以轻松地将 PC Server 作为 NAS 和存储设备来使用。 Openfiler 是当今开源软件中最流 行、功能最强大的 NAS&SAN 存储应用软件,可以安装在任何主流的 Linux 操作系统上。 Openfiler 还支持业内企业级 NAS 设备所支持的大多数协议,如 FTP、HTTP/DAV、CIFS、 NFS、iSCSI 等,支持 RAID0、RAID1、RAID5、RAID6、RAID10 等技术,支持用户单点登 录、数据快照保护等技术。它的底层存储采用 RAID 结合 LVM 技术来实现。 本章将对 Openfiler 的安装和配置进行详细介绍,例如 RAID 的配置,LVM 动态逻辑卷 的配置,快照的配置,FTP 服务器的配置,HTTP 服务器的配置,CIFS、NFS 文件共享配置, iSCSI 磁盘阵列的配置等。
第七天堂教程—Openfiler的安装

第七天堂教程第七天堂技术组:愛伱鈈變QQ交流群:96268397Openfiler的安装Openfiler简介:Openfiler是一款非常好的存储管理操作系统,开源免费,能通过WEB界面对存储磁盘的管理,支持现在流行的网络存储技术SAN和NAS,支持iSCSI、NFS、CIFS及FTP、DAV、HTTP等协议。
Openfiler可以把标准x86/64架构的系统变成一个强大的NAS、SAN存储和IP存储网关,为管理员提供一个强大的管理平台,并能应付未来的存储需求。
例如VMware,Virtual Iron和Xen服务器虚拟化技术,Openfiler也可部署作为一个虚拟机实例。
Openfiler灵活高效的部署方式,确保存储管理员能够在一个或多个网络存储环境下使系统的性能和存储资源得到最佳的利用和分配。
Openfiler的主要性能和优点:可靠性---Openfiler可以支持软件和硬件的RAID,能监测和预警,并且可以做卷的快照和快速恢复。
高可用性--Openfiler支持主动或被动的高可用性集群、多路径存储(MPIO)、块级别的复制。
性能--Linux 2.6内核支持最新的CPU、网络和存储硬件。
可伸缩性---文件系统可扩展性最高可超出60TB,并能使文件系统大小可以在线的增长。
本文主要使用虚拟机来讲解图形化安装Openfiler。
Openfiler版本:openfiler 2.3 x86 ISO Image虚拟机版本:VMware Workstation 8.0.首先新建虚拟机。
选择Custom(自定义),点击下一步。
Hardware Compatibility(硬件兼容性),一般选择虚拟机对应的版本。
选择Linux,因为Openfiler是基于Linux2.6内核。
Other Linux 2.6.x Kernel(其他Linux2.6.x内核)。
Number of Processors(处理器数量)。
openfiler安装配置
openfiler安装配置下载文件:openfileresa-2.99.1-x86_64-disc1.iso安装类似红帽的安装,只要1G内存,10G存储,其它默认就可以了;账号:openfiler/password创建卷组及卷;调整系统访问权限:打开iscsi服务:添加iscsi-target:(设置CHAP密码长度要复杂点,最好大于15位,要不验证不通过,大家其实都不配置这个CHAP)然后,重启一下ISCSI服务;LINUX客户端去连接OPENFILER:1,安装客户端工具:[root@rac1 yum.repos.d]# cd /media/CentOS/[root@rac1 CentOS]# cd Packages/[root@rac1 Packages]# rpm -ivh iscsi-initiator-utils-6.2.0.873-13.el6.x86_64.rpm warning: iscsi-initiator-utils-6.2.0.873-13.el6.x86_64.rpm: Header V3 RSA/SHA1 Signature, key ID c105b9de: NOKEYPreparing... ########################################### [100%] 1:iscsi-initiator-utils ########################################### [100%][root@rac1 Packages]#rm -rf /var/lib/iscsi/nodes/ rm -rf /var/lib/iscsi/send_targets/**2,编辑客户端配置(不配置CHAP,则不配置下面的内容)vim /etc/iscsi/iscsid.conf #将相关项前面的注释符#删除掉node.session.auth.authmethod = CHAP //开启CHAP认证1. To set a CHAP username and password for initiator# authentication by the target(s), uncommentthe following lines:ername = openfilernode.session.auth.password =123456789012345# To set a CHAP username and password for target(s)# authentication by the initiator, uncomment the following lines:ername_in =openfilernode.session.auth.password_in = 123456789012345#discovery#discovery.sendtargets.auth.authmethod = CHAP# To set a discovery session CHAP username and password for the initiator# authentication by the target(s), uncomment the followinglines:#ername = openfiler#discovery.sendtargets.auth.password = 123456789012345# To set a discovery session CHAP username and password for target(s)#authentication by the initiator, uncomment the followinglines:#ername_in =openfiler#discovery.sendtargets.auth.password_in = 123456789012345[root@rac1 Packages]# /etc/init.d/iscsid restart Stopping iscsid:[ OK ] iscsid: [ OK ]3,RAC1来发现ISCSI存储:[root@rac1 ~]# iscsiadm -m discovery -t st -p 10.10.10.25410.10.10.254:3260,1 iqn.2006-.openfiler:tsn.1030bbcbea9c[root@rac1 ~]# iscsiadm -m discovery -t sendtargets -p10.10.10.254 (上面的命令其实是简写)10.10.10.254:3260,1 iqn.2006-.openfiler:tsn.1030bbcbea9c[root@rac1 ~]# iscsiadm -m node -T .openfiler:tsn.1030bbcbea9c -p 10.10.10.254 -l Logging in to [iface: default, target: .openfiler:tsn.1030bbcbea9c, portal: 10.10.10.254,3260] (multiple)Login to [iface: default, target: iqn.2006-.openfiler:tsn.1030bbcbea9c, portal: 10.10.10.254,3260] successful.-l (登录)-u断开存储参考(设置开机自动映射[root@qionghai11g ~]# iscsiadm -m node -T .storbridge:block02-wt -p 192.16.10.188:3260 --op update -n node.startup -v automatic[root@qionghai11g ~]# iscsiadm -m node -T .storbridge:block01-wt -p 192.16.10.188:3260 --op update -n node.startup -v automatic这两个是开机自动映射)[root@rac1 ~]# fdisk -l ....................................................Disk /dev/sdb: 21.5 GB, 21474836480 bytes64 heads, 32 sectors/track, 20480 cylindersUnits = cylinders of 2048 * 512 = 1048576 bytesSector size (logical/physical): 512 bytes / 512 bytesI/O size (minimum/optimal): 512 bytes / 512 bytesDisk identifier: 0x00000000 Disk /dev/sdc: 183.3 GB, 183307862016 bytes255 heads, 63 sectors/track, 22285 cylindersUnits = cylinders of 16065 * 512 = 8225280 bytesSector size (logical/physical): 512 bytes / 512 bytesI/O size(minimum/optimal): 512 bytes / 512 bytesDisk identifier: 0x00000000接下来用fdisk /dev/sdb ; fdisk /dev/sdc 来分区,再格式化,结果如下(自建挂载目录/data /install-file):[root@rac1 /]#mkfs.ext4 /dev/sdb1[root@rac1 /]#mkfs.ext4 /dev/sdc1[root@rac1 /]# partprobe[root@rac2 /]# partprobe[root@rac2 /]# mount /dev/sdb1 /install-file/[root@rac2 /]# mount /dev/sdc1 /data4,设置自动挂载[root@rac1 /]# blkid /dev/sdb1 /dev/sdc1/dev/sdb1: UUID="c419526c-468a-443b-a244-0b8782ff8639" TYPE="ext4"/dev/sdc1: UUID="a54e2c7b-4754-4ba0-b35d-036ea22e742b"TYPE="ext4"[root@rac2 /]# blkid /dev/sdb1 /dev/sdc1/dev/sdb1: UUID="c419526c-468a-443b-a244-0b8782ff8639" TYPE="ext4"/dev/sdc1: UUID="a54e2c7b-4754-4ba0-b35d-036ea22e742b"TYPE="ext4"修改 /etc/fstab[root@rac1 /]# cat /etc/fstab## /etc/fstab# Created by anaconda on Wed Mar 2 16:56:31 2016## Accessible filesystems, by reference, are maintained under '/dev/disk'# See man pages fstab(5), findfs(8), mount(8) and/or blkid(8) for more info#/dev/mapper/vg_rac1-lv_root/ ext4 defaults 1 1UUID=68997162-bec2-44b1-b18c-ee67d1f51323/boot ext4 defaults 1 2/dev/mapper/vg_rac1-lv_home/home ext4 defaults 1 2/dev/mapper/vg_rac1-lv_swapswap swap defaults 00tmpfs /dev/shm tmpfs defaults 00devpts /dev/pts devpts gid=5,mode=620 00sysfs /sys sysfs defaults 00proc /proc proc defaults 0 0UUID=c419526c-468a-443b-a244-0b8782ff8639 /install-file ext4 _netdev 0 0UUID=a54e2c7b-4754-4ba0-b35d-036ea22e742b /data ext4 _netdev 0 05,用tune2fs修改文件系统的属性,去掉自动检查的属性:tune2fs -c -1 -i 0 /dev/sdb1tune2fs -c -1 -i 0 /dev/sdc1[root@rac1 ~]# tune2fs -c -1 -i 0 /dev/sdb1tune2fs 1.41.12 (17-May-2010)Setting maximal mount count to -1Setting interval between checks to 0 seconds[root@rac1 ~]# tune2fs -c -1 -i 0/dev/sdc1tune2fs 1.41.12 (17-May-2010)Setting maximal mount count to -1Setting interval between checks to 0 seconds6,确认iscsi服务随系统启动而启动[root@rac1 ~]# chkconfig --list |grepiscsi iscsi 0:off 1:off 2:off 3:on 4:on 5:on 6:offiscsid 0:off 1:off 2:off 3:on 4:on 5:on 6:off如果iscsid和iscsi没有随系统的启动而启动,则用chkconfig设置这两个服务在系统运行级别为3和5时随系统启动而启动chkconfig iscsi --level 35 onchkconfig iscsid --level 35 on7,用service iscsi status及service iscsid status查看iscsi相关服务的运行状态service iscsi status*********************** Attached SCSI devices:*********************** Host Number: 3 State: runningscsi3 Channel 00 Id 0 Lun: 0Attached scsi disk sdb State: runningscsi3 Channel 00 Id 0 Lun: 1Attached scsi disk sdc State: running8,Open-iSCSI是通过以下iSCSI数据库文件来实现永久配置的:Discovery (/var/lib/iscsi/send_targets):在/var/lib/iscsi/send_targets目录下包含iSCSI portals的配置信息,每个portal对应一个文件,文件名为"iSCSI portal IP,端口号"(例如"200.200.10.200,3260")。
- 1、下载文档前请自行甄别文档内容的完整性,平台不提供额外的编辑、内容补充、找答案等附加服务。
- 2、"仅部分预览"的文档,不可在线预览部分如存在完整性等问题,可反馈申请退款(可完整预览的文档不适用该条件!)。
- 3、如文档侵犯您的权益,请联系客服反馈,我们会尽快为您处理(人工客服工作时间:9:00-18:30)。
Openfiler安装与使用
Openfiler安装步骤
1.1 创建虚拟机
1.1.1使用vSphere Client登录Exsi主机管理界面,选择物理主机,新建虚拟机;
1.1.2选择自定义,单击下一步;
1.1.3输入虚拟机名称,单击下一步;
1.1.4选择虚拟机存放目标存储,单击下一步;
1.1.5默认,单击下一步;
1.1.6客户机操作系统选择linux/其他
2.6.x linux(32位), 单击下一步;
1.1.7确认CPU数和CPU内核数,单击下一步;
1.1.8确认内存大小,单击下一步;
1.1.9配置网卡数和网卡类型,默认即可,单击下一步;
1.1.10SCSI控制器,默认配置,单击下一步;
1.1.11选择磁盘,选择创建新的虚拟磁盘,单击下一步;
1.1.12磁盘大小8G,用于存放openfier系统文件,创建完虚拟机后还要创建一
个磁盘用作共享存储空间,单击下一步;
1.1.13磁盘高级选项,默认配置,单击下一步;
1.1.14选择完成前编辑虚拟机设置,单击继续;
1.1.15单机新建的CD/DVD,选择安装用光盘数据来源,此处选择客户端设备,
等虚拟机启动后加载本地ISO文件;
1.1.16单击上面的‘添加’按钮,选择添加设备类型为硬盘,单击下一步;
1.1.17选择磁盘,选择创建新的虚拟磁盘,单击下一步;
1.1.18创建磁盘窗口,设置磁盘大小,磁盘置备为精简置备,其他默认,单击下
一步;
1.1.19高级选项,硬盘模式使用‘独立/持久’,单击下一步;
1.1.20单击完成;
1.1.21虚拟机创建完成。
1.2 安装Openfiler
1.2.1启动虚拟机电源,单击工具栏,CD/DVD驱动器1/连接到本地磁盘上的
ISO映像;
1.2.2按热键Ctrl+Alt+Ins(即虚拟机对应真实机的热启动Ctrl+Alt+Del),重启虚
拟机,虚拟机自动重光驱引导到openfier安装界面,按Enter键开始安装向导;“回车”打开图形安装界面。
1.2.3选择默认键盘。
1.2.4选择清除所有分区,创建默认分区。
1.2.5设置网卡IP地址,设置为静态IP地址10.10.10.210.
1.2.6选择时间分区。
1.2.7设置管理员密码。
1.2.8开始安装openfiler。
1.2.9安装完成后单击重启即可;
Openfler配置步骤
1.3 服务器端配置
1.3.1打开能够访问安装openfiler时配置的IP地址的主机,在浏览器输入
https://10.10.10.210:446;输入默认用户名openfiler,密码password ;(此处并非安装时输入的root的用户名密码)
1.3.2进入Openfiler管理界面,单击窗口上方的V olumes标签页;
1.3.3单击窗口右侧的Block Devices,查看物理磁盘列表;
1.3.4选择/dev/sdb,即后面创建的磁盘;
1.3.5在弹出的页面里,选择Partition Type(分区类型)为Physical volume(物
理卷),单击Cerate,将磁盘空间创建成物理磁盘卷;
1.3.7在弹出的窗口单击右边的V olume Groups,进入卷组管理;填写卷组名称,
选择要加入该卷组的物理磁盘卷(即刚才创建的物理卷),单击Add volume group;
1.3.9在弹出的窗口单击右边的Add volume,进入创建逻辑卷窗口;输入V olume
Name(卷名,必要)、V olume Description(卷注释,可选)、Requred
Space(MB)(卷大小,根据需要定)、Filesystem/V olume type(ISCSI,卷类型),单击Create完成创建,如需多个共享盘,可在此处重复创建动作;
1.3.10选择Services标签页,单击iSCSI target server 后面的Enable,启动iSCSI
目标服务;
1.3.11选择V olume标签页,单击右边iSCSI Targets;在Target Configuration单
击Add,创建iSCSI目标器;
1.3.12选择LUN Maping标签页;单击逻辑卷行后面的Map按钮,将逻辑卷map
到刚才创建的iSCSI目标器;
1.3.13逻辑卷挂载完后,完成openfiler服务器配置。
服务器挂载存储
1.4 vmware网络设置:
1.4.1配置vkernel网络
1.4.2添加网络适配器
1.4.3命名vKernel适配器
1.4.4填写iscsi适配器的ip地址
1.4.5网络适配器添加完成
1.5 启动iSCSI端口
1.5.1选择‘属性’
1.5.2选择‘配置’
1.5.3单击“动态发现”,单机“添加”
1.5.4填入存储的iSCSI端口ip地址。
如果有多个端口,依次添加端口ip地址。
1.5.5动态发现存储
1.6 Esx配置配置磁盘:1.6.1重新扫描磁盘
1.6.2添加存储
VMotion
1.7 关机迁移
1.7.1更改数据存储
在需要迁移的主机上右键,选择“迁移”
选择更改数据存储
选择openfiler共享存储
确认信息,单机“完成”,开始迁移迁移
迁移完成
1.7.2更改主机。
