ZOOM云会议(V3.0)-产品介绍
视频会议系统产品介绍

视频会议系统产品介绍视频会议系统是一种现代化的会议方式,它可以让地理位置不同的人们在远程会议中进行交流和协作。
视频会议系统产品可以利用网络或互联网来连接远程用户,改善了原本需要面对面会议才能进行的业务和运营。
本文将介绍一些常用的视频会议系统产品及其功能。
一、ZoomZoom是一种通用的视频会议系统,被广泛应用于不同行业和企业,它的使用界面友好,各种功能设置也十分扩展和快速。
在Zoom平台上,用户可以创建缩放级别不同的会议,并且可以通过手机、电脑和iPad等终端来参加会议。
在Zoom会议中,还可以实现屏幕共享、虚拟背景切换、实时聊天和文件共享等多种功能,满足不同场景的会议需求。
二、微软Teams微软Teams是一款由微软公司开发的综合协作平台,它提供了更全面的协作工具,包括视频会议、文档编辑、实时聊天等多种功能。
在Teams平台中,用户可以在同一地方轻松集成多种协作工具,省去了频繁切换软件的烦扰。
在视频会议中,团队成员可以通过Teams进行拨打电话、实时聊天、屏幕共享和文件共享,大大提升了会议效率和交流质量。
三、Cisco WebExCisco WebEx是由思科公司开发的一款以音视频会议为主的协作平台,企业用户可以通过WebEx平台向客户、合作伙伴和同事进行远程沟通。
在WebEx平台中,用户可以方便地创建多人视频会议室,支持屏幕共享和视频录制等功能。
WebEx还支持多种重要的企业级安全特性,包括数据加密和数据隔离,给企业用户带来了更高的安全保障。
四、GoToMeetingGoToMeeting是一款功能强大的视频会议软件,它可以帮助用户在任何时候和任何地方与其他人沟通会议。
GoToMeeting的主要特点是其音视频质量的优秀、操作简便,以及丰富的功能特性。
在GoToMeeting会议中,可以进行实时共享、屏幕共享、白板共享、在线文档协作等多种功能,可以极大提高会议的效率和质量。
五、BlueJeansBlueJeans是一种基于云的视频会议系统,它以其安全性、易用性和稳定性等优点而备受好评。
Zoom会议系统使用手册
Zoom视频会议系统Windows及手机端使用手册目录1ZOOM概述 ........................... 错误!未定义书签。
什么是Z OOM .......................... 错误!未定义书签。
的功能.............................. 错误!未定义书签。
系统和网络要求 ...................... 错误!未定义书签。
电脑配置要求....................... 错误!未定义书签。
网络要求........................... 错误!未定义书签。
客户端下载 .......................... 错误!未定义书签。
2客户端操作.......................... 错误!未定义书签。
开启客户端 ......................... 错误!未定义书签。
登陆客户端 .......................... 错误!未定义书签。
.登录后界面 ......................... 错误!未定义书签。
会议信息 ........................... 错误!未定义书签。
录像文件 ............................ 错误!未定义书签。
客户端设置 ......................... 错误!未定义书签。
3 会议操作........................... 错误!未定义书签。
入会后界面 ......................... 错误!未定义书签。
管理参会者 .......................... 错误!未定义书签。
共享屏幕操作 ........................ 错误!未定义书签。
可选择共享整个桌面或只共享某个程序. 错误!未定义书签。
共享iPhone或iPad中的程序......... 错误!未定义书签。
《zoom使用手册》课件

根据安装向导完成安装,确保允 许访问摄像头和麦克风权限。
登录与注册
已有账号
输入邮箱和密码,点击登录。
新用户注册
创建账户,填写必要信息,设置密码,完成注册。
界面介绍
主界面
包括聊天窗口、参会者列表、共 享屏幕和控制面板等。
设置
可调整音频、视频设置,选择语 言偏好等。
聊天窗口
支持文字聊天、表情和文件传输 。
线上教育
Zoom为在线教育提供 支持,方便师生进行远 程互动教学和学习交流
。
商务会议
Zoom广泛应用于商务 会议领域,提供高效、 便捷的远程会议解决方
案。
社交活动
Zoom也常被用于社交 活动,如线上聚会、婚 礼等,方便亲友互动交
流。
02
安装与登录
下载与安装
下载
访问Zoom官网或通过应用商店 下载安装包。
容。
08
问题与解决
网络问题
网络延迟:当您在Zoom通话中遇到 语音或视频卡顿、延迟的情况时,可
能是由于网络连接问题。
网络不稳定:网络波动或不稳定可能 导致Zoom通话频繁掉线或出现连接
问题。
解决方案
1. 确保您的网络连接稳定,尽量使用 有线连接代替无线连接。
2. 尝试关闭其他占用网络资源的程序 ,以释放更多带宽给Zoom。
3. 在网络条件较好的环境下进行通话 ,例如使用高速宽带或移动数据网络 。
音频问题
在此添加您的文本17字
音频失真:通话中有时会出现音频失真、回声、噪音等问 题。
在此添加您的文本16字
扬声器和麦克风故障:硬件设备故障可能导致音频问题, 如无声、音量小或音质差。
在此添加您的文本16字
Zoom

感谢观看
软件简介
Zoom是一款多人手机云视频会议软件,为用户提供兼备高清视频会议与移动络会议功能的免费云视频通话服 务。用户可通过手机、平板电脑、PC与工作伙伴进行多人视频及语音通话、屏幕分享、会议预约管理等商务沟通。
Zoom支持最多1,000名视频参会者或10,000名观看者,是领先的移动视频会议工具。 Zoom适用于Windows、Mac、Linux、iOS、Android系统。 Zoom视频会议
功能介绍
基本功能 1)多人视频通话 Zoom支持多人视频会议,可在通话中与多位好友或同事进行在线视频交流。无需昂贵的硬件设备,只需在手 机或电脑安装Zoom软件即可一键发起视频会议。 zoom多人视频通话(2张) 手机高清视频仅消耗极少流量,会议中支持“全屏、窗口、多格、mini模式”显示模式。 2)添加人 Zoom支持查找Zoom号,添加常用人;手机版Zoom支持查看手机通讯录及导入功能,可一键邀请好友。 3)分享屏幕演示 Zoom视频会议中,支持分享屏幕功能。可个人屏幕操作演示给其他会议好友,配合发言进行详细讲解。分享 屏幕过程中支持画笔标注、段落选择、络链接跳转演示、选色、撤销等功能。 其他功能
2020年8月3日,Zoom在其中文官上表示,Zoom停止向中国用户直接销售产品,转由第三方提供服务。据悉, 这一规则变更于8月23日生效。
2020年8月4日,视频会议软件Zoom对外宣布,从8月23日起,Zoom在中国大陆转换为仅合作伙伴模式,停止 直接向中国大陆客户出售新产品或升级已有产品,Zoom之后在中国大陆仅通过第三方合作伙伴提供视频会议服务。
《zoom使用手册》课件
第二部分:使用Zoom
1
注册账号
详细介绍注册Zoom账号的流程和不同类型的账号选择。
2
进入会议室
展示如何快速参会、预会议以及加入已有的会议。
3
会议室工具
探索Zoom的丰富会议室工具,包括视频和音频设置、屏幕共享、文本聊天和白板共同协作。
4
会议管理与安全
介绍会议设置、会议限制以及确保会议安全的措施。
《zoom使用手册》PPT 课件
Zoom是一个功能强大且易于使用的在线会议平台。本课件将带您了解Zoom 的基本介绍和其功能优势。
第一部分:前言
Zoom的基本介绍
学习Zoom的起源、发展和主要特点,包括视频会议、屏幕共享等功能。
Zoom的功能优势
了解Zoom相对于其他在线会议平台的独特优势,如高清视频质量和稳定性等。
第三部分:问题解答
常见问题
回答Zoom用户常遇到的问题,并提供解决方案。
常见解决方案
分享解决Zoom使用中常见问题的有效方案和技巧。
结语
对Zoom的总结
总结Zoom的核心优势和适用场景,并展望未来 的发展。
最后的提醒
提供一些建议和注意事项,以帮助用户
上海zoom常用知识

上海zoom常用知识上海Zoom常用知识Zoom是一种在线视频会议和网络会议平台,被广泛地应用于商务会议、在线教育、远程医疗等场合。
本文将针对在上海常用的Zoom知识进行详细的介绍,以便读者们更好地掌握这一工具的使用技巧。
一、Zoom的基本功能Zoom提供了众多的功能,包括视频会议、音频会议、屏幕共享、虚拟背景、录制会议、实时聊天等。
其中,视频会议和音频会议是Zoom的主要功能,用户只需通过摄像头和话筒,即可与远程的参会人员进行实时的交流。
二、创建一个Zoom账号在使用Zoom之前,用户需要先创建一个账号。
创建账号的方式非常简单,用户只需要进入Zoom官网,填写一些必要的信息,即可创建自己的账号。
三、进入Zoom会议进入Zoom会议的方式有多种,可以通过邮件邀请链接进入会议,也可以通过会议ID和密码加入会议。
在进入Zoom会议之前,用户需要确保网络畅通和设备正常工作。
四、使用屏幕共享功能屏幕共享是Zoom的一项重要功能,它能够让用户在会议中展示自己的屏幕内容,这对于在线教育、商务演示等场合非常有用。
用户只需要在屏幕共享功能中选择要共享的屏幕或窗口,即可分享给与会人员。
五、虚拟背景的设置虚拟背景是Zoom的一项特色功能,它能够为用户提供各种虚拟背景,让用户在会议中呈现出更加专业和有趣的形象。
用户只需要在设置中,选择自己喜欢的虚拟背景即可。
六、录制Zoom会议Zoom还提供了会议录制功能,用户可以选择将会议内容录制下来,以便后续观看或分享给其他人员。
录制功能可以在会议结束后进行,用户只需点击录制按钮,即可开始录制。
七、实时聊天的应用实时聊天功能是Zoom的另一个特色功能,在会议中,用户可以通过实时聊天功能与其他人员进行文本聊天。
这对于随时需要进行交流、问答的场合非常有用。
总结Zoom是一款功能强大的在线视频会议工具,它在商务会议、在线教育、远程医疗等场合得到了广泛的应用。
本文详细介绍了在上海常用的Zoom知识,希望可以帮助读者更好地掌握这一工具的使用技巧。
如何使用Zoom进行在线会议
如何使用Zoom进行在线会议一、Zoom会议简介Zoom是一款专业的视频会议软件,以其强大的功能和稳定的性能而著称。
用户可以通过Zoom进行一对一的视频通话,也可以进行团队视频会议。
无论是商务会议、教育培训、还是远程医疗等领域,Zoom都能提供高质量的视频和音频体验,让用户无论身在何处都能与他人进行实时沟通和协作。
二、创建Zoom会议1. 下载并安装Zoom在Zoom官网上下载适用于你的操作系统的Zoom软件,然后按照提示进行安装。
安装完成后,启动Zoom应用。
2. 注册并登录Zoom账号在打开的Zoom应用上,点击"注册"按钮,然后按照提示填写相应的个人信息并完成账号注册。
注册成功后,使用注册时填写的用户名和密码登录Zoom。
3. 创建会议登录后,点击"新会议"按钮即可创建一个新的会议。
你可以选择是否启用密码,设置会议的开始时间、结束时间和持续时间,还可以设置是否允许参会者自动加入会议。
4. 发送邀请链接创建会议后,Zoom会生成一个唯一的会议链接。
你可以通过点击"邀请"按钮将邀请链接发送给待参会者。
可以通过邮件、短信或其他方式发送邀请,以便邀请他们加入你的Zoom会议。
三、加入Zoom会议1. 接收邀请链接当你被邀请参加Zoom会议时,你会收到一封包含会议链接的邀请邮件或者短信。
点击链接即可进入Zoom会议。
2. 加入会议在点击会议链接后,Zoom应用会自动启动并打开会议界面。
按照提示输入你的用户名和密码,让Zoom识别你的身份,并加入会议。
3. 验证身份为确保会议的安全性,有些会议可能会要求你输入会议密码以验证身份。
请根据会议邀请中的提示输入正确的密码。
四、会议控制与设置1. 显示设置在Zoom会议中,你可以调整视频窗口的显示方式。
可以选择只显示主讲人,或者平铺显示所有与会者的视频窗口。
你还可以切换摄像头、调整音量等。
2. 会议控制作为会议的组织者,你拥有一些特殊权限,如静音或取消静音参会者、将某个与会者提升为主讲人、禁止分享屏幕等。
如何使用ZoomCloudMeetings进行在线会议

如何使用ZoomCloudMeetings进行在线会议ZoomCloudMeetings是一款专业的在线会议工具,它不仅提供简单易用的界面和高品质的视频通话体验,还能满足各种共享和协作需求。
本文将从准备会议、邀请参会者、会议设置和共享内容等方面详细介绍如何使用ZoomCloudMeetings进行在线会议。
一、准备会议在使用ZoomCloudMeetings之前,首先需要下载并安装该软件。
用户可以在Zoom的官方网站上找到适用于不同操作系统的安装包并进行下载。
安装完成后,用户需要注册一个Zoom帐号,然后登录到软件中。
二、邀请参会者在开始会议之前,用户需要邀请参会者。
ZoomCloudMeetings支持多种邀请方式。
用户可以通过邮件、短信等方式将会议连接发送给参会者,也可以生成会议ID并告知参会者,在软件中输入该ID即可加入会议。
三、会议设置ZoomCloudMeetings提供了丰富的会议设置功能,可以根据实际需求进行调整。
用户可以选择开启或关闭视频功能,调整视频分辨率和帧率,设置会议密码以保护会议安全,还可以选择录制会议或开启实时字幕功能。
此外,用户还可以设置静音和解除静音、启用或禁用聊天功能等。
四、共享内容在在线会议中,共享内容是非常重要的一环。
ZoomCloudMeetings支持多种共享内容的方式。
用户可以选择共享屏幕,将自己的屏幕内容展示给其他参会者,这对于演示PPT、软件操作等非常有帮助。
此外,用户还可以共享特定的窗口或白板,进行实时的讨论和标注。
五、会议控制在会议进行过程中,主持人可以拥有更多的权限和控制。
ZoomCloudMeetings允许主持人对会议进行管理和控制。
主持人可以随时开始或结束会议,控制静音和解除静音,管理参会者列表,以及调整会议设置等。
此外,主持人还可以通过私聊功能与参会者进行一对一的交流。
六、会议记录与回放ZoomCloudMeetings提供了会议录制功能,可以将整个会议过程录制下来,并保存为本地文件。
Zoom会议系统使用手册(PC端与手机端)

Zoom视频会议系统Windows及手机端使用手册目录1ZOOM 概述 (3)1.1 什么是Z OOM (3)1.3Z OOM 的功能 (4)1.4 系统和网络要求 (5)1.4.1 电脑配置要求 (5)1.4.2 网络要求 (6)1.5 客户端下载 (7)2 客户端操作 (7)2.1 开启客户端 (7)2.2 登陆客户端 (8)2.3.登录后界面 (8)2.4 会议信息 (9)2.5 录像文件...............................................................................1...0.2.6 客户端设置...........................................................................1..1.3 会议操作 (11)3.1 入会后界面...........................................................................1..2. 3.2 管理参会者............................................................................1..2. 3.3 共享屏幕操作........................................................................1..3.3.3.1 可选择共享整个桌面或只共享某个程序....................1..33.3.2 共享iPhone 或iPad 中的程序...................................1 (4)3.3.3 共享过程操作.............................................................1..5....4 视频模式与操作 (16)5 安排会议 (17)1Zoom 概述1.1 什么是ZoomZoom 是一款云视频会议服务软件,将网络在线会议和移动视频会议集成到了易于使用的统一云端产品。
(完整版)Zoom使用手册(试运行)

(完整版)Zoom使用手册(试运行) Zoom使用手册(试运行) 完整版Zoom是一款强大的在线视频会议工具,本使用手册将介绍如何使用Zoom进行会议和协作。
以下是一些重要的功能和操作指南。
- 安装Zoom客户端,根据安装向导进行操作。
2. 创建和加入会议2.1 创建会议- 打开Zoom客户端。
- 点击“新会议”按钮,选择“立即开始”或“计划”的会议类型。
- 输入会议主题、日期、时间和持续时间。
- 选择是否需要密码保护会议,并设置其他会议选项。
- 点击“确定”按钮创建会议。
2.2 加入会议- 打开Zoom客户端。
- 点击“加入会议”按钮。
- 输入会议ID和您的姓名。
- 点击“加入会议”按钮。
3. 会议控制在会议中,您可以使用以下功能控制会议:- 静音/取消静音:控制自己的麦克风是否静音。
- 视频开启/关闭:控制自己的摄像头是否开启。
- 屏幕共享:共享自己的屏幕以展示内容。
- 聊天:发送消息给与会者。
- 举手:向主持人发出参与发言的请求。
4. 录制会议Zoom支持录制会议的功能,以便后续回放和分享。
录制会议时,请确保已得到与会者的同意。
- 在会议工具栏上,点击“录制”按钮进行会议录制。
- 录制过程中,可以暂停、停止或恢复录制。
- 录制的会议将以视频和音频文件的形式保存在您的设备上。
5. 结束会议当会议结束时,您可以选择结束会议并关闭Zoom客户端。
- 在会议工具栏上,点击“结束会议”按钮。
- 确认结束会议并关闭Zoom客户端。
这些是Zoom的基本功能和操作指南。
希望这份使用手册能为您提供一个良好的开始。
如果您遇到任何问题,请参考Zoom的官方文档或联系技术支持。
请注意,本使用手册是根据试运行版本编写的,可能会有一些功能和界面上的差异。
如有任何变化,请参考最新的官方文档。
zoom云视频会议软件使用手册说明书

Zoom使用说明本次线上视频会议采用的是一款国际通用且领先的移动视频会议软件Zoom 云视频会议软件,能提供兼备高清视频会议与移动网络会议功能的免费云视频通话服务。
用户可通过手机、平板电脑、PC进行多人视频及语音通话、屏幕分享等服务。
请线上参会人员提前安装并了解熟悉该视频会议软件,具体使用说明如下:一.下载安装1、下载地址:https:///download2、电脑安装:点击下载地址,点击“Zoom会议客户端”下载按钮,进行下载。
3、苹果手机安装:点击下载地址,跳转至App Store,下载“Zoom Cloud Meetings”。
4、安卓手机安装:如果在微信中点击下载地址,点击右上角,选择“在浏览器打开”;也可以直接复制链接地址,在手机浏览器中打开。
然后点击“从Zoom 网站下载”,再次点击“从Zoom网站下载”。
二.如何加入会议1、注册登录:加入会议不需要注册账号,也不需要登录。
但第一次使用Zoom加入会议,可能会需要手机号码进行短信验证。
2、电脑加入会议:1)双击打开Zoom,点击“加入会议”按钮;下午分会场的会议ID另行通知。
3)在会议ID下方填入会议中显示的自己的姓名,点击“加入会议”。
3、手机加入会议:1)打开Zoom;2)点击“加入会议”;3)填入会议ID和姓名,点击“加入会议”。
本次会议29日上午大会主会场的会议ID为:5347150442,下午分会场的会议ID另行通知。
4、开启和关闭音频视频1)开启和关闭音频如果已经连接语音设备,系统显示“麦克风”图标,点击视频会议界面左下角“静音”(即麦克风图标),可关闭或开启声音。
2)开启和关闭视频点击视频会议界面左下角“摄像机”图标可开启或关闭摄像头。
三.如何进行会议演讲1、会议演讲前的建议:如果您在会议中需要进行PPT演讲,建议使用带有摄像头的笔记本电脑加入Zoom会议,并在进入会议时打开视频。
2、如何进行会议演讲:1)按照会议流程,在您需要演讲时,会议主持人会解除静音,并将您的视频图像设置为焦点,所有参会者的屏幕会优先全屏显示您的视频,并听到您的声音。
视频会议软件Zoom的使用技巧

视频会议软件Zoom的使用技巧Zoom是一款功能强大的视频会议软件,它提供了许多实用的功能和技巧,使得远程会议更加高效和便捷。
本文将从不同角度介绍Zoom的使用技巧,并按照以下几个章节进行划分。
一、会议前的准备工作在开始使用Zoom之前,我们可以进行一些准备工作,以确保会议的顺利进行。
首先,我们需要安装Zoom客户端,可以通过Zoom官方网站进行下载。
安装完成后,我们可以登录Zoom账号,并在设置中检查和调整相应的配置,例如音频、视频和网络设置等。
此外,还可以更改默认的会议链接和密码,以增加会议的安全性。
二、会议入会和退出的技巧在Zoom中,有多种方式可以加入会议。
我们可以通过输入会议号码,直接点击邀请链接,或者通过电话拨入的方式加入会议。
此外,Zoom还提供了一键加入会议的快捷操作,只需点击桌面上的Zoom图标,即可自动进入最近加入的会议。
对于退出会议,我们可以选择直接关闭会议窗口,或者点击会议界面上的"结束会议"按钮进行退出。
三、音频和视频设置的技巧在Zoom中,我们可以根据需要调整音频和视频设置,以获得更好的会议体验。
在音频设置方面,我们可以选择使用计算机的内置麦克风,或者连接外部麦克风。
另外,Zoom还提供了音频调试功能,我们可以通过该功能测试麦克风和扬声器的工作状态,并进行必要的调整。
在视频设置方面,我们可以选择使用计算机的内置摄像头,或者连接外部摄像头。
同时,Zoom还提供了视频预览功能,我们可以在会议前对摄像头进行测试,以确保视频质量和画面稳定。
四、会议控制和互动功能Zoom提供了丰富的会议控制和互动功能,可以满足不同场合下的需求。
在会议进行过程中,会议主持人可以静音和解除静音与会人员的麦克风,以控制会议的秩序。
此外,还可以通过Zoom的共享屏幕功能,将自己的屏幕内容实时展示给与会人员,以便更好地进行演示和讲解。
除此之外,Zoom还支持实时互动功能,比如在线投票、白板共享和聊天室等,可以增加会议的参与度和交流效果。
Zoom 患者使用说明(智能手机、iPad 或平板电脑)说明书
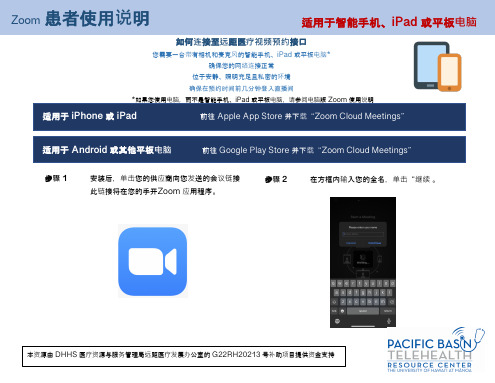
现在,您已连接至远距医疗视频访视。确保取消静音,并开启视频(音频和视频图标与下图所示相同)
步骤 2
在方框内输入您的全名,单击“继续 。
本资源由 DHHS 医疗资源与服务管理局远距医疗发展办公室的 G22RH20213 号补助项目提供资金支持
步骤 3
等待供应商邀请您进入。 进入会议之后,应用程序将提示您打开音频。 单击“确定”
步骤 4
单击“使用 Internet Audio 通话”,即可使 用设备的音频。或者选择“拨入”Zoom, 系统将为您提供拨入号码列表。
适用于 iPhone 或 iPad
前往 Apple App Store 并下载“Zoom Cloud Meetings”
适用于 Android 或其他平板电脑
前往 Google Play Store 并下载“Zoom Cloud Meetings”
步骤 1
安装后,单击您的供应商向您发送的会议链接 此链接将在您的手开Zoom 应用程序。
Zoom 患者使用说明
适用于智能手机、iPad 或平板电脑
如何连接至远距医疗视频预约接口conne
您需要一台带有相机和麦克风的智能手机、iPad 或平板电脑* 确保您的网络连接正常
位于安静、照明充足且私密的环境 确保在预约时间前几分钟登入直播间 *如果您使用电脑,而不是智能手机、iPad 或平板电脑,请参阅电脑版 Zoom 使用说明
Zoom操作流程和主要功能介绍

Zoom操作流程和主要功能介绍1. Zoom操作流程Zoom是一款功能强大的在线会议和视频通话工具,通过以下简单的操作流程,您可以快速上手使用Zoom。
步骤二:创建Zoom账户* 打开Zoom客户端,在登录界面点击“注册”按钮。
* 选择“使用Google或Facebook账号注册”或“使用电子邮件注册”。
* 根据相应的注册方式,填写必要的个人信息,并完成注册过程。
步骤三:加入或创建会议* 登录您的Zoom账户。
* 在主界面上,选择“加入会议”或“新建会议”选项,根据需要进行选择。
* 如果选择“加入会议”,输入会议ID和密码,点击“加入”按钮即可加入会议。
* 如果选择“新建会议”,设置会议名称和其他相关信息,点击“开始”按钮即可创建会议。
步骤四:Zoom会议中的基本操作* 在会议中,您可以通过音频、视频和聊天工具与其他与会者进行互动。
* 您可以使用底部工具栏上的按钮控制自己的音频和视频设置。
* 如果您是主持人或共同主持人,可以使用更多高级功能,如屏幕共享、白板等。
2. Zoom主要功能介绍2.1 视频通话和会议* Zoom提供高质量的视频通话和会议功能,支持多人同时参与。
* 用户可以展开或缩小视频窗口,选择自己感兴趣的与会者关注。
2.2 屏幕共享* 通过屏幕共享功能,用户可以将自己的屏幕内容展示给其他与会者。
* 这在教学、演示和协作等场景中非常有用。
2.3 会议录制与回放* Zoom允许用户将会议录制下来,以便后续回放或分享给其他人。
* 用户可以灵活选择录制整个会议或只录制部分内容。
2.4 聊天和文件共享* 用户还可以通过文件共享功能,共享文档、图片和视频等文件。
2.5 虚拟背景* Zoom提供虚拟背景功能,用户可以设置自定义背景,增加会议的趣味性。
2.6 安全和隐私保护* Zoom重视用户的隐私和安全,提供加密通信和会议室密码功能,确保会议的安全性。
以上是Zoom操作流程和主要功能的简要介绍。
希望这份文档能帮助您更好地使用Zoom进行在线会议和沟通。
MeetingPad V3.0 用户手册说明书
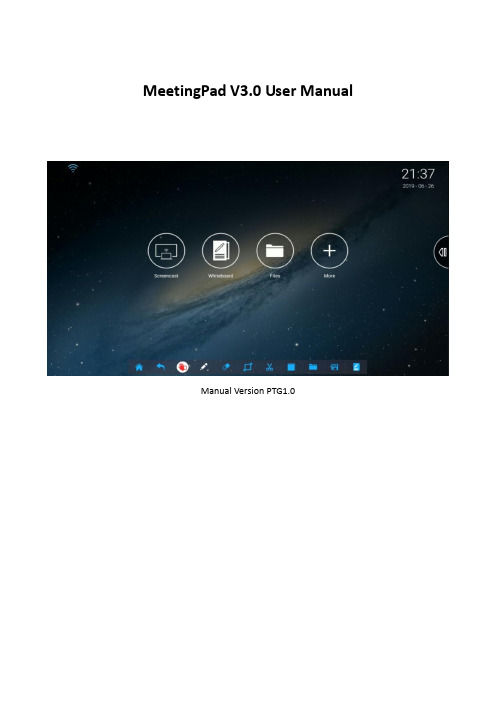
MeetingPad V3.0 User ManualManual Version PTG1.0Contents:1.Connecting your Touch Screen to a network (3)2.MeetingPad Interface Overview (5)2.1Toolbar and Control Panel (5)2.2Screencast (Wireless Connectivity) (8)2.3MeetingPad (Whiteboard) (10)2.4File Explorer (12)2.5More (Settings, Web Browser and Guide) (13)2.5.1Settings (13)2.5.2Google Chrome (Web Browser) (14)2.5.3Guide (15)3.Peripherals (16)3.1Smart Pen (16)3.2Screen Projection Dongle (17)4.E-Share App (18)4.1Downloading (18)4.2Connecting Mobile Apple Devices (20)4.3Connecting Mobile Android Devices (21)4.4Connecting a Windows PC/Mac (21)Interface Overview (Mobile Apple Devices) (22)4.5Mirroring (Mobile Apple Devices) (23)4.5.1From screen to device (23)4.5.2From Apple device to screen (Airplay) (25)4.6File Sharing (Mobile Apple Devices) (26)4.6.1From screen to device (26)4.6.2From device to screen (29)4.7Interface Overview (Mobile Android Devices) (30)4.8Mirroring (Mobile Android Devices) (30)4.8.1From screen to device (30)4.8.2From device to screen (31)4.9File Sharing (Mobile Android Devices) (32)4.9.1From Touch Screen to device (32)4.9.2From device to Touch Screen (34)4.10Snipping Tool (35)1. C onnecting your Touch Screen to a network 1.1 LANWherever possible it is recommended that you connect your touch screen to your network using an Ethernet cable. Please connect your Ethernet cable to the LAN port on the touch screen’s rear input:1.2 Wi-Fi NetworkTo connect your screen to your Wi-Fi network begin by ensuring that both Wi-Fi aerials have been screwed into the sockets marked “ATN1” and “ATN2” on the side inputs:Next, from the Home screen select “More”, then “Settings”:Next, select “W LAN” from the Settings menu:you to enter your password:Once you have entered your password, using the on-screen keyboard, select “CONNECT”.2. M eetingPad Interface OverviewOnce the MeetingPad option has been selected from the input list the full MettingPad software will launch. When the MeetingPad software loads you will be greeted with the Home screen that allows access to the following sections: Screencast, MeetingPad (Whiteboard), File Explorer and More.2.1 Toolbar and Control PanelAt any point you can access the toolbar at the bottom of the screen. If you are on the “MeetingPad” input you just need to touch the “Toggle Toolbar” button to access it.To access the Control Panel swipe your finger up from the bottom of the screen to the middle of the screen:From here you can preview a different input source, such as VGA, then once selected you can touch the “Signal source” panel on the left hand side to switch the touch screen to this input.By selec ting the “Menu” option you can also change the hardware configuration such as the picture, sound and power settings.Annotations will always be available on every input by using the Toolbar at the bottom.At any time you can view the tasks that are running, and close the ones you are no longer using, by pressing the “Task” button:2.2 Screencast (Wireless Connectivity)Selecting this section gives you the necessary information for connecting your device to the Touch Screen wirelessly. Begin by connecting your device to the same Wi-Fi network as your touch screen. If you have a mobile device you can then scan the QR. If you are using a desktop device, such as a Windows PC or Mac, you can use the Screen Projection Dongle (section 3.2) to launch the E-Share app and mirror your devices display to the touch screen. The device can also be controlled by the touch screen.These steps are outlined in following sections:You can also set a Connection Code to prevent other users from accidentally controlling or mirroring their device on the touch screen. T o do this touch the “Setting” option in the bottom right hand corner then select “Use Code”to create a unique connection code. This will also be shown on the Home screen of the MeetingPad interface.By selecting “2 Screens” or “4 Screens” in the “Settings” as illustrated above, you can mirror multiple devices to the screen at a time.2.3 MeetingPad (Whiteboard)This section replaces traditional Whiteboards in the sense that it gives you a blank canvas on which to teach/present to an audience.You can change the pen colour, size, opacity and shape by selecting the small pen icon:You can also change the background colour of the Whiteboard by selecting the “palette” icon:If you wan t to create a new page as part of the same Meeting please select the “new page” icon:If you would like to save your Meeting once you have finished please select the “save” icon:Using the new Eraser tool can also allow you to erase larger sections using the Zone Selection Eraser tool.2.4 File ExplorerThis section allows you to browse the files that you have stored locally, as well as any files you may want to browse via a USB stick. Here you can access the file locations of the internal storage, or access external devices (such as USB sticks). This also allows for APKs to be installed from a USB stick.2.5 More (Settings, Web Browser and Guide)By selecting this section you essentially access the rest of the Android OS, such as a web browser (Google Chrome), the Settings section, the step-by-step tutorial guide and the Google Play Store.2.5.1SettingsHere you can access the main Settings menu of the Android operating system. It is primarily so that you can input and edit your Wi-Fi settings but you can also access other sections if necessary.2.5.2Google Chrome (Web Browser)If you want to browse the web, to annotate webpages or play videos online etc., you can do so using the default web browser which is Google Chrome.2.5.3GuideThis section gives a quick reference tutorial overview of the MettingPad software.Swipe from left to right to scroll through the guide section.3. P eripherals3.1 Smart PenTo use the Smart Pen begin by removing the USB dongle from the top of the pen and inserting it into one of the USB ports on the touch screen.You can then use the Smart Pen to perform functions such as annotation, saving, navigating though PowerPoint presentations and webpages, returning to the Home page and opening a Whiteboard page. The controls are as follows:3.2 Screen Projection DongleThe Screen Projection Dongle included makes mirroring from your desktop device, such as a Windows PC or Mac, much easier you don’t need to download or install the E-Share app.Begin by connecting your PC/Mac to the same Wi-Fi network as your touch screen then insert the Screen Projection Dongle into one of the USB ports of your PC/Mac.Then inside you will notice there is an application called “E-Share”,double-click on the icon to launch this. You will then have the option to “Share Screen” once you click on this you will then project your device’s display directly to the touch screen. You can also control your device using the touch functionality on the touch screen. If you are asked for a code please refer to the “Setting” part of the Wireless Screen section.4. E-Share AppIf you want to communicate with the Touch Screen using another device, such as a smartphone, tablet or PC, you must first install the E-Share application. Once installed onto your device you can wirelessly control the touch screen as well as share files and mirror content from the touch screen to your device. This app is available for download from the relevant app store but to ensure that you download the correct app we recommend taking the steps outlined in the section below.4.1 DownloadingMobile DevicesTo download the E-Share app to your device begin by selecting the “Wireless Screen” section from the MeetingPad interface then scanning the QR code with your mobile device. If you do not have a code scanner app on your device you can also enter the IP address in the bottom left-hand corner into the address bar of your device’s web browser. This will direct you to the following page:You can then select the appropriate option for your device which will direct you to your app store to download the app.PC/MacIf you want to install the E-Share app onto your PC rather than using the Screen Projection Dongle you can do so. To download the E-Share app to your PC begin by selecting the “Wireless Screen” section from the MeetingPad interface. Next, enter the IP address in the bottom left-hand corner into the address bar of the web browser on your PC.Then select the “EShare for Windows” op tion to download the Windows application (or “EShare for Mac if you are using a Mac computer). Once downloaded please then install the application onto your PC.4.2 Connecting Mobile Apple DevicesBegin by ensuring that your device is connected to the same Wi-Fi network as your Touch Screen. Next, launch the E-Share app on your device and if there is only one touch screen on the Wi-Fi network it will connect automatically. If there are multiple screens please select the icon in the top right-hand corner:Th en select “EShare-XXXX” (each screen will have a unique 4-digit code that can be checked from the “Wireless Screen” section on the MeetingPad interface):NOTE: The above steps (downloading the E-Share app and connecting your device/PC to the same Wi-Fi network as your Touch Screen) are essential if you want to achieve any of the functions that follow.4.3 Connecting Mobile Android DevicesBegin by ensuring that your device is connected to the same Wi-Fi network as your Touch Screen. Next, launch the E-Share app on your device and if there is only one touch screen on the Wi-Fi network it will connect automatically. If there are multiple screens please select the screen you want to connect to –it will have a name of “EShare-XXXX” (each screen will have a uniq ue 4-digit code that can be checked from the “Wireless Screen” section on the MeetingPad interface).4.4 Connecting a Windows PC/MacBegin by ensuring that your PC is connected to the same Wi-Fi network as your Touch Screen. Next, launch the E-Share app on your PC, select “EShare-XXXX” (each screen will have a unique 4-digit code that can be checked from the “Wireless Screen” section on the MeetingPad interface) and click “Start”:If you are asked for a code please refer to the “Setting” part of the Wireles s Screen section.Interface Overview (Mobile Apple Devices)Once you have connected your device to your Touch Screen you can then start to wirelessly control the touch screen as well as share files and mirror content from the touch screen to your device. When you launch the E-Share application you will notice the following sections in the footer menu: ∙Local Files– here you can stream media files directly from your device on the Touch Screen.∙Mirroring– this section allows you to mirror your device’s di splay to the Touch Screen via Airplay.∙TV Mirror–here you can wirelessly mirror the Touch Screen’s display onto your device.∙Remote–this section is mainly a touch mouse pad but also allows you to go Home, activate the on-screen keyboard and even access the apps from the screen’s Android operating system:4.5 Mirroring (Mobile Apple Devices)4.5.1From screen to deviceBegin by selecting the “TV Mirror” option f rom the footer menu:You should then be able to see exactly what is being displayed on the Touch Screen on your device. You can also use your device’s touch screen to remotely control the cursor on the Touch Screen, giving you complete remote control:You will notice that there is a side menu with the following options:To exit this section at an y time please select the “X” in the top left-hand corner.4.5.2From Apple device to screen (Airplay)To mirror the content from your Apple device to the touch screen you can either select the “Mirroring” option from the E-Share footer menu:Or you can take the normal steps to connect via Airplay directly:1.Connect your Apple device and your AirPlay device to the same Wi-Fi network.2.On your Apple device, swipe up from the bottom of your screen to open Control Center.3.Tap on the “AirPlay” option.4.Tap “EShare-XXXX ” and the display on your device will now be mirrored on screen. NOTE: each screen will have a unique 4-digit code that can be checked from the “Wireless Screen” section on the MeetingPad interface4.6 File Sharing (Mobile Apple Devices)4.6.1From screen to deviceSharing FilesBegin by selecting the “Wireless Screen” section from the MeetingPad interface. Next, you can either scan the QR code with your mobile device or enter the IP address in the bottom left-hand corner into the address bar of the web browser on your PC. You will then see the following options:Select “Wireless Storage”. You will then have remote access to all of the files on the Touch Screen. You can then open and save files from your device.Sharing ScreenshotsIf you have a file open on your Touch Screen and you want to share a screenshot of it with your device begin by clicking the “save” icon:You will then see the following:At this stage you can either scan the QR code with your device, this will then point you to the location that the screenshot has been saved to on the local area. You can then save it to your device. The other option is to “Send”, selecting this allows you to send the screenshot via email. Once you select “Send” you will firstly need to enter your email server details using the on-screen keyboard:Once you have entered the correct details select the “Login” button. You will then be taken to the email composition page; here you can edit the Subject and body of the email accordingly:4.6.2From device to screenFrom your device select the “File Sharing” option from the main menu:You will then be presented with an IP address, like this:Next launch the “Browser” section of the MeetingPad interface and enter the IP address from your device into the address bar of the Touch Screen web browser. You will then have remote access to all of the files on your device.4.7 Interface Overview (Mobile Android Devices)Once you have connected your device to your Touch Screen you can then start to wirelessly control the touch screen while mirroring as well as share files from the touch screen to your device. When you launch the E-Share application you will notice that there is a side menu with the following options:4.8 Mirroring (Mobile Android Devices)4.8.1From screen to deviceOnce you launch the E-Share app and connect to your screen the Touch Screen’s display will automatically display on your device. You can also remotely control the cursor on the Touch Screen using your finger on the device.4.8.2From device to screenOnce you launch the E-Share app you will see a “Mirroring” icon in the side menu () begin by selecting this. You will then see the following message:Select “START NOW” and your devices display will be mirrored on the Touch Screen. To stop the mirroring swipe down from the top of your Android device to bring up your Notification panel and turn the “Mirroring” option off:You can also use this method to re-connect and begin mirroring again.4.9 File Sharing (Mobile Android Devices)4.9.1From Touch Screen to deviceSharing FilesBegin by selecting the “Wireless Screen” section from the MeetingPad interface. Next, you can either scan the QR code with your mobile device or enter the IP address in the bottom left-hand corner into the address bar of the web browser on your PC. You will then see the following options:Select “Wireless Storage”. You will then have remote access to all of the files on the Touch Screen. You can then open and save files from your device.Sharing ScreenshotsIf you have a file open on your Touch Screen and you want to share a screenshot of it with your device begin by clicking the “save” icon:You will then see the following:At this stage you can either scan the QR code with your device, this will then point you to the location that the screenshot has been saved to on the local area. You can then save it to your device. The other option is to “Send”, selecting this allows you to send the screenshot via email. Once you select “Send” you will f irstly need to enter your email server details using the on-screen keyboard:Once you have entered the correct details select the “Login” button. You will then be taken to the email composition page; here you can edit the Subject and body of the email accordingly:4.9.2From device to Touch ScreenBegin by selecting the “File Explorer” icon from the side menu ( ) this will then allow you to access the files on your device. Once you select a file it will then be loaded onto the Touch Screen, from here you can then edit or save it accordingly.4.10 Snipping ToolIf you want to cut and save a section of your display at any time you can use the Snipping Tool:Next, touch and drag the area that you want to crop:To save the screenshot select “”. You can then access the file via the “File Explorer” section. Youcan also launch the screenshot in a separate whiteboard by selecting “”. To cancel the selection select “”.。
Zoom视频会议使用技巧分享
Zoom视频会议使用技巧分享第一章:Zoom的基本介绍Zoom是一款功能强大的视频会议工具,通过Zoom,用户可以进行远程会议、在线教育、远程培训等各种形式的在线交流和协作。
Zoom提供了多种功能和工具,使得用户能够方便地进行远程沟通和协作。
接下来,我们将分享一些Zoom视频会议的使用技巧,帮助你更好地使用Zoom开展各种活动。
第二章:会议前的准备工作在开展Zoom视频会议之前,良好的准备工作是非常重要的。
首先,你需要确保你的设备(如电脑、手机、平板电脑)具备运行Zoom所需的最低配置,例如必要的网络带宽和操作系统版本。
其次,你需要提前下载并安装Zoom客户端或移动应用程序,并进行帐户注册和登录。
确保你的摄像头、麦克风和扬声器正常工作,以免在会议中出现音频或视频问题。
最后,准备好会议议程、资料和演示文稿,确保在会议过程中可以流畅地展示。
第三章:会议设置和控制Zoom提供了丰富的会议设置和控制选项,可以帮助你更好地定制会议体验。
在创建会议时,你可以选择是否开启摄像头和麦克风,默认是否允许参会者进入会议室等。
此外,你可以设置密码保护会议,防止未经授权的人员入侵。
在会议进行过程中,你可以使用会议控制面板来调整音频和视频设置、管理画廊和演讲模式、共享屏幕等。
熟悉这些设置和控制选项,可以使你更好地掌握会议的进度和节奏。
第四章:互动和协作Zoom不仅仅是一个视频会议工具,它还提供了多种互动和协作功能,使得会议更加生动和富有创造力。
举个例子,你可以使用实时聊天功能与其他参会者交流,发送消息、分享链接和文档。
你还可以使用白板工具进行集体写作、思维导图和涂鸦,同步展示给所有与会者。
除此之外,Zoom还支持小组分组和讨论功能,将大型会议分成小组讨论,提高会议效率和参与度。
第五章:录制和回放功能Zoom提供了录制和回放功能,可以方便地记录和分享会议内容。
在会议过程中,你可以选择录制会议的音频和视频,并保存到本地或云端。
利用Zoom进行远程会议和视频通话

利用Zoom进行远程会议和视频通话近年来,随着信息技术的快速发展,远程会议和视频通话变得越来越普遍。
特别是在当前全球疫情的背景下,越来越多的机构和个人选择利用Zoom进行远程会议和视频通话。
本文将介绍Zoom的基本功能和使用技巧,以及远程会议和视频通话的优势。
一、Zoom的基本功能Zoom是一种用于远程会议和视频通话的软件平台。
它提供了许多功能,包括音频和视频会议、屏幕共享、文件传输等。
与其他类似的软件相比,Zoom具有以下几个独特的特点:1.高质量音视频传输:Zoom提供了高质量的音视频传输,可以实现清晰的语音通信和高清的视频画面。
这使得远程会议和视频通话更加真实、直观。
2.多方参与:Zoom支持多方参与,可以容纳大量的与会人员。
无论是小型团队会议还是大型会议,Zoom都能轻松地满足需求,并提供稳定可靠的服务。
3.灵活的会议安排:Zoom允许用户根据需求自由安排会议时间和地点。
与传统的面对面会议相比,Zoom的灵活性更高,用户可以在任何地点、任何时间参加会议。
二、Zoom的使用技巧为了更好地利用Zoom进行远程会议和视频通话,以下是一些实用的使用技巧:1.提前测试设备和网络:在参加远程会议或视频通话之前,务必提前测试设备和网络连接。
确保摄像头、麦克风和扬声器正常工作,网络连接稳定。
2.合理安排会议时间:在安排会议时间时,要考虑不同时区的与会人员,并尽量选择对大多数人来说比较方便的时间段。
3.选择合适的会议模式:Zoom提供了不同的会议模式,包括音频会议、视频会议和共享屏幕等。
根据需要选择合适的模式,以提高会议效率。
4.利用屏幕共享功能:Zoom的屏幕共享功能非常实用,可以方便地展示文档、演示PPT等。
在远程会议中,合理利用屏幕共享功能,可以更好地传达信息。
三、远程会议和视频通话的优势利用Zoom进行远程会议和视频通话带来了许多优势。
1.提高沟通效率:远程会议和视频通话能够快速连接不同地区的与会人员,节省了时间和成本,提高了沟通效率。
利用Zoom进行远程会议和在线培训

利用Zoom进行远程会议和在线培训随着信息技术的不断发展,远程会议和在线培训逐渐成为一种重要的工作方式和学习方式。
Zoom作为一款专业的视频会议软件平台,广泛应用于各类会议和培训,方便了人们的工作和学习,使得远程交流变得更加高效和便捷。
一、Zoom的基本介绍Zoom是一种简单易用的远程会议和在线培训工具,可以实现多人视频通话、屏幕共享、文件传输等功能。
用户可以通过电脑、手机或平板等设备进行接入,只要拥有互联网连接,就可以轻松加入会议或培训,不受地点限制,方便快捷。
二、远程会议的优势1. 节省时间和成本:远程会议省去了参与者的交通时间和交通费用,减少了会议的成本开支。
2. 提高效率和灵活性:通过Zoom进行远程会议,参与者可以选择在任意地点参加会议,灵活性大大提高,同时也减少了因各种原因导致的会议延误和耽误事务处理。
3. 多人协作和交流:Zoom支持多人同时在线参与,参与者之间可以进行实时的语音、视频和文字交流,提高了协作效率,方便了沟通。
三、在线培训的优势1. 便捷高效:通过Zoom进行在线培训,不受地域限制,学员可以在任意地点参与培训,节省了学员的交通时间和交通费用。
同时,培训内容可以通过屏幕共享和文件传输等功能直观地呈现给学员,提高了培训效果。
2. 互动教学:Zoom支持多人同时在线互动,学员可以通过语音、视频和文字与讲师进行实时交流,提问问题、表达意见。
这种互动教学的方式相比传统面对面培训更加鼓励学员参与,增加了学习的积极性和效果。
3. 录制回放:Zoom提供了会议和培训的录制功能,讲师可以将培训内容录制下来,方便学员后期回顾和再学习。
这极大地提高了学习的便捷性和灵活性。
四、使用Zoom的技巧1. 提前准备:在进行远程会议或在线培训之前,提前测试设备的连接和软件的运行情况,确保一切顺利进行。
2. 清晰表达:通过Zoom进行远程交流时,要注意语音清晰、表达准确,避免因音频不清晰或表达不清楚而影响沟通效果。
- 1、下载文档前请自行甄别文档内容的完整性,平台不提供额外的编辑、内容补充、找答案等附加服务。
- 2、"仅部分预览"的文档,不可在线预览部分如存在完整性等问题,可反馈申请退款(可完整预览的文档不适用该条件!)。
- 3、如文档侵犯您的权益,请联系客服反馈,我们会尽快为您处理(人工客服工作时间:9:00-18:30)。
1ST
专业的 视频会议室
3合1云会议平台
云视频会议
• 满足200人参与的视频会议 • 高清视频和高保真音频 • 一键启动或加入 • 动态语音检测 • 全屏,画廊视图 • 双流,双屏
3合1云会议平台
会议无处不在
台式机或 笔记本
平板或手机
视频 会议室
电话会议 (呼入或呼出)
3合1云会议平台
zoom 云会议
云会议 历史
1980’s
1990’s
2000’s
电话 会议
硬件 视频会议
网络 在线会议
2014 云会议
云视频 会议
分组 消息
网络在 线会议
云会议
平板、手机
台式机、笔记本
移动设备 屏幕共享
1ST
3合1云会议平台
MP4录制功能
当前发言人 (MP4录制)
画廊视图 (MP4录制)
当前发言人 的屏幕共享
音频 (M4A录制)
3合1云会议平台
视频大会
常规会议
25 人 互动会议
100 人 互动会议
200 人 互动会议
视频大会
100人 单向会议
500 人 单向会议
1000人 单向会议
3000 人 单向会议
3合1云会议平台
高级功能
参会者选项
• 固定1至2个发言者 • 支持双屏显示 • 私人和群组聊天 • 举手发言
主持人选项
• 会议控制 • 设定焦点视频 • 参与者显示控制 • 会议特性控制
3合1云会议平台
网络在线会议
• 即时会议或安排会议 • Chrome和Outlook插件 • 参会者加会功能控制 • 主持人会议控制功能 • 私人或群组聊天 • MP4、M4A录制
3合1云会议平台
强劲的屏幕共享
1.Mac和PC
共享桌面、窗口、文档 和音视频片段共享
2.个人电脑和移动设备
电脑桌面、应用程序、 文档可以共享给移动设备
3.苹果平板 与智能手机
支持照片、网页和云端 文档共享
4.安卓平板和智能手机
支持照片、网页和云端 文档共享
3合1云会议平台
标注与协作标注
• 支持Mac 、PC、iPad和iPhone • 在共享屏幕上进行标注 • iPad白板 • 画线、矩形、椭圆、荧光笔 等各种工具 • 协作标注 • 痕迹存储与共享
3合1云会议平台
安全
基于角色或 用户的安全管理
会议加密
多媒体路由器
加密通讯 会议服务器加密
为什么选择zoom?
质量 易用性 视频质量 音频质量 屏幕共享质量
功能 群组消息与网络 移动设备协作标注 iPhone和ipad的屏幕共享 共享计算机音频 Mp4或m4A格式录制 Zoom专业视频会议室 支持H323/SIP硬件集成
3合1云会议平台
视频大会
• 站点注册 • 满足25人发言,3000人与会 • 可以使用Mac、台式机 、平板、智能手机、
桌面电话或传统视频会议系统加入 • 视频或文本的问答功能 • 大会数据统计
3合1云会议平台
会议协作
• PC、Mac、平板和智能手机 • 高质量的屏幕共享 • 标注和协作标注 • 白板 • 鼠标和键盘控制 • 群组消息
zoom专业视频会议室
• 通过Mac和iPad 使会议变得更简单 • 实时视频和屏幕共享 • 一键开会 • Google和outlook日历集成
3合1云会议平台
传统(H.323/SIP)视频会议室
• 支持传统的硬件视频会议系统接入 • 支持H.323/SIP传统视频会议室 • 支持H.239双屏或H.235接入 • 支持发言人和画廊视图
定价 全球电话会议 内部配置选项
Zoom
最好
第一 免费
其他在线会议解决方案
没有 昂贵
其他会议解决方案
没有 非常昂贵
65,000+ 客户
我们的服务值得信赖
摘
要
• 质量问题 • 简单性和易用性 • 生产力与创新 • 用户体验 • 安全 • 特殊功能
联系我们
上海盟视信息科技有限公司
Shanghai ZoomCloud Information Technology Co., Ltd.
地址:上海市宜山路515号环线广场2号楼18楼G座 热线:400-021-3822
EMail:sales@
Thank You!
3合1云会议平台
分组消息
• 支持Mac 、PC、平板和智能手机 • 聊天用户在线状态 • 对在线或离线消息进行多重分组 • 支持发送信息,链接和图片 • 对智能手机推送聊天信息 • 搜索号码、账号和联系人信息
3合1云会议平台
企业内部部署
• 在私有云上进行视频、语音及屏幕共享数据通讯 • 支持在任何虚拟机上运行会议服务器 • 易扩展 - 可在几分钟内扩充会议容量 • 本地高可用性 • 即时全球备份服务