boost编译
比特币0.9.2版编译中文手册
比特币0.9.2中文版编译手册日期:2014-07-01 构建比特币源码,是一件十分费时费力的工作,尤其在windows系统中编译比特币源码更加的麻烦,经过一两天努力,终于在windows7 64位系统中成功编译出了比特币源文件。
现在总结如下,首先准备一套干净的windows7 64位操作系统,最好是使用vbox或者vmware 虚拟机建立一个专用系统,这样的可以防止其它干扰导至编译失败,接下来说说,我的编译过程:1.安装msys系统msys作用是在windows系统中重建linux系统编译环境,在msys系统下操作,就像linux 中的操作一样,具有相同的语法命令。
从下面的网址中下载msys最新版:/projects/mingw/files/Installer/mingw-get-setup.exe/download然后运行mingw-get-setup.exe文件后,选择安装目录为H:\MinGW,之后软件会首先更新下载库,更新成功会弹出一个窗口MinGW installation manager,在这个窗口中,只下载msys相关的包文件,不要下载mingw相关文件,因为不使用它带的这个mingw。
主要如下面所示:msys-base-binmsys-autoconf-binmsys-automake-binmsys-libtool-bin选择好之后,点击Installation->Apply changes即可。
一定要确保mingw包没有被下载,这里我们只需要msys相关系统,也要确保msys-gcc和msys-w32api等包没有被下载,否则当我们执行编译时,可能会调用这些不该出现的包文件,而导至编译失败。
2.安装perl系统由于在编译比特币时,需要调用一些perl脚本,所以从下面的网址中下载一个perl安装程序,然后安装即可。
/ActivePerl/releases/5.18.1.1800/ActivePerl-5.18.1.1800-M SWin32-x64-297570.msi3.安装python同样还需要用到python环境,这里下载最新版的pytnon3.4.0版,并安装它。
Vc6.0 Boost
vc6.0环境下编译Boost 1.34.1(2009-07-27 17:09:46)转载▼分类:电脑标签:杂谈今天在同学的帮助下,成功的在vc6.0中安装和编译boost库,遇到不少问题,并解决之,把过程大概写一下,以便以后参阅:(主要参考文章:/blog/cns!C523F565A10E3B66!749.entry/liroket/archive/2009/06/10/4257308.aspx)据说c6.0不支持目前比较新版本,如:boost1.36。
这里给出VC6.0编译boost1.34.1的流程。
1.从下载相对应版本的压缩文件,我下载的是boost_1_34_1.zip。
2.解压缩到本地磁盘(这里为d盘),进入F:\boost_1_34_1\tools\jam\src,鼠标右键-》编辑“build.bat”文件。
把if "_%ProgramFiles%_" == "__" set ProgramFiles=c:\Program Files改成自己vc6.0的安装路径,我的是d盘program files,因此我改成了if"_%ProgramFiles%_" == "__" set ProgramFiles=d:\Program Files然后,顺便检查一下该文件中if EXIST "%ProgramFiles%\Microsoft Visual Studio\VC98\bin\VCVARS32.BAT" (set "BOOST_JAM_TOOLSET=msvc"set "BOOST_JAM_TOOLSET_ROOT=%ProgramFiles%\Microsoft Visual Studio\VC98\"goto :eof)是否和你的vc6.0路径相同。
Boost1.62.0编译参数
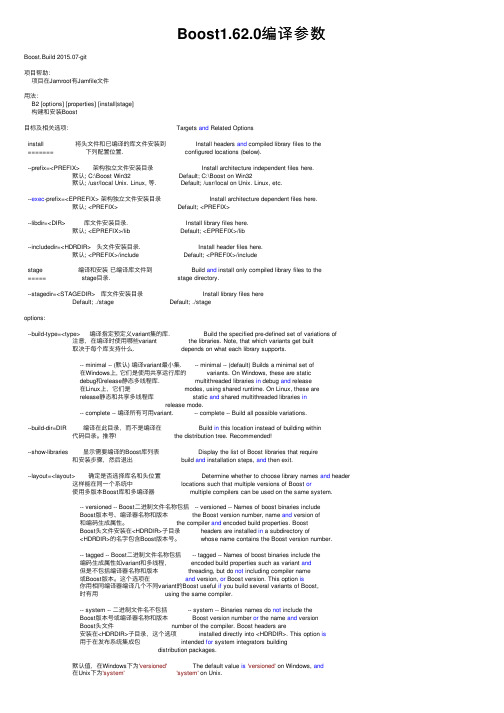
Boost1.62.0编译参数Boost.Build 2015.07-git项⽬帮助:项⽬在Jamroot有Jamfile⽂件⽤法:B2 [options] [properties] [install|stage]构建和安装Boost⽬标及相关选项: Targets and Related Optionsinstall 将头⽂件和已编译的库⽂件安装到 Install headers and compiled library files to the======= 下列配置位置. configured locations (below).--prefix=<PREFIX> 架构独⽴⽂件安装⽬录 Install architecture independent files here.默认; C:\Boost Win32 Default; C:\Boost on Win32默认; /usr/local Unix. Linux, 等. Default; /usr/local on Unix. Linux, etc.--exec-prefix=<EPREFIX> 架构独⽴⽂件安装⽬录 Install architecture dependent files here.默认; <PREFIX> Default; <PREFIX>--libdir=<DIR> 库⽂件安装⽬录. Install library files here.默认; <EPREFIX>/lib Default; <EPREFIX>/lib--includedir=<HDRDIR> 头⽂件安装⽬录. Install header files here.默认; <PREFIX>/include Default; <PREFIX>/includestage 编译和安装已编译库⽂件到 Build and install only compiled library files to the===== stage⽬录. stage directory.--stagedir=<STAGEDIR> 库⽂件安装⽬录 Install library files hereDefault; ./stage Default; ./stageoptions:--build-type=<type> 编译指定预定义variant集的库. Build the specified pre-defined set of variations of 注意,在编译时使⽤哪些variant the libraries. Note, that which variants get built取决于每个库⽀持什么. depends on what each library supports.-- minimal -- (默认) 编译variant最⼩集. -- minimal -- (default) Builds a minimal set of在Windows上, 它们是使⽤共享运⾏库的 variants. On Windows, these are staticdebug和release静态多线程库. multithreaded libraries in debug and release在Linux上,它们是 modes, using shared runtime. On Linux, these arerelease静态和共享多线程库 static and shared multithreaded libraries inrelease mode.-- complete -- 编译所有可⽤variant. -- complete -- Build all possible variations.--build-dir=DIR 编译在此⽬录,⽽不是编译在 Build in this location instead of building within 代码⽬录。
boost的编译使用

boost的编译使用Boost是一个流行的C++库,它提供了许多功能强大的工具和组件,包括容器、算法、并发编程、图形学、网络编程等。
要使用Boost库,首先需要下载并安装Boost库,然后在编译和链接你的C++程序时包含相应的Boost头文件和链接Boost库文件。
下面我将从编译和使用Boost库的角度来详细介绍。
1. 下载和安装Boost库。
首先,你需要从Boost官方网站下载最新的Boost库源代码。
然后,解压缩文件并按照官方文档中的指导进行安装。
通常情况下,Boost提供了一个名为bootstrap.bat(Windows)或者bootstrap.sh(Linux)的脚本,你可以运行这个脚本来配置Boost 库。
接着,运行b2命令来编译Boost库。
2. 编译和链接Boost库。
一旦Boost库安装完成,你就可以在你的C++程序中使用它了。
在编译你的程序时,确保你的编译器能够找到Boost库的头文件。
你可以使用编译器的命令行选项或者在你的IDE中配置头文件搜索路径。
在链接你的程序时,确保你的编译器能够找到Boost库文件。
你需要指定Boost库文件的路径和库名字,具体的方法取决于你使用的编译器和操作系统。
3. 使用Boost库。
一旦你的程序成功编译和链接了Boost库,你就可以在你的代码中包含相应的Boost头文件,并使用Boost提供的功能和组件了。
比如,如果你想使用Boost的智能指针,你可以包含<boost/shared_ptr.hpp>头文件,并使用boost::shared_ptr类来管理动态分配的对象。
总之,要使用Boost库,你需要下载、安装Boost库,配置你的编译器,包含Boost头文件,链接Boost库文件,并在你的代码中使用Boost提供的功能和组件。
希望这些信息能够帮助你成功地编译和使用Boost库。
boost库的编译以及在CodeBlocks中的配置

Boost库的编译和在CodeBlocks的配置基本信息:时间:2012/11/2Boost库的版本:boost.1.51.0 release版CodeBlocks版本:编译前准备:如果是用gcc编译boost,首先一定要先安装MinGW或者安装带MinGW的CodeBlocks,并给gcc编译器置环境变量。
当然是可以使用VS编译boost库,使用vs新建一个工程编译boost库,可以参考:/boost.html本机使用的gcc的版本:步骤一,从boost的官方网站上下载最新的boost版本库,输入网址:如图所示,一般是官网上是都是最新的Release版和最新的Bata版,这里为了稳等的需求,一般是选择Release版的。
点击download进入下载的页面:这里可以根据网速的需求,下载不同的压缩格式,一般而言,不同的格式,因为压缩率的不同,解压缩的时间也不同。
步骤二.下载完成后,解压缩,解压的后的文件大概是400多MB。
解压后的文件的组织形式如下。
这里,新版的文件组织好像和以前的不同,双击图中的booststrap.bat 文件,此时会出现如下的窗口:这个窗口会出现几分钟,当它消失的会产生两个exe文件:单击并运行这两个文件中一个,一开始的时候,也不是很清楚两者有什么区别,但是后来发现,这俩个程序至少完成的功能是一样的。
运行bjam.exe时,此时,boost开始编译,大概是30-40分钟的样子(注意:不同电脑的时间是不同的,这是一因为编译的时候需要耗费大量的CPU资源和内存资源。
我的笔记本是i3 的处理器,2g 的内存),步骤三.由于是直接运行exe文件的,没看到最后的结果,可以自cmd命令行中,先进入当前的目录,输入cd D:\Users\xj\Downloads\boost_1_51_0\boost_1_51_0 再一次运行bjam.exe,可看到,如下的截图,说明编译成功。
注意,在编译中能会出现一些警告入文件找不到之类的,请忽略它。
BoostC编译器和SourceBoost IDE软件包用户手册说明书

100001-BCPICPROWhat is BoostCBoostC is our latest generation C compiler that works with PIC18, PIC16 and some PIC12 processors. BoostC was designed to rival Hi-Tech C compiler. This ANSI C compatible compiler addresses limitations that exist in our C2C-plus compiler. It supports features like source level debugging, signed data types, structures/unions and pointers. The BoostC compiler will eventually replace the C2C-plus compiler.Check the BoostC compiler Reference Manual in PDF format here.The BoostC compiler can be used with the SourceBoost IDE (Integrated Development Environment), or can be integrated into Microchip MPLAB.BoostC works under MS Windows 95/98/ME/NT/2000/XP.Take a look at the BoostC Compiler Reference Manual.What's in the software packageWhen you download the SourceBoost software package you get the SourceBoost IDE, BoostC compiler and all the other SourceBoost compilers. The compilers and IDE are activated by using the appropriate activation key.License LimitationsAll license options for the BoostC 'C' compiler support PIC12, PIC16 and PIC18 Target Devices. Please check the supported devices list to confirm the devices you require are supported.Upgrade PolicyAll licenses get free minor revision upgrades. That means any BoostC V6.x license can be upgraded to the latest BoostC V6.x at zero cost.Major revision upgrades are chargeable. That means you will have to pay an upgrade fee in order to upgraded BoostC V6.x license to a BoostC V7.x license.The Full License has unlimited RAM and ROM usage. Suitable for projects of all shapes and sizes. The definite choice of the serious programmer. Non-commercial use. The Pro License has unlimited RAM and ROM usage. The correct choice for the professional programmer. This license allows commercial use.Supported Device ListWant to know if a desired target device is supported by the BoostC 'C' Compiler, then checkout the list below.If a device you want to use is not it the list, send us an email and we will see what we can do!The Supported Device ListPIC12PIC12C671, PIC12CE673, PIC12CE674, PIC12F609, PIC12HV609, PIC12F615, PIC12HV615, PIC12F629, PIC12F635, PIC12C672, PIC12F675, rfPIC12F675h, rfPIC12F675k, rfPIC12F675f, PIC12F683PIC16PIC16CE623, PIC16CE624, PIC16CE625, PIC16C432, PIC16C433, PIC16C554, PIC16C557, PIC16C558, PIC16C61, PIC16F616, PIC16HV616, PIC16C62,PIC16C62A, PIC16C62B, PIC16CR62, PIC16C620, PIC16C620A, PIC16CR620A, PIC16C621, PIC16C621A, PIC16C622, PIC16C622A, PIC16F627, PIC16F627A, PIC16F628, PIC16F628A, PIC16C63, PIC16C63A, PIC16CR63, PIC16F630,PIC16F631, PIC16F636, PIC16F639, PIC16C64, PIC16C64A, PIC16CR64,PIC16C642, PIC16F648A, PIC16C65, PIC16C65A, PIC16C65B, PIC16CR65,PIC16C66, PIC16C662, PIC16C67, PIC16F676, PIC16F677, PIC16F684,PIC16F685, PIC16F687, PIC16F688, PIC16F689, PIC16F690, PIC16C71,PIC16C710, PIC16C711, PIC16C712, PIC16C715, PIC16C716, PIC16F716,PIC16C717, PIC16C72, PIC16C72A, PIC16CR72, PIC16F72, PIC16C73,PIC16C73A, PIC16C73B, PIC16F73, PIC16F737, PIC16C74, PIC16C74A,PIC16C74B, PIC16F74, PIC16C745, PIC16F747, PIC16C76, PIC16F76, PIC16C765, PIC16F767, PIC16C77, PIC16F77, PIC16C770, PIC16C771, PIC16C773,PIC16C774, PIC16F777, PIC16C781, PIC16C782, PIC16F785, PIC16HV785,PIC16F818, PIC16F819, PIC16CR83, PIC16F83, PIC16C84, PIC16CR84, PIC16F84, PIC16F84A, PIC16F87, PIC16F870, PIC16F871, PIC16F872, PIC16F873,PIC16F873A, PIC16F874, PIC16F874A, PIC16F876, PIC16F876A, PIC16F877,PIC16F877A, PIC16F88, PIC16F883, PIC16F884, PIC16F886, PIC16F887,PIC16F913, PIC16F914, PIC16F916, PIC16F917, PIC16C923, PIC16C924,PIC16C925, PIC16C926, PIC16F946PIC18PIC18F1220, PIC18F1230, PIC18F1320, PIC18F1330, PIC18F2220, PIC18F2221, PIC18F2320, PIC18F2321, PIC18F2331, PIC18F2410, PIC18F24J10, PIC18C242, PIC18F242, PIC18F2420, PIC18F2423, PIC18LF2423, PIC18F2431, PIC18F2439, PIC18F2450, PIC18F2455, PIC18F248, PIC18F2480, PIC18F2510, PIC18F25J10, PIC18F2515, PIC18C252, PIC18F252, PIC18F2520, PIC18F2523, PIC18LF2523,PIC18F2525, PIC18F2539, PIC18F2550, PIC18F258, PIC18F2580, PIC18F2585, PIC18F2610, PIC18F2620, PIC18F2680, PIC18F2682, PIC18F2685, PIC18F4220, PIC18F4221, PIC18F4320, PIC18F4321, PIC18F4331, PIC18F4410, PIC18F44J10, PIC18C442, PIC18F442, PIC18F4420, PIC18F4423, PIC18LF4423, PIC18F4431, PIC18F4439, PIC18F4450, PIC18F4455, PIC18F448, PIC18F4480, PIC18F4510, PIC18F45J10, PIC18F4515, PIC18C452, PIC18F452, PIC18F4520, PIC18F4523, PIC18LF4523, PIC18F4525, PIC18F4539, PIC18F4550, PIC18F458, PIC18F4580, PIC18F4585, PIC18F4610, PIC18F4620, PIC18F4680, PIC18F4682, PIC18F4685, PIC18C601, PIC18F6310, PIC18F63J11, PIC18F6390, PIC18F63J90, PIC18F6410, PIC18F64J11, PIC18F6490, PIC18F64J90, PIC18F65J10, PIC18F65J11,PIC18F65J15, PIC18F6520, PIC18F6525, PIC18F6527, PIC18C658, PIC18F6585, PIC18F65J90, PIC18F66J10, PIC18F66J15, PIC18F6620, PIC18F6621, PIC18F6622, PIC18F6627, PIC18F66J60, PIC18F66J65, PIC18F6680, PIC18F67J10, PIC18F6720, PIC18F6722, PIC18F67J60, PIC18C801, PIC18F8310, PIC18F83J11, PIC18F8390, PIC18F83J90, PIC18F8410, PIC18F84J11, PIC18F84J15, PIC18F8490,PIC18F84J90, PIC18F85J10, PIC18F85J11, PIC18F85J15, PIC18F8520,PIC18F8525, PIC18F8527, PIC18C858, PIC18F8585, PIC18F85J90, PIC18F86J10, PIC18F86J15, PIC18F8620, PIC18F8621, PIC18F8622, PIC18F8627, PIC18F86J60, PIC18F86J65, PIC18F8680, PIC18F87J10, PIC18F8720, PIC18F8722, PIC18F87J60, PIC18F96J60, PIC18F96J65, PIC18F97J60Optimizing Compiler and Linker featuresSourceBoost IDE IntegrationThe BoostC compiler integrates seamlessly into the MS Windows SourceBoost IDE (Integrated Development Environment).Base Data types:•8 bit char - signed and unsigned.•16 bit int - signed and unsigned.•32 bit long - signed and unsigned.Special Data types:•Single bit - single bit data type for efficient flag storage.•Fixed address - fixed address data types allow easy access to target device registers.•Read only code memory based variables.Code Producing Features:•ANSI 'C' compatible - Makes code highly portable.•Produces optimized code for both PIC16 (14bit core) and PIC18 (16bit core) targets.•Support for Data Structures and Unions - Data structures and arrays can be comprised of base data types or other data structures. Arrays of base data types or data structures can be created.•Support for pointers - pointers can be used in "all the usual ways".•Inline Assembly - Inline assembly allows hand crafted assembly code to be used when necessary.•Inline Functions - Inline functions allows a section of code to be written as a function, but when a reference is made to it the inline function code is inserted instead of a function call. This speeds up code execution.•Eliminates unreachable (or dead) code - reduces code memory usage.•Removal of Orphan (uncalled) functions - reduces code memory usage.•Minimal Code Page switching - code where necessary for targets with multiple code pages.•Automatic Banks Switching for Variables - allows carefree use of variables •Efficient RAM usage - local variables in different code sections can shared memory. The linker analyzes the program to prevent any clashes.•Function pointers (not available yet).•Dynamic memory management.•Output file in Intel Hex format.Debugging features:•Source Level and Instruction Level Debugger - linker Generates COF file output for source level debugging under SourceBoost Debugger.•Step into, Step over, Step out - functions operate at source level and instruction level.•Multiple Execution Views - see where the execution of the code is at source level and assembly level at the same time.•Monitoring variables - variables can be added to the watch windows to allow there values to be examined. There is no need to know where a variable isstored.Librarian:•Allows generations of library files - this simplifies management and control of regularly used code.•Reduce compilation time - using library files reduces compilation time. Code Analysis:•Call tree view - in SourceBoost IDE displays the function call tree.•Target Code Usage - From the complete program, down to Function level the code space usage can be view in SourceBoost IDE.•Target RAM Usage - From the complete program, down to Function level the RAM usage can be view in SourceBoost IDE.C language supersetBoostC compiler has some advanced features "borrowed" from C++ language. These features allows to develop more flexible and powerful code but one doesn't have to use them.ReferencesReferences can be used as function arguments. This provides very effective way to change values of the variables passed into a function as references:void foo( char& x ) //'x' is a reference{x = 10;}void main( void ){char a = 1;foo( a ); //before the call 'a' is 1 and after the call it becomes 10...}Function overloadingFunctions can have same names and differ only by number and type of their arguments:void foo( void ) //'foo' number 1{...}void foo( char *ptr ) //'foo' number 2{...}void foo( char a, char b ) //'foo' number 3{...}void main( void ){foo(); //'foo' number 1 gets calledfoo( "test" ); //'foo' number 2 gets calledfoo( 10, 20 ); //'foo' number 3 gets called...}Function templatesFunctions can be declared and defined using data type placeholders. This feature allows writing very general code (for example linked lists) that isn't tightened to a particular data type and what may be more important to create libraries in form of header files:template <class T>void foo( T *t ){...}void main( void ){short s;foo<char>( "test" ); //'foo( char* )' gets calledfoo<short>( &s ); //'foo( short* )' gets called...}100001-BCPICPRO。
boost安装

或
# ./bjam --build-type=complete --layout=tagged stage
或
# ./bjam
方法2:
# cd /usr/src/boost_1_40_0/tools/jam
# ./build_dist.sh
也会完成Linux平台bjam和Boost的所有编译工作,并生成所有调试版、发行版的静态库和动态库。但不推荐该方式。
方法2:
(1) # cd /usr/src/boost_1_40_0/tools/jam/src
(2) # ./build.sh
编译完成后:
生成的可执行文件为
# /usr/src/boost_1_40_0/tools/jam/src/bin.linuxx86/bjam
需要将bjam.exe拷贝到源代码所在的目录
3. 完整编译Boost
对Boost进行完整编译,生成所有调试版、发行版的静态库和动态库。
方法1:
# cd /usr/src
# wget /projects/boost/files/boost/1.40.0/boost_1_40_0.tar.bz2
# tar --bzip2 -xvf boost_1_40_0.tar.bz2
# cd boost_1_40_0
# bjam --toolset=gcc --build-type=complete stage
或
# ./bjam --build-type=complete --layout=versioned //库名带gcc版本
# cp bin.linuxx86/bjam /usr/src/boost_1_40_0
Boost库的安装与使用

Boost库在Windows及Linux上的安装及使用Windows with VS20101.安装VS20102.下载安装Python (编译Boost库时需要)https:///3.下载 最新boost库/projects/boost/files/latest/download4.解压到指定目录。
例如:D:\boost_1_57_0这时,大部分库可以用了,但是与操作系统相关的部分还需要Build.比如thread库。
5.编译boost库运行command window. 开始菜单/运行/cmd输入Dos命令:d:输入Dos命令:cd d:\boost_1_57_0运行批处理:bootstrap.bat运行完后输入命令:./b2编译结束后就可以使用了6. 设置VS2010添加include 路径:d:\boost_1_57_0添加library路径: d:\stage\lib (编译好后产生的)Linux with GCC1.下载安装Python (编译Boost库时需要)https:///2.下载 最新boost库/projects/boost/files/latest/download3.解压到指定目录例如:/usr/boost_1_57_0这时,大部分库可以用了,但是与操作系统相关的部分还需要Build.比如thread库。
4.Build boost库运行命令窗口,将当前路径切到/usr/boost_1_57_0输入命令:./bootstrap.sh运行完后输入命令:./b2编译结束后就可以使用了5.编译使用boost库的项目例如程序文件为test.cppg++ -c test.cpp -o test.o –I/usr/boost_1_57_0g++ -o test test.o boost_thread.a–lstc++ -pthread –lrt-L/usr/boost_1_57_0/stage/lib注意:如果在使用STL库时报很多undefine的错误,多半是没有link STL 库的原因。
boost编译流程

boost编译流程Boost是一个由一系列C++库组成的开源项目,这些库提供了广泛的功能,用于增强C++语言的能力。
Boost库被广泛应用于C++开发中,它可以提供许多有用的功能,例如算法、容器、多线程、文件系统、正则表达式等等。
Boost库的编译流程相对简单,本文将介绍Boost库的编译流程及相关内容。
一、获取Boost库源代码二、解压源代码包1. boost - 该目录包含了所有的Boost库源代码2. doc - 该目录包含了Boost库的文档3. libs - 该目录包含了所有的Boost库的源代码和构建文件4. tools - 该目录包含了一些构建和安装工具三、构建Boost库进入解压后的源代码目录,打开终端或命令提示符,执行以下命令,进入Boost库的构建环境:$ ./bootstrap.sh (Linux和MacOS)或者$ .\bootstrap.bat (Windows)执行成功后,会生成一个名为b2或bjam的可执行文件,该文件是用于构建Boost库的工具。
四、编译Boost库在构建环境中执行以下命令,编译Boost库:$ ./b2 (Linux和MacOS)或者$ .\b2.exe (Windows)默认情况下,Boost库会在构建目录下的stage/lib目录中生成编译好的库文件。
使用者可以自行设置构建参数,控制Boost库的编译行为。
例如,可以通过指定编译器、选择要构建的库等方式来定制Boost库的编译。
五、安装Boost库执行以下命令,将编译好的Boost库安装到系统中:$ sudo ./b2 install (Linux和MacOS)或者$ .\b2.exe install (Windows)默认情况下,Boost库会被安装到系统的默认位置。
但是,使用者也可以通过设置install_path参数来指定安装路径。
六、配置开发环境将Boost库安装到系统后,需要配置开发环境,以便编译和链接Boost库。
boost在VS2010下的安装

其他版本也可用类似的方法进行编译
第一步:到官网,下载boost最新版boost_1_47_0.zip
第二步:将boost压缩包解压到C盘根目录下(在C盘操作简单,不会出错),目录为C:\BOOST_1_47_0,里面就是boost的源码和需要编译的文件及文档资料
第三步:用打开一个cmd命令窗口,在C:\Program Files\Microsoft Visual Studio 10.0\VC\bin目录下找到VCVARS32.bat,拖到cmd命令窗口,按回车
第四步:将cmd中的目录跳转到C:/boost_1_47_0/tools/build/v2下,拖动bootstrap.bat批处理文件到cmd,,按回车键,随即就会在C:/boost_1_47_0/tools/build/v2下生产一个bjam.exe和b2.exe。
第五步: 将bjam.exe复制或移动到boost的根目录下,即C:/boost_1_47_0下面。
然后在vc2010的工程目录下include项中包含C:\boost_1_47_0\bin.v2\libs,在lib目录下包含boost_files目录(自己最后保存编译的dll和lib文件的目录)
使用时,要在工程中包含相应的头文件。
最后申明:我是亲手实验每一步的过程所得结果,因为编译器版本和操作的原因,如您不能正常编译,请仔细检查原因或与给我留言。
第六步:将cmd命令中的目录跳到oolset=msvc-10.0 --build-type=complete stage 回车,等待20多分钟,编译就完成了
注意:整个操作过程中cmd命令窗口必须保证是开始打开的那个
附1:cmd 目录跳转指令 举例,例如,跳到d盘下的一个名为test的目录下,则输入cd d:\test按回车。
C++的boost库的编译安装

ICU编译(VS2010):ICU提供了unicode和国际化支持,目前的版本是 4.8.1。
ICU的主页是/。
(1). 下载可以从/projects/icu/files/下载源代码版本。
4.8.1是VS2010的,4.4.2才是VS2008的,如果是2010要做转换。
(2). 编译ICU的编译比较简单,打开ICU源代码目录下的source\allinone\allinone.sln,需要转换到VS2008格式,直接转换即可。
然后,选择release,Rebuild Solution即可。
(3). 测试将编译出来的bin目录加入到系统的PATH目录中去。
然后,重新打开allinone.sln工程。
需要通过测试的项目1. cintltst项目2. intltest项目3. iotest分别设置成启动项目,运行即可。
2. bzipbzip的主页是/,从/downloads.html下面下载源代码包即可,boost直接使用源代码来进行编译。
3. zlibzlib的主页是/,/projects/gnuwin32/files/zlib/从该网页下面下载源代码包即可,boost直接使用源代码来进行编译。
4. pythonpython的主页是/,下载python的2.5.2版本,安装即可。
boost默认是会编译python,并且会自动寻找python的安装目录。
ICU编译(MinGW):还未成功编译第一步:到官网,下载boost最新版boost_1_47_0.zip第二步:将boost压缩包解压到C盘根目录下(在C盘操作简单,不会出错),目录为C:\BOOST_1_47_0,里面就是boost的源码和需要编译的文件及文档资料第三步:用打开一个cmd命令窗口,在C:\Program Files\Microsoft Visual Studio 10.0\VC\bin目录下找到VCVARS32.bat,拖到cmd命令窗口,按回车第四步:将cmd中的目录跳转到C:/boost_1_47_0/tools/build/v2下,拖动bootstrap.bat批处理文件到cmd,,按回车键,随即就会在C:/boost_1_47_0/tools/build/v2下生产一个bjam.exe和b2.exe。
boost下载安装编译

理论上,本文适用于boost的各个版本,尤其是最新版本1.39.0;适用于各种C++编译器,如VC6.0,VS2003, VS2005,VS2008,gcc,C++ Builder等。
一、下载首先从boost官方主页下载最新版boost安装包(目前最新版是1.39.0)。
因为boost一部分类是需要编译成库才能使用的,所以我们还需要准备好boost专用的编译辅助工具bjam。
网上很多人都提倡直接使用boost安装包中附带的bjam源码来编译出bjam,但是之前需要修改若干配置脚本才能编译成功。
个人认为真没什么必要,费这劲毫无意义。
boost官方网站在提供boost安装包下载链接的同时也提供与该版本安装包对应的bjam的下载,只有200多KB,可以一同下载下来。
二、安装将boost安装包解压至本地目录,如:E:SDKboost_1_39_0,然后将bjam.exe拷贝到该目录下(bjam必须与boost-build.jam在同级目录)。
三、编译接下来就是最重要的编译步骤了。
需要打开命令提示符(cmd.exe)窗口并执行bjam,可以使用--help 参数来查看命令帮助。
这里详细讲解一下bjam的命令行参数,因为它非常重要。
首先,它涉及到编程环境的搭建,你需要根据自己今后具体的使用环境来选择合适的命令行参数;其次,它影响到你的硬盘空间,完全编译的话据说在3G以上,如果你同时拥有2个以上的IDE(如VC6和VC9共存)而且都要用到boost,那么占用多少硬盘就自己算吧……虽说如今大家的硬盘空间都不成问题,但就像本人一样崇尚合理利用资源不习惯铺张浪费提倡节俭的童子应该大有人在。
综合以上两点因素,本人使用的bjam命令如下:bjam stage --toolset=msvc-9.0 --without-python--stagedir="E:SDKboost_1_39_0vc9" link=shared runtime-link=shared threading=multi debug release下面详细解释一下每个参数的含义,请务必仔细看完:stage/install:stage表示只生成库(dll和lib),install还会生成包含头文件的include目录。
boost安装
boost 1_33_1在VC6.0上的安装、编译、配置2008-03-05 20:52转载自:/roger_77/archive/2006/01/13/577998.aspx最近要使用boost库来进行一些跨平台的开发,比如使用thread线程库来开发多线程的程序。
在网上找了一下,大部分关于boost安装编译的文档是在环境下进行的,关于boost 在VC6.0上进行编译的比较少,由于本人的主要开发环境是VC6.0,所以自己动手进行了下面的boost配置编译工作。
一.编译前的准备.本人的VS6.0安装在“D:\Program Files\Microsoft Visual Studio”目录,下载boost的地址"/boost/boost_1_33_1.zip?download",boost解压后的根目录为:"D:\C++\boost_1_33_1",可参考改为相应的目录即可。
二.编译步骤1.修改“D:\C++\boost_1_33_1\tools\build\jam_src\build.bat”中的所有:“C:\Program Files\Microsoft Visual Studio”为“D:\Program Files\Microsoft Visua l Studio”,也就是VS6.0的安装目录。
2.执行:“D:\C++\boost_1_33_1\tools\build\jam_src\build.bat”产生一个子文件夹“bin.ntx86”,里面有个可执行文件"bjam.exe"。
3.拷贝这个可执行文件"bjam.exe"放到“D:\C++\boost_1_33_1”目录.4.添加“D:\C++\boost_1_33_1”到操作系统的环境变量path中,SET path="D:\C++\boost_1_33_1";%PA TH%5.打开控制台(cmd),在命令行执行后面的步骤.5.1 先执行以下命令,设置VC编译环境:SET MSVC_ROOT="D:\Program Files\Microsoft Visual Studio\VC98"SET VISUALC="D:\Program Files\Microsoft Visual Studio\VC98"SET JAM_TOOLSET=VISUALCSET PYTHON_ROOT=D:\Program Files\Python2.2.2SET PYTHON_VERSION=2.25.2 进入“D:\Program Files\Microsoft Visual Studio\VC98\bin"目录,运行"VCV ARS32.BA T”,5.3 然后转到“D:\Program Files2\boost_1_33_1”目录,最后运行下面的命令来编译boost库:(仍然是同一个控制台窗口!否则无效)bjam -sBOOST_ROOT=. -sTOOLS=msvc "-sBUILD=debug release static/dynamic"6.编译过程在boost的根目录下产生“bin\boost\libs”文件夹,约130兆;整个过程约25分钟.7.为了以后在项目中配置方便,把编译出来的*.lib,*.dll文件搜索出来后,把这些文件统一放到一个自己新建的目录下,比如libs_vc6目录。
boost 编译参数
boost 编译参数boost是一个开源的C++库,提供了丰富的功能和工具,用于增强C++的性能和功能。
在编译boost库时,可以使用不同的编译参数来优化编译过程和生成的代码。
本文将介绍几个常用的boost编译参数,并对其功能和用法进行详细说明。
一、--with-<library>参数--with-<library>参数用于指定需要编译的boost库。
boost库提供了很多模块,如system、filesystem、thread等,可以根据具体需求选择需要编译的模块。
例如,使用--with-system参数可以编译boost.system库,用于处理系统相关的功能。
二、--without-<library>参数--without-<library>参数用于指定不需要编译的boost库。
如果不需要某个库的功能,可以使用该参数禁用对应的库的编译。
例如,使用--without-regex参数可以禁用正则表达式库的编译。
三、--build-type参数--build-type参数用于指定编译类型,常用的取值有debug和release。
debug类型用于调试和测试,生成的代码包含调试信息;release类型用于发布,生成的代码进行了优化,更加高效。
可以根据具体需求选择编译类型。
四、--toolset参数--toolset参数用于指定编译工具集,如gcc、clang、msvc等。
不同的编译工具集有不同的编译器和选项,可以根据具体需求选择合适的编译工具集。
例如,使用--toolset=gcc可以指定使用gcc编译器进行编译。
五、--cxxflags参数--cxxflags参数用于指定额外的编译选项。
可以使用该参数添加自定义的编译选项,如优化级别、警告级别等。
例如,使用--cxxflags="-O2 -Wall"可以指定编译器使用级别为2的优化,并开启所有警告。
boost 编译参数

boost 编译参数摘要:1.编译参数简介2.Boost 编译参数的作用3.Boost 编译参数的设置方法4.Boost 编译参数的常见问题及解决方法5.总结正文:Boost 是一个广泛应用于C++编程语言的开源库,它提供了许多有用的功能,例如智能指针、正则表达式、文件系统操作等。
在使用Boost 库进行编程时,我们需要对其进行编译,而编译过程中所使用的参数可以影响编译的结果。
因此,了解Boost 编译参数的作用及设置方法是非常有必要的。
首先,让我们了解一下Boost 编译参数。
编译参数,也称为编译选项或编译开关,是在编译源代码时告诉编译器如何处理源代码的一种方式。
Boost 编译参数主要用于控制编译器的行为,例如选择编译器支持的特性、优化编译等。
接下来,我们来探讨一下Boost 编译参数的作用。
Boost 编译参数可以帮助我们实现以下目标:1.选择编译器支持的特性。
Boost 库提供了许多高级特性,但并非所有编译器都支持这些特性。
通过设置编译参数,我们可以选择编译器支持的特性,从而确保编译的顺利进行。
2.优化编译结果。
通过设置编译参数,我们可以控制编译器生成的代码的性能和体积。
例如,我们可以使用编译参数启用编译器的优化功能,从而生成更高效的可执行文件。
3.控制编译过程的行为。
通过设置编译参数,我们可以控制编译器在编译过程中的行为。
例如,我们可以设置编译参数以启用或禁用编译器警告,或者控制编译器如何处理未定义的行为。
那么,如何设置Boost 编译参数呢?我们可以通过修改Boost 库的配置文件(例如,`project-config.jam`)或直接在编译命令行中指定编译参数。
具体方法取决于我们使用的编译器和构建工具。
在设置Boost 编译参数时,我们需要注意以下几点:1.确保所使用的编译器支持Boost 库。
不同的编译器对Boost 库的支持程度不同,因此在设置编译参数之前,我们需要确保所使用的编译器支持Boost 库。
boost的编译使用

boost的编译使用Boost是一个开源的C++库集合,提供了各种功能和工具,用于加速C++应用程序的开发过程。
它旨在提高C++程序的性能、可移植性和功能扩展性。
Boost库被广泛应用于各种领域,如网络编程、多线程编程、图形图像处理等。
Boost的编译使用非常简单,只需按照以下步骤进行即可:1. 下载Boost库:从官方网站下载最新版本的Boost库,解压缩到任意目录。
2. 设置环境变量:将Boost库所在目录添加到系统的环境变量中,以便编译器可以找到Boost库的头文件和库文件。
3. 编写代码:使用Boost库提供的功能和工具编写C++代码。
比如,如果需要使用Boost的字符串处理功能,只需包含相应的头文件,并使用Boost命名空间即可。
4. 编译代码:使用C++编译器编译代码。
在编译时,需要指定Boost 库的路径和库文件名。
5. 运行程序:编译成功后,就可以运行生成的可执行文件了。
根据具体的应用场景,可能需要提供一些参数或输入文件。
Boost库提供了丰富多样的功能和工具,可以大大简化C++程序的开发过程。
比如,Boost的智能指针可以帮助管理动态内存,避免内存泄漏;Boost的多线程库可以方便地实现并发编程;Boost的正则表达式库可以进行强大的文本匹配和处理等等。
Boost是一个功能强大的C++库集合,可以提高C++程序的开发效率和性能。
使用Boost库,开发者可以更加专注于业务逻辑的实现,而不必过多关注底层的细节。
同时,Boost库的开源性和广泛应用性也使得开发者可以从社区中获得丰富的资源和支持。
无论是初学者还是有经验的开发者,都可以从Boost库中受益,并加速自己的C++开发过程。
Boost库的编译
-- 输出: libboost_regex-vc90-mt-s.lib
libboost_regex-vc90-mt-1_44.lib
(4)生成 Release 版本,多线程,静态链接C++标准库 的regex 静态库
bjam --toolset=msvc-9.0 --stagedir=D:\ThirdParty\boost_1_44_0\boost-1_44\stage --with-regex link=static threading=multi variant=release runtime-link=static stage
【注意】: Boost 源代码所在路径最好全英文,不要有空格、特殊字符、中文等
编译要花上30分钟左右(根据PC性能所定), 会在指定生成目录:
D:\ThirdParty\boost_1_44_0\boost-1_44\stage下生成对应库文件和头文件。
Bjam 选项、参数说明
--build-dir=<builddir> 编译的临时文件会放在builddir里(编译完就可以把它删除了)
-- 输出: libboost_regex-vc90-mt-gd.lib
libboost_regex-vc90-mt-gd-1_44.lib
(2)生成 Debug 版本,多线程,静态链接C++标准库 的regex 静态库
bjam --toolset=msvc-9.0 --stagedir=D:\ThirdParty\boost_1_44_0\boost-1_44\stage --with-regex link=static threading=multi variant=debug runtime-link=static stage
linux下boost编译

2.编译,运行
--g++ -o test test.cpp
#ls
test test.cpp
# ./test
123456
123.456
int a= lexical_cast<int>("123456");
double b = lexical_cast<double>("123.456");
std::cout << a << std::endl;
std::cout << b << std::endl;
return 0;
所以编译完了是这样的
5.update动态链接库: sudo ldconfig
安装完毕
三,测试使用:
1.测试代码
#cat test.cpp
#include <boost/lexical_cast.hpp>
#include <iostream>
int main()
{
using boost::lexical_cast;
The following directory should be added to linker library paths:
/home/terry/Local/boost_1_47_0/stage/lib
因为我是解压到/home/terry/Local/boost_1_46_1下了
搜到所有的boost库
然后:
sudo apt-get install libboost-all-dev
安装相应的库
boost 编译 参数

boost 编译参数使用Boost编译参数优化C++程序的方法引言:在C++编程中,程序的性能优化是一个重要的问题。
而Boost是一个C++库的集合,提供了许多实用的工具和组件,可以帮助我们更高效地编写C++程序。
本文将介绍如何使用Boost编译参数来优化C++程序的性能。
一、了解Boost编译参数的作用Boost提供了一些编译参数,可以在编译C++程序时对程序进行优化。
这些编译参数可以帮助我们提高程序的性能,减少内存的占用,提高代码质量等。
二、使用Boost编译参数进行性能优化1. 使用`-O`参数进行编译优化。
`-O`参数是GCC编译器的一个优化选项,它可以对代码进行优化,提高程序的执行速度。
在使用Boost时,我们可以将该参数与其他Boost编译参数一起使用,以获得更好的性能优化效果。
2. 使用`-DNDEBUG`参数进行代码优化。
`-DNDEBUG`参数可以关闭断言,从而减少程序的运行时间。
在使用Boost时,我们可以通过在编译命令中添加`-DNDEBUG`参数来关闭断言,以提高程序的性能。
3. 使用`-march=native`参数进行硬件优化。
`-march=native`参数告诉编译器使用本地处理器的最佳指令集。
这样可以充分利用处理器的特性,提高代码的执行效率。
在使用Boost时,我们可以通过在编译命令中添加`-march=native`参数来进行硬件优化。
4. 使用`-finline-functions`参数进行函数内联。
函数内联可以减少函数调用的开销,提高程序的执行速度。
在使用Boost时,我们可以通过在编译命令中添加`-finline-functions`参数来进行函数内联优化。
5. 使用`-fno-exceptions`参数进行异常处理优化。
异常处理是一种消耗资源的操作,对程序的性能有一定的影响。
在使用Boost时,如果我们确定程序中不会出现异常,可以通过在编译命令中添加`-fno-exceptions`参数来关闭异常处理,以提高程序的性能。
- 1、下载文档前请自行甄别文档内容的完整性,平台不提供额外的编辑、内容补充、找答案等附加服务。
- 2、"仅部分预览"的文档,不可在线预览部分如存在完整性等问题,可反馈申请退款(可完整预览的文档不适用该条件!)。
- 3、如文档侵犯您的权益,请联系客服反馈,我们会尽快为您处理(人工客服工作时间:9:00-18:30)。
rem boost_1_49_0共有21个库需要编译使system, graph, graph_parallel, iostreams, locale, math,
rem mpi, program_options, python, random, regex, serialization, signals, system, test, thread, timer, wave。
rem 拷贝至\stage\lib\win32\vs9_0
copy stage\lib\*.* stage\lib\win32\vs9_0\*.* /Y
rem ##################################################################
rem 创建者:黄志丹 great3779@ 20120301
rem @echo off
rem 先编译bjam
start bootstrap.bat
rem 等待一分钟待bjam编译完成(如果电脑性能过差,可以设置等待时间更长一些)
SET SLEEP=ping 127.0.0.1 -n
rem 拷贝至\stage\lib\x64\vs10_0
copy stage\lib\*.* stage\lib\x64\vs10_0\*.* /Y
rem ##################################################################
rem 删除lib下所有文件(不删除文件夹)
rem ******************************************************************
rem 先删除lib下所有文件(不删除文件夹)
del stage\lib\*.* /Q
rem 编译vs2010 x64库文件
bjam --toolset=msvc-10.0 architecture=x86 address-model=64 --with-system --with-thread --with-date_time --with-filesystem --with-serialization
rem 我仅选用了自己常用的几个做以上编译示例,其他使用者可以根据自己的需求选择编译。全部编译boost大概需要1个小时以上(视机器性能)
rem 全部编译boost的命令如下:bjam --toolset=msvc-9.0 --build-type=complete stage
rem 拷贝至\stage\lib\x64\vs9_0
copy stage\lib\*.* stage\lib\x64\vs9_0\*.* /Y
rem ##################################################################
rem ******************************************************************
rem 拷贝至\stage\lib\win32\vs10_0
copy stage\lib\*.* stage\lib\win32\vs10_0\*.* /Y
rem ##################################################################
rem 先删除lib下所有文件(不删除文件夹)
del stage\lib\*.* /Q
rem 编译vs2010 win32库文件
bjam --toolset=msvc-10.0 architecture=x86 --with-system --with-thread --with-date_time --with-filesystem --with-serialization
rem ******************************************************************
rem 先删除lib下所有文件(不删除文件夹)
del stage\lib\*.* /Q
rem 编译vs2008 x64库文件
bjam --toolset=msvc-9.0 architecture=x86 address-model=64 --with-system --with-thread --with-date_time --with-filesystem --with-serialization
rem 先删除lib下所有文件(不删除文件夹)
del stage\lib\*.* /Q
rem 编译vs2008 win32库文件
bjam --toolset=msvc-9.0 architecture=x86 --with-system --with-thread --with-date_time --with-filesystem --with-serialization
md stage\lib\x64\vs9_0\
rem vs2010 win32库文件夹
md stage\lib\win32\vs10_0\
rem vs2010 x64库文件夹
md stage\lib\x64\vs10_0\
rem ******************************************************************
%SLEEP% 60 > nul
rem 利用bjam编译boost库
rem 在此,我们编译vs2008和vs2010下的x86及x64共4类boost库文件
rem 建立库文件夹
rem vs2008 win32库文件夹
md stage\lib\win32\vs9_0\
rem vs2008 x64库文件夹
