Cisco 安全设备管理工具(SDM)配置详解
Cisco SDM配置详解

14.2.4 Cisco SDM安装配置(1)14.2.4 Cisco SDM安装配置(1)用户可以使用Cisco SDM快速容易地部署Cisco路由器,实现WAN接入和网络安全特性。
Cisco客户可以通过Cisco SDM降低Cisco路由器的所有成本,因为可以使用由Cisco工程师进行过端到端测试并已经过Cisco TAC批准的由Cisco SDM生成的配置。
内置于Cisco SDM中的配置检查有助于减少配置出错机会。
1.安装接口卡和连接路由器电缆在使用SDM配置路由器前必须先安装路由器适用的所有必需的硬件附件,如用来连接网络的WAN接口卡(WIC)、“网络模块”(NM)或高级接口模块(AIM)卡。
2.配置计算机并将其连接到路由器在使用SDM配置路由器前必须设置计算机使其与SDM实现通信。
SDM出厂时随附有默认配置文件,它会为路由器上的LAN接口分配一个IP地址,此时必须将计算机配置为与路由器的LAN接口位于同一子网中。
首先,确定是否将路由器配置为DHCP服务器。
如表14-1所示为已经配置为DHCP 服务器的路由器,此时,只需配置计算机以自动获取IP地址和DNS服务器IP地址,并将计算机上的以太网端口与路由器的LAN端口相连接即可。
14.2.4 Cisco SDM安装配置(2)14.2.4 Cisco SDM安装配置(2)表14-2所示为未配置DHCP服务器的路由器,此时,必须为计算机分配静态IP地址,可选的IP地址范围为10.10.10.2 ~ 10.10.10.6,子网掩码255.255.255.248,将“默认网关”和“DNS服务器”字段为空,然后将计算机连接至路由器相应端口。
表14-2 未配置为DHCP服务器的路由器14.2.4 Cisco SDM安装配置(3)14.2.4 Cisco SDM安装配置(3)3.登录路由器SDM在Windows XP、Windows 2000、Windows 2003、Windows Me、Windows NT 4.0(安装Service Pack4)或Windows 98的计算机上的Internet Explorer 5.5(或更高版本)和Netscape7.1下运行,同时支持1.4.2_05或更高版本的Java插件。
思科CISCO设备的基本操作详解

CISCO设备的基本操作网络设备交换机、路由器、防火墙、VPN……..共同特性有智能,能识别数据报文中的控制信息,对数据进行定向转发。
交换机能识别数据帧中的MAC地址信息,在同一网段转发数据。
效率比集线器高。
默认工作在第二层。
主要用于组建局域网。
路由器能识别数据报文中的第三层信息(IP地址),在不同网段转发数据。
主要用于连接局域网和广域网。
路由器的内部组件:主板 CPU 存贮系统接口存贮系统ROM 只读存贮器基本的引导文件 1 →FLASH 闪存操作系统IOS 2 → RAM 随机存贮器 NV RAM 非易失内存配置文件 3→启动顺序寄存器的值( 注册表)正常 1 2 3 0X2102特殊 1 2 0X2142 跳过配置文件(用于密码的恢复)路由器的接口类型:Router>sh ip int briefInterface IP-Address OK? Method Status ProtocolFastEthernet0/0 unassigned YES unset administratively down downFastEthernet0/1 unassigned YES unset administratively down downSerial0/0 unassigned YES unset administratively down downSerial0/1 unassigned YES unset administratively down downSerial0/2 unassigned YES unset administratively down downSerial1/0 unassigned YES unset administratively down downSerial1/1 unassigned YES unset administratively down downSerial1/2 unassigned YES unset administratively down downSerial1/3 unassigned YES unset administratively down down一、局域网接口RJ-45 (以太网接口)100M F0/0 F0/1 fast ethernet 模块化设备2600以上1000M G0/0 G0/110G Ten3/1二、广域网接口异步串行口(用于异步拨号网络,淘汰)同步串行口( 用于DDN和帧中继网络)(铜缆)2Mserial S0 S1 S0/0 S0/1V.24 最大支持64K 淘汰V.35 可支持64k-2MPOS接口(packet over SDH)POS 1/0/0 POS 1/0/1 SDH专线(光纤)155M插槽/模块/接口2M、4M、8M、10M…. 155M…622M …2.5G…10G…40G设备的登录在网络管理中,希望这些网络设备按我们的要求去工作→指令(相关参数)控制台console 命令行网络 1. telnet 命令行2. SDM WEB页面一.控制台方式登录。
思科课件2、配置静态路由和使用SDM管理路由

五、实训步骤
配置计算机接口 配置PCA到PCD的网络接口信息,本例中以Windows XP的网络配置为例, 配置如图4-2所示,根据表4.1中的内容,依次配置4台计算机的IP信息。
五、实训步骤
4.测试各工作站之间的连通性。
五、实训步骤
五、实训步骤
五、实训步骤
ቤተ መጻሕፍቲ ባይዱ
五、实训步骤
五、实训步骤
五、实训步骤
五、实训步骤
1.连接路由器和各工作站。 2.配置路由器和各工作站IP地址等参数。 3.检查路由器的路由表信息。 4.测试各工作站之间的连通性。 5.检查路由器的运行配置文件内容。
2.4 实训2 静态路由、默认路由配置
一、实训目的 掌握静态路由和默认路由的配置方法。 二、实训任务 配置两台路由器上的静态路由,实现模拟远程网络 互联。 三、实训设备 路由器Cisco 2611两台,带有网卡的工作站PC两台, 控制台电缆一条,交叉双绞线若干。
2.1.2 路由协议的分类
1.直连路由、静态路由、动态路由 直连路由(connected route) 静态路由(static route) 动态路由(dynamic route)
图2-1-7
直连路由、静态路由、动态路由
2.1.2 路由协议的分类
2.IGP和EGP
图2-1-8 IGP和EGP
2.1.2 路由协议的分类
2.3 使用SDM管理Cisco路由器
2.3.1 SDM的安装
安装SDM需要的软件有: Java JRE(java 运行环境)安装包,可以从SUN网站下载。本 JRE java SUN 书 以 java 6.0 update 5 为 例 , 下 载 安 装 包 文 件 名 为 jre-6u5windows-i586-p-s.exe。 SDM安装包,可以从思科网站下载。本书以SDM 2.4.1中文版 为例,下载安装包文件名为SDM-V241-zh.zip。
第4章_Cisco的互联网络操作系统(IOS)和安全设备管理器(SDM)
路由器软、硬件概述
SDM程序既可以安装在PC上,也可以安装 在路由器上。安装在PC上能节约路由器的内 存并且可以它来管理其他支持SDM管理的路 由器,但是这种模式下不能执行恢复默认的操 作,由于IE默认禁止网页访问本机资源,需要 修改IE的安全设置(打开IE浏览器(以IE7.0 为例)的工具菜单,选择“Internet选项”, 选择“高级”选项卡,在“设置”里找到“允 许活动内容在我的计算机上运行*,启用该功 能;
定义路由器术语
模
式
定
义
用户模式 特权模式 全局配置模式 特定配置模式 设置模式
被限定于基本的监视操作命令Router> 提供对所有路由器命令的访问Router# 提供可以影响整个系统运行的命令 Router(config)# 只提供可以影响接口/进程运行的命令 提供可以交互的配置对话方式
编辑和帮助功能 使用Cisco高级编辑功能帮助配置路由器,使用问号(?) 增强的编辑命令
义
Ctrl+P或↑ Ctrl+N或↓ Show history Show terminal Terminal history size
上次输入过的命令 显示前面输入过的命令 默认时显示最近输入过的10条命令 显示终端配置和命令历史缓存空间的大小 修改缓存空间的大小(最大为256)
②Traceroute :使用带有IP生存周期超时的ICMP来跟踪数据包 通过互联网的路径。 Router#traceroute ? ③Telnet:使用网络上的IP和传输层的TCP来和远端主机创建会 话 Router#telnet ? ④show interface:显示路由器上所有接口上的配置参数和统计 数据。 Router#show interface ? ⑤show ip interface:提供有关路由器接口的第3层配置的信息 ⑥show ip interface brief:提供包含逻辑地址和状态的路由 器接口的快速汇总。 ⑦show protocols:查看每个接口上的第1层和第2层的状态以及 使用的IP地址 ⑧show controllers:显示物理接口自身的信息。
CISCO IOS 软件版本 12.3T 说明书
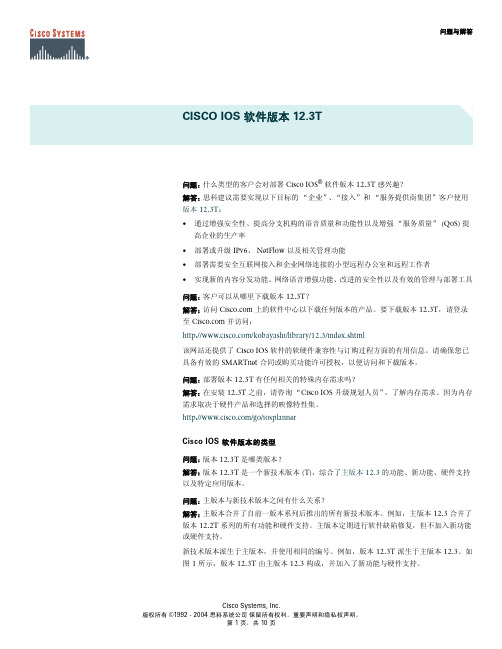
问题与解答CISCO IOS 软件版本 12.3T问题:什么类型的客户会对部署 Cisco IOS®软件版本 12.3T 感兴趣?解答:思科建议需要实现以下目标的“企业”、“接入”和“服务提供商集团”客户使用版本 12.3T:• 通过增强安全性、提高分支机构的语音质量和功能性以及增强“服务质量”(QoS) 提高企业的生产率• 部署或升级 IPv6、NetFlow 以及相关管理功能• 部署需要安全互联网接入和企业网络连接的小型远程办公室和远程工作者• 实现新的内容分发功能、网络语音增强功能、改进的安全性以及有效的管理与部署工具问题:客户可以从哪里下载版本 12.3T?解答:访问 上的软件中心以下载任何版本的产品。
要下载版本 12.3T,请登录至 并访问:/kobayashi/library/12.3/index.shtml该网站还提供了 Cisco IOS 软件的软硬件兼容性与订购过程方面的有用信息。
请确保您已具备有效的 SMARTnet 合同或购买功能许可授权,以便访问和下载版本。
问题:部署版本 12.3T 有任何相关的特殊内存需求吗?解答:在安装 12.3T 之前,请咨询“Cisco IOS 升级规划人员”,了解内存需求。
因为内存需求取决于硬件产品和选择的映像特性集。
/go/iosplannerCisco IOS 软件版本的类型问题:版本 12.3T 是哪类版本?解答:版本 12.3T 是一个新技术版本 (T),综合了主版本 12.3的功能、新功能、硬件支持以及特定应用版本。
问题:主版本与新技术版本之间有什么关系?解答:主版本合并了自前一版本系列后推出的所有新技术版本。
例如,主版本 12.3 合并了版本 12.2T 系列的所有功能和硬件支持。
主版本定期进行软件缺陷修复,但不加入新功能或硬件支持。
新技术版本派生于主版本,并使用相同的编号。
例如,版本 12.3T 派生于主版本 12.3。
基于思科路由器的IOS入侵检测功能配置SDM

专业务实 学以致用
任务实施及方法技巧
6、基于网络IPS与基于主机IPS 基于网络IPS缩写为NIPS,网络探测器安装到网段的主干,来监视多台主机的活动。 基于主机IPS缩写为HIPS,每一台主机上都安装有管理软件的代理程序。思科安全代理CSAs 对主机进行防御并报告给管理控制台。HIPS为每个主机提供检测与防御,HIPS不需要特殊的
测IDS与入侵防护IPS进行相关知识的综合介绍,并加以区别。最后通过在思科路由器或PIX
防火墙上利用SDM配置IPS完成入侵防护功能的规划与配置。 IDS与IPS都具有对攻击进行识别的能力,例如对网络与主机资源的非法访问或攻击等, 也都可以将发现的攻击行为进行日志及报警并发送到管理控制台。主要区别在于: IDS类似于Sniffer Pro等协议分析或嗅探软件的功能,放置于网络关键点进行协议数据 检查,一般采取旁路方式进行协议数据的分析(例如利用端口镜在交换机上分流共享到网络 关键入口的协议数据),将这获得的协议数据与攻击特征库相比较,以确定是否发生攻击行 为。当确认发生网络攻击后,IDS可采取的动作主要是日志、报警或向管理控制台发送消息, 较高级的是能与防火墙联动对正在进行的攻击进行阻断。 IPS是以串联方式放置与防火墙后,或串入网络主干对关键区域的流量进行入侵防护, 一般采取在线方式,所有流经IPS的数据流量,IPS都可以加以控制,以终止对网络的攻击行 为。将流经的协议数据与攻击特征库相比较,识别针对网络的攻击,并能终止攻击的继续进 行,根据预先设定对以类攻击进行记录,对同样的攻击做出快速准确的判断与阻止。
互联网 互联网
Cisco_SDM使用方法

Cisco 安全设备管理工具:SDMSDM(Security Device Manager)是Cisco公司提供的全新图形化路由器管理工具。
SDM在新版CCNP第三门课程ISCW1.0中重点讲解,该工具利用WEB界面、Java技术和交互配置向导使得用户无需了解命令行接口(CLI)即可轻松地完成IOS路由器的状态监控、安全审计和功能配置包括:QoS、Easy VPN Server、IPS、DHCP Server、动态路由协议等配置任务也可以利用SDM轻松而快捷地完成。
使用SDM可以简化网络管理员的工作量和出错的概率。
使用SDM 进行管理时,用户到路由器之间使用加密的HTTP连接及SSH v2协议,安全可靠。
目前Cisco 的大部分中低端路由器包括8xx, 17xx, 18xx, 26xx(XM), 28xx, 36xx, 37xx, 38xx, 72xx, 73xx等型号都已经可以支持SDM。
SDM在设备上默认Http(s)管理IP是10.0.10.1;所以如果采用默认配置登陆的话一定要保证PC的地址在10.0.10.0网段。
SDM的默认用户名是cisco,密码也是cisco.SDM程序既可以安装在PC上,也可以安装在路由器上。
安装在PC上能节约路由器的内存并且可以它来管理其他支持SDM管理的路由器,但是这种模式下不能执行恢复默认的操作,另外由于IE默认禁止网页访问本机资源,需要修改IE的安全设置(打开IE浏览器(以IE7.0为例)的工具菜单,选择“Internet选项”,选择“高级”选项卡,在“设置”里找到“允许活动内容在我的计算机上运行*,启用该功能;另外在“隐私”选项卡中将“打开窗口阻止程序”关闭)。
安装到路由器时基本安装需要大约4-5M Flash空间,组件Cisco SDM Express(需要1.5M Flash)只用于路由器的初始化配置无须安装。
SDM下载地址为:/pcgi-bin/tablebuild.pl/sdm(需要CCO账号),下载并解压SDM-V21.zip,运行Setup程序即可进行SDM的安装。
Cisco 3800 系列集成多业务路由器 快速说明书

快速入门指南Cisco 3800 系列集成多业务路由器快速入门指南包括许可证和担保信息1思科系统公司 90 天硬件保证条款第 2 页2概述第 3 页3文档、设备和工具第 4 页4安装机箱第 5 页5连接电缆第 16 页6启动路由器第 23 页7端口编号第 26 页8执行初始配置第 27 页9下一步是什么第 31 页10获取文档第 32 页11文档反馈第 32 页12获取技术支持第 32 页13获取其它出版物和信息第 34 页1 思科系统公司 90 天硬件保证条款专门针对用户可在保用期内享受的硬件保证及各种服务制定的适用条款。
在 网站上提供有正式的 Warranty Statement (保证声明),其中包括适用于 Cisco 软件的保证信息和许可证协议。
遵循以下步骤可访问 并下载Cisco Information Packet以及保证和许可证协议。
1.启动浏览器,然后转到此 URL:/univercd/cc/td/doc/es_inpck/cetrans.htm页面显示 Warranties and License Agreements。
2.要阅读Cisco Information Packet,请遵循以下步骤:a.单击Information Packet Number字段,并确认部件号 78-5235-03A0 突出显示。
b.选择您阅读文档所要使用的语言。
c.单击Go。
在 Information Packet 中显示 Cisco Limited Warranty and Software License 页。
d.阅读在线文档,或单击PDF图标采用“Adobe 可移植文档格式”(PDF) 下载并打印文档。
注意您必须具备 Adobe Acrobat Reader 才能查看和打印 PDF 文件。
您可从 Adobe 网站下载该程序,网址为:: 3.要阅读产品保证信息的译文和本地化版本,请遵循以下步骤:a.在 Warranty Document Number 字段中输入此部件号:78-5236-01C0b.选择您阅读文档所要使用的语言。
Cisco 安全设备管理工具(SDM)配置详解
大家在学习其他技术的时候,尤其是一些初学者,总会找到一些图形化管理工具辅助管理,比如管理MySQL的PHPMyAdmin,管理Linux的Webmin,那么管理Cisco这种网络设备是不是也有图形化管理程序呢?答案是肯定,思科公司针对一些初级人员推出的图形化管理工具Cisco Router and Security Device Manager,也就是我们常说的SDM即可轻松的解决此问题,当然,不要有了图形化管理工具就不去学习思科技术了,图形化管理工具只是替代命令的工具,有了它大家可以不用去记那么多复杂的命令了,但是原理依然要掌握,不然如果你连什么是VPN都不知道,该如何去配置呢?看到这里相信你一定非常想一睹SDM的芳容,呵呵,不要着急,先做一下准备工作。
用到的工具有1、DynamipsGUI一款非常优秀的模拟软件,可以模拟真实的IOS环境,而非一般的模拟软件那样模拟命令,所以,在这款模拟器下你会有种错觉是在真实的环境。
不要以为他有多么难学,初学者可能感觉配置比较麻烦,但是用了一段时间你会发现这才是真正的模拟器,会对你日后接触真是机器有很大的帮助。
软件的官方网站是,大家可以到网站上下载最新版本,软件为免费软件,自愿注册,未注册版本只是在标题上显示未注册版本,不限制任何功能,与注册版功能完全相同。
2、SecureCRT一款非常优秀的远程连接管理软件,支持多种协议,使用方便。
推荐大家使用,包括以后到企业去工作,笔记本电脑中也是必须安装这个软件的。
我们用它来链接我们的网络设备。
3、unzip-c7200-advsecurityk9-mz.124-11.T.bin思科的大部分IOS都是支持SDM,如果你发现你的设备不支持,请下载最新版本的IOS。
4、jre-6u3-windows-i586-p-sJava的运行环境,SDM是基于Java开发的Web应用程序,所以,要Java虚拟机的支持。
5、SDM-V241-zh我们的主角,SDM,大家下载中文版,当然如果你的英文比较好也可以用英文的。
Cisco设备配置基本命令详解全

Cisco设备配置基本命令详解交换机支持的命令:switch: ;交换机的ROM状态1.rommon> ; 路由器的ROM状态hostname> ;用户模式hostname# ;特权模式hostname(config)# ;全局配置模式hostname(config-if)# ;接口状态交换机口令设置:switch>enable ;进入特权模式switch#config terminal ;进入全局配置模式switch(config)#hostname <hostname> ;设置交换机的主机名switch(config)#enable secret xxx ;设置特权加密口令switch(config)#enable password xxa ;设置特权非密口令switch(config)#line console 0 ;进入控制台口switch(config-line)#line vty 0 4 ;进入虚拟终端switch(config-line)#login ;允许登录switch(config-line)#password xx ;设置登录口令xxswitch#exit ;返回命令交换机VLAN设置:switch#vlan database ;进入VLAN设置switch(vlan)#vlan 2 ;建VLAN 2switch(vlan)#no vlan 2 ;删vlan 2switch(config)#int f0/1 ;进入端口1switch(config-if)#switchport access vlan 2 ;当前端口加入vlan 2 switch(config-if)#switchport mode trunk ;设置为干线switch(config-if)#switchport trunk allowed vlan 1,2 ;设置允许的vlan switch(config-if)#switchport trunk encap dot1q ;设置vlan 中继switch(config)#vtp domain <name> ;设置发vtp域名2.switch(config)#vtp password <word> ;设置发vtp密码switch(config)#vtp mode server ;设置发vtp模式switch(config)#vtp mode client ;设置发vtp模式交换机设置IP地址:switch(config)#interface vlan 1 ;进入vlan 1switch(config-if)#ip address <IP> <mask> ;设置IP地址switch(config)#ip default-gateway <IP> ;设置默认网关switch#dir flash: ;查看闪存交换机显示命令:switch#write ;保存配置信息switch#show vtp ;查看vtp配置信息switch#show run ;查看当前配置信息switch#show vlan ;查看vlan配置信息switch#show interface ;查看端口信息switch#show int f0/0 ;查看指定端口信息2. 路由器支持的命令:路由器显示命令:router#show run ;显示配置信息router#show interface ;显示接口信息router#show ip route ;显示路由信息router#show cdp nei ;显示邻居信息router#reload ;重新起动路由器口令设置:router>enable ;进入特权模式router#config terminal ;进入全局配置模式router(config)#hostname <hostname> ;设置交换机的主机名router(config)#enable secret xxx ;设置特权加密口令router(config)#enable password xxb ;设置特权非密口令router(config)#line console 0 ;进入控制台口router(config-line)#line vty 0 4 ;进入虚拟终端router(config-line)#login ;要求口令验证router(config-line)#password xx ;设置登录口令xxrouter(config)#(Ctrl+z) ;返回特权模式router#exit ;返回命令路由器配置:router(config)#int s0/0 ;进入Serail接口router(config-if)#no shutdown ;激活当前接口router(config-if)#clock rate 64000 ;设置同步时钟router(config-if)#ip address <ip> <netmask> ;设置IP地址router(config-if)#ip address <ip><netmask> second ;设置第二个IP router(config-if)#int f0/0.1 ;进入子接口router(config-subif.1)#ip address <ip><netmask> ;设置子接口IP router(config-subif.1)#encapsulation dot1q <n> ;绑定vlan中继协议router(config)#config-register 0x2142 ;跳过配置文件router(config)#config-register 0x2102 ;正常使用配置文件router#reload ;重新引导路由器文件操作:router#copy running-config startup-config ;保存配置router#copy running-config tftp ;保存配置到tftprouter#copy startup-config tftp ;开机配置存到tftprouter#copy tftp flash: ;下传文件到flashrouter#copy tftp startup-config;下载配置文件ROM状态:Ctrl+Break ;进入ROM监控状态rommon>confreg 0x2142 ;跳过配置文件rommon>confreg 0x2102 ;恢复配置文件rommon>reset;重新引导rommon>copy xmodem:<sname> flash:<dname> ;从console传输文件rommon>IP_ADDRESS=10.65.1.2 ;设置路由器IPrommon>IP_SUBNET_MASK=255.255.0.0 ;设置路由器掩码rommon>TFTP_SERVER=10.65.1.1 ;指定TFTP服务器IPrommon>TFTP_FILE=c2600.bin ;指定下载的文件3.rommon>tftpdnld ;从tftp下载rommon>dir flash: ;查看闪存内容rommon>boot ;引导IOS静态路由:ip route <ip-address> <subnet-mask> <gateway> ;命令格式router(config)#ip route 2.0.0.0 255.0.0.0 1.1.1.2 ;静态路由举例router(config)#ip route 0.0.0.0 0.0.0.0 1.1.1.2 ;默认路由举例动态路由:router(config)#ip routing ;启动路由转发router(config)#router rip ;启动RIP路由协议。
Cisco SDM操作手册
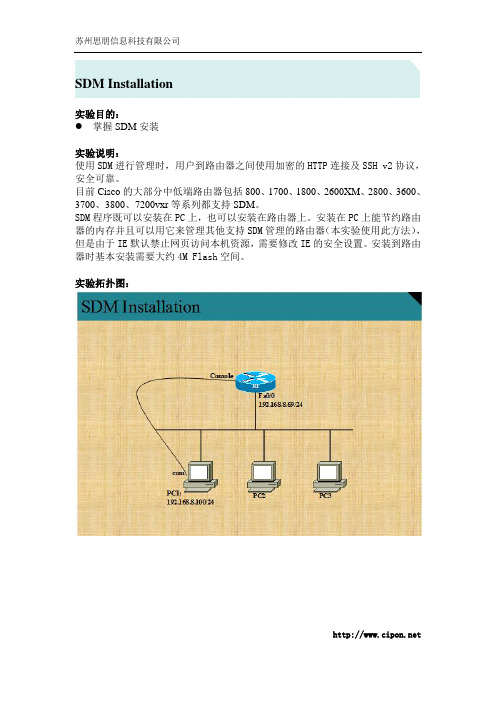
SDM Installation实验目的:掌握SDM安装实验说明:使用SDM进行管理时,用户到路由器之间使用加密的HTTP连接及SSH v2协议,安全可靠。
目前Cisco的大部分中低端路由器包括800、1700、1800、2600XM、2800、3600、3700、3800、7200vxr等系列都支持SDM。
SDM程序既可以安装在PC上,也可以安装在路由器上。
安装在PC上能节约路由器的内存并且可以用它来管理其他支持SDM管理的路由器(本实验使用此方法),但是由于IE默认禁止网页访问本机资源,需要修改IE的安全设置。
安装到路由器时基本安装需要大约4M Flash空间。
实验拓扑图:基本配置:hostname Cipon-R1ip http serverip http secure-server% Generating 1024 bit RSA keys, keys will be non-exportable...[OK]ip http authentication localusername cipon privilege 15 secret cipon123line vty 0 4login localtransport input telnet ssh实验步骤:1. 安装好JVM(Java Virtual Machine),JVM版本号取决于SDM的要求。
2. 从cisco网站下载SDM安装文件。
3. 打开SDM-V25.rar文件,双击setup.exe进行安装:点击“Next”进行基本软件安装设定:接受软件授权许可,点击“next”:选择安装目录,点击“Next”:点击“Finish”完成安装。
4. 安装完成后,如果SDM是安装本地PC上,则在PC的IE浏览器上做如下修改:IE浏览器→工具→ Internet选项→高级“允许活动内容在我的计算机上的文件中运行”前面的选项框打勾并重启IE浏览器。
5.2.3使用CiscoSDME...
5.2.3使用CiscoSDME...CCNA Discovery在中小型企业或 ISP 工作实验 5.2.3 使用 SDM Express 配置 ISR目标使用 Cisco SDM Express 配置基本路由器全局设置,如路由器名称、用户和登录口令。
使用 Cisco SDM Express 在 Cisco ISR 上配置 LAN 和 Internet 连接。
背景/准备工作Cisco Router and Security Device Manager (SDM) 是一款基于Java 的 Web 应用程序和设备管理工具,适用于采用 Cisco IOS 软件的路由器。
Cisco SDM 带有智能向导,可协助不了解命令行界面 (CLI) 的用户部署、配置和监视Cisco 路由器,从而简化了路由器配置和安全配置工作。
许多 Cisco 路由器和 Cisco IOS 软件版本都支持 Cisco SDM。
许多型号较新的Cisco 路由器在出厂时便预装了SDM。
如果您使用的是1841 路由器,则设备上预装有SDM(以及SDM Express)。
本实验以 Cisco 1841 路由器为例进行说明。
您也可使用其它支持SDM 的路由器型号。
如果您使用的路由器支持SDM,但没有安装该工具,那么您可从以下位置免费下载最新版的 SDM:/doc/add0f34633687e21af45a9a5.ht ml /pcgi-bin/tablebuild.pl/sdm点进上面的URL,查看或下载文档“D ownloading and Installing Cisco Router and Security Device Manager”(《下载并安装Cisco Router and Security DeviceManager》)。
该文档说明了如何在路由器上安装 SDM。
其中详细列出了支持SDM 的机型的编号和IOS 版本,以及所需的内存大小。
通过sdm配置cisco ssl vpn

IntroductionClientless SSL VPN (WebVPN) allows a user to securely access resources on the corporate LAN from anywhere with an SSL-enabled Web browser. The user first authenticates with a WebVPN gateway which then allows the user access to pre-configured network resources. WebVPN gateways can be configured on Cisco IOS® routers, Cisco Adaptive Security Appliances (ASA), Cisco VPN 3000 Concentrators, and the Cisco WebVPN Services Module for the Catalyst 6500 and 7600 Routers.Secure Socket Layer (SSL) Virtual Private Network (VPN) technology can be configured on Cisco devices in three main modes: Clientless SSL VPN (WebVPN), Thin-Client SSL VPN (Port Forwarding), and SSL VPN Client (SVC) mode. This document demonstrates the configuration of theWebVPN on Cisco IOS routers.Note: Do not to change either the IP domain name or the host name of the router as this will trigger a regeneration of the self-signed certificate and will override the configured trustpoint. Regeneration of the self-signed certificate causes connection issues if the router has been configured for WebVPN. WebVPN ties the SSL trustpoint name to the WebVPN gateway configuration. Therefore, if a new self-signed certificate is issued, the new trustpoint name does not match the WebVPN configuration and users are unable to connect.Note: If you run the ip https-secure server command on a WebVPN router that uses a persistent self-signed certificate, a new RSA key is generated and the certificate becomes invalid. A new trustpoint is created, which breaks SSL WebVPN. If the router that uses the persistent self-signed certificate reboots after you run the ip https-secure server command, the same issue occurs.Refer to Thin-Client SSL VPN (WebVPN) IOS Configuration Example with SDM in order to learn more about the thin-client SSL VPN.Refer to SSL VPN Client (SVC) on IOS with SDM Configuration Example in order to learn more about the SSL VPN Client.SSL VPN runs on these Cisco Router platforms:Cisco 870, 1811, 1841, 2801, 2811, 2821 and 2851 series routersCisco 3725, 3745, 3825, 3845, 7200 and 7301 series routersPrerequisitesRequirementsEnsure that you meet these requirements before you attempt this configuration:An advanced image of Cisco IOS Software Release 12.4(6)T or laterOne of the Cisco router platforms listed in the IntroductionComponents UsedThe information in this document is based on these software and hardware versions:Cisco 3825 routerAdvanced Enterprise software image - Cisco IOS Software Release 12.4(9)TCisco Router and Security Device Manager (SDM) - version 2.3.1The information in this document was created from the devices in a specific lab environment. All of the devices used in this document started with a cleared (default) configuration. If your network is live, make sure that you understand the potential impact of any command. The IP addresses used in this example are taken from RFC 1918 addresses which are private and not legal to use on the Internet.Network DiagramThis document uses this network setup:ConventionsRefer to the Cisco Technical Tips Conventions for more information on document conventions. Preconfiguration TasksBefore you begin, complete these tasks:Configure a host name and domain name.Configure the router for SDM. Cisco ships some routers with a preinstalled copy of SDM.If the Cisco SDM is not already loaded on your router, you can obtain a free copy of the software from Software Download ( registered customers only) . You must have a CCO account with a service contract. For detailed information on the installation and configuration of SDM, refer to Cisco Router and Security Device Manager.Configure the correct date, time, and time zone for your router.Configure WebVPN on Cisco IOSYou can have more than one WebVPN gateway associated with a device. Each WebVPN gateway is linked to only one IP address on the router. You can create more than one WebVPN context for a particular WebVPN gateway. To identify individual contexts, provide each context with a unique name. One policy group can be associated with only one WebVPN context. The policy group describes which resources are available in a particular WebVPN context.Complete these steps in order to configure WebVPN on Cisco IOS:Configure the WebVPN GatewayConfigure the Resources Allowed for the Policy GroupConfigure the WebVPN Policy Group and Select the ResourcesConfigure the WebVPN ContextConfigure the User Database and Authentication MethodStep 1. Configure the WebVPN GatewayComplete these steps in order to configure the WebVPN Gateway:Within the SDM application, click Configure, and then click VPN.Expand WebVPN, and choose WebVPN Gateways.Click Add.The Add WebVPN Gateway dialog box appears.Enter values in the Gateway Name and IP Address fields, and then check the Enable Gateway check box.Check the Redirect HTTP Traffic check box, and then click OK.Click Save, and then click Yes to accept the changes.Step 2. Configure the Resources Allowed for the Policy GroupIn order to make it easier to add resources to a policy group, you can configure the resources before you create the policy group.Complete these steps in order to configure the resources allowed for the policy group:Click Configure, and then click VPN.Choose WebVPN, and then click the Edit WebVPN tab.Note: WebVPN allows you to configure access for HTTP, HTTPS, Windows file browsing through the Common Internet File System (CIFS) protocol, and Citrix.Click Add.The Add WebVPN Context dialog box appears.Expand WebVPN Context, and choose URL Lists.Click Add.The Add URL List dialog box appears.Enter values in the URL List Name and Heading fields. Click Add, and choose Website.This list contains all the HTTP and HTTPS Web servers that you want to be available for this WebVPN connection.In order to add access for Outlook Web Access (OWA), click Add, choose E-mail, and then click OK after you have filled in all the desired fields.In order to allow Windows file browsing through CIFS, you can designate an NetBIOS Name Service (NBNS) server and configure the appropriate shares in the Windows domain in order. From the WebVPN Context list, choose NetBIOS Name Server Lists.Click Add.The Add NBNS Server List dialog box appears.Enter a name for the list, and click Add.The NBNS Server dialog box appears.If applicable, check the Make This the Master Server check box.Click OK, and then click OK.Step 3. Configure the WebVPN Policy Group and Select the ResourcesComplete these steps in order to configure the WebVPN policy group and select the resources: Click Configure, and then click VPN.Expand WebVPN, and choose WebVPN Context.Choose Group Policies, and click Add. The Add Group Policy dialog box appears.Enter a name for the new policy, and check the Make this the default group policy for context check box.Click the Clientless tab located at the top of the dialog box.Check the Select check box for the desired URL List.If your customers use Citrix clients that need access to Citrix servers, check the Enable Citrix check box.Check the Enable CIFS, Read, and Write check boxes.Click the NBNS Server List drop-down arrow, and choose the NBNS server list that you created for Windows file browsing in Step 2.Click OK.Step 4. Configure the WebVPN ContextIn order to link the WebVPN gateway, group policy, and resources together, you must configure the WebVPN context. In order to configure the WebVPN context, complete these steps:Choose WebVPN Context, and enter a name for the context.Click the Associated Gateway drop-down arrow, and choose an associated gateway.If you intend to create more than one context, enter a unique name in the Domain field to identify this context. If you leave the Domain field blank, users must access the WebVPN with https://IPAddress . If you enter a domain name (for example, Sales), users must connect with https://IPAddress/Sales.Check the Enable Context check box.In the Maximum Number of Users field, enter the maximum number of users allowed by the device license.Click the Default Group policy drop-down arrow, and select the group policy to associate with this context.Click OK, and then click OK.Step 5. Configure the User Database and Authentication MethodYou can configure Clientless SSL VPN (WebVPN) sessions to authenticate with Radius, the Cisco AAA Server, or a local database. This example uses a local database.Complete these steps in order to configure the user database and authentication method:Click Configuration, and then click Additional Tasks.Expand Router Access, and choose User Accounts/View.Click the Add button.The Add an Account dialog box appears.Enter a user account and a password.Click OK, and then click OK.Click Save, and then click Yes to accept the changes. ResultsUse this section to confirm that your configuration works properly.ProcedureComplete these procedures in order to confirm your configuration works properly:Test your configuration with a user. Enter https://WebVPN_Gateway_IP_Address into an SSL-enabled Web browser; where WebVPN_Gateway_IP_Address is the IP address of theWebVPN service. After you accept the certificate and enter a user name and password, a screen similar to this image should appear.Check the SSL VPN session. Within the SDM application, click the Monitor button, and then click VPN Status. Expand WebVPN (All Contexts), expand the appropriate context, and choose Users. Check error messages. Within the SDM application, click the Monitor button, click Logging, and then click the Syslog tab.View the running configuration for the device. Within the SDM application, click the Configure button, and then click Additional Tasks. Expand Configuration Management, and choose Config Editor.CommandsSeveral show commands are associated with WebVPN. You can execute these commands at the command-line interface (CLI) to show statistics and other information. For detailed information about show commands, refer to Verifying WebVPN Configuration.Note: The Output Interpreter Tool ( registered customers only) (OIT) supports certain show commands. Use the OIT to view an analysis of show command output.TroubleshootUse this section to troubleshoot your configuration.Note: Do not interrupt the Copy File to Server command or navigate to a different window while the copying is in progress. Interruption of the operation can cause an incomplete file to be saved on the server.Note: Users can upload and download the new files using the WebVPN client, but the user is not allowed to overwrite the files in the Common Internet File System (CIFS) on WebVPN using the Copy File to Server command. The user receives this message when the user attempts to replace a file on the server:Unable to add the fileProcedureComplete these steps in order to troubleshoot your configuration:Ensure clients disable pop-up blockers.Ensure clients have cookies enabled.Ensure clients use Netscape, Internet Explorer, Firefox, or Mozilla Web browsers.CommandsSeveral debug commands are associated with WebVPN. Refer to Using WebVPN Debug Commands for detailed information about these commands.Note: The use of debug commands can adversely impact your Cisco device. Before you use debug commands, refer to Important Information on Debug Commands.Cisco Support Community - Featured ConversationsCisco Support Community is a forum for you to ask and answer questions, share suggestions, and collaborate with your peers. Below are just some of the most recent and relevant conversations happening right now.Want to see more? Join us by clicking hereSSL VPN (WebVPN) issues with IOS...hardarson4 Replies6 months, 1 day agoHello everyone... I need your help!I am having some weird issues with webvpn/anyconnect, please find the relevant information below;Symptoms:- AnyConnect Client prompts users with the following error:"The secure gateway has rejected the agent's VPN connect or reconnect request. A new connection requires re-authentication and must be started manually. Please contact your network administrator if this problem persists."Debug:Mar 5 13:09:45:Mar 5 13:09:45: WV-TUNL: Tunnel CSTP Version recv use 1Mar 5 13:09:45: WV-TUNL: Allocating tunl_infoMar 5 13:09:45: WV-TUNL: Allocating stc_configMar 5 13:09:45: Inserting static route: 172.25.130.126 255.255.255.255 SSLVPN-VIF36 to routing tableMar 5 13:09:45: WV-TUNL: Use frame IP addr (172.25.130.126) netmask (255.255.255.255) Mar 5 13:09:45: WV-TUNL: Tunnel entry create failed:IP= 172.25.130.126 vrf=77 session=0x67234340Mar 5 13:09:45: HTTP/1.1 401 UnauthorizedMar 5 13:09:45:Mar 5 13:09:45:Mar 5 13:09:45:Mar 5 13:09:45: Deleting static route: 172.25.130.126 255.255.255.255 SSLVPN-VIF36 from routing tableMar 5 13:09:45: WV-TUNL: Failed to install (addr 172.25.130.126, table_id 77) to TCPMar 5 13:09:45: WV-TUNL*: Received server IP packet 0x6692EB08:Mar 5 13:09:45: WV-TUNL: CSTP Message frame received from user usr-test (172.25.130.126) WV-TUNL: Severity ERROR Type USER_LOGOUTWV-TUNL: Text: HTTP response contained an HTTP error code.Mar 5 13:09:45: WV-TUNL: Call user logout functionMar 5 13:09:45: WV-TUNL: Clean-up tunnel session (usr-test)When the error occurs, the "SVCIP install TCP failed" counter increments:VPN-Router1# show webvpn stats detail context CUSTOMER-VPN[snip]Tunnel Statistics:Active connections : 1Peak connections : 3 Peak time : 19:09:04Connect succeed : 9 Connect failed : 5Reconnect succeed : 0 Reconnect failed : 0SVCIP install IOS succeed: 14 SVCIP install IOS failed : 0SVCIP clear IOS succeed : 18 SVCIP clear IOS failed : 0SVCIP install TCP succeed: 9 SVCIP install TCP failed : 5DPD timeout : 0[snip]IOS Version Details:Cisco IOS Software, 7200 Software (C7200-ADVIPSERVICESK9-M), Version 15.0(1)M1, RELEASE SOFTWARE (fc1)System image file is "disk2:c7200-advipservicesk9-mz.150-1.M1.bin"The router also runs IPSEC remote access VPN in addition to the webvpn/anyconnect scheme. Config:webvpn context CUSTOMER-VPNtitle "SSL VPN for Customer"ssl authenticate verify all!login-message "Enter username and passcode"!policy group CUSTOMER-VPNfunctions svc-requiredsvc keep-client-installedsvc split include 10.1.16.0 255.255.240.0svc split include 10.1.2.0 255.255.254.0vrf-name CUSTOMER-VPNdefault-group-policy CUSTOMER-VPNaaa authentication list AAA-LISTaaa authentication autoaaa accounting list AAA-LISTgateway vpn virtual-host logging enableinserviceThe error happens sporadically, at least once a week, and on different contexts. Does anyone have any clue on what can cause this issue? Any help is appreciated!Subscribe ReplyRe: SSL VPN (WebVPN) issues with IOS...andreas.reimann6 months, 2 days agoWe encountered same issue very sporadically running IOS 12.4(24)T3 (ADV-IP-SERV) on 3825It matches quite close your configuration. Did you opened already a Cisco TAC Case?ReplyRe: SSL VPN (WebVPN) issues with IOS...hardarson6 months, 2 days agoHiDo you allocate the AnyConnect client's IP-adresses via IP pools on your ACS server? If so, you can consider switching it to a local ip pool on the router. This seemed to have solved the problem for us./AtleReplyRe: SSL VPN (WebVPN) issues with IOS...andreas.reimann6 months, 1 day agoYes, we allocate addresses through ACS. Local IP adress assignment i consider as a workaround only.ReplyRe: SSL VPN (WebVPN) issues with IOS...andreas.reimann6 months, 1 day agoHave you seen my post https:///message/2016069#2016069 ?At that point in time we were running with local pool definition.As the http 401 rc happens very sporadically we still gathering incident reports internally.Will open a case if you did not yet.cheers, AndyReplyCisco asa 5510 web vpn homepage...martinezloriente2 Replies4 days, 12 hours agohello, weare using ASA with clientless users with a customized portal, usint the post command on bookmarks, we can have "credentiales passthru" from the login page (asa is connected to AD domain) using post parameters.There are a group that needs the home page using the company intranet page (using the option homepage URL in the customization or the internal group policy.The problem is that is working ok but we cant use post commands, the user needs to login again, any idea?, using asdm 6.2(5) with ASA 8.2(2)Subscribe ReplyRe: Cisco asa 5510 web vpn homepage...m.schlienger5 days, 2 hours agoI have same kind of request (except on asa 5505, asa8.3, asdm6.3). We have successfully configured Exchange 2007 OW A Access with "SSO" thanks to POST bookmark.But we still have to use a bookmark, while it would be so elegant to have a straight redirection to OW A after logging in. Technically it should not be a problem, it is just a feature that seems not to appear with current versions. Let me know if you found any kind of...ReplyRe: Cisco asa 5510 web vpn homepage...hebaerte4 days, 12 hours agoYou can do this using the POST plugin:/en/US/docs/security/asa/asa83/asdm63/configuration_guide/vpn_web.html# wp1058342The latest version of the plugin is available here:ReplyCitrix Plug-in version 12 no good with...alicato435 Replies6 months, 1 day agoI thought I give the new version 12 of the Citrix Online Plug-in a try on my home PC, a Windows7 64-bit machine, but no go.I connect through a Cisco SSL VPN (ASA) to my place of work and try to launch apps from my citrix nfuse site, both Firefox (3.6.2) and IE 8 appear to download the launch file but then nothing happens at all.My first install was an update over an existing install of the 11.2 version of the Online Plug-In. I then removed version 12 and reinstalled it, no change in behavior. No go for me.Uninstalled 12 and reinstalled 11.2, and voila, back in business.Did anyone else experience problems with v. 12 on Windows 7 64bit? I saw a message on the Thin list of someone else who had issues with that environment but did not provide details.look like a problem with ver 12 of the client, but citrix aren't taking any blame for this and are blaming cisco. what can i dothe new citrix client doesnt use java anymore.see the link for more info /thread.jspa?threadID=261833&tstart=0 Subscribe ReplyRe: Citrix Plug-in version 12 no good...yleduc7 months, 1 week agoI got the same issue and I have a case open with Cisco about this.It is obvious that somehow the new Citrix client is handling the connection differently but where. I just sent one of the last post on the citrix site about the STA stuff to our Citrix Admin to see if he can decypher the information.regards.ReplyRe: Citrix Plug-in version 12 no good...florian.zahn6 months, 3 weeks agoHi,we have also the same issue....We also opened a Cisco-case regarding this...Best regardsFlorianReplyRe: Citrix Plug-in version 12 no good...nwlogical6 months, 1 week agoHas anyone got an update on this issue?ReplyRe: Citrix Plug-in version 12 no good...yleduc6 months, 6 days agoHello,At this point there is a bug ID on the problem:CSCtg81514 Bug DetailsTop of FormWebvpn with Citrix - Xenapp upgrade from 11.2 to...Bottom of FormReplyRe: Citrix Plug-in version 12 no good...yleduc6 months, 1 day agoHello,looks like Cisco found a solution on this issue....ReplyClientless SSL VPN and certificatesStanDamen1 Reply4 months, 2 weeks agoHi all,At our company we currently use the clientless SSL VPN Portal to grant users access to webmail and certain tools from the outside.Is there anyway to implement a check into the login process to check for a computer certificate we will place on company laptops/machines?I know that during the login process the access group is checked, as well as the group policy. But im not sure if certification checking is in any way possible.Thanks for your input!Subscribe ReplyRe: Clientless SSL VPN and certificatesrahgovin4 months, 2 weeks agoDo you mean authenticate using a certificate or just checking if a certificate is present during login?Certificate authentication can be done by selecting the authentication method for clientless as certificate instead of aaa. The client cert has to be installed in the browser store of the PC.For the second option, using endpoint assessment could be used I guess. You can check the following link if it helps:ReplyAudio With Clientless SSL/Web ne1 Reply1 month, 4 weeks agoI've successfully configured my ASA 5505 appliance to support the clientless SSL/Web VPN. The ASA has Version 8.3(2) software release. The clients are able to connect without a problem to internal servers and PCs but the sounds the PC generates are not audible on the remote computer. If I use the client based VPN and Microsoft's RDP Client, the sounds are audible. I've looked online in both Cisco's web site and a general web search and haven't found any information on the issue. I've also looked through the ASDM configuration (Version 6.3) and haven't found any setting for audio or sound.Is audio (bells, beeps, etc) not supported through the clientless SSL/Web VPN? If it is, how do I enable it?Subscribe ReplyRe: Audio With Clientless SSL/Web VPNmlatosie1 month, 4 weeks agoBenny,What sort of application are we talking about?In general we recommend DTLS to be enabled (and in used) you might want to look into disabling compression.Can you check vpn-sessiondb for me to see if DTLS is in use and check if compression is enabled or not.ReplyClientless SSL WebVPNmax.pierson7 Replies3 weeks, 4 days agoDoes anyone know how to inject HTTP POST if you choose to bypass the portal page via the Optional Homepage URL?? It seems as though you dont have any options to pass credentials unless you use the portal and bookmarks.Subscribe ReplyRe: Clientless SSL WebVPNtopula6 months, 3 weeks agoOne option would be to use the POST plug-in along with a customization page. On the customization portal page you can define a homepage URL which will have the post and macros included. You will then associate this customization to the group policy so that it loads after successful authentication. A sample POST URL may look something like...ReplyRe: Clientless SSL WebVPNnwlogical1 month, 4 weeks agoIs there another way to do this other than the POST command? It is my understanding that the POST command will not allow you to enable, "Use Smart Tunnel for Homepage" since it is not an HTTP(S) protocol.ReplyRe: Clientless SSL WebVPNtopula1 month, 4 weeks agoThe ASA 8.4 code release will include enhancements for auto sign-on capabilities using POST with smart tunneling.ReplyRe: Clientless SSL WebVPNnwlogical1 month, 4 weeks agoAny idea when this will be released?ReplyRe: Clientless SSL WebVPNnwlogical1 month, 3 weeks agoAnother question. If I have the home page set to an http or an https site and smart-tunnel enabled on the site I get this error is the smart tunnel is not installed on the system. WebVPN Relay loader is taking a long time to start. Jave must be installed and enabled in the browser. I know Java is enabled and I can go to another ASA site that does not have the home page set and smart-tunnel installs fine and works. Why is it not...ReplyRe: Clientless SSL WebVPNnwlogical1 month, 3 weeks agoOkay figured this one out. In IE you have to have the setting set in Intranet security to enable, allow previously unused activex controls to run without prompt. In Firefox you need to make sure Java is installed.ReplyRe: Clientless SSL WebVPNnwlogical3 weeks, 4 days agoJust so I understand. Having smart tunnel enabled on the home page by checking the enable button on "Use smart tunnel for Hompage:" is only for Windows systems. This will not work on a Mac since the docs say that you can only fire smart tunnel on a Mac from a bookmark, is this correct or is there a work around? If not is this being looked at to be fixed in the future?ReplyASA clientless SSL VPN (WebVPN) and...baskokken4 Replies2 months, 2 weeks agoCan anyone tell me if ASA (5505 on 8.04) supports using Ajax web applications through the WebVPN portal?Specifics : I am trying to use the management pages of a Synology NAS running Disk Station 2 software. This management page uses Ajax.It looks like the ASA cannot handle this.Subscribe ReplyRe: ASA clientless SSL VPN (WebVPN) and...brispin1 year, 8 months agoYou may try configuring the thin-client SSL VPN (port forwarding). A remote client must download a small, Java-based applet for secure access of TCP applications that use static port numbers. UDP is not supported. Examples include access to POP3, SMTP, IMAP, SSH, and Telnet. The user needs local administrative privileges because changes are made to files on the local machine. This method of SSL VPN does not work with applications that...ReplyRe: ASA clientless SSL VPN (WebVPN) and...baskokken1 year, 8 months agoThanks for this great suggestion, made me change focus.I will try asap.ReplyRe: ASA clientless SSL VPN (WebVPN) and...https:///people/ronnie.lebi%40tdsb.on.ca?referring_site=kapi2 months, 3 weeks agoIs AJAX truly incompatible with the ASA?? Using the smart-tunneled approach doesn't work for us.ReplyRe: ASA clientless SSL VPN (WebVPN) and...simonslater2 months, 2 weeks agoI has this working with an ASA5505 using clienless SSL and my Synology CS407 using DSM2.3-1157 but Synology have now upgraded the DSM software to DSM v3.0 which seems to be broken when using an SSL clientless connection through the ASA.is these anything I can do to stop the ASA SSL screwing up AJAX and allow me to actually see the default logon panel of the CS407?ReplyClientless SSL VPN QuestionsDJCanuck11 Reply3 years, 1 month agoWhen using a Clientless SSL VPN, is it possible to have the MAC address of the remote client pass through to an internal application? We are using a specific app that queries the connecting computer for it's MAC address before it will set up a session. The application runs fine when I connect the remote client via a full SSL VPN tunnel, but I'd prefer to go clientless SSL VPN with a published application link using Smart tunnels.Subscribe ReplyRe: Clientless SSL VPN Questionsvkapoor53 years, 1 month agoClientless SSL VPN (WebVPN) allows a user to securely access resources on the corporate LAN from anywhere with an SSL-enabled Web browser. The user first authenticates with a WebVPN gateway which then allows the user access to pre-configured network resources. WebVPN gateways can be configured on Cisco IOS routers, Cisco Adaptive Security Appliances (ASA), Cisco VPN 3000 Concentrators, and the Cisco WebVPN Services Module for the...Reply1841 IOS for Web Vpnimranraheel1 Reply3 years, 12 months agoI have a cisco 1841 router and i want to use web vpn on it i mean ssl vpn which ios is needed for ssl vpn as well as plz tell me the ssl vpn licence cost . I have heard that 2 SSL VPN Client Licence are free on but SDM doesnt allow me to do thatSubscribe ReplyRe: 1841 IOS for Web VpnMaseBarnes3 years, 12 months ago12.3.14T6 with Advanced Security should be the smallest ...。
cisco设备详细配置(全)
实验一口令和主机名设置1. 口令和设备名设置添加一个交换机或一个路由器,先对交换机进行操作,双击SwitchAswitch>enpassword: ;第一次密码为空,直接回车switch#conf t ;进入全局配置模式switch(config)#hostname swa ;设置交换机名swa(config)#enable secret aaa ;设置特权加密口令为aaaswa(config)#enable password aax ;设置特权非密口令为aaxswa(config)#line console 0 ;进入控制台口(Rs232)状态swa(config-line)#login ;允许登录swa(config-line)#password aa ;设置登录口令aaswa(config-line)#line vty 0 4 ;进入虚拟终端virtual ttyswa(config-line)#login ;允许登录swa(config-line)#password a ;设置登录口令aswa(config-line)#exit ;返回上一层swa(config)#exit ;返回上一层swa#sh run ;看配置信息swa#exit ;返回命令swa>enpassword: ;哪一个口令可以通过双击ROA对路由器进行与交换机类似的设置。
2. 清除口令清除交换机口令,实际中是在开机时按住交换机上的mode钮,本模拟机按Ctrl+Break。
口令请除,可以重新配置口令了。
清除路由器口令,实际中是在开机时上电时,按Ctrl+Break,本模拟机按Ctrl+Break。
参考操作如下:双击RouterA 。
先配置路由的特权口令:router>enpassword: ;第一次密码为空,直接回车router#conf t ;进入全局配置模式router(config)#enable secret aaa ;设置特权加密口令为aaarouter(config)#exit ;返回router#exitrouter>enpassword:aaarouter#清除路由器的口令是在假设口令丢失情况下使用的方法,具体的操作是开机进入rommon状态,打开寄存器配置开关:router#reload ;重新启动,按Ctrl+Break rommon>rommon>confreg 0x2142 ;跳过配置,26xx 36xx 45xxrommon>reset;重新引导,等效于重开机router>enpassword:router#conf trouter(config)#enable secret bbb ;设置特权加密口令为aaarouter(config)#config-register 0x2102 ;正常使用配置文件router(config)#exitrouter#exitrouter>enpassword:bbbrouter#在实际工作中一般要备份路由器的配置文件,当系统有问题时将配置文件复原。
cisco交换机安全配置设定命令详解
cisco交换机安全配置设定命令详解思科交换机的安全怎么设置,接下来是小编为大家收集的cisco交换机安全配置设定命令详解方法,希望能帮到大家。
cisco交换机安全配置设定命令详解的方法一、交换机访问控制安全配置1、对交换机特权模式设置密码尽量采用加密和md5 hash方式switch(config)#enable secret 5 pass_string其中 0 Specifies an UNENCRYPTED password will follow5 Specifies an ENCRYPTED secret will follow建议不要采用enable password pass_sting密码,破解及其容易!2、设置对交换机明文密码自动进行加密隐藏switch(config)#service password-encryption3、为提高交换机管理的灵活性,建议权限分级管理并建立多用户switch(config)#enable secret level 7 5 pass_string7 /7级用户进入特权模式的密码switch(config)#enable secret 5 pass_string15 /15级用户进入特权模式的密码switch(config)#username userA privilege 7 secret 5 pass_userAswitch(config)#username userB privilege 15 secret 5 pass_userB/为7级,15级用户设置用户名和密码,Cisco privilege level分为0-15级,级别越高权限越大switch(config)#privilege exec level 7 commands/为7级用户设置可执行的命令,其中commands可以根据分配给用户的权限自行定义4、本地console口访问安全配置switch(config)#line console 0switch(config-line)#exec-timeout 5 0 /设置不执行命令操作的超时时间,单位为分钟和秒switch(config-line)#logging synchronous/强制对弹出的干扰日志信息进行回车换行,使用户输入的命令连续可见设置登录console口进行密码验证方式(1):本地认证switch(config-line)#password 7 pass_sting /设置加密密码switch(config-line)#login /启用登录验证方式(2):本地AAA认证switch(config)#aaa new-model /启用AAA认证switch(config)#aaa authentication login console-in group acsserver localenable/设置认证列表console-in优先依次为ACS Server,local用户名和密码,enable特权密码switch(config)#line console 0switch(config-line)# login authentication console-in/调用authentication设置的console-in列表5、远程vty访问控制安全配置switch(config)#access-list 18 permit host x.x.x.x/设置标准访问控制列表定义可远程访问的PC主机switch(config)#aaa authentication login vty-in group acsserver localenable/设置认证列表vty-in, 优先依次为ACS Server,local用户名和密码,enable特权密码switch(config)#aaa authorization commands 7 vty-in group acsserver localif-authenticated/为7级用户定义vty-in授权列表,优先依次为ACS Server,local授权switch(config)#aaa authorization commands 15 vty-in group acsserver localif-authenticated/为15级用户定义vty-in授权列表,优先依次为ACS Server,local 授权switch(config)#line vty 0 15switch(config-line)#access-class 18 in /在线路模式下调用前面定义的标准ACL 18switch(config-line)#exec-timeout 5 0 /设置不执行命令操作的超时时间,单位为分钟和秒switch(config-line)#authorization commands 7 vty-in /调用设置的授权列表vty-inswitch(config-line)#authorization commands 15 vty-inswitch(config-line)#logging synchronous/强制对弹出的干扰日志信息进行回车换行,使用户输入的命令连续可见switch(config-line)#login authentication vty-in/调用authentication设置的vty-in列表switch(config-line)#transport input ssh/有Telnet协议不安全,仅允许通过ssh协议进行远程登录管理6、AAA安全配置switch(config)#aaa group server tacacs+ acsserver /设置AAA 服务器组名switch(config-sg-tacacs+)#server x.x.x.x /设置AAA服务器组成员服务器ipswitch(config-sg-tacacs+)#server x.x.x.xswitch(config-sg-tacacs+)#exitswitch(config)# tacacs-server key paa_string /设置同tacacs-server服务器通信的密钥二、交换机网络服务安全配置禁用不需要的各种服务协议switch(config)#no service padswitch(config)#no service fingerswitch(config)#no service tcp-small-serversswitch(config)#no service udp-small-serversswitch(config)#no service configswitch(config)#no service ftpswitch(config)#no ip http serverswitch(config)#no ip http secure-server/关闭http,https远程web管理服务,默认cisco交换机是启用的三、交换机防攻击安全加固配置MAC Flooding(泛洪)和Spoofing(欺骗)攻击预防方法:有效配置交换机port-securitySTP攻击预防方法:有效配置root guard,bpduguard,bpdufilterVLAN,DTP攻击预防方法:设置专用的native vlan;不要的接口shut或将端口模式改为accessDHCP攻击预防方法:设置dhcp snoopingARP攻击预防方法:在启用dhcp snooping功能下配置DAI和port-security在级联上层交换机的trunk下switch(config)#int gi x/x/xswitch(config-if)#sw mode trunkswitch(config-if)#sw trunk encaps dot1qswitch(config-if)#sw trunk allowed vlan x-xswitch(config-if)#spanning-tree guard loop/启用环路保护功能,启用loop guard时自动关闭root guard接终端用户的端口上设定switch(config)#int gi x/x/xswitch(config-if)#spanning-tree portfast/在STP中交换机端口有5个状态:disable、blocking、listening、learning、forwarding,只有处于forwarding状态的端口才可以发送数据。
- 1、下载文档前请自行甄别文档内容的完整性,平台不提供额外的编辑、内容补充、找答案等附加服务。
- 2、"仅部分预览"的文档,不可在线预览部分如存在完整性等问题,可反馈申请退款(可完整预览的文档不适用该条件!)。
- 3、如文档侵犯您的权益,请联系客服反馈,我们会尽快为您处理(人工客服工作时间:9:00-18:30)。
大家在学习其他技术的时候,尤其是一些初学者,总会找到一些图形化管理工具辅助管理,比如管理MySQL的PHPMyAdmin,管理Linux的Webmin,那么管理Cisco这种网络设备是不是也有图形化管理程序呢?答案是肯定,思科公司针对一些初级人员推出的图形化管理工具Cisco Router and Security Device Manager,也就是我们常说的SDM即可轻松的解决此问题,当然,不要有了图形化管理工具就不去学习思科技术了,图形化管理工具只是替代命令的工具,有了它大家可以不用去记那么多复杂的命令了,但是原理依然要掌握,不然如果你连什么是VPN都不知道,该如何去配置呢?
看到这里相信你一定非常想一睹SDM的芳容,呵呵,不要着急,先做一下准备工作。
用到的工具有
1、DynamipsGUI
一款非常优秀的模拟软件,可以模拟真实的IOS环境,而非一般的模拟软件那样模拟命令,所以,在这款模拟器下你会有种错觉是在真实的环境。
不要以为他有多么难学,初学者可能感觉配置比较麻烦,但是用了一段时间你会发现这才是真正的模拟器,会对你日后接触真是机器有很大的帮助。
软件的官方网站是,大家可以到网站上下载最新版本,软件为免费软件,自愿注册,未注册版本只是在标题上显示未注册版本,不限制任何功能,与注册版功能完全相同。
2、SecureCRT
一款非常优秀的远程连接管理软件,支持多种协议,使用方便。
推荐大家使用,包括以后到企业去工作,笔记本电脑中也是必须安装这个软件的。
我们用它来链接我们的网络设备。
3、unzip-c7200-advsecurityk9-mz.124-11.T.bin
思科的大部分IOS都是支持SDM,如果你发现你的设备不支持,请下载最新版本的IOS。
4、jre-6u3-windows-i586-p-s
Java的运行环境,SDM是基于Java开发的Web应用程序,所以,要Java虚拟机的支持。
5、SDM-V241-zh
我们的主角,SDM,大家下载中文版,当然如果你的英文比较好也可以用英文的。
实验拓扑图
实验步骤
1、为计算机添加Loopback,设置IP地址为192.168.1.20
2、安装jre-6u3-windows-i586-p-s,很简单,点击接受软件就开始自动安装,没等你反应过来点击完成就安装好了。
3、安装我们的主角SDM 1)点击下一步
2)接受许可协议
3)选择安装到本地计算机,当然也可以安装到路由器上,大约占用4兆的空间,但是会消耗一定的路由器资源,所以,建议大家不要把软件安装到路由器上,而是安装的本地计算机,毕竟我们的计算机配置比较强悍,应付这种小软件游刃有余,而路由器的资源让给路由器用比较好。
4)选择程序存放目录,我的习惯是把程序都放到D盘,呵呵,看你的个人喜好了。
5)点击安装。
我本来想抓图了,但是安装过程太快了,没有抓到。
6)安装完成了
先不要着急,我们需要配置一下路由器,启用http服务。
具体配置如下
Router>en //进入特权模式
Router#conf t //进入全局配置模式
Router(config)#hostname xiaowu //修改路由器的名字为xiaowu
xiaowu(config)#int f0/0 //配置f0/0接口
xiaowu(config-if)#ip address 192.168.1.30 255.255.255.0 //配置IP地址
xiaowu(config-if)#no shut //启用接口
xiaowu(config-if)#exit //退出接口配置模式
xiaowu(config)#ip http server //启用http服务
xiaowu(config)#username xiaowu privilege 15 secret 51cto //添加一个用户xiaowu,设置权限级别为15,同时增加一个加密的密码为51cto
xiaowu(config)#line vty 0 4 //设置vty接口
xiaowu(config-line)#password xiaowu //密码为xiaowu
xiaowu(config-line)#login //启用本地验证
至此,路由器上的配置就完成了,我们可以用SDM链接路由器了
1)在输入地址中输入与本地桥接的端口,也就是F0/0口的IP地址192.168.1.30,然后点击启动
2)启动后会打开浏览器,提示安全保护,我们允许其运行
3)如果你允许运行后在却看到了下面的窗口,一堆代码,那么不要慌
打开你的IE选项,在高级中找到下图所画位置,并在前面的方块打上一个勾。
然后关闭你的浏览器,重新运行SDM,你会看到一个安全警告,我们点击运行
4)你会看到载入路由器配置信息的进度条,马上就要成功啦
5)恭喜你,已经成功运行SDM了
你首先看到的是主页,里面有整个设备的信息概述。
大家看到这个小工具的界面非常简洁友好。
我比较喜欢。
现在大家就可以在这里不用敲击一个命令而完成想要的配置了,具体如何配置各项服务,可以参考软件的使用文档。
至此,你已经完成了SDM的安装配置,以后没人的时候可以偷偷用这个工具完成想要的实验了,呵呵,但是千万别忘记学命令哦。
