计算机图形学编程试8MFC明暗处理实现
MFC实现计算机图形学算法

MFC实现计算机图形学算法⽬录1.直线算法1.1 DDAvoid ChuituView::OnDDA(){// TODO: 在此添加命令处理程序代码dlg_line dlg;dlg.DoModal();CDC* pDC = GetDC();CRect rect;GetClientRect(&rect);//重定义坐标轴Axis(pDC, rect);pDC->TextOut(450, 18, _T("DDA画线法成功了!"));//在屏幕(450,18)的位置显⽰⼀个⽩⾊底⾊的⿊字:DDA画线法成功了!double dx, dy, e, x, y;dx = dlg.x2 - dlg.x1;dy = dlg.y2 - dlg.y1;e = (fabs(dx) > fabs(dy) ? fabs(dx) : fabs(dy));dx /= e;dy /= e;x = dlg.x1;y = dlg.y1;for (int i = 1; i <= e; ++i) {pDC->SetPixel(int(x + 0.5), int(y + 0.5), RGB(255, 0, 0));x += dx;y += dy;}}1.2 中点法void ChuituView::OnMidpointline(){// TODO: 在此添加命令处理程序代码dlg_line dlg;dlg.DoModal();float x, y, xa, xb, ya, yb;xa = dlg.x1, ya = dlg.y1;xb = dlg.x2; yb = dlg.y2;float d, k;CDC* pDC = GetDC();CRect rect;GetClientRect(&rect);//重定义坐标轴Axis(pDC, rect);pDC->TextOut(450, 18, _T("中点画线法成功了!"));k = (yb - ya) / (xb - xa);y = ya, x = xa;d = 0.5 - k;for (x = xa; x <= xb; x++){if (d < 0){y = y + 1; d = d + 1 - k;}else{y = y; d = d - k;}pDC->SetPixel(x, y, RGB(0, 0, 255));}}1.3Bresenham法void ChuituView::OnBresenhamline_1(int x0, int y0, int x1, int y1){// TODO: 在此处添加实现代码.CDC* pDC = GetDC();pDC->TextOut(450, 70, _T("请⽤⿏标划线!"));// TODO: 在此添加命令处理程序代码int color = 255;int x, y, e;int dx = x1 - x0;//x偏移量int dy = y1 - y0;//y偏移量int ux = dx > 0 ? 1 : -1;//x伸展⽅向int uy = dy > 0 ? 1 : -1;//y伸展⽅向int dx2 = abs(dx << 1);//x偏移量乘2int dy2 = abs(dy << 1);//y偏移量乘2if (abs(dx) > abs(dy))//以x为增量⽅向计算{int e = -dx; //e = -0.5 * 2 * dx,把e ⽤2 * dx* e替换int x = x0;//起点x坐标int y = y0;//起点y坐标while (x != x1 + ux){//printf("%d,%d\n", x, y);pDC->SetPixel(x, y, color);e = e + dy2;//来⾃ 2*e*dx= 2*e*dx + 2dy (原来是 e = e + k)if (e > 0)//e是整数且⼤于0时表⽰要取右上的点(否则是右下的点) {if (y != y1){y += uy;}e = e - dx2;//2*e*dx = 2*e*dx - 2*dx (原来是 e = e -1)}x += ux;}}else{//以y为增量⽅向计算int e = -dy; //e = -0.5 * 2 * dy,把e ⽤2 * dy* e替换int x = x0;//起点x坐标int y = y0;//起点y坐标while (y != y1 + uy){//printf("%d,%d\n", x, y);pDC->SetPixel(x, y, color);e = e + dx2;//来⾃ 2*e*dy= 2*e*dy + 2dy (原来是 e = e + k)if (e > 0)//e是整数且⼤于0时表⽰要取右上的点(否则是右下的点) {if (x != x1){x += ux;}e = e - dy2;//2*e*dy = 2*e*dy - 2*dy (原来是 e = e -1)}y += uy;}}}void ChuituView::OnBresenhamline(){CDC* pDC = GetDC();state = 1;pDC->TextOut(450, 70, _T("请⽤⿏标划线!"));}2.圆2.1中点法void ChuituView::OnMidpointcircle(){// TODO: 在此添加命令处理程序代码dlg_circle dlg;dlg.DoModal();CDC* pDC = GetDC();CRect rect;GetClientRect(&rect);//重定义坐标轴Axis(pDC, rect);int r = dlg.circle_r;int x0 =dlg.circle_x, y0 = dlg.circle_y;double d;int x = 0;int y = r;d = 1 - r;int color = 255;//pDC->SetPixel(x, y, color);while (x < y){pDC->SetPixel(x + x0, y + y0, color);pDC->SetPixel(-x + x0, y + y0, color);pDC->SetPixel(-x + x0, -y + y0, color);pDC->SetPixel(x + x0, -y + y0, color);pDC->SetPixel(y + x0, x + y0, color);pDC->SetPixel(-y + x0, x + y0, color);pDC->SetPixel(-y + x0, -x + y0, color);pDC->SetPixel(y + x0, -x + y0, color);if (d < 0){d += 2 * x;++x;}else{d += 2 * (x - y) + 5;++x;--y;}//pDC->SetPixel(x, y, 255);}}1.2 Bresenham法void ChuituView::Bresenhamcircle_1(int x0, int y0, int r){// TODO: 在此处添加实现代码.CDC *pDC = GetDC();int color = 255;int x = 0;int y = r;int d = 1 - r;while (x <= y){pDC->SetPixel(x + x0, y + y0, color);pDC->SetPixel(-x + x0, y + y0, color);pDC->SetPixel(-x + x0, -y + y0, color);pDC->SetPixel(x + x0, -y + y0, color);pDC->SetPixel(y + x0, x + y0, color);pDC->SetPixel(-y + x0, x + y0, color);pDC->SetPixel(-y + x0, -x + y0, color);pDC->SetPixel(y + x0, -x + y0, color);if (d < 0)d += 2 * x + 3;else{d += 2 * (x - y) + 5;y--;}x++;}}void ChuituView::OnBresenhamcircle(){// TODO: 在此添加命令处理程序代码CDC *pDC = GetDC();pDC->TextOut(450, 70, _T("请⽤⿏标划线以确定远点坐标和半径!"));state = 2;}3.椭圆(Bresenhame)void ChuituView::OnBresenhamellipse(){// TODO: 在此添加命令处理程序代码CRect rect;GetClientRect(&rect);CDC* pDC = GetDC();//重定义坐标轴Axis(pDC, rect);pDC->TextOut(400, 70, _T("这是⼀个长半轴为200,短半轴100的椭圆!"));int a = 200, b = 100, color = 255, x, y;float d1;float d2 = 0;x = 0; y = b;d1 = b * b + a * a*(-b + 0.25);pDC->SetPixel(x, y, color);pDC->SetPixel(-x, -y, color);pDC->SetPixel(-x, y, color);pDC->SetPixel(x, -y, color);while (b*b*(x + 1) < a*a*(y - 0.5)){if (d1 <= 0){d1 += b * b*(2 * x + 3);x++;}else{d1 += b * b*(2 * x + 3) + a * a*(-2 * y + 2);x++;y--;}pDC->SetPixel(x, y, color);pDC->SetPixel(-x, -y, color);pDC->SetPixel(-x, y, color);pDC->SetPixel(x, -y, color);}d2 += b * b*(x + 0.5)*(x + 0.5) + a * a*(y - 1)*(y - 1) - a * a*b*b;while (y > 0){if (d2 <= 0){d2 += b * b*(2 * x + 2) + a * a*(-2 * y + 3);x++;y--;}else{d2 += a * a*(-2 * y + 3);y--;}pDC->SetPixel(x, y, color);pDC->SetPixel(-x, -y, color);pDC->SetPixel(-x, y, color);pDC->SetPixel(x, -y, color);}}4.直线扫描//直线扫描void ChuituView::OnPolygonscan(){// TODO: 在此添加命令处理程序代码CDC* pDC = GetDC();const int POINTNUM = 6;typedef struct XET{float x;float dx, ymax;XET* next;}AET, NET;struct point{float x;float y;}polypoint[POINTNUM] = { 250, 50, 550, 150, 550, 400, 250, 250, 100, 350, 100, 100 };int MaxY = 0;int i;for (i = 0; i < POINTNUM; i++)if (polypoint[i].y > MaxY)MaxY = polypoint[i].y;AET *pAET = new AET;pAET->next = NULL;NET *pNET[1024];for (i = 0; i <= MaxY; i++){pNET[i] = new NET;pNET[i]->next = NULL;}for (i = 0; i <= MaxY; i++){for (int j = 0; j < POINTNUM; j++)if (polypoint[j].y == i){if (polypoint[(j - 1 + POINTNUM) % POINTNUM].y > polypoint[j].y){NET *p = new NET;p->x = polypoint[j].x;p->ymax = polypoint[(j - 1 + POINTNUM) % POINTNUM].y;p->dx = (polypoint[(j - 1 + POINTNUM) % POINTNUM].x - polypoint[j].x) / (polypoint[(j - 1 + POINTNUM) % POINTNUM].y - polypoint[j].y);p->next = pNET[i]->next;pNET[i]->next = p;}if (polypoint[(j + 1 + POINTNUM) % POINTNUM].y > polypoint[j].y){NET *p = new NET;p->x = polypoint[j].x;p->ymax = polypoint[(j + 1 + POINTNUM) % POINTNUM].y;p->dx = (polypoint[(j + 1 + POINTNUM) % POINTNUM].x - polypoint[j].x) / (polypoint[(j + 1 + POINTNUM) % POINTNUM].y - polypoint[j].y);p->next = pNET[i]->next;pNET[i]->next = p;}}}for (i = 0; i <= MaxY; i++){NET *p = pAET->next;while (p){p->x = p->x + p->dx;p = p->next;}AET *tq = pAET;p = pAET->next;tq->next = NULL;while (p){while (tq->next && p->x >= tq->next->x)tq = tq->next;NET *s = p->next;p->next = tq->next;tq->next = p;p = s;tq = pAET;}AET *q = pAET;p = q->next;while (p){if (p->ymax == i){q->next = p->next;delete p;p = q->next;}else{q = q->next;p = q->next;}}p = pNET[i]->next;q = pAET;while (p){while (q->next && p->x >= q->next->x)q = q->next;NET *s = p->next;p->next = q->next;q->next = p;p = s;q = pAET;}p = pAET->next;while (p && p->next){for (float j = p->x; j <= p->next->x; j++)pDC->SetPixel(static_cast<int>(j), i, RGB(255, 0, 0));p = p->next->next;//考虑端点情况}}}5.种⼦填充5.1 四领域//四领域void ChuituView::OnPolygonfloodfill4(){// TODO: 在此添加命令处理程序代码CClientDC dc1(this);for (int i = 0; i <= 60; i++){dc1.SetPixel(0, i, 200);}for (int i = 0; i <= 60; i++)dc1.SetPixel(i, 0, 200);for (int i = 0; i <= 60; i++)dc1.SetPixel(i, 60, 200);for (int i = 0; i <= 60; i++)dc1.SetPixel(60, i, 200);FloodFill4(20, 20, 200, 100);}void ChuituView::FloodFill4(int x, int y, int oldColor, int newColor){CClientDC dc(this);int color;color = dc.GetPixel(x, y);if ((color != oldColor) && color != newColor){dc.SetPixel(x, y, newColor);FloodFill4(x, y + 1, oldColor, newColor);FloodFill4(x, y - 1, oldColor, newColor);FloodFill4(x - 1, y, oldColor, newColor);FloodFill4(x + 1, y, oldColor, newColor);}}5.1⼋领域//⼋领域void ChuituView::OnPolygonfloodfill8(){// TODO: 在此添加命令处理程序代码CClientDC dc1(this);for (int i = 0; i <= 50; i++){dc1.SetPixel(0, i, 200);}for (int i = 0; i <= 50; i++)dc1.SetPixel(i, 0, 200);for (int i = 0; i <= 50; i++)dc1.SetPixel(i, 50, 200);for (int i = 0; i <= 50; i++)dc1.SetPixel(50, i, 200);FloodFill8(6, 6, 200, 250);}void ChuituView::FloodFill8(int x, int y, int oldColor, int newColor){CClientDC dc(this);int color;color = dc.GetPixel(x, y);if ((color != oldColor) && color != newColor){dc.SetPixel(x, y, newColor);FloodFill8(x, y + 1, oldColor, newColor);FloodFill8(x, y - 1, oldColor, newColor);FloodFill8(x - 1, y, oldColor, newColor);FloodFill8(x + 1, y, oldColor, newColor);FloodFill8(x + 1, y + 1, oldColor, newColor);FloodFill8(x - 1, y - 1, oldColor, newColor);FloodFill8(x + 1, y - 1, oldColor, newColor);FloodFill8(x - 1, y + 1, oldColor, newColor);}}6.⼆维⼏何变换-五种基本变换6.1 平移//平移void ChuituView::Onpingyi2(){// TODO: 在此添加命令处理程序代码CClientDC dc(this);CRect rect;GetClientRect(&rect);//返回的是设备坐标,⽽SetViewportOrg需要的也是设备坐标,故此处不⽤转换 dc.SetViewportOrg(rect.Width() / 2, rect.Height() / 2);int Tx = 100, Ty = 200;//x平移100,y平移200int a[4][2] = { 0, 0, 100, 0, 100, 100, 0, 0 };//确定三⾓形的形状dc.TextOut(100, 0, (CString)"原图形");for (int i = 0; i < 3; i++){dc.MoveTo(a[i][0], a[i][1]);dc.LineTo(a[i + 1][0], a[i + 1][1]);}CPen pen;pen.CreatePen(PS_SOLID, 1, RGB(0, 0, 255));dc.SelectObject(&pen);dc.TextOut(100 + Tx, Ty, (CString)"平移后图形");for (int i = 0; i < 3; i++){dc.MoveTo(a[i][0] + Tx, a[i][1] + Ty);dc.LineTo(a[i + 1][0] + Tx, a[i + 1][1] + Ty);}}6.2旋转//旋转void ChuituView::Onxuanzhaun2(){// TODO: 在此添加命令处理程序代码CClientDC dc(this);CRect rect;GetClientRect(&rect);//返回的是设备坐标,⽽SetViewportOrg需要的也是设备坐标,故此处不⽤转换 dc.SetViewportOrg(rect.Width() / 2, rect.Height() / 2);float o = 3.1415926 / 2; //旋转90度float c = cos(o);float s = sin(o);int Tx = 300;int a[4][2] = { 0, 0, 100, 0, 100, 100, 0, 0 };//确定三⾓形的形状dc.TextOut(100, 0, (CString)"原图形");for (int i = 0; i < 3; i++){dc.MoveTo(a[i][0], a[i][1]);dc.LineTo(a[i + 1][0], a[i + 1][1]);}CPen pen;pen.CreatePen(PS_SOLID, 1, RGB(0, 0, 255));dc.SelectObject(&pen);dc.TextOut(100 * c + Tx, 0, (CString)"旋转后图形");for (int i = 0; i < 3; i++){dc.MoveTo(a[i][0] * c - a[i][1] * s + Tx, a[i][0] * s + a[i][0] * c);dc.LineTo(a[i + 1][0] * c - a[i + 1][1] * s + Tx, a[i + 1][0] * s + a[i + 1][0] * c);}}6.3错切//错切void ChuituView::Oncuoqie2(){// TODO: 在此添加命令处理程序代码CClientDC dc(this);CRect rect;GetClientRect(&rect);//返回的是设备坐标,⽽SetViewportOrg需要的也是设备坐标,故此处不⽤转换 dc.SetViewportOrg(rect.Width() / 2, rect.Height() / 2);int b = 2, c = 2;int Tx = 300;int a[4][2] = { 0, 0, 100, 0, 100, 100, 0, 0 };//确定三⾓形的形状dc.TextOut(100, 0, (CString)"原图形");for (int i = 0; i < 3; i++){dc.MoveTo(a[i][0], a[i][1]);dc.LineTo(a[i + 1][0], a[i + 1][1]);}CPen pen;pen.CreatePen(PS_SOLID, 1, RGB(0, 0, 255));dc.SelectObject(&pen);dc.TextOut(100 + Tx, 0, (CString)"错切后图形");for (int i = 0; i < 3; i++){dc.MoveTo(a[i][0] + c * a[i][1] + Tx, b * a[i][0] + a[i][1]);dc.LineTo(a[i + 1][0] + c * a[i + 1][1] + Tx, b * a[i + 1][0] + a[i + 1][1]);}}6.4⽐例//⽐例void ChuituView::Onbili2(){// TODO: 在此添加命令处理程序代码CClientDC dc(this);CRect rect;GetClientRect(&rect);//返回的是设备坐标,⽽SetViewportOrg需要的也是设备坐标,故此处不⽤转换 dc.SetViewportOrg(rect.Width() / 2, rect.Height() / 2);int Tx = 300;int Sx = 3, Sy = 4; //放⼤缩⼩⽐例int a[4][2] = { 0, 0, 100, 0, 100, 100, 0, 0 };//确定三⾓形的形状dc.TextOut(100, 0, (CString)"原图形");for (int i = 0; i < 3; i++){dc.MoveTo(a[i][0], a[i][1]);dc.LineTo(a[i + 1][0], a[i + 1][1]);}CPen pen;pen.CreatePen(PS_SOLID, 1, RGB(0, 0, 255));dc.SelectObject(&pen);dc.TextOut(100 + Tx, 0, (CString)"⽐例变换后图形");for (int i = 0; i < 3; i++){dc.MoveTo(a[i][0] * Sx + Tx, a[i][1] * Sy);dc.LineTo(a[i + 1][0] * Sx + Tx, a[i + 1][1] * Sy);}}6.5对称//对称void ChuituView::Onduichen2(){// TODO: 在此添加命令处理程序代码CClientDC dc(this);CRect rect;GetClientRect(&rect);//返回的是设备坐标,⽽SetViewportOrg需要的也是设备坐标,故此处不⽤转换 dc.SetViewportOrg(rect.Width() / 2, rect.Height() / 2);int a[4][2] = { 0, 0, 100, 0, 100, 100, 0, 0 };//确定三⾓形的形状dc.TextOut(100, 0, (CString)"原图形");for (int i = 0; i < 3; i++){dc.MoveTo(a[i][0], a[i][1]);dc.LineTo(a[i + 1][0], a[i + 1][1]);}CPen pen;pen.CreatePen(PS_SOLID, 1, RGB(0, 0, 255));dc.SelectObject(&pen);dc.TextOut(-100, -0, (CString)"对称后图形");for (int i = 0; i < 3; i++){dc.MoveTo(-a[i][0], -a[i][1]);dc.LineTo(-a[i + 1][0], -a[i + 1][1]);}}7.裁剪7.1直线cohen-sutherland法//直线cohen-sutherland法unsigned int ChuituView::EnCode(CPoint point){#define D0 1 //0001#define D1 2 //0010#define D2 4 //0100#define D3 8 //1000// TODO: 在此处添加实现代码.int C1 = 0;if (point.x < wxl)C1 = C1 | D0;if (point.x > wxr)C1 = C1 | D1;if (point.y < wyb)C1 = C1 | D2;if (point.y > wyt)C1 = C1 | D3;return C1;}void ChuituView::Oncs_line(){// TODO: 在此添加命令处理程序代码CDC* pDC = GetDC();ChuituDoc* pDoc = GetDocument();ASSERT_VALID(pDoc);if (!pDoc)return;// wxl为左侧裁剪边,wxr为右侧裁剪边,wyb为下侧裁剪边,wyt为上裁剪边。
(完整版)计算机图形学期末考试

(完整版)计算机图形学期末考试计算机图形学期末模拟题⼀、选择题1、在下列叙述语句中,错误的论述为( C )A) 在图形⽂件系统中,点、线、圆等图形元素通常都⽤其⼏何特征参数来描述;B)在图形系统中,图形处理运算的精度不取决于显⽰器的分辨率;C) 在光栅扫描图形显⽰器中,所有图形都按⽮量直接描绘显⽰,不存在任何处理;D) 在彩⾊图形显⽰器中,使⽤RGB颜⾊模型。
2、光线跟踪算法中包括了哪些光照效果?( C )A) 仅有光反射;B) 仅有光透射;C) 有光反射和光透射;D) 都没有3、透视投影中主灭点最多可以有⼏个?( D )A) 0 B) 1 C) 2 D) 34、在明暗光滑处理算法中,下列论述哪个是错误的?( D )A) Gouraud明暗模型计算中,多边形与扫描平⾯相交区段上每⼀采样点的光亮度值是由扫描平⾯与多边形边界交点的光亮度插值得到的;B) Phong明暗处理模型中,采⽤了双线性插值和构造法向量函数的⽅法模拟⾼光;C) Gouraud明暗模型和Phong明暗处理模型主要是为了处理由多个平⾯⽚近似表⽰曲⾯物体的绘制问题;D) Phong明暗模型处理的物体表⾯光亮度呈现不连续跃变;5、B样条曲线中,按照节点⽮量T的不同可以将B样条分为均匀B样条,开放均匀B样条和⾮均匀B样条,以下选项中属于开放均匀B样条节点⽮量的是(C )。
A、T=(0,1,2,3,4,5,6)B、T=(0,0,1,1,2,2,3,3)C、T=(0,0,0,1,2,3,4,5,5,5)D、T=(0,0.1,0.2,0.2,0.5,1)6、曲线的分类有( A )A、规则曲线⾃由曲线随机曲线B、规则曲线变换曲线⾃由曲线C、变换曲线随机曲线⾃由曲线D 随机曲线变换曲线规则曲线7、曲线曲⾯拟合的⽅法有( B )A、插值做差拟合B、插值逼近拟合C、插值闭合拟合D 插值变换拟合8、光线跟踪算法中包括了哪些光照效果?( C )A) 仅有光反射;B) 仅有光透射;C) 有光反射和光透射;D) 都没有⼆、填空题1、计算机制作动画从狭义上是指根据要求⽣成⼀系列连续变动的画⾯,它的步骤由(造型)、(运动控制)和(绘制)组成。
计算机图形学复习题及答案
计算机图形学复习题及答案Newly compiled on November 23, 2020中南大学现代远程教育课程考试模拟复习试题.及参考答案计算机图形学一、名词解释1.图形2.像素图3.参数图4.扫描线5.构造实体几何表示法6.投影7.参数向量方程8.自由曲线9.曲线拟合10.曲线插值11.区域填充12.扫描转换二、判断正误(正确写T,错误写F)1.存储颜色和亮度信息的相应存储器称为帧缓冲存储器,所存储的信息被称为位图。
()2.光栅扫描显示器的屏幕分为m行扫描线,每行n个点,整个屏幕分为m╳n个点,其中每个点称为一个像素。
―――――――――――――――――――――()3.点阵字符用一个位图来表示,位图中的0对应点亮的像素,用前景色绘制;位图中的1对应未点亮的像素,用背景色绘制。
――――――――――――――――-()4.矢量字符表示法用(曲)线段记录字形的边缘轮廓线。
―――――――――――()5.将矢量字符旋转或放大时,显示的结果通常会变得粗糙难看,同样的变换不会改变点阵字符的显示效果。
―――――――――――――――――――――――――()6.在光栅图形中,区域是由相连的像素组成的集合,这些像素具有相同的属性值或者它们位于某边界线的内部。
―――――――――――――――――――――――()7.多边形的扫描变换算法不需要预先定义区域内部或边界的像素值。
――――――()8.齐次坐标表示法用n维向量表示一个n+1维向量。
―――――――――――――()9.实体的边界由平面多边形或空间曲面片组成。
―――――――――――――――()10.平面多面体表面的平面多边形的边最多属于两个多边形,即它的表面具有二维流形的性质。
―――――――――――――――――――――――――――――――()11.实体几何性质包括位置、长度和大小等。
―――――――――――――――――()12.实体的拓扑关系表示实体之间的相邻、相离、方位、相交和包含等关系。
计算机图形学上机指导——金刚石图案算法实现说明(MFC)

金刚石图案算法实现说明1、设计要求:总体需求:将半径为r的圆周n等分,用直线将各等分点作隔点相连,形成的图案称为“金刚石”图案。
具体要求:1、在MFC环境中建立一个由“文件”、“绘图”和“帮助”这3个菜单项组成的菜单。
“文件”的子菜单为“退出”;“绘图”的子菜单为“Diamond”;“帮组”的子菜单为“关于”。
2、定义一个输入对话框类,提供两个参数的输入界面。
3、在客户区显示金刚石图案。
实现效果图如图1-1所示:图1-1 输入对话框及效果图2、具体步骤:1、点的设计1)类视图“ClassV iew”里选中TestClasses后右击,选择“New Class”,打开“New Class”对话框。
2)在“Class type”中选择“Generic Class”,并在“Name”中输入类名“P2D”,然后单击“Ok”。
(到此,在文件视图的“source file”下VC向导自动添加了“P2D.h”和“P2D.cpp”)3)打开“P2D.h”,作类的初始化定义:添加两个公有数据成员x,y,数据类型均为doulbe。
(思考:为什么要设为公有数据成员?)4)完成P2D类的定义。
2、对话框的设计1)在资源视图“Resource View”中选择“Dialog”,并右击,选择“Insert Dialog”。
2)在新建对话框内添加静态文本(static text)和编辑框(Edit Box)控件。
3)属性打开(Alt+Enter)。
Edit1控件的ID为IDC_EDIT1,并设置取值范围:5~50;Edit1控件的ID为IDC_EDIT2,并设置取值范围:200~500;4)双击对话框弹出“Adding a Class”对话框,保持默认值,添加一个新类“Create a new class”,单击“Ok”。
5)在弹出的“New class”对话框中填写对话框类名“InputDlg”,单击“Ok”。
(基类是MFC中的CDialog)6)对话框的设计。
计算机图形学期末考试试卷(A卷)
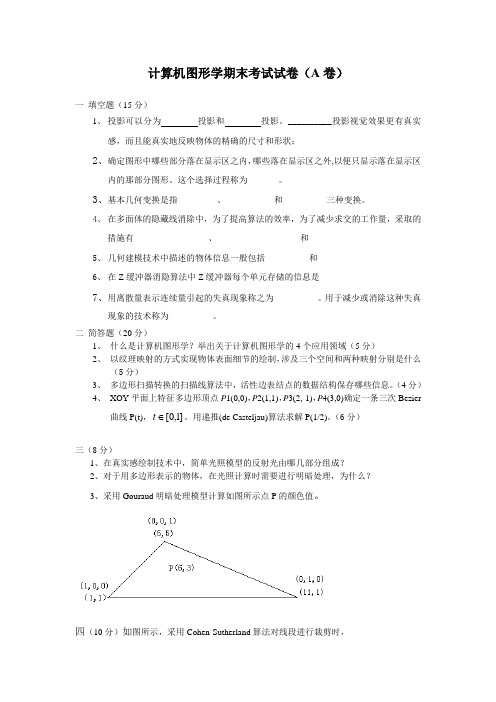
计算机图形学期末考试试卷(A 卷)一 填空题(15分)1、 投影可以分为 投影和 投影。
__________投影视觉效果更有真实感,而且能真实地反映物体的精确的尺寸和形状;2、确定图形中哪些部分落在显示区之内,哪些落在显示区之外,以便只显示落在显示区内的那部分图形。
这个选择过程称为_______。
3、基本几何变换是指________ 、 _________ 和__________三种变换。
4、 在多面体的隐藏线消除中,为了提高算法的效率,为了减少求交的工作量,采取的措施有________________ 、 _________________ 和__________________ 5、 几何建模技术中描述的物体信息一般包括__________和___________6、 在Z 缓冲器消隐算法中Z 缓冲器每个单元存储的信息是__________________7、用离散量表示连续量引起的失真现象称之为__________。
用于减少或消除这种失真现象的技术称为__________。
二 简答题(20分)1、 什么是计算机图形学?举出关于计算机图形学的4个应用领域(5分)2、 以纹理映射的方式实现物体表面细节的绘制,涉及三个空间和两种映射分别是什么(5分)3、 多边形扫描转换的扫描线算法中,活性边表结点的数据结构保存哪些信息。
(4分)4、 XOY 平面上特征多边形顶点P 1(0,0),P 2(1,1),P 3(2,-1),P 4(3,0)确定一条三次Bezier曲线P(t),]1,0[ t 。
用递推(de Casteljau)算法求解P(1/2)。
(6分)三(8分)1、在真实感绘制技术中,简单光照模型的反射光由哪几部分组成?2、对于用多边形表示的物体,在光照计算时需要进行明暗处理,为什么?3、采用Gouraud 明暗处理模型计算如图所示点P 的颜色值。
四(10分)如图所示,采用Cohen-Sutherland 算法对线段进行裁剪时,1、线段端点P点和Q点的编码各是多少2、此时是否需要与窗口的边界进行求交运算,为什么(利用编码解释)?3、如需要,可以与窗口的哪些边界求交,为什么(利用编码解释)?五(15分)采用Bresenham算法转换直线段,起点x0(2,1)、终点x1(12,5)。
计算机图形学第4章MFC基本应用程序的建立
{ public:
CEx_SDIHelloApp();
//{{AFX_VIRTUAL(CEx_SDIHelloApp)
public:
virtual BOOL InitInstance();
//}}AFX_VIRTUAL
// Implementation(实现)
//{{AFX_MSG(CEx_SDIHelloApp)
//}}AFX_MSG
DECLARE_MESSAGE_MAP()
// 声明消息映射
};
...
4.3使用MFC AppWizard (10 of 24)
代码中,
//{{AFX_VIRTUAL(类名)
...
//}}AFX_VIRTUAL
是ClassWizard定义的专门用作虚函数重载的标记,表示该程序块中的虚函 数的重载是由ClassWizard来自动管理的,一般不需要去更改。同样,
Windows编程的特点:
➢ 消息驱动机制
DOS程序是通过调用系统的函数来获得用户输入的,Windows程序则是 通过操作系统发送的消息来处理用户输入的。
无论是系统产生的动作或是运行应用程序产生的动作,都称为事件 (Events)产生的消息(Message)。在应用程序中,通过接收消息、分发消 息、处理消息来和用户进行交互。许多消息都经过了严格的定义,并且适 用于所有的应用程序。
CObject
CWinTread
CCmdTarget
CDocument
CWinApp
CWnd
CView
CFrameWnd
CDialog及控件
CMDIFrameWnd CMDIChildWnd CMiniFrameWnd 图4.4 MFC类的基本层次结构
MFC实现简单画图形程序

《MFC编程及应用》课程设计报告题目:简单画图形程序学号:姓名:指导老师:时间:程序设计步骤:一、建立基于对话框的应用程序框架;二、CMy0910200155Dlg类中关键新增变量的作用:CPtrArray pta; //用于保存已绘图形的相关信息。
CMemoryNode *pmN; //指向CMemoryNode类的指针,程序运行过程中动态保存对象信息。
CMemoryNode *pmn; //指向CMemoryNode类的指针,从文件中读取信息时动态创建类的对象。
COLORREF m_CurrentBrushColor; //用于存放当前画刷的颜色。
COLORREF m_CurrentPenColor; //用于存放当前画笔的颜色。
int num; //用于存放从"Index.txt"文件中读取的数字。
int flag=0; //用于标识:当为1时,表示按下了”画图”按钮;当为2时,表示按下了”撤消”按钮;当为3时,表示按下了”加载历史”按钮,则从文件中读取信息。
int mark; //用于标识:当为0时,表示刚画过矩形;当为1时,表示刚画过圆角矩形;当为2时,表示刚画过椭圆。
int index; //用于存放pta数组的容量。
int flag1=0; //用于标识,和flag搭配,用来处理多种情况下的窗口重绘问题。
int ButtonState=0; //用于标识,是类CShow和类CMy0910200155Dlg的一个接口,通过其值在1和0之间转换,来处理弹出式对话框的初次绘制和移动时的重绘问题。
三、CMemoryNode类中变量的作用:COLORREF BrushColor;COLORREF PenColor;int Mark; //以上三者为类CMemoryNode的成员变量,分别用来保存绘图时画刷颜色,画笔颜色和形状。
四、与控件相关联的变量:CComboBox m_BrushColor; //指示画刷颜色组合框。
计算机图形学考试简答题复习

计算机图形学测试简答题复习1、简述计算机动画的概念,它经历了哪几个阶段的发展?(2分)计算机动画是指采用图形和图像的处理技术,借助于编程或动画制作软件生成一系列的景物画面,其中当前帧是前一帧的部分修改。
计算机动画是采用连续播放静止图像的方法产生物体运动的效果。
60年代: 二维计算机辅助动画系统70年代: 三维图形和动画的基本技术的开发;80年代: 优化70年代出现的模型和阴影技术;90年代: 动力学仿真技术、三维仿真演员系统2、计算机图形学、图象处理、计算机视觉这三者之间有什么联系和区别?(2分) 1. 数字图像处理主要研究的内容数字图像处理(digital image processing)是用计算机对图像信息进行处理的一门技术,使利用计算机对图像进行各种处理的技术和方法。
数字图像处理主要研究的内容有以下几个方面:1) 图像变换由于图像阵列很大,直接在空间域中进行处理,涉及计算量很大。
因此,往往采用各种图像变换的方法,如傅立叶变换、沃尔什变换、离散余弦变换等间接处理技术,将空间域的处理转换为变换域处理,不仅可减少计算量,而且可获得更有效的处理(如傅立叶变换可在频域中进行数字滤波处理)。
目前新兴研究的小波变换在时域和频域中都具有良好的局部化特性,它在图像处理中也有着广泛而有效的使用。
2) 图像编码压缩图像编码压缩技术可减少描述图像的数据量(即比特数),以便节省图像传输、处理时间和减少所占用的存储器容量。
压缩可以在不失真的前提下获得,也可以在允许的失真条件下进行。
编码是压缩技术中最重要的方法,它在图像处理技术中是发展最早且比较成熟的技术。
3) 图像增强和复原图像增强和复原的目的是为了提高图像的质量,如去除噪声,提高图像的清晰度等。
图像增强不考虑图像降质的原因,突出图像中所感兴趣的部分。
如强化图像高频分量,可使图像中物体轮廓清晰,细节明显;如强化低频分量可减少图像中噪声影响。
图像复原要求对图像降质的原因有一定的了解,一般讲应根据降质过程建立"降质模型",再采用某种滤波方法,恢复或重建原来的图像。
《计算机图形学》练习测试题及参考答案
《计算机图形学》测试题一、名词解释:(每个4分)1.计算机图形学2.图象处理3.模式识别4.计算几何5.凸多边形6.种子填充算法7.窗口8.视区9.光顺性10.拟合11.多项式插值12.小挠度曲线13.图形变换14.齐次坐标系15.凸包16.轮廓线17.等值线18.图形的翼边表示19.ER模型20.图形消隐21.本影22.半影23.用户坐标系24.规范化设备坐标系25.构造26.约束技术27.光线跟踪28、走样29、CRT(Cathode Ray Tube)30、隔行(interlaced)扫描31、输入模式32、取样方式(sample mode)33、区域34、边界表示法35、复合变换36、二维复合平移37.二维复合比例38.二维复合旋转39.视区(Viewport)40、投影变换41、平面几何投影42. 参数图43. 像素图44.人机界面45.地理信息系统46.虚拟现实47.几何造型技术48.扫描转换49. 插值曲线50.逼近曲线51. 用户接口52. 交互技术53. 交互式图形系统的基本交互任务54. 定位任务55. 选择任务56. 拾取任务57 .选择技术58. 菜单技术59. 文字输入任务60. 数值输入任务61.动画62.帧63.场64. 消隐65.物体空间的消隐算法66. 漫反射光67. 环境光68. 镜面反射光二、选择题(每题2分)1、计算机图形学与计算几何之间的关系是( )。
A)学术上的同义词B)计算机图形学以计算几何为理论基础C)计算几何是计算机图形学的前身D).两门毫不相干的学科2、计算机图形学与计算机图象学的关系是( )。
A)计算机图形学是基础,计算机图象学是其发展B)不同的学科,研究对象和数学基础都不同,但它们之间也有可转换部分C)同一学科在不同场合的不同称呼而已D)完全不同的学科,两者毫不相干3、触摸屏是( )设备。
A)输入B)输出C)输入输出D)既不是输入也不是输出4.计算机绘图设备一般使用什么颜色模型?( )A)RGB;B)CMY;C)HSV ;D)HLS5. 计算机图形显示器一般使用什么颜色模型?( )A)RGB;B)CMY;C)HSV ;D)HLS6.分辨率为1024×1024的显示器各需要多少字节位平面数为24的帧缓存?( ) A)512KB;B)1MB;C)2MB ;D)3MB7.哪一个不是国际标准化组织(ISO)批准的图形标准?( )A)GKS;B)PHIGS;C)CGM ;D)DXF8.下述绕坐标原点逆时针方向旋转a角的坐标变换矩阵中哪一项是错误的? ( )| A B || C D |A) cos a;B) sin a;C) sin a;D) cos a9、在多边形的逐边裁剪法中,对于某条多边形的边(方向为从端点S到端点P)与某条裁剪线(窗口的某一边)的比较结果共有以下四种情况,分别需输出一些顶点.请问哪种情况下输出的顶点是错误的? ( )A)S和P均在可见的一侧,则输出S和P.B)S和P均在不可见的一侧,则输出0个顶点.C)S在可见一侧,P在不可见一侧,则输出线段SP与裁剪线的交点.D)S在不可见的一侧,P在可见的一侧,则输出线段SP与裁剪线的交点和P.10、在物体的定义中对边的哪条限制不存在? ( )A) 边的长度可度量且是有限的B) 一条边有且只有两个相邻的面C) 一条边有且只有两个端点D) 如果一条边是曲线,那么在两个端点之间不允许曲线自相交11.下述哪一条边不是非均匀有理B样条(NURBS)的优点? ( )A) NURBS比均匀B样条能表示更多的曲面B) 对于间距不等的数据点,用NURBS拟合的曲线比用均匀B样条拟合的曲线更光滑C) NURBS提供的权控制方法比用控制点更能有效的控制曲线的形状D) 使用NURBS可以提高对曲面的显示效率12.下列关于图的存储表示的叙述中,哪一个是不正确的?A) 无向图的相邻矩阵是对称矩阵B) 对于带权的图,其相邻矩阵中值为1的元素,其值可以用边的权来权替C) 用邻接表法存储包括n个结点的图需要保存一个顺序存储的结点表和n个链接存储的边表D) 用邻接表法存储包括n条边的图需要保存一个顺序存储的结点表和n个链接存储的边表13*.在面片的数量非常大的情况下哪一个消隐算法速度最快? ( )A) 深度缓存算法(Z-Buffer)B) 扫描线消隐算法C) 深度排序算法(画家算法)D) 不知道14*.下面关于深度缓存消隐算法(Z-Buffer)的论断哪一条不正确? ( )A) 深度缓存算法并不需要开辟一个与图像大小相等的深度缓存数组B) 深度缓存算法不能用于处理对透明物体的消隐C) 深度缓存算法能并行实现D) 深度缓存算法中没有对多边形进行排序15.在用射线法进行点与多边形之间的包含性检测时,下述哪一个操作不正确? ( )A) 当射线与多边形交于某顶点时且该点的两个邻边在射线的一侧时,计数0次B) 当射线与多边形交于某顶点时且该点的两个邻边在射线的一侧时,计数2次C) 当射线与多边形交于某顶点时且该点的两个邻边在射线的两侧时,计数1次D) 当射线与多边形的某边重合时,计数1次16*、扫描消隐算法在何处利用了连贯性(相关性Coherence)?(1)计算扫描线与边的交点;(2)计算多边形在其边界上的深度;(3)计算多边形视窗任意点处的深度值;(4)检测点与多边形之间的包含性。
【计算机图形学课程】一.MFC基本绘图函数使用方法
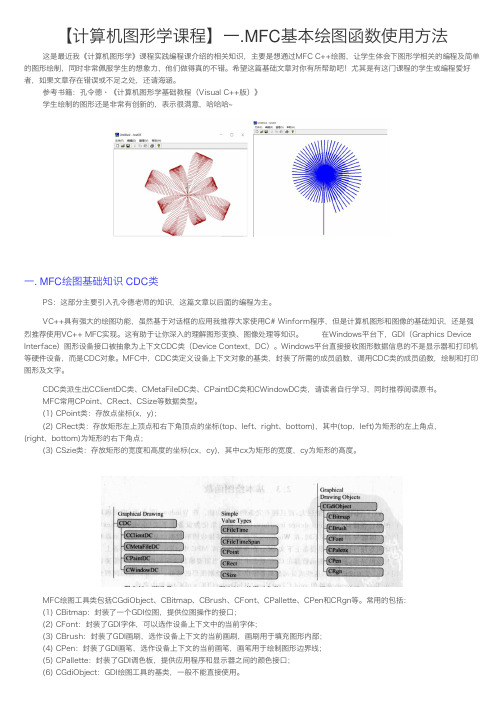
【计算机图形学课程】⼀.MFC基本绘图函数使⽤⽅法这是最近我《计算机图形学》课程实践编程课介绍的相关知识,主要是想通过MFC C++绘图,让学⽣体会下图形学相关的编程及简单的图形绘制,同时⾮常佩服学⽣的想象⼒,他们做得真的不错。
希望这篇基础⽂章对你有所帮助吧!尤其是有这门课程的学⽣或编程爱好者,如果⽂章存在错误或不⾜之处,还请海涵。
参考书籍:孔令德·《计算机图形学基础教程(Visual C++版)》学⽣绘制的图形还是⾮常有创新的,表⽰很满意,哈哈哈~⼀. MFC绘图基础知识 CDC类PS:这部分主要引⼊孔令德⽼师的知识,这篇⽂章以后⾯的编程为主。
VC++具有强⼤的绘图功能,虽然基于对话框的应⽤我推荐⼤家使⽤C# Winform程序,但是计算机图形和图像的基础知识,还是强烈推荐使⽤VC++ MFC实现。
这有助于让你深⼊的理解图形变换、图像处理等知识。
在Windows平台下,GDI(Graphics Device Interface)图形设备接⼝被抽象为上下⽂CDC类(Device Context,DC)。
Windows平台直接接收图形数据信息的不是显⽰器和打印机等硬件设备,⽽是CDC对象。
MFC中,CDC类定义设备上下⽂对象的基类,封装了所需的成员函数,调⽤CDC类的成员函数,绘制和打印图形及⽂字。
CDC类派⽣出CClientDC类、CMetaFileDC类、CPaintDC类和CWindowDC类,请读者⾃⾏学习,同时推荐阅读原书。
MFC常⽤CPoint、CRect、CSize等数据类型。
(1) CPoint类:存放点坐标(x,y);(2) CRect类:存放矩形左上顶点和右下⾓顶点的坐标(top、left、right、bottom),其中(top,left)为矩形的左上⾓点,(right,bottom)为矩形的右下⾓点;(3) CSzie类:存放矩形的宽度和⾼度的坐标(cx,cy),其中cx为矩形的宽度,cy为矩形的⾼度。
计算机图形学考试题及答案
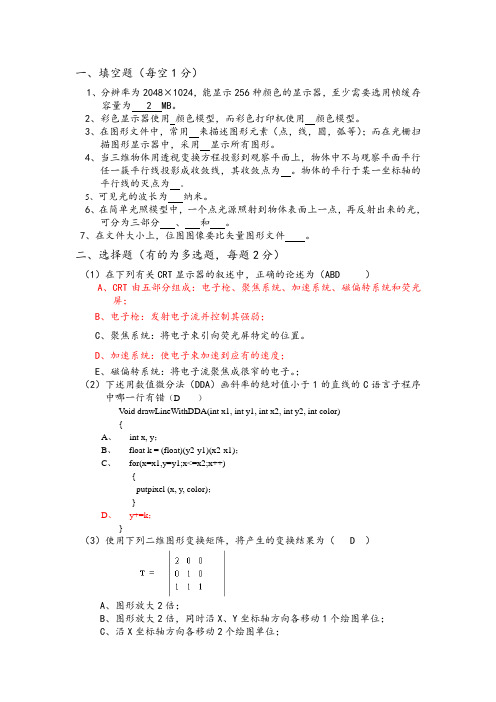
一、填空题(每空1分)1、分辨率为2048×1024,能显示256种颜色的显示器,至少需要选用帧缓存容量为 2 MB。
2、彩色显示器使用颜色模型,而彩色打印机使用颜色模型。
3、在图形文件中,常用来描述图形元素(点,线,圆,弧等);而在光栅扫描图形显示器中,采用显示所有图形。
4、当三维物体用透视变换方程投影到观察平面上,物体中不与观察平面平行任一簇平行线投影成收敛线,其收敛点为。
物体的平行于某一坐标轴的平行线的灭点为。
5、可见光的波长为纳米。
6、在简单光照模型中,一个点光源照射到物体表面上一点,再反射出来的光,可分为三部分、和。
7、在文件大小上,位图图像要比矢量图形文件。
二、选择题(有的为多选题,每题2分)(1)在下列有关CRT显示器的叙述中,正确的论述为(ABD )A、CRT由五部分组成:电子枪、聚焦系统、加速系统、磁偏转系统和荧光屏;B、电子枪:发射电子流并控制其强弱;C、聚焦系统:将电子束引向荧光屏特定的位置。
D、加速系统:使电子束加速到应有的速度;E、磁偏转系统:将电子流聚焦成很窄的电子。
;(2)下述用数值微分法(DDA)画斜率的绝对值小于1的直线的C语言子程序中哪一行有错(D )V oid drawLineWithDDA(int x1, int y1, int x2, int y2, int color){A、int x, y;B、float k = (float)(y2-y1)(x2-x1);C、for(x=x1,y=y1;x<=x2;x++){putpixel (x, y, color);}D、y+=k;}(3)使用下列二维图形变换矩阵,将产生的变换结果为( D )A、图形放大2倍;B、图形放大2倍,同时沿X、Y坐标轴方向各移动1个绘图单位;C、沿X坐标轴方向各移动2个绘图单位;D、沿X坐标轴方向放大2倍,同时沿X、Y坐标轴方向各平移1个绘图单位。
(4)在下列对投影的描述里,正确的论述为( CD )A、透视投影中灭点最多可以有3个B、透视投影与平行投影相比,视觉效果更有真实感,而且能真实地反映物体的精确的尺寸和形状C、太阳光线产生的投影为平行投影。
计算机图形学--明暗处理

ks cos I1
n
其中: 为入射光强, 为表 面的反射系数(与表面材料 和入射角有关)。
法线方向N 入射光方向L 反射光方向R
设R和V分别表示反射光和观察方向的单位方 向向量, 是反射光线和观察方向的夹角, 上式也可以表示为:
观察方向V
镜面反射方向的单位向量R 根据入射光线向量I、法线向量N决定
w FD / CD
A
Y=Y2
u EG / EF
t FD / AB
则对同一扫面线上各像素点的光强计算通常采用下 述的增量公式5:
Y=Y1
B
C
下午8时18分 22
计算机图形中真实感图形设计-- 明暗处理
使用Gouraud明暗处理来绘制多边形表面时需要进行下列计算: N 顶点 P k 处的平均法向量 k
I Ia ka I1[kd (L N)n k s (V R)m ]f(d)
明暗函数 用于决定物体上的一点或屏幕上一 像素点处的光强或明暗色调。公式 中的R、I、N可以由上页公式求得。
19
下午8时18分
计算机图形中真实感图形设计-- 明暗处理
计算物体表面上各点处的光强的关键:
求出物体表面在这些点处的法线方向N。
红敏细胞绿敏细胞蓝敏细胞上午6时9分7计算机图形中真实感图形设计光的颜色三基色模型rgbcmyred红色green绿色blue蓝色cyan青色magenta品红yellow黄色cmyyiqhsvhlscyan青色magenta品红yellow黄色ybrightness亮度iqchrominance色调hue色相saturation饱和度value明暗度值hue色相lightness亮度saturation饱和度上午6时9分8计算机图形中真实感图形设计1图形真实感简介2光的颜色23光的明亮程度4明暗处理上午6时9分9计算机图形中真实感图形设计光的明亮程度同一束光的明亮程度是因人而异
计算机图形学复习题(有答案)
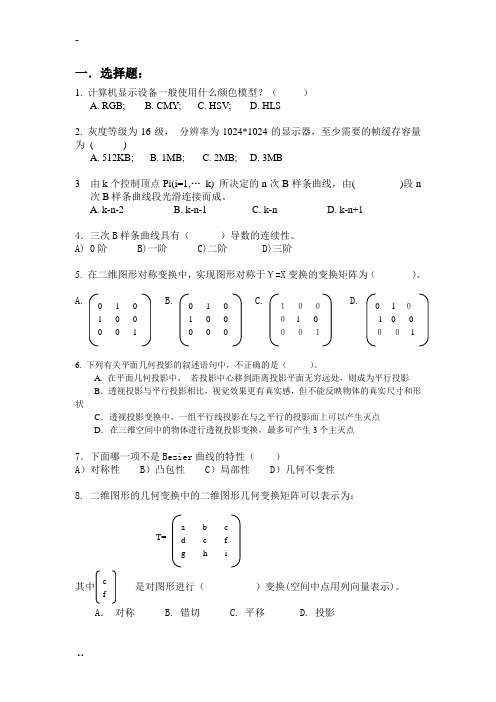
一.选择题:1. 计算机显示设备一般使用什么颜色模型?( ) A. RGB; B. CMY; C. HSV; D. HLS2. 灰度等级为16级, 分辨率为1024*1024的显示器,至少需要的帧缓存容量为 ( )A. 512KB;B. 1MB;C. 2MB;D. 3MB3 由k 个控制顶点Pi(i=1,… k) 所决定的n 次B 样条曲线,由( )段n 次B 样条曲线段光滑连接而成。
A. k-n-2B. k-n-1C. k-nD. k-n+14.三次B 样条曲线具有( )导数的连续性。
A) 0阶 B)一阶 C)二阶 D)三阶5. 在二维图形对称变换中,实现图形对称于Y=X 变换的变换矩阵为( )。
A.B. C. D.6. 下列有关平面几何投影的叙述语句中,不正确的是( )。
A. 在平面几何投影中, 若投影中心移到距离投影平面无穷远处,则成为平行投影 B .透视投影与平行投影相比,视觉效果更有真实感,但不能反映物体的真实尺寸和形状C .透视投影变换中,一组平行线投影在与之平行的投影面上可以产生灭点D .在三维空间中的物体进行透视投影变换,最多可产生3个主灭点7.下面哪一项不是Bezier 曲线的特性( )A )对称性B )凸包性C )局部性D )几何不变性8. 二维图形的几何变换中的二维图形几何变换矩阵可以表示为:其中 是对图形进行( )变换(空间中点用列向量表示)。
A . 对称 B. 错切 C. 平移 D. 投影0 1 0 1 0 0 0 0 1 0 -1 0 -1 0 0 0 0 1 1 0 0 0 1 0 0 0 1 0 1 0 1 0 0 0 0 0 cfa b cd e f g h iT=10. 在XOY 平面上,给定7个不重合的控制点P 0,P 1,…,P 6,由这7个控制点所确定的三次B 样条曲线应分为4段,如果移动控制点P 2,只影响第( )段曲线形状A. 第1段B. 第2段C. 第3段D. 第1段到第3段二. 填空题1. 直线的属性包括:线型、_______和颜色。
opencv+MFC图像处理界面设计与实现

opencv+MFC图像处理界⾯设计与实现数字图像处理作业⽤opencv + MFC图像处理界⾯设计与实现,点击按钮(Button)在Picture Control上显⽰处理前后的对⽐图像vs2015+opencv2.4.13.6 实现运⾏// ImageprocessingDlg.cpp : 实现⽂件//#include "stdafx.h"#include "Imageprocessing.h"#include "ImageprocessingDlg.h"#include "afxdialogex.h"#include<opencv2/opencv.hpp>#include <iostream>#include <fstream>using namespace cv;using namespace std;Mat src,gray, equalized;void drawEndPoints(const Mat& maskImg, Mat &dstImg);Mat thinning(const Mat &binaryImg);Mat findCorners(const Mat &inImg);void drawCircles(const Mat& maskImg, Mat &dstImg);double iterativeThreshold(const Mat &grayImg);double otsuThreshold(const Mat &grayImg);double pTileThreshold(const Mat &grayImg, double objRatio);/// 分块⾃适应阈值分割void blockAdaptiveThreshold(const Mat &srcImg, Mat& dstImg, Size blockSize = Size(64, 64));void writetxt(int num);#ifdef _DEBUG#define new DEBUG_NEW#endif// ⽤于应⽤程序“关于”菜单项的 CAboutDlg 对话框class CAboutDlg : public CDialogEx{CAboutDlg();// 对话框数据#ifdef AFX_DESIGN_TIMEenum { IDD = IDD_ABOUTBOX };#endifprotected:virtual void DoDataExchange(CDataExchange* pDX); // DDX/DDV ⽀持// 实现protected:DECLARE_MESSAGE_MAP()};CAboutDlg::CAboutDlg() : CDialogEx(IDD_ABOUTBOX){}void CAboutDlg::DoDataExchange(CDataExchange* pDX){CDialogEx::DoDataExchange(pDX);}BEGIN_MESSAGE_MAP(CAboutDlg, CDialogEx)END_MESSAGE_MAP()// CImageprocessingDlg 对话框CImageprocessingDlg::CImageprocessingDlg(CWnd* pParent /*=NULL*/): CDialogEx(IDD_IMAGEPROCESSING_DIALOG, pParent){m_hIcon = AfxGetApp()->LoadIcon(IDR_MAINFRAME);}void CImageprocessingDlg::DoDataExchange(CDataExchange* pDX){CDialogEx::DoDataExchange(pDX);DDX_Control(pDX, IDC_COMBO1_GRAYMORPHOLOGY, cbBox1);DDX_Control(pDX, IDC_COMBO1_Hough, cbBox2);}BEGIN_MESSAGE_MAP(CImageprocessingDlg, CDialogEx)ON_WM_SYSCOMMAND()ON_WM_PAINT()ON_WM_QUERYDRAGICON()ON_BN_CLICKED(IDC_BUTTON1_OPENIMG, &CImageprocessingDlg::OnBnClickedButton1Openimg)ON_BN_CLICKED(IDC_BUTTON2_CLOSEIMG, &CImageprocessingDlg::OnBnClickedButton2Closeimg)ON_BN_CLICKED(IDC_BUTTON1_2GRAY, &CImageprocessingDlg::OnBnClickedButton12gray)ON_BN_CLICKED(IDC_BUTTON2_2EQUA, &CImageprocessingDlg::OnBnClickedButton22equa)ON_BN_CLICKED(IDC_BUTTON3_GRAYHIST, &CImageprocessingDlg::OnBnClickedButton3Grayhist)ON_BN_CLICKED(IDC_BUTTON4_EQUAHIST, &CImageprocessingDlg::OnBnClickedButton4Equahist)ON_BN_CLICKED(IDC_BUTTON5_AVERFILTER, &CImageprocessingDlg::OnBnClickedButton5Averfilter)ON_BN_CLICKED(IDC_BUTTON6_MEDIANBLUR, &CImageprocessingDlg::OnBnClickedButton6Medianblur) ON_BN_CLICKED(IDC_BUTTON7_GAUSSBLUR, &CImageprocessingDlg::OnBnClickedButton7Gaussblur) ON_BN_CLICKED(IDC_BUTTON8_SOBEL, &CImageprocessingDlg::OnBnClickedButton8Sobel)ON_BN_CLICKED(IDC_BUTTON9_Laplacian, &CImageprocessingDlg::OnBnClickedButton9Laplacian)ON_BN_CLICKED(IDC_BUTTON10_CANNY, &CImageprocessingDlg::OnBnClickedButton10Canny)ON_BN_CLICKED(IDC_BUTTON1_RESIZE, &CImageprocessingDlg::OnBnClickedButton1Resize)ON_BN_CLICKED(IDC_BUTTON2_MOVE, &CImageprocessingDlg::OnBnClickedButton2Move)ON_BN_CLICKED(IDC_BUTTON3_FLIP, &CImageprocessingDlg::OnBnClickedButton3Flip)ON_BN_CLICKED(IDC_BUTTON4_ROTATE, &CImageprocessingDlg::OnBnClickedButton4Rotate)ON_BN_CLICKED(IDC_BUTTON6_DCT, &CImageprocessingDlg::OnBnClickedButton6Dct)ON_BN_CLICKED(IDC_BUTTON7_ERODE, &CImageprocessingDlg::OnBnClickedButton7Erode)ON_BN_CLICKED(IDC_BUTTON8_DLIATE, &CImageprocessingDlg::OnBnClickedButton8Dliate)ON_BN_CLICKED(IDC_BUTTON9_OPEN, &CImageprocessingDlg::OnBnClickedButton9Open)ON_BN_CLICKED(IDC_BUTTON10_CLOSE, &CImageprocessingDlg::OnBnClickedButton10Close)ON_BN_CLICKED(IDC_BUTTON11_FINDENDPOINT, &CImageprocessingDlg::OnBnClickedButton11Findendpoint)ON_CBN_SELCHANGE(IDC_COMBO1_GRAYMORPHOLOGY, &CImageprocessingDlg::OnCbnSelchangeCombo1Graymorphology) ON_BN_CLICKED(IDC_BUTTON4_THIN, &CImageprocessingDlg::OnBnClickedButton4Thin)ON_BN_CLICKED(IDC_BUTTON5_FINDCORNERS, &CImageprocessingDlg::OnBnClickedButton5Findcorners)ON_BN_CLICKED(IDC_BUTTON1_ITERATIVE, &CImageprocessingDlg::OnBnClickedButton1Iterative)ON_BN_CLICKED(IDC_BUTTON2_OTSU, &CImageprocessingDlg::OnBnClickedButton2Otsu)ON_BN_CLICKED(IDC_BUTTON3_PTILEThreshold, &CImageprocessingDlg::OnBnClickedButton3Ptilethreshold)ON_BN_CLICKED(IDC_BUTTON4_blockAdaptiveThreshold, &CImageprocessingDlg::OnBnClickedButton4blockadaptivethreshold)ON_CBN_SELCHANGE(IDC_COMBO1_Hough, &CImageprocessingDlg::OnCbnSelchangeCombo1Hough)ON_BN_CLICKED(IDC_BUTTON8_RegionLabel, &CImageprocessingDlg::OnBnClickedButton8Regionlabel)ON_BN_CLICKED(IDC_BUTTON1_AutoMarkerWatershed, &CImageprocessingDlg::OnBnClickedButton1Automarkerwatershed)ON_WM_CLOSE()END_MESSAGE_MAP()// CImageprocessingDlg 消息处理程序BOOL CImageprocessingDlg::OnInitDialog(){CDialogEx::OnInitDialog();// 将“关于...”菜单项添加到系统菜单中。
MFC下OpenGL入门,计算机图形学作业

MFC下OpenGL入门源文件1,建一工程文件,我这里命名为first,现在first工程里面我们没有添加任何东西,所有的东西都是MFC自动帮我们创建的。
2,添加链接库。
这一步很关键。
打开菜单栏下的项目->属性->配置属性->链接器->输入->附加依赖项里加入OpenGL32.lib GLu32.lib GLaux.lib,如图3,加头文件,在stdafx里面添加opengl的头文件。
如下代码所示:代码//-----------------------Tramp---添加OpenGL库头文件----------------------------->#include "stdio.h"#include "math.h"#include "gl\gl.h"#include "gl\glu.h"#include "gl\glaux.h"//---------------------------------------------------------------------------<4,CCY457OpenGLView类的属性栏,为下述消息加入消息处理函数:WM_CREATE (for OnCreate), WM_DESTROY (for OnDestroy), WM_SIZE (for OnSize), WM_ERASEBACKGROUND (for OnEraseBkground).如下图:5,设置窗口显示风格。
窗口创建之前我们必须设置窗口风格包含WS_CLIPCHILDREN和WS_CLIPSIBLINGS,从而避免OpenGL绘制到其他窗口中去。
这些应该放在PreCreateWindow()中。
代码BOOL CfirstView::PreCreateWindow(CREATESTRUCT& cs){// TODO: 在此处通过修改// CREATESTRUCT cs 来修改窗口类或样式cs.style |= WS_CLIPSIBLINGS | WS_CLIPCHILDREN;//Trampreturn CView::PreCreateWindow(cs);}6,在CfirstView.h中加入如下语句:/************************************************************************//* 设置的变量是Rendering Context(着色描述表)。
计算机图形学MFC编程
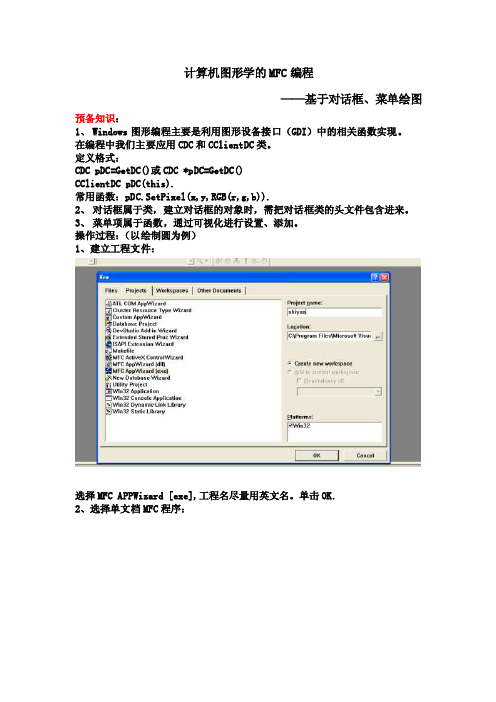
计算机图形学的MFC编程——基于对话框、菜单绘图预备知识:1、Windows图形编程主要是利用图形设备接口(GDI)中的相关函数实现。
在编程中我们主要应用CDC和CClientDC类。
定义格式:CDC pDC=GetDC()或CDC *pDC=GetDC()CClientDC pDC(this).常用函数:pDC.SetPixel(x,y,RGB(r,g,b)).2、对话框属于类,建立对话框的对象时,需把对话框类的头文件包含进来。
3、菜单项属于函数,通过可视化进行设置、添加。
操作过程:(以绘制圆为例)1、建立工程文件:选择MFC APPWizard [exe],工程名尽量用英文名。
单击OK.2、选择单文档MFC程序:4、单击Finish,工程建完。
单击OK5、建立对话框,在视图区,选择Resource View选项夹。
6、可视化建立对话框。
右击Dialog,选择insert Dialog选项,出现对话框的可视化设计界面。
其中旁边的竖条是控件工具箱,在图形学编程中,需要我们知道其中的两个:其中一个是第二行第一个(图标代码为Aa)称为静态文本框,另外一个是第二行第二个(图标代码为ab)称为动态文本框。
7、建立静态文本框。
我们可以通过选中该控件,将鼠标移到对话框面板上,在对话框面板上拖拽实现添加静态文本框,右击该文本框,选择properties选项,在Caption选项中实现对文本框的内容的修改。
动态文本框,右击该文本框,选择properties选项,ID框可采用默认的编码,要分清楚其实际含义。
9、通过Layout菜单实现对话框设计的整洁性。
通过ctrl选中两个或二个以上文本框实现上下或左右的对齐。
可以实现对话框大小相同10、建立对话框类。
双击对话框设计面板,出现一个建立对话框类的对话框,选择默认的create a new class.单击OK,为对话框类命名InputDlog。
单击OK结束.11、添加对话框的变量。
- 1、下载文档前请自行甄别文档内容的完整性,平台不提供额外的编辑、内容补充、找答案等附加服务。
- 2、"仅部分预览"的文档,不可在线预览部分如存在完整性等问题,可反馈申请退款(可完整预览的文档不适用该条件!)。
- 3、如文档侵犯您的权益,请联系客服反馈,我们会尽快为您处理(人工客服工作时间:9:00-18:30)。
计算机图形学编程试8MFC明暗处理实现————————————————————————————————作者:————————————————————————————————日期:计算机图形学编程练习8:MFC+明暗处理实现MFC与OpenGL集成在Windows下编程,利用MFC是一个非常便捷的方法。
本次练习的主要目的,是希望同学们在MFC应用程序框架下进行OpenGL编程。
为此,需要对MFC生成的应用程序进行适当的初始化,关于这方面的内容详见:[1] Crain, Dennis. "Windows NT OpenGL: Getting Started." April 1994. (MSDN Library, Technical Articles)[2] Rogerson, Dale. "OpenGL I: Quick Start.". December 1994. (MSDN Library, Technical Articles)[3] D. Shreiner and The Khronos OpenGL ARB Working Group. OpenGL Programming Guide: The Official Guide to Learning OpenGL, Versions 3.0 and 3.1, 7th Ed., 2009. (附录D)从设计目标来说,OpenGL是流水线结构(streamlined)、硬件无关(hardware-independent)、跨平台的3D图形编程API。
但是,在实际应用时,OpenGL的具体实现是与操作系统以及图形硬件相关的。
为此,操作系统需要提供像素格式(pixel format)与绘制上下文管理函数(rendering context managnment functions)。
Windows操作系统提供了通用图形设备接口(generic graphics device interface, GDI)以及设备驱动实现。
为了使OpenGL命令得到正确的执行,需要调用WGL函数,具体的步骤如下:Step 1: 添加成员变量在CView类(利用AppWizard生成)中添加如下成员变量:// OpenGL Windows specificationHDC m_hDC; // Device ContextHGLRC m_hGLRC; // Rendering ContextCPalette m_cGLLP; // Logical PaletteStep 2: 设置像素格式创建CView类的WM_CREATE的消息响应函数,进行像素格式的设置,例如:int COpenGLRenderView::OnCreate(LPCREATESTRUCT lpCreateStruct){if (CView::OnCreate(lpCreateStruct) == -1)return -1;// TODO: Add your specialized creation code hereint nPixelFormat; // Pixel format indexHWND hWnd = GetSafeHwnd(); // Get the window's handlem_hDC = ::GetDC(hWnd); // Get the Device contextstatic PIXELFORMATDESCRIPTOR pfd = {sizeof(PIXELFORMATDESCRIPTOR), // Size of this structure1, // Version of this structurePFD_DRAW_TO_WINDOW | // Draw to Window (not to bitmap)PFD_SUPPORT_OPENGL | // Support OpenGL calls in windowPFD_DOUBLEBUFFER, // Double buffered modePFD_TYPE_RGBA, // RGBA Color mode24, // Want 24bit color0,0,0,0,0,0, // Not used to select mode0,0, // Not used to select mode0,0,0,0,0, // Not used to select mode32, // Size of depth buffer0, // Not used to select mode0, // Not used to select modePFD_MAIN_PLANE, // Draw in main plane0, // Not used to select mode0,0,0 }; // Not used to select mode// Choose a pixel format that best matches that described in pfdnPixelFormat = ChoosePixelFormat(m_hDC, &pfd);// Set the pixel format for the device contextVERIFY(SetPixelFormat(m_hDC, nPixelFormat, &pfd));// Create the rendering contextm_hGLRC = wglCreateContext(m_hDC);// Create the palette if neededInitializePalette();// Make the rendering context current, perform initialization, then deselect it VERIFY(wglMakeCurrent(m_hDC, m_hGLRC));GLSetupDef(m_hDC);wglMakeCurrent(NULL, NULL);return 0;}上述步骤的具体含义参看参考文献[1-3].Step 3: 创建绘制上下文该步骤在Step 2中已完成,具体的就是:m_hGLRC = wglCreateContext(m_hDC);Step 4: 设置调色板创建CView类的一个成员函数,进行调色板的设置,例如:void CTriangularPatchView::InitializePalette(void){PIXELFORMATDESCRIPTOR pfd; // Pixel Format DescriptorLOGPALETTE *pPal; // Pointer to memory for logical paletteint nPixelFormat; // Pixel format indexint nColors; // Number of entries in paletteint i; // Counting variableBYTE RedRange,GreenRange,BlueRange;// Range for each color entry (7,7,and 3)// Get the pixel format index and retrieve the pixel format description nPixelFormat = GetPixelFormat(m_hDC);DescribePixelFormat(m_hDC, nPixelFormat, sizeof(PIXELFORMATDESCRIPTOR), &pfd);// Does this pixel format require a palette? If not, do not create a// palette and just return NULLif (!(pfd.dwFlags & PFD_NEED_PALETTE))return;// Number of entries in palette. 8 bits yeilds 256 entriesnColors = 1 << olorBits;// Allocate space for a logical palette structure plus all the palette entries pPal = (LOGPALETTE*)malloc(sizeof(LOGPALETTE) +nColors*sizeof(PALETTEENTRY));// Fill in palette headerpPal->palVersion = 0x300; // Windows 3.0pPal->palNumEntries = nColors; // table size// Build mask of all 1's. This creates a number represented by having// the low order x bits set, where x = pfd.cRedBits, pfd.cGreenBits, and// pfd.cBlueBits.RedRange = (1 << pfd.cRedBits) -1;GreenRange = (1 << pfd.cGreenBits) - 1;BlueRange = (1 << pfd.cBlueBits) -1;// Loop through all the palette entriesfor (i = 0; i < nColors; i++){// Fill in the 8-bit equivalents for each componentpPal->palPalEntry[i].peRed = (i >> pfd.cRedShift) & RedRange;pPal->palPalEntry[i].peRed = (unsigned char)((double) pPal->palPalEntry[i].peRed * 255.0 / RedRange);pPal->palPalEntry[i].peGreen = (i >> pfd.cGreenShift) & GreenRange;pPal->palPalEntry[i].peGreen = (unsigned char)((double)pPal->palPalEntry[i].peGreen * 255.0 / GreenRange);pPal->palPalEntry[i].peBlue = (i >> pfd.cBlueShift) & BlueRange;pPal->palPalEntry[i].peBlue = (unsigned char)((double)pPal->palPalEntry[i].peBlue * 255.0 / BlueRange);pPal->palPalEntry[i].peFlags = (unsigned char) NULL;}// Create the palettem_cGLLP.CreatePalette(pPal);// Go ahead and select and realize the palette for this device contextSelectPalette(m_hDC,(HPALETTE)m_cGLLP,FALSE);RealizePalette(m_hDC);// Free the memory used for the logical palette structurefree(pPal);}至此,已经可以调用OpenGL函数了,一定要记住:OpenGL命令只在获取了正确的绘制上下文后才能正确执行,即wglMakeCurrent(m_hDC, m_hGLRC);// issue OpenGL commands…..wglMakeCurrent(m_hDC, NULL);Step 5: 重载OnEraseBkgnd函数创建CView类的WM_ERASEBKGND的消息响应函数,防止Windows进行额外的背景清除操作,例如:BOOL COpenGLRenderView::OnEraseBkgnd(CDC* pDC){// TODO: Add your message handler code here and/or call defaultreturn FALSE;}Step 6: 设置OpenGL的基本参数(可选)在CView类中添加头文件:#include <GL/gl.h>#include <GL/glu.h>#include <GL/glut.h>以及成员函数:void GLSetupDef(void *pData);创建CView类的一个成员函数,进行OpenGL的基本参数的设置,例如:void COpenGLRenderView::GLSetupDef(void *pData){// set up clear colorglClearColor(1.0f, 1.0f, 1.0f, 1.0f);// set up lightingGLfloat light_position0[4] = {52.0f, 16.0f, 50.0f, 0.0f}; GLfloat light_position1[4] = {26.0f, 48.0f, 50.0f, 0.0f}; GLfloat light_position2[4] = {-16.0f, 52.0f, 50.0f, 0.0f};GLfloat direction0[3] = {-52.0f, -16.0f, -50.0f};GLfloat direction1[3] = {-26.0f, -48.0f, -50.0f};GLfloat direction2[3] = {16.0f, -52.0f, -50.0f};GLfloat color0[4] = {1.0f, 0.0f, 0.0f, 1.0f};GLfloat color1[4] = {0.0f, 1.0f, 0.0f, 1.0f};GLfloat color2[4] = {0.0f, 0.0f, 1.0f, 1.0f};glLightfv(GL_LIGHT0, GL_POSITION, light_position0); glLightfv(GL_LIGHT0, GL_SPOT_DIRECTION, direction0); glLightfv(GL_LIGHT0, GL_DIFFUSE, color0);glLightfv(GL_LIGHT0, GL_SPECULAR, color0);glLightfv(GL_LIGHT1, GL_POSITION, light_position1); glLightfv(GL_LIGHT1, GL_SPOT_DIRECTION, direction1); glLightfv(GL_LIGHT1, GL_DIFFUSE, color1);glLightfv(GL_LIGHT1, GL_SPECULAR, color1);glLightfv(GL_LIGHT2, GL_POSITION, light_position2); glLightfv(GL_LIGHT2, GL_SPOT_DIRECTION, direction2); glLightfv(GL_LIGHT2, GL_DIFFUSE, color2);glLightfv(GL_LIGHT2, GL_SPECULAR, color2);glEnable(GL_LIGHTING);glEnable(GL_LIGHT0);glEnable(GL_LIGHT1);glEnable(GL_LIGHT2);// set up materialsGLfloat ambient[4] = {0.3f, 0.3f, 0.3f, 0.5f};GLfloat material_ambient[4] = {0.0f, 0.0f, 0.0f, 0.0f}; GLfloat material_diffuse[4] = {1.0f, 1.0f, 1.0f, 0.3f}; GLfloat material_specular[4] = {0.5f, 0.5f, 0.5f, 0.5f}; GLfloat material_shininess = 51.2f;glLightModelfv(GL_LIGHT_MODEL_AMBIENT, ambient);glMaterialfv(GL_FRONT_AND_BACK, GL_SPECULAR, material_specular);glMaterialfv(GL_FRONT_AND_BACK, GL_DIFFUSE, material_diffuse);glMaterialfv(GL_FRONT_AND_BACK, GL_AMBIENT, material_ambient);glMaterialf(GL_FRONT_AND_BACK, GL_SHININESS, material_shininess);// enable depth testglDepthFunc(GL_LESS);glEnable(GL_DEPTH_TEST);// enable cull face// glCullFace(GL_BACK);// glEnable(GL_CULL_FACE);// set up point size and line widthglPointSize(1.0);glLineWidth(1.0);// set up point, line, polygon anti-aliasing mode// glEnable(GL_POINT_SMOOTH);// glHint(GL_POINT_SMOOTH_HINT, GL_NICEST);// glEnable(GL_LINE_SMOOTH);// glHint(GL_LINE_SMOOTH_HINT, GL_NICEST);glEnable(GL_POLYGON_SMOOTH);glHint(GL_POLYGON_SMOOTH_HINT, GL_NICEST);// set up the direction of front faceglFrontFace(GL_CCW);// glPolygonMode(GL_BACK, GL_LINE);}Step 7: 设置绘制模式、重载OnSize函数、鼠标响应函数处理等(可选) 略,参见计算机图形学编程练习6及示例代码。
