数字录音机设计
数字音频基础

ISDB T(日本)或8 VSB(美国)调制方式; (2)卫星传输:采用 QPSK 调制方式; (3)有线传输:采用 M QAM 或16 VSB
高数据率调制方式,根据有线信道的不同 特性,分别采用16/32/128/256 QAM 等方 式。
数字音视频技术
三种。DVB-S (QPSK 调制方式)主要用 于数字电视卫星广播系统;DVB -T(OFDM 调制方式)则用于地 面无线发射的数字 电视广播系统;DVB-C(QAM 调制方式)主 要为地面 HFC(Hybrid FiberCoaxnetworks,混合光纤同轴电缆 网)网络数字电视广播所采用。
数字音视频技术
• 图6-1 数字电视系统的基本原理框图
数字音视频技术
下,对反映信源全部信息的数 字信号进 行变换,用尽量少的数字脉冲来表示信源 产生的信息,这就是压缩编码。
信道编码器包括纠错编码和数字调 制,主要解决数字信号传输的可靠性问题, 故又称 为抗干扰编码。经过纠错编码的 传输码流具有检错和纠错的能力,其作用 是最大限度地减 少在信道传输中的误码 率,然后将经过纠错编码后的传输码流调 制成适合于在信道上传输 的波形。
数字音视频技术
6.2 二进制数字调制及其抗噪声性能分 析
6.2.1 二进制数字幅移键控(2ASK) 1.2ASK 调制原理 数字幅度调制又称幅移键控(ASK),二进制幅移键控记作
2ASK。2ASK 是利用代表 数字信息“0”或“1”的基带矩形 脉冲去键控一个连续的载波,使载波时断时续地输出。有载 波输出时发送“1”,无载波输出时发送“0”。
–按照声音的来源以及作用来看,可分为人声、乐音 和响音。人声包括人物的独白、对白、旁白、歌声、 啼笑,感叹等;乐音也可成为音乐,是指人类通过 相关乐器演奏出来的声音,如影视作品中的背景声 音,一般起着渲染气氛的作用;响音是指除语言和 音乐之外电影中所有声音的统称,如动作音响 、 自然音响、 背景音响 、机械音响、特殊音响。
DAR-1携带式数字录音机
DAR-1携带式数字录音机
佚名
【期刊名称】《电声技术》
【年(卷),期】2012(36)3
【摘要】DAR-1设置完整的档案相容性与录音功能,音源部分支持MP3,WAV,WMA,ADPCM等音乐播放格式;录音支持MP3,WAV,ADPCM等录音格式,蓝配备多种高音质录音模式选择,在录音过程中通过调节录音模式来达到符合场景的最佳方式。
【总页数】1页(P90-90)
【关键词】数字录音机;携带式;ADPCM;音乐播放格式;录音模式;录音功能;录音格式;最佳方式
【正文语种】中文
【中图分类】TN912.22
【相关文献】
1.8508A数字多用表检定携带式直流电位差计测量结果的不确定度评定 [J], 毕志建
2.用数字电压表检定携带式直流电位差计的示值误差测量不确定度的评定 [J], 柳
丽红
3.用数字电压表检定携带式电位差计示值误差的可行性论证 [J], 白英杰
4.数字时尚尽在手中:PDA、MP3随身听和数字录音机大扫描 [J],
5.从模拟录音机到数字录音机 [J], 郭晓川
因版权原因,仅展示原文概要,查看原文内容请购买。
BOSS MICRO BR BR-80数字录音机说明书

MICRO BR BR-80Digital Recorder▼▼▼▼▼▼▼▼The Complete Studio To GoDon’t be fooled by its size — this little studio is loaded! The MTR (Multi-Track Recorder) mode offers 64 V-Tracks with eight simultaneous playback tracks. In addition, a dedicated stereo rhythm track is provided, as well as an onboard library of great grooves to choose from. The intuitive user-interface continues the simple-to-use tradition of BOSS’ acclaimed BR series, with a graphical design that follows the layout of a conventional recording console. With EQ, reverb, and mastering tools plus, world-class COSM amps and effects for guitar, bass, and vocals the BR-80 is ready to deliver complete, pro-quality recordings with ease.High-Quality Multi FXThe BR-80 is packed with professional multi-effects powered by a newly developed custom DSP chip. Over 40 types of COSM amp models give you instant access to a wide range of powerful guitar and bass sounds. The preset patches allow fi rst-timers and pros alike to enjoy high-quality sounds immediately, while power users can tweak parameters in micro detail for the ultimate tonal control. The dedicated vocal effects, comparable with BOSS’s popular VE-20, include doubling, harmony effects, pitch correction, and more.Virtual Jam BandThe BR-80’s eBand mode offers musicians a fun way to play along with their favorite songs. With the bundled eBand Song List Editor software, you can import CD, MP3, and WAV audio fi les from a computer via USB. The Center Cancel function can be used tominimize the volume of pre-recorded vocals and solos for play- and sing-along enjoyment. eBand mode is also an excellent partner for musical training, as it lets you record your performance adjustplayback speed and/or pitch as desired.PC CompanionThe ultra-fl exible BR-80 can be used as a stand-alone digital recorder or as audio interface for a USB-equipped computer. Cakewalk’s SONAR X1 LE DAW software (for Windows) is bundled with the BR-80, giving users a full-fl edged PC-based music production environment with latency-free recording and a powerful range of COSM amps and effects. Furthermore, the bundled Wave Converter software lets you easily exchange data between the BR-80 and SONAR X1 LE or any other DAW.Built-In Stereo MicIn combination with the onboard high-grade stereo condenser microphones, the BR-80’s Live Rec mode lets you capture pristine stereo recordings instantly. Record vocals, guitar parts, and song ideas the moment inspiration strikes. Your recorded audio fi les can be easily imported into the BR-80’s MTR mode to use as a basis for multi-track song production.MICRO BR BR-80 Specifications■ Tracks [ MTR Mode ] Tracks: 8, Simultaneously recording track: 2, V-Track: 64 (8 V-Tracks per each Track) [ eBand Mode ] Tracks: 2 (stereo), Simultaneously recording track: 2 (stereo) [ LIVE REC Mode ] Tracks: 2 (stereo), Simultaneously recording track: 2 * Either the playback or the recording. ■ Recording Media SDHC Memory Card: 4 GB—32 GB, SD Memory Card: 1 GB—2 GB ■ Data Type [ MTR Mode ] Linear (Bit Depth: 16 bits) [ eBand Mode ] eBand Songs (Recording/Playback), WAV (Bit Depth: 16 bits, Playback only), MP3 (Bit Rates: 64 kbps—320 kbps, Playback only) [ LIVE REC Mode ] WAV (Bit Depth: 16 bits, Recording/Playback), MP3 (Bit Rates: 64 kbps—320 kbps, Recording/Playback) ■ AD Conversion 24 bits ■ DA Conversion 24 bits ■ Sample Rate 44.1 kHz ■ Recording Time (conversion in one track) [ MTR Mode ] 1 GB: 3 hours, 32 GB: 100 hours [ eBand Mode ] (eBand Song) 1 GB: 4 hours, 32 GB: 130 hours [ eBand Mode/LIVE REC Mode ] (WAV 16-bit, stereo) 1 GB: 1.5 hours, 32 GB: 50 hours (MP3 128 kbps, stereo) 1 GB: 16 hours, 32 GB: 550 hours * The above-listed recording times are approximate. Times may be slightly shorter depending on the number of songs that were created. * The above number of the MTR mode is the total for all the tracks that are used. If each of the eight tracks contains an equal amount of data, the length of the resulting song will be approximately 1/8 of the above. ■ Nominal Input Level GUITAR/MIC IN jack: -20 dBu (GUITAR/MIC SW = GUITAR), -40 dBu (GUITAR/MIC SW = MIC), LINE IN jack: -10 dBu ■ Input Impedance GUITAR/MIC IN jack: 1 M Ω (GUITAR/MIC SW = GUITAR), 6 k Ω (GUITAR/MIC SW =MIC), LINE IN jack: 10 k Ω ■ Nominal Output Level PHONES/LINE OUT jack: -14 dBu ■ OutputImpedance PHONES/LINE OUT jack: 22 Ω ■ Display Graphic LCD 128 x 64 dots (Backlit LCD) ■ USB Functions 24-bit/44.1 kHz USB-AUDIO (Hi-Speed USB), USB Mass Storage Class (Hi-Speed USB), BUS Power operation ■ Connectors GUITAR/MIC IN jack (1/4" phone type), LINE IN jack (Stereo miniaturephone type), PHONES/LINE OUT jack (Stereo miniature phone type), USB connector (mini-B type), DC IN jack ■ Power Supply DC 9 V: AC Adaptor (sold separately), Alkaline battery (AA, LR6) x 2, Rechargeable Ni-MH battery (AA, HR6) x 2 or USB Bus Power ■ Current Draw 130 mA (DC IN) Alkaline dry cell batteries: Approximately 6 hours (with continuous playback of 8 tracks, power save function) * May vary according to usage conditions, batteries used, and type of SD card used. ■ Dimensions 138.0 (W) x 86 (D) x 21.7 (H) mm / 5-7/16 (W) x 3-7/16 (D) x 7/8 (H) inches ■ Weight 140 g / 5 oz ■ Included Accessories SD Memory Card, SONAR X1 LE DVD-ROM, USB Cable (mini-B type), Alkaline battery (AA, LR6) x 2, Owner’s Manual ■ Options AC Adaptor (PSA series), Silicone Rubber Case and Carrying Pouch: BA-BR80S* 0 dBu = 0.775 Vrms* The specifications are subject to change without notice.BA-BR80SSilicone Case/Pouch Set for BR-80This custom-made silicone case and carrying pouch is specially designed forthe MICRO BR BR-80. The case protects the unit from scratches and dust and provides a secure grip. It also reduces unwanted noise due to vibrations during operation while using the onboard mics. The carrying pouch, made of the cushioned material, protects s ■ Side Panel (Right)■ Side Panel (Left)。
电影行业数字化拍摄与制作方案
电影行业数字化拍摄与制作方案第一章数字化拍摄概述 (3)1.1 数字化拍摄的定义 (3)1.2 数字化拍摄的优势 (3)1.3 数字化拍摄的发展历程 (3)第二章数字化拍摄设备 (4)2.1 数字化摄影机 (4)2.1.1 摄影机类型 (4)2.1.2 摄影机功能 (4)2.2 数字化镜头 (4)2.2.1 焦距 (4)2.2.2 光圈 (4)2.2.3 最大光圈 (4)2.2.4 解像力 (5)2.3 辅助设备 (5)2.3.1 稳定器 (5)2.3.2 轨道 (5)2.3.3 滤镜 (5)2.3.4 灯光设备 (5)第三章数字化拍摄技术 (5)3.1 摄影技术 (5)3.1.1 数字摄影机 (5)3.1.2 摄影参数设置 (5)3.1.3 摄影构图 (6)3.2 录音技术 (6)3.2.1 数字录音设备 (6)3.2.2 声音处理 (6)3.2.3 声音设计 (6)3.3 影像稳定技术 (6)3.3.1 防抖技术 (6)3.3.2 摄影器材稳定器 (6)3.3.3 后期调色与修复 (7)第四章数字化制作概述 (7)4.1 数字化制作的概念 (7)4.2 数字化制作的优势 (7)4.2.1 提高制作效率 (7)4.2.2 降低制作成本 (7)4.2.3 提高画面质量 (7)4.2.4 丰富表现手段 (7)4.2.5 促进产业升级 (7)4.3 数字化制作的发展趋势 (7)4.3.1 技术创新 (8)4.3.2 产业链整合 (8)4.3.3 跨界融合 (8)4.3.4 网络化发展 (8)4.3.5 绿色环保 (8)第五章数字化剪辑 (8)5.1 剪辑软件 (8)5.2 剪辑技巧 (8)5.3 剪辑流程 (9)第六章数字化特效制作 (9)6.1 视觉特效 (9)6.1.1 特效软件 (9)6.1.2 特效制作流程 (9)6.2 动画制作 (10)6.2.1 动画软件 (10)6.2.2 动画制作流程 (10)6.3 特效合成 (10)6.3.1 合成软件 (10)6.3.2 特效合成流程 (10)第七章数字化音频制作 (11)7.1 音频编辑 (11)7.1.1 声音素材整理 (11)7.1.2 声音剪辑 (11)7.1.3 声音修复与处理 (11)7.2 音效制作 (11)7.2.1 音效素材搜集 (11)7.2.2 音效设计 (11)7.2.3 音效合成与混音 (11)7.3 音乐制作 (12)7.3.1 音乐创作 (12)7.3.2 音乐制作与编曲 (12)7.3.3 音乐混音与母带处理 (12)第八章数字化色彩调整 (12)8.1 色彩校正 (12)8.2 色彩分级 (12)8.3 色彩调整技巧 (13)第九章数字化后期制作 (13)9.1 后期制作流程 (13)9.2 后期制作技巧 (14)9.3 后期制作管理 (14)第十章数字化拍摄与制作的应用 (14)10.1 电影制作 (15)10.2 广告制作 (15)10.3 网络影视制作 (15)第一章数字化拍摄概述1.1 数字化拍摄的定义数字化拍摄,指的是利用数字技术进行的电影拍摄过程。
专业数字立体声录音机 Gnome2(M)说明书

专业数字立体声录音机Gnome2(M)使用说明书1.说明袖珍立体声数字录音器 STC-H203(下面称录音器)是专业的声音录制装置,可通过其内置或外置麦克风,在室内和室外恶劣音响环境下录制即时语音信号。
录制的声音存储在可拆卸的CF I记忆卡上。
可使用单声道录音模式和数据压缩来增加总体录音时间。
可通过设置定时器或增益等级(语音激发模式)实现自动或手动起动和停止录音。
通过一套外部开关,LCD面板和耳机来控制该设备。
内置时钟自动确定录音的开始和终止的时间和日期且自动隐藏全部数据。
该特点可确保所录数据的真实性并防止未经授权的进入。
可直接使用录音器(需8位PIN码)或通过专用软件回放录音。
瘦体设计,坚固的2mm厚金属壳体,无运动噪声和电磁辐射使得该设备能够隐蔽录音过程、大大降低了被大多数录音器探测器探测到并清除的可能性。
2.完全发货清单3.技术规格采样率6, 8, 10, 16, 32, 48 kHz录音标准PCM 16 bit压缩形式低非线性失真系数(在1 kHz时,直接通道)不低于0.04%信噪比(在1 kHz时,直接通道)不低于72 dB动态范围(考虑增益控制)90 dB形式驻极体麦克风灵敏度-55dB自噪声等级25 dB可拆卸记忆卡形式CF I记忆卡,高达2Gb自身电源2xLR03 (1.5V AAA 碱性电池)电源外接电源3V (+ 正极在插座的中心导体处)功耗(在录音模式下)不大于0.4 W最大录音时间(不改变电源)不小于7.5小时单个CF卡的最大录音容量512尺寸115x55x15 mm重量130克4.功能概述该录音器可方便地录制各种语音信号。
1.通过内置或外置的麦克风录制数据,数据存储在可拆卸的CF I记忆卡上。
2.可通过手动或定时器起动和停止录音。
在预定的时间内,最多可同时自动使用5个定时器。
一经确定了定时器的优先级模式,不可手动停止录音。
3.打开/关闭压缩模式。
4.根据录音环境,可改变采样率。
Roland JUNO-Gi Mobile Synthesizer和数字录音机的工作室教程系列说明书

JUNO-Gi Mobile Synthesizer and Digital Recorder
Workshop
Working with the JUNO-Gi’s BOSS Insert Effects
© 2010 Roland Corporation U.S. All rights reserved. No part of this publication may be reproduced in any form without the
As we discussed on page 12 of the Workshop booklet The Digital Recorder—Getting Serious, you can combine V-Tracks by “bouncing” them. As you bounce, you can use the BOSS Insert FX and reverb, locking in your effects on the resulting V-Tracks.
The Using the JUNO-Gi’s Live Audio Inputs and BOSS Effects Workshop booklet describes using the BOSS Insert FX onstage with mics, instruments, and devices connected to the JUNO-Gi’s rear-panel GUITAR/MIC or LINE AUDIO INPUT jacks.
When you’ve finished mixing your song, you can add the final touches using the JUNO-Gi’s mastering tool kit effect. You can read up on it starting on page 120 in the Owner’s Manual. (The topic of mastering itself is covered on page 118 of the Owner’s Manual.)
新型智能数字式录音机
新型智能数字式录音机
靳张铝
【期刊名称】《电子技术应用》
【年(卷),期】1996(000)003
【摘要】介绍以Z89C68为核心研制的一种新型智能数字式录音机,包括系统功能,硬件结构,软件设计及主要性能参数。
【总页数】3页(P60-62)
【作者】靳张铝
【作者单位】无
【正文语种】中文
【中图分类】TN912.22
【相关文献】
1.基于G.723算法的数字式录音机的研究 [J], 曹正忠;姜为民
2.一种新型的NT数字式微带盒录音机 [J], 胡朝阳
3.数字式家用录音机选购指南 [J], 子良
4.袖珍数字式录音机 [J], 周道奇
5.数字式小型盒式磁带录音机简介 [J], 陈一
因版权原因,仅展示原文概要,查看原文内容请购买。
Aaton Cantar-X录音机
录音领域的特长所有通路及物理排列均被记忆,并可在以后调用,也可以存贮在PDA 或笔记本计算机中。
6个内置线性音量混音推子是防尘和防水的,用来进行2路混缩的"动态"控制。
单独的增益值用XML 作为导引文件被存贮,便于在最终混录时调用。
音量监测仪表盘型的增量为1db 的刻度表,具有峰值、箝位值和限幅指示。
用户可选择信道高对比度的液晶显示器可在阳光直射下显示,背景光亦可调整。
在肩背和工作台上时,可以旋转显示板在最佳可视位置。
时码与追踪内置晶振时钟的精度为百万分之一,可以更换8小时前的时码。
双时码:SMPTE 和Aaton 码通过Lemo-5插头进行时码的输入输出SMPTE 追踪:与视频同步的LTC 码可由AES 端输出,用于与23.98、24、25、29.97和30/fps 的数字视频磁带机的本机同步或复制。
电源Aaton 的工作系统确保低电源消耗,所有输入均工作时测试电流为500mA ,包括超快过冷启动(小于5秒)和自动防故障装置控制。
在录音时两块Aaton 电池(4芯XLR 扦孔)确保无缝转换(NP1电池也可以使)取决于"测试-录音"比,一块电池至少工作10到15小时其它特色有1到10秒的预录最后记录的文件立刻可以播放播放Scrub (播放条上)、入点和打拍记号软件和预装设置可以从Aaton 的服务器上下载,通过火线传输到核心的操作系统。
基准音调和警告发生器独立的模拟、数字和显示模块的开放机械结构,便于维护和更新升级。
录像机RS422摇控控制通过D -15串行接口连接。
无线蓝牙可以用掌上PDA 链接。
物理性能机身为铝铸,防水和防尘的音量控制器。
尺寸:230_310_80毫米重量:3.2公斤(无电池)导演王家卫拍摄的《2046》的录音现场,获41届金马奖最佳音效提名录音师:杜笃之。
技声callpadtm-100桌面型数字电话录音机使用手册说明书
-100桌面型数字电话录音机使用手册数字话机&IP话机&无线固话录音技声语音软件(上海)有限公司(C)2015Eletech Enterprise Co.,LtdEletech Voice Systems Inc.All Rights Reserved目录一、面板及外观介绍 (1)(一)俯视图 (1)(二)后视图 (3)(三)侧视图 (4)(四)安装图 (5)二、按键定义 (6)(一)播放模式 (6)(二)录音模式 (7)(三)空闲模式 (7)(四)设置模式 (7)三、使用操作 (10)(一)录音模式 (10)(二)播放模式 (12)(三)设备设置 (14)(四)格式化SD存储卡 (15)(五)删除文件 (16)四、CallPad技术规格 (17)一、面板及外观介绍(一)俯视图1.麦克风孔(内置麦克风用于现场谈话录音)2.LCD 显示屏3.扬声器4.头戴式耳麦切换麦克风静音模式5.②减小输出音量;修改数值(设置模式)6.④II 播放当前录音或暂停当前播放7.退出当前设置项/停止播放/停止录音8.录音按钮(LED 灯):LED 熄灭=空闲模式;绿色=待机模式;红色=录音中自动模式(VOX ):-LED 灯熄灭状态,设备不会录音。
-按此按键,LED 灯变成绿色,进入待机模式-LED 灯绿色状态下,拿起话机手柄将开始录音(LED 灯变成红色)1.内置麦克风2.LCD 显示屏3.扬声器4.头戴式耳麦(Headset MIC )静音键5.“向下”或减小音量6.播放及暂停键7.停止键8.录音键(带LED 双色灯)9.手柄/头戴式耳麦切换Handset /Headset 10.话机/内置麦克风切换Phone/MIC11.向左或播放快退12.向上或增加音量13.向右或播放快进14.删除记录键15.重要标记键16.解锁键Unlock key17.手柄及耳麦兼容设置滑档手动模式:Manual-LED灯熄灭状态,设备不会录音。
迪杰诺斯D1600 数字混音器与录音机说明书
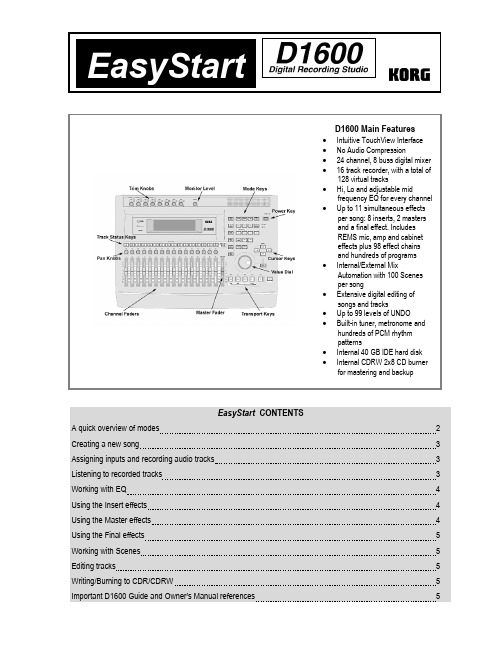
EasyStart CONTENTSA quick overview of modes 2 Creating a new song 3 Assigning inputs and recording audio tracks 3 Listening to recorded tracks 3 Working with EQ 4 Using the Insert effects 4 Using the Master effects 4 Using the Final effects 5 Working with Scenes 5 Editing tracks 5 Writing/Burning to CDR/CDRW 5 Important D1600 Guide and Owner’s Manual references 5D1600 EasyStartSONG/CD– This mode allows you to select songs, create a new song, rename a song, perform song editing functions (copy song, move song, protect song, etc.), use the Program Play function, listen to audio CD’s and burn a CDR/RW of your final mix.RECORD – Here you can select the Recording mode (“Input” or “Bounce”). The default setting to record tracks is “Input”.INPUT/TUNER – This mode allows you to assign the 8 analog and S/PDIFdigital inputs of the D1600 to different tracks, access the input EQ, use the Sub In function, and by pressing the “Tuner” tab you can also access the D1600’s tuner function.EQ/PHASE – In this mode you can change the EQ setting for each of the D1600’s 16 tracks. Press the “Eq1-4” tab to access the EQ settings for tracks 1-4, “Eq5-8” for tracks 5-8, etc. To change the settings, touch any EQ “knob” icon in the display and rotate the DIAL. The upper-left of the display will indicate which parameter you are adjusting.METER/TRACK VIEW – This mode enables you to see level meters for all of the tracks, effect sends, Monitor and Master outputs.You can select two different types of meter view, Pre-Fader (before the fader) and Post-Fader (after the fader), and three types of track views, which enable you to see which tracks contain recorded audio. To change the display mode, press the “ ” button at the top left-hand side of the display.INSERT EFFECT – In this mode you can set insert effect assignments on input or on track playback, and assign the effect type.By pressing one of the Insert effect tabs (InsEff1, etc.) you can select an Insert effect. You can edit the parameters by pressing the effect name button and then press any of the effect icons in the display.MASTER EFFECT/AUX – In this mode you select an effect for both Master effect 1 and 2 from one of 32 available Master effects and set the return levels and balance. You can also edit the effect parameters by pressing the effect name button. By pressing the “EffSnd1” and “EffSnd2” tabs, you can set individual send levels for each of the 16 tracks. You can also access the external Aux send (“AuxSend” tab) amount and Final effects (“FinalEff” tab) in this mode.SOLO/MONITOR – In this mode you can isolate and listen to specific tracks, effect send 1 and 2 levels, aux level and return levels for the Master effects. Press the number button of the track or tracks you wish to listen to. You can also route the isolated source to the Monitor L/R outs or MASTER L/R and HEADPHONE outs. By pressing the “Monitor” tab and then pressing the “Level”button, you can create a mix that is different from the mix routed to the Master outs, to be sent to the cue outputs.[STORE, IN/LOC1, OUT/LOC2, TO/LOC3, END/LOC4] – These keys are used for all track editing, “AUTO PUNCH” recording and “LOOP” recording functions. To assign any locate point (or IN/OUT/TO/END point), press the [STORE] key at the desired point in time, and then the appropriate [LOC] key, while playback is on or off.[SCRUB] – When playback is stopped and this key is pressed, you can view track waveform data (which you can select by pressing the “ ” button next to “1Tr”), and use the “ZOOM” buttons ( , etc.) to resize the waveform. Once you have selecteda track, turn the DIAL to scrub the audio. Pressing the [ ] FF key while in the scrub mode will play the audio back at half speed,one octave lower than the original pitch.TEMPO/RHYTHM – Here you can set song tempo, create a tempo map, record your own tempo track, set time signature and select rhythm patterns from any of the 96 metronome and 215 PCM-based drum patterns.TRACK - In this mode you can access the Virtual Tracks settings, perform track-editing functions (copy, reverse, normalize, etc.) and also import and export audio data from the clipboard.D1600 EasyStart1. After installing the internal hard drive (following the included instructions), connect the AC power cable and press the[MAIN] power key on the rear panel Ä press the [POWER] key (red) on the top panel2. Press the [SONG/CD] key, and then press the “SelSong” tab in the display.3. Press the “New” button in the display Ä select the “Song Type” as “16Bit/16Track” and the “Mixer Set” as “New”Äpress “OK”. The display will indicate “NEW SONG” in the next available empty song location.You can rename your song by pressing the “Rename” button in the display.The Transport Keys:4. Press the [INPUT/TUNER] key.5. Connect your audio source(s) (mic, keyboard, guitar, etc.) to one (or more) of the eight analog inputs on the rear of theD1600. If you are connecting a guitar to the D1600 directly, use the GUITAR IN jack on the front panel.6. In the display, select which track each input will be recorded onto by pressing the icon that looks like a ¼” phone jack andusing the DIAL to set the input (Note: if using the GUITAR IN jack, you will need to dial-in “8” as the input source for the desired record track, or simply use track 8, default assigned to input 8, as the record track for guitar).7. Press the green [TRACK SELECT] keys for each of the tracks that you assigned in the previous step, so that theychange to orange.8. Press the [METER/ TRACK VIEW] key, then press the “ ” popup button in the upper left of the display ÄSelect“PreFdr” from the list and press “OK”ÄNow you can play your audio sources and adjust the levels so that they do not clip (“CLP” line in display).9. To enable recording on those tracks, press the orange keys one more time to change them to red, and press [] to putthe D1600 in record standby mode.10. To start recording, press [ ]. To stop recording, press [ ].11. To return to the beginning of the song, press and hold [ ] and then press [ ] once.12. Press to set each of the track status keys to green for each track you want to listen to, by pressing them twice.13. Press [ ] and set your levels with the track faders and master fader.1. Press the [EQ/PHASE] key.2. Using the four way CURSOR keys [ ] and the DIAL, select the “knob” in the display for the EQ parameter thatyou would like to adjust for a specific track. The upper left hand side of the display will show the parameter and track you will be working with. (To change EQ settings for tracks 5-8, 9-12 and 13-16 press the tabs on the bottom of the display)D1600 EasyStart1. Press the [INSERT EFFECT] key, and then press the “ ” popup button in the display to the right of “Assign”.2. To assign an insert effect to a recorded track, select “PlayTrack” by pressing the “radio button” to the left of “PlayTrack”,and then press “OK”. (Note: To assign an insert effect to an audio source before recording it to a track, select “Input” by pressing the radio button to the left of “Input” and then press “OK”)3. To select the type of insert effect(s) you will be using, press the “ ” popup button to the left of “1 in 1 outx4”, and thenpress “OK”. (For more information on insert effect types refer to the Owners Manual pg. 105).4. To select the track where the insert effect is going to be applied, press the “ ” popup button in the display below“InsertTo:”. Using the CURSOR keys and the DIAL, select the assign channel and destination, and then press “OK”.5. To select an insert effect, press the “insert effect” tab for the effect that you want to change (ex. “InsEff1” for Insert Effect1) and use the DIAL to select and effect.6. To edit a selected effect’s parameters, press the “effect name” button in the display (ex. MM2:P4EQ-Wah ) and thenpress the “icon” in the display to access the edit parameters.1. Press the [MASTER EFFECT / AUX] key , and rotate the DIAL to select an effect for Master Effect 1 (“MstEff1”).2. Press the “MstEff2” tab and use the DIAL to select an effect for Master Effect 2.3. To edit the parameter for either effect, press the “effect name button” in the display (ex. RV1:ReverbHall ) and thenpress the “icon” in the display to access edit parameters.4. To apply master effects to a track, press the “EffSnd1” tab (for Master Effect 1) or “EffSnd2” tab (for Master Effect 2) inthe display ÄUse the CURSOR keys and DIAL to increase the send level for each track you want to add master effects to.1. Press the [MASTER EFFECT/AUX] key Ä Press the “FinalEff” tab.2. Rotate the DIAL to select a Final Effect. To edit any parameters of the Final Effect, press the “effect name button” in thedisplay (ex. DY1:p ) and then press the “icon” in the display to access the edit parameters.1. Press the [SCENE] key to enter Scene mode. If you have not stored any Scene memory locations yet, press the[STORE] key and then press the [SCENE] key. This will store a “snapshot” of your mixer settings for this song at theCOUNTER location indicated on the SONG/ CD page.2. After pressing the [SCENE] key, to enable Scene Memory, press SceneRead:Off in the display so that it readsSceneRead:On.3. To store additional scenes, start song playback and change mixer settings, then press the [STORE] key, followed bypressing the [SCENE] key again. Each time you do this, a new scene will be created and stored in the Scene Memory.4. You can also get a visual picture of what each Scene looks like, and edit its parameters, by pressing the “MixView” tabin the display and using the TRACK Faders and PAN knobs to adjust values. The changes yo9u make will be indicated in the display.You can reset a Scene’s Fader and Pan settings by moving each fader and pan knob until the display indicates two“arrows” versus a single directional arrow.D1600 EasyStart1. Press the [TRACK] key.2. Using the CURSOR keys and the DIAL, select which virtual track you will be listening to or recording to. To adjustVirtual Track settings for tracks 9-16, press the “Vtr9-16” tab in the display. For more info on Virtual tracks refer to theOwner’s Manual pgs. 27, 81.3. To use the “EditTrk” function, you must first select a range of the song to be edited by storing an IN, OUT and TOlocation (some editing functions also require an END location). To do this, move to the desired song location, and thenpress the [STORE] key followed by the LOCATE key for each location. Once you’ve set locate points, you can edit the specific region in the track(s).4. To see the list of edit functions, press the “ ” button next to “CopyTrack” in the display. To select a function, press the”radio button” to the left of the function you wish to perform and then press “OK”.5. To execute the function, press Exec. in the display. For more information on editing tracks, refer to the Owner’s Manualpgs. 81-87.1. Once you have finished a song and performed a mixdown to two tracks (refer to Owner’s Manual pgs. 29-31:Combiningmultiple tracks into two: Bounce), press the [SONG / CD ] key and then press the “CDR/RW” tab.2. Insert a blank CDR or CDRW disc into the CDR/RW drive and press WriteToCD in the display.3. Select the speed (“2x or 4x”) and press “YES” next to “AreYouSure?”You can download a more in-depth “D1600 Guided Tour” and additional “tips and tricks” from . There are also many important references to modes and applications in the D1600 Owner’s Manual. Some of these references are listed below: Installing hard disks and CD-R/RW drives 134 CD Mastering 49 / 91 D1600 MIDI sync procedures 73 / 76 Recording MIDI clock from an external sequencer 63 / 96 Using MIDI to control Scenes 41 / 74 MIDI Machine Control (MMC) 77 Working with WAV files and the Import/Export function 86 Initializing/formatting internal or external hard drive 67 / 79 Backing up and restoring data 66 / 77 Connecting external drives 67 Updating system software 139 Troubleshooting 127。
录音棚设备设计方案

录音棚设备设计方案一、设计目标本录音棚设备设计方案旨在搭建一个高品质的录音环境,提供专业的录音设备和设施,以满足用户的录制需求。
设计目标如下:1.提供合适的录音环境,消除外界噪音对录音质量的影响;2.配备专业的录音设备,包括录音机、麦克风、音频处理器等;3.提供良好的监听环境,确保录音过程中的准确监听;4.提供便捷的设备支持和维护,满足用户日常录音需求。
二、录音棚布局设计1.录音棚的布局应采用分离式设计,即将录音棚和控制室分开。
这样可以有效隔离录音时的噪声和控制室中的操作声音。
2.录音棚应具备一定的声学处理,包括吸音、隔音和演奏区的声音控制等。
墙壁和地面可以使用吸音材料进行处理,以减少噪音的反射和共鸣。
3.控制室应设有透明的玻璃窗,以便监视录音棚内的场景。
同时,控制室内的墙壁也应进行声学处理,以减少噪音的干扰。
三、录音设备选型1.录音机:选择具有多轨录音和高音质的数字录音机,以支持录制多声部和多乐器的音频。
2.麦克风:选择适用于不同声部的专业麦克风,包括动圈麦克风、电容麦克风、指向性麦克风等。
3.混音器:选择具有多通道输入和独立控制的混音器,以便实现多音源的混音和调节。
4.音频处理器:选择具有均衡、压缩、混响等功能的音频处理器,以改善录音的音质。
5.监听设备:选择高品质的中大型监听音箱,以确保录制时的准确监听,并配备舒适的耳机。
6.隔离设备:选择噪音隔离器和反射板等设备,以减少录音时的噪声和外界干扰。
四、设备互联与供电1.各设备之间的互联采用专业音频线缆,以保证传输的稳定性和音质的保真度。
2.录音设备和配套的音频电源应分开布置,以减少电源噪声对录音质量的影响。
3.控制室应配备专业音频接口和控制面板,以便用户灵活调节和控制录音设备。
五、设备支持与维护1.提供可调节高低的麦克风支架,以适应不同乐器和歌手的录音需求。
2.设备应有定期维护,并配备备用设备,以防止设备出现故障时影响录音的继续进行。
3.设备随时更新和维护,以保持符合行业标准和最新的录音技术。
数字录音机

前言………………………………………………………一、设计目的…………………………………………………二、设计内容及要求…………………………………………三、具体设计过程……………………………………………1、总体设计思想……………………………………………………2、硬件连接图……………………………………………………3、各芯片的作用及工作方式……………………………………4、各芯片工作原理及功能简介……………………………………(1)ADC0809………………………………………………………………………………(2)DAC0832……………………………………………………………………………………(3)可编程计数/定时接口芯片8253…………………………………………………………(4)可编程并行I/O接口芯片8255A…………………………………………………………(5)74LS138译码器………………………………………………………………………………5、流程图………………………………………………………………6、具体实现方法…………………………………………………………四、心得体会…………………………………………………………参考文献……………………………………………………………附录1 实验总程序………………………………………………附录2 实验原理图………………………………………………由于计算机技术的飞速发展,微机原理与接口技术课程已经作为一门比较重要的专业基础课。
微机原理与接口技术已经融入我们的基本生活当中,我们生活中的许多电子产品都与之密切相关。
微机原理与接口技术是一门实践性强的学科,其中很多理论和知识仅考书本的学习是无法掌握的,必须通过实践才能比较直观深刻的理解。
通过课程设计可以培养我们动手的能力,使我们对书本的理论知识掌握更加牢固,培养学生编程的能力以及提出问题,分析分体,解决问题的能力。
本次课程设计所做的是关于数字录音机的设计。
录音机 原理

录音机原理
录音机是一种能够录制和回放声音的电子设备。
它由麦克风、放大器、磁带机构和扬声器等组成。
录音机的原理是利用麦克风将声音转化为电信号。
麦克风接收到声波后,其中的话筒颗粒振动产生的声音会使麦克风的振膜产生相应的振动。
这些振动被传递到麦克风内的电路中,将声音转化为电信号。
电信号随后经过放大器进行放大,以增强电信号的强度。
放大后的电信号再经过一个磁带机构,磁带机构中有一个磁带盘,能够将电信号记录在磁带上。
磁带上有一层磁性材料,电信号的变化会改变磁带上的磁场分布。
当需要回放录音时,磁带机构将磁带上的信号传递给放大器,放大器再将信号传递给扬声器。
扬声器会将电信号转化为声波,使人们能够听到录制的声音。
通过这一原理,录音机实现了将声音存储下来并随时进行回放的功能。
在现代技术发展的今天,录音机已演变成了数字录音设备,采用了数字化的技术进行声音的录制和回放,提高了音质的清晰度和储存的方便性。
第三单元 活动主题二 数字声音与生活 (教案)苏少版六年级下册综合实践活动
第三单元活动主题二数字声音与生活 (教案)一、教学目标1. 让学生了解数字声音的基本概念,掌握数字声音的获取、处理和播放方法。
2. 培养学生运用数字声音技术进行创作的能力,提高学生的创新意识和实践能力。
3. 引导学生关注数字声音在生活中的应用,增强学生对数字声音的认识和兴趣。
二、教学内容1. 数字声音的基本概念2. 数字声音的获取、处理和播放方法3. 数字声音的创作和应用三、教学重点与难点1. 教学重点:数字声音的基本概念,数字声音的获取、处理和播放方法。
2. 教学难点:数字声音的创作和应用。
四、教学过程1. 导入新课通过播放一段数字声音,引导学生思考数字声音与模拟声音的区别,激发学生对数字声音的兴趣。
2. 讲解数字声音的基本概念介绍数字声音的定义、特点和应用领域,帮助学生建立对数字声音的认识。
3. 讲解数字声音的获取、处理和播放方法(1)获取数字声音:讲解录音设备的使用方法,如手机、电脑等。
(2)处理数字声音:介绍常用的数字声音处理软件,如Audacity、GoldWave 等,并讲解其基本操作。
(3)播放数字声音:介绍数字声音的播放设备,如耳机、音箱等,并讲解其连接和使用方法。
4. 数字声音创作实践活动(1)教师提供一段数字声音素材,引导学生进行创作,如剪辑、混音等。
(2)学生分组进行创作,交流创作心得,展示创作成果。
5. 总结与拓展(1)总结本节课所学内容,强调数字声音在生活中的应用。
(2)布置课后作业,要求学生运用所学知识创作一段数字声音作品。
五、教学评价1. 课堂表现:观察学生在课堂上的参与程度、提问和回答问题的情况。
2. 创作作品:评价学生在实践活动中的创作成果,包括创意、技术水平和完成度等。
3. 课后作业:检查学生课后作业的完成情况,了解学生对课堂所学知识的掌握程度。
六、教学反思1. 教师应关注学生在课堂上的学习情况,及时调整教学方法和节奏,以提高教学效果。
2. 在实践活动中,教师应鼓励学生发挥创意,培养学生的创新意识和实践能力。
第三章 数字音频技术基础

第三章 数字音频技术基础
17
3.2 音频数字化 3.2.2音频的数字化过程
• 音频数字化过程的具体步骤包括: • 第一步,将麦克风转化过来的模拟电信号以某一频率进行离散化的样本
采集,这个过程就叫采样; • 第二步,将采集到的样本电压或电流值进行等级量化处理,这个过程就
第三章 数字音频技术基础
7
3.1 音频技术及特性 3.1.2模拟音频记录设备
• 由干音频技术的迅猛发展,不论从机型的繁衍、结构和改进、功能的扩 展、性能的提高诸多方面都取得了瞩目的进步.
• 上述材料中显示了传统音频记录技术的演变历史,从记录介质上看历经 了石蜡(锡箔)记录、钢丝记录、磁带记录;从技术手段上来看经历了 机械记录和磁性记录,从外形上面来看录音设备由原来的开放式结构变 成后来的封闭式的设备(盒式)。
• 例如:用44.1kHz、16bit来进行立体声(即两个声道)采样(标准的 CD音质),录制(或采集)3分钟的音频,那么在该未经压缩的声音数 据文件的大小为:
• 一秒钟内采样44.1×1000次,每次的数据量是16×2=32bit(因为立 体声是两个声道),那么3分钟的总共数据量是44100×32×60×3= 254016000(bit),换算成计算机中的常用单位(Byte),总共数据量 是254016000/8/1024/1024= 30.28MByte。
可分等级越多,音质越好。 • 音频流码率:数字化后,单位时间内音频数据的比特容量,流码率越大
音质越好。 • 以上三个方面的指标中,前面两个指标是绝对指标,而音频流码率是一
个相对指标,可以间接用来考察音频的质量。
第三章 数字音频技术基础
Adobe-Audition数字音频制作教程PPT完整全套教学课件精选全文

数字音频技术基础 数字音频广播概述 广播节目的录音要求 音频采集设备 广播节目音频制作流程
1.1 数字音频技术基础
数字音频技术是一种利用数字化手段对声音进行录制、存放、编辑、 压缩或播放的技术,它是随着数字信号处理技术、计算机技术以及多媒 体技术的发展而形成的一种全新的声音处理手段。
1.1.1 音频技术的发展
第一个阶段是 20 世纪 50 年代出现的晶体管技术,代表着音频放大技术 的巨大飞跃。
第二个发展阶段是 20 世纪 60 年代开始的集成电路技术的发展,它在降 低成本的同时为音质的提高创造了条件。
第三个发展阶段是随着数字时代的新信号源的出现,人们对音质的需求 更高了,同时对播放设 备的小型化要求日益明显,此阶段,以 MP3 为代表的音频压缩技术被新 型媒体广泛接受使用。
1.调幅广播质量的音频压缩编码技术 2.MPEG-1 3.MPEG-2 4.杜比AC-3
1.2 数字音频广播概述
广播技术有着很长的发展历史,传统的广播主要有 AM 调幅广播与 FM 调频广播,两者均是模拟广播方式,也是我国目前正在使用的广播方式。 随着互联网和通信技术的发展,广播的接收质量和广播内容的丰富程度 等指标被人们重视起来,而传统的模拟广播方式相关的指标参数并不优 秀。由此看来,采用新的技术来改善模拟广播的缺陷或直接取代模拟广 播有重大意义。
1.录音师 广播节目的录音制作是一项综合性比较强的技术工作,录音师不仅要具 有较高的文学艺术修养,还需要具有较全面的电声专业知识。
2.录音环境 一档高质量的广播节目,除了要求录音师具备较高的综合素质之外,还
要根据 节目性质选择具有符合声学特性的录音棚或者演播室。
1.4 音频采集设备
音频采集设备包括麦克风、录音笔、采访机、调音台、专业录音声卡等 。 1.4.1 麦克风
BOSS BR-800 数字录音机培训指南说明书

BOSS BR-800 DIGITAL RECORDERTRAINING GUIDEContents1. FEATURES2. QUICK DEMO3. EZ RECORDING4. SONG SKETCH5. EFFECTS6. RHYTHM7. SIX THINGS TO KNOW and SHOW8. ACCESSORIES1. FEATURES∙4-track simultaneous recording, 8-track simultaneous playback plus dedicated stereo rhythm track playback∙EZ Recording interactively guides through the recording process∙Powerful guitar, bass, and vocal effects derived from BOSS’s flagship processors∙Song Sketch recording for quick stereo capture in WAV format∙Built-in advanced drum machine with editor software∙Functions as a USB audio interface and DAW control surface∙Cakewalk SONAR 8.5 LE software with full audio loops and backing tracks included∙Built-in stereo condenser microphone for instant recording∙Sleek new interface based on touch sensors∙1GB SD included (supports up to 32GB SDHC card)∙Runs on six AA batteries/USB bus power/AC adaptor (included)2. QUICK DEMOThe Quick Demo is a way to get up and running in less than 60 seconds. Before You Start1. Connect AC adaptor (included) to a power source.2. Connect the BR-800’s OUTPUT to monitor speakers or headphones.The Quick DemoPress the PLAY button to hear the Demo Song.3. EZ RECORDINGEZ Recording is a function that makes recording on the BR-800 quick and easy.1. Press EZ REC.2. Press cursor up ▲ and select NEW SONG and press ENTER.3. Using the dial, select the [SOURCE] on the left of the screen toVOCAL (MIC).4. Cursor right ► and using the dial, select FUSION for the[CATEGORY] and press ENTER.5. Using the dial, select the vocal effect to #12 (3rd+5th). Cursor down ▼ and use the dial to choose RHYTHM pattern #232 (FUSN1-V2). Press ENTER.6. Name your song: Press MENU, select SONG and press ENTER. Select NAME and press ENTER. Using the dial and cursor buttons, name your song. Press EXIT a number of times to return to the main screen.To Record:Press ZERO then press PLAY to hear your recording.4. SONG SKETCHBy putting the BR-800 in Song Sketch mode, you can use it as a stereoWAV file recorder / player. This provides an easy way to record your songideas and phrases.Press ZERO and then press Playto hear you’re your recording.5. EFFECTSThe BR-800 has independent processors for four different kinds of effects:insert effects, loop effects, track EQ and mastering effects.Press EZ REC, NEW SONG and select E. Guitar as the SOURCE. PressENTER twice.6. RHYTHMThe BR-800 provides a dedicated rhythm generator that is separate from theaudio tracks 1-8. You can use this rhythm as a guide during recording, orcreate an original rhythm backing by arranging various internal rhythms tomatch the structure of your song. Let’s create a rhythm arrangementconsisting of various patterns.7. SIX THINGS TO KNOW and SHOW1. 4-track simultaneous recording, 8-track simultaneous playback plus dedicatedstereo rhythm track playback2. EZ Recording interactively guides through the recording process with sleek newinterface based on touch sensors3. Powerful guitar, bass, and vocal effects derived from BOSS’s flagshipprocessors4. Song Sketch recording for quick stereo capture in WAV format5. Functions as a USB audio interface with USB bus power and DAW controlsurface6. Cakewalk SONAR 8.5 LE software with full audio loops and backing tracksincludedBOSS BR-800 Training GuidePage 11 Gary Lenaire 8. ACCESSORIESFS-5U FS-5L EV-5 EV-7DP-2FV-500HFV-500L。
数字录音设备常识小析

数字录音设备常识小析近些年,电台、电视台、音像公司,甚至包括一些个人MIDI制作室等都面临着设备数字化的问题,而市场上的数字设备种类繁多、型号更新快、功能复杂,为了能给关心数字设备的人一点儿参考,这里仅对几种数字音频设备作简要的比较。
按照所使用的记录载体来分,数字音频设备大概可分为:磁带类、磁光盘类、硬盘类。
磁带录音设备磁带类里又有卡带式的DCC、固定磁头开盘机式的DASH格式的录音机、旋转磁头的RDAT等。
1.普通盒式磁带数字录音机DCCDCC是一种在普通卡带上发展出来的,可兼容模拟卡带的数字记录格式。
从技术指标上看,DCC已经达到CD的音质,而且还可以记录一些相关的文本信息。
2.固定的磁头数字录音机DASH格式的数字录音机,是一种固定的数字磁带录音机,根据磁带宽度和带速的不同,其中又有若干种格式,其外形与操作方法都开盘机差不多,曾经得到过一些用惯了模拟开盘机人的青睐,不过由于磁带在工作时裸露在外,上带、卸带很容易使磁带沾上尘埃、带上指纹或被划伤,增加误码率。
3.旋转磁头数字录音机旋转磁头的数字录音机,称为RDAT,是目前比较常用的类型,又有两轨DAT 和多轨DAT。
RDAT是70年代在录像机基础上,采用PCM编码发展而来的。
近几年又出现了8轨的旋转磁头数字录音机,FOSTEX、ALISES、TESCAM 等公司都有不同型号的8轨DAT,有些是采用小1/2录像带,有些则是采用掌中宝录像机所用的Hi-8录像带。
电台外出采录实况、电视台搞晚会、音像部门的节目母带以及各电台之间的节目交流,现在大多采用这种DAT录音机。
4.存在的问题以磁带为载体的数字录音机,从音质上讲,不会有太多问题,但是毕竟没有脱离磁带、磁头这些易磨损的媒体,磁带受损后,因丢码而产生的噪音,往往是难以忍受的噪音;8轨DAT所用磁带使用前,还要进行1小时的格式化;再有,高速旋转的磁鼓也很容易磨损,因而造成诸如时间码出错、无法同步,甚至根本无法录放音。
- 1、下载文档前请自行甄别文档内容的完整性,平台不提供额外的编辑、内容补充、找答案等附加服务。
- 2、"仅部分预览"的文档,不可在线预览部分如存在完整性等问题,可反馈申请退款(可完整预览的文档不适用该条件!)。
- 3、如文档侵犯您的权益,请联系客服反馈,我们会尽快为您处理(人工客服工作时间:9:00-18:30)。
2.设计方案论证
2.1总体设计思想
根据设计要求,本次数字录音机的汇编语言设计所需芯片有模数转换芯片ADC0809、数模转换芯片DAC0832、定时计数器8253、可编程并行I/O接口8355A 及译码器74LS138。
设计过程可简述为:利用传感器和ADC0809采集语音数据,以每秒5000的速率采集IN0输入的语音数据并存入内存,共采集数据60000个,即录音12秒。
DAC0832进行数模转换,以同样的速率将数据送DAC0832使喇叭发声。
8253用作定时,定时0.2ms,设置成方式0,计数初值为200。
8253计数器0的OUT0与8255A的PA0连接,利用PA0查询OUT0电平,如果为高点平则表示定时时间到。
用译码器74LS138对地址线进行译码以产生各接口芯片所需的信号。
2.2硬件连接图
图1 硬件连接图
2.3各芯片的作用及工作方式
(1)ADC0809在本次设计中的作用及工作方式
ADC0809作数据采集用,用来采集12秒的语音信号并保存到相应的存储单元。
对ADC0809的8个模拟通道,这里是用数据总线的低8位D2、D1、D0来。
