centos7安装openstack经典已实践
openstack创建虚拟机实例命令
一、开篇介绍在云计算领域,OpenStack作为开源的云计算管理评台,被广泛应用于企业和科研机构中。
其中,创建虚拟机实例是OpenStack评台上最为基础和重要的操作之一。
本文将详细介绍如何使用OpenStack命令行工具来创建虚拟机实例。
二、准备工作1. 确保已经安装和配置了OpenStack命令行工具(OpenStackClient)。
2. 确保已经获取到OpenStack评台的认证信息,包括用户名、密码、项目名、以及认证终端URL等。
三、创建虚拟机实例的步骤1. 连接OpenStack评台在终端中通过以下命令连接到OpenStack评台:```openstack --os-username <用户名> --os-password <密码> --os-project-name <项目名> --os-auth-url <认证终端URL> login```2. 选择镜像通过以下命令列出OpenStack评台上可用的镜像:```openstack image list```选择一个合适的镜像ID,作为虚拟机实例的基础镜像。
3. 选择规格通过以下命令列出OpenStack评台上可用的虚拟机规格:```openstack flavor list```选择一个合适的规格ID,用于配置虚拟机实例的CPU、内存等资源。
4. 创建网络通过以下命令列出OpenStack评台上可用的网络:```openstack network list```选择一个合适的网络ID,用于连接虚拟机实例的网络。
5. 创建虚拟机实例通过以下命令来创建虚拟机实例:```openstack server create --flavor <规格ID> --image <镜像ID> --network <网络ID> <虚拟机名称>在命令中可以指定其它的参数,比如关联的密钥对、安全组等。
centos7服务器搭建7日杀(7daystodie)服务器,配置,存档,迁移方法(踩坑总结)

centos7服务器搭建7⽇杀(7daystodie)服务器,配置,存档,迁移⽅法(踩坑总结)最近搞了软路由, 不搞点事情不舒服. 正好周末和朋友玩7⽇杀, 搭个服务器玩玩.⽹络环境准备.1. 公⽹ip的机器or2. ⾃家⽹络, 找电信要了公⽹ip && 光猫使⽤桥接由路由拨号 && 路由器需要⽀持ddns && 路由器⽀持端⼝映射机器⼀个⼰喜欢的linux发⾏版(本记录使⽤centos7为例)安装过程:1. 安装steamlink所需要的lib包yum install glibc.i686 libstdc++.i686 -y2. 选⼀个steamlink的安装⽬录, 这⾥我装到 /home/ ,下载并解压cd /home/ && wget https:///client/installer/steamcmd_linux.tar.gztar xf steamcmd_linux.tar.gzcd steamcmd/3. 登录steamlink./steamcmd.sh登录账号前先设置7⽇杀安装⽬录, 这⾥我直接装在当前⽬录的 7d2d 新⽬录(/home/steamcmd/7d2d)force_install_dir ./7d2dlogin 你的steam账号输⼊密码和令牌登录成功4. 下载游戏app_update 2944205. 编辑服务器信息进⼊7⽇杀程序⽬录 cd 7d2d编辑服务器配置vim serverconfig.xml这⾥重点关注⼏个字段:ServerName 你服务器在公⽹显⽰的名字ServerPassword 连接密码ServerPort 服务器端⼝, 注意这个端⼝填的是tcp端⼝,假设是默认的26900. 但七⽇杀同时还需要⽤到这个端⼝号+3范围内的udp端⼝(我这udp监听的是26902), 配置⽂件这⾥只填tcp的端⼝号就好ServerVisibility 服务器可见性 2公开, 1朋友可见(但服务器没有朋友,所以和0效果⼀样), 0不列出TelnetEnabled telnet开关,强烈建议开着⽅便调试连通性GameWorld 这⾥填的值注意如果是随机地图就填 RWG , 如果不是随机地图⽽是系统预设好的,则使⽤系统预设地图名 ,名字就是7⽇杀安装⽬录/Data/Worlds ⾥的地图名WorldGenSeed 地图⽣成种⼦注意这⾥有坑如果是从外部迁移存档并且使⽤的是随机⽣成的地图, 这个种⼦必须和创建时⼀致. 因为他是通过这个种⼦和地图⼤⼩来计算出地图名的, 计算出的地图名的结果需要和你迁移过来的⽣成地图⼀致WorldGenSize 地图⼤⼩ 2048的倍数, 最⼤在16384以内,对应到游戏创建时的4km-14km 注意如果是从外部迁移存档并且使⽤的是随机⽣成的地图, 这个种⼦必须和创建时⼀致,原因同上(关于迁移, 下⾯会说)GameName 游戏名, 如果是迁移的, 也必须⼀致(关于迁移, 下⾯会说)其他配置根据⾃⼰喜好参考官⽅⽂档修改 https:///wiki/7_Days_to_Die_Dedicated_Server6. 启动服务器启动服务器, 因为 startserver.sh 会阻塞当前ssh窗⼝, 建议使⽤ nohup 和&结合, 新建⼀个脚本 startup.sh专门⽤来启动服务器,把⽇志输出到⽂件⾥.这样就可以随意关闭控制台了vim startup.sh#!/bin/shnohup ./startserver.sh -configfile=serverconfig.xml > stdout.log &保存退出, 设置运⾏权限chmod 777 startup.sh 启动服务器./startup.shtop ⼀下看看7DaysToDieServe 进程有没有开始在努⼒跑, 如果是那就正确了.tailf stdout.log 可以观察服务器⽇志输出.关闭服务器进程可执⾏pkill 7Days看服务器是否正确的监听了tcp和udp端⼝netstat -anop | grep 7Day如果端⼝没改过是默认的26900, 那么启动好后执⾏这个命令可以看到tcp端⼝监听,同时还会看到监听 26902 udp端⼝测试tcp端⼝连通性telnet 127.0.0.1 26900如果通,会看到下⾯消息Trying 127.0.0.1...Connected to 127.0.0.1.Escape character is '^]'.GameType:7DTD;GameMode:Survival;GameName:哎呀哟;ServerDescription:XXXXX 专⽤;ServerWebsiteURL:;IP:XXXXXXX;LevelName:Mahude Valley;GameHost.........测试udp端⼝连通性nc -vuz 127.0.0.1 26902如果通,会看到下⾯消息Ncat: Version 7.50 ( https:///ncat )Ncat: Connected to 127.0.0.1:26902.Ncat: UDP packet sent successfullyNcat: 1 bytes sent, 1 bytes received in 2.03 seconds.7. 外⽹处理如果是在外⽹ip的机器上, 直接设置防⽕墙和iptables开放26900-26903端⼝即可如果是⾃家⽹络, 需要在路由器上设置ddns, 路由器上设置端⼝映射外⽹的 tcp 26900, udp 26901-26903 映射到7⽇杀所在服上的相同端⼝, 这部分不同路由器操作不⼀样, 不记录步骤了. ⾃家⽹络不建议设置DMZ主机! 整台机全部端⼝暴露到公⽹会有安全风险.连通性测试, 和第6步后⾯⼀样, 只是把127.0.0.1 换成公⽹ip或是你设置的ddns域名8. 存档和⽬录结构win存档位置 C:\Users\⽤户名\AppData\Roaming\7DaysToDie\Saves\[GameWrold]\[GameName]win随机⽣成地图位置 C:\Users\⽤户名\AppData\Roaming\7DaysToDie\GeneratedWorlds\[GameWrold]linux存档位置 /root/.local/share/7DaysToDie/Saves/[GameWrold]/[GameName]linux随机⽣成地图位置 /root/.local/share/7DaysToDie/GeneratedWorlds/[GameWrold]注意 GameWrold 如果是预设地图, 则是游戏⽬录⾥Data/Worlds 对应的名字⽐如PREGEN02,PREGEN6k , 如果是随机⽣成地图则是⽣成的地图名字, ⽐如Voluya Territory, Mahude Valley 这种名字9. 迁移:如果是预设地图, 直接迁移 save\[GameWrold]\[GameName] 到服务器的 save\[GameWrold]\[GameName] , 然后编辑服务器serverconfig.xml的 GameWorld和GameName和⽬录对应即可,如果是随机⽣成地图, 需要迁移GeneratedWorlds\[GameWrold] 和 save\[GameWrold]\[GameName] 到服务器对应⽬录, 然后编辑服务器serverconfig.xml的 GameWorld 改为RWG, GameName填⽬录对应的GameName, WorldGenSeed和WorldGenSize需要和创建时⼀致. 改完后启动时注意观察⽇志输出, 如果看到 GamePref.GameWorld 这⾏和你迁移的GameWorld名字⼀样说明就对了, 说明服务器计算出的地图名和你迁移的GameWorld名称⼀致,就会使⽤你已经创建好的随机⽣成地图和存档, 这⾥有点坑不知道为什么这么设计..。
1+X 云计算平台运维与开发认证(初级)操作题

1+X 云计算平台运维与开发认证(初级)操作题与答案当前有一个/opt目录,该目录中的文件如下所示:├──ambari-2.6.0.0 │├──ambari │├──repodata │└──smartsense ├──base │├──packages │└──repodata 请问如何配置自己的local.repo文件,使得可以使用这两个地方的软件包,安装软件。
请将local.repo文件的内容以文本形式提交到答题框。
参考答案:[centos]name=centosbaseurl=file:///opt/ambari-2.6.0.0gpgcheck=0enabled=1[iaas]name=iaasbaseurl=file:///opt/basegpgcheck=0enabled=1教师点评:此题还没有任何教师进行点评~yum源管理(30分)42当前存在一个ftp源,IP地址为192.168.100.200,ftp共享的目录为/opt,/opt目录中存在一个iaas目录(该目录下存在一个repodata目录)请问如何配置自己的ftp.repo文件,使得可以使用这两个地方的软件包,安装软件。
请将ftp.repo文件的内容以文本形式提交到答题框。
参考答案:[iaas]name=iaasbaseurl=ftp://192.168.100.200/iaasgpgcheck=0enabled=112345教师点评:此题还没有任何教师进行点评~数据库管理(60分)43使用提供的“all-in-one”虚拟机,进入数据库。
(1)创建本地用户examuser,密码为000000;(2)查询mysql数据库中的user表的host,user,password字段;(3)赋予这个用户对所有数据库拥有“查询”“删除”“更新”“创建”的本地权限。
依次将操作命令和返回结果以文本形式提交到答题框。
参考答案:[MariaDB [(none)]> insert into er(host,user,Password) values("localhost","examuser",Password("000000"));Query OK, 1 row affected, 4 warnings (0.00 sec)MariaDB [(none)]> use mysqlReading table information for completion of table and column namesYou can turn off this feature to get a quicker startup with -ADatabase changedMariaDB [mysql]> select host,user,password from user;+-----------+----------+-------------------------------------------+| host | user | password |+-----------+----------+-------------------------------------------+| localhost | root | *032197AE5731D4664921A6CCAC7CFCE6A0698693 || xiandian | root | *032197AE5731D4664921A6CCAC7CFCE6A0698693 || 127.0.0.1 | root | *032197AE5731D4664921A6CCAC7CFCE6A0698693 || ::1 | root | *032197AE5731D4664921A6CCAC7CFCE6A0698693 || localhost | keystone | *032197AE5731D4664921A6CCAC7CFCE6A0698693 || % | keystone | *032197AE5731D4664921A6CCAC7CFCE6A0698693 || localhost | glance | *032197AE5731D4664921A6CCAC7CFCE6A0698693 || % | glance | *032197AE5731D4664921A6CCAC7CFCE6A0698693 || localhost | nova | *032197AE5731D4664921A6CCAC7CFCE6A0698693 || % | nova | *032197AE5731D4664921A6CCAC7CFCE6A0698693 || localhost | neutron | *032197AE5731D4664921A6CCAC7CFCE6A0698693 || % | neutron | *032197AE5731D4664921A6CCAC7CFCE6A0698693 || localhost | cinder | *032197AE5731D4664921A6CCAC7CFCE6A0698693 || % | cinder | *032197AE5731D4664921A6CCAC7CFCE6A0698693 || localhost | heat | *032197AE5731D4664921A6CCAC7CFCE6A0698693 || % | heat | *032197AE5731D4664921A6CCAC7CFCE6A0698693 || localhost | aodh | *032197AE5731D4664921A6CCAC7CFCE6A0698693 || % | aodh | *032197AE5731D4664921A6CCAC7CFCE6A0698693 || localhost | examuser | *032197AE5731D4664921A6CCAC7CFCE6A0698693 |+-----------+----------+-------------------------------------------+19 rows in set (0.00 sec)MariaDB [mysql]> grant select,delete,update,create on *.* to examuser@"localhost" identified by "000000";Query OK, 0 rows affected (0.01 sec)教师点评:此题还没有任何教师进行点评~Linux存储LVM管理(50分)44使用提供的“all-in-one”虚拟机,该虚拟机存在一块大小为20G的磁盘/dev/vdb,使用fdisk 命令对该硬盘进形分区,要求分出三个大小为5G的分区。
centos 7+hadoop2.7.3详细安装教程

centos 7+hadoop2.7.3详细安装教程前言:Hadoop 运行在jar环境下,因此安装hadoop的前提是得在系统上安装好jdk。
本次实验环境使用centos7进行安装。
需要安装的工具:1.虚拟机2.Centos 7镜像文件3.Filezilla(用于上传本地下载的hadoop镜像到centos系统,以及可以远程操作linux 文件系统)4.secureCrt(远程连接linux,敲指令方便。
本次安装的linux是没有图形界面的,命令窗口不能复制粘贴,因此使用secureCRT操作linux系统,方便后续修改hadoop 文件时可以复制粘贴)5.JDK镜像6.Hadoop2.7.3镜像文件一、虚拟机安装a)安装最新版本,具体安装方法比较简单,请上网自行搜索。
b)安装按虚拟机后,需要配置虚拟机的网络连接方式。
本次hadoop安装实验环境将会部署三个集群(一个namenode和两个DataNode),因此采用nat连接方式配置网络。
具体配置如下:选择编辑-虚拟网络编辑器-VMnet8注意:NAT设置里面网关IP地址为你的网段地址+2,,如我设置的网段是192.168.100,因此我的网关IP地址是192.169.100.2二、安装三台centos7(三台安装方式一样,仅是里面IP地址配置不一样。
具体安装多少台视各位看官需要配置多少集群而定)a)文件菜单选择新建虚拟机b)选择经典类型安装,下一步。
c)选择稍后安装操作系统,下一步。
d)选择Linux系统,版本选择CentOS7 64位。
e)命名虚拟机,给虚拟机起个名字,将来显示在Vmware左侧。
并选择Linux系统保存在宿主机的哪个目录下,应该一个虚拟机保存在一个目录下,不能多个虚拟机使用一个目录。
f)指定磁盘容量,是指定分给Linux虚拟机多大的硬盘,默认20G就可以,下一步。
g)点击自定义硬件,可以查看、修改虚拟机的硬件配置,这里我们不做修改。
openstack安装图解
本帖最后由cryboy2001 于2014-08-15 14:52 编辑目录1、云计算与openstack介绍传统的信息中心云计算介绍openstack介绍物理架构2、openstack架构3、安装openstack方法4、使用openstack5、openstack配置文件6、管理openstack7、详解openstack计算资源池存储资源池网络资源池Glance镜像资源池前端界面Keystone认证管理(不管会不会写完,象openstack一样,先把框架搞大点)一、云计算与openstack介绍1、传统的信息中心。
当然下面画的很简单(自己画的),如果加上多个出口、设备冗余、线路冗余、服务器集群就会复杂。
云计算就是用虚拟技术实现以下功能,如果理解了下面的网络功能,要理解openstack会很简单的,在openstack中都有与下面图中对应的模块。
缺点:1、部署应用时间长,工作量大,至少几个月2、资源利用率,有的服务器资源不够用,有的服务器大量资源浪费。
2、管理复杂3、扩展麻烦,灵活性差。
等等,这些也是云计算的优点。
2、云计算介绍云计算(Cloud Computing )是网格计算(Grid Computing )、分布式计算(Distributed Computing )、并行计算(Parallel Computing )、效用计算(Utility Computing )、网络存储(Network Storage Technologies )、虚拟化(Virtualization )、负载均衡(Load Balance )等传统计算机技术(如以上图)和网络技术发展融合的产物。
个人理解:把一堆功能小的设备,整合成一大个功能强大设备,再把这个强大的设备划分成小设备,然后按你的需要买给你。
公用云(Public Cloud)、私有云(Private Cloud)、混合云(Hybrid Cloud)云计算解决方案:VMware vSphere、微软云计算解决方案、亚马逊AWS、OpenStack 等等3、openstack介绍OpenStack是一个NASA和Rackspace2010年6月合作成立的,以Apache许可证授权,并且是一个自由软件和开放源代码项目。
openstack操作手册

以下是使用openstack的基本操作手册:
1. 安装openstack:根据您的系统和环境要求,遵循官方的安装指南进行安装。
2. 创建项目:使用命令行或管理界面创建一个新的项目。
项目将包含一组资源,包括计算、网络和存储资源。
3. 创建网络:在项目中创建一个新的网络。
网络是用于连接云中的虚拟机和其他资源的虚拟架构。
4. 创建虚拟机:使用命令行或管理界面在项目中创建一个新的虚拟机。
您需要指定所需的配置选项,例如操作系统、处理器、内存和存储。
5. 连接到虚拟机:使用SSH或其他远程桌面工具连接到虚拟机。
您需要提供虚拟机的IP地址和密码或密钥。
6. 配置和管理虚拟机:根据需要配置和管理虚拟机,例如安装软件、配置网络设置等。
7. 创建和管理云存储:使用命令行或管理界面在项目中创建一个新的云存储后端。
您可以定义存储的容量、访问级别和其他配置选项。
8. 创建和管理镜像:使用命令行或管理界面在项目中创建一个新的镜像。
镜像是虚拟机的完整快照,可用于创建新的虚拟机实例。
9. 管理和监控资源:使用命令行或管理界面监控和管理项目中的资源使用情况,例如CPU、内存和存储。
10. 删除项目和资源:根据需要删除项目和其中的资源,以释放云资源并降低成本。
以上是openstack的基本操作手册,根据您的具体需求,您可能需要进行其他高级配置和管理操作。
建议参考openstack的官方文档以获取更详细的信息和指导。
openstack实训总结报告
openstack实训总结报告OpenStack实训总结报告【引言】近年来,随着云计算技术的迅猛发展,OpenStack作为一个开源的云计算平台逐渐得到了广泛应用。
为了更好地掌握和运用OpenStack技术,加深对云计算的理解,笔者参加了一次OpenStack实训。
【背景】实训是由一家专业培训机构组织的一周的培训活动。
培训期间,学员们通过实际操作搭建了一个完整的OpenStack云平台,并进行了一系列的测试和实验。
【实训过程】1. 系统准备:在实训开始之前,我们首先采购了一台服务器作为实验平台,并安装了操作系统和所需软件。
同时,我们还下载了OpenStack的最新版本,并准备好了其他所需的依赖软件。
2. 系统初始化:接下来,我们对服务器进行了初始化配置,包括设置网络连接、安装必要的软件包等。
这些步骤为后续的OpenStack部署做好了准备。
3. 网络配置:在服务器初始化完成后,我们开始配置网络环境。
通过配置网络接口、IP地址等实现了服务器与外部网络的连接,为后续的云平台搭建提供了基础。
4. OpenStack部署:在网络配置完成后,我们通过运行相应的部署脚本,开始了OpenStack的安装和部署过程。
在这个过程中,我们需要指定一些配置参数,例如数据库设置、认证服务等。
5. 功能测试:在OpenStack部署完成后,我们进行了一系列的功能测试。
包括创建虚拟机、网络配置、存储管理等。
通过这些测试,我们验证了OpenStack 的基本功能,并掌握了其使用方法和操作技巧。
6. 性能测试:在功能测试完成后,我们还进行了一些性能测试和压力测试。
通过模拟大量用户操作和数据访问,评估了OpenStack的性能和稳定性。
同时,我们还优化了相关配置,提高了系统的性能。
【实训收获】通过这次OpenStack实训,我收获了很多。
首先,我熟悉了OpenStack的基本架构和工作原理,理解了云计算的概念和技术。
其次,我掌握了OpenStack 的安装和配置方法,能够独立搭建一个完整的OpenStack云平台。
open stack实训总结
open stack实训总结OpenStack实训总结一、实训目标本次OpenStack实训的目标是掌握OpenStack的安装、配置、管理和应用,了解云计算平台的基本原理和OpenStack的核心组件,提升对云计算技术的理解和实践能力。
二、实训内容在为期一周的实训中,我们主要完成了以下内容:1. OpenStack简介与环境准备:了解OpenStack的发展历程、核心组件及与其他云计算平台的比较。
同时,配置实训环境,包括虚拟化软件、网络设置等。
2. OpenStack安装与配置:按照官方文档的指引,逐步完成Keystone、Glance、Nova等组件的安装与配置。
期间,我们遇到了一些问题,但在团队的合作下,都得到了有效解决。
3. OpenStack管理与实践:学习并实践了如何使用命令行工具和Horizon 界面进行OpenStack的管理,包括用户管理、镜像管理、虚拟机管理等。
4. OpenStack网络配置:深入了解OpenStack的网络架构,完成Neutron组件的安装与配置,实现虚拟机的网络连接。
5. OpenStack高可用性部署:了解OpenStack的高可用性部署方案,如Keepalived、Corosync等,并进行简单的实践。
6. OpenStack应用实践:基于OpenStack平台,完成一个简单的应用实践,如部署一个Web应用或数据库服务等。
三、遇到的问题和解决方案在实训过程中,我们遇到了一些问题,如组件之间的通信问题、网络配置问题等。
针对这些问题,我们查阅了大量资料,并进行了深入的分析和探讨,最终找到了解决方案。
四、实训收获通过本次实训,我深刻认识到云计算平台的强大和复杂性。
在实践过程中,我不仅掌握了OpenStack的安装、配置和管理技能,还了解了云计算的原理和最佳实践。
此外,团队合作能力的提升也是这次实训的一个重要收获。
我们通过相互学习和帮助,共同克服了一个又一个难题。
openstack的安装和部署
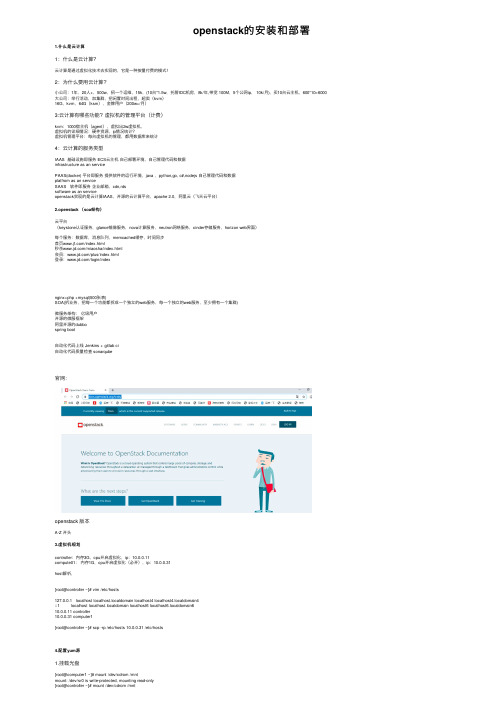
openstack的安装和部署1.什么是云计算1:什么是云计算?云计算是通过虚拟化技术去实现的,它是⼀种按量付费的模式!2:为什么要⽤云计算?⼩公司:1年,20⼈+,500w,招⼀个运维,15k,(10台*1.5w,托管IDC机房,8k/年,带宽 100M,5个公⽹ip, 10k/⽉), 买10台云主机,600*10=6000⼤公司:举⾏活动,加集群,把闲置时间出租,超卖(kvm)16G,kvm,64G(ksm),⾦牌⽤户(200w+/⽉)3:云计算有哪些功能?虚拟机的管理平台(计费)kvm:1000宿主机(agent),虚拟出2w虚拟机,虚拟机的详细情况:硬件资源,ip情况统计?虚拟机管理平台:每台虚拟机的管理,都⽤数据库来统计4:云计算的服务类型IAAS 基础设施即服务 ECS云主机⾃⼰部署环境,⾃⼰管理代码和数据infrastructure as an servicePAAS(docker) 平台即服务提供软件的运⾏环境,java ,python,go, c#,nodejs ⾃⼰管理代码和数据platfrom as an serviceSAAS 软件即服务企业邮箱,cdn,rdssoftware as an serviceopenstack实现的是云计算IAAS,开源的云计算平台,apache 2.0,阿⾥云(飞天云平台)2.openstack (soa架构)云平台(keystone认证服务,glance镜像服务,nova计算服务,neutron⽹络服务,cinder存储服务,horizon web界⾯)每个服务:数据库,消息队列,memcached缓存,时间同步⾸页/index.html秒杀/miaosha/index.html会员:/plus/index.html登录:/login/indexnginx+php +mysql(500张表)SOA(拆业务,把每⼀个功能都拆成⼀个独⽴的web服务,每⼀个独⽴的web服务,⾄少拥有⼀个集群)微服务架构:亿级⽤户开源的微服框架阿⾥开源的dubbospring boot⾃动化代码上线 Jenkins + gitlab ci⾃动化代码质量检查 sonarqube官⽹:openstack 版本A-Z 开头3.虚拟机规划controller:内存3G,cpu开启虚拟化,ip:10.0.0.11compute01:内存1G,cpu开启虚拟化(必开),ip:10.0.0.31host解析,[root@controller ~]# vim /etc/hosts127.0.0.1 localhost localhost.localdomain localhost4 localhost4.localdomain4::1 localhost localhost.localdomain localhost6 localhost6.localdomain610.0.0.11 controller10.0.0.31 computer1[root@controller ~]# scp -rp /etc/hosts 10.0.0.31 /etc/hosts4.配置yum源1.挂载光盘[root@computer1 ~]# mount /dev/cdrom /mntmount: /dev/sr0 is write-protected, mounting read-only[root@controller ~]# mount /dev/cdrom /mntmount: /dev/sr0 is write-protected, mounting read-only#查看(如果有内容代表挂载成功)[root@computer1 ~]# ll /mnttotal 686-rw-rw-r-- 1 root root 14 Nov 26 2018 CentOS_BuildTagdrwxr-xr-x 3 root root 2048 Nov 26 2018 EFI-rw-rw-r-- 1 root root 227 Aug 30 2017 EULA-rw-rw-r-- 1 root root 18009 Dec 10 2015 GPLdrwxr-xr-x 3 root root 2048 Nov 26 2018 imagesdrwxr-xr-x 2 root root 2048 Nov 26 2018 isolinuxdrwxr-xr-x 2 root root 2048 Nov 26 2018 LiveOSdrwxrwxr-x 2 root root 663552 Nov 26 2018 Packagesdrwxrwxr-x 2 root root 4096 Nov 26 2018 repodata-rw-rw-r-- 1 root root 1690 Dec 10 2015 RPM-GPG-KEY-CentOS-7-rw-rw-r-- 1 root root 1690 Dec 10 2015 RPM-GPG-KEY-CentOS-Testing-7-r--r--r-- 1 root root 2883 Nov 26 2018 TRANS.TBL[root@controller ~]# scp -rp openstack_rpm.tar.gz 10.0.0.31:/optrz 上传openstack_rpm.tar.gz到/opt,并解压⽣成repo配置⽂件root@controller opt]# vim/etc/yum.repos.d/local.repo[local]name=localbaseurl=file:///mntgpgcheck=0[openstack]name=openstackbaseurl=file:///opt/repogpgcheck=0root@controller opt]#echo 'mount /dev/cdrom /mnt' >>/etc/rc.localroot@controller opt]# chmod +x /etc/rc.d/rc.local[root@controller opt]# scp -rp /etc/yum.repos.d/local.repo 10.0.0.31:/etc/yum.repos.d/local.repo [root@computer1 opt]# vim /etc/yum.repos.d/local.repo[root@computer1 opt]# echo 'mount /dev/cdrom /mnt' >>/etc/rc.local[root@computer1 opt]# chmod +x /etc/rc.d/rc.local#注意:两台都要配2.安装基础服务在所有节点上执⾏:a:时间同步[root@controller opt]# yum install -y chrony[root@computer1 opt]# yum install -y chrony#编辑控制节点配置⽂件[root@controller opt]# vim /etc/chrony.conf1.将 server iburst 改成server iburst另三⾏删掉2.将 #allow 192.168.0.0/1改成allow 10.0.0.0/24#重启服务[root@controller opt]# vim /etc/chrony.confsystemctl restart chronyd#编辑计算节点[root@computer1 opt]# vim /etc/chrony.conf将 server iburst 改成server 10.0.0.11 iburst另三⾏删掉[root@computer1 opt]# systemctl restart chronyd5.安装openstack客户端和openstack-selinux1.在所有节点上执⾏[root@control ~]# yum install python-openstackclient openstack-selinux -y[root@computer1 ~]# yum install python-openstackclient openstack-selinux -y查看官⽅⽂档6.安装数据库以及安全初始化2.仅控制节点执⾏:[root@control ~]# yum install mariadb mariadb-server python2-PyMySQL -y在官⽅⽂档上有https:///mitaka/zh_CN/install-guide-obs/environment-sql-database.html3.创建并编辑 /etc/f.d/f[root@control ~]# cat /etc/f.d/f[mysqld]bind-address = 10.0.0.11 # 值为控制节点的管理⽹络IP地址以使得其它节点可以通过管理⽹络访问数据库default-storage-engine = innodb #默认存储引擎innodb_file_per_table #为每个表独⽴表空间⽂件max_connections = 4096 #最⼤连接数collation-server = utf8_general_ci # 默认字符集character-set-server = utf84.启动mariadb 并加⼊开机⾃启[root@control ~]# systemctl start mariadb[root@control ~]# systemctl enable mariadb5. 为了保证数据库服务的安全性,运⾏[root@control ~]# mysql_secure_installation ⼀定要执⾏要不然后⾯时间同步会有坑脚本。
Linux网络操作系统项目式教程(CentOS7.6)-实训指导书(96学时)

实训一安装CentOS 7.6操作系统虽然SISO学院的每个电子教室都配备了台式计算机,但是孙老师经常使用自己的计算机给学生上课。
最近,孙老师购买了一台崭新的笔记本电脑,除了预装的Windows 10操作系统外,她需要安装上课所需的Linux虚拟机。
要求如下。
(1)安装CentOS 7.6操作系统。
(2)将虚拟机硬盘空间设置为60GB,内存设置为4GB。
(3)要安装“带GUI的服务器”。
(4)为系统设置4个分区,/boot、/、/home和swap,分区容量分别为500MB、15GB、10GB和2GB。
前3个分区的文件系统类型设置为xfs,swap交换分区的文件系统类型必须使用swap。
(5)为root用户设置密码“Siso@7211”;创建“siso”用户,将其密码设置为“siso#1001”。
实训二使用Linux常用命令一、实训目的(1)掌握Linux各类命令的使用方法。
(2)熟悉Linux操作环境。
二、实训内容练习使用Linux常用命令,达到熟练应用的目的。
三、实训练习(1)文件和目录类命令●启动计算机,利用root用户登录到系统,进入字符提示界面。
●用pwd命令查看当前所在的目录。
●用ls命令列出此目录下的文件和目录。
●回到上层目录,利用rm命令删除目录test和其下所有文件。
(1)启动计算机,使用siso用户登录系统,登录后,打开一个终端窗口。
(2)使用pwd命令查看当前工作目录,使用ls命令查看当前目录下有哪些内容。
(3)使用cd命令切换到tmp目录,使用pwd命令检查当前工作目录是否改变。
(4)使用-l选项查看tmp目录下的详细信息。
在这一步中,孙老师要求同学们根据输出的第一个字符判断文件的类型,即判断哪些是目录,哪些是普通文件;使用-a 选项查看隐藏文件,观察隐藏文件的特点。
(5)使用cat命令查看文件file1的内容,并显示行号。
(6)在tmp目录下创建子目录dir2、文件file2及file3。
云计算技术OpenStack云计算平台应用OpenStack安装
项目一 OpenStack安装云计算技术OpenStack云计算平台能力CAPACITY 要求了解云计算的概念、架构和模式,以及主流的云计算平台了解OpenStack项目,调查OpenStack的应用情况理解OpenStack的架构,了解OpenStack的物理部署了解OpenStack部署工具,掌握OpenStack的快捷安装方法内容导航CONTENTS任务一了解云计算任务二了解OpenStack项目任务三理解OpenStack架构任务四部署与安装OpenStack任务说明01OPTION02OPTION03OPTION了解OpenStack部署拓扑了解OpenStack部署工具准备OpenStack安装环境04OPTION使用Packstack安装器安装OpenStack知识引入•什么是虚拟化•虚拟化是云计算的基础。
•虚拟化是指计算元件在虚拟的而不是真实的硬件基础上运行。
•虚拟化将物理资源转变为具有可管理性的逻辑资源,以消除物理结构之间的隔离,将物理资源融为一个整体。
虚拟化是一种简化管理和优化资源的解决方案。
知识引入•什么是云计算•云(Cloud)是网络、互联网的一种比喻说法。
•云计算是提供虚拟化资源的模式。
•云计算提供的是IT资源租用服务。
•云计算是IT系统架构不断发展的产物。
知识引入•云计算架构知识引入云计算部署模式公有云(Public Cloud)私有云(Private Cloud )混合云(Hybrid Cloud )知识引入•裸金属云•裸金属云(Bare Metal Cloud)是一种提供物理服务器服务的云产品。
•裸金属云没有虚拟机管理程序(Hypervisor)。
•裸金属云支持的处理器ØIntelØPOWERØARMØGPUØFPGA•随着容器技术的兴起,物理服务器正成为更多用户的选择。
•Amazon 公司的AWS(Amazon Web Services )•Microsoft 公司的Azure •阿里云(AliCloud )了解商用云计算平台任务实现11项目一 OpenStack安装任务一 了解云计算开源云计算平台OpenStack OpenNebula Eucalyptus CloudStack任务实现项目一 OpenStack安装12 内容导航CONTENTS任务一了解云计算任务二了解OpenStack项目任务三理解OpenStack架构任务四部署与安装OpenStack任务说明01OPTION 02OPTION 03OPTION 了解OpenStack的概念了解OpenStack项目的组成了解OpenStack版本演变04OPTION 了解OpenStack基金会与社区05OPTION 调查OpenStack的应用情况知识引入•什么是OpenStack•OpenStack是一系列开源软件项目的组合。
Centos7网络配置

wlp11s0:表示PCI接口的无线以太网设备,PCI总线地址为11插槽编号0
CentOS的网络配置方法
CentOS的网络配置有临时性的配置和持久的配置。 临时的配置是使用ifconfig命令进行配置,立即生 效,但重启后就没了。(在CentoS7中是用的 iproute2的命令工具)
被选中的连接。 Home: 用在家庭网络,只允许被选中的连接。 Internal:适用内部局域网。 Trusted:允许所有的网络连接
区域管理
firewall-cmd --get-zone-of-interface=网卡名 //查看指定接 口所属的区域
为指定区域添加网卡(一个网卡只能属于一个区域) firewall-cmd --zone=work --add-interface=网卡名
重启网卡:nmcli conn down ens33 && nmcli conn up ifname ens33
iproute2其他的命令工具 ip neigh //查看arp表
ip neigh add IP地址 lladdr MAC地址 dev 网卡名 //添加一条静态arp项
ip neigh del IP地址 dev 网卡名 //删除一条静态arp项
ip link show //显示出所有可用的网络接口列表
ip link set down 网卡名 //停用某个网络接口 ip link set up 网卡名 //激活某个网络接口
ip addr或ip addr show //查看所有网络接口的IP地址 ip addr show dev 网卡名 //查看指定网卡IP地址
firewall-cmd --zone=work --remove-service=tftp //移除允许访问的 服务
Centos7 install Openstack Juno (RDO)

Centos7 install Openstack Juno (RDO)2015/01/14|作者:naveen|分类: 工作|37 次围观|1条评论1、安装系统,Centos7镜像采用CentOS-7.0-1406-x86_64-Minimal.iso分区/、boot、swap,然后单独拿出一个分区,供cinder使用。
2、系统环境准备工作yum install -y net-tools wget screen[root@juno ~]# more /etc/hosts127.0.0.1 juno localhost localhost.localdomain localhost4 localhost4.localdomain4 ::1 localhost localhost.localdomain localhost6 localhost6.localdomain6 192.168.3.97 juno[root@juno yum.repos.d]# more /etc/resolv.conf# Generated by NetworkManagernameserver 8.8.8.8[root@juno yum.repos.d]# cd /etc/sysconfig/network-scripts/vi ifcfg-enp3s0vi ifcfg-enp5s2[root@juno network-scripts]# more /etc/sysconfig/network# Created by anacondaNETWORKING=yesHOSTNAME=junoGATEWAY=192.168.3.1[root@juno yum.repos.d]# systemctl disable NetworkManagerrm '/etc/systemd/system/dbus-org.freedesktop.nm-dispatcher.service'rm '/etc/systemd/system/workManager.service'rm '/etc/systemd/system/multi-user.target.wants/NetworkManager.service'[root@juno yum.repos.d]# systemctl stop NetworkManagervi /etc/selinux/config # SELINUX=enforcing SELINUX=disabledsetenforce 0yum install -y lvm2[root@juno ~]# df -h/dev/sda2 855G 1.2G 810G 1% /devtmpfs 7.7G 0 7.7G 0% /devtmpfs 7.7G 0 7.7G 0% /dev/shmtmpfs 7.7G 8.6M 7.7G 1% /runtmpfs 7.7G 0 7.7G 0% /sys/fs/cgroup/dev/sda5 48G 53M 46G 1% /data/dev/sda1 190M 106M 71M 61% /boot[root@juno ~]# umount /dev/sda5[root@juno ~]# pvcreate /dev/sda5Physical volume "/dev/sda5" successfully created[root@juno ~]# vgcreate cinder-volumes /dev/sda5Volume group "cinder-volumes" successfully created去掉/dev/sda5在/etc/fstab中的启动项3、准备rdo安装环境yum install -y /openstack-juno/rdo-release-juno.rpm #会在/etc /yum.repos.d目录增加rdo-release.repo源文件。
openstack安装配置文档
openstack(kilo版)安装配置文档写在前面:本文档所有指令在拷贝的时候注意空格和换行,由于文档的排版原因可能会出现自动换行等误差。
一、实验环境物理机器上的3台虚拟机分别模拟控制节点、网络节点、计算节点。
采用VMware虚拟机管理软件,首先建立一个模板,在上面安装第五部分所涉及到的基本组件,分别克隆出3台虚拟机作为控制、网络、计算节点。
虚拟机操作系统为Ubuntu 14.04.3,openstack版本为kilo版。
所需各部分组件均采用apt-get自动安装。
二、openstack的两种常用上网方式1、在官方文档的三个网卡基础上,我们使用第四个网卡上网(NAT 方式或桥接方式均可)。
另外三个网卡采用host-only方式。
2、使用管理网络上网。
本文采用第二种方式对网络进行配置,即将管理网络根据自己的网络环境配置成可上网的IP地址段(NAT和host-only均可)。
由于对第一种方式进行尝试时最终会遇到ping不通外网的情况,所以不建议尝试。
具体可见/thread-13508-1-1.html三、各节点的网络配置各节点建立好以后,根据openstack-install-guide-apt-kilo官方文档对各节点进行网络配置。
本例采用OpenStack Networking (neutron)方式进行网络配置。
使用OpenStack网络(neutron)的架构样例中,需要一个控制节点、一个网络节点以及至少一个计算节点。
控制节点包含一个在管理网络上的网络接口。
网络节点在包含一个在管理网络上的网络接口,一个在实例隧道网络上的网络接口和一个在外部网络上的网络接口。
计算节点包含一个在管理网络上的网络接口和一个在实例隧道网络上的接口。
所以此时需要在虚拟机管理界面添加虚拟网络,由于采用第二部分提到的第二种方式(即管理网络上网),所以网络分配如下:◆管理网络使用 192.168.109.0/24 带有网关 192.168.109.2◆实例隧道网络使用 10.0.1.0/24 无网关◆外部通道网络使用192.168.109.0/24 带有网关192.168.109.2首先需要配置管理网络采用NAT方式上网:VMware默认VMnet8为NAT模式,打开系统的网络适配器设置,可以看到VMnet8的网络配置信息,如下图:这个ip地址,因个人而异,也就是说不同网络,不同环境,这个ip变化的概率是很大的。
CentOS7-项目实训1-系统安装操作

CentOS7项目实训1-系统的安装操作安装步骤(图形模式下安装)
一.虚拟机设置(VMware软件)
1.D盘新建系统安装文件夹(使用姓名拼音)-XXX
2. 设置默认安装路径: 编辑菜单--设置--设置默认安装路径
3.新建虚拟机
二.CentOS安装
1.虚拟机设置—镜像加载
2.开启虚拟机
3.选择安装选项
4.语言界面选择
5.软件选择安装
6.自定义分区
/boot分区创建并挂载,文件系统为BIOS
Swap交换分区创建并挂载,标准分区,分区类型为swap
/根分区创建并挂载,标准分区,分区类型为ext4
分区格式化
7.root超级管理员密码设置
8.创建用户
9.安装完成重启
10.许可证同意,完成配置
11.登录系统、关机。
OpenStack安装手册

OpenStack安装手册目录OpenStack安装手册 (1)一、安装环境 (4)1、示例架构 (4)2、网络 (4)3、安全 (5)4、主机网络配置 (5)5、NTP (7)6、安装OpenStack包 (9)7、安装数据库 (10)8、消息队列 (11)9、缓存令牌 (12)二、认证服务 (12)在控制节点上配置。
(13)1、前提条件 (13)配置Apache服务器 (15)3、创建一个域、项目、用户和角色 (16)4、验证操作 (17)1、前提条件 (20)2、安装并配置组件 (22)5、验证操作 (24)四、计算服务 (25)1、安装和配置控制节点 (25)∙安装并配置组件 (26)∙完成安装 (30)3、安装并配置计算节点 (30)∙安装并配置组件 (30)∙验证操作 (33)一、安装环境1、示例架构根据官方文档,本文架构采用一个控制节点和一个计算节点。
(The example architecture requires at least twonodes (hosts) to launch a basic virtual machine or instance. )控制节点运行认证服务、镜像服务、计算服务的管理部分、网络服务的管理部分、各种网络代理以及Dashboard,还包括一些基础服务如数据库、消息队列以及NTP。
计算节点上运行计算服务中管理实例的管理程序部分。
默认情况下,计算服务使用KVM。
还运行网络代理服务,用来连接实例和虚拟网络以及通过安全组给实例提供防火墙服务。
2、网络∙公有网络公有网络选项以尽可能简单的方式通过layer-2(网桥/交换机)服务以及VLAN网络的分割来部署OpenStack网络服务。
实际上,它将虚拟网络桥接到物理网络,并依靠物理网络基础设施提供layer-3服务(路由)。
另外,DHCP服务为实例提供IP地址。
∙私有网络私有网络选项扩展了公有网络选项,增加了layer-3(路由)服务,使用VXLAN类似的方式。
《linux服务器配置与管理》教案01-任务一 CentOS 7.4 服务器的安装

1.阅读纸质教材,查阅与本章节相关资料;
2.在教学平台上学习教材电子版和课件。
教学过程
师生活动:
一、课程介绍
一位网络管理人员,由于工作需要,需要在linux环境下搭建服务器。所以必须尽快的掌握linux操作系统的配置方法,但这不是一个简单的工作,因为linux是一种全新的操作系统。在本门课程里主要学习如何使用linux,如何配置并管理Linux服务器。
四、课堂练习
1.使用VIM编辑器
2.按列表实践常用的Linux命令
3.新建虚拟机安装CentOS 7.4版(最小化安装)
4. 配置网络、修改软件源及软件包更新
5.使用nmcli配置网络连接
6.使用systemctl管理和控制服务
学生活动:观看教师演示、边学边做、思考、讨论、完成任务实践
五、课堂小结
1.总结本课学习内容
三、讲授新课
某单位组建局域网服务器,需要使用CentOS操作系统,在虚拟化服务器上安装Server版本。
(3)VMWare Workstation 14.0环境
下面以VMWare中CentOS文本界面的安装过程为例,介绍CentOS 7.4安装的一般流程和注意事项。除去安装光盘,其余的硬件设备,均是在选择“Linux CentOS 7 64位”操作系统安装后,VMWare给出的默认设置。安装光盘使用ISO镜像文件,本例中使用的是存放在E:\Soft\iso\文件夹下的CentOS-7-x86_64-DVD-1708.iso文件。
2.总结、评价学生小组活动情况
二次备课
布置作业
1.完成课后巩固练习题;
2.上交书面作业或者在教学平台上完成电子文档上传;
3.观看下一任务的微课或者项目实录视频。
centos7安装笔记---by-alone
安装系统工具:从网络上下载centos7.0-X86_X64.iso文件,测试安装系统成功安装选项:选择基本网页安装,但系统安装完成后发现setup工具没有,网口不会随系统启动,在etc/sysconfig/network-scripte/下的网口配置文件中更改onboot=no,将其变为onboot=yes;随后运行yum update更新。
安装完成后发现防火墙改为firewall了,所以打算改为常用的iptables但是运行完yum remove iptables后,系统基本不能用,所以放弃。
并且重新安装系统这次安装的centos7选择为最小安装安装完成后,查看网络信息正常,关闭了selinux#vi /etc/selinux/config# This file controls the state of SELinux on the system.# SELINUX= can take one of these three values:# enforcing - SELinux security policy is enforced.# permissive - SELinux prints warnings instead of enforcing.# disabled - No SELinux policy is loaded.SELINUX=disabled# SELINUXTYPE= can take one of these two values:# targeted - Targeted processes are protected,# minimum - Modification of targeted policy. Only selected processes are protected.# mls - Multi Level Security protection.#SELINUXTYPE=targeted:wq将firewall服务关闭并且不让其随机启动#service firewalld stop#chkconfigfirewalld off安装好需要的环境包# yum -y install gccgcc-c++ autoconflibjpeglibjpeg-devellibpnglibpng-develfreetypefreetype-devel libxml2 libxml2-devel zlibzlib-develglibcglibc-devel glib2 glib2-devel bzip2 bzip2-devel ncursesncurses-devel curl curl-devel e2fsprogs e2fsprogs-devel krb5 krb5-devel libidnlibidn-developensslopenssl-developenldapopenldap-develnss_ldapopenldap-clients openldap-servers pcre-develzlib-develgd-devellibjpeg-devellibpng-develfreetype-devel libxml2-devel curl-develfreetype-devel install bison gccgcc-c++ autoconfautomakezlib* libxml* ncurses-devellibtool-ltdl-devel* mysql-develyum install openssh-server openssh-client curl-develexpat-develgettext-developenssl-develzlib-develperl-devel net-tools设置好防火墙,将firewalld从系统中remove,系统启动正常,做防火墙测试#yum remove firewalld本次测试将测试nginx的性能,需要php5.4以上的版本,结合mysql达到管理运行公司网站与APP的目的。
centos7使用手册

centos7使用手册CentOS 7 使用手册CentOS 是一种基于 Linux 的操作系统,提供了广泛的功能和特性,成为许多人首选的服务器操作系统。
本手册将为你提供详细的指南,帮助你快速上手使用 CentOS 7。
第一部分:安装 CentOS 7CentOS 7 的安装过程相对简单,你可以按照以下步骤进行安装:1. 下载 CentOS 7 镜像文件,可以从 CentOS 官方网站获得,确保选择与你的计算机体系结构相匹配的版本。
2. 使用软件将镜像文件写入 USB 驱动器或 DVD 光盘。
3. 将 USB 驱动器插入计算机或将 DVD 光盘放入光驱,并重新启动计算机。
4. 进入计算机的 BIOS 设置界面,设置引导顺序以从 USB 驱动器或DVD 光盘引导。
5. 根据屏幕上的提示选择适当的选项并开始安装过程。
6. 在安装程序提示时,设置主机名、网络配置、用户账户和密码等信息。
7. 完成安装后,重新启动计算机,你现在已经成功安装了 CentOS 7。
第二部分:初次登录和基本操作当你成功安装 CentOS 7 后,你可以按照以下步骤进行初次登录和基本操作:1. 在计算机启动后,你将看到一个登录画面,输入你设置的用户名和密码。
2. 成功登录后,你将看到一个命令行界面。
现在你可以开始使用CentOS 7。
3. 首先,你可以运行命令 `yum update` 来更新系统的软件包。
4. 接下来,你可以使用命令 `yum install` 安装你需要的软件包。
5. 若要查找特定的软件包,可以使用命令 `yum search` 进行搜索。
6. 要卸载软件包,请使用命令 `yum remove`。
7. 若需要重启计算机,可以使用命令 `reboot`。
第三部分:常用命令和操作以下是一些常用的命令和操作,供你在 CentOS 7 中使用:1. 文件和目录操作:- `ls`:列出当前目录的内容。
- `cd`:切换目录。
- 1、下载文档前请自行甄别文档内容的完整性,平台不提供额外的编辑、内容补充、找答案等附加服务。
- 2、"仅部分预览"的文档,不可在线预览部分如存在完整性等问题,可反馈申请退款(可完整预览的文档不适用该条件!)。
- 3、如文档侵犯您的权益,请联系客服反馈,我们会尽快为您处理(人工客服工作时间:9:00-18:30)。
Centos7安装openstack经典已实践三个节点ip信息controller:192.168.100.10network:192.168.100.20compute1:192.168.100.30修改各节点的/etc/hosts 文件测试各节点到的连通性controller node配置NTP服务yum install -y ntpvi /etc/ntp.conf 修改文件如下:server NTP_SERVER iburst #此处未做修改,采用默认restrict -4 default kod notrap nomodifyrestrict -6 default kod notrap nomodifysystemctl enable ntpd.service #开机启动systemctl start ntpd.service其他节点同样安装yum install ntp修改/etc/ntp.conf文件如下:server controller iburst开机启动服务:systemctl enable ntpd.servicesystemctl start ntpd.serviceOpenStack packagesInstall the yum-plugin-priorities package to enable assignment of relative priorities within repositories:# yum install -y yum-plugin-prioritiesInstall the epel-release package to enable the EPEL repository:# yuminstall /pub/epel/7/x86_64/e/epel-release-7-5.noarch .rpmInstall the rdo-release-juno package to enable the RDO repository:# yum install /openstack-juno/rdo-release-juno.rpmUpgrade the packages on your system:# yum upgrade# rebootRHEL and CentOS enable SELinux by default. Install the openstack-selinux package to automatically manage security policies for OpenStack services:# yum install openstack-selinux安装如果报错,可通过下面安装:#yuminstall /repos/openstack/openstack-juno/epel-7/ope nstack-selinux-0.5.19-2.el7ost.noarch.rpmTo install and configure the database server# yum install mariadb mariadb-server MySQL-python修改/etc/fbind-address = 127.0.0.1default-storage-engine = innodbinnodb_file_per_tablecollation-server = utf8_general_ciinit-connect = 'SET NAMES utf8'character-set-server = utf8# systemctl enable mariadb.service# systemctl start mariadb.serviceTo install the RabbitMQ message broker service # yum install rabbitmq-server# systemctl enable rabbitmq-server.service# systemctl start rabbitmq-server.service启动服务时出现如下错误:# rabbitmqctl change_password guest 123456执行时如果有报错Identity service Install and configure# mysql> create database keystone;> grant all privileges on keystone.* to 'keystone'@'localhost' identified by 'test01';> grant all privileges on keystone.* to 'keystone'@'%' identified by 'test01';# openssl rand -hex 1002456f17dc198d827a90 #值不一样# yum install openstack-keystone python-keystoneclient修改 /etc/keystone/keystone.conf[DEFAULT]...admin_token= 02456f17dc198d827a90verbose = True[database]...connection=mysql://keystone:test01@localhost/keystone[token]...provider = keystone.token.providers.uuid.Providerdriver =keystone.token.persistence.backends.sql.Token# keystone-manage pki_setup --keystone-user keystone --keystone-group keystone # chown -R keystone:keystone /var/log/keystone# chown -R keystone:keystone /etc/keystone/ssl# chmod -R o-rwx /etc/keystone/ssl# su -s /bin/sh -c "keystone-manage db_sync" keystone 或者keystone-manage db_sync # systemctl enable openstack-keystone# systemctl start openstack-keystoneCreate tenants, users, and roles# export OS_SERVICE_TIOEN=02456f17dc198d827a90# export OS_SERVICE_ENDPOINT=http://controller:35357/v2.0Create the admin tenant:# keystone tenant-create --name admin --description "Admin Tenant"Create the admin user:# keystone user-create --name admin --pass test01 --email admin@Create the admin role:# keystone role-create --name adminAdd the admin role to the admin tenant and user:# keystone user-role-add --user admin --tenant admin --role adminCreate a demo tenant and user for typical operations in your environment: Create the demo tenant:# keystone tenant-create --name demo --description "Demo Tenant"Create the demo user under the demo tenant:# keystone user-create --name demo --tenant demo --pass test01 --emailadmin@Create the service tenant:# keystone tenant-create --name service --description "Service Tenant"Create the service entity for the Identity service:# keystone service-create --name keystone --type identity --description "Openstack Identity"Create the Identity service API endpoints:# keystone endpoint-create --service-id $(keystone service-list | awk '/ identity / {print $2}') --publicurl http://controller:5000/v2.0 --internalurlhttp://controller:5000/v2.0 --adminurl http://controller:35357/v2.0 --region regionOne# unset OS_SERVICE_TOKEN OS_SERVICE_ENDPOINT# keystone --os-tenant-name admin --os-username admin --os-password test01--os-auth-url http://controller:35357/v2.0 token-get# keystone --os-tenant-name admin --os-username admin --os-password test01--os-auth-url http://controller:35357/v2.0 tenant-list# keystone --os-tenant-name admin --os-username admin --os-password test01--os-auth-url http://controller:35357/v2.0 user-list# keystone --os-tenant-name admin --os-username admin --os-password test01--os-auth-url http://controller:35357/v2.0 role-list# keystone --os-tenant-name demo --os-username demo --os-password test01--os-auth-url http://controller:35357/v2.0 token-get# keystone --os-tenant-name demo --os-username demo --os-password test01--os-auth-url http://controller:35357/v2.0 user-listAdd the Image Service(in controller node)To configure prerequisites#mysql -u root> create database glance;> grant all privileges on glance.* to 'glance'@'localhost' identified by 'test01'; > grant all privileges on glance.* to 'glance'@'%' identified by 'test01';>quit# source admin-openrc.sh# keystone user-create --name glance --pass test01 --email admin@# keystone user-role-add --user glance --tenant service --role admin# keystone service-create --name glance --type image --description "Openstack Image Service"# keystone endpoint-create --service-id $(keystone service-list | awk '/ image / {print $2}') --publicurl http://controller:9292 --internalurlhttp://controller:9292 --adminurl http://controller:9292 --region regionOneTo install and configure the Image Service components # yum install openstack-glance python-glanceclient# vi /etc/glance/glance-api.conf[DEFAULT]verbose=True[database]connection=mysql://glance:test01@controller/glance[keystone_authtoken]auth_uri = http://controller:5000/v2.0identity_uri=http://controller:35357admin_tenant_name=serviceadmin_user=glanceadmin_password=test02[paste_deploy]flavor=keystonefilesystem_store_datadirs=/var/lib/glance/images/[glance_store]default_store = filefilesystem_store_datadir = /var/lib/glance/images/# vi /etc/glance/glance-registry.conf[DEFAULT]verbose=True[paste_deploy]flavor = keystone[database]connection=mysql://glance:test01@controller/glance[keystone_authtoken]auth_uri=http://controller:5000/v2.0identity_uri=http://controller:35357admin_tenant_name=serviceadmin_user=glanceadmin_password=test02# su -s /bin/sh -c "glance-manage db_sync" glance# systemctl enable openstack-glance-api.serviceopenstack-glance-registry.service# systemctl start openstack-glance-api.service openstack-glance-registry.service#mkdir /tmp/images#cd /tmp/images# wget /0.3.3/cirros-0.3.3-x86_64-disk.img #source admin-openrc.sh (要先进入admin-openrc.sh的目录下才有效,本次默认在/root/下)#cd /tmp/images# glance image-create --name "cirros-0.3.3-x86_64" --filecirros-0.3.3-x86_64-disk.img --disk-format qcow2 --container-format bare--is-public True --progress。
