AUDIO设计指南
声系统设备一般术语和计算方法_模板及概述说明

声系统设备一般术语和计算方法模板及概述说明1. 引言1.1 概述在现代科技快速发展的时代,声系统设备在各个领域扮演着非常重要的角色。
无论是在娱乐行业、电影制作、舞台演出还是会议室、教室等场合,我们都离不开声系统设备。
然而,对于初学者来说,声系统设备涉及的术语和计算方法可能会让人感到困惑不解。
因此,本文将针对声系统设备一般术语和计算方法进行全面介绍与说明,并提供相应的模板供读者参考。
1.2 文章结构本文共分为五个部分:引言、声系统设备一般术语、计算方法模板、概述说明以及结论。
在引言中,我们将简要介绍文章的概述,并解释文章结构的安排与目的。
接下来,在声系统设备一般术语部分,我们将定义和解释与声系统设备相关的常用术语,并进一步说明其中重要概念。
然后,在计算方法模板部分,我们将提供一个模板来指导读者如何进行具体的计算操作,并附上实际案例分析以便更好地理解。
随后,在概述说明部分,我们将探讨声系统设备的重要性、发展背景和趋势,以及各个应用领域的介绍。
最后,在结论部分,我们将对全文进行总结,并展望声系统设备未来的发展方向,同时提出一些问题与思考点供读者进一步研究。
1.3 目的本文的目的在于提供一个全面且易懂的指南,帮助读者更好地理解和应用声系统设备中涉及到的术语和计算方法。
通过详细介绍声系统设备一般术语,并提供实际案例分析,读者将能够更加深入地了解这些概念和方法的具体应用。
此外,通过概述说明部分对声系统设备的重要性、发展背景和趋势以及各个应用领域进行介绍,读者将对声系统设备在现实生活中的广泛应用有更加清晰的认识。
最后,在结论部分,我们将总结文章主要内容,并为读者展望未来声系统设备的发展方向,并提出一些问题与思考点作为进一步研究与探讨的方向。
2. 声系统设备一般术语2.1 定义和解释声系统设备是指用于放音或录音的设备,它们通常由多个组件组成,包括扬声器、声音处理器、混音器以及其他附件。
这些设备在不同的场合中使用,旨在提供高质量的音频体验。
iAUDIO 7 使用指南
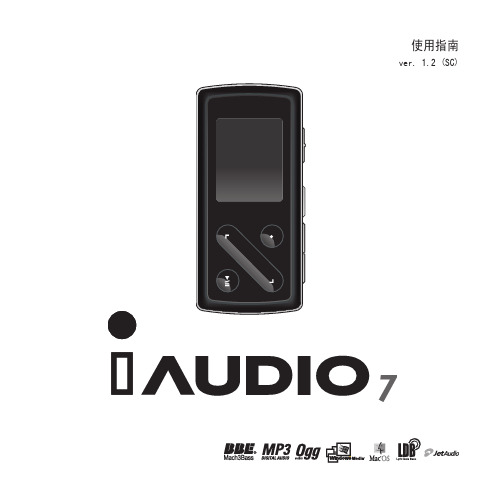
使用指南ver. 1.2 (SC)版权声明23概况• COWON 是(株)COWON SYSTEM 公司的注册商标。
• 本产品为家庭之用,因此不得用于商业目的。
• 该文档中所描述的软件(包括 JetAudio 在内),版权归 COWON SYSTEMS, INC 所有。
• JetAudio 只能根据授权协议的条款使用,且不能用于任何其他目的。
• 对通过 JetShell、JetAudio 的转换功能生成的文件用于除个人用途之外的商业目的或商业服务的行为系触犯著作权法的行为。
• JetAudio 的媒体转换功能仅用作私人用途。
此外,使用者有责任遵守所有成文的相关法规。
• 本说明书记载的各种文字、图表及图片如有变更恕不另行通知。
• 为提高产品性能,可在未事先通知的情况下更改本指南中阐述的产品功能或规格。
关于 BBE• 根据 BBE Sound 公司的许可进行生产。
• BBE SOUND 公司以 USP4638258、5510752 和 5736897 为依据享有许可权。
• BBE 和 BBE 徽标是 BBE SOUND 公司的注册商标。
网页介绍• 强烈建议用户在网站 上填写顾客注册表。
• 可在网站下载关于 COWON 产品最新信息和应用了最新技术的固件以及非常实用的程序等。
• 有关该主品的更多信息可在网站上查找: • 登录网站后,利用包装盒内的 CD-Key 和产品后面的序列号进行产品注册,就可升级为正式会员。
• CD-Key 不会再次提供,因此购买产品后请立即注册。
COWON SYSTEMS, Inc. 保留所有权利,2007 年。
45iAUDIO 7产品使用注意事项1) 前言1.什么是 iAUDIO 7?2.内装产品3.功能以及规格4.各部位名称5.不同 LCD 显示下的状态说明6.利用适配器充电7.利用 PC 充电8.安装 Windows98 驱动程序9.与 PC 连接以及储存文件10.关于固件 (Firmware)2) 基本功能的使用方法1.简单使用方法2.关于模式转换的基本操作3.关于设置的基本操作4.关于文件搜索的基本操作5.利用弹出窗口进行基本操作3) 主要功能的使用方法1.Music、Video 模式(播放多媒体文件)2.FM Radio 模式(收听 FM 广播)3.Record 模式(利用内置麦克风以及信号输入线录制)4.Picture 模式(查看图像)5.Text 模式(查看文本文件)6.控制摘要目录4) 设置功能说明1.设置清单2.模式转换画面 (Menu)3.JetEffect4.播放模式 (Play Mode)5.显示屏 (Display)6.计时器 (Timer)7.概况 (General)8.录制 (Recording)9.FM Radio(FM 广播)10.信息 (Information)5) 其它说明1.按出厂设置进行初始化2.使用 COWON MediaCenter – JetAudio 转换视频文件进行维修之前的故障检测目录67212535434667产品使用注意事项• 请勿将本产品用于使用指南介绍事项以外之处。
音频信号检测设计指南

音频信号检测设计指南声音即可以用模拟音频信号、也可以用数字音频信号来表征。
模拟音频信号强度采用电压。
不同类型的换能器将声音转换为电信号,或者将电信号转换为声音。
音频信号频率范围约为20Hz至20kHz。
麦克风和扬声器这类的音频源分别产生或接收音频信号,但信源也可能是白噪声或单音噪声。
这些噪声可能由电路中引起,并且其频率位于音频范围内。
有时候,噪声中可能根本没有有用信号。
在检测音频信号时,必须考虑这些可能性,以便将噪声和无用信号与真实音频信号(如人类语音、音乐和自然声音)区分开来。
音频信号检测原理人耳可以听到信号频率大约在20赫兹到20千赫兹范围内。
该范围可包括有来自诸如变压器嗡嗡声或来自各类无线电系统的白噪声等单音调。
这些声音在音响系统中是不期望出现的;水平过高的时候会损害听力。
人类的语言、音乐和自然声音具有不同的频率,这些频率连续变化。
因此,音频检测器应记录频率变化,并根据这些变化拾取有用的音频信号。
图1:音频信号检测的工作原理。
资料来源:Dialog Semiconductor音频信号检测的基本原理如图1所示。
系统设计考虑三个基准频率:100Hz、500Hz和3kHz。
对于给定信号,系统统计信号频率在特定时间段内与基准频率交叉的次数。
仅考虑从低频到高频的交叉;例如,从50Hz至150Hz将算作交叉100Hz,而从150Hz至50Hz则不算。
如果信号以表1中规定的最少次数穿过这三个基准频率中的任何两个,则该设计将其视为音频。
表1:表中给出了检测音频信号所需的最小频率交叉(穿越)次数;这些数字可以通过I2C根据用户需要进行调整。
图1中显示了三个样本信号:噪声信号(黑色):该噪声曲线三次穿越3kHz基准频率。
单音嗡嗡声(红色):该单音曲线没有穿越任何一个基准频率。
音频信号(绿色):像语音或音乐一样变化的音频信号。
该信号分别穿越100Hz六次,500Hz五次,3kHz一次。
该信号曲线穿过所有三个基准频率,尽管设备未检测到3kHz,因为它只穿过一次;如表1所示,必须交叉穿越至少2次才被检测到。
音乐制作与混音教程指南
音乐制作与混音教程指南第1章音乐制作基础 (3)1.1 软件与硬件概述 (3)1.1.1 音乐制作软件 (4)1.1.2 音乐制作硬件 (4)1.2 音频理论知识 (4)1.2.1 声音三要素 (4)1.2.2 声音的传播与反射 (4)1.2.3 频率响应与均衡器 (5)1.3 MIDI技术应用 (5)1.3.1 MIDI基本概念 (5)1.3.2 MIDI设备与应用 (5)第2章灵感收集与创作准备 (5)2.1 创意灵感来源 (5)2.2 创作主题确立 (6)2.3 创作素材整理 (6)第3章和声与旋律编写 (6)3.1 和声理论及应用 (6)3.1.1 和声基本概念 (7)3.1.2 和声进行原则 (7)3.1.3 和声模式及应用 (7)3.1.4 和声创新与拓展 (7)3.2 旋律创作技巧 (7)3.2.1 旋律构成要素 (7)3.2.2 旋律发展手法 (7)3.2.3 旋律与和声的关系 (7)3.2.4 旋律创作实例分析 (7)3.3 和声与旋律的结合 (7)3.3.1 和声与旋律的同步进行 (8)3.3.2 和声与旋律的对比与统一 (8)3.3.3 和声与旋律的动态变化 (8)3.3.4 和声与旋律结合实例分析 (8)第4章拍子与节奏设计 (8)4.1 拍子与节奏基础 (8)4.2 框架节奏构建 (8)4.3 创意节奏编排 (9)第5章音色选择与制作 (9)5.1 常见音色类型 (9)5.1.1 振荡器音色 (9)5.1.2 模拟合成器音色 (9)5.1.3 数字合成器音色 (9)5.1.4 真实乐器音色 (9)5.2.1 包络调整 (10)5.2.2 滤波器应用 (10)5.2.3 调制技术 (10)5.2.4 空间效果处理 (10)5.3 音色采样与合成 (10)5.3.1 音色采样 (10)5.3.2 音色合成 (10)第6章音频编辑与处理 (11)6.1 录音与剪辑技巧 (11)6.1.1 录音准备 (11)6.1.2 录音操作 (11)6.1.3 音频剪辑 (11)6.2 音频效果器应用 (11)6.2.1 混响效果器 (11)6.2.2 延迟效果器 (11)6.2.3 压缩器 (11)6.2.4 滤波器 (12)6.3 动态与均衡处理 (12)6.3.1 动态处理 (12)6.3.2 均衡处理 (12)第7章混音基础 (12)7.1 混音概念与流程 (12)7.1.1 音轨整理:在开始混音之前,首先要对音轨进行整理,保证各个音轨的音质干净、清晰。
JBL CBT系列设计指南说明书

It is very rare for sound systems to be deployed in the perfect acoustic environment. Whenever there is an increase in environmental background noise or reverberation time, there is a decrease in the intelligibility or performance of the loudspeaker system in the space.JBL CBT series’ primary purpose is to overcome the challenges of highly reflective or reverberant acoustic environments. CBT focusses the sound energy precisely and solely on the audience, and it does this with sonic performance rivalling some of the most complex and expensive line array systems. The footprint, ease of deployment and aesthetics are far better suited to architecturally sensitive spaces than typical line array systems.Conventional loudspeakers typically have a wider coverage pattern with limited control over the mid and low frequency spectrum. This results in sound reflecting off room boundaries and delivering less direct sound from the loudspeaker to the listener. Thus, increasing the number of unwanted reflections. The differing arrival times of some of these reflections result in a lack of clarity for the listener, and consequently a reduction in intelligibility.JBL CBT series is a proven and unsurpassed design shattering the notion of passive column speakers as performance-limited solutions to sound reinforcement with many of the benefits of a beam steering column style array.The JBL CBT series raises the bar far beyond the competition with patented technologies that draw upon and adds to the long history of JBL innovation, delivering new capabilities, many of which are firsts in the industry and still unrivalled in a passive column, and in many active column and line source arrays.Often the challenges with traditional passive columns are:• The coverage continually narrows at higher frequencies, resulting in much of the listening area being covered by only part of the sound spectrum.• Driver interactions cause the frequency response to change at every point – on and off axis and at every distance away from the speaker. Each listener hears a different balance of sound.• Lobes of sound projecting outside the listening area increase the reverberation, reducing intelligibility and interfering with musical quality. Any lobes that project into the audience further degrade the evenness of performance.• Often manufacturers use ‘Commercial-grade’ transducers without any waveguide. These products are targeted at low-cost or voice-band / background music audio reproduction.The solution is JBL’s patented Constant Beamwidth Technology (CBT), which is different from traditional passive columns. It solves these problems by locking in and maintaining a specific coverage over a very wide bandwidth. The CBT models deliver smooth, consistent coverage that is typically associated with complex and far more expensive line arrays.We also draw on generations of innovative driver and waveguide technology to deliver power, accuracy, and frequency response far beyond the expectations of conventional column speaker products.CBT series loudspeakers combine constant directivity coverage with line array efficiency, deliveringsurprising evenness of level and frequency response whether you are near or far, on or off axis to thespeaker.2. PORTFOLIODesigned for venues that would typically use larger point-and-shoot speakers, the CBT models incorporate technical advancements that allow them to vastly outperform competitive systems, with a level of user-friendliness that virtually eliminates the challenges of delivering great sound.The JBL CBT series comes in a variety of sizes and performance capabilities designed to suit many different applications and can be split into two distinct areas of use1. Traditional column applications2. Performance audio applicationsCBT 50, 100 and 200 products can be used where traditional column or point source loudspeakers would be deployed.Common features of CBT 50, 100, 200• Patented Constant Beamwidth Technology™ provides true wide-band constant directivitycoverage up to the highest frequencies and reduces out-of-coverage lobing • 50mm, custom-designed, true full-range drivers• Specifically tailored performance with on board selectable Music & Speech modes • Narrow width of 98.5 mm (3.8 in) fits visually into a wide variety of applications.• Dynamic Sonic-Guard™ low-audibility overload protection maximizes clarity at high drive levelswhile protecting the drivers from damage due to overpowering • Swivel (pan)/tilt wall bracket included• Built-in 70V/100V transformers, plus low impedance capability • Weatherised as standard – IP55• Black or White versions available • PaintableCBT-50CBT-100CBT-200Ideal applications:• Lecture halls• Difficult acoustic environments • Transport hubs • Conference rooms• Houses of Worship • Multi-purpose spaces • Architectural spaces • Shopping MallsCBT 70 and 1000 products suited for performance audio applications.Common features of CBT 70 and 1000:• Asymmetrical vertical coverage sends more sound toward the rear of the room, making front-to-back sound levels more consistent• Patented Constant Beamwidth Technology™ provides constant directivity up to the highestfrequencies and reduces out-of-coverage lobing • Switchable vertical pattern coverage• Switchable voicing provides flat response in music mode or mid-range presence peak in speechmode• Dynamic SonicGuard™ overload protection of HF devices • Swivel (pan) / tilt wall bracket included • Low impedance drive• Weatherised as standard – IP55• Black or White versions available • PaintableIdeal applications:• Full range high sound level A/V applications • Small to large performance spaces • Small to large houses of worship • Full fidelity lecture halls• Delay/fill applications for larger systems• Transit hubs with highly reverberant acoustic environments • Large-scale Immersive audio and surround sound systems• Outdoor systems such as sports fields, racetracks, and theme parks • Multi-purpose mixed content spacesCBT-70J+E CBT-70J CBT-1000CBT-1000+E3. CBT APPLICATIONS OF USECBT speakers are fantastic for challenging acoustic spaces, places where you want to keep sound focused on the audience and avoid unwanted reflections from hard walls or ceilings that can seriously degrade intelligibility. Churches, cathedrals, lecture theatres, modern glass-riddled acoustical nightmares, this is where the CBT series really shines. But they are also perfect for any situation where discreet, multi-purpose and high-fidelity audio is required.Here are a just a few case studies of CBT in use:COAL DROPS YARD - UKOutdoor Public Space – CBT series used for public address and music applications – read moreSamsung KX – London UKRetail Experience Centre – CBT is used with a 32-foot Screenmax LED display wall for presentations, demonstrations, discussions, gaming, and cinema movie nights – read moreCALI BEACH CLUB, AUSTRALIACali Beach Club is a $10 million Ibiza-inspired beach club in the heart of Surfers Paradise. read more Srisawad Power 1979 HQ - ThailandModern meeting spaces equipped with JBL CBT loudspeakers. read more4.CBT - THE TECHNOLOGY•CBT’s initial R&D concept was adapted from military research on sonar where a physical sphere of transducers is deployed along with gain reduction which gradually increases with each driver as they fan out from the centre. The resulting beam is clean, uniform and does not suffer from lobing issues that are inherent in flat designs without this ‘Legendre shading’•The second stage of JBL’s research took this technology further, instead of physically curving the array we use a passive delay and filter network to achieve the same time alignment in a straight form factor.•The technologies combine to allow us to create a tight, uniform, and coherent beam from a single, straight column, without negative lobing effects that this format naturally exhibits:•Because CBT produces fixed beam patterns, we can also use waveguide technology to highly optimise the coverage for this predetermined dispersion. This also has the added benefit of making the system simple to specify and use.•Beam width of a typical Column Design: CBT:•CBT also employs dual voice coil motors with neodymium magnets on every model in the range.In the CBT 70 and 1000 we add an array of custom, high performance high frequency drivers and further tour sound features to the bass drivers like copper shorting rings and highly damped surrounds. This is done for 2 reasons-1)These products are intended to be a reference for performance quality.2)This high level of performance is required while keeping the dimensionsof the driver narrow and shallow to maintain the discrete aesthetics of a column design.HF driversLF driversEnergy concentrated in front of the speaker vs energy spread evenly over the audienceAnother useful tool JBL has developed is the design and modelling software, CBT Calculator. JBL’s CBT Calculator software is a precision engineering tool allowing audio professionals to design JBL’s CBT Constant Beamwidth Technology line array column loudspeakers into a wide variety of venues.CBT Calculator shows the vertical coverage of CBT models in venues via a cross-sectional sound level coverage display. The program allows the use of up to 3 CBT speakers and virtual adjustment of their various adjustable settings for vertical coverage (narrow or broad) and voicing (speech or music/flat), in a space with up to 4 independent listening planes.In addition to the SPL vertical coverage mapping of a proposed design, the CBT Calculator also shows the frequency response for up to 6 listener locations as well as an SPL summary of the listener locations over user-defined frequency bands. It helps designers to determine the best CBT model selection, the proper vertical coverage and voicing settings, mounting height and the down-angle, allowing audio professionals to design CBT column line array speakers into many venue-application types.JBL's CBT Calculator is free to download from the JBL website.The JBL CBT Calculator dashboard used to model the deployment of all CBT loudspeakers.5.COLUMN LOUDSPEAKERS IN APPLICATIONFrom their inception in the middle of the last century right up to today, the benefits of the column loudspeaker have been known about and utilised in professional install applications.In the latter part of the 20th century beam steering using delay, driver spacing, and filtering came to the fore. Both technologies help to maximise the direct sound reaching the audience and reduce the spill into the reverberant field, however the lobing and inconsistencies in beam pattern at different frequencies tend to make them less than ideal for critical listening and performance applications.JBL’s CBT series of loudspeakers have been designed from the ground up to overcome these issues and create a range of products with the desirable sonic characteristics of the best point and line source designs while achieving the same beam-steering and design format of a versatile column system.All of this is achieved using passive electronics and waveguides, making installation the same as a conventional loudspeaker.With the CBT Series, every seat in the house experiences the same superb quality of sound, regardless of position. CBT series is a tool kit of options allowing many acoustical and architectural challenges to be overcome. Add to this the freely available modelling software, it really becomes easy to define a great sounding system using JBL CBT series for almost any application.PRODUCTSCBT 50LA-1Representing a breakthrough in pattern control, with Constant Beamwidth Technology50LA-1 utilises analog delay beam-forming and amplitude taperingto accomplish consistent vertical coverage without the narrow vertical beaming and out-of-coverage lobing that are typical of straight form-factor passive column speakers.Learn more on our website CBT 50LA-LSThe CBT 50LA-LS utilises analogdelay beamforming and amplitudetapering to accomplish consistentvertical coverage without the narrowvertical beaming and out-of-coveragelobing that are typical of straightform-factor passive column speakers.This loudspeaker is EN 54-24compliant for life safety applications.Learn more on our websiteCBT 100LA-1Representing a breakthrough inpattern control consistency, the CBT100LA-1 utilizescomplex analog delaybeam-forming and amplitude taperingto achieve consistent vertical coveragewithout the narrow vertical beamingand out-of-coverage lobingtypical ofstraight form-factor passive columnspeakers. Ideal for speech and full-range background music.Learn more on our websiteDouble the size of the CBT 100LA-1, this model offers an additional increase in the precision control of lower frequencies than its smaller series counterparts. Asymmetrical Progressive-Gradient settings give the 32 2" drivers residing within this 2m column array enhanced front-to back coverage consistency.Learn more on our websiteAbout HARMAN Professional SolutionsHARMAN Professional Solutions engineers and manufactures audio, video, lighting and control (AVLC) products for entertainment and enterprise markets, including live performance, audio production, large venue, cinema, retail, corporate, education, government, hospitality, broadcast and more. With leading brands including JBL Professional®, AKG®, Martin®, AMX®, Soundcraft®, BSS Audio®, Crown®, dbx Professional®, and Lexicon Pro®, HARMAN Professional delivers powerful, innovative and reliable solutions that are designed for world-class performance. HARMAN Professional Solutions is a Strategic Business Unit of HARMAN International, a wholly-owned subsidiary of Samsung Electronics Co., Ltd. For more information, visit /.©2022 HARMAN. All rights reserved. Specifications subject to change.。
Audio Distribution Network ADN数字会议系统操作指南说明书
內容內容重要安全提示 (4)SennheiserADN会议系统 (7)可购买的系统组件–供货范围 (8)组件总览 (10)代表传声器ADN D1 (12)主席传声器ADN C1 (13)无线代表传声器ADN-W D1 (14)无线主席传声器ADN-W C1 (15)锂离子电池ADN-W BA (16)无线传声器ADN-W MIC 15/ADN-W MIC 36鹅颈式麦克风 (17)天线模块ADN-W AM (18)电源适配器NT 12-50C (19)中央单元ADN CU1 (20)软件“Conference Manager” (22)电源设备ADN PS (23)系统电缆SDC CBL RJ45 (24)充电器ADN-W L 10 (24)运输和充电盒ADN-W CASE (26)计划会议系统的建立和控制 (28)主席和代表传声器的数量 (28)计算有线连接传声器和系统组件的电源供应 (28)创建一个有线连接的会议系统 (29)创建一个无线会议系统 (32)以组合方式建立有线连接传声器和无线传声器(混合运行) (33)会议系统的配置和控制 (34)音频信号的输入和输出 (34)结合媒体控制系统 (34)使用软件ADN Cable Calculator (35)对计算机系统的要求 (35)安装ADN Cable Calculator (35)使用ADN Cable Calculator (37)卸载ADN Cable Calculator (37)会议系统的调试 (38)中央单元ADN CU1使用前的准备 (38)准备运行电源设备ADN PS (40)准备运行天线模块ADN-W AM (42)有线连接传声器ADN C1/ADN D1使用前的准备 (44)准备运行无线传声器ADN-W C1/ADN-W D1 (46)充电器ADN-W L10使用前的准备 (48)运输和充电盒ADN-W CASE UNITS准备运行 (49)为无线传声器电池ADN-W BA充电 (51)建立会议系统 (56)ADN Digital Conference System|1內容2|ADN Digital Conference System天线模块ADN-W AM与中央单元ADN CU1(用于无线会议运行)连接 (66)安装和对齐天线模块ADN-W AM (69)放置无线传声器 ADN-W C1或ADN-W D1 (74)将外部音频设备连接到中央单元上 (75)将用于音频录制的USB大容量存储器连接到中央单元 (75)准备运行,结合软件“Conference Manager” (76)开启/关闭会议系统 (77)使用媒体控制 (80)配置无线运行 (81)操作中央单元 (83)解除中央单元按键锁 (83)按键功能 (83)通过中央单元配置会议系统 (84)操作菜单总览 (84)如何使用操作菜单 (88)进行会议设置– “会议菜单” (90)进行无线运行设置– “无线电设置” (95)进行音频设置– “音频菜单” (97)检查系统和识别故障– “系统菜单” (102)设置语言– “*语言” (113)进行扩展设置– “设置” (113)进行会议 (115)操作代表传声器 (116)操作主席传声器 (118)传声器扬声器音量调节 (120)在会议系统操作过程中添加传声器 (121)录制会议 (122)使用软件“Conference Manager” (125)软件和会议系统的使用方法下 (125)准备使用集成在中央单元的软件 (126)准备使用软件的Windows版本 (127)启动/关闭软件 (143)了解和设置软件的基本特性 (144)使用会议系统和软件 (154)进行无线操作设置 (160)准备会议和绘制空间–运行模式“Setup” (172)初始化传声器–操作模式“Setup” (189)布置会议–操作模式“Setup” (195)会议监控–操作模式“Live” (203)在会议进行过程中增加传声器 (213)在会议进行过程中进行设置 (214)结束操作模式“Live” (216)会议录制– “录制会议” (217)使用日志和诊断功能– “事件查看器” (219)会议系统的清洁和维护 (225)內容运输无线组件 (227)准备运输无线组件 (227)使用运输盒ADN-W CASE (227)更新会议系统固件 (230)如果出现故障/常见问题 (231)组件和附件 (237)技术参数 (240)附件 (247)安装尺寸 (247)高频频道和国家/地区适用发射功率表格(针对无线运行) (250)出厂设置 (252)键盘布局 (253)Microsoft Software License Terms (253)制造商声明 (256)ADN会议系统索引 (257)软件“Conference Manager”索引 (262)ADN Digital Conference System|34|ADN 数字会议系统重要安全提示1.请阅读本使用说明书。
PreSonus AudioBox USB 2x2 音频接口说明书

©2021 PreSonus Audio Electronics, Inc. All Rights Reserved. AudioBox USB, Capture, CoActual, EarMix, Eris, FaderPort, FireStudio, MixVerb, Notion, PreSonus, PreSonus AudioBox, QMix, RedLightDist, SampleOne, Sceptre, StudioLive, Temblor, Tricomp, WorxAudio, and the Wave Logo are registered trademarks of PreSonus Audio Electronics, Inc. Studio One is a registered trademark of PreSonus Software Ltd.Mac, macOS, iOS, and iPadOS are registered trademarks of Apple, Inc., in the U.S. and other countries. Windows is a registered trademark of Microsoft, Inc., in the U.S. and other countries. USB Type-C and USB-C are registered trademarks of USB Implementers Forum.Other product names mentioned herein may be trademarks of their respective companies. All specifications subject to change without notice... except the recipe, which is a classic.Baton Rouge • USA Revelator io242-channel audio interface for streamers and podcasters Quick Start GuideRevelator io24Interfaz de audio de 2 canales para streamers y podcasters Guía de arranque rápidoRevelator io242-Kanal-Audio-Interface für Streamer und Podcaster KurzanleitungRevelator io24Interface audio à deux canaux pour les streameurs et les podcasteurs Guide de prise en mainRevelator io24为流媒体工作者和播客设计的双通道音频接口快速启动指南Part# 70-12000164-BBasic functions • Funciones básicas • Grundlegende Funktionen • Fonctions de base • 基础功能Press channel 1 or 2 button to select channel. Press encoder to cycle through settings. Turn encoder to change chosen setting.Pulse el botón canal 1 ó 2 para seleccionar el canal. Pulse el encoder para desplazarse por los ajustes. Gire el encoder para cambiar el ajuste elegido.Channel 1 oder 2 drücken, um den Kanal auszuwählen. Endlosregler drücken, um durch die Einstellungen zu blättern. Endlosregler drehen, um die ausgewählte Einstellung zu ändern.Pressez la touche de canal 1 ou 2 pour sélectionner le canal. Pressez l’encodeur pour parcourir les réglages. Tournez l’encodeur pour modifier le réglage choisi.按下 channel 1 或 2 按钮进行轨道选择。
功放电路设计参考资料
功放电路设计参考资料
功放电路设计是电子工程师在音频领域的重要工作之一、它负责将低电平的音频信号放大成足够大的功率,以驱动扬声器或其他音响设备。
在设计功放电路时,需要考虑许多因素,例如音质、功率输出、失真度、稳定性和成本等。
以下是一些功放电路设计的参考资料,其中包括书籍、学术文章和在线资源:
1. 《放大器设计指南》(The Art of Electronics) - 作者Paul Horowitz和Winfield Hill的这本书是电子工程师的必读书籍之一,其中包含了丰富的功放电路设计知识和实用技巧。
此外,互联网上也有许多在线资源可供参考:
1. Audio Amplifier Circuits - 这个网站提供了许多功放电路的设计方案和示例,并附有详细的电路图和说明。
2. Electronics Tutorials - 这个网站提供了一系列有关功放电路设计的教程和学习资料,内容包括晶体管放大器、功率放大器和集成电路设计等。
3. DIY Audio Projects - 这个网站上有很多DIY音频项目的设计和建议,包括功放电路和管放大器等。
4. Audio Amplifier Schematics - 这个网站上提供了许多功放电路的电路图和设计,可以作为参考或起点进行自己的设计。
以上这些参考资料涵盖了功放电路设计的各个方面,并提供了不同层次和领域的专业知识。
在实际的功放电路设计中,需要根据具体需求和应
用场景选择适合的设计方案,并结合实际测试和优化进行调整和改进。
这些参考资料将帮助工程师理解功放电路设计的原理和方法,并为实际设计提供指导和灵感。
Kong Audio古筝音源使用指南
Kong Audio古筝音源使用指南kongaudio古筝音源使用指南kongaudio古筝音源使用指南kongaudio的民乐就是比较难搞到的中国民乐音源,音色取样相对比较不好,采用民乐音色的时候可以使用。
这里主要讲下新颖向的内容。
首先,这个音源是自带说明书的,在安装文件夹里能找到中文和英文的使用说明,使用前请仔细阅读说明书。
音色的表明:音色的名称音色的特性与使用leg名字具有力度后缀mffpp等,就是二百二十五的音色,右手不拎搓弦的平奏音,用作快速已连续弹奏,或者弯曲的声音。
trem名字带有力度前缀mffpp等,是带有右手揉弦颤音的音色,用于常见的单个音,具有古筝特点的音色。
fanying泛音技法的拼音简写,两只手在左边制作人工泛音的技法,由于两个手都在左边,恳请不要自作聪明加之弯音。
down,up从下、上方的音slide到这个音,前面没有数字3是2度音,有3是小三度音。
慢速演奏中单个音比较常见的技法音。
shake震音,很常用的已连续撕一根弦的声音,几个shake纸盒各有不同。
但是都存有个很差劲的问题,就是没自然的弦整动的余音,导致实际使用效果其实很糟糕。
除非你需要的长度正好等于那个采样的长度。
fx系列音效,各种敲击,常用装饰音。
其实这里面很多音效型的声音都需要放完--就是midi条长度大于采样长度。
否则效果非常糟糕。
所以实用性什么的。
patch的表明:这个音源需要经常切换patch,patch组合的说明在说明书中有,实际使用的时候发现除了c、d的key控制,modulation控制之外,力度也会影响patch中的音色调用(这个说明书上貌似没有),所以注意调整力度数据的时候不要越过阈值。
patch的设计可以说道就是相当不合理,既然存有力度掌控的设计,为啥不把相同力度的声音资源整合至一个patch里面,小范围的力度变化须要频密调用patch,如果不著再加就就可以弹奏四平八稳的声音。
实际使用中感觉组合patch中的控制调用也就是modulation调用震音比较多。
主板前置音频接口连接手册
主板前置音频接口连接手册篇一:常用主板前置音频接口连接规范通用主板前音频接口连接规范常用主板前置音频接口audio是按intel?的i/o面板连接规范设计的。
针脚定义(audio)如下:1、音频麦克风前面板麦克风输入2、aud_gnd模拟音频电路用地线3、音频麦克风偏置麦克风电源4、aud_vcc给模拟音频电路用的已滤波的+5v供电5、音频输出前面板右声道音频信号6、aud_ret_r前面板右声道音频信号返回7、 hp_uuon预留给未来的耳机放大器电路8、key空针脚9、音频输出前面板左声道音频信号10、aud_ret_l前面板左声道音频信号返回10针音频设计可应用于带功放和扬声器的高端机箱,以及普通机箱的前耳机插座。
由于引脚4用于为功率放大器提供+5V电源,因此在连接普通机箱的前耳机插座时,不要将任何线路连接到引脚4,否则会烧毁主板和耳机。
如果不使用前置音频插口,针脚5&6,9&10必须用跳线帽短接,这样输出信号才会转到后面的音频端口。
否则后面的line-out音频接口将不起作用。
目前,机箱前面的耳机插孔的类型和连接:一、基本按intel?的i/o面板连接规范设计,提供7条连接线:该前音频插孔的耳机插孔配有弹簧开关,还有两个左右声道可返回主板(lineoutrl 和lineoutrr)。
对于这种耳机插孔的情况,背面的音频输出插孔用于连接扬声器,前面的插孔用于连接耳机。
当使用前插孔连接耳机时,背面的扬声器会自动断开,当耳机拔出时,它会自动连接到扬声器。
7条线与主板的前置音频接口jaud1的连接方式如下:麦克风输入――麦克风输入>①地线(gnd)――――――――――――>②麦克风电源---------->③面板右声道输出(lineoutfr)――――>⑤面板右通道返回(lineoutrr)->⑥面板左声道输出(lineoutfl)――――>⑨面板左通道返回(lineoutrl)->⑩[请注意:? 音频麦克风已连接,micin连接至插脚1,micpower连接至插脚3。
BOSE Pendant Loudspeakers 设计指南说明书
Pendant LoudspeakersDesign GuideEnglishContents Overview 3 Introduction (3)System Design Resources (3)Overview (3)Design Guidelines (3)Design Worksheet 4 Choosing a Model (4)Step 1: Loudness (4)Step 2: Mounting Height (4)Step 3: Response (5)Step 4: Coverage (5)Step 5: Calculate Required Amplifier Size (8)Tap Charts 9 FS2P (9)DM3P (9)DM5P (9)DM6PE (10)Graph Paper 11 Overview OverviewIntroductionUsing this design guide, you will be able to create designs for applications that utilize pendant loudspeakers. We offer additional design guides for surface-mount and in-ceiling loudspeakers, as well as dedicated design guides for EdgeMax and FreeSpace 3 sub-satellite systems. T o learn more about our loudspeakers and technology capabilities, as well as access additional trainings and tutorials, visit /learn. System Design ResourcesIn addition to this guide, we offer the following tools at on the software and individual loudspeaker product pages:• Bose Modeler: advanced acoustical design simulation tool, with direct and reflected energy, and Speech Transmission Index (STI). Free at /modeler• Bose Business Music System Designer: Web-based auto-loudspeaker layout tool. Free at /BMSD• EASE .gll files: for use in the AFMG EASE application, and the EASE GLL Viewer application. EASE allows the simulation of reverberation times, speech intelligibility, and other acoustical parameters. EASE is a paid download. EASE GLL Viewer is free.• EASE Address files: for use in the AFMG EASE Address (2D tool, direct field coverage) or EASE Evac.EASE Address is free.• BIM files: includes the Revit format. Revit is a paid download.OverviewAll system designs begin with a set of requirements. The system requirements can be as simple as, “it has to sound great” or as detailed as, “it must play background-level music at 5 dB above the ambient noise level of the restaurant's main dining room, which is 65 dB.” The challenge is to gather the right set of requirements, and then turn them into a set of criteria that you can use to create your design. It is important to remember that you are the designer and should use your own intuition and decision skills when planning a project in addition to calculations. Applications with mounting heights between 2.4 meters and 10 meters (8 feet and 32 feet) are supported through the pendant-mount loudspeaker models listed in this guide.There are four key requirements that need to be identified to deliver the right system:Loudness: What sound pressure level (SPL) is required for this application?Mounting Height: What loudspeakers will work best for my planned mounting height?Response: What bandwidth is required for the type of program material that will be used?Coverage: How consistent must the sound be across the entire coverage area?Each of these requirements can be easily converted into a specification that we can use to create our system design. If we understand the customer’s needs in these four areas, we can deliver a design that will—at a minimum—meet their needs and—at best—exceed their expectations.For the purposes of this design guide, we will assume that you are familiar with the system requirements for a commercial audio system and are ready to focus on loudspeaker selection, creation of a loudspeaker layout, and defining the necessary amplifier power needed to power the design.Design GuidelinesWhen creating a design, you should consider the following:• Mounting Height (Grille-to-floor distance)• Maximum SPL for the application (for example 70 dB-SPL, Z-weighted)Design WorksheetDesign WorksheetUse the following worksheet to create a design using Bose Professional loudspeakers.Choosing a ModelStep 1: LoudnessMaximum SPL CapabilityConfirm that your chosen loudspeaker model will meet your loudness requirement. Find your mounting height and follow the column down until you reach your desired maximum continuous output level. Models with a higher sensitivity and higher tap settings will be able to play at higher levels. Individual model tap charts are available at the end of this document.Example: For a mounting height of 5 meters (16 feet) in a project that requires 90 dB, you would chooseDM5P.Note: The above table assumes standing ear height at 1.5 meters (5 feet), in minimum overlap configuration. Room reverberation could add as much as 4 dB system gain, which is not factored into the measurements above. Use of the transformer on 70/100V systems will introduce an insertion loss of 1 to 2 dB.Step 2: Mounting HeightAverage Conical Coverage and Woofer SizesSmaller woofer models have wider average conical coverage and provide better results at low mountingheights. Larger woofer models with narrower average coverage angles are better suited for higher mounting heights. Choose the models that will work with your mounting heights and rule out the other models.Mounting HeightS P L R a n g e (a t l i s t e n e r h e i g h t )<7582.5m ft 165329.78595>105D M5P , DM 6P E F S 2P, D M 3PDesign WorksheetStep 3: ResponseConfirm that the chosen loudspeaker will meet your low frequency response requirement.Step 4: CoverageDetermining Loudspeaker Quantity and SpacingThe goal is to fill a rectangle-shaped room with coverage circles at your desired density. Using the graph paper on the last page, create a sketch layout of the room. Using your sketch of the room, follow the steps below to create a layout with the loudspeaker spacing that meets your coverage requirement. Calculators or software can simplify this process. Medium-sized or larger distributed installed systems for background music or voice typically have four or more pendant loudspeakers in a room. Use Loudspeaker Spacing Distance (LSD) for small rooms that only need one.A.Calculate the Loudspeaker Spacing Distance (LSD)L = L istener HeightSeated: 3.5 ft | 1 mStanding: 5 ft | 1.5 m= C overage AngleSmall Woofer 120°Large Woofer 105°Small woofer and large wooferLSD = Spacing DistanceM = Multiplier LSD = (H – L) × MLoudspeakerLSD is also the coverage area for one loudspeaker For small rooms such as bathrooms, you may only need one or twoloudspeakers to cover the room; look atLSDDesign WorksheetMultipliers are created from Coverage Angles (CA). These are multipliers we have found to work for most applications. For more precise results, and to adjust for obstructions, use Bose Modeler , EASE , EASE Address , EASE Evac , or another calculator.Edge-to-edge coverage can provide fidelity in fixed-location seating/standing and can generally work well for installations on a budget. It also works well for ambient-level and low-level background music. Center-to-center installations will have higher density and can accommodate people listening in many different positions and moving floor plans due to uniform coverage. They will also have fewer dead zones. Minimum overlap (or center-to-center) may also be needed if critical communication is happening over the system. Bose Modeler or EASE Evac can help with speech intelligibility evaluation.B.Place the first loudspeaker at ½ LSD from any corner of the room.C.The remaining loudspeakers are arranged on a square grid pattern using the LSD. If a loudspeaker wouldbe placed on or beyond the perimeter of the room, delete that row/column of loudspeakers.D. After the last loudspeaker is placed, center the loudspeakers in that row to create new offset distancesout from each wall, which may be unique from ½ LSD.Design WorksheetE. (Optional) T o quickly calculate the total Loudspeaker Quantity (LQ) needed to fill the rectangular roomwithout using graph paper, follow this method. In square layouts, the final total is sometimes slightly reduced as you lay out rows. You can also determine final quantity by following Step B on graph paperuntil the room is filled.CA = Coverage Angle –6 dB point (coverage edge)Area = Square footage of room (Length × Width)Edge-to-edge = LQ/4–6 dB touchingMinimum overlap = LQ/4–3 dB touchingCenter-to-center = LQ/4–1.5 dB touchingLQ =Area[(H – L )M 2—]2Subwoofers: Quantity and Placement of SubwoofersThe number of subwoofers to use, where to position them, and how loud to set them can vary depending on the individual situation. Details such as placement, boundary loading, room size, coupling quantity of multiple loudspeakers to subwoofers, type of music, type of activity, budget, and the expectations of the listeners should all be considered. The following guidelines are general rules to follow.• Add one subwoofer for every group of four vocal- or full-range loudspeakers.• Subwoofer spacing should be as far apart as is practical. 12.2 meters (40 feet) or greater subwoofer-to-subwoofer spacing distance within the same zone is desirable.•When the suggested subwoofer count is two within a single zone, it may be preferable to use either one in a corner to avoid audible interference; or increase the count to three, which creates moreaudible interference locations but limits them to smaller sizes where the reverberant field (added room reflections) tends to mask them.•Placing a ceiling subwoofer within 0.9 meters (3 feet) of a wall increases its output by 3 dB. Placing it within 0.9 meters (3 feet) of a corner increases its output by another 3 dB (6 dB total) and also reduces reflections that can create audible interference (bass cancellations) in the listening area.•Listening positions located below the subwoofer should be supported by a nearby vocal- or full-range loudspeaker to provide better tonal balance in the low-frequency pressure zone.Design Worksheet Step 5: Calculate Required Amplifier SizeAll FreeSpace FS and DesignMax loudspeakers are compatible with 70-volt, 100-volt, and low-impedance amplifiers.Use the Tap Charts to determine which loudspeaker tap is required for this designA. Locate the loudspeaker tap chart and find the column for mounting height for this design.B. Follow the column to the desired maximum SPL.C. Follow the row across the chart to determine the required loudspeaker tap.D. Calculate the required amplifier power:×=Number of Loudspeakers Required Required Loudspeaker T ap Power RequiredE. Calculate the required amplifier size:× 1.10=Power Required Headroom Amplifier SizeAmplifiers: Example Amplifier ConfigurationsModern amplifiers come in a variety of channel counts and configuration options to allow for different output configurations, zoning options, and varying loudspeaker quantities. A properly optimized system may only need a low 1- or 2-watt tap setting to achieve 70 dB in a typical room. The below example lists how manyFS2P loudspeakers can be handled at the loudspeaker’s highest 70/100V tap setting.pink noise/compressed music, direct-field, no room gain.SmartBass: Application of SmartBass processingIf your design is using a PowerSpace+ amplifier; or your design utilizes a dedicated Bose DSP, such as the Commercial Sound Processor CSP models; or any of the ControlSpace ESP or EX models; you have the option of applying SmartBass to your loudspeaker output channel. This uses Bose EQ presets, dynamic EQ, and excursion limiting tuned to each model and room calibration. This will prevent lower background-level music from sounding thin, but also ensures the sound is consistent at various SPL levels. At louder levels, SmartBass also allows for more musical limiting than traditional voltage limiters. Tap Charts Tap ChartsIndividual Loudspeaker Continuous Output LevelNote: The following tap charts assume standing ear height at 1.5 meters (5 feet) in minimum overlap spacing. Room reverberation could add as much as 4 dB system gain, which is not factored into the measurements. Designing without room gain will ensure you don’t under-plan your design, and amp attenuation is possible at the job site if you exceed the average room SPL target during measurement. Values below 70 dB are omitted, select a higher tap.FS2PDM3PDM5PTap ChartsDM6PEEnglish • Graph Paper Graph Paper。
RK3288硬件设计指南
RK3288 HardwareDesign Guide作者:瑞芯硬件组文档版本:V1.0发布日期:2014-06-25免责声明您购买的产品、服务或特性等应受瑞芯微公司商业合同和条款的约束,本文档中描述的全部或部分产品、服务或特性可能不在您的购买或使用范围之内。
除非合同另有约定,瑞芯微公司对本文档内容不做任何明示或默示的声明或保证。
由于产品版本升级或其他原因,本文档内容会不定期进行更新。
除非另有约定,本文档仅作为使用指导,本文档中的所有陈述、信息和建议不构成任何明示或暗示的担保。
商标声明Rockchip、Rockchip TM图标、瑞芯微和其他瑞芯微商标均为福州瑞芯微电子有限公司的商标,并归瑞芯微电子有限公司所有。
本文档提及的其他所有商标或注册商标,由各自的所有人拥有。
版权所有? 福州市瑞芯微电子有限公司2014非经本公司书面许可,任何单位和个人不得擅自摘抄、复制本文档内容的部分或全部,并不得以任何形式传播。
福州市瑞芯微电子有限公司Fuzhou Rockchips Semiconductor Co . , Ltd地址:福建省福州市铜盘路软件园A区18号网址:客户服务电话:+86-591-83991906客户服务传真:+86-591-83951833客户服务邮箱:ForewordOverview本文档主要介绍RK3288硬件设计的要点及注意点,旨在帮助RK客户缩短产品的设计周期、保证产品的设计稳定性及降低故障率。
请客户严格按照本指南的要求进行硬件设计,同时尽量使用RK发布的相关核心模板。
如因模具原因确实需要修改核心模板的,设计需取得RK工程师的确认。
Product Version本文档对应的产品版本如下:产品名称产品版本RK3288Product Object本文档主要适用于以下工程师:单板硬件开发工程师技术支持工程师测试工程师Revision History修订记录累积了每次文档更新的说明。
最新版本的文档包含以前说有文档版本的更新内容。
lyngdorf audio tdai-1120用户手册说明书

LYNGDORF AUDIO TDAI-1120用户手册目录欢迎 (3)合规性 (3)包装箱装箱清单 (4)包装箱不包含的附件 (4)开始使用 (5)前面板控制钮 (6)连接音箱和低音炮 (6)音箱设置贴士 (7)RoomPerfect™音箱的摆位 (7)连接低音炮 (7)低音炮的摆位 (8)首次开启TDAI-1120 (9)TDAI-1120的使用方法 (10)遥控器应用 (11)访问TDAI-1120设置页面 (12)完成最后设置 (13)设置菜单导航 (14)4.2 RoomPerfect™设置 (15)测量距离 (23)RoomPerfect™ (24)将麦克风放置于焦点位置 (24)测量焦点位置 (24)测量随机的房间位置 (25)空间测量值提供的空间信息达到90%以上 (25)Lyngdorf前面板logo说明 (26)常见问题和建议 (26)RoomPerfect™故障排除 (27)清洁与保养 (27)串行控制手册 (28)技术支持 (28)欢迎感谢您购买采用最新Room-Perfect™技术的Lyngdorf Audio TDAI-1120全数字功放。
从此您将加入精英的一个小群体当中,他们秉持着一个共同理念:完美的声音不仅仅是一种奢侈品,它是必不可少的需求。
TDAI-1120将提供远远超出您期望的声音体验。
感谢您对Lyngdorf Audio的信赖。
本手册将为您介绍如何设置系统。
请仔细阅读本手册,更深入地了解TDAI-1120的功能。
如需详细了解Lyngdorf Audio产品采用的各种技术,请访问。
合规性废弃电气电子设备指令(WEEE)欧洲议会和欧盟理事会发布了《废弃电气电子设备指令》。
该指令的目的是防止电气和电子设备浪费,并倡导对这些设备进行再利用、回收或其他形式循环利用。
Lyngdorf产品及其随附的附件均受WEEE指令的约束。
请按照当地的回收法规处理所有废弃物。
必须收集起来重复利用、回收和采取其他形式循环利用的产品和设备均带有垃圾桶画叉图标。
Novation Circuit Tracks 用户指南说明书

商标“Novation”(诺维逊)商标属于Focusrite Audio Engineering Ltd.公司所有。
本用户指南涉及到的其他全部品牌名称,产品,公司名称,以及其他注册的名称或者商标分别归对应的所有人所有。
免责声明Novation已采取尽可能的措施确保本用户指南提供的信息是准确和完整的。
然而,对于使用本用户指南或者所提及的设备可能造成用户自身设备,第三方或者任何设备损坏的潜在风险,在任何情况下,Novation对此都不负有责任。
本用户指南提供的信息在没有事先通知情况下,可能随时会被修改。
产品技术规格和外观可能会与说明书阐述和列举的有所不同。
版权和法律声明Novation(诺维逊)和Circuit Tracks是属于Focusrite Audio Engineering Ltd.公司所有的商标。
2020 © Focusrite Audio Engineering Limited.保留全部相关权益。
Novation(诺维逊)是Focusrite Audio Engineering Ltd.公司下属部门。
地址:Windsor House, Turnpike RoadCressex Business Park , High WycombeBuckinghamshire , HP12 3FXUnited Kingdom电话:+44 1494 462246 传真:+44 1494 459920 邮件:***********************网址:目录产品介绍 (6)主要产品特点 (7)关于本用户指南 (8)包装内容 (8)启动与运行 (9)如果你使用的是Mac: (9)如果你使用的是Windows: (9)Novation Components概览 (9)开始使用Circuit Tracks (10)遇到疑难? (10)电源要求 (10)硬件概览 (12)术语 (12)顶部面板 (16)后置面板 (19)基础入门 (20)启动设备 (20)开始使用 (22)加载和保存 (23)从零开始 (25)合成器 (28)合成器的演奏 (28)Expanded Note View(扩展音符界面) (29)Scales(音阶) (31)选择音阶 (32)Root note(根音符) (33)选择Patch(预设) (34)Patch Preview(试听预设) (34)来自外部的Patch选用 (35)探讨Macro控制器 (35)实时录制合成器pattern (36)记录旋钮的移动 (37)Non-quantised record(非量化录制) (38)通过外部控制器进行录制 (39)编辑Step(步进) (39)删除音符 (41)插入音符 (41)Clear(清除)和Duplicate(复制) (41)清除步进 (41)复制步进 (41)Velocity(力度), Gate(门限)和Probability(概率) (42)Velocity(力度) (42)Gate(门限) (46)Probability(概率) (48)微步进编辑 (49)连结音符/持续音 (52)Pattern Settings(乐段设置) (54)起点和终点 (54)演奏次序 (56)Pattern同步速率 (56)Mutate(重置) (57)MIDI轨道 (58)介绍 (58)选择模板 (58)默认模板 (59)使用Components编辑器程序设置模板 (59)通过MIDI输出端口连接外部硬件设备 (60)鼓音轨道 (61)弹奏鼓音 (61)扩展鼓音界面 (62)选择采样 (63)使用Macro旋钮控制器编辑鼓点 (64)录制鼓音pattern (65)非量化录制 (65)手动输入和步进编辑 (65)微步进编辑 (67)Velocity(力度) (70)Probability(概率) (71)记录旋钮的移动 (72)清除和复制 (73)Pattern(乐段) (74)Patterns View(乐段界面) (74)清除Pattern (75)复制Pattern (76)Step Page(步进页面)和16/32-步进Patterns (76)串联Pattern (77)Pattern Octave(乐段八度) (80)View Lock(界面锁定) (81)Scene(场景) (82)为Scene配置Pattern (82)串联Scene创建编曲 (84)Scene排序 (85)清除Scene (85)复制Scene (85)TEMPO(节拍速率)和SWING(摇摆) (86)Tempo(节拍速率) (86)外部时钟 (86)Tap Tempo(打拍子) (87)Swing(摇摆) (87)Click track(节拍音轨) (88)模拟同步信号输出 (88)Mixer(混音器) (89)FX效果器组件 (91)混响 (92)延迟 (92)主压缩器 (93)Side Chains(旁链) (94)滤波器旋钮 (95)Project(工程) (96)切换工程 (96)清除工程 (96)保存工程至新的存储单元中 (97)修改Project(工程)打击垫的灯光颜色 (97)Pack(数据包) (98)加载一个Pack(数据包) (99)复制Pack(数据包) (99)使用microSD内存卡 (100)Components程序 (102)关于Components程序&Circuit Tracks导引 (102)附录 (103)升级固件 (103)Setup View(设置界面) (103)灯光亮度 (104)MIDI通道 (104)MIDI输入/输出 (105)时钟设置 (106)模拟时钟速率 (106)Advanced Setup View(高级设置界面) (107)Easy Start Tool引导程序工具(大容量存储设备) (107)MIDI Thru端口的设置 (107)Master Compressor(主压缩器) (107)关闭保存功能 (108)关于工程的加载 (108)MIDI参数 (108)Bootloader Mode(后台工程模式) (109)产品介绍Circuit Tracks是一款可以轻松且快捷地实现电音创作和演奏的音乐设备。
Philips MP3Player用户指南说明书

软件/驱动程序信息设备管理器软件可帮助您获得播放机的最新固件更新。
此设备管理器软件嵌有最新的固件版本6.38。
此升级的好处1. 修复了“打嗝"噪声故障。
2. 所有地区均将支持 RDS 显示。
3. 修正了音频快进速度 (FF/RW)。
4. 调整了浏览器在查看长标题曲目时的字符串滚动速度(适用于音频)。
如何检查播放机上的当前固件版本?您可以通过以下方式之一检查播放机中固件的版本。
1. 按一次或多次菜单键,进入播放机的根菜单。
2. 选择设置 -->信息。
您将看到固件版本信息。
或者1. 在电脑上启动播放机随附的设备管理器软件。
2. 将播放机连接到电脑。
您将在设备管理器软件页面上同时看到播放机的当前固件版本和支持网站上的固件版本。
重要事项:如果采用这种方式检查播放机的固件版本,请确保电脑连接了互联网。
如何升级播放机上的固件版本?不需要将固件下载到您的电脑。
设备管理器软件将自动转到支持网站并下载固件以便您升级播放机。
1. 确保您在固件升级之前将电脑连接至互联网。
2. 在您的电脑上,通过依次单击“开始”->“程序”->“Philips Digital Audio Player”->(型号)Device Manager -> Philips Device Manager 运行 Device Manager。
如果您的电脑尚未安装此软件,只需在“软件/驱动程序”部分单击“下载”按钮,即可下载最新版本进行安装。
3. 将播放机连接到电脑。
4. 在设备管理器软件界面上单击更新按钮。
升级过程将继续下载固件。
注:如果这不起作用,请用右键单击任务托盘中的设备管理器软件图标,以选择“检查更新”,软件将自动搜索并下载固件来完成更新。
5. 一旦升级过程完成,请单击完成关闭应用程序。
6. 您现在可以断开播放机与电脑的连接。
如果可以在电脑的任务托盘中找到 USB 图标,则只需单击该图标,便可安全移除 USB 海量存储设备,从而断开播放机与电脑的连接。
ASIO音频驱动开发指南

ASIO音频驱动开发指南ASIO(Audio Stream Input/Output)是一种专为音频应用程序开发的音频驱动接口标准。
它由德国的Steinberg公司提出并推广,旨在提供低延迟、高质量的音频输入和输出能力,使得音频应用程序可以更好地与音频设备进行交互。
1.音频硬件接口:ASIO音频驱动是中介软件,用于连接音频应用程序和音频硬件设备之间的通信。
因此,首先需要了解音频硬件设备的接口规范,如音频输入输出通道数、采样率、位深度等。
通常情况下,ASIO驱动开发者需要通过硬件厂商提供的API来访问硬件设备。
2.驱动程序接口:ASIO音频驱动需要实现一系列接口以与音频应用程序进行交互。
主要的接口包括驱动程序初始化、音频输入输出缓冲区管理、音频设备参数设置等。
需要注意的是,ASIO音频驱动开发者需要遵循ASIO标准接口规范,并实现相应的函数和数据结构。
3.低延迟处理:ASIO音频驱动的一个重要特点是低延迟。
为了实现低延迟处理,开发者需要优化驱动程序的性能,减少数据传输和处理时延。
这包括合理设计数据缓冲区、高效处理音频数据、减少中断次数等。
4.异步音频处理:对于音频应用程序来说,实时性是至关重要的。
为了提高音频应用程序的实时性能,ASIO音频驱动需要支持异步音频处理。
这意味着驱动程序需要采用合适的机制,以适应不同速率的数据接收和处理。
除了上述的主要开发方面1.驱动程序的稳定性和兼容性:在开发过程中,需要进行充分的测试和验证,以确保驱动程序的稳定性和兼容性。
尤其需要考虑不同操作系统、不同硬件设备和不同音频应用程序的兼容性。
2.异常处理和错误处理:在驱动开发过程中,需要考虑各种异常情况和错误处理机制。
例如,设备被拔出、数据传输错误等情况需要有相应的异常处理措施。
3.驱动程序的文档和示例代码:对于其他开发者来说,提供详细的驱动程序文档和示例代码是非常有帮助的。
这些文档和示例代码可以帮助其他开发者快速入门和理解驱动程序的开发流程和接口规范。
舞台音响设计规范

舞台音响设计规范引言:舞台音响设计是舞台演出中至关重要的一环。
合理的音响设计不仅能够提升演出效果,还能够为观众提供更好的听觉体验。
本文将针对舞台音响设计中的规范和标准进行探讨,分为以下几个小节进行论述。
一、舞台布局设计舞台音响设计的第一步是合理的舞台布局设计。
在进行布局时,需要确保声音能够均匀地传播到整个观众区域,同时避免产生杂音和回声。
为了达到这个目的,可以采用以下几个方法:1. 尽量将扬声器安装在舞台两侧高处,以实现声音的均匀分布。
2. 避免将扬声器直接对向观众,可以采用扬声器角度调整或者使用反射板等方式来控制扬声器的声音传播方向。
3. 根据剧目需求和舞台形式,合理设置主音箱、辅助音箱、低音炮等扩音设备的位置和数量。
二、声音平衡设计舞台音响设计的一个重要目标是实现声音的平衡,即各种音频信号之间的平衡以及舞台声音与自然声音之间的平衡。
为了实现声音平衡,可以考虑以下几点:1. 合理设置音频设备的增益,避免出现过高或过低的音量。
2. 使用音频混响器进行混音处理,确保各个声音元素在演出现场能够得到准确的表达。
3. 对舞台上的不同声源进行分组,设置独立的音量控制,以保证不同声源间的相对平衡。
三、消音措施设计舞台演出中,往往需要采取一些措施来减少噪音对演出的干扰。
为此,需要对舞台环境进行消音设计,以保证观众得到良好的听觉体验。
以下是一些常用的消音措施:1. 使用吸音材料,如吸音板、吸音棉等,来减少舞台上的回声和杂音。
2. 合理设置噪音屏障和隔声墙,以阻挡外界噪音对舞台的干扰。
3. 控制音频设备的噪音产生,如选择低噪音的音响设备和减少线路噪音等。
四、声音效果设计舞台音响设计中,声音效果的运用能够增加演出的艺术感染力和观赏性。
为了实现良好的声音效果,在音响设计中应注重以下几点:1. 合理利用音频特效器材,如混响器、延时器等,来创造不同的声音效果,如回声、立体声等。
2. 根据剧目要求和舞台效果,设计合适的音频特效,如自然环境的声音、特殊场景的音效等。
羚羊音频 Edge 系列建模话筒 快速指南说明书

快速指南感谢您选择羚羊音频产品!本快速指南将指导您激活Edge系列建模话筒,并下载安装所有相关软件,从而获得产品质保以及话筒仿真模拟功能。
要激活您的设备,请务必按照以下说明进行操作。
请注意,成功激活产品需要您的电脑连接到互联网。
在开始之前,需要提醒您的是: Edge系列话筒最适合与采用离散式话放的羚羊音频接口一同使用。
这将为您在工作中带来以下优势:请注意,要使用Native版本的话筒仿真插件,无论您是否使用羚羊音频接口,都需要使用iLok USB加密狗(第2代或更高版本)以及iLok License Manager软件来管理授权。
有了iLok加密狗,您可以将话筒仿真授权随身携带,并在任何地方使用它们。
第1步:登录/注册羚羊音频账号打开浏览器,在地址栏中输入https:///login/。
使用您的电子邮件和密码登录您的羚羊音帐号。
如果您还没有自己的羚羊音频账号,请访问https:///sign-up/并注册一个新账号。
第2步:激活Edge话筒登录后,点击右上角的My Account打开用户页面。
点击Activate New Device按钮。
从设备列表中选择你的Edge话筒的具体型号。
当前产品中的所有建模话筒都在“Modeling Mics”分类中,而已停产的Edge话筒在“Legacy Devices”分类中。
选择设备后,输入话筒的13位序列号,您可以在话筒底部的标签上找到该序列号。
确认设备激活后,屏幕上将显示以下内容。
请根据您的操作系统(Windows / Mac)下载并安装Antelope Launcher。
第3步:将话筒仿真功能分配到音频接口(仅针对羚羊音频接口用户)安装并打开Antelope Launcher,紧接着在Launcher中点击按钮。
输入您羚羊音频账号的E-mail和密码,然后点击Login登录。
话筒仿真功能在同一时间只能分配到一台音频接口。
如果您拥有多台羚羊音频接口,请选择要分配的设备,然后在该设备右侧的区域点击Manage Device。
M-Audio M32R 使用说明书

P r o F X v 3 P r o f e s s i o n a l E f f e c t s M i x e r w i t h U S BProFXv3 Professional Effects Mixer with USB重要的安全说明1. 请阅读本说明。
2. 请保存本说明。
3. 请注意所有的警告。
4. 请遵守使用说明。
5. 请勿在水源附近使用本设备。
6. 请用干布清洁。
7. 不要堵塞任何通气孔。
请按照制造商的指示安装。
8. 不要安装在任何热源附近,如散热器、加热器、炉具或其他 产生热量的装置(包括放大器)。
9. 不应在设备上放置明火源,如点燃的蜡烛。
10. 不要忽视极性或接地型插头的安全用途。
一个极性插头有两个刀片,其中一个比另一个宽。
接地式插头有两个刀片和第三个接地。
宽刀片或接地的使用是为了您的安全。
如果所提供的插头不适合您的插座,请咨询电工,及时更换过时的插座。
11. 防止电源线被踩到或被夹住,特别是在插头处,插座,以及设备接线处。
12. 只使用制造商指定的附件/配件。
13. 仅使用由制造商指定的或与设备一起出售的手推车、支架、三脚架、托架或桌子。
当使用推车时,移动推车/设备时请小心,避免因翻车而受伤。
14. 若长段时间未使用,在雷雨期间请拔下电源线。
15. 将所有维修工作交给合格的维修人员。
当设备因各种原因损坏时,如电源线或插头损坏,液体溅洒或物体落入设备,设备被雨淋湿或受潮,操作不正常,或掉落,需要维修服务。
16. 本设备不应暴露在滴水或溅水的环境中,任何装满液体的物体,如花瓶或啤酒杯,不应放置在设备上。
17. 不要过载壁式电源插座和延长电线,这可能导致火灾或电击的风险。
18. 本设备是按Class-I 结构设计的,必须连接到带有保护接地的电源插座(第三接地)。
19. 本设备配有摇杆式电源开关。
开关位于后面板上,应便于用户使用。
20. 电源插头或电器耦合器被用作断开装置,因此,断开装置应便于操作。
- 1、下载文档前请自行甄别文档内容的完整性,平台不提供额外的编辑、内容补充、找答案等附加服务。
- 2、"仅部分预览"的文档,不可在线预览部分如存在完整性等问题,可反馈申请退款(可完整预览的文档不适用该条件!)。
- 3、如文档侵犯您的权益,请联系客服反馈,我们会尽快为您处理(人工客服工作时间:9:00-18:30)。
• 回放和录音通道上的话音滤波器 实现了 ETSI 兼容的系统设计
• 自动耳机检测和 I2C‡音量控制
* 未来产品——供货状况请联络厂方。 ‡向Maxim Integrated Products, Inc.或其从属许可名义下的相关公司购买I2C元件,将传递Philips I2C专利许可,允许这些元件用于I2C系统,如果该系统符合Philips定义的I2C标准规范的话
评估软件 现已就绪
您完全可以将我们的高效率 D 类放大器视做 AB 类
注意,Maxim 的 D 类放大器所具有的 THD+N、PSRR 和 EMI 性能, 可能会使您误以为它是 AB 类放大器...
[接下页]
THD+N (%) PSRR (dB)
效率 (%)
总谐波失真加噪声的 频率分布
10
1
0.1
† 基于消费电子类用量的估计。价格仅供设计参考,且为美国离岸价。
业界领先的耳机放大器,具有 I2C 音量控制、 低音增强和超低咔嗒/噼谱声
RF
MAX9724
DirectDrive
+VCC
业界领先的 80dB PSRR
-VCC
MAX44xx MAX97xx
射频干扰抑制能力 相对于竞争者
改善了多达80dB
FCC 限制
MAX9705放大器带有3英寸非屏蔽 电缆时测得的EMI辐射能谱
竞争者
MAX9705
60.0 80.0 100.0 120.0 140.0 160.0 180.0 200.0 220.0 240.0 260.0 280.0 300.0 频率 (MHz)
型号 MAX9701 MAX9715
100k
0
25
50
75
100
峰值输出功率 (%)
高效率延长了电池寿命,并省去了昂贵、 笨重的散热器。
MAXIM的新一代 D类架构满足FCC的
电磁辐射限制, 并留有20dB的余量
50.0 45.0 40.0 35.0 30.0 25.0 20.0 15.0 10.0 5.0
30.0
幅度 (dBµV/m)
(美国 CODEC 简化掌上多媒体设计
[接上页]
MAX9851*/MAX9853 集成了所有需要的放大器,实现最佳的音频质量, 缩减了系统面积和尺寸,用于多媒体电话、MP3 和 PMP 播放器非常理想
MAX9851/MAX9853 特性 • 回放状态下仅 24.9mW 的总静态功耗 • 高达 80dB 的电源抑制比 • 1.7V 至 3.6V 低压数字电源 • D 类扬声器放大器直接工作于电池:
完备的AB类和 D类放大器系列
(见第6页)
最佳的 咔嗒/噼噗特性 抗射频干扰能力最强
(见第7页)
耳机放大器
多放大器器件 (见第10页)
三放大器
TV
笔记本 蜂窝电话
AB类 D类
1W
2W 3
6
10
25
50W
MAX9706
* 未来产品——供货状况请联络厂方。 Maxim标志是Maxim Integrated Products, Inc.的注册商标。Dallas Semiconductor标志是Dallas Semiconductor Corp.的注册商标。© 2006 Maxim Integrated Products, Inc. All rights reserved.
20
MAX9706
15
MAX9752
性能最佳, 外部元件最少
2
6
10
15
20
25
每通道输出功率 (W)
业界最佳的 EMI 抑制技术降低了料单成本, 并节省了板上空间
• 输出无需滤波电感,每通道节省 $0.15† • 高效率省掉了散热器
D类的 高效率 无需散热器
查阅完整的器件列表和数据手册,请到: /audio
仅需三只小巧的 外部元件
1
2
3
4
5
6
7
8
9
0
#
型号 MAX9705 MAX9759
Maxim 的最新款单声道 D 类放大器
输出功率 (W) 2.3 3.2
THD+N (%) 0.02 0.02
PSRR (dB) 75 90
外部支持元件 仅三只小电容 仅三只小电容
† 基于消费电子类用量的估计。价格仅供设计参考,且为美国离岸价。
音频同步 VIBE
受话器 左声道 右声道
省掉隔直电容—节省空间
超低EMI、高效率 D类放大器延长电池寿命
差分 线路输出
内部 麦克风
两个外部 麦克风
换能器/ 振动器
自动检测耳机
内置的话音滤波器 降低了DSP
复杂度和功率
单声道、 100mW、 AB类受话器放大器
2 x 1.2W D类立体声扬
声器放大器
可调增益的 三个麦克风放大器
多媒体电话
“VIBE” 输出与 音频输入同步
DirectDrive 立体 声耳机放大器
MAX9851/MAX9853 的优点
• 支持两种数字接口:数字话音和 数字音频 (I2S),且具有独立的数据速率, 从 8kHz 到 48kHz
• 内部混合器可与多种音源连接, 例如铃声发生器、FM 广播、 应用和基带处理器等
-40 -50 -60 -70 -80 -90 -100 -110 -120
10
电源抑制比
竞争者
MAX9850
100
1k
10k
100k
频率 (Hz)
• I2C 耳机音量和静音控制,省去外部电位器 • 自动检测耳机 • 立体声线路输入/输出 • 100dB PSRR
MAX9850评估板中包含了配套的Maxim控制模块 (CMOD232) 接口板和软件。它是一个装配完好并经过测试的表面安装电路板, 用于评估 MAX9850 立体声 DAC 和集成耳机放大器。
D类
0.01 AB类
0.001 10
100
1k
10k
100k
频率 (Hz)
0 -10 -20 -30 -40 -50 -60 -70 -80 -90 -100
10
电源抑制 比岁频率的变化
D类
AB类
100
1k
10k
频率 (Hz)
效率与 输出功率
100
90
80
D类 70
60
50
40 AB类
30
20
10
0
无须滤波器,3:1输入混合器,79dB PSRR 引脚兼容于 MAX9770
1.5mm x 2.0mm UCSP封装,3mm x 3mm 12-QFN封装
关于 Maxim 的全线音频方案的更多信息,请访问: /audio
µMAX是Maxim Integrated Products Inc.的注册商标。 UCSP是Maxim Integrated Products Inc.的商标。
2.6V 至 5.5V 工作范围 • 数字滤波、软静音、音量和增益控制 • 无咔嗒/噼噗声 • 集成麦克风偏置发生器 • 基于耳机检测的超低功耗唤醒电路
THD+N (%)
总谐波失真加噪声的 频率分布(DAC到受话器)
0
1
0.1
0.01 10
100
1k
10k
100k
频率 (Hz)
全功能 演示板和简单易用的
AUDIO
Data Sheets
•
ANALOG
DESIGN SOLUTIONS
Applications Notes •
Free Samples 第八版
创新音频产品
1
2
3
4
5
6
7
8
9
0
#
最高 集成度的CODEC (见第2页)
MAX9851* MAX9853
左声道
数字
DAC
接口
右声道 DAC
话音 滤波器
为你的平板显示器提供高效率、 低 EMI、D 类扬声器放大器
新一代 D 类放大器省去了肖特基二极管、LC 滤波器和散热器
显示器尺寸 (英寸)
MAXIM为显示器应用提供整套的D类扬声器放大器
50
MAX9709
MAX9708
40
MAX9704
MAX9741
30
MAX9714 MAX9703
MAX9713
功能 抑制咔嗒/噼噗声
麦克风放大器 麦克风放大器 麦克风放大器 麦克风放大器 扬声器放大器 集成放大器
放大器 放大器
主要特点 消除咔嗒和噼噗声 微型 µMAX®和UCSPTM封装 可选择内部或外部麦克风 SC70 封装内整合了完整的麦克风放大器和偏置
超小方案 可提供微型封装:1.5mm x 2mm x 0.6mm UCSP
低音提升
15
10
OFF
5
0
10
100
1k
10k
100k
频率 (Hz)
超低咔嗒-噼谱响应 (MAX9725)
电源电压
输出电压
灵巧的立体声音频 DAC 简化 MP3/PMP 设计
集成了 DAC 和立体声 DirectDrive 耳机放大器,是一款完整的数字音频回放方案, 具有 90dB 的动态范围和 8kHz 至 48kHz 的采样率
MCLK
1.8V至3.6V
数字
INR
PLL
数字
音频
接口
DAC
数字
音频
DAC
I2C 接口
I2C
