ROS 多线路端口映射完美解决
ROS多线路自动策略路由切

ROS多线路自动策略路由切2.9.X 电信+网通+ 1条ADSL 多线路自动策略路由切换+备份第一ip设好/ ip addressadd address=192.168.1.1/24 network=192.168.1.0 broadcast=192.168.1.255 \interface=lan comment="" disabled=noadd address=电信地址/掩码network=自动设置broadcast=自动设置interface=TEL comment="" disabled=noadd address=网通地址/掩码network=自动设置broadcast=自动设置interface=CNC comment="" disabled=no这里如果你有PPPOE的ADSL 也可以+上ADSL记住要改MSS/ ip firewall mangleadd chain=forward out-interface=pppoe-out1 protocol=tcp tcp-flags=syn \action=change-mss new-mss=1400 comment="" disabled=no/ ip firewall natadd chain=srcnat src-address=192.168.1.0/24 action=masquerade comment="" \ disabled=no--------------------------------------------------------------------------------------------------第2步添加网通的路由网关电信的服务器在网络中占了绝大多数所以不需要考虑电信的服务器/ ip routeadd dst-address=59.80.0.0/14 gateway=网通网关check-gateway=ping \distance=0 scope=255 target-scope=10 comment="CNC" disabled=noadd dst-address=60.0.0.0/13 gateway=网通网关check-gateway=ping \distance=0 scope=255 target-scope=10 comment="CNC" disabled=noadd dst-address=60.8.0.0/15 gateway=网通网关check-gateway=ping \distance=0 scope=255 target-scope=10 comment="CNC" disabled=noadd dst-address=60.10.0.0/16 gateway=网通网关check-gateway=ping \distance=0 scope=255 target-scope=10 comment="CNC" disabled=noadd dst-address=60.12.0.0/16 gateway=网通网关check-gateway=ping \distance=0 scope=255 target-scope=10 comment="CNC" disabled=noadd dst-address=60.13.0.0/18 gateway=网通网关check-gateway=ping \distance=0 scope=255 target-scope=10 comment="CNC" disabled=noadd dst-address=60.13.128.0/17 gateway=网通网关check-gateway=ping \distance=0 scope=255 target-scope=10 comment="CNC" disabled=noadd dst-address=60.16.0.0/12 gateway=网通网关check-gateway=ping \distance=0 scope=255 target-scope=10 comment="CNC" disabled=noadd dst-address=60.55.0.0/16 gateway=网通网关check-gateway=ping \add dst-address=60.208.0.0/13 gateway=网通网关check-gateway=ping \ distance=0 scope=255 target-scope=10 comment="CNC" disabled=no add dst-address=60.216.0.0/15 gateway=网通网关check-gateway=ping \ distance=0 scope=255 target-scope=10 comment="CNC" disabled=no add dst-address=60.220.0.0/14 gateway=网通网关check-gateway=ping \ distance=0 scope=255 target-scope=10 comment="CNC" disabled=no add dst-address=61.4.79.0/24 gateway=网通网关check-gateway=ping \ distance=0 scope=255 target-scope=10 comment="CNC" disabled=no add dst-address=61.4.64.0/20 gateway=网通网关check-gateway=ping \ distance=0 scope=255 target-scope=10 comment="CNC" disabled=noadd dst-address=61.48.0.0/13 gateway=网通网关check-gateway=ping \ distance=0 scope=255 target-scope=10 comment="CNC" disabled=no add dst-address=61.128.210.0/24 gateway=网通网关check-gateway=ping \ distance=0 scope=255 target-scope=10 comment="CNC" disabled=no add dst-address=61.133.0.0/17 gateway=网通网关check-gateway=ping \ distance=0 scope=255 target-scope=10 comment="CNC" disabled=no add dst-address=61.134.98.0/24 gateway=网通网关check-gateway=ping \ distance=0 scope=255 target-scope=10 comment="CNC" disabled=no add dst-address=61.134.108.0/22 gateway=网通网关check-gateway=ping \ distance=0 scope=255 target-scope=10 comment="CNC" disabled=no add dst-address=61.134.120.0/28 gateway=网通网关check-gateway=ping \ distance=0 scope=255 target-scope=10 comment="CNC" disabled=no add dst-address=61.134.112.0/20 gateway=网通网关check-gateway=ping \ distance=0 scope=255 target-scope=10 comment="CNC" disabled=no add dst-address=61.134.96.0/19 gateway=网通网关check-gateway=ping \ distance=0 scope=255 target-scope=10 comment="CNC" disabled=no add dst-address=61.134.128.0/17 gateway=网通网关check-gateway=ping \ distance=0 scope=255 target-scope=10 comment="CNC" disabled=no add dst-address=61.135.0.0/16 gateway=网通网关check-gateway=ping \ distance=0 scope=255 target-scope=10 comment="CNC" disabled=no add dst-address=61.136.64.0/18 gateway=网通网关check-gateway=ping \ distance=0 scope=255 target-scope=10 comment="CNC" disabled=no add dst-address=61.137.128.0/17 gateway=网通网关check-gateway=ping \ distance=0 scope=255 target-scope=10 comment="CNC" disabled=no add dst-address=61.138.128.0/18 gateway=网通网关check-gateway=ping \ distance=0 scope=255 target-scope=10 comment="CNC" disabled=no add dst-address=61.139.128.0/18 gateway=网通网关check-gateway=ping \ distance=0 scope=255 target-scope=10 comment="CNC" disabled=no add dst-address=61.148.0.0/15 gateway=网通网关check-gateway=ping \add dst-address=61.156.0.0/16 gateway=网通网关check-gateway=ping \ distance=0 scope=255 target-scope=10 comment="CNC" disabled=no add dst-address=61.158.128.0/17 gateway=网通网关check-gateway=ping \ distance=0 scope=255 target-scope=10 comment="CNC" disabled=no add dst-address=61.159.0.0/18 gateway=网通网关check-gateway=ping \ distance=0 scope=255 target-scope=10 comment="CNC" disabled=no add dst-address=61.161.0.0/18 gateway=网通网关check-gateway=ping \ distance=0 scope=255 target-scope=10 comment="CNC" disabled=no add dst-address=61.161.128.0/17 gateway=网通网关check-gateway=ping \ distance=0 scope=255 target-scope=10 comment="CNC" disabled=no add dst-address=61.167.0.0/16 gateway=网通网关check-gateway=ping \ distance=0 scope=255 target-scope=10 comment="CNC" disabled=noadd dst-address=61.168.0.0/16 gateway=网通网关check-gateway=ping \ distance=0 scope=255 target-scope=10 comment="CNC" disabled=no add dst-address=61.176.0.0/16 gateway=网通网关check-gateway=ping \ distance=0 scope=255 target-scope=10 comment="CNC" disabled=no add dst-address=61.179.0.0/16 gateway=网通网关check-gateway=ping \ distance=0 scope=255 target-scope=10 comment="CNC" disabled=no add dst-address=61.180.13.0/24 gateway=网通网关check-gateway=ping \ distance=0 scope=255 target-scope=10 comment="CNC" disabled=no add dst-address=61.180.128.0/17 gateway=网通网关check-gateway=ping \ distance=0 scope=255 target-scope=10 comment="CNC" disabled=no add dst-address=61.181.0.0/16 gateway=网通网关check-gateway=ping \ distance=0 scope=255 target-scope=10 comment="CNC" disabled=no add dst-address=61.182.0.0/16 gateway=网通网关check-gateway=ping \ distance=0 scope=255 target-scope=10 comment="CNC" disabled=no add dst-address=61.189.0.0/17 gateway=网通网关check-gateway=ping \ distance=0 scope=255 target-scope=10 comment="CNC" disabled=no add dst-address=61.233.7.0/24 gateway=网通网关check-gateway=ping \ distance=0 scope=255 target-scope=10 comment="CNC" disabled=no add dst-address=61.233.59.0/24 gateway=网通网关check-gateway=ping \ distance=0 scope=255 target-scope=10 comment="CNC" disabled=no add dst-address=61.237.148.0/24 gateway=网通网关check-gateway=ping \ distance=0 scope=255 target-scope=10 comment="CNC" disabled=no add dst-address=202.95.98.0/24 gateway=网通网关check-gateway=ping \ distance=0 scope=255 target-scope=10 comment="CNC" disabled=no add dst-address=202.96.0.0/18 gateway=网通网关check-gateway=ping \ distance=0 scope=255 target-scope=10 comment="CNC" disabled=no add dst-address=202.96.66.0/24 gateway=网通网关check-gateway=ping \add dst-address=202.96.64.0/19 gateway=网通网关check-gateway=ping \ distance=0 scope=255 target-scope=10 comment="CNC" disabled=no add dst-address=202.97.128.0/17 gateway=网通网关check-gateway=ping \ distance=0 scope=255 target-scope=10 comment="CNC" disabled=no add dst-address=202.98.0.0/19 gateway=网通网关check-gateway=ping \ distance=0 scope=255 target-scope=10 comment="CNC" disabled=no add dst-address=202.99.0.0/16 gateway=网通网关check-gateway=ping \ distance=0 scope=255 target-scope=10 comment="CNC" disabled=no add dst-address=202.102.128.0/18 gateway=网通网关check-gateway=ping \ distance=0 scope=255 target-scope=10 comment="CNC" disabled=no add dst-address=202.102.224.0/19 gateway=网通网关check-gateway=ping \ distance=0 scope=255 target-scope=10 comment="CNC" disabled=no add dst-address=202.106.0.0/16 gateway=网通网关check-gateway=ping \ distance=0 scope=255 target-scope=10 comment="CNC" disabled=noadd dst-address=202.107.0.0/17 gateway=网通网关check-gateway=ping \ distance=0 scope=255 target-scope=10 comment="CNC" disabled=no add dst-address=202.108.0.0/16 gateway=网通网关check-gateway=ping \ distance=0 scope=255 target-scope=10 comment="CNC" disabled=no add dst-address=202.110.0.0/17 gateway=网通网关check-gateway=ping \ distance=0 scope=255 target-scope=10 comment="CNC" disabled=no add dst-address=202.110.192.0/18 gateway=网通网关check-gateway=ping \ distance=0 scope=255 target-scope=10 comment="CNC" disabled=no add dst-address=202.111.128.0/18 gateway=网通网关check-gateway=ping \ distance=0 scope=255 target-scope=10 comment="CNC" disabled=no add dst-address=203.88.200.0/24 gateway=网通网关check-gateway=ping \ distance=0 scope=255 target-scope=10 comment="CNC" disabled=no add dst-address=203.88.203.0/24 gateway=网通网关check-gateway=ping \ distance=0 scope=255 target-scope=10 comment="CNC" disabled=no add dst-address=211.95.192.0/18 gateway=网通网关check-gateway=ping \ distance=0 scope=255 target-scope=10 comment="CNC" disabled=no add dst-address=211.97.245.0/24 gateway=网通网关check-gateway=ping \ distance=0 scope=255 target-scope=10 comment="CNC" disabled=no add dst-address=211.148.8.0/24 gateway=网通网关check-gateway=ping \ distance=0 scope=255 target-scope=10 comment="CNC" disabled=no add dst-address=211.151.130.0/24 gateway=网通网关check-gateway=ping \ distance=0 scope=255 target-scope=10 comment="CNC" disabled=no add dst-address=211.158.0.0/16 gateway=网通网关check-gateway=ping \ distance=0 scope=255 target-scope=10 comment="CNC" disabled=no add dst-address=211.163.0.0/16 gateway=网通网关check-gateway=ping \add dst-address=218.7.0.0/16 gateway=网通网关check-gateway=ping \ distance=0 scope=255 target-scope=10 comment="CNC" disabled=no add dst-address=218.8.0.0/14 gateway=网通网关check-gateway=ping \ distance=0 scope=255 target-scope=10 comment="CNC" disabled=no add dst-address=218.12.0.0/16 gateway=网通网关check-gateway=ping \ distance=0 scope=255 target-scope=10 comment="CNC" disabled=no add dst-address=218.24.0.0/14 gateway=网通网关check-gateway=ping \ distance=0 scope=255 target-scope=10 comment="CNC" disabled=no add dst-address=218.28.0.0/15 gateway=网通网关check-gateway=ping \ distance=0 scope=255 target-scope=10 comment="CNC" disabled=no add dst-address=218.56.0.0/14 gateway=网通网关check-gateway=ping \ distance=0 scope=255 target-scope=10 comment="CNC" disabled=no add dst-address=218.60.0.0/15 gateway=网通网关check-gateway=ping \ distance=0 scope=255 target-scope=10 comment="CNC" disabled=no add dst-address=218.62.0.0/17 gateway=网通网关check-gateway=ping \ distance=0 scope=255 target-scope=10 comment="CNC" disabled=noadd dst-address=218.67.128.0/17 gateway=网通网关check-gateway=ping \ distance=0 scope=255 target-scope=10 comment="CNC" disabled=no add dst-address=218.68.0.0/15 gateway=网通网关check-gateway=ping \ distance=0 scope=255 target-scope=10 comment="CNC" disabled=no add dst-address=218.104.0.0/16 gateway=网通网关check-gateway=ping \ distance=0 scope=255 target-scope=10 comment="CNC" disabled=no add dst-address=218.106.0.0/16 gateway=网通网关check-gateway=ping \ distance=0 scope=255 target-scope=10 comment="CNC" disabled=no add dst-address=218.107.0.0/16 gateway=网通网关check-gateway=ping \ distance=0 scope=255 target-scope=10 comment="CNC" disabled=no add dst-address=218.108.0.0/16 gateway=网通网关check-gateway=ping \ distance=0 scope=255 target-scope=10 comment="CNC" disabled=no add dst-address=218.109.0.0/16 gateway=网通网关check-gateway=ping \ distance=0 scope=255 target-scope=10 comment="CNC" disabled=no add dst-address=219.154.0.0/15 gateway=网通网关check-gateway=ping \ distance=0 scope=255 target-scope=10 comment="CNC" disabled=no add dst-address=219.156.0.0/15 gateway=网通网关check-gateway=ping \ distance=0 scope=255 target-scope=10 comment="CNC" disabled=no add dst-address=219.158.0.0/16 gateway=网通网关check-gateway=ping \ distance=0 scope=255 target-scope=10 comment="CNC" disabled=no add dst-address=219.159.0.0/18 gateway=网通网关check-gateway=ping \ distance=0 scope=255 target-scope=10 comment="CNC" disabled=no add dst-address=220.248.0.0/15 gateway=网通网关check-gateway=ping \add dst-address=220.250.0.0/16 gateway=网通网关check-gateway=ping \ distance=0 scope=255 target-scope=10 comment="CNC" disabled=no add dst-address=221.0.0.0/14 gateway=网通网关check-gateway=ping \ distance=0 scope=255 target-scope=10 comment="CNC" disabled=no add dst-address=221.4.0.0/15 gateway=网通网关check-gateway=ping \ distance=0 scope=255 target-scope=10 comment="CNC" disabled=no add dst-address=221.6.0.0/16 gateway=网通网关check-gateway=ping \ distance=0 scope=255 target-scope=10 comment="CNC" disabled=no add dst-address=221.7.0.0/18 gateway=网通网关check-gateway=ping \ distance=0 scope=255 target-scope=10 comment="CNC" disabled=no add dst-address=221.7.64.0/19 gateway=网通网关check-gateway=ping \ distance=0 scope=255 target-scope=10 comment="CNC" disabled=no add dst-address=221.7.128.0/17 gateway=网通网关check-gateway=ping \ distance=0 scope=255 target-scope=10 comment="CNC" disabled=no add dst-address=221.8.0.0/15 gateway=网通网关check-gateway=ping \ distance=0 scope=255 target-scope=10 comment="CNC" disabled=no add dst-address=221.10.0.0/16 gateway=网通网关check-gateway=ping \ distance=0 scope=255 target-scope=10 comment="CNC" disabled=noadd dst-address=221.11.0.0/17 gateway=网通网关check-gateway=ping \ distance=0 scope=255 target-scope=10 comment="CNC" disabled=no add dst-address=221.11.128.0/18 gateway=网通网关check-gateway=ping \ distance=0 scope=255 target-scope=10 comment="CNC" disabled=no add dst-address=221.11.192.0/19 gateway=网通网关check-gateway=ping \ distance=0 scope=255 target-scope=10 comment="CNC" disabled=no add dst-address=221.12.0.0/17 gateway=网通网关check-gateway=ping \ distance=0 scope=255 target-scope=10 comment="CNC" disabled=no add dst-address=221.12.128.0/18 gateway=网通网关check-gateway=ping \ distance=0 scope=255 target-scope=10 comment="CNC" disabled=no add dst-address=221.13.0.0/18 gateway=网通网关check-gateway=ping \ distance=0 scope=255 target-scope=10 comment="CNC" disabled=no add dst-address=221.13.64.0/19 gateway=网通网关check-gateway=ping \ distance=0 scope=255 target-scope=10 comment="CNC" disabled=no add dst-address=221.14.0.0/15 gateway=网通网关check-gateway=ping \ distance=0 scope=255 target-scope=10 comment="CNC" disabled=no add dst-address=221.136.0.0/16 gateway=网通网关check-gateway=ping \ distance=0 scope=255 target-scope=10 comment="CNC" disabled=no add dst-address=221.192.0.0/14 gateway=网通网关check-gateway=ping \ distance=0 scope=255 target-scope=10 comment="CNC" disabled=no add dst-address=221.196.0.0/15 gateway=网通网关check-gateway=ping \add dst-address=221.198.0.0/16 gateway=网通网关check-gateway=ping \ distance=0 scope=255 target-scope=10 comment="CNC" disabled=no add dst-address=221.199.0.0/19 gateway=网通网关check-gateway=ping \ distance=0 scope=255 target-scope=10 comment="CNC" disabled=no add dst-address=221.199.32.0/20 gateway=网通网关check-gateway=ping \ distance=0 scope=255 target-scope=10 comment="CNC" disabled=no add dst-address=221.199.128.0/18 gateway=网通网关check-gateway=ping \ distance=0 scope=255 target-scope=10 comment="CNC" disabled=no add dst-address=221.199.192.0/20 gateway=网通网关check-gateway=ping \ distance=0 scope=255 target-scope=10 comment="CNC" disabled=no add dst-address=221.200.0.0/14 gateway=网通网关check-gateway=ping \ distance=0 scope=255 target-scope=10 comment="CNC" disabled=no add dst-address=221.204.0.0/15 gateway=网通网关check-gateway=ping \ distance=0 scope=255 target-scope=10 comment="CNC" disabled=no add dst-address=221.207.0.0/18 gateway=网通网关check-gateway=ping \ distance=0 scope=255 target-scope=10 comment="CNC" disabled=no add dst-address=221.208.0.0/14 gateway=网通网关check-gateway=ping \ distance=0 scope=255 target-scope=10 comment="CNC" disabled=no add dst-address=221.212.0.0/15 gateway=网通网关check-gateway=ping \ distance=0 scope=255 target-scope=10 comment="CNC" disabled=noadd dst-address=221.214.0.0/16 gateway=网通网关check-gateway=ping \ distance=0 scope=255 target-scope=10 comment="CNC" disabled=no add dst-address=221.216.0.0/13 gateway=网通网关check-gateway=ping \ distance=0 scope=255 target-scope=10 comment="CNC" disabled=no add dst-address=222.128.0.0/12 gateway=网通网关check-gateway=ping \ distance=0 scope=255 target-scope=10 comment="CNC" disabled=no add dst-address=222.160.0.0/15 gateway=网通网关check-gateway=ping \ distance=0 scope=255 target-scope=10 comment="CNC" disabled=no add dst-address=222.162.0.0/16 gateway=网通网关check-gateway=ping \ distance=0 scope=255 target-scope=10 comment="CNC" disabled=no add dst-address=222.163.0.0/19 gateway=网通网关check-gateway=ping \ distance=0 scope=255 target-scope=10 comment="CNC" disabled=no add dst-address=222.173.101.0/24 gateway=网通网关check-gateway=ping \ distance=0 scope=255 target-scope=10 comment="CNC" disabled=no add dst-address=222.173.102.0/23 gateway=网通网关check-gateway=ping \ distance=0 scope=255 target-scope=10 comment="CNC" disabled=no add dst-address=222.173.104.0/22 gateway=网通网关check-gateway=ping \ distance=0 scope=255 target-scope=10 comment="CNC" disabled=no add dst-address=222.173.108.0/23 gateway=网通网关check-gateway=ping \add dst-address=222.208.65.0/24 gateway=网通网关check-gateway=ping \distance=0 scope=255 target-scope=10 comment="CNC" disabled=noadd dst-address=0.0.0.0/0 gateway=222.218.157.97 check-gateway=ping distance=0 \scope=255 target-scope=10 comment="TEL" disabled=no(最后这条的意义就是保证在上面找不到网通的网关后IP包自动走电信的线路如果想拷贝这个规则就用替换功能换上具体的IP就可以了)-------------------------------------------------------------------------------------------------------第3步设置好监控的开关/ tool netwatchadd host=电信网关timeout=1s interval=1m up-script=dxup \down-script=dxdown comment="TEL" disabled=noadd host=网通网关timeout=1s interval=1m up-script=CNCup \down-script=CNCdown comment="CNC" disabled=no--------------------------------------------------------------------------------------------------------第四写好脚本自动切换/ system scriptadd name="dxup" source="/ip route set \[/ip route find comment=TEL\] gateway \ 电信网关\n" policy=ftp,reboot,read,write,policy,test,winbox,passwordadd name="CNCup" source="/ip route set \[/ip route find comment=CNC\] gateway \网通网关\n" policy=ftp,reboot,read,write,policy,test,winbox,passwordadd name="dxdown" source=":if \(\[/tool netwatch get \[/tool netwatch find \ comment=CNC\] status\]=\"down\"\) do {/ip route set \[/ip route find \comment=TEL\] gateway \[/ip address get \[/ip address find \interface=pppoe-out1\] network\]} else {/ip route set \[/ip route find \comment=TEL\] gateway 网通网关}" \policy=ftp,reboot,read,write,policy,test,winbox,passwordadd name="CNCdown" source=":if \(\[/tool netwatch get \[/tool netwatch find \ comment=TEL\] status\]=\"down\"\) do {/ip route set \[/ip route find \comment=CNC\] gateway \[/ip address get \[/ip address find \interface=pppoe-out1\] network\]} else {/ip route set \[/ip route find \comment=CNC\] gateway 电信网关}" \policy=ftp,reboot,read,write,policy,test,winbox,password。
VRRPROS软路由双线组网方式(学习资料)

VRRP ROS软路由双线组网方式Edit by 特种兵217虚拟路由冗余协议Virtual Router Redundancy Protocol (VRRP),MikroTik RouteROS VRRP 协议遵循RFC2338。
VRRP 协议是保证访问一些资源不会中断,即通过多台路由器组成一个网关集合,如果其中一台路由器出现故障,会自动启用另外一台。
两个或多个路由器建立起一个动态的虚拟集合,每一个路由器都可以参与处理数据,这个集合最大不能超过255个虚拟路由器(可参考虚拟路由协议)。
一般现在的路由器都支持该协议。
许多VRRP 路由器可用组成一个虚拟路由器集合。
在一个网络中最大可用支持相同VRID(虚拟路由ID)255个。
每个路由器都必须设置一个优先参数,每个VRRP 配置通一个虚拟的网卡绑定在一个真实的网卡上。
VRRP地址放入虚拟的VRRP 网卡上。
VRRP Master 状态显示为running 标志,虚拟网卡上的地址被激活,其他属于backup(即优先级低的VRRP 路由)停止运行虚拟路由冗余协议是一种为路由提供高效率的路由选择协议。
一个或多个IP 地址可以分配到一个虚拟路由上,一个虚拟路由节点应该具备以下状态:•MASTER 状态, 一个节点回答所有的请求给相应请求的IP 地址。
仅只有一个MASTER 路由器在虚拟路由中。
每隔一段时间这个主节点发出VRRP 广播包给所有backup 路由器。
•BACKUP 状态, VRRP 路由器监视Master 路由器的状态。
它不会回答任何来至相应IP 地址的请求,当MASTER路由器无法工作时(假设至少三次VRRP 数据连接丢失),选择过程发生,新的MASTER 会根据优先级产生。
注:VRRP 不能运行在VLAN 接口上,VLAN 的接口MAC 地址于与运行在物理网卡MAC 地址是不同的。
以上是关于VRRP协议的简介,这里我们利用VRRP协议组成双线接入的网络,原理如下:ROS允许多个路由器加入一个VRRP组,其中master路由器负责转发数据,backup 路由器处于闲置状态,这样会造成资源浪费。
端口映射

计算机术语
01 简介
03 术语
目录
02 实现目的 04 分类
05 应用
07 如何进行
目录
06 与端口转发 08 能否提高速
端口映射是NAT的一种,功能是把在公的转翻译成私有,采用路由方式的ADSL宽带路由器拥有一个动态或固 定的公IP,ADSL直接接在HUB或交换机上,所有的电脑共享上。
动态端口映射其实也就是NAT关的工作方式 。
静态端口映射:就是在NAT关上开放一个固定的端口,然后设定此端口收到的数据要转发给内哪个IP和端口, 不管有没有连接,这个映射关系都会一直存在。就可以让公主动访问内的一台电脑 。
应用
WinRoute P个工作于NAT(络翻译)方式的Internet共享软件。它本身自带了端口映射功能 。
与端口转发
端口映射与端口转发,用于发布防火墙内部的服务器或者防火墙内部的客户端计算机,有的路由器也有端口 映射与端口转发功能。端口映射与端口转发实现的功能类似,但又不完全一样。端口映射是将外的一个端口完全 映射给内一个的指定端口,而端口转发是将发往外的一个端口的通信完全转发给内一个的指定端口。端口映射可 以实现外到内和内到外双向的通信,而端口转发只能实现外到内的单向通信 。
端口映射协议定义RPC络服务,这种络服务为基于RPC的客户机提供标准方法,以便能够査找由服务器支持的 远程基于RPC的程序的端口号。因为端口映射协议能够在提供等效端口的传输端口上执行,所以,这个协议解决 所有工作在客户机、服务器和络上的通用问题 。
实现目的
目前不少企业都已建好了内部局域,但随着互联时代的到来,仅搭建局域已经不能满足众多企业的需要,有 更多的用户需要在 Internet上发布信息,或进行信息检索,将企业内联接入 Internet已经成为众多企业的迫 切要求。但是,随着因特的迅速发展,IP短缺已成为一个十分突出的问题,企业中不可能每台电脑都拥有一个真 实的IP,所以大部分的企业用户都是通过关或代理服务器上,而内部的电脑只有一个内的IP这样做的好处虽然节 约了IP资源,但是有很多地方不方便,因为企业的络很多是要对外的,由于内的电脑采用关和代理上,本身没有 对外可访问的IP,所以造成外界无法访问这些电脑。又不能把企业的所有服务器全部放在作为代理服务器的一台 电脑上,这时候就要用到端口映射了 。
ros多线做端口映射脚本

正文开始,脚本在下面。
我做完ROS加VLAN ADSL多线PCC叠加设置设置后不久,网站开发小组的项目经理就找到我向我提出了需求,因为现在他们的测试服务器是放在我们办公室内网的,我们公司其它部门和其它分公司和我们办公室不是一个局域网,网站开发小组的项目经理想让我们公司的所有同事都能访问到测试服务器做用户体验度测试,想让我帮助实现,当时我一口答应下来,也觉得这是个很简单的事情,但是事情往往出人意料。
我一开始的思路是这样的,第一步就是在IP->firewall-> nat下面做基于目标的伪装,也就是映射,第二步就是要做回流让内网的客户端也能通过公网IP 访问到服务器,第三步就是做动态映射的计划任务,定时更新第一步里面的目标地址即ADSL的地址,最后一步就要用到DDNS做一个二级域名的动态解析方便同事记忆和输入。
做完以后发现需求基本满足,就是内网客户端不能通过域名访问到服务器,只能通过内网IP访问,为了精益求精,继续研究,baidu和google 上搜索了无数方法均无效,后来在一个论坛里面看到一个高人的回复内容给了我启发,于是再一次尝试配置居然成功了。
不敢独享,现在将思路和脚本整理分享给更多需要的人。
首先我来分析下出现上述问题的原因,因为我们这里的环境是多线叠加的,我们的每个连接在进行路由之前都会对连接进行标记并路由,不同的标记有可能走不同的路由导致数据没办法顺利到达服务器,其内部数据的具体流向以及转换我也不是很清楚,如有高手路过请不吝赐教。
下面进入正题,其实很简单,我们只要在标记里面把目标地址为我们的外网接口地址的数据直接通过就可以解决这个问题了,有几条线就做几个标记,最后要添加计划任务更新标记里的目标地址为对应的外网接口地址,所以加上这最后两步一共是六步,下面就放出每一步的脚本(我的环境是双线叠加的,所以以下脚本都是适合双线的,改成多线的也很容易)1、做映射,这里以把内网的8890端口映射成9000端口为例。
ROS里的限速功能与限速单位详解,映射与回流做法

ROS里的限速功能与限速单位详解,映射与回流做法2009年07月24日星期五 18:34ROS里的限速功能与限速单位详解#-----------------------------------------------------------------------------------------------## ROS批量限速脚本;#Windows下的速度显示#正常上传100KB,正常下载200KB;#突发上传200KB,突发下载800KB;#突发上传100KB,突发下载100KB;#说明:#路由内的限速单位是Kbitp/s(千比特位/秒)/8=Windows下的存储单位KByte(千字节/秒)#K代表的是个数量单位K=1000;另外K和k就没区别了..不要混淆..#b,小写的b全名是bit,bit是网速的基本单位.bps(bits per Second):每秒传输多少位数(二进制)#B,大写的B全名是Byte,Byte是字节的意思,就是Windows的存储单位#8Kb=1KB#有时我们在路由里看到某机器下载速度已经达到10Mbps,#但是实际在windows下看到的速度只是10Mbps/8=1.25MByte#限速脚本内的进制是如何的呢?#比如以下脚本的max-limit=800,000/1600,000,在WINBOX里看的话就是800k和1600k.#后面3个0就是K的意思了.而上面的800,1600就是bps,加一起就是800kbps 和1600kbps#WINDOWS下看到的速度就是800kbps/8=100KB和1600kbps/8=200KB#max-limit:正常的速度限制;上传/下载.#burst-limit:突发速度;上传/下载.#burst-threshold:突发速度阀值;上传/下载.burst-time:突发时间;上传时间/下载时间.#注意,burst-threshold的值不能大于burst-limit#脚本中的time=是控制某些时间限制的.下面脚本就是周1到周7上午11点到晚上11点限速.其余时间不限制.#-----------------------------------------------------------------------------------------------#:for myip from 2 to 254 do={/queue simple add name=("第" . $myip . "号机") target-address=("192.168.0." . $myip . "/32")max-limit=800000/1600000 burst-limit=1600000/6400000burst-threshold=800000/800000 burst-time=30/30 total-queue=default \ time=12h-23h,sun,mon,tue,wed,thu,fri,sat disabled=no }把代码框的内容保存为rsc格式文件.FTP传到路由上.然后用命令im 文件名.rsc激活.到queue里看是否生效.手动限速winbox---queues----simple queues点“+”,NAME里随便填,下面是IP地址的确定①Target Address 不管,Dst. Address里填你要限制的内网机器的IP,比如我这里有个 1号机器 IP为 192.168.1.101,那dst.address 里就填192.168.1.101 然后是/32(这里的32不是指掩码了,个人理解为指定的意思)!②interface里记着要选你连接外网那个卡,我这里分了“local和public”,所以选public③ 其他的不管,我们来看最重要的东西拉,Max limit ,这个东西是你限制的上限,注意的是这里的数值是比特位,比如我要限制下载的速度为 500K 那么就填入多少呢? 500 X 1000 X 8=400 0000=4M。
ROS多线不同网关分流图解教程
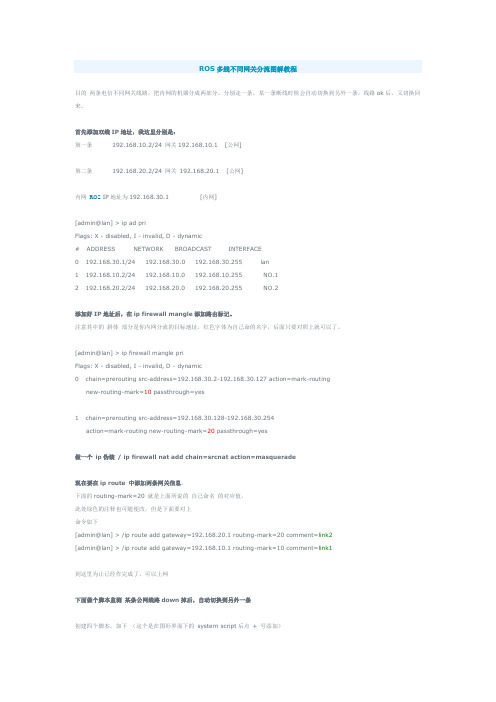
ROS多线不同网关分流图解教程目的两条电信不同网关线路,把内网的机器分成两部分,分别走一条,某一条断线时候会自动切换到另外一条,线路ok后,又切换回来。
首先添加双线IP地址,我这里分别是:第一条192.168.10.2/24 网关192.168.10.1 [公网]第二条192.168.20.2/24 网关192.168.20.1 [公网]内网ROS IP地址为192.168.30.1 [内网][admin@lan] > ip ad priFlags: X - disabled, I - invalid, D - dynamic# ADDRESS NETWORK BROADCAST INTERFACE0 192.168.30.1/24 192.168.30.0 192.168.30.255 lan1 192.168.10.2/24 192.168.10.0 192.168.10.255 NO.12 192.168.20.2/24 192.168.20.0 192.168.20.255 NO.2添加好IP地址后,在ip firewall mangle添加路由标记。
注意其中的斜体部分是你内网分流的目标地址,红色字体为自己命的名字,后面只要对照上就可以了。
[admin@lan] > ip firewall mangle priFlags: X - disabled, I - invalid, D - dynamic0 chain=prerouting src-address=192.168.30.2-192.168.30.127 action=mark-routingnew-routing-mark=10 passthrough=yes1 chain=prerouting src-address=192.168.30.128-192.168.30.254action=mark-routing new-routing-mark=20 passthrough=yes做一个ip伪装/ ip firewall nat add chain=srcnat action=masquerade现在要在ip route 中添加两条网关信息。
ros软路由实用技术ros软路由adsl双线 pppoe服务器设置(图文讲解)
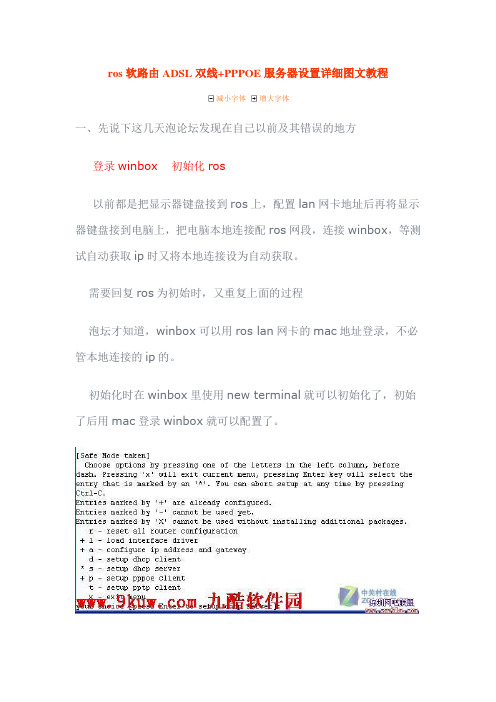
ros软路由ADSL双线+PPPOE服务器设置详细图文教程减小字体增大字体一、先说下这几天泡论坛发现在自己以前及其错误的地方登录winbox 初始化ros以前都是把显示器键盘接到ros上,配置lan网卡地址后再将显示器键盘接到电脑上,把电脑本地连接配ros网段,连接winbox,等测试自动获取ip时又将本地连接设为自动获取。
需要回复ros为初始时,又重复上面的过程泡坛才知道,winbox可以用ros lan网卡的mac地址登录,不必管本地连接的ip的。
初始化时在winbox里使用new terminal就可以初始化了,初始了后用mac登录winbox就可以配置了。
总结:把ros的电脑先设BIOS设为来电自动开机,忽略一切错误开机,就可以再也不接键盘和显示器了。
二、配置ros 双ADSl负载均衡走的弯路因为夹杂了pppoe服务,一直配不通,用脚本生成器生成的也不通,看很多教程,互相影响,自己最后也不知道在配什么了。
总结:先一步一步配,看到哪一步不通。
不如1、先配好lan,看winbox能否登陆winbox2、配置双线adsl,看2条adsl是否拨号成功,双线adsl脚本配置后,在ip里是不应该出现58类ip的,因为之前不理解自动刷新网关,看到脚本里58类ip,自己的机子里没有,以为不正常,重复添加脚本。
(增加pppoe服务后,拨号用户不通,这个后面详解)3、客户机配置手动ip和dns,看能否上网。
3、增加pppoe服务,导入pppoe账号,可以用脚本生成器生成。
三:配置双线adsl+pppoe服务过程1、安装ros,这个这里省略。
2、配置lan ip3、电脑配ip,和ros一个网段,winbox登陆,获取到lan的MAC,把ip换为mac登陆。
方法是ip登陆后点下后面小□(里面有三个...的那个,connect左边那个)在打开的菜单里点mac就可以换了。
4、改网卡名字我把第一个改为wan1,第二个改为wan2,第三个改为lan。
ROS双线分流
ROS双线做法(双电信)这也是我在网上下载的,看到了就想大家分享一下而已。
首先说一下,本文不能算是Ros双线的教程,只是在此存照,记录一下自己做的双线步骤,做为菜鸟一只的我,此过程如有错误,还望各位看贴的兄弟能提醒赐教,小弟不胜感激。
本文截图皆为网吧真实环境(IP及网关部分做了处理),尽量写得详细,我想做过单线的朋友应该能看懂。
RouterOS版本:2.9.27网络环境:双电信光纤固定IP两条:25M和10M。
两条光纤网关不同。
效果:做IP分流,固定豪华区走25M,普通区走10M光纤。
当某条光纤掉线后会自动切换到另一条,使得所有机器正常上网。
下文先说明后配图,括号中的红色字体为截图选项在winbox中的位置。
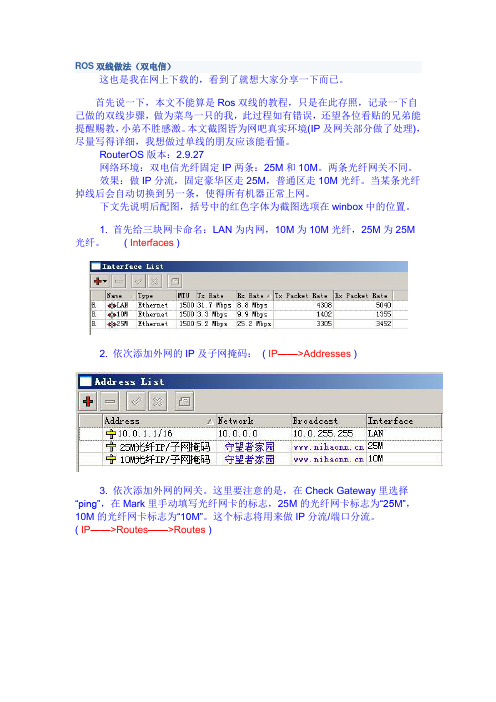
1. 首先给三块网卡命名:LAN为内网,10M为10M光纤,25M为25M 光纤。
( Interfaces )2. 依次添加外网的IP及子网掩码:( IP——>Addresses )3. 依次添加外网的网关。
这里要注意的是,在Check Gateway里选择“ping”,在Mark里手动填写光纤网卡的标志,25M的光纤网卡标志为“25M”,10M的光纤网卡标志为“10M”。
这个标志将用来做IP分流/端口分流。
( IP——>Routes——>Routes )4. 为外网网卡添加注释,即Comment。
可以在第三步的时候就完成,也可以第3步完成后再做。
这个注释将在自动切换脚本里用到。
25M的网卡注释为“25M”,10M的网卡注释为“10M”。
( IP——>Routes——>Routes )5. 添加IP伪装,让内网能够共享上网。
( IP——>Firewall——>NAT )6. 开始做IP分流策略,( IP——>Firewall——>Mangle——>"+"——>General页) Chain选择“prerouting”, Src. Address里填写要分流的IP段,即起始IP到结束IP,起末IP 用减号“-”相连,也可以填写单个IP。
什么是端口映射,路由端口映射如何设置
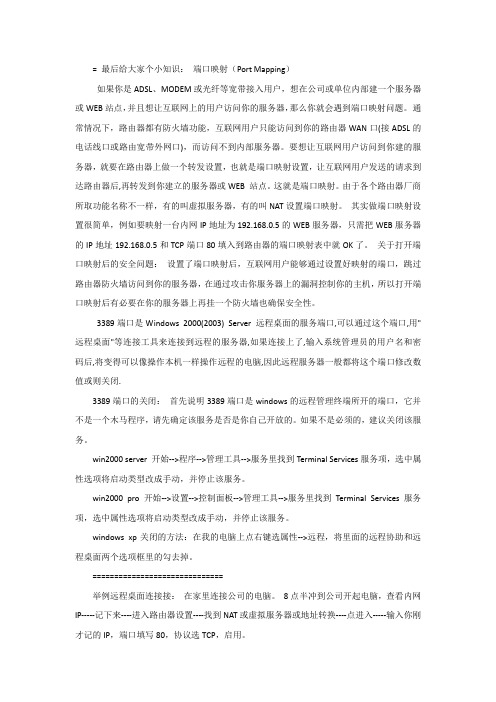
= 最后给大家个小知识:端口映射(Port Mapping)如果你是ADSL、MODEM或光纤等宽带接入用户,想在公司或单位内部建一个服务器或WEB站点,并且想让互联网上的用户访问你的服务器,那么你就会遇到端口映射问题。
通常情况下,路由器都有防火墙功能,互联网用户只能访问到你的路由器WAN口(接ADSL的电话线口或路由宽带外网口),而访问不到内部服务器。
要想让互联网用户访问到你建的服务器,就要在路由器上做一个转发设置,也就是端口映射设置,让互联网用户发送的请求到达路由器后,再转发到你建立的服务器或WEB 站点。
这就是端口映射。
由于各个路由器厂商所取功能名称不一样,有的叫虚拟服务器,有的叫NAT设置端口映射。
其实做端口映射设置很简单,例如要映射一台内网IP地址为192.168.0.5的WEB服务器,只需把WEB服务器的IP地址192.168.0.5和TCP端口80填入到路由器的端口映射表中就OK了。
关于打开端口映射后的安全问题:设置了端口映射后,互联网用户能够通过设置好映射的端口,跳过路由器防火墙访问到你的服务器,在通过攻击你服务器上的漏洞控制你的主机,所以打开端口映射后有必要在你的服务器上再挂一个防火墙也确保安全性。
3389端口是Windows 2000(2003) Server 远程桌面的服务端口,可以通过这个端口,用"远程桌面"等连接工具来连接到远程的服务器,如果连接上了,输入系统管理员的用户名和密码后,将变得可以像操作本机一样操作远程的电脑,因此远程服务器一般都将这个端口修改数值或则关闭.3389端口的关闭:首先说明3389端口是windows的远程管理终端所开的端口,它并不是一个木马程序,请先确定该服务是否是你自己开放的。
如果不是必须的,建议关闭该服务。
win2000 server 开始-->程序-->管理工具-->服务里找到Terminal Services服务项,选中属性选项将启动类型改成手动,并停止该服务。
映射端口介绍端口映射的作用及其配置

映射端口介绍端口映射的作用及其配置采用端口映射(PortMapping)的方法,可以实现从Internet到局域网内部机器的特定端口服务的访问。
例如,你所使用的机子处于一个连接到Internet的局域网内,你在机子上所开的所有服务(如FTP),默认情况下外界是访问不了的。
这是因为你机子的IP是局域网内部IP,而外界能访问的只有你所连接的服务器的IP,由于整个局域网在Internet上只有一个真正的IP地址,而这个IP地址是属于局域网中服务器独有的。
所以,外部的Internet登录时只可以找到局域网中的服务器,那你提供的服务当然是不起作用的。
所以解决这个问题的方法就是采用PM了。
端口映射在思科设备的配置:[pre]router(config)#ip nat inside source static tcp 10.10.10.1 22 210.10.8.1 22 extendablerouter(config)#ip nat inside source static tcp 10.10.10.2 80 210.10.8.1 80 extendable[/pre]映射端口:路由器端口映射的原理及设置方法介绍端口映射其实就是我们常说的NAT地址转换的一种,其功能就是把在公网的地址转翻译成私有地址,采用路由方式的ADSL宽带路由器拥有一个动态或固定的公网IP,ADSL直接接在HUB或交换机上,所有的电脑共享上网。
这时ADSL的外部地址只有一个,比如61.177.0.7。
而内部的IP是私有地址,比如ADSL设为192.168.0.1,下面的电脑就依次设为192.168.0.2到192.168.0.254。
在宽带路由器上如何实现NAT功能呢?一般路由器可以采用虚拟服务器的设置和开放主机(DMZ Host)。
虚拟服务器一般可以由用户自己按需定义提供服务的不同端口,而开放主机是针对IP地址,取消防火墙功能,将局域网的单一IP地址直接映射到外部IP之上,而不必管端口是多少,这种方式只支持一台内部电脑。
各种路由端口映射步骤
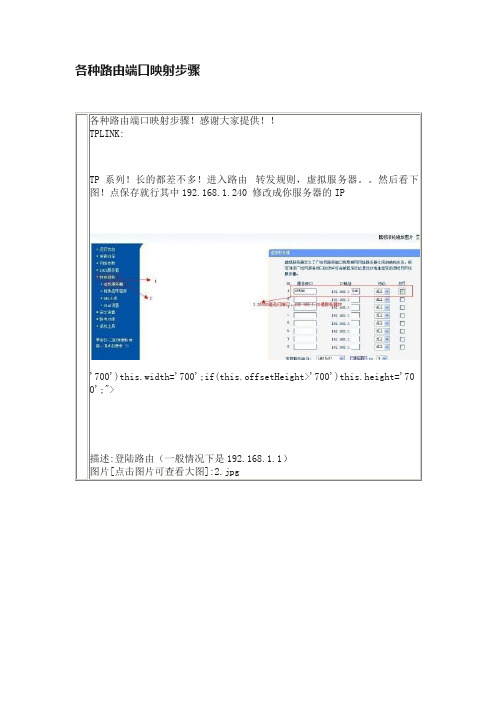
各种路由端口映射步骤各种路由端口映射步骤!感谢大家提供!!TPLINK:TP系列!长的都差不多!进入路由转发规则,虚拟服务器。
然后看下图!点保存就行其中192.168.1.240 修改成你服务器的IP'700')this.width='700';if(this.offsetHeight>'700')this.height='70 0';">描述:登陆路由(一般情况下是192.168.1.1)图片[点击图片可查看大图]:2.jpg'700')this.width='700';if(this.offsetHeight>'700')this.height='70 0';">描述:输入账号密码点转发规则添加新条目图片[点击图片可查看大图]:3.jpg'700')this.width='700';if(this.offsetHeight>'700')this.height='70 0';">描述:服务端口号:输入26501 IP输入你服务器内网IP 保存重启图片[点击图片可查看大图]:4.jpg'700')this.width='700';if(this.offsetHeight>'700')this.height='70 0';">'700')this.width='700';if(this.offsetHeight>'700')this.height='70 0';">图片[点击图片可查看大图]:2.jpg'700')this.width='700';if(this.offsetHeight>'700')this.height='70 0';">地板发表于: 2009-09-26只看该作者┊小中大D—link路由设置-端口映射方法这个基本差不多图片[点击图片可查看大图]:1.jpg'700')this.width='700';if(this.offsetHeight>'700')this.height='70 0';">图片[点击图片可查看大图]:2.jpg'700')this.width='700';if(this.offsetHeight>'700')this.height='70 0';">'700')this.width='700';if(this.offsetHeight>'700')this.height='70 0';">图片[点击图片可查看大图]:2.jpg'700')this.width='700';if(this.offsetHeight>'700')this.height='70 0';">图片[点击图片可查看大图]:3.jpg'700')this.width='700';if(this.offsetHeight>'700')this.height='700';">图片[点击图片可查看大图]:4.jpg'700')this.width='700';if(this.offsetHeight>'700')this.height='70 0';">NBR3000NBR3000图片[点击图片可查看大图]:1.jpg'700')this.width='700';if(this.offsetHeight>'700')this.height='70 0';">6楼发表于: 2009-09-26只看该作者┊小中大MONOWALL软路由端口映射步骤MONOWALL软路由端口映射步骤描述:登陆路由WEB管理图片[点击图片可查看大图]:1.jpg'700')this.width='700';if(this.offsetHeight>'700')this.height='70 0';">描述:2,点击NAT》添加规则图片[点击图片可查看大图]:2.jpg'700')this.width='700';if(this.offsetHeight>'700')this.height='70 0';">描述:3,填写规则,除了讯闪服务器IP按自己实际地址添加外。
路由器端口映射的设置方法__概述说明以及解释
路由器端口映射的设置方法概述说明以及解释1. 引言1.1 概述在现代的网络环境下,路由器端口映射是一项重要的设置。
它允许我们将外部网络请求导向到内部网络中特定设备或服务上,并提供了一种有效的方式来实现远程访问、在线游戏优化和安全防护等功能。
1.2 文章结构本文将详细介绍路由器端口映射的设置方法及其应用场景。
文章主要分为引言、路由器端口映射设置方法、使用路由器端口映射的场景和好处、路由器端口映射中的注意事项和常见错误以及结论等几个部分。
1.3 目的本文旨在帮助读者理解路由器端口映射的基本概念与原理,并提供清晰明了的步骤指南,使读者能够正确地进行路由器端口映射设置。
同时,我们将介绍一些常见问题及其解决方法,以及使用该技术的场景和好处,帮助读者更好地利用路由器端口映射来满足各种需求。
以上是“1. 引言”部分内容,请根据需要进行补充或修改。
2. 路由器端口映射的设置方法:2.1 什么是路由器端口映射:在理解路由器端口映射的设置方法之前,我们首先要了解什么是路由器端口映射。
路由器端口映射是一种网络配置技术,它允许外部网络通过特定的端口访问内部网络中的设备或服务。
当我们在家庭或公司网络中使用多个设备,并希望从互联网上访问某些特定设备或提供服务时,就需要进行路由器端口映射的设置。
2.2 设置路由器端口映射的步骤:路由器端口映射的设置通常涉及以下几个步骤:步骤1:确定要设置端口映射的设备或服务。
在开始设置之前,您需要明确知道将要公开访问的设备或服务所使用的具体端口号。
这可能是用于远程桌面连接、文件共享、在线游戏或其他类型应用程序所使用的特定端口。
步骤2:登录路由器管理界面。
打开互联网浏览器并输入路由器管理界面地址(通常是192.168.0.1 或192.168.1.1),然后输入用户名和密码进行登录。
步骤3:查找端口映射设置选项。
在路由器管理界面中,您需要查找和选择相关的“端口映射”或类似名称的选项。
这个选项通常可以在“高级设置”或“网络设置”等菜单下找到。
ros多线路叠加策略pcc超详细教程(图文)
PCC的负载均衡<互联网共享人人为我我为人人>这是ros最基本最重要的应用,网络上很多教程都比较笼统,新手基本看不懂!此教程,详细图文+脚本, 新手老手都可以借鉴.通分组源地址和源端口实现负载平衡,这里我们建立2个WAN出口分别是wan1和wan2,内网接口是lan1 网络环境如下:∙ISP1地址10.200.15.99/24,网关:10.200.15.1;∙ISP2地址10.200.100.99/24,网关:10.200.100.2;∙内网IP地址192.168.100.1/24;∙启用DNS缓存功能,用192.168.100.1作内网DNS解析;基本配置首先进入ip address配置IP地址:在ip dns setting中配置好DNS缓存,DNS为:61.139.2.69Mangle标记配置接下来我们进入ip firewall mangle标记连接和路由,我们使用per-connection-classifier双向地址进行分类做连接分类标记。
首先我们需要将进入路由的的链接进行标记如下图,我们进入一条mangle规则,中的advanced标签内容可以看到per-connection-classifier分类器,选择both-addresses的分类:然后选择dst-address-type=!local,即除了目标地址是本地以前的地址:注:2条线的分类代码定义是第一条线为2/0,第二条为2/1同样选择一下地址类型:下面命令是提取走第一条线路的连接标记取名位1st_conn,并从连接里提取路由标记名位1st_route,设置:per-connection-classifier=both-addresses:2/0, 设置in-interface=lan/ip firewall mangleadd action=mark-connection chain=prerouting comment="" disabled=no \in-interface=lan new-connection-mark=1st_conn passthrough=yes \per-connection-classifier=both-addresses:2/0add action=mark-routing chain=prerouting comment="" connection-mark=1st_conn \disabled=no in-interface=lan new-routing-mark=1st_route passthrough=yes提取走第二条线路的连接标记取名位2nd_conn,并从连接里提取路由标记名位2nd_route,设置:per-connection-classifier=both-addresses:2/1,设置in-interface=lan:/ip firewall mangleadd action=mark-connection chain=prerouting comment="" disabled=no \in-interface=lan new-connection-mark=2nd_conn passthrough=yes \per-connection-classifier=both-addresses:2/1add action=mark-routing chain=prerouting comment="" connection-mark=2nd_conn \disabled=no in-interface=lan new-routing-mark=2nd_route passthrough=yes在winbox在mangle中设置完成后如下:回程路由设置我们需要将从那个口进入就从相应的口回去,即保证每个外网口的数据能得到正确的路由/ip firewall mangleadd chain=input in-interface=wan1 action=mark-connectionnew-connection-mark=1st_connadd chain=input in-interface=wan2 action=mark-connectionnew-connection-mark=2nd_connwinbox设置标记完进入接口的链接后,将这些链接指定到相应的路由标记上:add chain=output connection-mark=1st_conn action=mark-routing new-routing-mark=1st_routeadd chain=output connection-mark=2nd_conn action=mark-routing new-routing-mark=2nd_routewinbox设置路由配置配置完标记后路由后,我们进入ip route配置路由,首先设置负载均衡的标记路由,首先设置第一条线路的路由标记,设置routing-mark=1st_route:设置第二条线路的路由标记,设置routing-mark=2nd_route:配置默认网关和备份网关,默认网关的distance设置为1,并设置check-gateway=ping,通过ping监测网关状态:备份网关的distance设置为2,并设置check-gateway=ping,通过ping监测网关状态:配置完成后的路由标如下图:配置nat最后配置nat转换规则,进入ip firewall nat中配置action=masquerade,分别对2条线路做伪装:/ip firewall natadd action=masquerade chain=srcnat out-interface=wan1add action=masquerade chain=srcnat out-interface=wan2命令代码如下:# 添加ADSL1的pppoe-out帐户密码并取取消自动添加网关及DNS/interface pppoe-client add name="pppoe-out1" interface="wan1" user="adsl1name" password="adsl1pass" add-default-route=no disabled=no/interface pppoe-client add name="pppoe-out2" interface="wan2" user="adsl2name" password="adsl2pass" add-default-route=no disabled=no# 激活pppoe-out拨号/interface pppoe-client enable pppoe-out1/interface pppoe-client enable pppoe-out2# 添加本地连接配置/ip address add address=192.168.1.254/255.255.255.0 interface=lan1 comment="LAN1" # 设置DNS缓存/ip dns set primary-dns="202.103.224.68" secondary-dns="202.103.225.68"allow-remote-requests=yes# 设置MSS值为1440/ip firewall mangle add action="change-mss" chain="forward" comment="change-mss" disabled=no new-mss="1440" protocol="tcp" tcp-flags="syn"# 设置input/ip firewall mangle add action="mark-connection" chain="input" comment="" disabled=no in-interface="pppoe-out1" new-connection-mark="pppoe-out1_conn" passthrough=yes/ip firewall mangle add action="mark-connection" chain="input" comment="" disabled=no in-interface="pppoe-out2" new-connection-mark="pppoe-out2_conn" passthrough=yes# 设置output/ip firewall mangle add action="mark-routing" chain="output" comment="" connection-mark="pppoe-out1_conn" disabled=no new-routing-mark="to_pppoe-out1" passthrough=yes/ip firewall mangle add action="mark-routing" chain="output" comment=""connection-mark="pppoe-out2_conn" disabled=no new-routing-mark="to_pppoe-out2" passthrough=yes# PCC设置/ip firewall mangle add action="mark-connection" chain="prerouting" comment="" disabled=no dst-address-type="!local" in-interface="lan1"new-connection-mark="pppoe-out1_conn" passthrough=yesper-connection-classifier="both-addresses:2/0" src-address="192.168.1.0/24" /ip firewall mangle add action="mark-connection" chain="prerouting" comment="" disabled=no dst-address-type="!local" in-interface="lan1"new-connection-mark="pppoe-out2_conn" passthrough=yesper-connection-classifier="both-addresses:2/1" src-address="192.168.1.0/24"/ip firewall mangle add action="mark-routing" chain=prerouting comment="" connection-mark="pppoe-out1_conn" disabled=no in-interface="lan1"new-routing-mark="to_pppoe-out1" passthrough=yes src-address="192.168.1.0/24" /ip firewall mangle add action="mark-routing" chain=prerouting comment="" connection-mark="pppoe-out2_conn" disabled=no in-interface="lan1"new-routing-mark="to_pppoe-out2" passthrough=yes src-address="192.168.1.0/24" /ip route add comment=1 disabled=no distance=1 dst-address="0.0.0.0/0" gateway="pppoe-out1" routing-mark="to_pppoe-out1" check-gateway="ping"/ip route add comment=2 disabled=no distance=1 dst-address="0.0.0.0/0" gateway="pppoe-out2" routing-mark="to_pppoe-out2" check-gateway="ping"/ip route add check-gateway="ping" comment="pppoe-out1" disabled=no distance="10" dst-address="0.0.0.0/0" gateway="pppoe-out1"/ip route add check-gateway="ping" comment="pppoe-out2" disabled=no distance="10" dst-address="0.0.0.0/0" gateway="pppoe-out2"# 配置pppoe-out数据转发共享及标记/ip firewall nat add action="masquerade" chain="srcnat" comment="1" disabled=no out-interface="pppoe-out1"/ip firewall nat add action="masquerade" chain="srcnat" comment="2" disabled=no out-interface="pppoe-out2"。
ROS 多线路端口映射完美解决

ROS 多线路端口映射完美解决
(来自网管联盟)
教程里的这个台ROS以前的主线路(main)是网通光纤,后来光纤撤了才上的网通ADSL,当时网通光纤为主线路的时候,做"端口映射"到内网服务器,电信线路也可以访问到其内网服务器的,但是回去的数据是走的网通光纤,而且不掉线,确实可以访问。
相当于一半网通,一半电信。
我一直很纳闷,反复测试确实是如此。
直到后来主线路换成了网通ADSL,应该是网通ADSL不转发来自电信的源地址了,所以
通过电信线路无法访问内网服务器,今天做了下面这套设置,才可以正常访问了,这才真正是电信线进,电信线出。
当然主线路访问一点问题没有的。
这套设置与通过标记线路用WINBOX远程访问ROS是有区别的,那样光做好
INPUT/OUTPUT就行了,因为数据只在ROS上中转,并没进入内网。
这样设置后就可以真正成为网通进网通出,电信进电信出,双线服务器了。
谢谢灰太狼帮忙测试,找出问题关键。
如果有其他更好的办法,或者我做得不对的地方,请大家不吝赐教,多跟帖,多交流。
- 11 -。
RouterOS软路由不同ISP多线合并的做法,本例电信+联通

#对于多线接入情况下,不同ISP接入线路是不能做流量合并的这一说法,一直谬误至今。
#以下的方法我很早就开始使用了,最近有朋友问起,我#索性做出一个文档,让有需要的人也能获益。
一,(我这里就不再详细写出如何架设pppoe服务了,如有需要在文库里搜索ROS设置pppoe服务就可以有不少相关文档)假设你的内网用户为pppoe拨号上网方式,服务配置文件为profile1,用户地址池为pool1,联通dns地址为221.5.88.88,电信dns地址为202.96.128.86,那么只需指定其中一个为主dns地址就可以了,我这里设为联通的dns地址,在winbox里打开ppp->profile,找到你的服务配置文件,设置如下图1所示:或者按下面第二步的方法输入脚本命令也可以:#脚本代码/ppp profile add change-tcp-mss=no dns-server=”221.5.88.88” local-address=”10.0.0.1” name=profile1 only-one=yes remote-address=pool1二,你先自行在winbox建立好各个宽带连接,以六条adsl宽带为例,假设宽带线路pppoe-out1,pppoe-out3,pppoe-out5为电信,pppoe-out2 pppoe-out4 pppoe-out6为联通,你可以按正常的PCC六线合并的方法先做好,或者你也可以进入winbox,在菜单打开New Terminal,复制下面#####开头,至#####结尾部份的内容,粘贴进去就可以了。
如下图2所标的:#####以下代码为pcc的6线合并做法,连接标记是大写C开头,路由标记是大写R开头(你若果有其它做法,也可以,这里你需要记住连接标记的名字,一会在NAT会用到)/ip firewall mangle add action="mark-connection" chain=prerouting dst-address-type="!local" new-connection-mark="C1” per-connection-classifier="both-addresses:6/0"/ip firewall mangle add action="mark-routing" chain=prerouting connection-mark="C1" dst-address-type="!local" new-routing-mark="R1"/ip firewall mangle add action="mark-connection" chain=prerouting dst-address-type="!local" new-connection-mark="C2" per-connection-classifier="both-addresses:6/1"/ip firewall mangle add action="mark-routing" chain=prerouting connection-mark="C2" dst-address-type="!local" new-routing-mark="R2"/ip firewall mangle add action="mark-connection" chain=prerouting dst-address-type="!local" new-connection-mark="C3" per-connection-classifier="both-addresses:6/2"/ip firewall mangle add action="mark-routing" chain=prerouting connection-mark="C3" dst-address-type="!local" new-routing-mark="R3"/ip firewall mangle add action="mark-connection" chain=prerouting dst-address-type="!local"new-connection-mark="C4" per-connection-classifier="both-addresses:6/3"/ip firewall mangle add action="mark-routing" chain=prerouting connection-mark="C4" dst-address-type="!local" new-routing-mark="R4"/ip firewall mangle add action="mark-connection" chain=prerouting dst-address-type="!local" new-connection-mark="C5" per-connection-classifier="both-addresses:6/4"/ip firewall mangle add action="mark-routing" chain=prerouting connection-mark="C5" dst-address-type="!local" new-routing-mark="R5"/ip firewall mangle add action="mark-connection" chain=prerouting dst-address-type="!local" new-connection-mark="C6" per-connection-classifier="both-addresses:6/5"/ip firewall mangle add action="mark-routing" chain=prerouting connection-mark="C6" dst-address-type="!local" new-routing-mark="R6"# 以下代码为标记各线路返程数据的连接和路由标记,in开头为连接标记,o1-o6是路由标记/ip firewall mangle add action="mark-connection" chain=input in-interface="pppoe-out1" new-connection-mark="in1"/ip firewall mangle add action="mark-routing" chain=output connection-mark="in1" new-routing-mark="o1"/ip firewall mangle add action="mark-connection" chain=input in-interface="pppoe-out2" new-connection-mark="in2"/ip firewall mangle add action="mark-routing" chain=output connection-mark="in1" new-routing-mark="o2"/ip firewall mangle add action="mark-connection" chain=input in-interface="pppoe-out3" new-connection-mark="in3"/ip firewall mangle add action="mark-routing" chain=output connection-mark="in1" new-routing-mark="o3"/ip firewall mangle add action="mark-connection" chain=input in-interface="pppoe-out4" new-connection-mark="in4"/ip firewall mangle add action="mark-routing" chain=output connection-mark="in1" new-routing-mark="o4"/ip firewall mangle add action="mark-connection" chain=input in-interface="pppoe-out5" new-connection-mark="in5"/ip firewall mangle add action="mark-routing" chain=output connection-mark="in1" new-routing-mark="o5"/ip firewall mangle add action="mark-connection" chain=input in-interface="pppoe-out6" new-connection-mark="in6"/ip firewall mangle add action="mark-routing" chain=output connection-mark="in1" new-routing-mark="o6"#下面是给所标记的数据指定路由出口/ip route add distance=1 dst-address="0.0.0.0/0" gateway="pppoe-out1" routing-mark=R1/ip route add distance=1 dst-address="0.0.0.0/0" gateway="pppoe-out2" routing-mark=R2/ip route add distance=1 dst-address="0.0.0.0/0" gateway="pppoe-out3" routing-mark=R3 /ip route add distance=1 dst-address="0.0.0.0/0" gateway="pppoe-out4" routing-mark=R4 /ip route add distance=1 dst-address="0.0.0.0/0" gateway="pppoe-out5" routing-mark=R5 /ip route add distance=1 dst-address="0.0.0.0/0" gateway="pppoe-out6" routing-mark=R6 /ip route add distance=1 dst-address="0.0.0.0/0" gateway="pppoe-out1" routing-mark=o1 /ip route add distance=1 dst-address="0.0.0.0/0" gateway="pppoe-out2" routing-mark=o2 /ip route add distance=1 dst-address="0.0.0.0/0" gateway="pppoe-out3" routing-mark=o3 /ip route add distance=1 dst-address="0.0.0.0/0" gateway="pppoe-out4" routing-mark=o4 /ip route add distance=1 dst-address="0.0.0.0/0" gateway="pppoe-out5" routing-mark=o5 /ip route add distance=1 dst-address="0.0.0.0/0" gateway="pppoe-out6" routing-mark=o6#下面是指定各个出口的上网方式,/ip firewall nat add action=masquerade chain=srcnat out-interface="pppoe-out1"/ip firewall nat add action=masquerade chain=srcnat out-interface="pppoe-out2"/ip firewall nat add action=masquerade chain=srcnat out-interface="pppoe-out3"/ip firewall nat add action=masquerade chain=srcnat out-interface="pppoe-out4"/ip firewall nat add action=masquerade chain=srcnat out-interface="pppoe-out5"/ip firewall nat add action=masquerade chain=srcnat out-interface="pppoe-out6"#####以上就是PCC六线的合并脚本。
ROS策略及限速
ROS限速、防syn、ip伪装、mac绑定、防火墙、屏蔽端口、教程大全、VPN、ROS端口映射2008-02-28 20:46节省磁盘资源!:foreach i in=[/system logging facility find local=memory ] do=[/system logging facility set $i local=none]RO防synip-firewall-connectionsTracking:TCP Syn Sent Timeout:50TCP syn received timeout:30限线程脚本::for aaa from 2 to 254 do={/ip firewall filter add chain=forwardsrc-address=(192.168.0. . $aaa) protocol=tcp connection-limit=50,32 action=drop}RO端口的屏蔽ip-firewall-Filer Rules里面选择forward的意思代表包的转发firewall rule-GeneralDst.Address:要屏蔽的端口Protocol:tcpAction:drop(丢弃)ros限速手动限速winbox---queues----simple queues点“+”,NAME里随便填,下面是IP地址的确定①Target Address 不管,Dst. Address里填你要限制的内网机器的IP,比如我这里有个 1号机器 IP为 192.168.1.101,那dst.address 里就填192.168.1.101 然后是/32(这里的32不是指掩码了,个人理解为指定的意思)!②interface里记着要选你连接外网那个卡,我这里分了“local和public”,所以选public③ 其他的不管,我们来看最重要的东西拉,Max limit ,这个东西是你限制的上限,注意的是这里的数值是比特位,比如我要限制下载的速度为 500K 那么就填入多少呢? 500 X 1000 X 8=400 0000=4M。
ROS软路由详细设置_图文全解
ROS软路由设置提示:此软件为顶级软路由软件!赶快用吧!记的要《全盘ghost!不是分区ghost恢复哦!是全盘恢复!》不要怀疑软路由的性能,也不用担心所谓的耗电多少。
所谓的软路由耗电大,只不过是商家搞的噱头而已。
软路由完全不需要显示器、键盘鼠标。
甚至,可以在BIOS 里设置系统启动完即关闭硬盘。
至于主板,带集成显卡的即可。
这样的配置下来,软路由功率仅仅20-30瓦左右。
软路由具有极高的性能和广泛的应用。
可轻易实现双线策略、arp绑定、限速、封杀BT 以及网吧借线、vpn等。
尤其对有连锁网吧经营者,利用IPIP协议,不仅可实现借线目的,还可象本地操作一样远程管理其他网吧。
这些,一般硬路由根本无法与之比拟。
我以前对硬路由一直情有独钟,换上软路由后,对它的强大功能赞叹不已。
现在利用它的内置VPN技术轻易做出电信网通加速软件-南北网桥(),又给两家网吧试做了IPIP借线,在这种比较大的压力下,软路由依然运行良好。
我软路由配置:730主板,128M内存,早期的AMD800毒龙CPU,集成显卡和一个8139网卡,外加两块3C905网卡抓图状态:vpn在线拨号,IPIP二家网吧,总用户数量在500多。
ROS软路由基本设置非常简单,如果只做路由转发,以下几步数分钟即可高定:硬件准备:A.首先下载软路由的ghost硬盘版,本站已经在压缩包总提供!B.释放后,ghost至一个小硬盘(20G以下),注意,是整盘GHOST而不是分区。
C.将该硬盘挂在要做路由电脑上,注意必须接在第一个IDE并且是主硬盘接口。
插上一张网卡,这是接内网的LAN。
开机。
软件设置:1.开机,出现登陆提示。
用户:admin 密码:空2.输入setup再按两次A3.在ether1后面输入你的内网IP,如:192.168.0.254/24 (这里/24是24位掩码与255.255.255.0一样)4.输入完ip后,按两次x退出,现在可以可以ping通192.168.0.254了,也可用winbox在图形界面下访问路由了。
ROS限速、防syn、ip伪装、mac绑定、防火墙、各种命令使用详解、屏蔽端口
ROS限速、防syn、ip伪装、mac绑定、防火墙、各种命令使用详解、屏蔽端口ROS限速、防syn、ip伪装、mac绑定、防火墙、各种命令使用详解、屏蔽端口:foreach i in=[/system logging facility find local=memory ] do=[/system logging facility set $ilocal=none]RO防synip-firewall-connectionsTracking:TCP Syn Sent Timeout:50TCP syn received timeout:30限线程脚本::for aaa from 2 to 254 do={/ip firewall filter add chain=forward src-address=(192.168.0. . $aaa) protocol=tcp connection-limit=50,32 action=drop}RO端口的屏蔽ip-firewall-Filer Rules里面选择forward的意思代表包的转发firewall rule-GeneralDst.Address:要屏蔽的端口Protocol:tcpAction:drop(丢弃)ros限速手动限速winbox---queues----simple queues点“+”,NAME里随便填,下面是IP地址的确定①Target Address 不管,Dst. Address里填你要限制的内网机器的IP,比如我这里有个1号机器IP为192.168.1.101,那dst.address 里就填192.168.1.101 然后是/32(这里的32不是指掩码了,个人理解为指定的意思)!②interface里记着要选你连接外网那个卡,我这里分了“local和public”,所以选public③其他的不管,我们来看最重要的东西拉,Max limit ,这个东西是你限制的上限,注意的是这里的数值是比特位,比如我要限制下载的速度为500K 那么就填入多少呢?500 X 1000 X 8=400 0000=4M。
- 1、下载文档前请自行甄别文档内容的完整性,平台不提供额外的编辑、内容补充、找答案等附加服务。
- 2、"仅部分预览"的文档,不可在线预览部分如存在完整性等问题,可反馈申请退款(可完整预览的文档不适用该条件!)。
- 3、如文档侵犯您的权益,请联系客服反馈,我们会尽快为您处理(人工客服工作时间:9:00-18:30)。
教程里的这个台ROS以前的主线路(main)是网通光纤,后来光纤撤了才上的网通ADSL,当时网通光纤为主线路的时候,做"端口映射"到内网服务器,电信线路也可以访问到其内网服务器的,但是回去的数据是走的网通光纤,而且不掉线,确实可以访问。
相当于一半网通,一半电信。
我一直很纳闷,反复测试确实是如此。
直到后来主线路换成了网通ADSL,应该是网通ADSL不转发来自电信的源地址了,所以通过电信线路无法访问内网服务器,今天做了下面这套设置,才可以正常访问了,这才真正是电信线进,电信线出。
当然主线路访问一点问题没有的。
这套设置与通过标记线路用WINBOX远程访问ROS是有区别的,那样光做好INPUT/OUTPUT就行了,因为数据只在ROS上中转,并没进入内网。
这样设置后就可以真正成为网通进网通出,电信进电信出,双线服务器了。
谢谢灰太狼帮忙测试,找出问题关键。
如果有其他更好的办法,或者我做得不对的地方,请大家不吝赐教,多跟帖,多交流。
