老虎触屏控台说明书
Tiger_Touch_入门手册

(此为 CueBiblioteka 场景重放选项设置,Cuelist 稍有不同)
选择程序释放通道属性
推杆模拟内置程序(Shape) 的幅度 推杆模拟内置程序(Shape) 的速度
设置程序的运行曲线
程序翻页设置
设置程序运行的 优先级 开关盲编模式
按键功能设置
重放选项设置 1/2
重放选项设置 2/2
第八步:程序更改
1、修改程序 1) 选择灯具、通过调节转轮或直接调用素材编辑好预期的效果。 2) 功能区按 Record Cue(保存一个单步场景)或 Record Chase/Cuelist(保存一个跑灯 程序或一个 Cue 序列)。 3) 选择需要修改的程序对应的蓝色按键,然后在主菜单中选择合并、替换或插入(插 入一步只针对 Chase / Cuelist)。 注:Chase / Cuelist 也可按功能键区的 Unfold 展开后单步修改
3、 保存快捷视窗。 当前屏幕(包括触摸屏)所显示的窗口可以保存成一个快捷视窗,直接双击触摸屏右下方的 Workspace 区域保存。
第四步:配接灯具
(选择在程序 SHOW 中你需要的所有灯具设备类型和数量) 1、 按 Patch->Fixture(电脑灯)或者 Dimmer(常规灯); 2、 选择相应厂商,找到所需设备(可通过外接键盘直接输入厂商和设备名称快速选取);
可以直接输 入厂商名称 快速选择
选择灯 具厂商
按 Previous 和 Next 翻页选择厂 商
3、选择灯具型号后,通过数字键区或者外接键盘输入灯具的 DMX 线路以及地址码; 修改 DMX 输出线 路和 DMX 地址码
修改灯具用户编号 可修改灯具名(方便记 忆和编程) 选择另外灯具类型 (同一厂商) 选择新的厂商 是否使用预置素材
老虎触屏控台说明书
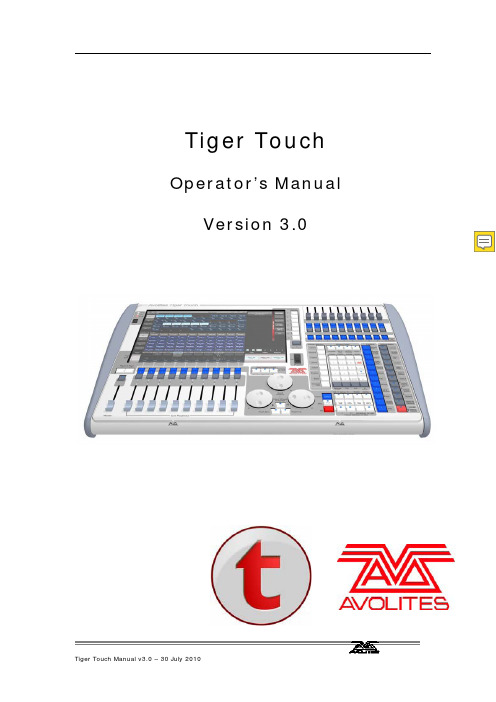
Tiger Touch Operator’s Manual Version 3.01 控台设置 (8)1.1 控台向导 (8)1.2 连接 (12)1.2.1主电源连接 (12)1.2.2启动与关闭 (12)1.2.3 连接DMX线 (12)1.2.4连接一个VDU(视频显示器) (13)1.2.5其他连接 (13)1.3 使用触摸屏和VDU(视频显示器) (14)1.3.1工作窗口 (14)1.3.2 触摸屏菜单区 (16)1.3.3 工具栏 (18)1.3.6 按键功能配置文件 (21)1.3.7 宏按键功能 (22)1.3.8 Tiger Touch Titan的应用 (22)1.4 读取和保存show (23)1.4.1手动保存和加载 (23)1.4.2自动保存 (24)1.4.3 备份现有的文件在U盘 (25)1.5 清除控制台 (25)2.配接 (26)2.1创建 (26)2.1.1灯具选择按键 (26)2.1.2 配接常规灯(Dimmer) (27)2.1.3 配接电脑灯 (28)2.1.4 Visualiser自动配接 (30)2.2 编辑 (30)2.2.1. 更改电脑灯的DMX地址 (30)2.2.2 命名 (31)2.2.3 查看配接 (32)2.2.4灯具调换(Fixture Exchange) (33)2.2.5 更新灯库文件 (34)2.3 复制和移动 (34)2.3.1 复制或移动配接的电脑灯 (34)2.3.2 使用复制灯具 (35)2.4 删除 (36)2.4.1 删除一个已配接的电脑灯 (36)2.5 高级选项 (36)2.5.1 调换水平和垂直功能 (36)2.5.2 反转属性 (37)3. 控制常规灯和电脑灯 (38)3.1 创建 (38)3.1.1 选择灯具来控制 (38)3.1.2 设置灯具的开始位置 (39)3.1.3 清除选择按键 (40)3.1.4 更改控制轮的属性 (41)3.1.5使用触摸屏设置属性 (43)3.1.6 使用数字设置属性 (44)3.1.7 通过数字选择fixtures和dimmers (45)3.1.8 模式选择(Selecting using a pattern) (46)3.1.9 属性组–IPCGBES (47)3.1.10 灯具编组(group) (47)3.1.11 步进式一次选择一个灯具 (49)3.1.12 选择灯具输出高亮状态 (49)3.1.13 排列灯具(Align) (49)3.1.14 翻转(Filp) (50)3.1.15 扇形散开(Fan)模式 (50)3.2 编辑 (51)3.2.1 网格通道窗口 (51)3.3 高级选项 (52)3.3.1 Tools/Menu Latch按键 (52)4.素材(Palettes) (53)4.1 创建 (53)4.1.1 素材以相对值保存 (53)4.1.2 哪个属性存储到素材中 (54)4.1.3保存一个素材 (54)4.1.4 快速保存 (56)4.2 重放 (56)4.2.1. 调出一个素材值 (56)4.2.2素材页面 (57)4.2.3 快速素材 (57)4.2.4 在一个重放中设置素材到灯具 (57)4.3. 编辑 (58)4.3.1.编辑素材 (58)4.3.2. 命名素材 (58)4.4 复制和移动 (59)4.4.1 复制或移动一个素材 (59)4.5 删除 (60)4.5.1 删除素材 (60)4.6 时间 (60)4.6.1 渐变(fade)一个素材和灯具交叠(fixture overlap) (60)4.6.2 素材主控时间(Master Time) (61)5.内置效果(Shapes) (62)5.1 重放 (63)5.1.1 创建一个内置效果 (63)5.1.2 修改内置效果的大小和速度 (64)5.1.3 在多个灯具中扩散内置效果 (65)5.2 编辑 (67)5.2.1 编辑运行中的内置效果 (67)5.2.2 反转内置效果 (67)5.3 删除 (67)5.3.1 删除内置效果 (67)5.4 高级选项 (68)5.4.1 内置效果的淡入淡出模式 (68)6. Cues (69)6.1创建 (69)6.1.1 编程时Tiger Touch如何工作 (69)6.1.2 创建一个cue (70)6.1.3 在cue中使用图形 (71)6.2重放 (71)6.2.1 HTP和LTP (72)6.2.2 重放一个cue (72)6.2.3 更改重放页面 (73)6.2.4释放运行的重放 (73)6.3编辑 (74)6.3.1 编辑一个cue (74)6.3.2 查看cue和重放 (75)6.3.3调入(Include)功能 (76)6.3.4 使用“Off”从cue中移除一个属性 (77)6.4 复制,移动和链接 (78)6.4.1复制或移动一个cue (78)6.5 删除 (79)6.5.1.删除一个cue (79)6.6 时间 (79)6.6.1 为一个cue设置渐变时间和交叠 (80)6.6.2 改变灯具顺序 (82)6.6.3 为一个cue设置属性的渐变时间 (83)6.7 高级选项 (84)6.7.1 释放遮盖 (84)6.7.2 推杆控制图形的大小/速度 (85)6.7.3 曲线 (85)6.7.4 手柄页面锁定(Handle Paging) (85)6.7.5 重放优先级别 (85)6.7.6 按键功能配置文件(Key Profile) (86)7. 多步程序(Chase) (87)7.1 创建 (87)7.1.1 编辑一个多步程序(chase) (87)7.2 重放 (88)7.2.1 运行一个多步程序 (88)7.2.2 连接一个多步程序到控制台 (89)7.2.3 设置多步程序的速度,交叉淡入淡出(crossfade) (90)7.2.4 手动控制多步程序的步 (90)7.2.5 改变多步程序的方向 (91)7.2.6 跳到一个步 (91)7.3 编辑 (91)7.3.1 打开编辑一个多步程序 (91)7.3.2 用 Unfold(展开)编辑一个多步程序 (92)7.4 复制,移动和连接 (93)7.4.1 复制或者移动一个多步程序 (93)7.5 删除 (94)7.5.1 删除多步程序 (94)7.5.2 从多步程序中删除一个步 (94)7.6 时间 (95)7.6.1 设置多步程序中global的时间 (95)7.6.2 设置时间并且关联到单独的步 (96)7.6.3 设置属性淡入淡出的时间并且关联到单独的步 (98)7.7 高级选项 (99)7.7.1 循环/停止一个cue (99)7.7.2 向前/向后/退回/随机 (99)7.7.3 步的链接 (99)7.7.4 记住cue (99)8. Cue Lists (100)8.1 创建 (101)8.1.1 编程一个 cue list (101)8.1.2 为cue list中的cue重命名 (102)8.1.3 在一个cue list中自动加载一个重放 (103)8.2 重放 (104)8.2.1运行一个cue list (104)8.2.2 快速终止(kill)一个 cue list (105)8.3 编辑 (105)8.3.1使用展开(Unfold)编辑一个cue list (105)8.3.2 编辑一个正在运行的 cue list (106)8.3.3 编辑一个正在记录的cue list (107)8.4 复制,移动和链接 (108)8.4.1复制或移动一个cue list (108)8.5 删除 (109)8.5.1.删除cue list (109)8.5.2 删除cue list中的一个cue (109)8.6 时间 (110)8.6.1 Cue List的时间和重放选项 (110)8.6.2 Cue链接和链接反转(Link Offset) (111)8.6.3 设置属性的渐变时间 (113)8.6.4 灯具交叠(Fixture Overlap) (113)8.6.5 使用时间码运行一个cue list (114)8.7 高级选项 (115)8.7.1 释放遮盖 (116)8.7.2 推杆工作模式(Fader mode) (116)8.7.3手柄页面锁定(Handle Paging) (116)8.7.4 Cue选项 (117)8.7.5 自动加载 (117)8.7.6按键功能配置文件(Key Profile) (117)9. 运行演出(Running the show) (118)9.1 重放 (118)9.1.1 备份show (118)9.1.2 工作模式 (118)9.1.3 主控推杆(Master fader) (118)9.1.4 Flash 和 swop 按键 (119)9.1.5 重放优先 (119)9.1.6 预置重放 (119)9.1.7 手动控制show (120)9.2 触摸屏和视频显示工作区 (121)9.2.1 查看菜单 (121)9.2.2 Tiger Touch Titan应用窗口 (121)9.3 使用移动功能 (122)10. 遥控 (123)10.1 设置遥控 (123)10.1.1 网络设置(Network setup) (124)10.1.2 控台设置 (125)10.2 操作遥控 (126)10.2.1 键盘 (126)10.2.2 灯具列表 (128)10.2.3 重放列表 (129)10.2.4 设置屏幕 (129)10.3 故障检测(Troubleshooting) (130)11. 用户设置和其他选项 (131)11.1 配置工作窗口 (131)11.1.1 打开工作窗口 (131)11.1.2 选择和定位工作窗口 (131)11.1.3 保存工作窗口 (132)11.1.4 兼容性视图 (133)11.1.5 配置外接显示器 (134)11.2 按键概况 (135)11.2.1 创建和编辑按键 (136)11.2.2 选择一个键设置 (137)11.2.3 单个重放键设置 (137)11.3 系统菜单 (138)11.3.1 Avotalk安全 (138)11.3.2 网络设置 (138)11.3.3 用户设置 (138)11.3.4 键设置 (139)11.3.5 清除 (139)11.3.6 显示设置 (140)11.4 VDU工具菜单 (140)11.4.1 Virtual面板 (140)11.4.2 Visualiser (140)11.4.3 VDU(视频显示器)用户设置 (140)11.4.4 出厂设置 (142)11.4.5 交换灯具 (143)11.4.6 设置DMX输出口 (143)11.4.7 热键功能 (143)11.5 曲线 (143)11.6 升级软件 (145)11.7 恢复/重新安装系统 (146)11.7.1 USB恢复棒引导 (146)11.7.2 安装说明 (147)11.7.3 安装以后 (147)11.7.4 前面板按键BOIS映射 (148)12. 灯库文件(Fixture Personalities) (149)12.1.1 从Avolite网站上下载灯库文件 (149)12.1.2 在控台上更新的灯库文件缓存区(Cache) (150)12.1.3 申请一个新的的灯库文件 (151)12.1.4 向Avolites报告灯库错误 (151)12.1.5 在紧急情况下 (151)13. 网络 (153)13.1 设置Tiger Touch IP地址 (153)13.1.1 设置IP地址 (153)13.2 设置DMX输出 (154)13.2.1 DMX输出安装窗口 (155)13.3 ArtNet (156)13.3.1 一个简单的ArtNet系统 (156)13.3.2 设置一个Art Net 系统 (158)13.3.3 附加Artnet资源 (159)13.4 用ACDI(异步通讯设备接口)连接模拟器 (160)13.4.1 ACDI (160)13.5 模块设置 (161)13.5.1 安装额外的模块 (162)13.6 AvoTalk (162)13.7 有关IP地址内容 (162)13.7.1 设置你的IP地址 (163)13.7.2 子网掩码 (164)13.7.3 选择一个IP地址和子网掩码 (164)13.7.4 自动分配IP地址(DHCP) (165)13.7.5专用IP地址范围 (166)13.8修复网络连接 (166)14. Tiger Touch用户说明 (167)14.1 控制和屏幕 (167)14.2 新的编程功能 (169)15. 版本备注(Release notes) (171)16. 术语表(Glossary of terms) (171)1 控台设置本章提要:连接主电源,DMX 信号线,视频显示;控台配置和各种视频显示窗口;控台向导;加载和保存show 。
老虎控台二代说明书
老虎控台二代说明书
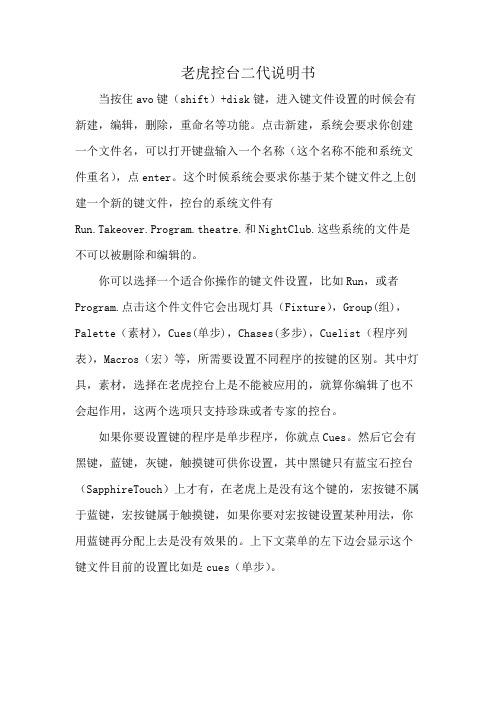
当按住avo键(shift)+disk键,进入键文件设置的时候会有新建,编辑,删除,重命名等功能。
点击新建,系统会要求你创建一个文件名,可以打开键盘输入一个名称(这个名称不能和系统文件重名),点enter。
这个时候系统会要求你基于某个键文件之上创建一个新的键文件,控台的系统文件有
Run.Takeover.Program.theatre.和NightClub.这些系统的文件是不可以被删除和编辑的。
你可以选择一个适合你操作的键文件设置,比如Run,或者Program.点击这个件文件它会出现灯具(Fixture),Group(组),Palette(素材),Cues(单步),Chases(多步),Cuelist(程序列表),Macros(宏)等,所需要设置不同程序的按键的区别。
其中灯具,素材,选择在老虎控台上是不能被应用的,就算你编辑了也不会起作用,这两个选项只支持珍珠或者专家的控台。
如果你要设置键的程序是单步程序,你就点Cues。
然后它会有黑键,蓝键,灰键,触摸键可供你设置,其中黑键只有蓝宝石控台(SapphireTouch)上才有,在老虎上是没有这个键的,宏按键不属于蓝键,宏按键属于触摸键,如果你要对宏按键设置某种用法,你用蓝键再分配上去是没有效果的。
上下文菜单的左下边会显示这个键文件目前的设置比如是cues(单步)。
一体化触摸屏操作台II型使用手册
一体化触摸屏操作台II型使用手册1.1操作台主界面操作台窗口主界面如下:操作台主窗口主要分为三个区域,包括呼叫显示区、按键呼叫区和功能键区。
1、呼叫显示区:显示操作台呼入、呼出对象的状态信息。
可显示呼叫方向、对方名称、功能号码、呼叫级别、通话状态、开始及结束时间、对方号码等信息。
2、按键呼叫区:可根据使用情况定义成单呼键、导航键、组呼、通播和广播。
3、功能键区:用来完成呼叫保持、转接、会议等功能。
1.2功能键区一体化触摸屏操作台II型的功能键区包括以下按键:1、录音:将当前通话录制保存,时长为5分钟。
2、复述:播放已经录制的声音。
3、主通道:当有用户来电时,选择主通道接听来电。
4、辅通道:当有用户来电时,选择辅通道接听来电。
5、保持:保持当前呼叫,当前用户听等待音乐。
6、拒绝:拒绝当前的呼入。
7、切换:在通话过程时,可切换主辅通道。
8、转接:调度转接分机。
当有用户来电时,需转接,9、返回:进入组呼键或导航键后,利用此键返回主页面。
10、会议:发起临时会议。
11、系统:完成系统配置。
(下一节有详细介绍)12、拨号盘:通过拨号方式发起呼叫。
通过输入车次号、机车号或ISDN号码呼叫与调度业务有关的用户。
如图:1)可以选择机车的型号和号码。
2)选择字母和数字的组合。
3)输入数字号码,点“呼叫”按钮呼出。
(这里的数字号码必须是按键上有的或者是系统呼出允许表里有的)4)对于面板上没有显示的字母,可以通过配置按钮来增加;这部分功能是针对维护人员的,这里不做介绍。
当使用拨号盘来呼叫时,建议用鼠标来操作。
当用触摸方式操作而又发现输入号码太过灵敏时(如触摸数字0,却出来2个0),可以请维护人员来修正触摸键的反应速度。
13、重拨:重拨选择的呼叫。
14、静音:对主通道进行静音。
15、上一页:该键用来对按键呼叫区进行翻页。
16、下一页:该键用来对按键呼叫区进行翻页。
17、呼叫1、呼叫2、呼叫3、呼叫4:如果呼入的电话号码在操作台上没有定义、从呼叫1到呼叫4中选择一个空闲的键来响应该呼叫,并进行号码翻译。
Eaton PXBCM 6英寸彩色触屏显示仪用户手册说明书

PXBCM Meter Color T ouchscreen Display User Manual2Instruction Booklet IB150007ENEffective August 2015PXBCM Meter Color T ouchscreenDisplay User ManualEATON 1 IntroductionThe Eaton PXBCM Meter 6” Color Touchscreen Display (PXBCM-DISP-6 ) is pre-programmed to communicate with Eaton PXBCM-MB Meters. The programming allows access to branch-circuit-monitor data and meters through the PXBCM meter base. The built-in navi-gation functions are simple and convenient, allowing easy navigation between screens. The display has been designed to display overall system information for up to 25 configured virtual meters, 100 chan-nel data meters, and alarms.2 InstallationFor installation and connection information, please refer to “PXBCM Meter Color Touchscreen Display Quick Start Guide” (Eaton Pub. #TD150016EN).3 Using the Touchscreen3.1 Basic NavigationBasic navigation between the screens is accomplished by touching labeled tabs, category areas, buttons or other available selections. In addition, unused areas of the screen can be used to navigate back to the home screen.The home screen provides access to Meter Base (MB) information, Meter Module (MMP1-MMP4) information, Virtual Meters, Channel Data, or Alarms. Touching a tab, category, or information button will take the user to the selected screen (see Figure 1).Figure 1. Navigating from the Home Screen to Virtual Meters, Channel Data, or Alarms Screens.Touching the information button on the MB row will take the user to the screen with Meter Base information (see Figure 2).Figure 2. Meter Base Information.As with many of the screens, the header contains several navigation buttons. Touching the “Back” arrow will return the user to the previ-ous level in the hierarchy, in this case, the home screen. Touching the “Next” arrow will take the user to the next associated screen, MMP1 information in this case. Touching the “Previous” arrow will take the user to the previous associated screen, MMP4 information in this case.Touching the information button for one of the Meter Modules(MMP1-MM4) will take the user to the appropriate screen with infor-mation for the selected Meter Module (see Figure 3).Figure 3. Meter Module Information.BackPreviousNextBackNextPreviousVirtual Meters Channel Data Alarms3Instruction Booklet IB150007ENEffective August 2015PXBCM Meter Color T ouchscreen Display User Manual EATON 3.2 Meters T abTouching the Meters tab will take the user to the list of configured Main and Virtual Meters (see Figure 4). There are up to 25 virtual meters (7 on each of the first three pages and 4 on the fourth page).Figure 4. Main and List of Virtual Meters.Each Virtual Meter or Main has a couple screens containing detailed data for the selected meter (see Figure 5).Figure 5. Main andVirtual Meter Data.3.3 Channel Data T abTouching the Channel Data Tab will take the user to a CategorySelection screen (see Figure 6). Once there, the user will be able to select one of nine categories.•The Voltage Pairing category identifies the current channel name and associated voltage for each current channel.•The Voltage category displays the three line-to-line voltages and three line-to-neutral voltages.•The Amps/Max Amps category displays the present RMS amps and largest recorded amps for each channel.•The Fwd./Rev. Energy category displays the accumulated Forward kWh and Reverse kWh for each channel.•The Watts/Max. Watts category displays the present RMS watts and largest recorded watts for each channel.•The VA/Max.VA category displays the present RMS VA and largest recorded VA for each channel.•The Amp Demand/Peak category displays the most recently cal-culated Amp Demand and largest recorded Amp Demand for each channel.•The Fwd./Rev. Demand category displays the most recently calcu-lated Forward Watt Demand and Reverse Watt Demand for each channel.•The Power Factor category displays the apparent power factor for each channel.4Instruction Booklet IB150007ENEffective August 2015PXBCM Meter Color T ouchscreenDisplay User ManualEATON Figure 6. Channel Data Selection Screen.Touching a category will take the user to the channels 1-7 data for the selected category and the most recently selected MMP . From within the Channel Data screens, the “Previous” and “Next” arrows navigate to adjacent Meter Modules. For example, from MMP1, “Previous” navigates to MMP4 while “Next” navigates to MMP2. Also within the Channel Data screens, the “Up” and “Down” arrows navigate through pages of channel data, specifically 1-7 on the first page, 8-15 on the second page, 16-21 on the third page, and AX1-AX4 on the fourth page (see Figure 7).Figure 7. Channel Data Screen.3.4 Alarm T abTouching the Alarms tab will take the user to an overview of the alarms (see Figure 8). Displayed are the number of Latched Current Alarms and Latched Voltage Alarms for each MMP1, MMP2, MMP3, and MMP4, which act as buttons to display additional alarm details (see Figure 9).Figure 8. Alarms Summary Screen.5Instruction Booklet IB150007ENEffective August 2015PXBCM Meter Color T ouchscreen Display User Manual EATON Figure 9. Latched Alarms.Touching MMP1, MMP2, MMP3, or MMP4 on Alarm Counter rows will take the user to screens with further alarm details. The Current Alarm Counters include columns for “Low-Low” (i.e. very low), “Low”, “High”, and “High-High” (i.e. very high). Meanwhile, the Voltage Alarm Counter include columns for “Low” and “High” (see Figure 10).Figure 10. Current Alarm Counters andVoltage Alarm Counters.6Instruction Booklet IB150007ENEffective August 2015PXBCM Meter Color T ouchscreenDisplay User ManualEATON Notes:7Instruction Booklet IB150007ENEffective August 2015PXBCM Meter Color T ouchscreen Display User Manual EATON Notes:EatonElectrical Sector1000 Eaton Boulevard Cleveland, OH 44122United States877-ETN-CARE (877-386-2273) © 2015 EatonAll Rights ReservedPrinted in USAPublication No. IB150007EN / TBG001240 August 2015Eaton is a registered trademark.All other trademarks are property of their respective owners.Instruction Booklet IB150007EN Effective August 2015 PXBCM Meter Color T ouchscreenDisplay User ManualThe information, recommendations, descriptions, and safety nota-tions in this document are based on Eaton’s experience and judg-ment. This instructional literature is published solely for information purposes and should not be considered all-inclusive. If further infor-mation is required, you should consult an authorized Eaton sales representative.The sale of the product shown in this literature is subject to the terms and conditions outlined in appropriate Eaton selling policies or other contractual agreement between the parties. This literature is not intended to and does not enlarge or add to any such contract. The sole source governing the rights and remedies of any purchaser of this equipment is the contract between the purchaser and Eaton. NO WARRANTIES, EXPRESSED OR IMPLIED, INCLUDING WARRANTIES OF FITNESS FOR A PARTICULAR PURPOSE OR MERCHANTABILITY, OR WARRANTIES ARISING FROM COURSE OF DEALING OR USAGE OF TRADE, ARE MADE REGARDING THE INFORMATION, RECOMMENDATIONS, AND DESCRIPTIONS CONTAINED HEREIN.In no event will Eaton be responsible to the purchaser or user in contract, in tort (including negligence), strict liability or otherwise for any special, indirect, incidental or consequential damage or loss whatsoever, including but not limited to damage or loss of use of equipment, plant or power system, cost of capital, loss of power, additional expenses in the use of existing power facilities, or claims against the purchaser or user by its customers resulting from the use of the information, recommendations and description contained herein.The information contained in this manual is subject to change without notice.。
控制器触摸屏操作的说明书
控制器触摸屏操作的说明书用户引导本说明书适用于控制器触摸屏。
在使用前,请务必认真阅读本手册并按照指南使用触摸屏。
如有任何疑问,请随时联系售后客服。
主要操作控制器触摸屏主要有三个功能区:主屏幕,菜单栏和操作区。
主屏幕显示控制器当前状态和指示灯。
菜单栏提供主菜单选项。
操作区可控制各种任务和设备功能。
主屏幕主屏幕显示当前控制器的状态和指示灯。
如果控制器处于活动状态,相应的指示灯将变亮。
在主屏幕上,您还可以看到当前控制器的IP地址和时间。
菜单栏菜单栏提供主菜单选项。
通过点击菜单栏可以展开菜单,选中需要的菜单选项,快速进入相关功能操作界面。
需要注意的是,如果某个菜单项没有权限,将不会被展示。
在这种情况下,您可以联系管理员以获取相应的权限。
操作区操作区可控制各种任务和设备功能。
对于每个任务或设备功能,操作区会显示一个对应的控件。
您可以通过点击这些控件来执行相应的操作。
需要注意的是,在某些情况下,操作区可能会有多个选项。
如果这是您所需的,请按照指示进行操作。
帮助中心如果您有任何问题或疑虑,请访问我们的帮助中心。
在帮助中心中,您可以找到有关如何使用控制器触摸屏的详细信息和常见问题的解决方案。
总结在使用控制器触摸屏时,请务必先认真阅读本手册并按照指南使用。
请注意在任何时候都要保持谨慎和小心,避免造成任何不必要的损害。
如果您有任何疑问或建议,请联系我们的客户服务中心。
我们会尽最大努力为您提供最好的服务。
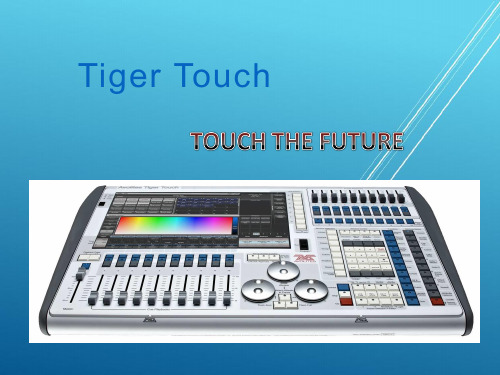
Tiger_Touch老虎控台详解
通道网格窗口
• 详尽显示 灯具的属性 设置与参数
12 DMX 输出 , 6144 通道
10个即时存储的宏按键 10个预置推杆
10个重放推杆 多达1000个的虚拟重放
内置ViTsigueraTloiusceh内r模部可拟以运软行件Avolites Visualiser软件,
预先编程的高效工具。
iPhone的 Wi-Fi信号来控制Tiger Touch。
Avolites 获奖记录
• Avolites思维的创新和技术的深刻理解,不断走在专业照明行业的前列,不断 得到业界的肯定, 最近的奖项包括:
• The 2001 LIVE! Silver Award for Lighting Console of The Year • The 2001 LIVE! Silver Award for Excellence inTraining • The 2000 LIVE! Silver Award for Lighting Console of The • The 1999 LIVE! Silver Award for New Lighting Product of The Year Focus
Finder • The 1999 LIVE! Silver Award for Excellence inTraining • The 1999 LIVE! Gold Award for Lighting Console of The • The 1999 LIVE! Silver Award for Lighting Console of The Year • The 1998 PLASA Products Excellence Award for the Focus Finder • The 1996 LIVE!Award for New Technology The Graphic Tablet • The 1996 PLASA Products Excellence Award for the ART Dimmer • The 1995 LIVE! Award for New Lighting Console Pearl • The 1994 LIVE! Award for Lighting Console Diamond
2201L 触摸显示器使用手册说明书
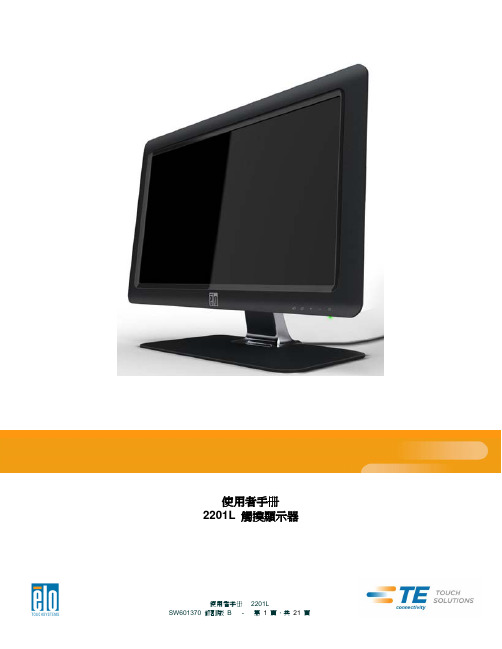
使用者手册2201L 觸摸顯示器版權所有© 2011 T yco Electronics。
保留所有權利。
未經 Tyco Electronics 的書面許可,不得以任何形式或方法(包括但不限於電子、磁性、光學、化學方法或手册等)複製、傳輸或改編本出版物的任何部分,不得將其儲存到擷取系統,不得將其翻譯成任何語言或電腦語言。
免責告示本文件中的訊息有可能在未通知的情况下進行變更。
Tyco Electronics 對本出版物的內容不提供任何形式的陳述或擔保,並且特別宣告拒絕對有特定目的適銷性或適用性提供任何默示擔保。
Tyco Electronics 保留對本出版物進行修訂並對其內容不斷進行變更,而不將這樣的修訂和變更通知任何人的權利。
商標告示Elo TouchSystems、IntelliTouch、iTouch、Tyco Electronics 和 TE(標誌)是 Tyco Electronics 集團公司及其許可方的商標。
Windows 為 Microsoft 集團公司的商標。
本文件中出現的其他產品名稱可能是其各自公司的商標或注册商標。
Tyco Electronics 對除自有商標以外的其他商標不享有任何權益。
目錄第 1 章 – 簡介 (4)第 2 章 – 安裝 (5)第 3 章 – 安裝 (9)第 4 章 – 操作 (10)第 5 章 – 技術支援 (14)第 6 章 – 安全與維護 (15)第 7 章 – 法規訊息 (16)第 8 章 – 擔保訊息 (19)第 1 章 – 簡介產品說明新的觸摸顯示器集 Elo TouchSystems 的可靠效能和觸摸技術與顯示屏設計領域的最新進展於一身。
這種功能組合可在使用者與觸摸顯示屏之間提供自然的訊息流動。
此觸摸顯示器帶有一個 24 位彩色有源矩陣薄膜晶體管 LCD 面板,提供了優异的顯示效能。
其全 HD 解析度 1920x1080 適合顯示圖形和影像。
Avolites Tiger Touch Pro V7.0 操作说明书

Tiger Touch Pro V7.0操作说明书目录1. 品牌介绍 (7)1.1 Titan家族成员 (7)1.2 控台面板介绍 (9)2. 配接灯具 (12)2.1 打开配接灯具窗口 (12)2.2 配接常规灯 (12)2.3 配接电脑灯 (12)2.4 查找灯具 (13)2.5 设置命名 (14)2.6 更改灯具的地址码 (14)2.7 灯具交换 (15)2.8查看配接 (15)2.9 DMX通道查看窗口 (16)2.10更新灯库 (16)2.11 复制和移动灯具 (16)2.12 删除灯具 (17)2.13 调换灯具的Pan和Tilt (17)2.14 调换通道属性 (17)2.15 属性限制 (17)3. 控制常规灯和电脑灯 (18)3.1 选择常规灯和电脑灯 (18)3.2 通过转轮改变灯具属性 (18)3.3 触摸屏调节灯具属性 (19)3.4 设置灯具的默认状态(Locate)键 (20)3.5 条件选灯 (20)3.6 选择高亮后的灯具 (21)3.7 关闭未选择的灯具 (21)3.8 灯具跟随 (21)3.9 翻转灯具Pan / Tilt 运动轨迹 (21)3.10 Fan发散模式 (22)3.11 Menu Latch按键 (24)4. 灯组 (25)4.1 创建灯组 (25)4.2 编辑灯组 (25)4.3 删除灯组 (25)4.4 复制,移动灯组 (25)4.5 灯组内的灯具顺序 (25)5. 素材 (26)5.1 储存单一属性素材 (26)5.2 保存多属性素材 (26)5.3 设置素材的命名 (27)5.4 创建内置效果素材 (27)5.5 应用一个素材 (27)5.6 查看和编辑素材的内容 (28)5.7 编辑素材 (28)5.8 更新重放中的素材 (28)5.9 复制和移动素材 (29)5.10 删除素材 (29)5.11 手动指定素材的时间 (30)5.12 手动修改应用素材时的灯具交叠状态 (30)5.13 素材的总体时间 (30)6. 内置效果 (31)6.1 创建内置效果 (31)6.2 改变内置效果的速度和幅度 (31)6.3 改变内置效果的相位时间 (32)6.4 反向内置效果运动方向 (33)6.5 改变内置效果中的灯具顺序 (33)6.6 内置效果中移除或添加灯具 (33)6.7 删除内置效果 (33)6.8 选择一个正在运行的内置效果进行修改 (33)6.9 内置效果幅度和速度渐入时间 (34)7. 像素映射效果 (36)7.1 创建像素映射效果 (36)7.2 修改cue内的内置效果和像素映射 (37)8. Cues (38)8.2 快建模式 (39)8.3 复制或移动一个cue (39)8.4 删除cue (40)8.5 修改Cue (40)8.6 更新cue内的内容和素材 (40)8.7 Include(调入)功能 (41)8.8 查看cue (41)8.9 使用OFF键移除cue内的属性 (42)8.10 设置cue中的渐变时间和灯具交叠 (43)8.11 改变灯具顺序 (43)8.12 设置cue中的灯具属性渐变时间 (44)8.13 在编程器内编辑cue的时间 (44)8.14 暗场模式 (46)8.15 HTP和LTP (47)8.16 重放一个cue (47)8.17 重放区翻页 (47)8.18 查看正在运行的重放 (48)8.19 速度总控 (48)8.20 释放运行中的重放 (48)8.21 释放Mask (49)8.22 锁定重放在推杆上 (49)8.23 重放优先度 (49)8.24 键设置 (50)9. Chase (51)9.1 创建chase (51)9.2 复制,移动chase (51)9.3 删除chase中的一步 (52)9.4 修改chase (52)9.5 使用【Unfold】(展开)键编辑chase (52)9.6 chase默认时间 (53)9.7 chase中独立的cue时间 (53)9.8 重放一个chase (54)9.9 连接一个chase进行控制 (55)9.10 设置chase的速度和渐入渐出 (55)9.11 手动控制chase的步 (55)9.12 改变chase的运动方向 (56)9.13 跳到第X步 (56)9.14 高级选项 (56)9.15循环/停止在最后的cue (56)9.16 播放方式 (56)9.17 重排cue序号 (56)10. Cue List (57)10.1 创建cue list (57)10.2 复制,移动cue list (57)10.3 删除一个cue list (57)10.4 删除cue list中的某步cue (57)10.5 编辑cue list (58)10.6 使用Unfold键编辑一个cue list (58)10.7 修改正在运行的cue list (58)10.8 禁用一个cue (59)10.9 设置cue list的渐变时间和延时时间 (59)10.10 独立通道渐变时间 (59)10.11 cue连接和offset (59)10.12 灯具交叠 (60)10.13 使用时间码 (60)10.14 Auto load(自动读取) (61)10.15 运行一个cue list (62)10.16 关闭一个cue list (63)10.17 高级选项 (63)10.18 推杆模式 (63)10.19 Tracking跟踪模式 (63)10.20 播放第一个cue (64)11. 演出开始 (65)11.1 备份演出文件 (65)11.2 命名 (65)11.3 总控推杆 (65)11.4 分类总控推杆 (65)11.5 速度总控 (65)11.6 分组总控 (66)11.7 回放优先度 (66)11.8 预置推杆 (66)11.9 查看正在激活的重放 (67)11.10 暗场模式 (67)11.11 快捷工作区 (67)11.12 View菜单 (67)11.13 整理控台 (67)11.14 使用移动功能 (67)12. 用户设置和其它选项 (68)12.1 打开工作窗口 (68)12.2 调整窗口的位置和大小 (68)12.3 保存窗口快照 (68)12.4 配置外接显示器 (69)12.5 系统档菜单 (69)12.6 用户设置 (69)12.7 Wipe (70)12.8 触发 (70)12.9 显示设置 (70)12.10 分配总控 (70)12.11 DMX输出管理 (70)12.12 配置DMX输出 (71)13.进阶 (73)1. 品牌介绍欢迎使用Avolites Titan系列控台。
老虎触屏控台说明书

Tiger Touch Operator’s Manual Version 3.01 控台设置 (8)1.1 控台向导 (8)1.2 连接 (12)1.2.1主电源连接 (12)1.2.2启动与关闭 (12)1.2.3 连接DMX线 (12)1.2.4连接一个VDU(视频显示器) (13)1.2.5其他连接 (13)1.3 使用触摸屏和VDU(视频显示器) (14)1.3.1工作窗口 (14)1.3.2 触摸屏菜单区 (16)1.3.3 工具栏 (18)1.3.6 按键功能配置文件 (21)1.3.7 宏按键功能 (22)1.3.8 Tiger Touch Titan的应用 (22)1.4 读取和保存show (23)1.4.1手动保存和加载 (23)1.4.2自动保存 (24)1.4.3 备份现有的文件在U盘 (25)1.5 清除控制台 (25)2.配接 (26)2.1创建 (26)2.1.1灯具选择按键 (26)2.1.2 配接常规灯(Dimmer) (27)2.1.3 配接电脑灯 (28)2.1.4 Visualiser自动配接 (30)2.2 编辑 (30)2.2.1. 更改电脑灯的DMX地址 (30)2.2.2 命名 (31)2.2.3 查看配接 (32)2.2.4灯具调换(Fixture Exchange) (33)2.2.5 更新灯库文件 (34)2.3 复制和移动 (34)2.3.1 复制或移动配接的电脑灯 (34)2.3.2 使用复制灯具 (35)2.4 删除 (36)2.4.1 删除一个已配接的电脑灯 (36)2.5 高级选项 (36)2.5.1 调换水平和垂直功能 (36)2.5.2 反转属性 (37)3. 控制常规灯和电脑灯 (38)3.1 创建 (38)3.1.1 选择灯具来控制 (38)3.1.2 设置灯具的开始位置 (39)3.1.3 清除选择按键 (40)3.1.4 更改控制轮的属性 (41)3.1.5使用触摸屏设置属性 (43)3.1.6 使用数字设置属性 (44)3.1.7 通过数字选择fixtures和dimmers (45)3.1.8 模式选择(Selecting using a pattern) (46)3.1.9 属性组–IPCGBES (47)3.1.10 灯具编组(group) (47)3.1.11 步进式一次选择一个灯具 (49)3.1.12 选择灯具输出高亮状态 (49)3.1.13 排列灯具(Align) (49)3.1.14 翻转(Filp) (50)3.1.15 扇形散开(Fan)模式 (50)3.2 编辑 (51)3.2.1 网格通道窗口 (51)3.3 高级选项 (52)3.3.1 Tools/Menu Latch按键 (52)4.素材(Palettes) (53)4.1 创建 (53)4.1.1 素材以相对值保存 (53)4.1.2 哪个属性存储到素材中 (54)4.1.3保存一个素材 (54)4.1.4 快速保存 (56)4.2 重放 (56)4.2.1. 调出一个素材值 (56)4.2.2素材页面 (57)4.2.3 快速素材 (57)4.2.4 在一个重放中设置素材到灯具 (57)4.3. 编辑 (58)4.3.1.编辑素材 (58)4.3.2. 命名素材 (58)4.4 复制和移动 (59)4.4.1 复制或移动一个素材 (59)4.5 删除 (60)4.5.1 删除素材 (60)4.6 时间 (60)4.6.1 渐变(fade)一个素材和灯具交叠(fixture overlap) (60)4.6.2 素材主控时间(Master Time) (61)5.内置效果(Shapes) (62)5.1 重放 (63)5.1.1 创建一个内置效果 (63)5.1.2 修改内置效果的大小和速度 (64)5.1.3 在多个灯具中扩散内置效果 (65)5.2 编辑 (67)5.2.1 编辑运行中的内置效果 (67)5.2.2 反转内置效果 (67)5.3 删除 (67)5.3.1 删除内置效果 (67)5.4 高级选项 (68)5.4.1 内置效果的淡入淡出模式 (68)6. Cues (69)6.1创建 (69)6.1.1 编程时Tiger Touch如何工作 (69)6.1.2 创建一个cue (70)6.1.3 在cue中使用图形 (71)6.2重放 (71)6.2.1 HTP和LTP (72)6.2.2 重放一个cue (72)6.2.3 更改重放页面 (73)6.2.4释放运行的重放 (73)6.3编辑 (74)6.3.1 编辑一个cue (74)6.3.2 查看cue和重放 (75)6.3.3调入(Include)功能 (76)6.3.4 使用“Off”从cue中移除一个属性 (77)6.4 复制,移动和链接 (78)6.4.1复制或移动一个cue (78)6.5 删除 (79)6.5.1.删除一个cue (79)6.6 时间 (79)6.6.1 为一个cue设置渐变时间和交叠 (80)6.6.2 改变灯具顺序 (82)6.6.3 为一个cue设置属性的渐变时间 (83)6.7 高级选项 (84)6.7.1 释放遮盖 (84)6.7.2 推杆控制图形的大小/速度 (85)6.7.3 曲线 (85)6.7.4 手柄页面锁定(Handle Paging) (85)6.7.5 重放优先级别 (85)6.7.6 按键功能配置文件(Key Profile) (86)7. 多步程序(Chase) (87)7.1 创建 (87)7.1.1 编辑一个多步程序(chase) (87)7.2 重放 (88)7.2.1 运行一个多步程序 (88)7.2.2 连接一个多步程序到控制台 (89)7.2.3 设置多步程序的速度,交叉淡入淡出(crossfade) (90)7.2.4 手动控制多步程序的步 (90)7.2.5 改变多步程序的方向 (91)7.2.6 跳到一个步 (91)7.3 编辑 (91)7.3.1 打开编辑一个多步程序 (91)7.3.2 用 Unfold(展开)编辑一个多步程序 (92)7.4 复制,移动和连接 (93)7.4.1 复制或者移动一个多步程序 (93)7.5 删除 (94)7.5.1 删除多步程序 (94)7.5.2 从多步程序中删除一个步 (94)7.6 时间 (95)7.6.1 设置多步程序中global的时间 (95)7.6.2 设置时间并且关联到单独的步 (96)7.6.3 设置属性淡入淡出的时间并且关联到单独的步 (98)7.7 高级选项 (99)7.7.1 循环/停止一个cue (99)7.7.2 向前/向后/退回/随机 (99)7.7.3 步的链接 (99)7.7.4 记住cue (99)8. Cue Lists (100)8.1 创建 (101)8.1.1 编程一个 cue list (101)8.1.2 为cue list中的cue重命名 (102)8.1.3 在一个cue list中自动加载一个重放 (103)8.2 重放 (104)8.2.1运行一个cue list (104)8.2.2 快速终止(kill)一个 cue list (105)8.3 编辑 (105)8.3.1使用展开(Unfold)编辑一个cue list (105)8.3.2 编辑一个正在运行的 cue list (106)8.3.3 编辑一个正在记录的cue list (107)8.4 复制,移动和链接 (108)8.4.1复制或移动一个cue list (108)8.5 删除 (109)8.5.1.删除cue list (109)8.5.2 删除cue list中的一个cue (109)8.6 时间 (110)8.6.1 Cue List的时间和重放选项 (110)8.6.2 Cue链接和链接反转(Link Offset) (111)8.6.3 设置属性的渐变时间 (113)8.6.4 灯具交叠(Fixture Overlap) (113)8.6.5 使用时间码运行一个cue list (114)8.7 高级选项 (115)8.7.1 释放遮盖 (116)8.7.2 推杆工作模式(Fader mode) (116)8.7.3手柄页面锁定(Handle Paging) (116)8.7.4 Cue选项 (117)8.7.5 自动加载 (117)8.7.6按键功能配置文件(Key Profile) (117)9. 运行演出(Running the show) (118)9.1 重放 (118)9.1.1 备份show (118)9.1.2 工作模式 (118)9.1.3 主控推杆(Master fader) (118)9.1.4 Flash 和 swop 按键 (119)9.1.5 重放优先 (119)9.1.6 预置重放 (119)9.1.7 手动控制show (120)9.2 触摸屏和视频显示工作区 (121)9.2.1 查看菜单 (121)9.2.2 Tiger Touch Titan应用窗口 (121)9.3 使用移动功能 (122)10. 遥控 (123)10.1 设置遥控 (123)10.1.1 网络设置(Network setup) (124)10.1.2 控台设置 (125)10.2 操作遥控 (126)10.2.1 键盘 (126)10.2.2 灯具列表 (128)10.2.3 重放列表 (129)10.2.4 设置屏幕 (129)10.3 故障检测(Troubleshooting) (130)11. 用户设置和其他选项 (131)11.1 配置工作窗口 (131)11.1.1 打开工作窗口 (131)11.1.2 选择和定位工作窗口 (131)11.1.3 保存工作窗口 (132)11.1.4 兼容性视图 (133)11.1.5 配置外接显示器 (134)11.2 按键概况 (135)11.2.1 创建和编辑按键 (136)11.2.2 选择一个键设置 (137)11.2.3 单个重放键设置 (137)11.3 系统菜单 (138)11.3.1 Avotalk安全 (138)11.3.2 网络设置 (138)11.3.3 用户设置 (138)11.3.4 键设置 (139)11.3.5 清除 (139)11.3.6 显示设置 (140)11.4 VDU工具菜单 (140)11.4.1 Virtual面板 (140)11.4.2 Visualiser (140)11.4.3 VDU(视频显示器)用户设置 (140)11.4.4 出厂设置 (142)11.4.5 交换灯具 (143)11.4.6 设置DMX输出口 (143)11.4.7 热键功能 (143)11.5 曲线 (143)11.6 升级软件 (145)11.7 恢复/重新安装系统 (146)11.7.1 USB恢复棒引导 (146)11.7.2 安装说明 (147)11.7.3 安装以后 (147)11.7.4 前面板按键BOIS映射 (148)12. 灯库文件(Fixture Personalities) (149)12.1.1 从Avolite网站上下载灯库文件 (149)12.1.2 在控台上更新的灯库文件缓存区(Cache) (150)12.1.3 申请一个新的的灯库文件 (151)12.1.4 向Avolites报告灯库错误 (151)12.1.5 在紧急情况下 (151)13. 网络 (153)13.1 设置Tiger Touch IP地址 (153)13.1.1 设置IP地址 (153)13.2 设置DMX输出 (154)13.2.1 DMX输出安装窗口 (155)13.3 ArtNet (156)13.3.1 一个简单的ArtNet系统 (156)13.3.2 设置一个Art Net 系统 (158)13.3.3 附加Artnet资源 (159)13.4 用ACDI(异步通讯设备接口)连接模拟器 (160)13.4.1 ACDI (160)13.5 模块设置 (161)13.5.1 安装额外的模块 (162)13.6 AvoTalk (162)13.7 有关IP地址内容 (162)13.7.1 设置你的IP地址 (163)13.7.2 子网掩码 (164)13.7.3 选择一个IP地址和子网掩码 (164)13.7.4 自动分配IP地址(DHCP) (165)13.7.5专用IP地址范围 (166)13.8修复网络连接 (166)14. Tiger Touch用户说明 (167)14.1 控制和屏幕 (167)14.2 新的编程功能 (169)15. 版本备注(Release notes) (171)16. 术语表(Glossary of terms) (171)1 控台设置本章提要:连接主电源,DMX 信号线,视频显示;控台配置和各种视频显示窗口;控台向导;加载和保存show 。
触摸屏控制器用户手册说明书
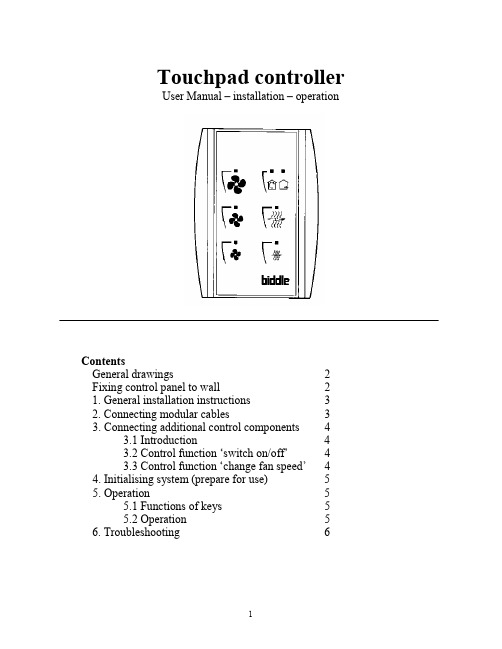
Touchpad controllerUser Manual – installation – operationContentsGeneral drawings2 Fixing control panel to wall21. General installation instructions32. Connecting modular cables33. Connecting additional control components43.1 Introduction43.2 Control function ‘switch on/off’43.3 Control function ‘change fan speed’44. Initialising system (prepare for use)55. Operation55.1 Functions of keys55.2 Operation56. Troubleshooting6Fixing control panel to wall 1234General drawings1. General installation instructions— Read this page carefully before starting the installation.— All installation work must be carried out by expert personnel.— Ensure that the appliances are disconnected from the mains before they are opened.— Avoid unnecessary contact with electronic components.Introduction:1. This manual is intended for all Biddle appliances with a built-in electronic interface.2. This manual describes the installation and use of the Biddle electronic control system.3. Several functions in this manual are only available from a certain version of a control system component. These functions are marked. Whenever you change an existing system you should compare the version number on the component with the version number in the manual.Installation details:1. Up to 10 appliances may be connected to one control panel.2. The total length of all modular cables in one system must be less than 100 metres.3. When installing the modular cable care should be taken to avoid interference with the cable by (electro)-magnetic fields as far as possible (therefore do not lay the cable close to high-voltage cables, fluorescent light starters, etc.)Components:The control system comprises the following components:1. Control panel consisting of 3, 4, 5 or 6 keys.2. Built-in interface with 3 or 6 output contacts, depending on the type of appliance.3. Modular cable including modular plugs, for connecting the control panel to one or more appliances. N.B.: B.T. type telecommunication cables are not suitable! The cable can be ordered from Biddle and is available in various lengths.Installation procedure:1. Connect modular cables + install control panel.2. Connect any customised controls, with control components with potential-free contacts.3. Provide all appliances with a power supply.4. Initialise the system.2. Connecting modular cablesA. Appliances with external connectionsType of appliance:— Modular fan coil unit (PS-B)— Air curtain (KW/MW/GW/KE/ME/GE/CAT/CAT-V)— Cassette air heater (KLV/KLV-E/KLVV)B.Appliances with internal connections Type of appliance:— Fan coil unit (B)— Extractor fan cabinetN.B.: The modular cables (X70) can be connected to both connectors (XiS)(see fold-out sheet, page 2).3. Connecting additional control componentsIf you have no control components to install, you can skip this section and go on to section 4 ‘Initialise the system’.3.1 IntroductionAs well as the basic system functions, there is also a possibility of connecting control components (e.g. room thermostat, timer BMS-controlled relay or door switch) to an appliance. Combinations of control components can also be used.N.B.: For remote switching on blocks X62/X72 volt free contacts are required. These contacts are advised to be gold plated and to have a low relay less than 20 m W to handle 1 mA at 5Vdc.Possible control functions:Control function Control range Adaptation to interface ofconnected appliance Connection points onblock X62/X72Connectionsummaryswitch on/off one appliance (local)none terminals T and G see § 3.2 switch on/off all appliances in system (general)remove jumper 6terminals T and G see § 3.2 change fan speed one appliance (local)none terminals D, P and G see § 3.3 change fan speed all appliances in system (general)remove jumper 5terminals D, P and G see § 3.3 N.B.: The function ‘switch on/off’ does not apply to the KLVV-unit. Consult the user manual of the unit when you want to connect control components to terminals T and G.3.2 Control function ‘switch on/off’1. Remove T-G bridge (X62/X72. see fold-out sheet, page 2) only from the appliance towhich the control component is to be connected.2. Connect the control component between T and G.— Contact made between T and G: Applicance stand-by.— No contact between T and G: Appliance/system off.3. General switching If the control function is to apply to the whole system, remove jumper 6(X64). This should only be done in the appliance to which the control component isconnected. Place the jumper on the reserve positions intended for it (X65), so that it can beused again later.3.3 Control function ‘change fan speed’1. Connect the control component between D and/or P and G (X62/X72, see fold-out sheet, page2). Important: do not disconnect T-G bridge.— Contact made between D and G : Appliance/system runs 1 speed higher than the controlpanel indicates (both speed and electric heating).— No contact between D and G Appliance/system working as indicated on the control panel.— Contact made between P and G Appliance/system runs at fan speed three (electric heatingstage remains unchanged, either one or two).— No contact between P and G Appliance/system working as indicated on the control panel.— Contact made between D, P and G: Appliance/system runs at fan speed three and electricheating stage two.N.B.: The functions using terminals P and G only are available from interface version V4.0Rev.06. Code IC 10 in the illustration on page 2 shows where you can find the version number.2. General switching: If the control function is to apply to the whole system, remove jumper 5(X64) as indicated in the facing illustration. This should only be applied to the appliance towhich the control component is connected. Place the jumper on the reserve positions intendedfor it (X65), so that it can be used again later.NB: General switching’ of the contact between P and G requires control pad version V2. IRev.02 or higher and interface version V4.O Rev.07 or higher. You can find the versionnumber on the printed circuit board of the control pad. In an existing system the control padcould be of a previous version. If the contact between P and G should still apply to the wholesystem, you should order a new control pad from Biddle.3. If the electric heating is not to be stepped up at the same time, remove jumper 4 (X64) asindicated in the illustration. This should be done in each appliance for which the function is required. Place the jumper on the reserve positions intended for it (X65), so that it can be used again later.14564. Initialising the system (prepare for use)When to use:1. On first installation.2. On each extension of the system.3. When checking cables.To start the procedure:1. Press keys 1, 2 and 3 simultaneously.—After 10 seconds the LEDs on keys 1 and 2 will start to flash. This flashing will continue for two minutes.— The LED on key 3 will then flash the same number of times as there are appliances in the system. The system is now ready for use.5. Operation5.1 Functions of keysLED lights when speed setting is ‘low’.LED flashes during initialisation.— Set speed to ‘low’.— Switch off appliance.— Start initialisation.LED lights when speed setting is ‘medium’LED flashes during initialisation.— Set speed to ‘medium’.— Switch off appliance.— Start initialisation.LED lights when speed setting is ‘high’.LED indicates number of appliances connected when initialisation is complete.— Set speed to ‘high’.— Switch off appliance.— Start initialisation.LED lights when electric heating is set to ‘low’.— Set electric heating to ‘low’.— Switch off electric heating.— Set electric heating to ‘low’ and speed to ‘low’.LED lights when electric heating is set to ‘high’.— Set electric heating to ‘high’.— Switch off electric heating— Set electric heating to ‘high’ and speed to ‘medium’.LED-R lights when setting is ‘Recirculate’ or standby.LED-V lights when setting is ‘Ventilate’.— Set air intake valve to ‘Ventilate’.— Set air intake valve to ‘Recirculate’.5.2 OperationA.Turn on appliance : Press key 1, 2, 3, 4 or 5.B.Turn off appliance : Press speed key (1, 2 or 3) on which the LED is illuminated. LED-R (if present) remains illuminated.Safety functions electric heating:1.The following scenarios will automatically be corrected:— Speed off, electric heating on.— Speed low, electric heating high.2. Appliance operates differently from control panel:If the appliance has just been switched off, it may start running again spontaneously.This is in order to discharge the heat stored in the heating elements.6.TroubleshootingAppliance not working:Check point Possible cause Action1no voltage on appliance check power supply to appliance2system not yet initialised start initialisation; see section 4 ‘Initialising the system’3poor contact in modular plug;check contacts (ensure plastic packaging is completely removed)4no bridge between terminals T and G fit bridge between terminals T and G on block X62/72. (see section 3‘Connecting Customised Control components’)5fuse(s) in appliance defective replace fuse (only to be done by skilled personnel)Appliance not working as expected:Check point Fault Possible cause Action/explanation1appliance (with electric heating)starts working spontaneously continued running of electricallyheated appliancesBiddle safety function; see section 5‘Operation’control components are notproperly connectedcheck system; see section 3‘Connecting Customised ControlComponents’2appliance works differently fromexpectationthe jumpers(l-3 red) on the interface are no longer in accordance with factory setting check jumper position against Specifications for factory setting jumper block X643electric heating not working appliance has overheated check maximum thermostat(see appliance manual) Factory setting jumper block X64Appliance type Jumper 1Jumper 2Jumper 3Jumper 4-6 appliance with electric heating with 2 positions present open present present CAT-air curtain open present present present KLV-E open present open present KLVV open open open presentall other appliances present present present present。
老虎触屏控台说明书

老虎触屏控台说明书Tiger Touch Operator’s Manual Version 3.0 1 控台设置 (8) 1.1 控台向导 (8)1.2 连接 (12)1.2.1主电源连接 (12)1.2.2启动与关闭 (12)1.2.3 连接DMX线 (12)1.2.4连接一个VDU(视频显示器) (13) 1.2.5其他连接 (13) 1.3 使用触摸屏和VDU(视频显示器) (14) 1.3.1工作窗口 (14) 1.3.2 触摸屏菜单区 (16)1.3.3 工具栏 (18)1.3.6 按键功能配置文件 (21)1.3.7 宏按键功能 (22)1.3.8 Tiger Touch Titan的应用 (22)1.4 读取和保存show (23)1.4.1手动保存和加载 (23)1.4.2自动保存 (24)1.4.3 备份现有的文件在U盘 (25)1.5 清除控制台 (25)2.配接 (26)2.1创建 (26)2.1.1灯具选择按键 (26)2.1.2 配接常规灯(Dimmer) (27)2.1.3 配接电脑灯 (28)2.1.4 Visualiser自动配接 (30)2.2 编辑 (30)2.2.1. 更改电脑灯的DMX地址 (30)2.2.2 命名 (31)2.2.3 查看配接 (32)2.2.4灯具调换(Fixture Exchange) (33) 2.2.5 更新灯库文件 (34) 2.3 复制和移动 (34)2.3.1 复制或移动配接的电脑灯 (34) 2.3.2 使用复制灯具 (35) 2.4 删除 (36)2.4.1 删除一个已配接的电脑灯 (36) 2.5 高级选项 (36)2.5.1 调换水平和垂直功能 (36)2.5.2 反转属性 (37)3. 控制常规灯和电脑灯 (38)3.1 创建 (38)3.1.1 选择灯具来控制 (38)3.1.2 设置灯具的开始位置 (39)3.1.3 清除选择按键 (40)3.1.4 更改控制轮的属性 (41)3.1.5使用触摸屏设置属性 (43)3.1.6 使用数字设置属性 (44)3.1.7 通过数字选择fixtures和dimmers (45)3.1.8 模式选择(Selecting using a pattern) (46)3.1.9 属性组–IPCGBES (47)3.1.10 灯具编组(group) (47)3.1.11 步进式一次选择一个灯具 (49)3.1.12 选择灯具输出高亮状态 (49)3.1.13 排列灯具(Align) (49)3.1.14 翻转(Filp) (50)3.1.15 扇形散开(Fan)模式 (50)3.2 编辑 (51)3.2.1 网格通道窗口 (51)3.3 高级选项 (52)3.3.1 Tools/Menu Latch按键 (52)4.素材(Palettes) (53)4.1 创建 (53)4.1.1 素材以相对值保存 (53)4.1.2 哪个属性存储到素材中 (54)4.1.3保存一个素材 (54)4.1.4 快速保存 (56)4.2 重放 (56)4.2.1. 调出一个素材值 (56)4.2.2素材页面 (57)4.2.3 快速素材 (57)4.2.4 在一个重放中设置素材到灯具 (57)4.3. 编辑 (58)4.3.1.编辑素材 (58)4.3.2. 命名素材 (58)4.4 复制和移动 (59)4.4.1 复制或移动一个素材 (59)4.5 删除 (60)4.5.1 删除素材 (60)4.6 时间 (60)4.6.1 渐变(fade)一个素材和灯具交叠(fixture overlap) (60)4.6.2 素材主控时间(Master Time) (61)5.内置效果(Shapes) (62)5.1 重放 (63)5.1.1 创建一个内置效果 (63)5.1.2 修改内置效果的大小和速度 (64)5.1.3 在多个灯具中扩散内置效果 (65)5.2 编辑 (67)5.2.1 编辑运行中的内置效果 (67)5.2.2 反转内置效果 (67)5.3 删除 (67)5.3.1 删除内置效果 (67)5.4 高级选项 (68)5.4.1 内置效果的淡入淡出模式 (68)6. Cues (69)6.1创建 (69)6.1.1 编程时Tiger Touch如何工作 (69)6.1.2 创建一个cue (70)6.1.3 在cue中使用图形 (71)6.2重放 (71)6.2.1 HTP和LTP (72)6.2.2 重放一个cue (72)6.2.3 更改重放页面 (73)6.2.4释放运行的重放 (73)6.3编辑 (74)6.3.1 编辑一个cue (74)6.3.2 查看cue和重放 (75)6.3.3调入(Include)功能 (76)6.3.4 使用“Off”从cue中移除一个属性 (77) 6.4 复制,移动和链接 (78)6.4.1复制或移动一个cue (78)6.5 删除 (79)6.5.1.删除一个cue (79)6.6 时间 (79)6.6.1 为一个cue设置渐变时间和交叠 (80) 6.6.2 改变灯具顺序 (82)6.6.3 为一个cue设置属性的渐变时间 (83) 6.7 高级选项 (84)6.7.1 释放遮盖 (84)6.7.2 推杆控制图形的大小/速度 (85)6.7.3 曲线 (85)6.7.4 手柄页面锁定(Handle Paging) (85) 6.7.5 重放优先级别 (85)6.7.6 按键功能配置文件(Key Profile) (86)7. 多步程序(Chase) (87)7.1 创建 (87)7.1.1 编辑一个多步程序(chase) (87)7.2 重放 (88)7.2.1 运行一个多步程序 (88)7.2.2 连接一个多步程序到控制台 (89)7.2.3 设置多步程序的速度,交叉淡入淡出(crossfade) (90)7.2.4 手动控制多步程序的步 (90)7.2.5 改变多步程序的方向 (91)7.2.6 跳到一个步 (91)7.3 编辑 (91)7.3.1 打开编辑一个多步程序 (91)7.3.2 用 Unfold(展开)编辑一个多步程序 (92)7.4 复制,移动和连接 (93)7.4.1 复制或者移动一个多步程序 (93)7.5 删除 (94)7.5.1 删除多步程序 (94)7.5.2 从多步程序中删除一个步 (94)7.6 时间 (95)7.6.1 设置多步程序中global的时间 (95)7.6.2 设置时间并且关联到单独的步 (96)7.6.3 设置属性淡入淡出的时间并且关联到单独的步 (98) 7.7 高级选项 (99)7.7.1 循环/停止一个cue (99)7.7.2 向前/向后/退回/随机 (99)7.7.3 步的链接 (99)7.7.4 记住cue (99)8. Cue Lists (100)8.1 创建 (101)8.1.1 编程一个 cue list (101)8.1.2 为cue list中的cue重命名 (102)8.1.3 在一个cue list中自动加载一个重放 (103)8.2 重放 (104)8.2.1运行一个cue list (104)8.2.2 快速终止(kill)一个 cue list (105)8.3 编辑 (105)8.3.1使用展开(Unfold)编辑一个cue list (105)8.3.2 编辑一个正在运行的 cue list (106)8.3.3 编辑一个正在记录的cue list (107)8.4 复制,移动和链接 (108)8.4.1复制或移动一个cue list (108)8.5 删除 (109)8.5.1.删除cue list (109)8.5.2 删除cue list中的一个cue (109)8.6 时间 (110)8.6.1 Cue List的时间和重放选项 (110)8.6.2 Cue链接和链接反转(Link Offset) (111)8.6.3 设置属性的渐变时间 (113)8.6.4 灯具交叠(Fixture Overlap) (113)8.6.5 使用时间码运行一个cue list (114)8.7 高级选项 (115)8.7.1 释放遮盖 (116)8.7.2 推杆工作模式(Fader mode) (116) 8.7.3手柄页面锁定(Handle Paging) (116) 8.7.4 Cue选项 (117)8.7.5 自动加载 (117)8.7.6按键功能配置文件(Key Profile) (117)9. 运行演出(Running the show) (118)9.1 重放 (118)9.1.1 备份show (118)9.1.2 工作模式 (118)9.1.3 主控推杆(Master fader) (118)9.1.4 Flash 和 swop 按键 (119)9.1.5 重放优先 (119)9.1.6 预置重放 (119)9.1.7 手动控制show (120)9.2 触摸屏和视频显示工作区 (121)9.2.1 查看菜单 (121)9.2.2 Tiger Touch Titan应用窗口 (121)9.3 使用移动功能 (122)10. 遥控 (123)10.1 设置遥控 (123)10.1.1 网络设置(Network setup) (124) 10.1.2 控台设置 (125) 10.2 操作遥控 (126)10.2.1 键盘 (126)10.2.2 灯具列表 (128)10.2.3 重放列表 (129)10.2.4 设置屏幕 (129)10.3 故障检测(Troubleshooting) (130)11. 用户设置和其他选项 (131)11.1 配置工作窗口 (131)11.1.1 打开工作窗口 (131)11.1.2 选择和定位工作窗口 (131)11.1.3 保存工作窗口 (132)11.1.4 兼容性视图 (133)11.1.5 配置外接显示器 (134)11.2 按键概况 (135)11.2.1 创建和编辑按键 (136)11.2.2 选择一个键设置 (137)11.2.3 单个重放键设置 (137)11.3 系统菜单 (138)11.3.1 Avotalk安全 (138)11.3.2 网络设置 (138)11.3.3 用户设置 (138)11.3.4 键设置 (139)11.3.5 清除 (139)11.3.6 显示设置 (140)11.4 VDU工具菜单 (140)11.4.1 Virtual面板 (140)11.4.2 Visualiser (140)11.4.3 VDU(视频显示器)用户设置 (140)11.4.4 出厂设置 (142)11.4.5 交换灯具 (143)11.4.6 设置DMX输出口 (143)11.4.7 热键功能 (143)11.5 曲线 (143)11.6 升级软件 (145)11.7 恢复/重新安装系统 (146)11.7.1 USB恢复棒引导 (146)11.7.2 安装说明 (147)11.7.3 安装以后 (147)11.7.4 前面板按键BOIS映射 (148)12. 灯库文件(Fixture Personalities) (149)12.1.1 从Avolite网站上下载灯库文件 (149)12.1.2 在控台上更新的灯库文件缓存区(Cache) (150) 12.1.3 申请一个新的的灯库文件 (151)12.1.4 向Avolites报告灯库错误 (151)12.1.5 在紧急情况下 (151)13. 网络 (153)13.1 设置Tiger T ouch IP地址 (153)13.1.1 设置IP地址 (153)13.2 设置DMX输出 (154)13.2.1 DMX输出安装窗口 (155)13.3 ArtNet (156)13.3.1 一个简单的ArtNet系统 (156)13.3.2 设置一个Art Net 系统 (158)13.3.3 附加Artnet资源 (159)13.4 用ACDI(异步通讯设备接口)连接模拟器(160) 13.4.1 ACDI (160)13.5 模块设置 (161)13.5.1 安装额外的模块 (162)13.6 AvoTalk (162)13.7 有关IP地址内容 (162)13.7.1 设置你的IP地址 (163)13.7.2 子网掩码 (164)13.7.3 选择一个IP地址和子网掩码 (164)13.7.4 自动分配IP地址(DHCP) (165)13.7.5专用IP地址范围 (166)13.8修复网络连接 (166)14. Tiger Touch用户说明 (167)14.1 控制和屏幕 (167)14.2 新的编程功能 (169)15. 版本备注(Release notes) (171)16. 术语表(Glossary of terms) (171)1 控台设置本章提要:连接主电源,DMX 信号线,视频显示;控台配置和各种视频显示窗口;控台向导;加载和保存show 。
TT(触摸老虎)控台重做系统教程说明

TT(触摸老虎)控台重做系统教程说明
阅读全文下载更多资料:
TT控台很多朋友在找关于系统找不到秘钥盘的问题以下是一
段系统的重做的教程方法希望对国产的TT控台7.0以上版本的不稳定解决方法
修改时间:
将时间改为2013年12月 01日然后控台关机
然后打开控台的盖板取出一个USB备用的U盘也就是系统盘插在后面USB接口
开机
弹出来菜单点击下一步
连续按箭头下直到agree起作用选择Agree
standard(重装C盘系统盘) FUll erase(重装全部)
选择standard(重装C盘系统盘)输入00034 点击install
等待安装完成
完成后拔出U盘选择重启restart
耐心等待驱动安装完成
安装完成
点击左下角阅读全下即可下载TT 6.1版本模拟器。
触摸屏使用说明书
1. 前言 (2)1.1 功能介绍 (2)1.2 技术指标 (3)1.3 注意事项 (3)2. 流水线操作指南 (4)2.1 启停控制 (4)2.2 故障复位操作 (6)2.2.1单工位故障复位 (6)2.2.2 断电故障复位 (7)2.3 屏蔽单工位操作 (9)2.4 单双线控制 (9)2.5 单独工位检测操作 (10)3. 触摸屏说明 (12)3.1 控制面板按钮说明 (12)3.2 触摸屏主页 (12)3.3辅助功能键 (14)3.3.1 辅助功能键F1 (14)3.3.2 辅助功能键F2 (15)3.3.3 辅助功能键F4 (16)3.3.4 辅助功能键F6 (18)4. 工控机说明 (19)4.1 打标机操作界面 (19)4.2 监控软件wincc (19)5.常见故障及处理 (19)5.1 单工位常见机械故障及处理 (19)5.2 报警处理 (20)5.3 电感式接近开关故障处理 (21)1. 前言1.1 功能介绍如上图所示为阀门检测流水线的平面视图,标有红色开始位置为阀门的手工上件处,也是整条流水线的起点。
本瓶阀检测流水线可以实现对瓶阀的流量、低压开启气密性、高压开启气密性、高压闭合气密性、外螺纹、内螺纹通规、内螺纹止规等的精确检测,同时对检测合格的产品进行压口和打标处理,对不合格的产品根据不合格的类型进行自动分拣。
上图中,气密性检测的A线和B线是功能相同的两条线,设置A、B线主要是为了提高检测效率。
阀门检测流水线分双线、A单线、B单线三种工作模式。
默认状态为双线运行模式,即A、B线同时运行,其检测的效率为36秒/个;A单线或B单线运行模式下,检测的效率均为72秒/个。
1.2 技术指标1.主控制柜输入电源电压AC380V,最大电流20A;控制柜内部弱电电压DC24V。
2.流水线正常工作气压:0.5~0.7Mpa;高压气密性检测的高压气体压力2.5MPa,低压检测的低压气体压力0.05Mpa。
Tiger_Touch老虎控台详解

HUD窗口
• HUD窗口是工作区的窗口之一。HUD窗口的大多数信息 已经显示在触摸屏,但若习惯使用Pearl Expert,可以将 它显示出来。
• Show文件完全与 Pearl Expert兼容 备份,复制,加载简单快捷
灯库资源丰富,超过1000种灯具
遥控增加一个外部的无线接入点,可以使用iPod Touch 和
整体外观轻便美观
Tiger Touch工作区域
触摸屏幕区
预置重放和宏功能区
重放推杆区
编程和控制区
Tig功能er Touch按键分布
按钮 工作区窗口
软键区
属性显示区
电源开关
重放信息区
播放页面 选择按键
预置推杆
宏按键 功能按键
主推杆 重放推杆 触摸屏控制键
转轮 窗口滚动条 控制按键
模式 开关
数字及控制键区
awardlightingconsolediamondavolites获奖记录关于tigertouch全新直观的titan操作系统即时强大的cuecuelistchase查看和编辑功能cuecuelistchaseplayback存储空间充足12条dmx输出线路多达6144通道show文件与pearlexpert完全兼容支持artnetavotalk和citp传输协议可用ipodtouch和iphone的wifi信号遥控控台稳定先进的硬件配置整体外观轻便美观tigertouch工作区域预置重放和宏功能区触摸屏幕区重放推杆区编程和控制区tigertouch按键分布电源开关属性选择按键功能按钮模式开关转轮属性显示区播放页面选择按键重放信息区工作区窗口重放推杆chase控制按键数字及控制键区预置推杆宏按键软键区功能按键窗口滚动条控制按键触摸屏控制键主推杆tigertouch后面板台灯插座vdu插座以太网和usb接口电源插口音频输入midi输入输出dmx输出口vbu安装点usb插口重启开关快速响应的宽触摸屏界面全新直观的titan操作系统强大功能保留pearl的友好操作界面titan操作系统免费升级即时强大的cue与cuelist查看编辑功能简单明了的cuelistview窗口给操作者提供了详尽的信息用户可以快速编辑列表
老虎控台说明书

老虎控台说明书老虎控台说明书1. 简介老虎控台是一款功能强大的网络控制台软件,它具有灵活的配置选项和丰富的功能,可以帮助用户更好地管理和监控网络设备。
2. 安装和配置2.1 安装要求在安装老虎控台之前,请确保您的系统满足以下要求:- 操作系统:Windows 7或更高版本- 内存:至少4GB RAM- 磁盘空间:至少100MB可用空间2.2 下载和安装1. 在老虎控台官方网站下载安装程序。
2. 双击安装程序并按照提示完成安装过程。
2.3 配置网络设备在开始使用老虎控台之前,您需要配置您的网络设备与控台进行通信。
以下是一些配置步骤:1. 打开老虎控台,并点击“设备配置”选项。
2. 添加您的网络设备,并输入正确的IP地址、用户名和密码。
3. 根据您的设备类型,选择正确的协议(如SSH、Telnet等)和端口号。
4. 点击“保存”按钮,完成设备配置。
3. 功能介绍老虎控台具有以下主要功能:3.1 远程登录老虎控台允许用户远程登录到网络设备,并执行各种管理操作。
用户可以通过SSH或Telnet协议登录设备,并通过控台界面进行命令输入和操作。
3.2 配置管理老虎控台提供了方便的配置管理功能,用户可以通过控台界面轻松地备份、恢复和修改设备配置。
用户还可以使用控台提供的模板功能来批量配置多个设备。
3.3 设备监控老虎控台可以实时监控网络设备的状态,并显示相关的性能指标。
用户可以通过控台界面查看设备的CPU、内存和网络使用情况,以及各个接口的状态。
3.4 告警和日志老虎控台具有强大的告警和日志功能,用户可以配置告警规则,并通过邮件或短信等方式接收告警通知。
用户还可以查看设备的日志文件,并进行搜索和导出操作。
4. 使用指南以下是一些使用老虎控台的常用操作指南:4.1 登录设备1. 打开老虎控台,并选择需要登录的设备。
2. 输入用户名和密码,并选择正确的登录协议和端口号。
3. 点击“登录”按钮,等待连接完成。
4.2 备份设备配置1. 在控台界面中找到需要备份配置的设备。
老虎控台中英文对照表

英文术语
中文术语
英文术语
中文术语
英文术语
中文术语
Dinner
调光、亮度
Shutter
频闪
Pan/Tilt
水平、垂直
Colour
颜色
CMY
青 品红黄
RGB
红 绿 蓝
Cyan
青色
Magenta
品红
Yellow
黄色
Red
红色
Green
绿色
Blue
蓝色
CTO
色温
White
白色
Macro
减弱
选项
Locate
定位
High Light
高亮
Low light
低亮
Stop
停止
Pause
暂停
Go
运行 开始
Step
步骤
Live
现场 当前
Attribute
属性
Feature
特性
Undo
撤销
Redo
还原
And
和/加
Not
不/减
Thru
至...到
Stage
舞台
Memory
场景 内存
Locate
定位
Reduce
磁盘
Playback
重放/回放
Page
页面/页码
View
查看/视图
Menu
菜单
Tools
工具
Position
位置
Palette
素材
Library
库
Window
窗口
Size
尺寸/规格
Time
- 1、下载文档前请自行甄别文档内容的完整性,平台不提供额外的编辑、内容补充、找答案等附加服务。
- 2、"仅部分预览"的文档,不可在线预览部分如存在完整性等问题,可反馈申请退款(可完整预览的文档不适用该条件!)。
- 3、如文档侵犯您的权益,请联系客服反馈,我们会尽快为您处理(人工客服工作时间:9:00-18:30)。
Tiger Touch Operator’s Manual Version 3.0 1 控台设置 (8)1.1 控台向导 (8)1.2 连接 (12)1.2.1主电源连接 (12)1.2.2启动与关闭 (12)1.2.3 连接DMX线 (12)1.2.4连接一个VDU(视频显示器) (13)1.2.5其他连接 (13)1.3 使用触摸屏和VDU(视频显示器) (14) 1.3.1工作窗口 (14)1.3.2 触摸屏菜单区 (16)1.3.3 工具栏 (18)1.3.6 按键功能配置文件 (21)1.3.7 宏按键功能 (22)1.3.8 Tiger Touch Titan的应用 (22)1.4 读取和保存show (23)1.4.1手动保存和加载 (23)1.4.2自动保存 (24)1.4.3 备份现有的文件在U盘 (25)1.5 清除控制台 (25)2.配接 (26)2.1创建 (26)2.1.1灯具选择按键 (26)2.1.2 配接常规灯(Dimmer) (27)2.1.3 配接电脑灯 (28)2.1.4 Visualiser自动配接 (30)2.2 编辑 (30)2.2.1. 更改电脑灯的DMX地址 (30)2.2.2 命名 (31)2.2.3 查看配接 (32)2.2.4灯具调换(Fixture Exchange) (33)2.2.5 更新灯库文件 (34)2.3 复制和移动 (34)2.3.1 复制或移动配接的电脑灯 (34)2.3.2 使用复制灯具 (35)2.4 删除 (36)2.4.1 删除一个已配接的电脑灯 (36)2.5 高级选项 (36)2.5.1 调换水平和垂直功能 (36)2.5.2 反转属性 (37)3. 控制常规灯和电脑灯 (38)3.1 创建 (38)3.1.1 选择灯具来控制 (38)3.1.2 设置灯具的开始位置 (39)3.1.3 清除选择按键 (40)3.1.4 更改控制轮的属性 (41)3.1.5使用触摸屏设置属性 (43)3.1.6 使用数字设置属性 (44)3.1.7 通过数字选择fixtures和dimmers (45)3.1.8 模式选择(Selecting using a pattern) (46)3.1.9 属性组–IPCGBES (47)3.1.10 灯具编组(group) (47)3.1.11 步进式一次选择一个灯具 (49)3.1.12 选择灯具输出高亮状态 (49)3.1.13 排列灯具(Align) (49)3.1.14 翻转(Filp) (50)3.1.15 扇形散开(Fan)模式 (50)3.2 编辑 (51)3.2.1 网格通道窗口 (51)3.3 高级选项 (52)3.3.1 Tools/Menu Latch按键 (52)4.素材(Palettes) (53)4.1 创建 (53)4.1.1 素材以相对值保存 (53)4.1.2 哪个属性存储到素材中 (54)4.1.3保存一个素材 (54)4.1.4 快速保存 (56)4.2 重放 (56)4.2.1. 调出一个素材值 (56)4.2.2素材页面 (57)4.2.3 快速素材 (57)4.2.4 在一个重放中设置素材到灯具 (57)4.3. 编辑 (58)4.3.1.编辑素材 (58)4.3.2. 命名素材 (58)4.4 复制和移动 (59)4.4.1 复制或移动一个素材 (59)4.5 删除 (60)4.5.1 删除素材 (60)4.6 时间 (60)4.6.1 渐变(fade)一个素材和灯具交叠(fixture overlap) (60)4.6.2 素材主控时间(Master Time) (61)5.内置效果(Shapes) (62)5.1 重放 (63)5.1.1 创建一个内置效果 (63)5.1.2 修改内置效果的大小和速度 (64)5.1.3 在多个灯具中扩散内置效果 (65)5.2 编辑 (67)5.2.1 编辑运行中的内置效果 (67)5.2.2 反转内置效果 (67)5.3 删除 (67)5.3.1 删除内置效果 (67)5.4 高级选项 (68)5.4.1 内置效果的淡入淡出模式 (68)6. Cues (69)6.1创建 (69)6.1.1 编程时Tiger Touch如何工作 (69)6.1.2 创建一个cue (70)6.1.3 在cue中使用图形 (71)6.2重放 (71)6.2.1 HTP和LTP (72)6.2.2 重放一个cue (72)6.2.3 更改重放页面 (73)6.2.4释放运行的重放 (73)6.3编辑 (74)6.3.1 编辑一个cue (74)6.3.2 查看cue和重放 (75)6.3.3调入(Include)功能 (76)6.3.4 使用“Off”从cue中移除一个属性 (77)6.4 复制,移动和链接 (78)6.4.1复制或移动一个cue (78)6.5 删除 (79)6.5.1.删除一个cue (79)6.6 时间 (79)6.6.1 为一个cue设置渐变时间和交叠 (80)6.6.2 改变灯具顺序 (82)6.6.3 为一个cue设置属性的渐变时间 (83)6.7 高级选项 (84)6.7.1 释放遮盖 (84)6.7.2 推杆控制图形的大小/速度 (85)6.7.3 曲线 (85)6.7.4 手柄页面锁定(Handle Paging) (85)6.7.5 重放优先级别 (85)6.7.6 按键功能配置文件(Key Profile) (86)7. 多步程序(Chase) (87)7.1 创建 (87)7.1.1 编辑一个多步程序(chase) (87)7.2 重放 (88)7.2.1 运行一个多步程序 (88)7.2.2 连接一个多步程序到控制台 (89)7.2.3 设置多步程序的速度,交叉淡入淡出(crossfade) (90)7.2.4 手动控制多步程序的步 (90)7.2.5 改变多步程序的方向 (91)7.2.6 跳到一个步 (91)7.3 编辑 (91)7.3.1 打开编辑一个多步程序 (91)7.3.2 用 Unfold(展开)编辑一个多步程序 (92)7.4 复制,移动和连接 (93)7.4.1 复制或者移动一个多步程序 (93)7.5 删除 (94)7.5.1 删除多步程序 (94)7.5.2 从多步程序中删除一个步 (94)7.6 时间 (95)7.6.1 设置多步程序中global的时间 (95)7.6.2 设置时间并且关联到单独的步 (96)7.6.3 设置属性淡入淡出的时间并且关联到单独的步 (98) 7.7 高级选项 (99)7.7.1 循环/停止一个cue (99)7.7.2 向前/向后/退回/随机 (99)7.7.3 步的链接 (99)7.7.4 记住cue (99)8. Cue Lists (100)8.1 创建 (101)8.1.1 编程一个 cue list (101)8.1.2 为cue list中的cue重命名 (102)8.1.3 在一个cue list中自动加载一个重放 (103)8.2 重放 (104)8.2.1运行一个cue list (104)8.2.2 快速终止(kill)一个 cue list (105)8.3 编辑 (105)8.3.1使用展开(Unfold)编辑一个cue list (105)8.3.2 编辑一个正在运行的 cue list (106)8.3.3 编辑一个正在记录的cue list (107)8.4 复制,移动和链接 (108)8.4.1复制或移动一个cue list (108)8.5 删除 (109)8.5.1.删除cue list (109)8.5.2 删除cue list中的一个cue (109)8.6 时间 (110)8.6.1 Cue List的时间和重放选项 (110)8.6.2 Cue链接和链接反转(Link Offset) (111)8.6.3 设置属性的渐变时间 (113)8.6.4 灯具交叠(Fixture Overlap) (113)8.6.5 使用时间码运行一个cue list (114)8.7 高级选项 (115)8.7.1 释放遮盖 (116)8.7.2 推杆工作模式(Fader mode) (116) 8.7.3手柄页面锁定(Handle Paging) (116) 8.7.4 Cue选项 (117)8.7.5 自动加载 (117)8.7.6按键功能配置文件(Key Profile) (117)9. 运行演出(Running the show) (118)9.1 重放 (118)9.1.1 备份show (118)9.1.2 工作模式 (118)9.1.3 主控推杆(Master fader) (118)9.1.4 Flash 和 swop 按键 (119)9.1.5 重放优先 (119)9.1.6 预置重放 (119)9.1.7 手动控制show (120)9.2 触摸屏和视频显示工作区 (121)9.2.1 查看菜单 (121)9.2.2 Tiger Touch Titan应用窗口 (121)9.3 使用移动功能 (122)10. 遥控 (123)10.1 设置遥控 (123)10.1.1 网络设置(Network setup) (124) 10.1.2 控台设置 (125)10.2 操作遥控 (126)10.2.1 键盘 (126)10.2.2 灯具列表 (128)10.2.3 重放列表 (129)10.2.4 设置屏幕 (129)10.3 故障检测(Troubleshooting) (130)11. 用户设置和其他选项 (131)11.1 配置工作窗口 (131)11.1.1 打开工作窗口 (131)11.1.2 选择和定位工作窗口 (131)11.1.3 保存工作窗口 (132)11.1.4 兼容性视图 (133)11.1.5 配置外接显示器 (134)11.2 按键概况 (135)11.2.1 创建和编辑按键 (136)11.2.2 选择一个键设置 (137)11.2.3 单个重放键设置 (137)11.3 系统菜单 (138)11.3.1 Avotalk安全 (138)11.3.2 网络设置 (138)11.3.3 用户设置 (138)11.3.4 键设置 (139)11.3.5 清除 (139)11.3.6 显示设置 (140)11.4 VDU工具菜单 (140)11.4.1 Virtual面板 (140)11.4.2 Visualiser (140)11.4.3 VDU(视频显示器)用户设置 (140)11.4.4 出厂设置 (142)11.4.5 交换灯具 (143)11.4.6 设置DMX输出口 (143)11.4.7 热键功能 (143)11.5 曲线 (143)11.6 升级软件 (145)11.7 恢复/重新安装系统 (146)11.7.1 USB恢复棒引导 (146)11.7.2 安装说明 (147)11.7.3 安装以后 (147)11.7.4 前面板按键BOIS映射 (148)12. 灯库文件(Fixture Personalities) (149)12.1.1 从Avolite网站上下载灯库文件 (149)12.1.2 在控台上更新的灯库文件缓存区(Cache) (150) 12.1.3 申请一个新的的灯库文件 (151)12.1.4 向Avolites报告灯库错误 (151)12.1.5 在紧急情况下 (151)13. 网络 (153)13.1 设置Tiger Touch IP地址 (153)13.1.1 设置IP地址 (153)13.2 设置DMX输出 (154)13.2.1 DMX输出安装窗口 (155)13.3 ArtNet (156)13.3.1 一个简单的ArtNet系统 (156)13.3.2 设置一个Art Net 系统 (158)13.3.3 附加Artnet资源 (159)13.4 用ACDI(异步通讯设备接口)连接模拟器 (160) 13.4.1 ACDI (160)13.5 模块设置 (161)13.5.1 安装额外的模块 (162)13.6 AvoTalk (162)13.7 有关IP地址内容 (162)13.7.1 设置你的IP地址 (163)13.7.2 子网掩码 (164)13.7.3 选择一个IP地址和子网掩码 (164)13.7.4 自动分配IP地址(DHCP) (165)13.7.5专用IP地址范围 (166)13.8修复网络连接 (166)14. Tiger Touch用户说明 (167)14.1 控制和屏幕 (167)14.2 新的编程功能 (169)15. 版本备注(Release notes) (171)16. 术语表(Glossary of terms) (171)1 控台设置本章提要:连接主电源,DMX 信号线,视频显示;控台配置和各种视频显示窗口;控台向导;加载和保存show 。
