三洋传真机说明书SFX-211Hmnl
传真机指南说明书
Removal of facsimile (fax) machines from general practiceThis guide has been developed to allow you to easily navigate to the information you need, whether it is contained in the guide itself or linked to a website. All buttons and images can be clicked on.Using this guide NavigationQuick links at the bottom left of each pageNavigation buttons at the bottom of each page.The home button takes you to the introduction page.Examples of other linkswithin this guideContents1) Introduction2) GP Contract3) Guidance4) Implementation Process5) Evaluation and Benefits6) Final ChecklistTestimonial: Advantages of not having a faxThe transition was made easy as our fax machine stopped working however the advantages of not having the fax machine; were evident within a few weeks.Initially departments would phone up to say that they couldn’t send a fax though, we then asked the senders to email requests instead. Although some were reluctant to do so, we believe it forced the users into changing their mindset, as no other alternative was offered.Emailing is by far, a better way of sending patient identifiable data, it is less timeconsuming than people think, and of course it saves paper.Alison Peat, Acting Practice Manager, South East LondonThe GP contract states that GP Practices will no longer use facsimile (fax) machines for either NHS or patient communications by April 2020.This best practice guidance documentprovides staff the direction, considerations and implementation plans for stopping the use of fax machines from GP Practices for NHS or patient communications, in support of the GP contract digital commitment.The recently published NHS Long Term Plan (LTP) and GMS contract have highlighted that technology will play a central role within the delivery of care. This guidance is anopportunity to move away from non secure communications via fax, NHSE/I is providing access to NHS mail for social care providers and supporting services.Introduction2020 Contractual arrangementsNHS England and GPC England have agreed an ambitious programme of work to be delivered over the next five years. There have been agreed measures that will become contractual requirements in April 2020 or April 2021 subject to available IT infrastructure.NHS England and GPC England expect practices, where feasible, to be making progress in2019/20 towards meeting those requirements. The use of alternatives to facsimile (fax) machines for NHS and patient communications is listed in the GMS contract 5 year framework and the associated guidance that supports the Long-Term Plan. The commitment states:-•By April 2020, practices will no longer use facsimile (fax) machines for either NHS or patient communications.Fax machines will be removed across the NHS in a bid to improve patient safety and cybersecurity. The outdated technology will be phased out by 31 March 2020 under plans announced by Secretary of State Matt Hancock in 2018.NHS organisations will be required to use modern communication methods instead, such as secure email.GP contract Background and requirementThis guide discusses the considerations andprovides guidance on the issues surrounding removal of the faxmachine in GP practices.GuidanceKey ConsiderationsThe following pages contain guidance and process steps that will help you to successfully remove the fax machine from your practice by April 2020.The key considerations are:ConsiderationInformation to consider and planningResources Ensure you allocate enough resources to deliver the planProject time for admin tasks should not be underestimated and considered fullyPlanning A plan/checklist will help you to allocate tasks, timescales and monitor progress effectivelyStaff buy inInvolve all staff in developing the new process -they will be the key to making this a successCommunications A robust communications plan will ensure all stakeholders are aware of whatthe new process will be and when it will happenFall back use of faxes was considered, it became obvious that GP practices should have business continuity plans in place, but they are not expected to rely on faxes.processOverview:Six steps to1Form a project teamsuccessfulimplementation2Who are you in contact with by fax?3New ways of working4Communications5Remove fax number and add email6Update patient facing informationForm project team and agree responsibilitiesExample project team processStep One: Setting up your project teamPractice ManagerOverall project managementAdmin Staff and Team Manager (includes medical secretaries and support staff)Project support to look at different ways of working and any business changeReception Team and Manager Project support to look at different ways of working and any business changeGP named Clinical LeadClinical support and guidance for the project IT, Quality, Governance Manager Guidance and support to ensure best practice for any IT infrastructure needs, data security and governance for sharing dataSocial care and supporting services staff -e.g. Care Home Manager, Senior Care staff, Lead Nurse, Pharmacists, Social Care admin teams etc.Project support to look at different ways ofworking and any business change with regards to different ways of approaching communication.Populate a list of all users that send and receive information from GP practice via faxMonitor sent and received faxes for a minimum of four weeks and record on a usage log. Once you have a comprehensive list, contact all key stakeholder listed about the changes to the fax machines. Explain how you will work through the process with them to identify risks and changes in working practice that may be required.Identify and agree an alternative secure route to communicate with these stakeholders. You may wish to retain this log for a short period in case any concerns are raised. Please destroy the document once the stakeholder engagement work is complete. See below an example list from a GP practice:process Step Two:Stakeholder list Who are you in contact with by fax?Who communicates with your practice using faxFor what reasonSend or receiveContact details Frequency CommentsNext Door Care Home Visit requestsReceivenextdoor@ca DailyProfessionals email has been shared, this is not a secureencrypted account, PID cannot be included in message. Encourage uptake of NHS mail.Down the road pharmacyMedicati onrequestReceiveDowntheroad @DailyProfessionals email has beenshared. This is a secure encrypted account.Best practice for managing NHS Mail clinical enquiries and requests:An automated response should be set to inform the professional/s that their email has been received.NHS mail accounts already set up and in use need to be reviewed and a decision made regarding email address inbox management.A different email address should be considered for patients. It can be an easy transition if you take some precautionary steps, for example, ensure the administration team are informed and have the skills, where required, to manage extra incoming emails to the practice email inbox.processStep Three: New ways of workingSuggested text:Thank you for your email. We will get back to you for all Non-Urgent emails within 48 hours during working hours Mon-Fri 9.00am-6.30pm.For advice or guidance on any health conditions please visit: https:///conditions/NHS 111 service should be used if you urgently need medical help or advice and it is not life-threatening https:///using-the-nhs/nhs-services/urgent-and-emergency-care/nhs-111/Call 999 for any emergency or anything life threatening.Guidance for sending secureemail Example of fax letterUsing your stakeholder list, send a communication to all stakeholders explaining: •the removal date of the fax machine•the agreed process in place to manage emails instead of faxes before the fax is switched ‘off’•your new contact information•their responsibility with regards to GDPR and encryption when sending and receiving patient identifiable information using anything other than NHS mail.process Step Four:communicationsGP practice staff to be informed of fax switch off date during practice team meetingsHow to password protect documentsThese documents may help when implementing your change process:Communications letter to be sentout to Care HomesIn order to successfully implement this project, please also consider these actions:1.Remove the old fax number from all of the following:•Letter headers including any pre-printed materials •Correspondence documents •Website•Social media2.Replace with your email address of choice3.Review all templates within the GP system and change to support the new contactinformation.processStep Five: remove fax number and add emailThe GP contract also mentions the need for a patient facing email address where patients can contact the practice directly.6.1 Practices are encouraged to have a patient-facing email account. NHS England and GPC England will publish guidance on how to deal with emails from patients, including how frequently inboxes should be monitored.Steps to take when setting up your practice’s patient facing email address:•Consider which email address is to be patient facing –ensure the one you choose is easy to be identified as patient facing•Who will manage the inbox from the practice side •Add the new contact information to the practice website•Remember to delete and file incoming emails as there is a limited mail box size for the mail accounts •Remove the fax number.Setting up a patient facing emailprocessStep Six: update patient facing informationAn automated response should be sent to inform the patients that their email has been received.Best practice for managing sent NHS Mail patient enquiries and requests:processStep Six: update patient facing informationSuggested text:Thank you for your emailWe will get back to you for all Non-Urgent emails within 48 hours during working hours Mon-Fri 9.00am-6.30pm.For advice or guidance on any health conditions please visit: https:///conditions/NHS 111 service should be used if you urgently need medical help or advice and it is not life-threateninghttps:///using-the-nhs/hs-services/urgent-and-emergency-care/nhs-111/Call 999 for any emergency or anything life threatening.This page looks at possible time and cost savings within the practice across the admin, reception and GP teams by removing the fax machine.Click here to see benefits calculator which gives an estimated cost saving for your practice following the removal of the fax machine(s).BenefitsCost savings and evidencePractices, pharmacies and care homes who no longer use fax machines have reported the following benefits: •Reduction in material and running costs •Reduction in time spent walking to the fax machine and around the building •Reduction in errors and queries as the communications are clearer•Reduction in missing requests thanks to a safer and more secure data transfer•Better audit trail•Improved data security and clinical safety as having NHS mail allowscommunications with the practice via secure email•Improved turnaround time for queries due to secure email communications improving patient care.Quick reference checklist Final ChecklistKey Considerations: Ensure resources are in place to cover the task, do not underestimate. Plan the project robustly, staff buy in will be key to success.Good communications with key stakeholders is also vital to ensure the move from fax communications to more secure data sharing via email is successful. Form project team: include Practice Manager, Admin, Reception, GP leadership support, IT/Compliance Officer, Social Care Providers and Supporting Staff.Identify stakeholders: monitor and log faxes sent and received from all key stakeholders. Contact all stakeholders recorded on the log and explain the upcoming changes, the process, any risks and new ways of working going forward.New ways of working: Review any NHS mail accounts already set up. Select a shared email address for professionals and one for patients and agree a management process with relevant staff.Communications: Contact all stakeholders on the log and outline the date the fax machine will be removed, new contact information including the responsibilities with governance. Example letters are available in the full guidance click here.Admin: Remove fax number and add email on all letterheads, correspondence documents, website, social media. Review templates in GP system to align with new contact info. Remove all fax machines and manage any issues.This guide discusses the considerations and provides guidance on the how to implement the removal of fax machines from your GP practice.If you would like to read about a practice that have removed their fax machines please click here for the case study.here If you require further information please contact us at Digital Primary Care Team: *************.ukFurther informationContact us How to get in touch。
传真发送和接收用户指南说明书
Sending and Receiving faxes User GuideTable of ContentsSending and Receiving Faxes (2)Configuration (2)Fax Reports (2)Fax Doctor (Prescription Authorization Request) (2)Rx Transfer Report (3)Inbound Documents (5)Fax Doctor (Prescription Authorization Request) (6)Delete these pages (7)Forward as mail message (7)Save as patient document (8)Use to process prescriptions (9)Forward as fax (10)Modifying an Inbound Document (11)Using an Inbound Document to Process a Prescription (13)Saving as a Patient Document (16)Outgoing Faxes (19)Sending a Fax (19)Sending as Mail (22)Printing and Deleting (25)To print a fax: (25)To delete a fax: (26)Sending and Receiving FaxesThis document explains the fax functionality in Kroll. It outlines the process for receiving incoming documents and sending outgoing faxes, as well how to send faxes as mail.ConfigurationThis section explains how to enable the outbound fax service in Kroll so faxes can be sent and received.1. From the Alt-X Start screen, go to File > Configuration > Store > Interfaces > Other and place acheckmark next to Use outbound fax service.2. Click OK to close the Store Level Configuration Parameters screen.Fax ReportsSeveral reports can be faxed directly from the report form. This section explains how to fax Prescription Authorization Requests and Rx Transfer Reports.Fax Doctor (Prescription Authorization Request)1. Call up a patient record and select All Rxs from the right navigation pane.2. Right-click the Rx you want to generate a Doctor Authorization Report for and select Fax Doctor(s).3. The Doctor Authorization Report form will appear. Select the Fax radio button and complete the form.■Comments tab: Enter any comments you want to include in the report■Customized Text tab: Enter any body text you want to include in the report■Options tab: Select the components you want to include in the report■Cover Page Comments tab: Enter any comments you want to appear on the cover page for the report4. Click Fax.The Prescription Authorization Request will be sent to the fax number listed on thecorresponding doctor profile and will appear in the Outbound Fax queue:Rx Transfer Report1. Call up a patient record and select All Rxs from the right navigation pane.2. Right-click the Rx you want to transfer out and select Transfer Rx to Another Store.3. Search for the store you want to transfer the Rx to and click Transfer Out Eligible Rxs.4. Answer Yes when asked ‘Do you want to print the Transfer Report?’.5. Click the Fax radio button and select Fax.The Rx Transfer Report will be sent to the fax number on the store record that you selected and will appear in the Outbound Fax queue:Inbound DocumentsIncoming faxes are located in the Inbound Docs screen, which is accessed from the default Alt-X Start screen. Select Inbound Fax from the highlighted dropdown menu to view inbound faxes.Fax Doctor (Prescription Authorization Request)Inbound Prescription Authorization Requests contain 2D barcodes that get decoded by the Kroll Background Service. Once a 2D barcode has been decoded …..1. Double-click the inbound fax from the Inbound Documents frame.2. The Sort Pages into Documents screen will appear. If the 2D barcode has been successfully decoded,Rx information will populate on the right side of the screen.3. Select an option from the dropdown list at the top of the screen. This determines how the inbound fax willbe used.Delete these pagesThe inbound fax image will be deleted.Forward as mail messageThe New Mail Message screen will appear with the fax image attached. Select a recipient, enter a subject line, and enter any comments in the space provided (optional). Click Send.Save as patient documentThe New Patient Document screen will appear with the fax image attached. Enter a description. Click Ins to add a comment to the file (optional). Click Save.The fax image will appear in the patient’s document library. This screen can be accessed by selecting Documents from the right navigation pane in the patient card.Use to process prescriptionsThe F11 - Drop-off form will appear with the original fill parameters of the faxed Rx. Make any necessary changes to the Rx. Click Okayed.The Rx will be added to the Workorder items frame.If the Prescription Authorization Request contains additional Rxs, the original fill parameters of the next faxed Rx will populate. Make any necessary changes and click Okayed for each Rx included in the fax.When each Rx has been added to the Workorder items pane, click Finalize Work Order. A To Do record will be created for each Rx.Forward as faxThe New Fax Message screen will appear with the fax image attached. Select a recipient and click Send.Modifying an Inbound Document1. Double-click the fax you want to modify.2. The Sort Pages into Documents screen will appear. The pages must be added to a manual documentbefore they can be modified. To do so, select the first page and click the star icon. The page will appear in the <Manual Document> pane.3. Select each additional page you want included in the document and click the plus sign icon. Theadditional pages will appear in the <Manual Document> pane.If you want to modify each page separately, click the star icon instead of the plus sign icon for the subsequent pages. Each page will appear in a separate <Manual Document> pane and can be modified independently.4. Use the Brightness, Contrast, and Saturation controls to adjust the colour display.5. Click Process to save the changes you made to the document.Using an Inbound Document to Process a Prescription1. Double-click the fax you want to use for a prescription.2. The Sort Pages into Documents screen will appear. The pages must be added to a manual documentbefore they can be used. To do so, select the first page and click the star icon. The page will appear in the <Manual Document> pane.3. Select each additional page you want included in the document and click the plus sign icon. Theadditional pages will appear in the <Manual Document> pane.4. Select Use to process prescription from the dropdown menu and click Process.5. The Drop-off screen will appear. Enter the required patient, doctor, and drug information and click Add.6. The Rx will appear in the Workorder Items pane. Repeat step 5 for each Rx you want included in thework order. When you are finished, click Finalize Work Order.Saving as a Patient Document1. Double-click the fax you want to save as a patient document.2. The Sort Pages into Documents screen will appear. The pages must be added to a manual documentbefore they can be used. To do so, select the first page and click the star icon. The page will appear in the <Manual Document> pane.3. Select each additional page you want included in the document and click the plus sign icon. Theadditional pages will appear in the <Manual Document> pane.4. Select Save as patient document from the dropdown menu and click Process.5. The New Patient Document screen will appear. Click F2 to perform a patient search. Enter a title anddescription and any applicable comments. When you are finished, click Save.The document will be added to the patient’s documents. To view the document, call up the Patient Profile and select Documents from the right navigation pane.The Patient Document List screen will appear. Double-click a document view its contents.Outgoing FaxesOutgoing faxes are located at the top of the default view on the Alt-X Start screen. When sending a fax or mail message, you have the option to include an existing script image from your computer or scan a new image. Please refer to your scanner’s user manual for operation instructions.Sending a Fax1. Select the Outbound Fax tab and click New Fax.2. Click Attach Document.Select From Fax/Network Scan to scan a new image, or select From OtherFile to upload an image from your computer.■If you selected From Fax/Network Scan, feed the script through your scanner, as shown:■If you selected From Other File, locate the document you want to attach and click Open. The image will display in the Picture Importer window. Use the Brightness, Contrast, and Saturation controls to adjust the colour display. When you are finished, click Save.3. Enter the recipient’s fax number in the To field and press the Enter key on your keyboard. Click Send.4. When the fax has been transmitted, it will show a status of Completed Successfully.Sending as Mail1. Double-click the document you want to send as a mail message. The document will appear in theUnprocessed Pages section of the Sort Pages into Documents screen.2. The page(s) in the document must be added to a manual document before they can be used. To do so,select the first page and click the start icon. The page will appear in the <Manual Document> pane.3. Select each additional page you want included in the document and click the plus sign icon. Theadditional pages will appear in the <Manual Document> pane.4. Select Forward as mail message from the dropdown menu in the <Manual Document> pane and clickProcess.5. The New Mail Message window will appear. Enter the recipient’s user initials and any body text you wantincluded with the mail message. You can send this message to additional recipients by entering more user initials in the To: field. When you are finished, click Send.The mail message will appear in the Sent Mail folder (accessed via the Mail dashboard icon).NOTE: Mail messages can be sent to Kroll users only.This section explains how to print and delete faxes.To print a fax:Select the fax you want to print and click the Print icon.To delete a fax:Right-click the fax you want to delete and select Delete.。
传真机 说明书

中国 OA 技术联盟论坛-资料网
五、操作面板和传真机功能简介
5.1 操作面板简介
中国 OA 技术联盟论坛-资料网 11
中国 OA 技术联盟论坛-资料网
01. 数字键
面板左侧的 12 个按键用来拨叫电话号码,也可作为参数及功能
设置时的数字或字符输入。
02. “免提拨号”键
用来在不提起手柄的情况下完成拨号工作。
03. “停止”键
用来停止正在进行中的各种工作,如;发送文件、接收文件、 复印等。
在功能设置时作“取消”键使用。
04. “退纸”按钮
按下“退纸”按钮,可将文稿直接从“文件送入口”取出。
B. 按 2 次“传真/复印”键 5. ARE YOU SURE?
C. 按“传真/复印”键确认,机器进行系统总清,操作完成返回至待 机状态。
注:若机器出现不正常现象,请先进行系统总清,若还不能解 决的话,再和我们的维修人员联系。注意:系统总清会清除原来用 户设定的信息而回到出厂设定状态。
中国 OA 技术联盟论坛-资料网 10
八、电话的操作与使用………………………………………24
8.1 正常拨号……………………………………………………………24 8.2 免提拨号……………………………………………………………24 8.3 单触键拨号…………………………………………………………24 8.4 编码拨号……………………………………………………………24 8.2 重拨…………………………………………………………………24
中国 OA 技术联盟论坛-资料网
9
中国 OA 技术联盟论坛-资料网
四、系统总清
安装好 HF-258 传真机之后,在第一次使用之前,请进行如下“系 统总清”操作。
传真机说明书

三洋SFX-S7CL(英文显示)传真机简单操作说明一、传真功能:5张原稿输送3个精细度模式64级灰度留守接收自动重拨B4幅面,30m记录卷纸省纸接收二、电话/拨号功能:LCD显示16个字位停电拨号录音/留言电话保留三、面板说明:1在液晶屏的右边有四个指示灯(分别是电源、外线、内线、再通信)。
2在液晶屏的右边有四个按键(分别是〔功能〕健、〔设定〕健、〔画质〕健、〔原稿种类〕健)。
3 A、B健是快速拨号健。
4 是〔免提〕健,♫是电话〔保留〕健。
5 〔用件〕健(用来听取语音留言),〔留守应答〕健(用来收取语音留言)。
在机器的底座上有下列的开关和插孔:1.24V电源:机器背后由左到右第三个孔。
2.分机接口(B型):机器背后由左到右第二个孔。
3.线路接口:机器背后由左到右第一个孔。
4.传真/电话(模式):右边由外到里第一个开关。
5.话筒接口:右边由外到里第二个孔。
6.铃声音量开关:右边由外到里第三个开关。
7.扬声器音量开关:右边由外到里第四个开关。
四、连接准备:1.将电话话筒曲线插入〔话筒接口〕,将电话线与〔线路接口〕连接好。
2.将随机配送的24V稳压电源一端插入220V电源插座,一端插入传真机的电源接口。
3.安装记录纸:拿下话筒,打开操作面板,按下开启按钮打开记录纸纸仓,将记录纸端从记录纸出口拉出10CM左右,按住记录纸仓盖左右两端关闭记录纸仓盖,合上操作面板将话筒放回。
适用的耗材:热敏纸A4(即210mm、216mm)长30M或B4(即257mm)长30M。
五、通过复印确认传真机的工作是否正常。
方法如下:1.放置文件原稿时有内容的一面向下,将纸导器调整到原稿宽度。
2.显示“STD NORMAL 00”3.按复印键,显示“ZOOM RATE ?100%”。
(按〔复印〕键若干次可以选择复印倍数,复印倍数显示顺序:100%—125%—80%)。
4.按〔传真〕键进行复印,显示“*** COPY ***”5.复印完毕撕下记录纸。
复印传真机 说明书

快速参考复印制作副本进行快速复印1将原始文档面朝上放入 ADF 中,让短边先进入,或面朝下放在扫描仪玻璃上。
注意:请勿将明信片、照片、小物品、透明胶片、相纸或薄介质(例如杂志剪报)放入 ADF 中。
请将这些物品放在扫描仪玻璃上。
2如果您将文档放入 ADF 中,请调整纸张导片。
3从打印机控制面板,按。
4如果将文档放在扫描仪玻璃上,请触摸完成作业来返回到主屏幕。
使用 ADF 复印1将原始文档面朝上放入 ADF 中,让短边先进入。
注意:请勿将明信片、照片、小物品、透明胶片、相纸或薄介质(例如杂志剪报)放入 ADF 中。
请将这些物品放在扫描仪玻璃上。
2调整纸张导片。
3在主屏幕上,触摸复印,或使用键盘来输入副本份数。
出现复印屏幕。
4根据需要更改复印设置。
5触摸复印。
使用扫描仪玻璃复印1将原始文档面朝下放在扫描仪玻璃的左上角。
2在主屏幕上,触摸复印,或使用键盘来输入副本份数。
出现复印屏幕。
3根据需要更改复印设置。
4触摸复印。
5如果您要扫描多个页面,请将下一个文档放在扫描仪玻璃上,然后触摸扫描下一页。
6触摸完成作业来返回到主屏幕。
使用作业中断作业中断暂停当前的打印作业并让您打印副本。
注意:“作业中断”设置必须设置为“开”才能实现此特性。
1将原始文档面朝上放入 ADF 中,让短边先进入,或面朝下放在扫描仪玻璃上。
注意:请勿将明信片、照片、小物品、透明胶片、照片纸或薄介质(例如杂志剪报)放入 ADF 中。
请将这些物品放在扫描仪玻璃上。
2如果您将文档放入 ADF 中,请调整纸张导片。
3从打印机控制面板,按。
4如果您已将文档放在扫描仪玻璃上,请触摸完成作业来返回到主屏幕。
取消复印作业当文档在 ADF 中时取消复印作业当 ADF 开始处理文档时,出现“正在扫描”屏幕。
要取消复印作业,在触摸屏上触摸取消作业。
出现“正在取消扫描作业”屏幕。
ADF 清除 ADF 中的所有页面并取消作业。
当使用扫描仪玻璃复印页面时取消复印作业在触摸屏上触摸取消作业。
传真指南说明书

Fax guide(傳真指南)傳真功能可讓您掃描物件,並將掃描文件傳真給一位或多位收件人。
若要從印表機傳送傳真,您可以輸入傳真號碼、使用快捷鍵號碼,或使用通訊錄來完成此項作業。
請注意:若要在傳真號碼中置入一秒鐘的撥號暫停,請按下在 Fax to(傳真目的地:)方框中,撥號暫停會以逗點呈現。
如果需要先撥外線,請使用這項功能。
使用印表機控制面板傳送傳真1將原始文件載入自動送件器中(面朝上,短邊先進入自動送件器)或放在掃描器玻璃上(面朝下)。
請注意:請不要將明信片、相片、小東西、專用透明投影膠片、相紙或細薄材質(如雜誌剪報)載入自動送件器。
將這些物品放置在掃描器玻璃上。
2若要將文件載入「自動送件器」,請調整紙張導引夾。
3在主畫面上,觸控Fax(傳真)。
4利用觸控式螢幕或鍵台,輸入傳真號碼或快捷鍵。
若要新增收件人,請觸控Next Number(下一個號碼),然後輸入收件人的電話號碼或快捷鍵號號碼,或者搜尋通訊錄。
請注意:若要在傳真號碼中置入撥號暫停,請按下 Fax to(傳真目的地:)框中,撥號暫停會以逗點呈現。
如果需要先撥外線,請使用這項功能。
5觸控Fax It(將它傳真)。
使用傳真快捷鍵傳真快捷鍵就像電話或傳真機上的快捷鍵號碼。
您可以在建立永久傳真目的地時,指定快捷鍵號碼。
永久傳真目的地或快捷鍵號碼建立在「內嵌式 Web 伺服器」上 Settings(設定)下的 Manage Shortcuts(管理快捷鍵)鏈結中。
快捷鍵號碼 (1–99999) 可以包含單一收件人或多個收件人。
建立一組含有快捷鍵號碼的傳真快捷鍵,即可快速而輕易地將群組發送資訊傳真給整個群組。
1將原始文件載入自動送件器中(面朝上,短邊先進入自動送件器)或放在掃描器玻璃上(面朝下)。
請注意:請不要將明信片、相片、小東西、專用透明投影膠片、相紙或細薄材質(如雜誌剪報)放入自動送件器。
將這些物品放置在掃描器玻璃上。
2若要將文件載入「自動送件器」,請調整紙張導引夾。
传真机说明书
安全使用本设备
请妥善保管本说明书,以备日后查阅和维修设备。
注释
如果设备中存有传真,关闭电源拔下设备插头前,您需要将传真打印出来或者保存传真。 (打印内 存中的传真,请参见第 4-4 页上的从内存中打印传真。保存内存中的传真,请参见第 11-4 页上的 将传真转发到另一传真设备上或第 11-4 页上的将传真转移到计算机上。 )
3 4 5
输入号码 (最多 20 位数字) 。 按功能 / 设定键, 输入名称 (最多 15 个字符或留空) 。 按功能 / 设定键, 按停止 / 退出键。
注释
要使用单拨号 5-8,请在按单拨号键的同时按 下转换键。 -或- 按检索 / 速拨键,然后按 # 键。按三位数 的速拨号码。
4
按启动键。
v
使用检索
2
开始
初始设置 ..............................................................................................................2-1 设置日期和时间 .............................................................................................2-1 设置音频或脉冲拨号模式 ...............................................................................2-1 设置本机标志 ID ............................................................................................2-2 常规设置 ..............................................................................................................2-3 设置模式定时器 .............................................................................................2-3 设置纸张类型 .................................................................................................2-3 设置纸张大小 .................................................................................................2-4 设置振铃音量 .................................................................................................2-4 设置蜂鸣器音量 .............................................................................................2-5 设置扬声器音量 .............................................................................................2-5 节墨模式 ........................................................................................................2-5 休眠时间 ........................................................................................................2-6 设置液晶显示屏的对比度 ...............................................................................2-6 安全性能 ........................................................................................................2-6 发送锁定 ........................................................................................................2-6 设置密码 ....................................................................................................2-7 更改发送锁定密码 ......................................................................................2-7 打开发送锁定 .............................................................................................2-7 关闭发送锁定 .............................................................................................2-7 设置锁定 ........................................................................................................2-8
传真机的使用方法和技巧
传真机的使用方法和技巧传真机其实是影像扫描器、调制解调器及电脑打印机的一种合体,扫瞄仪把文件的内容转化成数码影像,调制解调器则把影像资料透过电话线传送,在另一端的打印机则把影像变成原文件的复印本。
传真机工作原理传真机虽然是近20年才开始广泛使用的通讯工具,但是它的发明构思却形成在150年前。
据有关资料显示,早在1843年5月27日,传真机的原理就得到了专利保护,它比电话专利整整早了30年。
传真机的工作原理其实相对简单,首先将需要传真的文件通过光电扫描技术将图像、文字转化为采用霍夫曼编码方式的数字信号,经V.27、V.29方式调制后转成音频信号,然后通过传统电话线进行传送。
接收方的传真机接到信号后,会将信号复原然后打印出来,这样,接收方就会收到一份原发送文件的复印件。
总结一下就是发送时:扫描图像-->生成数据信号-->对数字信息压缩-->调制成模拟信号-->送入电话网传输接收时:接收来自电话网的模拟信号-->解调成数字信号-->解压数字信号成初始的图像信号-->打印。
不同类型的传真机在接收到信号后的打印方式是不同的,他们的工作原理的区别也基本上在这些方面。
现在市场上主要有两种传真机即:热敏纸传真机和喷墨/激光传真机。
热敏纸传真机是通过热敏打印头将打印介质上的热敏材料熔化变色,生成所需的文字和图形。
热转印从热敏技术发展而来,它通过加热转印色带,使涂敷于色带上的墨转印到纸上形成图像。
最常见的传真机中应用了热敏打印方式。
激光式普通纸传真机是利用碳粉附着在纸上而成像的一种传真机,其工作原理主要是利用机体内控制激光束的一个硒鼓,凭借控制激光束的开启和关闭,从而在硒鼓产生带电荷的图象区,此时传真机内部的碳粉会受到电荷的吸引而附着在纸上,形成文字或图像图形。
喷墨式传真机的工作原理与点矩阵式列印相似,是由步进马达带动喷墨头左右移动,把从喷墨头中喷出的墨水依序喷布在普通纸上完成打印的工作。
cimsun cimfax 传真服务器 用户手册说明书

CimFAX 传真服务器用户手册版权©2021 广州先尚计算机科技有限公司保留所有权利CimFAX传真服务器用户指南本版发行日期:11/2021 PFH本出版物的内容将定期变动,恕不另行通知。
更改的内容将会补充到本出版物,且会在本手册发行新版本时予以付梓印刷。
本公司不做任何明示或默许担保,包括本手册内容的适售性或符合特定使用目的,本公司将一律否认。
最近更新内容或其他信息请浏览CimFAX网站,网址:www. 。
请在下列预留的空白处,记录下型号、序列号、购买日期及购买地点。
型号及序列号可以在设备外贴的标签上找到。
与设备元件相关的资料应包括序列号、型号及购买信息。
未经广州先尚计算机科技有限公司书面同意,不得对本出版物的任何部分以任何方式。
包含电子、机械、复制、翻录或其它的方式,进行复制、重制或传播。
CimFAX传真服务器产品型号:产品序号:购买日期:购买地点:经销商:Cimsun和CimFAX标识为广州先尚计算机科技有限公司的注册商标。
本出版物中所用之其它公司之产品名称及商标仅供说明之用,并皆为各公司之所属商标。
有关安全性的信息在您使用本产品之前,请仔细阅读以下内容。
安全使用范畴为了更安全使用本产品,请仔细阅读安全须知,以下内容提出的建议可供参考,请遵照硬件设备上的警告标签与说明使用。
警告:●切勿将硬件设备靠近水源●切勿将硬件设备置于不稳定的平台,以免倾斜滑落而损坏。
●过热保护:硬件设备上的栅形槽口供设备散热通风用,严禁堵住或者盖住这些通风口,此外,设备勿放在保温物体上或者靠近发热物体。
●切勿将设备配件之外的其他物品插入该设备的接口内。
●请正确使用电源,勿使用其他不符合标准的电源,以免不慎造成短路,引起火灾或触电。
●切勿泼洒任何液体到硬件设备上。
●为避免对内部元件的损害和松动,切勿将硬件设备置于震动表面上。
使用电源:●该设备只有在标签上注明的电压类型下方能正常工作,若您不能确定您所使用的电压类型,请向经销商或当地电力部门进行咨询。
传真机说明书

目录(简介) 2安装和最初的准备工作附件---------------------------------------- 1—1 连接安装---------------------------------- 1—2 操作位置---------------------------------- 1—3 按键和指示器---------------------------- 1—5 注意事项---------------------------------- 1—7 袖珍盒带的安装------------------------- 1—8 记录纸的安装----------------------------- 1—9 材料输送盘和接收盘的安装----------- 1—11 选择器的安装----------------------------- 1—13 打开电源开关----------------------------- 1—14 录制外出口信----------------------------- 1—15 核实你的外出口信----------------------- 1—16 建议口信----------------------------------- 1—16 使用程序性能----------------------- ------1—17 编制程序------------------------------ -----1—18 记时系统装置(日期选择)------- ----1—19 标识语程序和传真电话号码鉴别器----------1—21 编制你的标识语程序---------------------1—22 符号代号表(目录)---------------------1—23 编制电话号码程序------------------------1—24 自动拨号电话号码编制程序------------1—25 姓名地址卡目录---------------------------1—25 一次接触拨号电话号码程序------------1—26 快速拨号电话号编制程序---------------1—27 秘密电话号码编制程序------------------1—28 电话号码的清除---------------------------1—29基础说明传送材料前------------------------------- -2—1 可传送的材料------------------------------2—1 自动材料输送盘---------------------------2—1 分析对比------------------------------------2—2 手工操作传送------------------------------2—3 对话过程中,传送材料------------------2—4 传送材料------------------------------------2—4 加入额外记录纸--------------------------2—4 自动传送-----------------------------------2—5 使用自动拨号传送材料-----------------2—5 使用重拨号传送材料--------------------2—6 接收材料和有声口信--------------------2—7 手工操作接收-----------------------------2—7 自动接收----------------------------------2—7 向你的机传送入材料-------------------2—9 在同一呼叫中留下口信或传送入材料------2—9 手近代传送材料-------------------------2—10 声音接触器(开关)-------------------2—11 声音接触器的安装----------------------2—11 从声音接触器接收到的要求----------2—11 复制品的制作----------------------------2—12 中断复印----------------------------------2—12回答装置当作回答装置的操作-------------------2—13 有声口信和材料接收的装配----------2—14 在你贮存口信后录音-------------------2—15 进来呼叫的监听-------------------------2—15 录制备忘口信-----------------------------2—16 两线对话的录音-------------------------2—17 进行和回答声音呼叫-------------------2—18 进行呼叫-----------------------------------2—18 重拨号--------------------------------------2—18 使用自动拨号器进行声音呼叫--------2—19进一步说明自动接收计时器--------------------------3—1呼叫对方-----------------------------------3—3呼叫对方通行语装置--------------------3—3为被呼叫回收材料作准备---------------3—4呼叫其它机--------------------------------3—5通讯网络-----------------------------------3—6编制通讯网通行代号程序--------------3—7打开传送通行代号检查器装置开关-----3—8打开接收通行代号检查器装置开关-----3—9使用保密铃声呼叫--------------------------3—10编制保密铃声身份号码程序--------------3—10使用秘密铃声代号呼叫-------------------3—11从一个遥控电话中,作为回答装置的操作---------------------3—12费用节省器-----------------------------------3—12遥控性能的概述----------------------------3—12编制遥控操作中遥控电话回答装置身份号码程序----------------------------3—13播放口信--------------------------------------3—14播放新录制口信----------------------------3—14倒带和进带----------------------------------3—15标识语口信的录音-------------------------3—15重新装置磁带、录制后来口信----3—16室内监听器----------------------------------3—16重录外出口信-------------------------------3—17跃过外出口信、录制接收进来口信----3—17其它装置-------------------------------------3—18声音按键-------------------------------------3—18闪光按键-------------------------------------3—18拨号联合装置-------------------------------3—18暂停按键-------------------------------------3—19打印材料和目录活动性能材料(日讠志材料)------------4—1 日讠志材料自动打印装置-----------------4—2日讠志材料的打印--------------------------4—3单独传送打印材料------------------------4—4传送材料装置------------------------------4—4贮存电话号码目录------------------------4—5打印电话号码目录------------------------4—5失误(错误)代号目录------------------4—6字体代号目录------------------------------4—7系统编制程序性能可编制程序性能的用法-----------------5—1传真电话标识语标题--------------------5—1传真电话传送速度-----------------------5—1传真电话接收速度-----------------------5—2声音侦听器--------------------------------------5—2 录音时间-----------------------------------------5—3 呼叫台控制方法--------------------------------5—3 电话回答装置(传真电话)铃声计数器--5—4 传真电话铃声计数器--------------------------5—4 重新装置可编制程序性能的使用-----------5—5 打印系统装置目录-----------------------------5—6 服务性能-----------------------------------------5—7 服务材料目录的打印--------------------------5—7 编制服务性能程序-----------------------------5—7故障检修和维修错误代码------------------------------------------6—1 故障检修指南------------------------------------6—2 维修------------------------------------------------6—5 规格------------------------------------------------6—7系统编制程序性能P5—1一、可编制程序性能的用法:1、传真电话标识语标题:ON:你的标识语和电话号码可打印在你机发出的传真材料的最顶一行。
传真机的使用方法与技巧
“卡纸”是传真机很容易出现的故障,特别是使用新的纸张 或使用过了的纸张都较容易产生卡纸故障。如果发生“卡纸”时, 在取纸时要注意,只可扳动传真机说明书上允许动的部件,不要 盲目拉扯上盖。而且尽可能一次将整纸取出,注意不要把破碎的 纸片留在传真机内。
接收到的传真字体变小
一般传真机会有压缩功能将字体缩小以节省纸张,但会与原 稿不同版面不同,可参考手册将“省纸功能”关闭或恢复出厂默 认值即可。
纸张无法正常馈出
请检查进纸器部分有异物阻塞,原稿位置扫描传感器失效,进纸 滚轴间隙过大等。另外应检查发送电机是否转动,如不转动则需检查 与电机有关的电路及电机本身是否损坏。
电话正常使用,无法收发传真
如果您的电话与传真机共享一条电话线,请检查电话线是否 连接错误。请将电信局电话线插入传真机标示“LINE”插孔,将 电话分机插入传真机标示“TEL”插孔。
设计类型
办公实用型
调制解调器速度 14.4kbps ,自动降速
传送速度
8秒/页
扫描速度
208mm
打印速度
8 (秒/页)
灰度等级 电话/拨号
外形尺寸 产品重量
64级中间色调
拨号方式:音频(DTMF)/脉冲;拨号存 储:110个电话号码和姓名 275×355×185
3.4Kg
二、传真机的分类及用途
从不同角度有多种分类方式: 按照信号的形式:模拟传真机、数字传真机; 按照图像的色调和颜色:文件传真机(黑白传真机或真迹传真机)、
向里侧转动蓝芯的齿轮件,确保印字薄膜至少在蓝芯上缠绕一 圈;
向下按后盖两端带有凸点的区域,关上后盖,再牢固地关上前 盖。
2. 载纸盘 载纸盘薄片插入机器背面的两个槽口。
三洋传真操作说明
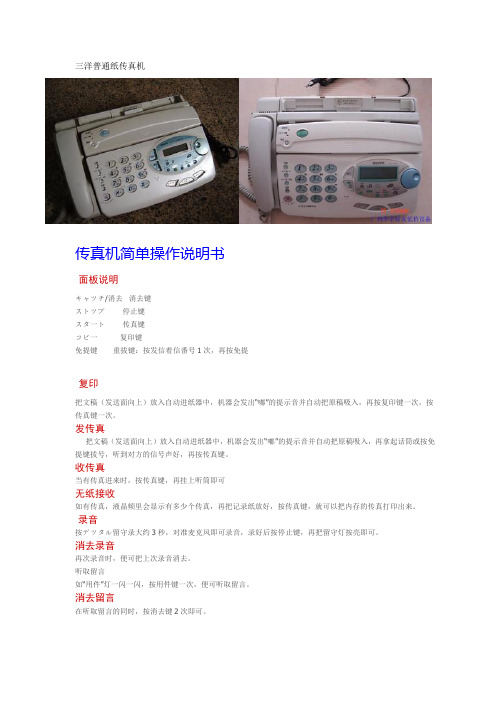
三洋普通纸传真机传真机简单操作说明书面板说明キャツチ/消去消去键ストツブ停止键スタ一ト传真键コビ一复印键免提键重拔键:按发信着信番号1次,再按免提复印把文稿(发送面向上)放入自动进纸器中,机器会发出“嘟”的提示音并自动把原稿吸入,再按复印键一次,按传真键一次。
发传真把文稿(发送面向上)放入自动进纸器中,机器会发出“嘟”的提示音并自动把原稿吸入,再拿起话筒或按免提键拔号,听到对方的信号声好,再按传真键。
收传真当有传真进来时,按传真键,再挂上听筒即可无纸接收如有传真,液晶频里会显示有多少个传真,再把记录纸放好,按传真键,就可以把内存的传真打印出来。
录音按デツタル留守录大约3秒,对准麦克风即可录音,录好后按停止键,再把留守灯按亮即可。
消去录音再次录音时,便可把上次录音消去。
听取留言如“用件”灯一闪一闪,按用件键一次,便可听取留言。
消去留言在听取留言的同时,按消去键2次即可。
三洋SFX-P3传真机简单操作说明书三洋SFX-P3CL传真机(sfx-p90cl)三洋P10传真机简单操作说明书一.面板说明キャツチ/消去消去键ストツブ停止键スタ一ト传真键コビ一复印键免提键重拔键:按发信着信番号1次,再按免提二.日期、时间设置按机能键一次,旋转电话盘一次,机能键一次,输入正确的年月日,时间,再按机能键一次,按停止键返回。
三.复印把文稿(发送面向上)放入自动进纸器中,机器会发出“嘟”的提示音并自动把原稿吸入,再按复印键一次,按传真键一次。
四.发传真把文稿(发送面向上)放入自动进纸器中,机器会发出“嘟”的提示音并自动把原稿吸入,再拿起话筒或按免提键拔号,听到对方的信号声好,再按传真键。
五.收传真当有传真进来时,按传真键,再挂上听筒即可六.无纸接收如有传真,液晶频里会显示有多少个传真,再把记录纸放好,按传真键,就可以把内存的传真打印出来。
七.手动、自动接收传真设置按机能旋转电话盘3次,机能键一次,旋转电话盘フマクス自动接收传真デフヮ手动接收传真(拿起话筒,按传真键一次,再挂上话筒即可)八.录音按デツタル留守录大约3秒,对准麦克风即可录音,录好后按停止键,再把留守灯按亮即可。
2009年三洋传真机维修培训资料
Copyright© SANYO Electric Co., Ltd. All Rights Reserved 2007
配件通用情况说明(A300系列)图例
2005年10月前
2005年10月后
主板/网络板/电源板/操作板/扫描器/打印头变更
26
Copyright© SANYO Electric Co., Ltd. All Rights Reserved 2007
生产中
停产
停产
配件通用情况说明(A200系列)
机型 配件 A200 A220 A190 A216 A200 H A220 H A200 V A220 V
主板 网络板 电源板 操作板 LCD
通 用(除EP-ROM)
通 用
通 用
全部通用
通用
中文 英文 中文 中文
扫描器
机械部
通 用(注意EP-ROM区别)
配件通用情况说明(B4热敏纸系列)
机型 配件
28
28C
34
34C 通用
26
36 适用 本机 适用 本机
主板
不通用
网络板
电源板 操作板 机械板 扫描器 其它
14
无
通用
通用
通用
通用 全部通用
适用 本机
适用 本机
全部通用(注意主板EP-ROM匹配) 基本通用
Copyright© SANYO Electric Co., Ltd. All Rights Reserved 2007
全部停电可打
配件通用情况说明(SFX-A300系列)
机型 配件
A300
A310
A300 V
A310 V
A300 A310Z Z
传真机基本设置
丰达FAX-829全清功能,三次重拨,7,7,9,3,启动,启动。
白电平功能,三次重拨,7,7,9,3,启动,9,启动,11,启动,启动,0或者1,启动,停止。
打印头测试功能,三次免提,4,3,5,7,,11,启动,1(黑)或2(灰)或3(黑白灰),启动。
马达测试功能,三次免提,4,3,5,7,,17,启动,1,2(发送马达)或者3,4(打印头马达)或者5,6(两个一起)丰达FAX-829全清功能,三次重拨,7,7,9,3,启动,启动。
白电平功能,三次重拨,7,7,9,3,启动,9,启动,11,启动,启动,0或者1,启动,停止。
打印头测试功能,三次免提,4,3,5,7,,11,启动,1(黑)或2(灰)或3(黑白灰),启动。
马达测试功能,三次免提,4,3,5,7,,17,启动,1,2(发送马达)或者3,4(打印头马达)或者5,6(两个一起)夏普(SHARP)夏普(SHARP)传真机分为FO和UX两大系列,但是维修方式的进入几乎完全相同,并且内部的菜单也相似。
方法如下:依次按下“FUNCTION” “9” “*” “8” “#” “7”“START”即可进入。
机器多显示为“SOFTTCH MODE” 可用“#” 或“*”进行选择。
一般有以下几项:1.ROM &RAM CHECK2.AUTO FEEDER MODE3.AGING MODE4.PANEL KEY TEST(面板按键测试)5.CHECK PATTERN(检测打印头)6.PRODUCT CHECK7.SIGNAL SEND MODE8.MEMORY CLEAR(存储器清除)9.CCD ADJUST MODE(针对欲夏普254/130/107等老型号的机器)如果机器的扫描器用的是CIS(比如夏普FO-175/375等),则会显示“SHADING MODE”(消隐/补偿模式)。
此功能非常有用,具体将会在以后“传真机扫描头之补偿大全”中做详细介绍10.G3 MODE11.TEL DATA SEND12.TEL DATA RECEIVE五夏普篇其实只要进入了维修方式之后,CIS的补偿步骤大同小异。
传真机中英文对照表及清零大全

传真机中英文对照表及清零大全(1)!传真机常见故障中英文对照clean up scanner 扫描头脏,需清洗扫描头comm.( communication) error 通信错误,传输信号不好,可以重试一次。
cover open 机器的前盖没有盖好,须盖好。
cutter jam 传真纸卡在切刀处,取出传真纸,重新装。
disconneted 传输线路中断,打其他的电话以检查线路。
document jam 文件被卡住,可能是文件没有放对或文件太长。
打开盖取出文件盖好盖,重新放入文件并调整位置重新发。
error code print out 打印错误代码。
hang up phone 挂上电话。
junk mail prohibitor 禁止[拉圾]邮件编程。
mmmmmmmmmm 存储器接收传真满。
nnnnnnnnnn 没有稿件。
no response/busy/ no ans greeting 被叫号码不对或占线,检查号码并重试。
over temperature 传真机温度高。
paper roll empty 传真纸用完。
printer overheated 打印机过热。
recording paper jam 记录纸堵塞。
remove document 清除文件夹纸。
scanner error 扫描错误,清洗扫描头。
total errors 总错误数(文件太长)。
unit overheated 本机过热[/face][/size]松下KX-F90B 无法拨号,是通信板坏了吗?三洋SFX33B 开机后始终打印报告无法停止,是主板坏了吗?理光188 显示全是乱码,是液晶屏坏了吗?把机器的程序做一下全清吧,哦,原来一切问题竟是这样的简单。
传真机在工作时偶尔未能将RAM 中的数据正确读写,或者由于其他原因,造成RAM 中的数据出错,引起传真机不能正常工作,其故障现象便如群魔乱舞,令人惊诧茫然不知所措。
此时只要对机器进行“全清”操作,就灵台清明了(所谓全清就是将传真机主控板上RAM 里的数据清除,使机器中的所有数据都恢复成出厂值)。
三洋传真机说明书

三洋传真机说明书篇一:三洋传真操作说明三洋普通纸传真机传真机简单操作说明书面板说明キャツチ/消去消去键ストツブ停止键スタ一ト传真键コビ一复印键免提键重拔键:按发信着信番号1次,再按免提复印把文稿(发送面向上)放入自动进纸器中,机器会发出“嘟”的提示音并自动把原稿吸入,再按复印键一次,按传真键一次。
发传真把文稿(发送面向上)放入自动进纸器中,机器会发出“嘟”的提示音并自动把原稿吸入,再拿起话筒或按免提键拔号,听到对方的信号声好,再按传真键。
收传真当有传真进来时,按传真键,再挂上听筒即可无纸接收如有传真,液晶频里会显示有多少个传真,再把记录纸放好,按传真键,就可以把内存的传真打印出来。
录音按デツタル留守录大约3秒,对准麦克风即可录音,录好后按停止键,再把留守灯按亮即可。
消去录音再次录音时,便可把上次录音消去。
听取留言如“用件”灯一闪一闪,按用件键一次,便可听取留言。
消去留言在听取留言的同时,按消去键2次即可。
三洋SFX-P3传真机简单操作说明书三洋SFX-P3CL传真机(sfx-p90cl)三洋P10传真机简单操作说明书一.面板说明キャツチ/消去消去键ストツブ停止键スタ一ト传真键コビ一复印键免提键重拔键:按发信着信番号1次,再按免提二.日期、时间设置按机能键一次,旋转电话盘一次,机能键一次,输入正确的年月日,时间,再按机能键一次,按停止键返回。
三.复印把文稿(发送面向上)放入自动进纸器中,机器会发出“嘟”的提示音并自动把原稿吸入,再按复印键一次,按传真键一次。
四.发传真把文稿(发送面向上)放入自动进纸器中,机器会发出“嘟”的提示音并自动把原稿吸入,再拿起话筒或按免提键拔号,听到对方的信号声好,再按传真键。
五.收传真当有传真进来时,按传真键,再挂上听筒即可六.无纸接收如有传真,液晶频里会显示有多少个传真,再把记录纸放好,按传真键,就可以把内存的传真打印出来。
七.手动、自动接收传真设置按机能旋转电话盘3次,机能键一次,旋转电话盘フマクス自动接收传真デフヮ手动接收传真(拿起话筒,按传真键一次,再挂上话筒即可)八.录音按デツタル留守录大约3秒,对准麦克风即可录音,录好后按停止键,再把留守灯按亮即可。
三洋SANYO
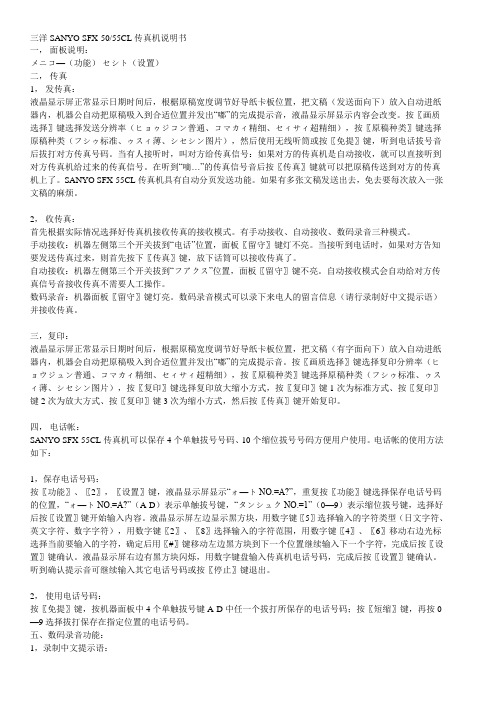
三洋SANYO SFX-50/55CL传真机说明书一,面板说明:メニコ—(功能)セシト(设置)二,传真1,发传真:液晶显示屏正常显示日期时间后,根椐原稿宽度调节好导纸卡板位置,把文稿(发送面向下)放入自动进纸器内,机器公自动把原稿吸入到合适位置并发出“嘟”的完成提示音,液晶显示屏显示内容会改变。
按〖画质选择〗键选择发送分辨率(ヒョゥジコン普通、コマカィ精细、セィサィ超精细),按〖原稿种类〗键选择原稿种类(フシゥ标准、ゥスィ薄、シセシン图片),然后使用无线听筒或按〖免提〗键,听到电话拔号音后拔打对方传真号码。
当有人接听时,叫对方给传真信号:如果对方的传真机是自动接收,就可以直接听到对方传真机给过来的传真信号。
在听到“嘀…”的传真信号音后按〖传真〗键就可以把原稿传送到对方的传真机上了。
SANYO SFX-55CL传真机具有自动分页发送功能。
如果有多张文稿发送出去,免去要每次放入一张文稿的麻烦。
2,收传真:首先根据实际情况选择好传真机接收传真的接收模式。
有手动接收、自动接收、数码录音三种模式。
手动接收:机器左侧第三个开关拔到“电话”位置,面板〖留守〗键灯不亮。
当接听到电话时,如果对方告知要发送传真过来,则首先按下〖传真〗键,放下话筒可以接收传真了。
自动接收:机器左侧第三个开关拔到“フアクス”位置,面板〖留守〗键不亮。
自动接收模式会自动给对方传真信号音接收传真不需要人工操作。
数码录音:机器面板〖留守〗键灯亮。
数码录音模式可以录下来电人的留言信息(请行录制好中文提示语)并接收传真。
三,复印:液晶显示屏正常显示日期时间后,根据原稿宽度调节好导纸卡板位置,把文稿(有字面向下)放入自动进纸器内,机器会自动把原稿吸入到合适位置并发出“嘟”的完成提示音。
按〖画质选择〗键选择复印分辨率(ヒョウジュン普通、コマカィ精细、セィサィ超精细),按〖原稿种类〗键选择原稿种类(フシゥ标准、ゥスィ薄、シセシン图片),按〖复印〗键选择复印放大缩小方式,按〖复印〗键1次为标准方式、按〖复印〗键2次为放大方式、按〖复印〗键3次为缩小方式,然后按〖传真〗键开始复印。
传真机故障中英文

传真机常见故障中英文对照CALL SERVICE——呼叫维修CHECK PAPER——纸用完OUT OF PAPER——没有放记录纸COVER OPEN——后盖打开,关好后盖FAX IN MEMORY——传真机内有文稿FILM EMPTY——色带用完了/色带松弛FILM NEAR EMPTY——色带快用完OPEN CABINET CHECK FILMTYPE/OPEN CABINET CHECK FILMTYPE——色带用完了/没有安装色带CHECK DOCUMENT——文稿没有正确送入本机,试图传送长度长于600mm的文稿。
请按《停止》取下文稿,将文稿分成两页或多页,然后再试一次CHECK MEMORY——存储器内容(电话号码、参数等)被消除了重新编程FAX MEMORY FULL——存储器中已存满了收到的文稿,按停止键可清除所有文件,按传真键可打印文件NO FAX REPLY——对方传真机占线或记录纸用完PAPER JAMMEN——记录纸被卡住PLEASE WAIT——本机正在检查色带是否松弛或停止,请等待REMOVE DOCUMENT——文稿被卡住TRANSMIT ERROR——发生了传送错误,请再试一次UNIT OVERHEATED——本机太热,让机器冷却下来激光机:CALL SERVICE1——多边行马达故障CALL SERVICE2——激光束故障CALL SERVICE3——熔融装置不能发热CALL SERVICE4——风扇马达故障CHANGE/CHANGE SUPPLIES——硒鼓发生了故障,请更换硒鼓和墨盒CHECK DOCUMENT——文稿没有正确送入本机CHECK DRUM——没有正确放入硒鼓,请重新正确插入硒鼓,安上的硒鼓已磨损坏,请更换新鼓COVER OPEN——前盖被打开DRUM LIFE OVER REPLACE DRUM/CHANGE SUPPLIES——硒鼓已经到达使用寿命,请立即更换硒鼓装置FAILED PICK UP——记录纸没有正确送入本机FAX IN MEMORY——本机存储器中存有文稿FAX MEMORY FULL——存储器中已存满了收到的文稿,当进行存储器传送时,正在存储的文稿超过了本机的存储器容量LOW TEM——本机温度太低MEMORY FULL——当进行复印时,正在存储的文件超过了本机的存储容量。
