MNK中文彩页
小清粉金色网页ins欧美风PPT模板

2011
Text Goes Here
Cupcake ipsum dolor. Sit amet cake gummies carrot cake tootsie roll tootsie roll.
Text Goes Here Cupcake ipsum dolor. Sit amet cake gummies
Robert Carlo
Graphic Designer
Cindy Brown
Accountant
14
Kate Perry
Costumer Service
Steve Elliot
Photographer
James Anderson
Engineer
Cupcake ipsum dolor. Sit amet cake gummies carrot cake tootsie roll tootsie roll.
Cupcake ipsum dolor.
5
Mocca Presentation
Cupcake ipsum dolor. Sit amet cake gummies carrot cake tootsie roll tootsie roll. Chocolate bar powder danish halvah. Dragée chocolate biscuit. Sweet jujubes candy tiramisu carrot cake.
Cupcake ipsum dolor. Sit amet cake gummies carrot cake tootsie roll tootsie roll. Chocolate bar powder danish halvah.
沃玛WPM1000系列电子糖果炸麦机及熔化站操作指南说明书

WPM1000 SeriesPOPCORN MAKER WITH MELTING STATIONFor your safety and continued enjoyment of this product,always read the instruction book carefully before using.Table of ContentsImportant Safeguards (2)Special Cord Set Instructions (4)Parts (5)Popping Instructions (6)Popping Chart (6)Popping Additional Batches of Popcorn (7)Melting Station Instructions (8)Tips & Hints (9)Cleaning & Maintenance (10)Recipes (12)IMPORTANT SAFEGUARDS When using any electrical appliance, basic safety precautions should always be taken, including the following:1. R EAD ALL INSTRUCTIONS.2. Always unplug this appliance when not in use.3. Do not use this appliance for other than intended use.4. T he use of accessory attachments not recommendedby Waring may cause injuries.5. K EEP OUT OF REACH OF CHILDREN. Close supervisionis necessary when this appliance is used by or nearchildren.6. D o not allow cord to hang over any edge where a childcan reach it. Arrange cord to avoid pulling, tripping orentanglement.7. D o not operate the appliance with a damaged cord or plug,or after the appliance malfunctions or has been damagedin any manner. Send the unit to the nearest authorizedservice center for examination, repair or adjustment.(ONLY technicians should open up the unit.)8. E XTREME CAUTION must be used when emptyingpopcorn maker. Always empty popcorn over a countertop so that residual hot oil or water will not drip out. Alwaysturn the popping plate away from you when turning.POPPING PLATE SURFACE IS VERY HOT.9. E xtreme caution must be used when moving an appliancecontaining hot oil or other hot liquids. Allow hot parts tocool down before handling or moving the appliance.10. Do not attempt to repair this appliance yourself.11. Do not attempt to pop corn kernels without using oil.12. D o not touch hot surfaces. Always use handles or knobsto operate.13. T his popcorn maker will not shut off automatically.To avoid overheating, add oil and then corn kernels before plugging in and turning on the unit (as specified in thePopping Instructions on page 6).14. D o not use this appliance or any parts on the stovetop,under the broiler, in the freezer, or in the oven.15. Do not use this appliance outdoors.16. T o protect against electric shock, do not immerse cord,plug or other electrical parts in water or other liquids.17. T urn both switches to OFF position before disconnectingpower plug from the wall outlet.18. After popping OR melting, unplug cord from wall outlet.19. N ever leave appliance unattended when it is plugged intoan outlet.20. K eep the cord away from hot parts of the appliance andhot surfaces during operation.21. Do not clean using any abrasive material.22. Never force any part or gear into position.23. D o not operate popcorn maker without popcorn kernels,oil, popping pan and bowl.24. Do not operate the melting station without ingredients.25. A LL PARTS ARE NOT DISHWASHER SAFE. SeeCleaning & Maintenance for instructions.26. U nit should be in the OFF position when the popping panis removed.27. D o not operate your appliance in an appliance garageor under a wall cabinet. When storing in an appliancegarage, always unplug the unit from the electricaloutlet. Not doing so could create a risk of fire, especiallyif the appliance touches the walls of the garage or the door touches the unit as it closes.28. U nplug from outlet when not in use and before cleaning.Allow to cool before putting on or taking off parts, andbefore cleaning the appliance.29. D o not place on or near a hot gas or electric burner,or in a heated oven.30. D o not let cord hang over edge of table or counter,or touch hot surfaces.31. T he melting station is not a fondue pot or deep fryer andis not intended for use with oil.32. D o not operate melting station for more than 10consecutive minutes.SAVE THESE INSTRUCTIONS FOR HOUSEHOLD USE ONLY SPECIAL CORD SET INSTRUCTIONSThis appliance is for 120 volts only and should not be used with a converter.This appliance has a polarized plug (one blade is wider than the other). To reduce the risk of electric shock, this plug will fit in a polarized outlet only one way. If the plug does not fit fully in the outlet, reverse the plug. If it still does not fit, contact a qualified electrician. Do not modify the plug in any way.1. A short power supply cord is provided to reduce the riskof becoming entangled in or tripping over a long cord.2. E xtension cords may be used if care is exercisedin their use.3. If an extension cord is used:A. T he marked electrical rating of the extension cordshould be at least as great as the electrical ratingof the appliance.B. T he longer cord should be arranged so that it will notdrape over the countertop or tabletop where it can bepulled on by children or tripped over unintentionally.CONTROL PANEL*M elting Pot ceramic nonstick coating is PTFE and PFOA free.BEFORE FIRST USEAfter unpacking the Popcorn Maker with Melting Station, follow the Cleaning & Maintenance instructions on page 10. POPPING INSTRUCTIONS1. P lace the popcorn maker and melting station base on aflat, dry surface.2. Place popping plate on base.3. It is not necessary to preheat the unit.4. P our the recommended amount of oil onto the poppingplate (do not add more oil than recommended and do notsubstitute with butter, margarine, shortening or lard, asthese will burn and cause excessive smoking).N OTE: You may use either vegetable, peanut or canola oilfor popping.5. A dd the recommended amount of corn kernels spread outevenly across the popping plate.POPPING CHARTOil CornYieldVegetable, Peanut, Canola KernelsMinimum Batch 1½ tablespoons ½ cup Up to 13 cups Maximum Batch 2 tablespoons 2∕3 cup Up to 20 cups 6. P lace popping bowl on the popping plate, making surehandles of the popping bowl line up and fit into the handles on the popping plate.7. D o not place black lid on the popping bowl during thepopping process. The vents in the popping bowl willallow steam to release during the popping process. 8. P lug into an outlet and turn the unit on by turning therocker switch to the left of the control panel to the POPposition. The stirring rod will rotate as long as the popcorn maker is in the POP position. In approximately 3½ minutes (depending on quantity and type of kernels being popped), the popping cycle will be complete and you will no longerhear the corn popping. Turn the popcorn maker powerswitch to the OFF position and unplug from outlet if you are not utilizing the melting station.N OTE: Do not shake the popcorn maker during thepopping cycle.9. I mmediately after the popping cycle is complete, firmlyplace the black lid on the top of the popping bowl, grasp handles and flip the popping bowl along with the popping plate upside down, turning the popping plate away fromyou (the popping bowl becomes a serving bowl).W ARNING: POPPING PLATE IS HOT. TOUCH ONLYDESIGNATED HANDLES.N OTE: Do not leave popped corn on the popping plateafter the popping cycle has been completed, as thepopping plate surface is still hot and could cause thepopped corn to overcook or burn.10. P opcorn is now ready to serve. Top with salt or followthe melting pot instructions to top popcorn with butter,chocolate, caramel and more!11. F or consecutive batches, wipe popping plate with cleancloth after each batch.POPPING ADDITIONAL BATCHESOF POPCORNIf you plan to pop multiple batches, transfer popcornfrom popping bowl to another serving bowl. Follow steps1 through 11.CAUTION: Popping plate is extremely hot after multiple batches.MELTING STATION INSTRUCTIONSBefore popping popcorn, begin melting the toppings. Typical melting times will vary, as indicated on page 9. You may also wish to pop multiple batches of popcorn while using the melting station.1. R2. Pproperly.3. A4. A5. Ais locked into place.6. Tsection.N OTE: When melting new ingredients, begin by setting the control dial to LOW and adjust if needed. The LOW setting is similar to the LOW setting on a stovetop, while the HIGH setting is similar to the MEDIUM setting on a stovetop.Ingredients Setting Time12 oz. Milk Chocolate Chips LOW4–6 minutes8 tbsp. Butter HIGH3–5 minutes7. T hroughout the melting cycle, look through the lid to seethat ingredients are mixing properly and that nothing hasinterfered with the stirrer.N OTE: During the melting process, ingredients may rise up and interfere with the stirring process. If this occurs, simply realign the stirring arm with the gear assembly and be sure that it is rotating properly.8. O nce melted, remove the melting pot, mix and pour themixture over freshly made popcorn or as described in therecipe section. Use caution when removing the meltingpot from the base as the handle may be hot. Do notuse metal utensils to mix ingredients or scrape excessingredients from the melting pot.9.Turn the melting station control dial to the OFF position. TIPS & HINTS• D o not fill the melting pot with ingredients past the MAX fill line (2 cups).• M elting pot has a nonstick interior, but to further reduce the chance of sticking, spray cooking spray on the bottom of the melting pot and on stirrer.• U se a heatproof spatula to remove/scoop ingredients from the melting pot.• S oak the melting pot with stirrer in hot water immediately after using. Some ingredients, such as caramel, will bestubborn to remove.• S emisweet chocolate chips do not melt well. Use milk chocolate for best results.• S pread ingredients out as evenly as possible in the melting pot for faster results.• D uring the melting process, ingredients may rise up and interfere with the stirring process. If this occurs, simply realign the stirring mechanism and be sure that it is rotating properly.• W hile ingredients are melting, minimize the amount of times that you open the lid, as this will interfere with the stirringmechanism and ingredients may get dislodged. CLEANING & MAINTENANCEBefore performing any cleaning and maintenance operations, be sure that the popcorn maker and melting station controls are both in the OFF position and that the unit is unpluggedand cooled. Clean the popcorn maker and melting pot after every use.NOTE: Do NOT place parts in an automatic dishwasher. Melting pot is NOT dishwasher safe.To Clean the Popcorn Maker1. W ash popping bowl, popping plate and lid in warm, soapywater with a dishcloth or sponge. Rinse thoroughly anddry. Do not use scouring pads or abrasive powder on lid as these could cause scratching.2. C lean surface of base with a damp, soapy dishcloth,sponge or nylon scouring pad such as Scotch BriteCookware Scrub ’n Sponge®. Wipe surface with a dampcloth and dry. Do not use abrasive scouring pads orpowders on nonstick finish, as scratching may occur. After consistent use, the nonstick finish may discolor. To remove discoloration, use a soft cloth saturated with lemon juiceor vinegar and rub over finish. Then wipe the finish with adamp cloth and dry.To Clean the Melting StationDue to the type of ingredients being melted in the melting pot, it is best to empty and clean the melting pot immediately after each melting cycle is complete. Clean all parts by hand as described below. Melting pot and parts are not dishwasher safe.1. R emove the melting pot from the base and remove the lid.CAUTION: Melting pot and base are hot.2. R emove the stirring arm from the lid by releasing the tabson the inside of the lid. Press down and out on the tabsand gently pull the lid off. Wipe the stirring arm clean with a damp, non-abrasive cloth. Do not submerge the stirringarm in water.3. W ash the lid, stirrer and melting pot in the sink with warmsoapy water, being sure to remove all residue. Do not use metal utensils to scrape the inside of the melting pot. NOTE: If you find that ingredients are sticking to the bottom of the melting pot, you can fill the melting pot with hot water upto the max fill line. Replace the melting pot into the base, along with the stirrer, lid and stirring arm properly assembled. Turn the control knob to HIGH and run for approximately 3–5 minutes. This will help to release any stubborn ingredients. After this, repeat steps 1–3 above.4. I f any ingredients drip into the base of the melting pot, usea damp, non-abrasive cloth to wipe clean. CAUTION: HOT.5. B e sure that all parts are thoroughly dry beforereassembling.Any other servicing should be performed by an Authorized Service Representative.RECIPESAll recipes are meant to be eaten with 18 cups of popcorn.Simply Chocolate Popcorn12 oz. (1 bag) milk chocolate chips (or chocolate madefor melting)With the stirrer in place, pour milk chocolate chips into themelting pot.Align the cover with the gear in the housing and the center of the stirrer. Set the control dial to LOW and melt for approximately 5½ minutes. Mix the chocolate and drizzle over popcorn.It is best to clean the melting pot immediately after melting cycle is complete. To clean the melting pot and stirrer, refer to the Cleaning & Maintenance instructions on page 11.Simply Butter Popcorn8 t ablespoons butter (for quicker results useroom-temperature butter)With the stirrer in place, cut butter into ¼-inch pieces and evenly place them in the melting pot. Align the cover with the gear in the housing and the center of the stirrer. Set the control dial to HIGH until the butter is melted. This will take approximately 5 minutes. Turn the control dial to the OFF position. Remove the cover and mix until you have a smooth consistency. Drizzle melted butter over popcorn.It is best to clean the melting pot immediately after melting cycle is complete. To clean the melting pot and stirrer, refer to the Cleaning & Maintenance instructions on page 11.Peanut Butter Popcorn10 oz. (1 bag) peanut butter chipsWith the stirrer in place, pour peanut butter chips into the melting pot. Align the cover with the gear in the housing and the center of the stirrer. Set the control dial to LOW and melt for approximately7 minutes. Turn the control dial to the OFF position. Remove the cover and mix until you have a smooth consistency. Drizzle melted mixture over popcorn.It is best to clean the melting pot immediately after melting cycleis complete. To clean the melting pot and stirrer, refer to the Cleaning & Maintenance instructions on page 11.Sesame Ginger Soy Mix Popcorn½ cup soy sauce3 teaspoons sugar2 teaspoons sesame oil2 teaspoons freshly grated ginger2 tablespoons toasted sesame seedsWith the stirrer in place, combine soy sauce, sugar and sesame oil in the melting pot. Align the cover with the gear in the housing and the center of the stirrer. Set the control dial to HIGH. At the 6-minute mark, turn the control dial to the OFF position, tilt open the cover and add the grated ginger to the melting pot. Replace the top and turn it back to HIGH, allowing it to cook for one more minute. Turn the control dial to the OFF position. Stir the mixture and pour over the popcorn. Toss the popcorn with the sesame seeds so that all the ingredients combine evenly.It is best to clean the melting pot immediately after melting cycle is complete. To clean the melting pot and stirrer, refer to the Cleaning & Maintenance instructions on page 11.Cilantro Herb Buttered Popcorn½ s tick salted butter (for quicker results useroom-temperature butter)½ teaspoon cumin¼ teaspoon garlic powder¼ teaspoon paprika1 tablespoon freshly chopped cilantro½ teaspoon saltWith the stirrer in place, cut butter into ¼-inch pieces and evenly place them in the melting pot, along with the cumin, garlic powder and paprika. Align the cover with the gear in the housing and the center of the stirrer. Set the control dial to HIGH. After approximately 4½ minutes (or once the butter has melted), turn the control dial to the OFF position. Mix thoroughly, and then drizzle the mixture over popcorn, alternating with a sprinkling of the freshly chopped cilantro, making sure to toss so that the popcorn is evenly coated. Once butter mixture is added you can season with ½ teaspoon of salt to taste.It is best to clean the melting pot immediately after melting cycle is complete. To clean the melting pot and stirrer, refer to the Cleaning & Maintenance instructions on page 11.S’mores Popcorn5 oz. milk chocolate chips2 oz. mini marshmallows1½ to 2 c ups chopped graham crackers (or graham cracker crumbs)With the stirrer in place, pour milk chocolate chips into the melting pot. Align the cover with the gear in the housing and the center of the stirrer. Set the control dial to LOW. After approximately 5½ minutes, turn the control dial to the OFF position. Remove cover and mix for smooth consistency. Drizzle melted chocolate over popcorn, and then add the marshmallows and graham crackers. Combine the entire mixture together and let sit until the chocolate has set.It is best to clean the melting pot immediately after melting cycle is complete. To clean the melting pot and stirrer, refer to the Cleaning & Maintenance instructions on page 11.Peanut Butter Bacon Popcorn4 t ablespoons butter (for quicker results useroom-temperature butter)10 oz. (1 package) peanut butter chips16 oz. (1 package) thick-cut bacon, cooked and cutinto bite- size piecesWith the stirrer in place, cut butter into ¼-inch pieces and evenly place them in the melting pot. Then add the peanut butter chips to the melting pot. Align the cover with the gear in the housing and the center of the stirrer. Set the control dial to LOW. After approximately 10 minutes, turn the control dial to the OFF position. Remove the cover and mix until you have a smooth consistency. Drizzle melted mixture over popcorn and sprinkle in the bacon.It is best to clean the melting pot immediately after melting cycle is complete. To clean the melting pot and stirrer, refer to the Cleaning & Maintenance instructions on page 11.Caramel Popcorn2 oz. mini marshmallows¹/³ cup brown sugar3 t ablespoons butter (for quicker results useroom-temperature butter)With the stirrer in place, cut butter into ¼-inch pieces and evenly place them in the melting pot. Then add the mini marshmallows and brown sugar. Align the cover with the gear in the housing and the center of the stirrer. Set the melting station control dial to HIGH. After approximately 10 minutes, turn the control dial to the OFF position. Remove the cover, stir the caramel until it has a smooth consistency and drizzle caramel over the popcorn. Mix with tongs or spoon until caramel is evenly distributed.It is best to clean the melting pot immediately after melting cycle is complete. To clean the melting pot and stirrer, refer to the Cleaning & Maintenance instructions on page 11.Sriracha Popcorn6 t ablespoons butter (for quicker results useroom-temperature butter)¼ cup Sriracha® hot sauce*With the stirrer in place, cut butter into ¼-inch pieces and evenly place them in the melting pot, then add Sriracha sauce. Align the cover with the gear in the housing and the center of the stirrer. Set the control dial to HIGH and cook for approximately 7 minutes. Turn control dial to the OFF position, remove cover and pour evenly over popcorn.It is best to clean the melting pot immediately after melting cycle is complete. To clean the melting pot and stirrer, refer to the Cleaning & Maintenance instructions on page 11.*If desired, cut the heat by adding a little bit of grated Parmesan or crumbled blue cheese to the mixture after the Sriracha and butter have been added to the popcorn.Birthday Party Popcorn3 t ablespoons butter (for quicker results useroom-temperature butter)½ cup sugar1 teaspoon pure vanilla extract2 ounces mini marshmallows¹/³cup rainbow sprinkles1 teaspoon salt (to taste)With the stirrer in place, cut butter into ¼-inch pieces and evenly place them in the melting pot, then add the sugar, vanilla extract and marshmallows. Align the cover with the gear in the housing and the center of the stirrer. Set the temperature knob to HIGH, and after approximately 10 minutes, turn the knob to OFF and remove the cover. Mix well and then evenly coat the popcorn with the marshmallow mixture. While mixing the popcorn mixture, distribute the sprinkles on the popcorn. Salt to taste.It is best to clean the melting pot immediately after melting cycle is complete. To clean the melting pot and stirrer, refer to the Cleaning & Maintenance instructions on page 11.NOTES_______________________________________________________________________________________ _______________________________________________________________________________________ _______________________________________________________________________________________ _______________________________________________________________________________________ _______________________________________________________________________________________ _______________________________________________________________________________________ _______________________________________________________________________________________ _______________________________________________________________________________________ _______________________________________________________________________________________ _______________________________________________________________________________________ _______________________________________________________________________________________ _______________________________________________________________________________________ _______________________________________________________________________________________ _______________________________________________________________________________________ _______________________________________________________________________________________ _______________________________________________________________________________________ _______________________________________________________________________________________ _______________________________________________________________________________________ _______________________________________________________________________________________ _______________________________________________________________________________________ _______________________________________________________________________________________ _______________________________________________________________________________________ _______________________________________________________________________________________ _______________________________________________________________________________________ _______________________________________________________________________________________ _______________________________________________________________________________________ _______________________________________________________________________________________ _______________________________________________________________________________________ _______________________________________________________________________________________ _______________________________________________________________________________________ _______________________________________________________________________________________ ______________________________________________________________________________________________________________________________________________________________________________ _______________________________________________________________________________________ _______________________________________________________________________________________ _______________________________________________________________________________________ _______________________________________________________________________________________ _______________________________________________________________________________________ _______________________________________________________________________________________ _______________________________________________________________________________________ _______________________________________________________________________________________ _______________________________________________________________________________________ _______________________________________________________________________________________ _______________________________________________________________________________________ _______________________________________________________________________________________ _______________________________________________________________________________________ _______________________________________________________________________________________ _______________________________________________________________________________________ _______________________________________________________________________________________ _______________________________________________________________________________________ _______________________________________________________________________________________ _______________________________________________________________________________________ _______________________________________________________________________________________ _______________________________________________________________________________________ _______________________________________________________________________________________ _______________________________________________________________________________________ _______________________________________________________________________________________ _______________________________________________________________________________________ _______________________________________________________________________________________ _______________________________________________________________________________________ _______________________________________________________________________________________ ______________________________________________________________________________________________________________________________________________________________________________ _______________________________________________________________________________________ _______________________________________________________________________________________ _______________________________________________________________________________________ _______________________________________________________________________________________ _______________________________________________________________________________________ _______________________________________________________________________________________ _______________________________________________________________________________________ _______________________________________________________________________________________ _______________________________________________________________________________________ _______________________________________________________________________________________ _______________________________________________________________________________________ _______________________________________________________________________________________ _______________________________________________________________________________________ _______________________________________________________________________________________ _______________________________________________________________________________________ _______________________________________________________________________________________ _______________________________________________________________________________________ _______________________________________________________________________________________ _______________________________________________________________________________________ _______________________________________________________________________________________ _______________________________________________________________________________________ _______________________________________________________________________________________ _______________________________________________________________________________________ _______________________________________________________________________________________ _______________________________________________________________________________________ _______________________________________________________________________________________ _______________________________________________________________________________________ _______________________________________________________________________________________ _______________________________________________________________________________________。
AMX MT-2002 20.3英寸Modero G5平板式桌面触摸面板产品简介说明书

QUICK START GUIDEOverviewThe MT-2002 20.3” Modero G5 Panoramic Tabletop Touch Panel(FG5969-35) features the G5 Graphics Engine to provide fast and smoothanimations and transitions, as well as a Quad Core Processor.The MT-2002 features a panoramic capacitive multi-touch screen thatprovides users access to multiple applications with minimal navigation. Thedistinctive, low-profile design is engineered to sit perfectly on a table withoutobstructing views.Sleep buttonSleep buttonUSB Ports (2)Cable slotFIG. 1 MT-2002Product SpecificationsConnector LocationsTwo Type A USB ports are located on the rear right corner of the device (FIG. 2).Type A USB PortsSpeakerSleep buttonFIG. 2 MT-2002-REAR VIEWUSB peripherals (mouse, keyboard, etc.) may be connected to either of the twoUSB ports on the rear of the device.The power and Ethernet connectors, as well as an additional USB port arelocated on the bottom of the device (FIG. 3).The underside USB port, as well as the two rear USB ports, may be used with aflash drive for page transfers or firmware upgrades.EthernetType A USB Port12V ... Power PortFIG. 3 MT-2002 UNDERSIDE CONNECTORSThe MT-2002 does not have individual channels on the base of the deviceto allow passage of cables from underneath the base. Instead, it has one slot atthe base to allow options on cable configuration, with channels for securingpower and Ethernet cables (FIG. 4).FerriteTie-wrap channelsTie-wrapFIG. 4 TIE-WRAP FOR POWER CONNECTOR FERRITEEach channel side has slots for attaching tie-wraps to secure each cable. Theferrite on the power cable must be secured with the included tie-wrap duringinstallation to prevent the possibility of the panel not sitting flush on the table.Other cables may be secured with tie-wraps if desired, but this is not necessary.Wiring GuidelinesThe MT-2002 uses a 12V ... -compliant power supply to provide power tothe panel via the 2-pin 3.5 mm captive wire PWR connector.The incoming PWR and GND wires from the power supply must be connected tothe corresponding locations within the PWR connector.Note: Apply power to the panel only after installation is complete.Note: Connecting power to the MT-2002 should be done using the included2-pin 3.5mm captive wire connector included with the device. This connectoris retained within its port with locking screws instead of the pins on each side ofstandard captive wire connectors, and using force to insert a standard captivewire connector may damage the device.A V FOR AN IT WORLD®Wiring a Power ConnectionTo use the 2-pin 3.5 mm captive wire connector with a 12V ... -compliant power supply, the incoming PWR and GND wires from the external source must be connected to their corresponding locations on the connector (FIG. 5).The connector uses locking screws to insure a connection to the device, so make sure to insert and tighten the screws before applying power.PWR +Power SupplyTo the Touch PanelGND -FIG. 5 NETLINX POWER CONNECTOR WIRING DIAGRAM1. Insert the PWR and GND wires on the terminal end of the 2-pin 3.5 mm captive wire cable.Match the wiring locations of the +/- on both the power supply and the terminal connector. 2. Tighten the clamp to secure the two wires. Do not tighten the screws excessively; doing so may strip the threads and damage the connector. 3. Verify the connection of the 2-pin 3.5 mm captive wire to the external 12V ... -compliant power supply and apply power.Powering On/Off Modero G5 PanelsModero G5 touch panels may be powered on by touching and holding the Sleep button. To power off the panel, press and hold the Sleep button, and select Power Off on the on-screen menu (FIG. 6):FIG. 6 SLEEP BUTTON - PRESS AND HOLD TO ACCESS POWER OFF/SETTINGS OPTIONSConfiguration and ProgrammingModero G5 touch panels are equipped with a Settings menu that provides the ability to configure various features on the panels. To access the Settings menu,press and hold the Sleep button, and select Settings .Note: Information on the Settings menu, panel configuration, and programming is provided in the Modero G5 Programming Guide, available at .Setting the Panel’s Device Number and Device Name1. In the Settings menu, select NetLinx . This opens a password keypad.2. Enter the panel password into the keypad (the default is 1988) and select OK to access the NetLinx page.3. Press Device Number to open the NetLinx editing window.4. Enter a unique Device Number assignment for the panel and press OK .5. Enter a unique Device Name assignment for the panel and press OK .Configuring the Panel’s IP AddressThe first step is to configure the panel’s IP address. Note that this only configures the panel to communicate with a network; it is still necessary to connect to the NetLinx Master (see Connecting to a NetLinx Master below ).Network Communication via DHCP1. In the Ethernet page, press DHCP/Static field to open the DHCP/Static window. Note that DHCP is the default setting.2. Select Host Name , enter the new host name3. Press OK to save changes.Network Communication via Static Address1. In the Ethernet page, press DHCP/Static to open the DHCP/Static window.2. Select Static to open the Static IP window.3. Press any field to open a keypad or keyboard (depending on the field), and enter the appropriate network address information.4. Press OK to save your changes and return to the Ethernet page.Connecting to a NetLinx MasterTo establish the type of connection to make between the panel and the NetLinx Master:1. In the NetLinx page, press Mode to choose the connection mode (URL, Listen or Auto):2. If password security is enabled on the target Master, enter the Username and Password:a. Select Username to open the NetLinx window.b. Enter the Username and Password required by the Master.c. Press OK to save changes and return to the NetLinx page.Related Software and Additional Documentation (at )• Programming the Modero G5 touch panel requires the use of either Rapid Project Maker (RPM) or the latest version of Netlinx Studio and TPDesign5, both available to download at . Refer to the NetLinx Studio and TPDesign5 online help for information.• For information on designing touch panel pages intended to optimize the Modero G5 experience, refer to the G5 Considerations Guide.• For additional information on the MT-2002 panel, refer to the Modero G5 Touch Panel Instruction Manual .• For detailed information on the Settings menu as well programminginformation and instructions on upgrading firmware, refer to the Modero G5 Programming Guide .• Detailed specifications drawings for the MT-2002 are available to download from .© 2018 Harman. All rights reserved. Modero X and Modero X Series, AMX, AV FOR AN IT WORLD, and HARMAN, and their respective logos are registered trademarks of HARMAN. Oracle, Java and any other company or brand name referenced may be trademarks/registered trademarks of their respective companies. AMX does not assume responsibility for errors or omissions. AMX also reserves the right to alter specifications without prior notice at any time. The AMX Warranty and Return Policy and related documents can be viewed/downloaded at .3000 RESEARCH DRIVE, RICHARDSON, TX 75082 | 800.222.0193 | 469.624.8000 | +1.469.624.7400 | fax 469.624.7153AMX (UK) LTD, AMX by HARMAN - Auster Road, Clifton Moor , York, YO30 4GD United Kingdom • +44 1904-343-100 • /eu/LAST REVISED: 09/12/2018。
NAM 4.4 B2C 演示门户配置指南说明书

B2C Demo Portal Configuration Guide1.DeploymentThe deployment of the various components that integrate to provide the Business to consumer capabilities:2.Pre-requisitesInstall SSPR. Optionally install Advanced Authentication if you want to demonstrate enhanced authentication capabilities.If using Access Manager 4.4.1 or later, configure B2C using the Business to Consumer UI on the Admin Console.If you are using non-public DNS names, ensure that:o AG and IDP have the host entries so they can communicate with one anothero Client should have host entries for IDP and AG as well.o Note that should point to AG’s IP.Use Firefox. Chrome seems to have an issue with Delete options.3.Portal SetupExtract the portal package on to your local system. This package contains:-portal directory – the B2C demo portal web application-nidp_jars_4.4.0 and nidp_jars_4.4.1 – updated JARs to include REST APIs needed by the portal -sspr –CSS for SSPR server to have uniform look and feel across the portals.Installation Steps:1.The B2C demo portal must be deployed on a tomcat server. Setup a tomcat server or simply use thetomcat in any IDP server.2.NAM Appliance:-Backup the default singlebox portal at /opt/novell/nam/adminconsole/webapps/portal.-Copy the portal directory in the demo portal zip to /opt/novell/nam/adminconsole/webapps Distributed NAM:-Copy the portal directory to <TOMCAT_HOME>/webapps directory.3.Edit <TOMCAT_HOME>/webapps/portal/index.html.Replace all instances of “:8443” with your IDP domain and port.4.Copy the JARs for your version of Access Manager to /opt/novell/nam/idp/webapps/nidp/WEB-INF/lib on every IDP server in the cluster.5.Restart all the IDP servers.6.If you are using non-public DNS names, add the host entry in your client system for the IDP DNS.7.Access the IDP URL – https://<idp-domain>:<port>/nidp. Accept the self-signed certificate warningshown on your browser. This step is important for the embedded login page to show up correctly on the portal.8.Go to https://<portal server IP>:<port>/portal. Ensure that the portal’s landing page and the loginfields show up fine.4.Access Manager Configuration4.1Protecting the B2C Demo Portal webapp1.Create a proxy service for this demo portal.NAM Appliance:Skip this step. You can use the default “NAM-RP > namportal” proxy service.Distributed NAM:a.Create a proxy service for the domain b.Configure the Web server. In this case, I have deployed the portal on an Admin Consolewebserver running on port 2443.c.Set up a Protected resource for the Public pagescontract that supports username and password.3.Configure an Identity injection policy to share the user details with the portalFYI, in the demo portal:portal/pages/user_details.jsp retrieves these injected headers from the request.portal/js/portalApp.js makes these user details available to the Portal html pages.4.Enable this policy for portal_protected PR4.2Protecting the IDP REST APIsThe Demo portal accesses the REST APIs exposed by the IDP. To make this possible, we need two things: -Handle CORS since portal is on and IDP is (for Non-Appliance)-Support SSO. User session for login is different from the session he has with the IDP. The portal does not have access to the IDP session ID. Hence the APIs are accessed with OAuth tokens. This applies to both NAM Appliance and traditional NAM.1.Configure OAuth2.Create Identity Injection policy3.Protect the nidp URLs.NAM Appliance:Skip this step, as the “namportal” proxy service already protects the /nidp URLs.Distributed NAM:a.Create a Path based proxy service for the IDP APIs. Add these additional paths.b.Add all the IDP servers to the webserver listproxy service).5.Enable and set the order of this profile6.Create a Protected resource for these API URLs. You can choose “Any Contract” here.7.Assign the OAuth Identity injection policy to this PR4.3SSPR Integration (skip these if B2C was configured using the Business to Consumer UI)Pre-requisite: SSPR Server must be installed and setup for B2C as documented here.1.Configure SSPR under IDP > Shared Settings.2.Create a user store pointing to the SSPR user store (as SSPR requires schema extensions). Assign it tothe default contract.SSPR user store configuration:3.Create a path based proxy service for /sspr4.Set the webserver details of the SSPR server5.Create a protected resource for the public pages of SSPR6.Create a protected resource for the protected pages of SSPR7.Create an identity injection policy and assign it to this PR.4.4Final ConfigurationThis is how the AG configuration will look after the above steps. The AA service can be configured (as shown here) following the documentation. This is optional.Update the AG and IDP servers.Access https:///portal and login (using a user in the SSPR user store)5.SSPR ConfigurationsSSPR must be configured to redirect the portal URL.Set the Home URL and Cancel URL to be https:///portal/pages/home.htmlSet the logout URL to be https:///AGLogout6.BrandingChange the logo and banner in all the following places to maintain a uniform look and feel:1.Demo Portal:a.Edit the setting for ‘masthead’ in <TOMCAT_HOME>/webapps/portal/css/portal.cssb.Change the logo.png in <TOMCAT_HOME>/webapps/portal/images2.Access Managera.Login to Admin console and go to Branding UI. Upload the logo and set the banner colors.3.SSPRa.Edit the SSPR css in <TOMCAT_HOME>/webapps/portal/css/sspr/themes/portal/style.cssb.Copy the new logo.png to the same dir as the CSSc. Create a zip of the themes directory.d. Upload the themes.zip to SSPR as demonstrated in https:///watch?v=bqX-ymk_8ZU7.Configuring Demo use casesSocial Contracts1.Create Social Auth class. Set the Identify Use locally. SSPR should also look for the sameattributes in its “Social Profile”.2.Create Password Fetch class. This is required for SSO between the portal and the SSPR in case ofsocial login.3.Create Social auth method and Password Fetch methodChoose Identifies User for both methods.For PasswordFetch, choose the SSPR userstore as the method’s userstore4.Create social auth contract.a.Select Satisfiable by a contract of equal or higher valueb.Select Facebook Auth method first, then add PasswordFetch auth method. Managed Applications TabThis displays two types of applications:Federated applications that user has consented to.Oauth clients that user has consented to.Configure these and access with the user account and provide consent.Risk evaluation with Device Fingerprinting1.Set the History DB to point to a SQL installation.2.Create a device fingerprint rule.3.Create a step up class (like TOTP Auth class)4.Create a risk policy, assign the Device fingerprint rule and the TOTP class as step up)5.Create risk auth method.6.Create risk contract. Set the risk method as the 2nd factor.8.Demo Portal CodeThe demo portal is an AngularJS based portal. It can be completely redone to customer’s requirement by simply using the available REST APIs.8.1Index Page with Login optionsThe entire index.html is static HTML page. Hence it can be rewritten as needed. The item of interest is the embedded login fields. This is dynamically built and served by the IDP. To include this on your index page, simply add the following container in the location you want the login fields to display:<div id="login-container"></div>The <script> tags in the index.html of the demo portal must be retained. They take care of loading the login fields dynamically into the container.6.2 Getting User AttributesThe /portal/app/user_details.jsp is used to read the user attributes from the request and return a JSON. These attribute headers are not accessible from javascript, hence the need for a JSP.Check the userService in portalApps.js to see how this JSP is invoked, parameters are read and made available to the pages.。
MITREK系列产品说明书

CONTROL HEADREF.NO.PART NO.DESCRIPTIONREF.NO.PART NO.DESCRIPTIONBAR COPY IF NECESSARYLOW BAND RADIO ASSEMBLY 284180175A01Spring (3.05 MM OD), pivot 290310904A02Screw (3.5 x 6-PH-M)300480149A01Washer, captivitate 313280074A02Gasket, cable plug341484391F01Insulator Mica, transistor 350484180C01Washer, shoulder (nylon)360310905A01Screw, (9.0 x 6-FIL-M), transistor 371483572K01Insulator Mica, transistor39HLN4033BCover, bottom inner w/gasket(includes 1580004A01, cover, and 3280129F01, gasket400310906A19Screw (3.5 x 13-FH-M), inner cover 414280013A01Clip, coax (dress)440180701T74Conn. and Feed Through Caps 470780079A01Bracket, IC board support 492910271A15Pin, terminal512880141H03Plug, male (2.54 CTRS) (25 post)542880096A01Plug, male (3.96 CTRS)(4 post)553280080A01Gasket, antenna connector560280006A01Nut, spanner, antenna connector 570400114522Washer, lock, antenna connector 581480077A01Insulator, P.A. compartment 590780078A01Bracket, thermal device 602980014A01Clip, coax (terminal)631480179A01Insulator, mica10980028A01Socket, transistor2HLN4034C Bottom Cover, assembly40310906A05Screw (3.5 x 6-FH-M) bottom cover latch50180252J01Top Cover, assembly 64680026A01Stud Latch, top cover 87580178A01Pad, compression 90180252J01Housing, frame 104780027A01Pushbutton, latch 134180029A01Spring, latch140780016A02Bracket, lock slide 150780015A02Support, lock slide 164180022A01Spring, lock170310936B15Screw (3.5 x 13-FM-TH) holds lock slide 185584101B01Lock203280081A01Gasket, lock support 214380150A01Sleeve, cover release 235580002A01Handle240780113B01Spring, torsion 264780021A01Pin, pivotREF.NO.PART NO.DESCRIPTIONREF.NO.PART NO.DESCRIPTIONBAR COPY IF NECESSARYHIGH BAND RADIO ASSEMBLY 370310905A01Screw (3.0 x 6-FIL-M)392980014A01Clip, coax (terminal)40HLN4033BCover, bottom inner w/gasket (includes 1580004A01, cover and 3280129F01, gasket)410310906A19Screw (3.5 x 13-FH-M)434280013A01Clip, coax 442680211A01Shield, PA 455584300B04Handle, nylon460180701T74Conn. and Feed Through Caps 490780079A01Bracket, IC board support 512910271A15Pin, terminal520980028A01Socket, transistor 542880141H03Plug, male (25 post)572880096A01Plug, male (4 post)581580008A01Housing610280045A01Nut, retainer M5x1620200007003Nut, 8-32 x 5⁄16x 1⁄8hex643280080A01Gasket, antenna connector 650280006A01Nut, spanner 660400114522Washer, lock 671480077A01Insulator, PA680780078A01Bracket thermistar mounting12684716D01Heatsink3HLN4034C Bottom Cover, assembly 50310906A05Screw (3.5 x 6-FH-M)60180252J01Top Cover, assembly 74680026A01Stud, latch97580178A01Pad, compression 114780027A01Push Button 144180029A01Spring, latch150780016A02Bracket, lock slide 160780015A02Support, lock slide 174180022A01Spring, lock180310936B15Screw (3.5 x 13-FH-TH)195584101B01Lock213280081A01Gasket, lock support 224380150A01Sleeve, cover release 245580002A01Handle250780113B01Spring, torsion 274780021A01Pin, pivot294180175A01Spring (3.05 MM OD)300310904A02Screw (3.5 x 6-PH-M)310480149A01Washer, captive 323280074A02Gasket, cable plug 351484391F01Insulator, mica360484180C01Washer, shoulder nylonREF.NO.PART NO.DESCRIPTIONREF.NO.PART NO.DESCRIPTIONUHF ASSEMBLY410310906A19Screw (3.5 x 13-FH-M)434280013A01Clip, coax442680211A01Shield, PA455584300B04Handle, nylon460180701T74Conn. and Feed Through Caps490780079A01Bracket, IC512910271A15Pin, terminal520980028A01Socket, transistor542880141H03Plug, male (2.54 CTRS) (25 post)572880096A01Plug, male (3.96 CTRS) (4 post)604680009A01Stud, coil M6x1614680010A01Stud, coil M8x1.25620380012A03Screw, set M6x1630380256A01Screw, set M8x1.75640280045A03Nut, retainer M6x1.0650280045A02Nut, retainer M8x1.25670200007003Nut, 8.32 x 5⁄16x 1⁄8hex680480083A01Washer, stud device703280080A01Gasket, antenna connector710280006A01Nut, spanner720400114522Washer, lock7314-80077A01Insulator, PA740780078A01Bracket, thermal mount752980014A01Clip, coax (terminal)760780157A01Support, transistor PA771580003A01Housing, filter (harmonic)12684716D01Heatsink3HLN4034C Bottom Cover, assembly 50310906A05Screw (3.5 x 6-FH-M) 60180252J01Top Cover, assembly 70780015A02Stud, latch97580178A01Pad, compression114780027A01Push Button144180029A01Spring, latch150780016A02Bracket, lock slide160780015A01Support, lock slide174180022A01Spring, lock180310936B15Screw (3.5 x 13-FH-TH) 195584101B01Lock213280081A01Gasket, lock support 224380150A01Sleeve, cover release 245580002A01Handle250780113B01Spring, torsion274780021A01Pin, pivot294180175A01Spring (3.05 MM OD) 300310904A02Screw (3.5 x 6-PH-M) 310480149A01Washer, captive323280074A02Gasket, cable plug351484391F01Insulator, mica360484180C01Washer, shoulder370310905A01Screw (3.05 x 6-FIL-M) 390310936B06Screw (3.5 x 8-FILM-TF)40HLN4033B Cover, bottom inner w/gasket(includes 15-80004A01, cover)MOBILE MICROPHONESHMN1015AHLN4024Bmode while still on-hook arealso available.HLN4024BHang-up BoxHLN4025ATLN4698BCradle, Private-LineTLN4507ACradle with Slide SwitchTLN4505BCradle, Carrier SquelchHSN4009ACONTROL HEADSHLN4022EHLN4012ANOISE REDUCTION KITSSingle HousingConsists of a single housing with standard trunnion which can accommodate one, one board option and one alterna-tive control module.THN6125A HLN1002ATLN1391ATHN6125AMITREK SYSTEMS•90 ACCESSORIESHSN4010A Microphone Hang-upHLN4188AMOBILE ANTENNASRAB4012ARA RAB4013ARA&RAB4014ARA 6680385A04RSX4028AService Aids, Manuals SERVICE AIDSTEKA48。
KODAK No. 1 Panoram Kodak产品说明书

IS.
".
.3
.p
Black Sole L eather Carrying Case, and Shoulder Strap
" Bull's-Eye" Tripod, folds. in two sections
I:
0 08 0 ';" 8 6
0 86
Panoram Albums : A rt canvas covers, brown leaves:Paste·on, to hold 24 prints ;. Slip-in
VIENNA: KODAK, LIMITED, Graben 29. ST. PETERSBURG : KODAK, LIMITED, Bolschaj a K onjuschenna ja, I .
rv,IELBO,URNE : KODAK , LIMITED, 284, Collins Streit. ROCHESTER, NEW YORK: E astma n K oda k Co.
I171 - 173, R.e~ent Street, London, W . MOSCOtv: K ODAK, LIMITED , P etrovka. Do m Micha lkoff.
WQ.MT860电能表彩页

WQ.MT860高精度结算关口电能表(0.2S)惠安系统控制Wescon Controls (Shanghai) Inc.WQ.MT860高精度结算关口电能表——专为发电厂、区域性电网、省际电网或其他高电压电网结算关口而设计●欧洲著名的三大电能表厂家之一--------仪斯卡(ISKRAEMECO)公司欧洲生产●仪斯卡有60多年电能表生产经验●产品遍布5,80多个国家和地区(包括中国及地区)●已被德国、比利时、意大利、瑞典等大型电力公司采用●军工级产品,采用专门设计的测量元件和特殊元器件●超强的抗干扰性和高可靠性,完全超过IEC标准要求●通信接口模块化设计,使通信系统和测量系统完全独立,可方便通信系统升级●3个独立RS232/RS485/CS/ISDN/GSM/Ethernet接口●IEC61107、IEC60870-5-102、DLMS(IEC62056)、STOM规约●可接MDS-100采集器、FAG采集器,和C2000系统连接●通过软件设置辅助电源优先级,选择部电源优先还是外部辅助电源优先●实时电流、电压、频率、功率因数、相角测量、谐波分析,实现电能质量监测●测量有功、无功、视在电量、需量、功率●两组独立的增量值/累积值负荷曲线,分时电量(TOU)记录●数据曲线存贮空间总容量可达4M●宽围测量电压(3 x 57.7/100~3 x 240/415V AC)●宽围交直流辅助电源(50~230V AC/DC)●CT/PT误差补偿和铁损/铜损补偿●电压跌落/上扬、电源干扰监测1. 概述为了满足电力市场发展的需求,继WU系列高精度关口表之后,仪斯卡(ISKRAEMECO)公司推出了新一代关口计量精品----WQ.MT(D)860电子式高精度结算关口电能表(WQ.MD860为三相三线电能表、WQ.MT860为三相四线电能表)。
它是专为发电厂、区域性电网、省际电网或其他高电压电网结算关口大容量电量精确计量而设计的;采用专门设计的测量元件和特殊元器件及高档的PCB板制造而成的,属军工级产品;不仅具有卓越的测量精度,还具有超强的抗干扰能力和可靠性,完全超过IEC标准要求。
史赛克动力系统彩页-180918
陕西西安
西安市南关正街88号 长安国际中心C座703室 电话:029-8760 7908 邮编:710061
广东广州
广州市越华路112号 珠江国际大厦4105/4104B 电话:020-8348 6919/6920 传真:020-8348 6921
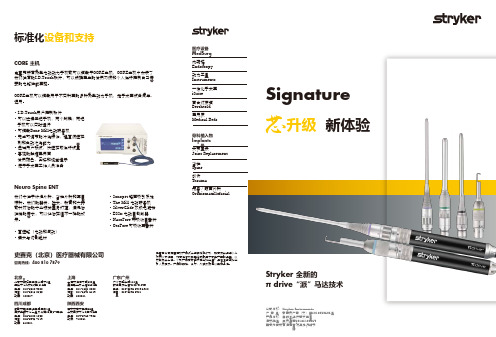
Signature
升级 新体验
Stryker 全新的 π drive“派”马达技术
专利的双叶钻头
Signature系列电钻可搭配Elite系列切割耗材,该系列产品为工具钢材 质,坚固耐用丰富种类,拥有专利的“双叶”精确钻头。
专利的双叶钻头设计,在保证了切割效率的同时极大降低了切割中的 “跳钻”,使手术更加精准、安全。
同一长度,适用不同接头
露出部分长度5级可调, 以适应不同手术
数字标示,方便医护 人员调节钻头长度
包含可调节暴露长度的钻头,钻头长度多级可调(暴露范围4mm-10mm)
史赛克独有的可调节暴露长度 的显微钻头,根据术式需要和 医生偏好调整钻头暴露长度, 能够获得更好的术野。
专利的“双叶”钻头使切割 更加精准、平稳
史赛克独有的大直径 5mm显微钻头,为临床 提供更多选择。
钻头套筒更加纤细,提供 良好的术野。
上海
上海市淮海中路300号 香港新世界大厦3601室 电话:021-2321 0000 传真:021-6391 6119 邮编:200021
四川成都
成都市锦江区红星路三段1号 国际金融中心一号办公楼28层3-4单元 电话:028-8200 1055 传真:028-8443 7119 邮编:610021
一体化手术室 iSuite
百合灯床塔 Berchtold
医用床 Medical Beds
熊本熊酷MA萌产品开发手册(页)PPT

●2-2 在脸部五官的一定范围内,不能配置图案
●2-3 酷 MA 萌 KUMAMON 不能带有特 定商品信息。
OK 例:苹果、球棒、球拍、球等不为特定之物 NG 例:带有商品名、商品画像、企业名、企业标志的
●2-4 给酷 MA 萌 KUMAMON 穿衣装的场合,禁止穿戴 能体现出企业、单位等信息的衣装 ※请参照 P24~P25“有关给酷 MA 萌 KUMAMON 穿衣装 的规定”
产品开发使用手册
目录:*26P
•形象由来------*3-5P •形象色值------ *6P •形象比例------ *7P •动作表情------ *8-10P • 禁用说明------*11-17P •名称规范-------*18-19P •台词规定--------*20-21P •活动规定-------*22-23P •服装规定------ *24-25P
名字
熊本熊(日语:くまモン,英语:Kumamon)
出身地
熊本县
诞生日
2010年3月12日(九州新干线全线开通)
性别
固执的BOY
年龄
5周岁
性格
随意洒脱 总是充满好奇
工作
工作基本上是公务员是日本熊本县营业部长兼
幸福部长、 熊本县地方吉祥物
Kumamon
诞生背景:熊本县利用九州新干线的契机,开发设计了KUMAMON, 将这个卡通人物融入熊本县的历史文化,旅游资源,生活细节方 方面面里,把熊本县打造成了一个KUMAMON的家乡,以吸引外界通 过这只熊而对熊本县产生的兴趣。 因为想看看KUMAMON生活的地方而到熊本县旅游的人爆炸式增长
【形状、花样、包装上使用酷 MA 萌 KUMAMON 的场合】
商品名使用“酷 MA 萌 KUMAMON”的名称 时的原则,如下所示。尚且,“酷 MA 萌 KUMAMON”是注册商标。
华为OTN产品彩页

5
OTN系列 光传输设备
OptiX OSN 8800 T64 & T32
——T-bit调度的智能骨干传输平台
T-bit大容量快速调度, 统一的光电联动交叉
• 业界最大的单子架64槽位,海量业务集中接入、调度和管理,消除了以往多个子架的拼装组网,节 省了80%占地面积,降低了55%单位带宽功耗,消除了ODF光纤转接,提升了网络可靠性;
光纤、老光纤等多种场景; • 100G全球份额第一,截止2013年12月,100G商用网络超过200个,连续5个季度市场份额第1;创
造并保持业界100G传送记录(陆缆4000km,海缆10000km); • 400G超高速,采用先进的PDM-16QAM调制技术实现;2012年,业界首家发布400G端到端样机;
700g400gosn9800u64256t400g单槽位40g100g400gosn1800v19英寸100m10g接入800goduk端到端系列产品端到端otn带宽云otn带宽云应用接入与汇聚osn1800iiiv在接入层我们关注业务如何高效接入otn带宽云依靠oduflexodu0等技术实现2m10g全业务统一接入城域骨干osn8800t16t32t64在城域我们关注快速建网简化运维otn带宽云pid技术类似sdh线路一连即通无需考虑光放与色散80g120g200g平滑扩容省际与国家干线osn
• 单槽位400G,业界最大单槽位容量; • 400G超高速:业界首家发布400G端到端样机,先进的PDM-16QAM调制支持1000km无中继传送; • 业界唯一单槽位2×100G板卡,集成度第一,单子架可出高达128路100G。可平滑升级支持
munchkin麦肯奇培训资料

純木漿混吸水粉型
特點:產品較厚,容易斷裂。由於其只有木漿和吸水粉尿液滲入後直接接觸吸收體,
因此其吸收速度會較超薄型的快,但保水性差,所以其乾爽性度不好,一般在中國此 類為低檔產品居多。
小包裝紙尿片
小碼 中碼 大碼 3-6kg 5-10kg 9-13kg 26kg 32pcs 26pcs 22pcs 20pcs
XL 加大碼
XL 加大碼
麥肯奇歐美舒爽新意念!
超值體用裝
麥肯奇歐美舒爽新意念!
各類型紙尿褲的對比
中國目前市場的紙尿褲類型及說明
純複合紙超薄型
特點:產品最薄,不易斷裂。被誤認為不會使寶寶的pp太熱、太捂。由於太薄,其使
麥肯奇歐美舒爽新意念!
品牌介紹
憑藉一顆母愛的心和熱情, Munchkin著重于 對嬰兒用品的新創意及安全性能的研發點, 滿 足現代父母對子女愛與呵護的需求! Munchkin產品,經歷考驗,展現了:新意念、 新創造、高品質、更安全的理念.
麥肯奇歐美舒爽新意念!
munchkin 來到中國
一直以來,麥肯奇只在英美等發達國家銷 售,隨著中國經濟的日益提升以及中國已 成為世界第二大嬰童產品的消費國,英國 NANNYcare公司將其引進中國,在經歷近 2年的調研,特別設計了適合中國寶寶的全 新麥肯奇紙尿褲,為中國寶寶提供更清爽、 更高質、更安全的享受。
英國納尼凱爾有限公司 UK NANNYCARE COMPANY LIMITED 廣州聖妮納進出口貿易有限公司 地址:廣州市番禺大石金怡商業大廈322室 E-mail:wxiangjun138@ web:
Invacare Matrx Vi和Matrx Kidabra-Vi产品说明书

1Invacare® Matrx® Vi and Kidabra-ViInvacare® Matrx® ViInvacare® Matrx® Kidabra-ViModel Numbers MA-Vi and KA-Vi 1 General1.1SymbolsSignal words are used in this manual and apply to hazards or unsafe practices which could result in personal injury or property damage. See the information below for definitions of the signal words.1.2OverviewImportant InformationThe best way to avoid problems related to pressure sores is to understand their causes and your role in a skin management program.Your therapist and physician should be consulted if you have questions regarding individual limitations and needs.All cushions should be selected carefully. Working with your therapist and physician is the best way to assure that a cushion choice matches your individual needs.As the needs of the individual become more complex, cushion evaluation becomes more important.Invacare Matrx Vi and Matrx Kidabra-ViThe Invacare Matrx Vi and Matrx Kidabra-Vi cushions are designed using a three part foam construction that targets skin protection to where it is needed most, and features improved stability, support and comfort.Outer Cover and Inner CoverThe outer cover is made of a mesh material that is moisture resistant and breathable. The inner cover is moisture resistant to protect the foam. Regular cleaning and inspection of the covers is recommended. Refer to Care and Maintenance on page 3.ƽWARNINGWarning indicates a potentially hazardous situation which, if not avoided, could result in death or serious injury.CAUTIONCaution indicates a potentially hazardous situation which, if not avoided, may result in property damage or minor injury or both.Gives useful tips, recommendations and information for efficient, trouble-free use.User ManualDEALER: This manual MUST be given to the user of the ER: BEFORE using this product, read this manual and save for future reference.Invacare® Matrx® Vi and Kidabra-Vi22 Safety2.1Intended UseThe Invacare Matrx Vi and Matrx Kidabra-Vi are designed to provide superior positioning, stability and comfort.2.2General WarningsCheck ALL parts for shipping damage. If shipping damage is noted, DO NOT use. Contact carrier/dealer for further instruction.ƽWARNINGDO NOT USE THIS PRODUCT OR ANY AVAILABLE OPTIONAL EQUIPMENT WITHOUT FIRST COMPLETELY READING AND UNDERSTANDING THESE INSTRUCTIONS AND ANY ADDITIONAL INSTRUCTIONAL MATERIAL SUCH AS OWNER’S MANUALS, SERVICE MANUALS OR INSTRUCTION SHEETS SUPPLIED WITH THIS PRODUCT OR OPTIONAL EQUIPMENT. IF YOU ARE UNABLE TO UNDERSTAND THE WARNINGS, CAUTIONS OR INSTRUCTIONS, CONTACT A HEALTHCARE PROFESSIONAL, DEALER OR TECHNICAL PERSONNEL BEFORE ATTEMPTING TO USE THIS EQUIPMENT - OTHERWISE, INJURY OR DAMAGE MAY OCCUR.ACCESSORIES WARNINGInvacare products are specifically designed and manufactured for use in conjunction with Invacare accessories. Accessories designed by other manufacturers have not been tested by Invacare and are not recommended for use with Invacare products.INSTALLATION WARNINGAfter any adjustments, repair or service and before use, make sure that all attaching component parts are secure.Ensure the seat cushion is properly secured to the wheelchair before using. Otherwise injury or damage may occur.Installing a cushion on a wheelchair may affect the center of gravity of the wheelchair and may cause the wheelchair to become unstable, potentially resulting in injury.WARNINGSkin condition should be checked very frequently after the installation of any new seating system.Your therapist and physician should be consulted if you have any questions regarding individual limitations and needs.Working with your therapist, physician, and equipment supplier is the best way to assure that a seating choice matches your individual needs.As the needs of the individual become more complex, the seating evaluation becomes more important.The cushion is designed to be used only at room temperature. If it is left at lower temperatures, always allow it to warm to room temperature before using. Sitting on extremely cold or hot surfaces can cause skin damage.Avoid sharp objects or exposure to excessive heat or open flame.3Invacare® Matrx® Vi and Kidabra-Vi2.3Weight Limitation and Model Numbers3 Usage3.1Installing the Invacare Matrx Vi or Kidabra-Vi1.Position the cushion so the materialidentification tags (not shown) face the rear.2.Align the hook and loop strips (not shown) on the bottom of the cushion with those on the wheelchair seat.3.Position the cushion onto the wheelchair as far back as possible.4.Press down to ensure the hook and loop strips are firmly engaged.4 Care and Maintenance4.1Cleaning Outer CoverThe cover can be wiped clean with a damp towel.The cover can be removed for laundering. Carefully remove the cover by unzipping the zipper found on the rear of the cushion. The zipper should be closed prior to laundering.Machine wash using the delicate cycle and hang dry or tumble dry on low.Inner CoverThe inner cover can be wiped clean with a damp cloth. The inner cover should not be removed from the foam.4.2Inspection Visually inspect parts including upholstery materials, foams (if accessible), and plastics, for deformation, corrosion, breakage, wear or compression.Refer to the chart for the weight limitation and stock model numbers.Configured model numbers are: MA-Vi and KA-Vi MA = Matrx Vi, KA = Matrx Kidabra Vi Grey = size not availableWIDTHDEPTH WEIGHT LIMIT*12 IN (30 CM)14 IN (36 CM)15 IN (38 CM)16 IN (41 CM)17 IN (43 CM)18 IN (46 CM)20 IN (51 CM)12 in (30 cm)KA1212-VI KA1214-VI 150 lbs (68kg)14 in (36 cm)KA1412-VI KA1414-VI MA1415-VIMA1417-VI300 lbs (136 kg)16 in (41 cm)MA1616-VI MA1618-VI MA1620-VI 18 in (46 cm)MA1816-VI MA1818-VI MA1820-VI 20 in (51 cm)MA2016-VIMA2018-VI MA2020-VI 22 in (56 cm)MA2218-VIMA2220-VI*Matrx-Vi Heavy Duty models are configured to order and have a weight limitation of 600 lb (272 kg). Heavy Duty cushions are available in sizes ranging from from 18 to 30 inches wide and 18 to 26 inches deep.RearFrontƽWARNINGDO NOT continue to use this product if problems are discovered. Corrective maintenance can be performed at or arranged through your equipment supplier.5 After Use5.1Reuse6 WarrantyPLEASE NOTE: THE WARRANTY BELOW HAS BEEN DRAFTED TO COMPLY WITH FEDERAL LAW APPLICABLE TO PRODUCTS MANUFACTURED AFTER JULY 4, 1975.This warranty is extended only to the original purchaser/user of our products.This warranty gives you specific legal rights and you may also have other legal rights which vary from state to state.Invacare/Motion Concepts warrants this product to be free from defects in materials and workmanship for two years of use by original purchaser. This warranty does not apply to punctures, tears or burns, nor to the removable cushion cover. If within such warranty period any such product shall be proven to be defective, such product shall be repaired or replaced, at Invacare's/Motion Concepts’ option, with refurbished or new parts. This warranty does not include any labor or shipping charges incurred in replacement part installation or repair of any such product. Product repairs shall not extend this warranty - coverage for repaired product shall end when this limited warranty terminates. Invacare's/Motion Concepts’ sole obligation and your exclusive remedy under this warranty shall be limited to such repair and/or replacement.For warranty service, please contact the dealer from whom you purchased your Invacare/Motion Concepts product. In the event you do not receive satisfactory warranty service, please write directly to Invacare/Motion Concepts at the address on the back cover. Provide dealer's name, address, model number, the date of purchase, indicate nature of the defect and, if the product is serialized, indicate the serial number.Invacare Corporation/Motion Concepts will issue a return authorization. The defective unit or parts must be returned for warranty inspection using the serial number, when applicable, as identification within thirty (30) days of return authorization date. DO NOT return products to our factory without our prior consent. C.O.D. shipments will be refused; please prepay shipping charges.LIMITATIONS AND EXCLUSIONS: THE WARRANTY SHALL NOT APPLY TO PROBLEMS ARISING FROM NORMAL WEAR OR FAILURE TO ADHERE TO THE ENCLOSED INSTRUCTIONS. IN ADDITION, THE FOREGOING WARRANTY SHALL NOT APPLY TO SERIAL NUMBERED PRODUCTS IF THE SERIAL NUMBER HAS BEEN REMOVED OR DEFACED; PRODUCTS SUBJECTED TO NEGLIGENCE, ACCIDENT, IMPROPER OPERATION, MAINTENANCE OR STORAGE; OR PRODUCTS MODIFIED WITHOUT INVACARE'S/MOTION CONCEPTS’ EXPRESS WRITTEN CONSENT INCLUDING, BUT NOT LIMITED TO: MODIFICATION THROUGH THE USE OF UNAUTHORIZED PARTS OR ATTACHMENTS: PRODUCTS DAMAGED BY REASON OF REPAIRS MADE TO ANY COMPONENT WITHOUT THE SPECIFIC CONSENT OF INVACARE/MOTION CONCEPTS; PRODUCTS DAMAGED BY CIRCUMSTANCES BEYOND INVACARE'S/MOTION CONCEPTS’ CONTROL; PRODUCTS REPAIRED BY ANYONE OTHER THAN AN INVACARE/MOTION CONCEPTS DEALER, SUCH EVALUATION SHALL BE SOLELY DETERMINED BY INVACARE/MOTION CONCEPTS.THE FOREGOING WARRANTY IS EXCLUSIVE AND IN LIEU OF ALL OTHER EXPRESS WARRANTIES, IF ANY, INCLUDING THE IMPLIED WARRANTIES OF MERCHANTABILITY AND FITNESS FOR A PARTICULAR PURPOSE.IT SHALL NOT EXTEND BEYOND THE DURATION OF THE EXPRESSED WARRANTY PROVIDED HEREIN AND THE REMEDY FOR VIOLATIONS OF ANY IMPLIED WARRANTY SHALL BE LIMITED TO REPAIR OR REPLACEMENT OF THE DEFECTIVE PRODUCT PURSUANT TO THE TERMS CONTAINED HEREIN. INVACARE/MOTION CONCEPTS SHALL NOT BE LIABLE FOR ANY CONSEQUENTIAL OR INCIDENTAL DAMAGES WHATSOEVER.THIS WARRANTY SHALL BE EXTENDED TO COMPLY WITH STATE/PROVINCIAL LAWS AND REQUIREMENTS.ƽWARNING: Risk of InjuryAlways have a dealer inspect the product for damage before transferring the product to a different user. If any damage is found, DO NOT use the product. Otherwise injury may occur.Invacare© 2011 Invacare Corporation. All rights reserved. Republication, duplication or modification in whole or in part is prohibited without prior written permission from Invacare. Trademarks are identified by ™ and ®. All trademarks are owned by or licensed to Invacare Corporation or its subsidiaries unless otherwise noted. Part No 1171788Rev A - 02/11。
KP-2012CGCK绿色LED灯源说明书

Green
ห้องสมุดไป่ตู้574
λD [1]
Dominant Wavelength
Green
570
Δλ1/2
Spectral Line Half-width
Green
20
C
Capacitance
Green
15
VF [2]
Forward Voltage
Green
2.1
IR
Reverse Current
Green
Notes: 1.Wavelength: +/-1nm. 2. Forward Voltage: +/-0.1V. 3. Wavelength value is traceable to the CIE127-2007 compliant national standards.
Iv (mcd) [2] @ 20mA
Min. Typ.
20
50
Viewing Angle [1]
2θ1/2
120°
Electrical / Optical Characteristics at TA=25°C
Kingbright Symbol
Parameter
Device
Typ.
λpeak
Peak Wavelength
Lens Type
KP-2012CGCK
Green (AlGaInP)
Water Clear
Notes: 1. θ1/2 is the angle from optical centerline where the luminous intensity is 1/2 of the optical peak value. 2. Luminous intensity/ luminous Flux: +/-15%. 3. Luminous intensity value is traceable to the CIE127-2007 compliant national standards.
2024版Smiles原版少儿教材白板互动课件演示

contents
目录
• 引言 • 教材特色与亮点 • 白板功能介绍与操作演示 • 课件内容展示与讲解 • 互动环节设计与实施 • 效果评估与反馈收集
01 引言
课件背景与目的
背景
Smiles原版少儿教材是专门针对少 儿英语学习者设计的一套综合性教 材,注重培养孩子的英语听说读写 能力。
替换练习操作
引导学生通过替换句子中的关键词, 进行句型拓展练习。
角色扮演活动
设置角色扮演环节,让学生在模拟 对话中灵活运用句型。
歌曲演唱环节
欢快旋律感染
选取富有节奏感的歌曲,激发学生跟唱兴趣。
歌词同步显示
实时显示歌词,帮助学生理解歌曲内容,快速学会歌曲。
演唱技巧指导
提供专业演唱技巧指导,引导学生用正确的发音和语调演唱歌曲。
适用对象与场景
对象
适用于使用Smiles原版少儿教材的英语教师和学生,特别是那 些注重互动式教学和多媒体教学资源的学校和培训机构。
场景
课件演示可以在课堂上进行,配合教师的教学讲解,也可以作 为学生课后自主复习和巩固知识点的辅助工具。同时,也适用 于家长辅导孩子学习英语时使用,增强亲子互动和学习效果。
场景应用实例演示
数学课件演示
展示如何使用白板制作数学课件, 包括绘制几何图形、添加数学公
式和符号等。
语文课件演示
展示如何使用白板制作语文课件, 包括添加和编辑文本、插入图片 和音频等。
英语课件演示
展示如何使用白板制作英语课件, 包括绘制单词卡片、制作语法解 析和听力练习等。
科学课件演示
展示如何使用白板制作科学课件, 包括绘制实验器材、模拟实验过
浅色简约风华为手机发布会通用PPT模板

字体大小
标题字体大小应足够大,以突出 标题的重要性。
字体颜色
标题字体颜色应与背景形成对比, 以便于阅读。
华为Logo设计
Logo位置
将华为Logo放置在封面的左上 角,以突出品牌形象。
Logo颜色
使用华为标准的蓝色和白色, 以保持品牌的一致性。
Logo大小
Logo大小应适中,以避免覆盖 整个封面。
浅色简约风华为手机发布 会通用ppt模板
xx年xx月xx日
目录
• 封面页 • 目录页 • 关于华为 • 华为新品——Mate50系列 • 产品特点展示 • 市场竞争力与用户反馈 • 品牌合作与生态建设 • 结语与展望
01
封面页
标题设计
字体选择
使用浅色字体,以白色或浅灰 色为主,以保持整体风格的简
高性能体验
搭载最新的麒麟990 5G处理器, 华为Mate50系列在运行速度、信 号接收和下载速度等方面表现出 色。
优秀的拍照效果
该系列手机配备先进的后置四摄系 统,能够满足用户在不同场景下的 拍照需求。
对华为品牌发展的展望与期待
拓展5G市场
随着5G网络的不断发展,华为 应继续拓展5G手机市场,推出 更多高性能、高品质的产品。
AI摄影功能能够智能识别拍摄场 景和主题,提供更加丰富的拍摄 效果和创意玩法
总结词:高清影像记录
支持全像素八核对焦和OIS光学防 抖,能够在低光环境下获得更加 清晰和稳定的拍摄效果
支持4K视频录制和960fps慢动作 视频拍摄,让用户轻松记录生活 中的精彩瞬间
06
市场竞争力与用户反馈
同类产品比较分析
加强研发投入
持续加大研发投入,在芯片、 操作系统等领域取得更多突破
Tissue-Tek 膜片说明书

Tissue-Tek® Coverslipping Film The clear choice!Why Tissue-Tek ® Coverslipping Film is your clear choice!2Q. Would you like to spendup to 66% less time onweekly maintenance of your coverslipper?Q. Do you want to avoid QCchecks and manual cleaning of slides resulting from excess mounting medium?Q. Would you like to provideslides to your pathologists faster?Keep your standards high using our trusted and respected brand. For more than 30 years, Tissue-Tek Coverslipping Film has been used on over 30 billion slides,making it the world’s clear choice for coverslipping ofmicroscope slides.A. Our Field Service Engineering Team documented the timefor weekly maintenance for the Tissue-Tek Film ® Coverslipper vs. glass coverslippers. It was determined that Film saved 20-30 minutes per day due to less required maintenance.A. 800,000 slides were stained and reviewed over 6 monthsby a high-throughput laboratory, while switching from glass coverslips to Film. As expected, Tissue-Tek Film coverslipped slides required much less manual quality checking to detect and clean excess mounting medium. The laboratory credited that these errors have been minimized since the adoption of Film coverslippers (Sakura Finetek).”1A. Xylene-activated Film dries within minutes, enabling slidesto be ready for pathologists’ review or for scanning earlier, without the need to use sticky mounting medium that requires hours to dry.Q. Would you want to retrieve archived slides stored for more than 10 years, preserved with significantly higher quality?Q. Have you ever suffered from inferior coverslipping tapes and the failures, disruptions, down-time and stress they create day-in and day-out due to their lower quality?Q. Would you like to scan slides without being forced to intervene constantly?A. In a study comparingthe quality of over 3,000externally-stored glass andFilm-coverslipped slides,3 artifacts were evaluated;lifting, bubble formation andeosin diffusion. Tissue-TekCoverslipping Film clearlyoutperformed with 99.8% ofslides without artifacts, vs.88% with glass. The mostsignificant differences wereless lifting and less bubbleformation when using Film.299.8% of slides werefurther confirmed to beartifact-free in a recentinternal accelerated stabilitystudy. This high quality isextrapolated further to bemaintained with 99.38% ofslides coverslipped with Filmwhen stored 35 years!4A. Don’t be fooled by cheap tape imitators! Tissue-Tek Coverslipping Film is the only coverslipping film that has been perfected over 5 product generations to deliver the highest quality demanded by laboratories worldwide. It is also the first and only coverslipping Film that can match the high-speed performance of the World’s fastest coverslipper!Copycat tapes cannot.A. In a recently published article, Grenada University Hospital (Grenada, Spain),1 found that switching from their glass coverslipper to Sakura Finetek’s Film with the Tissue-Tek Film Coverslipper addressed their problem of sticky mounting medium interfering with grippers of the whole slide scanner’s robotic arm. These errors were virtually eliminated with the Film Coverslipper and the desired high throughput was achieved. Together with other improvements, the laboratory benefitted by reducing scanning errors from 1.5% to just 0.1%.Tissue-Tek® Coverslipping FilmA. A study using artificial intelligence to measure thescanning speed and stain quality of slides coverslipped with Sakura Finetek Tissue-Tek Coverslipping Film vs. glass was performed. While the quality was the same for both, scanning of slides coverslipped with Film was 13 seconds per slide or 3.7% faster.3 This may bring a cumulative benefit for high volume settings.A. The Tissue-Tek ® Coverslipping Film was originally validatedby Hologic for the FDA Class II IVD Hologic ® ThinPrep ® Stain Plus Imaging System. Since then, Film remains the clear choice of laboratories, with an appreciated lower scanning rejection rate. Don’t be fooled by cheap tape imitators.Q. Are you scanning slidesaround the clock for archiving or research?Q. Do you need reliablycoverslipped slides to be quickly scanned on theHologic ® ThinPrep ® Stain PlusImaging System?5SpecificationsProduct name Tissue-Tek ® Coverslipping Film Product code 4770Applications Coverslipping for histology, cytology and advanced staining Length 60 m/roll Packaging5 rolls/caseCoverslipping lengths 45, 50, 55 and 60 mmCoverslips per roll 1,333 per 45 mm coverslip length Regulatory statusIVD, FDA Class ITissue-Tek ® Coverslipping Film5References1. Retamero JA, Aneiros-Fernandez J, del Moral RG. Complete Digital Pathology for Routine Histopathology Diagnosis in a Multicenter Hospital Network. Archives of Pathology & Laboratory Medicine. 2019. Arch Pathol Lab Med. doi: 10.5858/arpa.2018-0541- OA2. Greenlee J, Somasundaram B, Rios A, Hammer A, Holznagel M, Figueroa L, Scancich C, Webster S, von Bueren E. After 10 yearsof storage, significantly fewer artifacts are seen in Film-coverslipped slides versus glass coverslipped slides. Poster presented at : 44th Annual NSH Symposium/ Convention. Sep 21-26. 2018. St. Louis, U.S.A.3. von Bueren E, Webster S, Asanbaeva A, Figueroa L, Rios A, Grabowski O, Trageser A, Mishra A, Laris C, Weston C. No difference in scan speed and stain quality comparing Film vs. glass coverslipped slides. Poster presented at : 45th Annual NSH Symposium/ Convention. Sep 20-25 2019. New Orleans, U.S.A.4. Asanbaeva A, Webster S. Sakura Finetek USA, Internal Study. 2020.Please visit our website Sakura Finetek USA, Inc., 1750 West 214th Street Torrance, CA 90501 U.S.A.A long tradition of excellenceKnown for best-in-class automation and reliability Sakura Finetek remains a privately-held company in business since 1871. Sakura Finetek has achieved its success and solidified its reputation by providing timely, ingenious solutions to the realchallenges laboratories face on a day-to-day basis.Our rich history has given us athorough understanding of technology, quality, reliability, value for money and our customers’ requirements. We use this knowledge to passionately develop products that anticipate developments in both technology and market needs.Sakura Finetek USA, Inc. (SFA) isbased in Torrance, California. Functions covered at this facility include sales and marketing, service and technical support, R&D, and manufacturing.SFA is an ISO 13485 certifiedmanufacturer and supplier. As one of the two global manufacturing and R&D sites, SFA develops instruments and reagents into system solutions and secures our innovation with a steady stream of patents.In addition to supporting the U.S. marketplace, SFA is also responsible for Canada, Mexico, Central and South America and serves these markets witha network of local distributors.With the worldwide headquarters in Japan and regional offices in Japan, The Netherlands and the U.S.A., the global strategy of worldwide representation has been fulfilled to guarantee our customers the best service and support.Our organization is developing, professionalizing and growingcontinuously, and thus maintaining its position as a trustworthy and valuable partner in histopathology.0008716-01 R e v .A。
ThinkServer RQ940产品彩页
▪产品特征–技术特征–支持的操作系统(OS)▪机械部件–机械部件/硬盘驱动器(HDD)配置–前视图–后视图▪系统设计–系统框图–主板——布局和连接–扩展能力2014联想。
保留一切权利。
▪技术/关键子系统–中央处理器(CPU)兼容性–内存子系统–存储子系统–联网–电源管理▪可管理性/可维护性–服务器管理–易操作性和可维护性▪安全特征–可信平台模块(TPM)支持的处理器•E7-4800 v2系列,最高功率为155W SKU•英特尔C602芯片组内存•96个双列直插内存模块(DIMM)插口(8CH @ 3DPC/ 每个插槽24个DIMM)•LRDIMM和LV-RDIMM:DDR3 1600 MHz DIMM——最高内存容量为3TB •可靠性、可用性和可维护性(RAS):错误检查与纠正(ECC)、锁步(Lockstep)、镜像(Mirroring)、热备(Sparing)•英特尔C104可扩展内存缓冲区存储•12个2.5" HS硬盘驱动器(HDD)托架——最高支持12TB SATA或14.4TB SAS存储•支持SATA/SAS/SSD/PCIe存储控制器•英特尔集成RAID 100——SATA/SAS(RAID 0/1)•RAID 700适配器(RAID 0/1/5/6/10/50/60),带可选的电池•RAID 710适配器(RAID 0/1/5/6/10/50/60),带1GB缓存和可选的CacheVault/FastPath可用的I/O扩展插槽安装1个CPU时:•1个PCIe,第3代:全高/半长,x8机械式,x8电子式(RAID 控制器使用该插槽)安装2个CPU时:•3个PCIe,第3代:全高/半长,x8机械式,x8电子式•1个PCIe,第3代:全高/半长,x16机械式,x16电子式安装3个CPU时:•5个PCIe,第3代:全高/半长,x8机械式,x8电子式•2个PCIe,第3代:全高/半长,x16机械式,x16电子式With 4 CPU Installed•8个PCIe,第3代:全高/半长,x8机械式,x8电子式•2个PCIe,第3代:全高/半长,x16机械式,x16电子式I/O接口•1个用于远程管理的1 Gb/s以太网端口(端口不能与OS共享)•最多2个可选的以太网子卡。
易可导航-北欧企业商品宣传PPT-冷峻风格-2024 (60)+3w

@director general, tubes
5
易可资料库
易可资料库 Their collectively available skills or resources to achieve specific, declared goals. A company or association.
Mohammad
LUIS FULLY
易可导航
@CREATIVE DIRECTOR
12
DIRECTOR GENERAL
易可导航
Mohammad
LUIS FULLY
A company is an association or collection of individuals, whether natural persons, legal persons, or a mixture of both. Company members share a common purpose and unite in order to focus their various
Their collectively available skills or resources to achieve specific, declared goals.
6
易可资料库
易可资料库
Their collectively available skills or resources to achieve specific, declared goals. Their collectively available skills or resources to achieve specific, declared goals. Their collectively available skills or resources to achieve specific, declared goals.
- 1、下载文档前请自行甄别文档内容的完整性,平台不提供额外的编辑、内容补充、找答案等附加服务。
- 2、"仅部分预览"的文档,不可在线预览部分如存在完整性等问题,可反馈申请退款(可完整预览的文档不适用该条件!)。
- 3、如文档侵犯您的权益,请联系客服反馈,我们会尽快为您处理(人工客服工作时间:9:00-18:30)。
200年5
通过深圳市“高新技术企业”认定;
200年5
汇川E变M频C和器安通规过两项CE认证;
200年71月 200年74月
汇M川D32系0列变频器被授予“深圳市200年6优秀软件控制产品”荣誉称号; 通T过U 认证V机构关于ISO9:020010质0量管理体系的审核;
200年76月 “汇川变频器”被评选为“200年6中国变频器十大品牌”之一;
苏州默纳克依托着深圳汇川成熟的研发平台、营销平台、市场平台、制造平台和质量平台, 在为客户提供高质量高竞争力产品的同时,也为客户提供“默纳克品牌”的支持和服务。公司 以“为客户创造价值”为己任,和客户一起紧密合作,创造一种“共荣共赢”的新局面。 “专业、技术、 服务 ”作为苏州默纳克区别与其它公司的鲜明特点,正带动着公司以行业震惊 的速度健康发展。
优点: 工地现场安装调试方便,不需要添加平衡负载,安 全、可靠。 转旋编码器更换方便:可以在电梯任何负载情况下、 轿厢处于井道中任何位置时,都可以实现旋转编码器角 度识别。
启动无需称重信号补偿
优点: 松开抱闸瞬间,实现对载荷的自适应,无需调整即 可达到完美的启动效果。
特点: 整1简单调,功能开启既有完美启动效果 果2一致效性好,启动效果不会随机械状况的变化而
产品管理
AC驱动/DC驱动 PLC/HMI
伺服电机 直驱电机
微电子技术 总线技术 电机控制 电力电子技术 电机设计 核心技术管理
EMC 安规
热设计
结构造型
工艺
公共技术管理
标 准 产 品
通 线
用 系
客 统
户 解 决 方 案
专机
战略客户
营销与服务管理
成长历程
Growing Process
200年4
“软通件过产深品圳”市、“软件企业”的双软认定;
B 完美驱动,倡导舒适感受 界一世流的驱动算法,适应电动机范围更广; 业的专驱动制造技术,强大的环境适应能力; 业的专测试保证,可靠性更高; 业控专制,确保电梯品质
C 创新的N条曲线自动生成技术 新的创3闭环直接停靠技术 新的创无称重启动补偿与静态自学习技术;
D 便捷调试,实现高效工作 能码功精练,真正的傻瓜式调试 障等故级分类处理,查找问题更简单; 体化一设计,大大降低接线数量;
服务网络
Service Network
■提供全国范围联保服务; ■覆盖全国的29个办事处; ■53家分销商; ■60位一线营销与服务人员; ■重点市场重点资源保证;
黑龙江
内蒙古
吉林 辽宁
青海
天津
宁夏
河北 山西
山东
甘肃
陕西
四川
重庆
河南
安徽 湖北
江苏 上海
浙江
贵州
江西 湖南
福建
云南
广西 (广东)深圳
使命愿景 企业专注致力于控制系统的开发与制造,永远不遗余力和责无旁贷地推动电梯 技术的发展,致力成为客户满意、社会认同、具有高成长性和鲜明文化个性的 国际企业。
空开 MCCB
(A)
40 63 63 100
100 125 160 200
接触器
(A)
32 40 40 63 63 100 100 125
输入侧主 回路导线
(mm)
6 6 6 10 10 16 16 25
输出侧主 回路导线
(mm)
6 6 6 10 10 16 16 25
控制回 路导线
(mm)
1 1 1 1 1 1 1 1
N
I
Current Control module
PWM module
NICE3000
电梯一体化控制器
N I C E 3 0 0 0新 结 构
技 术 特 点:
A C多PU冗余控制、集成先进的Canbus、Modbus、GSM通讯技术 B 真正以距离控制为原则的直接停靠技术N,条曲线自动生成 C 用仅3根通讯线轻松实现2台梯并联控制 D 基于模糊控制理论的 8 台以下电梯群控算法 E 内置精准实时时钟,提供丰富的分时制控功能,方便实现楼宇智能
适 用 编 码 器 类 型: A 增量型(异步机) B UVW型(同步机) C SIN/COS型(无称重同步机)
R
端口 数字量信号输入点、模拟量输入、继电器输出、232通讯端口、485通讯端口、CAN总线通讯端口
标号
X1~X24
AI M 标号 Y1…Y6 ~ M1…M6
名称
数字量输入 功能选择
模拟输入端子 模拟量输入公共端 名称 继电器输出功能选择
R
电 梯 控 制 专 家 步同 世 界 潮 流
苏州默纳克控制技术有限公司
Suzhou OMNARCH oCntrol ecThnology oC., TDL 地址:江苏省苏州工业园区通园路25号 总机: 0(512)6285 7628 客服: 0(512)6285 6726 传真: 0(512)6285 7620
9 13 18.0 27.0 33.0 39.0 48.0 60.0 75.0 91.0
适 配 电 机 (KW)
2.2 3.7 5.5
7.5 11 15 18.5 22 30 37 45
制 动 电 阻(功率、阻值)
600W,220Ω 1100W,130Ω 1600W,90Ω 2500W,65Ω 3500W,43Ω 4500W,32Ω 5500W,25Ω 6500W,22Ω 9000W,16Ω 11000W,13Ω 13500W,10Ω
控制 F 灵活4的8VDC或者220VAC电源输入停电救援方案 G 短层站自动识别运行 H 手持式操作器、小键盘P、DA、上位机等为全系列产品提供方便的
调试方式 I 内置60个故障判别,并存储多次故障信息和时间,维修一目了然
适 用 梯 种:
A 单梯、并联梯、3~8台群控 B 高速、中速、低速 C 高档梯客、梯、医用梯、住宅梯、残障梯 D 梯速 ≤8m/s E 楼层:每个指令板适配16个楼层,16层以上, 可采用多级级连
Enterprise
Culture
Enterprise
NICE
系列命名规则
N
New /新的
I
Integrated /一体化
C
Control /控制
E
Elevator /电梯
NICE 一体 化 领引电 梯 控 制 未 来
A 高度集成,引领全新理念 动控驱制有机结合,性能更好,结构更紧凑
模块化设计,使控制柜的成本更低; 系统全集成,随行电缆更少;
200年76月 被变频器世界授予2“00年6中国变频器行业应用拓展奖”;
200年76月 被深圳市科技与信息管理局评2为00年6创新奖---最具成长性企业;
200年91月 《福布斯》中文版在沪发布了中国潜力企业榜20强0,深圳汇川技术
57;
股份有限公司位列第
About
R
Monarch
公司简介
州默纳克苏控制技术有限公司是深圳市汇川技术股份有限公司全资子公司,公司成立于 2003年12月,以汇川公司领先的变频驱动技术为基础,聚集专业化的人才队伍,为电梯行业 提供齐全的控制和驱动产品。苏州默纳克作为电梯一体化技术的引领者,先后推出了NICE 3000电梯一体化控制器、NICE2000扶梯一体化控制器、NICE1000货梯别墅梯一体化控制器, 在电梯控制系统领域掀起了一场新的变革,“一体化”这个新的名词正在引领着这个时代的 潮流。
NICE Series
Elevator Integrated Controller
R
NICE 系列 电梯一体化控制器
X. 6210022
About
Inovance
公司简介
作为苏州默纳克的母汇公川司技深术圳股市份有限公司是国内领先的工业自动化产品解决方案供应商, 专注于与客户建立长期的合作伙伴关系,我们拥有强大的研发、销售、制造以及快速响应客户需求的能力, 为客户提供整体解决方案和产品,助客户创造价值。
接地线
(mm)
4
4 4 4 4 4 4 4
R
NICE3000
Elevator Integration Controller Function Specification
电梯一体化控制器功能说明
检修运行
将自动/检修开关拨到检修一侧后,电梯即进入检修工作状 态,系统将取消一切自动运行包括自动门的操作。当有检 修上行信号或检修下行信号输入时,电梯以检修速度运行。
变化
v/速度
F3-18 F3-1 9
运行接触器 抱闸接触器
独创的输出接触器检测方式
仅用一个接触器就能符合GB7588安全标准 ; 先进的自诊断方法,避免安全隐患; 电流控制可以消除停车电流突然变化噪声;
New design for PM
N*
* Speed PI I
adjuster
Current PI adjuster
发展战略
Development Strategy
2003年-2007年 依靠变频器产品进入工控行业并成功立足; 创建国内高端品牌的形象; 致力于驱动技术与控制技术相结合,为客户提供有竞争力的解决方案
2007年-2011年 进入更高端的驱动器(伺服)、控制器(PLC)行业 逐步拓展海外市场 致力于驱动技术与电机相结合,成为客户定制化产品的首选供应商
汇川技术自主研发了变频器、/电伺机服、PL、C一体化控制器等产品,广泛应用于电梯、机床、金属制品、 线缆、印包、电源、冶金、石油、化工、造纸、起重、塑料、纺织等领域。
汇川技术在深圳、苏州、沈阳成立了汇川控制、苏州默纳克、沈阳汇川,分别专注于工业控制产品、电梯 驱动与控制产品、起重机驱动与控制产品的研发与推广。汇川技术在全国成立了29个办事处,拥有58家代理 商和合作伙伴,营销及服务网络遍及全国。