洗碗机分配器使用说明书
家用自动洗碗机说明书
5 喷臂 6 内胆
9
10
7 筷叉篮 8 碗篮
9 排水管 10 进水管连接口(进水阀)
3
清洗餐具前的准备
A.添加漂洗剂
漂洗剂的功能
漂洗剂可以防止水在碟子上留下斑点,提高干燥效果,漂洗剂在最后漂洗阶段由分配器自动释放出来。
如何添加漂洗剂
当控制面板上漂洗剂指示灯亮时,请添加漂洗剂。 漂 洗剂满时容量 大约是1 4 0ml。一 次添加可 多次 使 用。 您 可以直接观察 盖子旁边 的漂 洗 剂指示窗“C”, 根据它的颜色 变 化判 断漂洗剂 的剩 余量。
英工
中国首批荣获洗碗机"6A之星"企业
洗碗机说明书
本说明书适用以下产品:
T1 智能家用洗碗机
感谢您购买英工洗碗机,在使用前请先仔细阅读此说明书,阅后请妥善保存,以备日后查阅。
目录
说明书的使用
尊敬的用户: 使用前请仔细阅读此使用说明手册,以帮助您更有效的使用和保养洗碗机。请妥善保存以备日后查阅。请将此使
门不应一直放在打开的位置,因为这可能会导致器具翻 倒危险。 不要让小孩玩弄洗碗机。当洗碗机门开着时,请让小 孩远离洗碗机。 不要将门一直打开,否则有可能会发生绊跌危险。
如果电源软线损坏,为了避免危险,必须由制造商、 其维修部或类似部门的专业人员更换。 请正确处理废弃的外包装材料。 请不用使用洗碗机没有的功能。 在安装时,请不要过分的对电源线进行弯曲和挤压。 不要随意更改电路板的连接。 请让机器远离火焰和其它高温部件。 勿用湿手插拔电源插头。 在维修、清洗机器或长期不用时必须拔掉电源插头, 关掉水龙头。 允许的最大进水压力是 1MPa 。 允许的最小进水压力是 0.04MPa 。 本机器仅适合在室内使用。
Electrolux ESI5525LAX ZH 洗碗机 用户手册说明书

ESI5525LAXZH洗碗机用户手册内容1. 安全資訊.............................................................................................................22. 安全信息.............................................................................................................43. 產品說明.............................................................................................................54. 控制板 ................................................................................................................65. 程序.....................................................................................................................66. 設定.....................................................................................................................87. 特別功能...........................................................................................................108. 第一次使用前....................................................................................................109. 日常使用...........................................................................................................1110. 提示與訣竅......................................................................................................1311. 保養與清潔......................................................................................................1412. 疑難排解.........................................................................................................1513. 技術資訊.........................................................................................................1814. 台灣區服務與擔保. (18)以客為尊感謝您選購 Electrolux 產品。
AM60K洗碗机使用说明书

排水口高度不应高于洗碗机排水装置高度。
6
2. 控制
2
2
45
3
1
70
85
65
80
60
75
55
70
50
65
45
60
➀ 机器 启动/停止 按钮
➁ 程序按钮1&2 ➂ 维修按钮 ➃ 清洗温度显示 ➄ 喷淋温度 ➅⑦ 显示设定功能
67 按这个按钮机器开。 LED灯亮 −− 闪烁 = 机器注水并加热。 −− 长亮 = 机器已准备好运行。 在错误操作或发生故障时,按这个按钮可以立即关闭机器。 机器关闭后仍然带电! 通过按这些按钮选择短周期循环(1)或标准周期循环(2)。 相应的 LED 灯亮。
L3
L2
L1
DPS1 DPS2
RPS1 RPS2
1.5. 进水连接
必须由被授权的技术人员按照当地和国家标准执行。 本机器必须使用可饮用水。对高浓度矿物质水质,强烈推荐使用外 部矿物质去除装置。
–– 如果可能,连接温水(最高60°C)。 –– 水硬度:
• 不带软水器(最高 3.75°Clark, 相当于0.5 mmol/l)。 • 带软水器(最高 37.5°Clark, 相当于5.3 mmol/l)。 –– 进水压力: 流动压力 50kPa – 1000 kPa。 > 1000 kPa:必须安装减压阀。 –– 连接供水管路上的螺母“A”(3/4”)和现场的进水阀。 –– 不要扭结或切割供水管路。如果需要加长供水管路,其规格必须 与原软管相同。
8. 故障表.........................................................................................14
海尔 ETW42286BKU1 4套台式全自动洗碗机 使用说明书

洗碗机使用说明书型号ETW42286BKU1•本说明书为通用手册•本公司保留说明书解释权•产品外观请以实物为准•阅后请与发票一并妥善保存•如遇产品技术或软件升级,恕不另行通知•本产品只适合在中国大陆销售和使用一、产品介绍1.1.部件介绍1.1.1.各部件名称打开门体•按压键打开门体。
关闭门体•按压门体底部两端位置,直至听见“咔哒”声门体关闭。
若门体没有关好,指示灯闪烁,请再次按压门体底部两端,门体关闭后指示灯熄灭。
新机器前几次关闭门体可能较紧,使用一段时间磨合后,门体关闭会变得顺畅。
1.1.2.附件清单二、使用说明2.1.注意事项2.1.1.标志符号说明本产品属于I类电器,请您使用时注意用电安全。
为了您能更好的使用本产品,防止人身伤害及物品损坏事故,请重点关注安全注意事项内容,并运用生活常识谨慎操作。
对因使用不当造成的损失,本公司不承担相关责任。
请务必仔细阅读并遵守本说明书中有以下标志符号的内容。
2.1.2.电源及安放场景电源•本产品使用交流220V/50Hz电源,用电环境应有规格适宜的保险丝等过载保护装置,电表、电线、插座应能承受6A以上的电流。
•必须使用有可靠接地的电源,电源的地线应正确接地并远离地下水管及电线。
如果用电环境不能达到安全要求,如无接地线等,必须由专业人员处理到位。
•请使用原装电源线,不要擅自更换或改装电源线;保持电源线向下延展,确保电源线被固定在特定位置,过度弯曲、拉扯、缠绕、捆扎电源线或在电源线上放置重物可能导致电源线破损,均可引起触电或火灾。
•如果电源线损坏,为了避免危险,必须由制造商、其维修部或类似部门的专业人员更换。
•洗碗机电源插座必须能随手触及,便于用户断开电源。
•不要用潮湿的手触摸、插拔电源插头,以免触电。
安装场景•您的洗碗机为家用型,请勿用于商用。
•洗碗机适宜室内使用,不要将洗碗机安装在温度低于零度的地方。
•因洗碗机工作时会产生热量,请不要将洗碗机安装在暖气设备、锅炉或其他产生热量的热源附近,并注意不要将洗碗机与燃气管道及受热易老化部件直接接触,避免带来安全隐患。
洗碗机分配器使用说明书

洗碗机分配器分配器的安装1、机身安装将机身固定在架子或垂直的墙面上,保证机身远离洗碗机的通风口及蒸汽通道上,否则会造成设备过热,从而影响运行状况。
机身后壳上的预留孔是用于安装于墙面时上螺丝之用,安装时需加密封垫片。
2、分配器安装1)探头的安装:当分配器选择探头控制加料模式时,必须安装探头。
探头必须安装在水箱液面以下,并尽可能的在靠近水箱底部的洗碗机缸臂上钻一个22.0MM的孔,用橡胶圈从内、外部固定探头。
探头应与热源、洗涤剂入口、排水管、进水管等保持一定距离。
2)洗涤剂注入器的安装注入器应安装在水箱液面以上,在洗涤缸臂适当位置钻一个22.0MM的孔安装注入器,作为洗涤剂的入口。
用橡胶垫圈从内部固定注入器。
3)催干剂单向阀的安装将单向阀安装在洗碗机的过水管或者加热包上。
一般洗碗机上有预留接口;若没有,在管壁厚度足够的情况下,自钻一个11/32(8.7MM)的孔或用三通来替代。
4)输液管连接将ф6MM的白色输液管插入洗涤泵的黑色蠕动胶管末端,并用拉带扎紧。
再将输液管截成适当长度的两段,长度以达到洗涤剂料桶与重锤注入器连接。
进料输液管末端与注入器用白色螺帽紧密连接。
同样,将ф6MM的输液管截成适当长度的两段,长度以达到催干剂料桶与重锤连接。
进料输液管一端与催干泵的黑色蠕动胶管末端相连,另一端与白色PVC吸液管用白色螺帽相连,然后一并放入催干剂料桶。
出料输液管末端与单向阀相连。
电路安装1、分配器工作电压(常电源)220V、110V,如果有24V电压则不需要安装变压器电源,电源单独设置电源开关。
2、连接主电源前检查洗碗机输出端电压后再进行连接,以免烧坏变压器以及电路板。
3、一般洗碗机都在电控箱内,留有洗涤剂催干剂的电源信号接口,比较方便的就可以接在分配器的触发信号连接柱上,电压范围在24V—230V都可以。
4、如果洗碗机没有预留洗涤剂催干剂的电源信号,可以将触发电源信号连接在主洗接触器和过水接触器的电源上。
美的 Q6 WQP12-7209H-CN 洗碗机使用安装说明书

为了使喷射水柱能够充分清洗污渍面,需将污渍面斜向内侧放置。
产
品
刀和其它锋利的用具必须装在篮子里,并且尖端朝下或水平放置。
简
放入的餐具不得从碗篮底伸出,以免挡住喷臂。下碗篮餐具限高24.5 cm,以免
介
挡住上碗篮喷臂。
使
筷勺托盘摆放
用
说
小勺
明
筷子
清
饭勺
洁
保
汤勺
养
安 装 说 明
上碗篮摆放
服
务
指
小碗
南
可对筷勺托盘的摆放方 式进行调整,以加大上 碗篮的使用空间。
修范围。
产
使用新的软管组件
品
洗碗机应使用新的软管组件连接到水源,旧的软管组件不应重复
简 介
使用。
合适的进水压力
使
洗碗机的进水压力为0.04 MPa~1.00 MPa。
用
说
明
表示【注意】的内容
先暂停,后开门
清 洁
洗碗机运行时,若需中途开门,请先按“启动/暂停”键,然后慢
保
慢开门,以防过热蒸气和水溅出。
备注: 1 蒸煮、粘固在餐盘表面的请使用长时序; 2 水蒸蛋等手工都难以清洗的污渍,使用本洗碗机清洗可能达不到预计的清
技术要求: 1、印刷颜色为四色印刷; 2、规格为A5(145mm*210mm),骑马装订,32P; 3、放在包装塑料袋内。
用户手册Q6 (MIDEA)(集团新标准)
A
6720601735 80克双胶纸
洗碗机
使用安装说明书
微信扫一扫,美的服务到
使用前请仔细阅读本说明书,并妥善保管
目录
尊敬的用户:
“美的生活,从厨房开始”,感谢您选购美的厨房电器产品!美的厨 房电器担负着为人类提供美好厨房生活的社会使命,致力于成为全球最优 秀的厨房生活解决方案供应商。我们秉承“质量第一、用户至上”的宗旨 竭诚为您服务,如果您有什么建议或者意见请及时与我们联系(美的客服 电话:400-8899-315),我们将根据您的需要及时为您服务。
西门子ESF9516LOX 洗碗机 用户手册说明书

ESF9516LOXZH洗碗机用户手册内容1. 安全信息.............................................................................................................22. 安全说明.............................................................................................................43. 产品说明.............................................................................................................54. 控制板.................................................................................................................65. 程序.....................................................................................................................66. 设置.....................................................................................................................87. 选项...................................................................................................................108. 初次使用前........................................................................................................109. 日常使用...........................................................................................................1110. 建议和提示......................................................................................................1311. 养护和清洁......................................................................................................1412. 排除故障.........................................................................................................1713. 技术信息.........................................................................................................1914. 维修服务指南.. (20)伊莱克斯 - 想你所想!感谢您选购伊莱克斯设备。
Zanussi Professional 单层罩式洗碗机带上光剂分配器说明书
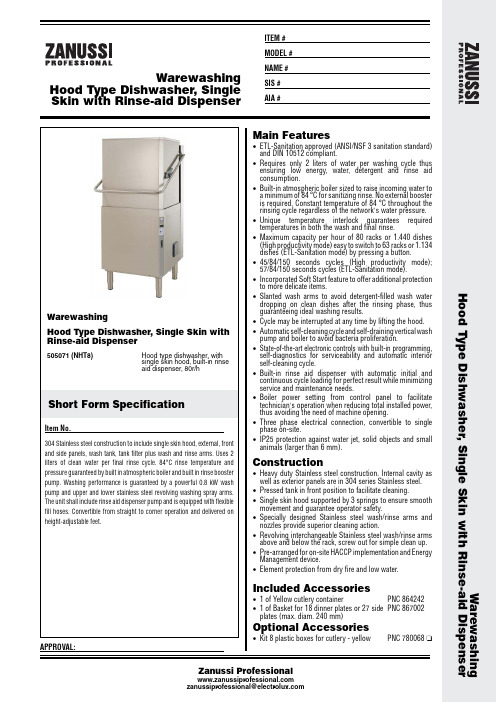
Warewashing Hood Type Dishwasher, Single Skin with Rinse-aid Dispenser ITEM # MODEL # NAME # SIS # AIA #Short Form SpecificationAPPROVAL:Zanussi Professional**********************************Warewashing Hood Type Dishwasher, Single Skin with Rinse-aid DispenserWarewashingHood Type Dishwasher, Single Skin with Rinse-aid Dispenser505071 (NHT8)Hood type dishwasher, withsingle skin hood, built-in rinseaid dispenser, 80r/h304 Stainless steel construction to include single skin hood, external, front and side panels, wash tank, tank filter plus wash and rinse arms. Uses 2 water per final rinse cycle. 84°C rinse Main Features•ETL-Sanitation approved (ANSI/NSF 3 sanitation standard) and DIN 10512 compliant.•Requires only 2 liters of water per washing cycle thus ensuring low energy, water, detergent and rinse aid consumption.•Built-in atmospheric boiler sized to raise incoming water to a minimum of 84 °C for sanitizing rinse. No external booster is required. Constant temperature of 84 °C throughout the rinsing cycle regardless of the network's water pressure.•Unique temperature interlock guarantees required temperatures in both the wash and final rinse.•Maximum capacity per hour of 80 racks or 1.440 dishes (High productivity mode) easy to switch to 63 racks or 1.134 dishes (ETL-Sanitation mode) by pressing a button.•45/84/150 seconds cycles (High productivity mode); 57/84/150 seconds cycles (ETL-Sanitation mode).•Incorporated Soft Start feature to offer additional protection to more delicate items.•Slanted wash arms to avoid detergent-filled wash water dropping on clean dishes after the rinsing phase, thus guaranteeing ideal washing results.•Cycle may be interrupted at any time by lifting the hood.•Automatic self-cleaning cycle and self-draining vertical wash pump and boiler to avoid bacteria proliferation.•State-of-the-art electronic controls with built-in programming, self-diagnostics for serviceability and automatic interior self-cleaning cycle.•Built-in rinse aid dispenser with automatic initial and continuous cycle loading for perfect result while minimizing service and maintenance needs.•Boiler power setting from control panel to facilitate technician's operation when reducing total installed power, thus avoiding the need of machine opening.•Three phase electrical connection, convertible to single phase on-site.•IP25 protection against water jet, solid objects and small animals (larger than 6 mm).Construction•Heavy duty Stainless steel construction. Internal cavity as well as exterior panels are in 304 series Stainless steel.•Pressed tank in front position to facilitate cleaning.•Single skin hood supported by 3 springs to ensure smooth movement and guarantee operator safety.•Specially designed Stainless steel wash/rinse arms and nozzles provide superior cleaning action.•Revolving interchangeable Stainless steel wash/rinse arms above and below the rack, screw out for simple clean up.•Pre-arranged for on-site HACCP implementation and Energy Management device.•Element protection from dry fire and low water. Included Accessories•1 of Yellow cutlery container PNC 864242•1 of Basket for 18 dinner plates or 27 sideplates (max. diam. 240 mm)PNC 867002 Optional Accessories•Kit 8 plastic boxes for cutlery - yellow PNC 780068 ❑•External manual water softener - 12 lt PNC 860412 ❑•External automatic water softener - 8 lt PNC 860413 ❑•External manual water softener - 20 lt PNC 860430 ❑•Haccp kit with cable for hood type PNC 864006 ❑•Stainless steel inlet hose kit PNC 864016 ❑•Filter for partial demineralization PNC 864017 ❑•Kit to measure total/partial water hardness PNC 864050 ❑•Yellow cutlery container PNC 864242 ❑•Advanced filtering system kit for single skin hoodtypePNC 864329 ❑•Drain pump kit for hood type PNC 864346 ❑•Filter for total demineralization PNC 864367 ❑•Detergent dispenser kit PNC 864369 ❑•Front control panel for single skin hood typedishwasherPNC 864374 ❑•Reverse osmosis filter for single tank dishwasherwith atmosphere boilerPNC 864388 ❑•Deliming device kit for Hood Type (drain pumpincluded)PNC 864391 ❑•Pressure reducer for single tank dishwasher PNC 864461 ❑•Kit of rack and support to wash fryer basket PNC 864463 ❑•Connecting kit for duet manual hood typedishwasherPNC 865264 ❑•Set of 4 yellow cutlery containers PNC 865574 ❑•Basket for 6 trays 530x370 mm PNC 866743 ❑•Basket for 12 soup plates or 12 cups (max. diam.240 mm)PNC 867000 ❑•Basket for 18 dinner plates or 27 side plates(max. diam. 240 mm)PNC 867002 ❑•Basket for cups and coffee cups (24-48 pcs) -bluePNC 867007 ❑•Basket for bulk cutlery-capacity: 100 pieces -brownPNC 867009 ❑•Cover grid for small/light items in rack PNC 867016 ❑•Basket for 25 glasses max. height: 120 mmdiameter: 80 mm - bluePNC 867021 ❑•Basket for 16 glasses max. height: 70 mm - blue PNC 867023 ❑•Basket semi-professional (500x500x190mm)PNC 867024 ❑•Basket for 16 glasses max. height: 220 mm diameter: 100 mm - blue PNC 867040 ❑Incoming water line size:G 3/4"Key Information:N° of cycles: 3Duration cycle - Highproductivity:*45/84/150 sec.Duration cycle - Thermal Labelcompliant:57/84/150 sec.Racks per hour - Highproductivity: *80Racks per hour - Therma Labelcompliant:63Dishes per hour - Highproductivity: *1440Dishes per hour - Therma Labelcompliant:1134Wash temperature - Highproductivity:55-65 °CWash temperature - ThermalLabel compliant:75 °C MINRinse temperature (MIN):84 °CNet weight:106 kgShipping weight:118 kgShipping volume: 1.23 m³Packaging size(WxDxH):746x755x1547 mmNoise level:<68 dBA* According to market standard, the productivity is declared at aninlet water supply temperature of 50°C . If the water is supplied at65°C, the power can be reduced by 3 kW without any loss inproductivity.NOTE:If the water supply temperature is less than 50°C, it is necessary torequest higher power to maintain productivity.Warewashing Hood Type Dishwasher, Single Skin with Rinse-aid Dispenser The company reserves the right to make modifications to the products without prior notice. All information correct at time of printing.2014.11.12。
樱花 SCE-W1001 洗碗机 使用说明书
洗碗机 SCE-W1001一、安全及注意事项 —————————————————— 01二、装箱清单及参数—————————————————— 05三、认识洗碗机 ———————————————————— 06四、机器安装 ————————————————————— 08五、操作说明 ————————————————————— 13六、清洁保养 ————————————————————— 28七、常规问题排除 ——————————————————— 32八、售后服务与包修 —————————————————— 34九、电气配线图———————————————————— 35十、产品有害物质说明————————————————— 36执行标准GB4706.1 《家用和类似用途电器的安全 第1部分: 通用要求》GB4706.25 《家用和类似用途电器的安全 洗碗机的特殊要求》一、安全及注意事项1、安全须知本说明书记载了安全事项的重要内容,请妥善保管。
在您使用本电器之前请仔细阅读本说明书,以防对使用者及他人造成人身伤害或财产损失。
请在充分理解下面内容(文字、标志和插图等)的基础上阅读正文,并请务必遵守内容中所记载的相关安全事项。
操作错误时,可能严重损坏产品或造成使用者伤亡,或造成电器危险或火灾危险。
本电器只适合一般家庭用来洗涤和干燥餐具,不适合使用于商业用途及其他非家用用途。
将洗碗机用作以上描述以外的其它用途而造成的任何损失,生产厂家概不负责。
洗碗机的安装、电气连接和初次调试必须要由专业资格的技术人员完成。
公司不承担任何因不按照制造商指示说明进行安装和使用而导致一切后果的责任。
在拆包装时,请妥善处理包装材料请勿随意丢弃。
请勿让儿童玩耍包装纸箱及塑料袋,以避免造成儿童窒息的危险。
洗碗机上贴有铭牌,用于随时了解洗碗机的相关技术数据、序列号及标记。
在使用洗碗机的过程中请勿去掉贴在洗碗机上的铭牌。
洗碗机必须接地线,接地线的可靠连接能确保您的安全,能有效的避免您在使用过程中的触电风险。
分液器cp619说明书

分液器cp619说明书数字流体分配器使用说明书数字型分配器使用说明书一.简介CP619分配器是一种方便轻巧的装置,可以准确,适量的向商用洗碗机注入洗涤剂,催干剂等化学药剂。
采用专业设计的洗涤电路板,可实现探头或时间双模式控制加料。
分配器面板上还设有洗涤▲及催干▼手动加药按钮,可适用于各类门式和通道式洗碗机。
二.分配器的安装1.机身安装将机身固定在架子或垂直的墙面上,保证机身远离洗碗机的通风口及蒸汽通道上,否则会造成设备过热,从而影响运行状况。
机身后壳上的预留孔是用于安装于墙面时上螺丝之用。
2. 分配器安装1)探头的安装:当分配器选择探头控制加料模式时,必须安装探头。
在距离水位线10CM处,通常距水箱底部30-50mm处的洗碗机缸壁上钻一个22.5MM的孔, 用橡胶垫圈从内部固定探头。
探头应与热源,洗涤剂入口,排水管,进水管等保持距离。
2)洗涤剂注入器的安装注入器应安装在探头之上。
在洗涤缸溢流线的上方钻一个22.5MM的孔安装注入器,作为洗涤剂的入口。
用橡胶垫圈从内部固定注入器。
3)催干剂单向阀安装将单向阀安装在1/8“NPT的洗碗机的过水管线上。
一般洗碗机上有预留接口。
若没有,在管壁厚度足够的情况下,自钻一个11/32“(8.7MM)的孔或用鞍型夹代之。
4)输送管连接将φ6MM的输送管插入洗涤泵的黑色蠕动胶管末段,并用拉带扎紧。
再将输送管截成适当长度的两段,长度以达到洗涤剂料桶和注入器为准。
进料输送管末端与灰色PVC吸液管用白色螺帽相连,然后一并放入洗涤剂料桶。
出料输送管末端与注入器用白色螺帽紧密连接。
同样,将φ6MM输送管截成适当长度的两段,长度以达到催干剂桶和单向阀为准。
进料输送管一端与催干泵的黑色蠕动胶管末段相连,另一端与灰色PVC吸液管用白色螺帽相连,然后一并放入催干剂料桶。
出料输送管末端与单向阀连接。
三.电路连接1、电源线(常有电)接线方法①、分配器的工作压力为240VAC、208VAC、120VAC,如有24VAC电压可直接接到电板上,当电压为220VAC时可接240VAC或208VAC。
餐饮设备清洁和卫生操作规范:洗碗机说明书
本规程由麻州大学(阿姆斯特)爱森伯格管理学院酒店及旅游管理系、麻州大学扩展部营养教育项目、麻州中小学教育部和营养、健康、安全办公室制定。
麻州大学扩展部与美国农业部合作是社会平等机会的提供者和雇用单位。
请向你当地的扩展办公室咨询有关残疾人住房的信息。
如果你有任何关于歧视的投诉,请致电麻州大学扩展部主任:413-545-4800。
此信息更新于:4/08设备安全规程为食品工作人员注意:目的清洁和消毒。
设备样式机器样式包括:台下式-商用、快速的洗涤循环洗碗机,与家用洗碗机样式类似门/碗碟架通道输送式-该洗碗机的架子是专为特种厨房用具、玻璃器皿、瓷器、托盘以及扁平餐具设计的。
将器皿置于架子里,由含有清洁剂和消毒杀菌剂的喷射水柱进行清洗、消毒。
• 单门式:按如下程序操作此类洗碗机,先打开一扇门,插入碗碟架,关上门,然后开始运行机器。
• 门通道输送式:按如下程序操作操作此类机器,把碗碟架推入机器,直至架子与通道输送相连接,该通道输送经过多次循环而把架子送入。
快速连续通道输送式-器皿由一个连续的输送机器送入,其设计与架子挂钩相似。
对于玻璃器皿和扁平器皿,使用专用架子,通过有挂钩的输送机器送入。
机器温度类型:了解你的机器是否是高温或低温机器。
• 如果是高温机器, 则该机器依赖水温进行消毒。
该机器有一个内置的温度计监控适度的水温。
• 如果是低温机器,则餐具是靠化学制品进行清洗和消毒。
不同的化学消毒剂要求不同的温度。
一定要按照机器厂家以及清洁剂厂家的说明进行操作、使用。
设备安全预防措施这些说明是总的指导方针。
请对照机器操作手册和清洁剂厂家的建议选择你那种型号机器的合适的架子、温度以及操作步骤。
使用任何电气设备都应小心谨慎。
• 不要穿戴可能卷入机器中的宽大衣物和首饰。
• 为了防止滑倒和跌倒,在洗碗机的前方,使用橡胶垫子,并且穿上合适的防滑鞋。
• 在你安装、清洗或者拆开电气设备时,随时关闭该设备的电源。
• 循环在运行时,千万不可打开洗碗机的门或者把手伸进洗碗机。
分配器说明书

洗碗机双液体电脑分配器安装使用说明书A600201-1CA600201-2C上海昌剑酒店设备用品有限公司SHANGHAI CHANG JIAN HOTEL EQUIPMENT CO., LTD.洗碗机分配器使用说明书一、简介昌剑公司最新研制开发的洗碗机分配器,适用于国内外销售的任何品牌洗碗机。
是一种准确方便经济实用的洗碗机清洁剂、催干剂分配器,有门式、通道式专用型,有探头和时间速度双模式控制方法,有CPU控制的探头、非探头(时间、速度)双模式控制,有遥控型、非遥控型。
适用于任何类型洗碗机上使用。
二、安装1. 分配器安装在洗碗机的进口上方墙体,打两个 6 墙洞,用塑料膨胀管螺丝固定分配器,须将密封垫片安在墙体上,防蒸汽进入箱体内。
2. 管路安装1)将 6塑管截成适当长度,插入泵管两端用扎带扎紧,注意不要将吸入口、出口搞反。
泵的转向应是顺时针方向,吸入口的塑管末端装上吸液管,长度能放入清洁剂和催干剂的桶内,出口与清洁剂下药口和单向阀连接。
2)清洁剂进口,在洗碗机洗涤槽水平面上方,打一个 22或7/8"标准孔装上进药口装置。
3)催干剂进口须装单向阀,一般洗碗机上有预留口。
3. 探头安装必须安装在洗涤槽的水平面下 10cm左右的地方,最好的位置应离水泵吸口较近,离进水口较远,切忌安装在加热管附近,否则容易熔化,选择好位置后打一个 22mm或7/8英寸的孔,用0.75-1平方米多股软线,连接至分配器的探头信号连接柱上。
4. 电路安装1)分配器工作电压(常电源)220V、110V,如有 24V 电压则不必接变压器电源,电源单独设置电源开关(以备清洗洗碗机用)。
2)连接主电源前检查洗碗机输出端电压后再进行连接,以免烧坏变压器及电路板,确定后再连接。
3)一般洗碗机都在电控箱内,留有洗涤剂催干剂的电源信号接口,比较方便的就可接在分配器的触发信号连接柱上,电压范围在14V-230V都可以。
4)若洗碗机没有预留洗涤剂催干剂的电源信号,可以将触发电源信号连接在主洗接触器和过水接触器的电源上。
DW-15F5(SS)-NZ 电子洗碗机用户手册说明书
E n g l i s hDISHWASHERINSTRUCTION MANUALModel:DW-15F5(SS)-NZRead these instructions carefully before using your DISHWASHER, and keep it carefully.SAFETY INSTRUCIONSAll instructions described should be carefully read and followed.These instructions are precautions to prevent the risks of serious injury or death of the user, and any damages to property.(*1) Serious injury - injury which requires hospitalization, lengthy treatment, or blindness, hot and cold skin burn, electric shock, broken bones or poisoning.(*2) Injury - injury, skin burn or electric shock which does not require hospitalization or lengthy treatment.(*3) Property loss - extended loss of houses, furniture, domestic animals or pets.02E n g l i s h03040506Handle the package of the dishwasher with extreme care.All packages are recyclables.Plastic parts are marked with abbreviation of international standard;TreatmentsPE Polyethylene, e.g., tableted package material Polystyrene, e.g., packing material Polymethyl, e.g., plastic clip Polymer, e.g., control panel Polypropylene, e.g., inner wallPS POM ABS PPE n g l i s hSuch warning sign is used to prevent dangers to you and others.Please follow it strictly.After reading, please store it properly for use just in case.07Recognize the dishwasher Dishwasher features Control panel 101101Please carefully read the instruction manual before using the dishwasher,and this is helpful for the use and maintenance of the product.Contents08Start upCleaning and care Filter cleaning Spray arms cleaning Care and maintenanceUse the dishwasher Adding rinse aid to the dispenser 13020304Rinse aid and detergent 172728291814Program Setting Washing program Changing the program mid-cycle Put additional dishes in Auto OpenBasket used tipsInstall dishwasher bowl basket 1920Adding rinse aid to the dispenser 23141515End of washing program1609TroubleshootingBefore connecting customer service center Error code Installation Product dimension Power connection 053031333536Specification 06Water connection Connection of drain hoses313237Product ficheRecognize the dishwasherDishwasher featuresImportant:Before using the dishwasher for the first time, read following instructions to ensure the best results.10Cutlery rackLower basketFilterLower spray arm DispenserTop spray armUpper basketControl panelE n g l i s hThe table below shows which programs are best for the levels of food residue on Washing programProgram SettingE n g l i s hthem and how much dishwashing powder is needed. It also show various information about the programs. Dishwashing powder (g)Highest Water Temperature65℃Time (min)Power (kWh)Water(L)ProgramAUTO120-1900.9-1.311-1550℃1900.75GLASS60℃1250.861365℃90 1.2711.5RAPIDNOTE: Select Hygiene cycle for better drying performance.45℃300.6HYGIENE75℃192 1.9917.55/28.7Or all in 15/28.7Or all in 15/28.7Or all in 15/28.7Or all in 125Or all in 12513.211.5(*AS/NZS 2007.1)Start upChanging the program mid-cycle1. The plug shall be firstly plugged into the socket. Power supply shall be of 220-240V AC 50Hz type, with socket of 10 A 220-240V AC.2. Make sure that the water supply is turned on to full pressure.3. Close the door, press "ON/OFF" button turn on the dishwasher.4. Press the button of desired program, the corresponding indicator will light up.5. Then, pass”Start/Pause”button to start.A wash cycle can only be changed if it has been running for a short time otherwise, the detergent may have already been released and the dishwasher may have already drained the wash water. If this is the case, the dishwasher needs to be reset and the detergent dispenser must be refilled. To reset the dishwasher, follow the instructions below:1. Press the Start/Pause button to pause the washing.2. Press the Program button for more than 3 seconds, the dishwasher will enter standby mode.3. Press the Program button to select the desired program.4.Press the Start/Pause button, the dishwasher will run after 10 seconds.3 secondsPut dishes inadditional Additional dishes can be placed in at any time before dishwasher program start. If you want to reload dishes in the process of washing, please follow instructions below:1. Press “Start/Pause” button to pause washing program;2. Wait for 5 seconds to open the door;3. Put the additional dishes in;4. Close the door;5. Press “Start/Pause” button and after 10 seconds, the dishwasher will start again.E n g l i s hAuto OpenEnd of washing programAfter the program finishes, the machine show "End" after the buzzer beeps for 8 seconds.Turn off the machinePress ON/OFF button to turn off the dishwasher.Open the door carefullyHot dishes are more likely to be damaged. The dishes shall be cool for about 15 minutes and then taken out from the dishwasher.Clear the dishwasherIt is normal that the dishwasher still remains wet inside.The rinse aid is released during the final rinse to prevent water from forming droplets on your dishes, which can leave spots and streaks. It also improves drying by allowing water to roll off the dishes. Your dishwasher is designed to use liquid rinse aids.Function of the rinse aid and detergentFunction of detergentThe chemical ingredients that compose the detergent are necessary to remove, crush and dispense all dirt out of the dishwasher. Most of the commercial quality detergents aresuitable for this purpose.When to refill the rinse aidThe regularity of the dispenser needing to be refilled depends on how often dishes are washed and the rinse aid setting used.The Low Rinse Aid indicator ( ) will appear in the display when more rinse aid is needed.Do not overfill the rinse aid dispenser.E n g l i s hUse the dishwasherTo achieve a better drying performance with limited rinse aid, the dishwasher is designed to adjust the consumption by user. Follow the below steps.1. .Close the door and s witch on the appliance 2. Within 60 seconds after step 1, press the Program button more than 5 seconds to enter the set model, the rinse aid indication blinks as 1 Hz frequency.3. Press the Program button to select the proper set according to your using habits , the sets will change in the following sequence: D3->D4->D5->D1->D2->D3. The higher the number, the more rinse aid the dishwasher uses.4. Without operation in 5 seconds or press the Power button to exit the set model, the set success.Adjusting the rinse aid reservoirAdding rinse aid to the dispenserAdding detergent to the dispenserE n g l i s hA. Open the cap by sliding the release latch.B. Open the cap by pressing down the release latch.C. Open the cap by pressing in the release latch.For better cleaning result, especially if you have very dirt items, pour a small amount of detergent onto the door.The additional detergent will activate during the pre-wash phase.Dishes and knives should not be placed in other utensils, and they can’t overlaid each other.Do not place glass close to each other to avoid damage.For long knives, placing upright is very dangerous.Precautions before and after the bowl basket is placedInstall dishwasher bowl basketSuggestionUse the dishwashing machine rationallyPurchase dishes suitable for dishwasher.Use a suitable mild dishwashing powder. If necessary, consult the manufacturer for more information.For special appliances, try to select a washing program that with a lower temperature.Do not take out the glass dishes immediately after the program ends to prevent damage.Limited use:Not for:Wooden, ivory, porcelain or pearl shank tool Non heat-resistant plastic products Cohesive knives or dishes Tin or copper vessels Crystal glass Rusty steel products Wooden utensils Synthetic fiber productsStale non heat-resistant cutters with glue adhesive partAfter several cleanings, some glassware will become dullColor of smooth dishes may fade out if often washedSilver or aluminum products tend to change color during cleaning(For the best use of dishwasher, follow the instructions below. For different models, the characteristics and appearance of the basket will be different) Clear larger food residues.Soften the residue of burnt food left on the pan. It is not necessary to rinse dishes with water first. Place the dishes in the dishwasher as follows:Cups, glasses, pots and so on are placed face down.For curved or concave and convex vessels, place them diagonally so that the water flows out. All utensils should be placed safely and must not be overturned.All utensils should be placed that the arms can rotate freely during washing.The open of hollow tablewares (such as cups, glasses, pots, etc.) should face downward so that water does not easily remain in the container or grooves.Long or sharp knives (eg. meat cleavers) should be placed horizontally in the basket.Do not use the dishwasher overloaded so that you can get better cleaning performance.E n g l i s h2122Loading the cutlery rackThe cutlery rack is best suited for washing flatware and most cooking or serving utensils. The separators on the cutlery racks help keep flatware separated to avoid damage and improve cleaning.315254452153Basket used tipsLoosen the four buttons on the tray and press down gently.Using the principle of crank slider mechanism, the cutlery are suspended. Convenient finger goes deep under the knife and fork, and holds several cutlery at a time.It can accommodate dishes such as egg beaters, cups, etc., and does not affect the upper basket.Easy removal of cutleryMake the most of spaceAdjust the height of the rackE n g l i s hLift the right basket up, both left and right basketsare flat.Move the right basket from right to left, two basketare overlapping.Remove the right basket from the tray, only has theleft basket.24Adjusting the upper basketE n g l i s h2526Cleaning and careThe filtering system in the base of the wash cabinet retains coarse debris from the washing cycle. The collected coarse debris may cause the filters to clog. Check the condition of the filters regularly and clean them if necessary under running water.Follow the steps below to clean the filters in the wash cabinet.Filter cleaningLift the filter upwards and out of the dishwasher.The coarse filter can be detached from the main filter by gently squeezing theFor a more thorough clean, use a soft cleaning brush.filter insert, and rotate clockwise tothe close arrow.27Spray arms cleaningIt is necessary to clean the spray arms regularly for hard water chemicals will clog the spray arm jets and bearings.To clean the spray arms, follow the instructions below:rotate the spray arm counterclockwiseto remove it.the jets. Replace them after rinsingthem thoroughly.28Care and maintenanceThe door and the door sealClean the door seals regularly with a soft damp cloth to remove food deposits.When the dishwasher is being loaded, food and drink residues may drip onto the sides of the dishwasher door. These surfaces are outside the wash cabinet and are not accessed by water from the spray arms. Any deposits should be wiped off before the door is closed.The control panelControl panel can be wiped with a slightly wet cloth. After cleaning, make sure it is completely dry.Do not use Sharp tools, Scratch sponge, or Rough detergent anywhere in the machine.E n g l i s h29Installation Product dimension30Height (H)Width (W)Depth (D1)Depth (D2)845mm598mm600mm (with the door closed)1175mm (with the door opened 90°)Power connectionPower requirementsPlease check the label of rated value of power supply system for knowing rated voltage and connect the machine to appropriate power supply. 10A fuse is required and time-delay fuse or circuit breaker is recommended. Only separate circuit is suitable for this machine.Machine connectionMake sure that supplied voltage and frequency correspond to those on rating plate. Plug can only be connected to a properly grounded socket. If the socket that the machine must be connected to is not suitable for the plug, replace the socket, and do not use a power adapter that may cause overheating and burning .Connect the cold water supply hose to a threaded 3/4(inch) connector and make sure that it is fastened tightly in place.If the water pipes are new or have not been used for an extended period of time, let the water run to make sure that the water is clear. This precaution is needed to avoid the risk of the water inlet to be blocked and damage the appliance.Water connectionE n g l i s hConnection of drain hosesInsert the drain hose into a drain pipe with a minimum diameter of 4 cm, or let it run into the sink, making sure to avoid bending or crimping it. The height of drain pipe must be less than 1000mm. The free end of the hose must not be immersed in water to avoid the back flow of it.Please securely fix the drain hose in either position A or position BHow to drain excess water from hosesIf the sink is 1000 higher from the floor, the excess water in hoses cannot be drained directly into the sink. It will be necessary to drain excess water from hoses into a bowl or suitable container that is held outside and lower than the sink.Water outletConnect the water drain hose. The drain hose must be correctly fitted to avoid water leaks. Ensure that the water drain hose is not kinked or squashed.Extension hoseIf you need a drain hose extension, make sure to use a similar drain hose.It must be no longer than 4 meters; otherwise the cleaning effect of the dishwashercould be reduced.Syphon connectionThe waste connection must be at a height less than 100 cm (maximum) from the bottom of the dish. The water drain hose should be fixed .TroubleshootingPlease check the chart below before connecting customer service centerBefore connecting customer service centerE n g l i s hWhen failure occurs, error code will appear to remind you:Error codeE n g l i s hSpecificationProduct ficheE n g l i s h。
芙子帝风商贸(上海)有限公司 6套家用洗碗机 使用说明书
警告:安装使用前请仔细阅读本说明书,严格按本说明书指示正确安装、使用,避免因不当的安装、使用而造成事故。
注意:由于本公司产品外观结构不断改进,您所购买的产品可能与本说明书图示外观结构有所不同,请以实物为准。
目录安全警示产品简介使用说明清洁保养禁止 强制部件名称附件清单使用贴士洗碗粉光亮剂软水器餐具摆放操作指引洗涤程序介绍加入餐具过滤器清洁喷臂清洁机身清洁0305060708091012151616171717服务指南安装说明故障处理产品参数中国RoHS安装注意事项安装信息安装步骤212324181819注意 04感谢您选购芙子帝风商贸(上海)有限公司的产品。
安全警示产品简介使用说明清洁保养安装说明服务指南03安全警示表示【禁止】的内容雷雨天气及湿手请勿使用洗碗机如遇雷雨天气,需断开电源,避免雷击导致洗碗机受损。
请不要用湿手触碰电源线,以免触电。
请小朋友远离洗碗机为了确保小朋友的安全,请小朋友在远离洗碗机的地方玩耍。
请小朋友远离洗碗粉,光亮剂,专用盐洗碗粉有很强的碱性,请放在小朋友接触不到的地方。
如不慎接触到皮肤及眼睛,请尽快用清水洗净。
门不应一直处于打开状态门不应一直处于打开状态,因为这可能会导致洗碗机翻倒危险。
请连接地线因为地线极低电阻特性,在出现洗碗机故障或损坏时,地线能有效地将电流分流,有效保护使用者,避免受到触电伤害。
合理使用电源线请合理使用电源线,过度弯曲和挤压电源线可能导致电源线破损,引起触电或火灾。
如果电源软线损坏,为了避免危险,必须由制造商、其维修部或类似部门的专业人员更换。
请使用原装电源线擅自更换电源线,或将电源线中途驳接或与其他电器并联使用,超负荷使用均有可能导致触电或引起火灾。
表示【强制】的内容为了避免给使用者带来伤害和财产损失,产品机身及使用说明书记载着正确、安全的使用方法等重要文本内容。
图标、图释符号目的是帮助用户理解,可能与实物有差异。
使用前请仔细阅读相关标识标注,并严格遵守。
伊莱克斯洗碗机用户手册说明书

ESI5205LOXZH洗碗机用户手册内容1. 安全信息.............................................................................................................22. 安全说明.............................................................................................................43. 产品说明.............................................................................................................54. 控制板.................................................................................................................65. 程序.....................................................................................................................76. 设置.....................................................................................................................77. 初次使用前..........................................................................................................98. 日常使用...........................................................................................................109. 建议和提示........................................................................................................1110. 养护和清洁......................................................................................................1211. 故障排除.........................................................................................................1412. 技术信息.........................................................................................................1613. 维修服务指南.. (17)伊莱克斯 - 想你所想!感谢您选购伊莱克斯设备。
易灞 e60系列 洗碗机 使用说明书

E60系列洗碗机INSTALLATION ANDOPERATION INSTRUCTIONS安装使用说明书开始系列号:2116030001DSN:A MC-13-01 V1.1 1601PN: 7160744-002E60 洗碗机安装使用说明书2本说明书不适用于身体、感官或精神有缺陷,或经验和知识有欠缺的人(包括儿童)持续改进是高达的一贯宗旨,产品如有改进恕不另行通知目 录1 使用须知 (4)2 运输、储存和安装 (5)2.1 运输及储存 (5)2.2 安装位置 (5)2.3 转换成转角操作 (5)2.4 电源连接 (5)2.5 进水连接 (6)2.6 排水连接 (6)3 连接外部分配器 (6)4 控制面板 (9)5 操作 (10)5.1 准备 (10)5.2 运行 (11)6 关闭和清洁机器 (13)6.1 关闭 (13)6.2 清洁(每天) (13)6.3 清洁(每周) (13)6.4 除垢(每月) (14)7 故障 (14)8 结冻预防 (14)9 维护 (14)10 故障解决指南 (15)3E60 洗碗机安装使用说明书1 使用须知按规定使用本机器仅适用于清洗碗、盘、杯子、刀叉勺、托盘等餐具。
不能用于电炊具、电保温器等用电器具,或木质器具。
本机为商用洗碗机,不适于家用。
清洗时必须使用和所洗涤器皿配套的篮筐,没有篮筐不能清洗。
不要洗涤塑料物品,除非它们耐高温并且不会被洗涤剂腐蚀。
仅能使用合适的洗涤剂洗涤铝制品,如壶,容器,罐等,以防止出现黑斑。
对于不按照指定用途使用洗碗机而导致的损失,本公司不承担责任。
使用清洁剂产品 (洗涤剂, 催干剂, 除垢剂,等 )使用清洁剂时,遵守印刷在包装上的安全须知,按照推荐剂量使用。
使用清洁剂时,穿防护服,戴防护手套和护目镜。
仅能使用适合商用洗碗机的产品,此类产品会有相应的标识。
不要混合不同的清洁剂产品,这会造成结晶,从而导致分配器不可修复的损坏。
不要使用泡沫型的产品,例如肥皂,软皂, 等其他手用洗涤剂。
樱花 SCE-X610 洗碗机 使用说明书

使用说明书洗碗机 SCE-X610关注樱花,服务更便捷本文所示图片仅供用户参考,请以实际产品为准。
本文所提供的信息可不经事先通知进行修改。
樱花卫厨(中国)股份有限公司对本文内容保留解释权。
使用前请仔细阅读本说明书,确保正确、安全的使用洗碗机,说明书并妥善保管,以备查阅。
一.安全及注意事项A-01二.装箱清单及参数A-02A-02三.认识您的洗碗机四.机器安装A-03五.操作说明B-01七.维护与保养C-03九.售后服务与包修C-06八.常规问题自检C-04十.电气配线图C-06C-01六.餐具清洗执行标准GB4706.1《家用和类似用途电器的安全 第1部分:通用要求》GB4706.25《家用和类似用途电器的安全 洗碗机的特殊要求 》十一.产品有害物质说明C-07洗碗机工作时,勿打开门洗碗机工作时,请勿打开洗碗机门,以防机器内高温水蒸汽烫伤。
若必须添加或取出餐具时,需按暂停键,待10秒后,微微打开门缝让热气消失再彻底打开门进行餐具操作。
运行中的机器请勿移动或倾斜机器在运行中,请勿移动或倾斜机器,会导致机器漏水、漏电,产生危险。
使用过程中禁止加水洗碗机使用过程中,禁止手动往里添加水,若加水可能会导致机器溢水,产生危险。
请小朋友远离洗碗机为了确保小朋友的安全,请小朋友在远离洗碗机的地方玩耍,拆除的塑料袋和包装箱、零配件放在小朋友够不到的地方保存,防止小朋友玩耍时窒息危险。
关闭电源及水源须知在维修、清洁机器或长期不使用时必须拨掉电源插头,关掉水源。
请使用专用洗碗粉、软水盐、亮碟剂请使用洗碗机专用洗碗粉、软水盐、亮碟剂。
切勿使用洗洁精或食用盐代替、以及其它非洗碗机专用洗涤用品。
请勿使用具有腐蚀性的清洁剂清洗洗碗机如使用腐蚀性清洁剂擦拭洗碗机表面,会导致机器变色、表面受损。
排水管和电源线扎线带要用平口剪刀剪断裁剪扎线带时,需要用平口剪刀剪断。
因为使用尖口剪刀有可能会把排水管、电源线戳破,这样会导致漏水和漏电。
雷诺洗碗机双头蠕动分配器说明书

雷诺洗碗机双头蠕动分配器说明书雷诺洗碗机双头蠕动分配器是一种先进的家用电器,它能够帮助我们轻松解决餐后清洁工作。
本说明书将全面介绍这款洗碗机的特点、使用方法以及维护保养等方面,旨在为用户提供清晰明了的指导,确保用户能够充分利用这款洗碗机的功能,轻松高效地完成餐后洗碗工作。
一、特点雷诺洗碗机双头蠕动分配器采用了先进的双头设计,能够同时清洗两个餐具,并能够灵活调整分配比例,适应不同规格的餐具。
其独特的蠕动技术,使得清洗更加彻底,有效去除食物残留和油污,保持餐具的清洁卫生。
二、使用方法1. 准备工作:将餐具按照种类进行分类,并清除其中的食物残渣。
将水槽中的过滤网清洗干净,确保畅通无阻。
2. 放置餐具:将清洗好的餐具分别放置在洗碗机的两个分配器中,确保餐具放置规整,不相互交叉。
3. 添加清洁剂:根据洗碗机的说明,在指定的位置添加适量的清洁剂,注意不要超过指定的标识线。
4. 调整分配比例:根据餐具的种类和数量,通过旋转蠕动分配器上的调节钮,调整分配比例。
一般情况下,较脏的餐具可设置为更高的分配比例,较干净的餐具可设置为较低的分配比例。
5. 启动洗碗机:将洗碗机的电源插头插入电源插座,选择合适的洗碗模式(例如快洗、强力洗等),按下启动按钮,洗碗机即可开始工作。
6. 完成洗碗:洗碗机工作结束后,通过观察洗碗机上的显示屏,确认洗碗过程是否顺利完成。
如果有需要,可以使用清洁刷清除餐具上的残留物。
三、维护保养1. 每次使用后,及时清理洗碗机内部的污垢,并清洗蠕动分配器。
可以使用软布蘸取适量的清洁剂进行清洗,再用清水冲洗干净。
2. 定期清洗过滤网和水槽,确保洗碗机的通水畅通。
3. 及时更换洗碗机的清洁剂和漂洗剂,避免使用过期或质量不佳的产品。
4. 对于长时间不使用的洗碗机,应将其清洗干净,并断开电源。
本说明书为用户提供了雷诺洗碗机双头蠕动分配器的特点、使用方法以及维护保养等方面的详细指导。
希望用户能够根据本说明书的指引,正确使用和维护该洗碗机,以确保其长时间的高效运行,为用户带来便利和舒适的生活体验。
美的洗碗机X3使用说明书
美的洗碗机X3使用说明书微信扫一扫,美的服务到使用前请仔细阅读本说明书,并妥善保管目 录产品特点223-26安装说明27-30服务指南使用说明3-4安全警告5认识洗碗机10选用餐具的建议10不建议机洗的物品11装载碗篮注意事项6洗碗粉7光亮剂8-9专用盐12-13餐具摆放建议14选择程序,启动洗碗机15程序详细介绍16漏装餐具17-19清洁过滤系统20技术参数20错误代码21-22解惑答疑倡导节能环保,乐享舒适生活节能环保,美的与您携手同行高温除油去污3大日常洗净程序满足家庭所需会呼吸的过滤系统食物残渣高效收集多功能百搭碗篮适应各种餐具 选择合适洗涤程序99.99%高效除菌多重安全保护,防漏电、防溢流、故障报警国内橱柜安装标准设计餐具累计再洗涤产品特点 Product Features002节能洗003使用说明 Use Instruction安全警告本节记载了安全事项的重要内容,为了避免对使用人员及其他人员造成危害或财产损失。
请在充分理解下面内容(标志、图标)的基础上阅读正文,并请务必遵守所记载的安全事项。
操作错误时,可能严重损坏洗碗机或造成使用者死亡或受伤,或造成电器危害或火灾危险。
必须由专业人员安装或移装,禁止擅自拆解、改装、修理。
擅自安装可能导致电击、火灾、漏水。
如不安装带保护装置的空气开关、漏电保护开关或安装不正确,可能导致触电。
在安装时,请不要过分的对电源线进行弯曲和挤压。
弯曲和挤压可能导致电源线破碎,会引起触电或火灾。
如电源线有损坏,请委托当地经销商或服务网店进行更换。
出现异常现象(如烧焦的气味)时,必须停止运行并切断电源。
在维修、清洗机器或长期不使用时必须拔掉电源插头,关掉水龙头。
洗碗机必须接地线,在出现故障和损坏时,地线由于其极低电阻几乎可以将全部电流分流,从而有限的保护您免受触电伤害。
禁止擅自更换电源线,或将电源线中途驳接或与其他电器并联使用,超负荷使用均有可能导致触电或引起火灾。
- 1、下载文档前请自行甄别文档内容的完整性,平台不提供额外的编辑、内容补充、找答案等附加服务。
- 2、"仅部分预览"的文档,不可在线预览部分如存在完整性等问题,可反馈申请退款(可完整预览的文档不适用该条件!)。
- 3、如文档侵犯您的权益,请联系客服反馈,我们会尽快为您处理(人工客服工作时间:9:00-18:30)。
洗碗机分配器使用说明书
一、简价
洗碗机分配器,适用于国外销售的任何品牌洗碗机。
是一种准确方便经济实用的洗碗机清洁剂、催干剂分配器,有门式、通道式专用型,有探头和时间速度双模式控制方法,有CPU控制的探头、非探头(时间、速度)双模式控制,适用于任何类型洗碗机上使用。
二、安装
1、分配器安装
在洗碗机的进口上方墙体,打两个φ6塑胶膨胀管螺丝固定分配器,须将密封垫片安在墙头,防蒸发进入箱体内。
2、管路安装
1)将φ6塑管截成适当长度,插入泵管两端用扎带扎紧,注意不要将吸入口、出口搞反。
泵的转向应是顺时针方向,吸入口的塑管末端装上过滤底阀,
长度能放入清洁剂和催干剂的桶内,出口与清洁剂下药口和单向阀连接。
2)清苦剂进口,在洗碗机洗涤槽水平面上方,打一个φ10.2-10.5孔或7/8”
标准孔装上进药口装置.
3)催干剂进口须单向阀,一般洗碗机上有预留口。
3、探头安装
必须安装在洗涤槽的水平面下10CM左右的地方,最好的位置应离水泵吸口
较近,离进水口较远,切忌安装在加热管附近,否则容易熔化,选择好位置
后打一个22(7/8英寸)的孔,用0.75-1平方米多股软线,连接至分配器的探
头信号连接柱上.
4、电路安装
1)分配器工作电压(常电源)220V、110V,如有24V电压则不必接变压器电源,电源单独设置电源开关(以备清洗洗碗机用)。
2)连接主电源前检查洗碗机输出端电压再进行连接,以免烧坏变压器及电路板,确实后再连接。
3)一般洗碗机都在电控箱内,留有洗涤剂催干剂的电源信号接口,比较方便的就可接在分配器的触发信号连接柱上,电压范围在14V-230V都可以。
4)若洗碗机没有预留洗涤干剂的电源信号,可以将触发电源信号连接在主洗接触器和过水接触器的电源上。
5)分配器选择在时间速度控制模式时,则将首次加药的电源信号,连接进水电磁阀的电源上。
6)远程预警,可用连接线将分配器内ALARM 连接柱连接外部报警器(3V-24V)。
5、设置与调试
1)具体见电路板图示和屏幕显示及设置。
2)此机有清洁剂泵、催干剂泵手动按钮,在显示面板上,可在初次使用时将清洁剂、催干剂直接打入泵体内,可测试泵是否能正常运转,压力如何。
3)在不用探头模式下,具有首次加药功能,只需将进水电磁阀的电源信号接入DET.SIG接线柱,再设置C2、C3,可设置延时功能,也可设置与电源
信号同步调节速度,进行首次加入清洁剂的运行功能。
4)在不用探头的模式下,补充加药量的控制,将信号电源接至RINSE.SIG接线柱。
此时可调节C4、C5。
可以用延时功能和定时功能循环加药,在通
道式洗碗机内特别适用。
再可调节D2、D3,与电源信号同步运行(将延
时调到0、定时调到1)。
用速度调节加催干剂的量(通道式),也可以定
时加催干剂的量(门式)。
5)在探头模式下,将A1设置为最高转速,数字越大转速越快,最高为99,A2为浓度设置,数字越大浓度越高,应运用化学滴定法来设置您所需要
的清洁剂浓度范围,A3为报警延时时间,最长时间为188秒(即设定数
字X2),如在所设定的时间内,未将加药浓度达到所设定的范围内,报警
器会蜂鸣,而且洗涤剂泵会停止工作,此时应关闭电源,查找原因后再启
动。
6)在探头模式下,催干剂泵的设置可以用速度调节加药量(将延时调节至0、定时调至1),也可用延时时间,定时时间来调节加药量(一般在门式上)。
6.故障处理
1)报警器启动,面板显示E1。
处理方式
a)设定报警时间太短,没有足够的时间加入清洁剂达到必须的浓度,重新设
定报警时间。
b)检查清洁剂料桶是否已用完,更换空桶。
c)检查探头部分是否清洁,连接线是否完好。
d)检查蠕动泵管是否已使用到一定时间,需要换。
连接塑料管是否有泄漏。
2)报警器启动,面板显示E2。
探头故障,有短路现象,检查探头是否有金属物卡住,连接线是否有导通现
象。
3)清洁剂泵催干剂泵不运转。
a)在常用电源的情况下,手按面板上的手动按钮可区分是蠕动泵不工作,还是
控制部分不工作.
b)控制部分不工作,可检查设置是否正确,触发信号电源是否到位,与洗碗机连
接部分是否正确,保险丝是否完好。
c)蠕动泵不工作,检查马达在运转,而变速箱输出轴不运转,变速箱坏,检
查有直流电压而马达不转,则马达坏或有异物卡住。
4)外接电源正常,而面板上无显示
a)电源开关是否打开。
b)检查保险丝是否完好。
c)检查各连接柱,连接是否完好,有否松动脱落现象。
d)检查变压器工作状况,初级电压和次级电压是否正确。
