三层交换机常用命令
三层交换机配置及命令解释(2)
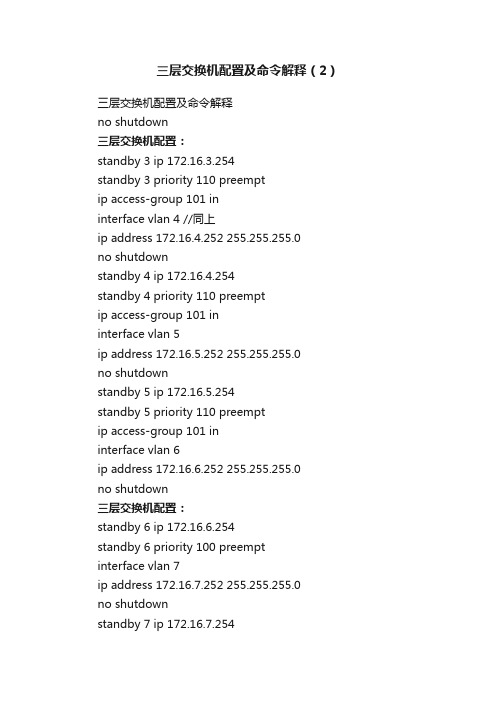
三层交换机配置及命令解释(2)三层交换机配置及命令解释no shutdown三层交换机配置:standby 3 ip 172.16.3.254standby 3 priority 110 preemptip access-group 101 ininterface vlan 4 //同上ip address 172.16.4.252 255.255.255.0no shutdownstandby 4 ip 172.16.4.254standby 4 priority 110 preemptip access-group 101 ininterface vlan 5ip address 172.16.5.252 255.255.255.0no shutdownstandby 5 ip 172.16.5.254standby 5 priority 110 preemptip access-group 101 ininterface vlan 6ip address 172.16.6.252 255.255.255.0no shutdown三层交换机配置:standby 6 ip 172.16.6.254standby 6 priority 100 preemptinterface vlan 7ip address 172.16.7.252 255.255.255.0no shutdownstandby 7 ip 172.16.7.254standby 7 priority 100 preemptinterface vlan 8ip address 172.16.8.252 255.255.255.0no shutdownstandby 8 ip 172.16.8.254standby 8 priority 100 preemptinterface vlan 9ip address 172.16.9.252 255.255.255.0no shutdown三层交换机配置:standby 9 ip 172.16.9.254standby 9 priority 100 preemptaccess-list 101 deny ip any 172.16.7.0 0.0.0.255 //扩展的访问控制列表101access-list 101 permit ip any anyInterface vlan 1 //进入vlan1这个逻辑接口Ip helper-address 172.16.8.1 //可以转发广播(helper-address 的作用就是把广播转化为单播,然后发向172.16.8.1)Interface vlan 2Ip helper-address 172.16.8.1Interface vlan 3ip helper-address 172.16.8.1interface vlan 4ip helper-address 172.16.8.1interface vlan 5ip helper-address 172.16.8.1interface vlan 6ip helper-address 172.16.8.1interface vlan 7ip helper-address 172.16.8.1interface vlan 9ip helper-address 172.16.8.1router rip //启用路由协议RIPversion 2 //使用的是RIPv2,如果没有这句,则是使用RIPv1network 172.16.0.0 //宣告直连的网段exit三层交换机配置:ip route 0.0.0.0 0.0.0.0 172.16.9.250 //缺省路由,所有在路由表中没有办法匹配的数据包,都发向下一跳地址为172.16.9.250这个路由器line con 0line aux 0line vty 0 15 //telnet线路(路由器只有5个,是0-4)password 12345678 //login密码loginendcopy running-config startup-config 保存配置。
H3C三层交换机配置命令.
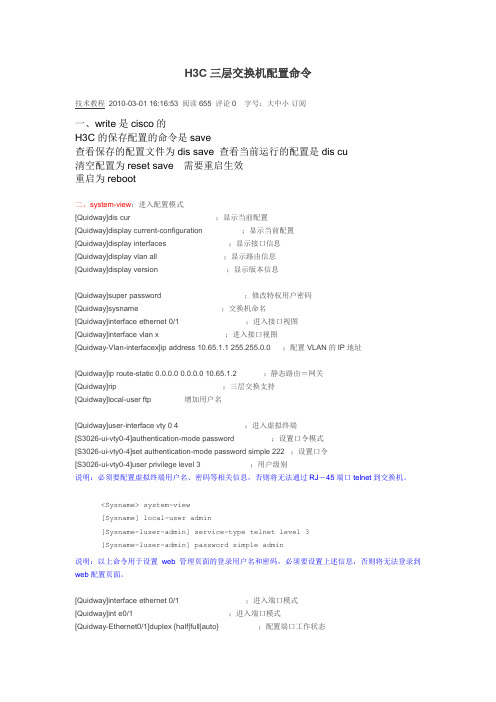
H3C三层交换机配置命令技术教程2010-03-01 16:16:53 阅读655 评论0 字号:大中小订阅一、write是cisco的H3C的保存配置的命令是save查看保存的配置文件为dis save 查看当前运行的配置是dis cu清空配置为reset save 需要重启生效重启为reboot二、system-view:进入配置模式[Quidway]dis cur ;显示当前配置[Quidway]display current-configuration ;显示当前配置[Quidway]display interfaces ;显示接口信息[Quidway]display vlan all ;显示路由信息[Quidway]display version ;显示版本信息[Quidway]super password ;修改特权用户密码[Quidway]sysname ;交换机命名[Quidway]interface ethernet 0/1 ;进入接口视图[Quidway]interface vlan x ;进入接口视图[Quidway-Vlan-interfacex]ip address 10.65.1.1 255.255.0.0 ;配置VLAN的IP地址[Quidway]ip route-static 0.0.0.0 0.0.0.0 10.65.1.2 ;静态路由=网关[Quidway]rip ;三层交换支持[Quidway]local-user ftp 增加用户名[Quidway]user-interface vty 0 4 ;进入虚拟终端[S3026-ui-vty0-4]authentication-mode password ;设置口令模式[S3026-ui-vty0-4]set authentication-mode password simple 222 ;设置口令[S3026-ui-vty0-4]user privilege level 3 ;用户级别说明:必须要配置虚拟终端用户名、密码等相关信息,否则将无法通过RJ-45端口telnet到交换机。
H3C三层交换机配置命令
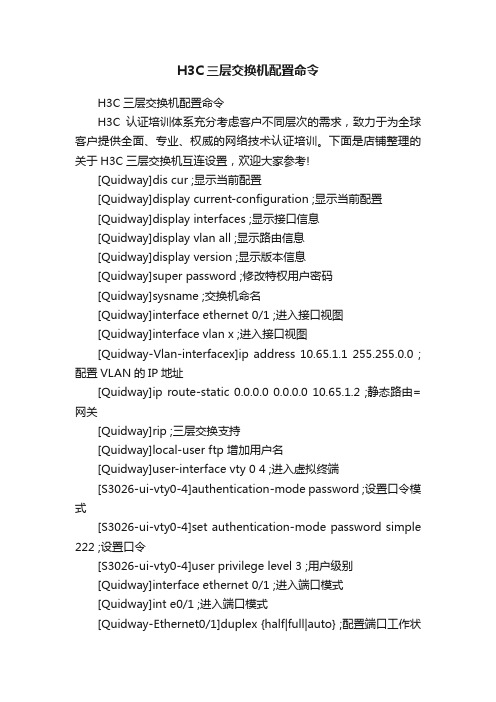
H3C三层交换机配置命令H3C三层交换机配置命令H3C认证培训体系充分考虑客户不同层次的需求,致力于为全球客户提供全面、专业、权威的网络技术认证培训。
下面是店铺整理的关于H3C三层交换机互连设置,欢迎大家参考![Quidway]dis cur ;显示当前配置[Quidway]display current-configuration ;显示当前配置[Quidway]display interfaces ;显示接口信息[Quidway]display vlan all ;显示路由信息[Quidway]display version ;显示版本信息[Quidway]super password ;修改特权用户密码[Quidway]sysname ;交换机命名[Quidway]interface ethernet 0/1 ;进入接口视图[Quidway]interface vlan x ;进入接口视图[Quidway-Vlan-interfacex]ip address 10.65.1.1 255.255.0.0 ;配置VLAN的IP地址[Quidway]ip route-static 0.0.0.0 0.0.0.0 10.65.1.2 ;静态路由=网关[Quidway]rip ;三层交换支持[Quidway]local-user ftp 增加用户名[Quidway]user-interface vty 0 4 ;进入虚拟终端[S3026-ui-vty0-4]authentication-mode password ;设置口令模式[S3026-ui-vty0-4]set authentication-mode password simple 222 ;设置口令[S3026-ui-vty0-4]user privilege level 3 ;用户级别[Quidway]interface ethernet 0/1 ;进入端口模式[Quidway]int e0/1 ;进入端口模式[Quidway-Ethernet0/1]duplex {half|full|auto} ;配置端口工作状态[Quidway-Ethernet0/1]speed {10|100|auto} ;配置端口工作速率[Quidway-Ethernet0/1]flow-control ;配置端口流控[Quidway-Ethernet0/1]mdi {across|auto|normal} ;配置端口平接扭接[Quidway-Ethernet0/1]port link-type {trunk|access|hybrid} ;设置端口工作模式[Quidway-Ethernet0/1]port access vlan 3 ;当前端口加入到VLAN[Quidway-Ethernet0/2]port trunk permit vlan {ID|All} ;设trunk允许的`VLAN[Quidway-Ethernet0/3]port trunk pvid vlan 3 ;设置trunk端口的PVID[Quidway-Ethernet0/1]undo shutdown ;激活端口[Quidway-Ethernet0/1]shutdown ;关闭端口[Quidway-Ethernet0/1]quit ;返回[Quidway]vlan 3 ;创建VLAN[Quidway-vlan3]port ethernet 0/1 ;在VLAN中增加端口[Quidway-vlan3]port e0/1 ;简写方式[Quidway-vlan3]port ethernet 0/1 to ethernet 0/4 ;在VLAN 中增加端口[Quidway-vlan3]port e0/1 to e0/4 ;简写方式[Quidway]monitor-port ;指定镜像端口[Quidway]port mirror ;指定被镜像端口[Quidway]port mirror int_list observing-port int_type int_num ;指定镜像和被镜像[Quidway]description string ;指定VLAN描述字符[Quidway]description ;删除VLAN描述字符[Quidway]display vlan [vlan_id] ;查看VLAN设置[Quidway]stp {enable|disable} ;设置生成树,默认关闭[Quidway]stp priority 4096 ;设置交换机的优先级[Quidway]stp root {primary|secondary} ;设置为根或根的备份[Quidway-Ethernet0/1]stp cost 200 ;设置交换机端口的花费[Quidway]link-aggregation e0/1 to e0/4 ingress|both ; 端口的聚合[Quidway]undo link-aggregation e0/1|all ; 始端口为通道号[SwitchA-vlanx]isolate-user-vlan enable ;设置主vlan[SwitchA]isolate-user-vlan secondary ;设置主vlan包括的子vlan[Quidway-Ethernet0/2]port hybrid pvid vlan ;设置vlan的pvid [Quidway-Ethernet0/2]port hybrid pvid ;删除vlan的pvid[Quidway-Ethernet0/2]port hybrid vlan vlan_id_list untagged ;设置无标识的vlan如果包的vlan id与PVId一致,则去掉vlan信息. 默认PVID=1。
举例讲解H3C配置三层交换机4个步骤详细用法
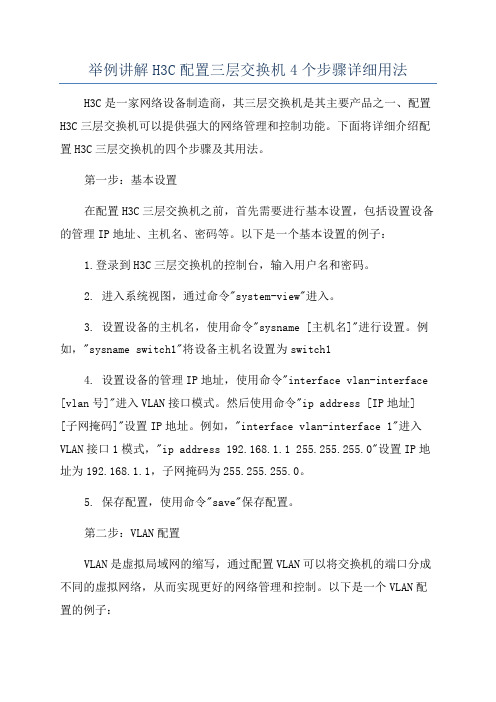
举例讲解H3C配置三层交换机4个步骤详细用法H3C是一家网络设备制造商,其三层交换机是其主要产品之一、配置H3C三层交换机可以提供强大的网络管理和控制功能。
下面将详细介绍配置H3C三层交换机的四个步骤及其用法。
第一步:基本设置在配置H3C三层交换机之前,首先需要进行基本设置,包括设置设备的管理IP地址、主机名、密码等。
以下是一个基本设置的例子:1.登录到H3C三层交换机的控制台,输入用户名和密码。
2. 进入系统视图,通过命令"system-view"进入。
3. 设置设备的主机名,使用命令"sysname [主机名]"进行设置。
例如,"sysname switch1"将设备主机名设置为switch14. 设置设备的管理IP地址,使用命令"interface vlan-interface [vlan号]"进入VLAN接口模式。
然后使用命令"ip address [IP地址] [子网掩码]"设置IP地址。
例如,"interface vlan-interface 1"进入VLAN接口1模式,"ip address 192.168.1.1 255.255.255.0"设置IP地址为192.168.1.1,子网掩码为255.255.255.0。
5. 保存配置,使用命令"save"保存配置。
第二步:VLAN配置VLAN是虚拟局域网的缩写,通过配置VLAN可以将交换机的端口分成不同的虚拟网络,从而实现更好的网络管理和控制。
以下是一个VLAN配置的例子:1. 创建VLAN,使用命令"vlan [vlan号]"进行创建。
例如,"vlan 10"将创建一个VLAN编号为10的VLAN。
2. 将端口加入VLAN,使用命令"port vlan [vlan号] [端口号]"进行配置。
华为三层交换机配置命令
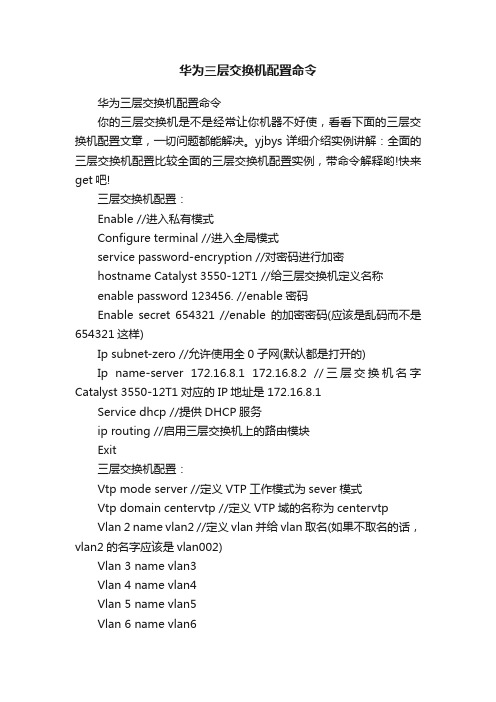
华为三层交换机配置命令华为三层交换机配置命令你的三层交换机是不是经常让你机器不好使,看看下面的三层交换机配置文章,一切问题都能解决。
yjbys详细介绍实例讲解:全面的三层交换机配置比较全面的三层交换机配置实例,带命令解释哟!快来get吧!三层交换机配置:Enable //进入私有模式Configure terminal //进入全局模式service password-encryption //对密码进行加密hostname Catalyst 3550-12T1 //给三层交换机定义名称enable password 123456. //enable密码Enable secret 654321 //enable的加密密码(应该是乱码而不是654321这样)Ip subnet-zero //允许使用全0子网(默认都是打开的)Ip name-server 172.16.8.1 172.16.8.2 //三层交换机名字Catalyst 3550-12T1对应的IP地址是172.16.8.1Service dhcp //提供DHCP服务ip routing //启用三层交换机上的路由模块Exit三层交换机配置:Vtp mode server //定义VTP工作模式为sever模式Vtp domain centervtp //定义VTP域的名称为centervtpVlan 2 name vlan2 //定义vlan并给vlan取名(如果不取名的话,vlan2的名字应该是vlan002)Vlan 3 name vlan3Vlan 4 name vlan4Vlan 5 name vlan5Vlan 6 name vlan6Vlan 7 name vlan7Vlan 8 name vlan8Vlan 9 name vlan9Exit三层交换机配置:interface Port-channel 1 //进入虚拟的`以太通道组1switchport trunk encapsulation dot1q //给这个接口的trunk封装为802.1Q的帧格式switchport mode trunk //定义这个接口的工作模式为trunkswitchport trunk allowed vlan all //在这个trunk上允许所有的vlan通过Interface gigabitethernet 0/1 //进入模块0上的吉比特以太口1 switchport trunk encapsulation dotlq //给这个接口的trunk封装为802.1Q的帧格式switchport mode trunk //定义这个接口的工作模式为trunkswitchport trunk allowed vlan all //在这个trunk上允许所有的vlan通过channel-group 1 mode on //把这个接口放到快速以太通道组1中Interface gigabitethernet 0/2 //同上switchport trunk encapsulation dotlqswitchport mode trunkswitchport trunk allowed vlan allchannel-group 1 mode on三层交换机配置:port-channel load-balance src-dst-ip //定义快速以太通道组的负载均衡方式(依*源和目的IP的方式)interface gigabitethernet 0/3 //进入模块0上的吉比特以太口3 switchport trunk encapsulation dotlq //给trunk封装为802.1Qswitchport mode trunk //定义这个接口的工作模式为trunkswitchport trunk allowed vlan all //允许所有vlan信息通过interface gigabitethernet 0/4 //同上switchport trunk encapsulation dotlqswitchport mode trunkswitchport trunk allowed vlan allinterface gigbitethernet 0/5 //同上switchport trunk encapsulation dotlqswitchport mode trunkswitchport trunk allowed vlan allinterface gigbitethernet 0/6 //同上switchport trunk encapsulation dotlqswitchport mode trunkswitchprot trunk allowed vlan all三层交换机配置:interface gigbitethernet 0/7 //进入模块0上的吉比特以太口7 Switchport mode access //定义这个接口的工作模式为访问模式switchport access vlan 9 //定义这个接口可以访问哪个vlan(实际就是分配这个接口到vlan)no shutdownspanning-tree vlan 6-9 cost 1000 //在生成树中,vlan6-9的开销定义为10000interface range gigabitethernet 0/8 – 10 //进入模块0上的吉比特以太口8,9,10switchport mode access //定义这些接口的工作模式为访问模式switchport access vlan 8 //把这些接口都分配到vlan8中no shutdown三层交换机配置:spanning-tree portfast //在这些接口上使用portfast(使用portfast以后,在生成树的时候不参加运算,直接成为转发状态)interface gigabitethernet 0/11 //进入模块0上的吉比特以太口11switchport trunk encapsulation dotlq //给这个接口封装为802.1Qswitchport mode trunk //定义这个接口的工作模式为trunkswitchport trunk allowed vlan all //允许所有vlan信息通过interface gigabitethernet 0/12 //同上switchport trunk encapsulation dotlqswitchport mode trunkswitchport trunk allowed vlan allinterface vlan 1 //进入vlan1的逻辑接口(不是物理接口,用来给vlan做路由用)ip address 172.16.1.7 255.255.255.0 //配置IP地址和子网掩码no shutdown三层交换机配置:standby 1 ip 172.16.1.9 //开启了冗余热备份(HSRP),冗余热备份组1,虚拟路由器的IP地址为172.16.1.9standby 1 priority 110 preempt //定义这个三层交换机在冗余热备份组1中的优先级为110,preempt是用来开启抢占模式interface vlan 2 //同上ip address 172.16.2.252 255.255.255.0no shutdownstandby 2 ip 172.16.2.254standby 2 priority 110 preemptip access-group 101 in //在入方向上使用扩展的访问控制列表101interface vlan 3 //同上ip address 172.16.3.252 255.255.255.0no shutdown三层交换机配置:standby 3 ip 172.16.3.254standby 3 priority 110 preemptip access-group 101 ininterface vlan 4 //同上ip address 172.16.4.252 255.255.255.0 no shutdownstandby 4 ip 172.16.4.254standby 4 priority 110 preemptip access-group 101 ininterface vlan 5ip address 172.16.5.252 255.255.255.0 no shutdownstandby 5 ip 172.16.5.254standby 5 priority 110 preemptip access-group 101 ininterface vlan 6ip address 172.16.6.252 255.255.255.0 no shutdown三层交换机配置:standby 6 ip 172.16.6.254standby 6 priority 100 preempt interface vlan 7ip address 172.16.7.252 255.255.255.0 no shutdownstandby 7 ip 172.16.7.254standby 7 priority 100 preempt interface vlan 8ip address 172.16.8.252 255.255.255.0 no shutdownstandby 8 ip 172.16.8.254standby 8 priority 100 preemptinterface vlan 9ip address 172.16.9.252 255.255.255.0no shutdown三层交换机配置:standby 9 ip 172.16.9.254standby 9 priority 100 preemptaccess-list 101 deny ip any 172.16.7.0 0.0.0.255 //扩展的访问控制列表101access-list 101 permit ip any anyInterface vlan 1 //进入vlan1这个逻辑接口Ip helper-address 172.16.8.1 //可以转发广播(helper-address 的作用就是把广播转化为单播,然后发向172.16.8.1)Interface vlan 2Ip helper-address 172.16.8.1Interface vlan 3ip helper-address 172.16.8.1interface vlan 4ip helper-address 172.16.8.1interface vlan 5ip helper-address 172.16.8.1interface vlan 6ip helper-address 172.16.8.1interface vlan 7ip helper-address 172.16.8.1interface vlan 9ip helper-address 172.16.8.1router rip //启用路由协议RIPversion 2 //使用的是RIPv2,如果没有这句,则是使用RIPv1network 172.16.0.0 //宣告直连的网段exit三层交换机配置:ip route 0.0.0.0 0.0.0.0 172.16.9.250 //缺省路由,所有在路由表中没有办法匹配的数据包,都发向下一跳地址为172.16.9.250这个路由器line con 0line aux 0line vty 0 15 //telnet线路(路由器只有5个,是0-4)password 12345678 //login密码loginendcopy running-config startup-config 保存配置【华为三层交换机配置命令】。
H3C华三交换机基本配置命令大全,别到用的时候找不到了
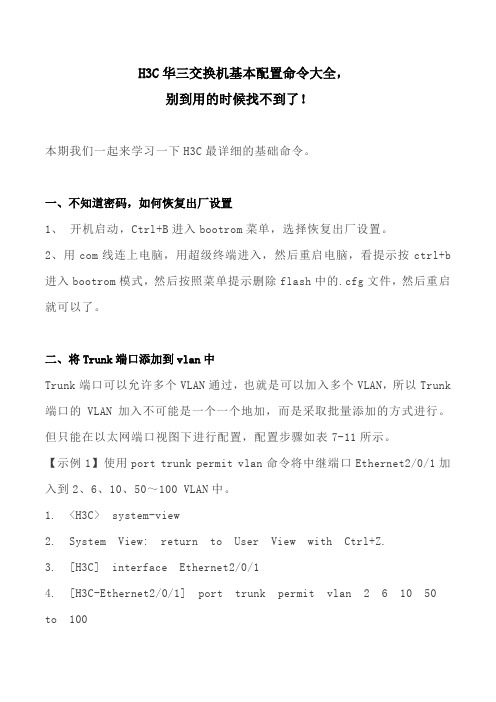
H3C华三交换机基本配置命令大全,别到用的时候找不到了!本期我们一起来学习一下H3C最详细的基础命令。
一、不知道密码,如何恢复出厂设置1、开机启动,Ctrl+B进入bootrom菜单,选择恢复出厂设置。
2、用com线连上电脑,用超级终端进入,然后重启电脑,看提示按ctrl+b 进入bootrom模式,然后按照菜单提示删除flash中的.cfg文件,然后重启就可以了。
二、将Trunk端口添加到vlan中Trunk端口可以允许多个VLAN通过,也就是可以加入多个VLAN,所以Trunk 端口的VLAN加入不可能是一个一个地加,而是采取批量添加的方式进行。
但只能在以太网端口视图下进行配置,配置步骤如表7-11所示。
【示例1】使用port trunk permit vlan命令将中继端口Ethernet2/0/1加入到2、6、10、50~100 VLAN中。
1. <H3C> system-view2. System View: return to User View with Ctrl+Z.3. [H3C] interface Ethernet2/0/14. [H3C-Ethernet2/0/1] port trunk permit vlan 2 6 10 50 to 100【示例2】使用undo port trunk permit vlan命令将中继端口Ethernet2/0/1从VLAN 1中删除。
三、H3C交换机基础配置说明1、以太网端口的链路类型Access link:只能允许某一个vlan的untagged数据流通过。
Trunk link:允许多个vlan的tagged数据流和某一个vlan的untagged数据流通过。
Hybrid link:允许多个vlan的tagged数据流和多个vlan的untagged数据流通过。
hybrid link端口可以允许多个vlan的报文发送时不携带标签,而Trunk端口只允许缺省vlan的报文发送时不携带标签。
华为、H3C、锐捷三家交换机配置命令详解
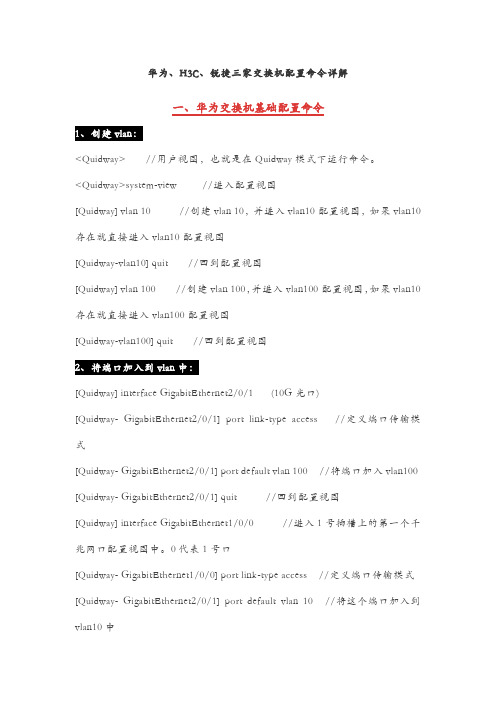
华为、H3C、锐捷三家交换机配置命令详解一、华为交换机基础配置命令1<Quidway> //用户视图,也就是在Quidway模式下运行命令。
<Quidway>system-view //进入配置视图[Quidway] vlan 10 //创建vlan 10,并进入vlan10配置视图,如果vlan10存在就直接进入vlan10配置视图[Quidway-vlan10] quit //回到配置视图[Quidway] vlan 100 //创建vlan 100,并进入vlan100配置视图,如果vlan10存在就直接进入vlan100配置视图[Quidway-vlan100] quit //回到配置视图2[Quidway] interface GigabitEthernet2/0/1 (10G光口)[Quidway- GigabitEthernet2/0/1] port link-type access //定义端口传输模式[Quidway- GigabitEthernet2/0/1] port default vlan 100 //将端口加入vlan100 [Quidway- GigabitEthernet2/0/1] quit //回到配置视图[Quidway] interface GigabitEthernet1/0/0 //进入1号插槽上的第一个千兆网口配置视图中。
0代表1号口[Quidway- GigabitEthernet1/0/0] port link-type access //定义端口传输模式[Quidway- GigabitEthernet2/0/1] port default vlan 10 //将这个端口加入到vlan10中[Quidway- GigabitEthernet2/0/1] quit3<Quidway>system-view[Quidway]vlan 10[Quidway-vlan10]port GigabitEthernet 1/0/0 to 1/0/29 //将0到29号口加入到vlan10中[Quidway-vlan10]quit4[Quidway] interface Vlanif100 // 进入vlan100接口视图与vlan 100命令进入的地方不同[Quidway-Vlanif100] ip address 119.167.200.90 255.255.255.252 // 定义vlan100管理IP三层交换网关路由[Quidway-Vlanif100] quit //返回视图[Quidway] interface Vlanif10 // 进入vlan10接口视图与vlan 10命令进入的地方不同[Quidway-Vlanif10] ip address 119.167.206.129 255.255.255.128 // 定义vlan10管理IP三层交换网关路由[Quidway-Vlanif10] quit5[Quidway]ip route-static 0.0.0.0 0.0.0.0 119.167.200.89 //配置默认网关。
三层交换机配置命令以及中文解释

基本配置S> enable 进入特权模式S# configure terminal 进入全局配置模式S(config)# hostname name 改变交换机名称S(config)# enable password level level_# password 设置用户口令(level_#=1)或特权口令(level_#=15)S(config)# line console 0 进入控制台接口S(config-line)# password console_password 接上一条命令,设置控制台口令S(config)# line vty 0 15 进入虚拟终端S(config-line)# password telnet_password 接上一条命令,设置Telnet口令S(config-line)# login 允许Telnet登录S(config)# enable password|secret privilege_password 配置特权口令(加密或不加密)S(config)# interface ethernet|fastethernet|gigabitethernet slot_#/port_# 进入接口子配置模式S(config-if)# [no] shutdown 关闭或启用该接口(默认启用)S(config)# ip address IP_address sunbet_mask 指定IP地址S(config)# ip default-gateway router's_IP_address 指定哪台路由器地址为默认网关S# show running-config 查看当前的配置S# copy running-config startup-config 将RAM中的当前配置保存到NVRAM中S> show interface [type slot_#/port_#] 查看所有或指定接口的信息S> show ip 显示交换机的IP配置(只在1900系列上可用)S> show version 查看设备信息S# show ip interface brief 验证IP配置S(config-if)# speed 10|100|auto 设置接口速率S(config-if)# duplex auto|full|half 设置接口双工模式S> show mac-address-table 查看CAM表S# clear mac-address-table 清除CAM表中的动态条目1900(config)# mac-address-table permanent MAC_address type [slot_#/]port_# 在CAM 表中创建静态条目2950(config)# mac-address-table static MAC_address vlan VLAN_# interface type [slot_#/] port_# 在CAM表中创建静态条目1900(config)# mac-address-table restricted static MAC_address source_port list_of_allowed_interface 设置静态端口安全措施1900(config-if)# port secure 启用粘性学习1900(config-if)# port secure max-mac-count value 设置粘性学习特性能够学到的地址数量(默认132,取值范围是1-132)1900(config)# address-violation suspend|ignore|disable 改变安全选项1900> show mac-address-table security 验证端口安全措施2950(config)# switchport mode access 定义接口为主机端口而不是中继端口2950(config)# switchport port-security 启用端口安全措施2950(config)# switchport port-security maximum value 指定可与此接口相关的设备的最大数量2950(config)# switchport port-security violation protect|restrict|shutdown 指定出现安全违规时应该发生的事2950(config)# switchport port-security mac-address MAC_address 指定允许与此接口相关的确切的MAC地址2950(config)# switchport port-security mac-address sticky 启用粘性学习特性2950(config)# show port interface type [slot_#/] port_# 验证接口配置2950(config-if) description name 设置接口描述信息2950# show buffers 查看系统缓存的大小1900# copy nvram tftp:// IP_address_of_TFTP_server/ file_name 将配置文件备份到TFTP 服务器上1900# copy tftp:// IP_address_of_TFTP_server/ file_name nvram 从TFTP服务器上恢复配置到NVRAM1900# delete nvram 删除配置文件2950# erase startup-config 删除配置文件3550# show tcam qos TCAM_ID statistics 查看TCAM剩余容量4000> enable 进入特权模式4000>(enable) set password 设置用户模式密码4000>(enable) set enablepass 设置授权密码4000>(enable) set interface sc0 IP_address mask 配置IP地址4000>(enable) set port enable|disable slot_#/port_# 启用/禁用接口4000>(enable) show port [slot_#/port_#] 显示接口信息4000>(enable) set port name slot_#/port_# name 设置交换机接口描述信息4000>(enable) set port speed slot_#/port_# 4|10|16|100|auto 设置交换机接口速率4000>(enable) set port duplex slot_#/port_# full|half 设置交换机接口双工模式4000>(enable) clear config all 删除NVRAM中的配置信息4000>(enable) erase all 删除FLASH中的内容4000>(enable) show flash 显示FLASH中的内容4000>(enable) show cam [count] dynamic|static|permanent|system [vlan_#] 显示CAM 表VLAN 1900(config)# vtp domain VTP_domain_name 定义交换机域名1900(config)# vtp server|client|transparent 定义交换机VTP模式(默认服务器)1900(config)# vtp password VTP_password 配置VTP口令1900(config)# vtp pruning enable|disable 启用/禁用修剪(默认启用)1900(config)# vtp trap enable 启用SNMP陷阱(默认启用)1900# show vtp 验证VTP配置2950# vtp database 访问VLAN和VTP配置(以下均是在IOS12.1前用,12.1后全是在全局配置模式下)2950(vlan)# vtp domain VTP_domain_name 定义交换机域名2950(vlan)# vtp server|client|transparent 定义交换机VTP模式(默认服务器)2950(vlan)# vtp password VTP_password 配置VTP口令2950(vlan)# vtp pruning 启用/禁用修剪(默认启用)2950(config)# snmp-server enable traps vtp 启用SNMP陷阱(默认启用)2950# show vtp status 检查VTP配置2950# show vtp counters 显示与VTP消息发送与接收相关的VTP统计信息1900(config-if)# trunk on|off|desirable|auto 指定中继类型1900# show trunk A|B 验证接口中继(A是fa0/26,B是fa0/27)2950(config-if)# switchport mode trunk|dynamic desirable|dynamic auto|nonegotiate 指定中继类型(默认自动协商)2950(config-if)# switchport trunk native|allowed|pruning vlan VLAN_# 配置中继2950(config-if)# switchport trunk pruning vlan remove VLAN_# 清除不希望消减的VLAN 2950# show interfaces [type 0/port_#] switchport|trunk 验证接口中继1900(config)# vlan VLAN_# [name VLAN_name] 创建VLAN1900(config-if)# vlan-membership static VLAN_# 将该接口静态地分配给一个VLAN 1900# show vlan 验证VLAN1900# show vlan-membership 查看VLAN成员关系1900# show spantree [VLAN_#] 查看VLAN的STP信息2950# vlan database 进入VLAN数据库(ISO12.1前用)2950(vlan)# vlan VLAN_# [name VLAN_name] 创建VLAN2950(config)# vlan VLAN_# 进入VLAN数据库(ISO12.1后用)2950(config-vlan)# name VLAN_name 创建VLAN2950(config-if)# switchport mode access 指定连接是接入链路连接2950(config-if)# switchport access vlan VLAN_# 指定VLAN是接入链路连接4000>(enable) set vlan VLAN_# name VLAN_name 配置VLAN4000>(enable) set vlan VLAN_# slot_#/port_#-port_# 为VLAN分配端口4000>(enable) set trunk slot_#/port_# [on|off|desirable|auto|nonegotiate] [VLAN_#] [isl|dot1q|dot10|lane|negotiate] 配置中继4000>(enable) clear trunk slot_#/port_# VLAN_# 删除VLAN4000>(enable) show trunk slot_#/port_# 验证中继端口4000>(enable) set vtp v2 enable 配置VTPv24000>(enable) set vtp [domain name] [mode client|server|transparent] [passwd password] [pruning enable|disable] [v2 enable|disable] 设置VTP4000>(enable) show vtp domain 验证VTP域的信息4000>(enable) show vtp statistics 显示发出或收到的VTP通告信息的摘要内容4000>(enable) set vtp pruneeligible VLAN_# 设置VTP消减4000>(enable) clear vtp pruneeligible VLAN_# 清除不希望消减的VLANSTP 4000>(enable) set spantree enable|disable VLAN_# 启用/禁用STP(默认启用)2950(config)# [no] spanning-tree vlan VLAN_# 启用/禁用STP(默认启用)4000>(enable) show spantree [VLAN_#] 验证STP状态2950# show spanning-tree 验证STP状态4000>(enable) set spantree root [secondary] VLAN_# [dia network_diameter] [hello hello_time] 设置主根节点桥、备份节点桥、最大桥数量(2-7)、持续时间(1-10,默认2)4000>(enable) set spantree portcost slot_#/port_# cost_# 设置端口开销2950(config-if)# spanning-tree cost cost_# 设置端口开销4000>(enable) set spantree portpri slot_#/port_# priority_# 设置端口优先级4000>(enable) set spantree portvlanpri slot_#/port_# priority_# [VLAN_#] 改变VLAN 的优先级设置2950(config-if)# spanning-tree vlan VLAN_# port-priority priority_# 设置端口优先级4000>(enable) set spantree fwddelay delay_# [VLAN_#] 设置从侦听状态到学习状态再到转发状态的时间间隔(默认15秒,取值范围是4-30秒)4000>(enable) set spantree hello interval_time [VLAN_#] 设置根节点交换机发送BPDU 的时间间隔(默认2秒,取值范围是1-10秒)4000>(enable) set spantree maxage agingtime [VLAN_#] 设置交换机持有BPDU的时间(默认20秒,取值范围是6-40秒)2950(config)# spanning-tree vlan VLAN_# forward-time forward_time 设置从侦听状态到学习状态再到转发状态的时间间隔(默认15秒,取值范围是4-30秒)2950(config)# spanning-tree vlan VLAN_# hello-time hello_time 设置根节点交换机发送BPDU的时间间隔(默认2秒,取值范围是1-10秒)2950(config)# spanning-tree vlan VLAN_# max-age maxage 设置交换机持有BPDU的时间(默认20秒,取值范围是6-40秒)4000>(enable) set port channel slot_#/port_# on 建立以太通道集合4000>(enable) show port capabilities slot_#/port_# 查看端口的配置4000>(enable) show port channel 验证以太通道集合的配置2950(config-if)# channel-group group_number mode auto|desirable|on 建立以太通道集合2950# show etherchannel group_number|brief|detail|load-balance|port|port-channel|summary 验证以太通道集合的配置4000>(enable) set spantree portfast slot_#/port_# enable 配置PortFast2950(config-if)# spanning-tree portfast 配置PortFast4000>(enable) set spantree uplinkfast enable|disable [rate station_update_rate] [all-protocols off|on] 启用/禁用UplinkFast4000>(enable) show spantree uplinkfast 验证UplinkFast配置2950(config)# spanning-tree uplinkfast [max_update_rate] 启用/禁用UplinkFast 2950# show spanning-tree uplinkfast 验证UplinkFast配置4000>(enable) set spantree backbonefast enable|disable 启用/禁用BackboneFast 4000>(enable) show spantree backbonefast 验证BackboneFast配置2950(config)# spanning-tree backbonefast 启用BackboneFast虚拟网间路由2600(config)# interface type slot_#/port_#.subint_number 配置子接口2600(config-subif)# encapsulation dot1q|isl|sde|tr-isl VLAN_# 配置封装类型4000>(enable) show module 查看交换机的硬件配置4000>(enable) session module_# 访问L3SML3SM(config-if)# mac-address mac_address 分配MAC地址MLS 2600(config)# mls rp ip 启动MLS2600(config-if)# mls rp vtp-domain domain_name 分配路由器接口到VTP域中2600(config-if)# mls rp vlan-id VLAN_# 向接口分配VLAN2600(config-if)# mls rp management-interface 指定该接口为管理接口2600# show mls rp 提供全局MLS信息2600# show mls rp interface type slot_#/port_# 提供指定接口的MLS信息2600# show mls rp vtp-domain domain_name 提供VTP域的MLS信息6500>(enable) set mls enable 在MLS-SE上启动MLS6500>(enable) set mls include rp_ip_address 告诉交换机哪一个IP地址是正确的6500>(enable) show mls include 显示外部路由处理器的IP地址列表6500>(enable) set mls flow [destination|destination-source|full] 告诉MLS交换机要缓存候选数据包的哪些信息6500>(enable) show mls entry 显示第三层缓存表6500>(enable) set mls agingtime aging_time 改变缓存的衰老时间(默认256秒,取值范围是8-2032秒中的8的倍数值)6500>(enable) set mls agingtime fast fast_aging_time pkt_threshold 改变快速衰老周期和数据包门限值6500>(enable) show mls ip 验证MLS-SE的配置6500>(enable) clear mls entry [destination IP_address] [source IP_address] [flow protocol] [source_port] [destination_port] [all] 删除所有或指定MLS缓存记录3550(config)# ip routing 启动IP路由3550(config)# ip cef 启动CEF3550(config-if)# no switchport 将第二层接口转换为第三层接口3550(config-if)# ip route-cache cef 在接口上启动CEF3550# show ip cef 验证CEF组播3640(config)# ip multicast-routing 启动路由器上的组播服务3640(config-if)# ip pim dense-mode 将接口设置为PIM密集模式3640(config-if)# ip pim sparse-mode 将接口设置为PIM稀疏模式3640(config-if)# ip pim sparsed-dense-mode 将接口设置为PIM稀疏-密集模式3640(config)# ip pim rp-address IP_address group_ACL_# [override] 手工配置RP 3640(config)# ip pim send-rp-announce type slot_#/port_# scope ttl_value group-list ACL_# 通告RP组的分配3640(config)# ip pim send-rp-discovery scope ttl_value 配置RP映射代理3640(config-if)# ip multicast ttl-threshold ttl_value 设置TTL门限值3640(config-if)# ip igmp join-group group_address 加入组播组3640# show ip mroute 查看组播信息3640# ping 验证RP之间或其他组播路由器之间的连接3640# mtrace source_IP_address [destination_IP_address] [group] 组播traceroute 3640(config-if)# ip cgmp 配置CGMP路由器4000>(enable) set cgmp enable 启动CGMP4000>(enable) show cgmp statistics 查看CGMP统计信息4000>(enable) show multicast group cgmp 查看交换机了解到的组播组信息4000>(enable) set cgmp leave enable 检查由客户端产生的IGMPv2的离开信息4000>(enable) set igmp enable 启动IGMP4000>(enable) ip igmp snooping 启动IGMP探听4000>(enable) set igmp fastleave enable 启动快速离开过程4000>(enable) show igmp statistics 显示交换机上IGMP探听的状态信息QoS 2950(config)# wrr-queue cos-map queue_ID cos_value 建立队列2950(config)# wrr-queue bandwidth bandwidth_value 设置队列门限2950(config)# class-maps name 定义对信息传输分类时的匹配标准2950(config-cmap)# match access-group ACL_# 识别被分类的信息传输2950(config)# policy-map name 确定为接入信息传输所设置的分类标准2950(config-pmap)# class name2950(config-pmap-c)# set ip dscp number2950(config-if)# service-policy input name 对该接口应用策略3550(config)# mls qos 启动QoS3550(config-if)# auto qos voip 在接口上启动自动服务质量3550(config)# priority-list priority_queue_# protocol protocol high|medium|normal|low [list ACL_#] 为优先级队列定义信息流3550(config)# priority-list priority_queue_# queue-limit limit_# 定义特定优先级队列的最大队列空间3550(config-if)# priority-group priority_queue_# 向特定输出接口分配优先级队列3550(config)# queue-list queue_list_# interface type slot_#/port_# queue_number 为一个特定的定制队列定义信息流3550(config)# queue-list queue_list_# queue queue_number byte-count size_in_bytes [limit number_of_queue] 为特定的定制队列定义队列的最大空间3550(config-if)# custom-queue-list custom_queue_number 为特定的输出接口分配优先级队列4840(config)# ip slb serverfarm serverfarm_name 配置SLB冗余4840(config-slb-sfarm)# real IP_address [port_#] 指定虚拟IP地址4840(config-slb-sfarm)# inservice 启动服务器4840(config)# virtual IP_address [network_mask] tcp|udp [port_number|wsp|wsp-wtp|wsp-wtls|wsp-wtp-wtls] [service service_name] 建立虚拟服务器IP地址。
思科华三交换机常用查询命令

查看路由表
show ip route
查看电源show power查看环境(风扇、温度)
show environment all
查看内存利用率
show memory
查看flash状态
show flash
查看日志信息
show log
查看时钟
show clock
查看NTP状态
display version
查看板卡模块运行状态
display device module
查看端口信息及VLAN情况
display bri inter
查看路由表
display ip routing-table
查看电源
display power
查看环境(风扇、温度)
display env
查看内存利用率
show ntp status
查看邻居关系
show cdp neighbors
查看CPU利用率
show processes cpu
查看ospf状态
show ip ospf nei
查看接口状态
show int status
查看指定端口信息
show int 端口
查看指定端口配置信息
show run int 端口
display mem
查看flash状态
dir flash
查看日志信息
display log
查看时钟
display clock
查看NTP状态
display ntp sta
查看邻居关系
display lldp nei
查看CPU利用率
display cpu
锐捷三层交换机命令大全

交换机 >Enable 进入特权模式#Exit 返回上一级操作模式#End 返回到特权模式#write memory 或copy running-config startup-config 保存配置文件#del flash:config.text 删除配置文件(交换机及1700系列路由器)#erase startup-config 删除配置文件(2500系列路由器)#del flash:vlan.dat 删除Vlan配置信息(交换机)#Configure terminal 进入全局配置模式(config)# hostname switchA 配置设备名称为switchA(config)#banner motd & 配置每日提示信息 &为终止符(config)#enable secret level 1 0 star 配置远程登陆密码为star(config)#enable secret level 15 0 star 配置特权密码为starLevel 1为普通用户级别,可选为1~15,15为最高权限级别;0表示密码不加密(config)#enable services web-server 开启交换机WEB管理功能Services 可选以下:web-server(WEB管理)、telnet-server(远程登陆)等查看信息#show running-config 查看当前生效的配置信息#show interface fastethernet 0/3 查看F0/3端口信息#show interface serial 1/2 查看S1/2端口信息#show interface 查看所有端口信息#show ip interface brief 以简洁方式汇总查看所有端口信息#show ip interface 查看所有端口信息#show version 查看版本信息#show mac-address-table 查看交换机当前MAC地址表信息#show running-config 查看当前生效的配置信息#show vlan 查看所有VLAN信息#show vlan id 10 查看某一VLAN (如VLAN10)的信息#show interface fastethernet 0/1 switchport 查看某一端口模式(如F 0/1)#show aggregateport 1 summary 查看聚合端口AG1的信息#show spanning-tree 查看生成树配置信息#show spanning-tree interface fastethernet 0/1 查看该端口的生成树状态#show port-security 查看交换机的端口安全配置信息#show port-security address 查看地址安全绑定配置信息#show ip access-lists listname 查看名为listname的列表的配置信息#show access-lists端口的基本配置(config)#Interface fastethernet 0/3 进入F0/3的端口配置模式(config)#interface range fa 0/1-2,0/5,0/7-9 进入F0/1、F0/2、F0/5、F0/7、F0/8、F0/9的端口配置模式(config-if)#speed 10 配置端口速率为10M,可选10,100,auto(config-if)#duplex full 配置端口为全双工模式,可选full(全双工),half(半双式),auto(自适应)(config-if)#no shutdown 开启该端口(config-if)#switchport access vlan 10 将该端口划入VLAN10中,用于VLAN(config-if)#switchport mode trunk 将该端口设为trunk模式,用于Tag vlan可选模式为access , trunk(config-if)#port-group 1 将该端口划入聚合端口AG1中,用于聚合端口聚合端口的创建(config)# interface aggregateport 1 创建聚合接口AG1(config-if)# switchport mode trunk 配置并保证AG1为 trunk 模式(config)#int f0/23-24(config-if-range)#port-group 1 将端口(端口组)划入聚合端口AG1中生成树(config)#spanning-tree 开启生成树协议(config)#spanning-tree mode stp 指定生成树类型为stp可选模式stp , rstp , mstp(config)#spanning-tree priority 4096 设置交换机的优先级为4096 , 优先级值小为高。
思科三层交换机配置命令
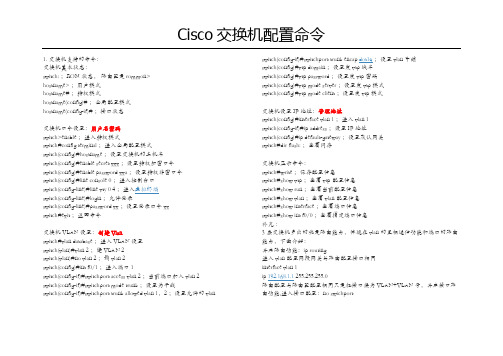
1. 交换机支持的命令:交换机基本状态:switch: ;ROM状态,路由器是rommon>hostname> ;用户模式hostname# ;特权模式hostname(config)# ;全局配置模式hostname(config-if)# ;接口状态交换机口令设置:用户名密码switch>enable ;进入特权模式switch#config terminal ;进入全局配置模式switch(config)#hostname ;设置交换机的主机名switch(config)#enable secret xxx ;设置特权加密口令switch(config)#enable password xxa ;设置特权非密口令switch(config)#line console 0 ;进入控制台口switch(config-line)#line vty 0 4 ;进入虚拟终端switch(config-line)#login ;允许登录switch(config-line)#password xx ;设置登录口令xxswitch#exit ;返回命令交换机VLAN设置:创建Vlanswitch#vlan database ;进入VLAN设置switch(vlan)#vlan 2 ;建VLAN 2switch(vlan)#no vlan 2 ;删vlan 2switch(config)#int f0/1 ;进入端口1switch(config-if)#switchport access vlan 2 ;当前端口加入vlan 2 switch(config-if)#switchport mode trunk ;设置为干线switch(config-if)#switchport trunk allowed vlan 1,2 ;设置允许的vlan switch(config-if)#switchport trunk encap dot1q;设置vlan 中继switch(config)#vtp domain ;设置发vtp域名switch(config)#vtp password ;设置发vtp密码switch(config)#vtp mode server ;设置发vtp模式switch(config)#vtp mode client ;设置发vtp模式交换机设置IP地址:管理地址switch(config)#interface vlan 1 ;进入vlan 1switch(config-if)#ip address ;设置IP地址switch(config)#ip default-gateway ;设置默认网关switch#dir flash: ;查看闪存交换机显示命令:switch#write ;保存配置信息switch#show vtp ;查看vtp配置信息switch#show run ;查看当前配置信息switch#show vlan ;查看vlan配置信息switch#show interface ;查看端口信息switch#show int f0/0 ;查看指定端口信息补充:3层交换机多出的就是路由能力,体现在vlan的互相通信功能和端口的路由能力,下面介绍:开启路由功能:ip routing进入vlan 配置网段网关与路由配置接口相同interface vlan 1ip 192.168.1.1 255.255.255.0路由配置与路由器配置相同只是把接口换为VLAN+VLAN号,开启接口路由功能,进入接口配置:no swichport。
交换机路由器常用命令
交换机路由器常用命令交换机和路由器是网络中非常重要的设备,熟练掌握它们的常用命令对于网络管理和故障排除至关重要。
下面为您介绍一些交换机和路由器常用的命令。
一、交换机常用命令1、`enable` 命令这个命令用于进入特权模式。
在特权模式下,可以执行更多高级的配置和管理操作。
2、`configure terminal` 命令输入此命令后,可以进入全局配置模式,对交换机的整体参数进行设置。
3、`interface` 命令通过`interface` 加上接口类型和编号,例如`interface ethernet0/1` ,可以进入特定接口的配置模式,对该接口的参数进行详细配置。
4、`vlan` 命令`vlan` 相关的命令用于创建、删除和配置 VLAN(虚拟局域网)。
比如`vlan 10` 创建 VLAN 10 ,`name VLAN10` 为 VLAN 10 命名。
5、`show vlan` 命令用于查看交换机上已创建的VLAN 信息,包括VLAN 编号、名称、端口成员等。
6、`show interfaces` 命令此命令可以查看交换机各个接口的状态、速率、双工模式等详细信息。
7、`port trunk allowpass vlan` 命令在配置 trunk 链路时,使用该命令允许特定的 VLAN 通过 trunk 链路。
8、`spanningtree` 命令用于配置生成树协议,防止网络环路。
例如`spanningtree moderstp` 可以设置生成树的模式为快速生成树。
二、路由器常用命令1、`enable` 命令同样用于进入特权模式。
2、`configure terminal` 命令进入全局配置模式。
3、`interface` 命令例如`interface fastethernet 0/0` ,进入特定的接口配置模式。
4、`ip address` 命令为接口配置 IP 地址,如`ip address 19216811 2552552550` 。
华为三层交换机配置方法、命令及实例
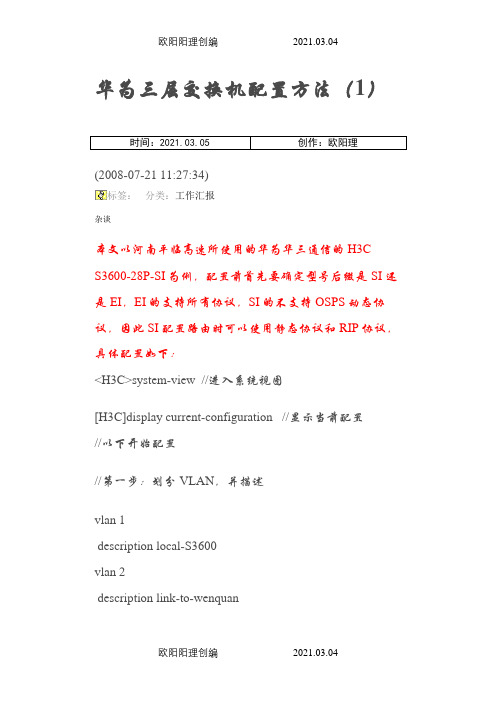
华为三层交换机配置方法(1)时间:2021.03.05 创作:欧阳理(2008-07-21 11:27:34)分类:工作汇报标签:杂谈本文以河南平临高速所使用的华为华三通信的H3CS3600-28P-SI为例,配置前首先要确定型号后缀是SI还是EI,EI的支持所有协议,SI的不支持OSPS动态协议,因此SI配置路由时可以使用静态协议和RIP协议,具体配置如下:<H3C>system-view //进入系统视图[H3C]display current-configuration //显示当前配置//以下开始配置//第一步:划分VLAN,并描述vlan 1description local-S3600vlan 2description link-to-wenquanvlan 3description link-to-ruzhouvlan 4description link-to-xiaotunvlan 5description link-to-baofengvlan 6description link-to-pingxivlan 7description link-to-pingnanvlan 8description Uplink-to-Putianvlan 9description link-to-pingxicentre//第二步:给VLAN 划网关interface Vlan-interface2description link to wenquanip address 10.41.77.41 255.255.255.192 interface Vlan-interface3description link to ruzhouip address 10.41.77.105 255.255.255.192interface Vlan-interface4description link to xiaotunip address 10.41.77.169 255.255.255.192 interface Vlan-interface5description link to baofengip address 10.41.77.233 255.255.255.192 interface Vlan-interface6description link to pingxiip address 10.41.78.41 255.255.255.192 interface Vlan-interface7description link to pingnanip address 10.41.78.105 255.255.255.192 interface Vlan-interface8description uplink to putianip address 10.41.244.102 255.255.255.252 interface Vlan-interface9description link to pingxicentreip address 10.41.80.233 255.255.255.192 //第三步:给VLAN 指定端口interface Ethernet1/0/2description link to wenquanport access vlan 2interface Ethernet1/0/3description link to ruzhouport access vlan 3interface Ethernet1/0/4description link to xiaotunport access vlan 4interface Ethernet1/0/5description link to baofengport access vlan 5interface Ethernet1/0/6description link to pingxiport access vlan 6interface Ethernet1/0/7description link to pingnanport access vlan 7interface Ethernet1/0/8description uplink to putianport access vlan 8interface Ethernet1/0/9 to Ethernet1/0/24 description link to pingxicentreport access vlan 9//第四步:配置路由协议//(1)用RIP配动态路由ripnetwork 10.41.77.41network 10.41.77.105network 10.41.77.169network 10.41.77.233network 10.41.78.41network 10.41.78.105network 10.41.80.233network 10.41.244.102//(2)配静态路由(只用对远华为三层交换机配置命令分类:默认栏目2007.6.2 07:28 作者:weiwei2501 | 评论:1 | 阅读:0 Enable //进入私有模式Configure terminal //进入全局模式service password-encryption //对密码进行加密hostname Catalyst 3550-12T1 //给三层交换机定义名称enable password 123456. //enable密码Enable secret 654321 //enable的加密密码(应该是乱码而不是654321这样)Ip subnet-zero //允许使用全0子网(默认都是打开的)Ip name-server 172.16.8.1 172.16.8.2 //三层交换机名字Catalyst 3550-12T1对应的IP地址是172.16.8.1Service dhcp //提供DHCP服务ip routing //启用三层交换机上的路由模块ExitVtp mode server //定义VTP工作模式为sever模式Vtp domain centervtp //定义VTP域的名称为centervtpVlan 2 name vlan2 //定义vlan并给vlan取名(如果不取名的话,vlan2的名字应该是vlan002)Vlan 3 name vlan3Vlan 4 name vlan4Vlan 5 name vlan5Vlan 6 name vlan6Vlan 7 name vlan7Vlan 8 name vlan8Vlan 9 name vlan9Exitinterface Port-channel 1 //进入虚拟的以太通道组1Interface gigabitethernet 0/1 //进入模块0上的吉比特以太口1channel-group 1 mode on //把这个接口放到快速以太通道组1中Interface gigabitethernet 0/2 //同上channel-group 1 mode onport-channel load-balance src-dst-ip //定义快速以太通道组的负载均衡方式(依靠源和目的IP的方式)interface gigabitethernet 0/3 //进入模块0上的吉比特以太口3interface gigabitethernet 0/4 //同上interface gigbitethernet 0/5 //同上interface gigbitethernet 0/6 //同上interface gigbitethernet 0/7 //进入模块0上的吉比特以太口7no shutdownspanning-tree vlan 6-9 cost 1000 //在生成树中,vlan6-9的开销定义为10000interface range gigabitethernet 0/8 – 10 //进入模块0上的吉比特以太口8,9,10no shutdownspanning-tree portfast //在这些接口上使用portfast(使用portfast以后,在生成树的时候不参加运算,直接成为转发状态)interface gigabitethernet 0/11 //进入模块0上的吉比特以太口11interface gigabitethernet 0/12 //同上interface vlan 1 //进入vlan1的逻辑接口(不是物理接口,用来给vlan 做路由用)ip address 172.16.1.7 255.255.255.0 //配置IP地址和子网掩码no shutdownstandby 1 ip 172.16.1.9 //开启了冗余热备份(HSRP),冗余热备份组1,虚拟路由器的IP地址为172.16.1.9standby 1 priority 110 preempt //定义这个三层交换机在冗余热备份组1中的优先级为110,preempt是用来开启抢占模式interface vlan 2 //同上ip address 172.16.2.252 255.255.255.0no shutdownstandby 2 ip 172.16.2.254standby 2 priority 110 preemptip access-group 101 in //在入方向上使用扩展的访问控制列表101interface vlan 3 //同上ip address 172.16.3.252 255.255.255.0no shutdownstandby 3 ip 172.16.3.254standby 3 priority 110 preemptip access-group 101 ininterface vlan 4 //同上ip address 172.16.4.252 255.255.255.0no shutdownstandby 4 ip 172.16.4.254standby 4 priority 110 preemptip access-group 101 ininterface vlan 5ip address 172.16.5.252 255.255.255.0no shutdownstandby 5 ip 172.16.5.254standby 5 priority 110 preemptip access-group 101 ininterface vlan 6ip address 172.16.6.252 255.255.255.0no shutdownstandby 6 ip 172.16.6.254standby 6 priority 100 preemptinterface vlan 7ip address 172.16.7.252 255.255.255.0no shutdownstandby 7 ip 172.16.7.254standby 7 priority 100 preemptinterface vlan 8ip address 172.16.8.252 255.255.255.0no shutdownstandby 8 ip 172.16.8.254standby 8 priority 100 preemptinterface vlan 9ip address 172.16.9.252 255.255.255.0no shutdownstandby 9 ip 172.16.9.254standby 9 priority 100 preemptaccess-list 101 deny ip any 172.16.7.0 0.0.0.255 //扩展的访问控制列表101 access-list 101 permit ip any anyInterface vlan 1 //进入vlan1这个逻辑接口Ip helper-address 172.16.8.1 //可以转发广播(helper-address的作用就是把广播转化为单播,然后发向172.16.8.1)Interface vlan 2Ip helper-address 172.16.8.1Interface vlan 3ip helper-address 172.16.8.1interface vlan 4ip helper-address 172.16.8.1interface vlan 5ip helper-address 172.16.8.1interface vlan 6ip helper-address 172.16.8.1interface vlan 7ip helper-address 172.16.8.1interface vlan 9ip helper-address 172.16.8.1router rip //启用路由协议RIPversion 2 //使用的是RIPv2,如果没有这句,则是使用RIPv1network 172.16.0.0 //宣告直连的网段exitip route 0.0.0.0 0.0.0.0 172.16.9.250 //缺省路由,所有在路由表中没有办法匹配的数据包,都发向下一跳地址为172.16.9.250这个路由器line con 0line aux 0line vty 0 15 //telnet线路(路由器只有5个,是0-4)password 12345678 //login密码loginendcopy running-config startup-config 保存配置cisco 3550Switch# configure terminalSwitch(config)#vtp mode transparentSwitch(config)#vlan 10Switch(config-vlan)# name vlan10Switch(config)#exitSwitch(config)#vlan 11Switch(config-vlan)name vlan11Switch(config-vlan)endSwitch#configure terminalSwitch(config)#interface fastethernet0/9Switch(config-if)#switchport mode accessSwitch(config-if)#switchport access vlan 10Switch(config-if)#exitSwitch(config)#interface fastethernet0/10Switch(config-if)#switchport mode accessSwitch(config-if)#switchport access vlan 10Switch(config-if)#exitSwitch(config)#interface fastethernet0/11Switch(config-if)#switchport mode accessSwitch(config-if)#switchport access vlan 11Switch(config-if)#exitSwitch(config)#interface fastethernet0/12Switch(config-if)#switchport mode accessSwitch(config-if)#switchport access vlan 11Switch(config-if)#exitSwitch(config)#interface vlan10Switch(config-if)#ip address 192.168.0.1 255.255.255.0Switch(config-if)#no shutdownSwitch(config-if)#exitSwitch(config)#interface vlan11Switch(config-if)#ip address 192.168.1.1 255.255.255.0Switch(config-if)#no shutdownSwitch(config-if)#exitSwitch(config)#ip routingSwitch(config)#ip forward-protocol udpSwitch(config)#inter vlan 10ip helper 172.16.11.255 //这个命令又是什么意思?是不是转发整个网段的UDP协议?为什么用到了172.16.11.255这个地址?Switch(config)#exitSwitch(config)#inter vlan 11Switch(config-if)#ip helper 172.16.10.255 //同上?Switch(config-if)#exitSwitch(config)#ip route 0.0.0.0 0.0.0.0 Vlan10Switch(config)#ip route 0.0.0.0 0.0.0.0 Vlan11Switch(config)#conf tSwitch(config)#access-list 103 permit ip 172.16.11.0 0.0.0.255 172.16.10.00.0.0.255Switch(config)#access-list 103 permit udp any any eq bootpcSwitch(config)#access-list 103 permit udp any any eq tftpSwitch(config)#access-list 103 permit udp any eq bootpc anySwitch(config)#access-list 103 permit udp any eq tftp anySwitch(config)#inter vlan 10Switch(config-if)#ip directed-broadcast 103 //请解释一下这个的具体含义,本人不是太明白,懂一点意思(直接广播这个列表?是不是)Switch(config-if)#exitSwitch(config)#access-list 104 permit ip 172.16.10.0 0.0.0.255 172.16.11.00.0.0.255Switch(config)#access-list 104 permit udp any any eq bootpcSwitch(config)#access-list 104 permit udp any any eq tftpSwitch(config)#access-list 104 permit udp any eq bootpc anySwitch(config)#access-list 104 permit udp any eq tftp anySwitch(config)#inter vlan 11Switch(config-if)#ip directed-broadcast 104 //同上Switch(config)#endSwitch#copy run star华为三层交换机配置实例一例网络技术 2008-07-25 06:08:28 阅读243 评论0 字号:大中小订阅华为三层交换机配置实例一例服务器1双网卡,内网IP:192.168.0.1,其它计算机通过其代理上网PORT1属于VLAN1PORT2属于VLAN2PORT3属于VLAN3VLAN1的机器可以正常上网配置VLAN2的计算机的网关为:192.168.1.254配置VLAN3的计算机的网关为:192.168.2.254即可实现VLAN间互联如果VLAN2和VLAN3的计算机要通过服务器1上网则需在三层交换机上配置默认路由系统视图下:ip route-static 0.0.0.0 0.0.0.0 192.168.0.1 然后再在服务器1上配置回程路由进入命令提示符route add 192.168.1.0 255.255.255.0 192.168.0.254route add 192.168.2.0 255.255.255.0 192.168.0.254这个时候vlan2和vlan3中的计算机就可以通过服务器1访问internet了~~华为路由器与CISCO路由器在配置上的差别"华为路由器与同档次的CISCO路由器在功能特性与配置界面上完全一致,有些方面还根据国内用户的需求作了很好的改进。
启用三层交换机的功能的语句

启用三层交换机的功能的语句启用三层交换机功能的语句取决于不同的交换机品牌与型号。
下面以思科交换机为例,提供几种可能的启用三层交换机功能的语句:1. 在全局配置模式下,使用“ip routing”命令启用三层路由功能:```Switch# configure terminalSwitch(config)# ip routingSwitch(config)# end```2. 在接口配置模式下,使用“no switchport”命令关闭接口交换功能,并为该接口分配IP地址,以启用三层路由功能:```Switch# configure terminalSwitch(config)# interface gigabitethernet 0/1Switch(config-if)# no switchportSwitch(config-if)# ip address 192.168.1.1 255.255.255.0Switch(config-if)# end```3. 在SVI(Switch Virtual Interface)接口配置模式下,为SVI接口分配IP地址,以启用三层路由功能:```Switch# configure terminalSwitch(config)# interface vlan 1Switch(config-if)# ip address 192.168.1.1 255.255.255.0Switch(config-if)# end```请注意,以上语句仅供参考,具体的命令和参数可能因交换机型号、固件版本等因素而有所不同。
在配置交换机时,请务必参考官方文档或咨询厂商技术支持人员。
三层交换机常用命令
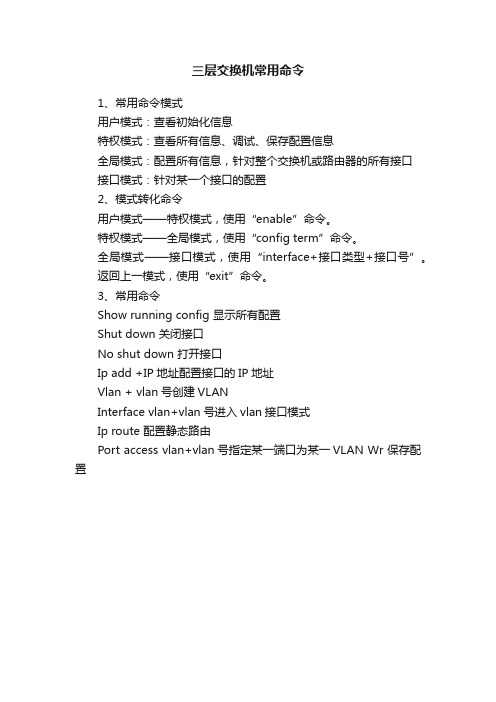
三层交换机常用命令
1、常用命令模式
用户模式:查看初始化信息
特权模式:查看所有信息、调试、保存配置信息
全局模式:配置所有信息,针对整个交换机或路由器的所有接口
接口模式:针对某一个接口的配置
2、模式转化命令
用户模式——特权模式,使用“enable”命令。
特权模式——全局模式,使用“config term”命令。
全局模式——接口模式,使用“interface+接口类型+接口号”。
返回上一模式,使用“exit”命令。
3、常用命令
Show running config 显示所有配置
Shut down 关闭接口
No shut down 打开接口
Ip add +IP地址配置接口的IP地址
Vlan + vlan号创建VLAN
Interface vlan+vlan号进入vlan接口模式
Ip route 配置静态路由
Port access vlan+vlan号指定某一端口为某一VLAN Wr 保存配置。
H3C三层交换机命令大全
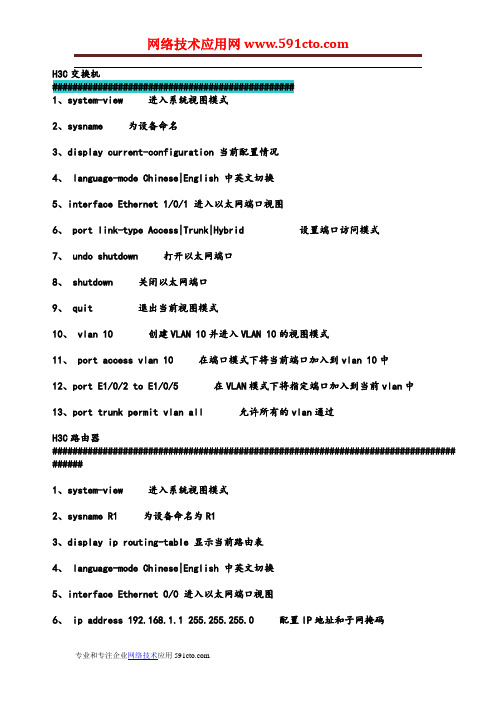
H3C交换机################################################1、system-view进入系统视图模式2、sysname为设备命名3、display current-configuration 当前配置情况4、 language-mode Chinese|English 中英文切换5、interface Ethernet 1/0/1 进入以太网端口视图6、 port link-type Access|Trunk|Hybrid设置端口访问模式7、 undo shutdown打开以太网端口8、 shutdown关闭以太网端口9、 quit退出当前视图模式10、 vlan 10创建VLAN 10并进入VLAN 10的视图模式11、 port access vlan 10在端口模式下将当前端口加入到vlan 10中12、port E1/0/2 to E1/0/5在VLAN模式下将指定端口加入到当前vlan中13、port trunk permit vlan all允许所有的vlan通过H3C路由器################################################################################ ######1、system-view进入系统视图模式2、sysname R1为设备命名为R13、display ip routing-table 显示当前路由表4、 language-mode Chinese|English 中英文切换5、interface Ethernet 0/0 进入以太网端口视图6、 ip address 192.168.1.1 255.255.255.0配置IP地址和子网掩码7、 undo shutdown打开以太网端口8、 shutdown关闭以太网端口9、 quit退出当前视图模式10、 ip route-static 192.168.2.0 255.255.255.0 192.168.12.2 description To.R2 配置静态路由11、 ip route-static 0.0.0.0 0.0.0.0 192.168.12.2 description To.R2 配置默认的路由H3C S3100 SwitchH3C S3600 SwitchH3C MSR 20-20 Router################################################################################ ##########1、调整超级终端的显示字号;2、捕获超级终端操作命令行,以备日后查对;3、 language-mode Chinese|English 中英文切换;4、复制命令到超级终端命令行,粘贴到主机;5、交换机清除配置 :<H3C>reset save ;<H3C>reboot ;6、路由器、交换机配置时不能掉电,连通测试前一定要检查网络的连通性,不要犯最低级的错误。
三层交换机链路聚合配置命令

三层交换机链路聚合配置命令在网络架构中,三层交换机扮演着非常关键的角色,它能够提供高性能、稳定的数据传输和路由功能,是构建大型企业网络的基础设备之一。
在实际应用中,我们经常会遇到需要增加网络带宽、提高网络吞吐量的情况。
而三层交换机链路聚合技术能够很好地解决这个问题。
三层交换机链路聚合技术,顾名思义就是将多个物理链路聚合成一个逻辑链路,在逻辑上将它们当作一个高带宽的链路来使用。
这样一来,我们就能够将多个链路同时利用起来,提供更大的带宽,并且实现负载均衡和冗余备份,从而提高网络的性能和可靠性。
在三层交换机链路聚合的配置中,需要了解以下几个重要的命令:1. 首先需要启用链路聚合功能,可以使用“interface port-channel <channel-id>”命令创建一个端口通道,并进入该端口通道的配置模式。
其中,<channel-id>是一个数字,代表端口通道的编号。
可以根据需求进行配置。
2. 接着,我们需要将物理接口添加到端口通道中。
可以使用“interface <interface>”命令选择一个物理接口,并使用“channel-group <channel-id> mode act ive/passive”命令将物理接口添加到端口通道中。
其中,<interface>是一个具体的物理接口,可以是以太网口或者光纤口。
3. 在配置链路聚合时,还需要选择一种链路聚合协议。
常见的协议有LACP(链路聚合控制协议)和PAgP(端口聚合协议)。
可以使用“channel-protocol lacp/pagp”命令选择相应的协议。
两种协议各有特点,具体选择可以根据网络的实际情况进行。
4. 链路聚合的工作方式还取决于聚合组的模式,可以选择主动模式(active)或者被动模式(passive)。
在主动模式下,交换机主动发送聚合控制帧进行链路聚合,而在被动模式下则被动应答。
h3c交换机命令

h3c交换机命令H3C交换机命令H3C交换机是一款功能强大且可靠的网络设备,广泛应用于企业、学校等各个领域。
它具有丰富的命令行界面,可以通过命令操作实现各种网络设置和管理。
本文将介绍H3C交换机常用的命令及其功能。
一、登录与基本命令1. 登录H3C交换机要登录H3C交换机,首先需要通过串口或网络连接到设备。
使用如下命令登录:login2. 查看系统信息使用如下命令可以查看设备的系统信息:display version3. 查看设备当前配置使用如下命令可以查看设备的当前配置:display current-configuration4.保存配置变更当你对交换机的配置进行了修改之后,为了确保修改的配置不会在重启交换机后丢失,你需要使用如下命令保存配置:save二、端口相关命令1. 查看端口状态使用如下命令可以查看设备的端口状态:display interface2. 配置端口描述你可以使用如下命令为端口添加描述信息:interface GigabitEthernet 1/0/1description This is a test port3. 配置端口速率和双工模式你可以使用如下命令修改端口的速率和双工模式:interface GigabitEthernet 1/0/1speed 1000duplex full4. 配置端口VLAN你可以使用如下命令配置端口的VLAN:interface GigabitEthernet 1/0/1port link-type accessport default vlan 105. 禁用/启用端口使用如下命令可以禁用或启用特定端口:interface GigabitEthernet 1/0/1shutdown #禁用端口undo shutdown #启用端口三、VLAN相关命令1. 创建VLAN使用如下命令可以创建一个新的VLAN:vlan 10name Test_Vlan2. 配置端口VLAN你可以使用如下命令将端口加入到指定的VLAN中:interface GigabitEthernet 1/0/1port link-type accessport default vlan 103. 显示VLAN信息使用如下命令可以查看当前交换机上所有VLAN的信息:display vlan四、静态路由相关命令1. 添加静态路由你可以使用如下命令添加静态路由:ip route-static destination mask next-hop2. 查看静态路由表使用如下命令可以查看当前交换机上的静态路由表:display ip routing-table五、访问控制列表(ACL)相关命令1. 创建ACL使用如下命令可以创建一个ACL:acl number 20002. 配置ACL规则你可以使用如下命令为ACL添加规则:rule permit source destination3. 应用ACL使用如下命令可以将ACL应用到特定的端口或VLAN上:interface GigabitEthernet 1/0/1traffic-filter inbound acl 2000六、SNMP配置命令1. 启用SNMP使用如下命令可以启用SNMP协议:snmp-agent2. 配置SNMP团体名你可以使用如下命令配置SNMP团体名:snmp-agent community read public七、系统管理相关命令1. 修改设备名称使用如下命令可以修改设备的名称:sysname New_Device_Name2. 修改设备登录密码你可以使用如下命令修改设备的登录密码:local-user admin password irreversible-cipher New_Password以上是H3C交换机常用的命令及其功能介绍。
- 1、下载文档前请自行甄别文档内容的完整性,平台不提供额外的编辑、内容补充、找答案等附加服务。
- 2、"仅部分预览"的文档,不可在线预览部分如存在完整性等问题,可反馈申请退款(可完整预览的文档不适用该条件!)。
- 3、如文档侵犯您的权益,请联系客服反馈,我们会尽快为您处理(人工客服工作时间:9:00-18:30)。
1、常用命令模式
用户模式:查看初始化信息
特权模式:查看所有信息、调试、保存配置信息
全局模式:配置所有信息,针对整个交换机或路由器的所有接口
接口模式:针对某一个接口的配置
2、模式转化命令
用户模式——特权模式,使用“enable”命令。
特权模式——全局模式,使用“config term”命令。
全局模式——接口模式,使用“interface+接口类型+接口号”。
返回上一模式,使用“exit”命令。
3、常用命令
Show running config 显示所有配置
Shut down 关闭接口
No shut down 打开接口
Ip add +IP地址配置接口的IP地址
Vlan + vlan号创建VLAN
Interface vlan+vlan号进入vlan接口模式
Ip route 配置静态路由
Port access vlan+vlan号指定某一端口为某一VLAN Wr 保存配置。