中智999新风系统说明书演示
宝工 UMS-C002吹吸风机 说明书

UMS-C002吹吸风机使用说明书1st Edition, 2020©2020 Copy Right by Prokit’s Industries Co., Ltd.版权所有拷贝必究感谢您选购UMS-C002吹吸风机。
使用产品前请详阅本使用说明书,阅后请妥为收存,以备日后查阅。
目录用途 (2)警告标记 (3)安全警告 (4)操作 (5)人身安全 (5)准备 (7)使用吸吹风机 (7)产品规格 (8)使用说明 (8)保养 (9)用途本设备只能用于吹扫或收集树叶和碎片,清洁家中的花园,不能用于商业用途。
本说明书中未包含的其他用途可能会损坏设备或严重伤害操作员。
本说明书使用到或可能使用的标识使用前请务必仔细阅读说明书,理解并遵守本说明书。
1)培训●仔细阅读使用说明书,务必熟悉控制器以及正确使用器具●切勿让儿童使用器具●切勿让不了解使用说明书的人使用器具。
地方性规定可对操作者的年龄作出限定●近旁有人(特别是儿童)或宠物时,切勿开动器具●操作者或用户对造成他人或其财物的意外伤害或危险负责2)准备●使用器具时,要一直穿着结实的鞋袜和长裤●不要穿戴宽松的衣服或会被吸入空气进气口的饰物。
操作者的长发应远离空气进气口●操作器具时,应佩戴护目镜●为防止灰尘的刺激,建议佩戴面具●使用前,应检查电源线和外接软线是否有损坏或老化的迹象。
若软线有损坏或磨损的情况时,不得使用器具;●禁止携带变形的防护罩或挡板,或没有安全装置(例如集屑器没有就位)情况下操作器具;●只使用能风雨的外接电缆,配上符合IEC 60320-2-3要求的耦合器3)操作●始终使电缆线位于器具的后方并远离器具●若软线在使用期间发生损坏时,应立即将电源线从电源上断开。
在切断电源前,不要碰到电线●不要用电缆线携带器具●在下列情况下,切断器具电源:无论何时你离开机器时;清除阻塞物之前;对器具进行检查、清洁或维护之前当器具开始异常振动时。
●只能在白天或良好人工光源照明的情况下操作器具●不要动作过大,并始终保持稳定●在斜坡上行走工作时,应始终保持稳定●要步行,不要奔跑●保持所有冷却空气进气口清洁无屑●禁止朝旁观者方向吹屑4)维护与存储●紧固在器具上的所有螺母、螺栓和螺钉以确保器具出于安全的工作状态●经常检查集屑器的磨损或老化情况●更换已磨损或已损坏的零件●只使用原装的备用零件和附件●只能将器具存储在干燥的场所操作了解你的器具已经阅读并了解使用说明书以及在器具上的标签非常重要。
新风系统智能控制器使用说明书

新风系统智能控制器使用说明书一.概述新风系统智能控制器适用于对家庭及公共场合新风系统风机的智能控制,控制器分别设有手动及自动风量调节(三档)功能,时间及室内温度显示,滤网使用时间提醒。
自动控制功能可以设定每周7天,每天4时段运行状态,每个时段可以根据需要设定新风系统启闭或风量。
新风系统智能控制器根据具体情况灵活控制新风系统风机运转速度,实现既节能环保又能保持室内良好空气品质。
二.显示及按键符号 内容1当前星期状态2本地时间24小时制显示3自动运行模式状态显示4设置选择5风量切换6开关(设置状态时:确认)7数字减少或向后选择设置参数8数字增加或向前选择设置参数9自动运行模式:正在运行时段10手动运行模式状态显示11风量显示12环境温度显示三.技术参数输入电源 功率消耗 时段数量 输出方式 外形尺寸A C220V1w每天4时段,每周最多28时段 继电器 ≤1A86m m×86m m×14m m四.操作设置说明1.手动运行模式控制器接通电源后,液晶屏显示温度、时间、星期状态,约五秒后按开关键,液晶屏出现风量图标及手动运行模式图标,风量默认为中。
按风量切换键,可依次在高、中、低风量间进行切换,对应的风量图标的风量显示条分别为3条、2条、1条。
2.自动运行模式同时按下▽及△键,控制器进入自动运行模式,液晶屏显示自动运行模式图标。
自动运行时段设定:自动运行模式下连按两次按设置选择键,液晶屏自动运行模式图标A U T O闪烁,进入时段设定。
这时星期状态图标闪烁,按▽或△选择你要设定星期状体,按开关键确认。
星期状态确认后,自动进入这一天第1时段设定,这时液晶屏运行时段标显示1,时间的小时数字闪烁,按▽或△选择你要设定的时间,按开关键确认;小时确认后,自动进入分钟设定,这时时间的分钟数字闪烁,按▽或△选择你要设定的分钟,按开关键确认;时间设定确认后,自动进入风量设定,这时风量图标闪烁,按▽或△选择你要设定的风量(风量图标中无风量条表示关闭),按开关键确认,第一时段设定完毕,并自动进入第二时段设置。
Vornado 293HD 全室通风器说明书

model293HD WHOLE ROOM CIRCULATOR OWNER’S GUIDEREAD AND SAVETHESE INSTRUCTIONS2English 800.234.0604****************we expect this product to be PERFECT if it’s not WE will make it right.CONTENTSImportant Safety Instructions (4)Features (7)Getting Started (8)Cleaning (9)Troubleshooting (11)Warranty (12)English3READ AND SAVE THESE INSTRUCTIONS IMPORTANT SAFETY INSTRUCTIONSThis owner’s guide and any additional inserts are considered part of the product. They contain important information about safety, use and disposal. Before using the product, please familiarize yourself with all operating and safety instructions. Please keep all documents for future reference and pass these documents on, together with the product, to any future owner. See www.vornado. com/circulators-manuals to view, download and print the most current version of these instructions.INTENDED USE: This product is intended to circulate the air in indoor living spaces only in the United States and Canada. This product is not intended for commercial or industrial use. The manufacturer assumes no responsibility for damage or injury due to unauthorized use or product modification. Failure to follow these directions will void the product warranty. WARNING: Risk to Children and Impaired Persons- Supervision is required during the installation, operation, cleaning and maintenance of this product by children under age 12 and anyone with reduced physical, sensory or mental capabilities. Children should be supervised to ensure that they do not play with the appliance, its parts and packaging material. INSTALLATION WARNING—To reduce risk of fire, electrical shock and injury to persons, observe the following:- Place this product away from curtains, draperies, tablecloths and other fabrics, since they may be drawn into the fan, damage themotor and/or cause a fire.- No part of this product (the appliance, power cord, plug, packaging, etc.) should be placed near furnaces, fireplaces, stoves or other high temperature heat sources. Do not use this product in a window, on an uneven or unstable surface, ornear water.- The appliance, power supply, power cord and plug cannot come into contact with water. Do not use this product on wet surfaces. Do not use this product in a bathtub or shower or position product where it may fall into a bathtub, laundry, swimming pool or other water container. Do not use this product outdoors or expose it weather or elements.- Do not run cord under carpeting. Do not cover cord with throw rugs, runners, or similar coverings. Do not route the cord under furniture or appliances. Arrange cord away from traffic area and where it will not be tripped over. The cord should not hang over edges of counters or be placed where it can be crimped or closed in doors. Place appliance near an easily accessible outlet so the product can be unplugged quickly during an emergency. SAFE USE WARNING—To reduce risk of fire, electrical shock and injury to persons, observe the following:- WARNING: To reduce likelihood of circuit overload, fire and electric shock, do not operate with a solid state speed device, such as a dimmer control switch.- Do not operate any fan with a damaged cord or plug. Discard fan or return to an authorized service facility for examination and/or repair. Do not operate unit if it has been droppedor is damage is apparent to any part of the unit. To avoidrisk of electrical shock, do not attempt to repair or replace4Englishparts. Only original replacement parts may be used. Contact Vornado Consumer Service at 1-800-234-0604 (phone) or***************************(email)forfurtherinstructions about replacement and repair.- Risk of fire. Your appliance may be equipped with a detachable power supply or a cord/plug with a safety device such as a fuse. Use only the power cord and plug provided.- Before plugging power cord into electrical outlet, be sure that all electrical information on the rating label, including voltage, is compatible with your outlet’s power supply.- Never use the cord as a handle or otherwise yank, strain or stretch the power cord.- While the product is plugged in, do not insert or allow foreign objects to enter any input or output opening as this may cause risk of electric shock or fire, or damage the product.- A loose fit between wall outlet (receptacle) and plug may cause overheating and distortion of the plug. Discontinue use of the product in this outlet. Contact a qualified electrician to replace loose or worn outlets.This product's power cord is equipped with a three-prong, grounded plug that must be inserted into a grounded receptacle.- Before moving, repositioning, servicing, cleaning and when not in use, use the product controls to turn off the power and then unplug. To disconnect from outlet, grasp and pull only the plug. Also, power off and unplug if the product will be left unattended for an extended period of time or during electrical storms. SERVICING WARNING—To reduce risk of fire, electrical shock and injury to persons, observe the following:- Clean your product regularly, only as is instructed in this manual. Prior to cleaning, turn off the power on your product and unplug. Do not use gasoline, thinners, solvents, ammonias or other chemicals for cleaning. Refer to the CLEANINGinstructions provided.- Do not open appliance housing. To avoid risk of shock, all service and/or repairs must be done by a Vornado Authorized Service Center.- This product employs overload protection (fuse). A blown fuse indicates an overload or short-circuit situation. If the fuse blows, unplug the product from the outlet. Replace the fuse as per the user servicing instructions (follow product marking for proper fuse rating) and check the product. If the replacement fuse blows, a short-circuit may be present and the product shouldbe discarded or returned to an authorized service facility for examination and/or repair.User Servicing Instructions1. Using the product controls, turn off the appliance.2. Grasp the plug (not the cord) and disconnect from theoutlet.3. Risk of Fire. Replace fuse only with 5 Amp, 125 Volt fuse asapproved by Vornado Consumer Service. For an authorizedreplacement fuse, please contact Vornado ConsumerService.4. Once the replacement is received, use a small flat-headscrewdriver to slide open the fuse cover (located on theplug) (See Page 6, Fig. A).5. Remove fuse by using the screwdriver to gently lift eachend of the fuse (See Page 6, Fig. B).5English6. Install the replacement fuse by using the screwdriver togently push each metal end of the fuse into the receptacleone at a time. Do not push on the center of the fuse—it isfragile and may break (See Fig. C).7. Slide the fuse cover closed using the screwdriver. Whenclosed, the cover should fit completely in the plug. No partof the cover should stick out (See Fig. D).8. Plug your appliance into the outlet and turn the power on.9. If the replacement fuse blows, a short-circuit may bepresent and the product should be discarded or returnedto an authorized service facility for examinationand/or repair.Risk of fire. Do not replace attachment plug. Contains a safety device (fuse, AFCI, LCDI) that should not be removed. Discard product if the attachment plug is damaged.FCC Consumer AdvisementThis equipment may generate, use and/or radiate radio frequency energy that may cause harmful interference toradio communications. If this equipment does cause harmful interference to radio or television reception, which can be determined by turning the equipment off and on, the user is encouraged to contact Vornado Consumer Service. Changes or modifications to this unit not expressly approved by the party responsible for compliance could void the user’s authority to operate the productDISPOSAL WARNINGTo reduce waste and environmental harm, observe the following:PACKAGE RECYCLING: The packaging protects theappliance from transport damage. The packaging materialsare selected from the point of view of their environmentalfriendliness and disposal technology and are thereforrecyclable. Dispose of all packaging materials in anenvironmentally responsible manner.6English7English FEATURESFULL 360° PIVOTING HEADPOWERFUL DUSTPROOF WATER-RESISTANT IP-54 RATED MOTOR TOOL FREE ASSEMBLY EXTRA LONG 10’GROUNDED POWER CORD NON-MARKING FEETSTURDY STEEL BASE3 VERSATILE SPEEDSEASY CLEANBUILT IN CUSHIONEDCARRY HANDLE8EnglishGETTING STARTED BASE ASSEMBLY1. Loosen the pivot knob by turning counter-clockwise. Remove the pivot knob and slip the legs of the base onto the bolts, in between the large washer and the knob.2. Re-install the pivot knobs onto the pivot bolts and tighten byturning clockwise.9English 1. Depress one of the grill clips by placing your thumb against the outside surface of the clip and pressing downwardtowards the motor, applying slight pressure forward. Usually by releasing one clip, the grill can be removed. If the grill cannot be removed, repeat the process on remaining clips.A flathead screwdriver can also be used if the clips are difficult to release.2. Replace by lining up the clips with the holes and firmly snapping the grill back into place.GRILL REMOVALWARNING: To reduce the risk of electrical shock and injury to persons, unplug the circulator before removing grill.Note: The motor is permanently lubricatedand requires no oiling.BLADE REMOVAL1. Pull the blade straight out from the shaft.2. Wipe the Blade with a damp cloth. If your circulator is used in a greasy environment, such as a kitchen, mild soap ora common household cleaner may be necessary. Do not use solvents. Do not place blade in the dishwasher. The excessive heat can distort the plastic.3. To reattach - be certain the flat side of the shaft aligns directly with the corresponding flat side on the blade’s socket. Push the blade all the way on the shaft until it bottoms out. Do not use a hammer as this could result in bearing damage.WARNING: To reduce the risk of electrical shock and injury to persons, unplug the circulator before removing blade.10EnglishTROUBLESHOOTINGEnglish11Vornado Air LLC (“Vornado”) warrants to the original consumer or purchaser this Vornado® Whole Room Circulator (“Product”) is free from defects in material or workmanship for a period of five (5) years from the date of purchase. If any such defect is discovered within the warranty period, Vornado, at its discretion, will repair or replace the Product at no cost. Forwarrantyorrepairservice:************************************************* a Return Authorization (“RA”) form. Please have or include your Product’s model number and serial number, as well as your name, address, city, state, zip code and phone number when contacting Vornado for warranty service.After receiving the RA form, ship your Product to: Vornado Air LLC Attn: Warranty & Repair 415 East 13th Street Andover, KS 67002. For your convenience, please have your model number and serial number when contacting Vornado with service inquiries. To assure proper handling, packages must be clearly marked with the RA number. Packages not clearly marked with the RA number may be refused at the receiving dock. Please allow 1-2 weeks for repair and return of your Product after the Product is received.Repairs not covered by the warranty or outside the warranty period will require a fee to cover the cost of materials, labor, handling and shipping.This warranty does not apply to defects resulting from abuse of the Product, modification, alteration, mishandling, improper maintenance, commercial use or repair or service of the Product by anyone other than Vornado; damages which occur in shipment or are attributed to acts of God. Improper product use, which includes using an external device that alters or converts the voltage or frequency of electricity, or shipping a Vornado productto a country not intended for use will void all warranties. Any unauthorized product modification, repair by unauthorized repair center, or use of non-approved replacement parts is not recommended and any consequences will not be covered by support services or product warranties. The product warranty will be honored only on models that are being used in the country intended. REPAIR OR REPLACEMENT AS PROVIDED UNDER THIS WARRANTY IS THE EXCLUSIVE REMEDY OF THE CONSUMER. VORNADO SHALL NOT BE LIABLE FOR ANY INCIDENTAL OR CONSEQUENTIAL DAMAGES FOR BREACH OF ANY EXPRESS OR IMPLIED WARRANTY ON THIS PRODUCT. EXCEPT TO THE EXTENT PROHIBITED BY APPLICABLE LAW, ANY IMPLIED WARRANTY OF MERCHANTABILITY OR FITNESS FOR A PARTICULAR PURPOSE ON THIS PRODUCT IS LIMITED IN DURATION TO THE DURATION OF THIS WARRANTY. Some states do not allow the exclusion or limitation of incidental or consequential damages, or allow limitations on how long an implied warranty lasts, so the above limitations or exclusions may not apply to you. This warranty gives you specific legal rights, and you may have other rights that vary from state to state. The manufacturer assumes no responsibility for damage caused by failureto follow these instructions or improper product use. Any such actions will invalidate the product warranty.All company names and product names are trademarks of their respective owners. ©All rights reserved. All technical information, data, and instructions for the installation, connection, and operation contained in these instructions for use correspond to the latest available information at time of printing. The contents of this manual may differ slightly from the actual product. Observe any additional supplements.WARRANTYWe expect this product to be perfect. If you’re not satisfied with this product, let us know.We’re Here To Help 800.234.0604 ****************12English。
9996_操作手册中文4
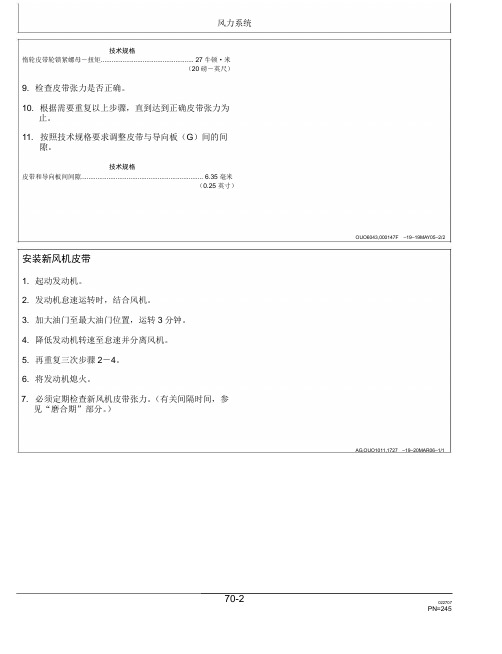
风力系统技术规格惰轮皮带轮锁紧螺母-扭矩................................................... 27牛顿·米(20磅-英尺)9. 检查皮带张力是否正确。
10. 根据需要重复以上步骤,直到达到正确皮带张力为止。
11. 按照技术规格要求调整皮带与导向板(G)间的间隙。
技术规格皮带和导向板间间隙................................................................... 6.35毫米(0.25英寸)OUO6043,000147F–19–19MAY05–2/2 安装新风机皮带1. 起动发动机。
2. 发动机怠速运转时,结合风机。
3. 加大油门至最大油门位置,运转3分钟。
4. 降低发动机转速至怠速并分离风机。
5. 再重复三次步骤2-4。
6. 将发动机熄火。
7. 必须定期检查新风机皮带张力。
(有关间隔时间,参见“磨合期”部分。
)AG,OUO1011,1727–19–20MAR06–1/1风力系统调整风筒注意:所有风筒的调整步骤相同。
根据需要调整风筒,使护罩总成的间隙合适,并使棉花能以最佳效果流入棉箱。
重要提示:如果调整不当的话,可能损坏风筒和护罩。
调整后,慢慢提升和下降风筒,并观察和检查确认间隙是否正确。
1. 在所有风筒均位于提升位置情况下,检查确认外风筒与护罩的前内壁间是否有25毫米(1.0英寸)或更大间隙(A和B)。
2. 检查确认其它内风筒在风筒与护罩前壁间是否有38毫米(1.5英寸)间隙。
注意:可能需要松开相邻风筒使之达到必要的间隙量。
3. 要调整风筒和护罩侧壁间的间隙量,松开锁环(D)上的调节螺丝(C),根据需要将锁环滑至风筒支管上的适当位置。
紧固调节螺丝。
重要提示:只要调整了对角支管,那么必须要调整风筒限位臂(E),以直接对正风筒支管的顶部。
4. 要调整风筒和护罩前壁间的间隙量,松开朝向对角支撑的四个螺栓(F),将风筒支撑移至适当位置。
室内新风系统说明书(电子版)
室内新风系统使用说明书中国建筑科学研究院环境测控与优化研究中心室内新风系统使用说明一、产品构成及型号说明室内新风控制系统是专门对室内空气质量进行检测和控制的系统,包括系统主机、控制分机和检测分机(如图1所示)。
具体的产品名称和型号如下:系统型号:CABR-EMCSO-S012系统主机:CABR-EMCSO-S012A控制分机:CABR-EMCSO-S012B检测分机:CABR-EMCSO-S012C图1 系统构成实物及连接示意图系统简介室内新风系统是专门改善室内空气环境设计研发的控制系统,该系统能够全面的检测室内空气质量,并上传系统主机,由内置的微控制芯片,智能的判断环境状态,如果出现CO2浓度超标等情况,系统会根据设置控制相应区域的风机作出相应的动作,实时的改善环境状态。
具体的系统具有以下突出的特点:1、操作灵活简便:系统设计充分考虑了不同人群的使用需求,运行做到了全自动化,设置系统只需点击触屏,选择内置的运行模式,即可满足用户不同的需求;2、控制合理准确:检测系统采用高精度传感器,能快速准确的检测室内的空气质量,同时,根据设置,如果某些参数超过设置范围,就会控制风机运转,以改善室内空气质量;3、运行稳定可靠:系统采用分布式控制方式,检测准确快速,系统软件经过全面考虑,和长期老化试验,基本排除了所有的故障;4、系统安装维护方便:系统可以兼容市面上的主流风机;系统采用总线形式,只需一根控制线即可,安装既可以进行预埋管线,也可后期布线安装,方便灵活;(一)功能简介根据混合通风系统的技术思路,系统可以根据室内二氧化碳浓度、温度、湿度等的状况联动通风装置,实现室内空气环境保持清新舒适的功能。
具体的功能如下:1、检测终端:可以检测房间内的空气品质,并且上传主机;2、控制终端:接收控制数据,实现风机联动控制;3、显示主机:采集各终端的检测及状态数据,根据控制逻辑,发出控制指令及界面显示。
(二)运行模式1、舒适模式:(1)CO2浓度阈值(600~1000ppm),优先控制换气启停;(2)如果室外温度适宜(18~26℃),室内温度高于29℃或低于15℃,开启换气;(3)如果室外温度适宜(18~26℃),室外湿度适宜(30~60%),室内湿度低于20%或高于70%,开启换气。
化验室用的直排风的使用说明书

化验室用的直排风的使用说明书安装
1. 确保安装位置远离其他设备和物品。
2. 将直排风与管道连接,并确保连接处密封良好。
3. 连接电源,并确保电源线不被压到或拉伸过度。
4. 完成安装后,进行必要的测试和校准。
使用
1. 打开直排风的电源开关。
2. 根据具体实验要求,设置适当的风速。
3. 在使用过程中,保持实验台面整洁,避免物品堵塞直排风的进气口。
4. 定期清洁直排风的滤网,以保证通风效果。
注意事项
•确保直排风的工作环境通风良好。
•避免在直排风工作时使用易燃、易爆等危险物品。
•如有异常情况或故障,应立即停止使用并联系维修人员。
请仔细阅读并按照使用说明书正确操作直排风设备。
三菱重工MAP37B(W)智能空氣清新機使用說明書说明书

使用說明書HIFIL智能空氣清新機MORI型 號: MAP37B(W)由衷的感謝您購買三菱重工空氣清新機為了正確並且舒適的使用本產品,請仔細閱讀說明書。
請妥善保管好此說明書與保證書,如有對功能不明之處或懷疑產品故障時,可參考本說明書。
產品外觀請以實物為準。
產品特徵安全事項各部件名稱使用前準備更換濾網和清潔產品開啟清新機自動運行模式手動運行模式睡眠模式兒童安全鎖功能負離子功能濾網更換濾網智能鎖定常見問題解答規格參數12581720181011121314141516使用之前維護保養更多使用方法目錄使用之前各部件名稱濾網更換按鍵濾網更換提示燈睡眠按鍵睡眠狀態提示燈自動按鍵自動狀態提示燈負離子按鍵負離子狀態提示燈空氣質素檢測光環本產品內部附帶有所需的過濾網,為保證您使用到性能最佳的濾材,本產品的360° 圓形複合夾層濾網進行了密封處理。
請您在使用產品前,務必確保濾網外的包裝材料已被拆除,並將濾網重新安裝在清新機的濾網倉內。
8初次使用本產品前,請清除產品上用於固定和機身防護的膠帶。
請您務必詳閱本章節內容,以便正確的使用本產品進行室內空氣淨化。
本章節包括“濾網安裝”和“使用位置指引”兩部分內容。
將調節裝置旋轉至開鎖符號處。
雙手握住濾網,將濾網向外拉出。
使用前準備請拆除濾網外的包裝材料。
將拆除包裝材料的濾網放回產品濾網倉,並將調節裝置轉動至閉鎖位置,將進風口欄柵復位。
本產品不能替代正常通風或室內吸塵及廚房烹飪油煙的清除之用。
陽光長時間直射或空調出風口等長時間受熱的場所;(可能造成變形、變質或發生故障)地面不平整、傾斜、高低起伏的場所;(可能造成產品倒伏,引起產品破損、運行故障、人體受傷)高溫高濕的場所,如浴室、衛生間、廚房等。
為達到理想的使用效果,請保證產品兩側後方各預留20cm的空間,產品上方預留30cm的空間。
拆除濾網包裝將濾網、進風口欄柵復位請勿放置於以下場所:連接電源後所有燈全部顯示1秒,然後全部熄滅,進入待機狀態。
新风系统用户手册-2021-08-03

系列新风系统用户手册1 前言 (3)1.1 机房环境要求 (3)1.2 专业节能新风系统 (3)2 产品介绍 (4)2.1 外观介绍 (4)2.2 型号说明 (4)2.3 主要特点 (5)2.4 标准组件 (5)2.4.1 风机 (5)2.4.2 滤网 (6)2.4.3 滤袋 (6)2.4.4 风阀 (6)3 技术参数 (7)3.1 机组参数 (7)3.2 使用条件 (8)4 尺寸参数 (8)4.1 机械尺寸 (8)4.2 底座安装尺寸 (9)4.3 新风管尺寸 (10)4.4 回风管尺寸 (10)4.5 维护空间 (11)4.6 安装考前须知 (11)5 应用指导 (12)5.1 显示屏 (12)5.1.1 显示屏按键说明 (12)5.1.2 系统启动界面 (12)5.1.3 待机界面内容 (13)5.1.4 菜单说明 (13)5.2 控制器 (15)5.2.1 主电路连接 (15)5.2.2 控制器原理框图 (16)5.3 新风机工作原理 (16)5.4 机房环境应用图例 (16)6 故障诊断与处理 (17)6.1 故障现象处置方法 (17)6.2 日常维护操作考前须知 (18)/ 、八—1 前言1.1机房环境要求现代计算机设备和数据交换设备均采用高热密度的CPU 芯片,单相机柜内的设备发热量也相应大幅提升,所以机房的提供的环境质量显得由为重要,主要表现在以下几个方面:a)温度控制:计算机及交换机工作时产生大量的热量,其密度是普通办公室的6〜20倍。
为了保证计算机设备能够发挥最正确效率,机房采用恒温控制,最正确控制范围为23C±2C(机房标准建议温度范围18C〜28 °C)o这就要求制冷机组一定要有足够的制冷能力和快速反响调控能力,以应对温度的急剧变化。
b)风量/洁净度控制:计算机及交换机工作时产生大量的显热,为了能迅速地排除这些热量,要求具有足够的冷却循环风量和足够的送风距离。
新风系统功能说明书终版(20151220)

赛菲新风机功能说明书(此说明书要适用无空调款机型)一、整机特性1、输入特性:输入端子L,N和接交流市电,为三个单插片6.3*0.8;系统工作电压为185V-240V/AC 。
2、性能指标1.控制器采用液晶显示2.控制板工作环境及储存要求:①工作温度:-20℃~85℃(室内机);②相对湿度:30~95RH ;③储存温度:-30℃~90;3.工作电压范围:185V-240V/AC;4.温度控制范围及控制精度:16℃~30℃±0.5℃,温度回差±1℃;5.温度显示范围:-30℃~90℃;6. 整机待机功率消耗:<2W;7. 电气控制部分要有良好的电磁兼容性能;8. 安全性能:符合GB4706.1-2005和GB4706.32-2005标准。
2、整机组成显示板GSC0040B电源控制板 GSC0040A变频板GSC0040CWIFI模块板GSC0040D液晶模组LCD-315A(黑底白字)粉尘传感器 PMS1003(客供)二氧化碳传感器 T6603客供温度传感器 4路(分别为新风入风口、排风入风口,新风出风口、室外排风出口)风机1 变频交流风机风机2 变频交流风机压缩机客供四通阀客供3、信号采集粉尘传感器 PMS1003(客供)(赛纳威备选数显)二氧化碳传感器T6603温度传感器 4路(分别为新风入风口、排风入风口,新风出风口、室外排风出口)二、净化机控制系统按键说明1、按键控制说明整机共有5个触摸按键,包含1个开关按键和4个功能键。
电源开关需用一个(橙蓝)双色发光二极管做出两种状态指示,其他按键由一个白色微蓝发光二极管做出状态指示。
所有正常按键操作都有提示音一声,提示操作有效(提示声音要选用美音或者由客户指定)。
2、开关键“”开关键的作用是切换控制板开机运行与待机状态。
机器通电后处于待机状态,屏幕和其他按键状态指示灯不亮,只有开关键亮橙色灯,指示整机现在处于待机状态,此时除开关键外其他按键均无效。
新风系统的面板操作方法

新风系统的面板操作方法
新风系统面板的操作方法通常分为以下几个步骤:
1. 开关机
在面板上找到开关机按钮,按下即可开启或关闭新风系统。
2. 选择模式
新风系统通常有多种模式可供选择,如通风模式、制冷模式、制热模式等。
在面板上找到模式选择按钮,按下即可选择所需的模式。
3. 调节风速
新风系统的风速通常有多档可供选择,一般以低、中、高三档为主。
在面板上找到风速调节按钮,按下即可选择所需的风速档位。
4. 设定温度
如果新风系统具备制冷或制热功能,那么在面板上会有温度调节按钮,按照需要设定所需温度即可。
5. 其他设置
除了以上几个操作外,新风系统的面板还可能有其他设置,如定时开关机、自动清洁等。
可以根据具体情况在面板上进行设置。
需要注意的是,不同品牌和型号的新风系统的面板操作方法可能会略有不同,建议在使用前认真阅读使用说明书。
microairsun新风机说明书

microairsun新风机说明书
摘要:
一、产品简介
二、产品安装
三、产品使用
四、产品维护
五、注意事项
正文:
一、产品简介
microairsun 新风机是一款室内空气净化设备,能够有效改善室内空气质量,为用户提供健康、舒适的居住环境。
该产品采用高性能过滤材料,能够过滤室内的灰尘、病毒、细菌等有害物质,并将新鲜空气引入室内,实现室内空气的循环净化。
二、产品安装
1.选择合适的安装位置,确保新风机能够顺畅地引入室外新鲜空气,并方便排风。
2.确定安装高度,一般建议安装在室内墙壁上,高度约为1.5 米。
3.根据新风机的尺寸和安装位置,确定管道的走向和长度,并进行管道的安装。
4.将新风机与管道连接,并确保连接处密封良好。
5.接通电源,启动新风机,检查设备运行是否正常。
三、产品使用
1.打开新风机,调整风速至适宜档位,以保证室内空气的流通和净化效果。
2.根据室内空气污染程度和用户需求,选择合适的工作模式,如自动模式、手动模式等。
3.定期更换过滤材料,以确保新风机的净化效果。
4.保持新风机的清洁,定期擦拭设备表面,避免灰尘和污垢影响设备运行。
四、产品维护
1.定期检查新风机的运行状态,如发现异常声音、震动等情况,应及时关闭设备并进行检修。
2.检查风机、过滤器等部件的磨损情况,如发现损坏,应及时更换。
3.保持新风机的通风管道畅通,避免堵塞导致设备运行异常。
五、注意事项
1.新风机运行时,请勿将手伸入设备内部,以免受伤。
2.请勿在新风机周围放置易燃、易爆物品,以免发生危险。
新风系统操作说明

新风系统操作说明
本系统为恒温控制系统,控制对象:水阀开度、变频器输出控制、风机启停、新风阀等。
控制原理:水阀:空调机组系统送电,PLC 正常运行,根据温度传感器检测的信号,在控制器内与温度设定值比较,输出信号控制水阀开度,以维持房间温度的恒定。
夏季模式时,当温度采样值高于设定值时,冷水阀开大;当温度采样低于设定值时,冷水阀关小;冬季模式时,当温度采样值高于设定值时,热水阀关小;当温度采样低于设定值时,热水阀开大。
新风阀:空调机组系统送电,PLC 正常运行,根据温度传感器检测的信号,在控制器内与温度设定值比较,输出信号控制新阀开度,以维持房间温度的恒定。
夏季模式时,当室外温度值高于室内温度时,新风阀关闭;当室外温度采样低于室内温度时,新风阀打开;冬季模式时,当室外温度采样值高于室内温度值时,新风阀开大;当室外温度采样低于室内温度时,新风阀关闭。
当夏季模式时,根据室外温度,开启新风阀,当新风阀开启后,水阀根据新风阀开度大小,延时开启水阀,初始值为:30Min 室外空气实际温湿度 空调箱名称
冬夏季模式
当前报警显示
回风实际温度 新风阀最小开度
电动阀开度控制
新风阀开度控制
变频器频率显示 当室外温度与需求温度设定值超过此温度。
抽风系统操作说明
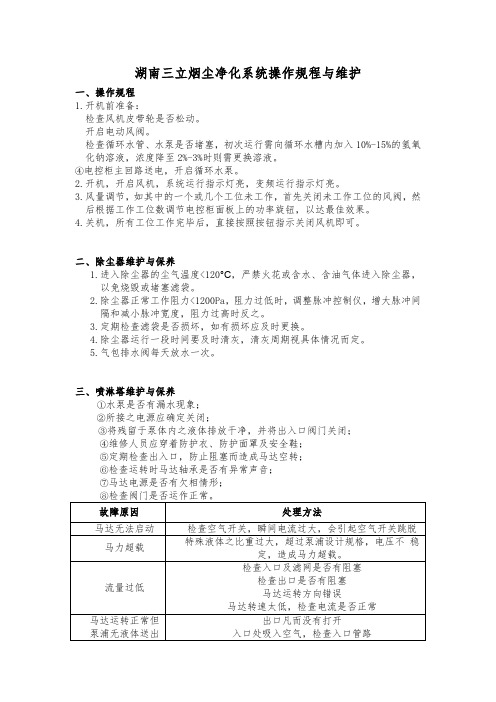
湖南三立烟尘净化系统操作规程与维护一、操作规程1.开机前准备:检查风机皮带轮是否松动。
开启电动风阀。
检查循环水管、水泵是否堵塞,初次运行需向循环水槽内加入10%-15%的氢氧化钠溶液,浓度降至2%-3%时则需更换溶液。
④电控柜主回路送电,开启循环水泵。
2.开机,开启风机,系统运行指示灯亮,变频运行指示灯亮。
3.风量调节,如其中的一个或几个工位未工作,首先关闭未工作工位的风阀,然后根据工作工位数调节电控柜面板上的功率旋钮,以达最佳效果。
4.关机,所有工位工作完毕后,直接按照按钮指示关闭风机即可。
二、除尘器维护与保养1.进入除尘器的尘气温度<120°C,严禁火花或含水、含油气体进入除尘器,以免烧毁或堵塞滤袋。
2.除尘器正常工作阻力<1200Pa,阻力过低时,调整脉冲控制仪,增大脉冲间隔和减小脉冲宽度,阻力过高时反之。
3.定期检查滤袋是否损坏,如有损坏应及时更换。
4.除尘器运行一段时间要及时清灰,清灰周期视具体情况而定。
5.气包排水阀每天放水一次。
三、喷淋塔维护与保养①水泵是否有漏水现象;②所接之电源应确定关闭;③将残留于泵体内之液体排放干净,并将出入口阀门关闭;④维修人员应穿着防护衣、防护面罩及安全鞋;⑤定期检查出入口,防止阻塞而造成马达空转;⑥检查运转时马达轴承是否有异常声音;⑦马达电源是否有欠相情形;⑧检查阀门是否运作正常。
故障原因处理方法马达无法启动检查空气开关,瞬间电流过大,会引起空气开关跳脱马力超载特殊液体之比重过大,超过泵浦设计规格,电压不稳定,造成马力超载。
流量过低检查入口及滤网是否有阻塞检查出口是否有阻塞马达运转方向错误马达转速太低,检查电流是否正常马达运转正常但泵浦无液体送出出口凡而没有打开入口处吸入空气,检查入口管路液面太低没有超过泵浦叶轮泵浦运转时产生不正常之振动及噪音马达轴承磨损,更新轴承马达轴心弯曲,更换新轴心及转子轴承座毁损,更换新轴承座叶轮或叶轮壳吸附杂质,检查泵浦并清除之入口管面积太小,或入口有阻塞现象马达停止运转后,液体从马达与泵体之间排放孔流出入口管路有阻塞,液体回流槽内太慢液体渗出泵浦与泵体外更换0-环泵浦主体破裂,更换泵浦主体固定螺丝毁损更换新固定螺丝更换新材质之固定螺丝一适合新的化学环境。
1.HDK-08-BA液晶控制器使用说明书20151120(新风系统)
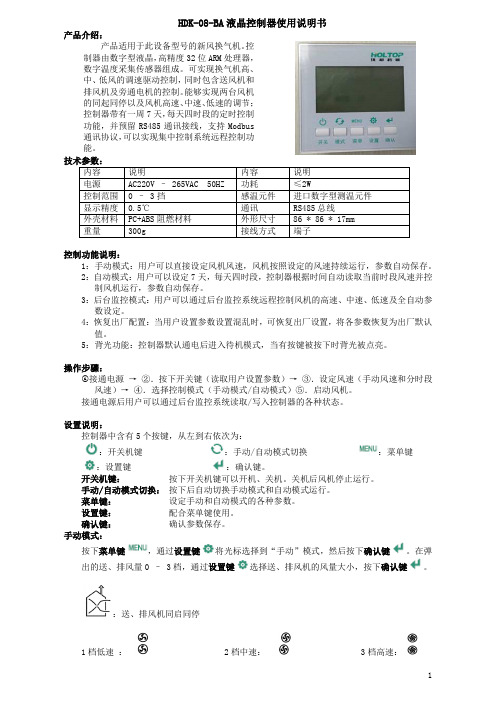
HDK-08-BA液晶控制器使用说明书产品介绍:产品适用于此设备型号的新风换气机。
控制器由数字型液晶,高精度32位ARM处理器,数字温度采集传感器组成。
可实现换气机高、中、低风的调速驱动控制,同时包含送风机和排风机及旁通电机的控制。
能够实现两台风机的同起同停以及风机高速、中速、低速的调节;控制器带有一周7天,每天四时段的定时控制功能,并预留RS485通讯接线,支持Modbus通讯协议,可以实现集中控制系统远程控制功能。
控制功能说明:1:手动模式:用户可以直接设定风机风速,风机按照设定的风速持续运行,参数自动保存。
2:自动模式:用户可以设定7天,每天四时段,控制器根据时间自动读取当前时段风速并控制风机运行,参数自动保存。
3:后台监控模式:用户可以通过后台监控系统远程控制风机的高速、中速、低速及全自动参数设定。
4:恢复出厂配置:当用户设置参数设置混乱时,可恢复出厂设置,将各参数恢复为出厂默认值。
5:背光功能:控制器默认通电后进入待机模式,当有按键被按下时背光被点亮。
操作步骤:接通电源→②.按下开关键(读取用户设置参数)→③.设定风速(手动风速和分时段风速)→④.选择控制模式(手动模式/自动模式)⑤.启动风机。
接通电源后用户可以通过后台监控系统读取/写入控制器的各种状态。
设置说明:控制器中含有5个按键,从左到右依次为::开关机键:手动/自动模式切换:菜单键:设置键:确认键。
开关机键:按下开关机键可以开机、关机。
关机后风机停止运行。
手动/自动模式切换:按下后自动切换手动模式和自动模式运行。
菜单键:设定手动和自动模式的各种参数。
设置键:配合菜单键使用。
确认键:确认参数保存。
手动模式:按下菜单键,通过设置键将光标选择到“手动”模式,然后按下确认键。
在弹出的送、排风量0 – 3档,通过设置键选择送、排风机的风量大小,按下确认键。
:送、排风机同启同停1档低速: 2档中速: 3档高速:自动模式:a: 按下菜单键,通过设置键将光标选择到“AUTO”模式,然后按下确认键。
soleus air HumidiBreeze 湿气吹风器说明书

MT1-19-32MT1-19-33 Operating Instructions3092402Thank you for choosing a Soleus Air HumidiBreeze Misting System. This owner’s manual will provide you with valuable information necessary for the proper care and maintenance of your new product. Please take a few moments to thoroughly read the instructions and familiarize yourself with all the operational aspects of your new Soleus Air HumidiBreeze.For your own records, please attach a copy of your sales receipt to this manual. Also, write the store name/location, date purchased, and serial number below:Store Name: ____________________________________________________Location: ______________________________________________________Date Purchased: _________________________________________________Serial Number (located on back of unit): ______________________________IMPORTANT INSTRUCTIONSBefore installing and using your HumidiBreeze, please read this owner’s manual carefully. Store this manual in a safe place for future reference.1) Always place the unit on a level surface.2) Never use or store gasoline or other flammable vapor or liquid near this unit unless instructed by thismanual.3) Maintain at least 10 inches (25 cm) clearance space around this unit. Do not block or cover air inlet oroutlet grilles.4) The unit must be connected to a correctly grounded power supply.5) Do not start or stop the unit by inserting or pulling out the power plug.6) Do not use an adapter plug or extension cord.7) Do not use the unit in the immediate surroundings of a bath, a shower or a swimming pool.8) Do not insert anything into the air outlet. Do not obstruct air inlet or outlet grills unless instructed by thismanual.9) Do not let children play near this unit.10) Always inspect the cord for signs of damage before use. If the power cord is damaged, it must be replacedby the manufacturer or a qualified service technician.11) When cleaning the unit, always turn the unit off and unplug the power cord.12) This unit can create a slippery surface at times. Please be careful if the floor becomes too wet to not slipand fall. Excessive water may damage floor or carpet.SPECIFICATIONS• Noise level is measured at a distance of 3.28 ft away from the front of the unit, when the unit is in cooling mode. • Power consumption is measured when the fan runs at the highest speed setting.• These specifications are for reference only. For actual data, please refer to the rating label on the back of the unit.DISCLAIMERALL INFORMATION AND THE TECHNICAL SPECIFICATIONS PRESENTED IN THIS USER’S MANUAL ARE THE PRESENTATION OF THE MANUFACTURER. SOLEUS INTERNATIONAL HAS NOT CONDUCTED INDEPENDENT TEST TO THE INFORMATION AND THE SPECIFICATIONS PRESENTED HEREWITHIN.PACKAGE CONTENTSHumidiBreeze Misting System Operating InstructionsWARNING : This fan is for use on 120 volts. The cord has a plug as shown in A. An adapter as shown in C is available for connecting three-blade grounding-type plugs to two-slot receptacles. The grounding lug ex-tending from the adapter must be connected to a per-manent ground such as a properly grounded outlet box. The adapter should not be used if a three-slot grounded receptacle is available.DO NOT DEFEAT THE SAFETY PURPOSE OF THE GROUNDED PLUG.MODELMT1-19-32 / MT1-19-33 Humidifying Capacity 25 Gallons per Day Water Tank Size 1 Gallon Power Consumption 78 WattsAir Flow Volume 353 CFM / 600m 3/h Power Source 120 V / 60 HZ Weight16.7 lbsDimensions (WxDxH)16.5”x11”x23.625”PRODUCT DIAGRAMOPERATING INSTRUCTIONS1) FILL THE WATER RESERVOIR - Pull the water reservoir drawer out from the back of the unit and fillthe water reservoir by pouring water into the drawer. Once you are finished filling the reservoir, close the drawer in the back of the unit. SEE FIGURE A BELOW.2) POWER ON THE HumidiBreeze - Plug the power cord into a three pronged grounded electrical outlet.Once the unit is plugged in, press the power button to turn on the HumidiBreeze. When power is “ON” the power button will light up blue in color. To turn off the HumidiBreeze, press the power button again.When the HumidiBreeze is “OFF” the blue light on the button will shut off.3) ADJUST THE HumidiBreeze POWER - Turn the control dial counter-clockwise to increase the power(increases misting power) Turn the control dial clockwise to decrease the power (decreases misting power).SEE FIGURE B BELOW.4) When the water bucket is empty, turn the unit off and refill the water bucket. DO NOT fill the waterbucket while the unit is on.TROUBLESHOOTINGMAINTENANCENote: Make sure power is off and the power cord is not plugged into an electrical outlet prior to performing any maintenance on the unit.1. Unplug the unit and let it cool completely.2. To keep the product clean, the outer shell may be cleaned with a soft, damp cloth. You may use a milddetergent if necessary. After cleaning, dry the unit with a soft cloth. CAUTION: DO NOT let liquid en-ter the product.3. DO NOT use alcohol, gasoline, abrasive powders, furniture polish, or rough brushes to clean the prod-uct. This may cause damage or deterioration to the surface of the product.4. DO NOT immerse the product in water.5. If the unit is wet, wait until the unit is completely dry before use.STORAGE1. Drain all of the water from the water reservoir. SEE FIGURE C.2. Store the product in a cool, dry location when not in use. Repack the unit in the original packaging to prevent dust and dirt buildup.Problem Possible ReasonSolutionNot WorkingNo PowerPlug in power cord to grounded threepronged outletBad Electrical Outlet Repair or change outletsLittle or No WaterMistCooling control valve is set too lowTurn the control dial counter-clockwiseto increase power.Water Tank is Empty Fill Water ReservoirLow Misting Power Cooling control valve is set too low Turn the control dial counter-clockwiseto increase power.Low voltage coming from electricaloutletRepair or change outlets Not Enough Air-flow Low voltage coming from electricaloutletRepair or change outletsFIGURE CWARRANTYOne Year Limited WarrantySoleus International Inc. warrants the accompanying Soleus Air HumidiBreeze to be free of defects in material and workmanship for the applications specified in its operation instruction for a period of ONE (1) year from the date of original retail purchase in the United States.If the unit exhibits a defect in normal use, Soleus International Inc. will, at its option, either repair or replace it, free of charge within a reasonable time after the unit is returned during the warranty period.As a condition to any warranty service obligation, the consumer must present this Warranty Certificate along with a copy of the original purchase invoice.THIS WARRANTY DOES NOT COVER:• Damage, accidental or otherwise, to the unit while in the possession of a consumer not caused by a defect in material or workmanship.• Damage caused by consumer misuse, tampering, or failure to follow the care and special handling provisions in the instructions.• Damage to the finish of the case, or other appearance parts caused by wear.• Damage caused by repairs or alterations of the unit by anyone other than those authorized by Soleus Interna-tional Inc.• Freight and Insurance cost for the warranty service.ALL WARRANTIES, INCLUDING ANY IMPLIED WARRANTY OF MERCHANT ABILITY ARE LIMITED TO ONE-YEAR DURATION OF THIS EXPRESS LIMITED WARRANTY. SOLEUS INTERNATIONAL INC. DISCLAIMS ANY LIABILITY FOR CONSEQUENTIAL OR INCIDENTAL DAMAGES AND IN NO EVENT SHALL SOLEUS INTERNATIONAL INC’S LIABILITY EXCEED THE RETAIL VALUE OF THE UNIT FOR BREACH OF ANY WRITTEN OR IMPLIED WARRANTY WITH RESPECT TO THIS UNIT.This warranty covers only new products purchased from our authorized dealers or retailers. It does not cover used, sal-vaged, or refurbished products.As some states do not allow the limitation or exclusion of incidental or consequential damages, or do not allow limitation on implied warranties, the above limitations and exclusions may not apply to you. This warranty gives you specific legal rights, and you may also have other rights that vary from state to state.For Technical Support and Warranty ServicePlease Call (888) 876-5387Or Write To:Soleus International Inc.20035 E. Walnut Dr. N.City of Industry, CA 91789 USA。
泰恩特新风面板说明书
泰恩特新风面板说明书
1、开机
新风系统通常是通过主机面板按键进行操作的,在使用前我们要先查看产品的使用说明书,了解面板上各个图标按建代表哪个功能键。
新风系统电源接通之后,我们可按下面板左下方或右下方的电源键,将新风系统开启。
2、功能设置
我们找到新风系统的模式按键或菜单按键,一般点击一下就会切换一个模式,例如新风系统有智能、恒湿、连续三种模式,我们点击一下模式按钮会出现智能模式,点击两下为恒湿模式等等。
我们选好模式之后,按加减键或上下键对其进行调整。
我们也可以按下面板上的单独功能按键,例如按下新风键或排风键等功能按键,再按加减键对其进行调节。
3、检查维护
新风系统使用久了也要定期进行检查维护,我们可以三个月就对其进行检查维护。
在维护时我们需按下新风系统电源键把新风系统关机。
接下来我们将风口的过滤网拆下来清洗干净,并将其重新安装回去。
除此之外,我们还需检查一下新风系统的其他零配件有没有出现磨损松动的问题,如果存在这些问题要及时维修处理。
- 1、下载文档前请自行甄别文档内容的完整性,平台不提供额外的编辑、内容补充、找答案等附加服务。
- 2、"仅部分预览"的文档,不可在线预览部分如存在完整性等问题,可反馈申请退款(可完整预览的文档不适用该条件!)。
- 3、如文档侵犯您的权益,请联系客服反馈,我们会尽快为您处理(人工客服工作时间:9:00-18:30)。
工作原理
Healthwind999新风系统是参考国家洁净室设计规范进行设计的---室内到室外采取微正压设计,正压一般不低于9.8Pa,至少不低于 4.98Pa。在密闭的居室内用风量稍大一些的风机向室内强制输送洁净新风,再由风量稍小一些的风机向室外排出原室内污浊空气,在室内 形成“新风流动场”,从而满足室内空气置换、满足人们随时能够呼吸新鲜洁净空气的需要。实施方案是:采用目前国际最先进的EC直流 高速无刷电机离心风机、依靠机械强力由专用管道向室内送风,另用专门设计的排风机向室外排出原室内污浊空气的方式强迫在系统内形 成新风流动场。在送风的同时对进入室内的空气进行新风过滤、灭毒、杀菌、增加负氧离子。排风经过主机时与新风进行热回收交换,回 收大部分能量通过新风送回室内,保证进入室内的空气是洁净的,以此达到室内空气净化环境的目的。
1.开/关
*控制系统整个电源的开关 *关机时记录“风速”、“负氧”、“杀菌”、“排风”、“热交换”、“自动”的工作状态并关机,再次按下“开关”按键时,恢复到 关机前所记录的工作状态。 *若关机后,按下“设置”使“自动”模式的环状图标依然亮着(自动模式被启用),此时当教室有人并且PM2.5较高或二氧化碳较高时, 新风机会自动开启,较低时自动关闭。 *若关机后,按下“设置”使“自动”模式环状图标熄灭(自动模式被停止),则无论环境如何变化,新风机都处于关机状态,须手动或 遥控器遥控开启。
用途和特点••••••••••••••••••••••••••••••••••••••••••••••••••••••••••••••••••••••••••••••••••••••••
5
安装方法••••••••••••••••••••••••••••••••••••••••••••••••••••••••••••••••••••••••••••••••••••••••••••
控制屏 高效率热交换器
外框 除臭氧过滤网
后盖板 高效HEPA网箱
新风蜗壳 排风蜗壳
活性炭网 初效网 静电除尘器
预过滤网
技术参数
型号
额定电压 额定频率 额定功率 额定风量 最高档噪音 CADR值(CFM)(0.538M3/H=1CFM) 适用面积 净重量 整机外形尺寸(长x宽x高)
healthwind999
7. 竣工验收 7.1 设备、系数、场地卫生是否清理。 7.2 运行2分钟后检查除尘器是否通电正常。 7.3 风机本身与风管是否有震动或噪音,有无漏风现象。风速是否达到设计要求。 7.4 除尘效果是否达标,现场测试室内出风口和室外颗粒物数据给客户确认。 7.5 填写竣工验收表客户确认。
结构简图
电视显示屏
5. 电源接入 电源接入方便,直接将电源线接至电源插座线板即可。
6. 通电检查 6.1 检查电源、电压是否符合要求(单相AC220V,50HZ). 6.2 检查电源插座是否良好。电源线是否达到要求 6.3 安装完成后,对照本手册“参数设置”逐项检查控制器设置。 6.4 电机试运行,接通电源后先启动机组,检查有无异常。
整机的清洁方法 13 ••••••••••••••••••••••••••••••••••••••••••••••••••••••••••••••••••••••••••••• 初滤异物的清洁方法 13 ••••••••••••••••••••••••••••••••••••••••••••••••••••••••••••••••••••• 滤网组件更换提示 14 •••••••••••••••••••••••••••••••••••••••••••••••••••••••••••••••••••••••••••••• 购买滤网组件 16 •••••••••••••••••••••••••••••••••••••••••••••••••••••••••••••••••••••••••••••••••••••• 故障及维护 17 •••••••••••••••••••••••••••••••••••••••••••••••••••••••••••••••••••••••••••••••••••••••••• 传感器的功能 18 •••••••••••••••••••••••••••••••••••••••••••••••••••••••••••••••••••••••••••••••••••••• 遥控器的使用 19 •••••••••••••••••••••••••••••••••••••••••••••••••••••••••••••••••••••••••••••••••••••• 锂电池的更换方法 20 •••••••••••••••••••••••••••••••••••••••••••••••••••••••••••••••••••••• •••••••
低噪
低噪音风机和内部消音处理,阻止了对现 场的干扰,整机除风机外无运动部件,控 制更合理。
独创
从系统构成,到空气过滤技术、热交换技 术,机组全钢板设计,最高使用寿命高达 15年,均为豪斯温特独创。
低价
新风净化达到医院手术室、芯片车间等洁 净室水平,价格只有15%~30% 。
简便
即插型过滤器设计,维护更方便,标准配 置变频直流无极变速控制器,任意调节风 量大小。
6
结构简图 8 •••••••••••••••••••••••••••••••••••••••••••••••••••••••••••••••••••••••••••••••••••••••••••••
技术参数 9 •••••••••••••••••••••••••••••••••••••••••••••••••••••••••••••••••••••••••••••••••••••••••••••
功能键的使用方法 11 •••••••••••••••••••••••••••••••••••••••••••••••••••••••••••••••••••••••••
清洁与维护•••••••••••••••••••••••••••••••••••••••••••••••••••••••••••••••••••••••••••••••••••••••••
a. 风管布置应尽量采取直管,以使新风机尽量贴墙安装。若确实需要沿墙铺设管道,也要爱注意室内装修和布局美观。 b. 风管弯头不宜过多,转角半径≥60°,尽量避免管道突变径,以减少沿程压力损失。 c. 风管走向遇柱或梁障碍时,采用绕柱或绕梁的方式。 d. 风口与机体连接处于平整、紧密、无滑动,并用密封胶粘牢。避免松弛和漏风现象。且不宜设计急弯,避免产生噪音。 e. 所有支、吊架不能妨碍连接,并做好防锈处理。 f. 风管口连接法兰应平整紧密。
Healthwind新风系统设计是由国际空气净化行业设计大师结合多年国际实用经验,认真考虑中国实际空气室内室外具体情况,认为
只有洁净室设计规范才能符合中国目前居室空气质量要求。本设计采取了智能化控制模式,只要室内空气质量co2/tvoc/pm2.5任何一项低
于国家优质空气质量标准,系统就会自动立即启动,进行空气室内室外置换,直到室内空气质量完全达到和超过国家优质空气质量标准, 系统才停止运转。我公司依据商用环境需求,不仅配置了高端智能控制系统,远程监控新风系统;并根据国家大数据要求,全国独家提供 了强大的大数据长期服务,向顾客实时提供新风系统运行情况,实时显示居室环境温度、湿度与过滤装置报警情况、空气洁净度状态等。
用途与特点
解决学校、办公室,大商场,会议室,公共场所空气质量低劣的问题。
超净
多级过滤,标准配置初效/高效 /HEPA/ 离子净化装置,净化效率99.9% 。洁净 新风引入,保持室内微正压,保持室内高 洁净度。
节能
新风与排风热交换,减小由于换气造成的 室内温度差。
节电
低阻力过滤器,高效风机、变频调节,使 风机电耗比常规低60%以上。
220V 50Hz 360W 1500m³/h 48dB 1500m³/h 200m² 85kg 800×450×2100mm
以上表格内各项性能参数按现行GB/T18801、GB4706.1、GB4706.45 要求测定,为出厂前测得,仅供参考。
使用方法
滤网组件的更换和安装方法
图1
1.用螺丝刀卸 下右下侧挡板上 的固定螺丝.注意: 在拆卸滤网挡板 前必须先断开电 源。(如图1)
安全规则
感谢使用本款新风机!
使用产品前请仔细阅读使用说明手册
1.非专业人员或者未授权维修人员,不得自行修炼或者改造本机. 2.开机使用前请将滤网包装袋拆除,否则对电机造成损坏. 3.严禁用湿手操作,以免点击造成伤害. 4.电源线老化、打结、插头损坏应立即停止使用,必须由制造厂或维修部或专职人员来更换. 5.不得带电清洗、维护和移动本机. 6.在使用本机时,请关闭门窗. 7.长时间不使用时,请拔掉电源插头. 8.请不要在空气进、出口处插入异物,因机内装有滤网高速转动的风轮,防止意外伤害或造成机器损坏. 9.请勿用有机溶剂清洗本机. 10.严禁在有易燃易爆气体的环境中使用本机,并避免阳光长期直射本机. 11.请勿把本机置放在倾斜或其他不平稳的地方,以免机器摔倒,造成对机体或机体内部件的损坏. 12.禁止用于浴室等湿气较重且易淋到水的场所,防止触电. 13.请不要在有油烟的环境中使用本机,如厨房。本机并非针对过滤油烟和油污而设计. 14.本机适用于室内,请勿在户外适用.
பைடு நூலகம்
安装方法
安装流程:
位
墙
机
置
体
体
确
开
安
定
洞
装
风
电
通
竣
管
源
电
工
安
接
检
验
装
入
查
收
1. 安装位置的确定 1.1 确定安装位置 1.2 选择能够承受新风机3倍重量的区域。新风机进、出风口不能有障碍物阻挡。
2. 墙体钻孔 2.1 新砌建筑应预留新风孔。旧建筑打通风孔和机体螺栓固定孔, 2.2 开孔位置应尽量远离房梁、门窗等,以免破坏墙体承重或钢筋结构。 2.3 墙外钻孔应比内孔略微向下2~5mm,防止外部雨水灌入室内。
