Linux驱动移植指南
rtl8188ce无线模块驱动移植到arm Linux平台

rtl8188ce无线模块驱动移植到arm Linux平台一、系统arm Linux 内核2.6.28.6 编译器版本4.2.2(内核版本比较老需要自己编译模块驱动,新内核的话一般内核中可以直接配置模块驱动)二、驱动下载:官网地址/ 下载驱动为RTL8188CE-VAU (Software)RTL8188C_8192C_USB_linux_v4.0.2_9000.20130911.zip三、解压用unzip命令解压 RTL8188C_8192C_USB_linux_v4.0.2_9000.20130911.zip 解压出来的为RTL8188C_8192C_USB_linux_v4.0.2_9000.20130911 文件夹包含10来个文件夹有驱动,工具等。
四、编译:1、修改Makefile修改部分如下:关闭省电模式修改成 CONFIG_POWER_SAVING = n选择平台CONFIG_PLATFORM_I386_PC = nCONFIG_PLATFORM_TI_AM3517 = nCONFIG_PLATFORM_ANDROID_X86 = nCONFIG_PLATFORM_JB_X86 = nCONFIG_PLATFORM_ARM_S3C2K4 = yCONFIG_PLATFORM_ARM_PXA2XX = nCONFIG_PLATFORM_ARM_S3C6K4 = nCONFIG_PLATFORM_MIPS_RMI = nCONFIG_PLATFORM_RTD2880B = nCONFIG_PLATFORM_MIPS_AR9132 = nCONFIG_PLATFORM_RTK_DMP = nCONFIG_PLATFORM_MIPS_PLM = nCONFIG_PLATFORM_MSTAR389 = nCONFIG_PLATFORM_MT53XX = nCONFIG_PLATFORM_ARM_MX51_241H = nCONFIG_PLATFORM_FS_MX61 = nCONFIG_PLATFORM_ACTIONS_ATJ227X = nCONFIG_PLATFORM_TEGRA3_CARDHU = nCONFIG_PLATFORM_TEGRA4_DALMORE = nCONFIG_PLATFORM_ARM_TCC8900 = nCONFIG_PLATFORM_ARM_TCC8920 = nCONFIG_PLATFORM_ARM_TCC8920_JB42 = nCONFIG_PLATFORM_ARM_RK2818 = nCONFIG_PLATFORM_ARM_TI_PANDA = nCONFIG_PLATFORM_MIPS_JZ4760 = nCONFIG_PLATFORM_DMP_PHILIPS = nCONFIG_PLATFORM_TI_DM365 = nCONFIG_PLATFORM_MN10300 = nCONFIG_PLATFORM_MSTAR_TITANIA12 = nCONFIG_PLATFORM_MSTAR_A3 = nCONFIG_PLATFORM_ARM_SUNxI = nCONFIG_PLATFORM_ARM_SUN6I = nCONFIG_DRVEXT_MODULE = n默认为CONFIG_PLATFORM_I386_PC = y这是平台的配置,根据具体情况配置,我的是2440核心板所以把CONFIG_PLATFORM_I386_PC = n改成这样,CONFIG_PLATFORM_ARM_S3C2K4 = y。
USB无线网卡的Linux驱动移植

( )增 加 D OP支 持 2 H
操 作 系 统 为 Wid ws Ln x Ma _ 。 n o / iu / c】 ]
1 移 植 要 求
移 植 目 标 是 在 原 有 ARM 监 测 系 统 的 基 础 上 实 现
配置 : ro @ l ah s ts] ma eme u o f o t o lo t e t # c k n c ni g
达 1O Mb s I E 8 2 1 n ; 作 模 式 Ad— Ho 5 p (E E 0 . 1 ) 工 c和
I fa tu te 选 ; 密 特 性 为 6 / 2 nr sr cr 可 加 4 1 8位 W E WP P、 A/
文 件 替 换 完 毕 进 行 内核 编 译 :
ma l ke z mag e
② 修 改 Ma ei 。 k fe l
修 改 第 8行 , 置 可 执 行 文 件 安 装 路 径 : 设
PREF X一 / s/o a/ rls I u r lc lwiees
生 成 内核 zma e 下 载 到 目标 板 。在 内核 编译 的过 I g后 程 中 , 会 出现 许 多 错 误 , 要 是 C O语 法 错 误 、 调 用 还 主 9 所 函 数 数 据 类 型不 匹 配 、 符 号 未 定 义 等 问题 。 主要 的 修 改 段
选 择 [ ei r e]+- ew rigsp ot- [ t D v eD i r- [ t okn u p r] ̄ Ne— c v N - w ri pi s。务 必 选 中“ ak t ok t和 “P: ok got n] n o P c e sc e” I DH—
linux下安装USB无线网卡驱动

安装方法及步骤:一、准备工作2、到/projects/ndiswrapper下载最新的ndiswrapper包,我的版本是ndiswrapper-1.52.tar.gz3、准备好网卡在Winxp下的驱动程序。
驱动程序最好是最新的,指定给XP用的。
二、安装及配置1、安装(1)解压:tar -zxvf ndiswrapper-1.52.tar.gz(2)进入ndiswrapper-1.52:cd ndiswrapper-1.52(3)编译:make//在此操作之前必需先把编译环境搭建好,即:安装好开发环境。
(4)安装:make install //如果不采取默认的安装路径,则可以用。
configure ——prefix="/etc/local"来指定安装目录。
//此目录是自建。
(5)查看安装后的版本ndiswrapper -v | grep //此处似乎不对。
如安装成功则显示version: 1.51(6)获取该无线网卡的WindowsXP驱动,(7)进入该驱动所在目录:cd /home/tsm/dwl_g520(8)安装无线网卡驱动:ndiswrapper -i net5211.inf(9)查看驱动是否安装:ndiswrapper -l//如:显示net5211(驱动名称):driver installed(10)写入配置文件:ndiswrapper -mndiswrapper -mandiswrapper -mi(11)启动后模块自动加载:modprobe ndiswrapper注:安装出现问题的仔细按照下面小问题的步骤会解决问题的:小问题:我是用ndiswrapper安装windows下的inf驱动的sony本本384M内存,4M集成显存,usb1.0接口,跑windows速度比较慢,就像装个轻量级的操作系统。
无线网卡的ID是0cf3:1006,查询得到芯片对应驱动为ar9271.fw装过几次puppy(4.0、4.1、5.1)多是因为usb无线网卡无法驱动只好作罢。
ARM板TL_WN725N usb wifi Linux Driver 移植
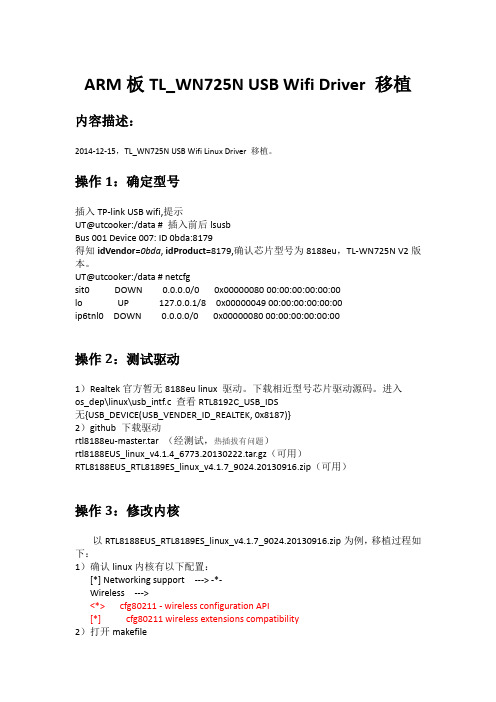
ARM板TL_WN725N USB Wifi Driver 移植内容描述:2014-12-15,TL_WN725N USB Wifi Linux Driver 移植。
操作1:确定型号插入TP-link USB wifi,提示UT@utcooker:/data # 插入前后lsusbBus 001 Device 007: ID 0bda:8179得知idVendor=0bda, idProduct=8179,确认芯片型号为8188eu,TL-WN725N V2版本。
UT@utcooker:/data # netcfgsit0 DOWN 0.0.0.0/0 0x00000080 00:00:00:00:00:00lo UP 127.0.0.1/8 0x00000049 00:00:00:00:00:00ip6tnl0 DOWN 0.0.0.0/0 0x00000080 00:00:00:00:00:00操作2:测试驱动1)Realtek官方暂无8188eu linux 驱动。
下载相近型号芯片驱动源码。
进入os_dep\linux\usb_intf.c 查看RTL8192C_USB_IDS无{USB_DEVICE(USB_VENDER_ID_REALTEK, 0x8187)}2)github 下载驱动rtl8188eu-master.tar (经测试,热插拔有问题)rtl8188EUS_linux_v4.1.4_6773.20130222.tar.gz(可用)RTL8188EUS_RTL8189ES_linux_v4.1.7_9024.20130916.zip(可用)操作3:修改内核以RTL8188EUS_RTL8189ES_linux_v4.1.7_9024.20130916.zip为例,移植过程如下:1)确认linux内核有以下配置:[*] Networking support --->-*-Wireless ---><*> cfg80211 - wireless configuration API[*] cfg80211 wireless extensions compatibility2)打开makefileCONFIG_PLATFORM_I386_PC = y 改为CONFIG_PLATFORM_I386_PC = nCONFIG_PLATFORM_ARM_S3C2K4 =n 改CONFIG_PLATFORM_ARM_S3C2K4 = y 配置编译链及内核源码地址ifeq ($(CONFIG_PLATFORM_ARM_S3C2K4), y)EXTRA_CFLAGS += -DCONFIG_LITTLE_ENDIANARCH := armCROSS_COMPILE := /opt/FriendlyARM/gcc-toolschain/4.5.1/bin/arm-linux-KSRC := /svn/pengdonghui/Android_maize/linux-3.5-newEndif3)make –j32后得到8188eu.ko放入开发板:adb push 8188eu.ko /data加载驱动模块:UT@utcooker:/data # insmod 8188eu.ko[18668.230000] bFWReady == _FALSE call reset 8051...[18668.260000] usbcore: registered new interface driver rtl8188eu 查看网络设备:UT@utcooker:/data # ifconfig -a…wlan0 Link encap:Ethernet HWaddr 08:57:00:98:6B:31BROADCAST MULTICAST MTU:1500 Metric:1RX packets:0 errors:0 dropped:0 overruns:0 frame:0TX packets:0 errors:0 dropped:0 overruns:0 carrier:0collisions:0 txqueuelen:1000RX bytes:0 (0.0 B) TX bytes:0 (0.0 B)此时,此时能看到网络接口,Android界面setting 无法打开wifi。
Linux2.6内核移植系列教程
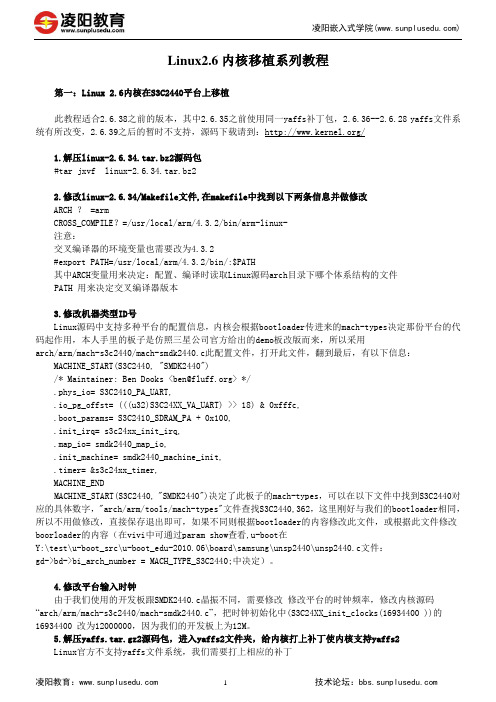
Linux2.6内核移植系列教程第一:Linux 2.6内核在S3C2440平台上移植此教程适合2.6.38之前的版本,其中2.6.35之前使用同一yaffs补丁包,2.6.36--2.6.28 yaffs文件系统有所改变,2.6.39之后的暂时不支持,源码下载请到:/1.解压linux-2.6.34.tar.bz2源码包#tar jxvf linux-2.6.34.tar.bz22.修改linux-2.6.34/Makefile文件,在makefile中找到以下两条信息并做修改ARCH ? =armCROSS_COMPILE?=/usr/local/arm/4.3.2/bin/arm-linux-注意:交叉编译器的环境变量也需要改为4.3.2#export PATH=/usr/local/arm/4.3.2/bin/:$PATH其中ARCH变量用来决定:配置、编译时读取Linux源码arch目录下哪个体系结构的文件PATH 用来决定交叉编译器版本3.修改机器类型ID号Linux源码中支持多种平台的配置信息,内核会根据bootloader传进来的mach-types决定那份平台的代码起作用,本人手里的板子是仿照三星公司官方给出的demo板改版而来,所以采用arch/arm/mach-s3c2440/mach-smdk2440.c此配置文件,打开此文件,翻到最后,有以下信息:MACHINE_START(S3C2440, "SMDK2440")/* Maintainer: Ben Dooks <ben@> */.phys_io= S3C2410_PA_UART,.io_pg_offst= (((u32)S3C24XX_VA_UART) >> 18) & 0xfffc,.boot_params= S3C2410_SDRAM_PA + 0x100,.init_irq= s3c24xx_init_irq,.map_io= smdk2440_map_io,.init_machine= smdk2440_machine_init,.timer= &s3c24xx_timer,MACHINE_ENDMACHINE_START(S3C2440, "SMDK2440")决定了此板子的mach-types,可以在以下文件中找到S3C2440对应的具体数字,"arch/arm/tools/mach-types"文件查找S3C2440,362,这里刚好与我们的bootloader相同,所以不用做修改,直接保存退出即可,如果不同则根据bootloader的内容修改此文件,或根据此文件修改boorloader的内容(在vivi中可通过param show查看,u-boot在Y:\test\u-boot_src\u-boot_edu-2010.06\board\samsung\unsp2440\unsp2440.c文件:gd->bd->bi_arch_number = MACH_TYPE_S3C2440;中决定)。
RT3070驱动移植

RT3070驱动移植无线网卡为RT3070,驱动分为STA驱动和SoftAP驱动两种,STA驱动支持无线网卡工作在STA模式下,而SoftAP的驱动支持无线网卡工作在软AP的模式下,可以作为一个软的接入点。
STA驱动为2010_0831_RT3070_Linux_STA_v2.3.0.0_DPO.bz2。
SoftAP的驱动是:2010_0203_RT3070_SoftAP_v2.4.0.1_DPA.bz2。
需要移植STA驱动和SoftAP驱动,两款驱动的移植步骤差不多。
下边首先对STA驱动进行移植。
STA驱动的移植#tar jxvf 2010_0831_RT3070_Linux_STA_v2.3.0.0_DPO.bz2cd 2010_0831_RT3070_Linux_STA_v2.3.0.0_DPO修改原有的Makefile文件如下(只给出需要修改的部分,“-”表示删除的行,“+”表示添加的行):+#Makefile for RT3070 on MBC-SAM9G45+#2010_11_13 by liyiRT28xx_MODE = STATARGET = LINUXCHIPSET = 3070-PLATFORM = PC+PLATFORM = IXPifeq ($(PLATFORM),IXP)-LINUX_SRC = /project-CROSS_COMPILE = arm-linux-+LINUX_SRC = /home/Embest_SAM9G45/linux-2.6.30+CROSS_COMPILE = /usr/local/arm2007q1/bin/arm-none-linux-gnueabi-endif修改os/linux文件夹中的config.mk文件,需要修改的地方如下(只给出需要修改的部分):# Support Wpa_Supplicant- HAS_WPA_SUPPLICANT=n+HAS_WPA_SUPPLICANT=y# Support Native WpaSupplicant for Network Maganger-HAS_NATIVE_WPA_SUPPLICANT_SUPPORT=n+HAS_NATIVE_WPA_SUPPLICANT_SUPPORT=yifeq ($(PLATFORM),IXP)- WFLAGS += -DRT_BIG_ENDIAN+#WFLAGS += -DRT_BIG_ENDIANendififeq ($(PLATFORM),IXP)EXTRA_CFLAGS := -v $(WFLAGS) -I$(RT28xx_DIR)/includeendififeq ($(PLATFORM),IXP)- CFLAGS := -v -D__KERNEL__ -DMODULE -I$(LINUX_SRC)/include-I$(RT28xx_DIR)/include -Wall -Wstrict-prototypes -Wno-trigraphs -O2 -fno-strict-aliasing -fno-common -Uarm -fno-common -pipe -mapcs-32-D__LINUX_ARM_ARCH__=5 -mcpu=xscale -mtune=xscale -malignment-traps -msoft-float $(WFLAGS)- EXTRA_CFLAGS := -v $(WFLAGS) -I$(RT28xx_DIR)/include- export CFLAGS-+endif修改完成以后,通过以下命令编译:make ARCH=arm KBUILD_NOPEDANTIC=1如果不加KBUILD_NOPEDANTIC=1将出现CFLAGS was changed in …. Fix it to use EXTRA_CFLAGS的错误,编译不能通过。
文档:、linux-308内核I2C触摸屏移植

Linux3.0.8平台搭建移植文档——I2C触摸屏移植1.I2C子系统goodix电容屏采用I2C接口与处理器连接,我们要首先确保linux内核拥有对I2C子系统的支持,下面我们从子系统的配置和电容屏驱动两个方面进行移植修改1)配置I2C子系统支持#make menuconfigDevice Drivers ---><*> I2C support --->[*] Enable compatibility bits for old user-space (NEW)<*> I2C device interface< > I2C bus multiplexing support (NEW)[*] Autoselect pertinent helper modules (NEW)I2C Hardware Bus support --->进入I2C Hardware Bus support选项,选中以下内容:*** I2C system bus drivers (mostly embedded / system-on-chip) ***< > Synopsys DesignWare (NEW)<*> GPIO-based bitbanging I2C< > OpenCores I2C Controller (NEW)< > PCA9564/PCA9665 as platform device (NEW)<*> S3C2410 I2C Driver< > Simtec Generic I2C interface (NEW)...2.GOODIX电容屏移植1)添加goodix电容屏驱动将“goodix_touch.c”文件copy到drivers/input/touchscreen/目录下,并将"goodix_touch.h"、"goodix_queue.h"文件copy到include/linux/目录下,并修改Kconfig文件及Makefile文件支持触摸屏驱动的配置和编译#vi driver/input/touchscreen/Kconfig在config TOUCHSCREEN_TPS6507X选项的后面添加以下内容:config TOUCHSCREEN_GOODIXtristate "GOODIX based touchscreen"depends on I2ChelpIt is a android driver to support Gooidx's touchscreen whose nameis guitar on s5pv210 platform. The touchscreen can support multi-touch not more than two fingers.Say Y here to enable the driver for the touchscreen on theS5V SMDK board.If unsure, say N.To compile this driver as a module, choose M here:the module will be called goodix_touch.ko.#vi driver/input/touchscreen/Makefile在文件最后添加如下内容:obj-$(CONFIG_TOUCHSCREEN_GOODIX) += goodix_touch.o2)添加i2c_board_info资源(电容屏)#vi arch/arm/mach-s5pv210/mach-smdkv210.c在smdkv210_i2c_devs0结构体数组定义中添加以下内容:...{ I2C_BOARD_INFO("24c08", 0x50), }, /* Samsung S524AD0XD1 */ { I2C_BOARD_INFO("wm8580", 0x1b), },{I2C_BOARD_INFO("Goodix-TS", 0x55),.irq = IRQ_EINT(4),},...3)配置电容屏选项#make menuconfigDevice Drivers --->Input device support --->...[*] Touchscreens ---><*> GOODIX based touchscreen4)make将在arch/arm/boot/下生成编译好的可执行程序zImage下载到开发板即可,执行命令“cat /dev/input/event0”,然后用手触摸屏幕会在终端看到输出打印的乱码信息,表示移植成功,如果没有打印信息或没有“/dev/input/event0”这个设备说明移植失败。
ZLG IMX280A KERNEL - 五步曲之四:linux kernel 4.14.1移植(下篇)
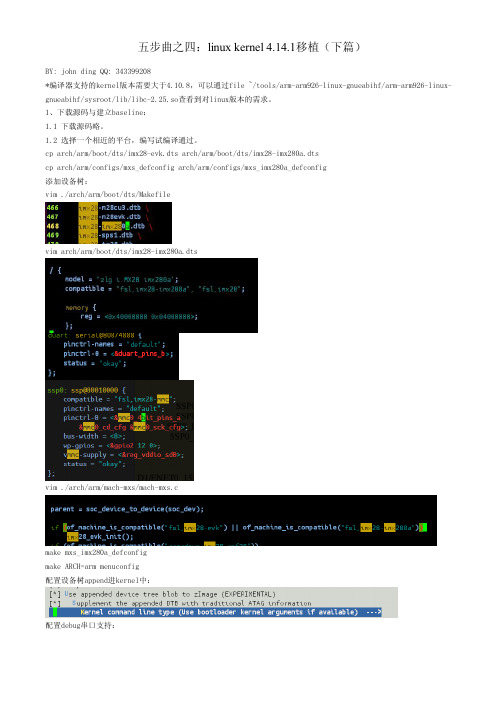
五步曲之四:linux kernel 4.14.1移植(下篇)BY: john ding QQ: 343399208*编译器支持的kernel版本需要大于4.10.8,可以通过file ~/tools/arm-arm926-linux-gnueabihf/arm-arm926-linux-gnueabihf/sysroot/lib/libc-2.25.so查看到对linux版本的需求。
1、下载源码与建立baseline:1.1 下载源码略。
1.2 选择一个相近的平台,编写试编译通过。
cp arch/arm/boot/dts/imx28-evk.dts arch/arm/boot/dts/imx28-imx280a.dtscp arch/arm/configs/mxs_defconfig arch/arm/configs/mxs_imx280a_defconfig添加设备树:vim ./arch/arm/boot/dts/Makefilevim arch/arm/boot/dts/imx28-imx280a.dtsvim ./arch/arm/mach-mxs/mach-mxs.cmake mxs_imx280a_defconfigmake ARCH=arm menuconfig配置设备树append进kernel中:配置debug串口支持:*从串口驱动代码可知生成的串口名为ttyAMAx。
配置nand(gpmi支持,mtd支持,ubi支持,ubifs支持):配置mmc(sdio支持,mmc支持,initrd支持(注意initramfs与initrd的区别)):去掉lcd,fb等相关支持:设置编译器兼容性:选上浮点运算单元支持:cp .config arch/arm/configs/mxs_imx280a_defconfig设备树与menuconfig精简:vim arch/arm/boot/dts/imx280a.dtsmake mxs_imx280a_defconfigcp .config arch/arm/configs/mxs_imx280a_defconfig./build.sh:编译kernel。
USB驱动移植教程

USB驱动移植教程一.USB驱动框架在Linux系统中,提供了主机侧和设备侧视角的USB驱动框架,这里,仅仅讲解主机侧角度看到的USB驱动框架。
从主机侧的角度而言,需要编写的USB驱动程序包括主机控制器驱动和设备驱动两类。
USB主机控制器驱动程序控制插入其中的USB设备,而USB设备驱动程序控制该设备如何作为设备与主机通信。
在USB主机控制器驱动和USB设备驱动之间还有一层叫USB核心层。
USB核心负责USB驱动管理和协议处理工作,它通过定义一些数据结构、宏和功能函数,向上为USB设备驱动提供编程接口,向下为USB主机控制器驱动提供编程接口;通过全局变量维护整个系统的USB设备信息,完成设备热插拔控制、总线数据传输控制等。
说了那么多,无图无真相啊~~Linux USB主机侧驱动总体框架二.USB驱动移植步骤1.S5PV210主机控制驱动的移植USB主机控制器有3种规范,UHCI(Universal Host Controller Interface),这种规范主要是Intel、Via芯片公司提供支持PC主板的;OHCI(Open Host Controller Interface),这种规范是微软提出来的,主要应用在非PC系统上的嵌入式领域上的USB芯片;EHCI(Enhanced Host Controller Interface),这种后来为提高USB速度而提出的规范,它支持最高速度为480Mbps。
在《S5PV210_UM_REV1.1》手册上搜索OHCI关键词,会发现下面一段话这表明S5PV210这款CPU支持一个USB主机接口,同时支持EHCI和OHCI这两种规范,支持USB1.1和USB2.0规范,支持最高的外设传输速率为480Mbps。
注意了,它并不支持USB3.0规范的USB设备,所以做测试的时候,千万不要拿USB3.0规范的USB设备去测试。
2.1移植ohci-s5p驱动打开内核目录:driversusbhost,发现Linux系统提供了大量的主机控制器驱动,找遍所有平台,都没有找到ohci-s5p.c源码。
linux系统下安装显卡驱动程序

前言:当用户执行下列操作有不能执行的时候或许是权限不够。
遇到这个问题可以用命令:[ilykty@bogon ~] su root #切换到root用户password : 输入root密码[root@localhost ~] chmod 777 文件名赋予文件最大权限。
linux 安装显卡驱动程序:1、百度输入nvidia or amd 找到官网2、在官网中找到显卡驱动程序(包括显卡型号、操作系统位数)如下图3、点击搜索、进入下载页面。
但是有时候会出现网页。
可能因为31M太大,网页会出现未能响应的情况。
所以在点前一个按钮的时候可以选择右键。
使用迅雷下载连接4、复制下载包到linux 目录下面。
可以用u盘考,推荐使用winSCP 工具。
这个在windows和linux系统直接传送文件还是很好用的。
当然还有好用的远程执行linux 命令的工具——putty(1-4步是在windows系统下完成的)5、linux下切换到命令行页面:init 36、执行安装命令[root@localhost ~] sh NVIDIA-Linux-x86-,系统弹出安装页面如果出现错误报警如:unable to find the development tool 'cc' in your path 需要安装GCC 。
错误原因是我这里没有安装gcc 编译器。
如果没有报错请跳过番外篇1和番外篇2番外篇1:关于gcc编译器gcc 是什么呢?我的理解是一个编译器。
来运行nvidia 编写的显卡驱动程序。
后来我在安装配置tomcat6服务的时候,我发现如果没有安装gcc也不能执行/etc/init.d/tomcat6的文件。
关于怎么安装tomcat6并配置成开机启动的服务我将在下一篇百度文库中介绍。
---------------------------------------------------------------------------------------------在debian系统中有这样的解决方法:一、下载NVIDIA-Linux-x86-二、sh NVIDIA-Linux-x86-1、报错:没安装binutils,apt-get intall binutils2、报错:No precompiled kernel interface was found to match your kernel..apt-get install3、上一步安装后仍然报错,继续往下走:unable to find the development tool 'cc' in your path;please make sure that you have the package 'gcc' installed.If gcc is installed on your system,then please check that 'cc' is in your PATH.apt-get install gcc4、unable to find the development tool 'make' in your path……apt-get install make5、继续:The compiler used to compile the kernel (gcc 4.1) does not exactly match thecurrent compiler (gcc 4.2). The Linux 2.6 kernel module loader rejects kernel modules built with a version of gcc that does not exactly match that of the compiler used to build the running kernel.---------------------------------------------------------------------------------------------------------------------但是我的并不是德班的系统。
Tiny-S3C6410_Linux下LED灯驱动移植过程
UT-S3C6410 ARM11 Linux 下的LED驱动一、实验环境操作系统:fedora13交叉编译环境:arm-Linux-gcc 或以上,6410板子内核源码路径在:忘了,需要厂家给的内核源代码硬件平台:S3C6410开发板(其他类型的开发板也可以注意配置GPIO)注:交叉编译环境一定要装好,一般的开发板给的配套资料中都会有,安装过程也都有详细的过程,如果没有,亲,你只有自己解决了。
也可以联系我(****************),泪奔支持你们。
二、实验原理控制LED是最简单的一件事情,就像学C语言时候写的“hello world”程序一样,是一个入门的程序。
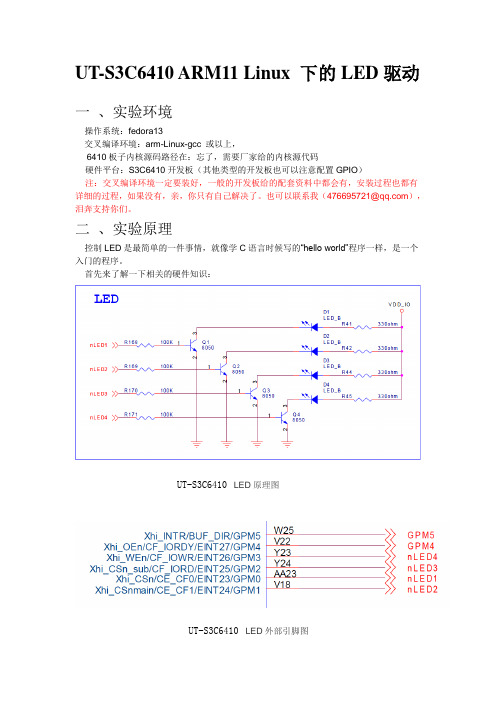
首先来了解一下相关的硬件知识:UT-S3C6410LED原理图UT-S3C6410LED外部引脚图从上面的原理图可以得知,LED与CPU引脚的连接方法如下,高电平点亮。
LED1 -GPM0LED2 -GPM1LED3 -GPM2LED4 -GPM3从数据手册可以找到相应的控制方法。
这里我们以LED1为例,介绍一下LED1的操作方法,其他的类似,请大家自行分析。
通过上面可以得知,需要先将GPM0设置为输出方式。
将寄存器GPMCON低四位配置成0001。
然后将GPMDAT寄存器的第0位置1灯亮,置LED0灯亮,开发板上有四个LED所以要对GPMDAT的低四位进行操作,就可以实现对灯的亮灭操作了。
三、实验步骤1、编写驱动程序mini6410_leds.c#include <linux/miscdevice.h>#include <linux/delay.h>#include <asm/irq.h>//#include <mach/regs-gpio.h>#include <mach/hardware.h>#include <linux/kernel.h>#include <linux/module.h>#include <linux/init.h>#include <linux/mm.h>#include <linux/fs.h>#include <linux/types.h>#include <linux/delay.h>#include <linux/moduleparam.h>#include <linux/slab.h>#include <linux/errno.h>#include <linux/ioctl.h>#include <linux/cdev.h>#include <linux/string.h>#include <linux/list.h>#include <linux/pci.h>#include <asm/uaccess.h>#include <asm/atomic.h>#include <asm/unistd.h>#include <mach/map.h>#include <mach/regs-clock.h>#include <mach/regs-gpio.h>#include <plat/gpio-cfg.h>#include <mach/gpio-bank-e.h>#include <mach/gpio-bank-k.h>#define DEVICE_NAME "leds"static long sbc2440_leds_ioctl(struct file *filp, unsigned int cmd, unsigned long arg) {switch(cmd) {unsigned tmp;case 0:case 1:if (arg > 4) {return -EINVAL;}tmp = readl(S3C64XX_GPKDAT);tmp &= ~(1 << (4 + arg));tmp |= ( (!cmd) << (4 + arg) );writel(tmp, S3C64XX_GPKDAT);//printk (DEVICE_NAME": %d %d\n", arg, cmd); return 0;default:return -EINVAL;}}static struct file_operations dev_fops = {.owner = THIS_MODULE,.unlocked_ioctl = sbc2440_leds_ioctl,};static struct miscdevice misc = {.minor = MISC_DYNAMIC_MINOR,.name = DEVICE_NAME,.fops = &dev_fops,};static int __init dev_init(void){int ret;{unsigned tmp;tmp = readl(S3C64XX_GPKCON);tmp = (tmp & ~(0xffffU<<16))|(0x1111U<<16); writel(tmp, S3C64XX_GPKCON);tmp = readl(S3C64XX_GPKDAT);tmp |= (0xF << 4);writel(tmp, S3C64XX_GPKDAT);}ret = misc_register(&misc);printk (DEVICE_NAME"\tinitialized\n");return ret;}static void __exit dev_exit(void){misc_deregister(&misc);}module_init(dev_init);module_exit(dev_exit);MODULE_LICENSE("GPL");MODULE_AUTHOR("FriendlyARM Inc.");(1)把Hello,Module 加入内核代码树,并编译一般编译2.6 版本的驱动模块需要把驱动代码加入内核代码树,并做相应的配置,如下步骤(注意:实际上以下步骤均已经做好,你只需要打开检查一下直接编译就可以了):Step1:编辑配置文件Kconfig,加入驱动选项,使之在make menuconfig 的时候出现打开linux-2.6.38/drivers/char/Kconfig 文件,添加如图所示:#====================cgf add===================================== config MINI6410_LEDStristate "LED Support for Mini6410 GPIO LEDs"depends on CPU_S3C6410default yhelpThis option enables support for LEDs connected to GPIO lineson Mini6410 boards.#================================================================== 保存退出,这时在linux-2.6.38 目录位置运行一下make menuconfig 就可以在DeviceDrivers Character devices 菜单中看到刚才所添加的选项了,按下空格键将会选择为<M>,此意为要把该选项编译为模块方式;再按下空格会变为<*>,意为要把该选项编译到内核中,在此我们选择<M>,如图,如果没有出现,请检查你是否已经装载了缺省的内核配置文件,(2)Makefile文件Step2:通过上一步,我们虽然可以在配置内核的时候进行选择,但实际上此时执行编译内核还是不能把mini6410_leds.c编译进去的,还需要在Makefile 中把内核配置选项和真正的源代码联系起来,打开linux-2.6.38-cgf/drivers/char/Makefile,obj-$(CONFIG_MINI6410_LEDS) += mini6410_leds.o添加并保存退出Step3:这时回到linux-2.6.38 源代码根目录位置,执行make modules,就可以生成我们所需要的内核模块文件drivers/char/mini6410_leds.ko 了,注意:执行make modules 之前,必须先执行make zImage,只需一次就可以了。
WiFi驱动移植到Linux

linux下移植之WIFI驱动2010-05-14 22:271.前言硬件平台: imx27+sd8686软件平台: linux内核: 2.6.272.移植思想1, WIFI 模块本身和 cpu 之间的接口;我们的模块和 cpu 之间的接口是 sdio 的,也就是说必须要先保证SDIO 本身是工作的,与SD卡,MMC属于同类型。
主要用到这几个GPIO引脚SD0...SD3,SD2_CMD,SD2_CLK,以及复位引脚PB24.2, WIFI 模块本身的上电时序;模块都有它自己的规律,所以必须要根据 spec 了解它本身的上电过程,严格遵守;3,以太网接口的创建;我们的 WIFI 模块本身是建立在 SDIO 口之上的,而对上都是提供以太网接口的,所以必须要保证这个接口以及创建;4,特殊处理;不同的模块都有它特别的地方,比如我们用的是 8686 和 compo 也就是说它和蓝牙共用天线,所以需要在初始化的时候做特殊的处理,发送特殊的命令,才能工作;3.移植过程1,sdio本身是通过gpio口模拟的,所以需要对gpio口进行配置;static mfp_cfg_t littleton_mmc3_pins[] = {GPIO7_2_MMC3_DAT0,GPIO8_2_MMC3_DAT1,GPIO9_2_MMC3_DAT2,GPIO10_2_MMC3_DAT3,GPIO103_MMC3_CLK,GPIO105_MMC3_CMD,};2,wifi模块本身的初始化;#define MFP_WIFI_V18_ENABLE (GPIO26_GPIO)#define MFP_WLAN_RESETN (GPIO99_GPIO)#define WIFI_WAKEUP_HOST (GPIO104_GPIO) /*error must be changed*/#define WLAN_ENABLE_PIN 26#define WLAN_RESET_PIN 99#define M200_B#ifdef M200_B#define BT_RESET_PIN EXT1_GPIO(1)#define BT_RESET_GPIO (GPIO1_2_GPIO)#else#define BT_RESET_GPIO (GPIO6_2_GPIO)#define BT_RESET_PIN EXT1_GPIO(6)#endifstatic mfp_cfg_t lin2008_wifibt_pins[] = {MFP_WIFI_V18_ENABLE,MFP_WLAN_RESETN,WIFI_WAKEUP_HOST,/*wakeup host*/};static mfp_cfg_t lin2008_wifibt_pins2[] = {MFP_WIFI_V18_ENABLE,};static int wifibt_power_status;int lin2008_poweron_wifibt_board(void){if (!wifibt_power_status) {mxc_mfp_config(ARRAY_AND_SIZE(lin2008_wifibt_pins)) ;gpio_direction_output(WLAN_ENABLE_PIN, 1);gpio_direction_output(WLAN_RESET_PIN, 1);gpio_direction_output(BT_RESET_PIN,1);mdelay(10);gpio_direction_output(BT_RESET_PIN, 0);gpio_direction_output(WLAN_RESET_PIN, 0);// bt need > 5 ms to resetmdelay(5);gpio_direction_output(BT_RESET_PIN, 1);gpio_direction_output(WLAN_RESET_PIN, 1);wifibt_power_status++;return 0;}wifibt_power_status++;return 1;}int lin2008_poweroff_wifibt_board(void){wifibt_power_status--;if (!wifibt_power_status) {mxc_mfp_config(ARRAY_AND_SIZE(lin2008_wifibt_pins2) );gpio_direction_output(WLAN_ENABLE_PIN, 0);return 0;}return 1;}3,以太网接口的创建这里在 android 平台上要做特殊的处理,也就是 firmware 的位置要放好,否则加载 firmware 始终不成功,那么以太网接口就不会被创建了;需要把 helper_sd.bin 放在 /lib/firmware/mrvl 下面(若没有,则创建一个);把 sd8686.bin 放在 /lib/firmware/mrvl 下面(同上);4,特殊的处理对于 8686 模块需要做特殊的处理,在注册完以太网接口以后,需要添加下面这段话 :{#define BCA_CFG_NUM_OF_MODES 4#define BCA_CFG_SINGLE_ANT_WITH_COEX 0#define BCA_CFG_DUAL_ANT_WITH_COEX 1#define BCA_CFG_SINGLE_ANT_FOR_BT_ONLY 2#define BCA_CFG_MRVL_DEFAULT 3#define BCA_CONFIG BCA_CFG_SINGLE_ANT_WITH_COEXstatic u32 BCACfgTbl[BCA_CFG_NUM_OF_MODES][3] = {//0xA5F0, 0xA58C, 0xA5A0{ 0xa027181c, 0x40214, 0xd24d}, //Mode 0: Single ANT with COEX enable{ 0xa027181c, 0x40211, 0xd24d}, //Mode 1: Dual ANT with COEX enable{ 0xa027181c, 0x40222, 0xd21c}, //Mode 2: single ANT for BT only{ 0xa027801d, 0x18000, 0xd21c}, //Mode 3: Marvell default};wlan_offset_value RegBuffer;RegBuffer.offset = (0xA5F0);RegBuffer.value = BCACfgTbl[BCA_CONFIG][0];wlan_prepare_cmd(priv,HostCmd_CMD_MAC_REG_ACCESS,HostCmd_ACT_GEN_SET,HostCmd_OPTION_WAITFORRSP,0,&RegBuffer);RegBuffer.offset =(0xA58C);RegBuffer.value = BCACfgTbl[BCA_CONFIG][1];wlan_prepare_cmd(priv,HostCmd_CMD_MAC_REG_ACCESS,HostCmd_ACT_GEN_SET,HostCmd_OPTION_WAITFORRSP,0,&RegBuffer);RegBuffer.offset = (0xA5A0);RegBuffer.value = BCACfgTbl[BCA_CONFIG][2];wlan_prepare_cmd(priv,HostCmd_CMD_MAC_REG_ACCESS,HostCmd_ACT_GEN_SET,HostCmd_OPTION_WAITFORRSP,0,&RegBuffer);}基本上这样就可以工作了;4.其它问题Sdio 口默认是用的 3.2V 这里需要修改相关的地方强制设成是1.8V ,否则 SDIO 接口将无法工作;Linux平台上需要移植一些上层软件才能验证,比如iwconfig , iwlist 等。
基于ARM9的UDA1341驱动在Linux下移植方法

基于ARM9的UDA1341驱动在Linux下移植方法刘文;王晓辉;盛文婷;李智【摘要】嵌入式系统的驱动程序是应用程序与嵌入式系统硬件之间的一个中间接口层,操作系统只有通过这个接口,才能控制硬件设备工作。
在嵌入式系统开发过程中,音频设备的驱动程序移植问题非常多,为了系统化地解决移植过程中遇到的各类问题,针对已经建立的S3C2410硬件平台,在嵌入式Linux平台上移植UDA1341声卡驱动,分析了UDA1341芯片的技术特点和音频驱动程序主要模块的设计思路,总结了驱动程序在嵌入式系统平台上的移植方法和步骤,分析并解决了移植通用UDA1341驱动程序过程中遇到的各类问题,并且通过了具体测试(实%Embedded system driver is the interface layer between application and hardware of the embedded system.Operating system only controls the hardware devices through this interface.In the development process of the embedded system,there is so much problem about driver transplantation of audio equipment.In order to solve the migration problems systematically,in accordance with the hardware platform of S3C2410,the UDA1341 sound card driver is transplanted on the embedded Linux platform,the characteristics and the audio driver design idea of the main modules on the UDA1341 chip technology are analyzed.The methods and procedures of the driver transplantation in the embedded system platform are summed up.Different kinds problem of transplanting the common UDA1341 drive are analyzed and solved,the specific test and is passed good results(implement all the features of the audio device,such as recording,volume control,etc.) are achieved.【期刊名称】《电子设计工程》【年(卷),期】2011(019)014【总页数】3页(P1-3)【关键词】嵌入式系统;S3C2410;UDA1341驱动;Linux内核调试【作者】刘文;王晓辉;盛文婷;李智【作者单位】新疆机电职业技术学院电气工程系,新疆乌鲁木齐830000 ;新疆机电职业技术学院电气工程系,新疆乌鲁木齐830000 ;新疆农业大学科学技术学院,新疆乌鲁木齐830091;新疆农业大学科学技术学院,新疆乌鲁木齐830091【正文语种】中文【中图分类】TP309S3C2410处理器是Samsung公司生产的基于ARM920T核心、采用0.18 μm制造工艺的32位微控制器,带IIC-BUS和IIS-BUS接口。
Linux内核移植步骤_添加DM9000网卡驱动(设备树)

Linux内核移植步骤2015年05月13日星期三上午 11:05往设备树中添加网卡驱动:1、选平台,指定交叉编译工具链:(1)、在Makefile中指定:源码顶层目录下MakefileARCH ?= $(SUBARCH)CROSS_COMPILE ?= $(CONFIG_CROSS_COMPILE:"%"=%)改为:ARCH ?= armCROSS_COMPILE ?=arm-linux-(2)、编译时指定:# make ARCH=arm CROSS_COMPILE=/opt/arm-linux-gcc-4.6.4/bin/arm-linux-2、导出缺省配置:(1)、直接把缺省配置文件改成”.config“:把“源码/arch/arm/configs”目录下的“xxxx_defconfig“(例如:”exynos_defconfig“)配置文件拷贝到源码顶层目录下,并改名为”.config“。
(2)、使用make生成缺省配置:# make exynos_defconfig#执行该命令后系统会在源码顶层目录下自动生成”.config“文件:# configuration written to .config3、往设备树文件中添加dm9000网卡驱动:(1)、参考与自己板子最接近的demo板的设备树文件生成自己的设备树文件(直接拷贝修改)。
设备树文件在”源码目录/arch/arm/boot/dts/exynos4412-fs4412.dts“(2)、在设备树文件中添加网卡设备驱动信息(参考网卡厂商提供的范例代码):示例代码在”Documentation/devicetree/bindings/net/davicom-dm9000.txt“,如下:Davicom DM9000 Fast Ethernet controllerRequired properties:- compatible = "davicom,dm9000";- reg : physical addresses and sizes of registers, must contain 2 entries:first entry : address register,second entry : data register.- interrupt-parent : interrupt controller to which the device is connected- interrupts : interrupt specifier specific to interrupt controllerOptional properties:- davicom,no-eeprom : Configuration EEPROM is not available- davicom,ext-phy : Use external PHYExample:ethernet@18000000 {compatible = "davicom,dm9000";reg = <0x18000000 0x2 0x18000004 0x2>;interrupt-parent = <&gpn>;interrupts = <7 4>;local-mac-address = [00 00 de ad be ef];davicom,no-eeprom;};修改并添加:ethernet@05000000 {compatible = "davicom,dm9000";reg = <0x05000000 0x2 0x05000004 0x2>;/*0x05000000为4412处理器的srom片选地址,详见手册*/interrupt-parent = <&gpx0>;/*继承父节点*/interrupts = <6 4>;/*gpx0节点中断中的第6个,4是标志*/local-mac-address = [00 00 de ad be ef];/*网卡地址*/davicom,no-eeprom;pinctrl@11000000 {...gpx0: gpx0 {gpio-controller;#gpio-cells = <2>;interrupt-controller;interrupt-parent = <&gic>;interrupts = <0 16 0>, <0 17 0>, <0 18 0>, <0 19 0>,/*中断<类型中断号中断标志>*/<0 20 0>, <0 21 0>, <0 22 0>, <0 23 0>;#interrupt-cells = <2>;};...}4、修改设备树的Makefile文件:设备树的Makefile文件在”xxx/linux-3.19.1/arch/arm/boot/dts“目录下。
Linux安装驱动更新磁盘使用指南(适用于Lenovo ThinkSystem服务器)说明书
Draft document for reviewApril 1, 2022 9:06 amFront coverUsing Driver Update Disk to Install Linux on Lenovo ThinkSystem ServersIntroduces the Driver Update DiskfeatureDescribes the use of the DUD fileExplains how to build a DUD file under Linux Shows how to confirm that the DUD file is loadedSong ShangClick here to check for updates1577TOC.fm Draft document for review April 1, 2022 9:06 am AbstractDriver Update Disk (DUD) is a feature of Linux operating systems used to install drivers forrequired devices or updated software packages during operating system installation. It iseasy to fix any installation issues and does not require a pre-installed operating system andapplication.This document introduces Driver Update Disk feature, shows users how to build a DUD file,and how to use it on supported Lenovo® ThinkSystem™ servers. This paper is intended forIT specialists and IT administrators who are familiar with Red Hat/SUSE Linux operatingsystem and want to install an older or customized operating system on Lenovo ThinkSystemservers with newer devices.At Lenovo Press, we bring together experts to produce technical publications around topics ofimportance to you, providing information and best practices for using Lenovo products andsolutions to solve IT challenges.See a list of our most recent publications at the Lenovo Press web site:Do you have the latest version? We update our papers from time to time, so checkwhether you have the latest version of this document by clicking the Check for Updatesbutton on the front page of the PDF. Pressing this button will take you to a web page thatwill tell you if you are reading the latest version of the document and give you a link to thelatest if needed. While you’re there, you can also sign up to get notified via email wheneverwe make an update.ContentsIntroduction . . . . . . . . . . . . . . . . . . . . . . . . . . . . . . . . . . . . . . . . . . . . . . . . . . . . . . . . . . . . . . 3Layout of the DUD . . . . . . . . . . . . . . . . . . . . . . . . . . . . . . . . . . . . . . . . . . . . . . . . . . . . . . . . . 3Building a DUD file. . . . . . . . . . . . . . . . . . . . . . . . . . . . . . . . . . . . . . . . . . . . . . . . . . . . . . . . . 4Using the DUD ISO file . . . . . . . . . . . . . . . . . . . . . . . . . . . . . . . . . . . . . . . . . . . . . . . . . . . . . 6Verification. . . . . . . . . . . . . . . . . . . . . . . . . . . . . . . . . . . . . . . . . . . . . . . . . . . . . . . . . . . . . . . 6Resources . . . . . . . . . . . . . . . . . . . . . . . . . . . . . . . . . . . . . . . . . . . . . . . . . . . . . . . . . . . . . . . 6Author. . . . . . . . . . . . . . . . . . . . . . . . . . . . . . . . . . . . . . . . . . . . . . . . . . . . . . . . . . . . . . . . . . . 7Notices. . . . . . . . . . . . . . . . . . . . . . . . . . . . . . . . . . . . . . . . . . . . . . . . . . . . . . . . . . . . . . . . . . 8Trademarks . . . . . . . . . . . . . . . . . . . . . . . . . . . . . . . . . . . . . . . . . . . . . . . . . . . . . . . . . . . . . . 9 2Using Driver Update Disk to Install Linux on Lenovo ThinkSystem ServersIntroductionDriver Update Disk (DUD) is a feature of Linux operating systems used to install drivers forrequired devices or updated software packages during operating system installation.Compared to other update methods, with DUD, it is easy to fix any installation issues anddoes not require a pre-installed operating system and application. The DUD file is a specialformat file that is created based on driver source code provided by hardware componentvendor or updated software packages provided by OS vendor, and is ultimately used by theinstalled system.In general, the OS or hardware component vendor only provides the current standard versionof the DUD file, but if you are using a customized OS or meet the following conditions youneed to make your own DUD file:The OS image does not support new devices and OS/hardware component vendor does not provide DUD files of new devices.You want to use the latest driver or specified version, but it is not in the OS image, or there is no DUD file provided by OS/hardware component vendor.There are some software issues when you install OS via the released image. You can build the fixed package as a DUD file and solve the problem.DUD (also known as Driver Update Programmer, DUP), is supported by the following Linuxdistributions:Red Hat Enterprise Linux 5 and laterSUSE Linux Enterprise Server 9 and laterSecure Boot limitation: On UEFI systems with the Secure Boot technology enabled, thesoftware package cannot be loaded or installed because it is not signed by the OS vendor. Layout of the DUDThe DUD layout depends on different Linux distributions. For SLES, the structure is as followsand shown in Figure1.linux / [ Distribution ] / [ Architecture ]-[ Version ] /# tree linux/linux/••• suse # [ Distribution]••• x86_64-sles15 # [ Architecture ]-[Version]••• dud.config••• inst-sys• ••• lib• ••• modules• ••• 5.3.18-22-default• ••• weak-updates• ••• megaraid_sas• ••• megaraid_sas.ko.new••• install••• megaraid_sas-07.717.02.00-1.x86_64.rpm••• update.post2••• update.preFigure 1 SLES DUD Structure© Copyright Lenovo 2022. All rights reserved.3For RHEL and CentOS, the DUD structure is as follows and shown in Figure2.OEMDRV/ [ rhdd3 & rpms] / [ Arch & Any other architecture file]# tree OEMDRV/ # The storage device MUST labeled “OEMDRV“OEMDRV/••• rhdd3 # DD marker, contains the DUD's description string••• rpms••• x86_64 # Contains RPMs for this arch and acts as package repo••• kmod-megaraid_sas-07.717.02.00_el8.1-1.x86_64.rpm••• repodata••• 3d92d42ad490563…db-other.xml.gz…••• repomd.xmlFigure 2 RHEL / CentOS DUD StructureBuilding a DUD fileThis section demonstrates how to build a DUD file from source code.The requirements to build a DUD file are as follows:Operating system with compilation environment (including gcc, rpmbuild, make,createrepo, mkisofs, etc)Driver source codeOpen source tools:–mkdud - see https:///openSUSE/mkdud–mkdriverdisk.sh - seehttps:///h2onda/9c73da8ddaa0f8dacc41#file-mkdriverdisk-sh –ddiskit - see https:///orosp/ddiskitThe following steps show how to build a DUD file. We are using the Broadcom MegaRAIDdriver for our example.1.Download the source code package from the component vendor website.2.Install the source rpm and review the output to determine the full path to the SPECSdirectory as shown in Figure3.Note: If provided by the IO vendor, it is recommended to install Kernel Module Packages(KMP) for SLES and Kernel Module (KMOD) package for RHEL / CentOS.# rpm -ivvvh megaraid_sas-07.717.02.00-1.src.rpm…D: 0 /usr/src/packages/SOURCES/D: 1 /usr/src/packages/SPECS/Figure 3 Full path to the SPECS directory4Using Driver Update Disk to Install Linux on Lenovo ThinkSystem Servers1577paper.fm - Draft document for review April 1, 20223.Navigate to the SPECS file directory and build the driver using the rpmbuild command asshown in Figure4.localhost:/usr/src/packages/SPECS # rpmbuild -ba megaraid_sas.specExecuting(%prep): /bin/sh -e /var/tmp/rpm-tmp.rge8Yb…Wrote: /usr/src/packages/RPMS/x86_64/megaraid_sas-07.717.02.00-1.x86_64.rpmlocalhost:/usr/src/packages/SPECS #Figure 4 rpmbuild command4.Build DUD/ISO file based on the rpm compiled in Step 3.For SLES:a.Create the DUD file using mkdud:# ./mkdud --dist SLES15SP2 --create SLES15SP2_RAID.dudmegaraid_sas-07.717.02.00-1.x86_64.rpmFigure 5 mkdud commandb.Get the directory “linux” by extracting the dud file:# gzip -dc SLES15SP2_RAID.dud | cpio -dim# lsSLES15SP2_RAID.dud linuxFigure 6 Determine thec.Create the ISO file with the “linux” directory above:# mkdir build # Create a temporary directory# mv linux build/ # Move the directory “linux” into temporary directory.# mkisofs -r -o SLES15SP2_RAID.iso ./build/Figure 7 Creating the ISO imageFor RHEL/CentOS:a.Create the ISO file via tool “mkdriverdisk.sh” using the rpm created in Step 3.# ./mkdriverdisk.sh /root/rpmbuild/RPMS/x86_64/kmod-megaraid_sas-07.717.02.00-1.x86_64.rpm Directory walk startedDirectory walk done - 1 packages…create driver disk to driverdisk_2022-01-12_19:39:42.iso is done!#Figure 8 Creating the ISO5Draft document for review April 1, 2022 - 1577paper.fm Using the DUD ISO fileThis section describes how to use the DUD file under Red Hat/CentOS and SUSE.To install an operating system using the DUD file, use the following steps:1.Burn the DUD ISO into a DVD/CD/USB flash drive or make the ISO image available to thesystem through a virtual disk.2.Boot the installer media and use the appropriate boot parameters for the version of OSyou are installing:–For RHEL/CentOS 6 and 5, use the option dd (driver disk)–For RHEL/CentOS 8 and 7, use the option inst.dd or inst.dd=location wherelocation can be a local storage device or a network location (HTTP, HTTPS or FTPserver). For example:•inst.dd=http://host.fake.domain/path/to/dd.iso•inst.dd=cdrom:/dev/cdromIf you are using inst.dd without a location, you will be asked for the driver file duringboot.–For SUSE, use the option dud=1 or dud=URL where URL can be, for example:•dud=ftp:///PATH_TO_DRIVER•dud=/PATH_TO_DRIVERIf you use dud=1, you will be asked for the URL during boot.3.Select the drivers required to complete the installation.VerificationYou can check the driver information via the command modinfo DRIVER_NAME as shown inFigure9.Figure 9 Verifying the driverIf the output version or file name path is identical to DUD file, the installation is successful. ResourcesRed Hat: How to create a driver update disk (DUD) for installation using USBhttps:///solutions/6078541Red Hat: How to create an anaconda driver disk for RHELhttps:///solutions/1581936Using Driver Update Disk to Install Linux on Lenovo ThinkSystem Servers1577paper.fm - Draft document for review April 1, 2022Red Hat: Where can I download Driver Update Program (DUP) disks?https:///articles/64322SUSE: usagehttps:///doc/Usage/Driver_Kits.htmlNovell: Creating a Driver Update Disk (DUD)https:///developer/creating_a_driver_update_disk_%28dud%29.html CentOS: Preparing for a Driver Update During Installationhttps:///en-US/centos/install-guide/DU-Updating_drivers_during_ins tallation_x86/#sect-driver-updates-during-installation-preparing-x86Driver Update Disks Developer Documentationhttps:///rhinstaller/anaconda/blob/master/dracut/README-driver-updates.mdddiskit repositoryhttps:///orosp/ddiskitAuthorSong Shang is a Linux Engineer in Lenovo Infrastructure Solutions Group, based in Beijing,China.Thanks to the following people for their contributions to this project:David Watts, Lenovo PressAdrian Huang, Lenovo Linux EngineerGary Cudak, Lenovo Lead Architect7© Copyright Lenovo 2022. All rights reserved.Note to U.S. Government Users Restricted Rights -- Use, duplication or disclosure restricted by Global Services Administration (GSA) ADP Schedule Contract 8NoticesLenovo may not offer the products, services, or features discussed in this document in all countries. Consult your local Lenovo representative for information on the products and services currently available in your area. Any reference to a Lenovo product, program, or service is not intended to state or imply that only that Lenovo product, program, or service may be used. Any functionally equivalent product, program, or service that does not infringe any Lenovo intellectual property right may be used instead. However, it is the user's responsibility to evaluate and verify the operation of any other product, program, or service.Lenovo may have patents or pending patent applications covering subject matter described in this document. The furnishing of this document does not give you any license to these patents. You can send license inquiries, in writing, to:Lenovo (United States), Inc.1009 Think Place - Building One Morrisville, NC 27560U.S.A.Attention: Lenovo Director of LicensingLENOVO PROVIDES THIS PUBLICATION “AS IS” WITHOUT WARRANTY OF ANY KIND, EITHER EXPRESS OR IMPLIED, INCLUDING, BUT NOT LIMITED TO, THE IMPLIED WARRANTIES OF NON-INFRINGEMENT, MERCHANTABILITY OR FITNESS FOR A PARTICULAR PURPOSE. Some jurisdictions do not allow disclaimer of express or implied warranties in certain transactions, therefore, this statement may not apply to you.This information could include technical inaccuracies or typographical errors. Changes are periodically made to the information herein; these changes will be incorporated in new editions of the publication. Lenovo may make improvements and/or changes in the product(s) and/or the program(s) described in this publication at any time without notice.The products described in this document are not intended for use in implantation or other life support applications where malfunction may result in injury or death to persons. The information contained in this document does not affect or change Lenovo product specifications or warranties. Nothing in this document shall operate as an express or implied license or indemnity under the intellectual property rights of Lenovo or third parties. All information contained in this document was obtained in specific environments and is presented as an illustration. The result obtained in other operating environments may vary.Lenovo may use or distribute any of the information you supply in any way it believes appropriate without incurring any obligation to you.Any references in this publication to non-Lenovo Web sites are provided for convenience only and do not in any manner serve as an endorsement of those Web sites. The materials at those Web sites are not part of the materials for this Lenovo product, and use of those Web sites is at your own risk.Any performance data contained herein was determined in a controlled environment. Therefore, the result obtained in other operating environments may vary significantly. Some measurements may have been made on development-level systems and there is no guarantee that these measurements will be the same on generally available systems. Furthermore, some measurements may have been estimated through extrapolation. Actual results may vary. Users of this document should verify the applicable data for their specific environment.This document was created or updated on April 1, 2022.Send us your comments via the Rate & Provide Feedback form found at/lp1577TrademarksLenovo and the Lenovo logo are trademarks or registered trademarks of Lenovo in the United States, other countries, or both. These and other Lenovo trademarked terms are marked on their first occurrence in this information with the appropriate symbol (® or ™), indicating US registered or common law trademarks owned by Lenovo at the time this information was published. Such trademarks may also be registered or common law trademarks in other countries. A current list of Lenovo trademarks is available fromhttps:///us/en/legal/copytrade/.The following terms are trademarks of Lenovo in the United States, other countries, or both: Lenovo®Lenovo(logo)®ThinkSystem™The following terms are trademarks of other companies:Linux is a trademark of Linus Torvalds in the United States, other countries, or both.Other company, product, or service names may be trademarks or service marks of others.9。
Linux操作系统声卡驱动的安装与配置

Linux操作系统声卡驱动的安装与配置
一般的声卡驱动是支持windows的,linux很少,所以安装声卡驱动很麻烦。
Linux下安装声卡驱动,用的是alsa,它就好像是万能的一样,可以支持很多类型的声卡,如:
;一个是alsa-lib;最后一个是alsa-untils。
安装步骤:
1、把前面的三个东西给解压出来,解压之后会产生文件夹,比如:文件夹——alsa-driver、alsa-lib、alsa-untils
2、打开终端,先进入alsa-driver文件夹,然后输入……
3、进入alsa-lib文件夹,然后输入的内容除了第2项中的第4小项不要之外,一切照旧。
4、进入alsa-untils文件夹,一切同第三项。
上面的都操作完之后接着就是修改系统文件了。
在/ect目录下有一个moudules.conf的文件,在里面加入:
以上那段内容里面有个snd-xxxx的,那个指的是声卡的设备名称。
查过之后,有一张表可以对照,如下:
根据自己的实际情况然后修改自己的把snd-xxxx改成相对应的名称。
好了保存重启,一般就OK了
第一次操作很麻烦,但习惯了会觉得那是一种乐趣的,至少我自己是这么觉得的。
注:如果是初次操作,需要修改到系统本身的一些东西的话,建议最好先备份,错了改过来就比较容易点,备份,其实就是复制一份同样的东西到另一个安全的地方。
linux 安装RAID驱动详解

安装手册(1)安装前准备,制作驱动盘IBM X346板载Adaptec 7902B HostRaid,在安装系统时需要单独加载驱动程序。
请将a320raid-S4.1.zip 解压,将解压得到的文件modinfo modules.cgz modules.dep pcitable rhdd-6.1拷贝到一张空白软盘中或是刻录光盘,请注意不要带任何子目录。
(2)开始安装将操作系统第一张光盘(CD1)插入光驱,机器将从光盘引导,在出现boot:时请输入linux expert noprobe如图:(3)加载驱动系统提示是否插入驱动盘,请选择“Yes”,并同时将驱动软盘插入软驱中,选择“fd0”,(如果使用驱动光盘,请选择“hda”,光驱所在的盘符)接着请在驱动列表中选择Adaptec A320RAID (a320raid),系统开始加载驱动,并提示成功。
如图:接下来请选择“语言”、“键盘类型”,选择“本地光盘”继续安装。
进入图形化安装界面。
参见下图所示。
单击“Next”继续,进入语言选择界面。
选择Chinese Simplified(简体中文)。
接下来显示《软件协议书》界面,选中“接受”(4)分区设置接着进入分区界面,DC4.1提供自动分区和手动分区两种功能,件sda,建立分区。
对话框。
“挂载点”:输入将创建的分区在整个目录树中的位置,可以从下拉菜单中选择正确的挂载点。
如果创建的是根分区,输入“/”;如果是交换分区,不需要输入装入点;如果创建的是根文件系统和交换分区以外的分区,应根据实际情况输入,这里请输入/emsbackup 。
“文件系统类型”:在下拉菜单中选择将创建分区的文件系统类型,如果创建的是交换分区,选择“swap”;如果创建的是根文件系统或其他分区,请选择“ext3”。
请按照下面的列表完成分区:分区分区类型分区大小交换分区(Swap)swap 2G数据分区(/emsbackup)ext3 30G根分区(/)ext3 所剩全部可用空间分区完成后,确认要格式化的分区点击下一步,将引导程序安装在主引导记录中,点击下一步,设置管理员(root)密码(5)设置管理员密码请在“密码”字段中输入 root 口令,然后在“确认”字段再次输入相同的口令;否则安装将无法继续。
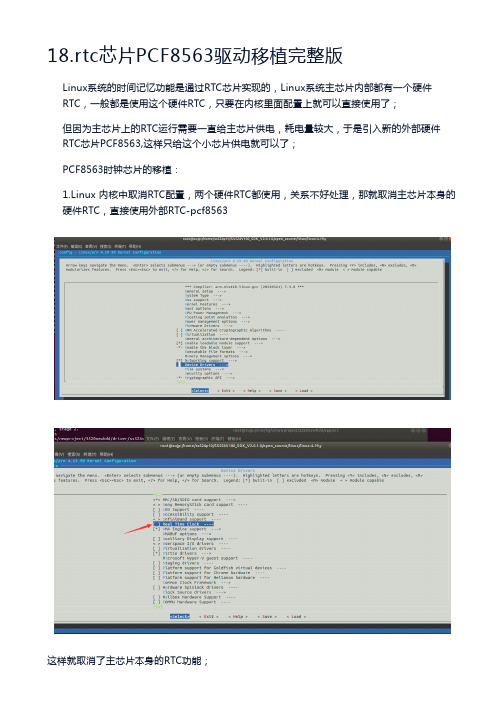
rtc芯片PCF8563驱动移植完整版
71 };
72
73 #define LEAPS_THRU_END_OF(y) ((y)/4 - (y)/100 + (y)/400)
74 #define LEAP_YEAR(year) ((!(year % 4) && (year % 100)) || !(year % 400))
75 /*
76 * The number of days in the month.
139
if (ret >= 0)
140
{
141
ret_data = buf[0];
142
}
143
return ret_data;
144 }
145 #else
146 unsigned char gpio_i2c_read(unsigned char chip_addr, unsigned char reg_addr)
168
169
ret = i2c_transfer(client->adapter, msg, 2);
170
if (ret != 2) {
171
printk("[%s %d] ot_i2c_transfer error, ret=%d.\n", __FUNCTION__, __LINE
__, ret);
0x0E /* timer control */
48 #define PCF8563_REG_TMR
0x0F /* timer */
49
50 #define PCF8563_SC_LV
0x80 /* low voltage */
51 #define PCF8563_MO_C
- 1、下载文档前请自行甄别文档内容的完整性,平台不提供额外的编辑、内容补充、找答案等附加服务。
- 2、"仅部分预览"的文档,不可在线预览部分如存在完整性等问题,可反馈申请退款(可完整预览的文档不适用该条件!)。
- 3、如文档侵犯您的权益,请联系客服反馈,我们会尽快为您处理(人工客服工作时间:9:00-18:30)。
字符设备的移植
主设备号和次设备号 1.主设备号是一个用来索引静态字符设备 数组的整数,标识设备对应的驱动程序,内核 利用主设备号将设备与相应的驱动程序对应起 来。 2. 次设备号只由设备驱动程序使用;内核 的其他部分不使用它,仅将它传递给驱动程序。 次设备号提供了一个驱动程序控制若干个设备 的方法。
网络接口设备
• 内核不再调用read,write,它调用与数据包 传送相关的函数,不再映射到文件系统。 • 发送 程序是在驱动程序的上层协议层有数 据要发送时自动调用的。一般驱动程序中 不对发 送数据进行缓存,而是直接使用硬 件的发送功能把数据发送出去。接收数据 一般是通 过硬件中断来通知的。在中断处 理程序里,把硬件帧信息填入一个skbuff结 构中,然后调用netif_rx()传递给上层处理。
谢谢
谢谢!
Linux设备驱动的中断处理 Linux设备驱动的中断处理
Linux设备驱动的慢速中断处理的实现方式 设备驱动的慢速中断处理的实现方式
.mark_bh方法 在2.4版本以前常用的方法 .task_let方法 在2.4版本引入的新的方法,可以很方便的实现 慢速中断处理的机制。
Linux设备驱动的内存 Linux设备驱动的内存
字符设备的移植
字符设备驱动需要实现的主要方法 1. Open方法 ·如果是首次打开,初始化设备。 ·检查设备相关错误(诸如设备未就绪或相似的 硬件问题)。 ·标别次设备号,如有必要更新f_op指针。 ·分配和填写要放在filp->private_data里的数据结 构。 ·增加使用计数。
字符设备的移植
字符型设备
• 可以象文件一样访问字符设备,字符设备驱动 程序负责实现这些行为 • 这样的驱动程序通常会实现open,close,read 和write系统调用 • 通过文件系统节点可以访问字符设备,例如 /dev/tty1和/dev/lp1 • 区别是:普通文件允许在其上来回读写,而大 多数字符设备仅仅是数据通道,只能顺序读写 • 字符设备通常是指存取时没有缓存的设备
网络接口设备的移植
网络驱动程序的核心数据结构net_device
该数据结构定义了所有网络设备驱动的属性和方法, 网络设备驱动在注册到系统时必须使用该数据结构。
网络驱动程序的注册函数register_netdevice
该函数将网络设备驱动注册到系统。使用net_device 数据结构做为参数。
网络接口设备的移植
块设备驱动的主设备号和从设备号的意义和字符 设备驱动一样,都是对驱动程序和设备的索引。
块设备驱动的主要方法
open: 1 . open: 开启设备程序,和字符设备类似 release: 2 . release: 释放设备程序, 和字符设备类似的工作
块设备驱动的移植
块设备驱动的request函数 块设备驱动的request函数 request
块设备
• 块设备是文件系统的宿主(磁盘、磁带、 CD-ROM 、Flash芯片) • 在大多数Unix系统中,只能将块设备看 作多个块进行访问为,一个块设备通常 是1K字节数据 • 块设备和字符设备只在内核内部的管理 上有所区别,因此也就是在内核/驱动程 序间的软件接口上有所区别 • 块设备也通过文件系统节点来读写数据 • 块设备的读写 都有缓存来支持,并且块 设备必须能够随机存取(random access)
字符设备的移植
字符设备驱动的挂接 1.内核内部使用一个file结构来标识设备,而且 内核使用file_operations结构访问驱动程序的函数。 2. register_chrdev注册函数:使用参数fops-它 是一个指向一组操作(open,read等等)表的指 针。这个表的每一个项都指向由驱动程序定义的 处理相应请求的函数。 通过该调用可以把驱动程 序注册到内核中. 3. file_operations结构是一个定义在<linux/fs.h> 中的函数指针表。
通过查询调试:
可以使用ioctl的方法,可以为设备驱动调试实现若干 ioctl命令。这些命令从驱动程序空间复制相关数据到进 程空间,在进程空间里检查这些数据。
Linux设备驱动的中断处理 Linux设备驱动的中断处理
Linux的中断挂接函数request_irq
Linux中挂接中断号和中断处理函数的调用.
阻塞型
当调用设备驱动的进程在需要等待(在接收)时,设备 驱动可以挂起调用进程,让它进入睡眠状态以便其他进 程可以使用计算资源。
非阻塞型
设备驱动在资源不满足时(如接收数据)直接返回, 而不挂起调用进程。
异步触发
使用异步触发机制,当数据达到时,向所有注册异步 触发的进程发送SIGIO信号。这种方式的效率最高。
常用的内存分配函数:
.kmalloc函数
kmalloc函数可以分配的内存空间最大不能超过32个页 物理内存只能按页大小进行分配 .get_free_page 功能类似于kmalloc,但是可以为DMA分配内存。 .vmalloc 分配虚拟地址空间的连续区域
Linux设备驱动的接收方式 Linux设备驱动的接收方式
Linux的中断释放函数free_irq free_irq
Linux中的中断释放函数
Linux设备驱动的中断处理 Linux设备驱动的中断处理
快速和慢速中断处理
这两种中断处理程序的主要差别就在于,快速中断 处理程序保证中断的原子处理,而慢速中断处理程 序则不保证(这种差别在最新的中断处理的实现也保 留了)。也就是说,“开启中断”处理器标志位(IF)在 运行快速中断处理程序时是关闭的,因此在服务该 中断时不允许被中断。而调用慢速中断处理时,内 核启动微处理器的中断报告,因此在运行慢速中断 处理程序时其它中断仍可以得到服务。 l
网络接口设备驱动程序的包发送和接收
1. 数据交换的主要数据结构sk_buff. 该数据结构主要定义了数据长度,数据缓冲的指 针。以及各种协议头的定义。 2. 系统发送时调用的发送方法hard_start_xmit 该方法主要实现将系统送来的sk_buff数据结构中 的数据包通过设备发送出去。 2. 设备驱动接收时调用的接收函数netif_rx 设备驱动在接收到数据包时,利用该包构造一个 Sk_buff的数据结构,然后调用该函数,将收到的数据 包送到系统。
Linux驱动移植指南 Linux驱动移植指南
简介
Linux驱动程序简介:
.设备驱动程序提供的是机制,而不是策略 .设备驱动程序应该仅仅处理硬件,将如何使 用硬件的问题留给应用程序。 .运行于内核空间,是内核的一部分
Linux驱动程序分类 Linux驱动程序分类
字符型设备驱动 块设备驱动 网络设备驱动
使用blk_init_queue将块设备驱动的函数实 现挂接到相应的块设备队列; request函数根据输入的参数实现对实际物理 设备的读操作和写操作; 由系统内核决定何时调用request函数进行实 际的物理读写操作;
网络接口设备的移植
网络接口设备驱动简介 网络接口设备驱动简介
网络接口并不象字符和块设备那样存在于文件系统。 相反,它在核心层处理包的发送和接收,并不与进 程中的某个打开的文件绑定在一起,所以网络接口设 备不需要主设备号和次设备号。一个网络接口必须 在特定的数据结构中注册自己,从而在与外部世界 交换包时可以被调用。
Linux设备驱动的常用调试技术 Linux设备驱动的常用调试技术
在Linux设备驱动的调试中,常用调试技术有: 打印信息调试: 类似于应用程序中的printf,在linux/kernel.h中定义了 8种记录级别串,Linux处理消息可以在任何地方调用 printk,因为printk函数是将消息写到一个长度为 printk printk LOG_BUF_LEN个字节的循环缓冲区中;
2. Release方法 .release方法的作用正好与open相反。这个设备 方法有时也称为close。 · ·使用计数减1。 1 ·释放open分配在filp->private_data 中的内存。 ·在最后一次关闭操作时关闭设备。 close调用与close方法 3.Read方法 .一般通过copy_to_user/__put_user完成驱动提 供给用户的read操作;
块设备驱动的移植
块设备驱动的注册 1. register_blkdev函数:使用指向块设 备驱动操作的数据结构 block_device_operations向内核传递驱动 实现的函数。 2. unregister_blkdev函数:使用主设备 号为参数,从系统中注销设备驱动。
块设备驱动的移植
块设备驱动的主设备号和从设备号
