星火项目使用手册
青岛北方星火通用机床 C61100 CK61100 卧式端面车床 说明书

C61100 卧式端面车床CK61100使用说明书 床身上最大回转直径 1000mm 出厂编号中华人民共和国青岛北方星火通用机床有限公司目 录1.注意事项 (2)2.主要用途与适用范围 (2)2.1 机床概述 (2)2.2 机床总图 (2)3.技术参数 (3)3.1 主要参数 (3)3.2 主传动 (3)3.3 进给传动 (3)3.4 电动机 (3)4.性能与结构简要介绍 (4)4.1 床身 (4)4.2 床头箱 (4)4.3 大滑板 (4)4.4 刀架 (4)5.润滑系统 (4)5.1 润滑系统说明 (4)5.1.1 床头箱润滑 (4)5.1.2刀架润滑 (4)6.吊运与安装 (5)6.1 吊运与开箱 (5)6.2 地基说明 (5)6.3 安装说明 (5)7. 试车、调整与操作 (6)7.1 试车前的准备与试车注意事项 (6)7.2 机床的操作 (6)7.3 机床的调整 (7)8. 机床传动系统图 (8)9. 机床地基图 (9)数控CK61100说明………………………………………………………………………11~16 普通C61100电气原理………………………………………………………………… 17~20 数控CK61100电气原理…………………………………………………………………21~27 装箱单………………………………………………………………………………… 28~29 合格证………………………………………………………………………………… 30~321.注意事项本机床在开箱、吊运和安装、操作使用前,必须按使用说明书中有关规定进行。
2. 主要用途和适用范围2.1 机床概述本机床适用于用高速钢和硬质合金刀具对不同材质的轴类、圆筒形、盘状等零件进行外圆、端面、环槽、内孔和内外锥体的车削加工。
本机床的主传动系统由交流变频电动机拖动,使主轴转速获得无级调速。
从而可以满足对不同工件加工时所需的合理切削速度。
本机床的进给系统是通过变频电动机传动的,进给量的选择很方便。
国家星火计划项目验收提纲

国家星火计划重点项目
验收总结报告
项目编号:
项目名称:
承担单位:
起止时间:
验收时间:年月日
新疆维吾尔自治区科学技术厅印制
总结提纲
一、目标任务
二、任务完成情况(依据合同书中的任务简述完成情况及达到的效果)
三、项目进展及取得的成效【对项目达到的目的与效果进行描述,包括项目覆盖区农民增收(人均比上年增收、项目促进人均增收);项目覆盖区劳动力转移(项目创造就业岗位、促进劳动力转移);项目执行期内的产值、产量、利税、创汇等经济效益情况。
】
四、组织管理及相关保障措施(包括解决关键技术和示范推广中遇到的问题及所采取的主要措施以及项目组织管理经验)
五、经费来源和经费使用情况说明
六、存在的问题、建议及其他需要说明的情况
国家星火计划重点项目验收申请表(表一)
国家星火计划重点项目经费情况表(表二)
国家星火计划重点项目完成情况表(表三)。
深圳星火源电子 信号转发系统 G T - RK 说明书
G T - RK1GPS信号转发系统说明书安装指导和使用指南设备原厂商:GPS SOURCE INC工程设计和施工:深圳星火源电子有限公司售后服务:深圳星火源电子有限公司电话: 86-755-29644311E-mail:*******************.cnWeb: 目录1.功能描述 (3)2.应用 (3)3.系统结构 (4)4. 组成部件 (5)5. 技术规格 (5)5.1 GPSRKL1 (5)5. 2 L1A 技术规格 (7)6. 室外天线安装指导 (9)6.1天台中间; (9)6.2天台的护栏边沿 (9)6.3 直接固定在墙壁上 (9)6.4天线的避雷措施 (10)7. 避雷器及室内转发器的安装 (10)7.1 室内避雷器的安装 (10)7.2 GPS信号发射器的安装位置 (11)7.2.1 在天花板上安装 (11)7.2.2 在墙壁上安装 (11)8. 日常维护和使用 (12)8.1 电源管理 (12)8.1.1系统的电源控制 (12)8.1.2 系统启动和关闭流程: (12)8.1.3系统的增益控制 (12)8.2 系统性能的例行检查 (13)8.2.1 信号测试记录 (13)信号测试记录 (13)1.功能描述GT-RK1主要功能是将卫星信号从室外引到室内或其它收不到卫星信号的地方,能在室内用普通的卫星接收机接收到卫星信号,在室内即可完成应在室外完成的各项工作,为GPS接收机提供可调整的测试信号。
GT-RK1是一款双频双系统信号转发器,可对 GPS+GLONASS 信号进行转发。
在采用双星天线后,天线接口可实现单输入——单输出模式,减少了馈线的数量,使转发器实现功能的同时,仍维持其小功耗特性。
同时也可以对双频信号进行转发,为需要测试双频接收机的客户解决了无法在室内测试的难题。
功能特性频率范围:GPS L1 (可选配其它的GPS天线,获得更多频段的信号转发)供电:220V交流。
项目营销管理操作手册

附件7:房展会参展办法
房展会作为房屋集中展示的场所;其特点是在短暂的时间内可以吸引大量的目标明确的客户;直接影响着售楼现场的人流;因而参展成为售房的极其重要的途径..
参加房展的几个要点:
1.选择合适的展会以及合适的时间..现在展会多且频繁;要求展会的规模、影响较大;如金陵晚报与房产局主办的展会;
附件3:推介会操作办法
一、推介会的形式:楼盘发布会、楼盘见面会、客户见面会、电影执行会、文艺演出、联谊会、招待酒会、新闻发布会、资讯式推介活动等
二、根据楼盘的定位及客户资源状况确定规模、场地以及活动的具体形式..
三、确定推介目标和活动程序;并邀请相关的讲解人员及新闻媒体..
四、会场包装安排..
五、宣传资料和礼品的准备..
a.媒体选择b.时段选择c.提供方式d.影片制作
6).DM广告
a.目标对象或区域的确定b.发行途径的选择
8.参加展会计划详见附件
9.销售人员作业计划
1).选择代销或自销;
2).销售培训计划;
3).销售激励办法..
10.本案销售预算的拟定
1).年度营销费用、项目营销费用公司计划;
2).月度营销费用每月资金协调会批准后执行..
4.加强对销售合同、资金、公司印章的安全管理;避免发生损失;并根据公司资金的要求及银行的相关规定;及时联系、协助银行办理客户个人按揭贷款的审批手续;以加速资金回笼....
5.及时收集市场信息、政策信息;为公司决策和销售工作提供支持;多途径收集、管理、利用好客户资源;促进销售的快速进行;同时不断分析客户形态;为项目进一步营销和楼盘的策划提供现场第一手资料..
深圳星火源电子有限公司全频段GNSS卫星信号转发系统安装指导和使用指南说明书
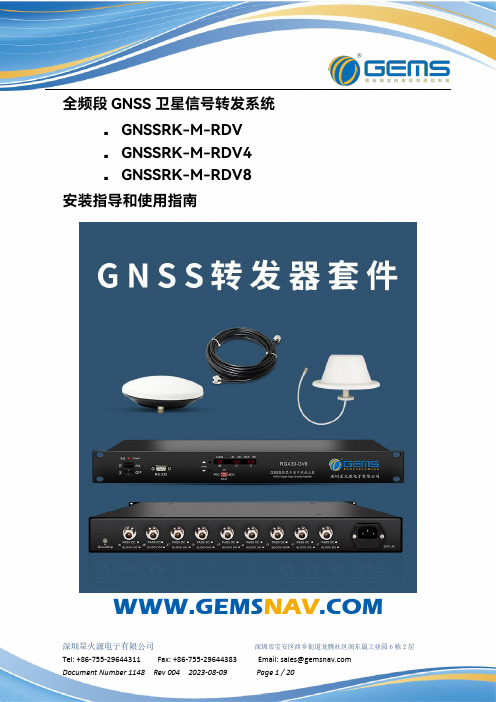
深圳星火源电子有限公司深圳市宝安区西乡街道龙腾社区润东晟工业园6栋2层Tel:+86-755-29644311Fax:+86-755-29644383Email:*****************全频段GNSS 卫星信号转发系统⏹GNSSRK-M-RDV⏹GNSSRK-M-RDV4⏹GNSSRK-M-RDV8安装指导和使用指南WWW.GEMS NAV .COM目录1.系统特性 (3)2.系统安装示意图 (4)3.功能描述 (5)4.典型应用 (5)5.标准配置的设备清单 (5)6.系统连接示意图 (7)7.系统组成部分 (10)7.1数显步进可调放大器RGA30-DV/RGA30-DV4/RGA30-DV8 (10)7.1.1放大器主机的使用和功能描述 (10)7.1.2技术规格 (11)7.1.2放大器自己的安装 (11)7.2接收天线:S440 (12)7.2.1技术规格 (13)7.2.2S440的安装 (14)7.3发射天线GRA10 (15)7.3.1技术规格 (16)7.3.2天线GRA10的安装 (16)7.4电缆组件 (17)7.4.1RG8/LMR400/KSR400 (17)5.4.2XHY240/KSR240/LMR240 (19)7.系统典型故障及解决方案 (20)8.频率参照表 (20)质量承诺我公司产品出厂前均已经过严格检验,出厂产品均为合格品。
我们承诺,所有产品一年内保修,可用5年。
在保修期内,如产品出故障或损坏,经我方鉴定为非人为因素造成,均可免费更换或返修,运费由我公司支付。
退换货须知我公司出场产品和其包装上均贴有LOGO,产品序列号。
客户使用过程中,请不要随意撕毁产品上的LOGO和序列号,此LOGO和序列号将是我公司识别退换货和产品返修的重要依据。
我公司目前没有招募代理和经销商,所有产品的购买和售后服务均由深圳星火源电子有限公司负责。
敬请广大客户注意。
客户服务电话:86-755-29644311或发邮件:*****************,我们将于24内给您答复。
深圳市星火思创科技有限公司 ESP-WROOM-32D U WiFi-BLE 模块规格书说明书

ESP-WROOM-32D/U WiFi-BLE模块规格书:版本:V1.0免责申明和版权公告本文中的信息,包括供参考的URL地址,如有变更,恕不另行通知。
文档“按现状”提供,不负任何担保责任,包括对适销性、适用于特定用途或非侵权性的任何担保,和任何提案、规格或样品在他处提到的任何担保。
本文档不负任何责任,包括使用本文档内信息产生的侵犯任何专利权行为的责任。
本文档在此未以禁止反言或其他方式授予任何知识产权使用许可,不管是明示许可还是暗示许可。
Wi-Fi联盟成员标志归Wi-Fi联盟所有。
蓝牙标志是Bluetooth SIG的注册商标。
文中提到的所有商标名称、商标和注册商标均属其各自所有者的财产,特此声明。
注意:由于产品版本升级或其他原因,本手册内容有可能变更。
深圳市星火思创科技有限公司保留在没有任何通知或者提示的情况下对本手册的内容进行修改的权利。
本手册仅作为使用指导,深圳市星火思创科技有限公司尽全力在本手册中提供准确的信息,但是深圳市星火思创科技有限公司并不确保手册内容完全没有错误,本手册中的所有陈述、信息和建议也不构成任何明示或暗示的担保。
1、概述ESP-WROOM-32模组是一款通用型WiFi-BT-BLE MCU模组,功能强大,用途广泛,可以用于低功耗传感器网络和要求极高的任务,例如语音编码、音频流和MP3解码等。
此款模组的核心是ESP32芯片,具有可扩展、自适应的特点。
两个CPU核可以被单独控制或上电。
时钟频率的调节范围为80MHz到240MHz。
用户可以切断CPU的电源,利用低功耗协处理器来不断地监测外设的状态变化或某些模拟量是否超出阈值。
ESP-WROOM-32模组还集成了丰富的外设,包括电容式触摸传感器、霍尔传感器、低噪声传感放大器,SD 卡接口、以太网接口、高速SDIO/SPI、UART、I2S和I2C等。
ESP-WROOM-32模组以下简称ESP32。
ESP-32集成了传统蓝牙、低功耗蓝牙和Wi-Fi,具有广泛的用途:Wi-Fi支持极大范围的通信连接,也支持通过路由器直接连接互联网;而蓝牙可以让用户连接手机或者广播BLE Beacon以便于信号检测。
Christie HS Series 2K 项目器安全指南说明书
Christie HS Series 2KDWU1612-HS/DWU2022-HSProduct Safety Guide020-001786-01Important Safety InformationRead this document carefully before installing or operating the DWU1612-HS/DWU2022-HS projectors. Store the document in a location close to the projectors for future reference.Product documentationFor installation, setup, and user information, see the product documentation available on the Christie website at . Read all instructions before using or servicing this product.1.Access the documentation from the Christiewebsite:•Go to this URL:https:/// zh-cn/business/products/projectors/1-chip-dlp/hs-series•Scan the QR code using a QR code reader app on a smart phone or tablet.2.On the product page, select the model and switchto the Downloads tab.Related documentationAdditional information on the projector is available in the following documents.•DWU1612-HS/DWU2022-HS Product Safety Guide(P/N: 020-001786-XX)•DWU1612-HS/DWU2022-HS Installation and Setup Guide (P/N: 020-001787-XX)•DWU1612-HS/DWU2022-HS User Manual(P/N: 020-001788-XX)•DWU1612-HS/DWU2022-HS Specification Guide(P/N: 020-001789-XX)•DWU1612-HS/DWU2022-HS Service Manual(P/N: 020-001790-XX)•DWU1612-HS/DWU2022-HS Serial CommandsTechnical Reference (P/N: 020-103352-XX)•DWU1612-HS/DWU2022-HS Lens Throw RatiosTechnical Reference (P/N: 020-103353-XX)•DWU1612-HS/DWU2022-HS HSG AdjustmentInstruction Sheet (P/N: 020-103354-XX)•DWU1612-HS/DWU2022-HS Lenses TechnicalBulletin (P/N: 020-200472-XX)Model names•DWU1612-HS•DWU2022-HSNotationLearn the hazard and information symbols used in the product documentation.Product labelsLearn about the labels that may be used on the product. Labels on your product may be yellow or black and white.General hazardsHazard warnings also apply to accessories once they are installed in a Christie product that is connected to power.Danger messages indicate a hazardoussituation which, if not avoided, results indeath or serious injury.Warning messages indicate a hazardoussituation which, if not avoided, could resultin death or serious injury.Caution messages indicate a hazardoussituation which, if not avoided, could resultin minor or moderate injury.Notice messages indicate a hazardoussituation which, if not avoided, may result inequipment or property damage.Information messages provide additionalinformation, emphasize or provide a usefultip.Mandatory actionElectrical labelsLaser labelsThis projector has been classified as Class 1 Laser Product-Risk Group 3 according to the IEC 60825-1:2014 and IEC 62471-5:2015 standard.Additional safety hazardImportant safeguardsTo prevent personal injury and to protect the device from damage, read and follow these safety precautions.This projector is intended for use in a non-cinema environment.Safety and warning guidelines•Do not expose the product to moisture.•Do not operate the product without all of its covers in place.•This product must be installed within a restricted access location not accessible by the general public.•Only personnel who are trained on the precautions for the restricted access location can be granted entry to the area.•FIRE HAZARD! Keep hands, clothes, and allcombustible material away from the concentrated light beam of the projector.•TRIP OR FIRE HAZARD! Position all cables where they cannot contact hot surfaces, be pulled, betripped over, or damaged by persons walking on or objects rolling over the cables.•SHOCK HAZARD! Disconnect the product from AC before installing, moving, servicing, cleaning,removing components, or opening any enclosure.General hazard.Electric shock hazard. To avoid personal injury, disconnect all power sources before performing maintenance or service.Electrocution hazard. To avoid personal injury, always disconnect all power sources before performing maintenance or service.Hot surface hazard. To avoid personal injury, allow the product to cool for the recommended cool down time before performing maintenance or service.Burn hazard. To avoid personal injury, allow the product to cool for the recommended cool down time before performing maintenance or service.Moving parts hazard. To avoid personal injury, keep hands clear and loose clothing tied back.Fan hazard. To avoid personal injury, keep hands clear and loose clothing tied back. Always disconnect all power sources before performing maintenance or service procedures.Voltage hazard. To avoid personal injury, always disconnect all power sources before performing maintenance or service procedures.Bright light hazard. To avoid personal injury, never look directly at the light source.Not for household use.Consult the service manual.Disconnect all power sources before performing maintenance or service procedures.Indicates the presence of an earth ground.FDA laser variance (US projectors only)Indicates a light hazard. Do not look directly into the lens. The extreme high brightness can cause permanent eye damage. Class 1 Laser Product-Risk Group 3 according to Class 1 IEC 60825-1:2014 and IEC 62471-5:2015.Do not look directly into the lens. The extremely high brightness can cause permanent eye damage.Warning! If not avoided, the followingcould result in death or serious injury.•A minimum of four people or appropriately rated lift equipment is required to safely lift, install, or move the product.•OPTICAL RADIATION HAZARD! Disconnect thepower plug from the AC outlet if the product is not being used for an extended period of time.•Do not allow anything to rest on the power cord.•Always provide proper ventilation for the product to prevent overheating.•Only Christie qualified technicians are permitted to open product enclosures.•All procedures must be performed by Christie qualified technicians.•Always use a lens plug when installing or moving the product. This prevents contaminants from entering the product.•Only use cleaning solutions recommended by Christie. All other cleaning solutions may cause product damage and will void the warranty.Installation safety and warning guidelines•High leakage current present when connected to IT power systems.•ELECTRICAL and BURN HAZARD! Use caution when accessing internal components.•Only Christie qualified technicians are authorized to use the tools provided in the toolbox.AC/power precautions•FIRE HAZARD! Do not use a power cord, harness,or cable that appears damaged.•FIRE OR SHOCK HAZARD! Do not overload power outlets and extension cords.•SHOCK HAZARD! Only use the AC power cord provided with the product or recommended by Christie.•FIRE AND SHOCK HAZARD! Do not attemptoperation unless the power cord, power socket, and power plug meet the appropriate local rating standards.•SHOCK HAZARD! Do not attempt operation if the AC supply is not within the specified voltage and current, as specified on the license label.•SHOCK HAZARD! The AC power cord must be inserted into an outlet with grounding.•SHOCK HAZARD! Disconnect the product from AC before installing, moving, servicing, cleaning,removing components, or opening any enclosure.•Install the product near an easily accessible AC receptacle.Laser safety precautions•PERMANENT/TEMPORARY BLINDNESS HAZARD! No direct exposure to the beam must be permitted.Class 1 Laser Product-Risk Group 3 according to IEC 62471-5:2015.•Possibly hazardous optical radiation emitted from this product. (Risk Group 3)•LASER RADIATION HAZARD! This projector has a built-in Class 4 laser module. Never attempt to disassemble or modify the laser module.•Any operation or adjustment not specificallyinstructed in the User manual creates the risk of hazardous laser radiation exposure.•Do not operate the product without all of its covers in place.•Do not look directly into the lens when the light source is on. The extremely high brightness can cause permanent eye damage.•Only Christie qualified technicians who areknowledgeable about the hazards associated with laser use, high-voltage, and high temperatures generated by the product are authorized toassemble, install, and service the Christie Laser Projection System.Light intensity hazard distanceThis projector has been classified as Risk Group 3 according to the IEC 62471-5:2015 standard due to possible hazardous optical and thermal radiation being emitted.•PERMANENT/TEMPORARY BLINDNESS HAZARD! No direct exposure to the beam must be permitted.•PERMANENT/TEMPORARY BLINDNESS HAZARD!Operators must control access to the beam within the hazard distance or install the productpreventing potential exposure of the spectators'eyes from being in the hazard distance. Hazard zone shall be no lower than 3.0 meters above the floor. In addition, horizontal clearance to the hazard zone shall be a minimum 2.5 meters.Caution! If not avoided, the following could result in minor or moderate injury.Notice! If not avoided, the following could result in equipment or property damage.Warning! If not avoided, the following could result in death or serious injury.Caution! If not avoided, the following could result in minor or moderate injury.Warning! If not avoided, the followingcould result in death or serious injury.Warning! If not avoided, the following could result in death or serious injury.Warning! If not avoided, the followingcould result in death or serious injury.•EXTREME BRIGHTNESS! Do not place reflectiveobjects in the product light path.The following diagram shows the zones for optical and skin hazard distances:•A—Hazard zone. The region of space where theprojection light from the laser-illuminated projector is above emission limits for Risk Group 2. The light intensity may cause eye damage after amomentary or brief exposure (before a person can avert his or her eyes away from the light source).The light may cause skin burns to occur.•B—Hazard distance. Operators must control access to the beam within the hazard distance or installthe product preventing potential exposure of thespectators' eyes from being in the hazard distance.•C—No access zone. Horizontal clearance of the no access zone must be a minimum of 2.5 meters.•D—Vertical distance to hazard zone. The hazardzone must be no lower than 3.0 meters above the floor.•E—Represents the top view of the projector.•F—Represents the side view of the projector.For information detailing the hazard distance for each lens, refer to the DWU1612-HS/DWU2022-HS Installation and Setup Guide (P/N: 020-001787-XX)or DWU1612-HS/DWU2022-HS User Manual (P/N: 020-1788-XX).Power requirementsLearn about the power requirements for DWU1612-HS/ DWU2022-HS projectors.Technical support•North and South America: +1-800-221-8025 or ************************************•Europe, Middle East, and Africa: +44 (0) 1189778111 or ********************************•Asia Pacific: +65 6877-8737 or********************************Parameter RequirementPower rating•DWU1612-HS:200 - 240 VAC, 50/60 Hz, 7 A•DWU2022-HS:200 - 240 VAC, 50/60 Hz, 9 A AC input coupler C14Inrush current80 A Maximum @240 VACPower consumption •DWU1612-HS: 1410 W Maximum •DWU2022-HS: 1710 W Maximum重要安全信息请在安装或操作 DWU1612-HS/DWU2022-HS 投影机之前仔细阅读此文档。
佛山市禅城区星火电子电器厂 CHL系列商用燃气炉安全自动控制器 说明书

商用商用燃气燃气燃气炉炉安全自动安全自动控制器控制器(CHL 系列)使用说明书佛山市禅城区星火电子电器厂地址:佛山市禅城区轻工三路16号 电话:0757-******** 82107005 传真:0757-******** 邮编:528000 E-mail:xhdzdq@一、简介本商用燃气炉自动点火及熄火保护控制器(以下简称控制器)专用于商用燃气炉的炒炉、蒸饭柜、蒸饭车、大镬炉、汤炉、矮汤炉等大功率燃气设备的自动控制。
该控制器采用可调节燃气流量、工作寿命长、高可靠并可通过大流量燃气的转子式燃气调节阀;控制开关为磁控开关,只要转动手动燃气阀的手柄,即可自动点火;点火则摒弃了以往一直使用的使用母火(火种)引燃的方式,采用大功率高频高压电流产生的电火焰点火,炉膛中高速鼓风的气流及燃气压力波动均不会影响点火效果,做到百点百着;点火棒是用高温抗氧化钢,可耐1200℃高温,使用时间超过2000小时以上,并且采用直接检测燃烧火焰的高灵敏火焰检测,当主火意外熄灭时,在1秒内安全切断燃气。
由于本控制器采用了多项已开发多时的成熟技术,可以达到操作方便,工作可靠,不受商用燃气炉燃气压力波动大、燃气和空气混合比波动大以及工作环境高温潮湿、炉膛中有水淋、杂物跌落等恶劣条件的影响。
本控制器把控制器与燃气转子式电磁阀组装成一体;进出气接头分别用四颗、六颗螺钉与电磁阀连接,减少了因应力造成漏气的现象发生;开关引线直接从控制器外壳引出,并用护套线连成一体,开关是磁控式,没有机械动作结构,经久耐用;只需将点火及探火两根线与点火棒用螺钉连接;一经接上AC 220V 电源,控制器即可工作。
控制器外壳采用高级工程塑料,耐温防淋。
因而该控制器外形结构简洁,安装方便简单,而且维护方便。
二、型号类别示例:a. CHL-BO1A厨房用炉控制器,自动点火及熄火保护功能(液化气、天然气通用); b. CHL-BO1B厨房用炉控制器,自动点火及熄火保护加上离镬火力控制功能;三、特性及功能说明控制器电路采用电脑芯片控制,把高频高压火焰点火器,火焰离子检测器电路与转子式燃气电磁阀组装在优质工程塑料注塑成型的外壳内,外表面只留燃气进出气接口、带护套的磁控开关引线、电源线及点火、探火线,磁控开关由护套与外壳连成一体,探火线、点火线的安装方式有两种安装方式。
星火说明书(11.7.2)

蓝星化工新材料股份有限公司江西星火有机硅厂年产40万吨(一期20万吨)有机硅单体配套烧碱扩建工程初步设计说明书化工部长沙设计研究院二0一一年六月1 总论1.1 概述1.1.1 项目名称、主办单位、企业性质及负责人项目名称:蓝星化工新材料股份有限公司江西星火有机硅厂年产40万吨(一期20万吨)有机硅单体配套烧碱扩建工程承办单位:蓝星化工新材料股份有限公司江西星火有机硅厂企业性质:国有法人代表:蔡朋发项目地址:江西省九江市永修县星火工业园内1.1.2项目概况蓝星化工新材料股份有限公司是国家高新技术企业,江西星火有机硅厂(以下简称江西星火)是该公司主要生产厂之一,主要从事有机硅产品的生产和开发的生产厂。
2007年中国蓝星提出在天津临港工业区建设蓝星(天津)化工新材料产业园,并确定在此天津产业园建设年产40万吨有机硅单体的生产装置,期望以此来提升中国蓝星在国内化工新材料行业中的地位和我国化工新材料整体水平,进一步做大做强化工新材料业务。
2009 年,由于天津市城市规划方案的调整,在建的蓝星化工天津产业园区位于新规划的“双港双城”的其中之一的城区范围之中,因此天津市提出要求希望中国蓝星的天津产业园能够另外拟址建设。
由于拟置换的厂址位置,目前以至将来的一段时期内还不能具备工程建设的条件,为加快项目建设进度,中国蓝星提出在其现有的江西有机硅厂附近建设有机硅单体项目。
本项目有机硅单体装置总规模为40万吨/年(分二期),其中一期工程为:20万吨/年,引进法国公司的先进技术,优先发展上游的有机硅单体,进而上下游整体发展。
本次中国蓝星在江西有机硅厂建设的项目,分两个部分,一是有机硅单体装置,总规模为40万吨/年,分二期建设,一期工程为20万吨/年;二是有机硅单体下游产品,分八个大类,18个产品,年产有机硅单体产品共计12万吨。
有机硅产品生产所需要的主要原料是高纯度氯化氢,主要有盐酸解析而得到,合成盐酸的原料为氯气和氢气。
星火GG、GX、GXH与GXHA系列、哨兵S SX系列和哨兵SE系列气炉与持续点燃系统用户指南说明书
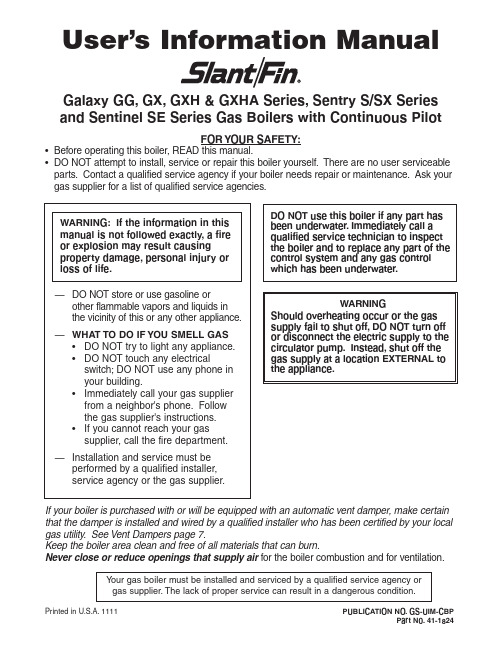
User’s Information ManualGalaxy GG, GX, GXH & GXHA Series, Sentry S/SX Series and Sentinel SE Series Gas Boilers with Continuous PilotWARNING: If the information in this manual is not followed exactly, a fire or explosion may result causing property damage, personal injury or loss of life.—DO NOT store or use gasoline orother flammable vapors and liquids in the vicinity of this or any other appliance.—WHAT TO DO IF YOU SMELL GAS•DO NOT try to light any appliance.•DO NOT touch any electricalswitch; DO NOT use any phone in your building.•Immediately call your gas supplier from a neighbor's phone. Follow the gas supplier's instructions.•If you cannot reach your gas supplier, call the fire department.—Installation and service must beperformed by a qualified installer,service agency or the gas supplier.DO NOT use this boiler if any part has been underwater. Immediately call a qualified service technician to inspect the boiler and to replace any part of the control system and any gas control which has been underwater.WARNINGShould overheating occur or the gas supply fail to shut off, DO NOT turn off or disconnect the electric supply to the circulator pump. Instead, shut off the gas supply at a location EXTERNAL to the appliance.If your boiler is purchased with or will be equipped with an automatic vent damper, make certain that the damper is installed and wired by a qualified installer who has been certified by your local gas utility. See Vent Dampers page 7.Keep the boiler area clean and free of all materials that can burn.Never close or reduce openings that supply air for the boiler combustion and for ventilation.Y our gas boiler must be installed and serviced by a qualified service agency or FOR YOUR SAFETY:•Before operating this boiler, READ this manual.•DO NOT attempt to install, service or repair this boiler yourself. There are no user serviceable parts. Contact a qualified service agency if your boiler needs repair or maintenance. Ask your gas supplier for a list of qualified service agencies.See lighting instructions on pages 7-8.Figure 2.Front and Right End View Models S-60 thru S-150Base Assembly* Vent damper may be installed horizontally on all models with use of a common vent elbow.See lighting instructions on pages 7-8.SENTINEL “SE” SERIES andSENTRY “SX” SERIES HOT WATER BOILERWITH EXTERNAL DRAFT HOOD Location and identification of partsFigure 9.Front and Right End ViewFigure 10.Base Assembly* Vent damper may be installed horizontally on all models with use of a common vent elbow.MODELS SX-150 to SX-210 and SE-70 to SE-245GALAXY GG/GX GXHA SERIES HOT WATER AND STEAM BOILERLocation and identification of partsFigure 14.Figure 15.Figure 17.BurnersGas ManifoldJacket TopTemperature and Pressure GaugeJacket TopPop Safety Valve Pressure GaugeFigure 16 GXHA Series—Steam BoilerJacket TopPop Safety Valve Pressure GaugeSee lighting instructions on page 8.Easy access front panel on standard extended jacket, is removed by simply pressing hand against panel and pushing up.I nspection, cleaning, repair—Chimney, flue pipe and boilerY our boiler and heating system will last an indefinitely long time at full efficiency , if it is inspected regularlyand is kept in good repair and adjustment. Y ou, the user,should make regular inspections, and report any prob-lems to your service agency . At regular intervals, you should have that agency inspect the system, and clean the boiler and make repairs and adjustments as neces-sary . What you and the service agency should do are listed below.Contact your gas supplier for a list of qualified service and repair agencies.User inspectionAt least once each month during the heating season and once just before cold weather starts:(1)Look closely at the smokepipe and draft hood (see Figure 18, 19 & 20). Make sure pipe joints are snug and are fastened with screws. Cement at the chim-ney joint should fill the joint and should not leak air. There should be no visible signs of rust (corrosion) or salts from water evaporation.(2)Look at all water (or steam) piping. There should be no leaks or signs of leaks at any pipe joints or around the boiler. Drain valves, other valves, and the relief valve (or steam safety valve) should not drip or leak.(3A) On water boilers:The temperature and pressure gauge indicates the pressure in the boiler at each water temperature. For most installations, it should indicate about 12 to 15 psi pressure when temperature is about 70 to 100 degrees F , and from 15 psi to 25 psi when tem-perature is up to 240 degrees F . FOR YOUR SYS-TEM, there is one correct pressure for each temper-ature. ASK YOUR INST ALLER OR SERVICEPER-SON TO EXPLAIN AND SHOW YOU. Learn what normal pressures to look for. If pressure decreases from normal, your system is losing water. If pres-sure rises from normal, the relief valve will open to relieve the pressure. Call your service organization if pressures are higher or lower than normal, and if the relief valve spills water. Repair or adjustment is needed.(3B) On steam boilers:(a)The water level in the gauge glass must be keptconstant. Y ou must have your installer or service organization explain to you how water is added to maintain water level.(b)Most boiler models are equipped with float type lowwater cutoff.Y ou must be familiar with this LOW WA TER CUT -OFF , how it works and HOW TO BLOW IT DOWN. Instructions are supplied with it. Ask your service organization to explain and show you blowdown. The cutoff should be blown down three times the first week and should be blown down weekly there-after. Maintenance of the low water cutoff is vital in protecting your steam boiler against breakage due to loss of water.If your boiler is equipped with an electronic probe type low water cutoff, it requires periodic testing. Ask your service agency to test this low water cutoff twice a year.(4)Study the labels attached to your boiler, especiallythe LIGHTING AND SHUTDOWN instructions. Have your installer or service organization show you how to start and shut down the boiler following those instructions. The lighting instructions on your boiler are also reproduced, with pictures, in this manual.(5)Stand near the boiler, look and listen. As the burnersstart and shut off, there should be no unusual noise. No fire should be visible coming out of the front when the burners start or run.(6)Ample air is required for your boiler to burn fuelcleanly and safely . Check to make sure the open-ings provided in your house are not closed and are not obstructed. This is most important in colderweather, when most air is needed.Figure 18.(Galaxy GG, GX, GXH,Sentinel SE, Sentry SX boilers)Figure 19.Figure 20.(7)If equipped with vent damper, which can ONL Y beinstalled on boilers equipped with 24 volt gas valve: (a)Y our vent damper must be OPEN when the boiler isoperating (BURNERS ARE ON). Ask your installer or serviceperson to show you the vent damper posi-tion indicator, indicating the open and closeddamper positions. Inspect for proper operationmonthly. If damper position indicator indicates thatthe damper is closed when the boiler is operating,SHUTDOWN the boiler immediately and call yourservice agency.(b)This device must be installed and inspected annuallyby a qualified installer in accordance with theSlant/Fin vent damper installation instructions. Ifimproperly installed, a hazardous condition such as explosion or carbon monoxide poisoning couldresult. If installed improperly, all vent damper andboiler warranties shall be voided.SERVICE INSPECTIONThe selected service organization should make these inspections, preferably once each year, before the cold weather begins:(1)Make the checks for leaks, corrosion, noise, flame,heat and outside air supply described under User’s Inspection.(2)Check safety operation of the HIGH LIMIT CON-TROL (and, for steam boilers, the LOW WA TERCUTOFF) and GAS VAL VE. If the boiler is equipped with an automatic vent damper, check this device for safe and automatic operation.(3)Check gas input rate, by clocking the gas meter.Inspect burner flame. Clean and adjust burners and adjust gas rate as required.(4)Disconnect flue pipe from draft hood. Remove drafthood and inspect boiler heating surface below. If any soot, scale or rust is visible, clean the boiler asdescribed in the next section.(5)Replace any corroded smokepipe. Repair or re-place other devices as found necessary. Check and adjust for normal operation. Explain to the userwhat was done and what to look for to prevent fu-ture problems.CLEANING—BOILER, SMOKEPIPE, CHIMNEY(See Figure 21). If necessary as indicated in (4) of Service Inspection section, the selected service organization should clean the boiler as follows:(1)Shut off electric power and gas supply.(2)Disconnect smokepipe and remove draft hood.(3)Remove jacket top panel. Remove flue coverfrom boiler.(4)Remove access door and remove burners, or placecover over burners for dirt protection.(5)Brush down boiler flues to bare metal. Clean alldebris from bottom of boiler after brushing.Clean burner slots, if necessary.(6)Replace flue cover and seal with furnace cement.Replace burners if removed. Replace access door.(7)Inspect draft hood and smokepipe. If corroded,replace. If soot or deposits from condensation arefound, clean out, and inspect inside of chimney for soot or other deposits. Clean if necessary.(8)Reconnect hood and flue pipe and fasten and sealall joints. T urn on gas and electric power.(9)Check boiler performance after cleaning, and adjustas necessary.NOTE: Condensate (water), rust, scale and soot are not found in the boiler or smokepipe of normally operating system. If any of these is found, eliminate the cause. The most likely cause of condensate and corrosion or soot is (a) restricted air supply, or (b) a faulty chimney.If you find during your inspection any unusualnoise, water leak, corroded smokepipe, abnor-mal water pressure or flame rollout, call forservice immediately.Figure 21.VENT DAMPERSA Slant/Fin vent damper is available only as part of a Slant/Fin gas boiler package equipped with a 24 volt gas valve. This vent damper is design certified by A.G.A.for use only on specific Slant/Fin Corporation gas boiler models.These boilers will be equipped with a plate which states that the boiler may be used with a Slant/Fin Corp. auto-matic vent damper device and indicates the proper vent damper model number.OTHER VENT DAMPER OR DEVICES WITH SIMILAR PURPOSE ARE NOT PERMITTED.WITH ANY VENT DAMPER OR PILOT SYSTEM(a)DO NOT attempt to install or adjust or service ityourself.(b)Make certain that the installation is approved by yourlocal gas utility .IGNITION SYSTEM—CONTINUOUS BURNING (STANDING) PILOTY our gas boiler is equipped with the Honeywell VR8200or VR8300 gas valves. See Safety and Lighting Instructions on pages 7 and 8 and Figure 22.SAFETY AND LIGHTING INSTRUCTIONSFOR IGNITION SYSTEMS EQUIPPED WITH GASVAL VES VR8200 AND VR8300SAFETY INFORMATIONFor Y our Safety Read Before LightingWARNING: If you do not follow these instructionsexactly, a fire or explosion may result causing property damage, personal injury or loss of life.A.This appliance has a pilot which must be lighted byhand. When lighting the pilot, follow these instruc-tions exactly .Y our gas boiler must be installed and serviced by a qualified service agency or gas supplier. The lack of proper service can result in a dangerous condition.WARNINGShould overheating occur or the gas supply fail to shut off, DO NOT turn off or disconnect the electric supply to the circulator pump. Instead,shut off the gas supply at a location EXTERNAL to the appliance.Figure 22. Continuous (Standing) PilotIgnition Systemurn knob on gas control counterclockwiseY our gas boiler must be installed and serviced by a qualified service agency orgas supplier. The lack of proper service can result in a dangerous condition.。
Sophos XG 火墙 SFOS v16 Beta 合作伙伴 Beta 计划说明书
Firewall XG / SFOS v16 Beta Partner Beta ProgramName:Company:Table of ContentWelcome (3)Look & Feel (4)Base: SFOS migration and performance (5)Base: HA with dynamic link (6)Network: Policy base routing (7)Heartbeat: Purpose based application filter policy (8)Heartbeat: Heartbeat deployment (9)Authentication: On appliance and third party OTP server for user authentication (10)RED: Red Site-2-Site (11)RED: Red 15w (12)Web Proxy: User / Group filters in policy (13)Web Proxy: Creative Commons filter → safe search with image licensing (14)Web Proxy: Policy warning (15)Web Proxy: Google Apps Domain (16)Web Proxy: Third-Party URL list (17)Mail Proxy: MTA mode deployments (18)Mail Proxy: SPX reply portal (19)Dear Beta-Tester,Welcome to our Beta program for Sophos XG Firewall SFOS v16! We are glad to have you on board, because your feedback will help us to make the new release simply better. Your experiences with the Sophos XG Firewall itself and with many different customer installations in the field will be a real benefit on our way to create a reliable SFOS v16 with useful new features!This document offers descriptions of new and exciting functionalities and a check list with ideas of useful test scenarios. Please feel free to add your own test ideas –you know exactly what your customers are looking for and how they like to use our solution.Both would be interesting for us: Does the new feature work as expected – what is not working? Do you think that the feature is complete – what are you missing –how would you design it?During the Beta phase we are offering several options how to get in touch with us depending on the type of information or help we have to share:A feature is not working as expected? You have found a bug?•and - if possible - with some details how our team can reproduce the behavior. Our engineering teams are checking the forum on a regular base.You have a question or a comment related to the Beta phase itself?•Please send an email to ****************Thank you very much in advance for your effort and your cooperation!Base: HA with dynamic linkNetwork: Policy base routingFirewall: Purpose based application filter policyHeartbeat: Heartbeat deploymentAuthentication: On appliance and third party OTP server for user authenticationRED: RED Site-2-SiteRED: RED15wWeb Proxy: User / Group filters in policyWeb Proxy: Creative Commons filter → safe search with image licensingWeb Proxy: Policy warningWeb Proxy: Google Apps DomainWeb Proxy: Third-Party URL listMail Proxy: MTA mode deploymentsMail Proxy: SPX reply portal。
新项目操作手册

新项目操作手册
目录
第一阶段:项目立项至规划总图确定期间(以万科地产设计要点为基础) (3)
1、安防
2、交通管理
3、绿地规划、绿化布局、浇灌系统
4、照明系统设计
5、垃圾中转站、垃圾桶平面布置
6、前期管理用房、活动场所、员工宿舍、社区用房、公用洗手间的规划
第二阶段:开工建设--项目开盘 (5)
1、物业管理方案
2、前期介入
3、前期开盘开荒
4、绿化浇灌设施的配置完善
第三阶段:管理处成立—交付 (7)
1、管理处理组织架构
2、工作移交
3、各种证照办理
4、管理用房装修
5、管理制度建设
6、公共关系建立
7、CI标识制作
8、清洁开荒、
9、房屋、设备设施接管验收
10、物业服务方案实现(客服项目、模式研讨)
11、入住策划、资料准备
第四阶段:交付使用半年内 (13)
1、装修管理(装修垃圾的清运管理)
2、工程遗留问题处理
3、水电抄表到户办理
4、安全、环境、设施设备管理
5、客户关系建立
6、商业街管理
4—1装修管理
4—4安全管理
4—6设施设备管理。
阿拉善盟新能源项目操作手册

阿拉善盟新能源项目操作手册一、引言概述嘿,小伙伴们!今天咱们来唠唠阿拉善盟的新能源项目操作手册。
这个项目可老酷了,它就像一个充满无限可能的宝藏,等着咱们去探索呢。
阿拉善盟这个地方呀,有着独特的地理环境和资源优势,这为新能源项目提供了超棒的发展土壤。
二、使用范围说明这个操作手册主要适用于阿拉善盟内的新能源项目相关工作哦。
不管是风力发电、太阳能发电,还是其他新能源相关的探索和开发工作,都能用到这个手册。
比如说你是一个新能源项目的小员工,或者是一个对这个项目感兴趣想深入了解的小伙伴,这手册就像是你的专属小秘书,能给你提供好多有用的信息。
三、操作步骤指南(一)项目前期筹备1. 调研工作首先要对阿拉善盟的地理环境进行全面的了解。
像哪里的风力比较大,适合建风力发电站;哪里的阳光充足,适合铺设太阳能板。
这就像是给新能源项目找一个最舒服的“家”。
还要调查当地的政策支持情况。
看看政府对新能源项目有啥优惠政策呀,有没有什么补贴之类的。
这可是项目能顺利进行的重要保障呢。
2. 团队组建找到那些对新能源项目有热情、有专业知识的小伙伴们。
要有懂工程建设的,能把发电站之类的设施建得稳稳当当;要有懂技术研发的,能让新能源设备发挥最大的效能;还要有会做市场推广的,这样咱们的新能源产品才能卖得出去呀。
(二)项目建设阶段1. 设备采购要是做风力发电项目,就得挑选合适的风力发电机。
要考虑它的功率大小、稳定性、性价比等因素。
就像挑手机一样,得挑个最适合自己的。
对于太阳能发电项目,太阳能板的质量可不能马虎。
要选那些转换效率高、使用寿命长的太阳能板。
2. 场地建设如果是风力发电,确定好风力发电机的安装位置后,就要进行基础建设。
要把地基打得牢牢的,这样大风来了,发电机也不会被吹倒。
太阳能发电场地的建设,要考虑光照角度、土地平整度等因素。
把太阳能板安装得妥妥当当的,让它们能充分吸收阳光。
(三)项目运营阶段1. 设备维护定期对风力发电机进行检查。
娱乐场所管理系统用户手册

娱乐场所管理系统用户手册某某市星火信息技术目录11公司简介2系统概述--------------------------------------------------------3操作说明--------------------------------------------------------3.1环境配置------------------------------------------------------3.2系统安装3.2.1硬件安装----------------------------------------------------3.2.2软件安装----------------------------------------------------3.3登陆系统------------------------------------------------------4系统功能结构----------------------------------------------------4.1系统的人员角色4.2业务实现------------------------------------------------------4.3具体功能操作---------------------------------------------------5系统相关操作说明5.1企业信息登记---------------------------------------------------5.2登记从业人员根本信息5.3制卡申请管理--------------------------------------------------5.4营业日志管理--------------------------------------------------5.5平安巡查管理--------------------------------------------------5.6查看通知通告--------------------------------------------------5.7登记从业人员离职信息5.8考勤信息查询---------------------------------------------------5.9系统维护-------------------------------------------------------6考勤系统使用说明6.1考勤机设置-----------------------------------------------------6.2考勤时段管理--------------------------------------------------6.3考勤制度设置--------------------------------------------------6.4考勤排班------------------------------------------------------6.5公出请假------------------------------------------------------6.6考勤补签------------------------------------------------------6.7考勤运算------------------------------------------------------6.8考勤报表------------------------------------------------------6.9相关考勤名词说明1 公司简介某某市星火电子工程公司成立于一九八八年四月,隶属于某某市公安局,定位为科技效劳型企业。
星火科技培训任务书.doc

星火科技培训任务书
项目类别:
项目名称:
项目编号:
管理单位(甲方):
承担单位(乙方):
乙方主管部门(丙方):
起止年限:20 年月至20 年月
科学技术部星火计划办公室
二O 年月
—1—
填写说明
一、本任务书的甲方是指科技部星火计划办公室(农村与社会发展司);乙方是指项目承担单位;丙方为承担单位上级主管部门(各省、自治区、直辖市、计划单列市科技厅,各部委有关司局)。
二、填写内容涉及到外文名称,要写清全称和缩写字母。
三、任务书文本需打印(A4),若手写需用钢笔或签字笔填写,字迹要工整清楚。
一式四份,必须每份签章。
四、凡不填内容的栏目,均用“—”表示。
—2—
—3—
—4—
五、经费预算
—5—
—6—
—7—。
“‘智慧星火’-中青学子学术支持计划”指导手册(团委提供,了解“智慧星火”用)

‚‘智慧星火’-中青学子学术支持计划‛指导手册共青团中国青年政治学院委员会编印二〇一二年五月目录卷首语 (3)前言:我们为什么要参加‚智慧星火‛? (6)第一部分:什么是‚智慧星火‛?智慧星火——中青学子学术支持计划 (7)第二部分:‚智慧星火‛活动流程 (8)第三部分:怎样参加‚智慧星火‛竞赛?(一)选题 (9)参考课题 (9)(二)规范要求 (15)(三)申请资助 (16)(四)课题审核 (17)(五)展开研究 (17)(六)初评 (17)(七)答辩 (17)(八)评奖及报送北京‚挑战杯‛竞赛 (17)第四部分:相关制度1.《中国青年政治学院‚智慧星火‛参赛作品评审规则》 (19)第五部分附录1.中国青年政治学院第十四届‚智慧星火‛作品撰写格式 (21)2.中国青年政治学院第十四届‚智慧星火‛项目申请书一、二 (25)3.中国青年政治学院第十四届‚智慧星火‛--中青学子学术支持计划合同书 (37)4.中国青年政治学院第十四届‚智慧星火‛作品竞赛资格及形式审查实施细则 (38)后记:参赛选手的感悟 (40)卷首语‚没有学术精神就很难有科学精神,没有科学精神就很难有实事求是的精神和勇气。
在大学,培养学术精神,知道尊重科学、尊重知识、尊重老师是非常重要的。
‛培养学术精神,是团中央书记处第一书记——中国青年政治学院校长陆昊对人才培养提出的要求。
人才培养是学校永恒的主题。
学校长期以来高度重视人才培养工作,并初步形成了独具特色的‚中青培养模式‛,学校一直注重围绕大学生‚政治观‛、‚道德观‛、‚品质观‛教育开展主题丰富的学习实践活动,办好具有学校特色的校园文化品牌活动,其中校团委主办的‚智慧星火——中青学子学术支持计划‛(下简称‚智慧星火‛)活动便是在学生中享有知名度的品牌活动之一。
‚智慧星火‛是在学校党委的悉心指导下,在学校有关部门的大力支持和帮助下,由校团委和科研处联合举办的大型校园学生学术科技文化活动。
如何申请星火计划项目
一、申报国家级星火计划项目必须具备的基本条件1.符合国家产业和技术政策,适应本地区国民经济和社会发展战略和行业发展规划要求,有利于保护生态环境;2.技术先进适用、成熟可靠,有利于农业和农村经济结构的战略性调整,具有良好的经济、社会、生态效益和发展前景;3.有利于推动农村科技进步和提高农村劳动者素质,有利于增加农村就业机会,增加地方财政收入和农民收入;4.项目申报单位必须是具有独立法人资格的企事业单位,以企业为主体。
鼓励企业与大专院校、科研单位联合申报;5.项目申报单位应具有良好的金融、商业和社会道德信誉,经营机制良好,没有知识产权纠纷。
申请银行贷款的项目,必须符合银行信贷要求。
申请重点项目的单位除具备上述条件外,还必须具有较强的技术开发和应用能力、可靠的技术依托以及完成项目所需的其它相关条件。
二、面上项目的申报、审批、实施管理和验收程序1.国家级星火计划面上项目由省及部委科技行政主管部门负责统一组织申报。
2.凡申请承担国家级星火计划项目的单位,必须据实填报星火计划项目申报书,经所在地科技行政主管部门审核后,报送省及部委科技行政主管部门。
3.省及部委科技行政主管部门负责本地区、本部门国家级星火计划面上项目的评审和论证。
按星火计划网络管理要求,将通过评审的项目申报材料于每年11月30日前,集中通过电子邮件发送科技部星火办。
网址为:*****************,抄送网址为:*************.cn。
省、地、县级星火计划项目由各级所属科技行政主管部门负责制定工作程序和管理规章制度。
4.科技部星火办组织有关专家对各地区和各部门报送的国家级星火计划项目进行认定,并负责编制国家级年度星火项目计划。
于每年四月底前下达到各省及部委科技行政主管部门,同时向项目承担单位颁发“国家级星火计划项目证书”,并向国家银行推荐贷款项目。
5.凡列入国家级星火计划的项目要组织验收。
面上项目的实施管理和验收组织工作由省及部委科技行政主管部门负责。
国家科技计划项目申报中心

国家科技计划项目申报中心星火计划项目申报申报单位手册2008年4月第一章引言1.1用户说明星火计划项目申报用户分单位管理员用户和申报用户两种类型,首先要由单位管理员创建申报用户(已经创建过的用户无需重复创建,可以直接授权)、创建申报项目、对已创建的项目授权给本单位的申报用户进行填报;其次由申报用户和单位管理员用户共同完成申请书的填报。
具体流程如下图所示:注:只有单位管理员需要在系统中注册,单位管理员用户负责本单位中所有星火计划项目申报的管理工作。
1.2申报流程说明星火计划项目申报过程中涉及到的单位包括科学技术部、地方科技管理部门、国务院直属部门、申报单位等,在申报过程中,申报单位通过怎样的流程可以完成申报过程,由各级管理部门确定,目前系统中共有以下四种申报流程,在此做简单说明,熟悉相关情况用户可不看此处。
1)面向区(县)、地市、省三级管理单位的申报流程(流程I):2)面向国务院部门申报流程(流程Ⅱ)1.部属单位用户申报只有两级,即部委和申报用户;3)面向省级单位用户申报流程(流程Ⅲ)申报用户将申报项目交由单位管理员向省级主管单位提交;4)面向直辖市或计划单列市用户申报流程(流程)两级或三级用户,管理用户为市和区县,申报用户通过单位管理员向区县管理单位向市级主管间接提交;或通过单位管理员直接向市级主管提交。
第二章星火计划单位管理员使用说明2.1单位管理员登录(不知如何登录用户请参照申报系统共用功能说明4.2登录系统)用户登录成功后点击左边计划列表中“星火计划”,即进入项目申报系统。
2.2用户管理在正常登录页面左侧菜单点击“填报帐号管理”,点击“创建申报用户”,如图:图2.4-1申报用户管理填写用户注册信息,点击“提交”,即将新用户加入用户列表。
如图:图2.4-2创建申报用户2.3项目管理1 新建项目在正常登录页面左侧菜单点击“项目管理”,弹出项目列表页面,如图:击“保存”即可,如下图:点击“返回”,在项目列表中可看到刚建立的项目:2 授权在项目列表中,点击项目对应的“未授权”链接,进入对该项目进行授权的页面,如下图:下图:点击单选框选中欲授权用户,然后点击按钮,窗口自动关闭,回到授权页面,并把刚选中的用户id自动带回,此时点击“保存授权”即可。
- 1、下载文档前请自行甄别文档内容的完整性,平台不提供额外的编辑、内容补充、找答案等附加服务。
- 2、"仅部分预览"的文档,不可在线预览部分如存在完整性等问题,可反馈申请退款(可完整预览的文档不适用该条件!)。
- 3、如文档侵犯您的权益,请联系客服反馈,我们会尽快为您处理(人工客服工作时间:9:00-18:30)。
国家科技计划项目申报中心星火计划项目申报申报单位手册2008年4月第一章引言1.1用户说明星火计划项目申报用户分单位管理员用户和申报用户两种类型,首先要由单位管理员创建申报用户(已经创建过的用户无需重复创建,可以直接授权)、创建申报项目、对已创建的项目授权给本单位的申报用户进行填报;其次由申报用户和单位管理员用户共同完成申请书的填报。
具体流程如下图所示:注:只有单位管理员需要在系统中注册,单位管理员用户负责本单位中所有星火计划项目申报的管理工作。
1.2申报流程说明星火计划项目申报过程中涉及到的单位包括科学技术部、地方科技管理部门、国务院直属部门、申报单位等,在申报过程中,申报单位通过怎样的流程可以完成申报过程,由各级管理部门确定,目前系统中共有以下四种申报流程,在此做简单说明,熟悉相关情况用户可不看此处。
1)面向区(县)、地市、省三级管理单位的申报流程(流程I):2)面向国务院部门申报流程(流程Ⅱ)1.部属单位用户申报只有两级,即部委和申报用户;3)面向省级单位用户申报流程(流程Ⅲ)申报用户将申报项目交由单位管理员向省级主管单位提交;4)面向直辖市或计划单列市用户申报流程(流程)两级或三级用户,管理用户为市和区县,申报用户通过单位管理员向区县管理单位向市级主管间接提交;或通过单位管理员直接向市级主管提交。
第二章星火计划单位管理员使用说明2.1单位管理员登录(不知如何登录用户请参照申报系统共用功能说明4.2登录系统)用户登录成功后点击左边计划列表中“星火计划”,即进入项目申报系统。
2.2用户管理在正常登录页面左侧菜单点击“填报用户管理”,点击“创建申报用户”,如图:图2.4-1申报用户管理填写用户注册信息,点击“提交”,即将新用户加入用户列表。
如图:图2.4-2创建申报用户2.3项目管理1 新建项目在正常登录页面左侧菜单点击“项目管理”,弹出项目列表页面,如图:点击“新建项目”按钮,弹出新建项目页面,填写项目名称,点击“保存”即可,如下图:点击“返回”,在项目列表中可看到刚建立的项目:2 授权在项目列表中,点击项目对应的“未授权”链接,进入对该项目进行授权的页面,如下图:点击“选择用户”按钮,弹出该项目可以授权给的用户列表,如下图:点击单选框选中欲授权用户,然后点击按钮,窗口自动关闭,回到授权页面,并把刚选中的用户id自动带回,此时点击“保存授权”即可。
若已授权的项目,通过点击相应的“已授权”链接,进入授权页面,通过同样的操作,可修改授权用户。
3 删除项目在项目列表左侧勾选需要删除的项目,点击页面左上角的“删除”,如图:注意:点击确定后记录将被永久删除而不可恢复。
4 提交项目在项目列表左侧勾选需要提交的项目,点击页面左上角的“提交”,如图:在列表中状态栏查看项目是否提交,若提交成功在状态栏会显示“已提交至推荐单位”字样,项目即被提交给上一级主管单位审核。
5 撤报项目在项目列表左侧勾选需要撤报的项目,点击页面左上角的“撤报”,如图:只有项目状态为“已提交至管理员”的项目才能撤报。
第三章星火计划申报用户使用说明3.1申报用户登录(不知如何登录用户请参照申报系统共用功能说明4.2登录系统)用户登录成功后点击左边计划列表中“星火计划”,在弹开菜单中选择“项目申报材料”,即可进入项目申报系统。
3.2申报内容填写在正常登录页面左侧菜单点击“项目申报材料”,系统弹开项目列表,如下图:1 第一页封面封面填写内容为申请书的基本信息,内容较为重要。
所在地区所在地区的选择直接决定了该项目的申报流程,所在地区分三级:第一级为部委、省厅、直辖市、计划单列市;第二级为地级市;第三级为区县。
参照1.2申报流程说明面向区(县)、地市、省三级管理单位的申报流程(流程I)三级均须选择。
面向国务院部门申报流程(流程Ⅱ)只需选择第一级,其它两级选择“不用逐级申报”。
面向省级单位用户申报流程(流程Ⅲ)只需选择第一级,其它两级选择“不用逐级申报”。
面向直辖市或计划单列市用户申报流程(流程Ⅳ)只需选择第一、三级。
如第三级选择“不用逐级申报”,项目将直接提交到直辖市或计划单列市审批。
注意:1.通常应该写成首页或封面。
2.申请书所有数据必需填写,如项目不需要填写的数据项,数字请填“0”,字符填“/”。
3. 项目结束时间应晚于项目起始时间。
2 第二页项目单位基本情况注意:1.建议输入数字采用英文输入法,用数字小键盘录入。
2. 人员构成总数不需填写,由人员构成分类合计。
人员构成总数=管理+研发/师资+营销+生产=硕士以上+大专和本科+高中和中专+初中或技校以下。
3 第三页申报项目基本情况(续)该页填写内容主要是项目经费情况。
注意:灰色输入框不需填写,由计算产生。
计算公式如下1.总投资额=科技部计划拨款+其他国家级拨款+地方政府拨款+贷款+自有资金+其他资金;2.支出预算合计=人员经费+设备经费+交流经费+相关业务经费+管理经费+其他经费;3.设备经费=设备购臵费+设备试制费;4.相关业务费=材料费+燃料及动力费+测试及化验费+会议差旅费。
4 第四页项目简介项目简介字数限制在1500字以内,按以下提纲填写:1、项目的意义和必要性2、主要开发内容和指标3、技术成熟度简介4、市场分析与预期效果5、环保措施及效果5 第五页项目人员组成信息注意:1.项目参加人数=高级职称人数+中级职称人数+初级职称人数+其他人数=博士+硕士+学士+其他人数。
2.主要参加人员为多个,点击“添加“增加参加人员,选中参加人员点击“删除”可删除添加人员。
6 第六页审核意见注意:审核意见不由申报用户填写,由各推荐单位填写。
以上就是项目申请需要填写的内容,填写完每一页确认无误后需点“保存”或者点页面下方的“下一页”系统会自动保存,(注:例如填写完第一页后不保存直接点页面上方的“第二页”您填写的第一页的内容就丢失了)。
根据要求依次填写完以上六页并确定保存成功。
3.3申请书打印打印申报书:点击申报书封面右上角的“打印申报书”图标,进入申报书打印界面,如图2-1-11特别注意因为NTKO Office文档控件通过OLE调用了Office 的功能,所以客户端不安装Office不能使用。
上网助手,雅虎助手一类的软件会拦截打印控件的安装,打印前请卸载这类软件。
当您的 Internet Explorer 的安全设臵为高时,页面会显示“ActiveX 控件不安全”。
需通过如下步骤重新设臵IE的Internet 区域的安全级别:1)在 Internet Explorer 的“工具”菜单上,单击“Internet 选项”如图。
2)单击“安全”选项卡,然后单击要设臵安全级别的区域,本处选择“Internet”区域。
3)在“该区域的安全级别”下,选择“默认级别”来使用Internet 区域的默认安全级别(在浏览课件时,一般情况下用“默认级别”即可)。
如果“默认级别”已变灰,表明Internet区域已处于默认的安全级别。
4)或者单击“自定义级别”,弹出“安全设臵”窗口,确保“ActiveX控件和插件”的有关设臵为:1.对标记为可安全执行脚本的ActiveX控件执行脚本——启用;2.对没有标记为可安全执行脚本的ActiveX控件进行初始化和脚本运行——提示;3.下载未签名的ActiveX控件——提示;4.下载已签名的ActiveX控件——启用;5.运行ActiveX控件和插件——启用。
然后点击确定,关闭“安全设臵”窗口和“Internet 选项”窗口。
3.4可行性报告、预算书上传1、若项目属于重点项目则必须要上传可行性研究报告及预算书,否则您的项目就无法成功提交。
2、在项目列表右侧,点“可行性报告”、“预算书”对应的上传连接进入上传界面,如图3.5申请内容提交审批在申报书第一页右上角,点击“项目提交”,如图:注意1、提交页面显示项目各页信息填写情况,仅当所有申请书信息填写完毕且重点项目上传可行性报告后,方可提交项目给单位管理员。
2、点确定后您就不能在修改申报项目的内容了。
3、在列表中状态栏查看项目是否提交,若提交成功在状态栏会显示已提交字样,您的申请项目就被提交给上一级主管单位审核。
第四章申报系统共用功能说明4.1用户注册本系统中的用户注册,涉及的用户包括:申报单位管理员用户、申报单位计划申报用户2类。
这2类用户的注册流程相同,只是在注册过程中的不同阶段,所进行的选择不同。
具体用户注册步骤如下:1.在登录页面点击“用户注册”,进入“确认申报说明”页面,用户必须仔细阅读该说明,确认申报信息服务符合网络申报的保密性、安全性、准确性等具体要求。
只有在同意该说明后,才能继续下面的注册过程,如果无法确认并同意相应说明内容,点击“不同意”,注册过程将结束,系统自动回到初始页面。
图2.2-1 注册说明2.选择“同意”按钮,进入“选择计划及申报用户类型”页面,科技部所有接受网络申报的科技计划均在此页面显示。
但用户只能选择当前正在接受申报的计划及相关用户类型。
用户选定计划及申报类型后,管理单位将根据具体管理办法审核用户提交的申报申请。
如图2.2-2。
注册用户必须至少选择一个申报用户类型(可以同时选择多个计划的申报用户类型)。
图2.2-2注册选择计划3.选择“下一步”,进入“单位信息检索及注册”页面。
用户首先须填写单位名称,然后点击“检索”,如果该单位存在,则单位信息会自动取出,说明单位已经注册,如果该单位信息不存在,则要由注册用户录入单位信息。
用户逐项填写单位和负责人信息(加带*号的信息项必须填写)。
说明1:单位名称必须是单位全称,与单位公章上的名称一致。
如果单位信息已经存在,就说明该单位已在申报系统中注册。
此时用户可以直接点击下一步进行用户信息的注册。
图2.2-3注册单位信息4.点击“下一步”,进入“注册用户信息”页面。
填写用户登录信息和用户基本信息:填写需要注册的用户登录名,通过点击“检索”来查询系统中是否存在重名用户名。
用户基本信息要如实、详细填写,所有信息填写完成后点击“提交”。
图2.2-4 注册个人信息5.注册完成后,用户登录申报系统,点击“”中的“此处”链接(如下图),进入打印页面。
如果是已具有其它计划申报权限的用户,登录申报系统后,点击右上角“单位用户信息管理”,然后再点击“审核信息打印”(如下图),进入打印页面。
关证明文件尽快寄送科技部信息中心。
相关管理部门将根据申报单位登记信息进行审核,只有审核通过后才可登录申报中心进行相应项目申报。
相关证明文件包括:组织机构代码证复印件、注册用户身份证复印件,企业单位还须提供企业法人营业执照复印件。
以上证明材料复印件均须加盖单位公章。
科技部信息中心联系方式:电话:(010)68576284,58881245 传真:(010)68584828电子信箱:program@ 邮编:100862通信地址:北京市海淀区复兴路乙15号科学技术部信息中心协调处收4.2系统登录用户只有完成单位信息、申报用户信息的注册,并通过系统的自动数据校验才能得到申报帐号。
