贴标机用户使用手册(全)
全自动贴标包装机的操作手册
全自动贴标包装机的操作手册
一、操作准备
1. 确保机器周围环境清洁,无杂物。
2. 检查电源线是否连接良好,确保电源稳定。
3. 根据包装需求和物品尺寸,选择合适的标签和包装材料。
二、开机与设置
1. 打开全自动贴标包装机的电源开关,启动机器。
2. 通过控制面板设置各项参数,如标签长度、宽度、贴标位置等。
3. 根据需要,调整输送带的速度和宽度,确保物品能够顺利通过包装机。
三、标签安装与调整
1. 将标签放置在指定位置,确保标签平整,无皱褶。
2. 根据物品的高度和宽度,调整标签的尺寸和位置,确保标签能够准确贴附在物品上。
3. 调整标签粘贴的压力和温度,确保标签粘贴牢固。
四、包装操作
1. 将物品放置在输送带上,确保物品稳定,无倾斜。
2. 调整输送带的速度,使物品能够匀速通过贴标区域。
3. 当物品经过贴标区域时,机器会自动完成标签粘贴和包装工作。
4. 如有需要,可以在贴标前对物品进行打印或喷码操作。
五、关机与清理
1. 当完成所有包装工作时,关闭全自动贴标包装机的电源开关。
2. 清理机器周围的杂物和垃圾,保持机器周围整洁。
3. 定期检查和维护机器,确保机器的正常运行和使用寿命。
得益膜贴标机使用说明书-160

LabelManager® 160 User GuideCopyright© 2011-2015 Newell Rubbermaid Europe, LLC. All rights reserved. Rev. 6/20No part of this document may be reproduced or transmitted in any form or by any means or translated into another language without the prior written consent of Newell Rubbermaid Europe, LLC.TrademarksDYMO and LabelManager are registered marks in the US and other countries. All other trademarks are the property of their respective holders.FCC StatementCaution: The user is cautioned that changes or modifications not expressly approved by the party responsible for compliance could void the user's authority to operate the equipment.Note: This equipment has been tested and found to comply with the limits for a Class B digital device, pursuant to part 15 of the FCC Rules. These limits are designed to provide reasonable protection against harmful interference in a residential installation. This equipment generates, uses and can radiate radio frequency energy and, if not installed and used in accordance with the instructions, may cause harmful interference to radio communications. However, there is no guarantee that interference will not occur in a particular installation. If this equipment does cause harmful interference to radio or television reception, which can be determined by turning the equipment off and on, the user is encouraged to try to correct the interference by one or more of the following measures:Reorient or relocate the receiving antenna.Increase the separation between the equipment and receiver.Connect the equipment into an outlet on a circuit different from that to which the receiver is connected.Consult the dealer or an experienced radio/TV technician for help.ContentsAbout Your New Label Maker . . . . . . . . . . . . . . . . . . . . . . . . . . . . . . . . . . . . . . . . . . . . . . . . . . . . . . 5 Registering Your Label Maker . . . . . . . . . . . . . . . . . . . . . . . . . . . . . . . . . . . . . . . . . . . . . . . . . . . . . . . . . . . . . . . . . . . . . . . . .5 Getting Started . . . . . . . . . . . . . . . . . . . . . . . . . . . . . . . . . . . . . . . . . . . . . . . . . . . . . . . . . . . . . . . . . 5 Connecting the Power . . . . . . . . . . . . . . . . . . . . . . . . . . . . . . . . . . . . . . . . . . . . . . . . . . . . . . . . . . . . . . . . . . . . . . . . . . . . . .5 Inserting the Batteries . . . . . . . . . . . . . . . . . . . . . . . . . . . . . . . . . . . . . . . . . . . . . . . . . . . . . . . . . . . . . . . . . . . . . . . . . . .5 Connecting the Optional Power Adapter . . . . . . . . . . . . . . . . . . . . . . . . . . . . . . . . . . . . . . . . . . . . . . . . . . . . . . . . . . . . .5 Inserting and Removing the Label Cassette . . . . . . . . . . . . . . . . . . . . . . . . . . . . . . . . . . . . . . . . . . . . . . . . . . . . . . . . . . . . . .5 Using the Label Maker for the First Time . . . . . . . . . . . . . . . . . . . . . . . . . . . . . . . . . . . . . . . . . . . . . 6 Getting to Know the Label Maker . . . . . . . . . . . . . . . . . . . . . . . . . . . . . . . . . . . . . . . . . . . . . . . . . . . 6 Power . . . . . . . . . . . . . . . . . . . . . . . . . . . . . . . . . . . . . . . . . . . . . . . . . . . . . . . . . . . . . . . . . . . . . . . . . . . . . . . . . . . . . . . . . . .6 LCD Display . . . . . . . . . . . . . . . . . . . . . . . . . . . . . . . . . . . . . . . . . . . . . . . . . . . . . . . . . . . . . . . . . . . . . . . . . . . . . . . . . . . . . .6 Navigation Keys . . . . . . . . . . . . . . . . . . . . . . . . . . . . . . . . . . . . . . . . . . . . . . . . . . . . . . . . . . . . . . . . . . . . . . . . . . . . . . . . . . .6 Cancel . . . . . . . . . . . . . . . . . . . . . . . . . . . . . . . . . . . . . . . . . . . . . . . . . . . . . . . . . . . . . . . . . . . . . . . . . . . . . . . . . . . . . . . . . .6 Backspace/Clear . . . . . . . . . . . . . . . . . . . . . . . . . . . . . . . . . . . . . . . . . . . . . . . . . . . . . . . . . . . . . . . . . . . . . . . . . . . . . . . . . .6 Caps Mode . . . . . . . . . . . . . . . . . . . . . . . . . . . . . . . . . . . . . . . . . . . . . . . . . . . . . . . . . . . . . . . . . . . . . . . . . . . . . . . . . . . . . . .6 Menu . . . . . . . . . . . . . . . . . . . . . . . . . . . . . . . . . . . . . . . . . . . . . . . . . . . . . . . . . . . . . . . . . . . . . . . . . . . . . . . . . . . . . . . . . . .7 Using Clip Art, Symbols, and Special Characters . . . . . . . . . . . . . . . . . . . . . . . . . . . . . . . . . . . . . . . 7 Adding Clip Art . . . . . . . . . . . . . . . . . . . . . . . . . . . . . . . . . . . . . . . . . . . . . . . . . . . . . . . . . . . . . . . . . . . . . . . . . . . . . . . . . . . .7 Adding Symbols . . . . . . . . . . . . . . . . . . . . . . . . . . . . . . . . . . . . . . . . . . . . . . . . . . . . . . . . . . . . . . . . . . . . . . . . . . . . . . . . . . .7 Adding International Characters . . . . . . . . . . . . . . . . . . . . . . . . . . . . . . . . . . . . . . . . . . . . . . . . . . . . . . . . . . . . . . . . . . . . . . .7 Formatting Your Label . . . . . . . . . . . . . . . . . . . . . . . . . . . . . . . . . . . . . . . . . . . . . . . . . . . . . . . . . . . . 7 Changing the Font Size . . . . . . . . . . . . . . . . . . . . . . . . . . . . . . . . . . . . . . . . . . . . . . . . . . . . . . . . . . . . . . . . . . . . . . . . . . . . . .7 Changing the Font Style . . . . . . . . . . . . . . . . . . . . . . . . . . . . . . . . . . . . . . . . . . . . . . . . . . . . . . . . . . . . . . . . . . . . . . . . . . . . .7 Adding Box and Underline Styles . . . . . . . . . . . . . . . . . . . . . . . . . . . . . . . . . . . . . . . . . . . . . . . . . . . . . . . . . . . . . . . . . . . . . .8 Creating Vertical Labels . . . . . . . . . . . . . . . . . . . . . . . . . . . . . . . . . . . . . . . . . . . . . . . . . . . . . . . . . . . . . . . . . . . . . . . . . . . . .8 Creating Two-Line Labels . . . . . . . . . . . . . . . . . . . . . . . . . . . . . . . . . . . . . . . . . . . . . . . . . . . . . . . . . . . . . . . . . . . . . . . . . . . .8 Caring for Your Label Maker . . . . . . . . . . . . . . . . . . . . . . . . . . . . . . . . . . . . . . . . . . . . . . . . . . . . . . . 8 Clip Art . . . . . . . . . . . . . . . . . . . . . . . . . . . . . . . . . . . . . . . . . . . . . . . . . . . . . . . . . . . . . . . . . . . . . . . 9 Symbols . . . . . . . . . . . . . . . . . . . . . . . . . . . . . . . . . . . . . . . . . . . . . . . . . . . . . . . . . . . . . . . . . . . . . . . 9 Troubleshooting . . . . . . . . . . . . . . . . . . . . . . . . . . . . . . . . . . . . . . . . . . . . . . . . . . . . . . . . . . . . . . . 10 Documentation Feedback . . . . . . . . . . . . . . . . . . . . . . . . . . . . . . . . . . . . . . . . . . . . . . . . . . . . . . . . 11 Environmental Information . . . . . . . . . . . . . . . . . . . . . . . . . . . . . . . . . . . . . . . . . . . . . . . . . . . . . . . 11123Figure 1 DYMO LabelManager 160 Label Maker1LCD display8Cancel15Accented characters 2Italic9OK16Navigation3Label exit slot10Symbols – Punctuation17Menu4Underline/Boxes11Backspace18On/Off5Vertical12Return19Font size6Cutter button13Space bar20Bold7Print 14CapsAbout Your New Label MakerWith the DYMO LabelManager 160 label maker, you can create a wide variety of high-quality, self-adhesive labels. You can choose to print your labels in many different font sizes and styles. The label maker uses DYMO D1 label cassettes in widths of 1/4”, 3/8”, or 1/2”. Labels are available in a wide range of colors.Visit for information on obtaining labels and accessories for your label maker.Registering Your Label MakerVisit /register to register your label maker online.Register your label maker to receive these benefits:Notification of availability of upgrades by emailSpecial offers and new product announcements During the registration process, you will need the serial number, which is located inside the back cover of the label maker.Getting StartedFollow the instructions in this section to print yourfirst label.Connecting the PowerThe label maker is powered by alkaline batteries oran optional AC power adapter. To save power, the label maker automatically turns off after two minutesof inactivity.Inserting the BatteriesThe label maker is powered by six AAA alkaline batteries. To insert the batteries1Press the thumb latch on the back of the label maker to remove the battery compartment cover. SeeFigure 2.2Insert the batteries following the polarity markings (+and –).3Replace the battery compartment cover.Safety PrecautionsDo not mix old and new batteries.Do not mix alkaline, standard (carbon-zinc), or rechargeable (ni-cad, ni-mh, etc.) batteries.Remove the batteries if the printer will not be used fora long period of time.Connecting the Optional Power AdapterAn optional 9 Volt, 2 A power adapter can be used to power the label maker. Connecting the power adapterto the label maker disconnects the batteries as a power source.Use only the power adapter listed in this user guide: Adapter model DSA-18PFM-09 Fc 090200 (note: “c” can be EU, UP, UK, US, UJ, JP, CH, IN, AU, KA, KR, AN, AR, BZ, SA, AF or CA) from Dee Van Enterprise Co., Ltd.To connect the optional power adapter1Plug the power adapter into the power connector on the top of the label maker.2Plug the other end of the power adapter into a power outlet.Inserting and Removing the Label Cassette Your label maker uses DYMO D1 label cassettes. Visit for information about purchasing additional label cassettes.Cutter blade is extremely sharp. While replacing the label cassette, keep fingers and other body parts away from cutter blade and do not press the cutter button.To insert the label cassette1Lift the label cassette cover to open the label compartment. See Figure 3.2Make sure that the label and ribbon are taut across the mouth of the cassette and that the label passesFigure 2Figure 43Insert the cassette and press firmly until the cassette clicks into place. See Figure 5.4Close the label cassette cover.Each time you change the label cassette, you will beprompted to choose the label width.To remove the label cassette1Lift the label cartridge door on the back of the printer. 2Remove the label cassette.3Insert a new label cassette as described above.4Select the new label width when prompted by the label maker.Using the Label Maker for the First Time The first time you turn on the power, you are asked to select the language and label width settings. These selections remain set until you change them.You can change these selections using the key. To set up the label maker1Press to turn on the label maker.2Select the language and press .3Select the width of the label cassette currently in the label maker and press .You are now ready to print your first label.To print a label1Enter text to create a simple label.2Press .3Press the cutter button to cutthe label.4Remove the backing from thelabel to expose the adhesive,and then attach the label.See Figure 6.Congratulations! You printed your first label. Continue reading to learn more about the options available for creating labels.Getting to Know the Label Maker Become familiar with the location of the function keys on your label maker. Refer to Figure1 on page4. The following sections describe each feature in detail. PowerThe key turns the label maker on and off. After two minutes of inactivity, the label maker is switched off automatically.When the label maker is turned off, the current label text and formatting are remembered and will be displayed when power to the label maker is turned back on. When the batteries are removed and the optional power adapter is disconnected, the current label text and formatting are lost.LCD DisplayWith DYMO’s exclusive graphical display, most of the formatting you add is visible instantly.Feature indicators along the top and bottom of the LCD display appear black when a feature or setting is selected. Navigation KeysYou can review and edit your label using the left and right navigation keys. You can move through menu selections using all four navigation keys, and then press to make a selection.CancelThe key exits from a menu without making a selection or cancels an action, such as printing. Backspace/ClearThe key deletes the character to the left of the cursor. Pressing and holding the key quickly deletes the characters to the left of the cursor.Caps ModeThe key toggles capitalization on or off. When CAPS mode is on, all the letters entered are in uppercase. When CAPS mode is off, all the letters entered are in lowercase. The default setting is CAPS mode on.Split backingFigure 6 1Uppercase5Bold2Lowercase6Italic3Accented characters7Underline/Boxes 4Font size8Vertical45678231MenuThe key displays the Symbols/Clip Art and Settings tabs.Pressing the key toggles between the Symbols/ Clip Art and Settings tabs.You can use the Symbols and Clip Art menu to insert symbols and clip art on your labels.You can use the Settings menu to change the language and label width settings.Using Clip Art, Symbols, andSpecial CharactersYou can add clip art, symbols, punctuation, and other special characters to your labels.Adding Clip ArtThe label maker includes the clip art shown on page9. To insert clip art1Press .2Press and to select Clip Art.3Press .4Use the navigation keys to select the desired image. 5Press to add the image to your label.Adding SymbolsThe label maker supports the extended symbol set shown on page9.To insert a symbol1Press .2Press and to select Symbols.3Press .4Use the navigation keys to select the desired symbol. 5Press to add the symbol to your label.You can quickly access the punctuation symbols by pressing .Adding International CharactersThe label maker supports the extended Latin character set.Pressing followed by a letter displays all of the available variations of that letter.For example, if you press and then the letter a,you will see à á â ã ä and so on through all the variations available.To add accented characters1Press and then press an alpha character.The accent variations for that alpha characterare displayed.2Use the navigation keys to select the character you want and press .You can also access the accent variations for a letter by pressing and briefly holding the corresponding alpha key.Formatting Your LabelYou can choose from several format options to enhance the appearance of your labels.Changing the Font SizeSix font sizes are available for your labels.The font sizes available depend on the label width selected. The font size applies to all characters on a label.To change the font size❝Press until the desired font size is displayed. Changing the Font StyleTwo font styles are available: bold and italic. These styles can be combined.Font styles are applied to all symbols and alphanumeric characters. However, font styles are not applied to clip art.To change the font style❝Press to add or remove bold.❝Press to add or remove italic.The style is instantly visible in the display.Symbols/ Clip Art tab SettingstabLabel Width Font Sizes Available1/4” 8, 10, 12 point3/8”8, 10, 12, 16, 20 point1/2”8, 10, 12, 16, 20, 24 pointAdding Box and Underline StylesYou can highlight the text by adding a box or underline style.Five styles are available:To add a box or underlinePress until the desired box or underline style is displayed.A label can be underlined or enclosed within a box, but not both together.When adding an underline on a two-line label, each line is underlined. When adding a box on a two-line label, both lines are enclosed in a single box.Creating Vertical LabelsYou can print labels with the text oriented vertically.When printing two-line vertical labels, the label will print with the second line of text after the first line.To create a vertical label1Press . 2Enter text.3Pressto print.The underline style will not print on a vertical label.Creating Two-Line LabelsYou can print a maximum of two lines on a label. Only one line of text can be printed on 1/4” labels.To create a two-line label1Enter text for the first line and press.The symbol appears. This symbol is not printed. 2Enter text for the second line.3Press to print.Caring for Your Label MakerYour label maker is designed to give you long and trouble-free service, while requiring very littlemaintenance. Clean your label maker regularly to keep it working properly. Clean the cutter blade each time youThe cutter blade is extremely sharp. Avoid direct contact with the cutter button while cleaning the blade.To clean the cutter blade1Remove the label cassette.2Press and hold the cutter button to expose the cutterblade. See Figure 7.3Use a cotton ball and alcohol to clean both sides of the blade.To clean the print head1Remove the label cassette.2Remove the print head cleaning tool from inside thelabel compartment cover. See Figure 7.If you do not have a cleaning tool, contact DYMO Customer Care ().3Gently wipe the padded side of the tool across the print head.Symbols☺!?! _:' " , . ;’¡ ¿/ \&@ # % ‰|( ) { }[ ]°•*+ - ÷ √^ ~ ≈= ≠± < > ≤≥€ £¢ ¥⅓¼½ ¾§₀₁₂₃₄₅₆₇₈₉⁰¹ ² ³ ⁴⁵⁶⁷⁸⁹αβγδεζηθικλμνξοπρστυφχψωΑΒΓΔΕΖΗΘΙΚΛΜΝΞΟΠΡΣΤΥΦΧΨΩ$¶ ∞TroubleshootingReview the following possible solutions if you encounter a problem while using your label maker.If you need further assistance, visit the DYMO Web site at .Problem/Error Message SolutionNo display Ensure the label maker is turned on.Replace batteries or connect the optional power adapter.Poor print qualityReplace batteries or connect the optional power adapter. Ensure label cassette is installed properly.Clean the print head. See Caring for Your Label Maker .Replace the label cassette.Poor cutter performance Clean the cutter blade. See Caring for Your Label Maker .Printing...No action required. Message disappears when printing is finished.Too many characters!Exceeded maximum number of characters in buffer Additional characters cannot be added.Too many lines!Exceeded maximum number of linesDelete a line to fit text within the label width. Insert a wider label cassette.Only one line of text is allowed on 1/4” labels.Up to two lines of text are allowed on 3/8” and 1/2” labels.Battery lowReplace batteries or connect the optional power adapter.Insert cassette!No label cassette is inserted.Insert a label cassette. See Inserting and Removing the Label Cassette .Label jam!Motor is stalled due to label jam.Remove jammed label; replace label cassette.Clean the cutter blade. See Caring for Your Label Maker .How do I remove the backing from the label?DYMO labels have an easy-to-peel split back.1Locate the split on the label backing.2Gently pinch the label length-wise, folding toward the printed side of the label. The label backing will separate.3Carefully peel away the backing from the label.Split backing11Documentation FeedbackWe are constantly working to produce the highest quality documentation for our products. We welcome your feedback.Send us your comments or suggestions about our user guides. Please include the following information with your feedback:Product name, model number, and User Guide page numberBrief description of instructions that are inaccurate or unclear, areas where more detail is needed, and so on We also welcome your suggestions about additional topics you would like to see covered in the documentation.Send email messages to: **********************Keep in mind that this email address is only for documentation feedback. If you have a technical question, contact Customer Support.Environmental InformationThe equipment that you have bought requires the extraction and use of natural resources for its production. It may contain substances that are hazardous to health and the environment.In order to avoid the dissemination of those substances in our environment, and to diminish the pressure on naturalresources, we encourage you to use the appropriate take-back systems. These systems will reuse or recycle most of the materials of your end-of-life equipment in an environmentally sound way.The crossed-bin symbol marked on your device indicates you should use these systems.If you need more information on the collection, reuse, and recycling of this product, please contact your local or regional waste administration.You can also contact DYMO for more information on the environmental performance of our products.Electrical RatingsThis product is CE marked in accordance with the EMC directive and the low voltage directive and is designed to conform with the following international standards:US FCC Class B Compatibility Safety - UL, CUL, TUV, CE, T-Mark, SAA, BABT, C-Tick EMC - EMI Compatibility EN 55022; EN 61000 (+ addendums)RoHS 2002/95/ECPrinter Power RatingInput: 9VDC, 2.0A Power Adapter Rating Input: 100-240Vac 50/60Hz 0.6AOutput: 9VDC 2.0A12。
贴标机使用及维护手册

贴标机使⽤及维护⼿册贴标机使⽤及维护⼿册720R-6T-S1-E1机器使⽤说明概述该机是⽤于容器尤其是玻璃瓶贴标的的典型电⽓控制贴标机,能独⽴操作或与⽣产线⼀起运⾏。
尽管在贴标机与被包装或瓶装的产品间没有直接的接触,但是贴标机的设计仍然按照保证⽣产环境卫⽣的标准来设计。
如果贴标机安装于⽣产线上,客户有必要建⽴贴标机与⽣产线相关的技术⽂档。
同时客户应保证贴标机的⽣产能⼒同⽣产线相适应。
贴标机只有在所有的零件都按说明书要求安装后才能运⾏。
该贴标机体现了⼀系列新⽅法,采⽤了保证操作者安全的新措施。
为了保证部件不被移动,考虑到机器及操作者的位置,设置了特定的警告标志。
该贴标机是⼀个复杂的⾃动机械,根据操作的不同需要不同技术⽔平的操作⼯。
下表给出了各操作所对应的技⼯⽔平。
要严格按照以下操作,否则会给机器或⼈员造成严重的伤害。
⽔平1 ⼀般操作:⾮熟练⼯在安全门关闭情况下,通过控制⾯板⾃动运⾏机器⽔平2 机器维护:熟练技术⼈员能够在正常条件下操作机器并进⾏常规维护。
有必要能维修机器备件。
允许在有电情况下不接触电⽓设备。
⽔平3 电⽓维护:熟练技术⼈员能够在正常条件下操作机器并进⾏常规维护有必要能维修电⽓备件。
能够在有电情况下维修电⽓设备。
⽔平4 制造⼯程师:熟练技术⼈员设计满⾜客户的要求,在特定的情况下解决特定的问题。
除了在特别注明操作⼯⽔平的段落及章节中,该说明书供⽔平1操作⼯使⽤。
在给定的⼀系列情况下进⾏交流是相当困难的,这些只作为帮助。
在结束前,希望在阅读和翻译该⼿册时必须全神贯注。
第⼀章贴标机简介1.1 注意该操作及维修保养操作说明书是贴标机技术参考资料的不可缺少的部分,该书务必妥善保管,并让所有相关⼈员传阅。
1.1.1进⼀步的信息我们的每⼀份努⼒均是为了能做到使⼿册尽可能简化,同时在各种不同的控制、调整以及如何使⽤及制成⽅⾯提供给操作者详细的信息。
所有关于机器使⽤⽅⾯的说明均确保您的个⼈⼈⾝安全。
另外,为保护您及您的投资,这些说明也指明了机器的正确使⽤⽅法。
自动打标贴标设备操作手册说明书
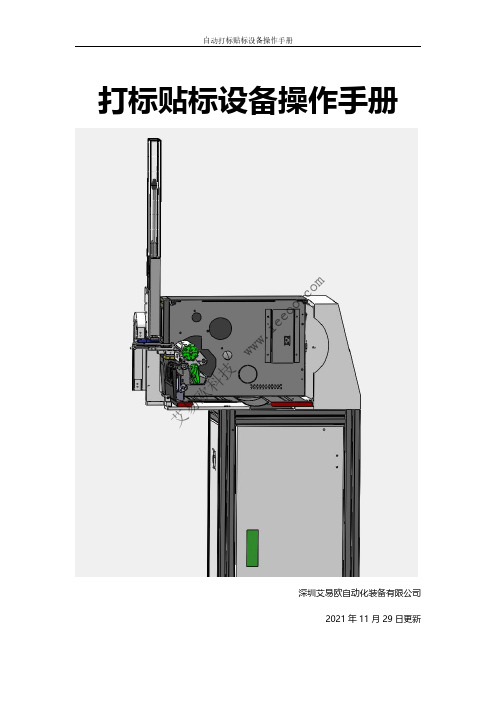
自动打标贴标设备操作手册打标贴标设备操作手册深圳艾易欧自动化装备有限公司2021年11月29日更新艾易欧科技w ww .i ee oo .c om目录第一章安全 (3)1.1内容....................................................................................................................................31.2安全装置的位置................................................................................................................41.3安全装置的功能................................................................................................................41.4潜在危险............................................................................................................................51.5安全预防............................................................................................................................5第二章设备组成 (8)2.1内容....................................................................................................................................82.2整机外观与功能概况........................................................................................................9第三章设备各部件.......................................................................................................................11第四章电源开启/关闭流程 (12)4.1内容..................................................................................................................................124.2开启电源检查表..............................................................................................................124.3关闭电源检查表..............................................................................................................134.4开启设备流程..................................................................................................................134.5关停设备流程..................................................................................................................134.6注意事项..........................................................................................................................14第五章打印机设置.. (15)5.1打印机组成介绍..............................................................................................................155.2打印机驱动介绍..............................................................................................................165.3打印机模式设置..............................................................................................................175.4打印机标签位置设置........................................................................................................18第六章PLC 逻辑信号介绍 (19)6.1PLC 逻辑介绍.....................................................................................................................196.2PLC 信号介绍.....................................................................................................................19第七章打标贴标软件介绍.. (21)7.1软件主界面介绍..............................................................................................................217.2软件主功能介绍..............................................................................................................237.3软件配置事项..................................................................................................................327.4故障检查处理..................................................................................................................32第八章与上位机通信协议.. (33)8.1与拍照机的通信协议概述................................................................................................33第九章常见问题与解决方法.......................................................................................................35第十章支持与反馈.. (40)艾易欧科技w ww .i ee oo .c om1.1内容介绍安全装置的位置(EMO、设备电源开关、一体机电脑电源开关)。
ALS204贴标机操作手册
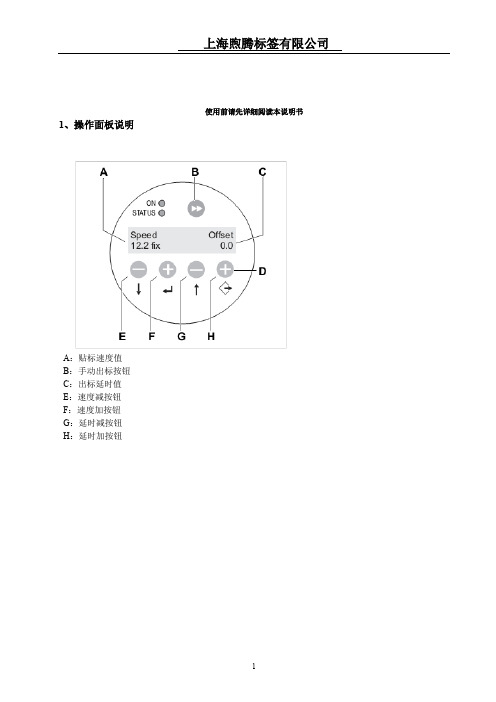
出厂设置, 选择 YES 确认后即回到出厂 时设置
7
上海煦腾标签有限公司
选择Applic. signals 气动贴标模式
贴标类型PEP II Sensor
选 择 after dispensing 检 测 到 马垛后剥离贴标
标签剥离完后 延时多久气缸 伸出, 可以设定 30MS
选择2000毫秒气动 贴标全过程,作用是 从检测到马垛到贴 标完成不能超过2 秒,否则5200 Home position故障,气缸自 动缩回
2
上海煦腾标签有限公司
2、进入和退出快速设定界面
在此状态பைடு நூலகம்此钮进入 快速设定界面
快速设定界面
快速设定状态下同时按 E 和 H 键回到正常 ONLINE 状态
3
上海煦腾标签有限公司
3、启动和停止贴标操作
在 ONLINE 状态下, 按 此钮停止出标
按此钮恢复正常贴标 状态
4
上海煦腾标签有限公司
3、进入和退出菜单
上海煦腾标签有限公司
使用前请先详细阅读本说明书
1、操作面板说明
A:贴标速度值 B:手动出标按钮 C:出标延时值 E:速度减按钮 F:速度加按钮 G:延时减按钮 H:延时加按钮
1
上海煦腾标签有限公司
显示状态说明:
ONLINE 正常贴标状态
OFFLINE 手动出标状态
按确认键可以 OFFLINE 和 ONLINE 切换
8
上海煦腾标签有限公司
9
OFFLINE 状态下 按此钮进入和退 出菜单 按此钮选择 菜单
5
上海煦腾标签有限公司
4、更改参数
在进入菜单状 态下, 按此钮进 入参数设定值 和更改后确认 设定值。
邢台简用热熔胶贴标机说明书
邢台简用热熔胶贴标机说明书
1.使用
1.1)商标切割刀片调整容
1.2)真空吸标轮采用高硬度材质制成;添加的褶皱处理程序可減少商标摩擦,防止静电产生
1.3)更换兼容件的工作可在15分钟內快捷高效地完成
1.4)可利用手动操作盘精确而又方便地调整好刀片位置
1.5)真空吸标轮及商标切割部位下部采用耐磨损防发热的特殊材质制成
1.6)商标长度变更时,触摸屏一键设定后可自动调节好I-MARK 位置
2.使用商标
2.1)标签材质OPP、BOPP、珍珠膜、复合纸等(连续卷标)
2.2)标签规格:参照用户要求
2.3)贴标方式直线式热熔胶首尾网状涂胶贴标
3.设备说明
3.1)采用轮式贴标方式
3.2)由标签卷输送而来的标签经由供标轮沿导轨运行进行贴标作业
3.3)标签经过供标轮时,传感器自动检测I-MARK
3.4)一旦确认电子眼位置,解调器自动调整供标轮作业速度,然
后正确无误地切标位置
3.5)标签经过供标轮后进入剪切部进行切标作业,然后将切好的标签送入真空吸盘
3.6)传感器检测吸盘上的标签后,标签进入胶鼓,进行涂胶作业
3.7)由输送带输送而来的容器经供给星轮进行适当排列后,涂胶后的标签在辊道区进行*次贴标,然后依靠同步带的作用进而进行完善的贴标作业.
4.装置说明:
4.1)控制:PMC,变频器
4.2)安全装置
4.2.1)驱动部设有超负荷运转保护装置
4.2.2)供给星轮异常状态终止装置
4.2.3)无瓶供给检测装置
4.2.4)供瓶过负荷检测装置
4.2.5)无标供应时,胶鼓终止作业装置。
60PA 60PE 贴标控制器操作手册说明书
60PA/60PE 贴标控制器操作手册匯出日期:2023-10-29修改日期:2023-04-13••••••••••••••••••一、档案格式二、软体更新操作二、基本操作步骤三、画面与功能详细说明3.1 主画面介绍3.2 功能键树状图3.3 画面功能介绍3.3.1 主画面说明3.3.2 打印参数设定3.3.3 档案载入操作五、控制器远端传档功能5.1 操作说明5.2 画面说明5.3 远端控制器传档设定范例六、加工表单参数设定七、常见问题排查附录联络方式序号版本号修改日期修改内容作者审查核准1V1.02017/09/25初版定稿邱林孙东目录文件履历目录文件履历1.2.3.1 一、档案格式透过办公室的计算机,利用CAD/CAM 软件生成加工所需的档案,包含大板材列表信息,贴标位置,贴标图文件,贴标预览图。
CAD/CAM 会将产生的档案传送至对应控制器的分享文件夹中,也可通过U 盘进行拷贝到控制器中生成的档案格式需为UTF-8编码格式,档头也应为UTF-8,否则可能出现读档错误。
使用时请确认软件档案格式符合新代贴边档案规格。
2 二、软体更新操作2.1安装新版软体安装对应版本的新版软体安装包2.2 汇入MACRO旧版macro除了自己客制的动作可全部直接进后台删除,客制动作根据实际情况修改G300(贴印标时的动作)、G2000(贴标之前的整料动作)、G2001(预上料动作)后汇入2.3 修改PLCPLC中配合旧版软体运行的背景执行元件部分可以删除,PLC中仅需要添加复位时将R20003,R1053清零的动作。
3 二、基本操作步骤1.开机进入系统,检查系统无警报,进入F4自动贴标——主画面。
2.插上优盘,F3载入列表——F7切换装置进入usb界面,选择想要汇入的文件夹,点击F8汇入档案。
注:选中的文件夹内不能有子文件夹,里面包含xml档、cyc档、bmp档(若使用远端控制器传档功能,将需要传输的档案也放在此文件夹)3.点击F7切换装置至系统档案界面,选中刚汇入的文件夹,点F1输出工作列表,加工列表生成完成。
贴标机操作规程(作业指导书)
DL-101ER 贴标机操作规程
1开机前的准备
[1]检查风压正常(风压大于0.4Mpa,小于0.7Mpa)
[2]检查传输链板、扶标辊、贴标头无异物
2开机前的调整
[1]将贴标头高度、水平位置、角度调整到合适位置
[2]调整拉纸压轮,使标签纸贴紧出标剥离板
[3]调整气动分瓶挡块位置,使之刚好有比将一个中桶抱住稍宽一点的间距。
[4]调节扶标辊上面的两个手轮,使扶标辊紧贴中桶。
3开机
[1]打开总电源开关
[2]打开贴标机左侧电源开关
[3]贴标机开启后,在触摸屏上输入密码:2820
[4]将标签纸在贴标机上安装好后,即可通过触摸屏对贴标头的参数进行调整。
[5]调试测物电眼位置、调节测标电眼灵敏度
[6]选择适合的速度
[7]按运行按钮,系统运行。
1
3关机
[1]按触摸屏上的停止按钮,系统停止运行。
[2]关闭贴标机左侧电源开关
[3]关闭总电源开关
附图
贴标机卷标方向、位置图示
2。
单侧贴标机说明书
注意事项 * 第一次使用前必看 *1:操作人员第一次使用前请务必先阅读本页。
2:机器插电之前先确保电源开关处于【关闭】状态,然后才按说明书步骤操作。
3:机器在长时间不运转要用干布搽净,不要用有腐蚀性清洁剂清洗。
4:严禁把液体溅射进机器电箱部,以免腐蚀或短路部电器元件。
5:电眼部位不得有灰尘或其它杂物,活动部位应清洁。
6:检查设备外观应无变形、损伤和锈蚀,各转轴应转动灵活,无卡滞现象。
7 :本机为单相交流220V,电源插头为扁平3插,应插到装有地线的电源插座上。
贴标头 导正带 压瓶带 主电箱输送带电源开关人机界面侧贴标机控制面板操作说明本机使用前请务必先阅读使用说明书*第一次操作顺序就按以下顺序进行* 1:首先把电源插接到单相电源上(要求接有良好地线)。
2:安装整卷标签: 把整卷标签放入标签芯下固定套,左贴标头:方向是沿顺时针方向出标签(标签底向输送带方向)。
整卷标签放在标签托盘上并压平。
人机界面触摸屏整卷标签底膜托盘底膜芯底膜夹夹标胶片标签下托盘总电源开关3:把标签按下图方向穿好,并把剥标板尖部之后的标签剥下,只剩下底膜,把底膜尾部逆时针绕在底膜芯上,再把底膜夹取出把底膜夹住再底膜芯上。
整段标签和底膜穿好之后都必须在同一水平面上,并把各个导膜筒上的定位胶圈调到合适位置,以保证导正标签。
穿膜图掰开压轮穿膜4:把电源开关旋开,此时屏幕指示灯显亮。
进入开机画面。
先触摸功能菜单进入启动运行画面。
触摸按下启动方块,屏幕里运行指示闪动,整机开始自动运行,输送带开始运转。
出标橡胶筒导膜筒定位胶圈剥标板压轮5:如果把需要贴标的物件放在输送带入口护拦之间,物件在护拦的导向下由输送带送进分瓶导正夹带之间,导正后进入压带把瓶子压紧在压带与输送带之间同步送入贴标区域,经过测物电眼检测到信号,伺服电机驱动出标橡胶筒拉动标签底纸,标签由剥标板剥出,贴在物件上表面,物件经过刷标海棉轮把标签均匀地标签刷平在物件侧面,然后在出口送出物件。
贴标机用户使用手册(全)
索引关于系统☐系统概述 (2)☐系统性能与特点 (3)☐系统部件认可 (4)开机☐开机前的准备 (5)☐认识系统 (6)操作系统☐贴标参数 (7)☐接触贴标 (7)☐气吹贴标 (7)☐推压贴标 (8)☐计数器 (8)☐选择计数器 (8)☐设定计数器 (8)☐当前计数器 (8)☐系统信息 (9)☐密码 (9)☐系统缺省值 (9)☐选项 (10)☐触发方式 (10)☐触发有效 (10)☐同步器 (10)☐多标功能 (11)☐漏标修复 (11)☐双机联动 (11)☐保存应用 (13)☐打开应用 (14)☐点动出标 (15)☐测试运行 (16)☐系统运行/停止 (17)配置系统☐贴标方式 (18)☐贴标方向 (18)附录1-系统参数 (19)附录2-故障 (20)系统概述欢迎使用本控制系统!本控制系统是专门为贴标行业设计。
专业友好的人机界面设计理念和模块化的集成控制,使系统的操作更为简捷,运行更为可靠。
系统性能与特点贴标参数---速度:0.3—60m/min停标精度:+/-0.4mm贴标方式---接触贴标气吹贴标推压贴标可选功能---传感器触发沿选择传感器有效使能,可防止物料和标签的多次触发同步器,可配生产线同步贴标〔完全实时同步,当贴标动作过程中,如果生产线停止或变化,贴标动作也同时停止或变化。
不会造成贴标标签的皱折〕多标功能。
不同与一般的多标功能,可实现一个物料可贴多X不同或相同的标签。
漏标修复。
标签底纸上没有标签时,系统会自动修复而不会造成物料的漏贴或重贴。
双机联动。
用户定义,可根据用户的要求组态成多台贴标机同时工作。
系统部件的认可CE ,UL操作界面防护等级IP65开机前的准备仔细检查系统电气与电源连接和机械的安全性警告:系统必须可靠接地。
认识系统开机,输入正确密码〔8位〕。
系统显示欢迎屏,之后进入操作主屏。
1-系统桌面。
触击桌面上的图标进入相关窗口进行相关操作。
2-状态栏。
显示当前的应用文件名称。
打印贴标机A600-zebra操作手册1.12
文件信息: 版本号 文件编号 更新日期
参考文件
作者 备注
1.12 MANUAL-A600-1.0
2013/12/19
赵银雄Leabharlann 目录1 设备结构 ........................................................................................................................................... 4
1.2.1 电源要求........................................................................................................................................... 6 1.2.2 气源要求........................................................................................................................................... 6 1.2.3 使用环境........................................................................................................................................... 6 1.3 耗材选择.................................................................................................................................................. 6 1.3.1 打印机参数....................................................................................................................................... 6 1.3.2 标签与色带....................................................................................................................................... 6
全自动手机贴标机操作手册
全自动手机贴标机操作手册产品说明:XTM20150110全自动手机贴标机:是鑫台铭自主研发推出的最新一代手机辅料全自动贴标机,是将料带底纸上的标签薄膜自动贴在零件表面指定位置上的一种机器,采用环形流水线,多工位,全自动工作,本机适用范围广如,手机、电子、通讯、电脑、LED等行业;贴装效果好,无气泡,无擦痕;无亮边;操作方便,料带更换方便,零件可正反作业,可微调,调整方便。
同时,一条线中可按客户要求任意增减工位,也可加入如热融,攻牙等项目,是解决人工短缺的最佳选择。
产品特点:采用PLC、进口步进电机控制,卷料平稳,精度高,性能稳定;采用激光精确定位;底座X-Y 方向可微调,调整方便,贴标精度高;接口通用,可适用不同机型和项目;可同时进行两个零件装配;产品规格:贴标速度:≥1200-1400Pcs/h (视贴膜长度而定,膜越小、贴膜的速越快)料带宽度:20~120mm贴膜长度:5~120mm机器精度:±0.05mm卷料规格:外径Φ350mm,内径Φ152mm工作压力:0.5~0.6Mpa电源:220V 50/60HZ使用环境温度:-20~+50℃使用相对湿度:20~85%外形尺寸:620mmX600mmX1600mm产品比较:现在市面上已有的设备:一类贴标机是采用剥料板活动剥料,贴标头上下活动来贴料,用光纤感应辅料。
这种结构精度不高,调机不方便。
另一类是剥料板固定不动,贴标头前后移动采用滚珠丝杆,用激光感应辅料。
这种结够效率偏低,剥料可靠性较差。
XTM20150110全自动手机贴标机是目前市场上的第3代产品,也是最先进的产品,剥料板是活动的,贴标头是用滚珠丝杆控制,激光感应辅料,效率高,稳定性好,调整更方便,精度更高,还有防漏贴装置。
贴标机说明书
贴标机说明书系统概述简介贴标机是专为电子加工行业精心設計的一种高速,高精度的贴标设备。
该机台是用来将双面胶,防尘网或者gasket贴到素材上的一种机器.人性化的人机界面設計,全触摸式操作可以让您的使用更加方便,简单。
人机界面采用320*240的四色触摸屏,控制核心采用先进的SUNSANG(三星)32位嵌入式处理器和OS2实时嵌入式操作系统,更加快了系统的时时响应能力。
PLC+步进电机+滑轨的控制方式,使得贴标精度大幅提高。
圆弧铝型材外骨架,封边条包边。
下部铁板烤漆,上部封透明压克力板。
造型高贵,美观。
贴标机工作原理:双手启动→滑台后退到位(真空开启) →取料汽缸下降到位→剥离汽缸后退到位→贴标汽缸下降到位→取料汽缸回到位(真空关闭) →贴标汽缸回到位(滑台汽缸出到位)→剥离汽缸出到位→压料汽缸回到位→电机送料(先快速后慢速) →压料汽缸出到位→再次启动.规格参数:贴标范围: 标间距8-65mm,宽度小于85mm贴标速度: 500-800PCS/H重复精度:+/-0.03mm(不含物料)考虑物料和治具+/-0.15mm操作方式:单人操作辅助工具:吸嘴+治具控制方式:触措屏+PLC输入电源:220VAC 50HZ 2A最大功率:200W本体重量:30KG外形尺寸图:绕料带示意图料盘1. 料带从料盘下来经过导料轮,剥离板及两滚轮,驱动轮和压带轮,最后到收料轴,就可以使用了。
2. 料带调整(一般是在换机种时候调整好就不要动了)调整挡导料环和挡块在一个平面上,固定好导料环。
3.料带调整好以后,对正吸嘴与标签左右对齐固定好吸嘴,手动连续送料,使标签和吸嘴前后对齐,调整光纤对正缺口,设定光纤感应值。
4.吸嘴对好后,对正治具,把产品放到治具上,关掉气源,调整治具前后左右位置(调整好后就不要动了)。
触摸屏操作画面1.开机画面设备通上电源后,按下触摸屏箱体上的电源开关后触摸上电就会显示画面.此画面主要显示设备供应商的一些基本信息如: 名称、地址、电话等.2.主页画面当在开机画面激活“进入”键则进入主页画面.电机参数:主要用来设定电机的各类参数.产量设定:用来设定产量.自动/手动:机台运行模式切换,默认为自动模式.实际产量: 显示机台的实际产量.信息显示条:显示机台当前的状态.3. 参数设定画面当在主页画面激活“参数设定”键则进入参数设定画面.当前等级:一个工程一共有0.1.2三级,2级为最高级到0为最低级,当处于高安全等级时,可以访问安全等级低的,而处于低安全等级时是不可以访问安全等级高的.此画面会自动显示当前的安全等级.切换等级:可以在0.1.2三个级别中相切换.但只能是高等级向低等级切换,只能输入0.1.2这3个数字.输入密码:当激活此按钮旁边的数字键盘就开始启用.当输入正确的密码后按“END”则密码输入成功.电机参数:激活此按钮则进入电机参数设定画面.版本信息:当前程序的版本.主页:激活此按钮则返回主页画面.4. 电机参数设定画面.在参数设定画面激活“电机参数”键则进入电机参数设定画面.运转频率:电机在自动运行时的频率.设定范围500到3000.标签距离:一个标签所占的距离.设定范围0到99.上传:将本页的数据上传到存储器内.最多能存5组数据.下载:将本页的数据下载到PLC程序内,电机以此数据运行.下页:下翻一页.退出:激活此按钮则返回参数设定画面.5. 上传画面在电机参数画面激活“上传”键则进入上传设定画面.品名:上传数据的名称.最多能输入6个字母组别:上传数据的组别,最多能存储5个.确定:上传数据确认.退回:退回电机参数设定画面.6. 下载设定画面当在电机参数画面激活“下载”键则进入下载设定画面.下载:激活此按钮会打开下载画面.确定: 组别和参数确定.退回:退回电机参数设定画面.下载操作说明: 先选择一个组别,然后按下“确定”键,此时旁边会显示这个组别的品名,下面就是这个品名的参数.再按“下载”键会弹出下载工位选择对话窗口,选择了下载工位后会弹出一个确定窗口,可以选择是或否.选择完毕后按下工位选择窗口中的确定就下载成功了或者按取消键重新开始.7. 下载设定画面当在下载画面激活“下载”键则进入下载确定画面.下载:将参数下载到PLC程序内.取消:取消此次下载.8. 下页设定画面当在电机参数画面激活“下页”键则进入下页设定画面.爬行距离:电机第二段速距离.单位:MM爬行频率:电机第二段速度. 单位:HZ手动频率:电机手动运行时的速度. 单位:HZ贴标延时:贴标汽缸贴料时保压时间.单位:S治具真空:是否启用治具真空功能,默认为启用.上页:返回上页.退出:退出本页返回参数设定画面.8. 产量设定画面当在主页画面激活“产量设定”键则进入产量设定设定画面.预设产量:用来设定机台的目标产量.设定范围0到9999.实际产量:机台的实际产值,此值只读.产量清零:激活此按钮实际产量会清零.主页:激活此按钮则返回主页画面.9.手动画面当在主页画面激活“手动/自动”键则进入手动画面取料下降:激活此键取料汽缸会伸出,贴标头会紧贴标签.再次激活取料汽缸会上升回原位.贴标下降:激活此键贴标汽缸会带动贴标头下降.再次激活贴标汽缸会上升.注意:当剥离汽缸在前进状态时就算激活此键贴标汽缸也不会下降,此时蜂鸣器会响.剥离后退:激活此键剥离汽缸会带动剥离刀后退.再次激活剥离汽缸会前进.注意:当贴标汽缸在下降状态时就算激活此键剥离汽缸也不会前进,此时蜂鸣器会响.滑台回来:激活此键滑台汽缸会进去.再次激活此键滑台汽缸会出来.压料上升:激活此键压料汽缸会退回松开.再次激活此键压料汽缸会伸出压紧料带.注意:当压料汽缸伸出时,不能电机不能送料否则会报警.真空开启:激活此键真空会开启.再次激活此键真空会关闭.连续送料:激活此键电机会一直送料,松开才后会停止送料.注意:当压料汽缸在压紧状态时就算激活此键也不会送料,此时蜂鸣器会响.单步送料:激活此键电机会送一个工位料.注意:当压料汽缸在压紧状态时就算激活此键也不会送料,此时蜂鸣器会响.单步:激活此键进入单步运行画面.注意:如果机台不在原点激活此键的话会报警.退出:激活此键会退出手动画面,进入主页画面.原点:激活此键机台会自动回原点,如果机台现在在原点状态的话,机台不会有动作.10.单步画面当在手动画面激活“单步”键则进入单步画面.单步运行:激活此键会机台会一步一步的动作.上页:激活此键会进返回上页.当前状态:显示机台现在运行状态下步状态:显示机台的下步状态。
贴标机用户使用基础手册全
是否应该减少辩论辩题的主题正方观点,应该减少辩论辩题的主题对这一辩题。
首先,我们要明确辩论的目的是为了展开有益的讨论,而不是为了争输赢。
如果辩题过于偏向某一方,很可能会导致辩论的结果偏颇,无法达到讨论的真正目的。
比如,如果辩题过于偏向正方,那么反方可能会感到无法发挥自己的观点,从而导致辩论的公平性受到质疑。
其次,减少辩论辩题的主题对这一辩题也有利于激发更多的思考和创新。
如果辩题的主题过于狭窄,可能会限制辩手们的思维,导致他们无法从更广阔的角度来思考问题。
而辩论本身应该是一个开放的平台,能够容纳各种不同的观点和思路,从而促进辩手们的思维活跃和创新。
此外,减少辩论辩题的主题对这一辩题也有利于培养辩手们的综合能力。
如果辩题过于偏向某一方,那么辩手们可能会过于依赖已有的观点和论据,而忽视了综合能力的培养。
而一个优秀的辩手应该具备全面的素质,既能够熟练运用逻辑思维,又能够灵活运用各种论据和案例,从而使自己的观点更加有说服力。
综上所述,我们可以得出结论,应该减少辩论辩题的主题对这一辩题。
因为这样做有利于保持辩论的公平性,激发更多的思考和创新,以及培养辩手们的综合能力。
正如英国哲学家培根所说,“辩论是思想的试金石。
”只有在公平、开放的辩论环境中,我们才能更好地锻炼自己的思维能力,从而更好地理解和解决问题。
反方观点,不应该减少辩论辩题的主题对这一辩题。
首先,辩论辩题的主题对这一辩题是为了明确辩论的范围和方向,有利于辩手们更好地展开讨论。
如果辩题过于宽泛,可能会导致辩手们无法集中精力,从而无法深入探讨问题的核心。
而辩论的目的就是要通过深入的讨论,找出问题的本质,从而得出更加准确的结论。
其次,辩论辩题的主题对这一辩题也有利于保持辩论的公平性。
如果辩题过于宽泛,那么可能会导致辩手们在论证时无法达到一致的标准,从而使得辩论的结果失去说服力。
而辩论的公平性是辩论的基本原则之一,如果失去了公平性,那么辩论就失去了意义。
此外,辩论辩题的主题对这一辩题也有利于保持辩论的针对性和实效性。
单侧贴标机说明书样本
7 : 本机为单相交流220V,电源插头为扁平3插,应插到装有地线的电源插座上。
概述此单侧贴标机主要用于医药、 日用化工、 食品等各种适合竖直放置的方形产品侧表面的自动贴标,采用高精度高速度的贴标装置, 适应各种不同尺寸范围的的产品贴标。
大量节省人手, 提高贴标精度和一致性。
采用进口高精度智能电眼及高可靠微型电脑芯片程序控制器( PLC) 控制步进电机贴标, 并采用彩色人机界面人性化图形显示控制, 操作及设置直观方便, 并具有50组参数储存及计数功能。
机器各外露部位采用不锈钢、 工程塑料、 经过阳极氧化表面处理的高强度合金铝制作,结构轻巧,强度高,耐腐蚀,并符合GMP 标准对设备的要求。
本贴标机由以下几部分组成:( 1) 输送带: 用于输送待贴标产品及已贴标产品, 由电机驱动POM 链片式输贴标头 导正压瓶带 主电输送电源开人机界贴标速度: 0-15米/分钟贴标误差: ±1毫米(不包括产品及标签误差)额定电压: 220V/50Hz整机功率: 1500W侧贴标机控制面板操作说明本机使用前请务必先阅读使用说明书 *第一次操作顺序就按以下顺序进行*人机界面触总电源,左贴标头:4: 把电源开关旋开, 此时屏幕指示灯显亮。
进入开机画面。
先触摸功能菜单进入启动运行画面。
触摸按下启动方块, 屏幕里运行指示闪动, 整机开始自动运行, 输送带开始运转。
5: 如果把需要贴标的物件放在输送带入口护拦之间, 物件在护拦的导向下由输送带送进分瓶导正夹带之间, 导正后进入压带把瓶子压紧在压带与输送带之间同步送入贴标区域, 经过测物电眼检测到信号, 伺服电机驱动出标橡胶筒拉动标签底纸, 标签由剥标板剥出, 贴在物件上表面, 物件经过刷标海棉轮把标签均匀地标签刷平在物件侧面, 然后在出口送出物件。
一、软件说明1、开机界面, 接通电源后显示开机界面如图2、自动操作界面, 点击触摸屏任意位置后进入自动操作界面, 如图产量显对应元件或机自动操自动操前贴标后贴标卷标带3、手动操作界面, 点击触摸屏上方手动操作按钮进入手动操作界面, 如图。
贴标机说明书
1.1 符号.......................................................................................................................................................7 1.2 使用人员...............................................................................................................................................7 1.3 指定用途...............................................................................................................................................7 1.4 产品铭牌...............................................................................................................................................8
自动贴标机说明书
自动贴标机说明书Kubovee 自动贴胶机用户手册一、设备简介自动贴胶带机是专为FPC板、PCB板高速钻孔前将叠放好的基板进行自动贴胶带固定的设备,从而提高基板钻孔精度、提高加工生产效率并提升生产品质。
机台使用PLC控制,具有自动放带、自动定位、自动切断、自动压紧胶带和产量计数等功能。
贴胶的长度可调节,基板两面外露胶带尺寸稳定。
目前公司开发了两种动力方式的设备,分别是:电动贴标机,型号为KBV-1001;气动贴标机,型号为KBV-1002.二、设备性能2.1电动贴标机:1、加工板厚发生变化时,贴胶长度亦可跟随调节。
2、加工范围不受加工板大小、厚度和块数的多少限制。
3、微电脑控制,操作简单,运行稳定可靠。
4、多台机连接后,可在一次贴多条胶带间自由选择,且贴胶间距可自由调整。
5、拥有记数功能,可记录贴胶次数,方便统计管理。
6、无需气源,只需220V 9W单相电源。
Kubovee 自动贴胶机用户手册主要规格与参数序号名称数值单位备注1 贴胶最近距离 ?133 mm 可调2 胶纸宽度 12 mm3 加工厚度 1.5-10.0 mm4 贴胶速度 0.6 sec/pcs5 加工板尺寸任意 mm6 电源 AC220V9W ?10% 50Hz7 外型尺寸 433*133*266 mm 单台8 重量 Kg 10使用方法1、在KBV-6贴胶机上装入胶带。
(买入的设备上已预先安装好胶带)2、合上上盖板。
3、接入并打开电源。
(注意电源必须接地)4、把叠好的基板按照图2箭头的方向放入。
(贴胶时间0.6秒)5、取出基板。
注意:基板下面的胶带长度可以调整。
(请参照图1旋钮) 胶带使用完后需更换胶带,换胶带时必须关闭电源。
Kubovee 自动贴胶机用户手册气动贴标机气动贴胶带机通过启动按钮开关将plc设备程序启动,plc I/O输出口控制对应的动作电磁阀,电磁阀通电后进一步控制对应的气缸执行相应的动作。
单个电气控制顺序如下图:气缸电磁阀 Plc I/O输出口电气控制参数设备功率 ?50W输入电源 AC220V 50HZ输入电源插头电流 250V 10A输出电源 DC24V 2A输入I/O接口数 16备用输入I/O接口数 ?5输出I/O接口数 16备用输出I/O接口数 ?6产量计数 0-99999气源要求 0.2MP-0.7MP进气管管径外径8mm气管外型尺寸 L450*W150*H350加工产品厚度 1.5mm-12mm贴胶带长度 10.0mm-25mm胶带加工宽度 5mm--15mm胶带最大外径 360mm净重 35KGKubovee 自动贴胶机用户手册操作次序A、选择并安装符合当前生产基板的整圈胶带,安装在胶带轮上并胶带头拉至贴胶的合适位置。
- 1、下载文档前请自行甄别文档内容的完整性,平台不提供额外的编辑、内容补充、找答案等附加服务。
- 2、"仅部分预览"的文档,不可在线预览部分如存在完整性等问题,可反馈申请退款(可完整预览的文档不适用该条件!)。
- 3、如文档侵犯您的权益,请联系客服反馈,我们会尽快为您处理(人工客服工作时间:9:00-18:30)。
索引关于系统☐系统概述 (2)☐系统性能与特点 (3)☐系统部件认可 (4)开机☐开机前的准备 (5)☐认识系统 (6)操作系统☐贴标参数 (7)☐接触贴标 (7)☐气吹贴标 (7)☐推压贴标 (8)☐计数器 (8)☐选择计数器 (8)☐设定计数器 (8)☐当前计数器 (8)☐系统信息 (9)☐密码 (9)☐系统缺省值 (9)☐选项 (10)☐触发方式 (10)☐触发有效 (10)☐同步器 (10)☐多标功能 (11)☐漏标修复 (11)☐双机联动 (11)☐保存应用 (13)☐打开应用 (14)☐点动出标 (15)☐测试运行 (16)☐系统运行/停止 (17)配置系统☐贴标方式 (18)☐贴标方向 (18)附录1-系统参数 (19)附录2-故障 (20)系统概述欢迎使用本控制系统!本控制系统是专门为贴标行业设计。
专业友好的人机界面设计理念和模块化的集成控制,使系统的操作更为简捷,运行更为可靠。
系统性能与特点贴标参数---速度:0.3—60m/min停标精度:+/-0.4mm贴标方式---接触贴标气吹贴标推压贴标可选功能---传感器触发沿选择传感器有效使能,可防止物料和标签的多次触发同步器,可配生产线同步贴标(完全实时同步,当贴标动作过程中,如果生产线停止或变化,贴标动作也同时停止或变化。
不会造成贴标标签的皱折)多标功能。
不同与一般的多标功能,可实现一个物料可贴多张不同或相同的标签。
漏标修复。
标签底纸上没有标签时,系统会自动修复而不会造成物料的漏贴或重贴。
双机联动。
用户定义,可根据用户的要求组态成多台贴标机同时工作。
系统部件的认可CE ,UL操作界面防护等级IP65开机前的准备仔细检查系统电气及电源连接和机械的安全性警告:系统必须可靠接地。
认识系统开机,输入正确密码(8位)。
系统显示欢迎屏,之后进入操作主屏。
1-系统桌面。
触击桌面上的图标进入相关窗口进行相关操作。
2-状态栏。
显示当前的应用文件名称。
3-状态栏。
显示当前所选取的计数器的计数值。
4-状态栏。
显示时钟,触击它可进入时钟窗口修改时钟。
5-显示实际的生产速度(每分钟刷新一次)。
6-打开应用按钮。
打开一个新的应用文件。
7-保存应用按钮。
保存当前的设置参数到一个应用文件。
8-点动出标按钮。
在停机状态下,点动它可出标一次。
9-测试运行按钮。
不运行贴标动作,可单独运行测试机械运行调整是否正确。
10-运行/停止按钮。
系统运行或停止。
贴标参数贴标系统共有三种贴标方式:接触贴标,气吹贴标,推压贴标接触贴标出标速度(0.3-60m/min):贴标机驱动标签的速度停标偏值(1-100mm):标签伸出出标板的长度《实际上还与送标速度有关》贴标位置(0-1000ms):物料传感器动作到贴标开始的时间最大贴标长度(0-1000mm):当标签传感器无效时,贴标机送标的最大长度《正常情况下,设定为标签长度的1.5-2倍》《设定送标最大长度后,本窗口自动关闭以初始化系统》点击贴标参数进入点击数值框设定数值按进行测试OK后退出气吹贴标出标速度(0.3-60m/min):贴标机驱动标签的速度停标偏值(1-100mm):标签伸出出标板的长度《实际上还与送标速度有关》贴标位置(0-1000ms):无效吹标时间(0-1000ms): 物料传感器动作到吹标开始的时间辅助吹标延时(0-1000ms):从送标开始到辅助吹标的延时最大贴标长度(0-1000mm):当标签传感器无效时,贴标机送标的最大长度《正常情况下,设定为标签长度的1.5-2倍》《设定送标最大长度后,本窗口自动关闭以初始化系统》点击贴标参数进入点击数值框设定数值按进行测试OK后退出推压贴标出标速度(0.3-60m/min):贴标机驱动标签的速度停标偏值(1-100mm):标签伸出出标板的长度《实际上还与送标速度有关》贴标位置(0-1000ms):无效推压时间(0-1000ms): 物料传感器动作到推压开始的时间辅助吹标延时(0-1000ms):从送标开始到辅助吹标的延时最大贴标长度(0-1000mm):当标签传感器无效时,贴标机送标的最大长度《正常情况下,设定为标签长度的1.5-2倍》《设定送标最大长度后,本窗口自动关闭以初始化系统》点击贴标参数进入点击数值框设定数值按进行测试OK后退出计数器计数器窗口包括物料计数器和标签计数器。
可以选择主窗口的计数器为何种计数器。
设定计数值,查看和清零计数值。
选取计数器点击计数器名称后的,则主窗口的计数器会显示此计数器的当前计数值。
设定计数器点击各计数器的数值框设定数值。
以使当前计数值大于或等于设定计数器的值时引起系统停止。
《一般设为最大999999,也可根据需要设定》当前计数器显示当前的计数值。
点击数值框输入0可以清零。
OK后退出系统信息显示系统的相关信息(系统,版本,注册,出厂时间使用时间,密码和系统缺省设定)系统:说明操作系统是关于什么类型的贴标系统版本:操作系统的版本号注册:注册用户名称。
表明是合法用户。
出厂日期:本机的出厂时间。
系统使用时间:本机到当前为至总共使用的时间设定密码:只有以一级用户的密码进入才能设定密码。
密码共分三级,所有操作均有一级用户来完成。
点击进入设定系统缺省设定当系统各参数设定错乱时可以使用恢复厂商缺省设定。
点击后,系统自动关闭本窗口。
选项点击主窗口选项图标进入选项窗口。
选项窗口是操作系统的一些辅助功能。
包括触发方式,触发有效,同步器,多标功能,漏标修复,多机联动等功能。
触发方式选择标签,物料传感器的触发沿(上沿和下沿)点击触发方式标题进入点击选取触发方式点击使当前触发方式生效,系统自动关闭选项窗口。
注意:可以在完成所有的标题操作之后,点击使所有的选项功能有效。
点击只关闭选项窗口而不能使选项功能有效。
触发有效通过触发有效,可以设定标签和物料传感器下次触发有效的条件。
标签---有效使能:标签有效使能功能的开关长度(mm):从当前停标位置开始的走标长度。
当走标长度大于此设定的长度,标签传感器触发才有效。
物料---有效使能:物料有效使能功能的开关时间(ms):从当前物料传感器触发开始计时的时间长度。
只有当这段时间大于此设定的时间,下次触发才有效。
点击触发有效标题进入点击打开/关闭使能。
输入标签使能长度(0-9999)mm输入物料使能时间(0-5535)ms点击使当前触发方式生效,系统自动关闭选项窗口。
同步器同步器功能使贴标机的送标速度自动跟随生产线的速度。
用于速度频繁变化的生产线贴标应用。
点击同步器标题进入点击有效使能开关打开/关闭使能。
输入同步值(一个脉冲的当量值即同步器的一个脉冲对应标签的送标长度)点击使当前触发方式生效,系统自动关闭选项窗口。
多标功能多标功能就是物料传感器每触发一次,系统自动送出设定的标签数目。
且标签之间的时间间隔和停标偏值均可自由设定。
点击多标功能标题进入点击有效使能打开或关闭此功能输入每次触发的标签数量(2-20)输入标签序号或按选取标签序号(1-20)输入每个标签序号对应的出标延时(0-6000ms)---标签之间的时间间隔停标偏值(0-100mm) ---下一张标签的停标位置点击使当前触发方式生效,系统自动关闭选项窗口。
漏标修复漏标修复就是当标签底纸上缺少标签时,系统自动检测并修正以使物料不会漏标和重标。
点击漏标修复标题进入点击有效使能打开或关闭此功能输入标签长度(0-999999)---标签实际长度+标签之间的间隙所对应的驱动系统的脉冲数输入标签偏值数量(1-20)---标签传感器前完整的标签数量 +1点击使当前触发方式生效,系统自动关闭选项窗口。
注意:当此功能有效时,系统的最大送标长度值无效。
且系统按照此窗口设定标签长度进行送标最大长度的检测。
如果送标的长度大于设定的标签长度且标签传感器未能触发,系统就认为这段标签底纸上缺标而进行系统修正动作。
所以此窗口中标签长度的设定值是否正确置关重要!双机联动双机联动是根据用户的需求进行双机或多机贴标的一种特殊的功能。
保存应用当上述参数设定完成之后,需要对当前设定进行保存操作。
以便将后应用于不同的产品生产环境。
系统总共有8个应用文件可保存。
在主窗口中点击进入输入应用文件号(1-8)---每个应用以不同的文件号进行保存或调用。
输入应用文件名。
最长为10个字符(0-9,A-Z,#,*,%,$)保存应用并关闭此窗口。
不保存而关闭此窗口。
注意:在不进行保存操作的时候,当前的系统各参数不会由于系统的断电而丢失!除非打开一个应用或再次改变。
打开应用在产品生产环境改变时,可通过打开一个应用操作来把以前调试好的应用参数调出来应用。
以节省调试的时间。
在主窗口中点击进入输入应用文件号(1-8)---每个应用以不同的文件号进行保存或调用。
应用文件名显示所对应的文件名。
最长为10个字符(0-9,A-Z,#,*,%,$)调用应用并关闭此窗口。
不调用而关闭此窗口。
点动出标点动主窗口按钮,贴标机出标一张。
用于测试贴标机或调试贴标机。
点动出标测试运行在调试系统设备时,有时需停止贴标动作,专一调试机械设备。
这时可用测试运行按钮来进行。
测试运行系统运行/停止当系统设备准备就绪时,系统可以进行工作。
按下系统运行,再次按下系统停止系统停止系统运行系统配置系统配置只用厂家才能进行。
包括贴标方式,贴标方向,生产速度的显示值设定等。
贴标方式系统共有三种贴标方式:接触贴标,气吹贴标,推压贴标。
进入系统配置窗口,点击贴标方式标题进入。
点击选取贴标方式。
点击使当前触发方式生效,系统自动关闭选项窗口。
贴标方向贴标方向是通过改变贴标电机的旋转方向而改变贴标机的贴标方向。
进入系统配置窗口,点击贴标方式标题进入。
点击选取贴标方向。
点击使当前触发方式生效,系统自动关闭选项窗口。
附录1---系统参数生产速度8段速度By Set贴标机送标速度停标偏值贴标延时最大送标长度0.3-60m/min1-100mm(+/-0.5)0-1000ms0-1000mm选取计数器标签物料设定计数器标签物料0-999999 0-999999当前计数器标签物料0-999999 0-999999密码0-9,A-Z 缺省值出厂日期系统使用时间####min 触发方式标签---有效使能上沿下沿物料---有效使能上沿下沿触发有效标签---有效使能长度物料---有效使能时间0-9999ms 0-5535ms同步器有效使能同步值0-5535mm/pulse 多标功能有效使能数量序号贴标延时停标偏值2-201-201-6000ms 1-100mm漏标修复有效使能标签长度标签偏值数量0-999999pulse 1-20双机联动有效使能主机辅机附录2—故障标签计数器到达设定值1.清零当前标签计数器2.加大标签计数器设定值物料计数器到达设定值1.清零当前物料计数器2.加大物料计数器设定值标签检测器未能检测到标签1.调节标签传感器增益2.加大送标最大长度或标签长度值伺服未能准备好1.伺服连接电缆2.伺服驱动器故障。
