上传图片脚本
jquery插件ajaxupload实现文件上传操作

jquery插件ajaxupload实现⽂件上传操作本⽂实例讲述了jquery插件ajaxupload实现⽂件上传操作代码。
分享给⼤家供⼤家参考。
具体如下:运⾏效果截图如下:图1 ⽂件上传前图2 ⽂件上传后具体代码如下:1、创建页⾯并编写HTML上传⽂档:<div class="uploadFile"><span id="doc"><input type="text" disabled="disabled" /></span><input type="hidden" id="hidFileName" /><input type="button" id="btnUploadFile" value="上传" /><input type="button" id="btnDeleteFile" value="删除" /></div>上传图⽚:<div class="uploadImg"><img id="imgShow" src="/images/nophoto.gif" /><input type="hidden" id="hidImgName" /><input type="button" id="btnUploadImg" value="上传" /><input type="button" id="btnDeleteImg" value="删除" /></div>2、引⽤AjaxUpload.js⽂件<script src="/js/common/AjaxUpload.js" type="text/javascript"></script>3、编写JS脚本window.onload = function() {init(); //初始化}//初始化function init() {//初始化⽂档上传var btnFile = document.getElementById("btnUploadFile");var doc = document.getElementById("doc");var hidFileName = document.getElementById("hidFileName");document.getElementById("btnDeleteFile").onclick = function() { DelFile(doc, hidFileName); };g_AjxUploadFile(btnFile, doc, hidFileName);//初始化图⽚上传var btnImg = document.getElementById("btnUploadImg");var img = document.getElementById("imgShow");var hidImgName = document.getElementById("hidImgName");document.getElementById("btnDeleteImg").onclick = function() { DelImg(img, hidImgName); };g_AjxUploadImg(btnImg, img, hidImgName);}var g_AjxTempDir = "/file/temp/";//⽂档上传function g_AjxUploadFile(btn, doc, hidPut, action) {var button = btn, interval;new AjaxUpload(button, {action: ((action == null || action == undefined) ? '/Common/UploadHandler.ashx?fileType=file' : action),data: {},name: 'myfile',onSubmit: function(file, ext) {if (!(ext && /^(rar|zip|pdf|pdfx|txt|csv|xls|xlsx|doc|docx|RAR|ZIP|PDF|PDFX|TXT|CSV|XLS|XLSX|DOC|DOCX)$/.test(ext))) {alert("您上传的⽂档格式不对,请重新选择!");return false;}},onComplete: function(file, response) {flagValue = response;if (flagValue == "1") {alert("您上传的⽂档格式不对,请重新选择!");}else if (flagValue == "2") {alert("您上传的⽂档⼤于2M,请重新选择!");}else if (flagValue == "3") {alert("⽂档上传失败!");}else {hidPut.value = response;doc.innerHTML="<a href='" + g_AjxTempDir + response + "' target='_blank'>" + response + "</a>";}}});}//图⽚上传function g_AjxUploadImg(btn, img, hidPut) {var button = btn, interval;new AjaxUpload(button, {action: '/Common/UploadHandler.ashx?fileType=img',data: {},name: 'myfile',onSubmit: function(file, ext) {if (!(ext && /^(jpg|JPG|png|PNG|gif|GIF)$/.test(ext))) {alert("您上传的图⽚格式不对,请重新选择!");return false;}},onComplete: function(file, response) {flagValue = response;if (flagValue == "1") {alert("您上传的图⽚格式不对,请重新选择!");}else if (flagValue == "2") {alert("您上传的图⽚⼤于200K,请重新选择!");}else if (flagValue == "3") {alert("图⽚上传失败!");}else {img.src = g_AjxTempDir + response;}}});}//删除⽂档function DelFile(doc, hidPut) {hidPut.value = "";doc.innerHTML = "<input type=\"text\" disabled=\"disabled\" />";}//删除图⽚function DelImg(img, hidPut) {hidPut.value = "";img.src = "/images/nophoto.gif";}4、创建/Common/UploadHandler.ashx处理程序<%@ WebHandler Language="C#" Class="UploadHandler" %>using System;using System.Web;using System.Text.RegularExpressions;using System.IO;public class UploadHandler : IHttpHandler {private string _filedir = ""; //⽂件⽬录/// <summary>/// 处理上传⽂件(1:⽂件格式不正确、2:⽂件⼤⼩不正确、3:上传失败、⽂件名称:上传成功)/// </summary>/// <param name="context"></param>public void ProcessRequest (HttpContext context) {_filedir = context.Server.MapPath(@"/file/temp/");try{string result = "3";string fileType = context.Request.QueryString["fileType"]; //获取上传⽂件类型if (fileType == "file"){result = UploadFile(context); //⽂档上传}else if (fileType == "img"){result = UploadImg(context); //图⽚上传}context.Response.Write(result);}catch{context.Response.Write("3");//3⽂件上传失败}}/// <summary>/// ⽂档上传/// </summary>/// <param name="context"></param>/// <returns></returns>private string UploadFile(HttpContext context){int cout = context.Request.Files.Count;if (cout > 0){HttpPostedFile hpf = context.Request.Files[0];if (hpf != null){string fileExt = Path.GetExtension(hpf.FileName).ToLower();//只能上传⽂件,过滤不可上传的⽂件类型string fileFilt = ".rar|.zip|.pdf|.pdfx|.txt|.csv|.xls|.xlsx|.doc|.docx......";if (fileFilt.IndexOf(fileExt) <= -1){return "1";}//判断⽂件⼤⼩int length = hpf.ContentLength;if (length > 2097152){return "2";}Random rd = new Random();DateTime nowTime = DateTime.Now;string newFileName = nowTime.Year.ToString() + nowTime.Month.ToString() + nowTime.Day.ToString() + nowTime.Hour.ToString() + nowTime.Minute.ToString() + nowTime.Second.ToString() + rd.Next(1000, 1000000) + Path.GetExtension(hpf.FileName); if (!Directory.Exists(_filedir)){Directory.CreateDirectory(_filedir);}string fileName = _filedir + newFileName;hpf.SaveAs(fileName);return newFileName;}}return "3";}/// <summary>/// 图⽚上传/// </summary>/// <param name="context"></param>/// <returns></returns>private string UploadImg(HttpContext context){int cout = context.Request.Files.Count;if (cout > 0){HttpPostedFile hpf = context.Request.Files[0];if (hpf != null){string fileExt = Path.GetExtension(hpf.FileName).ToLower();//只能上传⽂件,过滤不可上传的⽂件类型string fileFilt = ".gif|.jpg|.php|.jsp|.jpeg|.png|......";if (fileFilt.IndexOf(fileExt) <= -1){return "1";}//判断⽂件⼤⼩}Random rd = new Random();DateTime nowTime = DateTime.Now;string newFileName = nowTime.Year.ToString() + nowTime.Month.ToString() + nowTime.Day.ToString() + nowTime.Hour.ToString() + nowTime.Minute.ToString() + nowTime.Second.ToString() + rd.Next(1000, 1000000) + Path.GetExtension(hpf.FileName); if (!Directory.Exists(_filedir)){Directory.CreateDirectory(_filedir);}string fileName = _filedir + newFileName;hpf.SaveAs(fileName);return newFileName;}}return "3";}#region IHttpHandler 成员public bool IsReusable{get { throw new NotImplementedException(); }}#endregion}附件1:页⾯CSS样式/*上传⽂件*/.uploadFile{margin-bottom:10px;}/*上传图⽚*/.uploadImg{}.uploadImg img{width:102px; height:64px; border:1px solid #CCCCCC; display: block;}附件2:AjaxUpload.js⽂件/*** AJAX Upload ( /ajax-upload/ )* Copyright (c) Andris Valums* Licensed under the MIT license ( /mit-license/ )* Thanks to Gary Haran, David Mark, Corey Burns and others for contributions*/(function () {/* global window *//* jslint browser: true, devel: true, undef: true, nomen: true, bitwise: true, regexp: true, newcap: true, immed: true *//*** Wrapper for FireBug's console.log*/function log() {if (typeof(console) != 'undefined' && typeof(console.log) == 'function') {Array.prototype.unshift.call(arguments, '[Ajax Upload]');console.log(Array.prototype.join.call(arguments, ' '));}}/*** Attaches event to a dom element.* @param {Element} el* @param type event name* @param fn callback This refers to the passed element*/function addEvent(el, type, fn) {if (el.addEventListener) {el.addEventListener(type, fn, false);} else if (el.attachEvent) {el.attachEvent('on' + type, function () {fn.call(el);});} else {throw new Error('not supported or DOM not loaded');}}/*** Attaches resize event to a window, limiting* number of event fired. Fires only when encounteres* delay of 100 after series of events.** Some browsers fire event multiple times when resizing* /dom/events/resize.html** @param fn callback This refers to the passed element*/function addResizeEvent(fn) {var timeout;addEvent(window, 'resize', function () {if (timeout) {clearTimeout(timeout);}timeout = setTimeout(fn, 100);});}// Needs more testing, will be rewriten for next version// getOffset function copied from jQuery lib (/)if (document.documentElement.getBoundingClientRect) {// Get Offset using getBoundingClientRect// /blog/getboundingclientrect-is-awesome/var getOffset = function (el) {var box = el.getBoundingClientRect();var doc = el.ownerDocument;var body = doc.body;var docElem = doc.documentElement; // for ievar clientTop = docElem.clientTop || body.clientTop || 0;var clientLeft = docElem.clientLeft || body.clientLeft || 0;// In Internet Explorer 7 getBoundingClientRect property is treated as physical,// while others are logical. Make all logical, like in IE8.var zoom = 1;if (body.getBoundingClientRect) {var bound = body.getBoundingClientRect();zoom = (bound.right - bound.left) / body.clientWidth;clientTop = 0;clientLeft = 0;}var top = box.top / zoom + (window.pageYOffset || docElem && docElem.scrollTop / zoom || body.scrollTop / zoom) - clientTop, left = box.left / zoom + (window.pageXOffset || docElem && docElem.scrollLeft / zoom || body.scrollLeft / zoom) - clientLeft; return {top: top,left: left};};} else {// Get offset adding all offsetsvar getOffset = function (el) {var top = 0,left = 0;do {top += el.offsetTop || 0;left += el.offsetLeft || 0;el = el.offsetParent;} while (el);return {left: left,top: top};};}/*** Returns left, top, right and bottom properties describing the border-box,* in pixels, with the top-left relative to the body* @param {Element} el* @return {Object} Contains left, top, right,bottom*/function getBox(el) {var left, right, top, bottom;var offset = getOffset(el);left = offset.left;top = offset.top;right = left + el.offsetWidth;bottom = top + el.offsetHeight;return {left: left,right: right,top: top,bottom: bottom};}/*** Helper that takes object literal* and add all properties to element.style* @param {Element} el* @param {Object} styles*/function addStyles(el, styles) {for (var name in styles) {if (styles.hasOwnProperty(name)) {el.style[name] = styles[name];}}}/*** Function places an absolutely positioned* element on top of the specified element* copying position and dimentions.* @param {Element} from* @param {Element} to*/function copyLayout(from, to) {var box = getBox(from);addStyles(to, {position: 'absolute',left: box.left + 'px',top: box.top + 'px',width: from.offsetWidth + 'px',height: from.offsetHeight + 'px'});}/*** Creates and returns element from html chunk* Uses innerHTML to create an element*/var toElement = (function () {var div = document.createElement('div');return function (html) {div.innerHTML = html;var el = div.firstChild;return div.removeChild(el);};})();/*** Function generates unique id* @return unique id*/var getUID = (function () {var id = 0;return function () {return 'ValumsAjaxUpload' + id++;};})();/*** Get file name from path* @param {String} file path to file* @return filename*/function fileFromPath(file) {/*** Get file extension lowercase* @param {String} file name* @return file extenstion*/function getExt(file) {return (-1 !== file.indexOf('.')) ? file.replace(/.*[.]/, '') : '';}function hasClass(el, name) {var re = new RegExp('\\b' + name + '\\b');return re.test(el.className);}function addClass(el, name) {if (!hasClass(el, name)) {el.className += ' ' + name;}}function removeClass(el, name) {var re = new RegExp('\\b' + name + '\\b');el.className = el.className.replace(re, '');}function removeNode(el) {el.parentNode.removeChild(el);}/*** Easy styling and uploading* @constructor* @param button An element you want convert to* upload button. Tested dimentions up to 500x500px* @param {Object} options See defaults below.*/window.AjaxUpload = function (button, options) {this._settings = {// Location of the server-side upload scriptaction: 'upload.php',// File upload namename: 'userfile',// Additional data to senddata: {},// Submit file as soon as it's selectedautoSubmit: true,// The type of data that you're expecting back from the server.// html and xml are detected automatically.// Only useful when you are using json data as a response.// Set to "json" in that case.responseType: false,// Class applied to button when mouse is hoveredhoverClass: 'hover',// Class applied to button when AU is disableddisabledClass: 'disabled',// When user selects a file, useful with autoSubmit disabled// You can return false to cancel uploadonChange: function (file, extension) {},// Callback to fire before file is uploaded// You can return false to cancel uploadonSubmit: function (file, extension) {},// Fired when file upload is completed// WARNING! DO NOT USE "FALSE" STRING AS A RESPONSE!onComplete: function (file, response) {}};// Merge the users options with our defaultsfor (var i in options) {if (options.hasOwnProperty(i)) {this._settings[i] = options[i];}}// button isn't necessary a dom elementif (button.jquery) {// jQuery object was passedbutton = button[0];} else if (typeof button == "string") {if (/^#.*/.test(button)) {// If jQuery user passes #elementId don't break itbutton = button.slice(1);}button = document.getElementById(button);}if (!button || button.nodeType !== 1) {throw new Error("Please make sure that you're passing a valid element"); }if (button.nodeName.toUpperCase() == 'A') {// disable linkaddEvent(button, 'click', function (e) {if (e && e.preventDefault) {e.preventDefault();} else if (window.event) {window.event.returnValue = false;}});}// DOM elementthis._button = button;// DOM elementthis._input = null;// If disabled clicking on button won't do anythingthis._disabled = false;// if the button was disabled before refresh if will remain// disabled in FireFox, let's fix itthis.enable();this._rerouteClicks();};// assigning methods to our classAjaxUpload.prototype = {setData: function (data) {this._settings.data = data;disable: function () {addClass(this._button, this._settings.disabledClass);this._disabled = true;var nodeName = this._button.nodeName.toUpperCase();if (nodeName == 'INPUT' || nodeName == 'BUTTON') {this._button.setAttribute('disabled', 'disabled');}// hide inputif (this._input) {// We use visibility instead of display to fix problem with Safari 4 // The problem is that the value of input doesn't change if it// has display none when user selects a filethis._input.parentNode.style.visibility = 'hidden';}},enable: function () {removeClass(this._button, this._settings.disabledClass);this._button.removeAttribute('disabled');this._disabled = false;},/*** Creates invisible file input* that will hover above the button* <div><input type='file' /></div>*/_createInput: function () {var self = this;var input = document.createElement("input");input.setAttribute('type', 'file');input.setAttribute('name', this._);addStyles(input, {'position': 'absolute',// in Opera only 'browse' button// is clickable and it is located at// the right side of the input'right': 0,'margin': 0,'padding': 0,'fontSize': '480px','cursor': 'pointer'});var div = document.createElement("div");addStyles(div, {'display': 'block','position': 'absolute','overflow': 'hidden','margin': 0,'padding': 0,'opacity': 0,// Make sure browse button is in the right side// in Internet Explorer'direction': 'ltr',//Max zIndex supported by Opera 9.0-9.2'zIndex': 2147483583});// Make sure that element opacity exists.// Otherwise use IE filterif (div.style.opacity !== "0") {if (typeof(div.filters) == 'undefined') {throw new Error('Opacity not supported by the browser');}div.style.filter = "alpha(opacity=0)";}addEvent(input, 'change', function () {if (!input || input.value === '') {return;}// Get filename from input, required// as some browsers have path instead of itvar file = fileFromPath(input.value);if (false === self._settings.onChange.call(self, file, getExt(file))) { self._clearInput();return;}// Submit form when value is changedif (self._settings.autoSubmit) {self.submit();}});addEvent(input, 'mouseover', function () {addClass(self._button, self._settings.hoverClass);});addEvent(input, 'mouseout', function () {removeClass(self._button, self._settings.hoverClass);// We use visibility instead of display to fix problem with Safari 4 // The problem is that the value of input doesn't change if it// has display none when user selects a fileinput.parentNode.style.visibility = 'hidden';});div.appendChild(input);document.body.appendChild(div);this._input = input;},_clearInput: function () {if (!this._input) {return;}// this._input.value = ''; Doesn't work in IE6removeNode(this._input.parentNode);this._input = null;this._createInput();removeClass(this._button, this._settings.hoverClass);/*** Function makes sure that when user clicks upload button,* the this._input is clicked instead*/_rerouteClicks: function () {var self = this;// IE will later display 'access denied' error// if you use using self._input.click()// other browsers just ignore click()addEvent(self._button, 'mouseover', function () {if (self._disabled) {return;}if (!self._input) {self._createInput();}var div = self._input.parentNode;copyLayout(self._button, div);div.style.visibility = 'visible';});// commented because we now hide input on mouseleave/*** When the window is resized the elements* can be misaligned if button position depends* on window size*///addResizeEvent(function(){// if (self._input){// copyLayout(self._button, self._input.parentNode);// }//});},/*** Creates iframe with unique name* @return {Element} iframe*/_createIframe: function () {// We can't use getTime, because it sometimes return// same value in safari :(var id = getUID();// We can't use following code as the name attribute// won't be properly registered in IE6, and new window// on form submit will open// var iframe = document.createElement('iframe');// iframe.setAttribute('name', id);var iframe = toElement('<iframe src="javascript:false;" name="' + id + '" />');// src="javascript:false; was added// because it possibly removes ie6 prompt// "This page contains both secure and nonsecure items"// Anyway, it doesn't do any harm.iframe.setAttribute('id', id);iframe.style.display = 'none';document.body.appendChild(iframe);return iframe;},/*** Creates form, that will be submitted to iframe* @param {Element} iframe Where to submit* @return {Element} form*/_createForm: function (iframe) {var settings = this._settings;// We can't use the following code in IE6// var form = document.createElement('form');// form.setAttribute('method', 'post');// form.setAttribute('enctype', 'multipart/form-data');// Because in this case file won't be attached to requestvar form = toElement('<form method="post" enctype="multipart/form-data"></form>'); form.setAttribute('action', settings.action);form.setAttribute('target', );form.style.display = 'none';document.body.appendChild(form);// Create hidden input element for each data keyfor (var prop in settings.data) {if (settings.data.hasOwnProperty(prop)) {var el = document.createElement("input");el.setAttribute('type', 'hidden');el.setAttribute('name', prop);el.setAttribute('value', settings.data[prop]);form.appendChild(el);}}return form;},/*** Gets response from iframe and fires onComplete event when ready* @param iframe* @param file Filename to use in onComplete callback*/_getResponse: function (iframe, file) {// getting responsevar toDeleteFlag = false,self = this,settings = this._settings;addEvent(iframe, 'load', function () {if ( // For Safariiframe.src == "javascript:'%3Chtml%3E%3C/html%3E';" ||// For FF, IEiframe.src == "javascript:'<html></html>';") {// First time around, do not delete.// We reload to blank page, so that reloading main page// does not re-submit the post.if (toDeleteFlag) {// Fix busy state in FF3removeNode(iframe);},0);}return;}var doc = iframe.contentDocument ? iframe.contentDocument : window.frames[iframe.id].document; // fixing Opera 9.26,10.00if (doc.readyState && doc.readyState != 'complete') {// Opera fires load event multiple times// Even when the DOM is not ready yet// this fix should not affect other browsersreturn;}// fixing Opera 9.64if (doc.body && doc.body.innerHTML == "false") {// In Opera 9.64 event was fired second time// when body.innerHTML changed from false// to server response approx. after 1 secreturn;}var response;if (doc.XMLDocument) {// response is a xml document Internet Explorer propertyresponse = doc.XMLDocument;} else if (doc.body) {// response is html document or plain textresponse = doc.body.innerHTML;if (settings.responseType && settings.responseType.toLowerCase() == 'json') {// If the document was sent as 'application/javascript' or// 'text/javascript', then the browser wraps the text in a <pre>// tag and performs html encoding on the contents. In this case,// we need to pull the original text content from the text node's// nodeValue property to retrieve the unmangled content.// Note that IE6 only understands text/htmlif (doc.body.firstChild && doc.body.firstChild.nodeName.toUpperCase() == 'PRE') {response = doc.body.firstChild.firstChild.nodeValue;}if (response) {response = eval("(" + response + ")");} else {response = {};}}} else {// response is a xml documentresponse = doc;}settings.onComplete.call(self, file, response);// Reload blank page, so that reloading main page// does not re-submit the post. Also, remember to// delete the frametoDeleteFlag = true;// Fix IE mixed content issueiframe.src = "javascript:'<html></html>';";});},/*** Upload file contained in this._input*/submit: function () {var self = this,settings = this._settings;if (!this._input || this._input.value === '') {return;}var file = fileFromPath(this._input.value);// user returned false to cancel uploadif (false === settings.onSubmit.call(this, file, getExt(file))) {this._clearInput();return;}// sending requestvar iframe = this._createIframe();var form = this._createForm(iframe);// assuming following structure// div -> input type='file'removeNode(this._input.parentNode);removeClass(self._button, self._settings.hoverClass);form.appendChild(this._input);form.submit();// request set, clean upremoveNode(form);form = null;removeNode(this._input);this._input = null;// Get response from iframe and fire onComplete event when readythis._getResponse(iframe, file);// get ready for next requestthis._createInput();}};})();更多精彩内容请参考专题,和进⾏学习。
FCKeditor属性配置大全

fck 属性配置大全优化FCKeditor文件夹和文件:下载FCKeditor并解压之后,会产生_samples和editor两个文件夹和几个文件,全部删除以_开头的文件夹和文件,因为这些都是FCKeditor的一些例子而已,可以学习一下,但上传到网站服务器上就大可不必了,删除。
在根目录下,还有几个fckeditor.asp,fckeditor.php,fckeditor.js......等其它文件,这个就看你的网站服务器和网站需要什么程序语言,有PHP,ASP,PERL,.NET等,我选择的是脚本配置文件fckeditor.js,还有三个文件fckconfig.js、fckstyles.xml、fcktemplates.xml是必需的文件,其它的可以全部删除。
打开editor文件夹,进入lang文件夹,这里面是FCKeditor的语言包来的,一般国内选择en.js 和zh.js和zh-cn.js文件就可以了,加上必需的文件fcklanguagemanager.js(此文件是2.4版本以下必需的),其它的文件可以完全删除。
之后打开editor/filemanager文件夹,如果不要求在上传图片或者文件的时候显示服务器上的内容,可以选择删除filemanager文件夹下的brower文件夹。
然后进入upload文件夹,里面是各种程序语言的上传文件,选择你需要的那个程序语言文件夹,其它的删除。
进入editor/Plugins文件夹,如果你不需要这些额外的FCKeditor插件的话,把里面的文件夹全部删除。
进入editor/skins文件夹,里面是编辑器的皮肤文件,default文件是默认的灰色面板的编辑器,Office2003和silver是另外加载的,看哪个好看就选择哪个,然后其它的删除。
另外,editor/dialog文件夹里是一些编辑器的对话框,如果选择基本的一些功能的话,可以相应的选择其文件,把其它的删除也是可以的。
在Unity中发送邮件带图片的三种方式(C#脚本)(同时发多人不同邮件)

在Unity中发送邮件带图片的三种方式(C#脚本)(同时发多人不同邮件) 1,在正文中插入图片发送using UnityEngine;using System.Collections;using .Mail;using ;using System;using System.IO;publicclass SendMessage : MonoBehaviour{ string path ="";// Use this for initializationvoid Start () {}// Update is called once per framevoid Update () {void OnMouseDown(){string receiverName ="receiverName";string receiverEmail ="receiverEmail";string senderName ="senderName";string senderEmail ="senderEmail";path =Application.dataPath +"/test.png";//截屏存储路径Application.CaptureScreenshot(path);Debug.Log(path);//函数调用SendEmail(receiverName,receiverEmail,senderName,send erEmail);publicvoid SendEmail(string receiverName,string receiverEmail,string senderName,string senderEmail){MailMessage mail= new MailMessage();mail.From = new MailAddress(senderEmail);mail.To.Add(receiverEmail);mail.Subject = "标题";string htmlBody ="文本文字";//传参htmlBody +=receiverName;htmlBody+="<p>    </p>";htmlBody +="<br><img src=cid:companylogo>";//first we create the Plain Text partAlternateView plainView =AlternateView.CreateAlternateViewFromString("This is my plain text content, viewable by thoseclients that don't support html", null, "text/plain");AlternateView htmlView =AlternateView.CreateAlternateViewFromString(htmlBody, null, "text/html");//createthe LinkedResource (embedded image) LinkedResource picture = new LinkedResource(Application.dataPath+"/test.png");picture.ContentId= "companylogo";//add the LinkedResource to the appropriateviewhtmlView.LinkedResources.Add(picture);//add the viewsmail.AlternateViews.Add(plainView);mail.AlternateViews.Add(htmlView);SmtpClient client = new SmtpClient("");//specify the mail server addresseDefaultCredentials = false;client.Credentials = (ICredentialsByHost)new workCredential(senderEmail, "password");client.DeliveryMethod = work;client.Send(mail);}}2,以附件形式发送using UnityEngine;using System.Collections;using .Mail;using ;using System;using System.IO;publicclass SendMessage : MonoBehaviour{ publicstring path ="";// Use this for initializationvoid Start () {}// Update is called once per framevoid Update () {}void OnMouseDown(){string customerName1 ="receiverName";string customerEmail1 ="receiverEmail";string saleaName1 ="senderName";string salesEmail1="senderEmail";path =Application.dataPath +"/test.png";//截屏函数Application.CaptureScreenshot(path);Debug.Log(path);//函数调用SendEmail(customerName1,customerEmail1,saleaName1, salesEmail1);}publicvoid SendEmail(string customerName,string customerEmail,string salesName,string salesEmail){.Mail.SmtpClientclient = new SmtpClient("");eDefaultCredentials= false;client.Credentials= (ICredentialsByHost)new workCredential(salesEmail, "password");client.DeliveryMethod= work;MailAddressaddressFrom = new MailAddress(salesEmail, salesName);MailAddressaddressTo = new MailAddress(customerEmail, customerName);.Mail.MailMessagemessage = new MailMessage(addressFrom, addressTo);message.Sender= new MailAddress(salesEmail);message.BodyEncoding=System.Text.Encoding.UTF8;message.IsBodyHtml= true;string mailBody = "<br><img src=cid:ewen>";message.Body = mailBody;message.Subject= "This is a test";message.Attachments.Add( new Attachment("Application.dataPath +"/test.png "));message.Attachments[0].ContentId="ewen";message.Attachments[0]="image/png ";message.Attachments[0].ContentDisposition.Inline=true;message.Attachments[0].TransferEncoding=.M ime.TransferEncoding.Base64;client.Send(message);}}3,以.html形式发送。
彻底解决ewebeditor网站后台不能上传图片的方法
彻底解决ewebeditor⽹站后台不能上传图⽚的⽅法经我们技术员检查,结果原来是eWebEditor⽂本编辑器对IE8浏览器的兼容性导致的脚本错误,并不是什么“⽹站空间、服务器中毒、出问题了”呢!现就将解决⽅法公布给⼤家,⽅便⼤家修正⾃⼰⽹站的代码以使⽂本编辑器在各种浏览器下都能兼容、正常使⽤!【1】⾸先在eWebEditor⽂本编辑器根⽬录下的Include⽬录下找到editor.js⽂件(注意:不同的eWebEditor版本的editor.js⽂件所处⽬录可能有所不同,有的可能在js⽬录下)【2】⽤记事本打开editor.js⽂件,找到如下代码:if (element.YUSERONCLICK) eval_r(element.YUSERONCLICK + 'anonymous()');注意:不同版本的eWebEditor此段代码可能有所不同,也可能是以下代码:复制代码代码如下:if (element.YUSERONCLICK) {eval_r(element.YUSERONCLICK + 'anonymous()');}以上两段代码只是书写格式不同⽽已,代码、含义是⼀样的!【3】将上⾯的代码替换为下⾯的代码即可:复制代码代码如下:if(navigator.appVersion.match(/8./i)=='8.'){if (element.YUSERONCLICK) eval_r(element.YUSERONCLICK + 'onclick(event)');}else{if (element.YUSERONCLICK) eval_r(element.YUSERONCLICK + 'anonymous()');}【4】经测试在IE6、IE7、IE8下均能正常使⽤了,但是在装有IE8的机器上使⽤傲游浏览器却还是不能正常使⽤,汗!那就再加⼀句判断傲游浏览器的代码吧:复制代码代码如下:if(navigator.appVersion.match(/8./i)=='8.' || navigator.appVersion.match(/MAXTHON/i)=='MAXTHON'){if (element.YUSERONCLICK) eval_r(element.YUSERONCLICK + "onclick(event)");}else{if (element.YUSERONCLICK) eval_r(element.YUSERONCLICK + "anonymous()");}经测试IE6、IE7、IE8、遨游、360浏览器下均可正常使⽤!另外如果上⾯的⽅法都不⾏的话,不妨试试以下的构造⽅法:复制代码代码如下:try{if (element.YUSERONCLICK) eval_r(element.YUSERONCLICK + "anonymous()");}catch(e){if (element.YUSERONCLICK) eval_r(element.YUSERONCLICK + "onclick(event)");}IE8不⽀持eWebEditor在线⽂本编辑器的终级解决⽅法:如果你发现以上代码都不⾏!怎么回事呢?那是因为你⽤的是升级版的ie8,那样⽤代码读取出来的IE版本号其实还是升级前的版本号,那版本好读取的就是错误的,⽤以上代码当然就是不⾏的了,这时候你最好是重新下载安装个最终发布版的IE8就可以了,要么你只好⽤⼀下代码来改:复制代码代码如下:if(navigator.appVersion.match(/MSIE (7|8)\./i)!=null){if (element.YUSERONCLICK) eval(element.YUSERONCLICK + "onclick(event)");}else{if (element.YUSERONCLICK) eval(element.YUSERONCLICK + "anonymous()");}或复制代码代码如下:try{if (element.YUSERONCLICK) eval(element.YUSERONCLICK + "anonymous()");}catch(e){if (element.YUSERONCLICK) eval(element.YUSERONCLICK + "onclick(event)");}但是以上修改⽅法会导致⽂本编辑器在正常的IE7浏览器下⼜是失效的所以说最好是(说服客户)安装⼀个最终版的IE8 !。
imgxss利用方法
imgxss利用方法摘要:1.imgxss简介与原理2.imgxss的利用方法3.实战案例演示4.注意事项与防范措施正文:imgxss是一种基于图片的跨站脚本攻击(XSS)技术,它通过将恶意代码嵌入到图片中,欺骗浏览器执行恶意代码,从而实现对用户的攻击。
本文将详细介绍imgxss的利用方法、实战案例以及防范措施。
一、imgxss简介与原理imgxss攻击利用了浏览器对图片的解析漏洞,当用户访问带有恶意代码的图片时,浏览器会解析图片中的HTML标签,从而执行恶意代码。
imgxss与传统的XSS攻击相比,具有更难被发现和防范的特点。
二、imgxss的利用方法1.制作恶意图片:首先,你需要制作一个包含恶意代码的图片,可以使用一些在线工具将代码嵌入到图片中。
2.修改图片URL:将恶意图片的URL替换为目标网站的图片URL,或者将恶意图片上传到目标网站的服务器。
3.利用漏洞:在目标网站的某个地方插入恶意图片的URL,当用户访问该页面时,浏览器会自动加载并解析恶意图片中的HTML代码。
4.执行恶意代码:一旦浏览器解析到恶意代码,就会执行该代码,从而实现对用户的攻击。
三、实战案例演示以下是一个简单的imgxss实战案例:假设我们有一个恶意代码:`<script>alert("XSS攻击")</script>`我们将这个代码嵌入到一张图片中,并将其URL替换为目标网站的图片URL。
然后,在目标网站的某个地方插入该图片的URL。
当用户访问这个页面时,浏览器会加载并解析图片中的恶意代码,最终弹出警告框,显示“XSS攻击”。
四、注意事项与防范措施1.注意检查图片:在接收或上传图片时,务必对图片进行安全检查,避免恶意代码嵌入。
2.启用内容安全策略:针对imgxss攻击,可以启用浏览器的内容安全策略(CSP),限制浏览器加载外部资源。
3.过滤特殊字符:对用户输入进行过滤和编码,避免恶意代码注入。
jimageupload的用法

jimageupload的用法摘要:一、概述jimageupload的作用二、jimageupload的用法介绍1.安装与配置2.上传图片方法3.图片管理功能4.高级设置与应用场景三、实战案例分享四、总结与建议正文:【概述jimageupload的作用】jimageupload是一款便捷的图片上传与管理工具,适用于各种网站、博客和在线平台。
它具有轻量级、易用性强、功能全面等特点,可以帮助用户快速地上传和管理图片。
本文将详细介绍jimageupload的用法,带你轻松掌握这款优秀的开源项目。
【jimageupload的用法介绍】1.安装与配置在使用jimageupload之前,首先需要在你的项目中引入它。
你可以通过以下方式进行安装:```composer require jimageupload/jimageupload```安装完成后,按照官方文档进行配置。
配置过程中,你需要设置上传目录、图片处理工具、允许上传的文件类型等参数。
2.上传图片方法在配置完成后,你可以通过以下代码实现图片上传功能:```phpuse JimageuploadJimageupload;// 实例化Jimageupload类$jimageupload = new Jimageupload();// 设置上传参数$params = ["upload_dir" => "./uploads/", // 上传目录"allowed_types" => "jpg,png,gif", // 允许上传的文件类型"max_filesize" => 1000000, // 最大文件大小,单位:字节];// 初始化上传$jimageupload->init($params);// 开始上传图片if ($jimageupload->upload()) {echo "图片上传成功!";} else {echo "图片上传失败!";}```3.图片管理功能jimageupload内置了图片管理功能,你可以通过以下方法对已上传的图片进行操作:```php// 获取已上传图片列表$images = $jimageupload->get_uploads();// 删除图片$jimageupload->delete_image("image_name.jpg");// 调整图片大小$jimageupload->resize_image("image_name.jpg", 100, 100);// 生成缩略图$jimageupload->create_thumbs("image_name.jpg", 100, 100);```4.高级设置与应用场景jimageupload还提供了许多高级设置,如水印、裁剪、图片滤镜等。
KindEditor使用手册
KindEditor使用手册一简单使用方法1.把所有文件上传到程序所在目录下,例如:http://你的域名/editor/。
2.在此目录下创建attached文件夹,并把权限改成777。
3.要添加编辑器的地方加入以下代码。
(原来的TEXTAREA或其它编辑器可以先注释。
)这里[]里的内容要根据你的实际情况修改。
-----------------------------------------------------------------------<input type="hidden" name="[原TEXTAREA名字]" value="[这里放你要编辑的内容]"><script type="text/javascript" charset="utf-8"src="[JS路径]/KindEditor.js"></script><script type="text/javascript">var editor = new KindEditor("editor"); //创建编辑器对象editor.hiddenName = "[原TEXTAREA名字]"; editor.editorWidth = "[编辑器宽度,例如:700px]"; editor.editorHeight = "[编辑器高度,例如:400px]"; editor.show(); //显示//提交时获得最终HTML代码的函数function KindSubmit() {editor.data();}</script>----------------------------------------------------------------------- 4.FORM的onsubmit属性里添加KindSubmit()函数。
一个完整的php上传功能完整代码(upload代码)
⼀个完整的php上传功能完整代码(upload代码)创建⼀个⽂件上传表单允许⽤户从表单上传⽂件是⾮常有⽤的。
创建上传脚本"upload_file.php" ⽂件含有供上传⽂件的代码:<?phpif ($_FILES["file"]["error"] > 0){echo "错误:" . $_FILES["file"]["error"] . "<br>";}else{echo "上传⽂件名: " . $_FILES["file"]["name"] . "<br>";echo "⽂件类型: " . $_FILES["file"]["type"] . "<br>";echo "⽂件⼤⼩: " . ($_FILES["file"]["size"] / 1024) . " kB<br>";echo "⽂件临时存储的位置: " . $_FILES["file"]["tmp_name"];}?>通过使⽤ PHP 的全局数组 $_FILES,你可以从客户计算机向远程服务器上传⽂件。
第⼀个参数是表单的 input name,第⼆个下标可以是 "name"、"type"、"size"、"tmp_name" 或 "error"。
vue使用vue-quill-editor富文本编辑器且将图片上传到服务器的功能

vue使⽤vue-quill-editor富⽂本编辑器且将图⽚上传到服务器的功能⽬录⼀、准备⼯作⼆、定义全局组件quill-editor1、定义template模板2、定义富⽂本选项配置三、相关⽅法1、改变原有富⽂本编辑器上传图⽚绑定⽅法2、上传事件⼀、准备⼯作下载vue-quill-editornpm install vue-quill-editor --save 或者 yarn add vue-quill-editor⼆、定义全局组件quill-editor下载好vue-quill-editor后,我们需要定义⼀个全局组件,把这个组件名字命名为quill-editor1、定义template模板<div><quill-editorv-model="value"ref="myQuillEditor":options="editorOption"@change="onEditorChange"></quill-editor><input type="file" hidden accept=".jpg,.png" ref="fileBtn" @change="handleChange" /></div>2、定义富⽂本选项配置editorOption: {toolbar: [['bold', 'italic', 'underline'], //加粗、斜体、下划线、删除线, 'strike'['blockquote', 'code-block'], //引⽤、代码块[{ 'header': 1 }, { 'header': 2 }], //H1 H2[{ 'list': 'ordered' }, { 'list': 'bullet' }], //列表[{ 'script': 'sub' }, { 'script': 'super' }], //上标、下标[{ 'indent': '-1' }, { 'indent': '+1' }], //缩进[{ 'direction': 'rtl' }], //⽂字编辑⽅向,从左到右还是从右到左[{ 'size': ['small', false, 'large', 'huge'] }], //⽂字⼤⼩[{ 'header': [1, 2, 3, 4, 5, 6, false] }], //选中的⽂字容器⾼度[{ 'font': [] }], //字体样式[{ 'color': [] }, { 'background': [] }], //颜⾊、背景颜⾊[{ 'align': [] }], //对齐⽅式['clean'], //清除选中⽂字的所有样式['link', 'image', 'video'] //超链接、图⽚、视频链接],}三、相关⽅法1、改变原有富⽂本编辑器上传图⽚绑定⽅法mounted() {if (this.$refs.myQuillEditor) {//myQuillEditor改成⾃⼰的this.$refs.myQuillEditor.quill.getModule("toolbar").addHandler("image", this.imgHandler);}},methods:{imgHandler(state) {if (state) {//触发input的单击,fileBtn换成⾃⼰的this.$refs.fileBtn.click()}}}2、上传事件handleChange(e) {const files = Array.prototype.slice.call(e.target.files);if (!files) {return;}let formdata = new FormData();formdata.append("file_name", files[0].name);formdata.append("imgs", files[0]);//使⽤了axios请求this.axios({url: this.$store.state.baseUrl + 'upload/ueditorFile',method: 'post',data: formdata,headers: {'client-identity': localStorage.getItem('session_id')}}).then((res) => {//这⾥设置为空是为了联系上传同张图可以触发change事件this.$refs.fileBtn.value = "";if (res.data.code == 200) {let selection = this.$refs.myQuillEditor.quill.getSelection();//这⾥就是返回的图⽚地址,如果接⼝返回的不是可以访问的地址,要⾃⼰拼接let imgUrl = this.$store.state.baseUrl + res.data.data;imgUrl = imgUrl.replace(/\\/g,"/")//获取quill的光标,插⼊图⽚this.$refs.myQuillEditor.quill.insertEmbed(selection != null ? selection.index : 0, 'image', imgUrl)//插⼊完成后,光标往后移动⼀位this.$refs.myQuillEditor.quill.setSelection(selection.index + 1);}})}最后在⽗组件使⽤这个全局quill组件,并传递⾃⼰需要的相关参数,就完成啦~到此这篇关于vue使⽤vue-quill-editor富⽂本编辑器且将图⽚上传到服务器的功能的⽂章就介绍到这了,更多相关vue-quill-editor上传图⽚到服务器内容请搜索以前的⽂章或继续浏览下⾯的相关⽂章希望⼤家以后多多⽀持!。
急诊科突发心跳呼吸骤停应急预案演练脚本及图片
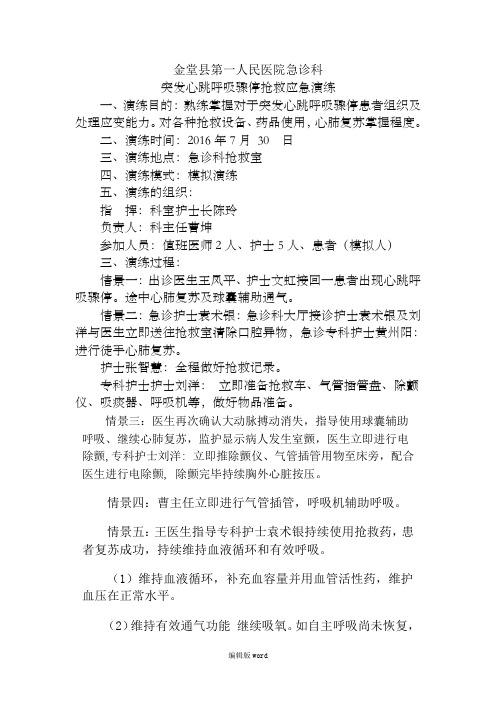
金堂县第一人民医院急诊科突发心跳呼吸骤停抢救应急演练一、演练目的:熟练掌握对于突发心跳呼吸骤停患者组织及处理应变能力。
对各种抢救设备、药品使用,心肺复苏掌握程度。
二、演练时间:2016年7月30 日三、演练地点:急诊科抢救室四、演练模式:模拟演练五、演练的组织:指挥:科室护士长陈玲负责人:科主任曹坤参加人员:值班医师2人、护士5人、患者(模拟人)三、演练过程:情景一:出诊医生王凤平、护士文虹接回一患者出现心跳呼吸骤停。
途中心肺复苏及球囊辅助通气。
情景二:急诊护士袁术银:急诊科大厅接诊护士袁术银及刘洋与医生立即送往抢救室清除口腔异物,急诊专科护士黄州阳:进行徒手心肺复苏。
护士张智慧:全程做好抢救记录。
专科护士护士刘洋:立即准备抢救车、气管插管盘、除颤仪、吸痰器、呼吸机等,做好物品准备。
情景三:医生再次确认大动脉搏动消失,指导使用球囊辅助呼吸、继续心肺复苏,监护显示病人发生室颤,医生立即进行电除颤,专科护士刘洋: 立即推除颤仪、气管插管用物至床旁,配合医生进行电除颤, 除颤完毕持续胸外心脏按压。
情景四:曹主任立即进行气管插管,呼吸机辅助呼吸。
情景五:王医生指导专科护士袁术银持续使用抢救药,患者复苏成功,持续维持血液循环和有效呼吸。
(1)维持血液循环,补充血容量并用血管活性药,维护血压在正常水平。
(2)维持有效通气功能继续吸氧。
如自主呼吸尚未恢复,继续用人工呼吸机;如自主呼吸恢复但不健全稳定,可酌用呼吸兴奋剂尼可刹米肌注或静滴;还要积极防治呼吸系统感染。
(3)心电监护发现心律失常酌情处理。
(4)积极进行脑复苏如心肺复苏时间较长,大脑功能会有不同程度损害,表现为意识障碍,遗留智力与活动能力障碍,甚至形成植物人,因此脑复苏是后期的重点。
①如意识障碍伴发热,应头部冰帽降温;如血压稳定还可人工冬眠,常用氯丙嗪和异丙嗪静滴或肌注。
②防治脑水肿:酌用脱水剂、肾上腺糖皮质激素或白蛋白等。
③改善脑细胞代谢药:如ATP、辅酶A、脑活素、胞二磷胆碱等。
主图短视频拍摄脚本模板

主图短视频拍摄脚本模板主图短视频拍摄脚本模板编剧:XXX注意事项:- 本脚本适用于主图短视频拍摄,字数不少于6000字以上。
- 每段时间长度建议控制在10-15秒之间。
- 所有文字、解说、或旁白要简洁明了,力求简练有力。
- 配乐和特效等细节部分因个人创意而异,可以根据具体情况进行调整。
[第一场景:开场]场景:黑屏音乐:欢快的音乐解说:欢迎来到我们的主图短视频!解说:本视频将为您带来一场思维的盛宴,让我们一起开始吧![第二场景:简介]场景:文字介绍音乐:柔和的背景音乐解说:我们的主题是XX,目的是帮助大家了解和掌握XX的重要概念和方法。
解说:通过本视频,我们将解密XX的奥秘,并教给您一些实用的技巧,让您受益终生。
[第三场景:问题引入]场景:问题的图片或文字音乐:紧张的音乐解说:问题是XX吗?解说:针对这个问题,让我们一起来思考一下。
[第四场景:解答论述]场景:有关XX的解答或论述音乐:平稳的背景音乐解说:首先,我们来解答这个问题。
解说:XX是指XXX,它的定义是XXX。
解说:XX与XXX的关系是XXX。
解说:接下来,我们将进行详细的论述和分析。
[第五场景:例子展示]场景:实例展示音乐:引人注目的音乐解说:为了更好地理解和应用XX,我们将通过一个实例来展示。
解说:让我们来认识一位实践者,他是如何运用XX解决实际问题的。
[第六场景:实践步骤]场景:实践步骤的文字或图片音乐:快节奏的音乐解说:接下来,我们将为您介绍具体的实践步骤。
解说:请仔细观看,并尝试跟随操作。
[第七场景:实践验证]场景:实践验证的结果或图片音乐:悬念的音乐解说:完成了吗?现在,让我们一起来看一下实践的结果吧!解说:实践证明,当您掌握了正确的方法,XX是可以成功的![第八场景:总结]场景:文字总结音乐:温和的背景音乐解说:通过本视频,您已经了解和掌握了XX的重要概念和方法。
解说:希望这个视频能够对您有所帮助,并在您的学习和工作中取得更好的成果。
脚本生成器

控件列表脚本命令控件脚本命令动作参数设置所有步骤编制生成(可编制)生成动作集,循环集1 绑定大漠2 绑定游戏3 对比图片,返回该图片所在坐标4 鼠标位移5 鼠标左击6 鼠标右击7 键盘输入8910控件区脚本命令 A 移动到(X,Y)B 向(方向)偏移(像素)参数编辑区控件编辑区动作参数设置插入插入1 鼠标移动至(X,Y)2 对比图片名,点击该图像位置3 鼠标点击左键,延迟2秒后释放4 在(x,y)进行截图,命名为所有步骤编制生成(可编辑)脚本区另存为保存动作集1动作区生成动作集脚本修改区动作参数修改一:菜单按钮1:新建新建脚本,创建出一个空的脚本页面2:打开打开一个保存好的脚本页面,包括设定好的动作集3:保存保存脚本区的脚本以及动作集4:调试调试脚本区的脚本5:生成运行脚本点击生成改脚本的EXE可执行程序二:控件1图片对比移动:在本界面根据所上传的图片进行对比,找到对比图片所在左顶点坐标,并将鼠标移动到该坐标位置提供参数:a.选择上传对比图片2鼠标位移:(1)将鼠标移动到指定坐标(x,y)提供参数:(x,y).指定坐标(2)将鼠标向(方向)偏移(像素)提供参数:a. 方向选择(向上、下、左、右) b.偏移像素3鼠标点击:(1)鼠标左击次数中带延时选择,即每点击一次加间隔延时时间提供参数:次数(a),延迟(b) 延迟需要有一个延迟勾选,默认不勾选(2)鼠标右击次数中带延时选择,延时时间(可勾选)后释放提供参数:次数(a),延迟(b) 延迟需要有一个延迟勾选,默认不勾选4键盘输入:提供文本自动输入文本内容提供参数:a.某个TXT文本内容5循环(1)循环文本顺序从第一行到最后一行依序循环。
提供参数: a.循环次数(2)循环出插入的动作集次数。
提供参数:循环动作集(a)次数(b)如图:从123564循环到5641326生成动作集将指定命令行生成一个动作集,可供调用。
7延时延时(x)提供参数:a.延时值(单位毫秒)8 截图在需要的位置坐标进行截图功能,并输入截图命名(1)根据坐标尺寸截图并命名提供参数:(x,y),命名a(2) 提供对角线2个图片对比进行截图提供参数:插入图片(A),图片(B)命名a9 插入插入设置好的动作集指令和循环集指令提供参数:插入动作集(A)或循环集(B)10 判断根据插入的图片进行判断执行操作。
LoadRunner测试上传下载文件
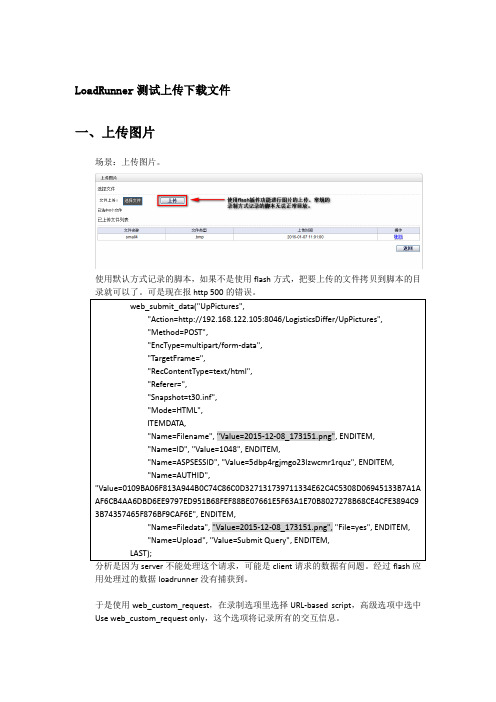
LoadRunner测试上传下载文件一、上传图片场景:上传图片。
使用默认方式记录的脚本,如果不是使用flash方式,把要上传的文件拷贝到脚本的目录就可以了。
可是现在报http 500的错误。
分析是因为server不能处理这个请求,可能是client请求的数据有问题。
经过flash应用处理过的数据loadrunner没有捕获到。
于是使用web_custom_request,在录制选项里选择URL-based script,高级选项中选中Use web_custom_request only,这个选项将记录所有的交互信息。
这是记录的脚本,上传的是一个8k的空白图片,报文体在BodyBinary里面,注意,这个文件是一个空白的图片,生成的文本开起来很规整,个人建议如果上传图片不要上传有内容的,因为生成的文本有乱码和一些字符,我在回放的时候可能报错,提示一些字符有问题,我想可能是一些特殊字符没有转义造成的。
所以最好选用简单的图片。
上传的文件大于100k,脚本生成两个附加的文件,custom_body_variables.txt,存放的是定义的变量(body_variable_1),lrw_custom_body.h存放的是上传报文的信息,因为是把二进制的图片转为文本存放,所以可能比较大,我测试中4m的图片存成文本大概20m。
注意,lrw_custom_body.h包含的文本也是越简单越好,不要用复杂的图片,二、视频下载视频下载比较简单使用默认URL录制模式,web_url参数Mode=HTTP,能模拟下载,脚本录制完成后运行一次,我们还可以自己定义下载文件的位置,看附件VideoDownload-Local.zip附测试脚本上传TMS_PicUpLoad_001.zip TMS_PicUpLoad_002.zip下载VideoDownload.zip VideoDownload-Local.zip。
PHPmove_uploaded_file()函数(将上传的文件移动到新位置)

PHPmove_uploaded_file()函数(将上传的⽂件移动到新位置)定义和⽤法move_uploaded_file()函数将上传的⽂件移动到新位置。
若成功,则返回 true,否则返回 false。
语法move_uploaded_file(file,newloc)参数描述file必需。
规定要移动的⽂件。
newloc必需。
规定⽂件的新位置。
说明本函数检查并确保由 file 指定的⽂件是合法的上传⽂件(即通过 PHP 的 HTTP POST 上传机制所上传的)。
如果⽂件合法,则将其移动为由 newloc 指定的⽂件。
如果 file 不是合法的上传⽂件,不会出现任何操作,move_uploaded_file() 将返回 false。
如果 file 是合法的上传⽂件,但出于某些原因⽆法移动,不会出现任何操作,move_uploaded_file() 将返回 false,此外还会发出⼀条警告。
这种检查显得格外重要,如果上传的⽂件有可能会造成对⽤户或本系统的其他⽤户显⽰其内容的话。
提⽰和注释注释:本函数仅⽤于通过 HTTP POST 上传的⽂件。
注意:如果⽬标⽂件已经存在,将会被覆盖。
安全补充来⾃w3c的介绍,下⾯说说我遇到的问题。
⼀般来说,我们都会这样写保存⽂件:$fileName = $_SERVER['DOCUMENT_ROOT'].'/Basic/uploads/'.$_FILES['file']['name'];move_uploaded_file($_FILES['file']['tmp_name'],$fileName )先解释,这两句代码的含义:直接保存⽂件,同时⽂件名也为⽤户上传的⽂件名好了,这下⼦风险来了:①直接保存⽂件。
这意味着不对⽂件进⾏任何识别,如果有⽤户上传了⼀段后台代码保存为jpg后缀或者其他,要是管理员⼀不注意将其以php 映射,然后访问这个后台,- -结果可想⽽知,要是他在后台中执⾏删除所有数据库,整个⽹站直接GG。
多媒体课件制作脚本范例(2024)

图标与图片选择
图标设计
选择与课件内容相关的图 标,简洁明了地表达各功 能模块的含义,方便用户 快速理解和操作。
2024/1/28
图片素材
选用高质量的图片素材, 确保图片清晰度高、色彩 鲜艳、与内容相关性强, 提升课件整体视觉效果。
图片处理
对选用的图片进行必要的 处理和优化,如调整大小 、裁剪、添加滤镜等,以 适应课件界面设计需求。
根据需要设置不同类型的按钮,如“ 下一步”、“返回”、“暂停”等。
2024/1/28
使用明确的按钮标签,描述按钮的功 能和作用。
确保交互按钮在不同设备和屏幕尺寸 上均可良好显示和使用,并提供适当 的反馈效果。
18
05 内容呈现方式探 讨
2024/1/28
19
文字内容编辑技巧
简洁明了
尽量使用简短、清晰的语句,避 免冗长和复杂的句子结构。
音频嵌入
将音频文件上传到在线音频平台(如网易云音乐 、QQ音乐等),然后在课件中插入音频链接或 嵌入代码。
注意事项
3
确保嵌入的视频和音频内容与课件主题相关,且 不影响课件的整体呈现效果。同时,要遵守相关 平台的版权和使用规定。
2024/1/28
22
06 测试评估与发布
2024/1/28
23
课件测试方法
2024/1/28
功能测试
确保课件的各项功能正常运行,如链接跳转、动画效果、交互功 能等。
兼容性测试
测试课件在不同操作系统、浏览器和设备上的兼容性,以确保用 户能够顺利访问和使用。
性能测试
评估课件的加载速度、响应时间等性能指标,优化课件性能,提 升用户体验。
24
评估指标设定
python接口自动化(十五)multipartform-data上传多个附件

python接⼝⾃动化(⼗五)multipartform-data上传多个附件前⾔上传附件的时候,⽂件的name参数名称是⼀样的,python⾥⾯key是不可以重复的,⼜如何处理参数名称相同的情况?上传附件OPMS——员⼯相册上传图⽚,提⽰成功,访问响应中的url也可以访问到该图⽚,web页⾯和数据库却没有该条数据;⽆解ing-------------------------------------------------------------------------------------------------------------------------------禅道项⽬1.下⾯以禅道提交bug的时候上传附件为例2.fiddler抓包查看请求参数,查看到⽂件上传的参数如下:上传⼀个附件1.把参数分开,表单的数据⽤data提交,⽂件附件⽤files提交。
传多个附件1.传多个⽂件的时候如下,这两个参数的name都是⼀样的,如果⽤字典去传key值,很显然 python的key值是不能重复的。
2.这时候需要换个格式,传list数据3.上传之后,查看禅道上的图⽚;参考代码:# coding:utf-8import requestsimport reimport hashlibpw="P@ssw0rd"s=requests.Session()headers={"User-Agent":"Mozilla/5.0 (Windows NT 10.0; Win64; x64) AppleWebKit/537.36 (KHTML, like Gecko) Chrome/83.0.4103.106 Safari/537.36" }vrand=0while(True):rs1=s.get("http://localhost/zentaopms/www/user-login.html",headers=headers)rs1.encoding='utf-8'#print(rs1.text)rand=re.findall(r"'verifyRand' value='(.+?)'",rs1.text)#print(rand[0])if len(rand[0])==10:vrand=rand[0]breakprint(vrand)#⽅式⼀hash=hashlib.md5()hash.update(pw.encode('utf-8'))f=hash.hexdigest()+vrand#print(f)#⽅式⼆hash2=hashlib.md5(f.encode('utf-8'))pwd=hash2.hexdigest()print(pwd)data={"account":"fuhui","password":pwd,"referer":"http://localhost/zentaopms/www/bug-browse-6.html","verifyRand":vrand}rs2=s.post("http://localhost/zentaopms/www/user-login.html",headers=headers,data=data)rs2.encoding='utf-8'#print(rs2.text)rs3=s.get("http://localhost/zentaopms/www/bug-browse-6.html",headers=headers)rs3.encoding='utf-8'#print(rs3.text)result=re.findall(r"\<a href=\'\/zentaopms\/www\/user-logout.html' \>(.+?)\<\/a\>",rs3.text)print(result)if result[0]=="退出":print("登录成功")#-----------------上传附件-------------------------url2="http://localhost/zentaopms/www/bug-create-6-0-moduleID=0.html"d2={"product":"6","module":"0","project":"5","openedBuild[]":"trunk","assignedTo":"huyongqin","type":"codeerror","title":"python学习上传多图","severity":"3","pri":"3","steps":"<p>[步骤]</p><br/><p>[结果]</p><br/><p>[期望]</p><br/>","oldTaskID":"0","uid":"5f2a0514c39db","case":"0","caseVersion":"0","result":"0","testtask":"0",# "labels[]":"2.png"}# file={# "files[]":("2.png",open("2.png","rb"),"image/jpeg")# }file={("files[]",("2.png",open("2.png","rb"),"image/jpeg")),("labels[]","2.png"),("files[]",("qq.png",open("E:\\qq.png","rb"),"image/jpeg")), #图⽚与当前脚本⾮同⼀⽬录,需要写路径⽬录("labels[]","qq.png"),}result2=s.post(url2,data=d2,headers=headers,files=file,allow_redirects=False)result2.encoding="utf-8"print(result2.content) 运⾏结果。
SpringBoot利用MultipartFile上传本地图片生成图片链接的实现方法

SpringBoot利⽤MultipartFile上传本地图⽚⽣成图⽚链接的实现⽅法⽅法⼀实现类:public String fileUpload(MultipartFile file) {if(file == null){return null;}String fileName = file.getOriginalFilename();fileName = FileUtil.renameToUUID(fileName);//⾃定义保存到本地路径String uploadpath = "D:/image/";try{FileUtil.uploadFiles(file.getBytes(), uploadpath,fileName);}catch (Exception e){throw new SignException(001,"图⽚上传出错"+uploadpath);}//localhost:8080String url = "/static/" + fileName;return url;}⼯具类:public class FileUtil {//图⽚上传public static void uploadFiles(byte[] file, String filePath, String fileName) throws Exception {File targetFile = new File(filePath);if (!targetFile.exists()) {targetFile.mkdirs();}FileOutputStream out = new FileOutputStream(filePath + fileName);out.write(file);out.flush();out.close();}//创建新的⽂件名public static String renameToUUID(String fileName) {return UUID.randomUUID() + "." + fileName.substring(stIndexOf(".") + 1);}}浏览器输⼊ip地址端⼝号+⾃⼰的⽣成url就可以访问了:localhost:8080/ + url⽅法⼆:配置⽂件#=============⽂件上传========## ⽂件访问路径file.path=/upload/**# 静态资源⽂件访问路径file.staticPath=/upload#⽂件保存的绝对路径file.address=d://springbootimage/#是否⽀持 multipart 上传⽂件spring.servlet.multipart.enabled=true#最⼤⽀持⽂件⼤⼩spring.servlet.multipart.max-file-size=30MB#最⼤⽀持请求⼤⼩spring.servlet.multipart.max-request-size=30MB//获取图⽚上传的配置路径@Value("${file.address}")String fileAdress;//⽤户访问的图⽚路径@Value("${file.staticPath}")String upload;@RequestMapping("/upload")@ResponseBodypublic String upload(MultipartFile file){try {//定义上传⽂件的前缀String pre = "";//保证⽂件上传后存到服务器的⽂件名的唯⼀性pre = UUID.randomUUID()+"";//获取⽂件的后缀名String suffix = "";if(file != null){//.jpgString originalName = file.getOriginalFilename();suffix= originalName.substring(stIndexOf(".")+1);}//⽂件名String fileName = pre+suffix;//定义⽂件上传的全路径String filePath = fileAdress + "\\" + fileName ;//创建file对象File f = new File(filePath);//⽬录是否存在,不存在则创建if(!f.isDirectory()){f.mkdirs();}//上传⽂件file.transferTo(f);String url = upload+fileName ;return url;} catch (IOException e) {e.printStackTrace();}return "上传失败";}到此这篇关于SpringBoot 利⽤MultipartFile上传本地图⽚⽣成图⽚链接的实现⽅法的⽂章就介绍到这了,更多相关SpringBoot上传本地图⽚⽣成图⽚链接内容请搜索以前的⽂章或继续浏览下⾯的相关⽂章希望⼤家以后多多⽀持!。
md类型文件迁移至Notion(img资源也可以上传)
md类型⽂件迁移⾄Notion(img资源也可以上传)前⾔之前⼀直使⽤typora,⽤起来很不错,也很⽅便,唯⼀存在的问题就是资源多了指挥浏览起来会卡顿,mac ⽤户,问了其他⼏个⼩伙伴也存在这个问题,⽽且保存的图⽚不能和md ⽂件⼀起发送给别⼈,共享起来也⽐较⿇烦,最近typora⼜开始收费了,让我更是放弃了这个软件。
后⾯经过对⽐和⼩伙伴的推荐选择了notion 但是怎么把笔记迁移过去成为了⼀⼤难题,后⾯通过耀总的指导找到了⽤脚本迁移的⽅法,图⽚也可以迁移过去。
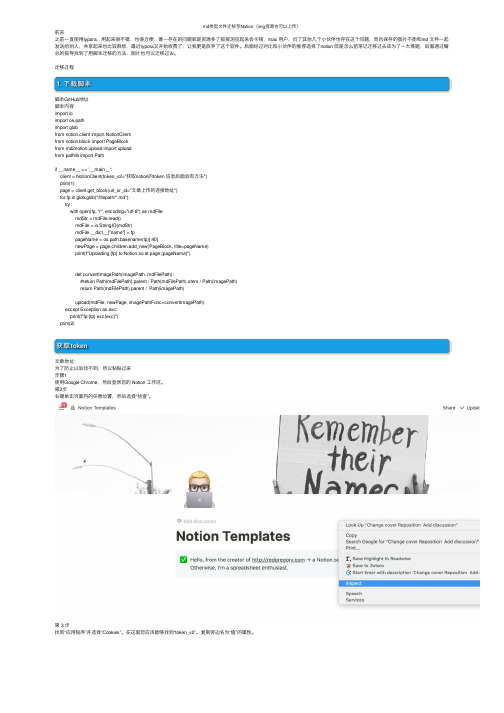
迁移过程1. 下载脚本脚本GitHub地址脚本内容import ioimport os.pathimport globfrom notion.client import NotionClientfrom notion.block import PageBlockfrom md2notion.upload import uploadfrom pathlib import Pathif __name__ == '__main__':client = NotionClient(token_v2="获取notion的token 信息后⾯会有⽅法")print(1)page = client.get_block(url_or_id="⽂章上传的连接地址")for fp in glob.glob("/filepath/*.md"):try:with open(fp, "r", encoding="utf-8") as mdFile:mdStr = mdFile.read()mdFile = io.StringIO(mdStr)mdFile.__dict__["name"] = fppageName = os.path.basename(fp)[:40]newPage = page.children.add_new(PageBlock, title=pageName)print(f"Uploading {fp} to Notion.so at page {pageName}")def convertImagePath(imagePath, mdFilePath):#return Path(mdFilePath).parent / Path(mdFilePath).stem / Path(imagePath)return Path(mdFilePath).parent / Path(imagePath)upload(mdFile, newPage, imagePathFunc=convertImagePath)except Exception as exc:print(f"fp:{fp} exc{exc}")print(2)获取token⽂章地址:为了防⽌以后找不到,所以粘贴过来步骤1使⽤Google Chrome,然后登录您的 Notion ⼯作区。
