opengl入门简单漂亮的小程序,完全代码
qtopenglwidget例子
qtopenglwidget例子qtopenglwidget是一个开源的Qt库,用于在Qt应用程序中创建OpenGL渲染窗口。
它提供了一种简单的方法来利用OpenGL进行3D图形渲染,这对于开发图形应用程序非常有用。
下面是一个简单的qtopenglwidget例子,用于在Qt中创建一个简单的3D立方体: 1. 首先,我们需要包含必要的头文件:```#include <QtOpenGL>```2. 然后,我们需要定义一个类,继承自QOpenGLWidget:```class MyOpenGLWidget : public QOpenGLWidget {Q_OBJECTpublic:MyOpenGLWidget(QWidget *parent = nullptr);protected:void initializeGL() override;void resizeGL(int w, int h) override;void paintGL() override;private:void drawCube();};```3. initializeGL()方法将在OpenGL上下文被创建时被调用。
在这个方法中,我们需要设置OpenGL的状态和参数,以及加载所需的着色器和纹理:```void MyOpenGLWidget::initializeGL() {// 设置清除颜色为黑色glClearColor(0.0f, 0.0f, 0.0f, 1.0f);// 启用深度测试glEnable(GL_DEPTH_TEST);// 创建和编译着色器// ...// 加载纹理// ...}```4. resizeGL()方法将在窗口大小发生变化时被调用。
在这个方法中,我们需要更新OpenGL的视口和投影矩阵:```void MyOpenGLWidget::resizeGL(int w, int h) {// 设置OpenGL视口glViewport(0, 0, w, h);// 更新投影矩阵// ...}```5. paintGL()方法将在每一帧渲染时被调用。
opengl 入门程序集
openGL入门程序集没有特别声明的,均适用该函数作为main函数..int main(intargc,char *argv[]){glutInit(&argc,argv);glutInitDisplayMode(GLUT_RGB|GLUT_SINGLE);glutInitWindowPosition(100,100);glutInitWindowSize(400,400);glutCreateWindow("我的第一个openGL程序"); glutDisplayFunc(&myDisplay);glutMainLoop();return 0;}------------------------------------------------------------------------------- 矩形显示函数/*voidmyDisplay(void){glClear(GL_COLOR_BUFFER_BIT);glRectf(-0.5f,-0.5f,0.5f,0.5f);glFlush();}*/------------------------------------------------------------------------------- 圆的显示函数constint n=20;constGLfloat R=0.5f;constGLfloat Pi=3.1415926536f;/*void myDisplay(void){inti;glClear(GL_COLOR_BUFFER_BIT);glBegin(GL_POLYGON);for (i=0;i<n;++i)glVertex2f(R*cos(2*Pi/n*i),R*sin(2*Pi/n*i));glEnd();glFlush();}------------------------------------------------------------------------------- 五角星显示函数GLfloat Pi=3.1415926536f;/*void myDisplay(void){GLfloat a=sqrt(1.0f/2.0f/(1.0f-cos(72.0f*Pi/180.0f)));GLfloatbx=a*cos(18.0f*Pi/180.0f);GLfloat by=a*sin(18.0f*Pi/180.0f);GLfloat cy=-a*cos(36.0f*Pi/180.0f);GLfloatpointA[2]={0.0f,a},pointB[2]={bx,by},pointC[2]={0.5f,cy},pointD[2]={-0.5f,cy},pointE[2]={-bx,by};glClear(GL_COLOR_BUFFER_BIT);glBegin(GL_LINE_LOOP);glVertex2fv(pointA);glVertex2fv(pointC);glVertex2fv(pointE);glVertex2fv(pointB);glVertex2fv(pointD);glEnd();glFlush();}*/------------------------------------------------------------------------------- 正弦曲线显示函数constGLfloat factor=0.1f;/*void myDisplay(void){GLfloat x;glClear(GL_COLOR_BUFFER_BIT);glBegin(GL_LINES);glVertex2f(-1.0f,0.0f);glVertex2f(1.0f,0.0f);glVertex2f(0.0f,-1.0f);glVertex2f(0.0f,1.0f);glEnd();glBegin(GL_LINE_STRIP);for (x=-1.0f/factor;x<1.0f/factor;x+=0.01f)glVertex2f(x*factor,sin(x)*factor);glEnd();glFlush();}*/------------------------------------------------------------------------------- 关于点的显示函数voidmyDisplay(void){glClear(GL_COLOR_BUFFER_BIT);glPointSize(100.0f);glBegin(GL_POINTS);glVertex2f(0.0f,0.0f);glVertex2f(0.5f,0.5f);glEnd();glFlush();}------------------------------------------------------------------------------- 虚线显示函数voidmyDisplay(void){glClear(GL_COLOR_BUFFER_BIT);glEnable(GL_LINE_STIPPLE);glLineStipple(2,0x0f0c);glBegin(GL_LINES);glVertex2f(-1.0f,0.0f);glVertex2f(1.0f,0.0f);glEnd();glFlush();}------------------------------------------------------------------------------- 多边形的两面绘制方式及反转显示函数voidmyDisplay(void){glClear(GL_COLOR_BUFFER_BIT);glPolygonMode(GL_FRONT,GL_FILL);glPolygonMode(GL_BACK,GL_LINE);glFrontFace(GL_CCW);glBegin(GL_POLYGON);glVertex2f(-0.5f,-0.5f);glVertex2f(0.0f,0.5f);glVertex2f(0.0f,0.0f);glVertex2f(-0.5f,0.0f);glEnd();glBegin(GL_POLYGON);glVertex2f(0.0f,0.0f);glVertex2f(0.0f,0.5f);glVertex2f(0.5f,0.5f);glVertex2f(0.5f,0.0f);glEnd();glFlush();}------------------------------------------------------------------------------- 多边形镂空显示函数staticGLubyte Mask[]={0x00,0x00,0x00,0x00,0x00,0x00,0x00,0x00,0x03,0x80,0x01,0xC0,0x06,0xC0,0x03,0x60,0x04,0x60,0x06,0x20,0x04,0x30,0x0C,0x20,0x04,0x18,0x18,0x20,0x04,0x0C,0x30,0x20,0x04,0x06,0x60,0x20,0x44,0x03,0xC0,0x22,0x44,0x01,0x80,0x22,0x44,0x01,0x80,0x22,0x44,0x01,0x80,0x22,0x44,0x01,0x80,0x22,0x44,0x01,0x80,0x22,0x44,0x01,0x80,0x22,0x66,0x01,0x80,0x66,0x33,0x01,0x80,0xCC,0x19,0x81,0x81,0x98,0x0C,0xC1,0x83,0x30,0x07,0xE1,0x87,0xE0,0x03,0x3F,0xFC,0xC0,0x03,0x31,0x8C,0xC0,0x03,0x3F,0xFC,0xC0,0x06,0x64,0x26,0x60,0x0C,0xCC,0x33,0x30,0x18,0xCC,0x33,0x18,0x10,0xC4,0x23,0x08,0x10,0x63,0xC6,0x08,0x10,0x30,0x0C,0x08,0x10,0x18,0x18,0x08,0x10,0x00,0x00,0x08};voidmyDisplay(void){staticGLubyte Mask[128];FILE *fp;fp=fopen("C:\Users\Administrator\Desktop\mask.txt","rb");if(!fp)exit(0);if(fseek(fp,-(int)sizeof(Mask),SEEK_END))exit(0);if(!fread(Mask,sizeof(Mask),1,fp))exit(0);fclose(fp);glClear(GL_COLOR_BUFFER_BIT);glEnable(GL_POLYGON_STIPPLE);glPolygonStipple(Mask);glRectf(-0.5f,-0.5f,0.0f,0.0f);glDisable(GL_POLYGON_STIPPLE);glRectf(0.0f,0.0f,0.5f,0.5f);glFlush();}-------------------------------------------------------------------------------设置Index 颜色表示例程序(完整版)!!!注意:此处main函数发生变化#include<windows.h>#include<GL/glut.h>#include<GL/glaux.h>#include<stdio.h>#include<stdlib.h>#pragma comment(lib,"opengl32.lib");#pragma comment(lib,"glaux.lib");#include<math.h>constGLfloat Pi=3.1415926536f;voidmyDisplay(void){inti;for (i=0;i<8;++i)auxSetOneColor(i,(float)(i&0x04),(float)(i&0x02),(float)(i&0x01));glShadeModel(GL_FLAT);glClear(GL_COLOR_BUFFER_BIT);glBegin(GL_TRIANGLE_FAN);glVertex2f(0.0f,0.0f);for (i=0;i<=8;++i){glIndexi(i);glVertex2f(cos(i*Pi/4.0f),sin(i*Pi/4.0f));}glEnd();glFlush();}int main(void){auxInitDisplayMode(AUX_SINGLE|AUX_INDEX);auxInitPosition(0,0,400,400);auxInitWindow(L"");myDisplay();Sleep(100*1000);return 0;}------------------------------------------------------------------------------- 指定着色模型函数voidmyDisplay(void){inti;glShadeModel(GL_FLAT);glClear(GL_COLOR_BUFFER_BIT);glBegin(GL_TRIANGLE_FAN);glColor3f(1.0f,1.0f,1.0f);glVertex2f(0.0f,0.0f);for (i=0;i<=8;++i){glColor3f(i&0x04,i&0x02,i&0x01);glVertex2f(cos(i*Pi/4.0f),sin(i*Pi/4.0f));}glEnd();glFlush();}------------------------------------------------------------------------------- #include<GL/glut.h>#include<stdio.h>#include<time.h>#include<math.h>staticint day=200;doubleCalFrequency(){staticint count;static double save;staticclock_tlast,current;doubletimegap;++count;if(count<=50)return save;count=0;last=current;current=clock();timegap=(current-last)/(double)CLK_TCK;save=50.0/timegap;return save;}voidmyDisplay(void){double FPS=CalFrequency();printf("FPS=%d\n",FPS);glEnable(GL_DEPTH_TEST);glClear(GL_COLOR_BUFFER_BIT|GL_DEPTH_BUFFER_BIT);glMatrixMode(GL_PROJECTION);glLoadIdentity();gluPerspective(75,1,1,400000000);glMatrixMode(GL_MODELVIEW);glLoadIdentity();gluLookAt(0,-200000000,200000000,0,0,0,0,0,1);//绘制红色太阳glColor3f(1.0f,0.0f,0.0f);glutSolidSphere(69600000,20,20);//绘制蓝色地球glColor3f(0.0f,0.0f,1.0f);glRotatef(day/360.0*360.0,0.0f,0.0f,-1.0f);glTranslatef(150000000,0.0f,0.0f);glutSolidSphere(15945000,20,20);//绘制黄色月亮glColor3f(1.0f,1.0f,0.0f);glRotatef(day/30.0*360.0-day/360.0*360.0,0.0f,0.0f,-1.0f);glTranslatef(38000000,0.0f,0.0f);glutSolidSphere(4345000,20,20);glFlush();glutSwapBuffers();}voidmyIdle(void){++day;if(day>=360)day=0;myDisplay();}int main(intargc,char *argv[]){glutInit(&argc,argv);glutInitDisplayMode(GLUT_RGB|GLUT_DOUBLE);glutInitWindowPosition(100,100);glutInitWindowSize(400,400);glutCreateWindow("太阳、地球和月亮运动简易模型"); glutDisplayFunc(&myDisplay);glutIdleFunc(&myIdle);glutMainLoop();return 0;}------------------------------------------------------------------------------- >>>…………………………-------------------------------------------------------------------------------。
弹弹堂游戏在C开发环境下使用OpenGL库进行开发

弹弹堂游戏在C开发环境下使用OpenGL库进行开发弹弹堂游戏是一款极其受欢迎的休闲游戏,玩家可以通过弹射弹性球来消除屏幕上的方块。
在本文中, 将介绍如何利用C开发环境下的OpenGL库来实现弹弹堂游戏的开发。
这个过程将涵盖如何创建游戏窗口、加载资源、绘制游戏元素以及处理用户输入等方面。
1. 引言OpenGL是一个强大的图形渲染库,通过利用它的功能,我们可以轻松实现弹弹堂游戏中的各种效果,例如绘制图形、添加贴图以及实现动画效果等。
C语言是一种方便、简单的编程语言,适用于对底层操作有需求的开发工作。
因此,使用C开发环境下的OpenGL库来开发弹弹堂游戏,不仅能保证程序的高效性,还能满足开发人员对于底层控制的需求。
2. 创建游戏窗口为了在C语言环境下使用OpenGL库进行游戏开发,首先需要创建一个游戏窗口来显示游戏画面。
可以使用OpenGL的工具库来创建窗口,并设置窗口的大小、标题等属性。
在创建窗口后,还需要初始化OpenGL的上下文环境,以确保之后的绘制操作能够正常进行。
3. 加载资源弹弹堂游戏中需要加载的资源包括游戏关卡的地图、玩家的角色模型、音效等。
在C开发环境下,可以利用OpenGL库提供的纹理加载函数来加载贴图资源,并将其应用到游戏元素上。
同时,还可以使用其他C语言的文件操作函数来加载地图数据、读取角色模型等。
4. 绘制游戏元素在弹弹堂游戏中,有许多不同的游戏元素需要绘制,如方块、弹性球、角色模型等。
使用OpenGL库的绘图功能,可以通过指定每个元素的顶点坐标、纹理坐标等属性来绘制它们。
同时,还可以利用OpenGL提供的变换函数来实现元素的平移、旋转、缩放等动画效果。
5. 处理用户输入弹弹堂游戏需要根据用户的输入来控制玩家角色的移动、发射弹性球等操作。
在C语言环境下,可以通过监听键盘或鼠标事件,并根据用户的操作来更新游戏状态。
通过OpenGL库提供的回调函数,可以轻松地捕获用户的输入,并进行相应的处理。
OpenGL入门学习——第一课 编写第一个OpenGL程序
OpenGL入门学习——第一课编写第一个OpenGL程序OpenGL作为当前主流的图形API之一,它在一些场合具有比DirectX更优越的特性。
1、与C语言紧密结合。
OpenGL命令最初就是用C语言函数来进行描述的,对于学习过C语言的人来讲,OpenGL 是容易理解和学习的。
如果你曾经接触过TC的graphics.h,你会发现,使用OpenGL作图甚至比TC更加简单。
2、强大的可移植性。
微软的Direct3D虽然也是十分优秀的图形API,但它只用于Windows系统(现在还要加上一个XBOX游戏机)。
而OpenGL不仅用于Windows,还可以用于Unix/Linux等其它系统,它甚至在大型计算机、各种专业计算机(如:医疗用显示设备)上都有应用。
并且,OpenGL的基本命令都做到了硬件无关,甚至是平台无关。
3、高性能的图形渲染。
OpenGL是一个工业标准,它的技术紧跟时代,现今各个显卡厂家无一不对OpenGL提供强力支持,激烈的竞争中使得OpenGL性能一直领先。
总之,OpenGL是一个很NB的图形软件接口。
至于究竟有多NB,去看看DOOM3和QUAKE4等专业游戏就知道了。
OpenGL官方网站(英文)下面我将对Windows下的OpenGL编程进行简单介绍。
学习OpenGL前的准备工作第一步,选择一个编译环境现在Windows系统的主流编译环境有Visual Studio,Broland C++ Builder,Dev-C++等,它们都是支持OpenGL的。
但这里我们选择Visual Studio 2005作为学习OpenGL的环境。
第二步,安装GLUT工具包GLUT不是OpenGL所必须的,但它会给我们的学习带来一定的方便,推荐安装。
Windows环境下的GLUT下载地址:(大小约为150k)/resources/libraries/glut/glutdlls37beta.zip无法从以上地址下载的话请使用下面的连接:/upfile/200607311626279.zipWindows环境下安装GLUT的步骤:1、将下载的压缩包解开,将得到5个文件2、在“我的电脑”中搜索“gl.h”,并找到其所在文件夹(如果是VisualStudio2005,则应该是其安装目录下面的“VC\PlatformSDK\include\gl文件夹”)。
OpenGL编程轻松入门之一个简单的例子
OpenGL编程轻松入门之一个简单的例子先编译运行一个简单的例子,这样我们可以有一个直观的印象。
从这个例子我们可以看到OpenGL可以做什么,当然这个例子只做了很简单的一件事--绘制一个彩色的三角形。
除此以外,我们还可以看到典型的OpenGL程序结构及openGL 的运行顺序。
例1:本例在黑色的背景下绘制一个彩色的三角形,如图一所示。
#include <stdlib.h>#include <GL/glut.h>void background(void){glClearColor(0.0,0.0,0.0,0.0);//设置背景颜色为黑色}void myDisplay(void){glClear(GL_COLOR_BUFFER_BIT);//buffer设置为颜色可写glBegin(GL_TRIANGLES);//开始画三角形glShadeModel(GL_SMOOTH);//设置为光滑明暗模式glColor3f(1.0,0.0,0.0);//设置第一个顶点为红色glV ertex2f(-1.0,-1.0);//设置第一个顶点的坐标为(-1.0,-1.0)glColor3f(0.0,1.0,0.0);//设置第二个顶点为绿色glV ertex2f(0.0,-1.0);//设置第二个顶点的坐标为(0.0,-1.0)glColor3f(0.0,0.0,1.0);//设置第三个顶点为蓝色glV ertex2f(-0.5,1.0);//设置第三个顶点的坐标为(-0.5,1.0)glEnd();//三角形结束glFlush();//强制OpenGL函数在有限时间内运行}void myReshape(GLsizei w,GLsizei h){glViewport(0,0,w,h);//设置视口glMatrixMode(GL_PROJECTION);//指明当前矩阵为GL_PROJECTION glLoadIdentity();//将当前矩阵置换为单位阵if(w <= h)gluOrtho2D(-1.0,1.5,-1.5,1.5*(GLfloat)h/(GLfloat)w);//定义二维正视投影矩阵elsegluOrtho2D(-1.0,1.5*(GLfloat)w/(GLfloat)h,-1.5,1.5);glMatrixMode(GL_MODELVIEW);//指明当前矩阵为GL_MODELVIEW }int main(int argc,char ** argv){/*初始化*/glutInit(&argc,argv);glutInitDisplayMode(GLUT_SINGLE|GLUT_RGB);glutInitWindowSize(400,400);glutInitWindowPosition(200,200);/*创建窗口*/glutCreateWindow("Triangle");/*绘制与显示*/background();glutReshapeFunc(myReshape);glutDisplayFunc(myDisplay);glutMainLoop();return(0);}图一:一个彩色的三角形首先创建工程,其步骤如下:1)创建一个Win32 Console Application。
OpenGL介绍与编程入门

OpenGL编程入门什么是Open GL•是一个功能强大的图形库,用户可以很方便地开发所需要地有多种特殊视觉(如光照,纹理,透明,阴影)的三维图形。
•与软硬件平台无关的三维图形软件包,可运行于多种窗口系统之上•包含图元生成、投影、光照、光栅化等图形显示过程所需的功能OpenGL的组成•OpenGL实用库–实用函数43个–函数以glu开头–例:gluPers pectiv e();–完成更高层的图形处理如曲线曲面的生成、图象操作等•OpenGL辅助库–包括函数31个–函数以aux开头–例:auxInit Window();–主要用于窗口管理–OpenGL(Open Graphic s Library)是图形硬件的一个软件接口,也是该领域的工业标准。
图形程序员利用这些指令可以创建高质量的交互式的三维应用。
OpenGL的前身是SGI(Silicon Graphic s)公司为其图形工作站开发的I RIS GL。
IRIS GL虽然功能强大但是移植性不好,于是SGI公司便在IRIS GL的基础上开发了Open GL。
OpenGL是一个与硬件无关的软件接口。
可以在不同的平台如Wind ows 95、Windows NT、Unix、Linux、MacOS、OS/2之间进行移植。
因此,支持OpenG L 的软件具有很好的移植性,可以获得非常广泛的应用。
OpenGL是网络透明的,具有网络功能。
即便客户机和服务器是不同类型的计算机O penGL程序也可以在网络上运行。
这一点对于制作大型3D图形、动画非常有用。
例如,《玩具总动员》、《泰坦尼克》等电影的电脑特技画面就是通过应用Ope nGL的网络功能,使用120多台图形工作站共同工作来完成的。
OpenGL的发展一直处于一种较为迟缓的态势,每次版本的提高新增的技术很少,大多只是对其中部分做出修改和完善。
QT+OpenGL描绘简单图形
QT+OpenGL描绘简单图形初学opengl,绕了很多弯路,继承于QOpenGLWindow,描画出来。
新建类myopengl,头⽂件如下:#ifndef MYOPENGL_H#define MYOPENGL_H#include <QWidget>#include <QOpenGLWidget>#include <QOpenGLWindow>#include <QGLWidget>#include <QGLFunctions>#include <QOpenGLFunctions>#include <QtOpenGL>#include <QOpenGLBuffer>#include <QOpenGLShaderProgram>#include <QMatrix4x4>#include <GL/glu.h>class myopenGL:public QOpenGLWindow, protected QOpenGLFunctions{Q_OBJECTpublic:explicit myopenGL(QWindow *parent = 0);~myopenGL();protected:void initializeGL() override;void paintGL() override;void resizeGL(int width, int height) override;void loadGLTextures();protected:GLfloat rTri;GLfloat rQuad;GLfloat xRot, yRot, zRot;GLuint texture[1];private:};#endif// MYOPENGL_Hmyopengl.cpp 代码如下:#include "myopengl.h"#include <QImage>#include <QDebug>myopenGL::myopenGL(QWindow *parent){rTri = 0.0;rQuad = 0.0;xRot = yRot = zRot = 0.0;}myopenGL::~myopenGL(){}void myopenGL::loadGLTextures(){QImage tex, buf;if ( !buf.load( "./msbg_blue.png" ) ){qWarning( "Could not read image file, using single-color instead." );QImage dummy( 128, 128, QImage::Format_RGB32 );dummy.fill( Qt::green );buf = dummy;}tex = QGLWidget::convertToGLFormat( buf );glGenTextures( 1, &texture[0] );glBindTexture( GL_TEXTURE_2D, texture[0] );glTexImage2D( GL_TEXTURE_2D, 0, 3, tex.width(), tex.height(), 0,GL_RGBA, GL_UNSIGNED_BYTE, tex.bits() );glTexParameteri( GL_TEXTURE_2D, GL_TEXTURE_MIN_FILTER, GL_LINEAR );glTexParameteri( GL_TEXTURE_2D, GL_TEXTURE_MAG_FILTER, GL_LINEAR );}//初始化opengl窗⼝部件void myopenGL::initializeGL(){initializeOpenGLFunctions();glClearColor(0.0,0.0,0.0,1.0);glShadeModel(GL_SMOOTH);glClearDepth(1.0);glEnable(GL_DEPTH_TEST);glDepthFunc(GL_LEQUAL);glHint(GL_PERSPECTIVE_CORRECTION_HINT,GL_NICEST); }//绘制opengl窗⼝void myopenGL::paintGL(){glClear(GL_COLOR_BUFFER_BIT | GL_DEPTH_BUFFER_BIT); glLoadIdentity();glTranslatef(-1.5f,0.0f,-6.0f);glRotatef( rTri, 0.0, 1.0, 0.0 );glBegin(GL_TRIANGLES);glColor3f( 1.0, 0.0, 0.0 );glVertex3f( 0.0, 1.0, 0.0 );glColor3f( 0.0, 1.0, 0.0 );glVertex3f( -1.0, -1.0, 1.0 );glColor3f( 0.0, 0.0, 1.0 );glVertex3f( 1.0, -1.0, 1.0 );glColor3f( 1.0, 0.0, 0.0 );glVertex3f( 0.0, 1.0, 0.0 );glColor3f( 0.0, 0.0, 1.0 );glVertex3f( 1.0, -1.0, 1.0 );glColor3f( 0.0, 1.0, 0.0 );glVertex3f( 1.0, -1.0, -1.0 );glColor3f( 1.0, 0.0, 0.0 );glVertex3f( 0.0, 1.0, 0.0 );glColor3f( 0.0, 1.0, 0.0 );glVertex3f( 1.0, -1.0, -1.0 );glColor3f( 0.0, 0.0, 1.0 );glVertex3f( -1.0, -1.0, -1.0 );glColor3f( 1.0, 0.0, 0.0 );glVertex3f( 0.0, 1.0, 0.0 );glColor3f( 0.0, 0.0, 1.0 );glVertex3f( -1.0, -1.0, -1.0 );glColor3f( 0.0, 1.0, 0.0 );glVertex3f( -1.0, -1.0, 1.0 );glEnd();glTranslatef(3.0f,0.0f,-7.0f);glRotatef( rQuad, 0.0, 0.0, 1.0 );glRotatef( rTri, 0.0, 1.0, 0.0 );glRotatef( rQuad, 0.0, 0.0, 1.0 );glBegin(GL_QUADS);glColor3f( 0.0, 1.0, 0.0 );glVertex3f( 1.0, 1.0, -1.0 );glVertex3f( -1.0, 1.0, -1.0 );glVertex3f( -1.0, 1.0, 1.0 );glVertex3f( 1.0, 1.0, 1.0 );glColor3f( 1.0, 0.5, 0.0 );glVertex3f( 1.0, -1.0, 1.0 );glVertex3f( -1.0, -1.0, 1.0 );glVertex3f( -1.0, -1.0, -1.0 );glVertex3f( 1.0, -1.0, -1.0 );glColor3f( 1.0, 0.0, 0.0 );glVertex3f( 1.0, 1.0, 1.0 );glVertex3f( -1.0, 1.0, 1.0 );glVertex3f( -1.0, -1.0, 1.0 );glVertex3f( 1.0, -1.0, 1.0 );glColor3f( 1.0, 1.0, 0.0 );glVertex3f( 1.0, -1.0, -1.0 );glVertex3f( -1.0, -1.0, -1.0 );glVertex3f( -1.0, 1.0, -1.0 );glVertex3f( 1.0, 1.0, -1.0 );glColor3f( 0.0, 0.0, 1.0 );glVertex3f( -1.0, 1.0, 1.0 );glVertex3f( -1.0, 1.0, -1.0 );glVertex3f( -1.0, -1.0, -1.0 );glVertex3f( -1.0, -1.0, 1.0 );glColor3f( 1.0, 0.0, 1.0 );glVertex3f( 1.0, 1.0, -1.0 );glVertex3f( 1.0, 1.0, 1.0 );glVertex3f( 1.0, -1.0, 1.0 );glVertex3f( 1.0, -1.0, -1.0 );glEnd();rTri += 0.2;rQuad -= 0.15;}//处理窗⼝⼤⼩void myopenGL::resizeGL(int width, int height){glViewport(0,0,(GLint)width,(GLint)height);glMatrixMode(GL_PROJECTION);glLoadIdentity();gluPerspective(45.0,(GLfloat)width/(GLfloat)height,0.1,100.0);glMatrixMode(GL_MODELVIEW); //选择模型观察矩阵glLoadIdentity(); //重置模型观察矩阵}main.cpp修改代码如下:#include "myopengl.h"#include <QGuiApplication>#include <QPushButton>int main(int argc, char *argv[]){QCoreApplication::setAttribute(Qt::AA_UseDesktopOpenGL);QGuiApplication a(argc, argv);myopenGL w;w.resize(QSize(1280,720));//QPushButton ptn(&w);w.show();return a.exec();}效果图:这么简单的效果⽤了就⾛了好多弯路。
OpenGL3 程序设计入门

OpenGL3 程序设计入门
dx rx dt
黄可坤
嘉应学院
OpenGL程序设计入门
1. 2. 3. 4. 5.
OpenGL的状态机制 OpenGL中的图元绘制 坐标变换及其OpenGL实现 应用变换的一个实例 光照处理
1 OpenGL的状态机制
OpenGL的绘图方式是由一系列的状态决定的,如果设置了 一种状态或模式而不改变它,OpenGL在绘图过程中将一直 保持这种状态或模式。 例如,当前绘图颜色就是OpenGL 的一个状态,当选定颜 色后,OpenGL就用这个颜色绘图。在例10.1中,以下语句 void myinit(void) { glClearColor(0.0,0.0,0.0,0.0); } 中的函数glClearColor(0.0,0.0,0.0,0.0)将视口背景色清为黑 色,如果不改变这种状态,视口背景色将一直保持为黑色。
例如:
glVertex2i(0,1);
glVertex3d(-1.0,1.0,3.1425926); glVertex4d(40,-15.9, 0,2); Glfloat v[3]={-1.2f,3.4f,5.6f}; glVertex3fv(v);
以下操作的结果是在屏幕上绘制三个点 :
glBegin(GL_POINTS) glVertex3f(1.0,0.0,0.0); glVertex3f(1.0,1.0,0.0); glVertex3f(0.0,1.0,1.0); glEnd();
glBegin(GL_POINTS);
glVertex3f(v); /* draw transformed vertex v */ glEnd(); 在这个过程中,在GL_MODELVIEW状态下,相继引入了I (单位阵),N,M,L矩阵。变换后的顶点为NMLv(顶点取列向 量)。因此,顶点的变换为N(M(Lv)),即是先作变换L,然后是 变换M,最后才是N。这里,顶点v 的实际变换顺序正好与指 定的顺序相反。
实验一OpenGL图形编程入门
实验⼀OpenGL图形编程⼊门实验⼀ OpenGL图形编程⼊门三、实验内容1、建⽴⼀个⼯程⽂件,并运⾏样本程序my first program.cpp,观看结果。
(6)在⼯程⽂件中输⼊样本程序,单击启动调试按钮,观察运⾏结果。
样本程序:my first program.cpp#includevoid display(void){glClear(GL_COLOR_BUFFER_BIT); //刷新颜⾊缓冲区glFlush(); //⽤于刷新命令队列和缓冲区,使所有尚未被执⾏的OpenGL命令得到执⾏}void main(int argc, char** argv){glutInit(&argc, argv); //初始化GLUT库glutInitDisplayMode(GLUT_SINGLE|GLUT_RGB); //设置显⽰模式 glutCreateWindow("hello"); //创建窗⼝,标题为“hello”glutDisplayFunc(display); //⽤于绘制当前窗⼝glutMainLoop(); //表⽰开始运⾏程序,⽤于程序的结尾}运⾏结果:创建⼀个名称是“hello”的窗⼝。
如图1-7所⽰。
2、认真阅读样本程序,理解每个函数的作⽤,并修改窗⼝标题,显⽰为“我的第⼀个OpenGL程序”。
3、窗⼝的设置。
在默认情况下,窗⼝的位置出现在屏幕的左上⾓,默认⼤⼩为300*300。
要求:修改窗⼝⼤⼩为其他尺⼨。
参考函数:glutInitWindowPosition(int x, int y);//为窗⼝指定初始位置,窗⼝左上⾓在屏幕上的位置为(x,y) glutInitWindowSize(int width, int height); //设置窗⼝⼤⼩4、背景⾊的设置。
在默认情况下背景⾊是⿊⾊。
要求:(1)将窗⼝背景设置为⽩⾊(2)将窗⼝背景设置为其他颜⾊参考函数:glClearColor(r,g,b,alpha);//设置背景颜⾊,此函数放在display()中,并且放在glClear(GL_COLOR_BUFFER_BIT);语句的前⾯。
opengl简单入门实例
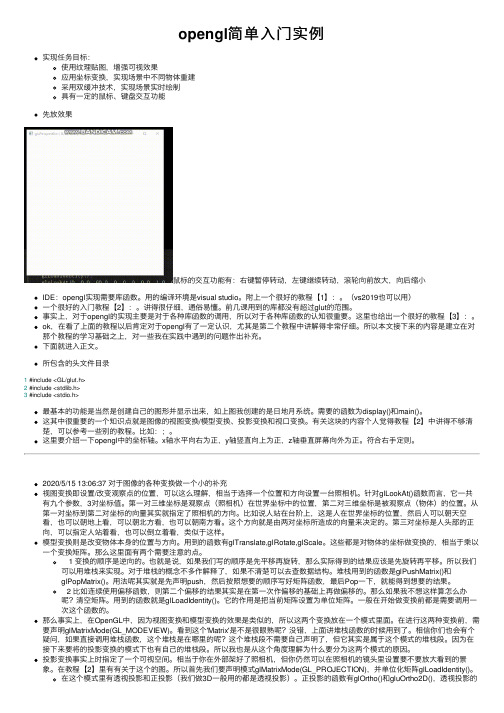
opengl简单⼊门实例实现任务⽬标:使⽤纹理贴图,增强可视效果应⽤坐标变换,实现场景中不同物体重建采⽤双缓冲技术,实现场景实时绘制具有⼀定的⿏标、键盘交互功能先放效果⿏标的交互功能有:右键暂停转动,左键继续转动,滚轮向前放⼤,向后缩⼩IDE:opengl实现需要库函数。
⽤的编译环境是visual studio。
附上⼀个很好的教程【1】:。
(vs2019也可以⽤)⼀个很好的⼊门教程【2】:。
讲得很仔细,通俗易懂。
前⼏课⽤到的库都没有超过glut的范围。
事实上,对于opengl的实现主要是对于各种库函数的调⽤,所以对于各种库函数的认知很重要。
这⾥也给出⼀个很好的教程【3】:。
ok,在看了上⾯的教程以后肯定对于opengl有了⼀定认识,尤其是第⼆个教程中讲解得⾮常仔细。
所以本⽂接下来的内容是建⽴在对那个教程的学习基础之上,对⼀些我在实践中遇到的问题作出补充。
下⾯就进⼊正⽂。
所包含的头⽂件⽬录1 #include <GL/glut.h>2 #include <stdlib.h>3 #include <stdio.h>最基本的功能是当然是创建⾃⼰的图形并显⽰出来,如上图我创建的是⽇地⽉系统。
需要的函数为display()和main()。
这其中很重要的⼀个知识点就是图像的视图变换/模型变换、投影变换和视⼝变换。
有关这块的内容个⼈觉得教程【2】中讲得不够清楚,可以参考⼀些别的教程。
⽐如:;。
这⾥要介绍⼀下opengl中的坐标轴。
x轴⽔平向右为正,y轴竖直向上为正,z轴垂直屏幕向外为正。
符合右⼿定则。
2020/5/15 13:06:37 对于图像的各种变换做⼀个⼩的补充视图变换即设置/改变观察点的位置,可以这么理解,相当于选择⼀个位置和⽅向设置⼀台照相机。
针对glLookAt()函数⽽⾔,它⼀共有九个参数,3对坐标值。
第⼀对三维坐标是观察点(照相机)在世界坐标中的位置,第⼆对三维坐标是被观察点(物体)的位置。
OpenGL基础操作篇

第一章OpenGL 基本程序结构用OpenGL编写的程序结构类似于用其他语言编写的程序。
实际上,OpenGL是一个丰富的三维图形函数库,编写OpenGL程序并非难事,只需在基本C语言中调用这些函数,用法同Turbo C、Microsoft C等类似,但也有许多不同之处。
本书所有的程序都是在Windows NT的Microsoft Visual C++ 2.0 集成环境下编译连接的,其中有部分头文件和函数是为这个环境所用的,如头文件"glos.h"。
此外,为便于各类读者同时快速入门,在短时间内掌握OpenGL编程的基本方法和技巧,书中例子尽量采用标准ANSI C调用OpenGL函数来编写,而且所有例程都只采用OpenGL附带的辅助库中的窗口系统。
此外,这样也便于程序在各平台间移植,尤其往工作站UNIX操作系统移植时,也只需改动头文件等很少很少的部分。
下面列出一个简单的OpenGL程序simple.c:例 2-1 OpenGL简单例程 simple.c#include <GL/gl.h>#include <GL/glaux.h>#include "glos.h"void main(void){auxInitDisplayMode(AUX_SINGLE|AUX_RGBA);auxInitPosition(0,0,500,500);auxInitWindow("simple");glClearColor(0.0,0.0,0.0,0.0);glClear(GL_COLOR_BUFFER_BIT);glColor3f(1.0,0.0,0.0);glRectf(-0.5,-0.5,0.5,0.5);glFlush();_sleep(1000);}这个程序运行结果是在屏幕窗口内画一个红色的方块。
下面具体分析整个程序结构:首先,在程序最开始处是OpenGL头文件:<GL/gl.h>、<GL/glaux.h>。
opengl画图完整代码
opengl画图完整代码#define NULL 0#define LINE 1#define RECTANGLE 2#define TRIANGLE 3#define POINTS 4#define TEXT 5#define CIRCLE 6const int cl = 360;const float Pi = 3.1415926536f;#include#include#includevoid mouse(int, int, int, int);void key(unsigned char, int, int);void display();void drawSquare(int, int);void myReshape(GLsizei, GLsizei); void myinit();void screen_box(int, int, int);void right_menu(int);void middle_menu(int);void color_menu(int);void pixel_menu(int);void fill_menu(int);int pick(int, int);/* globals */GLsizei wh = 500, ww = 500;GLfloat size = 3.0; /* half side length of square */int draw_mode = 0;int rx, ry; /*raster position*/GLfloat r = 1.0, g = 1.0, b = 1.0;int fill = 0;void drawSquare(int x, int y){y=wh-y;glColor3ub( (char) rand()%256, (char) rand()%256, (char) rand()%256);glBegin(GL_POLYGON);glVertex2f(x+size, y+size);glVertex2f(x-size, y+size);glVertex2f(x-size, y-size);glVertex2f(x+size, y-size);glEnd();}void myReshape(GLsizei w, GLsizei h){ww=w;wh=h;glMatrixMode(GL_PROJECTION);glLoadIdentity();glOrtho(0.0, (GLdouble)w, 0.0, (GLdouble)h, -1.0, 1.0); glMatrixMode(GL_MODELVIEW);glLoadIdentity();glViewport(0,0,w,h);glClearColor (0.8, 0.8, 0.8, 1.0);glClear(GL_COLOR_BUFFER_BIT);display();glFlush();ww = w;wh = h;}void myinit(){glViewport(0,0,ww,wh);glMatrixMode(GL_PROJECTION);glLoadIdentity();glOrtho(0.0, (GLdouble) ww , 0.0, (GLdouble) wh , -1.0, 1.0);glClearColor (0.8, 0.8, 0.8, 1.0);glClear(GL_COLOR_BUFFER_BIT);glFlush();}void mouse(int btn, int state, int x, int y){static int count;int where;static int xp[2],yp[2];if(btn==GLUT_LEFT_BUTTON && state==GLUT_DOWN) {glPushAttrib(GL_ALL_ATTRIB_BITS);where = pick(x,y);glColor3f(r, g, b);if(where != 0){count = 0;draw_mode = where;}else switch(draw_mode){case(LINE):if(count==0){count++;xp[0] = x;yp[0] = y;}else{glBegin(GL_LINES);glVertex2i(x,wh-y);glVertex2i(xp[0],wh-yp[0]); glEnd();draw_mode=0;count=0;}break;case(RECTANGLE):if(count == 0){count++;xp[0] = x;yp[0] = y;}else{if(fill) glBegin(GL_POLYGON); else glBegin(GL_LINE_LOOP); glVertex2i(x,wh-y); glVertex2i(x,wh-yp[0]); glVertex2i(xp[0],wh-yp[0]);glVertex2i(xp[0],wh-y); glEnd();draw_mode=0;count=0;}break;case (TRIANGLE):switch(count){case(0):count++;xp[0] = x;yp[0] = y;break;case(1):count++;xp[1] = x;yp[1] = y;break;case(2):if(fill) glBegin(GL_POLYGON); else glBegin(GL_LINE_LOOP); glVertex2i(xp[0],wh-yp[0]); glVertex2i(xp[1],wh-yp[1]); glVertex2i(x,wh-y);glEnd();draw_mode=0;count=0;}break;case(POINTS):{drawSquare(x,y);count++;}break;case(TEXT):{rx=x;ry=wh-y;glRasterPos2i(rx,ry);count=0;}case(CIRCLE):if(count == 0){count++;xp[0] = x;yp[0] = y;}else{int i=0;if(fill) glBegin(GL_POLYGON);else glBegin(GL_LINE_LOOP);for(i=0; iglVertex2f(0.5*xp[0]+0.5*x+0.5*pow(pow(x-xp[0],2)+pow(y-yp[0],2),0.5)*cos(2*Pi/cl*i),wh-(0.5*yp[0]+0.5*y+0.5*pow(pow(x-xp[0],2)+pow(y-yp[0],2),0.5)*sin(2*Pi/cl*i)));glEnd();draw_mode=0;count=0;}}glPopAttrib();glFlush();}}int pick(int x, int y){y = wh - y;if(y < wh-ww/10) return 0;else if(x < ww/10) return LINE;else if(x < ww/5) return RECTANGLE; else if(x < 3*ww/10) return TRIANGLE; else if(x < 2*ww/5) return POINTS; else if(x < ww/2) return TEXT;else if(x < 3*ww/5) return CIRCLE; else return 0;}void screen_box(int x, int y, int s ) {glBegin(GL_QUADS);glVertex2i(x, y);glVertex2i(x+s, y);glVertex2i(x+s, y+s);glVertex2i(x, y+s);glEnd();}void right_menu(int id){if(id == 1) exit(0);else display();}void middle_menu(int id){}void color_menu(int id){if(id == 1) {r = 1.0; g = 0.0; b = 0.0;} else if(id == 2) {r = 0.0; g = 1.0; b = 0.0;} else if(id == 3) {r = 0.0; g = 0.0; b = 1.0;} else if(id == 4) {r = 0.0; g = 1.0; b = 1.0;} else if(id == 5) {r = 1.0; g = 0.0; b = 1.0;} else if(id == 6) {r = 1.0; g = 1.0; b = 0.0;} else if(id == 7) {r = 1.0; g = 1.0; b = 1.0;} else if(id == 8) {r = 0.0; g = 0.0; b = 0.0;} }void pixel_menu(int id){if (id == 1) size = 2 * size;else if (size > 1) size = size/2;}void fill_menu(int id){if (id == 1) fill = 1;else fill = 0;}void key(unsigned char k, int xx, int yy){if(draw_mode!=TEXT) return;glColor3f(0.0,0.0,0.0);glRasterPos2i(rx,ry);glutBitmapCharacter(GLUT_BITMAP_9_BY_15, k); rx+=glutBitmapWidth(GLUT_BITMAP_9_BY_15,k);}void display(){int shift=0;glPushAttrib(GL_ALL_ATTRIB_BITS); glClearColor (0.8, 0.8, 0.8, 1.0);glClear(GL_COLOR_BUFFER_BIT);glColor3f(1.0, 1.0, 1.0);screen_box(0,wh-ww/10,ww/10);glColor3f(1.0, 0.0, 0.0);screen_box(ww/10,wh-ww/10,ww/10);glColor3f(0.0, 1.0, 0.0);screen_box(ww/5,wh-ww/10,ww/10);glColor3f(0.0, 0.0, 1.0);screen_box(3*ww/10,wh-ww/10,ww/10);glColor3f(1.0, 1.0, 0.0);screen_box(2*ww/5,wh-ww/10,ww/10);glColor3f(0.0, 1.0, 1.0);screen_box(1*ww/2,wh-ww/10,ww/10);glColor3f(0.0, 0.0, 0.0);glBegin(GL_LINES);glVertex2i(wh/40,wh-ww/20);glVertex2i(wh/40+ww/20,wh-ww/20);glEnd();glBegin(GL_POLYGON);glVertex2i(ww/9+ww/60,wh-ww/10+ww/40);glVertex2i(ww/9+ww/60+ww/20,wh-ww/10+ww/40);glVertex2i(ww/9+ww/60+ww/20,wh-ww/10+3*ww/40);glVertex2i(ww/9+ww/60,wh-ww/10+3*ww/40);glEnd();int i;glBegin(GL_POLYGON);// glVertex2i(5*ww/9,wh-ww/10+ww/40);for(i=0; iglVertex2f(5*ww/9-ww/150+ww/30*cos(2*Pi/cl*i), wh-ww/13+ww/40+ww/30*sin(2*Pi/cl*i));glEnd();glBegin(GL_TRIANGLES);glVertex2i(ww/5+ww/40,wh-ww/10+ww/40); glVertex2i(ww/5+ww/20,wh-ww/40);glVertex2i(ww/5+3*ww/40,wh-ww/10+ww/40); glEnd();glPointSize(3.0);glBegin(GL_POINTS);glVertex2i(3*ww/10+ww/20, wh-ww/20);glEnd();glRasterPos2i(2*ww/5,wh-ww/20); glutBitmapCharacter(GLUT_BITMAP_9_BY_15, 'A'); shift=glutBitmapWidth(GLUT_BITMAP_9_BY_15, 'A'); glRasterPos2i(2*ww/5+shift,wh-ww/20); glutBitmapCharacter(GLUT_BITMAP_9_BY_15, 'B'); shift+=glutBitmapWidth(GLUT_BITMAP_9_BY_15, 'B'); glRasterPos2i(2*ww/5+shift,wh-ww/20); glutBitmapCharacter(GLUT_BITMAP_9_BY_15, 'C'); glFlush();glPopAttrib();}int main(int argc, char** argv){int c_menu, p_menu, f_menu;glutInit(&argc,argv);glutInitDisplayMode (GLUT_SINGLE | GLUT_RGB);glutCreateWindow("work"); glutDisplayFunc(display);c_menu = glutCreateMenu(color_menu); glutAddMenuEntry("Red",1); glutAddMenuEntry("Green",2); glutAddMenuEntry("Blue",3); glutAddMenuEntry("Cyan",4); glutAddMenuEntry("Magenta",5); glutAddMenuEntry("Yellow",6); glutAddMenuEntry("White",7); glutAddMenuEntry("Black",8);p_menu = glutCreateMenu(pixel_menu); glutAddMenuEntry("increase pixel size", 1); glutAddMenuEntry("decrease pixel size", 2); f_menu = glutCreateMenu(fill_menu); glutAddMenuEntry("fill on", 1); glutAddMenuEntry("fill off", 2); glutCreateMenu(right_menu); glutAddMenuEntry("quit",1); glutAddMenuEntry("clear",2);glutAttachMenu(GLUT_RIGHT_BUTTON); glutCreateMenu(middle_menu); glutAddSubMenu("Colors", c_menu); glutAddSubMenu("Pixel Size", p_menu); glutAddSubMenu("Fill", f_menu); glutAttachMenu(GLUT_MIDDLE_BUTTON); myinit ();glutReshapeFunc (myReshape);glutKeyboardFunc(key);glutMouseFunc (mouse); glutMainLoop();}。
OpenGL编程实例

OpenGL程序实例2——绘制奥运五环
int main(int argc, char* argv[]) { glutInit(&argc, argv); glutInitDisplayMode(GLUT_SINGLE | GLUT_RGB); glutInitWindowSize(400,400); glutInitWindowPosition(100,100); glutCreateWindow("OpenGL模型绘制函数示例"); glutDisplayFunc(Display); glutReshapeFunc(ChangeSize); Initial(); glutMainLoop(); return 0; }
OpenGL程序实例2——绘制奥运五环
glColor3f(0.0, 1.0, 0.0); glTranslatef(44.0, 0.0, 0.0); glutSolidTorus(0.5, 20.0, 15, 50); glColor3f(0.0, 0.0, 0.0); glTranslatef(-22.0, 30.0, 0.0); glutSolidTorus(0.5, 20.0, 15, 50); glColor3f(0.0, 0.0, 1.0); glTranslatef(-42.0, 0.0, 0.0); glutSolidTorus(0.5, 20.0, 15, 50); glColor3f(1.0, 0.0, 0.0); glTranslatef(84.0, 0.0, 0.0); glutSolidTorus(0.5, 20.0, 15, 50); glEndList(); //绘制绿色环
16
OpenGL程序实例1——绘制矩形
#include <gl/glut.h> void Initial(void) { glClearColor(1.0f, 1.0f, 1.0f, 1.0f); //设置窗口背景颜色为白色 glMatrixMode(GL_PROJECTION); //设置投影参数 gluOrtho2D(0.0,200.0,0.0,150.0); } void Display(void) { glClear(GL_COLOR_BUFFER_BIT); //用当前背景色填充窗口 glColor3f(1.0f, 0.0f, 0.0f); //设置当前的绘图颜色为红色 glRectf(50.0f, 100.0f, 150.0f, 50.0f); //绘制一个矩形 glFlush(); //处理所有的OpenGL程序 }
OpenGL编程(VC++)入门 七巧板
// 此代码模块中包含的函数的前向声明:
BOOL Initialize(GL_Window* window, Keys* keys); // 设置你绘制前的初始化值
void DrawSceneGL(void); // 在这里完成场景的绘制
{
DEVMODE dmScreenSettings; // 设备设置模式
ZeroMemory(&dmScreenSettings, sizeof(DEVMODE)); // 清空
dmScreenSettings.dmSize = sizeof(DEVMODE); // Devmode结构的大小
// 定义绘制圆时用的顶点数(用顶点组成的线段逼近圆)(new)
#define NUM 200
// 在此处引用程序要求的头文件:
#include <windows.h> // Windows的头文件
#include <gl\gl.h> // OpenGL32库的头文件
Keys* OGL_keys; // 存储按键信息
// 在此处定义用户变量:
GLfloat r = 1.0f; // 定义圆半径(new)
GLfloat angle_Left; // 左边金字塔绕Y轴的旋转角度
GLfloat angle_X; // 右边十字架绕X轴的旋转角度
glMatrixMode(GL_PROJECTION); // 切换到投影矩阵模式
glLoadIdentity(); // 重置投影矩阵
gluPerspective(45, (float)width/(float)height, 0.1, 100); // 设置透视投影
写给 python 程序员的 opengl 教程
一、介绍1.1 什么是OpenGL在计算机图形学中,OpenGL是一种应用编程接口(API),用于渲染二维和三维矢量图形。
它提供了一组函数,用于处理复杂的图形任务,如三维建模、渲染和动画制作。
1.2 为何学习OpenGL如果你是一名Python程序员,对图形编程感兴趣,那么学习OpenGL将为你打开全新的视野。
OpenGL具有强大的功能和广泛的应用领域,掌握它可以让你在图形编程领域更加游刃有余。
二、基础知识2.1 安装OpenGL在Python中,你可以使用PyOpenGL库来使用OpenGL。
你可以通过pip安装PyOpenGL库:```pythonpip install PyOpenGL```2.2 准备环境在开始编写OpenGL程序之前,你需要安装Python和OpenGL的开发环境。
确保你的计算机上已经安装了OpenGL的驱动程序,以及Python的开发环境。
2.3 理解OpenGL的基本结构OpenGL程序的基本结构包括初始化、设置视口、加载顶点和片段着色器、渲染和清理缓冲区等步骤。
在编写OpenGL程序之前,你需要了解这些基本结构。
三、绘制图形3.1 绘制三角形在OpenGL中,绘制一个三角形是最基本的图形绘制操作。
你可以通过设置顶点的坐标、颜色等信息,来绘制一个三角形。
3.2 绘制正方形类似地,你可以通过设置顶点的坐标,来绘制一个正方形。
3.3 绘制其他图形除了三角形和正方形,OpenGL还支持绘制更多种类的图形,如圆形、多边形等。
四、使用着色器4.1 顶点着色器在OpenGL中,着色器是一种用来处理图形数据的程序,它可以控制顶点的位置、颜色等属性。
你可以编写自定义的顶点着色器,来实现更加复杂的图形效果。
4.2 片段着色器片段着色器用来处理像素的颜色、光照等属性。
你可以编写自定义的片段着色器,来实现更加真实的图形效果。
五、渲染5.1 渲染到窗口通过设置OpenGL视口,你可以将绘制的图形渲染到窗口中,以实现图形的显示。
图形学opengl绘图入门代码
图形学opengl绘图入门代码// opg1.cpp : Defines the entry point for the console application.//#include "stdafx.h"/*#includevoid display(void){glClear (GL_COLOR_BUFFER_BIT);// clear all pixelsglColor3f (1.0, 1.0, 1.0);glBegin(GL_POL YGON);//draw white polygonglVertex3f (0.25, 0.25, 0.0);glVertex3f (0.75, 0.25, 0.0);glVertex3f (0.75, 0.75, 0.0);glVertex3f (0.25, 0.75, 0.0);glEnd();glFlush ();// start processing buffered OpenGL routines}void init (void){glClearColor (0.0, 0.0, 0.0, 0.0);// select clearing colorglMatrixMode(GL_PROJECTION);glLoadIdentity();glOrtho(0.0, 1.0, 0.0, 1.0, -1.0, 1.0);// initialize viewing values }int main(int argc, char** argv){glutInit(&argc, argv);glutInitDisplayMode (GLUT_SINGLE | GLUT_RGB);glutInitWindowSize (250, 250); //Declare initial window size.glutInitWindowPosition (100, 100);//Declare initial window position.glutCreateWindow ("hello");//Open window with "hello"in its title bar.init ();//Call initialization routines.glutDisplayFunc(display); /*Register callback function to display graphics.glutMainLoop();//Enter main loop and process events.return 0; // ANSI C requires main to return int.}*/// GL_2_17.cpp : Defines the entry point for the console application.///*#include#include#include#includeconst int screenWidth=640;const int screenHeight=480;GLdouble A,B,C,D;void myInit(void){glClearColor(1.0,1.0,1.0,0.0);glColor3f(0.0f,0.0f,0.0f);glPointSize(2.0);glMatrixMode(GL_PROJECTION);glLoadIdentity();gluOrtho2D(0.0,screenWidth,0.0,screenHeight);A=screenWidth/4.0;B=0.0;C=D=screenHeight/2.0;}void myDisplay(void){glClear(GL_COLOR_BUFFER_BIT | GL_DEPTH_BUFFER_BIT); glBegin(GL_POINTS);for(GLdouble x=0;x<4.0;x+=0.001){GLdouble func=exp(-x)*cos(2*3.14159265*x);glVertex2d(A*x+B,C*func+D);}glEnd();glFlush();}void main(int argc, char** argv){glutInit(&argc,argv);glutInitDisplayMode(GLUT_SINGLE|GLUT_RGB); glutInitWindowSize(640,480); glutInitWindowPosition(100,150); glutCreateWindow("Dot plot of a function"); glutDisplayFunc(myDisplay);myInit();glutMainLoop();*/图形学第三课--opengl绘图入门代码#include#include#include#include#includevoid myInit(void){glClearColor(0.0,0.0,0.0,0.0);glClear(GL_COLOR_BUFFER_BIT);}void myReshape(GLsizei w,GLsizei h){glViewport(0,0,w,h);glMatrixMode(GL_PROJECTION);glLoadIdentity();if(w<=h)glOrtho(-1.5,1.5,-1.5*(GLfloat)h/(GLfloat)w, 1.5*(GLfloat)h/(GLfloat)w,-10.0,10.0);elseglOrtho(-1.5*(GLfloat)h/(GLfloat)w,1.5*(GLfloat)h/(GLfloat)w,-1.5,1.5,-10.0,10.0);glMatrixMode(GL_MODELVIEW);glLoadIdentity();}void myDisplay(void){glColor3f(1.0,1.0,0.0);//auxWireSphere(1.0);auxSolidTeapot(1.0);glFlush();}void main(int argc, char** argv){glutInit(&argc,argv);glutInitDisplayMode(GLUT_SINGLE|GLUT_RGB); glutInitWindowSize(640,480); glutInitWindowPosition(100,150); glutCreateWindow("AUX_SAMPLE");myInit();glutReshapeFunc(myReshape); glutDisplayFunc(myDisplay);glutMainLoop();}图形学opengl入门--建模代码#include#include#include#include#includevoid DrawMyObjects(void){/* draw some points */glBegin(GL_POINTS);glColor3f(1.0,0.0,0.0);glVertex2f(-10.0,11.0);glColor3f(1.0,1.0,0.0);glVertex2f(-9.0,10.0);glColor3f(0.0,1.0,1.0);glVertex2f(-8.0,12.0);glEnd();/* draw some line_segments */glBegin(GL_LINES);glVertex2f(-11.0,8.0); glVertex2f(-7.0,7.0); glColor3f(1.0,0.0,1.0); glVertex2f(-11.0,9.0); glVertex2f(-8.0,6.0);glEnd();/* draw one opened_line */ glBegin(GL_LINE_STRIP); glColor3f(0.0,1.0,0.0); glVertex2f(-3.0,9.0); glVertex2f(2.0,6.0); glVertex2f(3.0,8.0); glVertex2f(-2.5,6.5);glEnd();/* draw one closed_line */ glBegin(GL_LINE_LOOP); glColor3f(0.0,1.0,1.0); glVertex2f(7.0,7.0); glVertex2f(8.0,8.0); glVertex2f(10.3,7.5); glVertex2f(11.5,6.0); glVertex2f(7.5,6.0);glEnd();/* draw one filled_polygon */ glBegin(GL_POL YGON); glColor3f(0.5,0.3,0.7); glVertex2f(-7.0,2.0); glVertex2f(-8.0,3.0); glVertex2f(-10.3,0.5);glVertex2f(-6.0,-1.0);glEnd();/* draw some filled_quandrangles */ glBegin(GL_QUADS);glColor3f(0.7,0.5,0.2);glVertex2f(0.0,2.0);glVertex2f(-1.0,3.0);glVertex2f(-3.3,0.5);glVertex2f(-0.5,-1.0);glColor3f(0.5,0.7,0.2);glVertex2f(3.0,2.0);glVertex2f(2.0,3.0);glVertex2f(0.0,0.5);glVertex2f(2.5,-1.0);glEnd();/* draw some filled_strip_quandrangles */ glBegin(GL_QUAD_STRIP);glVertex2f(6.0,-2.0);glVertex2f(5.5,1.0);glVertex2f(8.0,-1.0);glColor3f(0.8,0.0,0.0);glVertex2f(9.0,2.0);glVertex2f(11.0,-2.0);glColor3f(0.0,0.0,0.8);glVertex2f(11.0,2.0);glVertex2f(13.0,-1.0);glColor3f(0.0,0.8,0.0);glVertex2f(14.0,1.0);glEnd();/* draw some filled_triangles */glBegin(GL_TRIANGLES);glColor3f(0.2,0.5,0.7);glVertex2f(-12.3,-7.5);glVertex2f(-8.5,-6.0);glColor3f(0.2,0.7,0.5);glVertex2f(-8.0,-7.0);glVertex2f(-7.0,-4.5);glVertex2f(-5.5,-9.0);glEnd();/* draw some filled_strip_triangles */ glBegin(GL_TRIANGLE_STRIP); glVertex2f(-1.0,-8.0);glVertex2f(-2.5,-5.0);glColor3f(0.8,0.8,0.0);glVertex2f(1.0,-7.0);glColor3f(0.0,0.8,0.8);glVertex2f(2.0,-4.0);glColor3f(0.8,0.0,0.8);glVertex2f(4.0,-6.0);glEnd();/* draw some filled_fan_triangles */ glBegin(GL_TRIANGLE_FAN); glVertex2f(8.0,-6.0);glVertex2f(10.0,-3.0);glColor3f(0.8,0.2,0.5);glVertex2f(12.5,-4.5);glColor3f(0.2,0.5,0.8);glVertex2f(13.0,-7.5);glColor3f(0.8,0.5,0.2);glVertex2f(10.5,-9.0);glEnd();}void myInit(void){glClearColor(0.0,0.0,0.0,0.0);glClear(GL_COLOR_BUFFER_BIT);glShadeModel(GL_FLAT);}void myReshape(GLsizei w,GLsizei h) {glViewport(0,0,w,h);glMatrixMode(GL_PROJECTION);glLoadIdentity();if(w<=h)glOrtho(-20.0,20.0,-20.0*(GLfloat)h/(GLfloat)w, 20.0*(GLfloat)h/(GLfloat)w,-50.0,50.0);elseglOrtho(-20.0*(GLfloat)h/(GLfloat)w,20.0*(GLfloat)h/(GLfloat)w,-20.0,20.0,-50.0,50.0);glMatrixMode(GL_MODELVIEW);glLoadIdentity();}void myDisplay(void){glColor3f(1.0,1.0,0.0);DrawMyObjects();glFlush();}void main(int argc, char** argv){glutInit(&argc,argv);glutInitDisplayMode(GLUT_SINGLE|GLUT_RGB); glutInitWindowSize(600,600); glutInitWindowPosition(100,150); glutCreateWindow("Geometric Primitive Types"); myInit();glutReshapeFunc(myReshape); glutDisplayFunc(myDisplay);glutMainLoop();}。
OpenGL新手入门实验1view类代码
// Exam13View.h : interface of the CExam13View class///////////////////////////////////////////////////////////////////////////////#include <gl/gl.h> //必须添加的源文件#include <gl/glu.h>//必须添加的源文件#if !defined(AFX_EXAM13VIEW_H__A279BA96_43C7_4ACC_9F1A_7A4A43B19DC1__INCLUDED_ )#define AFX_EXAM13VIEW_H__A279BA96_43C7_4ACC_9F1A_7A4A43B19DC1__INCLUDED_#if _MSC_VER > 1000#pragma once#endif // _MSC_VER > 1000class CExam13View : public CView{protected: // create from serialization onlyCExam13View();DECLARE_DYNCREA TE(CExam13View)// Attributespublic:CExam13Doc* GetDocument();// Operationspublic:// Overrides// ClassWizard generated virtual function overrides//{{AFX_VIRTUAL(CExam13View)public:virtual void OnDraw(CDC* pDC); // overridden to draw this viewvirtual BOOL PreCreateWindow(CREATESTRUCT& cs);protected:virtual BOOL OnPreparePrinting(CPrintInfo* pInfo);virtual void OnBeginPrinting(CDC* pDC, CPrintInfo* pInfo);virtual void OnEndPrinting(CDC* pDC, CPrintInfo* pInfo);//}}AFX_VIRTUAL// Implementationpublic:void gl_Point(GLint x,GLint y);//添加的三个灰常重要的函数void gl_Init();//添加的三个灰常重要的函数void Draw();//添加的三个灰常重要的函数virtual ~CExam13View();#ifdef _DEBUGvirtual void AssertValid() const;virtual void Dump(CDumpContext& dc) const;#endifprotected:// Generated message map functionsprotected:HGLRC m_hRC;/ //添加的2个灰常重要的变量HDC m_hDC; //添加的2个灰常重要的变量//{{AFX_MSG(CExam13View)afx_msg void OnDestroy();afx_msg void OnSize(UINT nType, int cx, int cy);afx_msg int OnCreate(LPCREATESTRUCT lpCreateStruct);//}}AFX_MSGDECLARE_MESSAGE_MAP()};#ifndef _DEBUG // debug version in Exam13View.cppinline CExam13Doc* CExam13View::GetDocument(){ return (CExam13Doc*)m_pDocument; }#endif///////////////////////////////////////////////////////////////////////////////{{AFX_INSERT_LOCATION}}// Microsoft Visual C++ will insert additional declarations immediately before the previous line.#endif// !defined(AFX_EXAM13VIEW_H__A279BA96_43C7_4ACC_9F1A_7A4A43B19DC1__INCLUDED_) // Exam13View.cpp : implementation of the CExam13View class//#include <gl/gl.h>#include <gl/glu.h>#include <gl/glaux.h>#include "stdafx.h"#include "Exam13.h"#include "Exam13Doc.h"#include "Exam13View.h"#ifdef _DEBUG#define new DEBUG_NEW#undef THIS_FILEstatic char THIS_FILE[] = __FILE__;#endif///////////////////////////////////////////////////////////////////////////// // CExam13ViewIMPLEMENT_DYNCREATE(CExam13View, CView)BEGIN_MESSAGE_MAP(CExam13View, CView)//{{AFX_MSG_MAP(CExam13View)ON_WM_DESTROY()ON_WM_SIZE()ON_WM_CREATE()//}}AFX_MSG_MAP// Standard printing commandsON_COMMAND(ID_FILE_PRINT, CView::OnFilePrint)ON_COMMAND(ID_FILE_PRINT_DIRECT, CView::OnFilePrint)ON_COMMAND(ID_FILE_PRINT_PREVIEW, CView::OnFilePrintPreview) END_MESSAGE_MAP()///////////////////////////////////////////////////////////////////////////// // CExam13View construction/destructionCExam13View::CExam13View(){// TODO: add construction code here}CExam13View::~CExam13View(){}BOOL CExam13View::PreCreateWindow(CREATESTRUCT& cs){// TODO: Modify the Window class or styles here by modifying// the CREATESTRUCT csreturn CView::PreCreateWindow(cs);}///////////////////////////////////////////////////////////////////////////// // CExam13View drawingvoid CExam13View::OnDraw(CDC* pDC){CExam13Doc* pDoc = GetDocument();ASSERT_VALID(pDoc);Draw();//必须在最后加上对Draw()函数的调用否则不显示}///////////////////////////////////////////////////////////////////////////// // CExam13View printingBOOL CExam13View::OnPreparePrinting(CPrintInfo* pInfo){return DoPreparePrinting(pInfo);}void CExam13View::OnBeginPrinting(CDC* /*pDC*/, CPrintInfo* /*pInfo*/) {// TODO: add extra initialization before printing}void CExam13View::OnEndPrinting(CDC* /*pDC*/, CPrintInfo* /*pInfo*/) {// TODO: add cleanup after printing}///////////////////////////////////////////////////////////////////////////// // CExam13View diagnostics#ifdef _DEBUGvoid CExam13View::AssertValid() const{CView::AssertValid();}void CExam13View::Dump(CDumpContext& dc) const{CView::Dump(dc);}CExam13Doc* CExam13View::GetDocument() // non-debug version is inline {ASSERT(m_pDocument->IsKindOf(RUNTIME_CLASS(CExam13Doc)));return (CExam13Doc*)m_pDocument;}#endif //_DEBUG/////////////////////////////////////////////////////////////////////////////// CExam13View message handlersvoid CExam13View::OnDestroy(){CView::OnDestroy();::wglMakeCurrent(NULL,NULL);::wglDeleteContext(m_hRC);}void CExam13View::OnSize(UINT nType, int cx, int cy){CView::OnSize(nType, cx, cy);glViewport(0, 0, cx, cy); //设定视口大小glMatrixMode(GL_PROJECTION);glLoadIdentity();glOrtho(-cx/2, cx/2, -cy/2, cy/2, -10, 10);//设置用户定义的绘图区域//glFrustum();//glOtho2D();设置投影方式}int CExam13View::OnCreate(LPCREATESTRUCT lpCreateStruct){///固定格式的,这个都一样if(CView::OnCreate(lpCreateStruct) == -1)return -1;gl_Init(); // 初始化OpenGL绘图环境return 0;void CExam13View::Draw(){// gl_Transform(); //进行世界坐标系到设备坐标系之间的变换glClearColor(1.0f,1.0f,1.0f,1.0f);//清除原来的颜色glClear(GL_COLOR_BUFFER_BIT); //置窗口底色为白色glColor3f(0.0f,0.0f,0.0f);//设置绘图颜色为黑色//以上的东西都是必须的~!// gl_Point(100,100) //可以在屏幕上只画一个点for(int i=0; i<=100; i++) gl_Point(i,0); //将坐标为(0,0)至(0,100)的像素置成黑色SwapBuffers(m_hDC);//交换内外缓存,便于图形显示glFlush(); //显示上述OpenGL命令的执行效果}void CExam13View::gl_Init(){//下面的结构说明绘图设备的像素格式,例如像素的表示方法、各种颜色表示位数等PIXELFORMATDESCRIPTOR pfd = {sizeof(PIXELFORMATDESCRIPTOR), //数据结构大小1, //数据结构版本号PFD_DRAW_TO_WINDOW|PFD_SUPPORT_OPENGL|PFD_DOUBLEBUFFER,PFD_TYPE_RGBA, //缓冲区可以在窗口上绘图,支持OpenGL绘图24, //深度颜色缓冲区位数0,0,0,0,0,0, //忽略颜色位0,0,0, //没有非透明度缓存,忽略移位位,无累加缓存0,0,0,0, //忽略累加位32, //32位深度缓存0, //无模板缓存0, //无辅助缓存PFD_MAIN_PLANE, //主层0, //保留0,0,0, //忽略层,可见性和损毁掩模};//得到当前正在使用的绘图设备句柄m_hDC=GetDC()->GetSafeHdc();//用到了一开始添加的变量m_hDc/*根据当前绘图设备的特性,为之选择一个与pfd所指定的格式相匹配的像素格式,存于nPixelFormat中。
写给 python 程序员的 opengl 教程 -回复
写给python 程序员的opengl 教程-回复Python程序员经常需要使用OpenGL进行图形编程,无论是进行3D游戏开发还是进行图形可视化,OpenGL都是一个强大且灵活的工具。
本文将为Python程序员提供一个有关OpenGL的基础教程,帮助你开始使用OpenGL进行图形编程。
一、什么是OpenGL?OpenGL(Open Graphics Library)是一个用于渲染2D和3D图形的跨平台应用程序接口(API)。
它提供了一系列的函数和命令,允许开发者将图形信息传输到图形硬件上,以便在屏幕上进行图形渲染。
不同的操作系统和编程语言都有与之对应的OpenGL实现,如OpenGL ES用于移动设备上的OpenGL编程,OpenGL for Web用于在Web上进行图形编程等等。
二、如何安装OpenGL?在Python中,我们可以通过PyOpenGL模块来使用OpenGL。
PyOpenGL是OpenGL的一个Python绑定库,它允许我们使用Python 语言来调用OpenGL的各种功能。
要安装PyOpenGL,我们可以使用pip 命令,在命令行中输入以下命令:pip install PyOpenGL这样就可以安装PyOpenGL库了。
三、基本窗口设置在使用OpenGL之前,我们需要先创建一个窗口来进行图形渲染。
在PyOpenGL中,我们可以使用Pygame模块创建一个窗口。
Pygame是一个跨平台的Python多媒体库,它提供了一系列用于游戏开发的功能,其中包括创建窗口的功能。
下面是一个简单的代码示例,用于创建一个窗口:pythonimport pygamefrom pygame.locals import *from OpenGL.GL import *from OpenGL.GLU import *def main():pygame.init()display = (800, 600)pygame.display.set_mode(display, DOUBLEBUF OPENGL)gluPerspective(45, (display[0] / display[1]), 0.1, 50.0)glTranslatef(0.0, 0.0, -5)while True:for event in pygame.event.get():if event.type == pygame.QUIT:pygame.quit()quit()glRotatef(1, 3, 1, 1)glClear(GL_COLOR_BUFFER_BIT GL_DEPTH_BUFFER_BIT)glBegin(GL_TRIANGLES)glVertex3fv((0, 1, 0))glVertex3fv((-1, -1, 0))glVertex3fv((1, -1, 0))glEnd()pygame.display.flip()pygame.time.wait(10)main()上述代码中,我们首先导入了一些必要的模块和函数。
