无线麦克风使用方案书
H-700E无线麦克风说明书
连接线接头 (母 座)
地 (屏蔽)
将本机所配的接收天线插入天线座,将天线插头向右转动到拧紧,使天线定位,旋 转天线,使之与地面垂直。
将本机所配的电源适配器的输出插头插入本机电源插座内。
用 非 平 衡6. 35mm的 音 频 线 将 本 机 和 功 放 机 的 麦 克 风 输 入 孔 相 连 。(此 项 可 选)
四、接收机LCD液晶显示屏:
6 11
无线会议座 对频符号:点亮表示接收机正在发射对频信号
10 按键锁
11 频 道 : 本 设 备 属 频 道 调 整 优 先 , 我 们 已 为 每 个 频 道 设 置 了 不 同 的 频 点 , 在 多 台 设 备 同时使用时,如果是多房间独立使用,左右通道按顺序CH 001 -100,CH101-200调 整即可;如果是叠机使用,则需要隔一个频道调整,调整过程要确保相互之间不能 有信号干扰。
8
<-43dB±3dB(0dB=1V/Par at 1KHz) >110dB SPL
接收天线
2支
2台
十六、故障排除:
接 收 机MUTE 偶尔会点亮 接 收 机RF信 号条少、不稳
一、产品特点:
1、 行 业 领 先 的 电 路 设 计 和 制 作 , 确 保 产 品 可 靠 稳 定 ; 2 、 PLL双 频 道 锁 相 环 回 路 设 计 , 频 偏 可 自 动 修 正 ; 3 、独 特 智 能ID识 别 技 术 , 更 有 效 的 对 抗 干 扰 ; 4 、数 字 模 拟 混 合 传 输 , 无 音 频 传 输 延 时 的 缺 点 ; 5 、内 建 最 多200个 频 道 , 频 点 分 布 从 容 设 定 ; 6 、简 约 的 红 外 对 频 设 计 , 频 率 调 整 轻 松 实 现 ; 7 、 LCD液 晶 显 示 屏 , 设 备 工 作 状 态 一 目 了 然 ; 8 、具 有 平 衡 和 非 平 衡 音 频 输 出 , 方 便 驳 接 各 种 音 响 设 备 ; 9 、接 收 机 显 示 发 射 机 的 参 数 , 便 于 监 控 话 筒 工 作 状 况 ; 1 0 、鹅 颈 麦 壳 风 上 有 静 音 指 示 灯 , 便 于 主 持 了 解 设 备 状 况 1 1 、无 线 发 射 座 上 可 调 整 音 量 和 发 射 功 率 , 便 于 工 程 调 试 1 2 、无 线 发 射 座 有 按 键 锁 , 避 免 使 用 者 误 触 调 整 设 备 。
麦拉达智能系列无线麦克风产品使用说明书

使用产品前请仔细阅读本说明书,并请妥善保管感谢您使用本公司出品的无线麦克风产品。
该产品专为智能手机的音视频录播需求而设计,采用全架构数字音频处理技术,具有信号传送稳定可靠,音质清晰无电流噪声等显著特点,可广泛应用于短视频拍摄、视频直播、教学培训以及其它无1产品使用说明:一拖一无线麦克风,配置一个发射器一拖二无线麦克风,配置两个发射器接口一拖一无线麦克风,配置一个发射器接口一拖二无线麦克风,配置两个发射器接口一拖一无线麦克风,配置一个发射器接口一拖二无线麦克风,配置两个发射器射器①充电指示灯,充电时亮,充满停止后不亮DC-5V 充电输入插座,输入规格为:DC-5V,0.3A-2A ③信息显示屏④麦克风输入插座LINE IN 输入插座⑥信道按键,待机状态下可调节信道;短按一次电源键后进入音量界面, 可调节麦克风音量大小⑦电源开关,长按1秒开机或关机;短按一下显示屏进入音量界面,通过 信道按键可调整音量大小⑧开关机指示灯1/4波长天线24Product Instructions⑨⑧⑦⑥⑤④③②①①音频输出插座,用于连接手机或相机的麦克风插座;连接不同设备时使用的音 频线有区别,使用时请注意区分②DC-5V充电输入插座,输入规格为:DC③固定夹,用于夹持各种附着设备;或固定在相机的热靴上④耳机监听输出插座⑤充电状态指示灯,充电时亮红色,充满后亮蓝色⑥麦克风收音指示灯,动态指示麦克风收音的状态⑦信息指示灯:接收器连接发射器后显示;(连接接B通道发射器成功后亮红色,两个通道连接时指示灯为紫色)接收器低电量时 指示灯闪烁提示⑧开关机指示灯⑨电源按键,长按Exceeding the specified operating temperature will affectthe Li battery performanceThe battery performance will decrease after more than 500charging cycles. Please replace with fresh batteriesCheck whether the microphone windscreen is put onDo not use the microphone in the windward position or infront of the fanWhile recording by cell phone, please set the phone at flightmode to avoid interference noiseWhen the transmitter is under charging, it may be affectedby electric signal and generate noiseNoise generated by interference from other radio equipment,please change the transmit to a different channelInterfered by high-powered electrical equipment, such asinduction cooktops, microwave ovens, distribution boxes,etc., please keep away from these equipmentWhen using it near a computer or 220 V cable, it may beaffected by internet and electric signal and generate noise.Please keep away from these facilities1. This product is a precise electronic device, which should avoid watering or heavy fall; if it gets wet, please dry it in time, and hand it up to professional technician for2. When not using for a long time, the built-in rechargeable Li-battery should be fully charged every three months to maintain the high performance of the battery.3. When plugging and unplugging the receiver, please make sure you aim at the socket of the smart device straightly. Do not apply excessive force on the receiver in wrong223①充电状态指示灯:充电时亮红色,充满后亮蓝色②LIGHTNING 连接插头③电源开关,拨至“ON”为开机④接收天线A ⑤开机指示灯,开机后亮⑥信息指示灯:电池低电时闪烁;连接A 通道发射器时亮蓝色,连接B 通道发射器 时亮红色;AB 发射器同时连接时亮紫色⑦麦克风收音指示灯:动态指示麦克风的收音状态223LR 接收器 (LIGHTNING 接口)3USB TYPE-C 连接插头②③④⑤⑥TYPE -C 接口)①No sound /small sound Short operating distance 产品使用说明⑧⑦⑥⑤④①②③2147、优良的无线频率范围:音频频率响应:信道数量: 信道群组)无线发射功率:≤信噪比:≥接收器插头类型:3.5MM-TRS USB-C 发射器供电:DC3.7V 发射器充电输入规格:三、技术参数Product Instructions If you need more sets, just repeat the above steps to set up. Make sure not to use the same frequencies, if it gets interference, please change the transmitter to a different All smart series wireless microphones can support 4 transmitters to be operated ST 发射器电池充电时间:接收器电池充电时间:接收器电池使用时间:5DC3.7V (内置聚合物锂电池),DC-5V/0.3-2A 外置电源输入(2R ) USB-C 插座设备供电(3UR) DC3.7V, 内置聚合物锂电池 (3LR)发射器和接收器功耗:低于1W(微功耗)55 ℃55 ℃发射器: 87(长)*57(宽)*14(厚)mm 接收器: 61(长)*29(宽)*13(厚)mm 接收器: 75(长)*24(宽)*12(厚)mm 接收器: 72(长)*15(宽)*10(厚)mm 发射器: 90克 2R 接收器: 30克接收器: 15克 3UR 接收器: 8克ST 发射器x1,2R接收器x1,领夹麦克风x1,充电线x2,说明书x1。
Sennheiser EM 300 SK 300无线麦克风说明书

Tastensymbole /Button icons /Icônes de touches /Simboli dei tasti /Símbolos de las teclas / Toetssymbolen / Símbolos dos botões / Символыкнопок/ 按键图标EM 300 SK 300РусскийNederlands Español Italiano Français Português 中文Tastensymbole / Button icons / Icônes de touches / Simboli dei tasti /S ímbolos de las teclas / Toetssymbolen / Símbolos dos botões /Символы кнопок / 按键图标SKM 300目录目录重要安全提示 (2)设备系统 (2)接收机 (2)背包式发射机和无线麦克风 (3)革命无线ew 300 G3系列 (4)频道库系统 (4)产品总览 (5)接收机EM 300总览 (5)EM 300显示总览 (6)背包式发射机SK 300总览 (8)SK 300显示总览 (9)无线麦克风SKM 300总览 (10)SKM 300显示总览 (11)设备使用前的准备 (12)接收机EM 300 (12)背包式发射机SK 300 (14)无线麦克风SKM 300 (15)设备的使用 (17)打开/关闭设备 (18)同步调整发射机和接收机 (21)暂时解除按键锁 (21)静音设置音频信号或关闭无线电信号 (22)选择标准显示 (25)操作菜单总览 (25)设备的清洁和维护 (29)技术参数 (32)制造商声明 (36)您可以在本公司网页中产品栏目下看到一个动画形式的使用说明。
无线麦克风A1-说明书

无线麦克风A1-说明书(完整版)-中英文-中性成品:65x75mm 展开:585x75mm印色:K+K 正面反面无线麦克风A1-说明书(完整版)-中英文-中性成品:65x75mm 展开:585x75mm印色:K+K 正面反面This device complies with part 15 of the FCC Rules. Operation is subject to the following two conditions: (1) This device may not cause harmful interference, and (2) this device must accept any interference received, including interference that may cause undesired operation.Any Changes or modifications not expressly approved by the party responsible for compliance could void the user's authority to operate the equipment.Note: This equipment has been tested and found to comply with the limits for a Class B digital device, pursuant to part 15 of the FCC Rules. These limits are designed to provide reasonable protection against harmful interference in a residential installation. This equipment generates uses and can radiate radio frequency energy and, if not installed and used in accordance with the instructions, may cause harmful interference to radio communications. However, there is no guarantee that interference will not occur in a particular installation. If this equipment does cause harmful interference to radio or television reception, which can be determined by turning the equipment off and on, the user is encouraged to try to correct the interference by one or more of the following measures:-Reorient or relocate the receiving antenna.-Increase the separation between the equipment and receiver.-Connect the equipment into an outlet on a circuit different from that to which the receiver is connected.-Consult the dealer or an experienced radio/TV technician for help.。
得胜TS-3310UH无线麦克风说明书

Wireless MicrophoneTS-3310UH无线麦克风前言产品特性产品配置TS-3310UH 接收机音频输出线电源适配器手持麦克风5号电池1台1条1个2支4节尊敬的用户:感谢您选购得胜TS-3310UH 无线麦克风,为了您能够更好的了解使用本产品,建议您在使用前仔细阅读本说明书。
若存在有疑问或者您有宝贵的建议,可通过拨打得胜官方服务热线400 6828 333或微信扫描二维码关注得胜官方公众号与我们联系。
话筒防滑圈说明书2个1份•• 特设频道ID码识别功能,有效防止外界或频道之间串扰出现噪声•LCD 显示工作信息,人机对话一目了然• 接收机具备一键自动扫频功能,能自动快速选取无干扰频道使用• 红外对频方式,只需轻松一按,即可完成发射机与接收机频道同步,使用方便• 具备独立的平衡(XLR)及非平衡(6.3插座)的混合输出,方便设备连接采用UHF高性能集成电路设计,多频道可供选择,有效改善接收死角,提高接收稳定度学校教室、KTV 、会议、家庭娱乐和户外演出适用范围技术参数• • 频率稳定度:±10ppm • 灵敏度:10dBuV • 邻道抑制:65dB • 镜像频率抑制:75dB • 音频输出:200MV• 输出阻抗:XLR接头:200Q 1/4”接头:1K • 信噪比:100dB • 失真度:<0.1%频率范围:470-932MHz (分段设计)• 失真度:<0.1%• 频率响应:50Hz-18KHz • 接收距离:100 (m)• 功能显示方式:LCD • 电源供应:DC 12V • 尺寸:210*180*45mm • 重量:约745g • 材质:铁壳,铝面板• 470-932MHz (分段设计)• 频率稳定度:±10ppm • 发射功率:10mW • 发射距离:100(m)• 谐波抑制:65dB以上频率范围:• 调制方式:FM • 最大调制度:75K • 工作电压:3V • 工作电流:120mA • 功能显示方式:LCD注:以上数据由得胜实验室测试得到。
hivi H-700无线麦克风 使用手册说明书
频道调整原则 相 邻 两 台 接 收 机 建 议 至 少3个 频 道 以 上 !
接收机远离干扰源! 麦克风和接收机之间避免阻隔!
接收天线 最好能做到可视直线范围内
7
8
九、技术参数:
频点数
分集接收
标称频偏 谐波 输出功率 显示方式 消耗电流
H-700 ≥50米(实际距离和周围的环境有关) 740-790MHz
七、对频:
当接收机完成频率或模组设定后,需要完成麦克风的对频,系统才能正常工作: 在按键未锁定状态下,短按“ /SYNC”键,接收机红外对频窗口的对频灯点亮, 表 示 接 收 机 己 进 入 对 频 状 态 , 对 频 状 态 持 续 时 间 约 为5秒 , 接 收 机 处 于 静 音 状 态 ; 频 率 处显示“F--”,“ ”符号点亮。
1
一、产品特点:
1、 行 业 领 先 的 电 路 设 计 和 制 作 , 确 保 产 品 可 靠 稳 定 ; 2、PLL双 频 道 锁 相 环 回 路 设 计 , 频 偏 可 自 动 修 正 ; 3、 独 特 智 能ID识 别 技 术 , 更 有 效 的 对 抗 干 扰 ; 4、 数 字 模 拟 混 合 传 输 , 无 音 频 传 输 延 时 的 缺 点 ; 5、 微 处 理 器 控 制 , 有 效 避 免 接 收 死 角 ; 6、 最 多1200个 频 点 , 内 建 最 多120个 模 组 , 频 点 分 布 从 容 设 定 ; 7、 简 约 的 红 外 对 频 设 计 , 频 率 调 整 轻 松 实 现 ; 8、LCD液 晶 显 示 屏 , 设 备 工 作 状 态 一 目 了 然 ; 9、 具 有 平 衡 和 非 平 衡 音 频 输 出 , 方 便 驳 接 各 种 音 响 设 备 ; 1 0、 接 收 机 显 示 发 射 机 的 参 数 , 便 于 监 控 话 筒 工 作 状 况 ; 1 1、 发 射 器 及 话 筒 结 构 的 合 理 设 计 , 美 观 、 坚 固 、 耐 用 ; 1 2、 采 用 真 分 集 电 路 , 双 通 道 共 用2天 线 和2高 放 的 设 计 ,
得胜 3000B 智能感应无线麦克风 使用说明书
地址: 广东省惠州市博罗县龙溪镇富康一路2号电话: 400 6828 333传真*************邮箱:**************邮编:516121网址:广东得胜电子有限公司用户手册智能感应无线麦克风INTELLIGENT INDUCTION WIRELESS MICROPHONE目录标准配置接收机 一台手持式麦克风 两支音频传输线 一条电源适配器 一个天线 两支角码 一套 1.5V 五号电池 四节使用手册 一 份一.目录 (01)二.安全须知/产品特性/调校注意 (02)三.接收机功能和操作方法 ............................................................................ 03-04四.液晶显示面板操作................................................................................... 04-07五.操作方法/正确使用方法............................................................................ 07-08六.故障现象/故障原因 (08)七.使用、保存 (09)八.技术参数/包装清单 ..................................................................................09-10安全须知● 只能使用本机提供的电源适配器,并且确认接入电源电压是否与适配器要求一致,若使用其它规格 的电源适配器,可能会损坏本机。
● 本机外置的电源适配器使用220V AC电源电压,使用其它电压会引起火灾和故障。
● 请勿将本机放在高温、潮湿、灰尘多的地点及碰到液体物质,以免造成故障。
● 请勿碰撞、抛掷、振动本机,以免损坏本机。
无线麦克风用户手册说明书
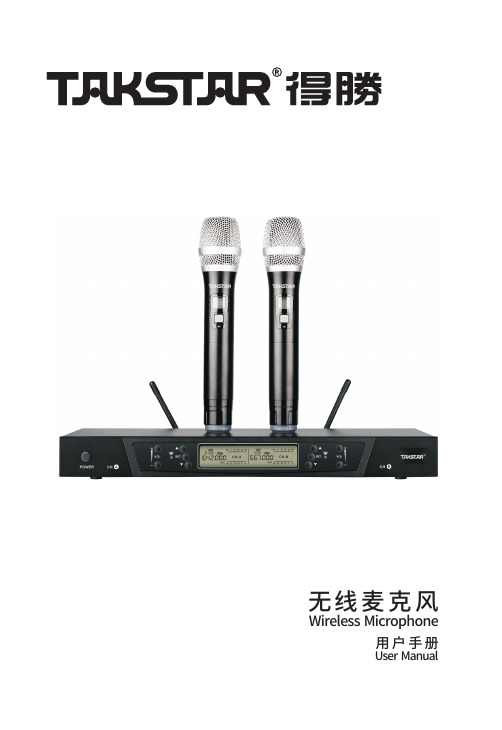
用户手册UserManual无线麦克风Wireless Microphone目录Content目录--------------------------------------------------------------------------------01 Content---------------------------------------------------------------------------01前言--------------------------------------------------------------------------------02 Foreword-------------------------------------------------------------------------10产品特性---------------------------------------------------------------------------02 Features--------------------------------------------------------------------------10适用场合---------------------------------------------------------------------------02 Application-----------------------------------------------------------------------10技术参数---------------------------------------------------------------------------02 Specification--------------------------------------------------------------------10标准配置---------------------------------------------------------------------------03 Product content-----------------------------------------------------------------11接收机功能------------------------------------------------------------------------03 Receiver function---------------------------------------------------------------11接收机LCD显示面板操作方法---------------------------------------------------04 Receiver LCD display and operation-----------------------------------------12麦克风使用和操作方法-------------------------------------------------------05-06 Microphone operation-----------------------------------------------------13-14系统操作方法----------------------------------------------------------------------07 System operation---------------------------------------------------------------15注意事项---------------------------------------------------------------------------07 Note-------------------------------------------------------------------------------15安全警告---------------------------------------------------------------------------08 Caution---------------------------------------------------------------------------16故障及解决方法-------------------------------------------------------------------09 Trouble shooting----------------------------------------------------------------17尊敬的用户:感谢您选购TAKSTAR 无线麦克风,为了您能够更好的了解使用本产品,建议您在使用前仔细阅读本说明书。
Shure BLX4R 无线麦克风系统说明书
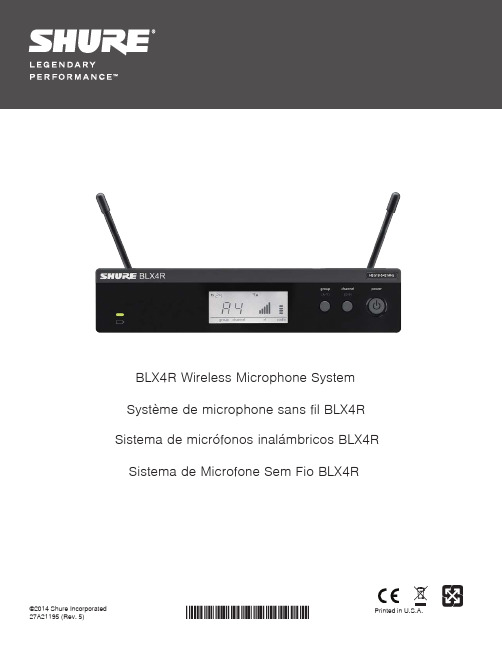
©2014 Shure Incorporated 27A21195 (Rev. 5)Printed in U.S.A.BLX4R Wireless Microphone System Système de microphone sans fil BLX4R Sistema de micrófonos inalámbricos BLX4R Sistema de Microfone Sem Fio BLX4R4567BLX4R ReceiverFront PanelRear Panel① Transmitter Battery LED• Green = Runtime greater than 1 hour • Red = Runtime less than 1 hour ② LCD DisplayDisplays receiver and transmitter settings.③ group Button• Scan: push and release group button to scan for an open group and channel • Manual: push and hold group button to select a group.④ channel Button• Scan: push and release channel button to scan for an open channel• Manual: push and hold channel button to se-lect a channel.⑤ Power ButtonPowers the receiver on/off.⑥ Antenna Jack BBNC connector for antenna B.⑦ DC Power JackFor DC external power supply (12 to 15 V DC).⑧ Strain-relief loop for power cordSecures power cord to receiver.⑨ Mic Out XLR audio output jackSupplies microphone-level audio output.⑩ INST Out audio output jackSupplies instrument-level audio signal.⑪ Volume ControlUse a screwdriver to adjust the output level.⑫ Antenna Jack ABNC connector for antenna A.Receiver LCD Screen① TV ChannelTV channel for selected frequency.② Receiver LockIndicates control and power lock enabled.③ GroupDisplays selected group.④ ChannelDisplays selected channel.⑤ RF Signal StrengthNumber of bars corresponds to RF signal strength. OL indicates signal overload.⑥ Audio MeterNumber of bars indicates audio signal level. OL indicates signal clipping.⑦ Active Antenna IndicatorIndicates active antenna for the diversity signal.BLX1①②③BLX28BLX1① LED IndicatorDisplays power and battery status (see table).② power SwitchToggles power on or off.③ 4-Pin Microphone Input Jack (TA4 connector)④ Antenna⑤ group ButtonChanges group setting.⑥ LED DisplayDisplays group and channel setting.⑦ channel ButtonChanges channel setting.⑧ Battery Compartment⑨ Audio Gain AdjustmentRotate to increase or decrease transmitter gain.BLX2① LED IndicatorDisplays power and battery status (see table).② power ButtonPush to turn power on or off.③ group ButtonChanges group setting.④ channel ButtonChanges channel and gain setting.⑤ LED DisplayDisplays group and channel setting.⑥ Identification Cap ⑦ Battery CompartmentTransmitter LED IndicatorsTransmittersLED IndicatorStatusGreenReadyRapidly Flashing Red Controls lockedSolid RedBattery power low (less than 1 hour remaining*)Flashing Red and shuts offBatteries dead (change batteries to power on transmitter)*For alkaline batteries only. For rechargeable batteries, solid red means the batteries are dead.groupgroup9Before you begin, turn off all transmitters and turn on any equipment (othermicrophones or personal monitoring systems) that could cause interferenceduring the performance.1. Press and release the group button on the receiver.The receiver scans for the clearest group and channel.Note: If you want to stop the scan, push the group button again.2. Turn on transmitter and change the group and channel to match the re-ceiver (See Setting Transmitter Group and Channel).Once the system is set up, perform an audio check and adjust the gain if necessary. Setting Transmitter Group and ChannelTransmitter group and channel must be manually set to match the receiver.Group (letter)1. Press and release the group button on the transmitter to acti-vate the display. Press the group button again and the displayflashes.2. While the display is flashing, press the group button again to ad-vance to the desired group setting.Channel (number)If channel needs to be changed, follow the same procedure using the channelbutton instead of the group button.Note:• When the group and channel correctly match the receiver, the RF barsand battery LED on the receiver illuminate.• After manual setup, the transmitter alternately displays the group andchannel setting for about two seconds.Up to 12 systems can operate simultaneously (band and RF environment dependent).Important: Set up each system one-at-a-time. Once a receiver and transmitter are tuned to the same group and channel, leave the transmitter powered on. Otherwise, scans from the other receivers will not detect that channel as occupied.Turn on any other equipment that could cause interference during the performance so it will be detected during the group and channel scans in the fol-lowing steps.Before you begin system set up, turn all receivers ON and all transmitters OFF.For the first receiver:1. Perform a group scan to find the group with the most clear channels.2. Turn on the first transmitter and change the group and channel to match the receiver.3. Leave the transmitter on and continue with the additional systems.Note: If the selected group does not contain enough open channels, manually select group "d" when setting up larger systems.For each additional receiver:1. Manually change the receiver to match the group setting of the first receiver. Recall that each time the group setting is changed, a channel scan is automatically done.2. Turn on the transmitter and change the group and channel to match the receiver.3. Leave the transmitter on and continue to the next system.4. Once all receivers are set up, perform an audio check on all microphones.Manually Setting Receiver Group and ChannelThe receiver group may need to be changed as part of a multiple system setup.Group (letter)1. Hold the group button on the receiver until the display begins to flash.2. While the display is flashing, press the group button again to advance to the next group.Note: Only the group setting will be displayed during the manual setup.3. Once the desired group is reached, release the group button. The receiver automatically performs a channel scan.Channel (number)Always use a channel selected by the channel scan. However, if necessary, the channel can be set manually. Follow the same steps above using the channel button instead of the group button.1011Tips to Improve Wireless System PerformanceIf you encounter interference or dropouts, try the following suggestions:Getting Good SoundAdjusting GainMonitor the audio meter on the receiver display when setting the transmitter gain. The OL indicator should only illuminate infrequently when you speak loudly or play your instrument loudly.BLX1Rotate the audio gain adjustment to increase (+) or decrease (−) the gain until desired level is reached.For instruments, turn gain to minimum setting. For lavaliers, increase the gain as desired.BLX2The BLX2 features two gain level settings:• Default • -10 dB• Choose a different receiver channel• Reposition the receiver so there is nothing obstructing a line of sight to the transmitter (including the audience)• Avoid placing transmitter and receiver where metal or other dense materials may be present • Move the receiver to the top of the equipment rack• Remove nearby sources of wireless interference, such as cell phones, two-way radios, computers, media players, Wi-Fi devices, and digital signal processors • Charge or replace the transmitter battery• Keep transmitters more than two meters (6 feet) apart• Keep the transmitter and receiver more than 5 meters (16 feet) apart • During sound check, mark trouble spots and ask presenters or performers to avoid those areasUse the default setting for most situations. If the receiver audio OL indicator displays often, set the mi-crophone to -10 dB.1. To change the gain to -10 dB, hold down the channel button until a small dot appears in the lower right hand corner of the transmitter display.2. To change the gain back to de-fault, hold the channel button until the dot disappears.Correct Microphone Placement• Hold the microphone within 12 inches from the sound source. For a warmer sound with increased bass presence, move the microphone closer.• Do not cover grille with hand.Wearing the Headworn Microphone• Position the headworn microphone 13 mm (1/2 in.) from the corner of your mouth.• Position lavalier and headworn microphones so that clothing, jewelry, or other items do not bump or rub against the microphone.12BatteriesExpected life for AA batteries is up to 14 hours (total battery life varies depending upon batterytype and manufacturer).When the LED indicator turns red, it signifies "low battery" with approximately 60 minutes of re-maining battery life.For alkaline batteries only. For rechargeable batteries, solid red means the batteries are dead.To remove batteries from the handheld transmitter, push them out through the opening in themicrophone battery compartment.Power OffPress and hold the power button to power off the BLX2 or BLX4R. Topower off the BLX1, slide the power switch to OFF.Wearing the Bodypack TransmitterClip the transmitter to a belt or slide a guitar strap through the transmitterclip as shown.For best results, the belt should be pressed against the base of the clip.Removing and Installing IdentificationCapsThe BLX2 is equipped with a black identification cap from the factory(dual vocal systems ship with additional gray cap).To remove: Remove battery cover. Squeeze sides and pull off cap.To install: Align the cap and click into place. Replace battery cover.An Identification Cap Kit containing assorted colored caps is availableas an optional accessory.WARNING: Danger of explosion if battery incorrectlyreplaced. Operate only with Shure compatible batteries.WARNING: Battery packs shall not be exposed to ex-cessive heat such as sunshine, fire, or the like.Locking and Unlocking ControlsLock system controls to prevent accidental setting changes or power-off.Transmitter (lock/unlock)Turn the transmitter on. Hold the group button, then press the channelbutton for approximately 2 seconds. The LED indicator rapidly flashesred when locked.Receiver (lock/unlock)Turn the receiver on. Simultaneously hold the group and channel but-ton until the flashing lock icon appears in the lower left-hand corner ofthe display, indicating the controls are locked. Repeat to unlock thecontrols.13TroubleshootingIssueIndicator Status SolutionNo sound or faint soundReceiver RF bars and battery LED illuminated• Verify all sound system connections or adjust gain as needed (see Adjusting Gain)• Verify that the receiver is connected to mixer/amplifierReceiver RF bars and battery LED off • Turn on transmitter • Make sure the batteries are installed correctly• Perform transmitter setup (see Single System Setup)• Insert fresh batteries Receiver screen off • Make sure AC adapter is securely plugged into electrical outlet.• Make sure receiver is powered on.Transmitter indicator LED flashing redReplace transmitter batteries (see Changing Batteries).Audio artifacts or dropoutsReceiver RF bars and battery LED flickering • Change receiver and transmitter to a different group and/or channel.• Identify nearby sources of RF interference, and shutdown or remove source.• Replace transmitter batteries.• Ensure that receiver and transmitter are positioned within system parameters• System must be set up within recommended range and receiver kept away from metallic surfaces.• Transmitter must be used in line of sight from receiver for optimal sound DistortionAudio meter on re-ceiver indicates over-load (OL)Reduce transmitter gain (see Adjusting Gain).Sound level variations when switching to dif-ferent sources N/A Adjust transmitter gain as necessary (see Adjusting Gain).Receiver/transmitter won't turn off LED indicator flash-ing rapidly, lock icon shown on receiver displaySee Locking and Unlocking Controls.Transmitter beyond receiver rangeReceiver display dimmed to 50%Move transmitter closer to receiverBLX1Audio Input Levelgain position max-16 dBV maximummin (0 dB)+10 dBV maximum Gain Adjustment Range26 dBInput Impedance1 MΩRF Transmitter Output10 mW, typicalvaries by regionDimensions110 mm X 64 mm X 21 mm H x W x DWeight75 g (2.6 oz.), without batteriesHousingMolded ABSPower Requirements2 LR6 AA batteries, 1.5 V, alkalineBattery Lifeup to 14 hours (alkaline)BLX2Audio Input Levelgain position0dB-20 dBV maximum-10dB-10 dBV maximumGain Adjustment Range10 dBRF Transmitter Output10 mW, typicalvaries by regionDimensions224 mm X 53 mm L x Dia.Weight218 g (7.7 oz.) (without batteries)HousingMolded ABSPower Requirements2 LR6 AA batteries, 1.5 V, alkalineBattery Lifeup to 14 hours (alkaline)BLX4ROutput ImpedanceXLR connector200 Ω6.35 mm (1/4") connec-tor50 ΩAudio Output LevelRef. ±33 kHz deviation with 1 kHz toneXLR connector–20.5 dBV (into 100 kΩ load)6.35 mm (1/4") connec-tor–13 dBV (into 100 kΩ load)RF Sensitivity-105 dBm for 12 dB SINAD, typicalImage Rejection>50 dB, typicalDimensions50 mm X 198 mm X 163 mm H x W x DWeightwithout antennas998 g (2.2 lb.)HousingMolded ABS, steelPower Requirements12–15 V DC @ 260 mA, supplied by external power supply (tip positive)SystemWorking Range91 m (300 ft) Line of SightNote: Actual range depends on RF signal absorption, reflection and interference. Audio Frequency Response50 to 15,000 HzNote: Dependent on microphone typeTotal Harmonic DistortionRef. ±33 kHz deviation with 1 kHz tone0.5%, typicalDynamic Range100 dB, A-weighted, typicalOperating Temperature-18°C (0°F) to 57°C (135°F)Note: Battery characteristics may limit this range.PolarityPositive pressure on microphone diaphragm (or positive voltage ap-plied to tip of WA302 phone plug) produces positive voltage on pin 2 (with respect to pin 3 of low-impedance output) and the tip of the high impedance 1/4-inch output.14This Class B digital apparatus complies with Canadian ICES-003. Cet appareil numérique de la classe B est conforme à la norme NMB-003 du Canada. Meets requirements of the following standards: EN 300 422 Parts 1 and 2, EN 301 489 Parts 1 and 9, EN60065.EN 300 422 Parts 1 and 2. EN 301 489 Parts 1 and 9. EN60065.Meets essential requirements of the following European Directives:• R&TTE Directive 99/5/EC• WEEE Directive 2002/96/EC, as amended by 2008/34/EC• RoHS Directive 2002/95/EC, as amended by 2008/35/ECNote: Please follow your regional recycling scheme for batteries and electronic wasteApproved under the Declaration of Conformity (DoC) provision of FCC Part 15.Certified by IC in Canada under RSS-123 and RSS-102.Certified under FCC Part 74.Certified by IC in Canada under RSS-123 and RSS-102.FCC ID: DD4BLX1A, DD4BLX1B, DD4BLX1C, DD4BLX1D; DD4BLX2A, DD4BLX2B, DD4BLX2C, DD4BLX2D. IC: 616A-BLX1A, 616A-BLX1B,616A-BLX1C, 616A-BLX1D; 616A-BLX2A, 616A-BLX2B, 616A-BLX2C, 616A-BLX2DThis device complies with Industry Canada licence-exempt RSS standard(s). Operation of this device is subject to the following two conditions: (1) this device may not cause interference, and (2) this device must accept any interference, including interference that may cause undesired operation of the device.Le présent appareil est conforme aux CNR d'Industrie Canada applicables aux appareils radio exempts de licence. L'exploitation est autorisée aux deux conditions suivantes : (1) l'appareil ne doit pas produire de brouillage, et (2) l'utilisateur de l'appareil doit accepter tout brouillage radioélectrique subi,même si le brouillage est susceptible d'en compromettre le fonctionnement.The CE Declaration of Conformity can be obtained from Shure Incorporated or any of its European representatives. For contact information please visit The CE Declaration of Conformity can be obtained from: /europe/complianceAuthorized European representative:Shure Europe GmbHHeadquarters Europe, Middle East & AfricaDepartment: EMEA ApprovalJakob-Dieffenbacher-Str. 1275031 Eppingen, GermanyPhone: 49-7262-92 49 0Fax: 49-7262-92 49 11 4Email:********************LICENSING INFORMATIONLicensing: A ministerial license to operate this equipment may be required in certain areas. Consult your national authority for possible requirements. Changes or modifications not expressly approved by Shure Incorporated could void your authority to operate the equipment. Licensing of Shure wireless microphone equipment is the user’s responsibility, and licensability depends on the user’s classification and application, and on the selected frequency. Shure strongly urges the user to contact the appropriate telecommunications authority concerning proper licensing, and before choosing and ordering frequencies.Information to the userThis equipment has been tested and found to comply with the limits for a Class B digital device, pursuant to Part 15 of the FCC Rules. These limits are designed to provide reasonable protection against harmful interference in a residential installation. This equipment generates uses and can radiate radio frequency energy and, if not installed and used in accordance with the instructions, may cause harmful interference to radio communications. However, there is no guarantee that interference will not occur in a particular installation. If this equipment does cause harmful interference to radio or television reception, which can be determined by turning the equipment off and on, the user is encouraged to try to correct the interference by one or more of the following measures:• Reorient or relocate the receiving antenna.• Increase the separation between the equipment and the receiver.• Connect the equipment to an outlet on a circuit different from that to which the receiver is connected.• Consult the dealer or an experienced radio/TV technician for help.Note: EMC conformance testing is based on the use of supplied and recommended cable types. The use of other cable types may degrade EMC performance.Changes or modifications not expressly approved by the manufacturer could void the user’s authority to operate the equipment.Australia Warning for WirelessThis device operates under an ACMA class licence and must comply with all the conditions of that licence including operating frequencies. Before 31 December 2014, this device will comply if it is operated in the 520-820 MHz frequency band. WARNING: After 31 December 2014, in order to comply, this device must not be operated in the 694-820 MHz band.15Asia, Pacific:Shure Asia Limited 22/F , 625 King’s Road North Point, Island East Hong KongPhone: 852-2893-4290Fax: 852-2893-4055Email:**************.hkUnited States, Canada, Latin America, Caribbean:Shure Incorporated5800 West Touhy Avenue Niles, IL 60714-4608 USA Phone: +1-847-600-2000Fax: +1-847-600-1212 (USA)Fax: +1-847-600-6446Email:**************Europe, Middle East, Africa:Shure Europe GmbHJakob-Dieffenbacher-Str. 12,75031 Eppingen, Germany Phone: +49-7262-92490Fax: +49-7262-9249114Email:*************。
得胜 HM-300W 无线手持麦克风(单手持) 使用手册说明书
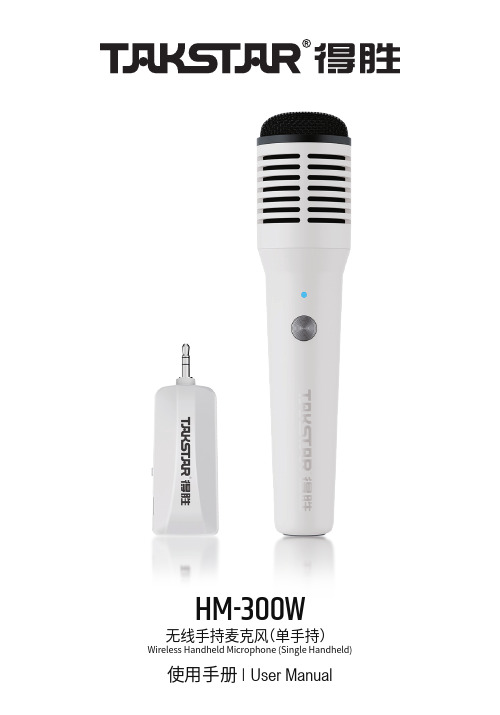
HM-300W 无线手持麦克风(单手持)Wireless Handheld Microphone (Single Handheld)尊敬的用户:感谢您选购得胜HM-300W无线手持麦克风(单手持),为了您能够更好的了解使用本产品,建议您在使用前仔细阅读本说明书。
若存在有疑问或者您有宝贵的建议,可通过拨打得胜官方服务热线400 6828 333或微信扫描二维码关注得胜官方公众号与我们联系。
产品特性• 针对教学、广场舞、导购等场合而设计,应用于扩音器、音箱等扩音设备上;• 采用UHF低功耗无线技术,抗干扰能力强,传输距离40米以上;• 可调频,40个精选频道,支持多套麦克风同时使用;• 采用自动对频技术,开机一键自动配对连接,操作简单方便;• 内置锂离子电池,支持Type-C充电,避免频繁更换电池;• 配备Φ6.35mm转换插头,可兼容Φ3.5mm与Φ6.35mm接口的音频设备。
适用范围适用于教学、广场舞、导购等宣传活动配合扩音器或音箱使用标准配置· 手持麦克风 1支· 接收器 1个· 6.35mm转接头 1个· 充电线 1条· 说明书 1份• 拾音器:动圈音头• 指向性:单指向• 频率响应:60Hz-16kHz• 灵敏度:-55(±3)dB(at 1KHz)(0dB=1V/Pa)• UHF频率:630MHz-698MHz• UHF使用距离:空旷地带约40米• 电池类型:锂离子电池• 电池规格:3.7V/1800mAh• 充电电压:DC 5V/1A• 使用时间:约15小时• 充电时间:约2.5小时• 充电方式:Type-C• 产品规格:Φ41mm*185mm(直径*高)• 产品重量:约150g • UHF频率:630MHz-698MHz • UHF使用距离:空旷地带约40米• 电池类型:锂离子电池• 电池规格:3.7V/400mAh • 充电电压:DC 5V/0.4A • 使用时间:约5小时• 充电时间:约2小时• 充电方式:Type-C• 产品重量:约22g注:以上数据由得胜实验室测试得到,并拥有最终解释权!电源开关:长按该按键1秒开启或关闭麦克风;开机状态下,点按该按键可切换频道;关机状态下,长按该按键5秒进入配对模式。
2.4G无线麦克风安装使用说明书
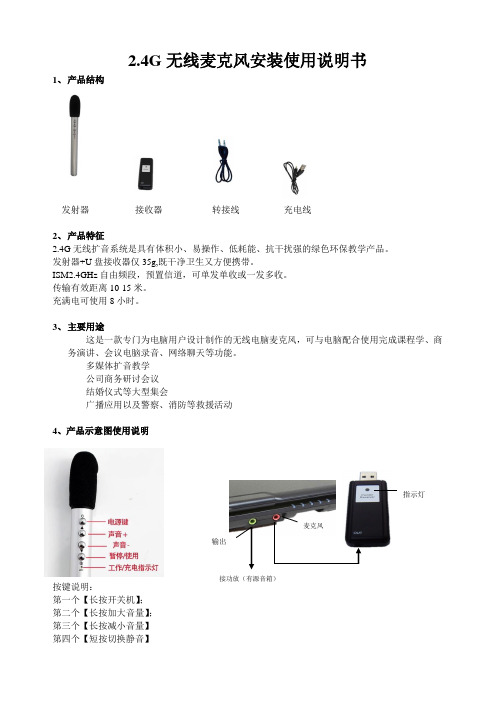
2.4G 无线麦克风安装使用说明书1、 产品结构发射器 接收器转接线充电线2、 产品特征2.4G 无线扩音系统是具有体积小、易操作、低耗能、抗干扰强的绿色环保教学产品。
发射器+U 盘接收器仅35g,既干净卫生又方便携带。
ISM2.4GHz 自由频段,预置信道,可单发单收或一发多收。
传输有效距离10-15米。
充满电可使用8小时。
3、 主要用途这是一款专门为电脑用户设计制作的无线电脑麦克风,可与电脑配合使用完成课程学、商务演讲、会议电脑录音、网络聊天等功能。
多媒体扩音教学 公司商务研讨会议 结婚仪式等大型集会广播应用以及警察、消防等救援活动4、产品示意图使用说明按键说明:第一个【长按开关机】; 第二个【长按加大音量】; 第三个【长按减小音量】 第四个【短按切换静音】接功放(有源音箱)输出麦克风指示灯5、产品参数:1)、按上图连接后,接收器指示灯蓝灯快闪。
2)、把耳麦接到发射器上,在距离接收器1米内,长按打开FS01发射器电源开关,自动对频,接收指示灯变为蓝灯慢闪,并听到“嘀”声。
即可使用。
3)、指示灯说明:(1)长按开机----红灯变蓝灯(2)长按关机----红灯变玫红(3)红蓝紫交替闪烁----开机状态;(4)使用状态下红灯亮----电量不足;(5)话筒蓝灯慢闪----对频模式;(6)充电----红灯长亮(7)充满电-----红灯灭。
7、问题解决方案:(1)问题:开机无声音?解决:1.重启话筒,检查话筒与接收器是否都在蓝灯慢闪状态,2.检查是否正确连接扩音器或功放设备的话筒插口,插口是否能正常使用,可更换设备测试。
(2)问题:电脑上使用无声音?解决:1.检查话筒插口是否能正常使用开始—控制面板—硬件与声音---声音---录制【麦克风显示未插入的请更换话筒插口】2.双击【插入后显示准备就绪或默认设备状态的麦克风】--进入麦克风属性--侦听--侦听此设置--应用---长按话筒电源键2-3秒开机。
LARK M1 2人无线麦克风系统用户手册说明书
LARK M1 User ManualLARK M1EN-02PACKING LISTEN-03EN-04TX: TransmitterRX: Receiver Charging Case for 2-person Wireless Microphone System ➀ Status Indicator➁ Built-in Microphone ➂ Power Button➃ Pair/HearClear Noise -Cancelling Button➄ Mounting Clip ➅ Charging Contact& Type-C Port ➀ Type-C Port ➁ Pair/Volume Up Button ➂ Mode Switch/Volume Down Button ➃ Power Button ➄ 3.5mm Phone/Camera Interface Port➅ Power Indicator ➆ Mounting Clip ➇ Charging Contact➀ Indicator Inside the Case ➁ Indicator Outside the Case ➂ USB Type-C PortThe TX and RX automatically turn on andClip the TX to a shirt collar. pair with each other out of the box.EN-05EN-06EN-07To ensure optimal use with the camera, please follow the settings as recommended below.SONY camera Camera recording volumeset to 1Canon cameraRecording level set to 1 blockFujifilm cameraExternal microphonevolume set to -26dBCAMERA SETTINGSEN-08Indicator Lights Guide - RX &TXIndicator Light Status Device StatusBlue indicator light stays on Device connectedBlue indicator light flashing Device disconnectedRed indicator lights on TX & RX stay on Low-battery TX2 red indicator lights flashing on RX Low-battery RXOrange indicator light flashing Device in charging (charging when powered off) Orange indicator light stays on Device fully charged (charging when powered off) Green static light on TX Noise-cancelling function ONGreen static light on RX Camera mono modePhone mode/Camera stereo modeBlue static light on RXEN-09Indicator Lights Guide - Charging Case Indicator Light Status Device StatusOne indicator light outside the case flashing when connected via USB Charging case in charging(refer to the number of shining indicator lights for charging progress)Four indicator lights outside the case stay on Charging case fully chargedIndicator lights inside the case breathing TX/RX in chargingIndicator lights inside the case stay on TX/RX fully chargedIndicator Lights Outside the Case GuideNumber of Shining Indicator Lights Charging Case Battery LevelOne flashing indicator light Low battery, output charging discontinued One shining indicator light25%Two shining indicator lights50%Three shining indicator lights75%Four shining indicator lights100%EN-10Auto Power On/OffRemove TX/RX from the charging case, it will automatically turn on.Put TX/RX back in the charging case, it will automatically turn off.Manually Power On/OffHold Power Button of TX/RX for 3s seconds to power on/off the device manually. (Figure 1) Auto PairingRemove TX/RX from the charging case, they will automatically pair with each other.Put TX/RX back in the charging case, they will automatically disconnect with each other. Manually PairingHold Pair/HearClear Noise-Cancelling Button of TX for 3s seconds and then hold PairButton of RX for 3s seconds to pair. (Figure 2)(Figure 1)(Figure 2)EN-11Auto ChargingPut the devices back to the charging case, the auto-charging starts.Manually ChargingCharge the TX, RX, and Charging Case separately via the Type-C port of each unit.Turn On/Off HearClear Noise-Cancelling Function on TXPress the Pair/HearClear Noise-Cancelling Button on TX to turn on/off the noise-cancelling function. (Figure 3)Volume Gain AdjustmentThere are three volume level settings on the RX: Low, Middle, and High.The volume level of the device is set to Middle by default.Press the Pair/Volume Up Button on the RX to increase volume and Mode Switch/VolumeDown Button to decrease volume. (Figure 4)(Figure 3)(Figure 4)EN-12Mode SwitchLong press the Mode Switch/Volume Down Button for 5 seconds to switch modes: Green static light indicates Camera Mono ModeBlue static light indicates Phone Mode or Camera Stereo Mode (depending on the deviceconnected) (Figure 5)EN-13Wireless Transmission 2.4GHz Adaptive Frequency Hopping (AFH) Transmission Range40M (free movement), 200M (LOS)In-Built Microphone Polar Pattern: OmnidirectionalFrequency Range: 20Hz ~ 20KHz Maximum SPL110dB SPLInput Dynamic Range86 dBBattery Type TX: 140mAh (0.518Wh)RX: 200mAh (0.76Wh) Charging Case: 1400mAh (5.18Wh)Runtime TX: 8HRX: 8HCharging Case: Maximum 2 times charging for 2 TX and 1 RX.Charging Time TX: 1.5HRX: 1.5H Charging Case: 1.5HDimensions TX: 48 x 21.5 x 10 mm RX: 48.3 x 27.6 x 11mm Charging Case: 83x60x30 mmWeight TX: 11.8gRX: 17.5g Charging Case: 80gPARAMETERSEN-14Note: The frequency range and wireless transmit power of the device vary based on the regulations of different countries and regions.Safety PrecautionsDo not place the product near or inside heating devices (including but not limited to microwave ovens, induction cookers, electric ovens, electric heaters, pressure cookers, water heaters, gas stoves) to prevent the battery from overheating and exploding.Never use non-original charging cases, cables, and batteries with the product.The use of non-original spare parts may cause electric shock, fire, explosion, or other dangers.EN-15FCC RequirementAny changes or modifications not expressly approved by the party responsible for compliance could void the user's authority to operate the equipment.This device complies with Part 15 of the FCC Rules. Operation is subject to the following two conditions:(1) t his device may not cause harmful interference.(2) t his device must accept any interference received, including interference that may cause undesired operation.Note:This equipment has been tested and found to comply with the limits for a Class B digital device, pursuant to Part 15 of the FCC Rules. These limits are designed to provide reasonable protection against harmful interference in a residential installation. This equipment generates, uses, and can radiate radio frequency energy, and if not installed and used in accordance with the instructions, may cause harmful interference to radio communications. However, there is no guarantee that interference will not occur in a particular installation. If this equipment does cause harmful interference to radio or television reception, which can be determined by turning the equipment off and on, the user is encouraged to try to correct the interference by one or more of the following measures:-Reorient or relocate the receiving antenna.-Increase the separation between the equipment and receiver.-Connect the equipment into an outlet on a circuit different from that to which the receiver is connected.-Consult the dealer or an experienced radio/TV technician for help.EN-16。
MFM无线麦克风使用说明书-多点乐

飞视达悦唱M1和M9无线FM麦克风使用说明书尊敬的客户:感谢你购买飞视达国际商城M1和M9无线麦克风产品,本FM无线话筒,小巧迷你, 只要亲的设备带FM收音功能就可配对使用,适用范围广,但请注意:〖话筒本身不发声,此款效果一流,但声音的大小和最终效果取决于你所配对的机器和调式方法〗。
本篇将为大家介绍使用步骤和常用调式方法.1:如何开机和无线配对当你收到我们精致的麦克风产品,首先请打开包装拿出麦克风主机,先不要开机,先打开你车里面的FM(收音机)或者你家里带收音机的扩音器或者带收音机的音箱,(注意:不带收音机的音箱和设备不能实现无线功能,但可以有线连接,带天线的设备信号会更强,效果会更好,请拉出天线使接收距离更远,一些小的插卡音箱有收音机不带天线,效果不会很好,还有手机上的收音机系统是软件来实现的,也不能和本麦克风配对使用)当打开你自己带收音机的设备,把它调到87.5的频率,然后再开启本麦克风开关,(长按麦克风上第一个按钮3秒种让绿色灯亮起)即可实现麦克风的无线配对使用。
此时就可以讲话了,接下来你就需要设置手机平板或者是麦克风的背景音乐的传输了。
2:手机连接方法打开你的设备,这里可以是手机、平板、台式电脑、笔记本电脑,带输出功能的一切音源,此说明书以手机设置为主,其它设备的设置也类似,完成第一步的FM连接之后,大家不要再操作麦克风了,先打开你的手机,下载《酷我K歌》APP,安装到自己的手机,使手机在不使用我们的麦克风的状态下戴上自己的耳机,本机自身能实现K歌唱歌的状态下,证明本身手机端暂时输出信号没有问题了,接下来呢,开始连接手机端了,(此点大家注意,一定确认你的手机在不用麦克风的状态下能正常使用软件时进行连接此麦克风)接下来先确认你的手机型号和品牌3.5也就是耳机接口的位置是国家标准还是国际标准,我在这里以苹果手机和三星手机为例说明,苹果手机耳机孔接口是用我们麦克风里面的美标线,(线上有标识)而三星手机则是用国标线(线上有标识)客户需要确定自己的手机耳机接口是国标还是美标,如不能确定,也可以2条线都试试,哪一条能用就用哪一条。
数字无线话筒使用说明书

数字无线话筒使用说明书(共4页) -本页仅作为预览文档封面,使用时请删除本页-数字无线话筒使用说明书一、手持开关机1.将两节5号电池装入手持并拧紧网头(注意电池负极朝下,电池装反将损坏手持),向上推开关打开手持,此时屏幕背光亮起并显示ON然后滚动显示CH 000—CH199,3秒后背光熄灭,手持进入开机状态。
2.向下推开关屏幕亮起并显示OFF,然后背光熄灭同时屏幕无显示,手持关机。
二、接收机开关机1.将12V开关电源插入接收机,接收机电源指示灯亮起2.按电源键可以开启和关闭接收机电源。
3.断电后重新通电主机将自动进入开机状态,此时无需再按电源键开机。
三、对码1.接收机开机后按功能键进入A通道对码状态,电源指示灯和A通道的射频指示灯亮,此时A通道可以对码,再按功能键进入B通道对码状态,电源指示灯和B通道射频指示灯亮,此时B通道可以对码。
再按功能键又将切换到A通道,如此循环。
2.按照上一步将接收机切换到需要对码的通道,再按电源键,该通道射频指示灯闪烁,此时打开任意一支手持,接收机将自动与手持实现连接,连接成功后该通道射频指示灯和音频指示灯同时亮起一秒。
说明这个通道的手持对码成功,即可使用。
3.重复步骤1和步骤2以实现另一个手持与对应通道的对码。
四、高低功率设置(根据使用范围来选择功率的高低)1.将接收机电源线拔除,同时按住功能键和电源键再将电源插入主机,此时电源灯闪烁设备进入功率设置状态。
a.按功能键:手持将被设置为小功率,使用半径15m;b.按电源键:手持将被设置为大功率,使用半径35m。
2.设置好功率后要将电源线拔除重插一次。
3.重插接收机电源查看功率的设置情况,如果A通道音频和射频灯闪一次表示低功率,如果B通道音频和射频灯闪一次表示高功。
网头屏幕电源开关5 A 通道音频指A 通道射频指功能键 B 通道射频指B 通道音频指电源键 电源指。
SONY UHF无线麦克风操作指南说明书

Please follow the instructions in this manual to obtain the optimum results from this unit. We also recommend that you keep this manual handy for future reference.WM-4210WM-4220UHF WIRELESS MICROPHONE OPERATING INSTRUCTIONS•To prevent the electromagnetic wave from badly influencing medical equipment, make sure to switch off the unit's power when placing it in close proximity to the medical equipment.•When the unit is not in use for 10 days or more, be sure to take the battery out of the unit because battery leakage may cause personal injury orcontamination of environment.•Make sure to observe the following handlingprecautions so that a fire or personal injury doesnot result from leakage or explosion of the battery.·Do not short, disassemble, heat nor put thebattery into a fire.·Never charge batteries of the type which are notrechargeable.·Do not solder a battery directly.·Be sure to use the specified type of battery.·Note correct polarity (positive and negativeorientation)when inserting a battery in the unit.·Avoid locations exposed to the direct sunlight,high temperature and high humidity when storingbatteries.1. SAFETY PRECAUTIONS•Be sure to read the instructions in this section carefully before use.•Make sure to observe the instructions in this manual as the conventions of safety symbols and messages regarded as very important precautions are included.•We also recommend you keep this instruction manual handy for future reference.Safety Symbol and Message ConventionsSafety symbols and messages described below are used in this manual to prevent bodily injury and property damage which could result from mishandling. Before operating your product, read this manual first and understand the safety symbols and messages so you are thoroughly aware of the potential safety hazards.2. GENERAL DESCRIPTIONThe WM-4210 Wireless Microphone employs a dynamic microphone element and is suitable for vocal applications.The WM-4220 Wireless Microphone employs an electret condenser microphone element and is suitable for speech applications.3. FEATURES•One frequency can be selected from 16 operating frequencies of 690 – 865 MHz.•An optimized PLL-synthesizer minimizes the oscillation frequency drift resulting from the ambient temperature or voltage fluctuation.•Battery lamp indicates battery consumption to prevent the unit from malfunctioning when the battery level remarkably decreases.4. HANDLING PRECAUTIONS•Do not expose the unit to rain or an environment where it may be splashed by water or other liquids, as doing so may result in unit failure.•Never open nor remove the unit case to modify the unit. Refer all servicing to your nearest TOA dealer.•Take care not to drop the unit onto the floor nor bump it against a hard object as the unit could fail.•Do not place the unit in locations of high temperature (ex. in a car parked in summer) or high humidity as the unit could fail.•Do not use the unit in locations where it is exposed to seawater.•To clean, use a dry cloth. When the unit gets very dirty, wipe lightly with a cloth damped in a dilute neutral cleanser, then wipe with a dry cloth. Never use benzine, thinner, or chemically-treated cleaning towel.•Avoid using a mobile telephone near the wireless microphone in use. Noise could be picked up.5. NOMENCLATURE[WM-4210][WM-4220]Channel select switchBattery clip6. BATTERY INSERTIONStep 1.Hold the microphone body and rotate the microphonegrip counterclockwise to remove it.Step 2.Insert the battery 6LR61 (Alkaline 9 V) according tothe instructions attached to the inside of the batterycompartment. Pay attention to the correct polaritywhen inserting the battery.Step 3.Replace the microphone grip by sliding and rotating itclockwise.Battery replacement•A brand-new battery will provide the power enough to operate the unitcontinuously for 10 hours.•As long as the battery has sufficient power for the microphone to functionproperly, the orange LED will light. When the orange LED starts to fade andthen flash, replace it with a new one.7. OPERATIONStep 1.Make sure that the receiver and the wireless microphone are of the same channel (frequency).Step 2.If they are not identical in channel, you have to adjust the channel switch.Step 3.Place the microphone ON/OFF switch in the ON position.The orange LED indicates the circuit is active.Step 4.Make sure to shift the ON/OFF switch back to the OFF position after using the wireless microphone.8. OPERATIONAL HINTS•The microphone's service distance is 3 – 120 m. When the microphone user moves in a facility, signal dropouts (momentary losses of signal reception) may be encountered. These dropouts are caused by the building's architectural designs or materials which block the travel of or reflect the radio signal. If this occurs,the user needs to change locations for better signal reception.•The proper operation of your wireless system may be interfered with by other system operating on the same frequency. In such cases, change the operating frequency of your system. (As to dealing with the interference, refer to the operating instructions of the wireless tuner.)•Should you have any questions regarding the use or availability of TOA wireless products, please contact your local TOA dealer.9. CHANNEL NUMBER SETTINGStep 1.Switch off the power. Rotate the microphone gripcounterclockwise to remove it.Step ing the supplied screwdriver, set the Channel settingswitch pointer to the desired channel number.Step 3.Replace the microphone grip.Note:Make sure that the wireless microphone is identical tothe wireless tuner in the channel number. Should themicrophone's setting differ from that of the tuner, thetuner does not receive the microphone signal.Orange LED Indicates the battery level by lighting orflashing.10. SPECIFICATIONSModel No.WM-4210WM-4220Microphone Element Dynamic type Electret condenser typeCardioid pattern Cardioid patternEmission F3EFrequency Range 690 – 865 MHz, UHFSelectable Channel 16 channelsRF Carrier Power Less than 50 mWTone Frequency32.768 kHzMaximum Input Level130 dB SPL125 dB SPLMaximum Deviation±40 kHzAudio Frequency Response100 – 12,000 Hz200 – 12,000 HzDynamic Range (AF Circuit)More than 100 dB (with WT-4810)Battery 6LR61 (9 V x 1)Battery Life More than 10 hours (alkaline)Indicator Power/Battery lamp (orange LED)Antenna Built-in typeOperating Temperature –10 to +50°CFinish Resin, coating, dark grayDimensions ø50 x 235.2 mmø45 x 235.2 mmWeight 270 g (with battery)250 g (with battery)Note:The design and specifications are subject to change without notice for improvement.• AccessoriesMicrophone holder (with stand adapter) (1)Screwdriver (for setting) (1)Storage case (1)License requirementOperation is subject to the following two conditions:(1) This device may not cause harmful interference, and (2) this device must accept any interference received, including interference that may cause undesired operation.133-07-180-90。
- 1、下载文档前请自行甄别文档内容的完整性,平台不提供额外的编辑、内容补充、找答案等附加服务。
- 2、"仅部分预览"的文档,不可在线预览部分如存在完整性等问题,可反馈申请退款(可完整预览的文档不适用该条件!)。
- 3、如文档侵犯您的权益,请联系客服反馈,我们会尽快为您处理(人工客服工作时间:9:00-18:30)。
MC-300V
无线麦克风使用说明书一、前面板功能说明
电源开关
LCD液晶显示屏
通道A音量控制旋钮,调节此旋钮可控制通道A音量输出之大小
通道B音量控制旋钮
天线A
天线B
铁金属面板
二、后面板功能说明
混合输出插座
独立通道B输出插座
独立通道A输出插座
平行输出接口A和B
DC电源插座
面版
三、LCD液晶显示屏功能说明
四、可选配件
1、手持式无线麦克风
音头/ 网头
手持管体
电池状态及电源指示灯,打开电源开关后,指示灯随之闪亮。
当电池电压低于标准工作电压时,此灯变为常亮,此时应尽快更换电池。
电源开关
电池盒,用以盛装电池,电池电力不足时要及时按开更换。
电池盖
可更换橡胶色带
可拆管尾
2、腰挂式无线麦克风
受音头
音头插座
电源指示灯
电源开关
电池盒
发射天线
频道转换开关
增益调节
五、接收机操作说明
1.拉出天线A和B,使之与机体成90度角。
2.将电源线一头插入本机电源插座,另一头插入供电插座,注意电压要符合当地的市电电压。
3.音频输出的连接
◆混合输出:将音频线一端插入“MIX OUT”插座,另一端插入前置放大器的“AUX”
输入接口或“EMC”优先接口。
◆独立输出:将附带音频线一端插入“CH.A”或“CH.B”插座,另一端插入前置放大
器的“AUX”输入接口或“EMC”优先接口。
4.打开电源开关,LCD显示屏亮,并显示信息。
5.关机前,请将音量调整到最小,打开麦克风后,再调整到适当的音量,以保护音响设备。
六、接收机的安装注意事项
离地面要高于一米
距离面要大于一米
天线要全部拉出,否则将会影响收讯效果
七、手持麦克风操作说明
1.打开电池盒盖,装入2节1.5V电池,注意电池的正负极不能接反。
2.拔电源开关到“NO”,如果接收机没有接收到信号,应检查电池电夺是否不足或电池极性是否接反。
3.拔音频静音开关到“MUTE”(中间档)时,接收机将切断音频输出,抑制噪音通过接收机。
八、性能指标
1.综合性能
载波频率:VHF200-270MHZ 频率稳定性:<±30ppm
动态范围:>90dB 谐波失真:<0.5%
频率响应:40HZ-15KHZ±3 dB 音频输出:独立式:0-±200mV
混合式:0-±200mV
2.固定式接收机
变压器电压:15V 350mA
消耗功率:4WATT
信噪比:>90 dB
假象干扰比:>80 dB
邻道干扰比:>80 dB
接收灵敏度:>10dBu(SINAD=30 dB)
去加重:50uS
3.手持麦克风
发射功率:8.5mW
调制方式:FM,F3F
最大调制度:±25KHZ
高次谐波:低于主波基准40DBI以上
使用电源电压:2节1.5V电池
连续使用时间:6小时
4、腰挂式无线麦克风
使用音头:背极电容式
发射功率:300mW
调制方式:FM,F3F
最大调制度:±25KHZ
高次谐波:低于主波基准40DBI以上
使用电源电压:9V层叠式电池
连续使用时间:6小时(对于GP1604S 9V型电池)。
