大金空调调试手册
大金空调调试手册

大金空调调试手册(总10页) -CAL-FENGHAI.-(YICAI)-Company One1-CAL-本页仅作为文档封面,使用请直接删除SHANGHAI DAIKIN AIR CONDITIONING CO., LTD.一、注意事项: 1.本说明书适用于上海大金空调远程监控接口的安装及调试使用。
2.适用机型:FVY71/125LMVL 。
3.适用接口:RS232/485接口。
二、准备工作1. 在改造前准备好监控板及附件,十字螺丝刀,尖头钳,9孔信号线(见下图)及调试用笔记本电脑。
2. 改造时应由两人进行。
3.9孔信号线示意图三、RS232/485接口板安装步骤远程监控接口 安装调试说明书1.拉开下回风格栅;2.旋下两颗螺钉;3.卸下面板;4.卸下电气盒盖板;5.卸下上面板;6.向下斜拉,取下面板;7.卸下电气盒; 8.准备好监控板,及其附件;9.在盒体上插入插脚; 10.安装监控板;11.插上接线孔保护套; 12.将黑白信号线接入第一组螺栓;黄蓝电源线插入插孔;RS232信号线(附配)插入白色插座。
13.安装上盒盖; 14.将监控盒装在电气盒后面;15.安装电气盒; 16.将电源线另一头插在空调电脑板上,注意极性一致;17.信号线接在P1、P2上, 18.盖上电气盒盖板;19.将九孔信号线与监控板接口连接; 20.另一头与电脑连接;21.开启电脑,进行调试; 22.调试结束后,装上面板。
23.装下面板; 24.拧紧螺钉;25.盖紧盖板,改造结束。
注:新监控板安装步骤及方法与旧监控板一致。
四、监控板设置在使用监控板之前需根据要求对监控板进行设置工作,具体设置方法,及设置内容如下:⒈按下方框所示按钮,红灯闪烁。
⒉遥控器过60秒后显示“88”。
⒊再过15秒后显示正常。
⒋持续按TEST键4秒,遥控器如图显示“10”。
⒌按下图示按钮直到遥控器显示⒍按下图示按钮直到遥控器显“20”。
示“15”。
⒎按下时钟键改变显示屏左边数值,按下时钟键改变显示屏右边数值。
VIP资料┃大金空调内外机设定方法、强制运转、故障代码......
VIP资料┃大金空调内外机设定方法、强制运转、故障代码......
一、VRV 室外机现场设定的维修应用
1、各种设定模式的切换
2)LED显示型外机PC板
2、常用设定—监控模式
查询室内机连接台数:查询当前室外机PC板已识别出的室内机连接台数。
可检查内外机P板是否相互识别,确认内外机自检通信是否正常。
② 数码管显示型室外PC板操作方法
3、常用设定—设定模式2
1) 真空模式:可打开室外机旁通管路电磁阀及内外机膨胀阀,使整个管路处于导通,操作方法:
①进入设定模式2 的第21项起用“真空模式”功能;
②真空完成后,按BS3(RETURN)退出该运转。
② 数码管型室外PC板操作方法
2) 各种强制运转功能
应急运转:正常操作,跳过故障部分,停止均油等功能;
配线检查运转:通过内机热交温度与压力传感器判定;
内机风扇强制运转:检测内外机传送线路通断状态,可检测室内风机转速控制状态;
内机强制运转:制冷模式可作为手动回油,辅助判断变频器弱电控制状态,分析冷媒偏流的大致成因。
① 室内机强风运行
② 应急运转VRV Ⅲ P 系列
③ 应急运转( 对于VRV Ⅲ全变频系列和VRV X系列、VRV X7系列)
④ 室内机强制运行
二、VRV 室内机现场设定应用。
大金空调用户手册i-ManagerⅢ具体操作方法介绍

目录1.启动和停止i-ManagerⅢ的运行 (1)1.1启动运行 (1)1.2停止运行(直至关闭电源) (2)1.3停电管理:自动停止/再启动 (2)1.4应急停机管理:失火状态/解除失火状态 (2)2.登录/退出登录 (4)2.1登录i-ManagerⅢ (4)2.2退出登录 (4)3.操作详述 (5)3.1管理组 (5)3.1.1状态监视列表 (5)3.1.2启动/停止操作 (9)3.1.3显示详细信息 (9)3.1.4设置设备 (11)3.1.5表列查看功能 (17)3.2控制组 (18)3.2.1监视控制组 (19)3.2.2通过控制组进行集中控制 (19)3.3图像浏览 (21)3.3.1基本原理 (21)3.3.2状态监视 (22)3.3.3控制各管理点和控制组 (23)3.4设定日程计划 (23)3.4.1日程基本原理 (24)3.4.2管理基准日历 (24)3.4.3创建调度程序 (24)3.4.4年度历 (25)3.4.5每周日程 (26)3.4.6执行日程 (28)3.4.7启用/禁止指令 (30)3.4.8复制日程表 (30)3.4.9删除日程 (31)3.4.10日程的更名 (32)3.5联锁功能 (33)3.5.1设定联锁程序 (34)3.5.2设置应急停止程序 (37)3.6数据管理 (42)3.6.1大楼管理应用 (42)3.6.2配置租户 (43)3.6.3图形报告 (47)3.6.4电力按比例分配设置(选项) (55)3.7系统选项 (56)3.7.1配置管理组 (57)3.7.2配置控制组 (60)3.7.3配置用户登录 (63)3.7.4编辑管理点 (68)3.7.5设置集中控制 (69)3.7.6配置蜂鸣器 (70)3.7.7配置日志选项 (71)3.7.8调节时间 (71)3.7.9启用确认对话框 (72)3.7.10设置夏日制时间 (73)3.7.11自动转换 (73)3.7.12可调节温度 (75)3.7.13温度极限 (76)3.7.14制热模式最佳化 (77)3.8窗口之间的移动 (77)3.8.1简单移动 (78)3.8.2通过保留按钮进行的移动 (78)3.8.3自动循环顺序 (79)3.9帮助 (81)3.10异常显示和日志管理 (81)3.10.1显示故障消息 (82)3.10.2操作人员日志显示功能 (82)3.10.3详细日志窗口 (83)1.启动和停止i-ManagerⅢ的运行1.1启动运行如下所示,计算机电源接通时,i-ManagerⅢ就开始工作。
大金控制手册
大金控制手册最新(总47页) -CAL-FENGHAI.-(YICAI)-Company One1-CAL-本页仅作为文档封面,使用请直接删除大金(中国)投资有限公司技术部前言目前,空调市场对控制系统的要求越来越多,为了方便公司员工能够更好地对应用户所提出的控制需求,了解掌握大金控制产品知识,故整理总结了相关控制产品及知识,并制作成册。
本手册中总结了公司现有自控产品的规格、功能及设计要点等,方便大家查阅。
本手册在内容上还有不尽完善之处,虽经多次校对,但难免还有遗漏甚至出错之处,今后将不断更新充实内容。
3空调单独控制、集中控制i-M a n a g e rⅢ2 i-C o n t r o l l e r4 i-e a s y6集中遥控器79统一O N/O F F开关空调状态显示及故障报警i-M a n a g e rⅢ2 i-C o n t r o l l e r4 i-e a s y6集中遥控器7统一O N/O F F开9关温度控制i-M a n a g e rⅢ2 i-C o n t r o l l e r4 i-e a s y6集中遥控器7遥控器权限设定[空调开关|运转模式|温度控制]i-M a n a g e rⅢ2 i-C o n t r o l l e r4 i-e a s y6集中遥控器7模式转换[制冷|制热|通风]i-M a n a g e rⅢ2 i-C o n t r o l l e r4 i-e a s y6集中遥控器7日程定时设定i-M a n a g e rⅢ2 i-C o n t r o l l e r4 i-e a s y6集中遥控器7电量划分i-M a n a g e rⅢ2室温上下限设定i-M a n a g e rⅢ2 i-C o n t r o l l e r4 i-e a s y6联锁控制[火警联动|故障联动]等i-M a n a g e rⅢ2 i-C o n t r o l l e r4开关运转、监视B AC n e t12L o n W o r k s14 K R P4A8016D R C H-R417温度控制、监视B AC n e t12L o n W o r k s14 K R P4A8016D R C H-R417运转模式设定、监视[制冷|制热|通风]B AC n e t12L o n W o r k s14D R C H-R417故障监视B AC n e t12L o n W o r k s14 K R P4A8016D R C H-R418联锁控制[火警联动|故障联动]等B AC n e t12L o n W o r k s14 K R P4A8016D R C H-R418对遥控器权限设定及监视[空调开关|运转模式|温度控制]B AC n e t12L o n W o r k s14风量控制与监视B AC n e t12L o n W o r k s14D R C H-R418压缩机运转状态监视B AC n e t12名词解释18疑问与解答21附录一:控制产品功能一览表27附录二:控制产品兼容表30附录三:控制产品适用机型一览表32附录四:控制用选配件及转接P板功能一览表35附录五:控制信号线要求一览表36附录六:i-M a n a g e rⅢ控制系统设备配件表376本章节中的控制设备不能与非大金的控制设备及软件兼容i-M a n a g e rⅢ系统1.规格2.外形尺寸图3.系统框架4.系统概述1)注意点:✓i-M a n a g e rⅢ系统控制单元i P U有4个DⅢ-N e t端口,每个端口最多可连64组内机,10套外机。
大金空调开机调试流程

遥控器受潮可能导致按键失灵或内部电路 故障。将遥控器放在通风处晾干,或使用
电吹风吹干,以解决问题。
电池没电
遥控器电池没电会导致遥控器失灵。更换 新电池即可解决问题。
红外线接收器故障
红外线接收器故障会导致遥控器无法正常 控制空调。请专业人员对红外线接收器进 行检查和维修是解决此问题的关键步骤。
室内机应远离电视机、收音机等磁场 干扰源。
安装过滤网
01
按照说明书要求正确安装过滤网 。
02
确保过滤网无破损、污垢等影响 使用效果的因素。
准备工具和资料
准备螺丝刀、扳手等常用工具。 准备好空调使用说明书、保修卡等相关资料。
02
开机操作
打开电源开关
确保电源插座正常供电,将电 源插头插入插座。
打开电源开关,听到“咔嚓” 一声响,表示电源已接通。
大金空调开机调试流程
• 开机前准备 • 开机操作 • 调试步骤 • 调试结果检查 • 常见问题及解决方案
01
开机前准备
检查电源连接
电源线是否牢固连接, 无裸露部分。
电源插座是否接地良 好。
电源电压是否符合空 调使用要求。
确认室内外机位置
确保室内外机位置通风良好,无阳光 直射。
室外机应放置在平稳、无振动的地方, 确保安全。
测试制热功能
总结词
测试制热功能是否正常
详细描述
切换到制热模式,观察制热效果是否良好,包括室内温度上升速度、制热温度范围等。
检查送风和回风
总结词
检查送风和回风是否顺畅
详细描述
观察送风口和回风口的风量是否 适中,有无堵塞或异常声响。检 查过滤网是否清洁,如有需要更 换或清洗。
调整风速和摆风
大金VRV空调安装及调试修改
毕业设计(论文)题目:大金VRV机组(RHXYQ26QY1)空调安装及调试二级学院:应用工程学院专业班级:供热通风与空调工程技术姓名:王林利学号:1522112529指导教师:徐中干2014年 3 月 13 日目录摘要 (1)关键字 (1)引言 (2)1. 大金VRV-X系列中央空调机型介绍 (3)1.1 室内机的机型简介 (3)1.1.1 智能感知环绕气流嵌入机 (3)1.2 室外机的机型简介 (4)1.2.1 室外机基本参数 (4)2. 安装施工方法及技术要点 (5)2.1 系统安装工艺流程 (5)2.2 安装要点及技术要求 (6)2.2.1 钻孔及处理 (6)2.2.2 室内机的安装 (6)2.2.3 冷媒配管 (6)2.2.4 冷凝水管的安装: (7)2.2.5 信号控制线作业 (8)2.2.6 绝热工作 (9)2.2.7 冷媒系统的排污 (9)2.2.8 气密性试验 (9)2.3 室外机安装 (10)2.3.1 室外机安装空间(单机安装) (10)2.3.2 室外机安装空间(多台安装) (10)3. 风管安装 (11)3.1 风管安装基本流程 (11)3.2 风管系统安装要求 (11)4. 工程验收及调试 (13)4.1 隐蔽工程验收 (13)4.1.1 工程验收内容 (13)4.1.2 工程验收方式 (13)4.2 冷媒配管气密性试验 (14)4.2.1 可能泄漏的位置 (14)4.2.2 检查步骤(氮气试压) (14)4.3 冷凝水管验收 (14)4.3.1 现场检查 (14)4.3.2 试验检查 (14)4.4 调试整理及验收 (15)4.4.1 调试整理内容包括 (15)4.4.2 验收方式标准 (15)4.5 调试流程 (16)4.5.1 真空干燥需要注意点 (16)4.5.2 制冷工质的充填 (17)4.6 运转测试 (17)4.6.1 检查运转 (17)4.6.2 室内机运转数据表4-1 (17)4.6.3观察项目表4-2 (17)4.6.4室外机运转数据表4-3 (18)4.6.5 系统调试总结 (18)总结 (19)参考文献 (20)摘要浙江丹桂机电设备安装有限公司是绿城电商专业子公司,业务涵盖暖通工程设计、设备销售、工程安装及售后维保。
大金使用说明书

大金空调使用说明书公司工程部制作年月日1.开/关钮:按下按钮,则系统开始运转,再按一次按钮,则系统停止运转。
2.运转指示灯(红色):在运转时,该指示灯点亮。
3.“”显示在控制下转换:当该显示出现时,不能使用控制器进行制冷、制热、、除湿运转的转换。
4.“”显示摆动挡板:可进行固定风向和自动摆动设定;可通过21键来进行调节。
5.“”显示(设定温度):可通过17键来调节温度。
6.“”“”“”“”显示(运转方式):该显示表示现在运转的方式;可通过20键来调节。
7.“”显示(程序设定的时间):该显示表示程序的系统开始运转和停止运转的时间。
8.“”显示(检验/试运转):当按下检验/试运转按钮时,该显示表示系统现在的运转方式。
9.“”显示(处于集中控制之下):当该显示出现时,表示系统处于集中控制之下(本显示不是标准规格)。
10.“”显示(送风速度):该显示表示风扇的速度,“低”或“高”。
11.“”显示(空气滤尘网清扫时期):请参照室内机附带的使用说明书。
12.“”显示(除霜/热起动):⑴除霜运转随着室外机盘管上凝结的冰霜增多,制热效果将降低,系统将自动进入除霜运转;室内机风扇停止运转,控制器上显示“”(除霜/热起动);除霜运转6至8分钟(最长10分钟)以后,系统将回到制热运转。
⑵热起动为了防止在制热开始运转时,从室内机吹出冷风,室内机的风扇自动停止运转。
控制器上显示“”(除霜/热起动)。
13.定时器方式启动/停止钮:由专业人员操作。
14.定时器开/关钮:由专业人员操作。
15.检验/运转钮:本按钮仅可由专业的维修人员进行维修时使用!正常运转时请勿使用!16.程序设定时间钮:使用该钮,可设定程序“启动或停止”系统运转的时间。
17.温度设定钮:使用该钮,可设定温度调节器的设定温度。
18.空气滤尘网清扫指示复位钮:请参照室内机附带的使用说明书。
19.风扇速度控制钮:按该钮,可根据您的要求选择风扇的速度,“低”或“高”。
大金VRV空调安装调试
4、排水管工程
2)单机排水管尺寸选择(VRVⅡ) )单机排水管尺寸选择( Ⅱ
室内机 型号 排水管 PVC32(内径25) (内径 ) PVC32(内径25) (内径 ) PVC32(内径25) (内径 ) PVC32(内径25) (内径 )
PVC32(外径32、内径 ) (外径 、内径25) 请参照其他资料) (FXM200/250请参照其他资料) 请参照其他资料
注:图上铜管左侧可用盖子封住,留细小空隙,以节省氮气。 图上铜管左侧可用盖子封住,留细小空隙,以节省氮气。
3、冷媒配管工程
13)冷媒管的冲洗 )
●目的:去除钎焊时的氧化膜,去除灰尘和水分。 目的:去除钎焊时的氧化膜,去除灰尘和水分。 方法: 用减压阀将氮气瓶压力上升至5.0kgf/cm2; ●方法:①用减压阀将氮气瓶压力上升至 ②检查管的另一端有无氮气; 检查管的另一端有无氮气; 用木块抵住管口; ③用木块抵住管口; 当压力上升到手掌不能支撑时,松手; ④当压力上升到手掌不能支撑时,松手; 再次用木块抵住管口,重复第④步骤; ⑤再次用木块抵住管口,重复第④步骤; 用纱布擦拭管口,反复进行冲洗直到不出现脏物和潮湿; ⑥用纱布擦拭管口,反复进行冲洗直到不出现脏物和潮湿; ⑦如果不马上连接或抽真空,必须将管口封好。 如果不马上连接或抽真空,必须将管口封好。
VRV系统简介
VRVⅡ VRVⅡ
1、套筒插入工程
1)要点:排水管向下倾斜。 )要点:排水管向下倾斜。
●排水管道孔应使管道具有向下坡度,至少1/100,同时要考 排水管道孔应使管道具有向下坡度,至少 , 虑保温的厚度; 虑保温的厚度;
2)冷媒管的通孔直径也要考虑保温材料的厚度; )冷媒管的通孔直径也要考虑保温材料的厚度; 3)注意横梁的结构,有时部分梁不允许通孔。 )注意横梁的结构,有时部分梁不允许通孔。
大金空调调试手册

SHANGHAI DAIKIN AIR CONDITIONING CO., LTD.远程监控接口 安装调试说明书一、注意事项:1.本说明书适用于上海大金空调远程监控接口的安装及调试使三、RS232/485接口板安装步骤1.拉开下回风格栅;2.旋下两颗螺钉;3.卸下面板;4.卸下电气盒盖板;5.卸下上面板;6.向下斜拉,取下面板;7.卸下电气盒;8.准备好监控板,及其附件;9.在盒体上插入插脚;10.安装监控板;11.插上接线孔保护套;12.将黑白信号线接入第一组螺栓;黄蓝电源线插入插孔;信号线(附配)插入白色插座。
13.安装上盒盖;14.将监控盒装在电气盒后面;15.安装电气盒;16.将电源线另一头插在空调电脑板上,注意极性一致;17.信号线接在P1、P2上,18.盖上电气盒盖板;19.将九孔信号线与监控板接口连接;20.另一头与电脑连接;21.开启电脑,进行调试;22.调试结束后,装上面板。
23.装下面板;24.拧紧螺钉;25.盖紧盖板,改造结束。
注:新监控板安装步骤及方法与旧监控板一致。
四、监控板设置在使用监控板之前需根据要求对监控板进行设置工作,具体设置方法,及设置内容如下:⒈按下方框所示按钮,红灯闪烁。
⒉遥控器过60秒后显示“88”。
⒊再过15秒后显示正常。
⒋持续按TEST键4秒,遥控器如图显示“10”。
⒌按下图示按钮直到遥控器显示⒍按下图示按钮直到遥控器显“20”。
示“15”。
⒎按下时钟键改变显示屏左边数值,按下时钟键改变显示屏右边数值。
根据附表中的项目来改变设置。
在“20”项目下的设置完毕后按一下左图中的按钮。
⒏持续按TEST键4秒,遥控⒐持续按TEST键4秒,遥控器器显示“40”。
显示“50”后再根据步骤7进行相关操作。
10.所有项目设置完毕后,按下11.再按下监控板上“SS1”键,图中白色框里的按钮然后按60秒后遥控器显示“88”。
“TEST”键,遥控器显示正常。
60秒后遥控器显示“88”。
大金空调控制面板说明
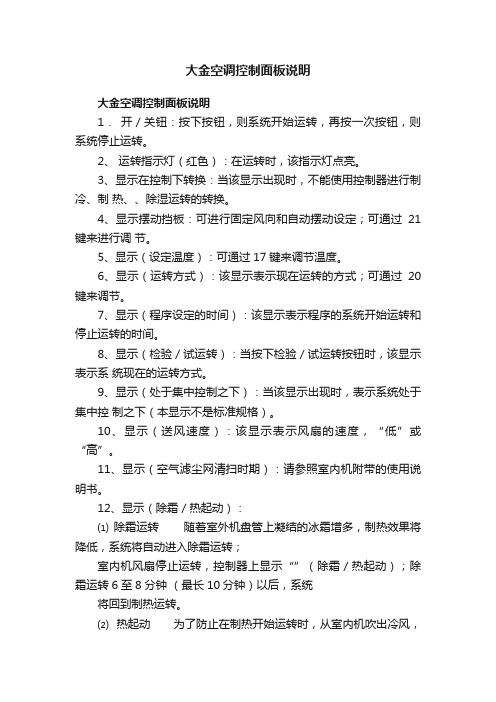
大金空调控制面板说明大金空调控制面板说明1.开/关钮:按下按钮,则系统开始运转,再按一次按钮,则系统停止运转。
2、运转指示灯(红色):在运转时,该指示灯点亮。
3、显示在控制下转换:当该显示出现时,不能使用控制器进行制冷、制热、、除湿运转的转换。
4、显示摆动挡板:可进行固定风向和自动摆动设定;可通过21键来进行调节。
5、显示(设定温度):可通过17键来调节温度。
6、显示(运转方式):该显示表示现在运转的方式;可通过20键来调节。
7、显示(程序设定的时间):该显示表示程序的系统开始运转和停止运转的时间。
8、显示(检验/试运转):当按下检验/试运转按钮时,该显示表示系统现在的运转方式。
9、显示(处于集中控制之下):当该显示出现时,表示系统处于集中控制之下(本显示不是标准规格)。
10、显示(送风速度):该显示表示风扇的速度,“低”或“高”。
11、显示(空气滤尘网清扫时期):请参照室内机附带的使用说明书。
12、显示(除霜/热起动):⑴ 除霜运转随着室外机盘管上凝结的冰霜增多,制热效果将降低,系统将自动进入除霜运转;室内机风扇停止运转,控制器上显示“”(除霜/热起动);除霜运转6至8分钟(最长10分钟)以后,系统将回到制热运转。
⑵ 热起动为了防止在制热开始运转时,从室内机吹出冷风,室内机的风扇自动停止运转。
控制器上显示“ ”(除霜/热起动)。
13、定时器方式启动/停止钮:由专业人员操作。
14、定时器开/关钮:由专业人员操作。
15、检验/运转钮:本按钮仅可由专业的维修人员进行维修时使用!正常运转时请勿使用!16、程序设定时间钮:使用该钮,可设定程序“启动或停止”系统运转的时间。
17、温度设定钮:使用该钮,可设定温度调节器的设定温度。
18、空气滤尘网清扫指示复位钮:请参照室内机附带的使用说明书。
19、风扇速度控制钮:按该钮,可根据您的要求选择风扇的速度,“低”或“高”。
20、运转方式选择钮:按该钮,可选择系统的运转方式。
大金家用空调vrv140j开机调试

大金家用空调VRV140J开机调试家用VRV-140J(RMX 140JVM)开机调试 (VRV=Variable Refrigerant Volume)主机功能:家用VRV-140J机组是一个高端技术、高质量的空调,最多能够接一拖七台内机运转,是复杂的居住环境空调。
制冷、制热时,最大功率可达到6.5HP,外机内机设计为节能型控制,制冷时运转频率可从25Hz~98Hz运转,制热时运转频率可从30Hz~105Hz运转,能够保证房间内精确温度控制。
外风机控制系统为直流变频控制,可一年四季制冷运转或低气温制热运转控制,制冷、制热、气管等温控制。
BP要求:家用VRV对BP安装、焊接、接线要求很高。
焊接时一定要用湿布裹好,防止焊接时高温烧坏热敏电阻,如果焊接时烧坏热敏电阻,只能外部追加热敏电阻、紧固在损坏位置上(旧件取不出)不能装错。
如有错误会影响电子膨胀阀的开启度。
如有BP装置空接头,暂时不用的(如少接一台内机)一定要接一段铜管后再密封焊接,而且还要做好保温以防产生凝露水。
BP装置可以悬吊于天花板上,也可以挂在墙上,但倾斜度必须在±5度以内,BP装置内部已进行整体发泡保温,如果需拆除螺丝,螺孔要求用铝制胶带封闭以防结露水。
热敏电阻位置和连接器的插脚编号(G-代表气管/ L-代表液管) (1-2)DLA (3-4)DGA黑色线(5-6)DLB (7-8)DGB蓝色线 (9-10)DLC (11-12)DGC黄色线调试要求:试运转前,检查外机至BP1/BP2/BP3之间接线,打开液管阀门、气管阀门。
第一次接通电源后外机监控电脑板显示888,LED闪烁,过一分钟后闪烁BP连接室内机BP1连接内机台数;BP2连接内机台数;BP3连接内机台数。
如果显示正确就按SW6开关确认,闪烁就转变为持续点亮;如果室内机台数跟监控器上显示台数不符合就重新扫描,再不对,需检查BP至内外机的接线,重新再扫描确认,室外机接BP控制电线一定要先接BP1,然后接BP2、BP3。
大金vrv中央空调控制器说明书

1.开/关钮:按下按钮,则系统开始运转,再按一次按钮,则系统停止运转。
2.运转指示灯(红色):在运转时,该指示灯点亮。
3.“”显示在控制下转换:当该显示出现时,不能使用控制器进行制冷、制热、、除湿运转的转换。
4.“”显示摆动挡板:可进行固定风向和自动摆动设定;可通过21键来进行调节。
5.“”显示(设定温度):可通过17键来调节温度。
6.“”“”“”“”显示(运转方式):该显示表示现在运转的方式;可通过20键来调节。
7.“”显示(程序设定的时间):该显示表示程序的系统开始运转和停止运转的时间。
8.“”显示(检验/试运转):当按下检验/试运转按钮时,该显示表示系统现在的运转方式。
9.“”显示(处于集中控制之下):当该显示出现时,表示系统处于集中控制之下(本显示不是标准规格)。
10.“”显示(送风速度):该显示表示风扇的速度,“低”或“高”。
11.“”显示(空气滤尘网清扫时期):请参照室内机附带的使用说明书。
12.“”显示(除霜/热起动):⑴除霜运转随着室外机盘管上凝结的冰霜增多,制热效果将降低,系统将自动进入除霜运转;室内机风扇停止运转,控制器上显示“”(除霜/热起动);除霜运转6至8分钟(最长10分钟)以后,系统将回到制热运转。
⑵热起动为了防止在制热开始运转时,从室内机吹出冷风,室内机的风扇自动停止运转。
控制器上显示“”(除霜/热起动)。
13.定时器方式启动/停止钮:由专业人员操作。
14.定时器开/关钮:由专业人员操作。
15.检验/运转钮:本按钮仅可由专业的维修人员进行维修时使用!正常运转时请勿使用!16.程序设定时间钮:使用该钮,可设定程序“启动或停止”系统运转的时间。
17.温度设定钮:使用该钮,可设定温度调节器的设定温度。
18.空气滤尘网清扫指示复位钮:请参照室内机附带的使用说明书。
19.风扇速度控制钮:按该钮,可根据您的要求选择风扇的速度,“低”或“高”。
20.运转方式选择钮:按该钮,可选择系统的运转方式。
大金调试流程+故障代码
一字、十字螺丝刀
活动扳手
公制内六角螺丝刀
※工具没破损,可以正常使用;
参考图
28/09/2011 大金(中国)投资有限公司广州分公司 3
相信大金 相信专业
一、调试前工具准备、检查 调试前工具准备、 真空泵逆流 截止阀
※机器可以正常 使用; ※选择不小于 40L/min的排气 量; ※冷冻机油在油 镜的1/3~2/3之 间; ※保证冷冻机油 不污蚀;
参考图
28/09/2011 大金(中国)投资有限公司广州分公司 14
相信大金 相信专业
三、追加冷媒
※确认已按照计 算出来的冷媒量 进行追加; ※按要求完全打 开各室外机的高 低压截止阀; ※拧紧截止阀的 螺母;
参考图
28/09/2011 大金(中国)投资有限公司广州分公司 15
相信大金 相信专业
2 15(25) 3 5 6
直接风管连接 (使用风管直接连接室内机和热回收 通风设备时) 排水泵加湿器联锁选择 通过遥控器现场设定选择各通风设 定 通过遥控器现场设定选择各通风设 定
未配备
配备
W (2个方向) — — —
—
未配备 未配备 未配备
配备 配备 配备
— — —
出厂设定
28/09/2011 大金(中国)投资有限公司广州分公司 34
1 2 12(22) 3 4
— — — 08:7
5
停电自动复位
未配备
配备
出厂设定
28/09/2011 大金(中国)投资有限公司广州分公司 32
相信大金 相信专业
设定内容和代码号
模式 号 设定 开关 号 0 设定内容 01 高送风速度 (安装在天花板高于2.7m的地方时设 定)仅FXFQ、FXHQ 气流方向的选择 (安装挡风垫组件时设定)仅FXFQ 气流方向调节(安装装饰板时设定) 现场设定风向位置 现场设定风扇速度选择(通过相位控 制的排气口来进行风扇速度控制) N 第二代码号 02 H 03 S 04 —
大金空调-正爵KTS0协议调试说明

KanonBUS网关KTS0-DK621可完美实现符合EIB/KNX的系统与大金空调的无缝系统集成,并获大金空调官方指定授权和推荐(具体相关说明请咨询大金空调厂家或我司) 组地址第一位[main group]定义为14开头的组地址来实现控制命令,状态响应以15开头的组地址来实现。
组地址第二位[middle group]对应大金空调室内机地址的第一位减1。
组地址第三位对应大金空调室内机地址的第二位及具体操作功能。
具体规则为(大金室内机地址为[x]-[y]): 14/([x]-1)/([y]*3+1) 为开关控制:对第一台室内机开关控制组地址为14/0/114/([x]-1)/([y]*3+101) 为风速控制:对第一台室内机风速控制组地址为14/0/101 14/([x]-1)/([y]*3+2) 为模式控制:对第一台室内机模式控制组地址为14/0/2 14/([x]-1)/([y]*3+3) 为温度设定控制:对第一台室内机温度控制组地址为14/0/315/([x]-1)/([y]*6+1) 为开关状态:对第一台室内机开关状态组地址为15/0/115/([x]-1)/([y]*6+101) 为风速状态:对第一台室内机风速状态组地址为15/0/101 15/([x]-1)/([y]*6+2) 为模式状态:对第一台室内机模式状态组地址为15/0/2 15/([x]-1)/([y]*6+3) 为温度设定状态:对第一台室内机温度状态组地址为15/0/315/([x]-1)/([y]*6+4) 为故障代码状态[预留, 默认不开启]:对第一台室内机故障代码状态组地址为15/0/4 15/([x]-1)/([y]*6+5) 为当前源自于空调风口传感器的室内温度状态: 对第一台室内机室内温度状态组地址为15/0/515/([x]-1)/([y]*6+6) 为当前源自于空调风口传感器的异常状态[预留, 默认不开启]:对第一台室内机室内温度传感器的异常状态组地址为15/0/6附一:[KTS0] 大金空调集成说明地址对应规则[详细点表见附二]大金空调室内机地址通常格式为"[x]-[y]",如第一台室内机通常为1-00,第18台通常为2-01,则此时控制组地址格式为14/0/-或14/1/-,状态组地址格式为15/0/-或15/1/-特点及功能·即插即用:KTS0-DK621使用通信组地址自绑定的方式来实现EIB/KNX系统与大金空调通信地址点表 的对应关系,用户无需编程,使用预设的组地址及对应关系表即可实现与大金空调的集成·网关自适应空调的连接台数,自动对所连接的所有室内机进行状态查询,最多可连接64台室内机·可实现开关控制、风速设定(3档或5档,根据所使用空调机型)、模式设定(制冷/制热/送风/干燥/自动) 温度设定;·可实现开关状态实时监测、风速状态监测、模式状态监测、温度设定状态监测、当前空调回风口温度 监测,可根据需求开启空调故障代码·支持大金自带温控面板与EIB/KNX系统之间的数据同步数据类型/长度对应规则控制开关及开关状态应使用1bit风速控制和状态应使用1byte(EIS6)的数据长度模式控制和状态应使用1byte数据长度温度控制和状态应使用EIS5的2-byte数据长度(非2-byte字节数据直接发送,须使用EIS5的温度数据,参见EIB/KNX协议)数据值对应规则和偏移量a. 开关值:1=开;0=关b. 风速值:5=高速;1=低速;2=中速档一;3=中速档二;4=中速档三c. 模式值:0=送风;1=制热;2=制冷;3=自动;7=除湿d. 温度值:完全等同。
大金空调调试手册.doc

远程监控接口安装调试说明书SHANGHAI DAIKIN AIR CONDITIONING CO., LTD.一、注意事项:1.本说明书适用于上海大金空调远程监控接口的安装及调试使用。
2.适用机型:FVY71/125LMV。
L3.适用接口:RS232/485接口。
二、准备工作1.在改造前准备好监控板及附件,十字螺丝刀,尖头钳,9 孔信号线(见下图)及调试用笔记本电脑。
2.改造时应由两人进行。
3.9 孔信号线示意图XH插座针号D-sub 9P 针针号信号名15GND2空34ER4空57RTS63TXD78CTS82RXD三、RS232/485 接口板安装步骤1. 拉开下回风格栅;2. 旋下两颗螺钉;3. 卸下面板;4. 卸下电气盒盖板;5. 卸下上面板;6. 向下斜拉,取下面板;7. 卸下电气盒;8. 准备好监控板,及其附件;9. 在盒体上插入插脚;10. 安装监控板;11. 插上接线孔保护套;12. 将黑白信号线接入第一组螺栓;黄蓝电源线插入插孔;RS232 信号线( 附配) 插入白色插座。
13. 安装上盒盖;14. 将监控盒装在电气盒后面;15. 安装电气盒;16. 将电源线另一头插在空调电脑板上,注意极性一致;17. 信号线接在P 1、P2上,18. 盖上电气盒盖板;19. 将九孔信号线与监控板接口连接;20. 另一头与电脑连接;21. 开启电脑,进行调试;22. 调试结束后,装上面板。
23. 装下面板;24. 拧紧螺钉;25.盖紧盖板,改造结束。
注:新监控板安装步骤及方法与旧监控板一致。
四、监控板设置在使用监控板之前需根据要求对监控板进行设置工作,具体设置方法,及设置内容如下:⒈按下方框所示按钮,红灯闪烁。
⒉遥控器过60秒后显示“88”。
⒊再过15秒后显示正常。
⒋持续按TEST键4秒,遥控器如图显示“10”。
⒌按下图示按钮直到遥控器显示⒍按下图示按钮直到遥控器显“20”。
示“15”。
⒎按下时钟键改变显示屏左边数值,按下时钟键改变显示屏右边数值。
大金 1.5匹 壁挂式空调 使用说明书

EspañolFrançaisEnglish AIR CONDITIONERWall Mounted TypeOPERATING MANUALBefore using this product, read these instructions thoroughly and keep this manual for future reference. Safety PrecautionsTo prevent personal injury to others, or property damage, read this section carefully before you use this product, and be sure to comply to thefollowing safety precautions.Incorrect operation due to failure to follow the instructions may cause harm or damage, the seriousness of which is classifi ed as follows:ContentsSafety Precautions ..........................................................En-1Indoor Unit Overview and Operations .............................En-2Remote Controller Overview and Operations ..................En-3Timer Operation...............................................................En-5General Informations on Operation .................................En-6Cleaning and Care...........................................................En-6Troubleshooting ...............................................................En-8shut completely. Incomplete closing might have an effect on theproper working or performance of the product.occurs.*:To stop forced cooling, press this button or START/STOP button onthe remote controller.Each time you press SET button on the remote controller, the angleof the vertical airfl ow direction louver moves as follows:1*: Default setting in each mode.• Do not adjust by hand.• At the beginning of AUTO or HEAT mode, they may stay position 1for a while for adjustment.• If you set the angle to position 4–7 for more than 30 minutes inCOOL or DRY mode, they automatically return to position 3.In COOL or DRY mode, if the angle is set to position 4–7 for many hours,condensation may be formed, and the drips may wet your property.fl ow direction louver,the angle of the power diffuser moves as follows:• In SWING operation, power diffuser does not move.Lights in TIMER operation, and blinks slowly when the timer settingerror is detected.As for the timer setting error, refer to “Auto-restart function” on page 6.operation.Adjust two knobs by hand.fi lters resist mildew growth.fl ow. Indoor Unit Overview and OperationsAIR CONDITIONER Wall Mounted Type Remote Controller Overview and OperationsYou can quickly start the operation with following 3 steps:Notes in HEAT mode:• At the beginning of the operation, the indoor unit operates at verylow fan speed for about 3–5 minutes for preparation, and thenswitches to the selected fan speed.• Automatic defrosting operation overrides the heating operation whenit is necessary.In COOL/DRY mode, the value needs to be set at lower temperaturethan current room temperature, and in HEAT mode, the value needsto be set at higher temperature than current room temperature.Otherwise, corresponding operation mode does not start to work.*:Temperature control is not available in FAN mode.In actual operation, the display is linked with the button operation, andonly shows the necessary indicators for each setting.(continued)when you want to quickly cool down or warm up the room.When you press the button to start the POWERFUL operation, the indoor unit emits 3 short beeps.POWERFUL operation is automatically turned off in the following situations:• Adjusted room temperature reached to the de fi ned temperature in temperature setting in COOL, DRY, or HEAT mode.• 20 minutes have passed after fi nishing the POWERFUL operation mode setting.It is not turned off automatically during setting of the POWERFUL operation.Notes:• The air fl ow direction and the fan speed are controlled automatically.• This operation cannot be performed simultaneously with ECONOMY operation.To return to normal operation, press the button again. Then the indoor unit emits 2 short beeps.50 °F (10 °C) so as to prevent the room temperature to drop too low.When you press the button to start the MIN. HEAT operation, the indoor unit emits 2 short beeps and the ECONOMY indicator (green) turns on.Notes:• In MIN. HEAT operation mode, only vertical air fl ow direction can beadjusted by usingbutton.• HEAT mode will not be performed if the room temperature is warm enough.• In multi-type air conditioning system, if other indoor unit is in HEAT mode, the temperature of the room where MIN. HEAT operation is performed will rise. When performing MIN. HEAT operation, all the indoor units should be run in MIN. HEAT operation mode.To return to normal operation, press the START/STOP button.The ECONOMY indicator turns off.• Signal transmit indicator on the remote controller display shows that signal from the remote controller is being transmitted.• Operating range is approximately 22 ft. (7 m).• You will hear a beep if the transmitted signal has been sent properly. If there is no beep, press the button on the remote controller again.• When AUTO is selected, the fan speed is automatically adjusted according to the operation mode.Starts or stops automatic swing of the vertical air fl ow direction louver.• Each time you press the button, the vertical air fl ow direction louver swings as follows:1Notes:• SWING operation may stop temporarily when the fan in the unit is rotating at very low speed or stopping.• In FAN mode, either of swing direction 1 ↔ 3 or 4 ↔ 7 is performed in accordance with the vertical air fl ow direction previously set before you start the SWING operation.Remote Controller Overview and Operationsfl ow direction.with gradual temperature control.a ballpoint pen or other small object in correct direction as shown in this fi gure.consumption than the other operations with a conservative adjustment of the room temperature.When you press the button, the ECONOMY indicator on the indoor unit turns on.• In COOL or DRY mode, the room temperature will be adjusted at a few degree higher than the de fi ned temperature.In HEAT mode, the room temperature will be adjusted at a few degree lower than the de fi ned temperature.• Especially in COOL or DRY mode, you can have improved dehumidi fi cation without signi fi cantly lowering the room temperature.Notes:• In COOL, HEAT, or DRY mode, the maximum output of thisoperation is approximately 70 % of usual air conditioning operation.• This operation cannot be performed during temperature monitoring by AUTO mode.• In multi-type air conditioning system, ECONOMY operation isperformed only on the indoor unit whose ECONOMY button on the corresponding remote controller is pressed.(Factory setting is °F.)AIR CONDITIONER Wall Mounted Type Remote Controller Overview and OperationsNote for timer settings:Any interruption of the power supply, such as a blackout or cutting off of a circuit breaker, makes the set internal clock go wrong.In such a case, the TIMER indicator on the indoor unit blinks, and you need to readjust the setting.O N timer or OFF timer1.Turn on the indoor unit by pressing the START/STOP button.OPERATION indicator on the indoor unit turns on.If the indoor unit is already operating, skip this step.2.Press the ON timer button or the OFF timer button.Clock indicator on the remote controller display starts blinking, andTIMER indicator on the indoor unit turns on.3.Adjust the time by pressing the SELECT button within about 5seconds, while the clock indicator is blinking.(About 5 seconds later, the remote controller display returns tostandby screen.)To cancel the timer and return to the normal operation, press theCANCEL button.To redo the timer setting, perform step 2 and 3.Program timer (combined use of the ON timer and the OFF timer)You can set an integrated ON–OFF or OFF–ON timer.Either of the timer whose confi gured starting time is closer to thecurrent time works fi rst, and the order of timer operation is displayedThe timer that is set later starts counting down after the countingdown of the preceding timer is fi nished.Notes:• If you change the setting value for the timer after the program timeris set, the counting down of the timer will be reset at that moment.• Time setting for each combination should be within a span of 24 hours.SLEEP timer1.Press the SLEEP timer button to activate the SLEEP timer.OPERATION indicator and TIMER indicator on the indoor unit turnson.2.Adjust the time by pressing the SELECT button within about 5seconds, while the clock indicator is blinking.(About 5 seconds later, the remote controller display returns tostandby screen.)Each time you press the button, the time changes as follows:To repeat the timer, press the SLEEP timer button whenindicator is not displayed on the remote controller display.To help you to fall asleep comfortably and prevent excessive warmingor cooling in sleep, the SLEEP timer controls the temperature settingautomatically in accordance with the set time shown as follows. Theair conditioner completely turns off after the set time has elapsed. Timer OperationRemote controller custom code settingUse the following steps to select the customcode of the remote controller.(Note that the air conditioner cannot receivea custom code if the air conditioner has notbeen set for the custom code.)1. P ress the START/STOP button untilonly the clock is displayed on the remotecontroller display.2. P ress the MODE button for at least fi veseconds to display the current custom code(initially set to ).3. P ress the SET TEMP. ( / ) button to change the custom codebetween →→→.Match the code on the display to the air conditioner custom code.4. P ress the MODE button again to return to the clock display. Thecustom code will be changed.If no buttons are pressed within 30 seconds after the custom codeis displayed, the system returns to the original clock display. In thiscase, start again from step 1.The air conditioner custom code is set to A prior to shipment.Contact your retailer to change the custom code.Wired Remote Controller (Option)The optional wired remote controller can be used.When you use remote controller, there are following different points ascompared with using wireless remote controller.[The additional functions for wired ones]• Weekly timer• Temperature set back timerAnd you can use both wired and wireless remote controller simultane-ously.(But function is limited)When the restricted functions on the remote controller are used, beep-ing sound will be heard, OPERATION, TIMER and the 3rd lamp of theindoor unit will fl ash.[The restricted functions for wireless ones]• SLEEP TIMER• TIMER• MIN. HEAT• POWERFUL OPERATIONDaily careWhen cleaning the indoor unit body, mind the following:• Do not use water hotter than 104 °F (40 °C).• Do not use scouring cleanser, volatile solvents such as benzene or thinner.• Wipe the unit gently by using soft cloth.C leaning the intake grille 1. Open the intake grille in direction of the arrow a . While gently pressing the left and right mounting shafts of the intake grille outward b , remove the intake grille in direction of the arrow c .2. Wash the intake grille gently with water or wipe it gently with a softcloth moisten with warm water.Then wipe it with a dry and soft cloth.3. While holding the grille horizontal, set the left and right mountingshafts into the pillow blocks at the top of the panel a . To latch each shaft properly, insert the shaft until it snaps.Then close the intake grille b .4. Press 4 places on the intake grille to close it completely.Cleaning and CareGeneral Informations on OperationMalfunctions caused by other electrical devices:Use of other electrical appliances such as an electric shaver ornearby use of a wireless radio transmitter may cause the malfunction of the air conditioner.If you encounter such a malfunction, turn off the circuit breaker once. Then turn it on again, and resume operation by using the remote controller.AIR CONDITIONER Wall Mounted Type3. Attach new or maintained air cleaning fi lter d to the fi lter holder.New air cleaning fi lter can be attached to either of the right holder orthe left holder.4. Latch 2 corners of the fi lter holder e to the air fi lter fi rmly.5. Reinstall the air fi lter. (Refer to step 6 in “Cleaning the air fi lter”.)6. Close the intake grille fi rmly.(Refer to step 4 in “Cleaning the intake grille”.)Following 2 types of air cleaning fi lters are used in this product.When you replace them, purchase dedicated air cleaning fi lters for this product.APPLE-CATECHIN FILTER: UTR-FA16(1 sheet)With using static electricity, puri fi es the air by removing fi ne particles or dust such as tabacco smoke or plant pollen.• This fi lter is disposable. Do not wash or reuse it.• O nce you open the package, use it as soon as possible. The cleaning effect is reduced if the fi lter is left the package opened.• Replace the fi lter once every 3 months under normal use.• With setting the fan speed high, the air cleaning effect increases.(Light blue, 1 sheet)Contained super micro-ceramic particles produce negative air ions,that is considered to have deodorizing effect, absorb and reduce room smell.• To maintain the deodorizing effect, clean the fi lter once every 3 months as follows:1. Remove the ion deodorization fi lter.2. F lush the fi lter with high-pressure hot water until the surface of the fi lter is covered with water.3. W ash the fi lter gently with diluted neutral detergent. Do not wash it by wringing or rubbing to prevent reducing the deodorizing effect by damage.4. Rinse the fi lter well with water fl ow.5. Dry the fi lter throughly in shaded place.6. Reinstall the ion deodorization fi lter to the indoor unit.• Replace the fi lter once every 3 years under normal use.After extended non-use of the unitIf you have shut down the indoor unit for 1 month or more, perform the FAN operation for half a day to dry the internal parts throughly before you perform normal operation.Additional inspectionAfter long period of use, accumulated dust inside the indoor unit may reduce the product performance even if you have maintained the unit with instructed daily care or cleaning procedures written in this manual.In such a case, the product inspection is recommended.For more information, consult authorized service personnel.C leaning the air fi ltersMind that you have a periodical cleaning of the air fi lters to prevent reducing the operation ef fi ciency of the product. Using of clogged air fi lter with dust will lower the product performance, and may cause air fl ow reduction or increase of operating noise. Clean the air fi lters once every 2 weeks under normal use.1. Open the intake grille.(Refer to a of step 1 in “Cleaning the intake grille”.)2. While holding the intake grille with your hand, pull up the handle aof the fi lter in direction of the arrow and release the 2 claws b .Then pull the fi lter out with gently sliding it downward c .3. Filter holder and air cleaning fi lter are attached on the rear sideof the air fi lter. Remove them from the air fi lter by unlatching each corner of the fi lter holder d .4.Remove dust by using a vacuum cleaner or by washing the fi lter.When you wash the fi lter, use neutral household detergent and warm water.After rinse the fi lter well, dry it throughly in a shaded place before you reinstall it.5. Attach the air cleaning fi lter and the fi lter holder to each air fi lter.6. Attach the air fi lter with aligning both side of the fi lter with the frontpanel, and push in the fi lter fully.Note:Make sure that 2 claws are fi rmly snapped to the guide holes on the panel.7. Close the intake grille fi rmly.(Refer to step 4 in “Cleaning the intake grille”.)Replacing the air cleaning fi lter1. Remove the air fi lter. (Refer to step 1 in “Replacing the air fi lter”.)2. Release 2 latches a of the fi lter holder, and turn over the holder indirection of arrow b .Remove the soiled air cleaning fi lter c .Note: Air cleaning fi lter is attached on each air fi lter.Cleaning and CareFollowing symptoms do not indicate the product malfunction, but they are normal functions or characteristics of this product.Immediately stop operation and turn off the electrical breaker in following cases. Then consult authorized service personnel.• The problem persists even if you perform these checks or diagnostics.• The OPERATION indicator and TIMER indicator blink while the ECONOMY indicator is blinking fast.Troubleshooting。
大金空调arc480a59说明书
大金空调arc480a59说明书
一、大金空调的使用方法。
1、面板功能,当遥控器找不到时,运转开关的操作内容是:25℃,自动运转方式,自动风量。
当运转时,绿灯亮;当设定定时时,黄灯也亮。
2、遥控器,安装在墙上时,用所附的螺丝安装在墙上或者柱子上。
3、定时设定,按“定时开机”按钮,屏幕闪烁,调节时间,再按下定时开机按钮。
4、TIPs,推荐的制冷温度是26℃到28℃,推荐的制热温度是20℃到24℃。
当挡住阳光和室外空气时,空调机工作会更有效。
二、大金空调怎么制热。
按下空调的模式按键,空调就会按照“自动→制冷→除湿→送风→制热→自动”的方式进行循环,调到制热就行了。
1.“开/关”键:在待机状态下按下开机键就能使空调进入到运行状态,空调在开机之后,按下空调的关机键,空调就会进入到待机状态。
2.“风速”键:能够调整空调内风机的风速,风速会按照“自动→低风→中风→高风→自动”方式进行循环。
3.“风向”键:这一按键能够调整空调的出风方式,空调导风片的角度选择按照“自动→位置[1]→位置[2]→位置[3]→位置[4]→位置[5]→自动”方式循环。
4.“摆风”键:按下摆风键,可以将空调摆风设置成连续摆动和点动摆动两种方式。
大金空调开机调试流程
22/03/2021
※开启真空泵,打开 压力表的开关
※确认真空泵工作2 小时以上,高、低压 的表压达到-0.1MPa;
※真空干燥完成后, 放置1小时,表压无返 回;
※真空完成后,先关 闭压力表的开关,再 停止真空泵;
参考图
11
相信大金 相信专业
三、追加冷媒
22/03/2021
12
相信大金 相信专业
相信大金 相信专业
GZGBS07-6
开机调试流程
VRVR410a系列
22/03/2021
图片版
1
相信大金 相信专业
一、调试前工具准备、检查
22/03/2021
2
相信大金 相信专业
一、调试前工具准备、检查
一字、十字螺丝刀
活动扳手
※工具没破损,可以正常使用;
22/03/2021
公制内六角螺丝刀
参考图
27 晚间低噪音结束时间设定(6/7/8 AM)
29 能力优先设定(OFF/ON)
30 要求设定1(60%/70%/80%)
32 普通要求设定(OFF/ON)
35 外机在下时的内外机高低差设定(40m/65m/90m)
22/03/2021
亮
闪烁
灭 * 闪烁或者灭 斜体为出厂默认设定
38
相信大金 相信专业
设定内容
第二代码号
01
02
03
04
0
滤网的污垢-严重/轻度(清洁 超长效 轻度 约
严重 约
—
—
滤网显示时间的设定)(滤网 滤网
10,000
10,000
污染严重时,可设定清洁滤
小时
小时
- 1、下载文档前请自行甄别文档内容的完整性,平台不提供额外的编辑、内容补充、找答案等附加服务。
- 2、"仅部分预览"的文档,不可在线预览部分如存在完整性等问题,可反馈申请退款(可完整预览的文档不适用该条件!)。
- 3、如文档侵犯您的权益,请联系客服反馈,我们会尽快为您处理(人工客服工作时间:9:00-18:30)。
大金空调调试手册
远程监控接口安装调试
说明书
SHANGHAI DAIKIN AIR
CONDITIONING CO., LTD.
一、注意事项:
1.本说明书适用于上海大金空调远程监控接口的安装及调试使
用。
2.适用机型:FVY71/125LMVL。
3.适用接口:RS232/485接口。
二、准备工作
1.在改造前准备好监控板及附件,十字螺丝刀,尖头钳,9孔信号线(见下图)及调试用笔记本电脑。
2.改造时应由两人进行。
3.9孔信号线示意图
XH插座针号D-sub 9P针
针号
信号名
15GND2空
34ER4空
57RTS63TXD78CTS82RXD
三、RS232/485接口板安装步骤
1.拉开下回风格栅;
2.旋下两颗螺钉;
3.卸下面板;
4.卸下电气盒盖板;
5.卸下上面板;
6.向下斜拉,取下面板;
7.卸下电气盒;8.准备好监控板,及其附件;
9.在盒体上插入插脚;10.安装监控板;
11.插上接线孔保护套;12.将黑白信号线接入第一组螺栓;
黄蓝电源线插入插孔;
RS232信号线(附配)插入白
色插座。
13.安装上盒盖;14.将监控盒装在电气盒后面;
15.安装电气盒;16.将电源线另一头插在空调电脑板
上,注意极性一致;
17.信号线接在P1、P2上,18.盖上电气盒盖板;
19.将九孔信号线与监控板接口连接;20.另一头与电脑连接;
21.开启电脑,进行调试;22.调试结束后,装上面板。
23.装下面板;24.拧紧螺钉;
25.盖紧盖板,改造结束。
注:新监控板安装步骤及方法与旧监控板一致。
四、监控板设置
在使用监控板之前需根据要求对监控板进行设置工作,具体设置方法,及设置内容如下:
⒈按下方框所示按钮,红灯闪烁。
⒉遥控器过60秒后显示“88”。
⒊再过15秒后显示正常。
⒋持续按TEST键4秒,遥控
器如图显示“10”。
⒌按下图示按钮直到遥控器显示⒍按下图示按钮直到遥控器显“20”。
示“15”。
⒎按下时钟键改变显示屏左边数值,按下时钟键改变显示屏右边数值。
根据附表中的项目来改变设置。
在“20”项目下的设置完毕后按一下左图中的按钮。
⒏持续按TEST键4秒,遥控⒐持续按TEST键4秒,遥控器
器显示“40”。
显示“50”后再根据步骤7进
行相关操作。
10.所有项目设置完毕后,按下11.再按下监控板上“SS1”键,图中白色框里的按钮然后按60秒后遥控器显示“88”。
“TEST”键,遥控器显示正常。
60秒后遥控器显示“88”。
12.再过15秒遥控器显示正常,
此时调试结束。
附表一。
