SD10-快速入门指南
Codisk%20SmartSD10%20防拷贝TF卡开发指南pdf
防拷贝TF卡开发指南(SmartSD)许可协议同意本许可协议的所有条款及此处包含的任何补充或特殊的许可条款是获得本产品许可的必要条件。
如果您不同意此协议的所有条款,请在三天内将产品退还深圳泰吉通公司。
您对本软件的使用将表明您同意接受本协议中条款的约束。
1.授予您使用许可权。
您可以为了备份的目的而复制磁盘中的软件,可以为了将本产品集成到您的软件的目的,根据本产品的文档说明将我们提供的软件合并进您的程序中。
2.除已按上述第一条被授权外,不可以复制、修改、逆向工程、分解或重组该产品的全部或部分,不可向他人销售、租借、许可、转让、分发全部或部分本产品或本协议授予的权利。
3.保证在自产品交给您之日起的12个月内,在正常使用情况下,产品不会出现实质性的材料上和生产制造上的缺陷。
深圳泰吉通公司的全部责任和您能获得的全部补救措施为:可选择尝试更换或修理或其他补救措施。
4.除了上述对本产品的原始购买者所提供的有限保证之外,不向任何人作任何其他的保证。
对深圳泰吉通公司的产品、性能或服务亦没有明示的或暗示的或其他任何形式的保证,包括但不仅仅限于商品的适销性和对特定用途的适用性。
5.任何情况下,无论如何引起及依据何种责任理论,均不负担任何因使用或不能使用本产品造成的损失责任,包括:丢失数据、损失利润及其他特别的、偶然的、附随的、继发的或间接的损失。
6.所有的产品,包括Smart SD、软件、文档、与本产品一并附送的其他材料及您制作的备份的所有权与版权均属于深圳泰吉通公司。
7.违反上述条款时,本协议的授权将自动终止。
本文所涉及的其他产品和公司名称可能是各自相应所有者的商标目录第1章产品简介 (4)1.1了解SmartSD (4)1.2存储结构 (4)1.3访问方式 (4)1.4如何实现数据文件防拷贝 (4)1.5开发包安装 (5)1.6开发包内容 (6)1.7开发包卸载 (7)第2章安全区编程指南 (7)2.1软件访问安全区的流程 (7)第3章安全区操作指令 (10)3.1密码认证指令 (10)3.2密码修改指令 (10)3.3写数据指令 (10)3.4读数据指令 (10)第4章测试工具使用 (11)4.1打开设备 (11)4.2密码认证 (12)4.3密码修改 (13)4.4写入数据 (13)4.5读取数据 (14)4.6关闭设备 (15)附录I (16)产品特点 (16)技术规格 (16)平台支持 (16)第1章产品简介防拷贝TF卡(SmartSD)采用高性能高速32位SD卡安全芯片,结合片内安全加密技术,防止数据文件被非法拷贝,特别适合于智能手机、平板电脑上的音视频多媒体、教育教材类等软件厂商。
SD10-Z简单调试说明 (1)
1、伺服系统油路电气连接检查(1)油路的检查:检查油路有无泄漏,压力传感器安装是否正确,并打开系统压力安全阀。
(2)电气连接检查:驱动器R、S、T、PE是否接好,电机的接线线序U、V、W、PE是否对应,电机UVW以电机内部出线上面的套管UVW标记为准,需要跟伺服一一对应。
电机编码器连线要一一对应跟伺服控制板相连。
注:模拟量线和端子控制线先不要连接2、电机参数配置(1)在伺服驱动器运行前,必须准确输入电机铭牌参数,SD10-Z伺服驱动器据此铭牌参数自动匹配标准电机参数,准确的电机参数可以获得良好的控制性能。
电机参数自动调谐步骤如下:第一步:根据电机铭牌输入以下参数F801:电机功率(kW)F802:电机额定电压(V)F803:电机额定电流(A)F804:电机极数F805:电机额定速度(RPM)F806:电机最高速度(RPM)F810:电机额定频率(Hz)第二步:电机参数整定如果电机与负载不能够拖开可采用静态辨识(注:此时请将负载的负载率降到最低)操作方式为:将F800 = 1,按控制面板上的“运行”键,此时面板会显示”test”,测试完毕后“test”消失,此时伺服驱动器会自动计算出电机的下列参数:F815:D轴电感(mH)F817:编码器安装角度F907:Q轴电感(mH)F910:定子电阻(Ω)如果电机与负载可以拖开建议采用动态辨识,此时电机会旋转,请注意安全操作方式为:将F800 = 2,按控制面板上的“运行”键,此时面板会显示”test”,测试完毕后“test”消失,此时伺服驱动器会自动计算出电机的下列参数F815:D轴电感(mH)F816:反电动势(V)F817:编码器安装角度F907:Q轴电感(mH)F910:定子电阻(Ω)学习完毕恢复待机显示。
将FA30 = 0选择速度模式,F113 = 1.00设定运行频率,此时可通过面板“运行”后,上升、下降键调速,查看电机在各频率段的运行状态是否正常。
曙光DS200-S(D)I10系列磁盘阵列快速使用指南V1.0

曙光DS200-S(D)10系列磁盘阵列快速使用指南V1.0Web管理磁盘阵列Web管理综述曙光的领先的RAIDWatch软件 ,是一个基于HTML的专门设计用于管理曙光的RAID盘阵的程序。
RAIDWatch嵌入于盘阵的firmware中,可以通过远程或本地浏览器进行管理。
RAIDWatch是一种用户友好界面,通过这个界面生动地描述磁盘阵列的内容并且简化了配置盘阵的复杂的过程;RAIDWatch能够实时报告盘阵的状态,从而使监控磁盘阵列几乎易如反掌。
功能概述:¾支持所有firmware配置方式,包括raid配置、迁移、扩容、计划任务等等;¾盘阵主要组件的实时显示;¾实时显示和系统事件通知;¾点击选择、可视化管理;¾标准TCP/IP连接到互联网,从而进行全面的管理;¾通过局域网或互联网与盘阵通信;¾可以通过电子邮件, SNMP traps,网络广播和Windows Messenger服务配置严重级别和显示顺序;¾提供密码保护,防止未授权用户修改配置。
进入方式有Information和Configuration两种方式;¾独立于操作系统,管理浏览器可以是:微软IE、网景Netscape、Mozilla 以及Firebox。
Web界面登录方法及初始页面介绍最初RAIDWatch没有预设的密码1、进入RAIDWatch很简单,您只需在您的浏览器的URL栏中键“http://xx.xx.xx.xx/index.html(IP地址)”。
IP地址是盘阵管理端口的IP,出厂默认的地址为:192.168.0.100.2、登陆系统应该迅速。
从下拉列表中选择你想要的登录方式:信息(Information)和配置(Configuration);如果您的盘阵有一个预设的密码,输入密码,然后点击登录按钮。
如果通过192.168.0.100,无法登陆到磁盘阵列,就需要从前面板LCD上查看当前IP地址并登陆,查看方法如下:View and Edit Configuration Parameters----CommunicationParameters.--- LAN IP Configuration--L0[Chip Info]MA--L0[Chip Info] IP xx.xx.xx.xx3、登录系统后,就可以查看或配置磁盘阵列。
SD10伺服说明书(精简版)
目录
3.4.3 电磁抱闸的配线.............................................................................................................. 24 四 运行.............................................................................................................................................. 25
3.4 输入输出信号(CN3)的连接实例...................................................................................... 22 3.4.1 模拟量速度模式的连接实例.......................................................................................... 22 3.4.2 位置脉冲模式的连接实例.............................................................................................. 23
3.3 输入输出信号配线 ................................................................................................................. 14 3.3.1 输入输出信号连接器端子排列...................................................................................... 14 3.3.2 输入输出信号端子名称及功能...................................................................................... 15 3.3.3 可编程输入信号端子功能设定...................................................................................... 18 3.3.4 可编程输出信号端子功能设定...................................................................................... 21
Delvcam DELV-HDSD-10 高清数字视频监控系统用户指南说明书

DelvcamDELV-HDSD-10User GuideIMPORTANT SAFETY INSTRUCTIONS:●Please read manual before using this product.●Please keep manual for future reference.●Please read the cautions to prevent possible danger and loss of property●Please enjoy the benefits of convenience, safety, and space-saving from thisTFT LCD monitor in different ways.FEATURES:This product employs integrate circuits, lower power consumption, and lower radiation emission. It has fashion designed appearance and good portability;LED backlight display makes the device much thinner, more power saving;Video (or SDI)、YPbPr、Dual audio and HDMI inputs, to connect with HD camera;High brightness & contrast with flexible folding sun shade cover, makes picture detail much clearer, more vivid outline, stronger sense of hierarchy;178°/ 178°(H/V) wide viewing angles,to provide better viewing effect;1024×768 high resolutionDC 7-24V wide range voltage.CAUTIONS:1.Please do not place the display screen face down on the ground.2.Please avoid heavy impact, do not drop monitor.3.The LCD screen scratches easily. Be sure screen does not come into contactwith sharp objects.4. Please do not block any of the vent hole s.5.Please follow the instructions and trouble-shootings to adjust the product.Other improper adjustment may result in damage. Any further adjustmentmust be performed or conducted by a qualified technician.6.Please unplug the power or remove the battery if long-term no-use, orduring lightning / electrical storms.Contents1. PRODUCT DESCRIPTION (2)2. INSTALLATION OF SUNSHADE COVER (4)3. DV BATTERY MOUNT PLATE (5)4. SETTING MENU (7)5. ACCESSORIES: (9)6. PARAMETERS (10)7. TROUBLE SHOOTING (10)1.PRODUCT DESCRIPTION1. TALLY (indicator light);2. Battery power on/off switch: “‖” is battery power; “O” is power off; “|” isDC power;3. Earphone jack;4. Power indicator light;5. VIDEO: Indicator lights up when signal switch to video state;(No use under the SDI mode);6. YPbPr: Indicator lights up when signal switch to YPbPr state;7. HDMI1: Indicator lights up when signal switch to HDMI 1 state;8. HDMI2: Indicator lights up when signal switch to HDMI 2 state;(Signal switch to SDI state under the SDI mode);9. F1-F4:4 user-definable buttons:Default functions:F1:PeakingF2:False ColorF3:ExposureF4:Histogram10. Knob BRI/M/SEL: Press the knob to access the menu function, pressingthe knob in the menu to return to the previous page or exit the menu.Rotate knob to select an option;Default as Brightness function.11. Knob SAT/ADJ: Press the knob to select main MENU options; rotate knobto confirm the selection and adjust parameter values;Default as Saturation function.12. Knob TINT: Default as Tint function;13. Knob CONTRAST: Default as Contrast function.14. Video signal output / input (Optional: SDI signal input/ output); 15. Y signal input / output; 16. Pb signal input / output; 17. Pr signal input / output; 18. Audio (L/R) input; 19. HDMI 1 signal input;20. HDMI 2 signal input (no use under SDI mode ); 21. HDMI signal loop output (optional);22. Mini USB input (Only for program upgrades, do NOT use if non-professionals)23. Power cable interface (connecting to the battery plate); 24. Speaker;25. TALLY signal input;26. USB output port (DC 5V/0.5A) 27. 4-pin XLR DC power input.Ps: Unavailable under SDI mode 26 (USB 5V/0.5A output power).※ Optional: Without BNC interfaces2. INSTALLATION OF SUNSHADECOVERPushing to close / open sunshade from assigned round area when assembly / disassembly. (i.e. assembly instruction ② / disassembly instruction ①); otherwise assembly / disassembly failed, and even damaged.Assembly instructionsDisassembly instructions3.DV BATTERY MOUNT PLATEStandard mounts processFollowing three types of battery plates are suitable for this device, model F970, QM91D, DU21 & LP-E6 (choose 2 out of 4).MODEL: F-970 MODEL: QM91D MODEL: DU21 MODEL: LP-E6DV Battery Mount Plate:DV Battery Mount Plate Specification:Model DU21 for battery of Panasonic DV:NV-GS/PV-GS/DZ-MV/GS/H28/H258/H288GK series, comply withPanasonic battery DU06/VBD140/SANYO DZhs301sw/HitachiDZ-HS303SW/BZ-BP14S/DZ3200/BP07W.Model QM91D for battery of SONY DV:DSCR1/F/S/MVCCD/E/HC15E/HC1E/AE1u/DCRTRV828/E/CCD-TRV116/DCR-DVD/PS105K/300K/10P/1E series.Model F970 for battery of SONY DV:DCR-TRV series, DCR-TRV E series, VX2100E PD P series, GV-A700,GV-D800 FD/CCD-SC/TR3/FX1E/HVR-AIC, HDR-FX1000E,HVR-Z1C, HVR-V1C, FX7E F330.Model LP-E6 for battery of Canon DSLR:5D Mark II/EOS7D/EOS60D;V-mount battery plate (optional): Please refer to GP-L130AB type battery specifications.Anton Bauer mount battery plate (optional):Please refer to GP-L130B type battery specifications.4.SETTING MENUBefore setting the functions, please make sure the device is connected correctly.When power on, press BRI/M/SEL knob on the device, function menus will pop-up on the screen. After confirm the option value, then press BRI/M/SELknob to return to the previous, and press the BRI/M/SEL knob again to exit themenu settings.BRI / M / SEL knob to select an option.SAT / ADJ knob to select the main menu, adjusting option values and confirm the selection.Function of buttons and knobsFunction of buttons and knobs can be customized by users ’ needs.Functions of F1-F4 buttons can also be customized: ·Aspect Ratio ·Check Field ·Freeze Input ·Center Marker·Underscan ·H/V delay ·Color Bar ·Screen Marker ·Zoom ·Camera ·Pixel-to-Pixel ·PIP·Peaking ·False Color ·Exposure ·Histogram.Functions of R1-R4 buttons can also be customized: ·Contrast ·Brightness ·Saturation ·Tint ·Volume ·SharpnessNote: Off, camera, X2, X4 and X8 options can be set when zoom function customized as shortcut key.5.ACCESSORIES:Standard accessories:1.Flexible folding sun shade cover 1 piece2.Battery plate bracket 1 piece3.Battery plate (F-970/QM91D/DU21/LP-E6) 2 pieces (choose 2 out of 4)4.HDMI type A –A 1 piece5.DC 12V power adapter (XLR connector) 1 piece6.TALLY connector 1 piece7.Manual 1 copyOptional accessories:1. Gimbals bracket 1 piece2. Anton Bauer mount battery plate 1 piece3. V-mount battery plate 1 piece4. Suitcase 1 piece6.PARAMETERS7.TROUBLE SHOOTING1. Only black-and-white display:- Check whether the color saturation is properly setup.2. Power on but no pictures:- Check whether the cables of Video (or SDI), HDMI and YPbPr are correctly connected or not. Please use the standard power adapter coming with the product package. Improper power input may cause damage.3. Wrong or abnormal colors:- Check whether the cables are correctly and properly connected. Broken or loose pins of the cables may cause a bad connection.- Adjust the color temperature or saturation values to make it displayed as normal proportion.4. When on the picture shows size error:- press“MENU→→Underscan”to zoom in/out pictures automatically when receiving HDMI (High-Definition Multimedia Interface) signals.- Set shortcut key to zoom function, and then adjust it.- Check whether the aspect ratio switch into 16:9 or not.5. Other problems:- Please press “MENU” button and choose“→Manufacturer Default→OK”6. According to the ISP, the machine can not function properly:- ISP for program upgrades, non-professionals do not use. If accidentally press this key, restart the system.400cd/㎡1011 * It is normal to see some bright lines appear on the screen when turn off the device.Note: due to constant effort to improve products and product features, specifications may change without notice.。
D10 中文操作与维护手册
D-10TM糖化血红蛋白检测系统操作与维护手册全国维修热线800-820-5567目录表页码简介 (2)概况 (2)测定原理 (3)定货信息 (4)试剂组成 (4)样本采集和处理 (5)试剂准备和保存 (6)仪器软件介绍 (7)如何更换新试剂盒 (9)常规测定步骤 (12)结果报告的格式 (13)校正报告 (14)结果的解释和说明 (15)仪器特性 (17)每日保养 (25)运行前检查 (25)运行后检查 (25)关机程序 (25)每200测试保养 (26)每400测试保养 (26)一、简介糖尿病的特征是高血糖,是因为机体不能充分将葡萄糖作为能源加以利用。
在1型糖尿病中,胰腺不能产生足够的胰岛素,从而使血糖不能被利用;在2型糖尿病,或者是胰岛不能产生足够的胰岛素,或者是机体不能正常对胰岛素发生反应。
不论1型还是2型均会发生包括微血管方面的眼,肾,神经及大血管方面的心脏,脑和四肢等并发症。
全世界约有5%的人群患有糖尿病。
1.1概况DCCT实验表明糖尿病的治疗需要血糖长时间地尽可能维持正常水平,以减少患各种并发症的风险。
单纯空腹血糖测定仅能反映患者最近期的血糖状况(以小时计),但并不能全面反应血糖调控的真正情况。
因此可以通过每两到三个月测定糖化血红蛋白HbA1c来精确反应这一段时间内的平均血糖浓度。
HbA1c是血红蛋白经由两步非酶促糖化反应形成的。
第一步是生成不稳定的醛胺,即希夫氏碱,或称为前A1c,此可逆反应是血红蛋白β链上的N末端缬氨酸与糖的羟基间反应形成的。
希夫氏碱的形成与血中葡萄糖的浓度直接相关。
在红细胞的循环过程中,一部分希夫氏碱经Amadori重排形成稳定的不可逆的酮胺,即HbA1c。
HbA1c的水平与血糖的平均浓度及血红蛋白的循环寿命相关。
因此它的测定被普遍认为可以反映临床上糖尿病控制的程度。
图1 血红蛋白A的ß链糖化1.2测定原理Bio-Rad D-10血红蛋白A1c测定仪应用离子交换高效液相色谱法(HPLC)对人全血糖化血红蛋白A1C的自动化和准确的测定。
10寸监护仪操作手册
1
目录
第 1 章 概述 .............................................................................................................................................. .1 1.1 概述.................................................................................................................................... .1 1.2 安全信息............................................................................................................................ .1 1.2.1 危险............................................................................................................................ .1 1.2.2 警告............................................................................................................................ .1 1.2.3 小心....................................................
Canon 数码相机PowerShot D10 相机使用者指南

中文
• 使用相機之前,請先閱讀本指南。 • 請妥善存放本指南,以供日後參考。
檢查包裝內容
請檢查您的相機包裝內是否包含下列物品。如發現物品不齊全,請聯絡您購 買相機的零售商。
相機
電池 NB-6L
電池充電器
(附端子蓋)
CB-2LY/CB-2LYE
介面連接線 IFC-400PCU
AV 連接線 AVC-DC400
相機帶 WS-DC8
相機帶扣
相機使用者指南 (本指南)
數碼相機解決方案光碟 (DIGITAL CAMERA
Solution Disk)
保修卡
請同時參閱光碟上的 PDF 指南。安裝後,桌面上會顯示捷徑圖 示。如無法安裝軟件,請參閱光碟上 “Readme”資料夾內的 指南。
• 個人打印指南 如您要將相機連接到打印機及打印影像,請閱讀此指南。
1 檢視影像
● 檢視相片 . . . . . . . . . . . . . . . . . . . . . . . . 29 ● 自動播放相片 (幻燈片播放). . . . . . . . . . . . . . . 105 ● 在電視上檢視相片 . . . . . . . . . . . . . . . . . . . . 109 ● 快速搜尋相片 . . . . . . . . . . . . . . . . . . . 102、103 ● 刪除相片 . . . . . . . . . . . . . . . . . . . . . . 29、110 ● 保護相片以避免意外刪除 . . . . . . . . . . . . . . . . . 114
失,請聯絡隨產品提供佳能客戶支援單張上的佳能客戶服務中心。 • 除上述事項外,佳能公司對於因操作產品不當而導致的損壞概不負責。
SD10快速应用指南_V13
如上图所示,其中,Scanlist 选项可以设置添加到 DeviceNet 主站扫描列表的设备,Input、 Output 分别可以设置网关映射到 DeviceNet 主站映射区的输入、输出字节数。
特别需要注意的是 Scanlist 中的 SD10 输入输出字节数必须和产品 SD10 中的输入输出字 节数一致!否则无法通信。
例如:在配置 DeviceNet 输入输出都是 32 个字节的情况下,串口发送 2 次数据给 DeviceNet 主站,SD10 就先缓存这两帧数据(即多帧缓存功能),若 DeviceNet 输出数据前 2 个字节发送 0 0(第 1,2 个字节是流量控制字节),这样 SD10 才会把第一帧数据发送给 DeviceNet,若 DeviceNet 可以开始接收第二帧数据,则 DeviceNet 输出数据的第 1,2 个字 节需改为 80 00(控制流量位反转),即第 1 个字节的最高位需进行 0,1 反转变化。
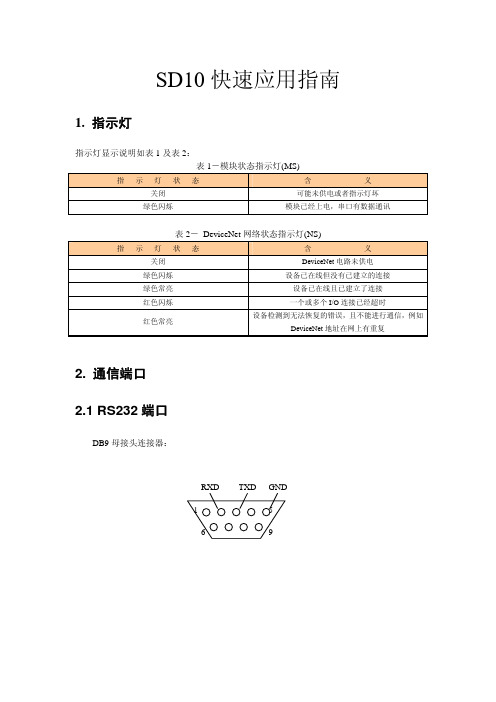
注意:一般设备只需连接 3,2,5 脚即可。
接线 连用户设备的 RXD,2 号脚 连用户设备的 TXD,3 号脚 连用户设备的 GND,5 号脚
2.2 DeviceNet 接线
五针连接器:
1
5
-24V
CANL
CANH
屏蔽
+24V
DeviceNet 侧采5脚
接线 GND CANL 屏蔽 CANH +24V
3. 软件配置
本网关的参数可通过 DeviceNet 网络参数来进行配置,用户能够在 DeviceNet 主站组态软件 中设置 SD-10 的串口及 DeviceNet 相关参数。
3.1 DeviceNet 参数配置
DNet Input bytes:DeviceNet I/O 连接输入字节数,可选 16 个字节、20 个字节、32 个 字节、48 个字节、64 个字节,默认字节为 20 个字节。
PRIMEDIC除颤监护仪DM10使用手册

0. 目录页码1. 安全指南 32. 仪器说明 53.准备工作13 3.1 蓄电池的充电133.2 心脏除颤仪/心电图监护器的配置(启动莱单)144.心脏除颤仪的操作16 4.1 心脏除颤仪的启动和关闭/自我检测16 4.2 同步和异步驱动16 4.3 能量选择17 4.4 充入能量18 4.5 电极的放置19 4.6 能量的释放194.7 儿童专用电极205.心电图监护器的操作21 5.1 心电图导联的选择21 5.2 信号强度的调节22 5.3 心缩期音的音量22 5.4 心率报警的启动225.5 滤波器235.6 心电图电极的放置246. SpO2-监护器的操作(仅DM30型号)256.1 SpO2-传感器的联接256.2 选择正确的SpO2-传感器276.3 调节SpO2警报287. 打印机的操作297.1 记录心电图信号297.2 每次放电后自动记录输出(自动打印) 307.3 存储器数据的打印317.4 安装打印纸32 8.PRIMEDIC起搏模块的操作338.1 起搏模块的联接338.2 起搏-/除颤电极的置放348.3 起搏器的开启和关闭368.4 操作方式的调节388.5 刺激频率的调节398.6 刺激强度的调节398.7 起搏的开始和停止408.8 起搏过程中进行除颤/通过枕电极除颤429. PRIMEDIC体内除颤(I/D)模块的操作439.1 体内除颤模块的联接439.2 体内除颤用勺电极的联接449.3 通过勺电极进行除颤4410. PRIMEDIC遥控除颤(R/D)模块的操作4510.1遥控除颤模块的联接4510.2 枕电极的置放4610.3 遥控除颤导线的联接4610.4 通过枕电极进行遥控除颤4711. 充电器的使用4712. 可换蓄电池的使用4812.1 蓄电池的更换4912.2 在充电器上同时对蓄电池充电5013. 维护和保养 5114. 废弃处理5215. 技术数据、配件和图示5315.1 PRIMEDIC DEFI-MONITOR DM10和DM30的技术数据53 15.2 配件5615.3 图示5716. 保修条款5817. 附录59A1蓄电池部件的一般指南和规定59A2使用心脏除颤仪的一般指南和规定61A3使用血氧饱和度检测的一般指南67A4对电压一时间函数的说明69A5对监护器图象和输出的说明71A6安全技术检验75PRIMEDIC是Metrax GmbH, Rottweil的注册商标1.安全指南您所购买的PRIMEDIC DEFI-MONITOR是根据在紧急情况下使用的高要求而设计的。
SD10-快速入门指南

4. The Customer agrees not to attempt to decompile the object code of the Product otherwise than in circumstances specifically
provided for by law, and then only after consultation with Digico UK Ltd.
SD10 操作指南
用户手册-入门指南
结合 SD 系列软件阅读参考
用户手册 B 版本对应控台 4.0.680+
地址:广州市番禺区沙头街禺山西路 363 号联邦工业城内 电话:020-84666123 传真:020-84661633 官网:
0-1
SD10 操作指南
Copyright © 2014 Digico UK Ltd
All rights reserved.
No part of this publication may be reproduced, transmitted, transcribed, stored in a retrieval system, or translated into any language in any form by any means without the written permission of Digico UK Ltd. Information in this manual is subject to change without notice, and does not represent a commitment on the part of the vendor. Digico UK Ltd shall not be liable for any loss or damage whatsoever arising from the use of information or any error contained in this manual. All repair and service of the SD10 product should be undertaken by Digico UK Ltd or its authorised agents. Digico UK Ltd cannot accept any liability whatsoever for any loss or damage caused by service, maintenance, or repair by unauthorised personnel.
欧瑞传动SD10-Z(S)系列伺服驱动器使用说明书
前言感谢您选用欧瑞传动电液伺服控制系统!同时,您将享受到我们为您提供的全面、真诚的服务。
SD10-Z(S)系列伺服驱动器容量范围广,能够完美地实现伺服油泵控制,亦能实现大部分通用型伺服功能需求。
是目前市场上性价比较高的中大功率伺服驱动器。
本手册将为您提供安装调试、操作使用、故障诊断及日常维护的有关注意事项,在安装、使用前请仔细阅读。
本手册随驱动器一起提供,请妥善保管,以备以后查阅和维护使用。
当您在使用中发现任何问题,而本手册无法为您提供解答时,请与本公司联系咨询。
我们的专业技术服务人员将竭诚为您服务,并希望您能继续选用我们的产品,敬请提出宝贵的意见和建议!本公司致力于产品的不断改善和功能升级,手册提供资料如有变更,恕不一一通知。
最新及详细版使用手册会在公司网站()上进行公布。
■安全标识本产品的安全运行取决于正确的安装和操作以及运输与保养维护,请务必遵守本手册中使用的如下安全标识:错误的操作将引发危险情况,导致人身伤亡。
错误的操作将引发危险情况,导致轻度或中度人身伤害,损坏设备。
另外,该标识中所述事项有时也可能造成严重的后果。
驱动器及电机上标识符的意义如下:电压高,有电击危险。
表面热,禁止触摸。
目录前言 (1)1.1 产品确认事项 (4)1.2 伺服驱动器的铭牌 (4)1.3 伺服电机的铭牌 (4)1.4 驱动器命名规则 (5)1.5 伺服电机命名规则 (6)1.6 产品外观 (8)1.7 安全须知 (8)1.7.1 安装、布线注意事项 (8)1.7.2 运行、维护注意事项 (9)1.7.3 废弃注意事项 (9)2 伺服系统技术规范及选型 (10)2.1 伺服驱动器技术规范和参数 (10)2.1.1伺服驱动器技术规范 (10)2.1.2伺服驱动器主要参数和外围电气元件选型指导 (11)2.1.3伺服驱动器外围配线、磁环使用指导 (12)2.2 伺服电机技术规范和参数 (13)2.2.1 伺服电机技术条件 (13)2.2.2 伺服电机主要参数 (13)2.3 伺服系统推荐配置表以及选型计算 (15)2.3.1 各品牌油泵的推荐表 (17)2.3.2 伺服驱动器、电机、油泵的选型计算方法 (18)2.3.3伺服、电机、油泵的组合配置 (18)3 产品安装 (21)3.1 驱动器安装 (21)3.1.1 驱动器结构尺寸 (21)3.1.2 驱动器安装 (24)3.2 伺服电机安装 (24)3.3 制动单元及制动电阻 (25)4.1 电液系统构成 (27)4.2 电气连接 (28)4.2.1 主电路接线示意 (29)4.2.2 控制端子功能简介和接线示意图 (29)4.2.3 拨码开关介绍 (31)5 操作面板和功能参数 (32)5.1 面板显示说明 (32)5.2 面板操作 (32)5.3 参数设置 (33)5.4 功能码区内和区间的切换 (33)5.5 面板显示内容 (34)5.6参数设定 (35)5.6.1 基本参数 (35)5.6.2运行控制 (35)5.6.3 多功能输入输出 (37)5.6.4 模拟量检测和输入输出 (39)5.6.5 能耗制动和保护控制 (40)5.6.6 电机控制参数 (41)5.6.7 压力控制参数 (43)5.6.8 多泵合流控制 (46)5.6.8.1多泵合流控制参数 (46)5.6.8.2多泵合流控制示意图 (48)6 电液机整机调试步骤 (49)7 故障分析处理 (51)8 日常检查和保养 (57)8.1定期检查 (57)8.2易损件更换 (57)8.3存储 (57)附录一功能码速查表 (58)附录二电液机卡说明 (72)附录三伺服电机结构尺寸示意图 (73)1使用须知1.1 产品确认事项产品到货之后,请对如下项目进行检查并确认。
联想 ThinkVision P25d-10用户指南

目录安全事项. . . . . . . . . . . . . . . . . . . . . . . . . . . . . . . . . . . . . . . . . . . . . . . . . . . . . . . . . . . . . . . . . . . . . . . . . . . . . iii 一般安全原则 . . . . . . . . . . . . . . . . . . . . . . . . . . . . . . . . . . . . . . . . . . . . . . . . . . . . . . . . . . . . . . . . . . . . . . . . . . . . . . . . . . . . . . . . . . . . iii 第1章开始使用. . . . . . . . . . . . . . . . . . . . . . . . . . . . . . . . . . .1-1物品清单 . . . . . . . . . . . . . . . . . . . . . . . . . . . . . . . . . . . . . . . . . . . . . . . . . . . . . . . . . . . . . . . . . . . . . . . . . . . . . . . . . . . . . . . . . . . . . . . 1-1使用注意事项 . . . . . . . . . . . . . . . . . . . . . . . . . . . . . . . . . . . . . . . . . . . . . . . . . . . . . . . . . . . . . . . . . . . . . . . . . . . . . . . . . . . . . . . . . . . 1-2产品概述 . . . . . . . . . . . . . . . . . . . . . . . . . . . . . . . . . . . . . . . . . . . . . . . . . . . . . . . . . . . . . . . . . . . . . . . . . . . . . . . . . . . . . . . . . . . . . . . 1-3调整类型 . . . . . . . . . . . . . . . . . . . . . . . . . . . . . . . . . . . . . . . . . . . . . . . . . . . . . . . . . . . . . . . . . . . . . . . . . . . . . . . . . . . . . . . . . . . . 1-3倾斜 . . . . . . . . . . . . . . . . . . . . . . . . . . . . . . . . . . . . . . . . . . . . . . . . . . . . . . . . . . . . . . . . . . . . . . . . . . . . . . . . . . . . . . . . . . . . . . . . 1-3旋转 . . . . . . . . . . . . . . . . . . . . . . . . . . . . . . . . . . . . . . . . . . . . . . . . . . . . . . . . . . . . . . . . . . . . . . . . . . . . . . . . . . . . . . . . . . . . . . . . 1-3高度调整 . . . . . . . . . . . . . . . . . . . . . . . . . . . . . . . . . . . . . . . . . . . . . . . . . . . . . . . . . . . . . . . . . . . . . . . . . . . . . . . . . . . . . . . . . . . . 1-4监视器枢轴 . . . . . . . . . . . . . . . . . . . . . . . . . . . . . . . . . . . . . . . . . . . . . . . . . . . . . . . . . . . . . . . . . . . . . . . . . . . . . . . . . . . . . . . . . . 1-4监视器控制 . . . . . . . . . . . . . . . . . . . . . . . . . . . . . . . . . . . . . . . . . . . . . . . . . . . . . . . . . . . . . . . . . . . . . . . . . . . . . . . . . . . . . . . . . . 1-5线缆锁槽 . . . . . . . . . . . . . . . . . . . . . . . . . . . . . . . . . . . . . . . . . . . . . . . . . . . . . . . . . . . . . . . . . . . . . . . . . . . . . . . . . . . . . . . . . . . . 1-5设置监视器 . . . . . . . . . . . . . . . . . . . . . . . . . . . . . . . . . . . . . . . . . . . . . . . . . . . . . . . . . . . . . . . . . . . . . . . . . . . . . . . . . . . . . . . . . . . . . 1-6连接和打开监视器电源 . . . . . . . . . . . . . . . . . . . . . . . . . . . . . . . . . . . . . . . . . . . . . . . . . . . . . . . . . . . . . . . . . . . . . . . . . . . . . . . . 1-6注册您的选件 . . . . . . . . . . . . . . . . . . . . . . . . . . . . . . . . . . . . . . . . . . . . . . . . . . . . . . . . . . . . . . . . . . . . . . . . . . . . . . . . . . . . . . . . . . 1-11第2章调整和使用显示器. . . . . . . . . . . . . . . . . . . . . . . . . . . . . . .2-1舒适和辅助功能 . . . . . . . . . . . . . . . . . . . . . . . . . . . . . . . . . . . . . . . . . . . . . . . . . . . . . . . . . . . . . . . . . . . . . . . . . . . . . . . . . . . . . . . . . 2-1安排您的工作区域 . . . . . . . . . . . . . . . . . . . . . . . . . . . . . . . . . . . . . . . . . . . . . . . . . . . . . . . . . . . . . . . . . . . . . . . . . . . . . . . . . . . . 2-1放置显示器 . . . . . . . . . . . . . . . . . . . . . . . . . . . . . . . . . . . . . . . . . . . . . . . . . . . . . . . . . . . . . . . . . . . . . . . . . . . . . . . . . . . . . . . . . . 2-1关于健康工作习惯的小技巧 . . . . . . . . . . . . . . . . . . . . . . . . . . . . . . . . . . . . . . . . . . . . . . . . . . . . . . . . . . . . . . . . . . . . . . . . . . . . 2-2辅助功能信息 . . . . . . . . . . . . . . . . . . . . . . . . . . . . . . . . . . . . . . . . . . . . . . . . . . . . . . . . . . . . . . . . . . . . . . . . . . . . . . . . . . . . . . . . 2-2调整显示器图像. . . . . . . . . . . . . . . . . . . . . . . . . . . . . . . . . . . . . . . . . . . . . . . . . . . . . . . . . . . . . . . . . . . . . . . . . . . . . . 2-3使用直接访问控件 . . . . . . . . . . . . . . . . . . . . . . . . . . . . . . . . . . . . . . . . . . . . . . . . . . . . . . . . . . . . . . . . . . . . . . . . . . . . . . . . . . . . 2-3使用On-Screen Display (OSD,屏幕显示)控件. . . . . . . . . . . . . . . . . . . . . . . . . . . . . . . . . . . . . . . . . . . . . . . . . . . . . . . . . . . . 2-4选择受支持的显示模式 . . . . . . . . . . . . . . . . . . . . . . . . . . . . . . . . . . . . . . . . . . . . . . . . . . . . . . . . . . . . . . . . . . . . . . . . . . . . . . . . 2-7了解电源管理. . . . . . . . . . . . . . . . . . . . . . . . . . . . . . . . . . . . . . . . . . . . . . . . . . . . . . . . . . . . . . . . . . . . . . . . . . . . . . . . 2-8保养显示器. . . . . . . . . . . . . . . . . . . . . . . . . . . . . . . . . . . . . . . . . . . . . . . . . . . . . . . . . . . . . . . . . . . . . . . . . . . . . . . . . . 2-9卸下监视器底座和支撑臂 . . . . . . . . . . . . . . . . . . . . . . . . . . . . . . . . . . . . . . . . . . . . . . . . . . . . . . . . . . . . . . . . . . . . . . . . . . . . . . . . . 2-9壁挂(可选) . . . . . . . . . . . . . . . . . . . . . . . . . . . . . . . . . . . . . . . . . . . . . . . . . . . . . . . . . . . . . . . . . . . . . . . . . . . . . . . . . . . . . . . . . . . 2-9第3章参考信息. . . . . . . . . . . . . . . . . . . . . . . . . . . . . . . . . . .2-1显示器规格 . . . . . . . . . . . . . . . . . . . . . . . . . . . . . . . . . . . . . . . . . . . . . . . . . . . . . . . . . . . . . . . . . . . . . . . . . . . . . . . . . . . . . . . . . . . . . 2-1故障排除 . . . . . . . . . . . . . . . . . . . . . . . . . . . . . . . . . . . . . . . . . . . . . . . . . . . . . . . . . . . . . . . . . . . . . . . . . . . . . . . . . . . . . . . . . . . . . . . 2-3手动图像设置 . . . . . . . . . . . . . . . . . . . . . . . . . . . . . . . . . . . . . . . . . . . . . . . . . . . . . . . . . . . . . . . . . . . . . . . . . . . . . . . . . . . . . . . . 2-4手动安装显示器驱动程序 . . . . . . . . . . . . . . . . . . . . . . . . . . . . . . . . . . . . . . . . . . . . . . . . . . . . . . . . . . . . . . . . . . . . . . . . . . . . . . 2-5在Windows 7系统中安装显示器驱动程序 . . . . . . . . . . . . . . . . . . . . . . . . . . . . . . . 2-5在Windows 10系统中安装显示器驱动程序. . . . . . . . . . . . . . . . . . . . . . . . . . . . . . . 2-6获得进一步帮助 . . . . . . . . . . . . . . . . . . . . . . . . . . . . . . . . . . . . . . . . . . 2-6附录A. 服务和支持 . . . . . . . . . . . . . . . . . . . . . . . . . . . . . . . . . . . . . . . . . . . . . . . . . . . . . . . . . . . A-1电话技术支持 . . . . . . . . . . . . . . . . . . . . . . . . . . . . . . . . . . . . . . . . . . . . . . . . . . . . . . . . . . . . . . . . . . . . . . . . . . . . . . . . . . . . . . . . . . . A-1附录B. 声明. . . . . . . . . . . . . . . . . . . . . . . . . . . . . . . . . . . . . . . . . . . . . . . . . . . . . . . . . . . . . . . . . B-1回收信息 . . . . . . . . . . . . . . . . . . . . . . . . . . . . . . . . . . . . . . . . . . . . . . . . . . . . . . . . . . . . . . . . . . . . . . . . . . . . . . . . . . . . . . . . . . . . . . . B-2商标 . . . . . . . . . . . . . . . . . . . . . . . . . . . . . . . . . . . . . . . . . . . . . . . . . . . . . . . . . . . . . . . . . . . . . . . . . . . . . . . . . . . . . . . . . . . . . . . . . . . B-2电源线和电源适配器 . . . . . . . . . . . . . . . . . . . . . . . . . . . . . . . . . . . . . . . . . . . . . . . . . . . . . . . . . . . . . . . . . . . . . . . . . . . . . . . . . . . . . B-2《废弃电器电子产品回收处理管理条例》提示性说明 . . . . . . . . . . . . . . . . . . . . . . . . . . . . . . . . . . . . . . . . . . . . . . . . . . . . . . . . . B-3中国环境标志产品认证提示性说明 . . . . . . . . . . . . . . . . . . . . . . . . . . . . . . . . . . . . . . . . . . . . . . . . . . . . . . . . . . . . . . . . . . . . . . . . . B-3中国能源效率标识 . . . . . . . . . . . . . . . . . . . . . . . . . . . . . . . . . . . . . . . . . . . . . . . . . . . . . . . . . . . . . . . . . . . . . . . . . . . . . . . . . . . . . . . B-3有害物质 . . . . . . . . . . . . . . . . . . . . . . . . . . . . . . . . . . . . . . . . . . . . . . . . . . . . . . . . . . . . . . . . . . . . . . . . . . . . . . . . . . . . . . . . . . . . . . . B-4安全事项一般安全原则有关安全使用计算机方面的提示,请访问:/safetyBefore installing this product, read the Safety Information.第1章开始使用本用户指南为用户提供详细的操作说明。
INSIGNIA NS-DSC10A NS-DSC10B NS-DSC10G数码相机 快速设置指南
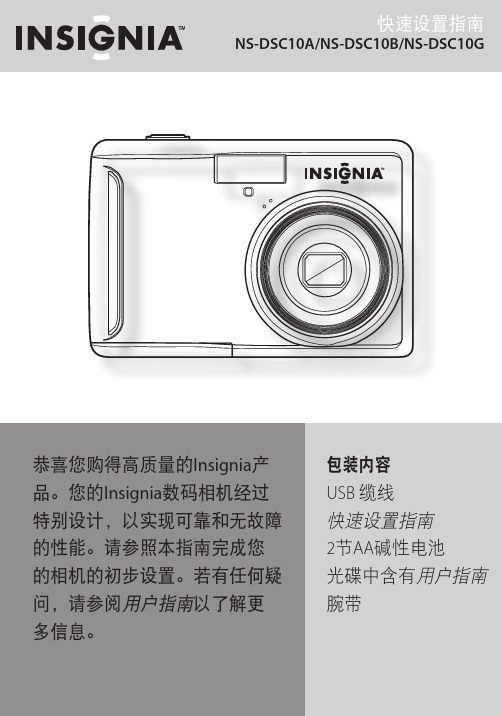
恭喜您购得高质量的Insignia产品。
您的Insignia数码相机经过特别设计,以实现可靠和无故障的性能。
请参照本指南完成您的相机的初步设置。
若有任何疑问,请参阅用户指南以了解更多信息。
包装内容
USB 缆线
快速设置指南
2节AA碱性电池
光碟中含有用户指南腕带
5
按钮保存设置并关闭菜单。
键,选择菜单项,然后按压4向导向控制按钮的向右 以显示选中的菜单项。
或向下 键,选中一个选项,然以应用该设置。
㊒㒚催㞾
䋼䞣 䕼⥛,62 㡆 㸵䰆
开开关开
声音快速浏览日期标记日期和时间省电模式
307 10M
AUTO
F2.81/60100
最新录制的图像或视频就会出现在显示屏上。
如果未曾存储图字样会出现在显示屏上。
按键以查看前一张或 查看后 按键不放,可在图像文件中快速滚动。
02:03:04
x5.0。
预应力自动张拉系统用户手册Rev1.0
预应力自动张拉系统用户手册Rev1.0(Rev1 .0)DS-10预应力自动张拉系统用户手册(Rev1.0)本系统的安装、维护、操作都要由专业技术人员进行。
招商局重庆交通科研设计院有限公司对产品有更改的权利,产品更改信息恕不另行通知。
本文件所含信息归招商局重庆交通科研设计院有限公司所有。
本文件中所有信息、数据、设计、以及所含图样都属招商局重庆交通科研设计院有限公司所有,未经招商局重庆交通科研设计院有限公司书面许可,不得以任何形式(包括影印或其他任何方式)翻印或复制、间接或直接透露给外界团体。
尊敬的用户:您好,非常感谢您选择使用我公司生产制造的仪器设备,在使用该仪器设备之前,务必请您认真阅读本用户手册,这对于您快速熟悉和使用我们的产品非常有帮助。
通过本用户手册,您可以在以后的使用中避免一些错误的操作,从而更好地开展工作。
祝您工作愉快!预应力张拉安全注意事项1. 张拉作业区应设置明显的警示标识,禁止非工作人员进入张拉区域。
2. 张拉千斤顶安装端须设置防护装置,保护张拉人员和路人安全。
3. 张拉作业区内机具设备、材料物品须摆放整齐,场面整洁,通道畅通。
4. 参加张拉的人员,上岗前必须进行技术交底和操作培训,掌握张拉工艺和设备操作规程。
张拉作业时,穿戴好劳动保护用品,明确分工,固定岗位,服从指挥。
张拉过程中不得擅自离开岗位,如需离开,则必须停机或切断电源。
5. 张拉作业前必须检查机具设备是否符合施工及安全要求,检查合格后方可予以使用。
张拉设备(千斤顶、油泵和压力表等)应定期配套标定,配套使用。
6. 锚具、夹片安装前应分批进行检查并核对合格证书,不得有裂纹、伤痕、锈蚀,检查合格后方可予以安装。
7. 张拉之前,结构或构件混凝土必须达到要求的强度和弹性模量(龄期)。
8. 张拉机具应搭设防雨防晒棚,防止张拉时雨淋日晒,高压油泵确保油路与千斤顶之间必须正确连接,各接口均须完整紧密,畅通,不得漏油。
9. 千斤顶安装时,工具锚应与前端的工作锚对正,工具锚和工作锚之间的各根预应力筋不得错位、扭绞。
AD10简明教程—快速入门
AD10简明教程—快速入门目录第六部分 Altium Designer 10电路设计........................... - 2 - 第1章印制电路板与Protel概述.............................. - 2 -1.1印制电路板设计流程................................... - 2 -第2章原理图设计........................................... - 4 -2.1 原理图设计步骤:.................................... - 4 -2.2 原理图设计具体操作流程.............................. - 4 -第3章原理图库的建立...................................... - 11 -3.1 原理图库概述....................................... - 11 -3.2 编辑和建立元件库.................................. - 11 -第4章创建PCB元器件封装................................. - 16 -4.1 元器件封装概述.................................... - 16 -4.2 创建封装库大体流程.................................. - 17 -4.3 绘制PCB封装库具体步骤和操作........................ - 17 -第五章 PCB设计............................................ - 26 -5.1 重要的概念和规则.................................... - 26 -5.2 PCB设计流程........................................ - 27 -5.3 详细设计步骤和操作................................ - 27 -第6章实训项目............................................ - 33 -6.1 任务分析............................................ - 33 -6.2 任务实施............................................ - 35 -6.3 利用热转印技术制作印制电路板........................ - 61 -第六部分Altium Designer 10电路设计第1章印制电路板与Protel概述随着电子技术的飞速发展和印制电路板加工工艺不断提高,大规模和超大规模集成电路的不断涌现,现代电子线路系统已经变得非常复杂。
D10操作规程2011

Bio-Rad VII糖化血红蛋白A1c测定仪操作规程1 仪器名称及型号:Bio-Rad VII糖化血红蛋白A1c测定仪2. 生产厂家:伯乐生命医学产品有限公司3. 检测范围:HbA1c3.1目的:VII糖化血红蛋白A1c测定仪用于报告个体EDTA抗凝静脉全血样本的糖化血的实验结果,用于个体糖尿病辅助诊断和治疗监测。
红蛋白A1c4. 检测原理4.1 VII糖化血红蛋白A1c测定仪是台式仪器,应用离子交换高效液相色谱法的自动化和准确的测定。
标本可被自动稀释后(HPLC)对人全血糖化血红蛋白A1C注入分析柱。
VII糖化血红蛋白A1c测定仪将预先编程设置的由低到高离子浓度的缓冲液注入系统,在这一过程中,血红蛋白经和分析柱中偶联离子结合的程度大小达到分离。
处理好的样本自动被注入分析通路,分离的血红蛋白随后在流经光感测量计时,测量其在415nm的光吸收情况。
4.2 VII糖化血红蛋白A1c测定仪临床数据处理软件(CDM) 将每次分析过程中收集到的数据还原。
此间要经过两个水平的计算。
通过微积分计算得出分析结果和分析图谱,面积计算使用了指数模式的高斯对数(EMG),这样计算已经排除了可变部分的血红蛋白A1C和氨基甲酰血红蛋等干扰成分。
4.3 VII糖化血红蛋白A1c测定仪可从全血管中自动吸取标本,随后进行稀释和分析,每个样本在3分钟内即可完成测定。
5. 参数设置5.1设定界面,包含子界面(设置(setup),运行(run),数据(data),维护(maintaining),打印按纽和滚动按纽。
在这些界面上的信息能在任何时间被观看。
当系统正在运行状态时信息不能被更新。
5.2软件设置5.2.1软件版本—显示当前软件版本。
该区域不能被操作者编辑。
5.2.2硬件配置—显示当前硬件配置。
该区域不能被操作者编辑。
5.2.3自动预热—提示系统将自动地执行开启行动的时间,从睡眠状态到等待状态。
5.2.4使用滚动按纽来设定运行当天的小时和分钟(24小时格式)。
- 1、下载文档前请自行甄别文档内容的完整性,平台不提供额外的编辑、内容补充、找答案等附加服务。
- 2、"仅部分预览"的文档,不可在线预览部分如存在完整性等问题,可反馈申请退款(可完整预览的文档不适用该条件!)。
- 3、如文档侵犯您的权益,请联系客服反馈,我们会尽快为您处理(人工客服工作时间:9:00-18:30)。
This agreement is made under the Laws of England.
LICENCE NO: ...........................................................................
REGISTRATION DATE: ...........................................................
Licenses and Trademarks
The SD10 logo and SD10 name are trademarks, and Digico UK Ltd and the Digico UK Ltd logo are registered trademarks of Digico UK Ltd. Microsoft is a registered trademark and Windows is a trademark of Microsoft Corp. Digico (UK) Ltd
Unit 10
Silverglade Business
Park Leatherhead Road
Chessington
Surrey
KT9 2QL
England
Telephone:
+44 (0)1372 845600
Fax:
+44 (0)1372 845656
Email:
sales@
4. The Customer agrees not to attempt to decompile the object code of the Product otherwise than in circumstances specifically
provided for by law, and then only after consultation with Digico UK Ltd.
9. Digico UK Ltd reserves the right to terminate this Agreement upon breach, in which event Customer shall thereafter only be authorised to use the Product to the extent that its contractual commitments to third parties require and then only where such
ment or repair at Digico UK Ltd option. Digico UK Ltd makes no other express warranty, whether written or oral with respect of this
Product.
LIMITATION OF LIABILITY - Except as otherwise expressly provided by law, (a) the remedies provided above are the Customer's sole
ably execute its programming instructions when properly installed on the Target Platform. In the event that this Product fails to execute its programming instructions during the warranty period, the Customer's remedy shall be to return the Product to Digico UK Ltd for replace-
5. The Customer agrees not to use, or licence the Product for use, with equipment other than the Target Platform.
6. The Customer agrees not to modify the Product without the prior written consent of Digico UK Ltd.
"Target Platform": Digico SD10 Digital Console system.
In return for the payment of the one-time fee, the Customer (identified at the end of this Agreement) receives from Digico UK Ltd a licence to use the Product subject to the following terms and conditions.
and exclusive remedies and (b) Digico UK Ltd shall not be liable for any direct, indirect, special, incidental, or consequential daprofit whether based on warranty, contract, tort, or any other legal theory.)
Copyright © 2014 Digico UK Ltd
All rights reserved.
No part of this publication may be reproduced, transmitted, transcribed, stored in a retrieval system, or translated into any language in any form by any means without the written permission of Digico UK Ltd. Information in this manual is subject to change without notice, and does not represent a commitment on the part of the vendor. Digico UK Ltd shall not be liable for any loss or damage whatsoever arising from the use of information or any error contained in this manual. All repair and service of the SD10 product should be undertaken by Digico UK Ltd or its authorised agents. Digico UK Ltd cannot accept any liability whatsoever for any loss or damage caused by service, maintenance, or repair by unauthorised personnel.
commitments relate to use of the Product as authorised in the foregoing provisions of the Agreement.
LIMITED WARRANTY - Digico UK Ltd warrants for a period of 1 year from the date of purchase of the Product, the Product will reason-
Software License Notice
Your license agreement with Digico UK Ltd, which is included with the SD10 product, specifies the permitted and prohibited uses of the product. Any unauthorised duplication or use of Digico UK Ltd software, in whole or in part, in print or in any other storage and retrieval system is prohibited.
3. The Product and its licence are not transferable, and the Customer is not permitted to onward-license to any third party. The Cus-
tomer indemnifies Digico UK Ltd against any and all claims and actions arising from third party use of copies of the Product made by the Customer.
1. The Product may be used without time limit by the Customer on the Target Platform.
2. The Customer must register the Product with Digico UK Ltd. Registering the Product is deemed an acceptance of the terms and conditions in this agreement.
WWW:
Manual Issue and Date: Issue B - April 2014 - For Version 4.0.680+ Software