MY006-2A旋钮式单路调光器使用说明书
单杆 单位位置或3路(多位置)通用光度调节器说明书

Single Pole (One location) or 3-Way (Multi-location)Universal DimmerCat. No. REL06, 600W Incandescent, 600VA Magnetic Low Voltage, 300W - LED & CFL120VAC, 60HzINSTALLATION INSTRUCTIONSWARNINGS AND CAUTIONS:• TO AVOID FIRE, SHOCK, OR DEATH; TURN OFF POWER at circuit breaker or fuse and test that power is off before wiring!• DISCONNECT POWER AT CIRCUIT BREAKER OR FUSE WHEN SERVICING, INSTALLING OR REMOVING FIXTURE.• To be installed and/or used in accordance with electrical codes and regulations.• If you are unsure about any part of these instructions, consult an electrician.•T o avoid overheating and possible damage to this device and other equipment, do not install to control a receptacle, fluorescent lighting, a motor- or transformer operated appliance with exception to the listed compatible loads. Refer to for compatible LED and CFL bulbs.• Renu™ dimmers are not compatible with standard 3-way or 4-way switches. They must be used with compatible Renu™ remotes for multi-location dimming.• Use only one (1) Renu™ dimmer in a multi-location circuit with up to 9 coordinating remotes. The remote(s) will turn the light on at the brightness level selected at the dimmer.WARNINGS AND CAUTIONS:• F or use with compatible LED and CFL bulbs or fixtures that are marked as dimmable and designed for use with incandescent style phase cut dimmers.• Do not use to operate dioded lamps (Sylvania Designer 16™ or Philips PAR-16™).• Total minimum load must exceed 8W.• Dimmer may feel warm to the touch during normal operation.• Recommended minimum wall box depth is 2-1/2".• Maximum wire length from dimmer to all installed remotes cannot exceed 300 ft.• Use this device WITH COPPER OR COPPER CLAD WIRE ONLY .renuTMDI-000-REL06-02A-X6。
自动旋光仪的使用介绍 旋光仪如何做好保养
自动旋光仪的使用介绍旋光仪如何做好保养自动旋光仪是一个测量旋光性的仪器。
自动旋光仪的使用方法:(1)将旋光仪接于220V交流电源。
开启电源开关,约5分钟后钠光灯发光正常,就可开始工作。
自动旋光仪是一个测量旋光性的仪器。
自动旋光仪的使用方法:(1)将旋光仪接于220V交流电源。
开启电源开关,约5分钟后钠光灯发光正常,就可开始工作。
(2)检查旋光仪零位是否精准,即在旋光仪未放试管或放进充分蒸馏水的试管时,察看零度时视场亮度是否一致。
如不一致,说明有零位误差,应在测量读数中减去或加上该偏差值。
或放松度盘盖背面四只螺钉,微微转动度盘盖校正之(只能校正0.5°左右的误差,严重的应送制造厂检修)。
(3)选取长度适合的试管,注满待测试液,装上橡皮圈,旋上螺帽,直至不漏水为止。
螺帽不宜旋得太紧,否则护片玻璃会引起应力,影响读数正确性。
然后将试管两头残余溶液揩干,以免影响察看清楚度及测定精度。
(4)测定旋光读数:转动度盘、检偏镜、在视场中觅得亮度一致的位置,再从度盘上读数。
读数是正的为右旋物质,读数是负的为左旋物质。
(5)接受双游标读数法可按下列公式求得结果Q=(A+B)/2 式中:A和B分别为两游标窗读数值。
假如A=B,而且度盘转到任意位置都符合等式,则说明旋光仪没有偏心差(一般出厂前旋光仪均作过校正),可以不用对项读数法。
(6)旋光度和温度也有关系。
对大多数物质,用λ=5893A°(钠光)测定,当温度上升1℃时,旋光度约削减0.3%。
对于要求较高的测定工作,*好能在20℃±2℃的条件下进行。
—专业分析仪器服务平台,试验室仪器设备交易网,仪器行业专业网络宣扬媒体。
相关热词:等离子清洗机,反应釜,旋转蒸发仪,高精度温湿度计,露点仪,高效液相色谱仪价格,霉菌试验箱,跌落试验台,离子色谱仪价格,噪声计,高压灭菌器,集菌仪,接地电阻测试仪型号,柱温箱,旋涡混合仪,电热套,场强仪万能材料试验机价格,洗瓶机,匀浆机,耐候试验箱,熔融指数仪,透射电子显微镜。
光功率计使用说明书详尽细致版资料

光功率计使用说明书一、概述光功率计是光纤通信系统工程建設和维护中测量光电器件、光无源器件、光纤、光缆、光纤通信设备的必备工具。
二.技术条件2.1 性能指标2.基本功能a.显示方式:线性(mw/μw/ nw),对数(dBm)、相对測量(dB);b.自动功能:自动量程,自动调零,量程保持,平均处理,相对测量处理, 波长校准;三.原理光功率计由五部分组成, 即光探測器、程控放大器和程控滤波器、A/D转换器、微处理器以及控制面板与数码显示器。
被測光由PIN光探测器检测转换为光电流,由后续斩波稳定程控放大器将电流信号转换成电压信号,即实现I/V转换并放大,经程控滤波器滤除斩波附加分量及干扰信号后,送至A/D 转换器,变成相应于输入光功率电平的数字信号,由微处理器(CPU)进行数据处理,再由数码显示器显示其数据。
CPU可根据注入光功率的大小自动设置量程状态和滤波器状态,同时,可由面板输入指令(通过CPU)控制各部分完成指定工作。
不注入光的情况下,可指令仪器自动调零。
四.使用4.1 面板说明1)前面板(1)POWER 电源开关。
(2)W dBm 对数或线性测量方式转换开关按键每按一次此键,显示方式在“W”和“dBm”之间切换,并且数码显示窗右侧相应的指示器发光。
(3)d(REL) 相对测量按键。
按下,其数码显示窗右侧相应的指示器发光,可进行光功率的相对测量,参考光功率值即为按此键时的输入光功率值Pref,第二次测量的光功率显示值是相对于Pref的相对值。
按“W dBm”键便解除了此测量方式。
(4)λ SEL 波长选择键。
按一下此键,其上方指示器发光,指示仪器当前处于波长选择状态,并在数码显示窗显示其选择波长,并且右方nm指示器发光,示意单位为“纳米”。
此时,面板上其它控制键,除“MEAS”和“RMT”外,均不起作用。
(9)数码显示窗五位LED数码显示窗口。
显示光功率测量值或者(在波长选择期间)波长数。
4.2 操作电源开关置“ON”。
旋钮式LED调色温开关二

旋钮式LED 调色温开关二
本开关是一款集控于LED 开关/色温,适用于86暗盒式安装,固定式有线控制器,避免以往遥控器丢失或死区造成的遥控不灵的现象出现。
结合人性化合理的设计,更贴近使用者心声。
一参数描述:
1、额定电压:220VAC ±10%
2、静态功耗:≤0.1W
3、电源频率:50Hz
4、安装类型:86型,暗装式
二功能简述:
1、适用于可调色温LED 球泡灯、吸顶灯、射灯灯。
2、利用旋钮开关旋转控制ON/OFF 和亮度,中间按钮功能调节灯的色温。
面板功能分别为亮度加与减,色温冷与暖,ON/OFF 。
3、旋钮开关打开即电源接通,接着调节旋钮可改变所接负载灯的亮度。
中间按钮功能为调节灯的色温,长按中间按钮所接负载灯色温由冷色慢慢变暖色(整个变化行程时间6秒),色温调到最高时灯闪两下慢慢由暖色变为冷色循环(未松手时);松手时则记住当前状态。
亮度和色温可人性化灵活设置。
4、本控制器是固定式,有线控制;避免以往遥控器丢失,或死区造成的遥控不灵的现象。
5、接线如下图
火线入 数据线 火线 零线 零线入 信号地 零线
旋钮调光调色温开关 可调光调色温LED 灯
6、 本开关如下图
火线进
数据线
信号地
MCU
控制部分
数据编码
旋钮调光调色温开关 LED 灯内置数据解码,解码出PWM(DIM)信号去控制LED 灯的亮度和色温 电源变换电路供MCU , 零线入 火线入
7、外型图如下:。
功率调光器使用说明书
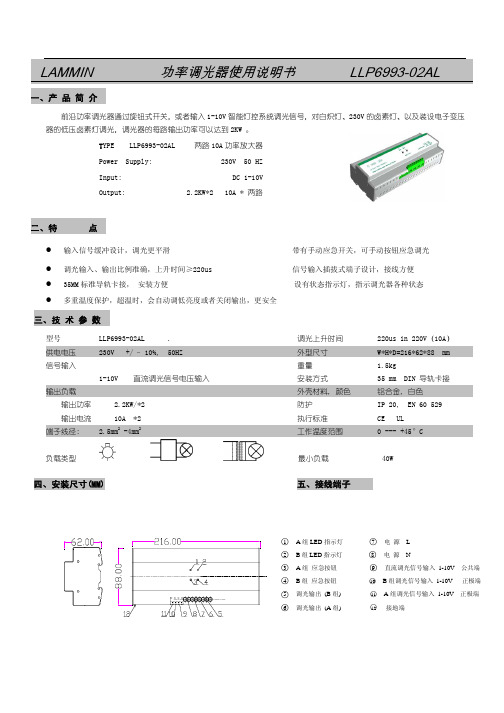
Power Supply:
230V 50 HZ
Input:
DC 1-10V
Output:
2.2KW*2 10A * 两路
二、特
点
z 输入信号缓冲设计,调光更平滑
z 调光输入、输出比例准确,上升时间≥220us z 35MM 标准导轨卡接, 安装方便 z 多重温度保护,超温时,会自动调低亮度或者关闭输出,更安全
在应急需要和检测时,持续按住应急手动/测试按钮(3), 此时,指示灯(1)开始快速闪烁,A 组输出亮度将持续从 0-100%, 100%-0 循环;短按按钮(3),回到正常工作状态,即 A 组输出 亮度,跟随(11)—(9)间输入电压改变。指示灯慢速闪烁。
B 组使用与 A 组相同,在(10)—(9)之间输入前级直流调 光信号(1-10V)时,输出端(5)输出大电流的调光信号。
入该设备。 z 如受潮或被液体侵袭,应及时进行干燥处理。 z 定期检查线路的受损和老化程度,应及时更换不合格
线路。 z 机器出现故障时,请与授权服务中心或本公司联系。 z ! 电源 AC220~240V 的接入必须通过合适的断路
器。
LAMMIN
制造监制商:莱明电子科技有限公司 本公司保留修改产品规格的权利
最小负载
40W
五、接线端子
○1 A 组 LED 指示灯 ○2 B 组 LED 指示灯 ○3 A 组 应急按钮 ○4 B 组 应急按钮 ○5 调光输出 (B 组) ○6 调光输出 (A 组)
○7 电 源 L ○8 电 源 N ○9 直流调光信号输入 1-10V 公共端
○10 B 组调光信号输入 1-10V 正极端 ○11 A 组调光信号输入 1-10V 正极端 ○12 接地端
调光上升时间 外型尺寸 重量 安装方式 外壳材料, 颜色 防护 执行标准 工作温度范围
单相电力调整器(调功器)的使用说明书
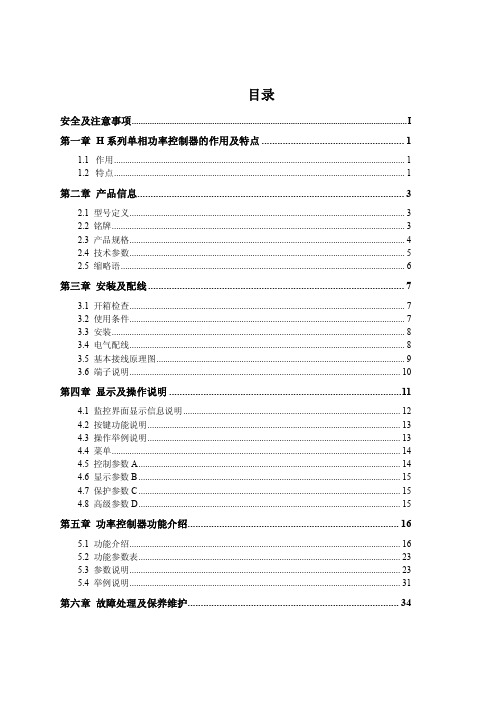
第六章 故障处理及保养维护................................................................................ 34
6.1 故障处理 ......................................................................................................................... 34 6.2 保养维护 ......................................................................................................................... 34
第三章 安装及配线 ................................................................................................. 7
3.1 3.2 3.3 3.4 3.5 3.6 开箱检查 ........................................................................................................................... 7 使用条件 ........................................................................................................................... 7 安装 ................................................................................................................................... 8 电气配线 ........................................................................................................................... 8 基本接线原理图 ............................................................................................................... 9 端子说明 ......................................................................................................................... 10
单火线触摸屏遥控调光开关说明书

单火线触摸屏遥控调光开关说明书本系列产品依据国际电工惯例,并采用国内外最先进的电子线路设计,电磁兼容性好,性能稳定可靠。
开关面板符合国家:GB16915.1-2003标准;该系列产品荣获国家两项专利:实用新型专利:200920167799.8 外观专利:200930083453.5特别适合家庭、酒店客房、别墅、商场、办公室、医院、仓库等照明场所使用。
一:产品结构示意图及规格说明:1、大小: 88mm*88mm*36mm2、装饰: 常规本白:镀金/镀银/PU银色/PU金色等(颜色装饰任选或自定)。
3、颜色: 面板钢化玻璃为黑色/纯白/银色/粉红(四种任选);底壳为黑色、ABS防火材料。
4、触摸屏:采用最新最先进的电子触控技术,手动触摸。
5、接线柱釆用纯铜。
二:技术指标:1、最大负载电流:总负载≤400W ; 大于400W时可订做。
2、使用寿命:10,0000 次操作;3、工作电压:交流AC:160-250V 50Hz/60H;4、温度环境:-10~60 度; 相对湿度≤90%;(无结露)5、工作电流:AC220V 时,待机功耗<0.2W。
6、遥控距离:空旷距离≥30米(无金属屏蔽情况)7、调节方法:电压调节每级10﹪,共十级或无级调节光式两种。
最低可调到20V左右。
8、安装方法:接线:与普通的传统开关完全一样, 可以直接更换和安装(不需要接零线)。
9、适用灯具:可以适用于市场上常见可调光灯具,常见的白炽灯,射灯,部分LED灯等,(对于节能灯管不适用) ;10:上电系统默认为100﹪最亮。
每级调整10﹪。
三:主要功能:1、多向控制--即可墙上用手动触摸控制,也可移动遥控器控制,手动遥控互动使用更方便;2、集中遥控-- 一个多键的遥控器可集中控制全家的智能遥控开关;3、隔墙遥控-- 可隔墙进行无线远距离遥控(在房间可遥控客厅的灯具);4、来电自熄-- 电网停电后再来电,开关自动处于关闭状态,避免浪费电能;5、互不干扰-- 采用数字编解码技术,无方向性,与邻居家同型号产品间不会互相干扰;6、群控功能-- 可让遥控器上的一个按键同时控制任意多路灯具的同时开、或同时关;7、总开总关-- 遥控器上可自由设定总开/总关按键轻松按下一个按键就能打开或关掉,(己学习并在控制距离范围内的)所有灯具;8、配合我公司的场景遥控器可实现:延时关、娱乐、夜、总开、总关等功能,还可通过电话控制器、防盗报警、网络控制。
控制器规格说明书
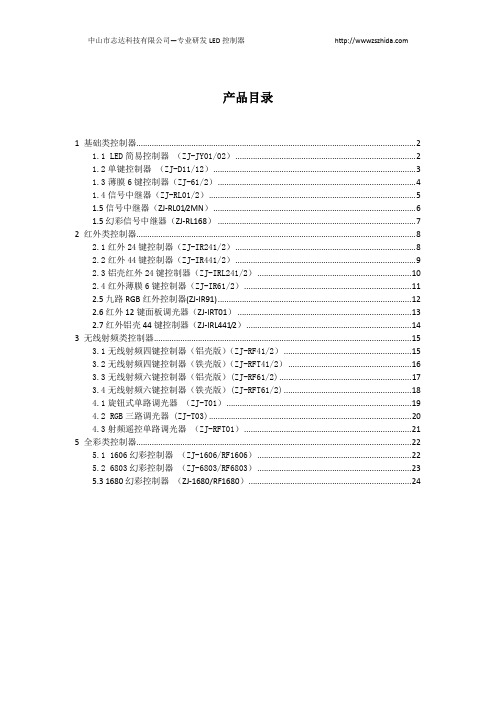
产品目录1 基础类控制器 (2)1.1 LED简易控制器(ZJ-JY01/02) (2)1.2单键控制器(ZJ-D11/12) (3)1.3薄膜6键控制器(ZJ-61/2) (4)1.4信号中继器(ZJ-RL01/2) (5)1.5信号中继器(ZJ-RL01/2MN) (6)1.5幻彩信号中继器(ZJ-RL168) (7)2 红外类控制器 (8)2.1红外24键控制器(ZJ-IR241/2) (8)2.2红外44键控制器(ZJ-IR441/2) (9)2.3铝壳红外24键控制器(ZJ-IRL241/2) (10)2.4红外薄膜6键控制器(ZJ-IR61/2) (11)2.5九路RGB红外控制器(ZJ-IR91) (12)2.6红外12键面板调光器(ZJ-IRT01) (13)2.7红外铝壳44键控制器(ZJ-IRL441/2) (14)3 无线射频类控制器 (15)3.1无线射频四键控制器(铝壳版)(ZJ-RF41/2) (15)3.2无线射频四键控制器(铁壳版)(ZJ-RFT41/2) (16)3.3无线射频六键控制器(铝壳版)(ZJ-RF61/2) (17)3.4无线射频六键控制器(铁壳版)(ZJ-RFT61/2) (18)4.1旋钮式单路调光器(ZJ-T01) (19)4.2 RGB三路调光器 (ZJ-T03) (20)4.3射频遥控单路调光器(ZJ-RFT01) (21)5 全彩类控制器 (22)5.1 1606幻彩控制器(ZJ-1606/RF1606) (22)5.2 6803幻彩控制器(ZJ-6803/RF6803) (23)5.3 1680幻彩控制器(ZJ-1680/RF1680) (24)1 基础类控制器1.1 LED简易控制器(ZJ-JY01/02)技术参数型号:HX-JYA \ HX-JYC工作温度:-20-60℃供电电压:DC 5V、12V、24V可选(订货时需注明)外形尺寸:L50*W35*H22mm输出:三个CMOS漏极开路输出连接方式:共阳、共阴最大负载电流:每路2A功能:七彩渐变、七彩跳变。
易成智能走廊灯自动调光器说明书

Selected Programmable ParametersPOWER UP Options: On/Off Sets the status of luminaires when power is applied. On - lights power-up on irrespective of occupancy. Off - lights respond to occupancy after 15 seconds. Pre-set - OnMOVEMENT DETECTOR OPERATIONOptions: Auto/Semi-auto Note: Only affects switched-live output, R1 (R2 is always fully automatic).Auto - lights switch on and off automatically. Semi-auto - lights are switched on by wall switch or hand-held controller and switch off automatically. Pre-set - Auto OFF DELAY 1 minute - 96 hours Sets the period after the last observed movement when the lights switch off. (In walk-test mode, the Off Delay is 10 seconds.) Pre-set - 20 mins(SENSITIVITY) RANGE WHEN LIGHTS ON/LIGHTS OFFOptions: 12 levels Occupied (i.e. Lights On): Max, High, Med, LowUnoccupied: (i.e. Lights Off): can reduce to a percentage of the ‘Occupied’ Range, improving immunity to nuisance triggering. Pre-set - HIGH/75%PHOTOCELL Options: Active/Passive/Disabled Passive - holds lights off when sufficient natural light. Active - lights turn on and off as required when natural light levels fluctuate and area is occupied. Disabled - the photocell has no effect. Pre-set - Disabled 24 HOUR CYCLE Options: Yes/No For use in ‘Washroom Mode’ only. Provides hygiene flush if area has been unoccupied for 24 hours. Pre-set - NoThe Gold Series LightSpot is part of a comprehensive range of presence detection systems designed to control modular luminaires with high frequency ballasts and other fixed-output lighting loads.Gold LightSpot offers superior-performance, programmable presence detection for lighting control in offices including open-plan areas. It uses microwave presence detection technology which enables the range and sensitivity to be adjusted to ensure a tailored detection pattern to suit any application. It is a dual-circuit control and is available for flush and surface mounting.Gold LightSpot offers the following features:LightSpot - Stand-alone lighting control by presence detection and photocellGold Series LightSpotActive presence detection by microwave technology.Passive photocell holds lights off in ambient conditions. Active photocell has the capability to switch lights off in occupied areas.Off delay - period following the last observedmovement after which the lights switch off (selectable via QuickSet Pro).Detection pattern and range in metres under normaloperating conditions.Switched Live influenced by photocell and occupancy; volt-free output by occupancy only. Independent time delays can be programmed via QuickSet Pro.Hand-held Controller provides local user override.Remote programming ensures changes can be easily accommodated.Washroom mode. If no movement is detected in a 24-hour period, detector can be programmed to switch the load on for the duration of the off delay. Can operate as a urinal control when used with an SV3 solenoid valve unit.Gold Series LightSpot T echnical Data Sheet D4072 Rev. H 14-Jul-2020 Page 1Gold Series LightSpot detectors are extremely sensitive to movement; they must be mounted on a solid surface which has no movement whatsoever.As these detectors use microwave technology to detect movement they are not recommended for applications where there are large surface areas of metal, e.g. metal ceiling or floor tiles, as unpredictable sensitivity may result.Also, note that these detectors are capable of detecting large moving metal objects well beyond the normal range at which they are sensitive to human targets.The units are colour coded (blue, yellow, red or green) according to four variations in operating frequency. T o ensure reliable operation, it is essential that units of the same colour code do not occupy adjacent positions in open-plan areas.Installation and Commissioning NotesSurface versionThe housing may be secured to a hard surface or a BESA box. The unit fits into the sinking box with a simple bayonet action thus concealing the fixing screws.Flush versionDepth required behind ceiling: 62mm from front flange plus an allowance for the minimum bend radius of the cable. Sinking box fits into 89mm diameter hole in ceiling tile or plasterboard ceiling. T o avoid damage to ceiling tile, do not overtighten. No access above the ceiling is necessary.Note :Do not mount within 25cm of a luminaire.Do not position this product on a pitch narrower than 5m.Page 2 Gold Series LightSpot T echnical Data Sheet D4072 Rev. H 14-Jul-2020Part Numbers MS2421PF Dual-circuit Gold LightSpot with photocell - flushMS2421PSM Dual-circuit Gold LightSpot with photocell - surface mounted QUICKSET PRO QuickSet Pro Digital 2-Way ProgrammerHC5A Universal Hand-held Controller c/w wall bracketSV3 WRAS-Approved Solenoid Valve - 15mm compression fittingsQuickSet Pro Digital 2-Way ProgrammerMenu-driven LCD Programmer with automatic equipment recognition and parameter download facilities.HC5A Universal Hand-held ControllerAllows manual override. Supplied with wall bracket.Ancillary ItemsOPERATING VOLTAGE: 230V 50-60 HzPRODUCT RATING & RECOMMENDED CIRCUIT PROTECTION: 10 Amps MAXIMUM RECOMMENDED LOAD: 10 Amps per output (not exceeding 10A in total)2TERMINAL CAPACITY: 2 x 2.5mm PHOTOCELL: Adjustable 0-5000 lux (with a 20% reflective work plane)OFF DELAY: 1 minute - 96 hoursRANGE: Approx 7m dia at 2.4m ceiling heightMAXIMUM RECOMMENDED MOUNTING HEIGHT : 3.0m COLOUR: WhiteMATERIAL: Flame retardant PC/ABSWEIGHT : 243g (flush version), 251g (surface version)IP RATING: 2Xo o OPERATING TEMPERATURE: 0C to 40CEx-Or operates a genuine policy of continuous improvement. You may expect the specification to be regularly enhanced. For latest technical information, please visit Technical DataGold Series LightSpot T echnical Data Sheet D4072 Rev. H 14-Jul-2020 Page 3Please check to ensure this is the most recent issueD4072 Rev. H 14-Jul-2020Gold Series LightSpot T echnical Data Sheet Page 4。
led调光器使用方法

led调光器使用方法
LED调光器是一种用于控制LED灯光亮度的设备,它可以帮助
用户实现灯光的调节和控制。
在本文中,我们将介绍LED调光器的
使用方法,帮助大家更好地了解如何使用这一设备。
首先,LED调光器通常具有多种控制方式,包括旋钮式、触摸式、遥控式等。
用户可以根据自己的需求和喜好选择合适的控制方式。
其次,使用LED调光器时,首先需要将LED灯和调光器连接好,并确保电源已经接通。
接下来,根据调光器的说明书,进行相应的
操作,例如旋动旋钮、触摸屏操作或者遥控器控制,来调节LED灯
的亮度。
此外,LED调光器通常还具有定时、记忆、情景模式等功能,
用户可以根据自己的需求进行设置和调节。
比如可以设置定时开关灯,或者通过情景模式来实现不同场景下的灯光效果切换。
需要注意的是,使用LED调光器时,要根据LED灯的功率和调
光器的功率匹配情况来选择合适的调光器,以免造成设备损坏或者
不良使用效果。
总的来说,LED调光器是一种非常实用的灯光控制设备,能够帮助用户实现灯光的调节和控制,提升居家、办公等环境的舒适度和美观度。
希望通过本文的介绍,大家能更好地掌握LED调光器的使用方法,从而更好地享受LED灯光带来的便利和舒适。
爱立信单拨调光器说明书

Eaton SUL06P-GYEaton slide dimmer, 300W LED-600W Halogen, #14 -12 AWG,Residential/ Light Commercial, Flush, 120V, Grey, 63 Hz, Mark 10Flourescent, Single-pole, Three-way, 1,2,3+, Single-phase, Backand side wire, Polycarbonate, 300W - 600W 319199General specificationsProduct Name Catalog NumberEaton slide dimmer SUL06P-GYUPC Product Length/Depth************ 2 inProduct Height Product Width4.25 in 2 inProduct Weight Certifications0.001 lb Contact ManufacturerSingle-phase Back and side wire Mark 10 FLR-4 °FMaintainedBack and side Flush300 - 600 WSlide158 °F60 Hz120VBackSide120 VNo neutral required Dimmer switch Gray Universal slide dimmer instruction sheetUniversal slide dimmer brochureUniversal slide dimmer sell sheetUniversal dimmers brochureUniversal dimmers sell sheetUniversal slide dimmerHow to install Eaton's universal slide dimmersUniversal dimmers quick reference guideEaton SUL dimmers - how to change the color of the faceplateEaton Specification Sheet - SUL06P-GYUniversal slide dimmer spec sheetPhaseTermination styleLoad typeOperating temperature - min Closure typeWiring methodMounting methodPower consumptionStyle typeOperating temperature - max Frequency ratingVoltageConnection typeVoltage ratingSpecial featuresSwitch typeColor BrochuresInstallation instructions Installation videosManuals and user guides MultimediaSpecifications and datasheetsEaton Corporation plc Eaton House30 Pembroke Road Dublin 4, Ireland © 2023 Eaton. All Rights Reserved. Eaton is a registered trademark.All other trademarks areproperty of their respectiveowners./socialmediaResidential Polycarbonate Single-pole, Three-way 2 3 1GrayDryThree-way Low-voltage/low-magnetic 14 lbf-inchGrade Material Number Of Poles Number of gangs Surface finishing color Environmental conditions Number of ways ApplicationTorque rating。
调光器使用说明_V1
SMARTISYS IPCLI系列调光器使用说明一.功能描述在学术报告、多媒体演示等场合,配合演示要求,通过SMARTISYS®控制系统和IPCLI调光器对会议灯光进行控制和调节能够极大地提高演示的效果。
SMARTISYS®IPCLI系列调光器有程序控制和手动控制两种控制模式;在应急情况下,可以通过手动方式对相应的灯组进行开关控制及操作;在程序控制模式下,通过Smart Control Builder™编程进行任意独立或组合的灯光进行明暗调节和控制。
IPCLI输入采用4-Pin专用网络接线端子,用于直接给该设备供电和发送控制信号,调光器直接根据信号判定当前的调节程度,然后控制可控硅,以达到无级灯光调节的目的。
在整个SMARTISYS®系统中,每一个网络控制单元均需要设置一个唯一的ID,它由两位十六进制数组成,用户通过直接调拨L和H两个旋钮,根据需要,设置成从03到FF,只要设置同Smart Control Builder™软件硬件配置中的参数匹配,系统便可自动识别,以达到对应控制目的。
由于整个系统采用了专用网络和协议通讯,加上ID的唯一性,我们可以将处于不同位置的设备接入到同一系统中来,并且支持多达250个网络设备,这样,不仅大大提高了整个硬件系统的使用效率,提升了集控程度,而且还简化了操作。
SMARTISYS®系列调光器有IPCLI-4、IPCLI-4L和IPCLI-6L两个型号,它们具有相同的电气特性,主要区别在于:IPCLI-4 IPCLI系列调光器,4路独立灯光调节单元IPCLI-4L IPCLI系列机架式调光器,4路独立灯光调节单元IPCLI-6L IPCLI系列机架式调光器,6路独立灯光调节单元二.物理特征调光路数:4路/6路独立调光单元接入功率:单通道220V,1800W,总功率小于3600W网络输入:4位专用网络接线端子外壳:深灰色和黑色金属外壳安装方式:嵌墙、挂墙式或机架式三.操作说明输入包括4-Pin专用网络接线端子,用于直接给该设备发送控制信号,接入了系统,便可直接通过主控机控制,调光器控制芯片通过解析主控机发送过来的命令从而执行相应的操作。
单火线调光面板安装说明书

一、调光面板示意图图1二、 面板的安装按下图2方式连接好火线、零线以及灯控线。
图2三、无线调光面板的学习第一步:在主机PC客户端选择“设备”—“常规设备”,点击添加,如图3。
图31、名称:用户自定义设备的名称;2、设备类型:必须选择为调光灯;2、楼层和房间:根据设备安装的位置进行设置;3、频率类型:315MHz;4、编码类型:2262编码;5、电阻类型:3.3M;6、地址码:每一位有三种状态,分别为“H”、”N”和“L”,可以自由设置;7、数据码:软件自动分配;成功添加后,如图4第二步:返回主界面“房间”选项,点击选择“灯光”,如图5。
图5四、调光面板的学习长按【开关】按钮进入学习状态。
学习状态有以下4种模式:学码指示灯闪亮1次,同时蜂鸣器“滴”一声 -------学习单开/单关;(按一下开,按一下关)学码指示灯闪亮2次,同时蜂鸣器“滴”一声 -------学习只开不关;学码指示灯闪亮3次,同时蜂鸣器“滴”一声 -------学习只关不开;学习指示灯闪亮4次,同时蜂鸣器“滴”一声 -------开关按键进入清码状态。
进入清码状态后松手,在2秒内再长按【开关】按钮,学码指示灯闪亮5次后完成清码。
4.1关灯学习调光面板上电。
当调光面板进入“只关不开”学习状态时松手。
然后单击PC端软件上的调光灯任意刻度。
验证:调光灯处于开灯状态,单击PC端软件上调光灯刚学习的刻度。
若调光灯熄灭,则说明此刻度学习成功,为关灯刻度。
4.2xx% 亮度学习首先调光灯处于开灯状态。
通过【调亮】/【调暗】按钮调整需要学习的亮度xx%,然后使调光面板进入“只开不关”学习状态。
此时松手。
然后单击PC端软件上的调光灯任意刻度(除已学习刻度)。
验证:使调光灯处于关灯状态,单击PC端软件上调光灯刚学习的刻度。
若调光灯达到学习亮度xx%,则说明此刻度学习成功,为xx%亮度的只开灯刻度。
备注:在PC端软件上的调光灯的刻度,通常最左为0%(即关灯),最右为100%亮度。
调光器和电源连接说明说明书

Dimmer & Power supply208Connectable length per dimmerble driverPX24606 (3A x 1ch)DALI6010 (10A x 1ch)DIM-S1L10V-0 (10A x 1ch)PWM-120-24*connectable up to 2.4A,when using 100W DC24V PSUas 60% load factor*connectable up to 3.75A,when using 150W DC24V PSUas 60% load factor*connect up to 108W as 90% load Model No.Output(W/m)Max. lengthper circuit (m)Connectable lengthper one driver (m)W (VA)Connectable lengthper one driver (m)W (VA)Connectable lengthper one driver (m)W (VA) LRE-1003-*DF-I31.2 3.3 1.856.2 2.887.4 3.4*106.1 LCEL or LCEF-0880-*-DF-I20.65 2.755.7 4.388.6 5.2*107.1 LSWK or LSXK-1008-*-DF-I-1313.16 4.356.4 6.889.18.2*107.4 LSWK or LSXK-1008-*-DF-I-88.167.1*57.611.1*89.913.3*107.7 LSWK or LSXK-1008-*-DF-I-4 4.3613.3*57.220.9*89.925.1*107.9 LNL-0980-*DF-I7.258*57.612.5*9015*108 LSM-T1000W-*-DF-I15.45 3.7*57 5.8*89.37*107.8 LFPEX15-T1000W-*-CL-*18.2 5.0 m (I), 3.5 m(O) 3.156.5 4.989.2 5.9*107.4 LFPEX20-T1000W-*-CL-*12.15 4.756.97.489.58.9*107.7 LFPEX30-T1000W-*-CL-*-99.556*579.4*89.311.3*107.4 LFPEX30-T1000W-*-CL-*-6 6.558.8*57.213.8*89.716.6*107.9 LFPEX30-T1000W-*-CL-*-4 4.5512.8*57.620*9024*108 LFPSC20-1000-*-CL-I14.25456.8 6.3*89.57.6*108 LFP15-T0900W-*-CL-*15.4 4.5 3.757 5.8*89.37*107.8 LFP20-T1000W-*-CL-*10.55 5.456.78.5*89.310.2*107.1 LFPA20-0960-*-CL-*10.45 5.5*57.28.6*89.410.3*107.1 LFTF10 or LFTXF10-T1000W-*-CL-* 3.9514.7*57.423*89.727.6*107.6 LFTF16-T1000W-*-CL-* 2.5523*57.536*9043.2*108 LRO-1142-*-DF-IW8.4 4.5 6.8*57.210.7*89.912.8*107.5 L-ELA9K2-096***-24C-P19.29357.6 4.688.3 5.6*107.5 L-ELS7K1-098***-247.7 6.97.4*5711.6*89.314*107.8 L-ELR9K2-098***-M-247.7 6.97.4*5711.6*89.314*107.8 LFU -T1000WS-*-DF-O-1515.85 3.656.9 5.688.5 6.8107.4 LFU -T1000WS-*-DF-O-121210 4.857.67.5909108 LFU -T1000WS-*-DF-O-88107.257.611.289.613.5*108 LFXK-T1000W-*-DF-O 4.81012*57.618.7*89.822.5*108Dimmer*Split into multiple circuitDimmer & Power supply | DimmerDimmer | Dimmer & Power supplyDimmer & Power supply209DALI or Touch DIM- Meets DMX512/1990- 1 output CH.,can drive 3A- With control system,can express perfect effect - Can set the DMX512 addess freely- Modularizing,can be combined with LED module neatly - Single channel constant voltage output ,10A - Meet DALI protocol IEC 62386- Dimming range from 0.1-100%- PWM digital dimming, no alter LED color rendering index - Suitable for indoor LED lighting application- Protections: Short circuit, over load, over temperature Wiring DiagramWiring DiagramMaximum wiring distance from - is 10m/20m.Please refer to manuals of each product. Please check the maximum of connectable LED length in one series referring to the catalog page of each product.When the LED total length exceeds the maximum length in series, please connect by separating into several circuit.Twist shield cable is recommended to use as a signal cable.Maximum wiring distance from - is 10m/20m.Please refer to manuals of each product. Please check the maximum of connectable LED length in one series referring to the catalog page of each product.When the LED total length exceeds the maximum length in series, please connect by separating into several circuit.Twist shield cable is recommended to use as a signal cable.0-10V DCDNX512INPUT DNX512OUTPUT For DC24V single color series PX24606series Constant Voltage - Dimmable driver (DC input) - 1ch DMX Driver 3A x 1chDimmable driver (DC input) - 1ch EUCHIPSFor DC24V single color series DALI6010Constant Voltage - Dimmable driver (DC input) - 1ch DALI Driver 10A x 1ch EUCHIPS* Please read and follow the specification and the instruction manual issued by the manufacturer of controller and driver. The specification may be subject to change without prior notice.Dimmer & Power supply2100-10V / 1-10VDC12-24VPOWERDimmer・Analog Signal driver,receive 0-10V/1-10V dimsingal.・1channel output,MAX 10A per 1ch.*Connectable 80% load=8A of LED・Over-temperature protection・Analog Signal driver,receive 1-10V dimsingal.Wiring DiagramWiring DiagramMaximum wiring distance from - is 20m.Maximum wiring distance from - is 20m.Please check the maximum of connectable LED length in one series referring to thecatalog page of each product.When the LED total length exceeds the maximum lengthin series, please connect by separating into several circuit.Twist shield cable is recommended to use as a signal cable.For DC24V single color seriesFor single color seriesDIM-S1L10V-0Walldim 103E1Constant Voltage - Dimmable driver (DC input) - 1chDimmer controller - 1ch0-10V/1-10V Driver 10A x 1ch1-10V Dimmer ControllerEUCHIPSEUCHIPSMaximum wiring distance from - is 10m/20m.Please refer to manuals of eachproduct. Please check the maximum of connectable LED length in one series referring tothe catalog page of each product.When the LED total length exceeds the maximum length in series, please connect byseparating into several circuit.Twist shield cable is recommended to use as a signal cable.* Please read and follow the specification and the instruction manual issued by the manufacturer of controller and driver. The specification may be subject to change without prior notice.Dimmer & Power supply | DimmerDimmer | Dimmer & Power supplyDimmer & Power supply211Twist shield cable is recommended to use as a signal cable.- DC 24V constant volage dimmable power supply - IP67 waterproof- 3 in 1 dimming function 0-10V, PWM, resistance Wiring DiagramFor DC24V single color series PWM-120-24Constant Voltage - Dimmable driver (AC input) - 1ch Dimmable power supply IP67MeanwellAC/L(Brown)AC/N(Blue)+V(Red)-V(Black)DIM+(Blue)DIM-(White)Dimmer & Power supply212- Support 3-in-1 dimming function(0-10V /1-10V active signal, Adjustable resistance, PWM)- Support dimming mode selectionc- Support the short circuit, over current protection and alarm functionc- Logarithmic dimming curve- Built-in CCT adjust mode, the user can adjust color temperaturewithout changing the output power- For adjusting the brightness/ color temperature of LED strip- Supply voltage of 12-15VDC- Output 2 channels 0-10V analog dimming signal- Can adjust brightness and color temperature of lamps- Show the current brightness or color grades- can be installed in compliance with DIN 49073 and 86 standard wall boxWiring DiagramWiring DiagramFor DC24V Dynamic white seriesFor Dynamic white seriesDIM-S2L8V-0Walldim 202Constant Voltage - Dimmable driver (DC input) - 2chDimmer controller - 2ch0-10V/1-10V Driver 8A, 2ch2ch Multi Function Panel ControllerEUCHIPSEUCHIPS0/1-10V SignalDC12-24VPOWER0-10V SignalDC12POWERLED DimmerConnectable length per dimmerble driver (DIM-S2L8V)ex. when using 150W PSU, 60% load factorModel No.Output(W/m)Max. lengthper circuit (m)Connectable lengthper one driver (m)W (VA)LFPTH-1000--*CL-I1158.1*89.1LTH-1000-*-DF-I31.24 2.887.4* Please read and follow the specification and the instruction manual issued by the manufacturer of controller and driver. The specification may be subject to change without prior notice.Twist shield cable is recommended to use as a signal cable.*Split into multiple circuitTwist shield cable is recommended to use as a signal cable.Dimmer & Power supply | DimmerDimmer | Dimmer & Power supplyDimmer & Power supply213- Wide input range 180 ~ 528 VAC - Constant current mode output - Metal housing with class I design- IP67 / IP65 design for indoor or outdoor installations - Function options:output adjustable via potentiometer; 3 in 1 dimming (dim-to-off); Timer dimmingWiring DiagramFor Vivoxy Graze HVGC-*-*B Constant Current - Dimmable driver (AC input) - 1ch Constant Current dimmable driver IP67MeanwellFG (Green/Yellow)AC/L(Brown)AC/N(Blue)HVGC-65DIM+(Blue)DIM-(White)-V(Black)+V(Red)* Please read and follow the specification and the instruction manual issued by the manufacturer of controller and driver. The specification may be subject to change without prior notice.Twist shield cable is recommended to use as a signal cable.Dimmer & Power supply214With thorough quality control,Luci continues to make products that customers canuse with confidenceQuality policy of Luci ORILEGA- In-house designed electric circuit and housing- Reliability test and safety test conducted by our company and third-party test laboratory- Ongoing operation test in high-temperature circumstance (60- Production process under Luci own standards and one hundred percent inspectionPSE certified range: AC100 - 242VComplied with CISPR11Ordinary LED driver used in Japan100V100V 120V242VORILEGA is PSE compliant at all voltages. Voltage range that can be used not onlyin Japan but also in many overseas countries.CISPR is an abbreviation of French of the International Special Committee on RadioInterference, and it is a standard that sets electromagnetic tolerance for equipment thatmay be affected by electromagnetic waves. Available to use in hospital and medicalinstitution as ORILEGA is in conformity to CISPR11 and CISPR15.Quiet structure conforming to JISReduced sound generation due to coil vibration during PWM dimming, maintainingoperating noise in 25 dB or less. Meets the requirements of JIS C 8115 sound level.CE mark compliance / RoHScompliant with environmental directivesAvailable to import and use in EU as ORILEGA comply with CE mark which required tobe labelled on the product complying with the laws and regulations and RoHS directivecompliant with the environmental standard in EU. In addition, ORILEGA is designedLuci ORILEGA conforms to various standardsPower SupplyPower supply | Dimmer & Power supplyDimmer & Power supply | Power supplyDimmer & Power supplyDimmer & Power supply215Luci Power Supply AC100v-242vPC isolated case, safe and durable structureRobust structure conforming to Japan indoor wiring regulations aimed at securing the safety of electrical equipment Countermeasures against discoloration and overheating*In case using LED fixture which maximum length per series is 5m.=1.25sqMaximum distanceto the terminal of LED fixture: 35 mThe distance from power supply to the terminal of LED fixture can be extended up to 35 m when the output cable is 1.25 sq mm.Structure of low heat dissipationRipple voltage occurs in DC24V output device. It may slightly affect the output effect of the LED fixtures. The lower output ripple voltage, the lower flickering occurs. Output ripple voltage of ORILEGA is 50mV which is lower than other power supply.TimetyPower supply | Dimmer & Power supplyDimmer & Power supply216LPSOLND : Non dimLPSOL -- 24 - ND -I145 : 145W 075 : 75W 030 : 30W24 : 24VLPSOL -145/075/030I : IndoorsCertification- PSE (AC100 ~242V) - CE - CCC - RoHS- IEC61000-3-2 Class C - CISPR11, CISPR15- JIS C 8115 Sound level requirement75W30W12.584side view 23512side view 25012side view 2Dimmer & Power supply | Power supplyDimmer & Power supply217Terminal block for Output side Model No. : LBX-O1Easy output side connectionOutput box with built-in terminal block Output branch (3 branch)9041.525.4side view 2side view 1top viewTerminal blockOption partsPower supply | Dimmer & Power supplyDimmer & Power supply218System configuration diagramDimmingLuci ORILEGA DC24V power supply LPSOL-*-24-ND-IExternal dimming driverInstallation Guide* Please read and follow the specification and the instruction manual issued by the manufacturer of controller and driver. The specification may be subject to change without prior notice.Dimmer & Power supply | Power supplyDimmer & Power supply219vertical orientation!- This product has a life span.- Degradation occurs inside after 8-10 years of installation even when the device looks fine from the outside.- Parts of the product degrade due to heat when using for a long period. This causes not only safety issues, but also reduces power efficiency and it is recommended to have regular maintenance and inspection. - Life cycle of the product will be shorter in high ambient temperature or in the use for a long period.- Cleaning and inspection should be performed at least once every 6 months.- Inspection by a specialist, such as a product contractor, should be performed at least once every 3 years.- If the product is used for a long time without having an inspection, there is a small possibility that it could lead to fuming, igniting, electric shock and the like. Inspection MethodsIs the output verification indicator (LED-green: located at the side of the lead-wire on output side) turned on?Are output voltage and output current in normal conditions?Is there any coloring/ fall-off/ abnormal heat build-up at wiring connection part?Is there any unusual smell, sound or heat?Are there any cracks, splits, or detached parts on any parts or joints?Cleaning MethodTurn off the power before cleaning the device.Lightly wipe this product with a soft cloth.To best clean this product, wipe dirt with a soft cloth which has been soaked in a neutral detergent diluted with water and wrung firmly. To finish off, wipe it with a damp cloth and dry it. Make sure the place of installation has enough strength to hold the weight of the device. Make sure the LED fixture meets the specification of this device.Do not perform installation/ removal work while power on. Otherwise, an electric shock may occur.Wire connection methodsInstalling the productMaintenance and Inspectioninstantly.Please ensure to connect the device to ground in order to protect from electric shock or devices from getting damaged by external noise.Power supply | Dimmer & Power supplyDimmer & Power supply220Model Product nameModel No.Rating Size noteCCC, CE Model35W Single Output Switching Power SupplyLRS-35-2485~264VACDC24V 1.5A W99 H82 D30- MEAN WELL - I/O terminal block-Protections: Short circuit / Overload / Over voltage100W Single Output Switching Power SupplyLRS-100-24DC24V 4.5A W129 H97 D30150W Single Output Switching Power SupplyLRS-150-2485~132VAC / 170~264VAC by switchDC24V 6.5A W159 H97 D30- MEAN WELL - I/O terminal block-Protections: Short circuit / Overload /Over voltage / Over temperaturCables used for connecting LED fixtures and Power supply must be a suitable type and gauge.The cable should be joined with a suitable terminal. Otherwise, the power supply will be broken. Please install appopriate envioment according to specifications.Caution: When using a long thin cable, the resistance of cable will increase. Voltage drop and heat accumulation may occur and result in brightness decreasing.Caution: When separate one cable to multiple circuits in the same gauge, the current loading are collected on the junction of the branch circuit and it will be high temprature there. Please consider the loading of the power supply (quantity of LED fixture) and review the wiring system to avoid the above problem.When connect the dimmer driver with power supply, unpredicted noise might occur. It is the characteristic of electronic devices, not a malfunction of the LED fixture.Please choose an appropriate power supply and consider a place to install. Reducing the loading factor of LED fixture mightimprove the noise from the power supply, and the noise from LED fixtures might be improved by splitting the circuit of LED fixtures into multiple.Pay attention to the electrical capacity of the load (lamp) connected to the power supply.For 15 to 150W, consumption of 70% of a full power or less by the load is typically assumed.When using dimming driver, the load factor of the LED fixtures connected to the power supply is recommended 60% or less to reduce the possibility of occurrence of noise.Example: Choosing power supply for 10pcs of Luci Power FLEX 20mm pitch Luci Power FLEX 20mm pitch 10.5W x 10pcs = 105W 105W ÷70% (load factor) = Approx. 150W Select a 150W power supply.Small noise may be emitted from the appliance and the dimmer while using the dimmer, but it is normal. Load capacity of 60% is recommended to reduce noise.Specification may be subject to change without announcement.Power supplyConnecting to power supplyPower supply selection method* Please read and follow the specification and the instruction manual issued by the manufacturer of controller and driver. The specification may be subject to change without prior notice.CE MARK CE MARK221Signature:Junko Kageyama。
实验一调光台、调光器的使用

实验一调光台、调光器的使用一、实验目的1、了解演播厅灯光知识2、了解掌握调光台、调光器的的原理3、掌握调光台、调光器的的设备连接和操作使用二、实验原理(一)演播厅灯光知识演播室的灯具的配置:1.以冷光源为主,灯体采用铝型材所制,重量轻,发光面积大,光线柔和.阴影谈化。
不眩目,不刺眼.长时间拍摄室内温度不升高.寿命长,灯管寿命不低于一万小时. 2.冷光聚光灯,光学设计合理,光效高、重量轻、散热性能好,灯具冲压成型,耐高温喷塑工艺。
采用新型大螺纹透镜,高纯铝金属反光碗,光洁度达到国际水平,永不老化.变色.压弹式灯泡插座,换灯泡方便,安全可靠,灯具散热性能好。
悬挂部分:1.主、副轨采用铝合金“工”字轨,重量轻,承重性能好,移动无噪音,不导磁.是演播室首选悬挂器材. 2.万向滑车、灯具滑车采用铝合金材料。
滑轮采用承重轴承,移动灵活方便,万向滑车可360度旋转、滑动.可将灯具任意调整。
布光部分:轮廓光、面光、侧光、背景光(二)调光台、调光器调光台走灯原理:由运放接成施密特门再接成多谐振荡器产生走灯脉冲,脉冲送入计数器CD4028,计数器再产生移位脉冲,形成走灯效果。
调光台输出原理:线性混合电路能将走灯信号、分控信号、点控信号叠加,按“输出电压大者优先输出”原则加入运放的正确输入端,进行混合,因运放的输入阻抗无穷大,减少了信号经二极管隔离后的非线性影响,等效于线性混合。
运放还有电流放大作用,信号经放大后输出。
调光器原理:模拟调光台所发出的模拟信号,经传输电缆送至本机模拟信号输入座,通过触发电源板形成触发脉冲后,使得输出模块产生随输入信号幅值而变化的输出,从而驱动与玻璃钢输出座相连的负载灯具。
三、实验仪器HDL-3006调光台1台,HDL-调光器1台,演播厅灯光设备1套(轮廓光、面光、侧光、背景光),连接线若干,220V交流电等。
四、实验步骤1、确认交流电源是关闭的。
2、调光台的连接和使用(见HDL-3006调光台说明书3-4)3、调光器的连接和使用(见HDL-3006DS(N)调光台说明书6-8)五、实验心得附一:调光技术的基础知识一、调光控制系统的现状1.1 调光控制系统的构成调光控制系统主要由调光控制台、调光器及辅助设备等组成。
调光开关的功能和特征以及工作原理

调光开关的功能和特征以及工作原理
调光开关以其智能,方便,时尚的品质被众多消费者所喜爱.调光开关是一个方便的电子设备,通过旋钮或滑杆可以从几乎没有光线的亮度逐渐调整到最大亮度。
调光器开关调整,电阻值的大小控制通过灯电压。
调光开关原理
调光器开关调整,电阻值的大小控制通过灯的电压,如果你想控制电机和连接串联分压。
调光开关特性
1个触摸金属片或按/关闭按钮,远程控制打开或关闭灯;
2长时间接触金属板或一个单一的遥控按钮,调整光的亮度逐渐变化;
3具有记忆功能,每一个开始和最
后一组亮度。
调光开关功能
1,断电记忆功能
2,手动/远程控制功能
3,单向可调光
4,淡出的功能
调光开关特性
1单次触摸金属片或按遥控器
NO/OFF键开启或关闭灯;
2长时间接触金属片或单一的遥控按钮,调整光的亮度逐渐变化;
3具有记忆功能,每次重新开启并保留上次设置的亮度。
调光器开关可以满足人们的需求在不同时间上的光的亮度不同的需求,可以直接取代现有的墙壁开关。
适用于家庭居室,公寓,酒店,医院和其他公共场所。
扩展阅读:调光开光如何接线?。
- 1、下载文档前请自行甄别文档内容的完整性,平台不提供额外的编辑、内容补充、找答案等附加服务。
- 2、"仅部分预览"的文档,不可在线预览部分如存在完整性等问题,可反馈申请退款(可完整预览的文档不适用该条件!)。
- 3、如文档侵犯您的权益,请联系客服反馈,我们会尽快为您处理(人工客服工作时间:9:00-18:30)。
MY006-2A旋钮式单路调光器使用说明书产品简介:
MY006-2A调光器是一种可实现无级调光的控制器。
采用旋钮控制方式,用户可根据实际需要,将灯光调至适当的亮度。
一、产品技术参数:
●工作温度:-20-60℃
●电源输入:DC12V-24V
●输出:1回路
●输出电流:<2A
●输出功率: <24W( 12V ) ; <48W( 24V )
●静态功耗:<0.5W
●外型尺寸:L65ΧW33ΧH35 mm
●净重:60g
二、使用说明:
1.先连接好负载线,再接电源线;上电前确保连接线之间无短路现象。
2.采用旋转式控制,功能如下:
旋钮向右旋转时,亮度逐渐变亮,旋到最右边时,亮度最大。
旋钮向左旋转时,亮度逐渐变暗,旋到最左边时,灯关闭。
3.引出线应按照接线图提供的标号,正确接线。
4.本产品不可超负荷使用。
5.本产品的质保期为1年,但不包括人为损坏或超负荷工作的情形。
三、控制器连接示意图:。
