ThingMagic推出增强版Sargas RAIN RFID读卡器
超高频rfid四通道读写器M6 -wifi版 ThingMagic
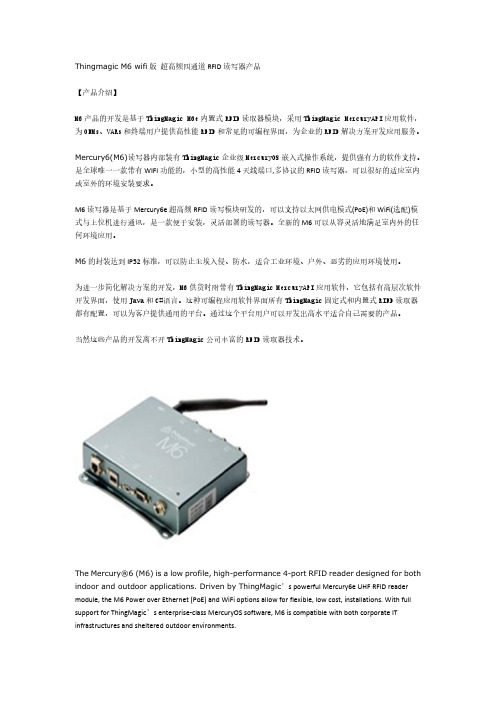
Thingmagic M6wifi版超高频四通道RFID读写器产品【产品介绍】M6产品的开发是基于ThingMagic M6e内置式RFID读取器模块,采用ThingMagic MercuryAPI应用软件,为OEMs、VARs和终端用户提供高性能RFID和常见的可编程界面,为企业的RFID解决方案开发应用服务。
Mercury6(M6)读写器内部装有ThingMagic企业级MercuryOS嵌入式操作系统,提供强有力的软件支持。
是全球唯一一款带有WIFI功能的,小型的高性能4天线端口,多协议的RFID读写器,可以很好的适应室内或室外的环境安装要求。
M6读写器是基于Mercury6e超高频RFID读写模块研发的,可以支持以太网供电模式(PoE)和WiFi(选配)模式与上位机进行通讯,是一款便于安装,灵活部署的读写器。
全新的M6可以从容灵活地满足室内外的任何环境应用。
M6的封装达到IP52标准,可以防止尘埃入侵、防水,适合工业环境、户外、恶劣的应用环境使用。
为进一步简化解决方案的开发,M6供货时附带有ThingMagic MercuryAPI应用软件,它包括有高层次软件开发界面,使用Java和C#语言。
这种可编程应用软件界面所有ThingMagic固定式和内置式RIFD读取器都有配置,可以为客户提供通用的平台。
通过这个平台用户可以开发出高水平适合自己需要的产品。
当然这些产品的开发离不开ThingMagic公司丰富的RFID读取器技术。
The Mercury®6(M6)is a low profile,high-performance4-port RFID reader designed for both indoor and outdoor applications.Driven by ThingMagic’s powerful Mercury6e UHF RFID reader module,the M6Power over Ethernet(PoE)and WiFi options allow for flexible,low cost,installations.With full support for ThingMagic’s enterprise-class MercuryOS software,M6is compatible with both corporate IT infrastructures and sheltered outdoor environments.Building on the ease of use,reliability and enterprise-grade performance ThingMagic products are known for,the M6offers a low-profile form factor,rugged service operatingcapabilities and the industry’s highest transmit power for a Power over Ethernet(PoE)capable reader.These features make the M6well suited for enterprise,commercial and industrial environments where highperformance in a wide range of operating conditions is required.【产品参数】标签/传输协议标签协议EPCglobal Gen2(ISO18000-6C)DRM支持;ISO18000-6B(*可选);I-PX(*可选)射频接口天线连接器4个反向TNC连接器;支持4个独立天线RF输出独立的读写模式,5至31.5dBm输出(1.4W),±0.5dBm可调频率特性可配置符合以下区域频率要求:FCC(NA,SA)902-928MHz;ETSI(EU)865.6-867.6MHz;MIC(Korea)910-914MHz;SRRC-MII(P.R.China);920-925MHz传输控制接口通信接口10/100Base-T以太网;USB B型端口(控制台端口);USB A型端口(附件端口);5.54mm密封连接器(直流电源);SMA插座(*选配的WiFi天线);HD15(GPIO接口)无线网内置802.11b/g(*可选);WEP40位和104位密钥;WPA及WPA2的TKIP和AES算法及共享密钥或EAP-TLS指示灯和GPIO1个双色LED状态指示灯,复位开关,光电隔离GPIO,4进4出,另加5V DC和接地参考规格外形尺寸160mm长×178mm宽×34mm高重量0.9Kg供电直流供电10-30V DC,最大直流功率:15WPoE供电802.3af标准的以太网A和B模式,支持100米环境特性工作温度-20℃to+50℃存储温度-40℃to+85℃IP等级IP52湿度5%-95%非冷凝性能标签识读率大于750标签/秒标签识读距离大于30feet(9M)采用6dBi天线(36dBm EIRP)最大读写EPC ID长度最高496bits操作系统操作系统Linux内核版本2.6网络思科认证的DHCP和DHS的配置和固件管理;TCP/IP网络堆栈安全SSL/SSH基础的安全性基于Web的控制从Web浏览器配置和监控,HTTP/HTTPS协议认证与安全认证FCC47CFR Ch.1Part15;Industrie Canada RSS-210;ETSI EN302208V1.2.1;RoHS compliant per EU directive2002/95/EC;UL Listed;ThingMagic是全球知名的RFID设备制造商,成立于2000年,总部设在美国波士顿,5名公司创始人全部来自麻省理工学院。
ALU 产品手册

上海贝尔行业产品手册公司介绍阿尔卡特朗讯是全球领先的通信解决方案供应商,专注于IP网络、超宽带接入和云技术,致力于为全球的运营商、企业和政府机构提供更加灵活、快速、可靠的通信网络。
阿尔卡特朗讯旗下的贝尔实验室是全球最具活力的前沿技术研究机构之一,贡献了一大批奠定现代信息通信基础的创新发明。
贝尔实验室共获得8项诺贝尔奖,拥有14位诺贝尔奖获得者。
最近,阿尔卡特朗讯凭借一系列技术创新,获得国际机构的高度认可。
上海贝尔股份有限公司成立于1984年,是国务院国有资产监督管理委员会的直属企业,也是中国第一家外商投资股份制公司,拥有强大的本土实力和广泛的全球资源。
上海贝尔为运营商、企业和行业客户提供先进的信息通信解决方案和高质量的服务,其产品覆盖有线和无线方案、IP网络、光网络、光接入、云计算、网络核心及应用、网络管理及服务等诸多领域。
上海贝尔拥有贝尔实验室中国研究中心和数个重要的全球研发中心,可全面进入阿尔卡特朗讯全球技术库,开发服务于中国和阿尔卡特朗讯全球客户的独创技术,并且在多项新技术开发中居于主导地位。
上海贝尔拥有技术先进、制造能力达到世界一流水平的生产制造平台,公司销售服务网络遍及全国和海外50多个国家。
今天,上海贝尔已成为集世界一流的生产制造基地,全球重要的研发中心、采购和物流中心、信息服务中心以及上海贝尔大学于一体的阿尔卡特朗讯在全球的旗舰。
目录总体描述 (4)行业解决方案 (5)全业务传送网解决方案 (5)城域网解决方案 (8)骨干网解决方案 (9)数据中心网络解决方案 (10)数据中心互联/出口解决方案 (11)电力数据调度网与综合数据网解决方案 (12)专业DNS_DHCP_IPAM系统解决方案 (13)无源局域网解决方案(POL) (15)端到端L TE解决方案 (17)IMS/NGN解决方案 (19)产品系列 (21)光传送 (21)OTN/WDM 产品-1830 PSS系列产品 (21)PTN-1850 TSS系列产品 (23)MSTP系列产品 (24)微波传输 (25)中短距分组微波-9500 MPR系列产品 (25)长距微波-9600 LSY系列产品 (26)数据承载 (27)骨干/核心路由平台-7950 XRS (27)城域业务路由-7750 SR/7705 SAR (28)MES系列交换机 (30)软件定义网络– Nuage SDN (32)VitalQIP:面向IPv4、IPv6的下一代IP地址管理解决方案 (33)超宽带接入 (34)PON OL T局端设备-7360 ISAM FX (34)丰富的光终端(ONU)系列 (34)LTE无线产品 (37)业务核心网 (38)IMS产品 (38)NGN产品 (38)总体描述通信网的未来将会何去何从?企业期望应对动态的市场和客户需求,实施新的业务策略并开拓新的市场机会,今天的网络已经无法应对日益增长的海量数据,我们需要一个灵活敏捷、伸缩自如的人性化网络,基于IP的网络演进势在必行,而这一切必须以网络为基石。
霍尼韦尔门禁报价
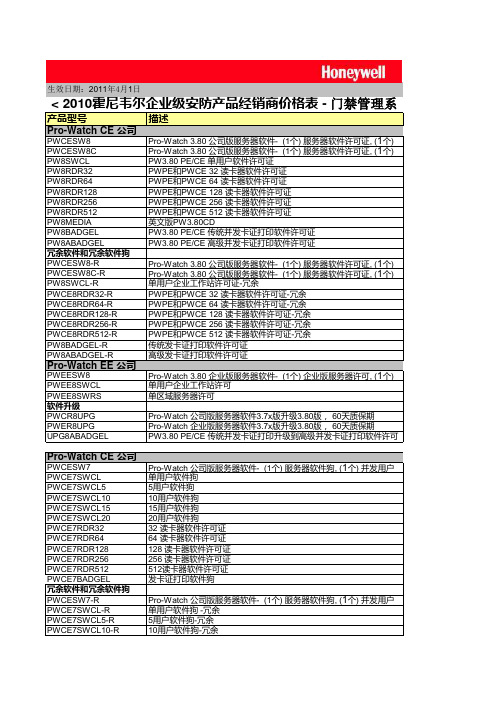
产品型号描述Pro-Watch CE公司版管理软件 (CE) 3.8PWCESW8Pro-Watch 3.80 公司版服务器软件- (1个) 服务器软件许可证, (1个)PWCESW8CPro-Watch 3.80 公司版服务器软件- (1个) 服务器软件许可证, (1个)PW8SWCLPW3.80 PE/CE 单用户软件许可证PW8RDR32PWPE 和PWCE 32 读卡器软件许可证PW8RDR64PWPE 和PWCE 64 读卡器软件许可证PW8RDR128PWPE 和PWCE 128 读卡器软件许可证PW8RDR256PWPE 和PWCE 256 读卡器软件许可证PW8RDR512PWPE 和PWCE 512 读卡器软件许可证PW8MEDIA英文版PW3.80CD PW8BADGELPW3.80 PE/CE 传统并发卡证打印软件许可证PW8ABADGELPW3.80 PE/CE 高级并发卡证打印软件许可证冗余软件和冗余软件狗PWCESW8-RPro-Watch 3.80 公司版服务器软件- (1个) 服务器软件许可证, (1个)PWCESW8C-RPro-Watch 3.80 公司版服务器软件- (1个) 服务器软件许可证, (1个)PW8SWCL-R单用户企业工作站许可证-冗余PWCE8RDR32-RPWPE 和PWCE 32 读卡器软件许可证-冗余PWCE8RDR64-RPWPE 和PWCE 64 读卡器软件许可证-冗余PWCE8RDR128-RPWPE 和PWCE 128 读卡器软件许可证-冗余PWCE8RDR256-RPWPE 和PWCE 256 读卡器软件许可证-冗余PWCE8RDR512-RPWPE 和PWCE 512 读卡器软件许可证-冗余PW8BADGEL-R传统发卡证打印软件许可证PW8ABADGEL-R高级发卡证打印软件许可证Pro-Watch EE 公司版管理软件 (EE) 3.8PWEESW8Pro-Watch 3.80 企业版服务器软件- (1个) 企业版服务器许可, (1个)PWEE8SWCL单用户企业工作站许可PWEE8SWRS单区域服务器许可软件升级PWCR8UPGPro-Watch 公司版服务器软件3.7x 版升级3.80版, 60天质保期PWER8UPGPro-Watch 企业版服务器软件3.7x 版升级3.80版, 60天质保期UPG8ABADGEL PW3.80 PE/CE 传统并发卡证打印升级到高级并发卡证打印软件许Pro-Watch CE 公司版管理软件 (CE) 3.7PWCESW7Pro-Watch 公司版服务器软件- (1个) 服务器软件狗, (1个) 并发用户PWCE7SWCL单用户软件狗PWCE7SWCL55用户软件狗PWCE7SWCL1010用户软件狗PWCE7SWCL1515用户软件狗PWCE7SWCL2020用户软件狗PWCE7RDR3232 读卡器软件许可证PWCE7RDR6464 读卡器软件许可证PWCE7RDR128128 读卡器软件许可证PWCE7RDR256256 读卡器软件许可证PWCE7RDR512512读卡器软件许可证PWCE7BADGEL发卡证打印软件狗冗余软件和冗余软件狗PWCESW7-RPro-Watch 公司版服务器软件- (1个) 服务器软件狗, (1个) 并发用户PWCE7SWCL-R单用户软件狗 -冗余PWCE7SWCL5-R5用户软件狗-冗余PWCE7SWCL10-R 10用户软件狗-冗余< 2010霍尼韦尔企业级安防产品经销商价格表 - 门禁管理系Honeywell Security -China 生效日期:2011年4月1日¥58,928.99¥56,033.34¥12,192.20¥12,446.21¥24,384.41¥45,720.77¥90,425.51¥171,706.87¥406.41¥20,117.14¥30,277.31¥29,464.49¥26,360.56¥6,096.10¥6,223.10¥12,192.20¥22,860.38¥45,212.76¥85,853.44¥10,058.57¥15,138.65¥396,185.67¥18,288.31¥104,852.95¥36,820.46¥118,264.38¥10,160.17¥63,265.35¥19,507.53¥79,249.33¥158,498.65¥205,865.36¥262,193.35¥12,446.21¥24,384.41¥45,720.77¥90,425.51¥171,706.87¥24,140.56¥31,632.67¥9,753.76¥39,624.66¥79,249.33¥131,096.67¥6,223.10¥12,192.20¥22,860.38¥45,212.76¥85,853.44¥12,070.28¥396,187.43¥19,202.72¥91,187.53¥172,824.49¥244,809.30¥307,243.54¥104,852.95¥239,475.21¥480,017.23¥722,946.90¥971,413.86¥55,880.94¥19,583.65¥164,228.33¥30,480.51¥20,269.54¥0.00¥8,493.90¥8,397.38¥8,204.34¥0.00¥4,572.08¥4,368.87¥5,080.09¥1,097.30¥5,740.50¥279.24¥5,689.70¥1,428.59¥1,538.48¥3,186.86¥61.28¥61.12¥61.28¥112.42¥809.73¥809.73¥1,110.49¥17.35¥23.14¥1,388.11¥2,602.70¥2,487.02¥4,800.54¥3,123.24¥6,535.67¥74.50¥74.50¥125.20¥124.93¥92.54¥108.27¥179.98¥179.59¥201.89¥199.85¥174.47¥80.97¥169.04¥126.66¥1,214.59¥1,214.59¥1,850.81¥2,834.05¥2,834.05¥3,817.29¥7,923.78¥32.39¥2,240.00¥8,800.00¥12,724.31¥13,881.07¥14,459.45¥4,627.02¥5,783.78¥13,881.07¥462.70¥853.15¥853.15¥924.32¥1,086.73¥1,782.48¥1,144.88¥1,306.29¥200.50¥335.84¥174.44¥155.39¥453.14¥420.06¥374.94¥150.38¥114.29¥114.29¥194.49¥219.55¥501.26¥250.63¥310.78¥310.78¥323.81¥323.81¥1,306.29¥1,306.29¥36,240.47¥59,940.78¥3,840.05¥3,600.05¥3,600.05¥124,561.63¥56,640.74。
PCS-9721C_X_说明书_国内中文_国内标准版_X_R1.00_(ZL_PWZD5204.1006)
警告 !
为增强或修改现有功能 ,装置的软硬件均可能升级 ,请确认此版本使用手册和您 购买的产品相 兼容 。
警告 !
电气设备在运行时 ,这些装置的某些部件可能带有高压 。不正确的操作可能导致严重的人身伤 害或设备损坏 。
额定值 在接入交流电压电流回路或直流电源回路时,请确认他们符合装置的额定参数。
印刷电路板 在装置带电时 ,不允许插入或拔出印刷电路板,否则可能导致装置不正确动作 。
外部回路 当把装置输出的接点连接到外部回路时 ,须仔细检查所用的外部电源电压 , 以防止所连接的回
路过热。 连接电缆
仔细处理连接的电缆避免施加过大的外力 。
版权声明
说明书版本 R1.00
南京南瑞继保电气有限公司
P/N: ZL_PWZD5204.1006
中国南京江宁开发区苏源大道 69 号
Copyright © 2010 南京南瑞继保电气有限公司版权所有 电话:86-25-87178185,传真:86-25-87178208
我们对本文档及其中的内容具有全部的知识产权。除非特 网址:
南京南瑞继保电气有限公司
i
PCS-9721C 配网自动化终端
,因为可能会产生危险的高电压 。
残余电压 在装置电源关闭后 ,直流回路中仍然可能存在危险的电压。这些电压需在数秒钟后才会消失。
警示 !
接地 装置的接地端子必须可靠接地。
运行环境 该装置只允许运行在技术参数所规定的大气环境中 ,而且运行环境不能存在不正常的震动。
1.1 应用 .................................................................................................................................... 1 1.2 特点 .................................................................................................................................... 2 第 2 章 功能介绍 .............................................................................................................................. 5 2.1 测量控制功能...................................................................................................................... 5
爱华收音机说明书

爱华收音机说明书篇一:AIWA CSD快速手册AIWA CSD-ES50手提音响使用指南(快速上手)特奥淘宝店1、注意事项? ? ? ?请确认所用市电为正常范围如用电池,忽略上步骤如果本机从室外带至室内(冷处至温暖处),可能会造成部件结露现象,请稍等片刻机器顶部为CD舱,打开后,可见到激光头,此部件为敏感易损部件,勿触。
2、操作步骤2.1 开机将电源线从机器背部电池仓中取出,一端接机器(插口也在背部),一端接220V交流电插座此时,手提音响处于待机/卡带播放,状态,如果要放卡带,按下相应按键,即可播放。
2.2 CD收听如下图所示,轻按顶部CD舱盖右前部(有防滑触点),舱门即可弹起,将所要播放CD碟放入后,重新关上CD舱盖。
将下图所示FUNCTION波段,拨至CD档(即最右端),可以看到,液晶显示,CD碟开始读取,会显示出总曲目等相关信息,此时可以按PLAY等微触键进行操作左侧旋钮为音量旋钮,顺时针旋转为音量增加最左侧为耳机插孔,用来独享音乐。
2.3 收音机FUNCTION波段,拨至RADIO档(即中间),右侧有BAND 波段开关可以选择电台波段,MW为中波,SW为短波,FM为调频,选择相应波段,(SW,FM收听,需要将拉杆天线抽出),调节TURNING,选出相应电台欣赏。
2.4 磁带收听将FUNCTION波段,拨至TAPE档,可对各仓卡带进行对应操作。
注:音响断开市电前,最好将波段拨至TAPE档(待机状态)。
2.5 音效及其他按键FM STEREO 指示:当收听调频节目为立体声信号时,此灯亮起下面黑色按键,可供用户选择各种音效,如增加低音,增加环绕效果。
感谢选择特奥淘宝店祝:一切顺利 Ups专家篇二:AWA6221A声级计使用说明书AWA6221A型声校准器使用说明书杭州爱华仪器有限公司20XX年8月目录1 概述................................................1 2 主要技术性能....................................2 3 使用方法 (2)3.1 配合器的选用 (2)3.2 开机 (3)3.3 等效自由场声压级 (3)3.4 声压级调整 (4)3.5 “+20dB”的使用 (4)3.6 关机 (4)3.7 频率计权选择....................................4 4 使用与维护 (4)4.1 使用环境 (4)4.2 电池电压 (5)4.3 电池更换 (5)4.4 计量检定 (5)5 注意事项 (5)1 概述AWA6221A型声校准器主要用于对测试传声器和声学测量仪器进行声压灵敏度校准。
创意之星机器人说明

v1.0 可编辑可修改创意之星机器人说明书目录1结构套件简介 ............................................................................ .. (3)结构件概述 ............................................................................ (3)C o n n F L E X连接结构 ............................................................................ (3)不同版本 ............................................................................ . (4)使用零件3D模型 ............................................................................ . (6)2控制器及电源 ............................................................................ .. (7)M u l t i F L E X™2-A V R控制器 ............................................................................ (8)M u l t i F L E X™2-P X A270控制器 ............................................................................ (9)电池和直流电源 ............................................................................ (12)3传感器............................................................................. .. (12)传感器的信号类型及电气规范 ............................................................................ (13)“创意之星”传感器接口 ............................................................................ (14)接近传感器 ............................................................................ .. (16)测距传感器 ............................................................................ . (19)声音传感器 ............................................................................ . (24)碰撞传感器 ............................................................................ . (26)倾覆传感器 ............................................................................ . (26)温度传感器 ............................................................................ . (27)光强传感器 ............................................................................ . (27)灰度传感器 ............................................................................ (28)视觉和语音传感器 ............................................................................ (28)4执行器............................................................................. (29)C D S5516机器人舵机 ............................................................................ .. (29)C D S5401大扭矩R/C舵机 ............................................................................ .. (32)B D M C1203电机驱动模块 ............................................................................ (33)F a u l h a b e r大功率减速电机............................................................................. .. (34)5N o r t h S T A R图形化开发环境 ............................................................................ (35)安装及使用介绍 ............................................................................ . (35)使用流程图开发 ............................................................................ (39)手写代码开发 ............................................................................ . (46)调试与在线监控 ............................................................................ (47)6其它部件............................................................................. (54)U P-D e b u g g e r下载调试器 ............................................................................ .. (54)W i F i无线网卡或以太网线缆............................................................................. (55)Z i g B e e无线模组 ............................................................................ .. (56)1结构套件简介结构件概述“创意之星”是一种模块化机器人组件,其特点是组成机器人的各种零件都是通用、可重组的,各个零件之间有统一的连接方式,零件之间可以自由组合,从而构建出各种各样的机器人构型。
霍尼韦尔RFID系统ANT513读写器使用说明书

操作说明RFID系统ANT513读写头11458694 / 00 05 / 2022CNANT513目录1初步说明 (3)1.1使用的符号 (3)1.2使用的警告 (3)1.3法律和版权信息 (3)2安全说明 (4)3指定用途 (5)4所供配件 (6)5功能 (7)5.1ID 标签 (7)5.2设备概览 (7)6安装 (8)6.1设备安装的注意事项 (8)6.2避免干扰 (8)6.3机械设计 (8)6.4调整感应面 (9)6.5安装产品 (9)6.6安装距离 (10)6.7ID 标签定位 (10)7电气连接 (12)7.1配线 (12)8操作和显示元件 (13)9维护、修理及处理 (14)10认证/标准 (15)术语表 (16)2ANT5131 初步说明说明、技术资料、认证和其他信息可通过扫描设备/包装上的二维码或访问网站 获取。
1.1 使用的符号1.2 使用的警告1.3 法律和版权信息© ifm electronic gmbh 保留所有权利。
未经 ifm electronic gmbh 同意,不得复制或使用本说明书的任何部分。
我方页面上使用的所有产品名称、图片、公司或其他品牌均为各自权利所有者的资产。
3ANT5132 安全说明概要•所述产品为集成至系统的子组件。
–系统架构师为系统的安全负责。
–系统架构师根据运营商和系统用户提供的法规和规范要求来实施风险评估和存档。
该存档必须包含针对运营商和用户(如适用,还要包含系统架构师授权的维修人员)的所有必要信息和安全说明。
•设定产品前请阅读本文档,并在产品整个使用周期内妥善保管本文档。
•产品必须适合相应的应用和环境条件,且不受任何限制。
•仅将产品用于指定用途(Ò →指定用途)。
•如果未遵照操作说明或技术资料,则可能导致人身伤害和/或财产损失。
•对于操作员擅自改装产品或错误使用导致的任何后果,制造商概不承担任何责任。
•必须由机器操作员授权的合格人员执行产品的安装、电气连接、设置、操作及维护工作。
i code sil-x芯片卡 技术原理
i code sil-x芯片卡技术原理Sil-X芯片卡是近年来应用最广泛的一种非接触式智能卡,是基于ISO15693标准设计的一种高性能RFID芯片卡,其具有感应距离远、读写速度快、应用广泛等优点。
其技术原理主要涉及RFID射频通信技术、功率控制技术、数据传输技术以及数据协议等方面。
一、RFID射频通信技术Sil-X芯片卡的核心是射频技术,主要是通过电磁感应的方式实现与读写器之间的无线通信。
当读写器向芯片卡发送一定频率的电磁波时,芯片内的天线会感应到电磁波,从而产生电磁感应,再通过芯片内的电路将感应到的电能转换成通信信号,从而与读写器进行数据通信。
RFID技术中的频率主要有两种:LF(低频)和HF(高频)。
Sil-X芯片卡采用的是HF 射频技术,通信频率为13.56MHz。
在这个频率下,通信距离在数厘米到数十厘米之间,而读写速度可以达到数十秒内读取多张卡片的数据。
二、功率控制技术Sil-X芯片卡的另一个核心技术是功率控制技术。
这是为了确保芯片卡与读写器之间的通信能够稳定,并扩大芯片卡与读写器之间的通信距离而采取的技术。
功率控制技术是通过在芯片卡电路中增加功率控制器实现的。
当芯片卡接收到读写器的电磁波时,功率控制器会对电磁波进行感应和放大,从而达到扩大读写器和芯片卡之间通信距离和加快数据传输的目的。
当读写器距离芯片卡越远时,功率控制器输出的电压和电流越大,以弥补受损的信号,从而实现通信。
三、数据传输技术Sil-X芯片卡的数据传输技术采用了单向数据传输的方式,主要通过读写器与芯片卡之间的天线实现数据的双向传输。
读写器通过发射一定频率的电磁波,使芯片卡内的天线感应到电磁波,从而产生电磁感应,进行数据传输。
在数据传输过程中,芯片卡通过解码的方式将读写器传输过来的数据进行解析,再利用芯片卡内部的电路进行相关计算,并根据自身的存储器和数据传输规则返回相应信息给读写器。
四、数据协议Sil-X芯片卡中的数据协议是指芯片卡和读写器之间数据传输的规则和格式。
AES 1235 品牌 BNS 产品名称 磁性安全传感器 型号 101170049说明书

DATASHEETDataOrdering dataNote (Delivery capacity)Phased-out product Product type description AES 1235101170049Article number (ordernumber)EAN (European Article4030661297118 Number)27-37-18-19eCl@ss number, version12.027-37-18-19eCl@ss number, version11.027-37-18-19eCl@ss number, version9.0EC001449ETIM number, version7.0EC001449ETIM number, version6.0Available until31.12.2023Approvals - StandardsCertificates BGcULusGeneral dataStandards BG-GS-ET-14BG-GS-ET-20EN IEC 62061EN ISO 13849-1EN IEC 60947-5-1EN IEC 60947-5-3EN IEC 60947-5-5EN IEC 60204-1EN IEC 60947-1Climatic stress EN 60068-2-3BG-GS-ET-14Enclosure material Glass-fibre reinforced thermoplastic, ventilated Gross weight240 gGeneral data - FeaturesStop-Category0Wire breakageYesdetectionCross-circuit detection YesFeedback circuit YesYesAutomatic resetfunctionReset afterYesdisconnection of supplyvoltageEarth connectionYesdetectionYesIntegral systemdiagnostics, statusNumber of LEDs12Number of normallyclosed (NC)1Number of normallyopen (NO)Number of undelayed2semi-conductor outputswith signaling functionNumber of safety2contactsNumber of signalling2outputsSafety classificationStandards EN ISO 13849-1EN IEC 61508Safety classification - Relay outputsdPerformance Level, uptoCategory3PFH value 1.00 x 10⁻⁷ /hNotice for max. 50,000 switching cycles/year and max. 80% contact load2Safety Integrity Level(SIL), suitable forapplications inMission time20 Year(s)Mechanical data20,000,000 OperationsMechanical life,minimumMounting Snaps onto standard DIN rail to EN 60715Mechanical data - Connection techniqueTerminal designations IEC/EN 60947-1Termination rigid or flexibleScrew terminals M20 x 1.5Cable section, minimum0.25 mm²2.5 mm²Cable section,maximumTightening torque of0.6 NmClipsMechanical data - DimensionsWidth22.5 mmHeight100 mmDepth121 mmAmbient conditionsDegree of protection ofIP40the enclosureDegree of protection ofIP54the mounting spaceDegree of protection ofIP20clips or terminalsAmbient temperature+0 ... +55 °CStorage and transport-25 °Ctemperature, minimumStorage and transport+70 °Ctemperature, maximumResistance to vibrations10...55 Hz, Amplitude 0.35 mm, ± 15 % Restistance to shock30 g / 11 msAmbient conditions - Insulation valuesRated impulse4 kVwithstand voltage UimpOvervoltage category IIIDegree of pollution2Electrical dataFrequency range50 Hz60 HzOperating voltage24 VAC -15 % / +10 %24 VDC -10 % / +20 %Ripple voltage10 %Thermal test current 6 ARated operating voltage24 VACRated operating voltage24 VDC20.4 VACRated AC voltage forcontrols, 50 Hz,minimum26.4 VACRated control voltage atAC 50 Hz, maximum20.4 VACRated AC voltage forcontrols, 60 Hz,minimum26.4 VACRated control voltage atAC 60 Hz, maximum20.4 VDCRated AC voltage forcontrols at DC minimumRated control voltage at28.8 VDCDC, maximum5 WElectrical powerconsumption0.1 ΩContact resistance,maximumin new stateNote (Contactresistance)Drop-out delay in case80 msof power failure,typically20 msDrop-out delay in caseof emergency, typically100 msPull-in delay atautomatic start,maximum, typically20 msPull-in delay at RESET,typicallyMaterial of the contacts,Ag-Ni 10 and 0.2 µm gold-plated electricalElectrical data - Safe relay outputsVoltage, Utilisation230 VACcategory AC-156 ACurrent, Utilisationcategory AC-15Voltage, Utilisation24 VDCcategory DC-136 ACurrent, Utilisationcategory DC-13Switching capacity,10 VDCminimum10 mASwitching capacity,minimum250 VACSwitching capacity,maximum8 ASwitching capacity,maximumElectrical data - Digital inputs10 … 30 VDCInput signal, HIGHSignal "1"0 … 2 VDCInput signal, LOW Signal"0"40 ΩConduction resistance,maximumElectrical data - Digital OutputVoltage, Utilisation24 VDCcategory DC-120.1 ACurrent, Utilisationcategory DC-12Electrical data - Relay outputs (auxiliary contacts) Switching capacity,24 VDCmaximumSwitching capacity,2 AmaximumElectrical data - Electromagnetic compatibility (EMC)EMC rating EMC-DirectiveIntegral system diagnosis (ISD)Note (ISD -Faults)The following faults are registered by the safety monitoring modules and indicated by ISD.Faults Failure of the safety relay to pull-in or drop-outFailure of door contacts to open or closeCross-wire or short-circuit monitoring of the switch connectionsInterruption of the switch connectionsFault on the input circuits or the relay control circuits of the safety monitoring moduleOther dataNote (applications)Safety sensorGuard systemNoteNote (General)Inductive loads (e.g. contactors, relays, etc.) are to be suppressed by means of asuitable circuit.Wiring exampleNote (Wiring diagram)The wiring diagram is shown with guard doors closed and in de-energised condition.To secure a guard door up to PL d and Category 3Monitoring 1 guard door(s), each with a magnetic safety sensor of the BNS rangeThe ISD tables (Intergral System Diagnostics) for analysis of the fault indications andtheir causes are shown in the appendix.Expansion of enable delay time: The enable delay time can be increased from 0.1 s to1 s by changing the position of a jumper link connection under the cover of the unit.The feedback circuit monitors the position of the contactors K3 and K4.Start push button: A start push button (NO) can optionally be connected into thefeedback circuit. With the guard door closed, the enabling paths are then not closeduntil the start push button has been operated.If only one external relay or contactor is used to switch the load, the system can beclassified in Control Category 3 to ISO 13849-1, if exclusion of the fault “Failure of theexternal contactor” can be substantiated and is documented, e.g. by using a reliabledown-rated contactor. A second contactor leads to an increase in the level of securityby redundant switching to switch the load off.If neither start button nor feedback circuit are connected, a jumper connection must bemounted between X1 and A1.Modification for 2 NC contacts: The safety monitoring module can be modified tomonitor two NC contacts by bridging the terminals A1 and X2. In this configuration, theshort-circuit detection becomes inoperative.Ordering codeProduct type description:AES 123(1)(1)56without start-up test6with start-up testDocumentsOperating instructions and Declaration of conformityAES 1235 / AES 1236(245.3 kB, 10.05.2019, Revision D)BG-test certificateAES and BNS - BG-GS-ET-14 - AES 1135 / AES 1136 / AES 1145 / AES 1146 / AES 1155 / AES 1156 / AES 1165 / AES 1166 / AES 1175 / AES 1176 / AES 1235 / AES 1236 / AES 1265 / AES 1266 / AES 1185(1.4 MB, 10.05.2019, Revision F)BG-test certificateAES - BG-GS-ET-20 - AES 1135 / AES 1136 / AES 1145 / AES 1146 / AES 1155 / AES 1156 / AES 1165 / AES 1166 / AES 1175 / AES 1176 / AES 1235 / AES 1236 / AES 1265 / AES 1266(738.9 kB, 10.05.2019, Revision D)UL CertificateAES / FWS / BNS / BN(415.3 kB, 01.08.2019)Wiring example (electr. wiring)AES 123x(19.6 kB, 10.05.2019)Wiring example (electr. wiring)AES 123x(19.7 kB, 10.05.2019)InfoAES 1135 / AES 1136 / AES 1165 / AES 1166 / AES 1185 / AES 1235 / AES 1236(34.3 kB, 30.06.2021)SISTEMA-VDMA library(659.5 kB, 23.03.2023)PicturesProduct picture (catalogue individual photo)ID: kaes1f09| 711.0 kB | .jpg | 265.642 x 529.167 mm - 753 x 1500 px - 72 dpi| 84.7 kB | .png | 74.083 x 147.461 mm - 210 x 418 px - 72 dpiWiring exampleID: maes1l11| 34.0 kB | .cdr || 143.8 kB | .jpg | 352.778 x 408.517 mm - 1000 x 1158 px - 72 dpiWiring exampleID: kaes1l41| 34.1 kB | .cdr || 139.5 kB | .jpg | 352.425 x 396.875 mm - 999 x 1125 px - 72 dpiK.A. Schmersal GmbH & Co. KG, Möddinghofe 30, 42279 WuppertalThe details and data referred to have been carefully checked. Images may diverge from original. Further technical data can be found in the manual. Technical amendments and errors possible.Generated on: 27/07/2023, 01:44。
香港国际机场采用Intermec第二代RFID行李标签系统

香港国际机场采用Intermec第二代RFID行李标签系统全球供应链解决方案供应商美国易腾迈公司宣布,香港国际机场选用了该公司所提供的第二代RFID行李标签打印系统,此类系统将被安装于机场的各个办理登机手续柜台,协助增强其RFID行李分拣系统的处理能力。
香港国际机场率先于2005年安装RFID行李分拣系统,它是全球首个实施端对端RFID行李标签/分拣系统的机场。
香港机场管理局这次所采用的Intermec方案是其含集成第二代RFID模块的IntermecEasyCoderPF2i行李标签打印机,它拥有嵌入式第二代RFID芯片。
在香港国际机场的系统实际运作里,这款先进打印机将把航班及行李数据以条形码的形式打印在行李标签上。
此外,打印机的集成第二代RFID模块将把有关数据编码,存放在其第二代RFID芯片里。
打印出来的标签将附在所有已经办妥登机手续的行李上,这些行李将会按照其RFID数据被分拣及上载。
Intermec也将为香港国际机场提供打印机的支持服务。
以国际客运量计算,屡获大奖的香港国际机场在世界排名第五,其处理的货运量在全球更高踞首位,在2005年,香港国际机场所处理的客运量达到4,100万人次。
香港国际机场被誉为亚洲的“超级枢纽”,目前在该机场运营的航空公司超过80家,航线目的地逾140个,遍布世界各地。
香港机场管理局机场管理总监伍翘楚表示:“香港国际机场全力以赴,巩固其注重安全、保安、运营效率及服务水平等核心价值。
有鉴于航空运输量日益繁忙,香港国际机场预算投资45亿元,用于多项提升机场设施及提高客货运能力的工程。
现在采用的全新RFID行李标签技术及时地改进了我们的行李处理系统,使得香港国际机场的服务水平精益求精,令旅客能享受安心、愉快的旅程。
”具备RFID功能的EasyCoderPF2i行李标签打印机EasyCoderPF2i行李标签打印机可以打印行李标签、内部折叠标签、信用卡尺寸票据或者登机牌。
美国国家半导体推出全新SolarMagiclC芯片
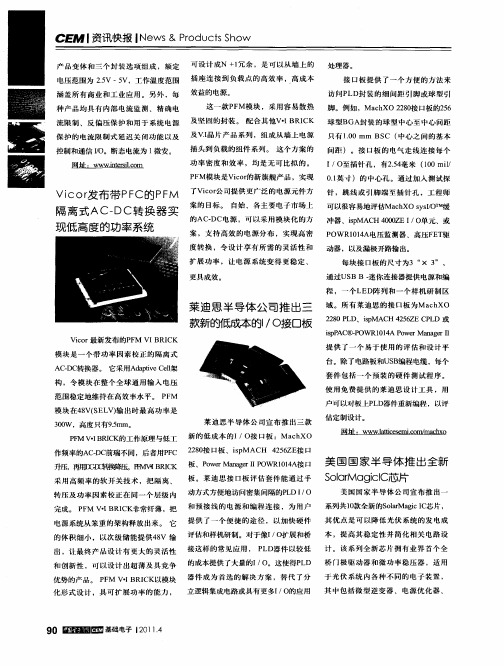
间距 )。接 口板的 电气 走线连接每个
I 0至插 针 孔 ,有25 毫 米 (0 l / . 4 10mi /
01 .英寸 )的中,  ̄ 。通过加入测试探 L L 3
针 ,跳 线 或 引 脚 端 至 插 针 孔 ,工 程 师
cr Vi CO 发布 带 P C的 P M 了Vio公 司提 供 更 广 泛 的 电 源 元件 方 r F F
域 。 所 有 莱 迪 思 的接 口板 为M a h c XO
2 8 L 2 0P D、i MA H 4 5 Z P D 或 s p C 2 6 E C L
ipP C ̄ - s A POW R 1 4 Po r M a a e Ⅱ 01 A we n g r
模 块 是 一 个 带 功 率 因 素 校 正 的 隔 离 式
网 hi. www. tmic m - i e lo n
只 有 1 0mm C ( . 0 BS 中心 之 间 的基 本
插 头 到 负载 的组 件 系 列 。 这 个 方 案 的 功 率 密 度 和 效 率 ,均 是 无 可 比拟 的 。
P M模 块 是Vio的 新旗 舰 产 品 ,实现 F cr
案 ,支 持 高 效 的 电 源 分 布 , 实现 高 密 P OW R11A电压 监 测 器 、高 压F T 04 E 驱 度 转 换 ,令 设 计 享 有 所 需 的 灵 活 性 和 动 器 ,以及 漏 极开 路输 出。 扩 展 功 率 ,让 电源 系 统 变 得 更 稳 定 、
更 具成 效 。
A —C CD 转换 器 。 它 采用 A at e e架 dpv l i C l
提 供 了 一 个 易 于 使 用 的 评 估 和 设 计 平 台 。除 了电路 板和 U B S 编程 电缆 ,每个 套 件 包 括 一 个 预 装 的硬 件 测 试 程 序 。
火鸟帧抓取器快速入门指南说明书

FireBird Frame Grabbers - Installation and UseQUICKSTART GUIDEFIREBIRD FRAME GRABBERS – QUICKSTART GUIDEContentsFIREBIRD FRAME GRABBERS – QUICKSTART GUIDE 2HARDWARE INSTALLATION 3 SOFTWARE INSTALLATION 4 UPDATING THE FIREBIRD FIRMWARE 5 WHERE TO GO NEXT 6 ACTIVECAPTURE - INTRODUCTION 7 ACTIVECAPTURE - IN USE 8 GENTL CAMERA LINK SETUP UTILITY 9 WHAT ELSE IS INSTALLED? 10 SOFTWARE UN-INSTALLATION 11 CONTACT DETAILS 12DisclaimerWhile every precaution has been taken in the preparation of this document, Active Silicon assumes no responsibility for errors or omissions. Active Silicon reserves the right to change the specification of the product described within this document and the document itself at any time without notice and without obligation of Active Silicon to notify any person of such revisions or changes.Copyright NoticeCopyright © 2022 Active Silicon. All rights reserved. This document may notin whole or in part, be reproduced, transmitted, transcribed, stored in any electronic medium or machine readable form, or translated into any language or computer language without the prior written consent of Active Silicon.Trademarks and AcknowledgementsAll trademarks and registered trademarks are the property of their respective owners.Windows is either a registered trademark or trademark of Microsoft Corporation in the United States and/or other countries.GenICam is a trademark of EMVA, CoaXPress is a trademark of JIIA, Camera Link is a trademark of A3.Part InformationPart Number: FBD-MAN-QS.Power off and open up the computer taking the usual anti-static precautions.Please note: The boards are keyed so that they can only be fitted into a slot in which they will work.Do not modify the FireBird board or the motherboard in an attempt to override the keying as this could result in serious damage.For full performance, boards with a part number including ’PE8’ mustbe fitted in a slot that supportsPCI Express at x8 width; similarly those including ‘PE4’ must use aslot supporting x4. Boards with apart number including ’3PE’ mustbe fitted in a slot that supports PCIExpress at Gen 3 speeds; similarlythose including ‘2PE’ must use a slotsupporting Gen 2 speeds. Check yourcomputer documentation for detailsof the PCI Express connectors.CoaXPress Boards Only: Formultichannel CoaXPress boards,and the 1XCXP6-2PE8 board, if theboard will be used to power camerasthrough the CoaXPress cables usingPoCXP then the auxiliary powerconnector J13 must be connectedto the computer power supply. Thecorrect power supply cable is oneintended for PCI Express Graphics(PEG) cards, and may have 6 or 8ways. To distinguish it from othersimilar connectors in the computer,the connector should be black andmay be marked ‘PCI-E’ or ‘PEG’. Similarconnectors that are not PEG should bewhite. However this is often not thecase, so the cables should be carefullychecked for the pattern of squaresand chamfers on the plastic body ofthe connector at the end of the cable.See the images below.Also, the wires should be black onthe side with the connector clip, andcolored (often yellow or blue) on theother side.If the connector does not matchthose shown above, DO NOTattempt to force it into FireBird asthis could result in serious damage.If a 6 way connector is plugged intoFireBird, it should be aligned at theupper 6 ways of the 8 way FireBirdconnector as shown below.PEG cable splitters, PEG to SATAadapters and PEG to ‘Molex’ adaptersare available from Active Silicon andare included in the optional cablestarter kit.Close and power on the computer.The Active Silicon FireBird Package includes the FireBird Driver (device driver and core libraries), various applications including ActiveCapture, a GenICam-based GUI program, and the GenTL Producer. Additionally, ActiveSDK is for software developers.By default, selecting Typical installs everything, but individual options can be deselected if required (see image below). The packages are supplied as a compressed file which includes the installation package along with theseinstructions and the release notes.The file naming convention is:as-<product>-<OS>- vXX_YY_ZZwhere <product> is:z fbd-cxp for the FireBird CoaXPressPackage.z fbd-cl for the FireBird Camera LinkPackage.z fbd-sdk for the FireBird ActiveSDKPackage.Windows® 10 and 11Uninstall any previous version ofthe Active Silicon FireBird Package(see page 11). Note: The previousSDK can be left on the PC to allowdevelopers to refer to both old andnew SDKs.Un-zip the required msi package to alocal disk.Run the msi.Follow the on-screen prompts,including to reboot the PC onceinstallation has completed.After completing installation it isrecommended to update the FireBirdfirmware (see the next page).Windows ServicePart of the installation is a Windowsservice ‘Active Silicon FireBird’ whichautomatically runs as Windows starts.This loads the main firmware intoFireBird boards with part numbersincluding ‘3PE’. Until the service runsthese boards have limited functionality,and from a hardware viewpoint theydo not power or discover connectedcameras and LEDs do not function. Thisprocess is needed to meet PCI Expressrequirements with the larger FPGA used.Other Operating SystemsSee the specific Quickstart Guidesupplied with the installation package.It is recommended to always update the firmware on FireBird boards to match that in the current driver set. This is also important because new boards ship with firmware used in production testing.UPDATING THE FIREBIRD FIRMWARE Design option controls the configuration mode of the board. The options presenteddepend on the board in use. The options with a 4xCXP6 FireBird are shown here.Default updates the firmware keeping the same configuration mode as before the update.4xCXP6: 1 Camera selects the configuration mode with 1 camera with up to 4 coax cables.4xCXP6: 2 Camera selects the configuration mode with 2 cameras each with 2 coax cables.4xCXP6: 4 Camera selects the configuration mode with 4 cameras each with 1 coax cable.Feedback window shows which boards will be updated, their current configuration and firmware version, what they will beupdated to, and progress information duringupdating.Board option allows only selected boards in a system to be updated. By default all boards are updated. Note that updater will update any Phoenix boards it finds in a system as well as FireBirds. Program Board(s) button to start the update process. Wait for the process to complete, then reboot the PC.If the updater fails for any reason so that the board is no longer recognized, jumper J8 can be moved to the ‘FF’position before rebooting the PC to allow the board to configure from its ‘Factory’ design, to allow the update process to be run again. When the updater has finished, shut down the PC and move the jumper back to its default position before powering up the board. See the Jumpers section of the FireBird Hardware Manual for more information.and documentation for other for other operating systems refer to the specific Quickstart Guide.four coax cables, but it can be configured e.g. to support four cameras each with one coax cable by selecting Design 4xCXP6: 4 Camera .To update firmware select Flash Programming from the Tools menu in ActiveCapture to run the FireBird / Phoenix Firmware Updater utility.This utility also allows the configuration mode of the board to be changed – for example a four input CoaXPress board by default supports one camera with up toWHERE TO GO NEXTCheck the PC BIOSOlder BIOS versions in PCs cangive noticeably lower PCI Express bandwidth. It is recommended to check for available BIOS updates, especially if any bandwidth problems are seen.Many PCs now support power saving features in the BIOS. These can result in poor PCI Express bandwidth, maybe only occasionally. Therefore Active Silicon recommends that the following settings are used (where available):z C-States set to ‘Off’.z Speedstep set to ‘Off’.z PCI Performance Mode set to ‘On’.z PCI Express Power Management setto ‘Off’.Check the BandwidthNext run the Bandwidth Test utility.FireBird can transfer data at very highrates but if the PC cannot keep up thesystem will not work. This utility, in theTools menu in ActiveCapture, shows themaximum rate that FireBird can transferdata to the PC.For a board with part number including‘3PE8’ a value around 6800 Mbytes/secis typical of a good PC; similarly 3400Mytes/sec for a ‘3PE4’ or ‘2PE8’ and 1700Mbytes/sec for a ‘2PE4’. A low or unstablevalue means that problems are likely tobe seen.Low Bandwidth?If the bandwidth test reports a low orunstable value, check the following:Check that a suitable PCI Express slotis in use (see Hardware Installation onpage 3). Sometimes motherboardrestrictions mean that a Gen 2 x16 slotworks much better than a Gen 2 x8slot, so try using a x16 slot.Check the BIOS settings (see Check thePC BIOS opposite).How old is the motherboard?Old chipsets may show worseperformance than current ones.DocumentationThe Start Menu under Active SiliconFireBird <xx> – Documentation includesthis document, release notes, and thefollowing key documents:The FireBird Hardware Manual givesfull details of all connectors, LEDs andjumpers on FireBird, I/O support, and PCrequirements.The FireBird System Manual is thefirst place for system developers andprogrammers to go. It gives an overviewof the options to configure a system,describes all the trigger modes in detail,and discusses system issues.Documentation on the API is describedin the ActiveSDKsection (see page 10).Device List.Acme” highlighted here, andConnect button.Live button for continuousSingle Sequence buttonTools menu gives access to utilities such as the firmware updaterand the GenTL CL Setup Utility.ACTIVECAPTURE - IN USE and “-” keys on the keyboard, or the mouse wheel.2. The Feature Browser shows the selected in the Device List . Any feature that is not greyed out can be changed. Note that many features are greyed out whileacquisition is in progress – first stop acquistion to change them. The FireBird features for pixel format, width and height are automatically set to match the camera. Therefore to change the values of these features, change them on the camera.The Feature Browser refreshes visible features periodically while the system is in use. With Camera Link cameras this can be slow, and turning off Polling can be useful. Refresh button can then be used to update features on demand.Clicking the Histogram button displays a histogram and statistics for the selected image, or byentering coordinates, for just part of the image.Similarly, the 1D Profile button ActiveCapture featuresGENTL CAMERA LINK SETUP UTILITY The GenTL CL Setup Utility needs to be run to allow the use of Camera Link cameras that support GenICam. It is needed because Camera Link pre-dates GenICam so cameras cannot be discovered automatically.The utility only needs to be run once for a given camera connection. ToCamera Probing to select a channel on a FireBird board, and the camera that is connected to it.The list of cameras will show all the CLProtocolDLLs installed on the machine, including thegeneric GenICam#GenCP_01_00 DLL which should be used for all GenCP cameras.Click Add to attempt to connect to the camera. If it is found it will be added to the list ofknown cameras.found and added using the Camera Probing controls.Click Save when the cameras have been correctly added.A GenTL application will attempt to connect to these cameras, so if a camera is removedfrom a system or moved to another port, select the camera and click Delete .Status Log shows what the utility has done.do this run it from the Tools menu in ActiveCapture , after ensuring that no cameras are open in ActiveCapture , and closing any other application that may have the cameras open.After it has been run, refresh the Device List in the GenTL consumer applicationin use, such as ActiveCapure , and the camera should then be listed and operate correctly.The utility associates a CLProtocol DLL with a specific Camera Link port on FireBird. For cameras using GenCP , a generic GenCP DLL is provided as part ofthe FireBird installation.For other cameras, note that onlyCamera Link cameras that are provided with a CLProtocol DLL can be used with GenICam. Older Camera Link cameras may not provide a suitable DLL and therefore will not work with GenICam applications. Contact the camera vendor to obtain the correct DLL file.WHAT ELSE IS INSTALLED?GenICam GenTLThe GenTL Producer allows GenTL based GenICam applications to control the camera and FireBird. It should work with third party applications described as‘GenTL Consumers’, without needing any custom interface code.Note that some GenICam applications do not use GenTL, but rely on direct image transfer from GigE Vision cameras – these will not work with FireBird. Documentation on the Producer and the following GenTL utilities is in the FireBird GenTL Producer Manual which can be found in the Start Menu under Active Silicon FireBird <xx> – Documentation.ActiveSDKThe FireBird ActiveSDK IntroductoryManual gives an overview of ActiveSDK,and the various API Manuals describethe available ActiveSDK functions indetail. These are in the Start Menu underActive Silicon ActiveSDK vXX.YY.ZZ –Documentation.Example source code is in the theStart Menu under Active Silicon ActiveSDKvXX.YY.ZZ – View Example Source, andthe Visual Studio project can be openedfrom the Start Menu under Active SiliconActiveSDK vXX.YY.ZZ – Open ExampleProjects.Support InformationThe Help menu in ActiveCapture givestwo groups of information that can beuseful when contacting Active Silicon’ssupport team.Show Board Information gives details ofthe Active Silicon boards in the system.System Information gives more generalinformation about a system. Theinformation is both displayed to thescreen, and saved in file as_sysinfo.txt inPublic Documents \ Active Silicon.Miscellaneous:PCF setup files for many camerasare in the Start Menu under ActiveSilicon FireBird <xx> – PCF Files. Theseconfigure the FireBird board to matchthe specified camera. They can be usedwith ActiveCapture, and can be read intoprograms written using the PHX API.PhoenixCapture: This is Active Silicon’soriginal application to display imagesfrom cameras. It has been replaced byActiveCapture, but for users familiar withthe application it can be found in theProgram Files \ Active Silicon \ FireBird<xx>\ Bin \ Win64/32 directory. The utility isbest used in conjunction with PCF files(see above).WindowsWindows 10 and 11: Remove the package using the Windows Settings Apps & features. All packages are listed with names starting “Active Silicon”.Note that it is not necessary to remove previous copies of ActiveSDK before installing a new one. Multiple copies of ActiveSDK can be installed on the PC to allow developers to refer to both old and new versions.Other Operating SystemsSee the specific Quickstart Guide supplied with the installation package.SOFTWARE UN-INSTALLATIONFireBird Frame Grabbers – Quickstart Guide v2.511CONTACT DETAILS Contact DetailsNorth AmericaTel: +1 410-696-7642Email:***************************** Web: Europe & ROWTel: +44 (0) 1753 650600 Email:***************************** Web: 。
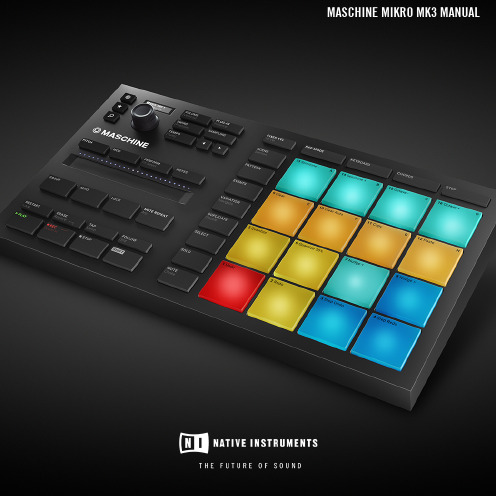
Native Instruments MASCHINE MIKRO MK3用户手册说明书
The information in this document is subject to change without notice and does not represent a commitment on the part of Native Instruments GmbH. The software described by this docu-ment is subject to a License Agreement and may not be copied to other media. No part of this publication may be copied, reproduced or otherwise transmitted or recorded, for any purpose, without prior written permission by Native Instruments GmbH, hereinafter referred to as Native Instruments.“Native Instruments”, “NI” and associated logos are (registered) trademarks of Native Instru-ments GmbH.ASIO, VST, HALion and Cubase are registered trademarks of Steinberg Media Technologies GmbH.All other product and company names are trademarks™ or registered® trademarks of their re-spective holders. Use of them does not imply any affiliation with or endorsement by them.Document authored by: David Gover and Nico Sidi.Software version: 2.8 (02/2019)Hardware version: MASCHINE MIKRO MK3Special thanks to the Beta Test Team, who were invaluable not just in tracking down bugs, but in making this a better product.NATIVE INSTRUMENTS GmbH Schlesische Str. 29-30D-10997 Berlin Germanywww.native-instruments.de NATIVE INSTRUMENTS North America, Inc. 6725 Sunset Boulevard5th FloorLos Angeles, CA 90028USANATIVE INSTRUMENTS K.K.YO Building 3FJingumae 6-7-15, Shibuya-ku, Tokyo 150-0001Japanwww.native-instruments.co.jp NATIVE INSTRUMENTS UK Limited 18 Phipp StreetLondon EC2A 4NUUKNATIVE INSTRUMENTS FRANCE SARL 113 Rue Saint-Maur75011 ParisFrance SHENZHEN NATIVE INSTRUMENTS COMPANY Limited 5F, Shenzhen Zimao Center111 Taizi Road, Nanshan District, Shenzhen, GuangdongChina© NATIVE INSTRUMENTS GmbH, 2019. All rights reserved.Table of Contents1Welcome to MASCHINE (23)1.1MASCHINE Documentation (24)1.2Document Conventions (25)1.3New Features in MASCHINE 2.8 (26)1.4New Features in MASCHINE 2.7.10 (28)1.5New Features in MASCHINE 2.7.8 (29)1.6New Features in MASCHINE 2.7.7 (29)1.7New Features in MASCHINE 2.7.4 (31)1.8New Features in MASCHINE 2.7.3 (33)2Quick Reference (35)2.1MASCHINE Project Overview (35)2.1.1Sound Content (35)2.1.2Arrangement (37)2.2MASCHINE Hardware Overview (40)2.2.1MASCHINE MIKRO Hardware Overview (40)2.2.1.1Browser Section (41)2.2.1.2Edit Section (42)2.2.1.3Performance Section (43)2.2.1.4Transport Section (45)2.2.1.5Pad Section (46)2.2.1.6Rear Panel (50)2.3MASCHINE Software Overview (51)2.3.1Header (52)2.3.2Browser (54)2.3.3Arranger (56)2.3.4Control Area (59)2.3.5Pattern Editor (60)3Basic Concepts (62)3.1Important Names and Concepts (62)3.2Adjusting the MASCHINE User Interface (65)3.2.1Adjusting the Size of the Interface (65)3.2.2Switching between Ideas View and Song View (66)3.2.3Showing/Hiding the Browser (67)3.2.4Showing/Hiding the Control Lane (67)3.3Common Operations (68)3.3.1Adjusting Volume, Swing, and Tempo (68)3.3.2Undo/Redo (71)3.3.3Focusing on a Group or a Sound (73)3.3.4Switching Between the Master, Group, and Sound Level (77)3.3.5Navigating Channel Properties, Plug-ins, and Parameter Pages in the Control Area.773.3.6Navigating the Software Using the Controller (82)3.3.7Using Two or More Hardware Controllers (82)3.3.8Loading a Recent Project from the Controller (84)3.4Native Kontrol Standard (85)3.5Stand-Alone and Plug-in Mode (86)3.5.1Differences between Stand-Alone and Plug-in Mode (86)3.5.2Switching Instances (88)3.6Preferences (88)3.6.1Preferences – General Page (89)3.6.2Preferences – Audio Page (93)3.6.3Preferences – MIDI Page (95)3.6.4Preferences – Default Page (97)3.6.5Preferences – Library Page (101)3.6.6Preferences – Plug-ins Page (109)3.6.7Preferences – Hardware Page (114)3.6.8Preferences – Colors Page (114)3.7Integrating MASCHINE into a MIDI Setup (117)3.7.1Connecting External MIDI Equipment (117)3.7.2Sync to External MIDI Clock (117)3.7.3Send MIDI Clock (118)3.7.4Using MIDI Mode (119)3.8Syncing MASCHINE using Ableton Link (120)3.8.1Connecting to a Network (121)3.8.2Joining and Leaving a Link Session (121)4Browser (123)4.1Browser Basics (123)4.1.1The MASCHINE Library (123)4.1.2Browsing the Library vs. Browsing Your Hard Disks (124)4.2Searching and Loading Files from the Library (125)4.2.1Overview of the Library Pane (125)4.2.2Selecting or Loading a Product and Selecting a Bank from the Browser (128)4.2.3Selecting a Product Category, a Product, a Bank, and a Sub-Bank (133)4.2.3.1Selecting a Product Category, a Product, a Bank, and a Sub-Bank on theController (137)4.2.4Selecting a File Type (137)4.2.5Choosing Between Factory and User Content (138)4.2.6Selecting Type and Character Tags (138)4.2.7Performing a Text Search (142)4.2.8Loading a File from the Result List (143)4.3Additional Browsing Tools (148)4.3.1Loading the Selected Files Automatically (148)4.3.2Auditioning Instrument Presets (149)4.3.3Auditioning Samples (150)4.3.4Loading Groups with Patterns (150)4.3.5Loading Groups with Routing (151)4.3.6Displaying File Information (151)4.4Using Favorites in the Browser (152)4.5Editing the Files’ Tags and Properties (155)4.5.1Attribute Editor Basics (155)4.5.2The Bank Page (157)4.5.3The Types and Characters Pages (157)4.5.4The Properties Page (160)4.6Loading and Importing Files from Your File System (161)4.6.1Overview of the FILES Pane (161)4.6.2Using Favorites (163)4.6.3Using the Location Bar (164)4.6.4Navigating to Recent Locations (165)4.6.5Using the Result List (166)4.6.6Importing Files to the MASCHINE Library (169)4.7Locating Missing Samples (171)4.8Using Quick Browse (173)5Managing Sounds, Groups, and Your Project (175)5.1Overview of the Sounds, Groups, and Master (175)5.1.1The Sound, Group, and Master Channels (176)5.1.2Similarities and Differences in Handling Sounds and Groups (177)5.1.3Selecting Multiple Sounds or Groups (178)5.2Managing Sounds (181)5.2.1Loading Sounds (183)5.2.2Pre-listening to Sounds (184)5.2.3Renaming Sound Slots (185)5.2.4Changing the Sound’s Color (186)5.2.5Saving Sounds (187)5.2.6Copying and Pasting Sounds (189)5.2.7Moving Sounds (192)5.2.8Resetting Sound Slots (193)5.3Managing Groups (194)5.3.1Creating Groups (196)5.3.2Loading Groups (197)5.3.3Renaming Groups (198)5.3.4Changing the Group’s Color (199)5.3.5Saving Groups (200)5.3.6Copying and Pasting Groups (202)5.3.7Reordering Groups (206)5.3.8Deleting Groups (207)5.4Exporting MASCHINE Objects and Audio (208)5.4.1Saving a Group with its Samples (208)5.4.2Saving a Project with its Samples (210)5.4.3Exporting Audio (212)5.5Importing Third-Party File Formats (218)5.5.1Loading REX Files into Sound Slots (218)5.5.2Importing MPC Programs to Groups (219)6Playing on the Controller (223)6.1Adjusting the Pads (223)6.1.1The Pad View in the Software (223)6.1.2Choosing a Pad Input Mode (225)6.1.3Adjusting the Base Key (226)6.2Adjusting the Key, Choke, and Link Parameters for Multiple Sounds (227)6.3Playing Tools (229)6.3.1Mute and Solo (229)6.3.2Choke All Notes (233)6.3.3Groove (233)6.3.4Level, Tempo, Tune, and Groove Shortcuts on Your Controller (235)6.3.5Tap Tempo (235)6.4Performance Features (236)6.4.1Overview of the Perform Features (236)6.4.2Selecting a Scale and Creating Chords (239)6.4.3Scale and Chord Parameters (240)6.4.4Creating Arpeggios and Repeated Notes (253)6.4.5Swing on Note Repeat / Arp Output (257)6.5Using Lock Snapshots (257)6.5.1Creating a Lock Snapshot (257)7Working with Plug-ins (259)7.1Plug-in Overview (259)7.1.1Plug-in Basics (259)7.1.2First Plug-in Slot of Sounds: Choosing the Sound’s Role (263)7.1.3Loading, Removing, and Replacing a Plug-in (264)7.1.4Adjusting the Plug-in Parameters (270)7.1.5Bypassing Plug-in Slots (270)7.1.6Using Side-Chain (272)7.1.7Moving Plug-ins (272)7.1.8Alternative: the Plug-in Strip (273)7.1.9Saving and Recalling Plug-in Presets (273)7.1.9.1Saving Plug-in Presets (274)7.1.9.2Recalling Plug-in Presets (275)7.1.9.3Removing a Default Plug-in Preset (276)7.2The Sampler Plug-in (277)7.2.1Page 1: Voice Settings / Engine (279)7.2.2Page 2: Pitch / Envelope (281)7.2.3Page 3: FX / Filter (283)7.2.4Page 4: Modulation (285)7.2.5Page 5: LFO (286)7.2.6Page 6: Velocity / Modwheel (288)7.3Using Native Instruments and External Plug-ins (289)7.3.1Opening/Closing Plug-in Windows (289)7.3.2Using the VST/AU Plug-in Parameters (292)7.3.3Setting Up Your Own Parameter Pages (293)7.3.4Using VST/AU Plug-in Presets (298)7.3.5Multiple-Output Plug-ins and Multitimbral Plug-ins (300)8Using the Audio Plug-in (302)8.1Loading a Loop into the Audio Plug-in (306)8.2Editing Audio in the Audio Plug-in (307)8.3Using Loop Mode (308)8.4Using Gate Mode (310)9Using the Drumsynths (312)9.1Drumsynths – General Handling (313)9.1.1Engines: Many Different Drums per Drumsynth (313)9.1.2Common Parameter Organization (313)9.1.3Shared Parameters (316)9.1.4Various Velocity Responses (316)9.1.5Pitch Range, Tuning, and MIDI Notes (316)9.2The Kicks (317)9.2.1Kick – Sub (319)9.2.2Kick – Tronic (321)9.2.3Kick – Dusty (324)9.2.4Kick – Grit (325)9.2.5Kick – Rasper (328)9.2.6Kick – Snappy (329)9.2.7Kick – Bold (331)9.2.8Kick – Maple (333)9.2.9Kick – Push (334)9.3The Snares (336)9.3.1Snare – Volt (338)9.3.2Snare – Bit (340)9.3.3Snare – Pow (342)9.3.4Snare – Sharp (343)9.3.5Snare – Airy (345)9.3.6Snare – Vintage (347)9.3.7Snare – Chrome (349)9.3.8Snare – Iron (351)9.3.9Snare – Clap (353)9.3.10Snare – Breaker (355)9.4The Hi-hats (357)9.4.1Hi-hat – Silver (358)9.4.2Hi-hat – Circuit (360)9.4.3Hi-hat – Memory (362)9.4.4Hi-hat – Hybrid (364)9.4.5Creating a Pattern with Closed and Open Hi-hats (366)9.5The Toms (367)9.5.1Tom – Tronic (369)9.5.2Tom – Fractal (371)9.5.3Tom – Floor (375)9.5.4Tom – High (377)9.6The Percussions (378)9.6.1Percussion – Fractal (380)9.6.2Percussion – Kettle (383)9.6.3Percussion – Shaker (385)9.7The Cymbals (389)9.7.1Cymbal – Crash (391)9.7.2Cymbal – Ride (393)10Using the Bass Synth (396)10.1Bass Synth – General Handling (397)10.1.1Parameter Organization (397)10.1.2Bass Synth Parameters (399)11Working with Patterns (401)11.1Pattern Basics (401)11.1.1Pattern Editor Overview (402)11.1.2Navigating the Event Area (404)11.1.3Following the Playback Position in the Pattern (406)11.1.4Jumping to Another Playback Position in the Pattern (407)11.1.5Group View and Keyboard View (408)11.1.6Adjusting the Arrange Grid and the Pattern Length (410)11.1.7Adjusting the Step Grid and the Nudge Grid (413)11.2Recording Patterns in Real Time (416)11.2.1Recording Your Patterns Live (417)11.2.2Using the Metronome (419)11.2.3Recording with Count-in (420)11.3Recording Patterns with the Step Sequencer (422)11.3.1Step Mode Basics (422)11.3.2Editing Events in Step Mode (424)11.4Editing Events (425)11.4.1Editing Events with the Mouse: an Overview (425)11.4.2Creating Events/Notes (428)11.4.3Selecting Events/Notes (429)11.4.4Editing Selected Events/Notes (431)11.4.5Deleting Events/Notes (434)11.4.6Cut, Copy, and Paste Events/Notes (436)11.4.7Quantizing Events/Notes (439)11.4.8Quantization While Playing (441)11.4.9Doubling a Pattern (442)11.4.10Adding Variation to Patterns (442)11.5Recording and Editing Modulation (443)11.5.1Which Parameters Are Modulatable? (444)11.5.2Recording Modulation (446)11.5.3Creating and Editing Modulation in the Control Lane (447)11.6Creating MIDI Tracks from Scratch in MASCHINE (452)11.7Managing Patterns (454)11.7.1The Pattern Manager and Pattern Mode (455)11.7.2Selecting Patterns and Pattern Banks (456)11.7.3Creating Patterns (459)11.7.4Deleting Patterns (460)11.7.5Creating and Deleting Pattern Banks (461)11.7.6Naming Patterns (463)11.7.7Changing the Pattern’s Color (465)11.7.8Duplicating, Copying, and Pasting Patterns (466)11.7.9Moving Patterns (469)11.8Importing/Exporting Audio and MIDI to/from Patterns (470)11.8.1Exporting Audio from Patterns (470)11.8.2Exporting MIDI from Patterns (472)11.8.3Importing MIDI to Patterns (474)12Audio Routing, Remote Control, and Macro Controls (483)12.1Audio Routing in MASCHINE (484)12.1.1Sending External Audio to Sounds (485)12.1.2Configuring the Main Output of Sounds and Groups (489)12.1.3Setting Up Auxiliary Outputs for Sounds and Groups (494)12.1.4Configuring the Master and Cue Outputs of MASCHINE (497)12.1.5Mono Audio Inputs (502)12.1.5.1Configuring External Inputs for Sounds in Mix View (503)12.2Using MIDI Control and Host Automation (506)12.2.1Triggering Sounds via MIDI Notes (507)12.2.2Triggering Scenes via MIDI (513)12.2.3Controlling Parameters via MIDI and Host Automation (514)12.2.4Selecting VST/AU Plug-in Presets via MIDI Program Change (522)12.2.5Sending MIDI from Sounds (523)12.3Creating Custom Sets of Parameters with the Macro Controls (527)12.3.1Macro Control Overview (527)12.3.2Assigning Macro Controls Using the Software (528)13Controlling Your Mix (535)13.1Mix View Basics (535)13.1.1Switching between Arrange View and Mix View (535)13.1.2Mix View Elements (536)13.2The Mixer (537)13.2.1Displaying Groups vs. Displaying Sounds (539)13.2.2Adjusting the Mixer Layout (541)13.2.3Selecting Channel Strips (542)13.2.4Managing Your Channels in the Mixer (543)13.2.5Adjusting Settings in the Channel Strips (545)13.2.6Using the Cue Bus (549)13.3The Plug-in Chain (551)13.4The Plug-in Strip (552)13.4.1The Plug-in Header (554)13.4.2Panels for Drumsynths and Internal Effects (556)13.4.3Panel for the Sampler (557)13.4.4Custom Panels for Native Instruments Plug-ins (560)13.4.5Undocking a Plug-in Panel (Native Instruments and External Plug-ins Only) (564)14Using Effects (567)14.1Applying Effects to a Sound, a Group or the Master (567)14.1.1Adding an Effect (567)14.1.2Other Operations on Effects (574)14.1.3Using the Side-Chain Input (575)14.2Applying Effects to External Audio (578)14.2.1Step 1: Configure MASCHINE Audio Inputs (578)14.2.2Step 2: Set up a Sound to Receive the External Input (579)14.2.3Step 3: Load an Effect to Process an Input (579)14.3Creating a Send Effect (580)14.3.1Step 1: Set Up a Sound or Group as Send Effect (581)14.3.2Step 2: Route Audio to the Send Effect (583)14.3.3 A Few Notes on Send Effects (583)14.4Creating Multi-Effects (584)15Effect Reference (587)15.1Dynamics (588)15.1.1Compressor (588)15.1.2Gate (591)15.1.3Transient Master (594)15.1.4Limiter (596)15.1.5Maximizer (600)15.2Filtering Effects (603)15.2.1EQ (603)15.2.2Filter (605)15.2.3Cabinet (609)15.3Modulation Effects (611)15.3.1Chorus (611)15.3.2Flanger (612)15.3.3FM (613)15.3.4Freq Shifter (615)15.3.5Phaser (616)15.4Spatial and Reverb Effects (617)15.4.1Ice (617)15.4.2Metaverb (619)15.4.3Reflex (620)15.4.4Reverb (Legacy) (621)15.4.5Reverb (623)15.4.5.1Reverb Room (623)15.4.5.2Reverb Hall (626)15.4.5.3Plate Reverb (629)15.5Delays (630)15.5.1Beat Delay (630)15.5.2Grain Delay (632)15.5.3Grain Stretch (634)15.5.4Resochord (636)15.6Distortion Effects (638)15.6.1Distortion (638)15.6.2Lofi (640)15.6.3Saturator (641)15.7Perform FX (645)15.7.1Filter (646)15.7.2Flanger (648)15.7.3Burst Echo (650)15.7.4Reso Echo (653)15.7.5Ring (656)15.7.6Stutter (658)15.7.7Tremolo (661)15.7.8Scratcher (664)16Working with the Arranger (667)16.1Arranger Basics (667)16.1.1Navigating Song View (670)16.1.2Following the Playback Position in Your Project (672)16.1.3Performing with Scenes and Sections using the Pads (673)16.2Using Ideas View (677)16.2.1Scene Overview (677)16.2.2Creating Scenes (679)16.2.3Assigning and Removing Patterns (679)16.2.4Selecting Scenes (682)16.2.5Deleting Scenes (684)16.2.6Creating and Deleting Scene Banks (685)16.2.7Clearing Scenes (685)16.2.8Duplicating Scenes (685)16.2.9Reordering Scenes (687)16.2.10Making Scenes Unique (688)16.2.11Appending Scenes to Arrangement (689)16.2.12Naming Scenes (689)16.2.13Changing the Color of a Scene (690)16.3Using Song View (692)16.3.1Section Management Overview (692)16.3.2Creating Sections (694)16.3.3Assigning a Scene to a Section (695)16.3.4Selecting Sections and Section Banks (696)16.3.5Reorganizing Sections (700)16.3.6Adjusting the Length of a Section (702)16.3.6.1Adjusting the Length of a Section Using the Software (703)16.3.6.2Adjusting the Length of a Section Using the Controller (705)16.3.7Clearing a Pattern in Song View (705)16.3.8Duplicating Sections (705)16.3.8.1Making Sections Unique (707)16.3.9Removing Sections (707)16.3.10Renaming Scenes (708)16.3.11Clearing Sections (710)16.3.12Creating and Deleting Section Banks (710)16.3.13Working with Patterns in Song view (710)16.3.13.1Creating a Pattern in Song View (711)16.3.13.2Selecting a Pattern in Song View (711)16.3.13.3Clearing a Pattern in Song View (711)16.3.13.4Renaming a Pattern in Song View (711)16.3.13.5Coloring a Pattern in Song View (712)16.3.13.6Removing a Pattern in Song View (712)16.3.13.7Duplicating a Pattern in Song View (712)16.3.14Enabling Auto Length (713)16.3.15Looping (714)16.3.15.1Setting the Loop Range in the Software (714)16.3.15.2Activating or Deactivating a Loop Using the Controller (715)16.4Playing with Sections (715)16.4.1Jumping to another Playback Position in Your Project (716)16.5Triggering Sections or Scenes via MIDI (717)16.6The Arrange Grid (719)16.7Quick Grid (720)17Sampling and Sample Mapping (722)17.1Opening the Sample Editor (722)17.2Recording Audio (724)17.2.1Opening the Record Page (724)17.2.2Selecting the Source and the Recording Mode (725)17.2.3Arming, Starting, and Stopping the Recording (729)17.2.5Checking Your Recordings (731)17.2.6Location and Name of Your Recorded Samples (734)17.3Editing a Sample (735)17.3.1Using the Edit Page (735)17.3.2Audio Editing Functions (739)17.4Slicing a Sample (743)17.4.1Opening the Slice Page (743)17.4.2Adjusting the Slicing Settings (744)17.4.3Manually Adjusting Your Slices (746)17.4.4Applying the Slicing (750)17.5Mapping Samples to Zones (754)17.5.1Opening the Zone Page (754)17.5.2Zone Page Overview (755)17.5.3Selecting and Managing Zones in the Zone List (756)17.5.4Selecting and Editing Zones in the Map View (761)17.5.5Editing Zones in the Sample View (765)17.5.6Adjusting the Zone Settings (767)17.5.7Adding Samples to the Sample Map (770)18Appendix: Tips for Playing Live (772)18.1Preparations (772)18.1.1Focus on the Hardware (772)18.1.2Customize the Pads of the Hardware (772)18.1.3Check Your CPU Power Before Playing (772)18.1.4Name and Color Your Groups, Patterns, Sounds and Scenes (773)18.1.5Consider Using a Limiter on Your Master (773)18.1.6Hook Up Your Other Gear and Sync It with MIDI Clock (773)18.1.7Improvise (773)18.2Basic Techniques (773)18.2.1Use Mute and Solo (773)18.2.2Create Variations of Your Drum Patterns in the Step Sequencer (774)18.2.3Use Note Repeat (774)18.2.4Set Up Your Own Multi-effect Groups and Automate Them (774)18.3Special Tricks (774)18.3.1Changing Pattern Length for Variation (774)18.3.2Using Loops to Cycle Through Samples (775)18.3.3Load Long Audio Files and Play with the Start Point (775)19Troubleshooting (776)19.1Knowledge Base (776)19.2Technical Support (776)19.3Registration Support (777)19.4User Forum (777)20Glossary (778)Index (786)1Welcome to MASCHINEThank you for buying MASCHINE!MASCHINE is a groove production studio that implements the familiar working style of classi-cal groove boxes along with the advantages of a computer based system. MASCHINE is ideal for making music live, as well as in the studio. It’s the hands-on aspect of a dedicated instru-ment, the MASCHINE hardware controller, united with the advanced editing features of the MASCHINE software.Creating beats is often not very intuitive with a computer, but using the MASCHINE hardware controller to do it makes it easy and fun. You can tap in freely with the pads or use Note Re-peat to jam along. Alternatively, build your beats using the step sequencer just as in classic drum machines.Patterns can be intuitively combined and rearranged on the fly to form larger ideas. You can try out several different versions of a song without ever having to stop the music.Since you can integrate it into any sequencer that supports VST, AU, or AAX plug-ins, you can reap the benefits in almost any software setup, or use it as a stand-alone application. You can sample your own material, slice loops and rearrange them easily.However, MASCHINE is a lot more than an ordinary groovebox or sampler: it comes with an inspiring 7-gigabyte library, and a sophisticated, yet easy to use tag-based Browser to give you instant access to the sounds you are looking for.What’s more, MASCHINE provides lots of options for manipulating your sounds via internal ef-fects and other sound-shaping possibilities. You can also control external MIDI hardware and 3rd-party software with the MASCHINE hardware controller, while customizing the functions of the pads, knobs and buttons according to your needs utilizing the included Controller Editor application. We hope you enjoy this fantastic instrument as much as we do. Now let’s get go-ing!—The MASCHINE team at Native Instruments.MASCHINE Documentation1.1MASCHINE DocumentationNative Instruments provide many information sources regarding MASCHINE. The main docu-ments should be read in the following sequence:1.MASCHINE MIKRO Quick Start Guide: This animated online guide provides a practical ap-proach to help you learn the basic of MASCHINE MIKRO. The guide is available from theNative Instruments website: https:///maschine-mikro-quick-start/2.MASCHINE Manual (this document): The MASCHINE Manual provides you with a compre-hensive description of all MASCHINE software and hardware features.Additional documentation sources provide you with details on more specific topics:►Online Support Videos: You can find a number of support videos on The Official Native In-struments Support Channel under the following URL: https:///NIsupport-EN. We recommend that you follow along with these instructions while the respective ap-plication is running on your computer.Other Online Resources:If you are experiencing problems related to your Native Instruments product that the supplied documentation does not cover, there are several ways of getting help:▪Knowledge Base▪User Forum▪Technical Support▪Registration SupportYou will find more information on these subjects in the chapter Troubleshooting.Document Conventions1.2Document ConventionsThis section introduces you to the signage and text highlighting used in this manual. This man-ual uses particular formatting to point out special facts and to warn you of potential issues.The icons introducing these notes let you see what kind of information is to be expected:This document uses particular formatting to point out special facts and to warn you of poten-tial issues. The icons introducing the following notes let you see what kind of information canbe expected:Furthermore, the following formatting is used:▪Text appearing in (drop-down) menus (such as Open…, Save as… etc.) in the software andpaths to locations on your hard disk or other storage devices is printed in italics.▪Text appearing elsewhere (labels of buttons, controls, text next to checkboxes etc.) in thesoftware is printed in blue. Whenever you see this formatting applied, you will find thesame text appearing somewhere on the screen.▪Text appearing on the displays of the controller is printed in light grey. Whenever you seethis formatting applied, you will find the same text on a controller display.▪Text appearing on labels of the hardware controller is printed in orange. Whenever you seethis formatting applied, you will find the same text on the controller.▪Important names and concepts are printed in bold.▪References to keys on your computer’s keyboard you’ll find put in square brackets (e.g.,“Press [Shift] + [Enter]”).►Single instructions are introduced by this play button type arrow.→Results of actions are introduced by this smaller arrow.Naming ConventionThroughout the documentation we will refer to MASCHINE controller (or just controller) as the hardware controller and MASCHINE software as the software installed on your computer.The term “effect” will sometimes be abbreviated as “FX” when referring to elements in the MA-SCHINE software and hardware. These terms have the same meaning.Button Combinations and Shortcuts on Your ControllerMost instructions will use the “+” sign to indicate buttons (or buttons and pads) that must be pressed simultaneously, starting with the button indicated first. E.g., an instruction such as:“Press SHIFT + PLAY”means:1.Press and hold SHIFT.2.While holding SHIFT, press PLAY and release it.3.Release SHIFT.1.3New Features in MASCHINE2.8The following new features have been added to MASCHINE: Integration▪Browse on , create your own collections of loops and one-shots and send them directly to the MASCHINE browser.Improvements to the Browser▪Samples are now cataloged in separate Loops and One-shots tabs in the Browser.▪Previews of loops selected in the Browser will be played in sync with the current project.When a loop is selected with Prehear turned on, it will begin playing immediately in-sync with the project if transport is running. If a loop preview starts part-way through the loop, the loop will play once more for its full length to ensure you get to hear the entire loop once in context with your project.▪Filters and product selections will be remembered when switching between content types and Factory/User Libraries in the Browser.▪Browser content synchronization between multiple running instances. When running multi-ple instances of MASCHINE, either as Standalone and/or as a plug-in, updates to the Li-brary will be synced across the instances. For example, if you delete a sample from your User Library in one instance, the sample will no longer be present in the other instances.Similarly, if you save a preset in one instance, that preset will then be available in the oth-er instances, too.▪Edits made to samples in the Factory Libraries will be saved to the Standard User Directo-ry.For more information on these new features, refer to the following chapter ↑4, Browser. Improvements to the MASCHINE MIKRO MK3 Controller▪You can now set sample Start and End points using the controller. For more information refer to ↑17.3.1, Using the Edit Page.Improved Support for A-Series Keyboards▪When Browsing with A-Series keyboards, you can now jump quickly to the results list by holding SHIFT and pushing right on the 4D Encoder.▪When Browsing with A-Series keyboards, you can fast scroll through the Browser results list by holding SHIFT and twisting the 4D Encoder.▪Mute and Solo Sounds and Groups from A-Series keyboards. Sounds are muted in TRACK mode while Groups are muted in IDEAS.。
SINAMICS S210 伺服驱动系统样本
E86060-K4670-A101-B6-76001) SIMATIC HMI / 基于 PC 的自动化系统 操作与监控系统 基于 PC 的自动化系统 E86060-K4680-A101-C5-76001) 工业通信 SIMATIC NET IK PI ST 80/ST PC
E86060-K6710-A101-B8-76001) MD 10.1 SITRAIN 工业培训
E86060-K5710-A111-A5-76001) SIMOGEAR MD 50.1 减速电机 圆柱齿轮减速电机、平行轴减速电机、 锥齿轮减速电机、螺旋蜗轮减速电机以及 蜗轮减速电机 E86060-K5250-A111-A5-76001) 运动控制系统 SIMOTION 生产机械设备 E86060-K4921-A101-A4-5D00
Siemens D 32 · 12/2017 版
3
集成驱动系统
凭借集成驱动系统实现更快上市和更快盈利
SINAMICS 是西门子集成驱动系统的重要组件。SINAMICS 在提升工业生产 过程中的效率、生产率和可用性方面起着举足轻重的作用。 集成驱动系统是西门子对当今驱动与自动化技术所面临的极度复杂性挑战 而给出的指导性解答。全球唯一真正面向整套驱动系统的全面解决方案以 其三位一体的集成概念而著称:横向集成、纵向集成以及生命周期集成, 这些确保了每个驱动组件都能无缝集成到各个驱动系统、各类自动化环 境,甚至于设备的整个生命周期之中。 您将获得:一个从配置到服务的最佳工作流,达到更高的生产率、增效以 及更高的可用性。最终,集成驱动系统将显著缩短上市时间 以及盈利周期。
3
MOTION-CONNECT 接线系统
4
配置工具
5
服务与文档
6
SIMATIC Energy Manager PRO V7.2 - Operation Operat
2 Energy Manager PRO Client................................................................................................................. 19
2.1 2.1.1 2.1.2 2.1.3 2.1.4 2.1.5 2.1.5.1 2.1.5.2 2.1.6
Basics ................................................................................................................................ 19 Start Energy Manager ........................................................................................................ 19 Client as navigation tool..................................................................................................... 23 Basic configuration ............................................................................................................ 25 Search for object................................................................................................................ 31 Quicklinks.......................................................................................................................... 33 Create Quicklinks ............................................................................................................... 33 Editing Quicklinks .............................................................................................................. 35 Help .................................................................................................................................. 38
4 Megapixel Bullet IP摄像头 DWC-MB74Wi4 产品参数说明书
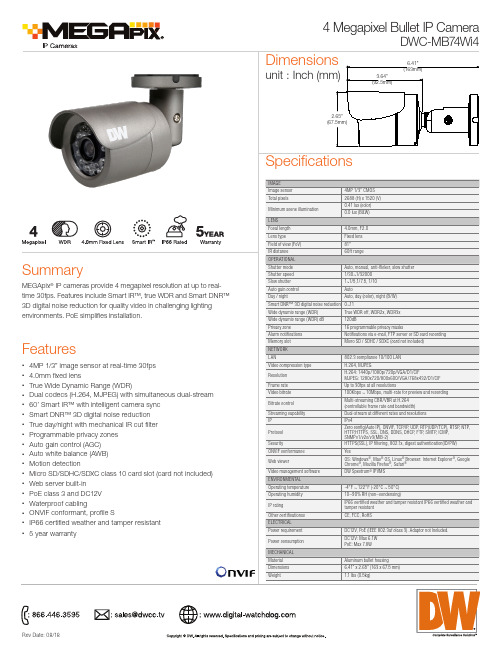
Dimensions
unit : Inch (mm)
3.64" (92.5mm)
6.41" (163mm)
2.65" (67.5mm)
Specifications
IMAGE
Image sensor
4MP 1/3” CMOS
120dB
Privacy zone
16 programmable privacy masks
Alarm notifications
Notifications via e-mail, FTP server or SD card recording
Memory slot
Micro SD / SDHC / SDXC (card not included)
Frame rate
Up to 30fps at all resolutions
Video bitrate
100Kbps ~ 10Mbps, multi-rate for preview and recording
Bitrate control
Multi-streaming CBR/VBR at H.264 (controllable frame rate and bandwidth)
Streaming capability
Dual-stream at different rates and resolutions
IP Protocol Security
IPv4
Zero config(Auto IP), ONVIF, TCP/IP, UDP, RTP(UDP/TCP), RTSP, NTP, HTTP,HTTPS, SSL, DNS, DDNS, DHCP, FTP, SMTP, ICMP, SNMPv1/v2c/v3(MIB-2)
gmr标准及演进
gmr标准及演进
GMR(Giant Magnetoresistance)技术是指一种利用电磁学原理来进行数据存储和读取的技术,在磁性存储介质中加入特殊的多层结构,通过读取不同层之间的磁阻抗变化来实现数据读取。
GMR技术因其高灵敏度、高磁阻比、低功耗等优点而得到广泛应用。
GMR技术发展的历史可以追溯到20世纪80年代初,当时物理学家Albert Fert 和Peter Grünberg发现了磁性多层结构中的磁阻抗变化现象,并提出了利用该现象来进行数据存储和读取的想法。
随着磁性多层结构技术的不断发展和完善,GMR技术也得到了较为广泛的应用。
GMR技术的演进,主要包括以下几个阶段:
1. GMR单元技术阶段:在90年代初期,GMR技术逐渐发展为一种可行的数据存储和读取方式,取得了一定的实验性成果。
2. GMR读头技术阶段:90年代中期,GMR技术开始应用于硬盘读头中,实现了更高密度和更快速的数据读取,使得硬盘存储密度不断提高。
3. GMR垂直读头技术阶段:2000年左右,GMR技术开始向垂直读头技术方向发展,实现了更高的存储密度和更低的误码率。
4. GMR磁性随机存储器(MRAM)技术阶段:近年来,GMR技术逐渐向MRAM 领域发展,实现了高速、非易失性的存储器器件,并逐渐进入实际生产和应用阶段。
未来,随着GMR技术的不断发展和完善,其应用领域也将不断拓展,包括新型存储技术、数据通信技术等。
随着照片文件越来越大,除了储存卡,我们还需要性能强劲的读卡器

随着照片文件越来越大,除了储存卡,我们还需要性能强劲的读卡器作者:暂无来源:《摄影之友·影像视觉》 2011年第5期翻译:Elina 编辑:林曦随着相机的像素提高,照片文件也越来越大,除了储存卡,我们还需要更加稳定和高速的读卡器。
Hama USB 2.0读卡器 35合Hama这款读卡器可以读取最新的储存卡,包括SDXC卡。
它的传输速度很快,大约20Mb/秒,是评测中速度最快的读卡器之一。
但是它的做工不是很好,外壳容易损坏。
雷克沙专业UDMA双槽读卡器市场上最简化的读卡器之一,只能读取CF卡和SD/SDHC卡,不支持SDXC卡。
它读取CF卡的速度为23.8Mb/秒,而使用SDHC卡的速度为16Mb/秒。
雷克沙多功能24合1USB读卡器雷克沙多功能读卡器采用了折叠式设计,外壳的做工很好,坚固防滑。
这款读卡器支持市面上所有主流储存卡,包括SDXC卡。
它的传输速度为19Mb/秒。
Integral多合一读卡器这款读卡器最大的特点就是体积小巧。
它可以读取CF卡和SD卡等,但是不支持SDXC卡。
而且它的传输速度非常慢,使用CF卡测试时,传输速度仅为4Mb/秒。
闪迪影像伴侣多合一USB2.0读卡器这款读卡器的外表采用精致的黑色钢琴漆,做工也很好,还配有一个竖放读卡器的磁力架。
它支持SDXC卡,对于CF卡,它的读取速度为22.7MB/秒,SD卡为18.9Mb/秒。
金士顿读卡器这款读卡器采用了滑出式设计,可以从读卡器内抽出一小段USB线,而且还另配了USB延长线。
这样的设计有些繁琐。
这款读卡器的传输速度还不错,达到了19Mb/秒。
ThingMagic推出最新支持IOS系统的Mercury API
ThingMagic推出最新支持IOS系统的Mercury API
佚名
【期刊名称】《金卡工程》
【年(卷),期】2014(000)008
【摘要】2014年7月11日,Trimble公司(纳斯达克股票代码:TRMB)宣布,苹果的iOS系统可支持ThingMagic(r)Mercury(r)API的软件开发包。
这项最新功能来自于日益增长的移动设备替代RFID掌上电脑--智能手机&平板电脑。
另外Trimble公司下一步的研发目标仍然是继续丰富Mercury(r)API的软件工具开发包:通过一个统一的接口接入ThingMagic所有的成品和嵌入式产品。
【总页数】1页(P54)
【正文语种】中文
【相关文献】
1.ThingMagic推出Mercury4 RFID读取器 [J],
2.ThingMagic推出最新支持IOS系统的Mercury API [J],
3.顶级品牌,顶级音效关于Mercury发烧天蝶录音的历史及最新推出的50CD限量版套装碟(一) [J], 曼莎
4.顶级品牌,顶级音效——关于Mercury发烧天碟录音的历史及最新推出的50 CD限量版套装碟(一) [J],
5.ThingMagic推出可读任何标签的Mercury4 RFID读取器 [J],
因版权原因,仅展示原文概要,查看原文内容请购买。
基于物联网技术的智慧文物管控系统

基于物联网技术的智慧文物管控系统概述:利用RFID技术,对博物馆内的文物进行标签式管理,通过加装RFID电子标签,在出入口及博物馆内部安装RFID识别设备,再结合数据中心资产实时监控平台,实现资产全面可视和信息实时更新,能够实时监控文物的存放和搬运情况,具体体现为文物所在位置实时查询,文物移动跟踪记录,报警;文物的管理统计报表等管理目标,建立一套先进的、规范的、优化的管理机制。
2。
技术简介RFID无线射频识别技术是利用雷达反射原理,通过天线向电子标签发出微波查询信号,电子标签被读写器微波能量激活,接受到微波信号后应答并发出带有标签数据信息的回波信号。
射频识别技术的基本特点是采用无线电技术实现对静止的或移动的物体进行识别,达到确定待识别物体的身份、提取待识别物体的特征信息(或标识信息)的目的。
通过射频识别系统采集到的待识别物体的特征信息通常情况下先由中间软件进行处理,或直接将采集到的识别信息通过计算机信息处理技术(如数据库技术等)及计算机网络技术(Intranet & Internet技术)实现信息的融合、共享、远距离传送等直接服务于有关的业务应用系统,如RFID珠宝管理系统。
3。
系统整体方案设计3.1系统设计思路为实现对文物的精确管理,需要定位到单个文物,济南卓伦智慧文物管理系统中,RFID电子标签具有唯一的ID号,因此将电子标签与文物个体一一对应后,通过对电子标签的识别,达到对单个文物进行精确管理的目标。
同时,RFID设备具有多标签同时读取的特点,因此通过RFID珠宝管理系统的建设,可实现快速准确的文物盘点,实现文物资产的高效管理。
RFID文物管理系统深入渗透于文物资产从入库、在展出、盘点、搬运等各个关键节点,结合计算机和网络技术,打造RFID智慧珠宝管理系统,实现珠宝资产的信息化、精确化和高效性管理。
3.2系统业务流程方案RFID智慧文物管理系统的建设,将RFID技术贯穿于文物管理从入库到完成展出的各个环节。
- 1、下载文档前请自行甄别文档内容的完整性,平台不提供额外的编辑、内容补充、找答案等附加服务。
- 2、"仅部分预览"的文档,不可在线预览部分如存在完整性等问题,可反馈申请退款(可完整预览的文档不适用该条件!)。
- 3、如文档侵犯您的权益,请联系客服反馈,我们会尽快为您处理(人工客服工作时间:9:00-18:30)。
《中国自动识别技术
》
感器数据,以接收传感器的信息并将其转发到基于云的服务器。
然后,云服务器便会对数据进行管理及分析。
Unified Office 使用第三方供应商提供的网络枢纽及传感器。
ThingMagic 推出增强版Sargas RAIN RFID 读卡器
JADAK 子公司ThingMagic 推出增强版ThingMagic Sargas 2端口超高频(UHF)RFID 读取器。
该增强版产品支持更多的RFID 协议,并提供了RAINstream 应用程序以简化数据集成。
除了标准EPC Gen 2ISO 18000-63:2015协议外,增强版Sargas RAIN 读卡器还支持AEI ATA ,IP-X 和ISO 18000-6B 协议。
自动设备识别(AEI)和美国卡车协会(ATA)协议主要在铁路和货车运输应用中使用。
配有条码扫描仪的安卓平板电脑问世
超坚固现场数据采集解决方案提供商瞻博网络推出搭载Android 5.1的Mesa 2坚固型平板电脑。
该平板防护等级为IP68,拥有较长电池寿命和7英寸显示屏,可用
于各种应用场景中。
瞻博网络称,该平板可视角度广,重量也比上一代产品要轻。
该平板电脑适用于Class 1,Div II 的危险区域。
同时,平板还配备了1D-2D 条码扫描仪,扫描手枪式握柄和RFID 读取器等
定制选项,以提升生产力及效率。
Urbanest Darling Square 部署ASSA ABLOY 门锁解决方案
悉尼学生宿舍Urbanest Dar⁃ling Square 近日部署了ASSA ABLOY Hospitality 的Visionline 无
线在线解决方案,VingCard Signa⁃ture RFID 门锁,移动门禁系统以增强安全性。
该门锁解决方案可与ASSA ABLOY 的移动应用程序协同工作,为Urbanest 的住户提供便利的移动接入服务。
ASSA ABLOY 的移动接入系统可与该公司的Seos 技术协同使用。
该解决方案与物业管理系统配合,为每个房间分配数字钥匙,并将其传送到住户的智能手机上。
Senseon 扩展柜锁系统
Senseon 宣布增强其安全访问控制系统的功能,增强其无钥匙柜
锁功能,以帮助高端及消费级电子零售商加强防损及客户体验。
Senseon 的最新产品有5EL 电子锁,适用于展示柜移门的锁护。
该锁可在玻璃、木材或其他材料制成的门中使用。
Mist 推出BLE 资产可见
性服务
智能无线网络系统供应商Mist 宣布推出新的资产可视性服务。
这项新服务是蓝牙低功耗(BLE)产品的延伸,几乎任何领域的公司都可以使用标准BLE 技术来定位移动设备和资产。
Mist 还扩展了BLE 联盟计划,引进了新的战略供应商,以共同实现使用BLE 资产的可见性来节省时间和金钱,提升运营效率的目标。
Avery Dennison RFID 宣布与Target 达成合作
Avery Dennison RFID 日前宣布与Target 公司签订一项全球射频识别合作协议。
Avery Dennison 将向Target 的1600家门店提供RFID 技术支持,以
最大限度提升库存可用性及客户体验。
该项目的规模是全球同类项目中最大的。
Target 将利用Avery Dennison 广泛的UHF RFID 产品组合,以满足其各类需求。
Avery Dennison RFID 标签还和装饰产品进行了集成,以优化服
装产品的标记。
29。
