2011年09月20日IMF预测今明两年中国经济增速分别为9.5%和9.0%
摩托罗拉XTL-5000与223系列调制板适配器面板连接说明书

AN-DISPATCH-010 Rev B11 FEB 2011MotorolaXTL-5000 Radios to 223 Series Adapter PanelsTable of Contents1.0 General (3)2.0 Interconnect Cable Assembly (3)3.0 223 Series Panels (4)3.1 TRA-223 Setup (4)3.1.1 TRA-223 Dip Switch Settings (4)3.2 DSP-223 Setup (5)3.2.1 DSP-223 Jumper Settings (5)3.3 IP-223 Setup (5)3.3.1 IP-223 Jumper Settings (5)2AN-DISPATCH-010AN-DISPATCH-010 31.0GeneralThis application note is intended to assist technical staff with cable assembly and hardware setup of different Telex 223 series adapters (TRA-223, DSP-223 and IP-223) to a Motorola**1 XTL-5000 series mobile radio.2.0Interconnect Cable AssemblyA cable assembly is required to connect to the 26-pin accessory connector of the XTL to the various 223 series adaptor e Table 1 to build the specified cable assembly.1.See “Copyright Notice” on page 7.TABLE 1. Cable Assembly PinoutsTRA-223DB-25 Pin DSP-223DB-25 Pin IP-223DB-25 Pin XTL 26-PinSignal25252523MIC +24242421RX +14141416PTT 77714 & 15GNDMotorolaXTL-5000 Radios to 223 Series Adapter PanelsMotorola XTL-5000 Radios to 223 Series Adapter Panels4 AN-DISPATCH-0103.0223 Series Panels3.1TRA-223 Setup 3.1.1TRA-223 Dip Switch SettingsTo set front panel dip switches , do the following:1. Set to on :•position 4•position 6•position 72. Select 2- or 4-wire operation using:•position 1•position 2•position 3REFERENCE:For more information, see the TRA-223 Technical ManualP/N 803570, Line Connection section. This document is available for download at /.FIGURE 1.XLT Cable Assembly DiagramMotorola XTL-5000 Radios to 223 Series Adapter PanelsAN-DISPATCH-010 53.2DSP-223 SetupNo DSP-223 software programming is required. 3.2.1DSP-223 Jumper SettingsTo set the DSP223 Jumpers, do the following:1. Set to the A position :•J14, J15, J22, J23, J24, J25, J27.2. Set to the B position:•J12 and J13 3. Solder close JP2.To set the operating mode , do the following > Select 2- or 4- wire operation:•J19, J20 and J21.REFERENCE:For more information, see the DSP-223 Technical Manual (P/N 803274), DSP to Console Line Connection section. Thisdocument is available for download at /.3.3IP-223 SetupSetup the desired IP-223 line’s jumpers for Local radio control.3.3.1IP-223 Jumper SettingsTABLE 2. Jumper SettingsLine 1Jumper SettingsLine 2J33, J34 B = 4-WireJ5, J6J16, J21 A = Singled EndedJ19, J20J14Hanging on center pin = 10K Ohm J24J3, J9, J11 A = Single Ended J25, J28, J29J13 B = HighJ27J17, J22 B = 600 OhmsJ10, J15R377Solder bridge the pads together R381Motorola XTL-5000 Radios to 223 Series Adapter Panels 6 AN-DISPATCH-010P ROPRIETARY N OTICEThe product information and design disclosed herein were originated by and are the property of Bosch Security Systems, Inc. Bosch reserves all patent, proprietary design, manufacturing, reproduction, use and sales rights thereto, and to any article disclosed therein, except to the extent rights are expressly granted to others.C OPYRIGHT N OTICECopyright 2011 by Bosch Security Systems, Inc. All rights reserved. Reproduction, in whole or in part, without prior written permission from Bosch is prohibited.*All other trademarks are property of their respective owners.**MOTOROLA and the Stylized M logo are registered in the U.S. Patent and Trademark Office.W ARRANTY AND S ERVICE I NFORMATIONFor warranty and service information, refer to / warranty.F ACTORY S ERVICE C ENTERFactory Service CenterBosch Security Systems, Inc.Radio Dispatch Products8601 East Cornhusker HighwayLincoln, Nebraska, 68507C ONTACT I NFORMATIONSales:Phone...............................................(800) 752-7560Fax ..................................................(402) 467-3279E-mail.......................**********************.com Customer Service:Repair...............................................(800) 553-5992 Technical Support:Phone ..............................................(800) 898-6723********************************************.comWeb C LAIMSNo liability will be accepted for damages directly or indirectly arising from the use of our materials or from any other causes. Our liability shall be expressly limited to replacement or repair of defective materials.AN-DISPATCH-010 7Revision HistoryDocument Title: Motorola XTL-5000 Radios to 223 Series Adapter PanelsDocument Number: AN-DISPATCH-010Revision Change Description DateA Update brand, format and new document number. (Reference rev B)01-OCT-2009B Update Telex website url. Table 2 correction to row 7 column 1.11-FEB-2011。
09年3月份日照九州戴尔笔记本标准配置及价格表doc-4

37%
9,893.
27
笔记本
戴尔E6400 (14寸)
主板Intel(R) 45 Express芯片组/ CPU Intel酷睿2 P8400, 2.26GHz, 1066MHz, 3MB)/ 14.1" LED WXGA+ (1440X900) TrueLife(TM) / 2GB内存(1x2G) DR2 800MHz / 64G SSD固态硬盘2.5" / DVD刻录光驱/ 256MB独立显卡NVS 160M / Dell Wireless(TM) 1510无线网卡(802.11a/b/g/n 2X3)/ Windows vista Home SP1正版操作系统/指纹识别器/蓝牙/内置摄像头/背光键盘/原厂笔记本包和光电鼠标/ 6芯电池/ 65W电源适配器/内置调制解调器/黑色本
16231
43%
.9252
22
笔记本
戴尔E5400 (14寸)
主板Intel(R) 45 Express芯片组/ CPU Intel酷睿2P8600(2.40GHz 1066MHz 3M)/ 14.1"(1440 x 900)/2GB内存(1x2G) DR2 800MHz /250GSATA硬盘7200 RPM/ DVD刻录光驱/集成显卡/ Dell Wireless(TM) 1510无线网卡(802.11a/b/g/n 2X3)/双指点杆/蓝牙/原厂笔记本包和光电鼠标/ 6芯电池笔记本电池的质量保证期为一年/ /三年上门保修65W电源适配器/内置调制解调器/黑色笔记本
5699
8%
5300
4
笔记本
戴尔1330(13寸)
T6400/ 2G/250G / 128M 8400GS显卡/ 13.3”/ DVDRW/ 6蕊电池/无线/200万摄像头黑色笔记本
Nokia刷机,凤凰2011通过USB数据线刷机教程与强刷教程
凤凰2011通过USB数据线刷机教程与强刷教程图文教程,文库页面可能显示不了图片,下载后就可以显示了!!!凤凰2011通过USB数据线刷机教程与强刷教程凤凰2011刷机软件(Phoenix_2011.08.005.45529_Cracked)下载地址:/file/aqp3mq1n刷机固件包,就需要找与自己手机型号相对应的才可以咯百度吧!此教程转自:/forum-234-1.html需要备份手机内容请使用PC套件做好备份工作,比如联系人,信息等1.安装凤凰刷机软件,文件名一般是Phoenix_Service_Software_xxx.xx.xxx.xxx_Cracked.exe,他会自动安装,安装的时候请退出360安全卫士,360安全卫士会阻碍程序的正常安装2.安装刷机包,文件名例如5230_Nokia_firmware_RM-588_CHINA_40.0.102_v9.0.exe,也是默认路径安装3.以第一个模式连接手机,应该是PC套件模式(PC SUITE)或者诺基亚模式,可以看到设备管理器里驱动加载正常,如果你开着PC套件等相关程序,请退出4.打开凤凰5.下拉选择当前机型的工厂代码,此处选择RM-5556.点击“File” - “Scan Product”7.此时显示了手机的相关信息8.点击“Flashing” - “Firmware Update”9.如果你机器的CODE在安装的资料包内,那么会直接显示相关信息,如下图10.如果你机器的CODE不在安装的资料包内,那么会显示空白,如下图11.如果是空白,请点击旁边的“...”进行CODE的选择,如下图12.选择有中文的CODE,一般(S60机型:APAC1、Singapore、Malaysia)(S40机型:APAC-X、APAC-R)地区的CODE都有中文,选好点击OK13.点击SW Reset开始刷机后开始等待刷机完成14.中途设备管理器会出现2个ADL驱动* 如果出现下图所示驱动完成安装提示,请一定要迅速点击完成S60机型会先出现2个USB驱动15.刷完设备管理器出现2个含有机型的USB驱动16.点击确定,刷机成功Code:Flashing startedCreating product data items listProduct data items list createdBackup not requiredFlashing phoneInitializingVerifying communication to device...Scanning image files...Loading secondary boot code: 15232 bytesSecondary boot loadedLoading update server code: 2884815 bytesUpdate server loadedAsic CMT: Verifying communication to device...Asic CMT: Verifying communication to device...Asic CMT: Start programming 165230 KB...Asic CMT: Partitioning RM-555_12.0.110_prd.core.C00 Asic CMT: Partitioning area 1...Asic CMT: Erasing RM-555_12.0.110_prd.core.C00Asic CMT: Erasing area 1...Asic CMT: Erasing area 2...Asic CMT: Erasing area 3...Asic CMT: Erasing area 4...Asic CMT: Erasing partition 0x0000000A...Asic CMT: Erasing RM-555_12.0.110_prd.rofs2.V19Asic CMT: Erasing area 1...Asic CMT: Erasing RM-555_12.0.110_C01_prd.rofs3.fpsx Asic CMT: Erasing area 1...Asic CMT: Erasing RM555_12.0.110_uda_11_001.uda.fpsx Asic CMT: Erasing area 1...Asic CMT: Erasing rm555ENOA09w24v0.050.fpsxAsic CMT: Erasing area 1...Asic CMT: Programming RM-555_12.0.110_prd.core.C00 Asic CMT: Programming 0%Asic CMT: Programming 2%Asic CMT: Programming 4%Asic CMT: Programming 6%Asic CMT: Programming 8%Asic CMT: Programming 10%Asic CMT: Programming 12%Asic CMT: Programming 14%Asic CMT: Programming 16%Asic CMT: Programming 18%Asic CMT: Programming 20%Asic CMT: Programming 22%Asic CMT: Programming 24%Asic CMT: Programming 26%Asic CMT: Programming 28%Asic CMT: Programming 30%Asic CMT: Programming 32%Asic CMT: Programming 34%Asic CMT: Programming 36%Asic CMT: Programming 38%Asic CMT: Programming 40%Asic CMT: Programming 42%Asic CMT: Programming 44%Asic CMT: Programming 46%Asic CMT: Programming 48%Asic CMT: Programming 50%Asic CMT: Programming 52%Asic CMT: Programming 54%Asic CMT: Programming 56%Asic CMT: Programming 58%Asic CMT: Programming 60%Asic CMT: Programming 62%Asic CMT: Programming RM-555_12.0.110_prd.rofs2.V19Asic CMT: Programming 64%Asic CMT: Programming 66%Asic CMT: Programming 68%Asic CMT: Programming 70%Asic CMT: Programming 72%Asic CMT: Programming 74%Asic CMT: Programming 76%Asic CMT: Programming 78%Asic CMT: Programming 80%Asic CMT: Programming 82%Asic CMT: Programming 84%Asic CMT: Programming RM-555_12.0.110_C01_prd.rofs3.fpsx Asic CMT: Programming RM555_12.0.110_uda_11_001.uda.fpsx Asic CMT: Programming 86%Asic CMT: Programming 88%Asic CMT: Programming 90%Asic CMT: Programming 92%Asic CMT: Programming 94%Asic CMT: Programming 96%Asic CMT: Programming 98%Asic CMT: Programming rm555ENOA09w24v0.050.fpsxAsic CMT: Programming 100%Asic CMT: Verifying communication to device...Phone flashing completed. Waiting for phone to boot upBootup successfulVerifying communication to product (before flash finalizing) Communication verifiedDoing factorysetsFactorysets completeLoading default data to phoneLoading default data to phoneGetting Data PackageReading product stateStarting backup/restore sub-procedure: data item pre-delaydata item pre-delaydata item pre-delaySub-procedure completed: Succeeded., result code: 0Starting to backup/restore data item: ProductProfile, version: 1.1 Data Item backup/restore completed: Succeeded., result code: 0 Starting backup/restore sub-procedure: data item post-delaydata item post-delaydata item post-delaySub-procedure completed: Succeeded., result code: 0Backup/restore result: 0 out of 1 items were not backed upDefault data loading completeStopping all operations, returning phone to default modeAll operations completedFirmware updating succeeded.•凤凰2011通过USB数据线强刷教程注意:1.不管最高版本的资料是否有中文,只要机器无法开机,必须强刷最高版本的资料,否则强刷无法成功;2.S40非智能机机型强刷成功后需要按照楼上的方法在开机状态下重新刷一遍,否则丢失证书;1.打开凤凰,并且打开电脑的设备管理器,连接手机至电脑,不插手机电池2.保持NO CONNECTION首位,点击“File” - “Open Product”3.选择死机的工厂代码(RM-xxx),一般从电池仓内的标签里可以寻找到4.点击“Flashing” - “Firmware Update”5.点击旁边的“...”进行CODE的选择,选择有中文的CODE,一般(S60机型:APAC1、Singapore、Malaysia)(S40机型:APAC-X、APAC-R)地区的CODE都有中文,选好点击OK,如果最高版本资料没有中文,就随便选个,确保是最高版本6.勾选“Dead phone USB Flashing”,点击“SW Reset”开始强刷7.等到出现如下提示,点击确定后插上电池,按开机键3秒松手,此时可以听到电脑有叮咚的声音,说明检测到新驱动(N97等机型无需按开机键,只要插上电池,即可被检测到),如果过了10秒钟设备管理器不出现下图2个驱动,请直接拔了电池再插上电池,按开机键3秒松手,直到出现2个USB驱动为止2个USB驱动图例8.强刷正常进行,中途设备管理器里的2个USB驱动会转换为2个ADL驱动,如下图(N96不会变为2个ADL,永远是2个USB)9.点击确定,强刷成功,手机会自动开机,如果没有开机,可以尝试移除电池再插上电池,按开机键完整强刷进度Code: Flashing startedCreating product data items listProduct data items list createdBackup not requiredFlashing phoneInitializingScanning image files...Waiting for USB device...Loading secondary boot code: 15232 bytesSecondary boot loadedLoading update server code: 2884815 bytesUpdate server loadedAsic CMT: Verifying communication to device...Asic CMT: Verifying communication to device...Asic CMT: Start programming 165230 KB...Asic CMT: Partitioning RM-555_12.0.110_prd.core.C00 Asic CMT: Partitioning area 1...Asic CMT: Erasing RM-555_12.0.110_prd.core.C00Asic CMT: Erasing area 1...Asic CMT: Erasing area 2...Asic CMT: Erasing area 3...Asic CMT: Erasing area 4...Asic CMT: Erasing partition 0x0000000A...Asic CMT: Erasing RM-555_12.0.110_prd.rofs2.V19Asic CMT: Erasing area 1...Asic CMT: Erasing RM-555_12.0.110_C01_prd.rofs3.fpsx Asic CMT: Erasing area 1...Asic CMT: Erasing RM555_12.0.110_uda_11_001.uda.fpsx Asic CMT: Erasing area 1...Asic CMT: Erasing rm555ENOA09w24v0.050.fpsxAsic CMT: Erasing area 1...Asic CMT: Programming RM-555_12.0.110_prd.core.C00 Asic CMT: Programming 0%Asic CMT: Programming 2%Asic CMT: Programming 4%Asic CMT: Programming 8%Asic CMT: Programming 10%Asic CMT: Programming 12%Asic CMT: Programming 14%Asic CMT: Programming 16%Asic CMT: Programming 18%Asic CMT: Programming 20%Asic CMT: Programming 22%Asic CMT: Programming 24%Asic CMT: Programming 26%Asic CMT: Programming 28%Asic CMT: Programming 30%Asic CMT: Programming 32%Asic CMT: Programming 34%Asic CMT: Programming 36%Asic CMT: Programming 38%Asic CMT: Programming 40%Asic CMT: Programming 42%Asic CMT: Programming 44%Asic CMT: Programming 46%Asic CMT: Programming 48%Asic CMT: Programming 50%Asic CMT: Programming 52%Asic CMT: Programming 54%Asic CMT: Programming 56%Asic CMT: Programming 58%Asic CMT: Programming 60%Asic CMT: Programming 62%Asic CMT: Programming RM-555_12.0.110_prd.rofs2.V19 Asic CMT: Programming 64%Asic CMT: Programming 66%Asic CMT: Programming 68%Asic CMT: Programming 70%Asic CMT: Programming 72%Asic CMT: Programming 74%Asic CMT: Programming 78%Asic CMT: Programming 80%Asic CMT: Programming 82%Asic CMT: Programming 84%Asic CMT: Programming RM-555_12.0.110_C01_prd.rofs3.fpsx Asic CMT: Programming RM555_12.0.110_uda_11_001.uda.fpsx Asic CMT: Programming 86%Asic CMT: Programming 88%Asic CMT: Programming 90%Asic CMT: Programming 92%Asic CMT: Programming 94%Asic CMT: Programming 96%Asic CMT: Programming 98%Asic CMT: Programming rm555ENOA09w24v0.050.fpsxAsic CMT: Programming 100%Asic CMT: Verifying communication to device...Phone flashing completed. Waiting for phone to boot up Bootup successfulVerifying communication to product (before flash finalizing) Communication verifiedProduct code changedDoing factorysetsFactorysets completeLoading default data to phoneLoading default data to phoneGetting Data PackageReading product stateStarting backup/restore sub-procedure: data item pre-delay data item pre-delaydata item pre-delaySub-procedure completed: Succeeded., result code: 0Starting to backup/restore data item: ProductProfile, version: 1.1 Data Item backup/restore completed: Succeeded., result code: 0 Starting backup/restore sub-procedure: data item post-delay data item post-delaydata item post-delaySub-procedure completed: Succeeded., result code: 0 Backup/restore result: 0 out of 1 items were not backed up Default data loading completeStopping all operations, returning phone to default mode All operations completedFirmware updating succeeded。
超详细凤凰刷机教程
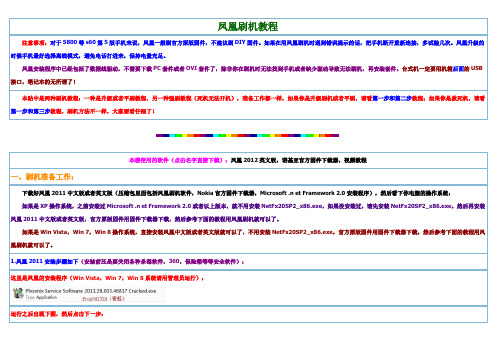
注意事项:对于 5800 等 s60 第 5 版手机来说,凤凰一般刷官方原版固件,不建议刷 DIY 固件。如果在用凤凰刷机时遇到错误提示的话,把手机断开重新连接,多试验几次。凤凰升级的 时候手机最好选择离线模式,避免电话打进来,保持电量充足。 凤凰安装程序中已经包括了数据线驱动,不需要下载 PC 套件或者 OVI 套件了,除非你在刷机时无法找到手机或者缺少驱动导致无法刷机,再安装套件。台式机一定要用机箱后面的 USB 接口,笔记本的无所谓了! 本贴中是两种刷机教程:一种是升级或者平刷教程,另一种强刷教程(死机无法开机),准备工作都一样,如果你是升级刷机或者平刷,请看第一步和第二步教程;如果你是救死机,请看 第一步和第三步教程,刷机方法不一样,大家要看仔细了!
运行之后出现下图,然后点击下一步:
更新日志界面,继续点击下一步:
解压安装包,等待安装:
提示安装驱动,可能会出现多次,都允许安装:
正在安装凤凰软件和一些系统插件:
点击完成按钮,安装成功:
2.凤凰安装成功后,用下载器下载固件步骤如下:
下载固件时注意选择带中文的 Code, 如果提示错误找不到服务器, 请在选项, 服务器里面选择 Nokia Care Suit, 下载好后放在 C:\Program Files\Nokia\Phoenix\Products\RM-XXX 里面,这里的 XXX 是你的手机的 RM,比如是 356,427 等等(注意此处的 RM-XXX 目录是自己新建的,里面的文件名和固件下载器中的文件名要一致)
选择红色部分,点击删除按钮,删除文件,然后点确定,最后重新点刷机就可以了:
如果刷机失败或者没有救活,重新刷一次试试,如果没有降级刷过或者硬件没有损坏的话,一般凤凰都可以救回来的,如果在刷机过程中出现错误提示,请关闭凤凰,按照教程重新操作一 次,切记不要降级刷机。
凤凰2011强制刷机教程

凤凰2011强制刷机教材当手机软件系统损坏无法开机时,当刷机过程中意外中断导致手机无法开机时(俗话所说的手机变砖块),需要使用凤凰强制刷机,恢复手机系统。
一、准备工作参考【第一部分】E52 港行(HONG KONG Black AL 54.003)破解教材1、下载最新固件(使用固件下载工具NaviFirm下载最新固件);2、拷贝固件文件到凤凰2011系统中(见“二、准备工作”中的“4”)二、打开凤凰2011三、在Connections处,点击右边向下的三角拉下菜单,选中NO Connection:注意:左下角显示“Ready”表示正常状态。
四、点击File - Open Product选择手机的Type,拿下手机后在铭牌上能找到手机的type,对于E52手机,Type为RM-469找到RM-469,并点击选定,然后点击按钮“OK”确认左下角显示:Ready RM-469字样。
五、准备固件:(1)、点击Flashing - Firmware Update(2)、点击Firmware Update界面中的“…”按钮,在打开的界面中点击选择Product Code为0591717的固件,然后点击“OK”按钮。
(3)、然后在Dead phone USB flashing前打钩。
注:Firmware Update窗口较长,注意显示全部窗口,否则看不到“Options”。
(4)、点击按钮“Options”打开Firmware Update advanced Options of DP2.0窗口,点击选择RM469_MC13_2GB_4.0.fpsx,然后点击“Delete”删除此文件,最后点击“OK”返回firmware Update界面。
五、点击“Refurbish”开始刷机注:必须按照上面提示的六个步骤操作。
按住开机开关直到信息“Programming complete”出现,或手机有反应以后松手,也可一直按住直到刷机结束。
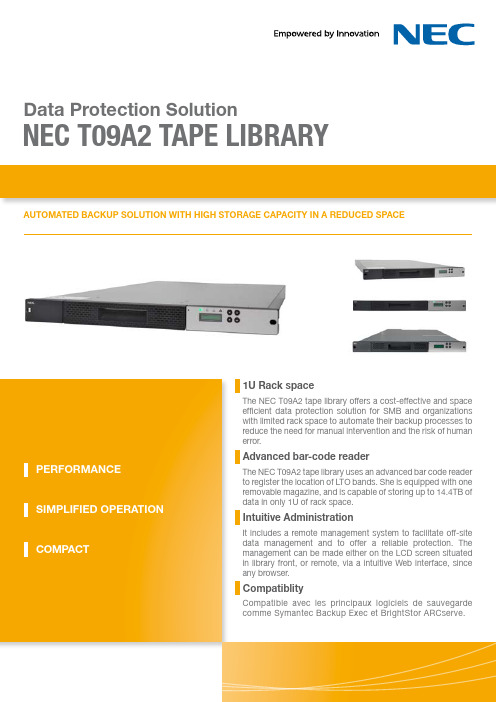
NEC T09A2磁带库1U架空说明书
Warranty
LTO Ultrium 4
1 9 7.2TB (native) 14.4TB (compressed at 2:1) 120MB/sec (native) 240MB/sec (compressed at 2:1) 1 slot
Standard SAS
30 sec (average) Less than 150 sec More than 1,000,000 swaps 250,000 hours (power-on hours) AC100-240V, 50/60Hz (auto-ranging)
3 years on site D+1 in standard
Pack content (1x library, rails kit, SAS 3mn Data Cable, 1x LTO cleaning cartridge)
*1 1GB = 1,000,000,000 bytes *2 Data transfer rate would differ due to operating environment and conditions. * Need SAS3442E-R Host Bus Adapter to connect library on server
Open solution
• Supports most of the operating systems such as Microsoft Windows and Linux.
Drive type Number of drives Number of cartridges Maximum data capacity*1
Simplified operation
THINKPAD 2011年产品资料

N/A
ABS材料
E50
6芯
2.58
ABS材料
9芯 X100e 3芯 6芯 3芯 E10
2.74 1.33 1.50 1.33
ABS材料
N/A
Intel平台:3.3 AMD平台:3 ABS材料
N/A
E10
ABS材料 N/A Intel平台:7 AMD平台:6 Intel平台:4.3 4芯 1.64 AMD平台:3.8 E31 ABS材料 N/A Intel平台:6.4 6芯 1.74 AMD平台:5.7 镁合金+玻璃纤维复 E220s 8芯 1.58 5.4 镁铝合金 合材料(屏幕边框) 镁合金+玻璃纤维复 E420s 4芯 1.88 7 镁铝合金 合材料(屏幕边框) 3合1读卡器 MMC, Secure Digital, SDHC 4合1读卡器 / SDHC / SDXC / MMC SD 5合1读卡器 MMC, Memory Stick, Mem Stick Pro, Secure Digital, SDHC 7合1读卡器 MMC, Memory Stick, Mem Stick Pro, SD, SDHC, XD, XD Type H 6芯 1.50
eH
端口
最大支持内 型号 存
1个USB 3.0,1个USB 2.0,1个Powered USB 2.0,VGA DB-15, DisplayPort,RJ-45,耳机&麦克风组合接口,四合一读卡器(SD 8GB(4GB*2) T420s / SDHC / SDXC / MMC),34mm Express卡插槽 2个USB 2.0,1个Powered USB 2.0,1个USB 2.0/eSATA 组合端 口,VGA DB-15,DisplayPort,RJ-45,耳机&麦克风组合接口, 8GB(4GB*2) T420 四合一读卡器(SD / SDHC / SDXC / MMC),34mm Express卡插槽 2个USB 2.0,1个Powered USB 2.0,1个USB 2.0/eSATA 组合端口 (如果是集成显卡机型,USB接口为:3个USB 2.0,1个Powered USB 2.0),VGA DB-15,DisplayPort,RJ-45,耳机&麦克风组合 8GB(4GB*2) T520 接口,1394接口,四合一读卡器(SD / SDHC / SDXC / MMC),34mm Express卡插槽 2个USB 3.0,1个Powered USB 2.0,1个USB 2.0/eSATA 组合端 8GB(双核) 口,VGA DB-15,DisplayPort,RJ-45,1394接口,耳机&麦克风 16GB(4GB*4) W520 组合接口,四合一读卡器(SD / SDHC / SDXC / MMC),34mm (四核) Express卡插槽 3个USB 2.0, VGA, Express卡,麦克风,耳机,RJ45,3合1多媒 体读卡器或5合1多媒体读卡器+modem(RJ11) 3个USB 2.0, VGA, Express卡,麦克风,耳机,RJ45,3合1多媒 体读卡器或5合1多媒体读卡器+modem(RJ11) 3个USB 2.0, VGA, Express卡,麦克风,耳机,RJ45,3合1多媒 体读卡器或5合1多媒体读卡器+modem(RJ11) Max 8G,2 Intel GMA HD ,Intel 个插槽
凤凰2009刷机教程

1、论坛刷机资料区下载固件资料。网址:/forum-202-1.html
刷机数据包文件都标明了对应的RM码和固件版本号,如“RM-320_APAC_31.0.015_v5.0.exe”表明此刷机包文件为RM-320机型使用,包含的固件版本为v31.0.015,对应的CODE码在网页有相应介绍。下载后,双击资料包使用默认路径安装,新的固件资料会自动安装到“C:\Program Files\Nokia\Phoenix\Products”目录,这种方法方便灵活,可以选择不同CODE码和不同的固件版本。
启动软件后,稍等片刻即会联网,按图中顺序选择好资料好,点击“download from fire”下载,然后根据自己下载的RM码自建文件夹,看下一张图自建文件夹。然后开始下载过程,结束后关闭软件即可。
按照选择的RM码自建文件夹,资料会保存到这个目录,凤凰软件可有直接读取,可以先下载在其他地方,然后移动到“C:\Program Files\Nokia\Phoenix\Products”目录,也可以直接在这个目录中新建文件夹,不然凤凰开启后找不到刷机资料。
然后如上图依次点击,此处为扫描设备,凤凰会在下面显示手机固件有关信息,如RM码,当前版本等信息。
2、选择刷机资料、刷机。
依次点击,选择刷新固件。
在弹出的窗口中点击右上角的“...”图标,在第二个弹出窗口中,去掉“Detect Product Automatically”前面复选框的“√”,根据CODE码选择刷机资料,不同机型的RM码和CODE码不同,本教程凡是诺基亚BB5机型,也就是几乎全部机型都可以通用,选择好资料后点击“OK”。
有的电脑上凤凰2009还是不能正常找到手机,如果是干净的机器最好,如果电脑中诺基亚PC或OVI套件最好卸载,如果不卸载就安装,安装后凤凰后将手机以“PC套件”模式连接到电脑,看看我的电脑中是否有***感叹号,则要安装好驱动后才能刷机。
Transcend USB2.0 JetFlash 中文说明书
JetFlash™ 中文使用手冊( Version 1.0 )目錄產品介紹 (2)包裝內容 (2)產品特色 (2)系統需求 (2)安裝驅動程式 (3)在Windows 98SE (第二版)下安裝驅動程式 (3)在Windows Me、2000及XP下安裝驅動程式 (3)在Mac OS 9.0或之後的版本下安裝驅動程式 (3)在Linux Kernel 2.4.2或之後的版本下安裝驅動程式 (3)磁碟分割及加密功能 (4)磁碟分割區型式 (4)在保密資料區存取資料 (6)登出保密資料區 (7)更改密碼 (7)當您忘記密碼 (9)電腦鎖功能 (9)在Windows 98SE (第二版)、Me、2000及XP下使用電腦鎖功能 (9)鎖定電腦 (10)解除鎖定 (10)開機功能 (10)執行開機功能之系統需求 (11)在Windows 98SE (第二版)及Me下啟動開機功能 (11)在Windows XP下啟動開機功能 (12)移除mFormat (15)如何安全地移除JetFlash (15)在Windows 98SE (第二版)下移除JetFlash (15)在Windows Me、2000及XP下移除JetFlash (15)在Mac OS下移除JetFlash (16)在Linux OS下移除JetFlash (16)疑難排解 (17)產品介紹感謝您選購創見資訊所生產製造的JetFlash™系列行動碟,本產品能讓您更方便且快速地在儲存媒體和電腦系統間存取及傳輸大量資料。
相較於傳統儲存裝置,Jet Flash 提供消費者更高的容量、更長的資料保存時間及更快的傳輸速率,其功能將足以取代軟碟機或硬碟機。
另外,它的可攜性、優越的資料保存能力及時尚的外型設計將帶給您截然不同的全新感受。
包裝內容本產品之包裝盒內含有下列物品:• JetFlash• 頸繩• 驅動程式光碟• 快速安裝說明產品特色• 完全相容於USB2.0規格。
Thinkpad全系列型号详细介绍(刘维伟)
Thinkpad全系列型号详细介绍(刘维伟)Thinkpad全系列型号详细介绍(购机必看)Thinkpad, 型号, 购机IBM Thinkpad系列笔记本电脑,深沉的黑色经典,中规中距、棱角分明的外形,沉稳大气的设计风格给所有观者都会留下很深刻的印象。
在市面上众多的各品牌笔记本产品中,ThinkPad系列笔记本称得上是其中的典范,自92年以来至今,ThinPad 系列笔记本电脑在全球的销量已经达到了2000万台以上。
作为全球移动技术的先驱,优良的品质和售后服务网络,拥有如此庞大的用户群体,对每一位想要购置笔记本产品的朋友来说,ThinPad 系列笔记本都是您视线中首要考虑选择的品牌。
IBM于2001年10月将PC业务出售给联想,并且授权准许联想在后续产品中继续使用IBM商标。
根据授权,联想已经于2006年10月以后的生产的thinkpad系列笔记本停止使用IBM商标,并启用了lenovo标志。
因此IBM笔记本准确的说法应该是thinkpad笔记本。
但是由于IBM笔记本长期以来积累起来的良好口碑,国内一般习惯于继续称其为IBM笔记本。
IBM笔记本设计偏重于商务,因此各方面的能力较为均衡,侧重稳定和安全。
在SL系列的推出前,Thinkpad笔记本的娱乐性能并不占优势,但它的稳定性与舒适性会使你使用ThinkPad笔记本异常的安心和舒适的用户体验。
Thinkpad 品牌即源于“思考”。
ThinkPad之父内藤先生说过:“如果人们能够赋予一种产品以思考的力量,那么它必定拥有超越于技术之上的价值。
”这是对thinkpad品牌笔记本的最有力的注释。
09年五月ThinkPad笔记本电脑全线新产品登场,包括全新的W系列新品。
ThinkPad就此以W、T、X、R、SL等五大产品系列对商务笔记本电脑市场形成了充分地覆盖,旨在为需求各异的广大商务用户提供品质卓越、技术创新的笔记本电脑产品,进一步巩固其在商务市场不可撼动的领导者地位。
伊顿9速同步变速器说明书
Eaton 9-Speed Synchronized Transmissions Double “H” Shift Control ConfigurationTRDR0070February 2008FS(O) 6109FS(O) 6209FS(O) 6309FS(O) 8209FS(O) 8309FS(O) 10209FS(O) 10309Warnings and CautionsRead the entire driver instruction before operating this transmission.Set the park brakes before starting the vehicle, always be seated in the driver's seat, move the shift lever to neutral, and depress the master clutch.If engine cranks in any gear other than neutral or without the master clutch depressed, service your vehicle neutral safety start circuit immediately (where a safety start circuit is fitted).Before working on a vehicle, parking the vehicle, or leaving the cab with the engine running, place the transmission in neutral, set the parking brakes, and block the wheels.Do not release the parking brake or attempt to select a gear until the air pres-sure is at the correct level.TOWING: To avoid damage to the transmission during towing, place the trans-mission in neutral and lift the drive wheels off the ground or disconnect the driveline.iWarnings & Cautions (i)Introduction (1)Tag Information (1)Operation (2)Nomenclature (2)Shift Pattern (2)General Information (3)High to Low Range Shifting (3)Driving Tips (4)Initial Start-Up (5)Upshift (5)Downshift (6)Service & Maintenance (7)Proper Lubrication (7)Mixing Oil Types (7)Proper Transmission Lubrication Levels (8)Lubricant Change Intervals (9)Operating Temperatures (10)Lubricant Change (11)Maintenance Checks (12)Tag InformationTransmission model designation and other transmission identification information are stamped on the transmission tag. To identify the transmission model designation and serial number, locate the tag on the transmission and then locate the numbers as shown.IMPORTANT: DO NOT REMOVE OR DESTROY THE TRANSMISSION IDENTIFICATION TAG.Transmission TagRecord the Transmission Model and Serial Number below. Have these reference numbers handy when ordering replacement parts or requesting service information:Transmission Model:Transmission Serial Number:Every effort has been made to ensure the accuracy of all information in this manual. However, Eaton Truck Components Operations makes no expressed or implied warranty or representation based on the enclosed information. Any errors or omissions may be reported to Eaton Corporation, Truck Components, Global Marketing Services, P.O.Box 4013, Kalamazoo, Michigan, 49003.1NomenclatureShift PatternCNote: The shift lever is cross gate biased and will rest naturally in 3rd / 4th gate position when in LOW and in 5th / 6th gate position when in HIGH.The cross gate bias could vary or may be omitted depending on thevehicle manufacturer. Ensure you are familiar with this before driving the vehicle2General Information9-Speed Double “H”Models in this series provide nine forward speeds and one reverse speed, consisting of a five-speed front section and a two-speed auxiliary range section.Crawler gear (C) in the front section is used only as a starting gear. The other four ratios are used once in LOW range and once again in HIGH range.After shifting out of Crawler gear, shift the remaining gears in LOW range and HIGH range as you would shift any synchronized transmission.Shift range from LOW to HIGH and HIGH to LOW by moving the shift lever fully to the right or fully to the left as described in the Operation section. The transmission will automatically make the synchronized range shift as the shift lever is moved fully left or right.High to Low Range ShiftingNever attempt to shift down at too high a vehicle speed as this will result in major damage to the driveline.Note: Some vehicles are fitted with a range shift over-speed protection device in conjunction with the vehicle manufacturer. Never assume a rangeover-speed device is fitted.As a guide never shift from HIGH range to LOW range above 30 kph - not even if the vehicle is in neutral and the clutch pedal is depressed.Note: This speed will vary based on the overall driveline configuration.3Shift Pattern DiagramsA shift pattern diagram / etched shift knob should be in your vehicle (depending on vehicle manufacture).Driving Tips•Always use the clutch when making up shifts or down shifts.Premature synchronizer failure can result from not using the clutch.•Always select an initial starting gear that provides sufficient reduction for load and terrain.•Never slam or jerk the shift lever to complete gear engagement.•Never coast with the shift lever in the neutral position.•Never downshift at too high of a road speed.•Never shift to crawler gear (C) while the vehicle is moving.•Never select reverse gear while the vehicle is moving.4Initial Start-UpBefore starting the vehicle, always be seated in the drivers seat, move the shift lever to neutral, and depress the master clutch fully.Before moving a vehicle, make sure you understand your shift pattern configuration.1.Make sure the shift lever is in neutral, the range section is in LOW,and the parking brakes are set.2.Turn on the key switch. Start the engine.3.Build up the air pressure to cut off.4.Apply the service brakes.5.Depress the clutch pedal to the floor.6.Move the shift lever to the desired initial gear.7.Release the parking brakes.8.Slowly release the clutch pedal and apply accelerator.In the following instructions it is assumed that the driver is familiar with operating a commercial vehicle and can coordinate the shift lever movement and clutch pedal to make a smooth gear engagement while upshifting and downshifting.Upshift1.Fully depress the clutch pedal. Move the shift lever to the nextdesired speed.2.Release the clutch pedal.3.Accelerate the vehicle.4.Continue upshifting to 4th speed.5Range Shift Low to High (4th to 5th)1.When in the last LOW range gear position (4th) and ready for thenext upshift, with the engine / vehicle speed at a point that will allowthe vehicle to accelerate.2.Release the accelerator.3.Fully depress the clutch pedal. Move the shift lever to neutral.4.Move the shift lever fully RIGHT for a short period - doing this willtrigger the range valve to automatically shift the transmission toHIGH range.5.Allow the shift lever to return to its natural cross gate position.6.With the clutch still depressed shift to 5th speed.7.Release the clutch and apply the accelerator.8.Continue upshifting to 8th speed.Downshift1.Fully depress the clutch pedal, move the shift lever to the nextdesired speed.2.Release the clutch pedal.3.Continue downshifting to 5th speed.Range Shift High to Low (5th to 4th)1.When in the last HIGH range gear position (5th) release theaccelerator.2.Fully depress the clutch pedal. Move the shift lever to neutral.3.Move the shift lever fully LEFT for a short period - doing this willtrigger the range valve to automatically shift the transmission toLOW range.4.Allow the shift lever to return to its natural cross gate position.5.With the clutch still depressed shift to 4th speed.6.Release the clutch.7.Slow the vehicle and continue downshifting.Note: Never shift to crawler gear (C) while the vehicle is moving.6Proper LubricationProper lubrication procedures are key to a good all-around maintenance program. If the lubricant level is ignored, all the maintenance procedures in the world are not going to keep the transmission running or assure long transmission life.Eaton transmissions are designed so that the internal parts operate in an oil circulating bath created by the motion of the gears and shafts.All parts will be lubricated if these procedures are closely followed:•Maintain oil level and inspect regularly.•Follow maintenance plan.•Use correct grade and type of oil. Prolonged oil change will cause internal damage.•Do not overfill as this causes overheating and effects fuel economy.•Buy from a reputable dealer.Mixing Oil TypesNever mix engine oils and gear oils in the same transmission.Note: Additives and friction modifiers must not be introduced. Engine oils and gear oils may not be compatible; mixing can cause breakdown of thelubricant and affect component performance. When switching between types of lubricants, all areas of each affected component must bethoroughly flushed.7Proper Transmission Lubrication Levels•Make sure the transmission lubricant is level with the bottom of the fill opening.Always check the oil on level ground•8Lubricant Change Intervals•Lubricant change intervals will be included in the vehicle operating handbook and will be defined based on the type of oil used and theoperating conditions.•As a base rule the following should be followed:Mineral Oils* On Highway UseInitial oil change -At the operator’s discretion.Every 20,000 km -Inspect oil level and check for leaks.-Change oil (see Note below) Every 100,000 km (orannually)Note: Whichever comes first.* Off Highway UseInitial oil change -At the operator’s discretion.Every 40 hours -Inspect oil level and check for leaks.Every 500 hours -Change oil (see Note 1 below)Every 1000 hours -Change oil (see Note 2 below)Note 1: Oil change - where severe dirt conditions exist.Note 2: Oil change - where normal conditions exist.910Operating TemperaturesTransmissions must not be allowed to operate at temperatures above 120o C (250o F). Operating above this temperature causes loaded gear toothtemperatures to exceed 177o C (350o F), which will ultimately destroy the heat treatment of the gears. If the elevated temperature is associated with an unusual operating condition that will recur seek advice from your vehicle manufacturer.Synthetic / Semi-Synthetic Oils* On Highway UseEvery 20,000 km-Inspect oil level and check for leaks.Every 300,000 km to500,000 km- OR -Every 3 years - -Change oil (see Note below)Change oil.Note: Mileage will depend on type of oil used.* Off Highway UseEvery 40 hours-Inspect oil level and check for leaks.Every 500 hours-Change oil (see Note below)Every 1000 hours -Change oil (Normal operation)Note: Change oil where severe dirt conditions exist.Lubricant ChangeDraining OilHot oil may be present during this activity.•Drain the transmission when the oil is warm.•Remove the two drain plugs from the transmission.•Clean the oil strainer before replacing it.•Replace copper washer / o-ring as required.Re-filling•Fill transmission to the level of the filler opening.•Do not inter mix different types of brands of oil.•Do not use additives i.e. friction modifiers.•Do not overfill the transmission, as this will cause overheating and may cause oil leaks through the input and output shaft oil seals. 11Maintenance ChecksConduct regular maintenance checks where possible regarding:-Clutch mechanism -General operation-Lubricant-Correct level-Filler and drain plug -Correct tightness / damage towashers-Cap screws and gaskets -Loose / oil leaks-LRC / Shift tower -Secure / free play / wear12Copyright Eaton Corporation, 2012.Eaton hereby grant their customers,vendors, or distributors permission to freely copy, reproduce and/or distribute this document in printed format. It may be copied only in its entirety without any changes or modifications. THIS INFORMATION IS NOT INTENDED FOR SALE OR RESALE, AND THIS NOTICE MUST REMAIN ON ALL COPIES.Note: Features and specifications listed in this document are subject to change without notice and represent the maximum capabilities of the software and products with all options installed. Although every attempt has been made to ensure the accuracy of information contained within, Eaton makes no representation about the completeness, correctness or accuracy and assumes no responsibility for any errors or omissions. Features and functionality may vary depending on selected options.For spec’ing or service assistance, call 1-800-826-HELP (4357) or visit /roadranger.In Mexico, call 001-800-826-4357.Eaton Corporation Vehicle Group P .O. Box 4013Kalamazoo, MI 49003 USA 800-826-HELP (4357)/roadrangerPrinted in USA Roadranger: Eaton and trusted partners providing the best products and services in the industry, ensuring more time on the road.。
Duo v2 NV+ v2 Ultra 2 Ultra 2 Plus Ultra 4 Ultra 4
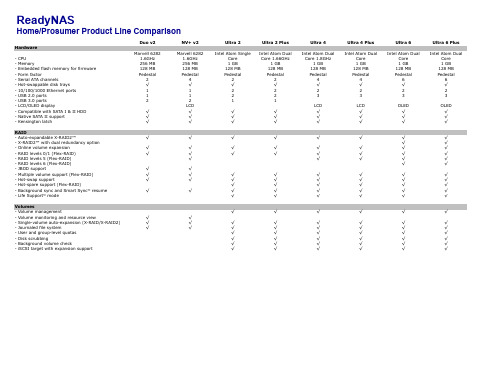
Home/Prosumer Product Line Comparison
Hardware
- CPU - Memory - Embedded flash memory for firmware - Form factor - Serial ATA channels - Hot-swappable disk trays - 10/100/1000 Ethernet ports - USB 2.0 ports - USB 3.0 ports - LCD/OLED display - Compatible with SATA I & II HDD - Native SATA II support - Kensington latch
Volumes
- Volume management
- Volume monitoring and resource view
√
√
- Single-volume auto-expansion (X-RAID/X-RAID2)
√
√
- Journaled file system
√
√
- User and group-level quotas
√ √ √ √ √ √ √ √ √ √ √ √ Optional
√
√ √ √
√ √ √ √
√
√
√ √ √ √ √ √ √
Optional
Ultra 6 Plus
√ √ √ √ √ √ √ √ √ √
√ √ √ √ √ √ √ √ √ √ √ √ Optional
√
√ √ √
√ √ √ √
√
√
√ √ √ √ √ √ √
华为 T2011 手机T卡升级指导书
T2011 手机T卡升级指导书
准备条件:TF卡一张,预置T卡升级文件(将bl_update 文件夹copy至TF卡根目录)。
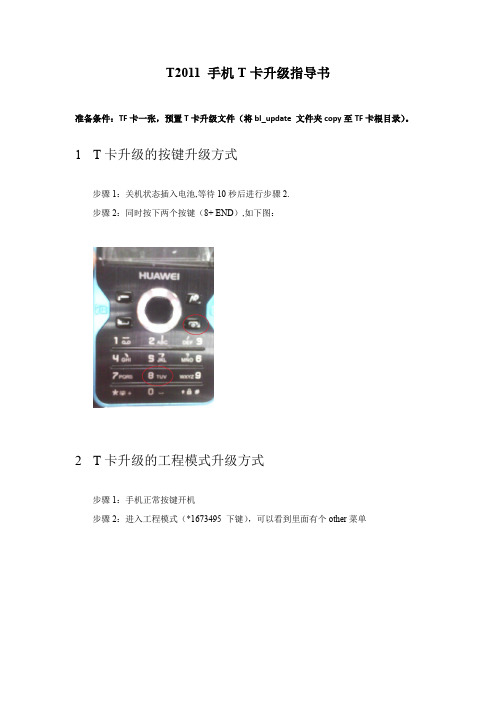
1T卡升级的按键升级方式
步骤1:关机状态插入电池,等待10秒后进行步骤2.
步骤2:同时按下两个按键(8+ END),如下图:
2T卡升级的工程模式升级方式
步骤1:手机正常按键开机
步骤2:进入工程模式(*1673495 下键),可以看到里面有个other菜单
步骤3:选择确认,可以看到里面有一个TFlash Update菜单
步骤4:选择确认,弹出以下菜单
步骤5:选择确认,进入T卡升级界面
3T卡升级的界面显示流程1:刚开机的瞬间,手机显示白屏如下图:
2:升级过程种界面如下图:
说明:
其中第一个字符串为文件的名字
第二个字符串为当前操作的类型(COPY 或者ERASE)蓝色的为当前操作的进度条显示
3:升级完成的提示为Success。
如下图:
4:在升级完成后,手机重启,回到IDLE界面
1.4:异常操作的T卡升级的界面显示流程
当手机符合可以T卡升级的要求时候,例如手机不包含T卡,,或者在T卡没有bl_update目录,手机选择进行T卡升级,
界面显示如下:
1:刚开机的瞬间,手机显示白屏如下图:
2:由于手机检测异常,不能进行正常T卡升级,手机重启,回到IDLE界面。
Urovo-DT50-Mobile-Computer-User-Guide

lUSER GUIDEDT50操作指南DT50 User GuideAndroid 9.0https://.au注释:Note:*本说明是针对DT50通用功能,您的PDA设备可能没有其中某些功能,或者说明书没有介绍您的DT50设备终端某些功能。
* This Guide is for general functions of DT50 only. Your PDA device may not have some functions wherein or the Instruction gives no description to some functions in your DT50 device terminal.*本说明书的插图可能与实际产品不同,请以实物为准。
* There may be differences between the illustrations in this Guide and the actual product. And the actual product shall prevail.©版权所有深圳优博讯科技股份有限公司 2019.© All rights reserved Shenzhen Urovo Technology Co., Ltd. 2019.使用条款Terms of usage声明Statement本手册包含深圳市优博讯科技股份有限公司的专有信息。
他的目的仅仅是为了帮助使用当事人更好的操作、使用及维护本文所描述的设备。
未经优博讯的书面许可,不得复制或向任何一方披露本文专有信息。
This Guide includes proprietary information of Shenzhen Urovo Technology Co., Ltd. Its purpose is to help users better operate, use and maintain the device described herein only. Without written permit of Urovo, the proprietary information in the text shall not be copied or disclosed to any other party.产品改进Product improvement优博讯的产品将会持续改进,所有规格和设计如有变更,恕不另行通知。
凤凰刷机完整教程

回复本贴可有效提高人品及刷机成功率
不得不说...关于刷机时
USB供电不足的一些琐
点击进入事...
[Windows7认
点击进入证]JAF1.98.62稳定版、
支持最新机型最新驱动
凤凰2010修改手机震动
点击进入幅度教程(附视频)
Navifirm+NSS─→NSU
点击进入离线刷机法(不推荐)
NSS\JAF多种方法修改
点击进入code
有关JAF资料选择混乱的
点击进入解决方案
存储卡解锁教程点击进入
[D.I.Y]刷机资料安装包的
点击进入制作及美化教程(内部教
材)
浅谈凤凰25倒计时和
点击进入JAF刷机结束时的
=========================分割一下
===========================
凤凰2011刷机教程QUOTE:
刷机过程
点击“refurbish”(推荐)或“updata software(升级慎用,平刷推荐)”(图中点击的此项)即开始刷机
刷机过程中,手机重启,白屏,电脑右下角出现“发现新硬件”,设备管理器中驱动自己更新!不用理睬~当进程到达终点后弹出对话框,提示刷机成功!
QUOTE:
如果刷机失败,不要慌张,可以对其进
行强刷
点击直达QUOTE:
救机(强刷)教程
凤凰强刷(救机)视频教程.rar
点。
凤凰刷机方法
方法:1把PC套件,NSU(诺机亚的升级工具)删除。
2然后装上,凤凰2009.3,然后在连接里选NO CONNECTION,点APPLE. 如果有USB项,把它删除。
4,然后下载刷机文件,5,然后选择自己的机型。
6,然后在固件那项,选固件升级。
7,选到下好的固件8,勾上USB强刷9,取出电池,连上数据线,再装上电池,按完全刷机,Press phone's power button时,按开机一至两秒10,然后你会发现,电脑有新的驱动在安装,这是正常的,然后开始刷机,全自动。
此方法在这看到的:/thread-4533605-1-1.html再次感谢lbxkjzz074126大大的好帖11,自己的总结,如果,照这个做了还是一直失败的话,请换一个固件版本试试。
接下来换凤凰强刷首先打开凤凰2009破解版然后点FILE---Manage Connections...然后选中NO CONNECTION,按向上的箭头,将他放在第一位,并点Apply,然后关闭Close然后点File---Scan product然后选择要前刷手机的版本RM--***,选后点OK!我的5630是RM-431然后选择Flashing--farmware Update然后点Product code后面的 ...选择自己要强刷的版本CODE这里我选择的是CODE 0578400 新加坡的版本选中之后点OK然后在这个窗口的Dead phone USB Flashing处打钩,表示强刷!现在将手机抠掉电池,插上数据线带出现下图信息后在装上电池,按开机键接下来你会看到如下信息Asic CMT: Programming data sent: 0% Asic CMT: Programming data sent: 5% Asic CMT: Programming data sent: 10% Asic CMT: Programming data sent: 15% Asic CMT: Programming data sent: 20% Asic CMT: Programming data sent: 25% Asic CMT: Programming data sent: 30% Asic CMT: Programming data sent: 35% Asic CMT: Programming data sent: 40% Asic CMT: Programming data sent: 45% Asic CMT: Programming data sent: 50% Asic CMT: Programming data sent: 55% Asic CMT: Programming data sent: 60% Asic CMT: Programming data sent: 65% Asic CMT: Programming data sent: 70% Asic CMT: Programming data sent: 75% Asic CMT: Programming data sent: 80% Asic CMT: Programming data sent: 85%Asic CMT: Programming data sent: 90%Asic CMT: Programming data sent: 95%Programming completeWARNING: Asic CMT: NAND status reported bad blocksAsic CMT: programming succeededAsic CMT: Verifying communication to device...USB Flashing succeeded.Phone flashing completed. Waiting for phone to boot upBootup successfulVerify ing communication to product (before flash finalizing)Communication verifiedRestoring user dataRestoring user dataGetting Data PackageReading product stateInitializing datafileDataItem "ProductProfile" version "1.1" set to defaults, restoring from default datafile Starting backup/restore sub-procedure: data item pre-delaydata item pre-delaydata item pre-delaySub-procedure completed: Succeeded., result code: 0Starting to backup/restore data item: ProductProfile, version: 1.1Data Item backup/restore completed: Succeeded., result code: 0Starting backup/restore sub-procedure: data item post-delaydata item post-delaydata item post-delaySub-procedure completed: Succeeded., result code: 0Backup/restore result: 0 out of 1 items were not backed upData restoring completedStopping all operations, returning phone to default modeAll operations completedProduct flashing succeeded.手机强刷成功把数据线,扣电池,装电池,重新启动手机凤凰强刷教程凤凰强刷教程(适合USB刷机失败无法开机者) 刷机有风险,后果自负!刷机失败结果:刷到一半显示FLASHING FAILED! 手机无法开机,phoenix无法检测到手机。
N-乙酰半胱氨酸对急性心肌梗死再灌注心律失常的影响

� O
To i nvest i g a te t he e ff ect s of Na cetyi cys te i ne on t he i nci d ence ofrep e rfu si on
a rrhyt hm i a s( R A) i npa t i ent s wi th a cu te m yoca rd i a li nf a rct i on ( AMI) , i na ddi t i on t he p os si bl e m echa ni sm of a ct i on.M 81 p a ti ents w i th p resu m pt i ve cl i ni ca ldi a g nosi s ofAMI a g reei ngwi t h di rect P C I t rea t m e nt
were ra nd om l y di vi d ed i nto cont rol g roup a nd Na cet yi cyst ei ne t rea t m ent g roup , t he i nci d ence of R A a nd t he � � � � � � le vels of bl ood SOD , C KMB, C K, cTnI were record ed i na llthe p a ti ents .R ( 1 ) The i nci d ence of R A wa ss i g ni fi ca ntl yl ower i nt he trea t m ent g rou p ( 51. 2% ) t ha nt ha ti n the control g roup ( 77. 5% ) ( P < 0. 05 ) . ( 2 ) Blood SOD leveli n the trea tm ent g rou p we re m u ch hi g her tha nt ha ti nt he control g rou p ( P < 0. 01 ) . (3 ) The p ea k va lu e of blood C KMB , C K, cTnI i nt he trea tm ent g roup were l ow e r tha n tha ti nt he cont rol g rou p ( P < 0.05 ) .C The resu l ts s ug g est ed t ha t Na cet yi cys t ei ne ca n ef fecti vely p revent R A i n
迈腾变速器上
D、超速档 0.743-0.686
• 3档、4档离合器K3闭合,驱动行星架 • 2档、4档制动器B2闭合,制动大太阳
轮 输出转速=自转+公转>输入公转转速
09G-AG6(6)
E、倒档 2.884-3.393
倒档离合器K2闭合,驱动大太阳轮,1档、 倒档制动器B1锁止行星支架,从而实现了倒档
AG4: 各离合器的功用( 01M)
离合器K1驱动小太阳轮 离合器K2驱动大太阳轮 离合器K3驱动行星架 制动器B1制动行星齿轮架 制动器B2制动大太阳轮 单向离合器F单向制动行星架 整个系统中齿圈为向外传递动力的部件,离合器 制动器对行星架、小太阳轮、大太阳轮的作用的 组合,构成了动力传递路线
A、一档(D 档状态) 2.714-4.148
AG5
AG6
AG4
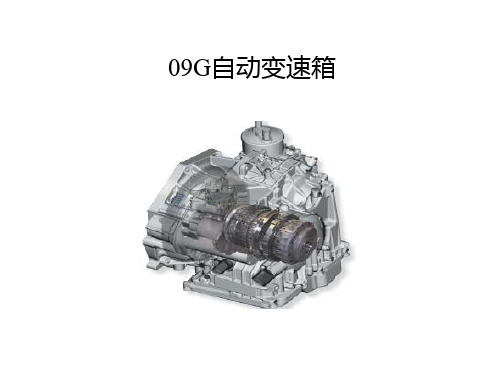
09系列 六档自动变速器
液力变矩器带锁止离合器 6个前进档与一个倒档 带Tiptronic与S档 结构紧凑适合横置 ATF 冷却器安装于壳体顶端 可选换档程序 动力传递:三组离合器、两 组制动器和一个单向自由轮
AISIN六速自动
机构紧凑, 重量轻, 最新一代电控液力自动变速箱 整合单行星齿轮系统和 一个二级 Ravigneaux 行星齿轮系统 一个非常精确的液压离合器控制系统 保证高的响应速度,确保 换档平顺 横置匹配于New Beetle, Golf, Touran and Transporter MY 2004) 可选两种换档程序, 经济型(标准) 、 运动型, 通过换档杆选择 “D” 或 “S” 即可实现 另外, Tiptronic 也被提供
Free wheel
F1 X
See notes page
Function Load curve diagram
戴尔TM通用坞D6000用户指南说明书

D6000 User GuideNOTE: A NOTE indicates important information that helps you makebetter use of your computer.CAUTION: A CAUTION indicates potential damage to hardware or lossof data if instructions are not followed.WARNING: A WARNING indicates a potential for property damage,personal injury, or death.© 2017 Dell Inc. All rights reserved.Information in this document is subject to change without notice. Reproduction of these materials in any manner whatsoever without the written permission of Dell Inc. is strictly forbidden.Trademarks used in this text: Dell and the Dell logo are trademarks of Dell Inc., Intel®, Centrino®, Core™, and Atom™ are either trademarks or registered trademarks of Intel Corporation in the U.S. and other countries; Microsoft®, Windows®, and Windows start button logo are either trademarks or registered trademarks of Microsoft Corporation in the United States and/or other countries; Bluetooth® is a registered trademark owned by Bluetooth SIG, Inc. and is used by Dell under license; Blu-ray Disc™ is a trademark owned by the Blu-ray Disc Association (BDA) and licensed for use on discs and players; Other trademarks and trade names may be used in this document to refer to either the entities claiming the marks and names or their products. Dell Inc. disclaims any proprietary interest in trademarks and trade names other than its own.2017 – 03 Rev. A00• USB 3.0 Type A (Via C-to-A converter)Product Overview Front ViewEthernetDPDPUSB 3.0Audio line outUSB 3.0Back View56Recommended System RequirementsHardwareDL-6xxx devices (4K UHD resolutions)Minimum Requirements for O ce, Productivity, WebProcessor: Intel Core i3 2+GHz / Intel Core M / AMD Trinity or better Memory: 4GBVideo Card: Intel HD 4000, ATI Radeon HD7xxx, NVidia GeForce 5xxM or better, with drivers released specifically for the Windows B: USB 2.0 but USB 3.0 recommendedMinimum Requirements for Full-Screen Video PlaybackProcessor: Intel SkyLake i3 or Intel Core i7 2+GHz / AMD Richland A10-575x / AMD Kaveri A10-7400P or better Memory: 8GBVideo Card: Intel HD 4000, ATI Radeon HD 8650, NVidia GeForce 7xxM or better, with drivers released specifically for the Windows B: USB 3.0Disk: 7200RPM or SSDIf playing UHD content (4K), the system must be capable of decoding the 4K video in the GPU.Operating SystemWins OS (Win 7, 8, 8.1, 10); 32/64 bits (with DisplayLink Driver version: 8.2 onwards).Ubuntu OS 14.04.2 or greater.Chrome OS Build 58 onwards.1.Lite-On (DPN: VJCH5) adapter:100 VAC to 240 VAC/50 Hz to 60 Hz.2.Chicony (DPN: 6G99N) adapter:100 VAC to 240 VAC/50 Hz to 60 Hz.Recommended 130W Power adapterAC/DC AdapterOutput voltage/currentOperating TemperatureMax. operating temperature is 40 o CInput voltage/frequency/currentOutput: 19.5VDC/6.7A7: Windows will start installing the DisplayLink driver automatically if connected to Internet.2. Follow the screen instructions until the installation is complete.Windows 7/8/8.1/10 Setup1. Start to install the drivers first before connecting the Dock to your computer. It is recommended to download the latest drivers from below support website:For network/IT administrators, please visit this link for a corporate installation software package. (*User registration required)/corporateinstall/· /supportUSB-C 3-1-b. Connect your dock and peripherals to your PC.USB-A 3-2-b. Connect your dock and peripherals to your PC.89Features2. You will also see a red border on the DisplayLink screen.The red border shows the size of the new Windows desktop. Use the “+” and “-”controls on the Fit to TV GUI to change the size of the red border until it fits on the TV: Finer configuration of the size of the border can be achieved by holding down the CTRL key and clicking the “+” and “-”.3. Once the red border is at the edges of the TV screen, click Apply to resize theWindows desktop.FAQs of Dell Universal Dock - D6000Regulatory InformationDell Universal Dock-D6000 complies with the FCC/CE rules and abides by worldwide regulatory compliance, engineering, and environmental a airs.Contacting Dell:1. Visit /support2. Select your support category3. Select the appropriate service or support link based on your need.Or Visit:/support/.。
- 1、下载文档前请自行甄别文档内容的完整性,平台不提供额外的编辑、内容补充、找答案等附加服务。
- 2、"仅部分预览"的文档,不可在线预览部分如存在完整性等问题,可反馈申请退款(可完整预览的文档不适用该条件!)。
- 3、如文档侵犯您的权益,请联系客服反馈,我们会尽快为您处理(人工客服工作时间:9:00-18:30)。
IMF预测今明两年中国经济增速分别为9.5%和9.0%
2011年09月20日 21:28
来源:新华网作者:阳建
字号:T|T
16人参与3条评论打印转发
新华网华盛顿9月20日电(记者阳建)国际货币基金组织(IMF)20日表示,在投资依然强劲的推动下,中国经济将继续保持强劲增长势头,成为世界经济增长的领头羊。
国际货币基金组织当天公布的2011年下半年《世界经济展望》报告预测,今年中国实际国内生产总值增速将达到9.5%,2012年增速将达到9.0%。
报告说,随着财政刺激逐步解除,中国投资增长已出现放缓,但仍然是世界经济增长的主要贡献力量。
报告还说,虽然通胀压力依然存在,但在回收信贷等措施的作用下,中国房地产价格上涨和信贷增长势头已缓和。
